I'm a wife, stay-at-home mom, crafter, and blogger living in rural New England. As seen in Martha Stewart Living, Food Network Magazine, and more! | Tutorials, DIY, crafts, parenting tips, recipes, money saving tips, product reviews, local product features, New England living, intentional living, and more! |
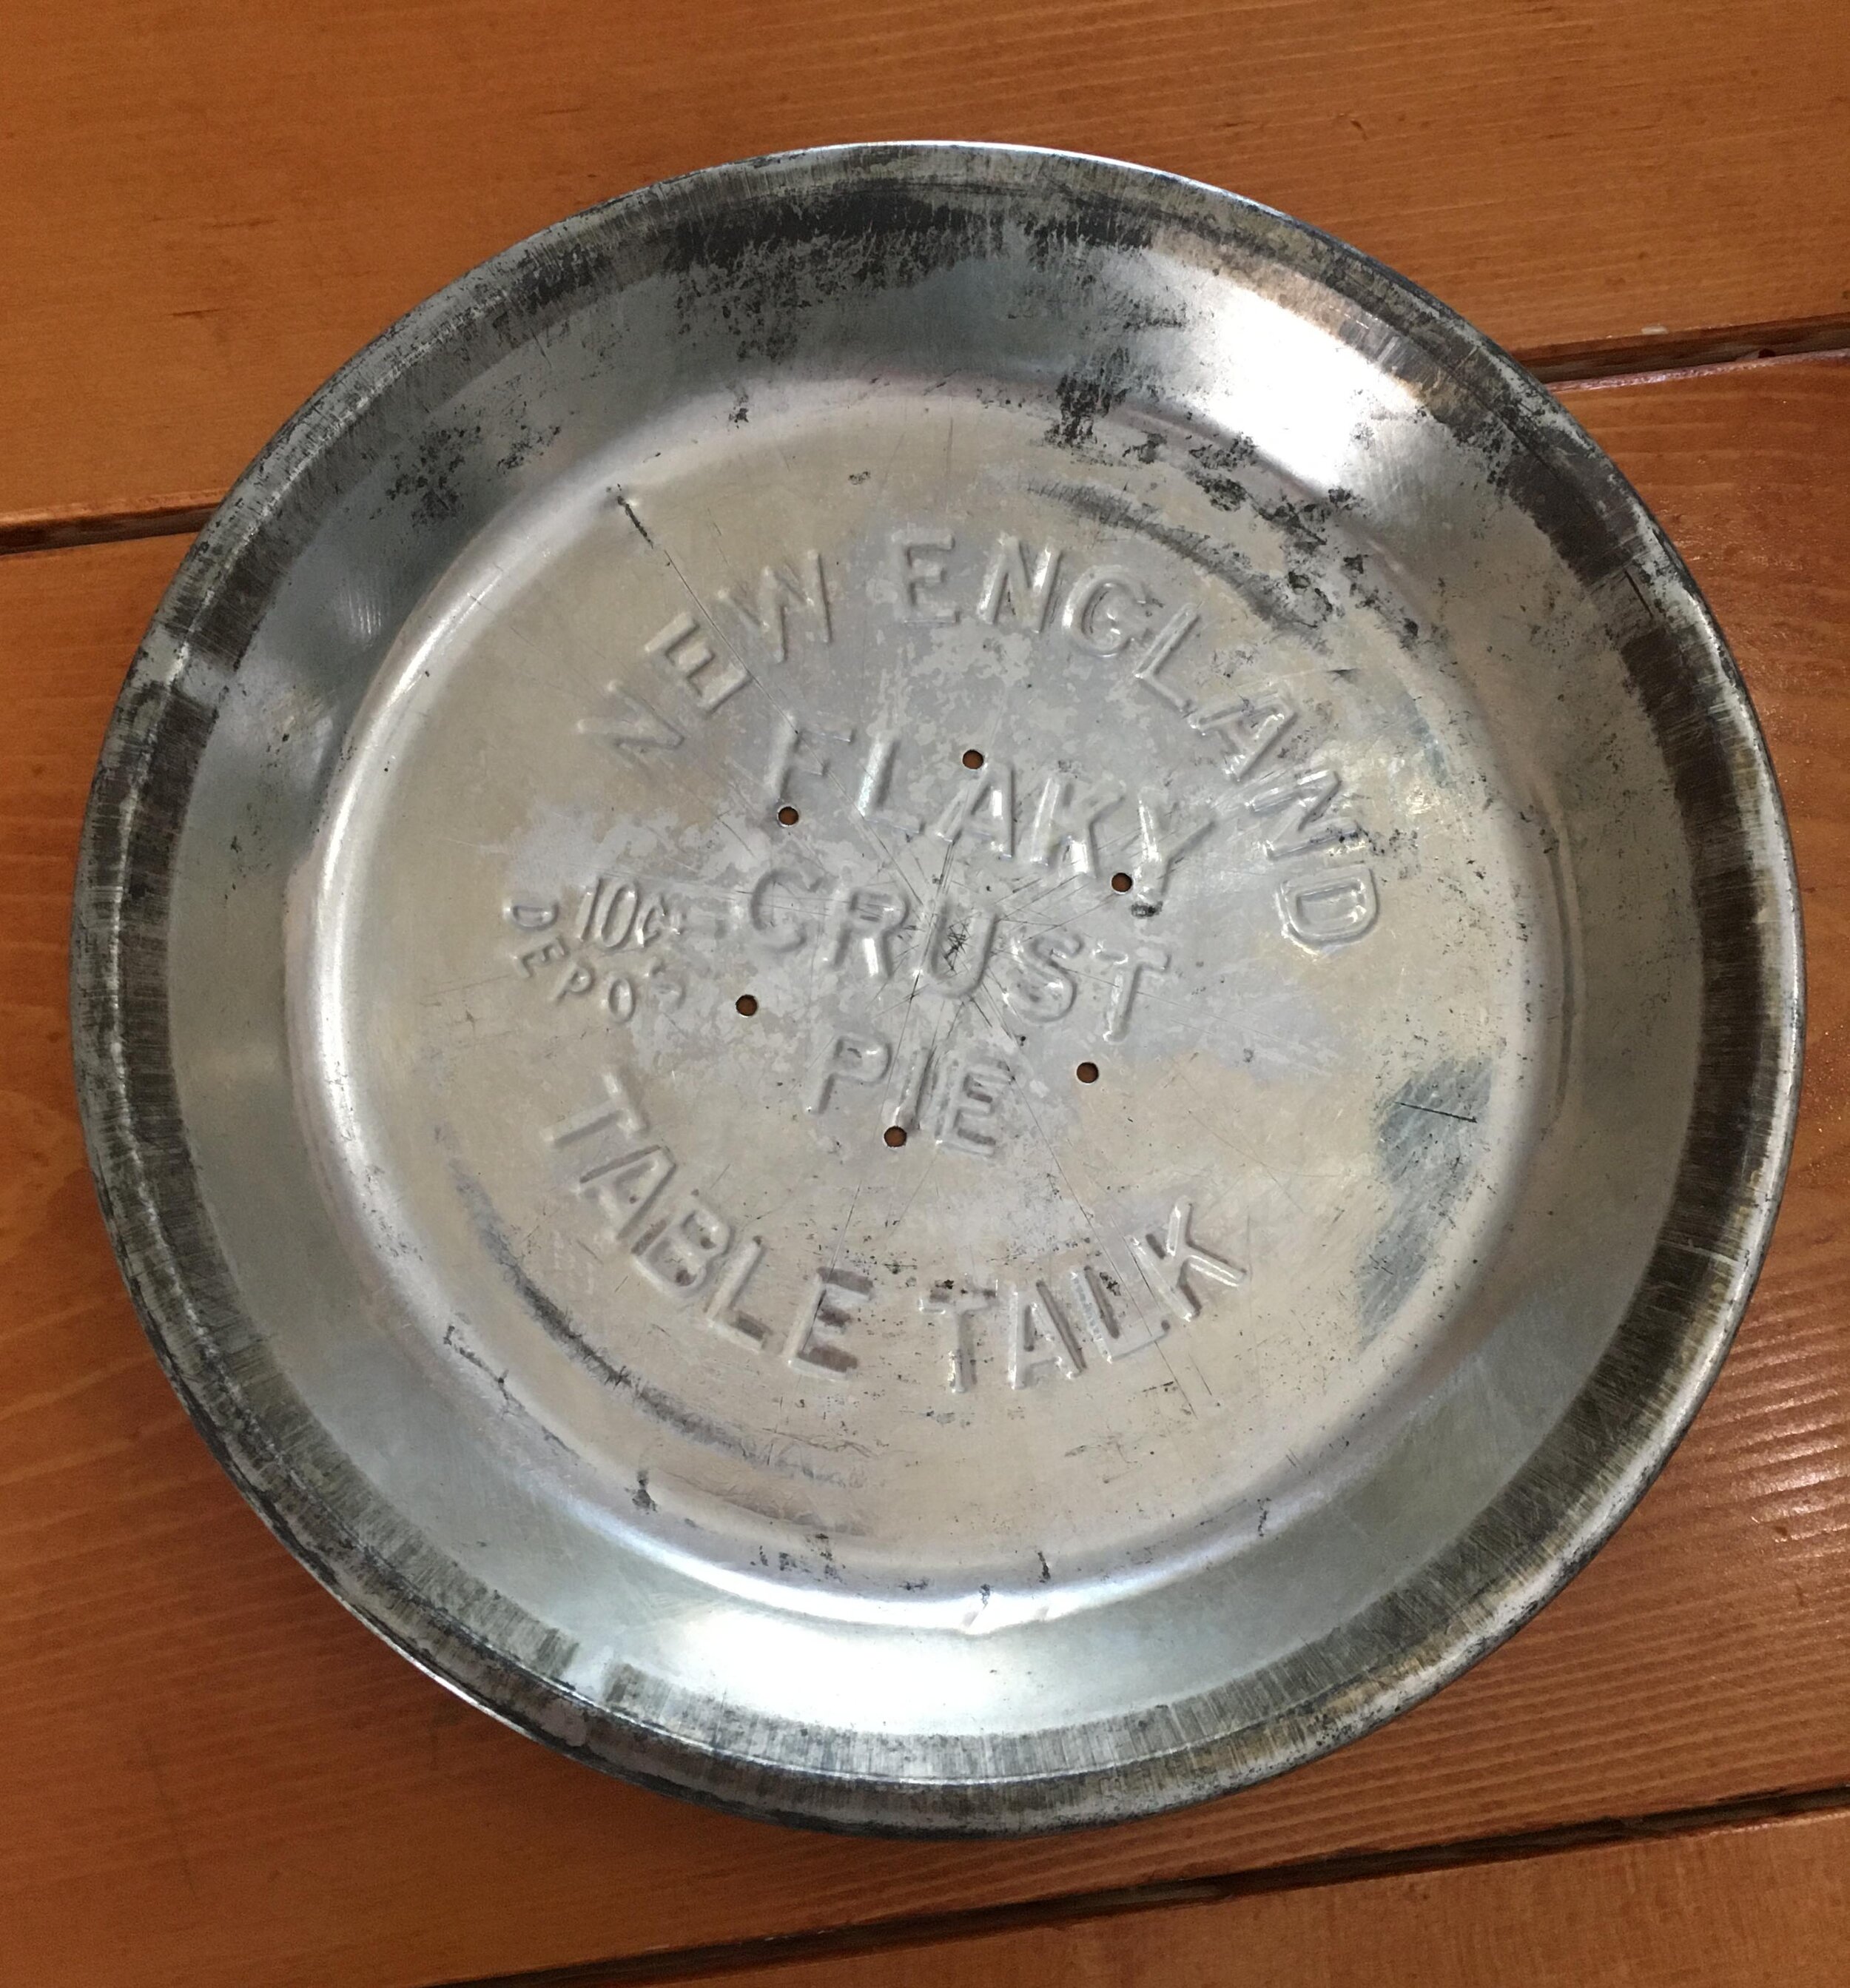
Rummaging around in my parents basement a few weeks ago, I stumbled across a stack of Vintage Table Talk Pie Tins that had been my Grandmother’s. Back in the day (approximately the 1930’s-1950’s), people would buy these store-bought pies with an extra 10 cent deposit that would be reimbursed if you returned the clean pie tin back to the store… but apparently my Grandmother chose not to, haha. These pie tins were a fun vintage find, and sentimental because they had once belonged to her. Since we didn’t have a kitchen clock I figured turning one of these tins into a clock would be a fun idea - and here’s how I did it. | This post contains affiliate links |
The first step to creating your clock is to purchase a clock kit that has the right diameter hands for your pie tin, so when they are mounted in the center of the tin they can move freely all around the face without touching the sides (very important).
After some measuring and browsing around on Amazon, I settled on this Mudder Clock Kit - I liked the style of the hands and they would fit perfectly in my particular pie tin.
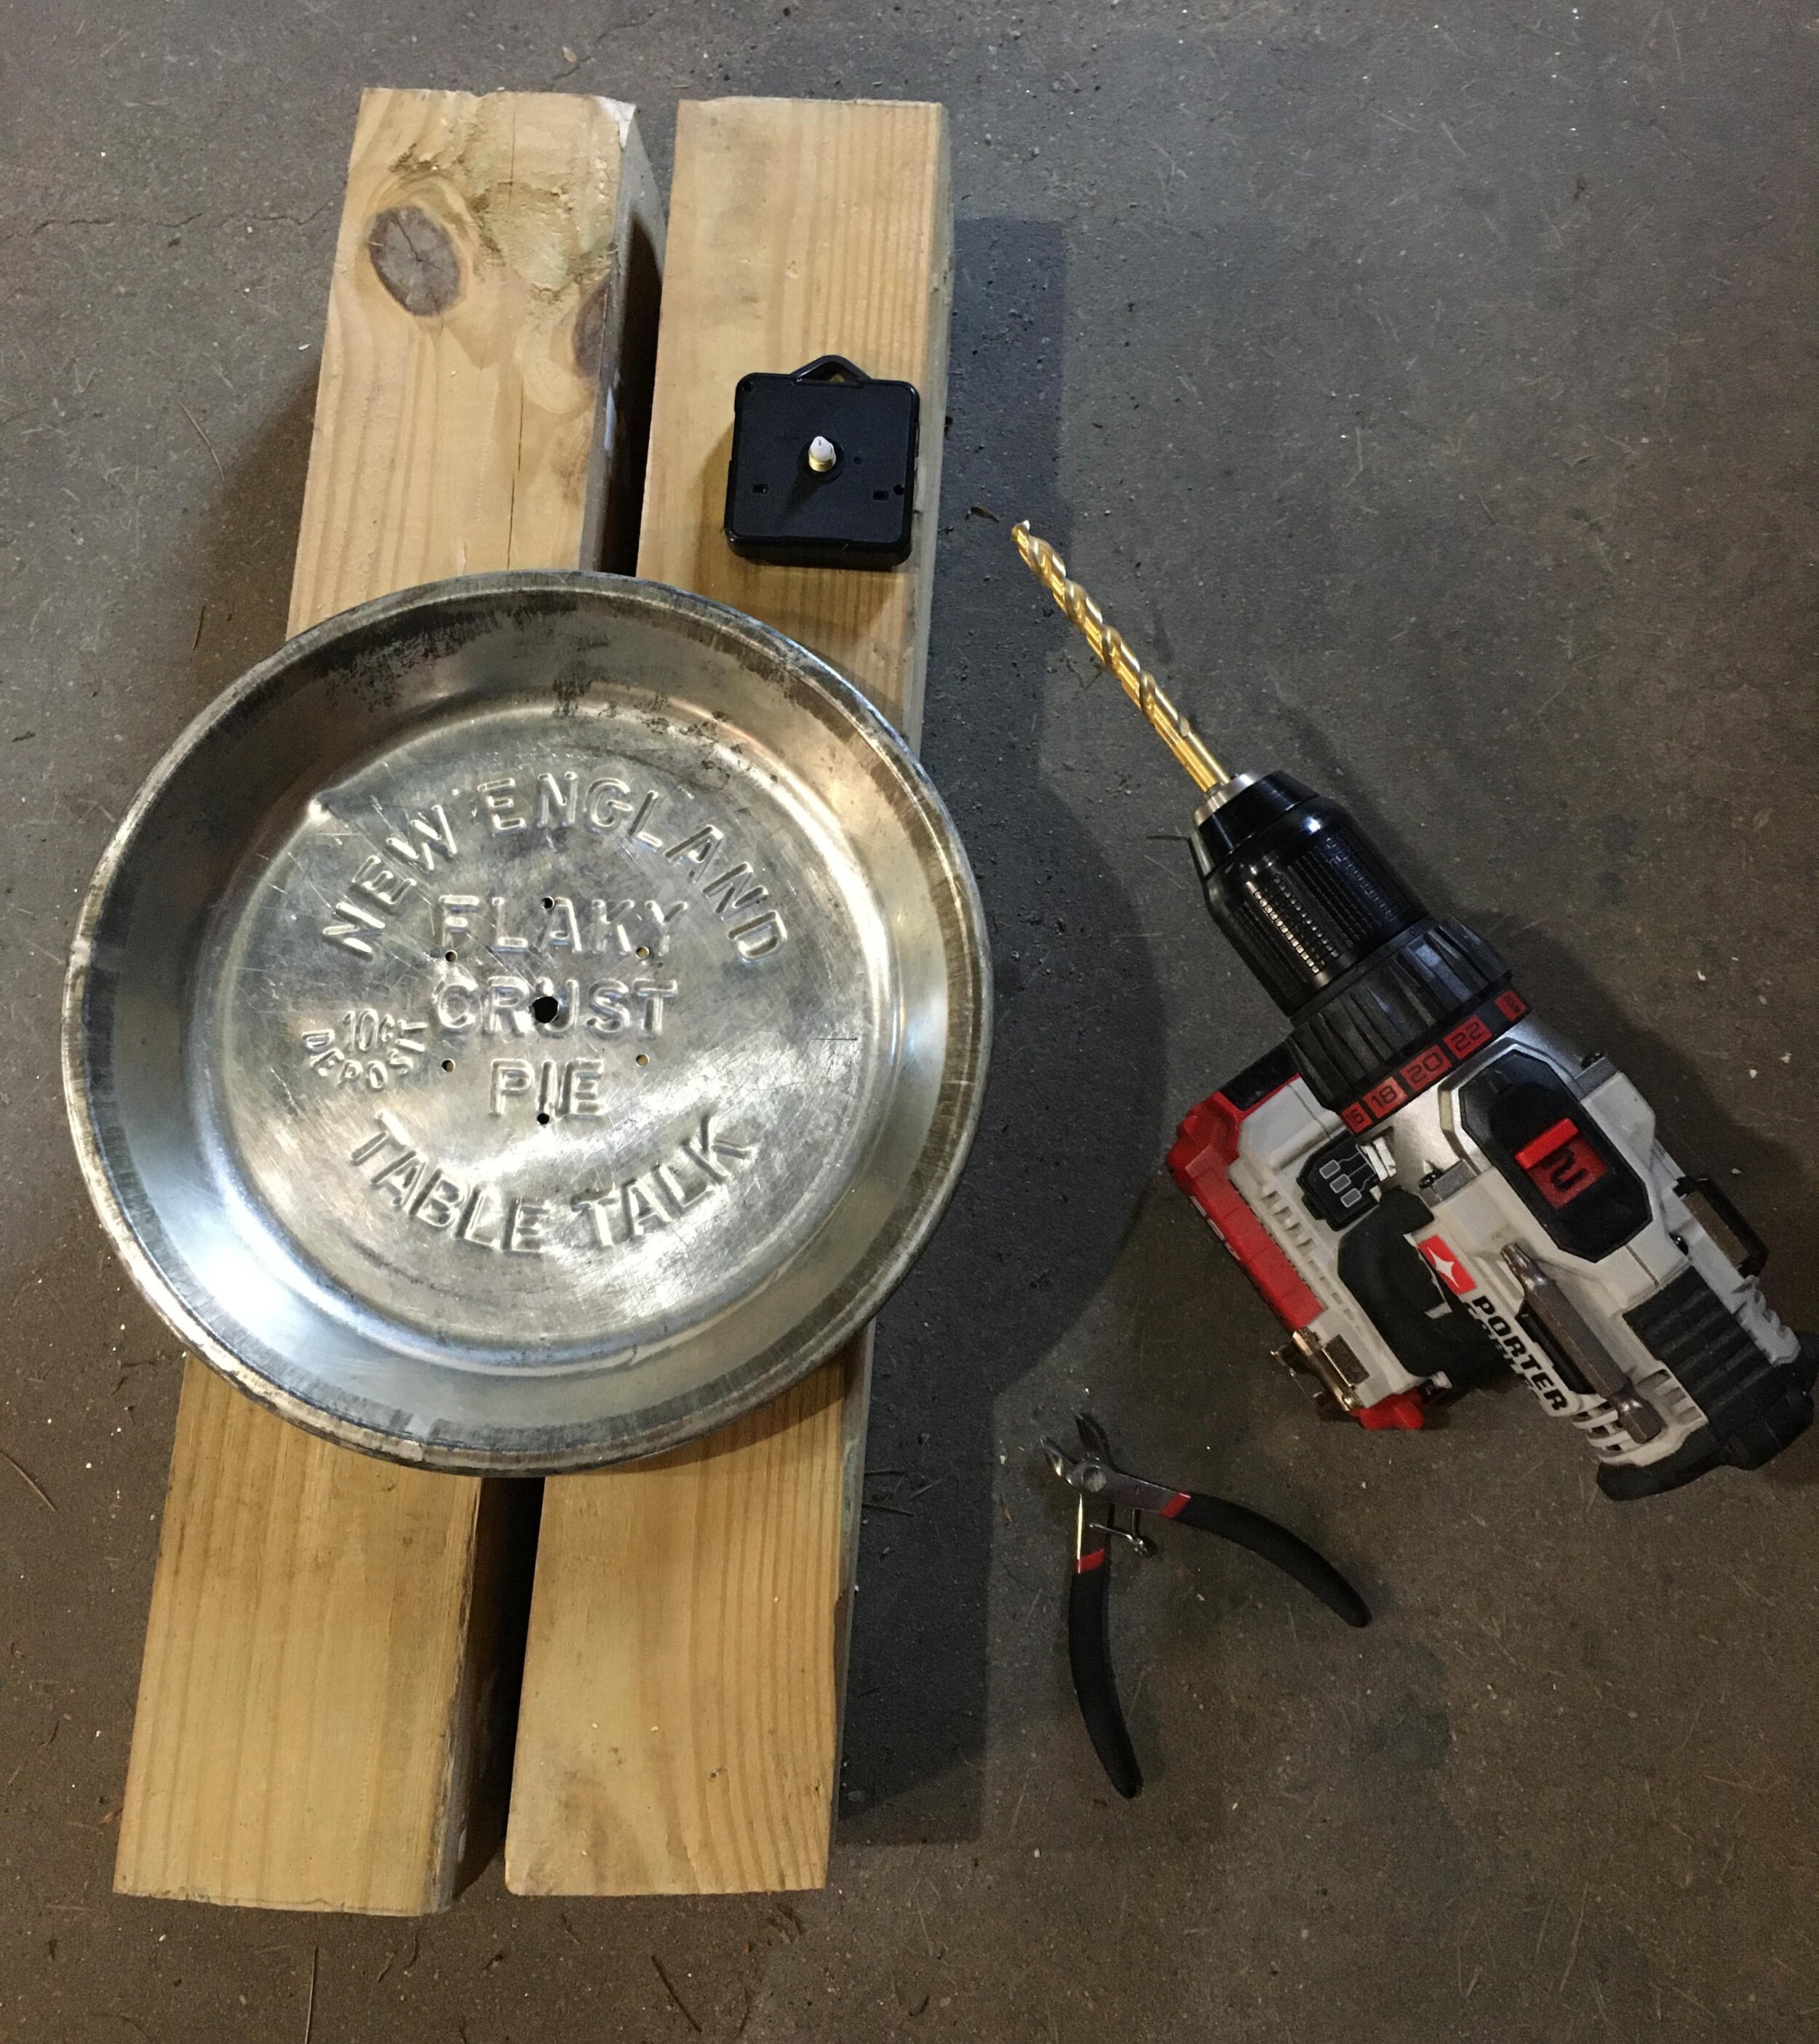
Next, carefully measure to find the center of the pie tin and poke a pilot hole through with a small nail and hammer. After that, make sure your pie tin is well supported and on a safe area for drilling (I used some scrap 4x4 posts as a work station). Then carefully drill out your hole, starting with your smallest drill bit.
In order not to “rip” the tin, it’s very important to start small and work your way up in drill bit size. I started with the smallest drill bit and then worked my way up, using every-other-drill bit in the set going up in size order.
If you get a large burr, carefully cut it off with a pair of small wire cutters before you move up to your next drill bit size.
Please note: Keep in mind that these pieces of tin are SHARP so use care and be mindful of the metal shavings you may drop while drilling. Make sure to clean up the shavings well after your project is done.
Periodically check to see if the threaded clock mechanism can pass through your hole yet. For this clock kit, I needed to jump up to a larger drill set in order to finally work my way up to the size hole I needed (in this case it was a 5/16” drill bit).
Once the hole is the correct size, use a round file to clean up any little burrs around the edge.
Now it’s time to assemble your clock - follow the manufacturer’s directions on the best way to assemble the clock hands for your particular kit. Keep in mind that clock kits and especially the hands are VERY delicate so take care assembling them.
Once your clock is assembled, install the battery and set the time - now you can enjoy your new Vintage Pie Tin Clock!
Are you interested in making your own Vintage Pie Tin Clock but need a pie tin?
I’m selling some extra pie tins* in my Etsy shop, click the button below to shop:
Does anyone else need makeup help out there or am I the only clueless one? These days with a toddler I'm lucky if I get any make-up on my face at all but in the past I've always just stuck to the tried-and-true concealer, powder, a little shadow, mascara = done. I've always wanted to up my makeup game though; learn about contouring, layering, and creating fun looks for date nights and parties, which is why I was so excited to learn that a college friend had started a YouTube channel dedicated to all of these things!
Corey Anne was my dorm-mate in college and back then I would have never imagined that the soccer-playing tomboy next door would have her own makeup tutorial series someday! Corey has been interested in makeup for a long time but decided to take the leap into tutorials and vlogging fairly recently. She's really enjoyed learning and sharing from others on YouTube and thought it was time to put herself out there too.
Corey's videos cover everything from basic how-tos to costume makeup to product and Birch Box reviews. They're entertaining to watch and the step-by-step makes the looks achievable for everyone. I've shared her Holiday Makeup Look below; I love how it's glamorous with just a hint of flashy - but not over the top. It'd totally be suitable to wear to a work party, an outing with friends, or even to a family event if everyone's just a little dressed up.
Now, if you'll excuse me I need to go practice my eyeliner technique.
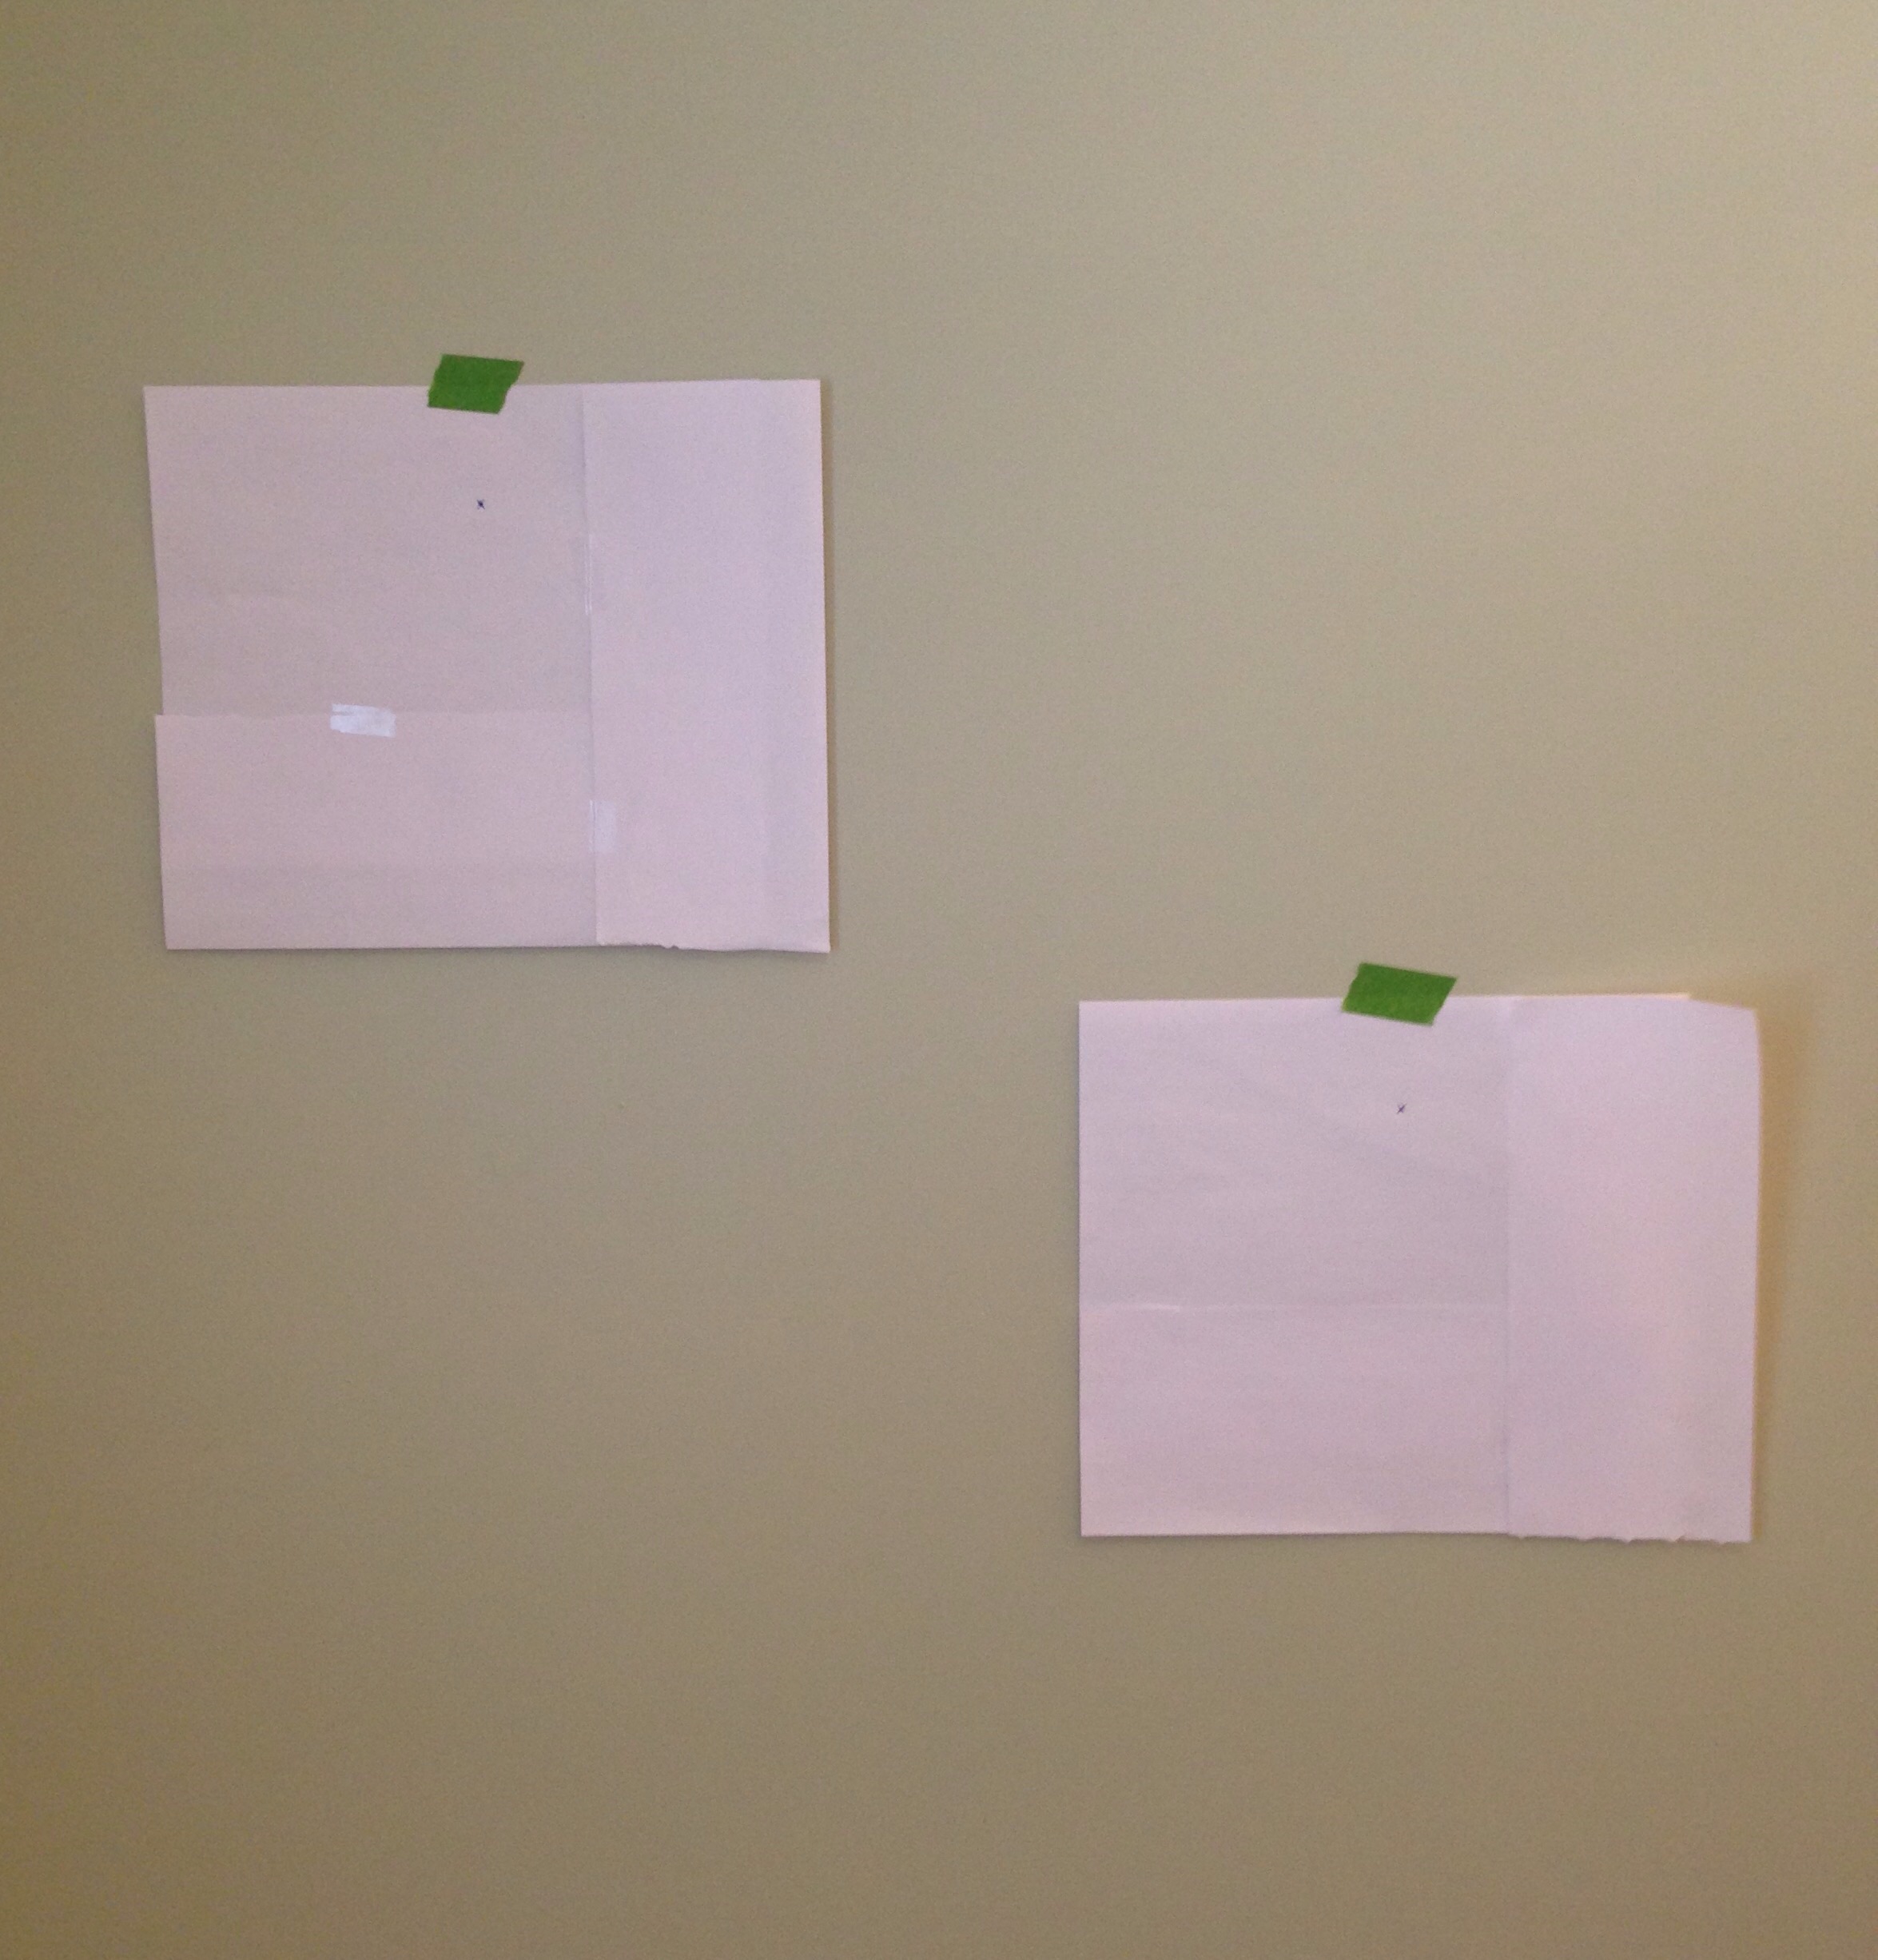
This post will show you a simple technique to lay out gallery wall so everything is spaced the way you want, without the trial and error of putting a lot of nail holes in your wall. My example is very small-scale (only two photos), but this technique would work well for any size gallery wall.
Materials:
picture frames
paper
painter's tape
scotch tape
pen or marker
nails
hammer Also useful:
tape measure
level
How-to:
Cut paper to size of frames. I used computer paper since it was handy, taped together in order to make it large enough.
Next, lay your paper template over the back of the frame and feel where the hanger is. Mark were the nail would be with a pen or marker.
Now's the fun part - start laying out your gallery wall by hanging up the paper templates with painter's tape and moving them around until you're happy with the height, spacing, etc. Here is where a tape measure and level might be useful if you have large pieces to hang or want to get the spacing absolutely perfect.
Next nail right through your paper templates, where the marking for the hanger is. Then take down the templates, ripping the paper off around the nail.
Now hang up your photos, and they'll be spaced just the way you wanted them!
This tiny gallery wall is in our family bathroom - it will have black and white photos of our little one taking a bath and brushing her teeth. I can't wait for the photos to come in so I put them in the frames!
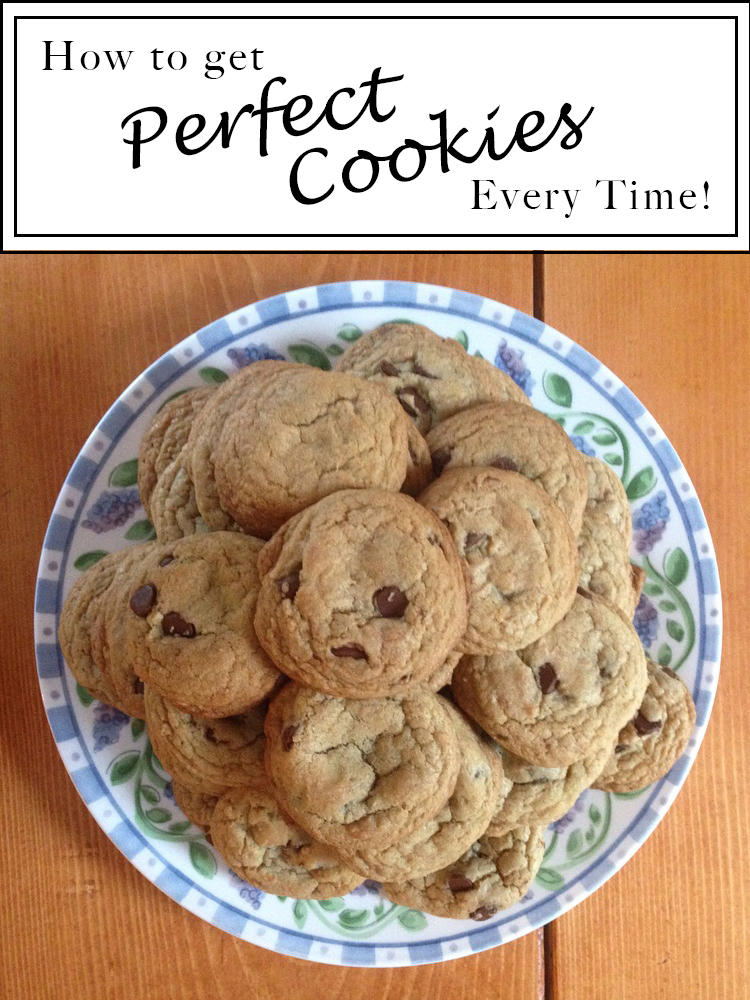
I always get told I make the best cookies, but making amazing cookies isn't all about the recipe - technique is what makes a good recipe great! Read on for my 5 tips to make perfect cookies, every time. | This post contains affiliate links |
5 Tips for Perfect Cookies
Sift
Make sure to sift all your dry ingredients. Doing this breaks up any clumps of flour or baking soda, combines everything evenly, and helps make your cookies light and fluffy.
Parchment Paper
Always line your cookie sheet with parchment paper, this is key to getting the cookie bottoms that perfect light golden brown. If you're planning on doing several batches of cookies make sure to round the corners of the parchment with some scissors first, as the sharp corners of the paper can start to burn after a few times in the oven.
Cookie Scoop
A cookie scoop is probably one of the best little investments you'll make in the kitchen and I don't know how I ever lived without mine. Using a cookie scoop ensures you get uniform-sized cookies every time and makes the whole process of getting your cookies ready for the oven go so much faster.
Time
Always bake your cookies for the lower suggested time. Cookies that are just cooked all the way through make for the softest, chewiest cookies. If they aren't cooked in the middle yet you can always put them back in for another minute or two, but it's best to start with the lowest time.
Your Secret Weapon - the "Bread Trick"
Accidentally over-cook the cookies? Forget to cover them on the counter? Believe it or not, the magical solution for over-cooked or stale cookies is just a slice of sandwich bread and a big ziplock. Put all the cookies in a gallon ziplock bag, throw in a slice of bread, seal, and leave for a few hours - the cookies will get softer as the bread gets staler. Magic!
Okay, we're taking it back to the very basics here this week - a simple, easy whitewash tutorial. I actually used the whitewash boards pictured here to make the backdrop for all my Etsy photos (and in the next week or two I'm planning on whitewashing more boards to use for a gallery wall in our kitchen - stay tuned for that project!).
Materials:
whatever you're planning to whitewash - unfinished furniture, wooden board to use for a sign, etc.
white paint (can be just about any kind of non-glossy paint)
plastic cup with water
brush (bristled brush if you want a dry, streaky affect; sponge brush for a more uniform look)
Leftover ceiling paint works great to make your whitewash mixture.
How to:
Dilute your paint with water - about one part paint to two parts water then simply brush the paint/water mixture on, letting it dry between coats. It will be pretty translucent at first, but keep building layers until you get the look you're going for. I did quite a few coats to get it nice and white, but still translucent enough that the wood grain shone through.
That's it! Like I said, we're taking it back to the basics this week.
A closeup of the whitewash boards as my Etsy backdrop - I love the subtle texture it has!
Ever notice that the silhouette of those Starbucks bottles are very much like an old-fashioned milk bottle? I'm sure the real reason is smart marketing, but an ever better reason is for you to turn that bottle into a milk bottle vase!
Materials:
Starbucks glass bottle, with lid (which means you have to drink one of those delicious coffee drinks.. darn)
white or cream acrylic paint
cardboard
How to:
First drink a Starbucks (most difficult part of the job right here). Then remove the labels and wash the bottle thoroughly, inside and out. You should be able to get the glue residue and expiration mark off the bottle with a scrubby sponge and dish soap. Rinse the cap and save.
After the bottle has completely dried, squirt a decent amount of acrylic paint into it and replace the cap. Swirl and shake the bottle until the paint has completely coated the inside of the bottle, adding more paint if necessary.
Remove the cap and pour the excess paint back into your paint bottle.
Next set bottle upside down on the cardboard for about 30 seconds then pick straight up, set back down in a different spot, and repeat several more times until you seem to have most of the excess paint out and a nice even coat on the inside of the bottle.
Put bottle back upright to dry so the paint doesn't drip and pull away from the bottom and also so that air can get inside. At this point I brought it inside the garage to dry - didn't want any curious grasshoppers falling in!
Let dry about 48 hours.. it can take a surprisingly long time to dry due to the small opening of the bottle.
Once completely dry, place on a sunny windowsill and admire. (Note: this vase is for decor purposes only. If you put water in it for cut flowers the acrylic paint may start to lift off the glass after a while.. just something to keep in mind. You may want to consider using fake flowers.)
You could even dress these up a bit with some gingham or burlap ribbon. They are so easy to make and could be used for all sorts of things such as small centerpieces or accents for a bridal or baby shower.
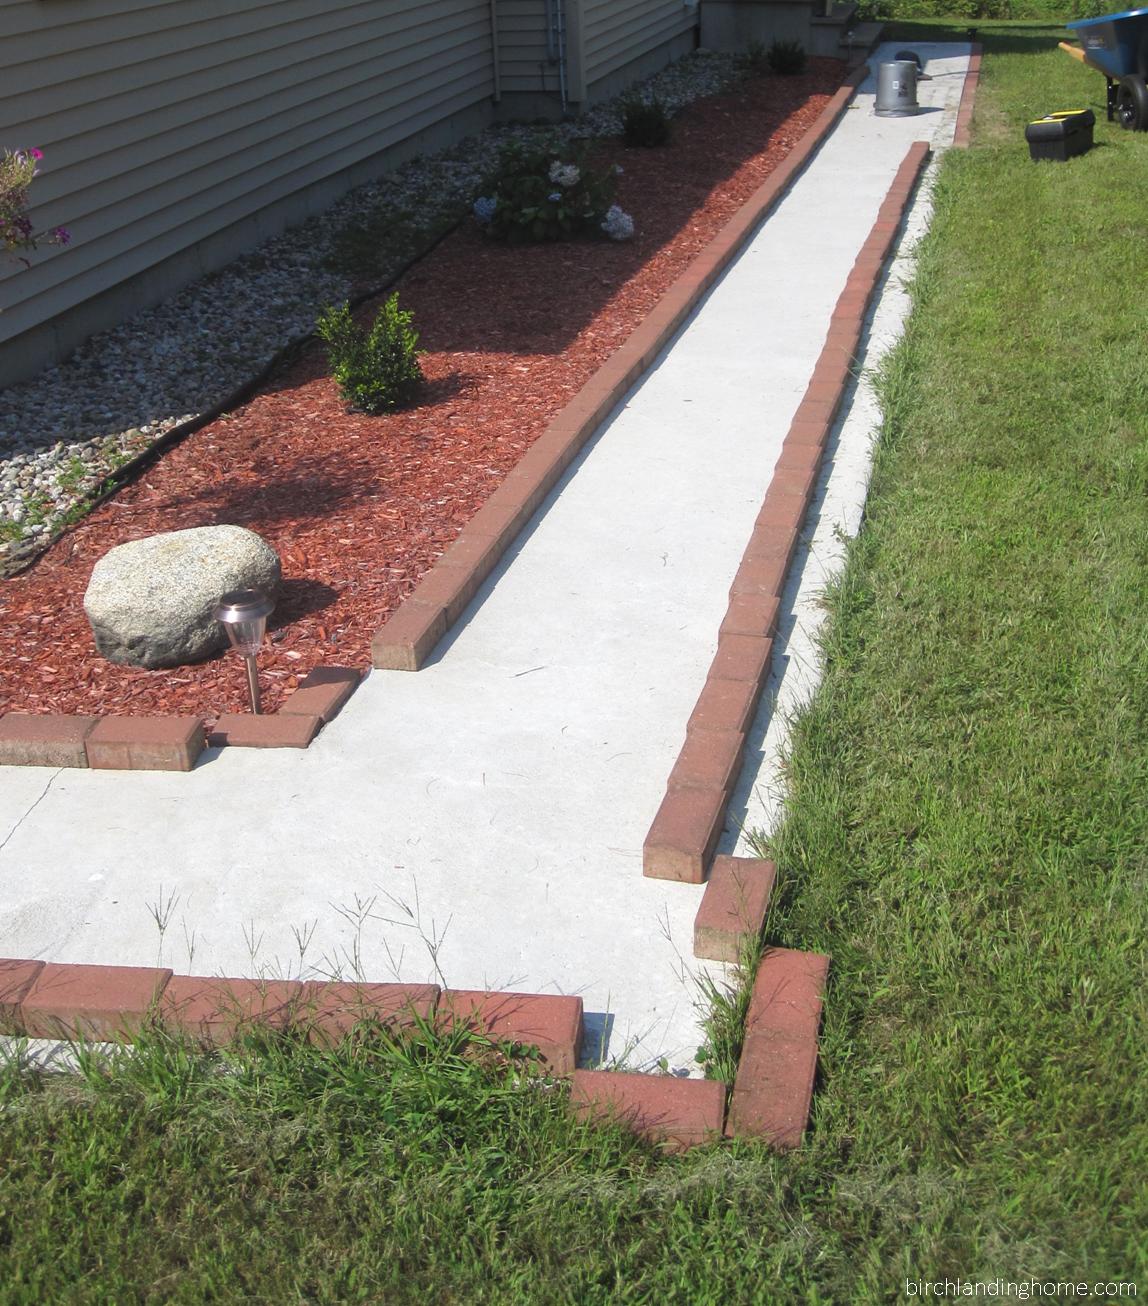
This week I was hoping to bring you a post on making pickles. I've never made them before and wanted to give them a try with all the cucumbers we've been getting out of our garden. Unfortunately I let the cucumbers get too big and they were all seeds - no good for pickles. Such a bummer, but I've learned my lesson. So, without the pickle post I decided to share the easy brick upgrade we did on our concrete walkway after we moved in our home.
When we first moved into our home there was nothing in front of it.. no bushes or anything substantial, just a plain white concrete walkway and a bark mulch bed with a few sad daffodils that had already gone by. It was so boring and even the walkway looked really unfinished.
The obvious solution to dressing up the existing "flower" (I use that term loosely here) bed was to get plants and bushes in there - but what about the concrete walkway? Luckily for us the previous homeowners had left behind a lot of bricks... A LOT. Some were stacked under the back deck, but there was also a small random brick patio that we had plans to disassemble anyways. There were sooo many bricks.. it was actually becoming a problem on where to store them and what to do with them.
While trying to figure out what to do I came up with the idea of inlaying them along the walkway to dress it up a bit - and though it was a little time-consuming, the whole process was actually really easy!
Materials:
lots of bricks (enough to line both sides of the walkway, plus a few extra)
edger
wheelbarrow
spade
rubber mallet
How to:
First I started hauling all the bricks to the front yard and laying them along the walkway to make sure I had enough (though we had so many I probably could have done this project twice!). I started laying them out at the front steps and put them end-to-end along the whole length of the walkway, along both sides. This way I was able to get a sense of how they fit and where I would need to do cuts (we were very lucky to have a pretty straight walkway, so the cuts needed were minimal). If you're thinking of starting this project from scratch, I would recommend measuring the length along both sides of the walkway, then head to your local home improvement center to see what they have for bricks, their sizes, and how much they cost. Once you decide on a brick you like, you can calculate how many bricks you will need.
Laying out all the bricks. You can also see our first additions to the flower bed - some tiny boxwoods and hydrangea bushes. It's amazing how much they've grown!
After everything was all laid out, I started by using the edger along the side of the bricks to cut the edge of the "trench" they would be set in. I made sure not to get carried away and would only prep about two feet ahead of where I was. I would cut as I went along to compensate for how the bricks were sitting against the walkway.
Once the outside edge was cut, I would use the spade to dig out enough soil for a brick. Then I'd set the brick in and pound on it with the rubber mallet until it was even with the grass. Sometimes I would need to take the brick out and add or remove soil until it sat where I wanted it too.
I continued this process along the line, brick-by-brick until I got to corners or areas where the bricks needed to be cut. After tracing on the bricks where cuts would need to be and a quick trip to a local mason, they were cut and ready to be inlaid as well.
We have a really long walkway and I worked on this project at my leisure over the course of a week or two but probably could have gotten it done over a weekend if I had really set my mind to it. It's definitely made a huge difference to the curb appeal of our home.
The now-full flower beds look great next to the brick lined walkway.
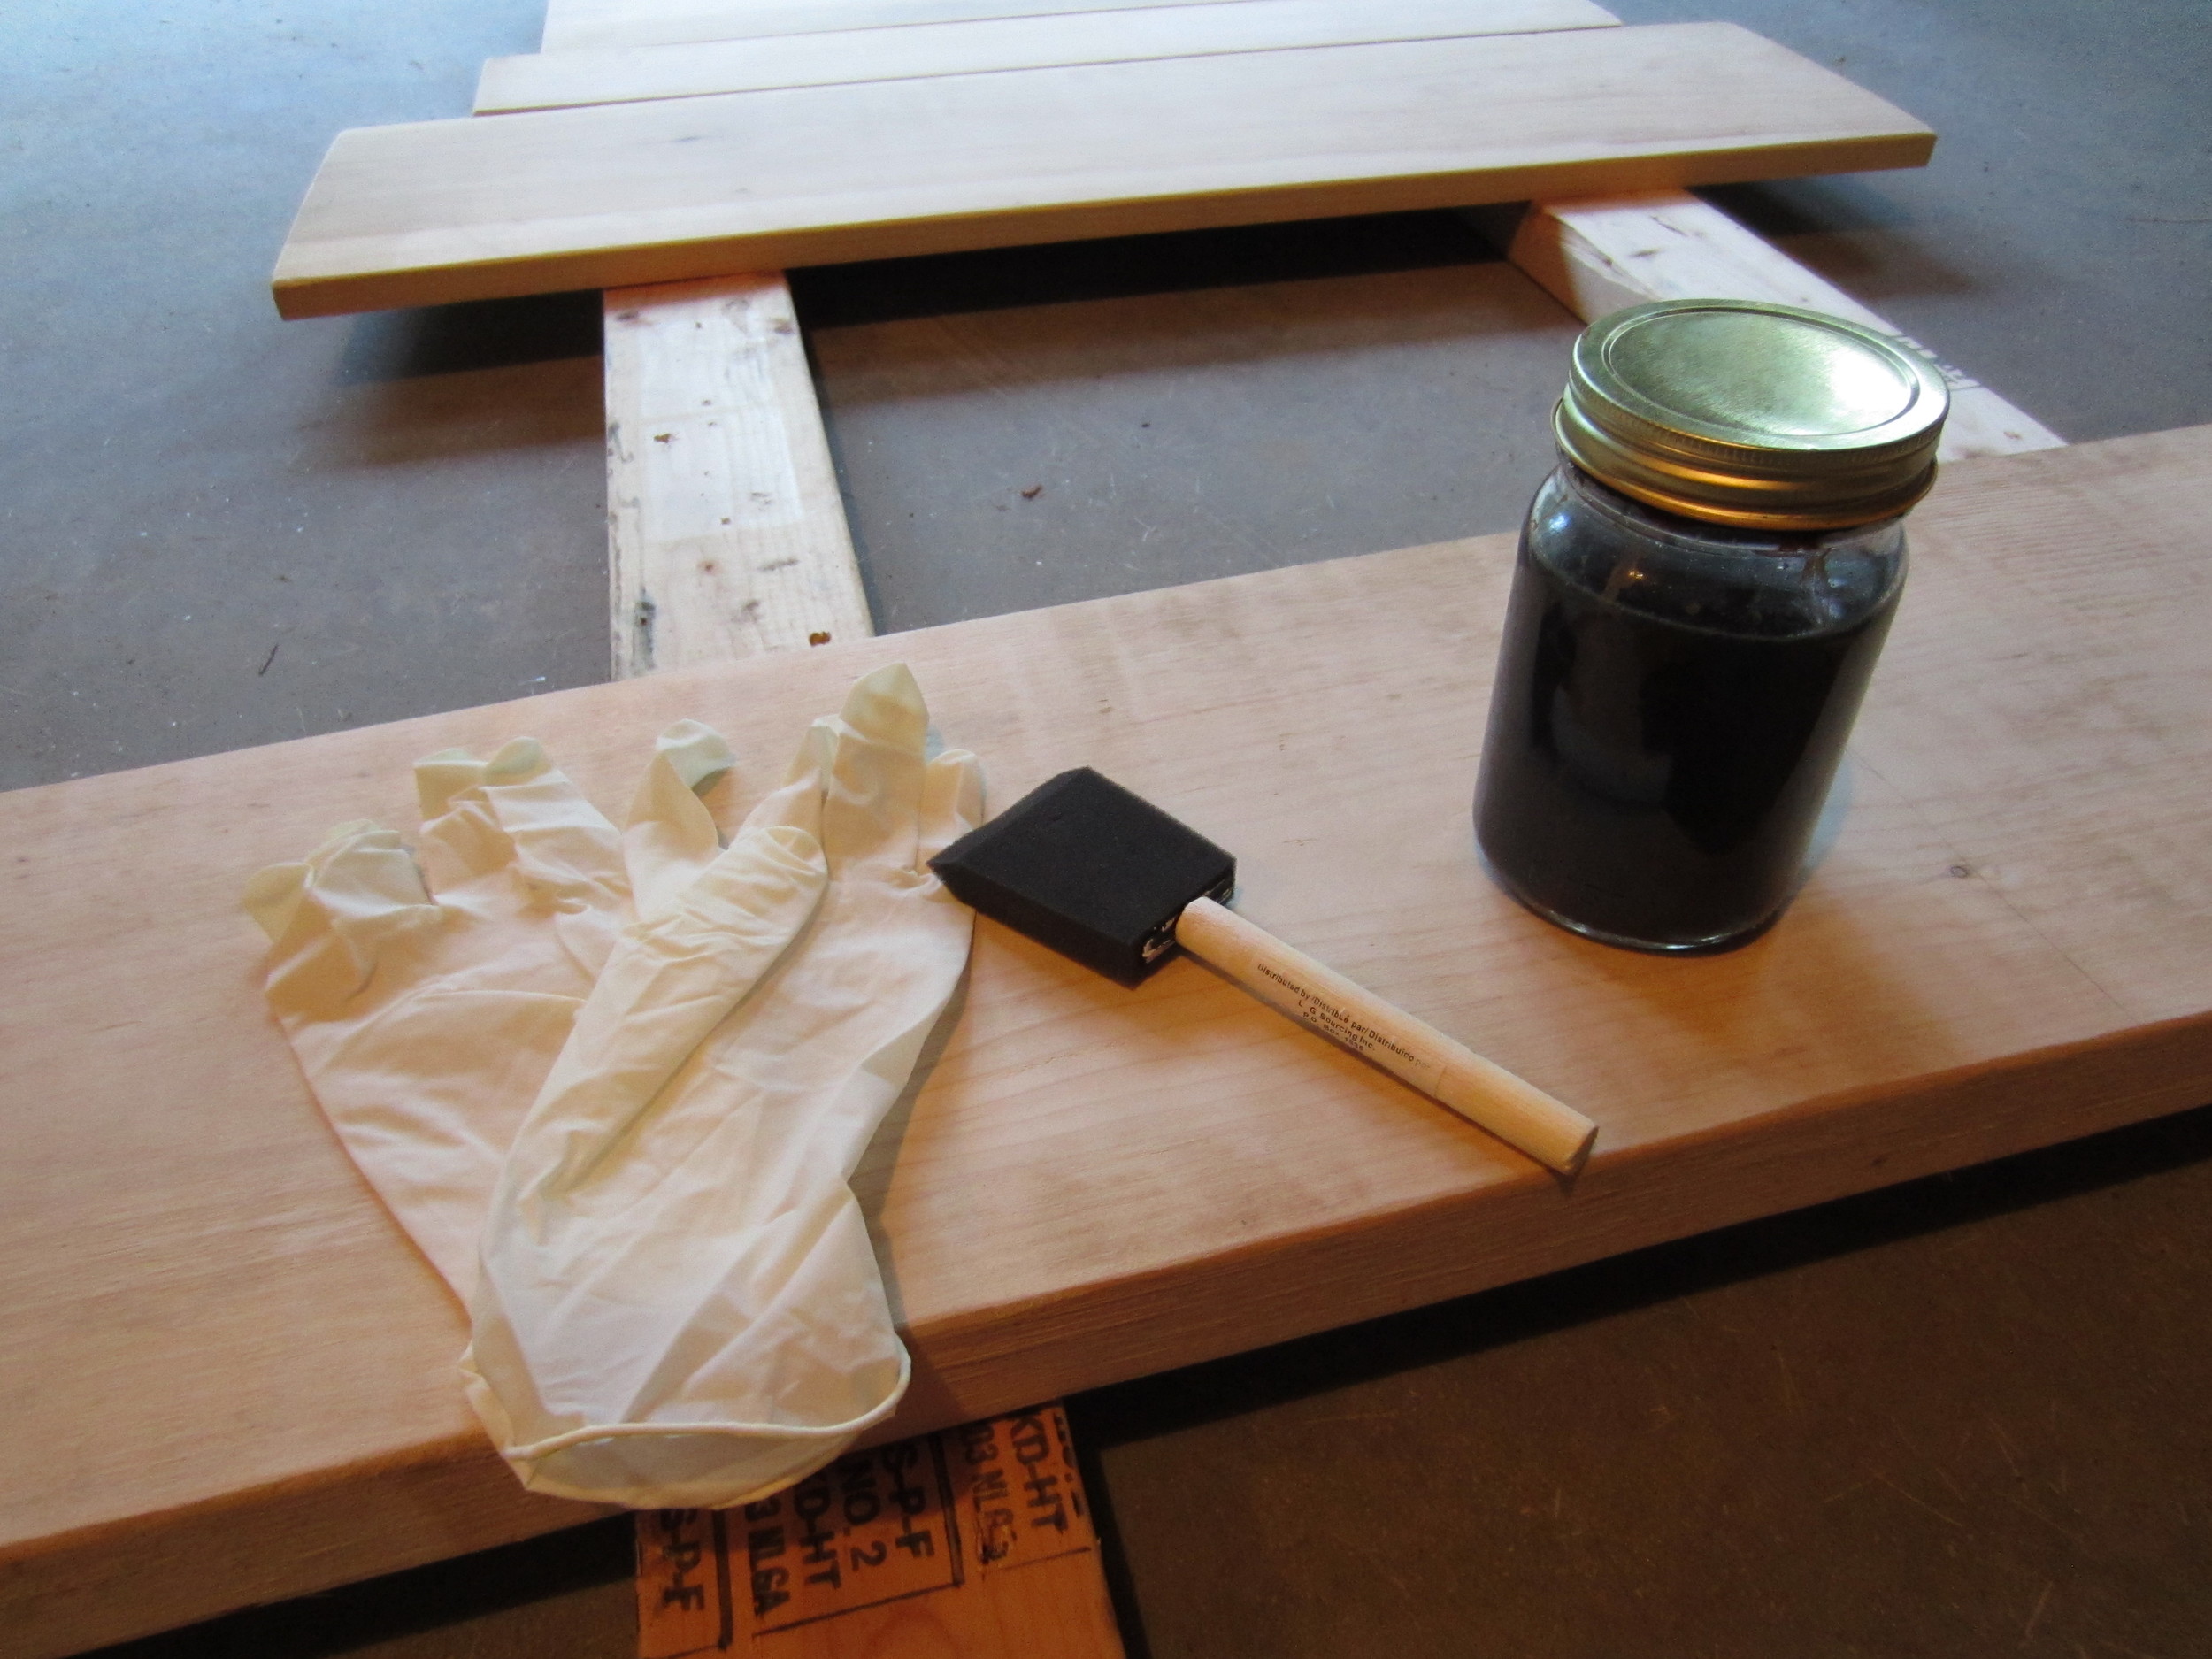
I'd heard that you can make your own stain using just steel wool and regular vinegar. I was intrigued and had to give it a try myself.
Materials:
glass jar
ball of fine steel wool
white vinegar
rubber gloves
sponge brush or rag
wood
How to:
Put a ball of fine steel wool in a glass jar and fill with white vinegar to about 1-2 inches from the top. Replace the lid and let sit for a few days until the steel wool has dissolved or nearly dissolved, giving the jar a shake once or twice a day.
Yep, that's it.* It's just that easy.
*I'd recommend leaving the jar on a paper towel and carefully opening and closing the jar before shaking it. We noticed that our jar built up quite a bit of pressure from the chemical reaction of the steel wool dissolving in vinegar and the pressure needed to be released a few times a day.
Two days later, after having been shaken up. Gross, huh?
Once the steel wool has dissolved, put on some rubber gloves, give the jar one last shake and start staining!
The stain is very deceiving at first.. when you initially put it on it just looks like you're putting dirty water on the wood - it doesn't look significantly changed. However, as it's exposed to the air and dries it rusts and gives the wood a beautifully rustic, warm color. Once it's completely dry, take a rag to rub the loose rust off - you're done!
After drying.
If you're using this process for a sign or something that won't be touched when finished I'd leave the wood raw like this. If you're thinking of using it for a table or something you will come in contact with, I'd strongly suggest sealing the wood to keep you from getting rust stains.
I didn't have a project in mind for this process, but I love how rich the color turned out! I think I'll be staining the edges of this board and turning it into something.