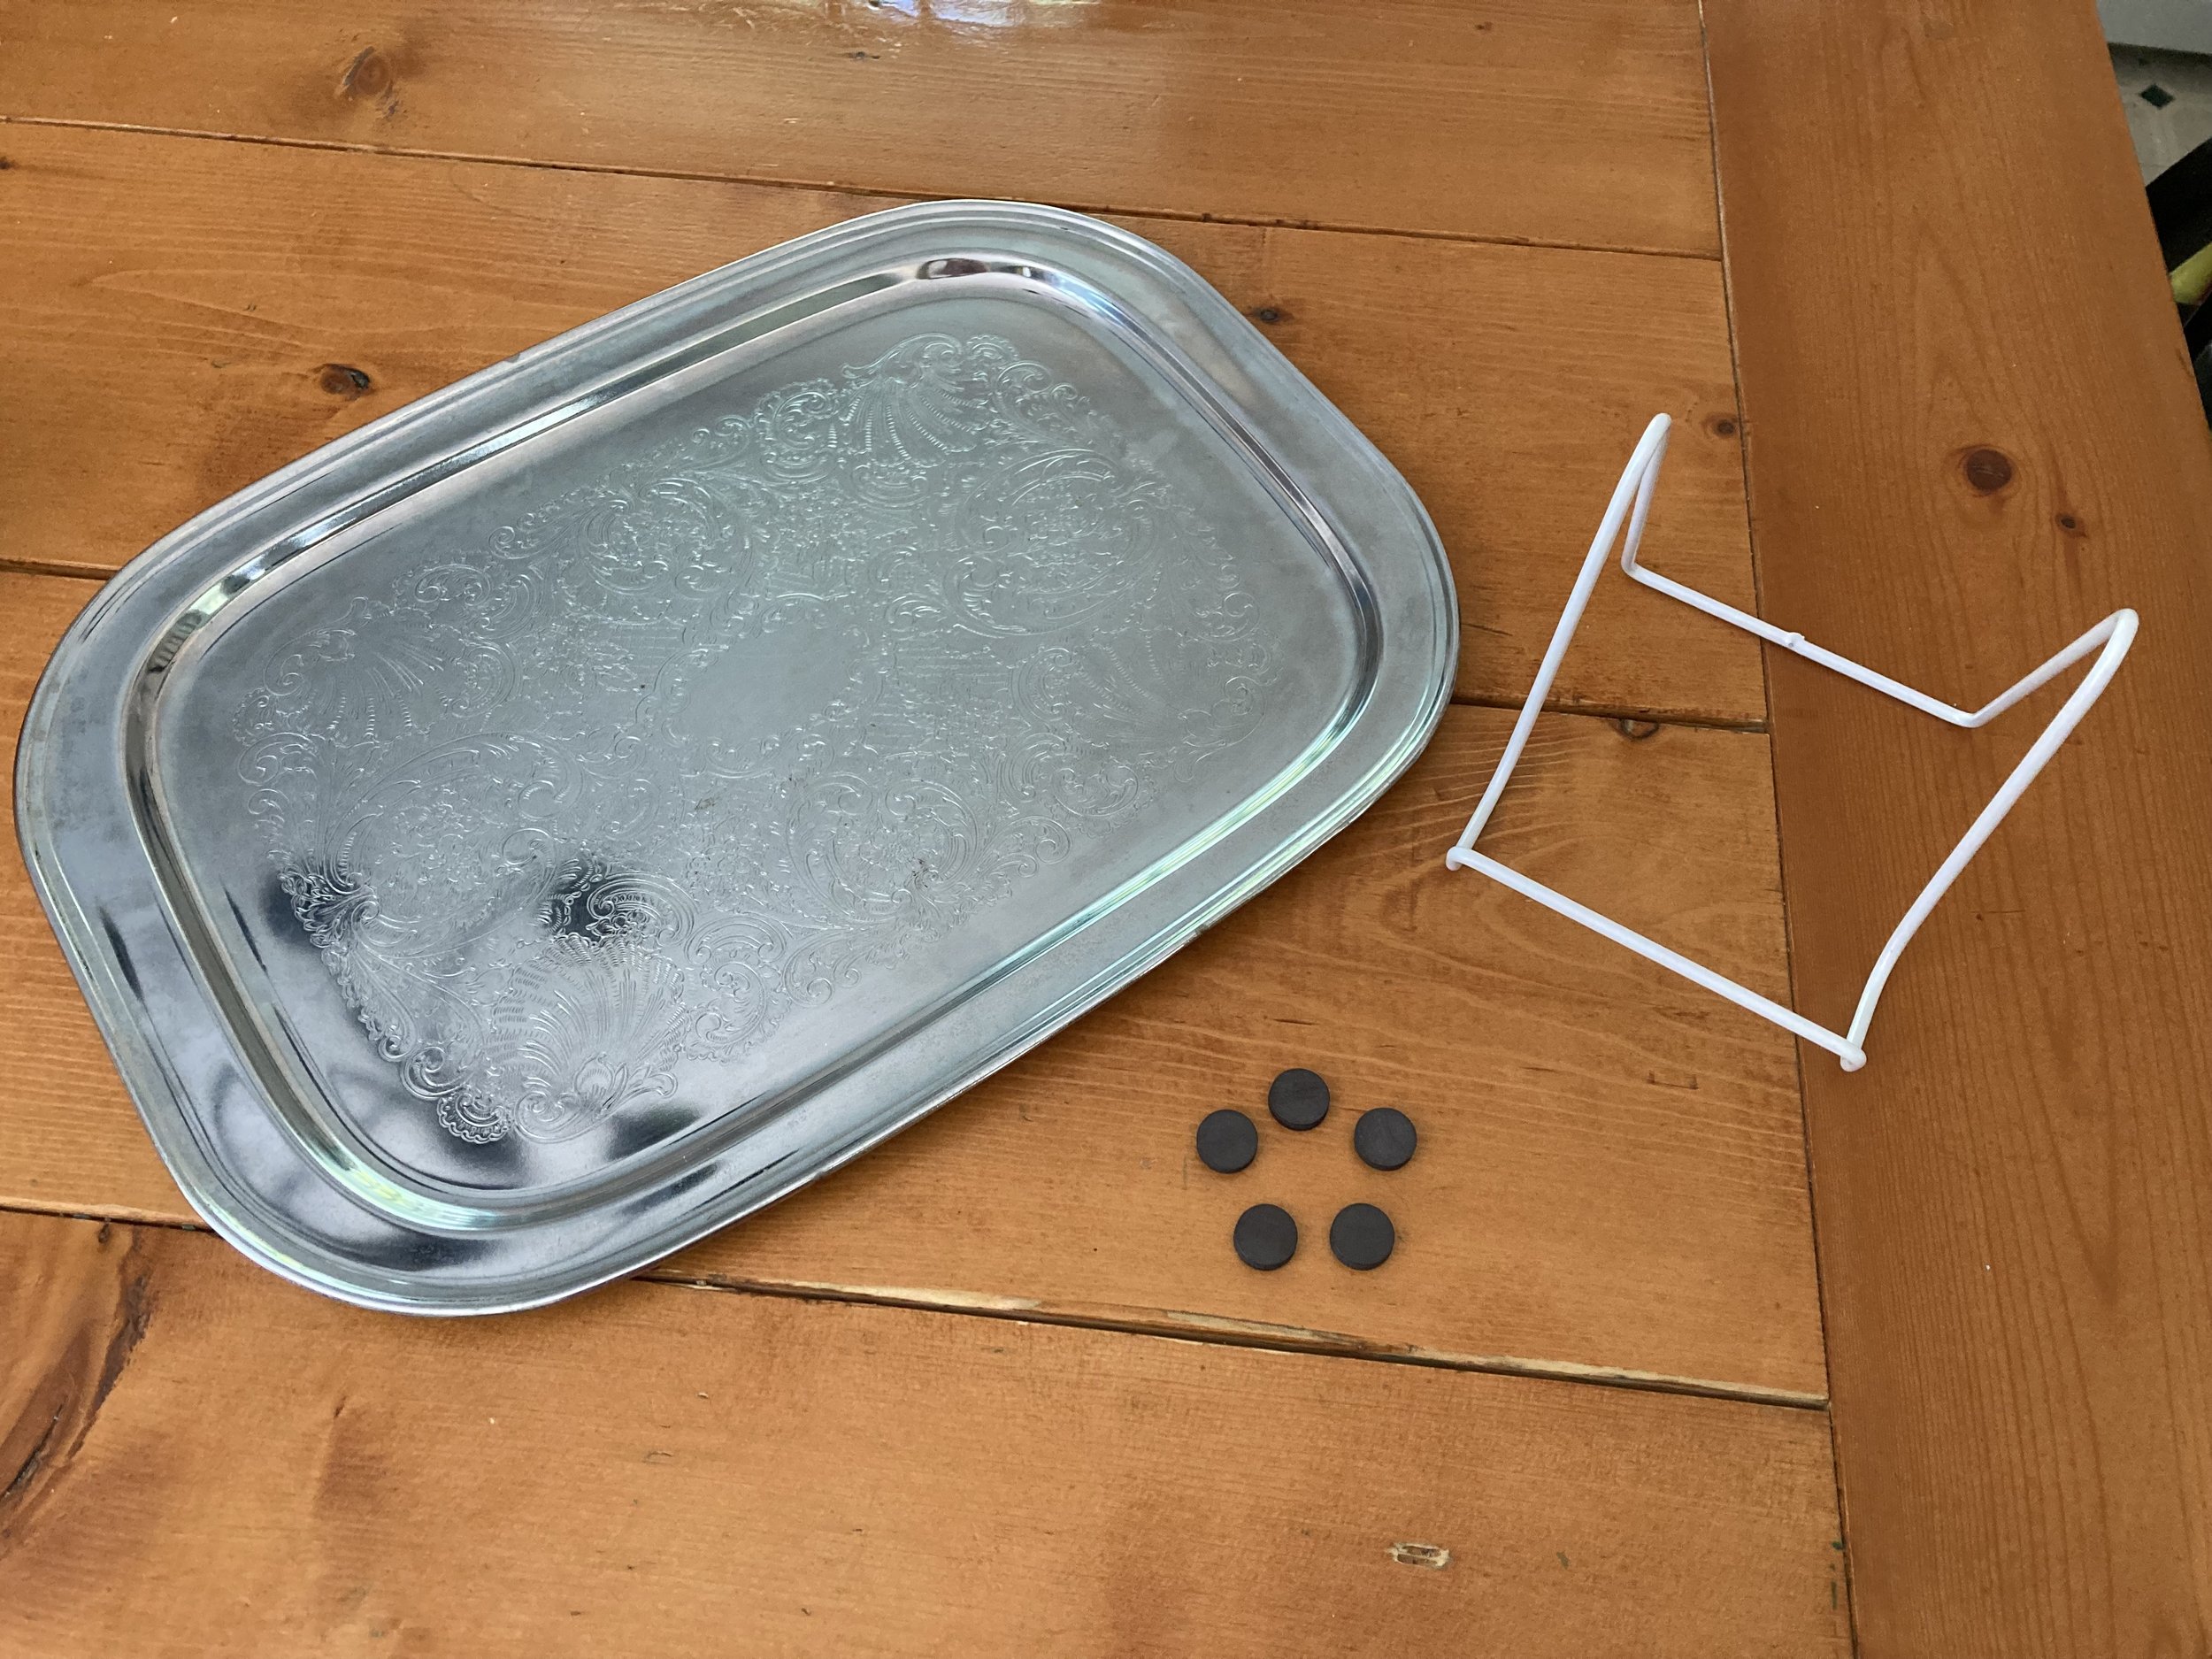
We’ve been slowly helping to clean out a family member’s attic and came across this old heavy “silver” (not actually silver) serving tray. Since not many people still use serving trays I thought it might be fun to repurpose it into something else - and since it seems to be made of some kind of steel (therefore magnetic), I thought it would make a fun magnetic memo board! | This post contains affiliate links |
- Vintage metal tray (check to make sure it's magnetic)
- plate stand big enough to support the tray (similar size stand linked)
- magnets
How To:
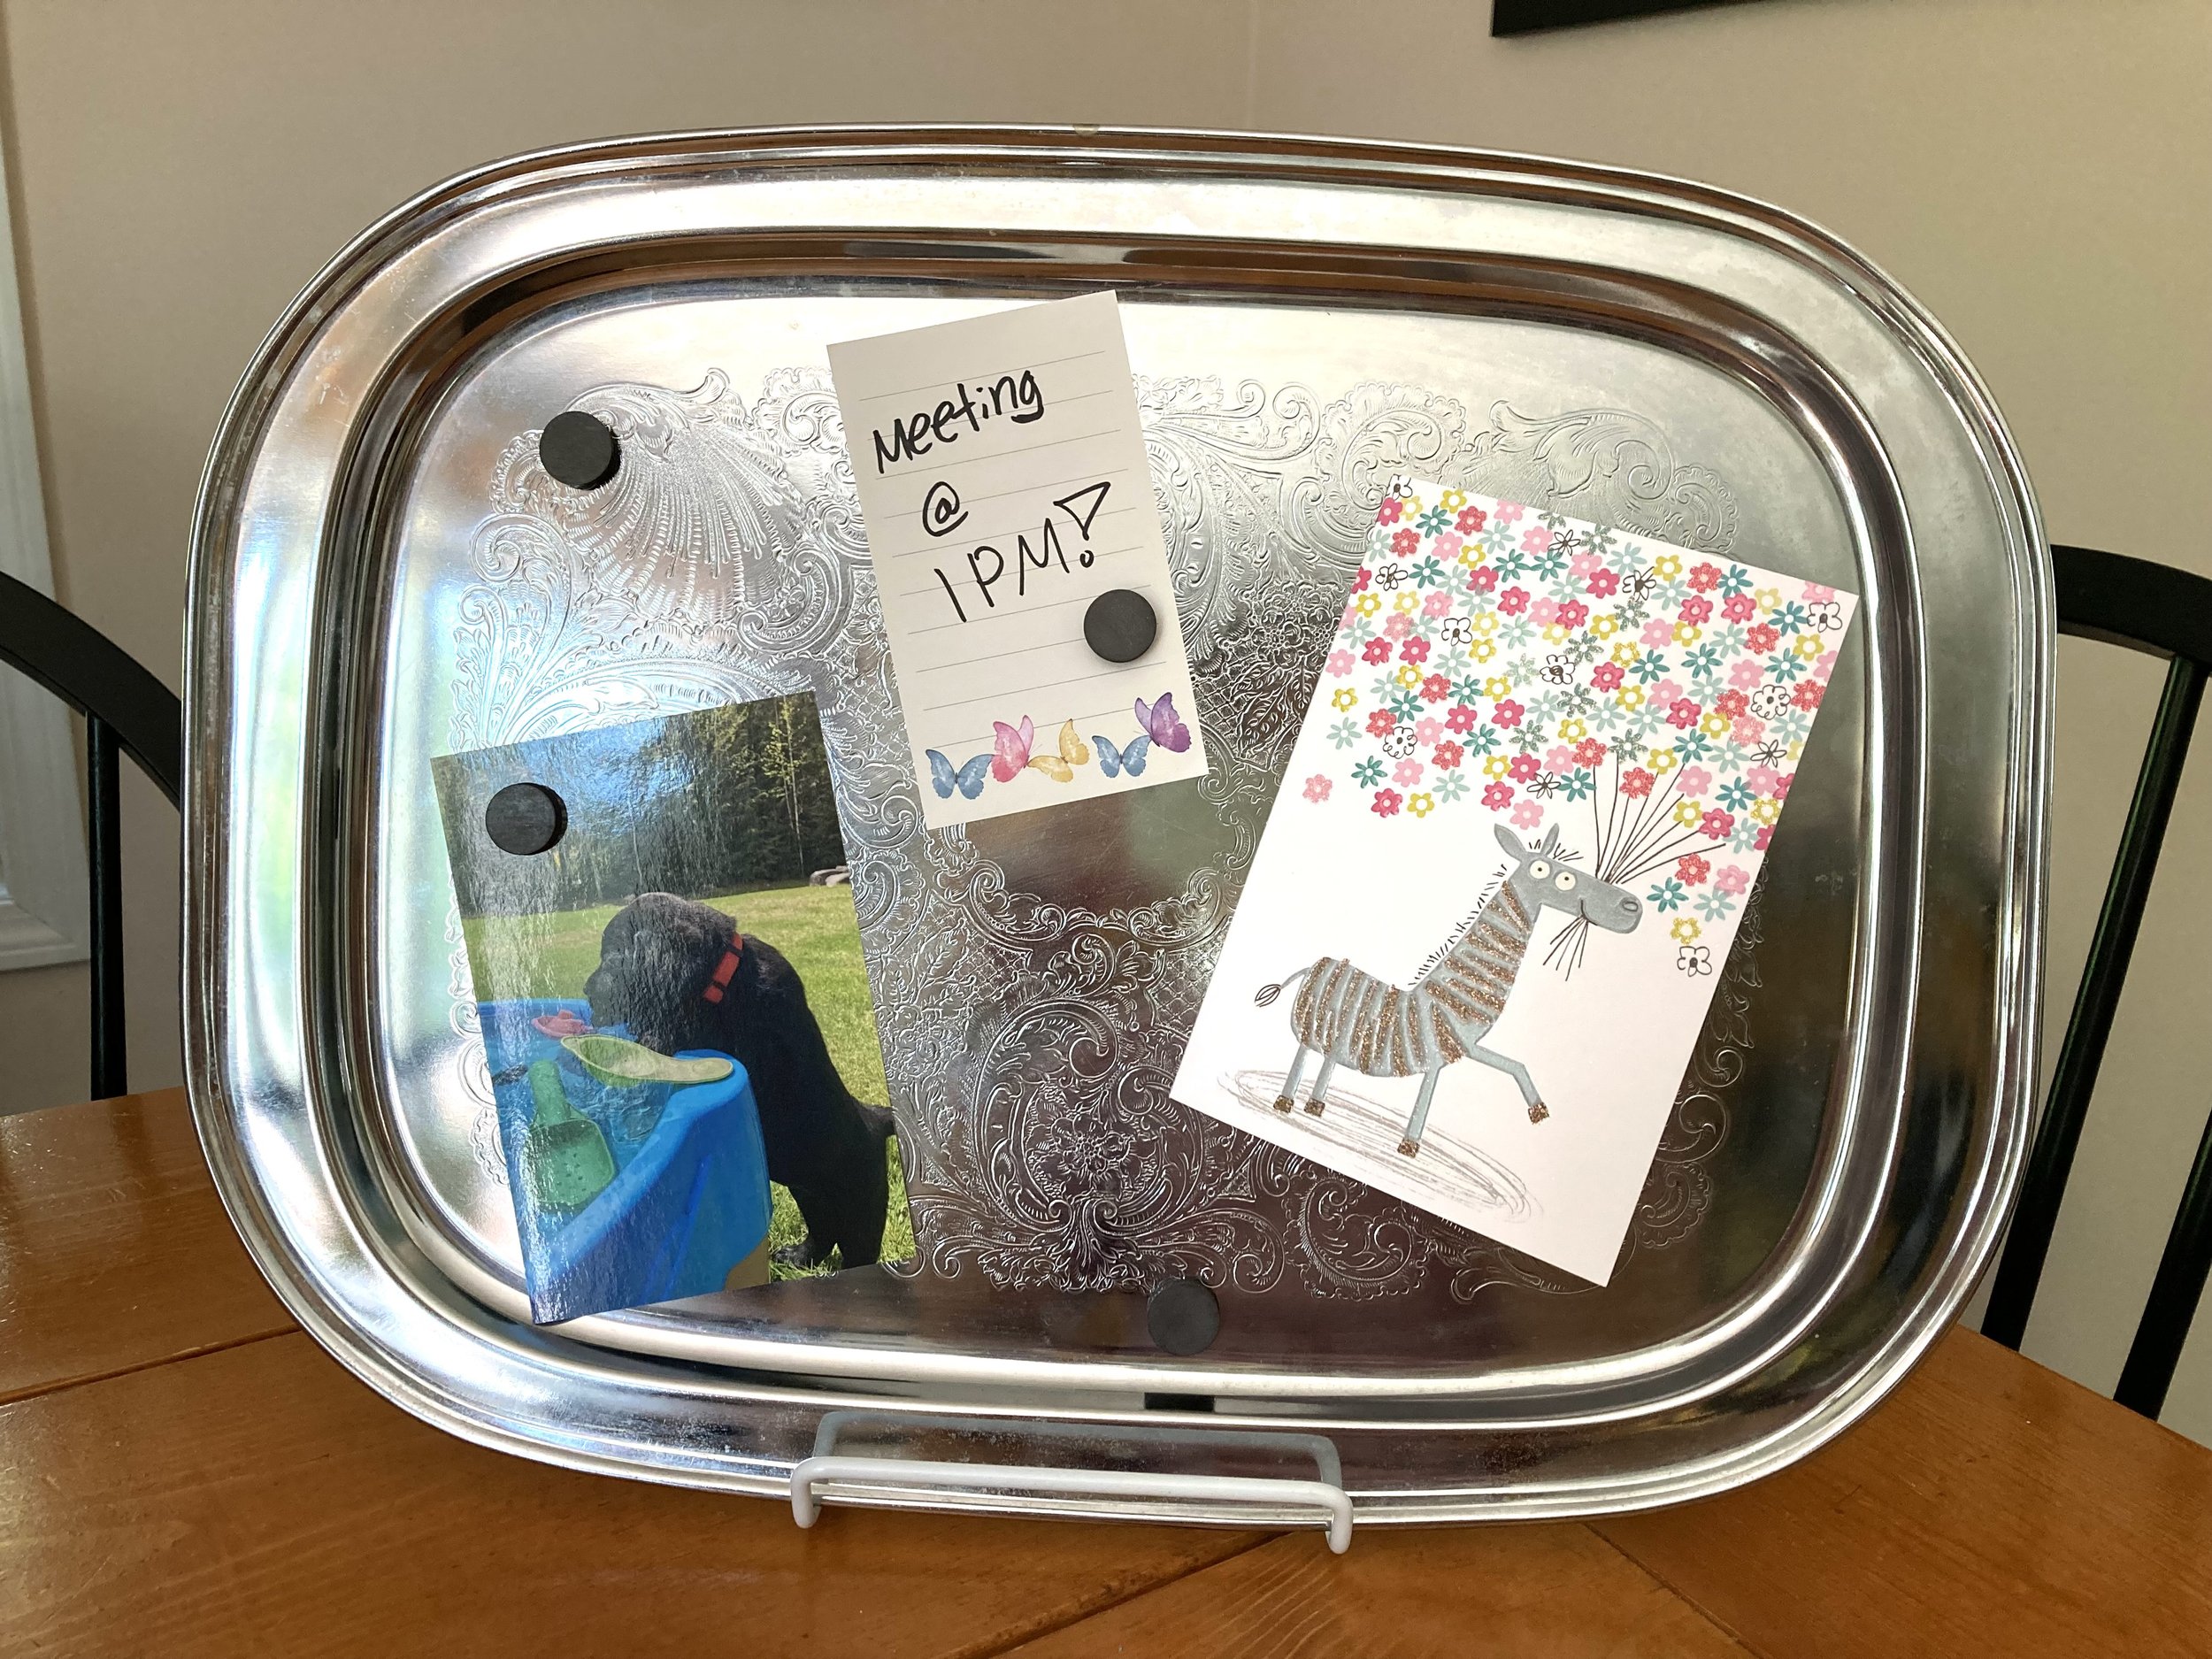
Really the how-to for this project could not be easier! Rest that serving tray on a plate stand that’s big enough/sturdy enough to support it, add some magnets, and BAM, you’re done! I think this project would look so cute on a dresser in a bedroom, a feminine office space, or on a desk nook in the kitchen. It can be used to hold reminders, photos, thank you notes, recipes, mementos, and more.
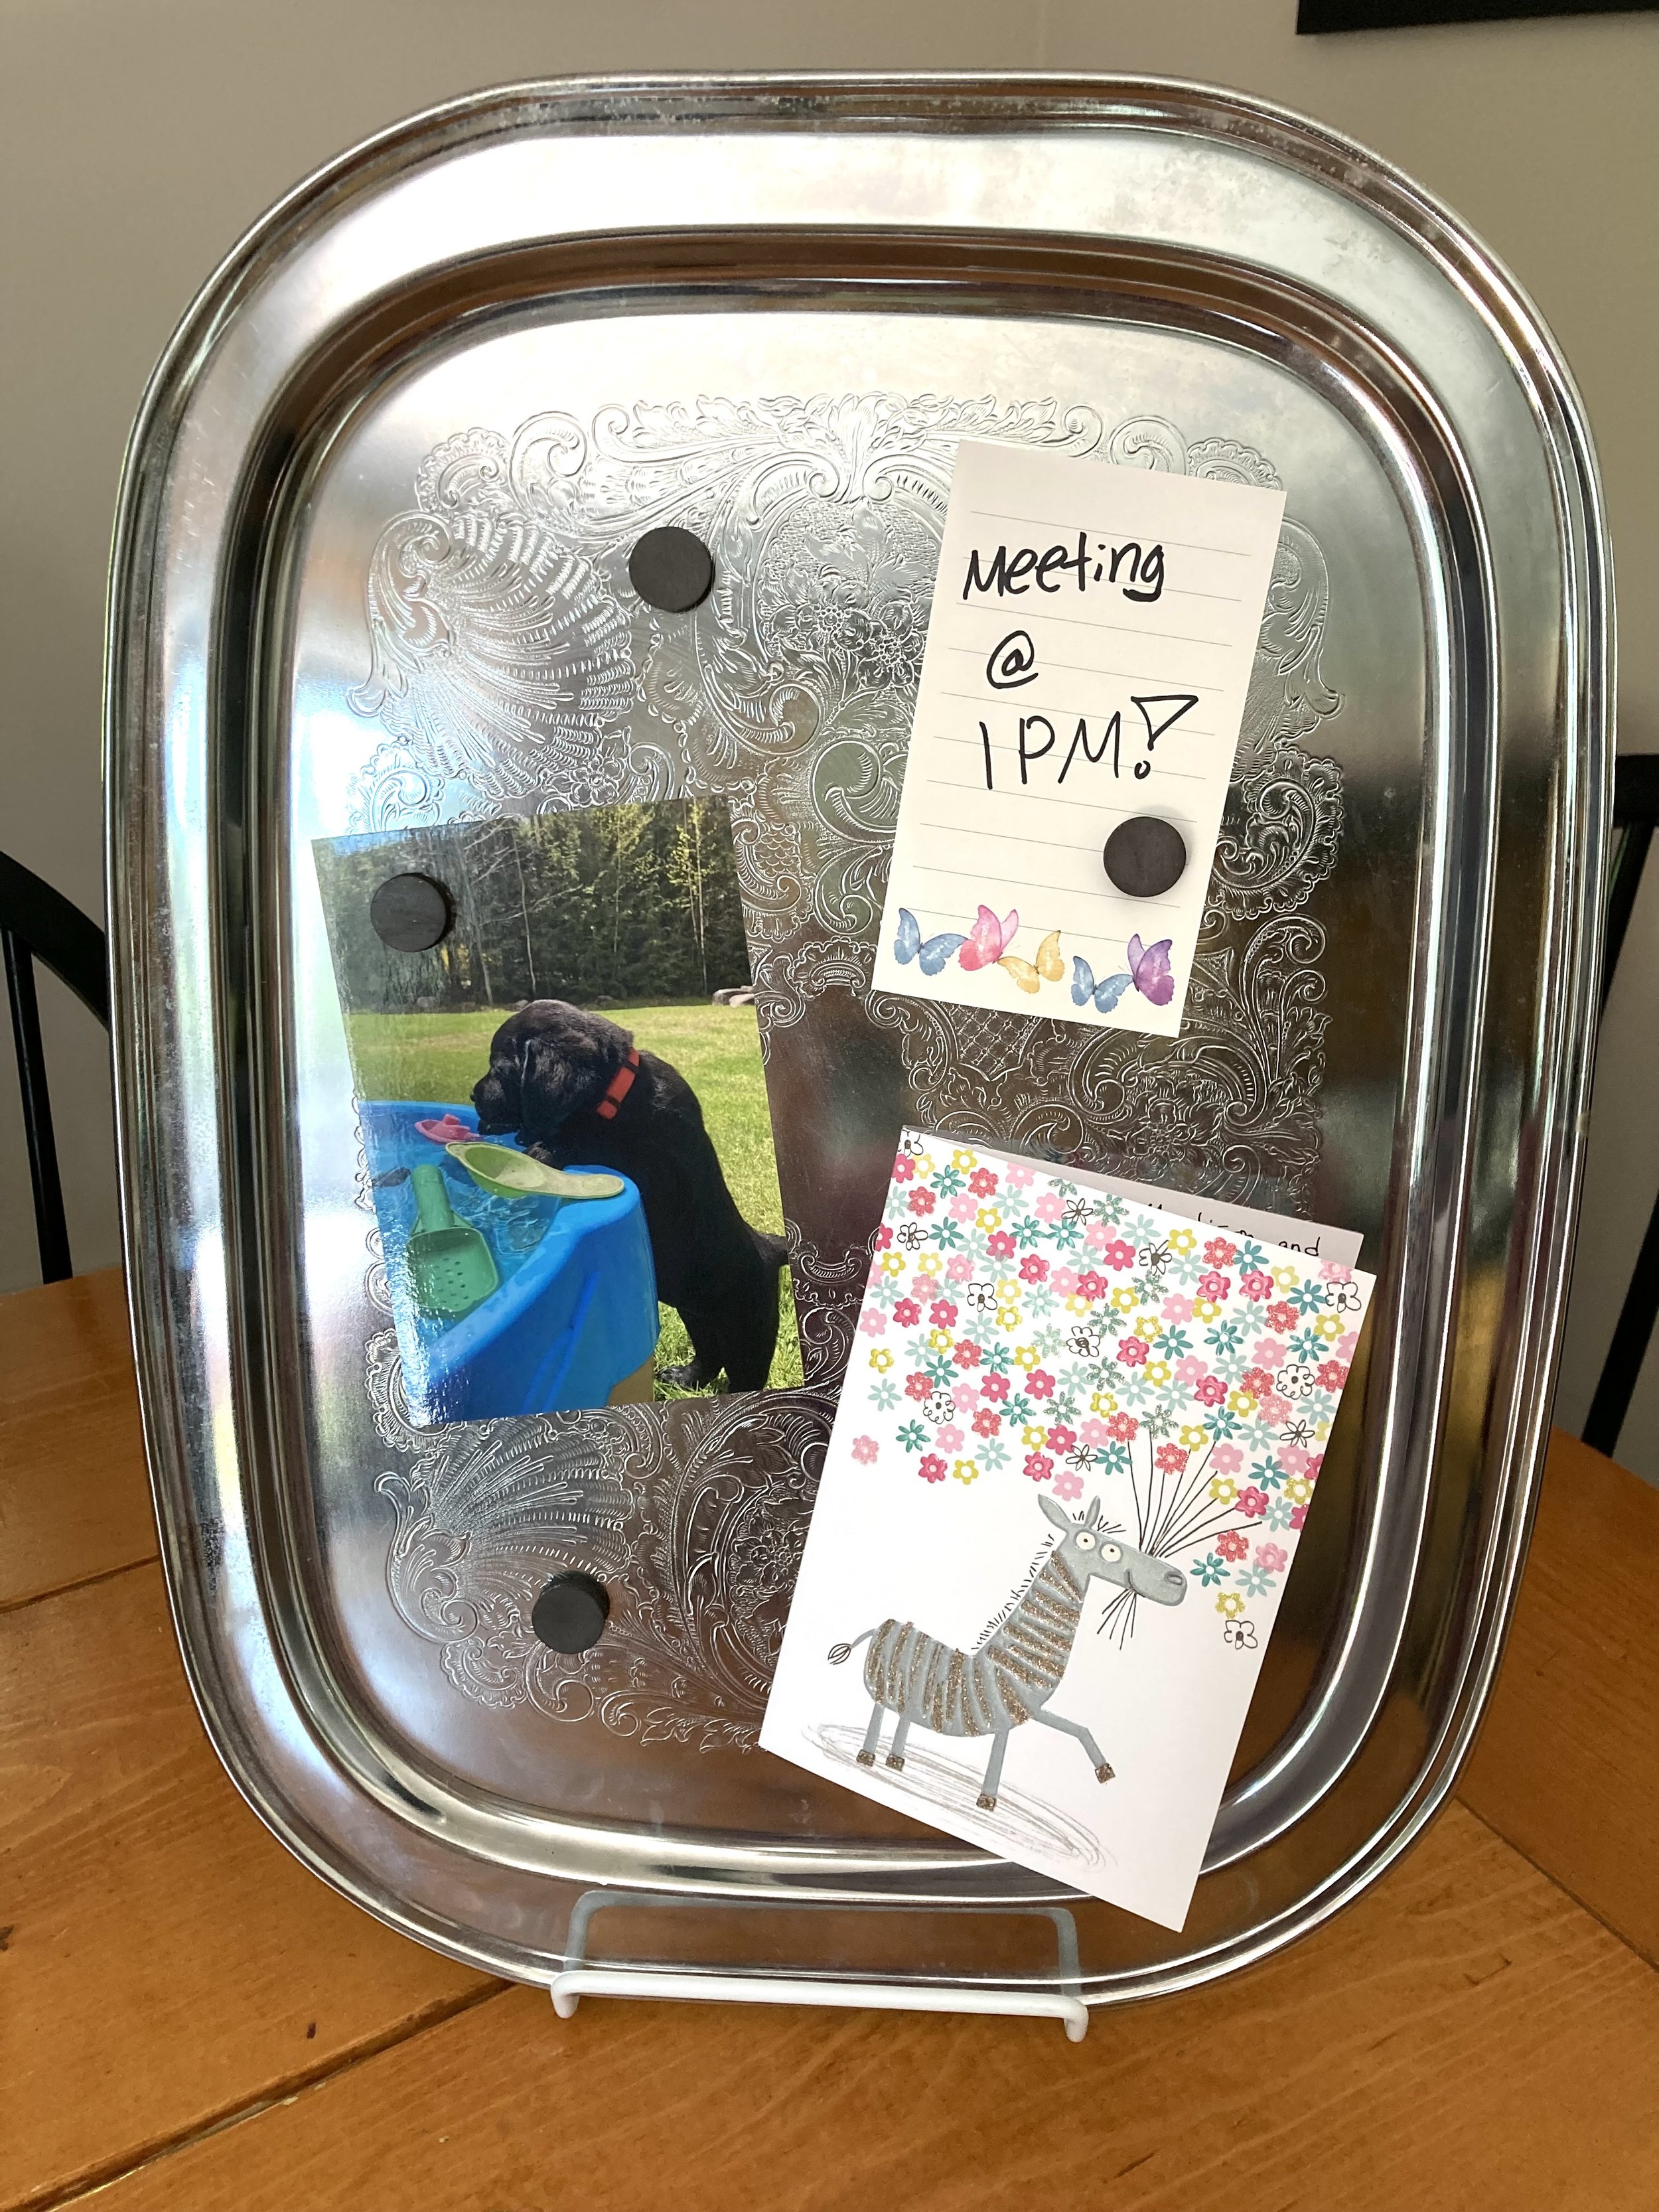
And if the horizontal orientation isn’t working for your space, just turn the tray and you instantly have a vertical memo board!
If you wanted to hang the tray on a wall instead, you could try using a tray hanger. Just make sure to buy the correct size hanger for your tray and make sure it's rated to support the weight of it.
PS - looking for vintage items like the serving tray in this post? Be sure to check out our Etsy Shop for some fun vintage finds! Our inventory is always changing so check back often :)
KEEP UP WITH BIRCH LANDING HOME
| Etsy | Facebook | Instagram | Pinterest | Bloglovin' | Hometalk |
Did you know it’s Secondhand September?
We’re personally huge fans of consigning and shopping secondhand - in fact everything I’m wearing today is secondhand and name brand (blouse and jeans are Ann Taylor and the leather mocs are M.Gemi, which is a fancy Italian luxury brand I could never afford new). Right now I’m putting together a bag of winter consignments to bring to M&C Clothing and Gifts in Amherst, NH, one of our favorite consignment shops.
We love consigning because the money we earn from reselling our items can be spent at the consignment shops we use for new-to-us clothing and other items - it’s like trading up what we don’t want anymore for what we do. Reduce-Reuse-Recycle.
If you’ve been thinking of giving consignment shopping/selling a try, check out my past blog post where I share some tips on the process:
KEEP UP WITH BIRCH LANDING HOME
| Etsy | Facebook | Instagram | Pinterest | Bloglovin' | Hometalk |
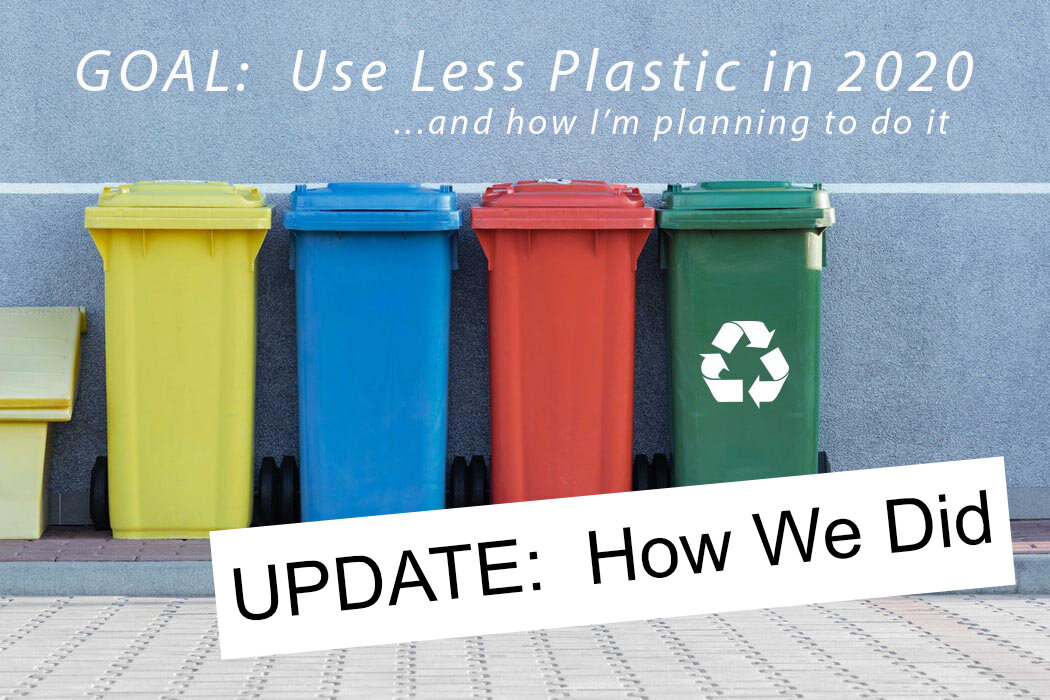
In January of last year I wrote a post about how one of my big goals for the year was to use less plastic in our daily lives…. but then as you know, everyone’s daily lives changed a lot due to the Covid Pandemic. Even though it was a very strange year that changed our normal, we still made some good progress towards our goal to use less plastic. | This post contains affiliate links |
Below are the improvements we planned to make in 2020, and how well we carried them out one year later… and how we could have done better:
- Reusable Water Bottles. We did great with our goal to use reusable water bottles and not buy bottled drinks when out... it especially helped that we didn't go out much for most of the year, so drinking water at home was very easy.
- Reusable Grocery Bags. Through March we used our reusable grocery bags for every trip, but once the Covid Pandemic started our state banned reusable bags in order to try to curb the spread of germs. They have since allowed reusable bags again, but many stores still won't use them at this time. So until the pandemic is over and everyone feels comfortable about reusable grocery bags again, we plan to ask for paper over plastic.
- Reusable Produce Bags. This fell to the same fate as Reusable Grocery Bags above, and I have been just using the store-provided plastic produce bags. Though, I did write to the grocery store chain to ask them to make the switch to compostable produce bags... hopefully they will eventually.
- Reusable Travel Mug for Coffee/Tea. This was quite easy again since we didn't go out much this year. We made a point to avoid unneccessary stops and we didn't stop at coffee shops much... instead, if we were going for a drive we would make our coffee at home and take it to-go in one of our own reusable mugs.
- Silicone "Plastic" Bags. Last year I told myself I would purchase some reusable silicone plastic bags for our kids' lunch boxes once we started to get low on our plastic bags (we had a very large box of them), but then school was cancelled soon after that and we haven't had the need for them yet. However, I have since come across these Compostable Wax Paper Bags, and once school is open again I think I will probably use these until our kids are a bit older and I know they won't throw away the expensive silicone ones by accident.
- Silicone "Plastic" Wrap. We ended up getting some Silicone Covers and have loved them - they work great for covering leftovers in the fridge or cut-up fruit and it saves us from using a lot of plastic wrap.
- Glass or Metal "Tupperware". We were planning on waiting on this one as we still have very functional plastic Tupperware and don't need to replace it yet. Once we need some new containers we will make a point to get more eco-friendly, non-plastic options.
- Sustainably Made Wooden Toys. Our kids are still loving and playing with the wooden toys they have gotten in the past. I don't think we added any new ones this year, but I still think that getting some heirloom quality, sustainably made wooden toys for young kids is a great idea.
KEEP UP WITH BIRCH LANDING HOME
| Etsy | Facebook | Instagram | Pinterest | Bloglovin' | Hometalk |
Being home 24/7 and trying to limit grocery trips and ordering really makes you evaluate how quickly you’re going through supplies in your home. With two little kids, paper products were something we were blowing through and made me wonder how we could change this for the better. | This post is not sponsored but does contain affiliate links |
Now when I say "paper products" in this post I'm talking about paper towels and paper napkins. To greatly reduce our usage of these things we made the switch to reusable "unpaper" towels and aren't looking back.
(And before you ask... yes, reusable toilet paper/wipes do exist too - but that's not for us, though if the toilet paper shortage continues who knows...).
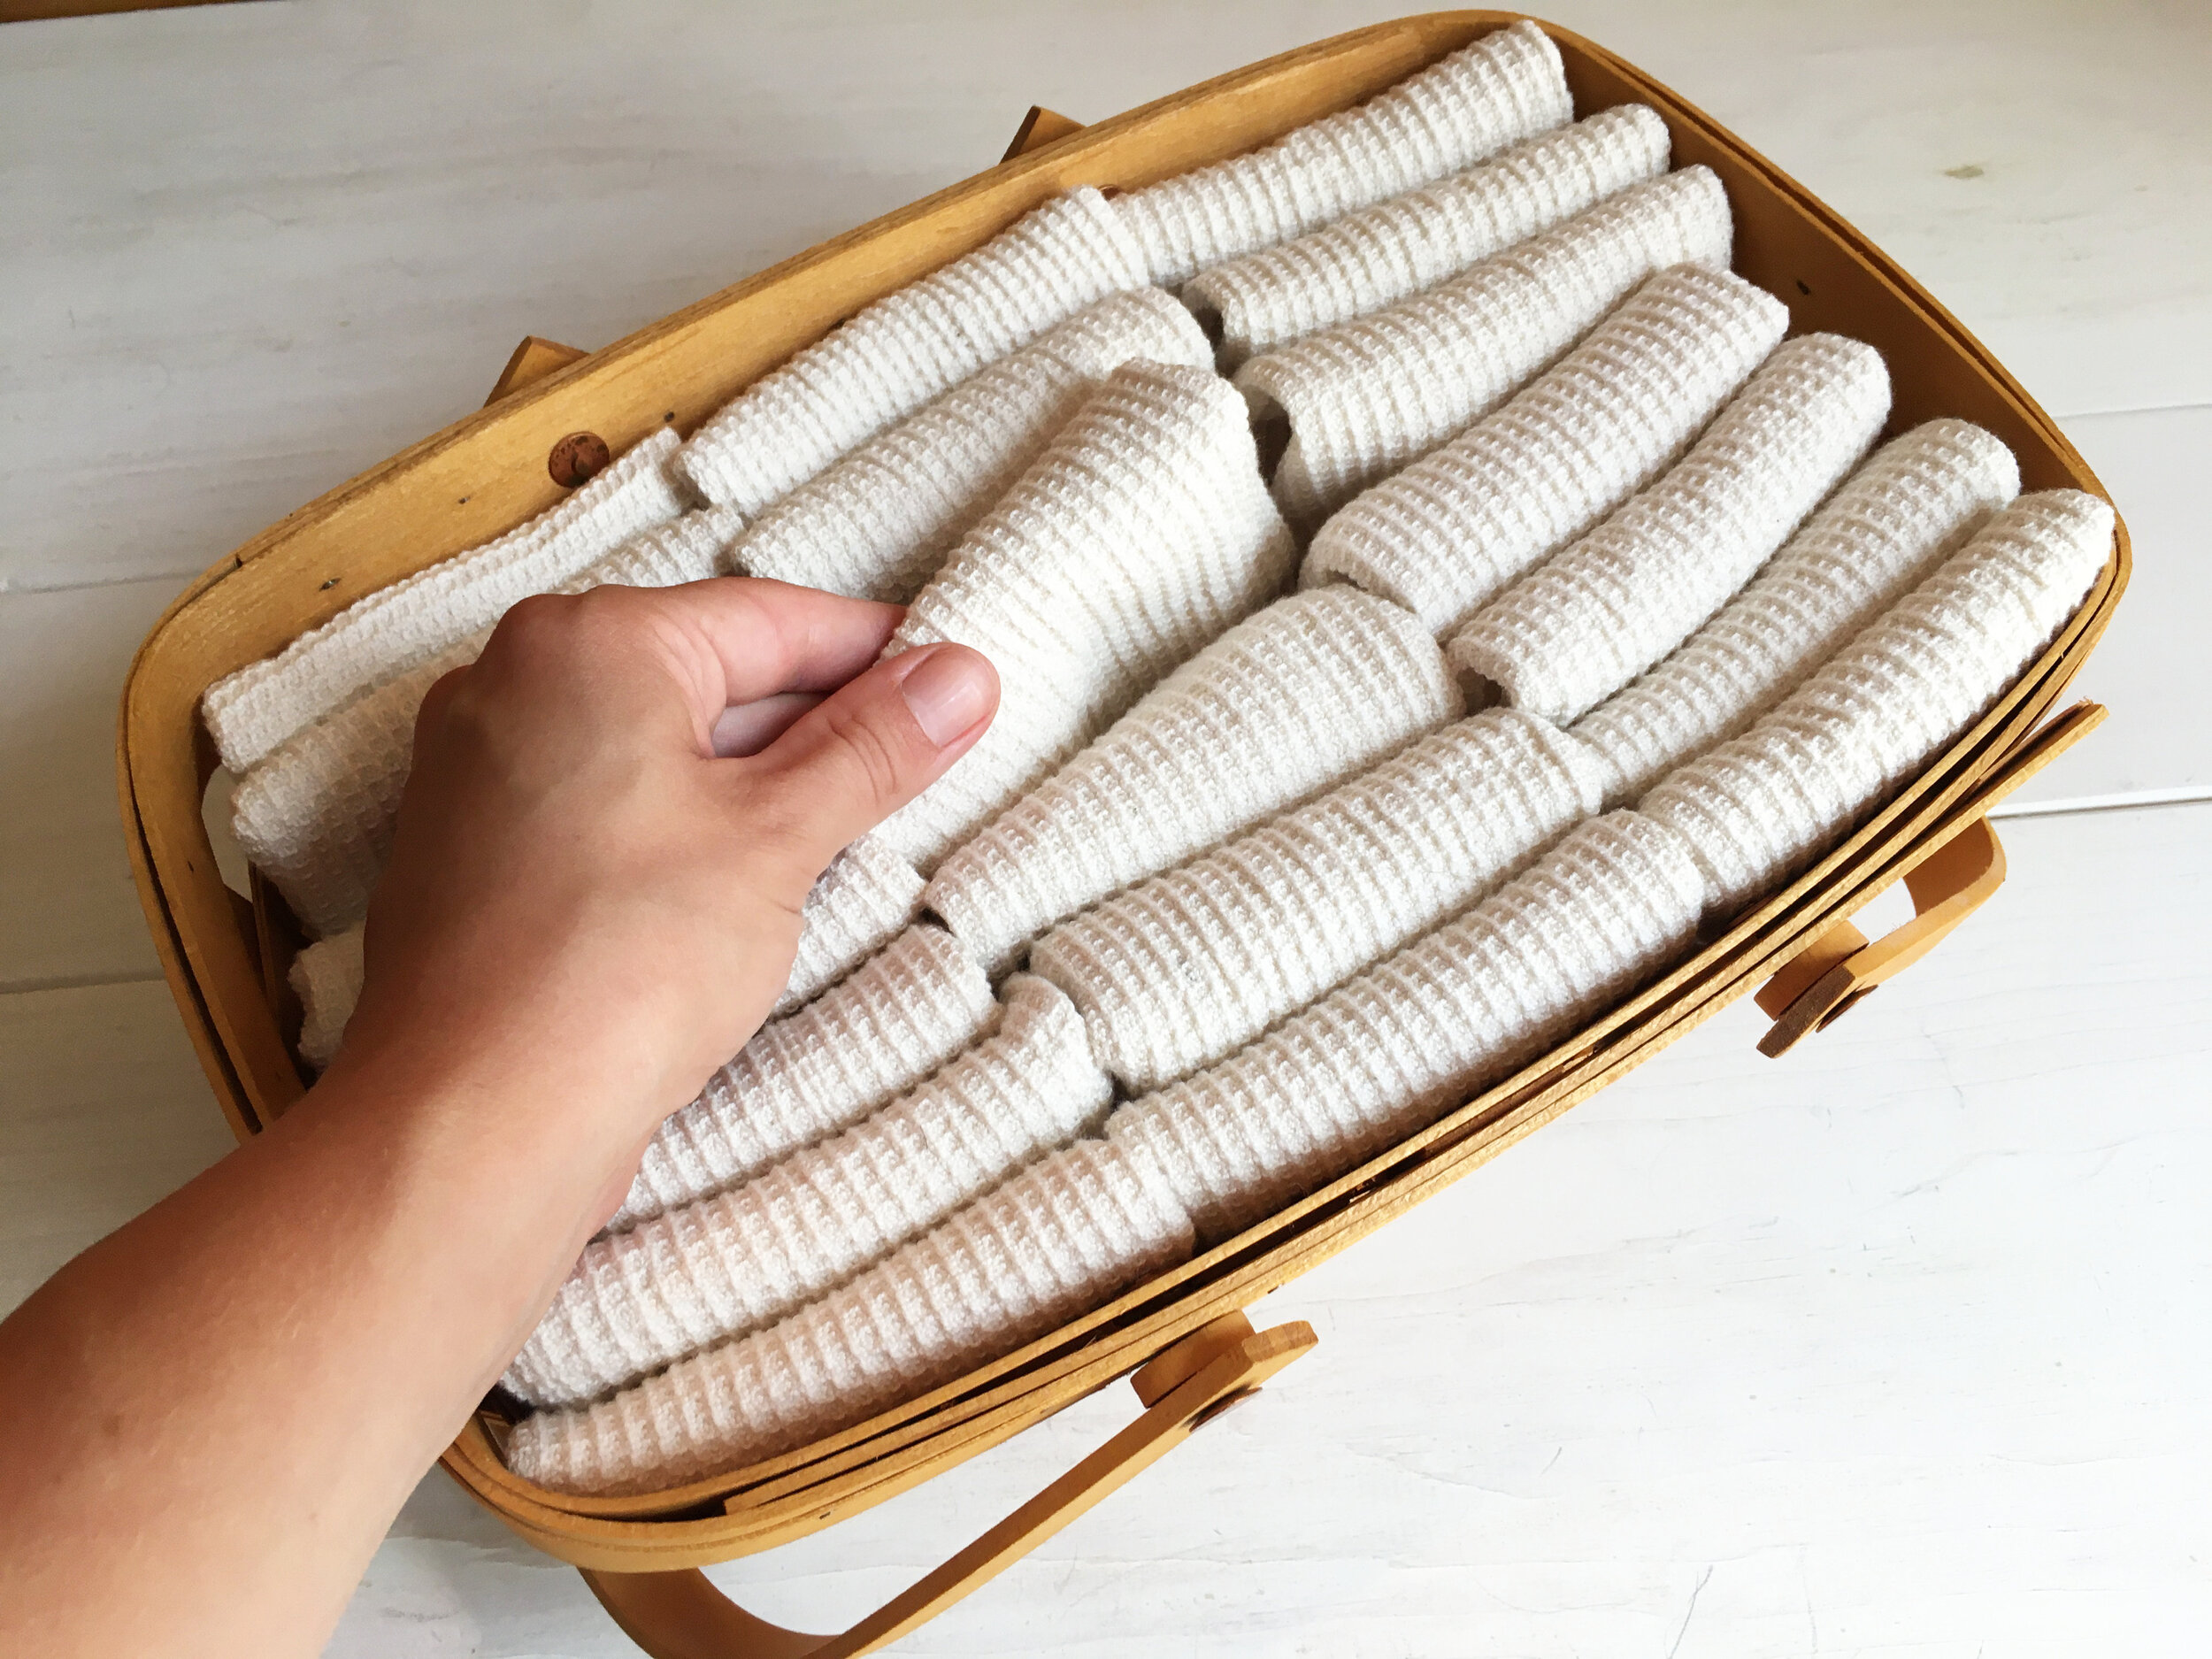
“Unpaper” towels are cloths that you can use like paper towels but wash and reuse for a long time. You could really use just about any kind of cloth - wash cloths, tea towels, cloth napkins, pieces of flannel, etc. Hopefully you have something around the house already that you can use, but if you don’t and decide to purchase some we’ve found them to be worth the investment. For the price of a large package of throw-away paper towels, you can purchase of set of reusable ones that will last you a very, very long time and will eventually pay for themselves.
We thought about just using our current dishtowels but we use them regularly already for dishes and big spills (which happen a lot with two small kids). We were primarily looking for something smaller that would function like a paper towel and also wouldn’t fill our washing machine quickly (something else to consider), which is why we settled on these modestly-sized, organic bamboo cloths.
Some people will roll them on a paper towel holder and use them in place of ALL paper towels, completely eliminating paper towels in their home. For our household we decided to fold them and place them in a basket on our counter, next to our roll of paper towels. That way we’d be constantly reminded to grab a cloth instead of a paper towel whenever we had to wipe a dirty face or sticky fingers, but we’d still have paper towels at the ready if we really needed them. I even hung a little note over the paper towel holder to remind us to use less of them.
Since starting this system we’ve cut down on our paper towel usage big time. This has saved us money on our grocery bill and we feel like we’ve made a positive long-term change that’s more eco-friendly.
Cleaning Unpaper Towels: I hung a small mesh laundry bag on the doorknob of our laundry closet, which is conveniently right off the kitchen, to toss the used unpaper towels in to be washed. Whenever I start a load of laundry, I just throw the mesh bag in with the rest of the washing. You could also easily hang a mesh bag or small basket on the inside of a cupboard door with a Command Hook too if that is a more convenient spot.
Hopefully I’ve inspired you to find a reusable, money-saving solution to something in your home like we have found unpaper towels to be for us.
This post is not sponsored but contains my personal opinion as well as affiliate links.
KEEP UP WITH BIRCH LANDING HOME
| Etsy | Facebook | Instagram | Pinterest | Bloglovin' | Hometalk |
Happy Earth Day! Back in the ‘80’s my Dad bought these Vermont State Parks t-shirts on a camping trip for himself and baby-me... somehow they survived all these years and now me and my kids wear them.
Vintage ;)
Hope you have a great Earth Day and can find a safe way to better your household or neighborhood during this Pandemic.
KEEP UP WITH BIRCH LANDING HOME
| Etsy | Facebook | Instagram | Pinterest | Bloglovin' | Hometalk |
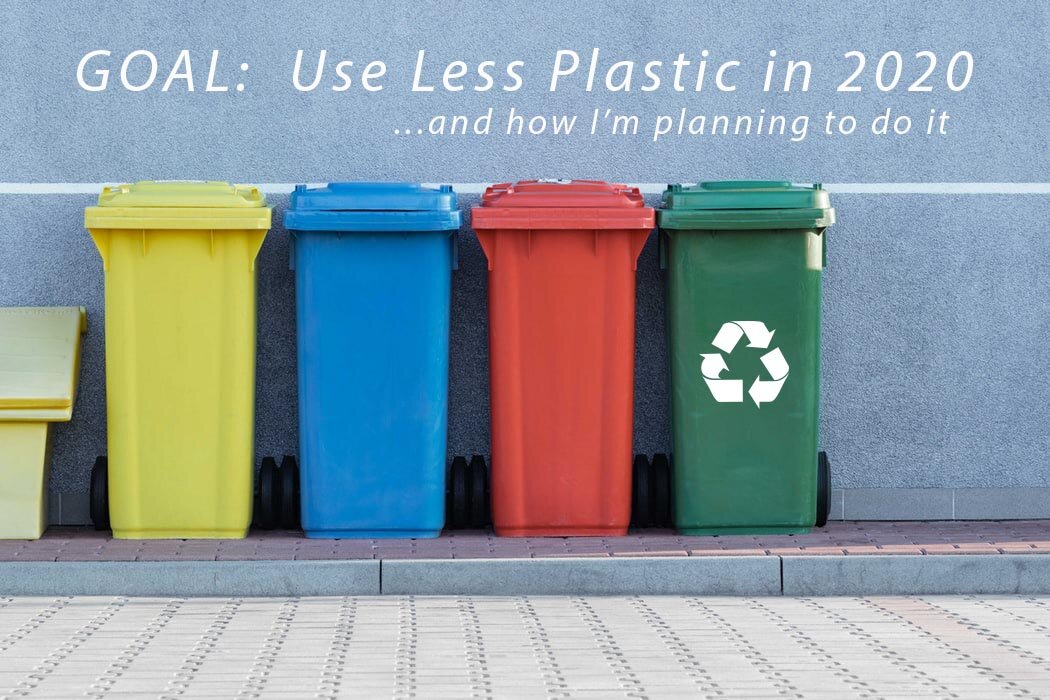
As I had mentioned previously in my “Goals for the New Year” post, one of my goals is to use less plastic in our daily lives. We already make an effort to recycle as much as possible and not be wasteful but watching the documentary “Broken: Recycling Sham” on Netflix was eye-opening. So much of what people put in the recycling bin ends up in landfills or the ocean in the end, as a lot of plastic is too difficult or expensive to recycle and it’s sorted out and discarded. (PS - if you haven’t watched this documentary yet, I highly recommend it!) If everyone were to decrease their use of plastic in small ways it would eventually decrease the demand and less plastic would be made and end up in the environment. Here I’m sharing some small ways we’re working towards less plastic in our lives. | This post contains affiliate links |
As Emily Ley would say, I’m striving for “progress, not perfection.” I am not planning on eliminating all plastic from our home overnight - after all that wouldn’t be environmentally responsible either. We have plenty of BPA-free Tupperware, kids plates, reusable bottles, containers, etc and they are serving us well - there’s no need to go chuck them in the trash now. It’s also impractical (and arguably impossible) for our family to totally eliminate plastic from our lives. - But moving forward, we will try to consume less plastic, and as things wear out and need replacing we will look to non-plastic or high-recycled-content materials for replacements.
Here are a few eco-friendly “swaps” we have implemented or are planning to in the future:
- Reusable Water Bottles. This is a very easy one... find a Reusable Water Bottles that you like and carry it around with you, refilling it as needed. I personally prefer stainless steel bottles, but others prefer glass or plastic. Not only is a reusable bottle good for the environment, it's good for your wallet too as you'll never have to buy an overpriced bottle of water at a gas station or cafe again. Most office buildings, schools, and malls have bubblers (AKA water fountains for all you non-New Englanders) where you can fill your bottle, and most cafes and fast food restaurants will refill your bottle with water for free too.
- Reusable Grocery Bags. This is another easy change - in fact, I can almost guarantee you have some Reusable Grocery Bags kicking around in your closet or car trunk this very minute since businesses often give out reusable bags for promotions and advertising. Dig those bags out and make a neat stash of them in your trunk or car door pocket and make a mental note to grab them before heading into the grocery store. (Side note: It's a good idea to periodically wash your reusable bags to keep them clean and reduce the spread of potential germs.)
- Reusable Produce Bags. Purchase some small cotton Reusable Produce Bags to use when you go grocery shopping. Produce bags are often overlooked since they're small but they add up fast during a weekly grocery trip. By using reusable bags you're reducing your plastic consumption (and not to mention no more busted plastic produce bags when you're buying a decent amount of potatoes or apples - yay!).
- Reusable Travel Mug for Coffee/Tea. Find a travel mug that you love (personally I love my Yeti Rambler - worth every penny in my opinion!) and take your coffee to go. A lot of coffee shops will give a small discount for bringing a reusable mug in too - it pays to be green ;)
- Silicone "Plastic" Bags. Plastic snack and sandwhich bags are another thing that quickly add up, especially if you pack your own lunch. Switching out plastic for washable and reusable Silicone "Plastic" Bags will cut back on a lot of the single-use plastic in your life.
- Silicone "Plastic" Wrap. Plastic wrap for covering leftovers also quickly adds up but can be replaced with washable and reusable Silicone Covers.
- Glass or Metal "Tupperware". We have plenty of good quality plastic tupperware for packing lunches and leftovers, but as they need replacing we'll look to switching to glass or stainless steel.
- Sustainably Made Wooden Toys. Our kids will still play with plastic toys (legos, action figures, etc)... we're not going to forbid it. But we're definitely being mindful about what and how much plastic toys we do buy - and when we have the opportunity to provide them with sustaibably-made wooden toys like play food for their kitchen set or blocks we definitely will. (Side note: I had recently partnered with the company Lovevery to review their sustainably-made Block Set and was super impressed! Feel free to check out that previous post HERE, I highly reccomend them).
And while the recycling business is far from perfect, you should still always recycle whenever you can. That way your waste has a chance of being reused. If items are reusable things in good shape (toys, containers, etc), donate them to local charities or a "drop 'n swap" where people leave items to be taken for free by someone that can use them (check your local dump/transfer station to see if they have one).
If they are single-use items (like plastic bags, milk jugs, food packaging, etc) then sort and recycle as best you can. Setting up an in-home recycling system can make sorting and recycyling second-nature so everything (plastic, glass, paper, cans, etc) makes it to recycling center with the best chance of getting recycled.
Are there more ways to go plastic-free? Oh heck yes. But I’m personally looking for doable, attainable changes that fit with our lifestyle. I feel like these are changes most people could accomplish as well too. If everyone just reduced their plastic consumption with simple changes it would add up and make a huge difference.
KEEP UP WITH BIRCH LANDING HOME
| Etsy | Facebook | Instagram | Pinterest | Bloglovin' | Hometalk |
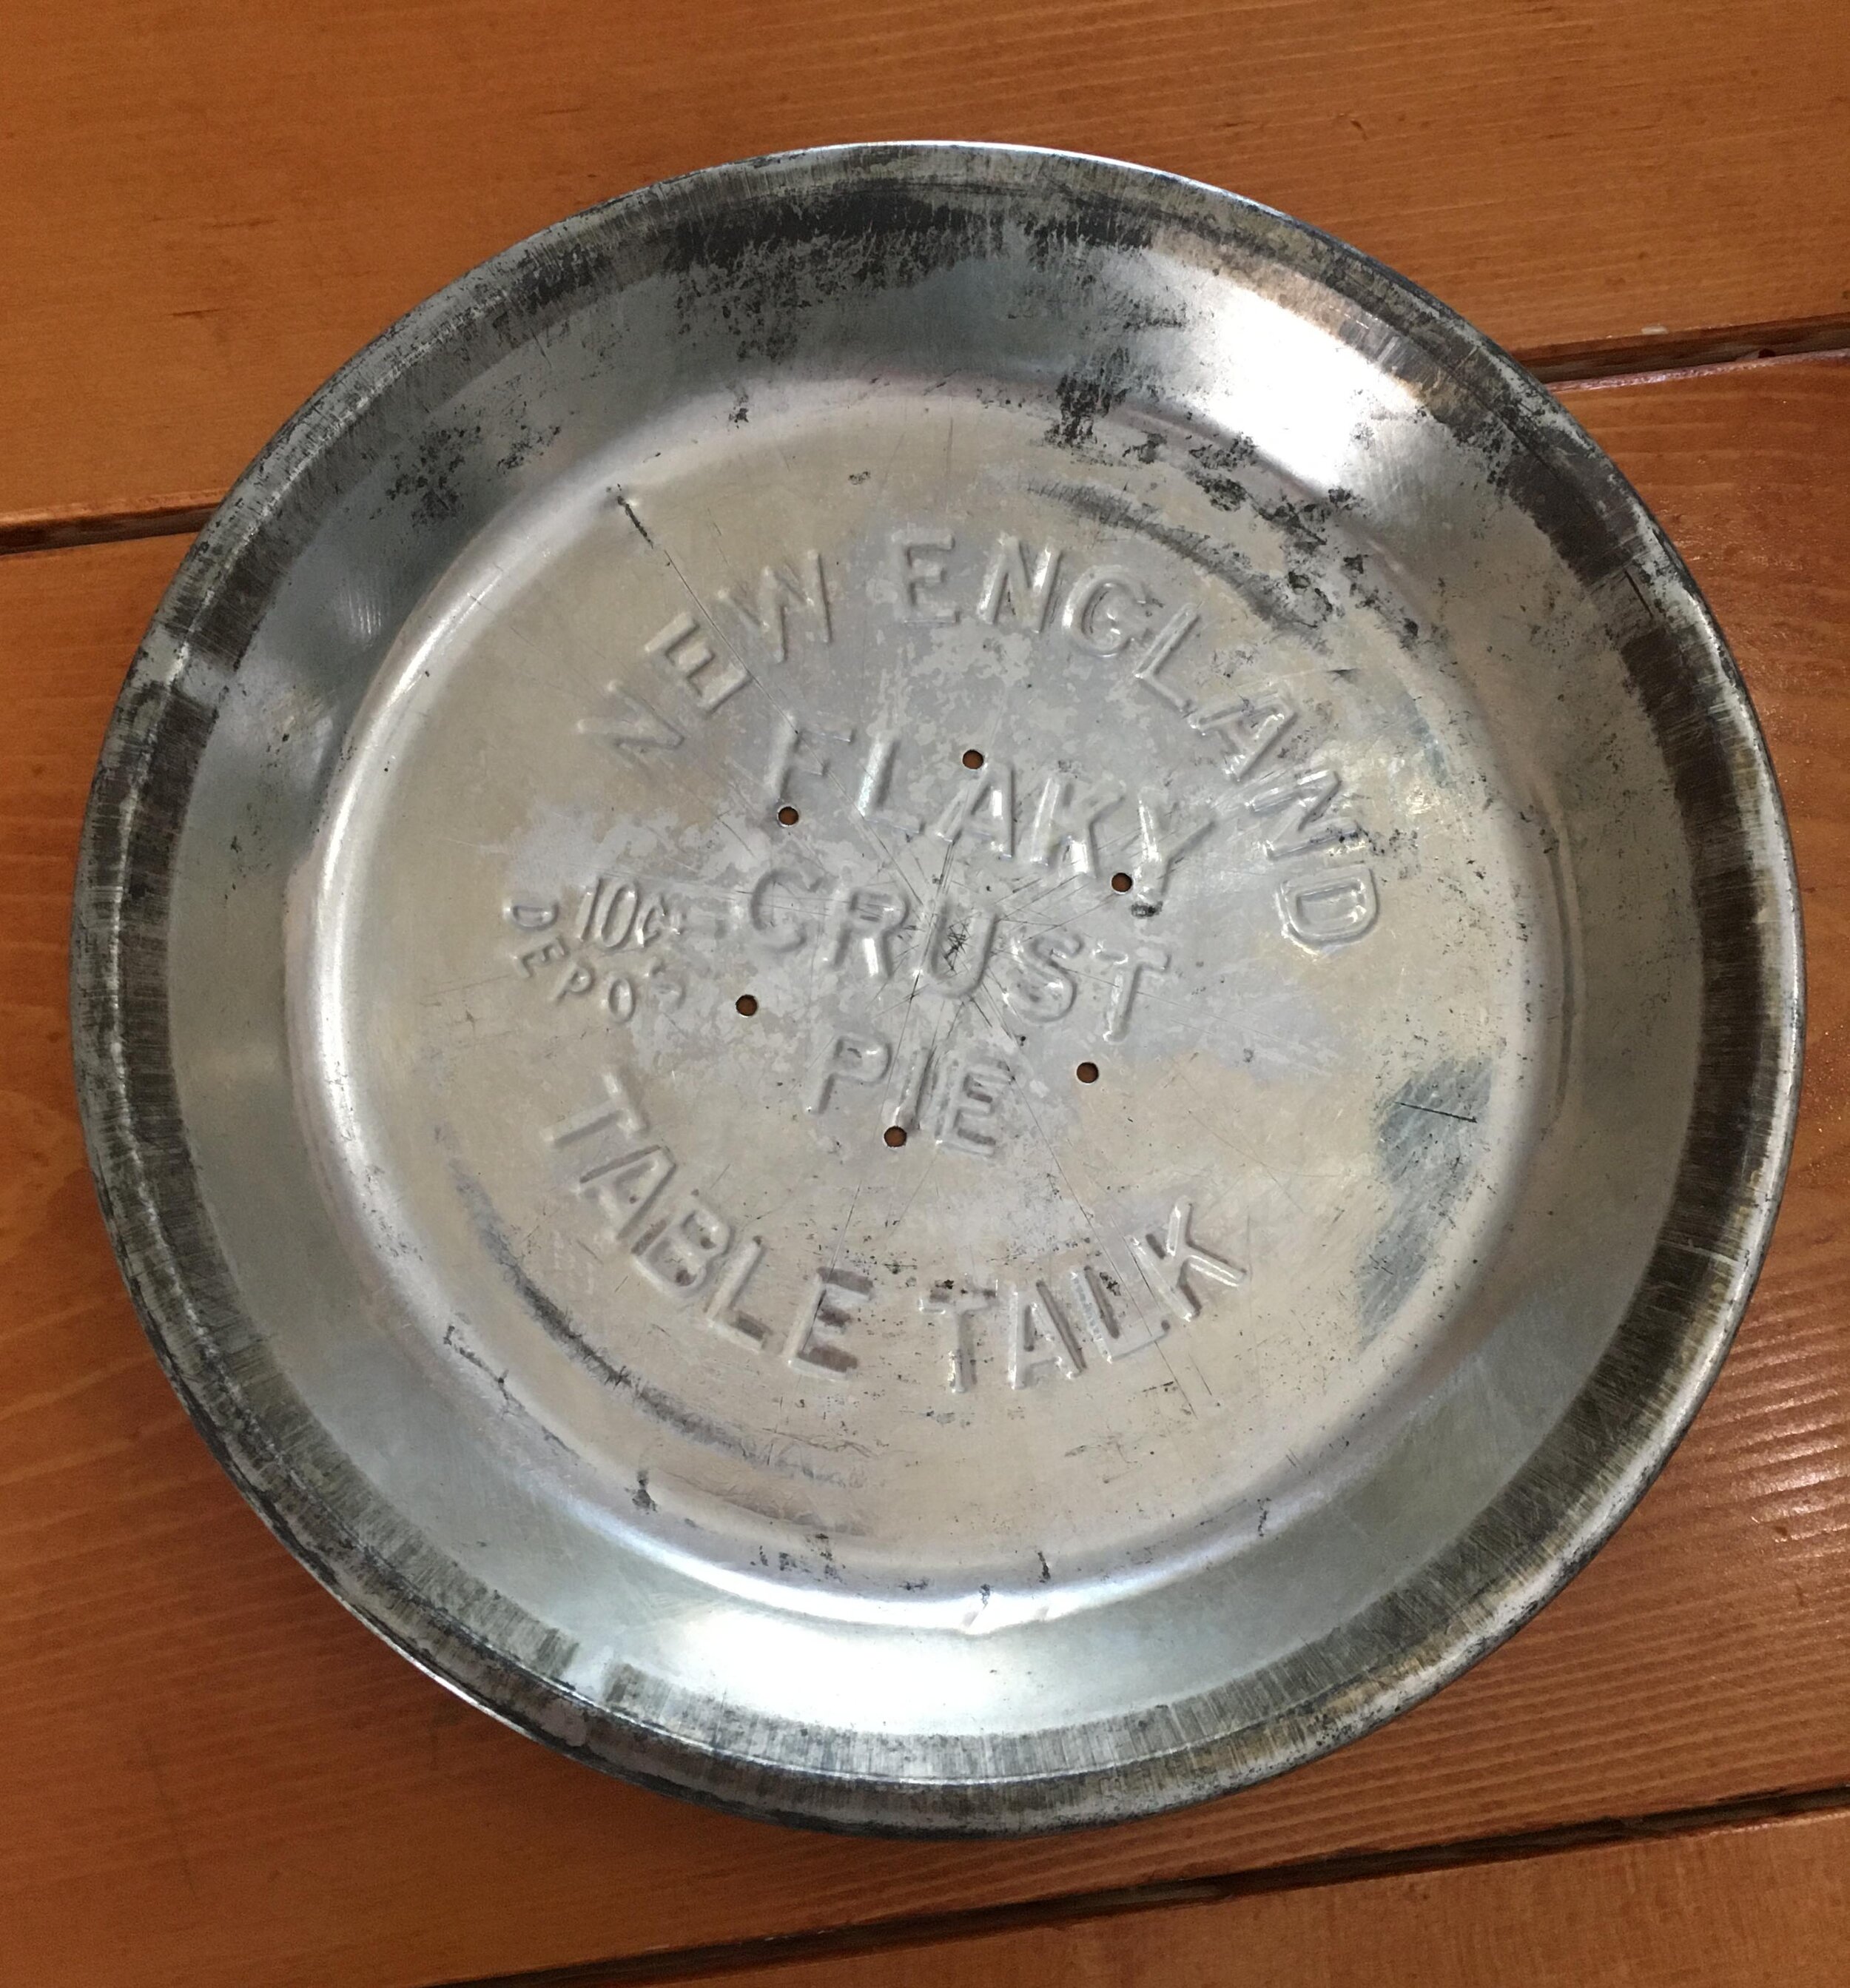
Rummaging around in my parents basement a few weeks ago, I stumbled across a stack of Vintage Table Talk Pie Tins that had been my Grandmother’s. Back in the day (approximately the 1930’s-1950’s), people would buy these store-bought pies with an extra 10 cent deposit that would be reimbursed if you returned the clean pie tin back to the store… but apparently my Grandmother chose not to, haha. These pie tins were a fun vintage find, and sentimental because they had once belonged to her. Since we didn’t have a kitchen clock I figured turning one of these tins into a clock would be a fun idea - and here’s how I did it. | This post contains affiliate links |
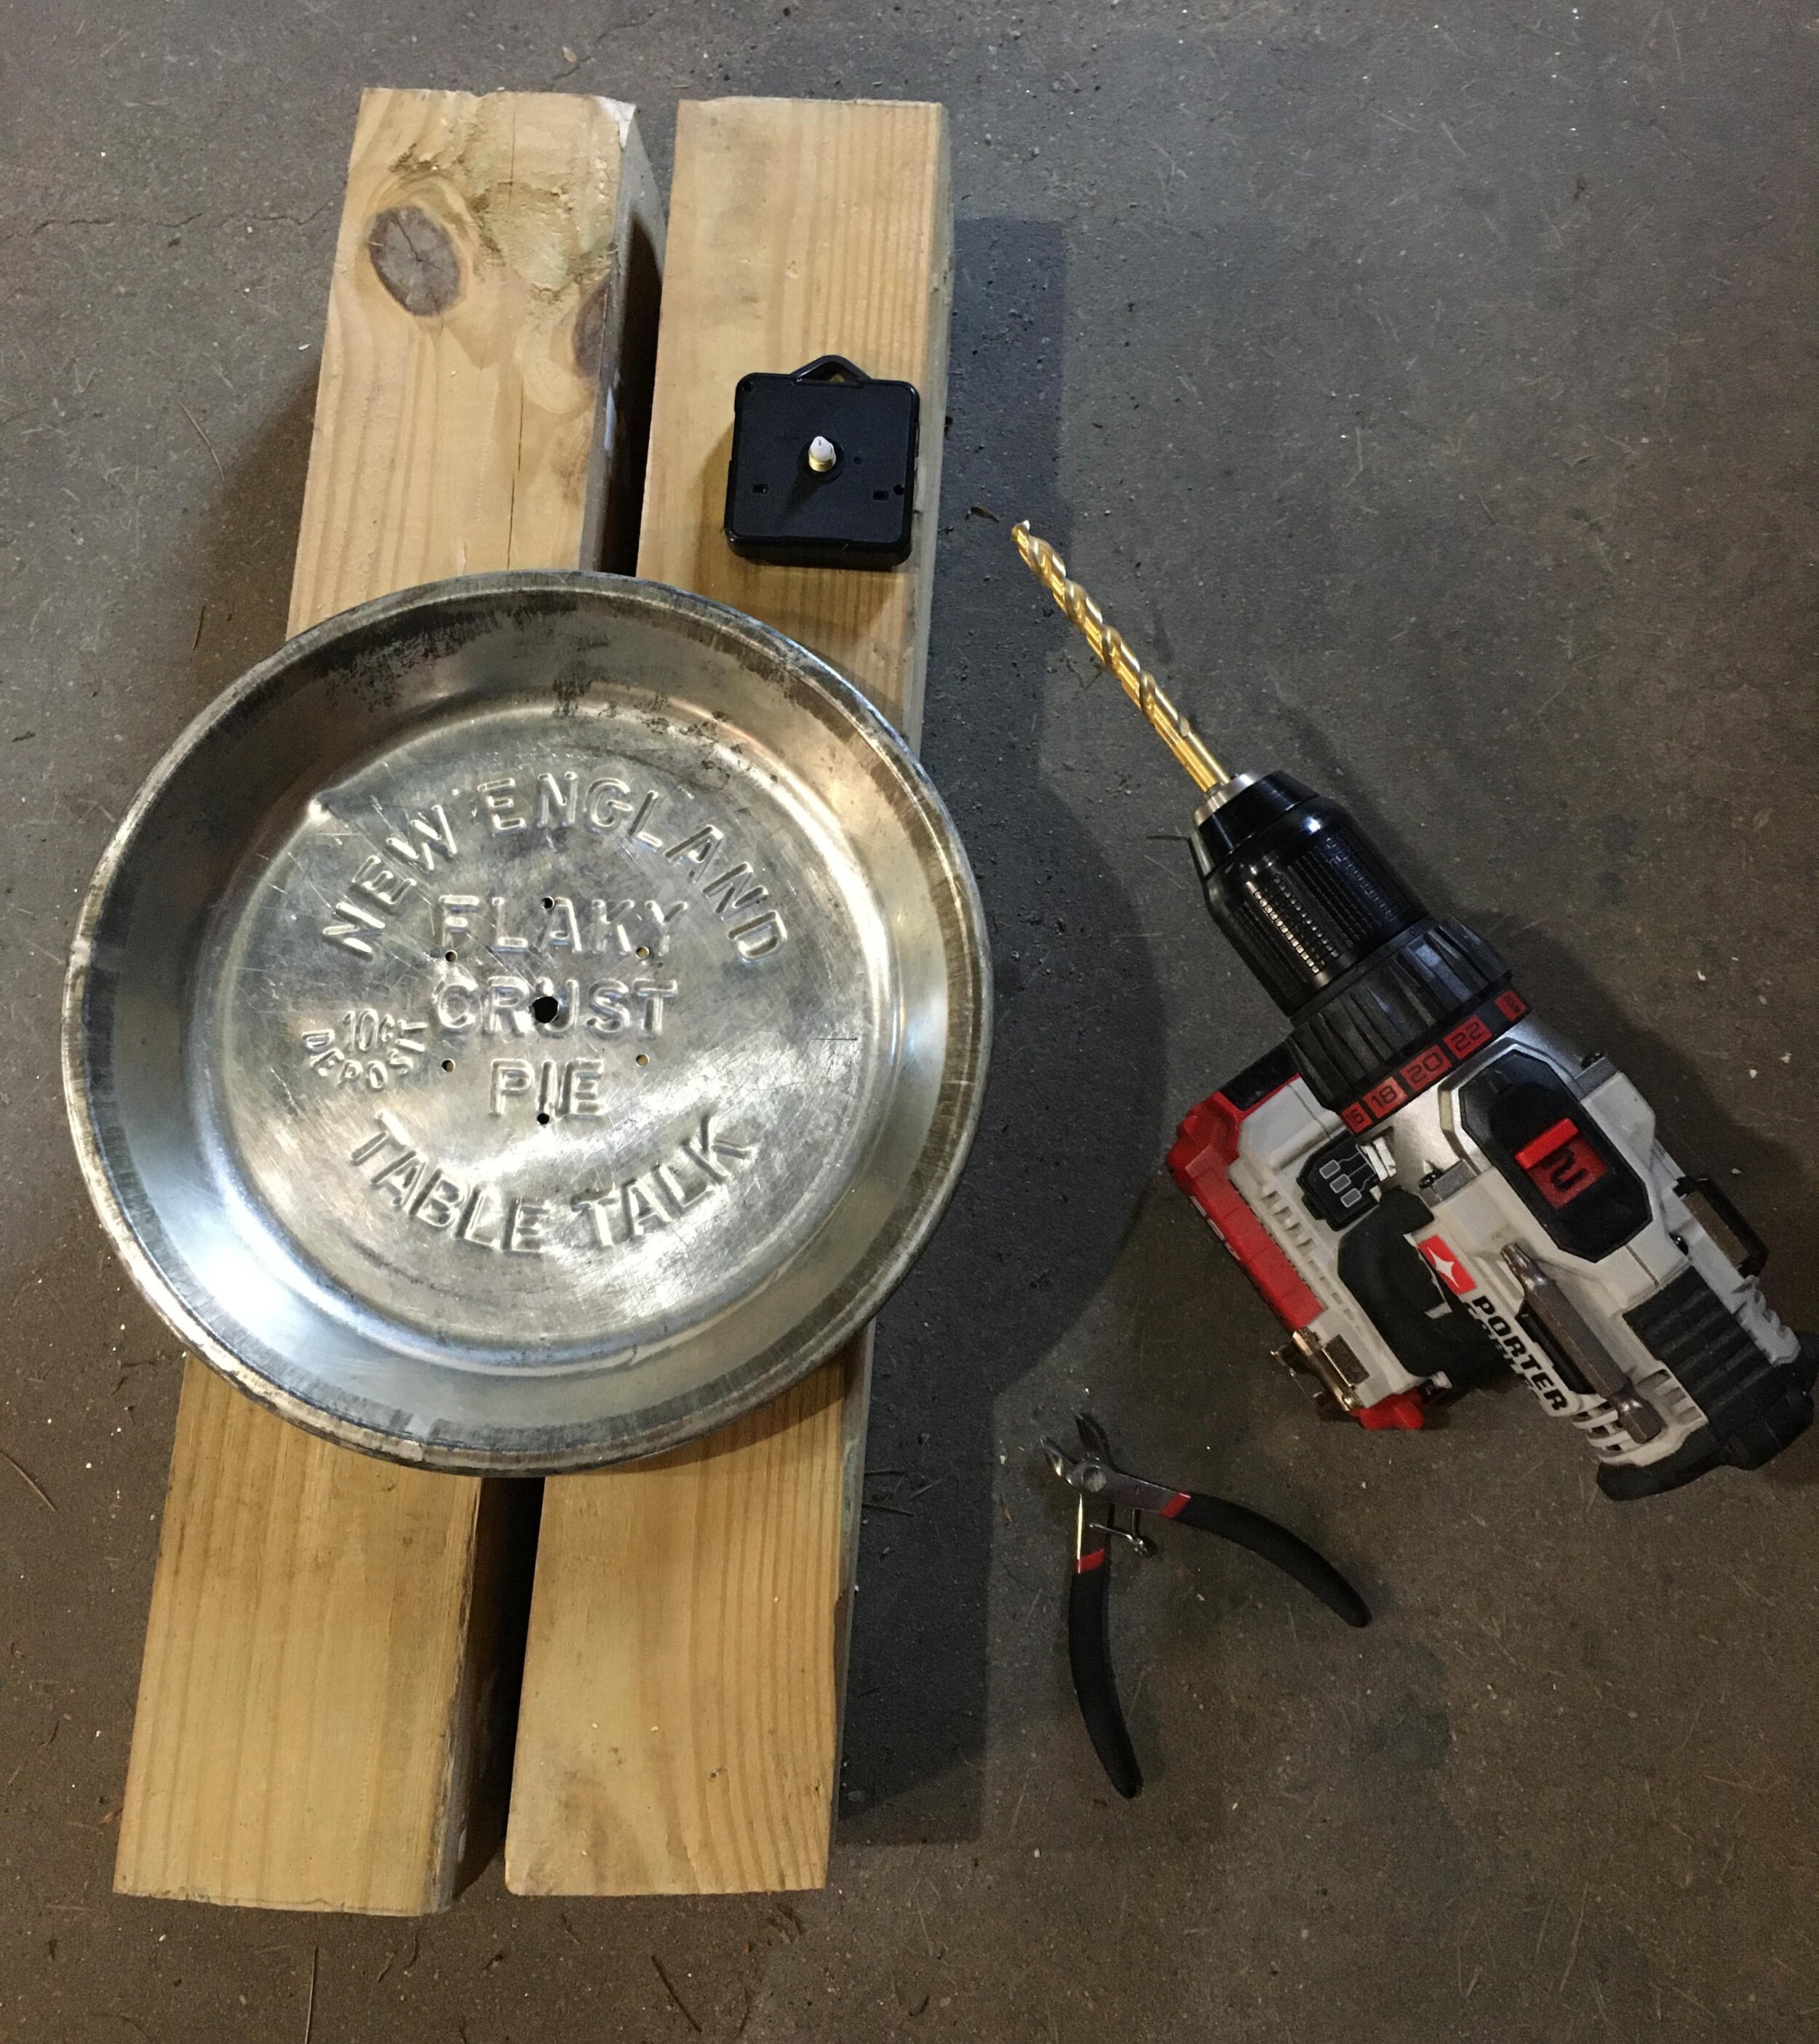
The first step to creating your clock is to purchase a clock kit that has the right diameter hands for your pie tin, so when they are mounted in the center of the tin they can move freely all around the face without touching the sides (very important).
After some measuring and browsing around on Amazon, I settled on this Mudder Clock Kit - I liked the style of the hands and they would fit perfectly in my particular pie tin.
Next, carefully measure to find the center of the pie tin and poke a pilot hole through with a small nail and hammer. After that, make sure your pie tin is well supported and on a safe area for drilling (I used some scrap 4x4 posts as a work station). Then carefully drill out your hole, starting with your smallest drill bit.
In order not to “rip” the tin, it’s very important to start small and work your way up in drill bit size. I started with the smallest drill bit and then worked my way up, using every-other-drill bit in the set going up in size order.
If you get a large burr, carefully cut it off with a pair of small wire cutters before you move up to your next drill bit size.
Please note: Keep in mind that these pieces of tin are SHARP so use care and be mindful of the metal shavings you may drop while drilling. Make sure to clean up the shavings well after your project is done.
Periodically check to see if the threaded clock mechanism can pass through your hole yet. For this clock kit, I needed to jump up to a larger drill set in order to finally work my way up to the size hole I needed (in this case it was a 5/16” drill bit).
Once the hole is the correct size, use a round file to clean up any little burrs around the edge.
Now it’s time to assemble your clock - follow the manufacturer’s directions on the best way to assemble the clock hands for your particular kit. Keep in mind that clock kits and especially the hands are VERY delicate so take care assembling them.
Once your clock is assembled, install the battery and set the time - now you can enjoy your new Vintage Pie Tin Clock!
Are you interested in making your own Vintage Pie Tin Clock but need a pie tin?
I’m selling some extra pie tins* in my Etsy shop, click the button below to shop:
*Please note the tins I have listed for sale may vary slightly in size and style from the one I made my Pie Tin Clock with.
Other posts you might enjoy from Birch Landing Home:
KEEP UP WITH BIRCH LANDING HOME
| Etsy | Facebook | Instagram | Pinterest | Bloglovin' | Hometalk |
Happy Earth Day! Today we stopped by the garden center to pick up some lavender plants for our deck. Lavender not only smells and looks beautiful but it can help as a natural bug repellent. Win-win!
I’ve also updated my Amazon Storefront to include a list of “Green Living” products and ideas to help you live like it’s Earth Day every day - because it is!
KEEP UP WITH BIRCH LANDING HOME
| Etsy | Facebook | Instagram | Pinterest | Bloglovin' | Hometalk |