DIY Slate Garden Markers

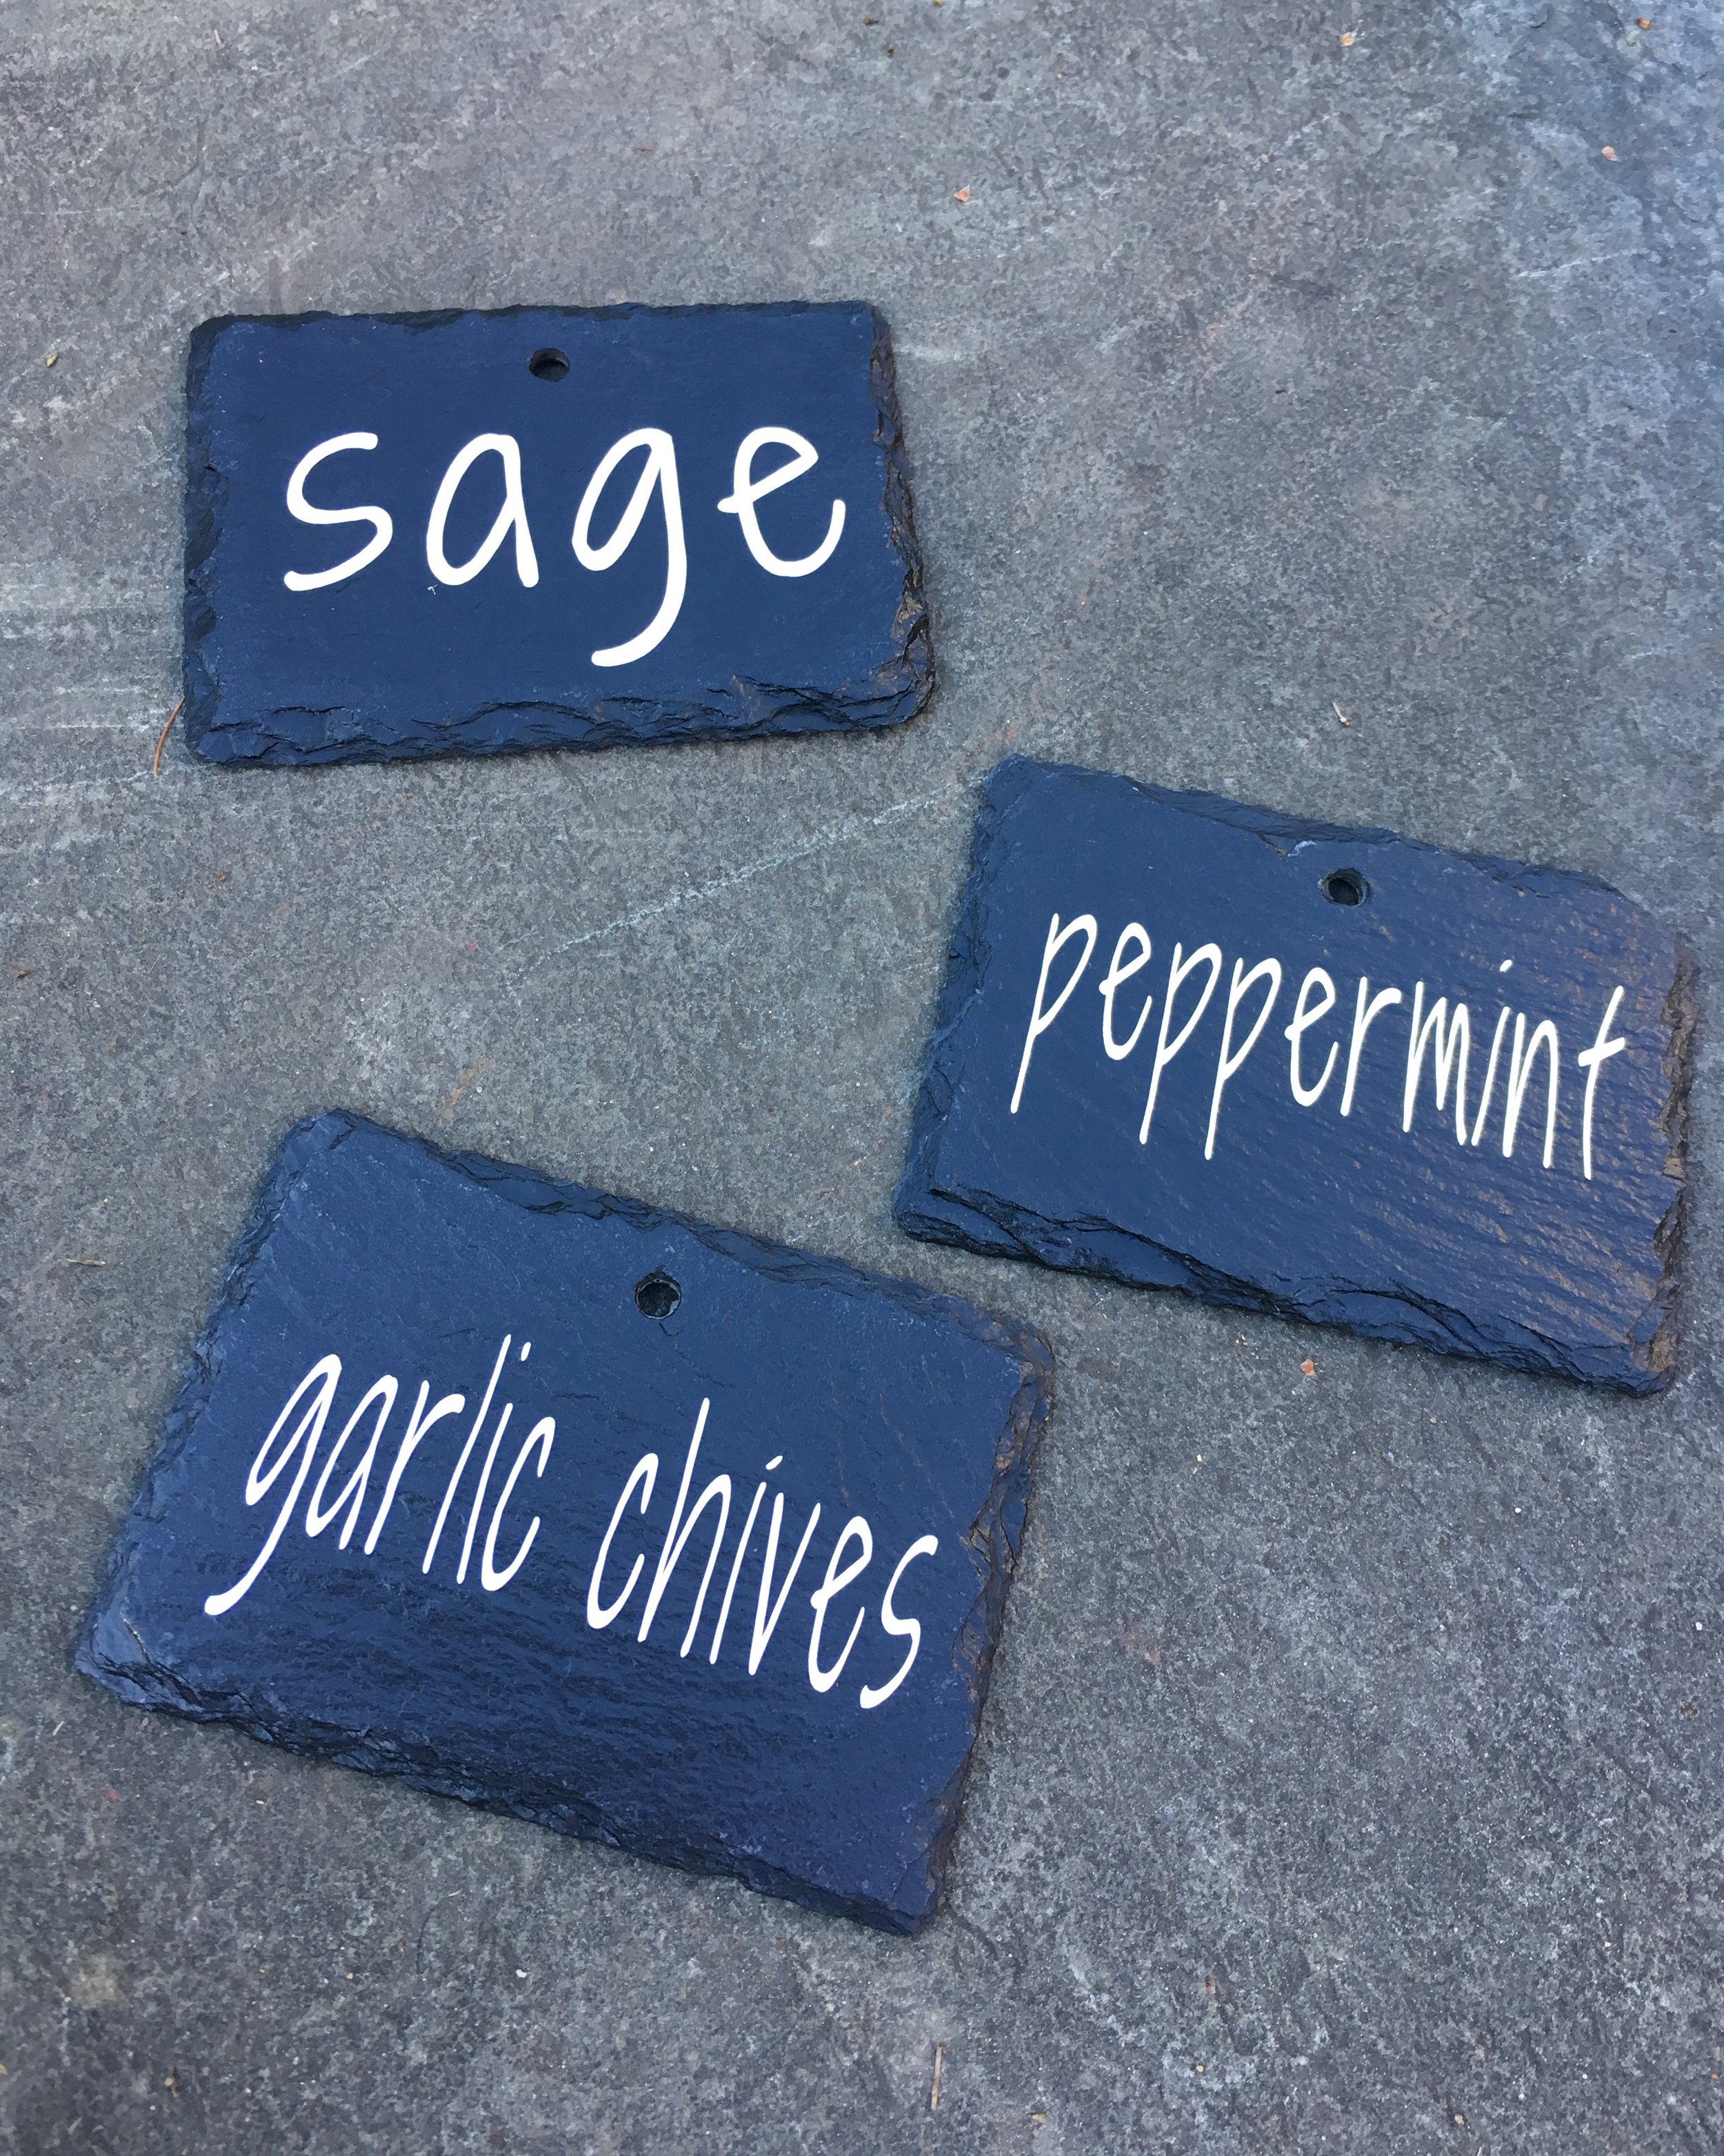
I've been eyeing slate garden markers for our herb garden for awhile now, but buying pre-made ones are soooo expensive and they never have all the varieties I want.  So I decided to take matters into my own hands and make my own.  Because I have the world's worst handwriting (it's true, ask anyone) I used a Cricut to cut the text for me, but if you have half-decent handwriting you could easily do this project with a paint marker too.  | This post contains affiliate links |

DIY Slate Garden Markers

Materials:  

How To:  

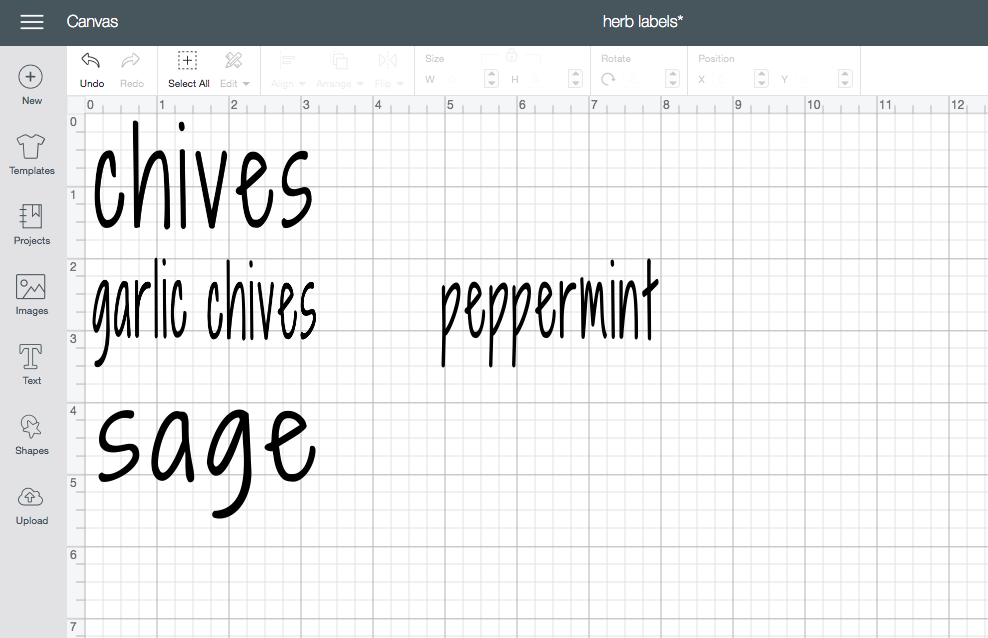
1.  If using your Cricut to make the text, measure your garden markers and make each "label" in Design Space the appropriate size.  I chose a font with a handwritten feel, but you can use whatever font you prefer.  You may need to play around with the scale of the lettering to get it to fit.  Use 651 Permanent Vinyl to cut your text.  

Making the labels in Design Space for Cricut

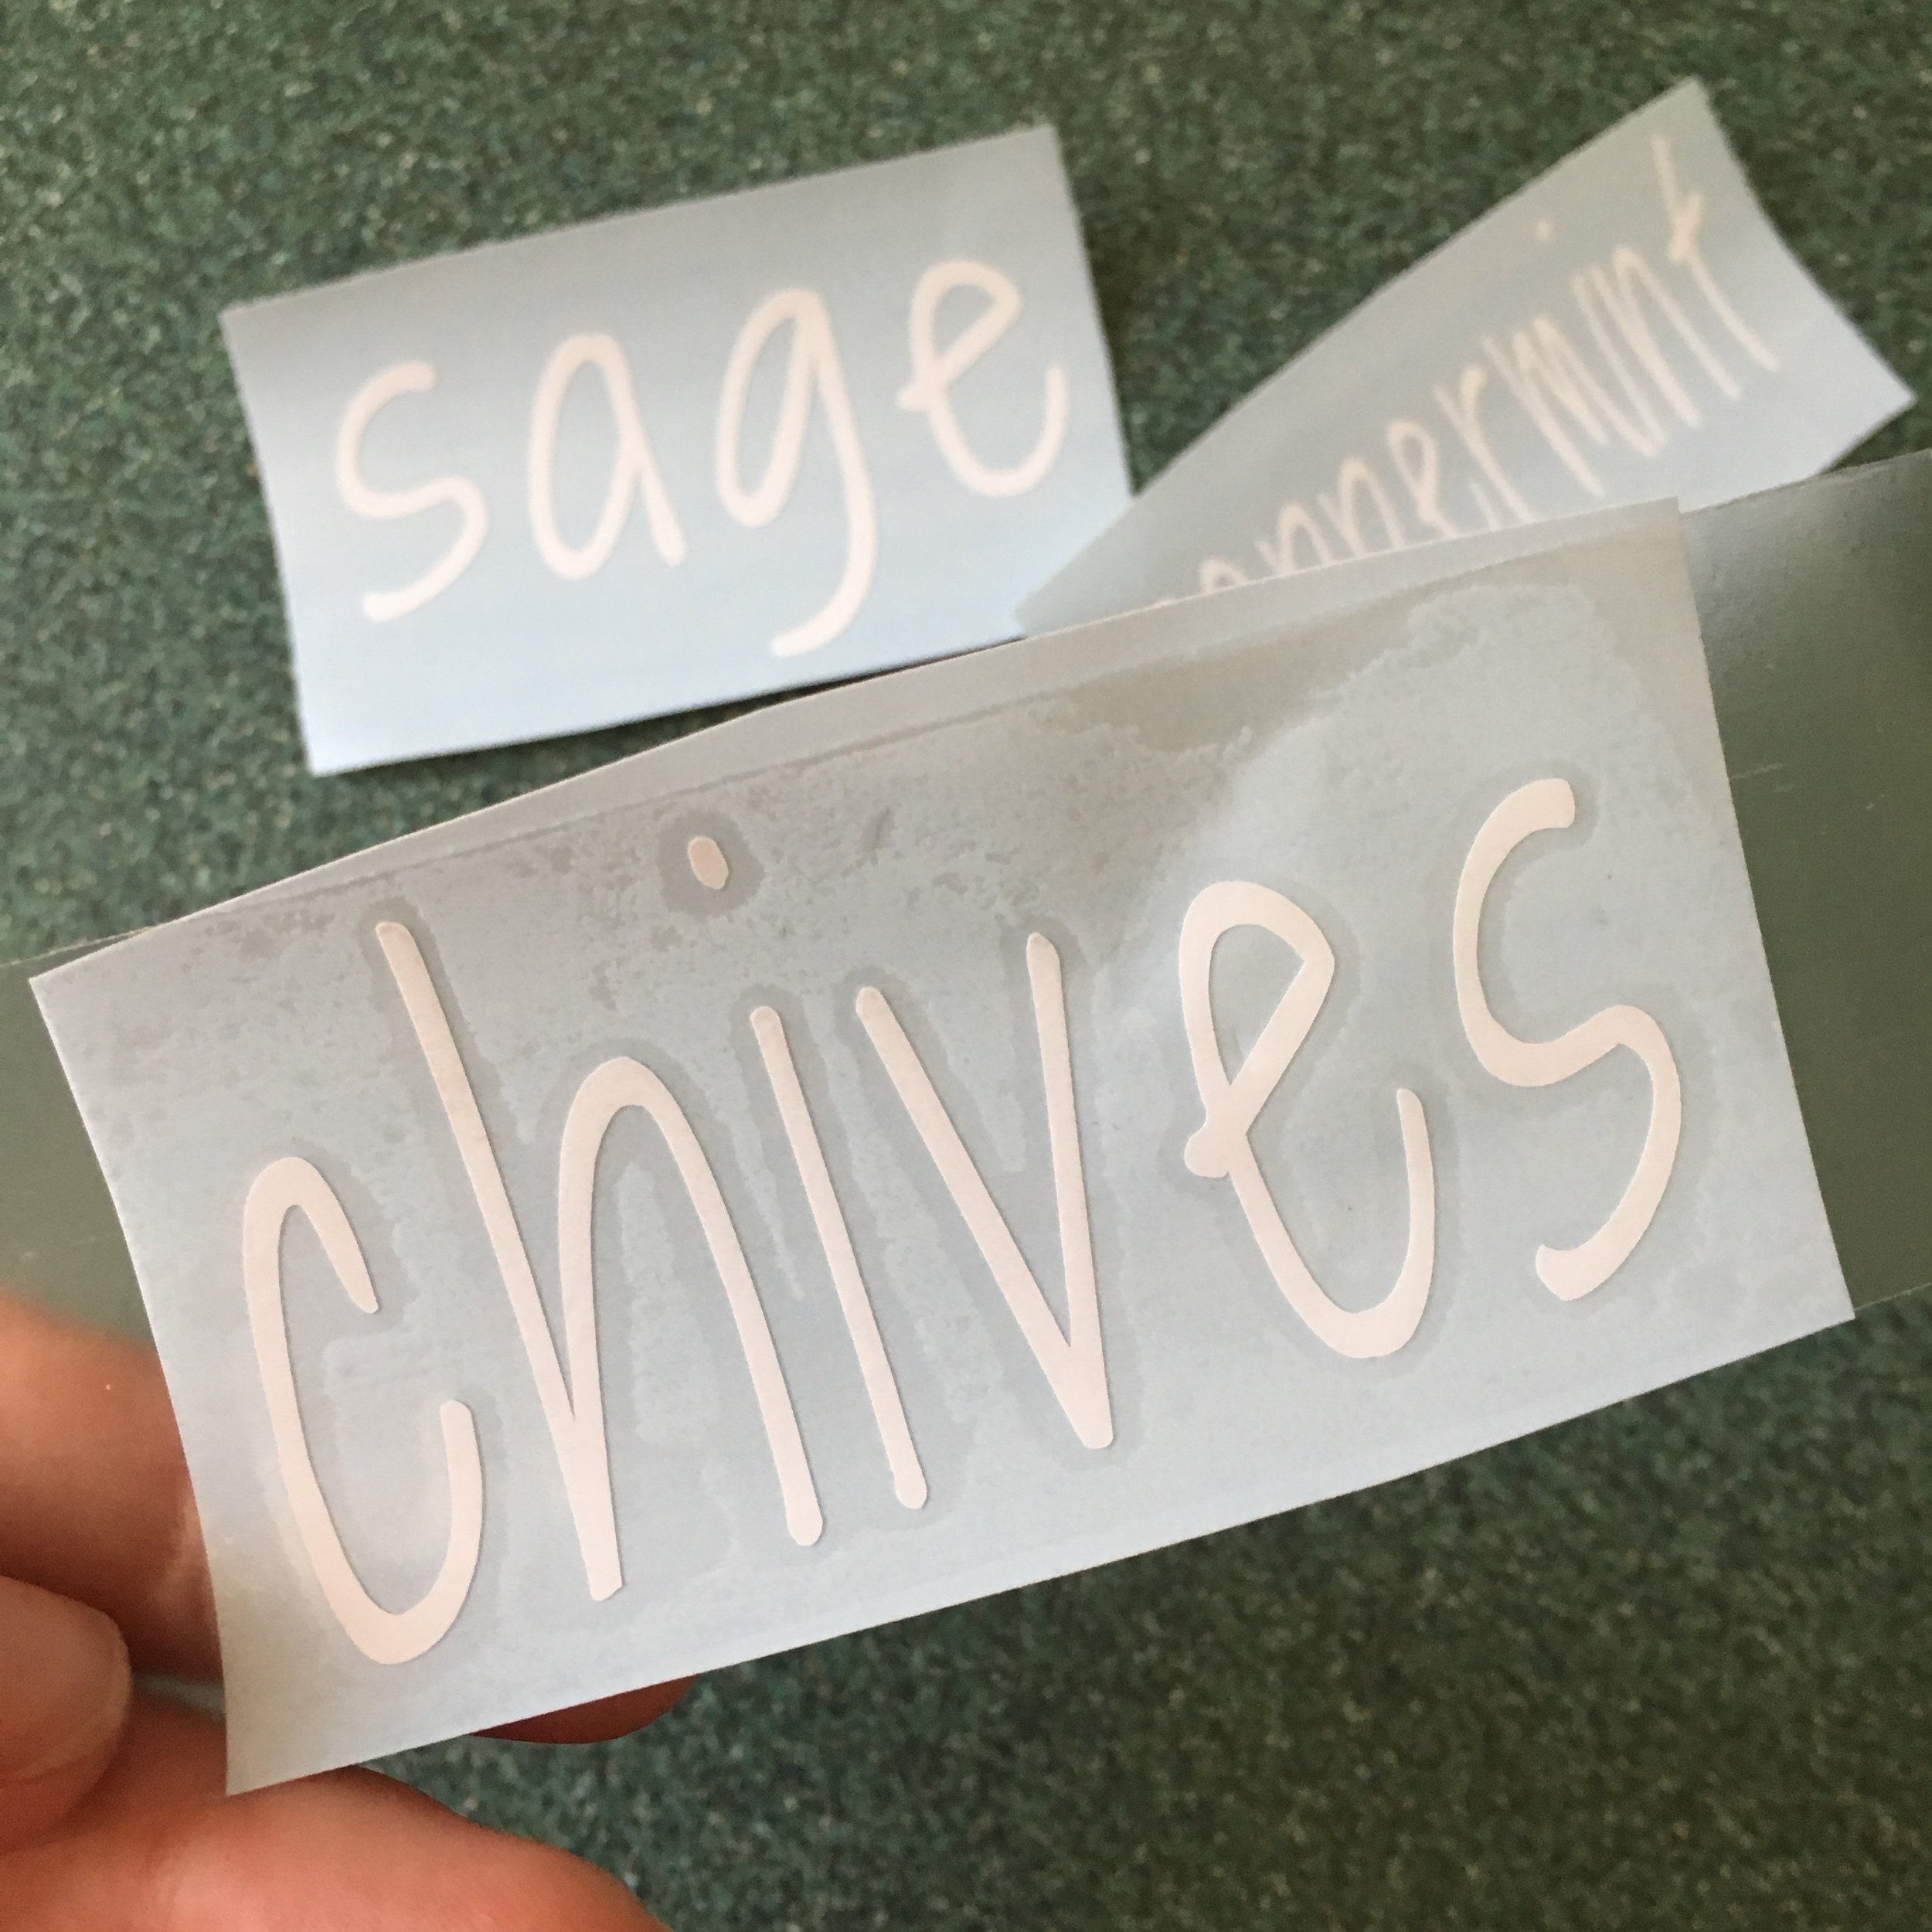
2.  "Weed out" your text, removing any pieces of vinyl you don't want to be in your final design.  I find a dental explorer to be super useful here to get rid of the pieces inside of letters, but it's not necessary.  The finer-point text was definitely a lot harder to weed (which is why you'll notice the dot on the "i" in garlic chives isn't in the right place).  

DIY Slate Garden Markers in progress

3.  Next use contact paper or transfer tape to put over your final vinyl design and rub well to make sure it's on there good.  This will "carry" the vinyl once the backing is removed.  

DIY Slate Garden Markers in progress

4.  Carefully peel the backing off your design.. this can be tricky.  My advice is to go slowly and have your dental explorer handy if you have one!  It can help hold letters down as you peel off the back.  

5.  Once the backing is removed, carefully place on a clean and dry slate marker.  Rub the design on well (I use an old gift card like a squeegee).  Once it's on there good, carefully peel off the contact paper.  
Alternatively:  If you don't have a Cricut or want to do this project by hand, you can skip steps 1-5 and just write your text freehand with a white paint marker and allow to dry.  

DIY Slate Garden Markers in progress

6.  To make sure the vinyl doesn't peel or come loose, I use a spray acrylic sealer to seal them.  Just put the markers on a scrap piece of cardboard, give a light coating of the spray sealer, and allow to dry (make sure you're in a well-ventilated area). 
If you used a paint marker instead I would also suggest sealing them.  

DIY Slate Garden Markers in progress
DIY Slate Garden Markers

7.  Hang your new garden markers!  You can buy special hangers for them if you like, or use sticks and some twine or wire.  In my case I wanted them on the barrels in our herb garden so I simply used some thin copper wire and "flossed" it through the slots in the barrel, tying it off with a large washer at the back so they don't pull through.  

It has been SOOO abnormally hot in New England these past few weeks that my herb garden isn't looking too wonderful at the moment (hence the limited "after" pictures).  We have six wine barrel planters on a small patio; four of the planters have perennial herbs (chives, garlic chives, sage, and peppermint) that come back each year and the other two planters I switch up each summer.  Currently my poor plants are a bit sun-stressed and I'm far behind on weeding, but I hope you'll get the idea of the final install below.  I think it really helps finish the space and I love that things are finally labeled.  

EDIT Spring, 2020: Just wanted to hop on here and add that I’ve left these up year-round on our herb barrels since 2018 and they still look great! No fading or peeling with the sun or snow. The slate with the permanent vinyl labels and sealer have definitely held up wonderfully.

DIY Slate Garden Markers

KEEP UP WITH BIRCH LANDING HOME
|  Etsy  |  Facebook  |  Instagram  |  Pinterest  |  Bloglovin'  |  Hometalk  |

Shop Small - and Secondhand

I'm a big fan of supporting small/local companies as well as shopping secondhand when I can.  I consign a lot and often use the money earned from the consignment shop towards new items - that way in a sense we're just "trading up" and not spending a lot out of pocket.  

I thought I'd share some outfit details from a recent wedding we attended to show how you can pull these things together. This dress is Lauren by Ralph Lauren (I couldn't find the exact one to link, but here is a similar one - affiliate link), and I bought it second-hand at a NH-based consignment store called M&C. Because I had store credit from consigning some things there, I only had to pay a whopping 62 cents out of pocket for it! The leather "Buoy Block Clutch" is from Maine-based company Eklund Griffin, and while it can be considered an investment piece it's definitely something that's well-made and timeless and will get a lot of use for many years to come. Finally the gold necklace is from The Silver Wren on Etsy - a small shop that makes beautiful hand-stamped jewelry. I had this necklace made with our daughters' initials and love that I can wear it dressed up or down.

By spending your money wisely, you can get the most impact by saving big shopping second-hand and supporting small and local companies when you can.  Happy shopping!  

Save big and invest in small business by shopping secondhand and shopping small.

KEEP UP WITH BIRCH LANDING HOME
|  Etsy  |  Facebook  |  Instagram  |  Pinterest  |  Bloglovin'  |  Hometalk  |

Shop my Amazon Favorite Finds with Ease!

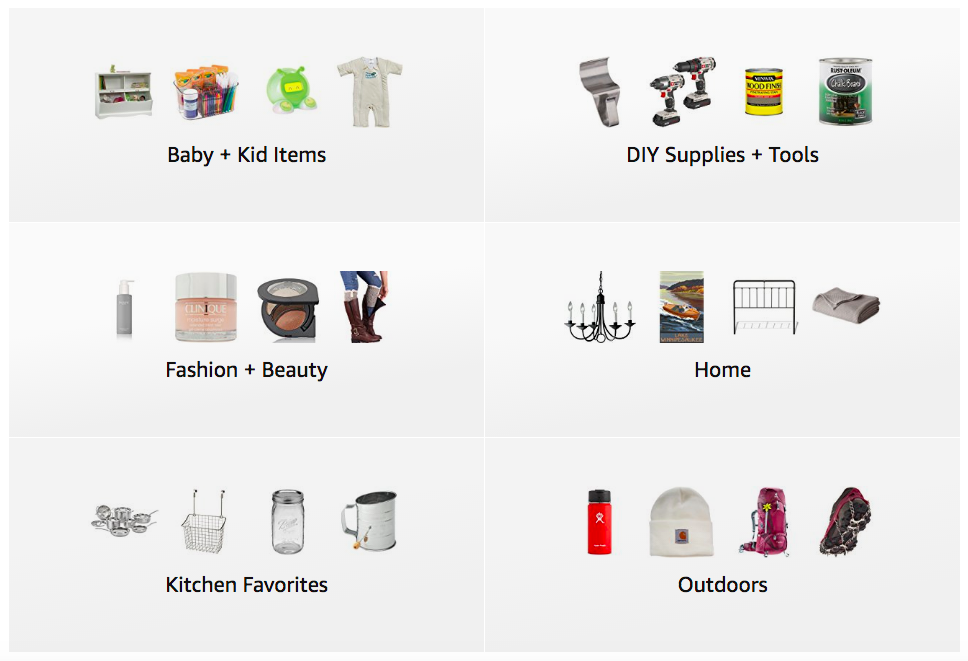
Amazon Influencers now have categories which makes browsing my Favorite Finds so much easier!  Check out my lists and let me know if you have any questions on the products - I have different lists for Home, Kitchen Favorites, DIY Supplies + Tools, Fashion + Beauty, Outdoors, and Baby + Kid Items. 
| This post contains affiliate links |

Shop Birch Landing Home's Amazon Favorites with Ease!

KEEP UP WITH BIRCH LANDING HOME
|  Etsy  |  Facebook  |  Instagram  |  Pinterest  |  Bloglovin'  |  Hometalk  |
Pain-Free Childbirth: My Hypnobirthing Experience

When you're a first-time mom, the idea of childbirth can be pretty terrifying.  Of course it doesn't help that everyone is always quick to share their horror stories with you which just adds to the stress and the fear of the unknown.  The bottom line though is that everyone's labor and birth experience is different - and yours doesn't have to be stressful, painful, or scary.  It IS possible to have a pain-free natural labor and delivery.  | This post contains affiliate links | 
Disclaimer:  This post shares my personal experience and is not medical advice - please always consult with your doctors for what's best for you and know that everyone's birth experience is different.

Pain-Free Childbirth:  My Hypnobirthing Experience

For our first baby, I was induced (she was a week late) and through guided relaxation and trusting my body to do it's job I can honestly say I felt no pain during labor or her birth.  The whole experience was still absolutely exhausting, draining, and overwhelming at times - but I never felt anything I can describe as pain.  In fact, towards the end of my labor I stopped feeling the contractions and even dozed through some of them.  It's incredible what a woman's body is capable of, and how much you can control mind-over-matter.  

Here is how I was able to have a pain-free, natural delivery:  

Do Your Homework

During your pregnancy read up on labor and delivery techniques. Know that anything is possible and learn all your options, but really focus on learning and practicing all of the relaxation techniques. I particularly liked The Pregnancy Book and The Birth Book. Both books had overall very positive messages and covered everything from natural birth to epidurals to c-sections, but The Birth Book especially talked about natural birth coping techniques. Doing this homework really lays the groundwork to mentally prepare yourself for labor and birth, and being mentally prepared is most of the battle.

Tune out Negative, Seek out Positive Stories

When you're pregnant, everyone will give you unsolicited advice - from your friends and family to total strangers in the grocery store - and probably 95% of these stories will be negative.  It's hard not to let all the horror stories get to you after awhile but really try to tune these out because your birth experience doesn't have to be like that.  When someone has a positive story to share, pay attention - viewing the whole process with a more positive mindset will help you see that a wonderful birth story can be possible.  

Take a Hypnobirthing Class

This was something I actually did not do... I lucked out being able to hypnobirth without formal training (being mentally prepared, having wonderful support people, and a little luck allowed me to be successful without training, but I'm probably an exception).  By taking a hypnobirthing class you will learn about all the natural coping techniques and be given time to practice and visualize how you hope your birth to go.  All of this will help you be more mentally and physically prepared for delivery day.  

Hire a Doula

When you go to the hospital to deliver, you have no choice on which nurse you will get.. and for all you know you might get the one that will just rub you the wrong way.  The L&D nurses also tend to come and go throughout your labor.. they will check on you and stay with you if necessary, but otherwise you'll labor a lot on your own especially in the beginning.  A Doula is your own personal labor support person - someone who has experience and training attending births and helping the laboring mother.  A Doula is not a doctor or a nurse, and will not make medical decisions, give medical advice, or deliver the baby.  She is strictly there to be your personal cheerleader and coach you on ways to make your labor more comfortable.  By choosing your doula, you decide who will be there to support you and can pick someone you feel comfortable with and enjoy.  

Our Doula came armed with a bag of "labor tricks" - which included aromatherapy, relaxing music, spiky rubber handles for you to squeeze (the discomfort of squeezing them with your hands is supposed to help distract you from the discomfort of your contractions), tennis balls to massage your back, and LED candles to give the room a relaxing atmosphere.  She also was a certified lactation consultant and had a certificate in hypnobirthing so she knew all the relaxation techniques.  

Create a "Birth Wishes" List

I say Birth Wishes instead of Birth Plan here because nothing about your labor and delivery may go "to plan."  If you have a "plan" that tends to fall in the mindset of expecting your birth to go exactly a certain way and that's almost never the case... but by having "wishes" you set yourself up to be more flexible with the whole situation.  When you write your Birth Wishes list make sure to phrase it all as wishes too, in order to keep that flexible mindset (for example, don't write "I will not have an epidural" or "I will do skin-to-skin", but instead say "I would like to labor all naturally for as long as possible, hopefully the entire time.  I hope to have a natural birth" or "I would like to do skin-to-skin immediately after the birth").  

Definitely write out a "Birth Wishes" list as it will help you visualize how you'd like things to go, and will give your medical team an idea of what things you do/do not want to do - but keep in mind it can all change at any time, some things are just beyond your control.  

Start Relaxing from the First Contraction

In the beginning of labor your contractions can start out slow and not bothersome.  You may be able to move and talk through them at first or at least stop and easily let them pass over you.  Even if they're easy to deal with in the beginning it's important to set yourself up for success for the remainder of your labor and start relaxing now.  Relaxing when something hurts seems counterintuitive (after all, if you stub your toe you tend to tense up, right?), but by totally relaxing during contractions they will actually hurt less because you're not fighting it and you're letting your body do it's job.  The best way I can describe this total relaxation is letting yourself "melt."  When you're having a contraction just let yourself become a puddle on the bed or in your chair, etc.  And if you're standing, have your husband support you and just let yourself melt.. let your knees go soft and your arms and head drop and have him hold you.  It's so important to not hold any tension anywhere in your body during the contractions, and the more you're able to relax the easier it should be.  Having a Doula really helps here because she can help coach you through the relaxation ("relax your jaw, relax your fingers, let your shoulders drop...").  After a few hours of coached relaxation, my body went on autopilot and I honestly didn't even feel the contractions anymore and was even able to doze through some of them.  

Don't Watch the Clock

Once you're safely laboring in the hospital, put your phone away and pay no attention to the clock.  Time means nothing in labor... some women labor for minutes, some for hours, and yes.. some even labor for days.  The important thing is to take each contraction one at a time - it doesn't matter how many contractions you've had or how many more are to come, all that matters is the moment you're in now.  Taking it one contraction at a time is the easiest way not to feel discouraged or overwhelmed, just take it one step at a time.  

Save the Tub as your Last Resort

If you have access to a labor tub, it's heaven.  The warm water and being able to let yourself float during contractions is just such a huge relief.  However, you don't want to play that card early in your labor since the relaxing effects of the tub tend to wear off the longer you're in it.  Instead save the tub until you just can't take the contractions anymore (like during the Transition Phase of labor), then savor all the warm relaxation the labor tub has to offer - it'll feel like heaven.  

Realize that Sometimes Decisions are Made For You

Above all, go in with a positive mindset and ready to relax yourself through labor but understand that ultimately sometimes decisions will be made for you in the best interest of you and your baby's health.  For us, I was lucky enough to successfully hypnobirth our first baby and have the incredible all-natural birth experience I always wanted.  However, for our second pregnancy baby #2 stayed breech and just would not turn.  For us this time, I did not get the opportunity for an all-natural birth but instead had a planned c-section - and guess what?  It was still incredible!  No matter how your baby is delivered it's an amazing experience - enjoy and savor it.  

Best of luck, Mamas!!  


Disclaimer:  This post shares my personal experience and is not medical advice - please always consult with your doctors for what's best for you and know that everyone's birth experience is different.

KEEP UP WITH BIRCH LANDING HOME
|  Etsy  |  Facebook  |  Instagram  |  Pinterest  |  Bloglovin'  |  Hometalk  |

Bottle Feeding Tips with Nûby

Introducing a bottle can be difficult at first, especially if your baby had been exclusively breastfed.  Here are a few quick tips on ways to make bottle feeding easier.  | This post contains affiliate links and an honest review on products provided by Nuby |

Bottle Feeding Tips with Nuby

When our little one was about 3.5 months old we had no choice but to make the switch from exclusively breastfed to formula fed because she was unable to digest my breastmilk (if you'd like, you can read more about that HERE).  Going cold turkey from breast to bottle was hard on everyone and I definitely learned some lessons along the way.  

Bottle Feeding Tips

Use a "natural-shaped" bottle

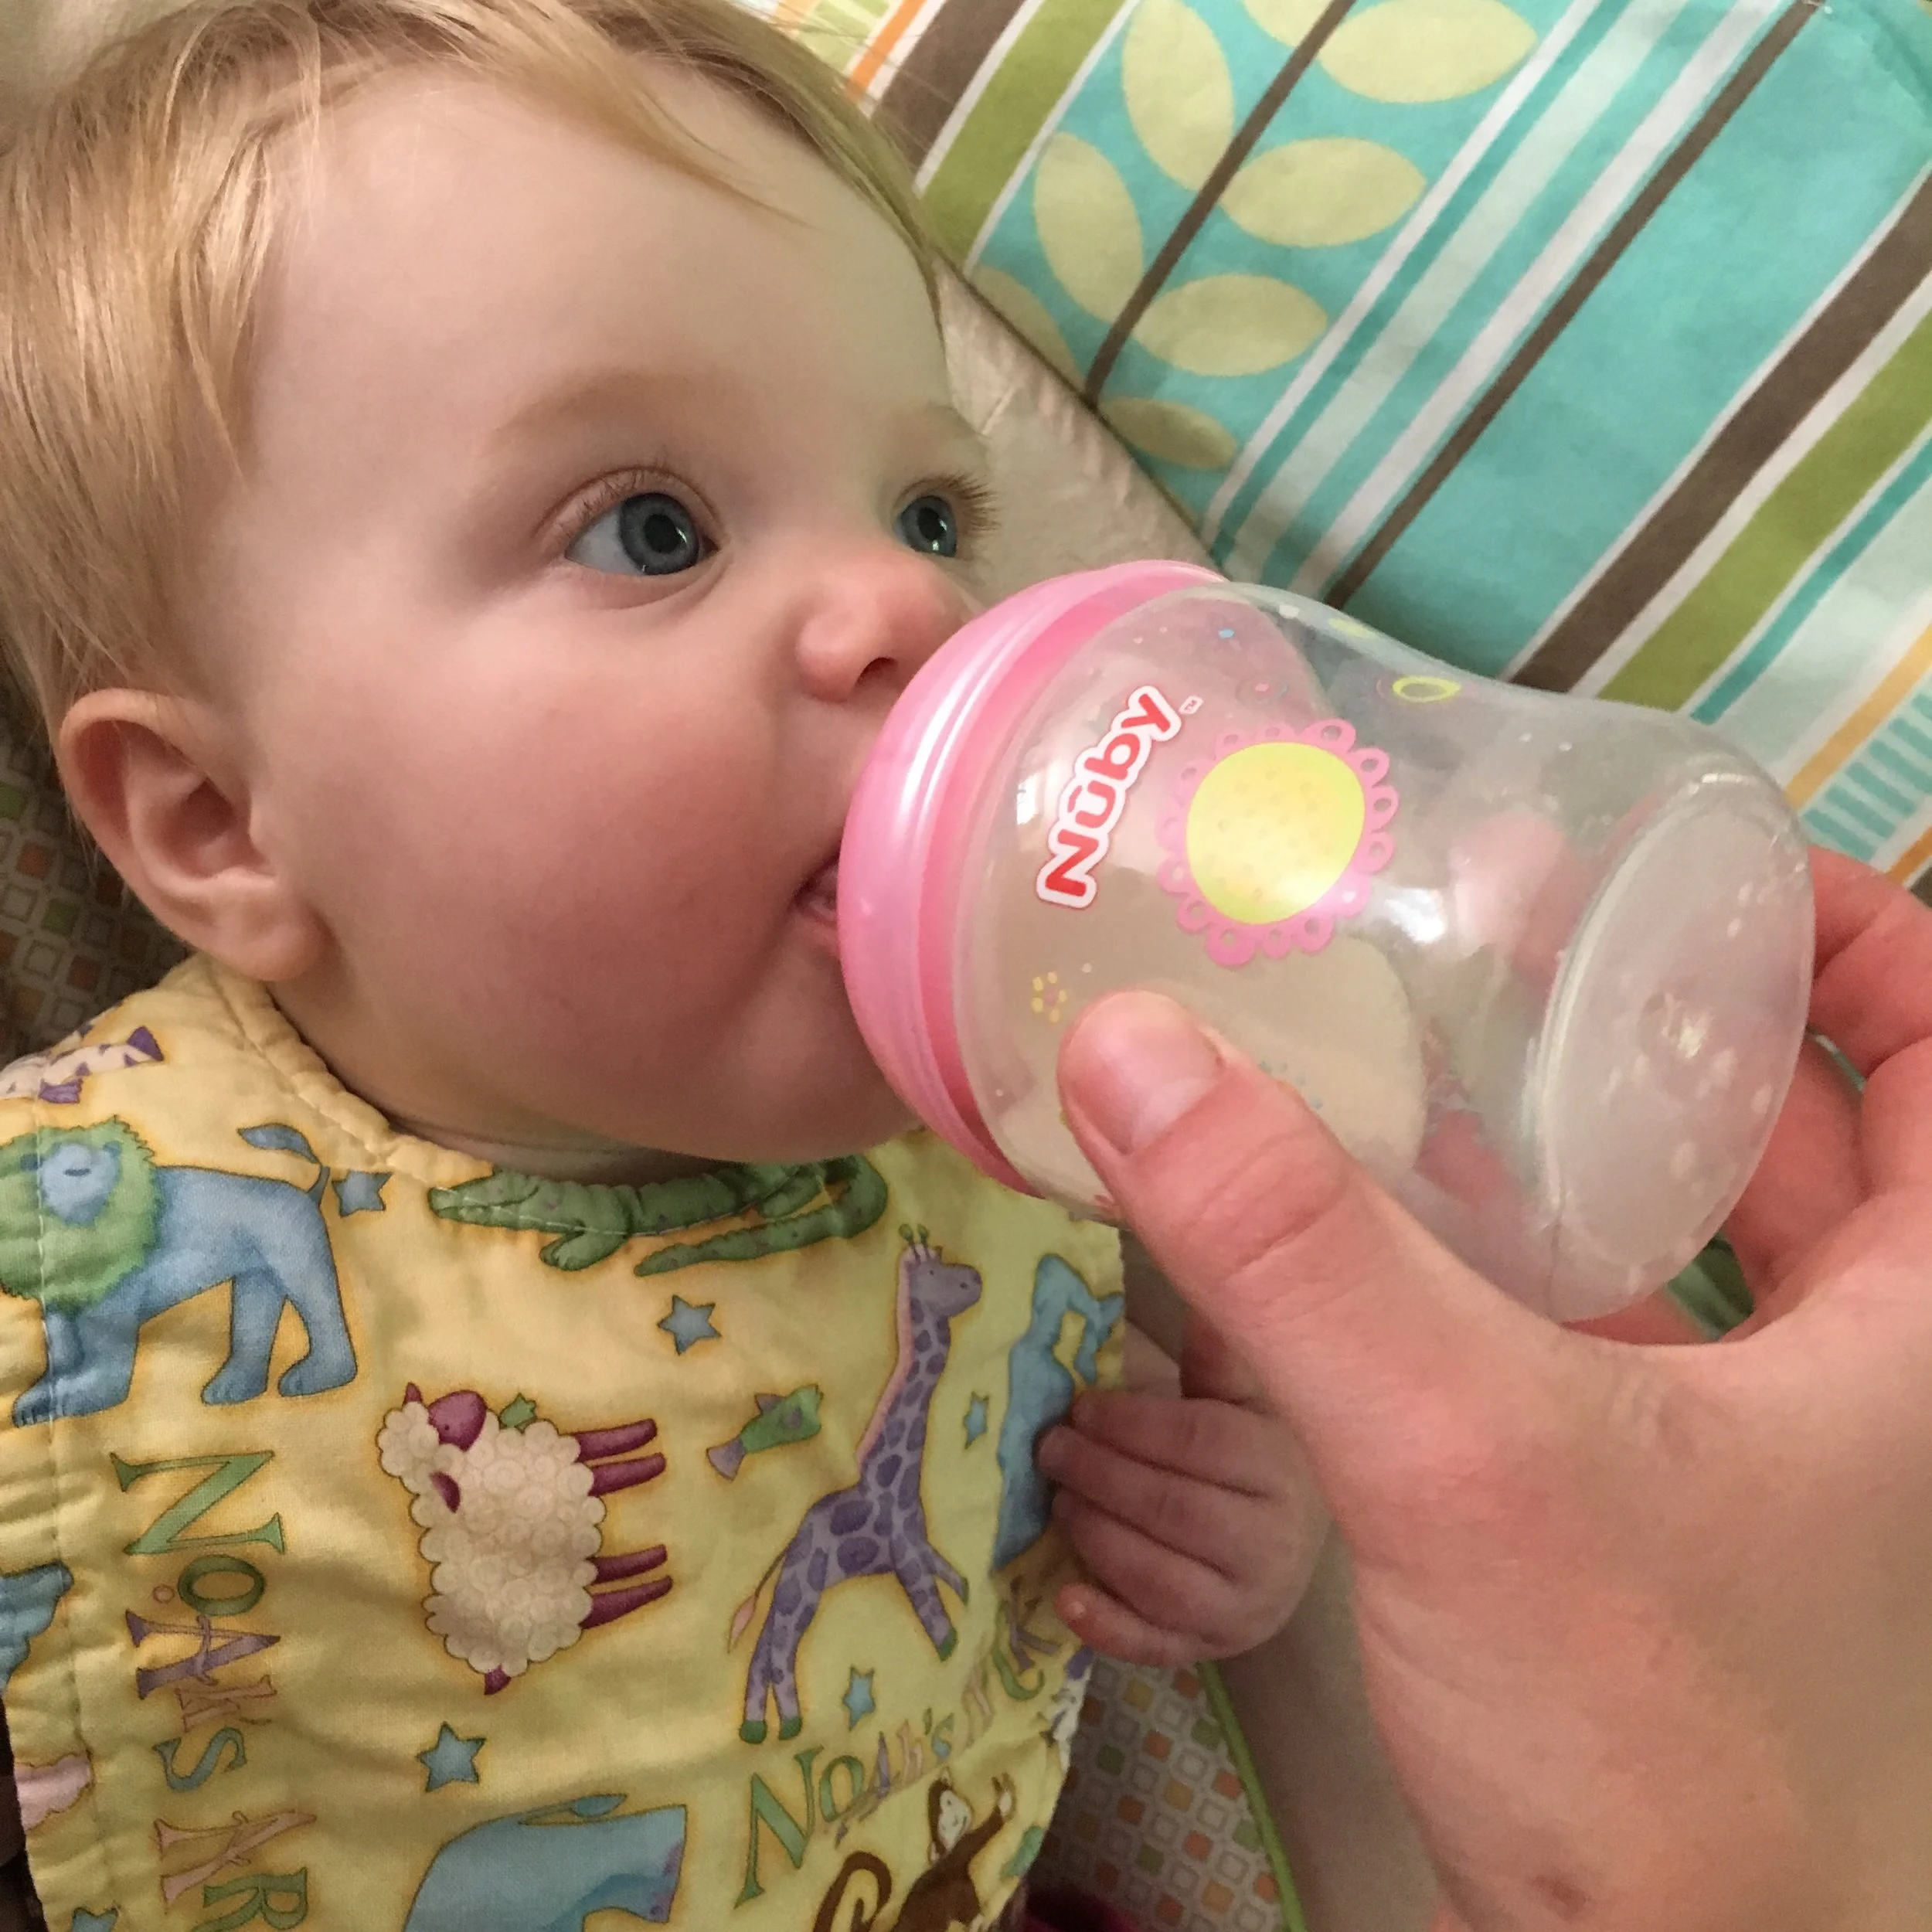
In the beginning we tried a lot of different kinds of bottles to see what our baby would take. It was a lot of trial-and-error at first but we quickly found that she took best to bottles in a natural shape that mimics the shape of a breast, like Nuby's Natural Touch Bottles - rather than the traditionally-shaped narrow bottles. For her, latching on to a natural bottle was easier and more instinctive.

Nuby's Natural Touch Infant Bottle

Use bottles with fewer pieces to clean

One of the first bottles we had tried was a specialty bottle that literally had 7 pieces to it that had to be taken apart and cleaned every time you used it.  It was such a daunting and tedious process and ain't nobody got time for that!  Thankfully using a simpler bottle system (like Nuby's Natural Touch Bottles), was a lot easier since they only have three easy-to-clean pieces - the bottle, the nipple, and the collar.  

Using Nuby's Natural Touch Infant Bottle

Find a comfortable and consistent place to feed in the beginning

When we first introduced the bottle, our baby just wouldn't have it.  I initially tried bottle feeding her in the rocking chair I always nursed in but it just made her so mad because she was reminded of nursing.  I quickly realized that in our case she needed somewhere new and comfortable to be her new feeding spot so we switched to a little bouncy chair on the floor which really helped.  She sits in the chair at a comfortable, somewhat upright angle that's perfect for her and I sit on the floor facing her to feed her.  

Introduce the bottle when baby is well rested and not starving

When you first start introducing a bottle to your baby, it can be very overwhelming to them so it's best to set yourself up for the highest chance of success!  Your baby will likely get easily frustrated because it's something new, so try not to push the matter when they're overtired or starving.  A calm baby will be more likely to try to figure out the bottle rather than just melt down at the first sign of frustration.  

Be Consistent

Consistency is key.  Even if your baby hates bottle feeding, keep trying and keep offering it regularly until they get the hang of it.  It can be so hard in the beginning but hang in there!  

Nuby Natural Touch Bottles - 3 Pack
Nuby Parent Blogger

- I received this item for review from Nûby but all opinions expressed are my own.  Please read our full Disclosure Policy for more information - 

Nûby's Natural Touch Infant Bottle with Easy Latch Nipple can be found at Wal-Mart, Babies 'R Us, and Amazon.  

KEEP UP WITH BIRCH LANDING HOME
|  Etsy  |  Facebook  |  Instagram  |  Pinterest  |  Bloglovin'  |  Hometalk  |
Create a Tick Removal Kit to Help Protect Your Family

Living in the Northeast, ticks have just been awful the last few years and it seems as though you can't enjoy the outdoors anymore without finding one.  It's so important to protect yourself and family from getting a tick in the first place (if you want to read more on my tips to keep ticks at bay, check out my previous post "Safeguarding Against TICKS").  But in the event you unfortunately get one on you, you need to be prepared so you can remove that awful thing ASAP.  By having a Tick Kit handy, you'll be able to remove the tick quickly and safely and hopefully lessen your chances of catching a tick-borne illness. 
| This post contains affiliate links and personal tips - Disclaimer: I am not a medical expert, always check with your doctor for advice |

Create a Tick Kit & Help Protect Your Family

I recommend putting together several tick removal kits and keeping them handy at all times - keep one at home, one in the car, and one in your hiking bag for outdoor trips or diaper bag for playground excursions.  That way if you're out and about and find one on you or your family you can safely remove it and document it, ready for testing purposes.  

What to Include in your TICK REMOVAL KIT:  

Items for a Tick Kit

If you unfortunately get a tick attached to you, safely remove it immediately to help reduce your exposure to tick borne illnesses.  Use the alcohol wipes to cleanse the area where the tick was removed as well as wipe down the tick spoon after removal. 

How to record a tick bite.

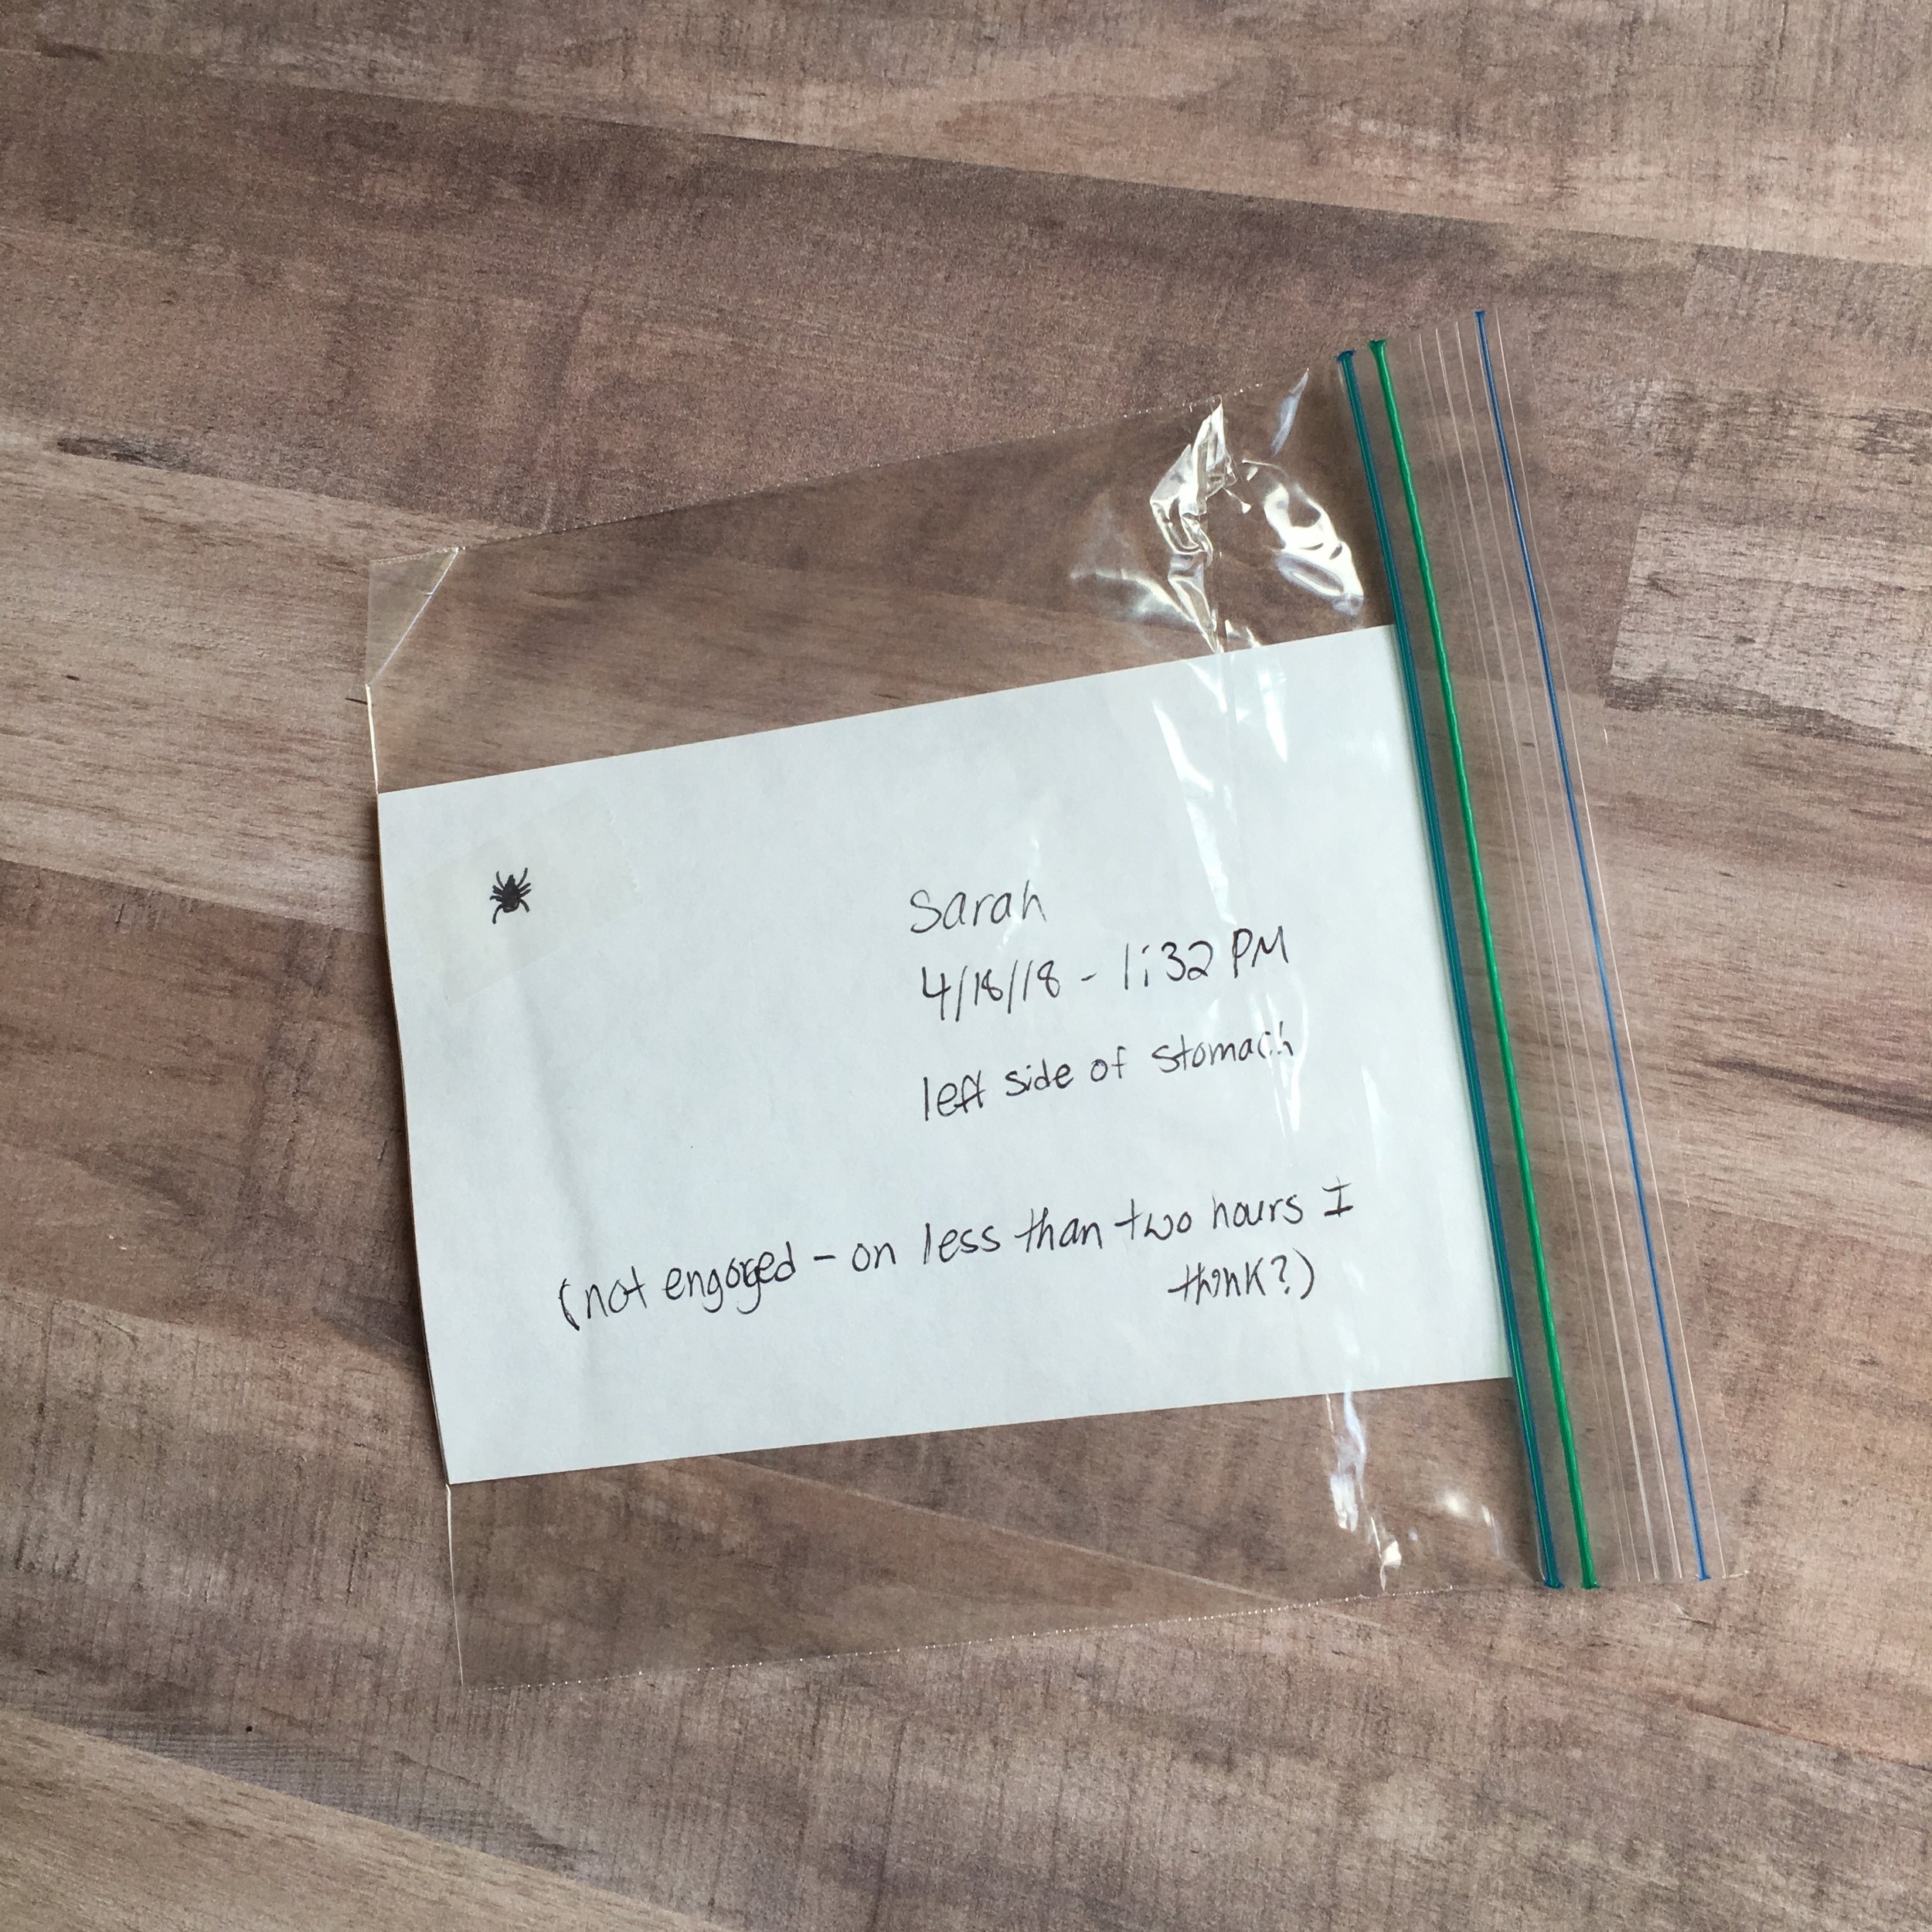
It's important to keep the tick itself - as well as note when and where it was located and any other information about the situation (if the tick was engorged, your best guess at how long it could have been attached, etc).  Tape the tick to an index card and use your pen to record all of this information, then place in an empty ziplock bag - feel free to double bag it if you want.  Then call your doctor right away for advice on any precautions you may need to take, or if he wants to order to get the tick tested.   

Whether or not you get the tick tested (either by your doctor or privately), you can also report your tick bite to TickEncounters. TickEncounters is a program run by the University of Rhode Island, recording and monitoring trends and information regarding tick bites and your information helps aid in their research. They can also help advise you about how to get the tick tested for your peace of mind in the event your doctor's office doesn't do it.

Related posts:  

How to record and save a tick for testing.

DISCLAIMER:  I am NOT an expert or medical professional.  These are tips and information I've learned over the years living in a tick-prone area.  Always check with your own doctor and local experts for the best prevention and treatment plans for yourself and your family.  Discuss with your doctor ahead of time what to do in the event of a tick bite (and I hope you never need to use that information).  

KEEP UP WITH BIRCH LANDING HOME
|  Etsy  |  Facebook  |  Instagram  |  Pinterest  |  Bloglovin'  |  Hometalk  |

Gold-Dipped Birch Egg How-To {As seen in Food Network Magazine!}

A few months ago, Food Network Magazine emailed me and asked if I'd be interested in designing a New Hampshire-themed egg for their Easter issue!  I was completely blown away and honored for the opportunity.  My New Hampshire egg design was a gold-dipped, faux birch bark egg - gold-dipped to represent our State House with it's golden dome, and the birch bark paint finish to represent our our state tree, the white birch. 
Fun Fact:  My great-grandfather was a steeplejack and did the gold leaf on the New Hampshire capitol dome back in the 1920's!  
| This post contains affiliate links |

Gold-Dipped Birch Egg How-To | As seen in Food Network Magazine!  New Hampshire-Inspired Easter Egg

Creating one of these gold-dipped birch eggs for yourself is pretty simple!  Here's the full how-to:  

Materials:  

Eggnot ready to be painted
  • faux egg (for the Food Network Magazine example and most of the photos in this how-to, I used an Eggnot, a fake ceramic egg - but you could also use a wooden egg. If you use real hardboiled eggs I would not recommend eating them after painting)
  • gold acrylic paint
  • black acrylic paint
  • white acrylic paint (if your fake egg isn't already white to begin with)
  • paper cup
  • thin paintbrush
  • tinfoil to make a stand for the egg to dry on

How-to:  

Adding the gold-dip to the egg.

1.  First, make a tinfoil ring to hold your egg while it dries between steps.  Then if your egg isn't already white, paint white and allow to dry between coats.  It may need several coats of paint.  

2.  Next shake the gold acrylic paint well and pour about half an inch of it into a small paper cup.  Dip the top of the egg carefully into the cup.  (I found it best to to do the gold-dip first, then paint the bark pattern after since sometimes the black lines were visible under the gold-dip.) 
Gold paint tends to be thick and you may have some swirling or thick drips after dipping.  You can try to smooth these out a bit with a paintbrush but it usually looks cleaner if you just leave it as-is, even if you end up with a thick spot within the dip.  After the gold dip, carefully place the egg in the tinfoil ring to dry.  

3.  Once the gold-dip is dry, use a thin paint brush to paint horizontal black lines on the egg, all the way around.  Vary the placement and thickness of the lines a bit to mimic the look of birch bark.  
You may have to carefully hold the egg for a few minutes to let it air dry a bit before carefully setting it, gold top down, into the tinfoil ring to finish drying.  

Hand-painting a birch bark design to the egg.
Gold Dipped Birch Egg drying in a tinfoil holder.

And that's it!  While making them can be tedious with the drying time between steps, it's really quite easy.  And in the event you don't feel like tackling this project yourself,  I have a limited supply of painted Wooden Gold-Dipped Birch Eggs in my Etsy Shop!  

Gold-Dipped Birch Egg How-To | As seen in Food Network Magazine!
As seen in the April, 2018 issue of Food Network Magazine!  

As seen in the April, 2018 issue of Food Network Magazine!  

KEEP UP WITH BIRCH LANDING HOME
|  Etsy  |  Facebook  |  Instagram  |  Pinterest  |  Bloglovin'  |  Hometalk  |

Protein + Fiber Packed Turkey Chili Recipe {and Instapot Giveaway!}

It's been cold and snowy here in New England these last two weeks (like 3 Nor'easters in two weeks snowy!), so what better way to warm up than with a bowl of hearty and healthy chili!  This recipe was done in our crockpot but could be made in less time in an Instapot.  Don't have an Instapot?  You're in luck - I've teamed up with several other bloggers to give one away!  {Scroll down to enter the givewaway}

Protein and Fiber Packed Turkey Chili

This chili is super easy to make and can be adjusted to your taste with whatever veggies you'd like to add.  I often make chili as an excuse to use up all the extra veggies we have in the fridge - once all the flavors meld together you can hide just about any vegetable in there (perfect for picky toddlers or husbands).  While not in this current batch, I've often added things like mushrooms, spinach, sweet potatoes, zucchini, tomatoes, carrots, squash, etc.  As far as using canned beans and tomato sauce I always buy store-brand organic varieties when I can - they tend to have less additives and salt than non-organic and are cheaper than the name brand ones!  

Ingredients

  • 1 lb of lean ground turkey (can also use lean ground beef if you prefer)
  • 2 cans of low sodium tomato sauce
  • 1 can of red kidney beans
  • 1 can of garbanzo beans
  • 1 can of lentils (adds a lot of protein and you won't even notice them mixed in with the ground meat!)
  • 2/3 cup of frozen corn (using frozen veggies is a great shortcut)
  • 1/2 cup of frozen chopped peppers
  • 2 tablespoons chili powder
  • 1 teaspoon chopped jarred garlic
  • 1 teaspoon turmeric (turmeric has great anti-inflammatory properties)
  • 1 teaspoon Italian seasoning
  • salt and pepper to taste
  • shredded cheese and/or crackers to garnish

Directions

  1. Brown ground meat in a skillet, pouring off excess fat.  

  2. Add meat and all remaining ingredients (except for garnishes) to crockpot.  

  3. Cook on low in crockpot for 8 hours or high for 4 hours, until veggies are soft and flavors have melded.  

  4. Garnish with shredded cheese and crackers, if desired.  

Looking for a way to make this yummy recipe faster?  Use an Instapot! 
I've teamed up with several other bloggers to give one away to a lucky follower.  Enter below for a chance to win - good luck!  

Instapot Giveaway!

Instapot Giveaway!

KEEP UP WITH BIRCH LANDING HOME
|  Etsy  |  Facebook  |  Instagram  |  Pinterest  |  Bloglovin'  |  Hometalk  |