Bath Time Staples with Nûby + Giveaway!

As a mom, I'm always looking for ways to make the everyday must-dos a little easier and more fun.  So I was so excited when Nûby offered to let us try out some of their bath time staples - and give away a set to a lucky follower too!  
| This post contains affiliate links as well as an honest review of Nûby products |

Nuby Bath Bundle Product Review + Giveaway

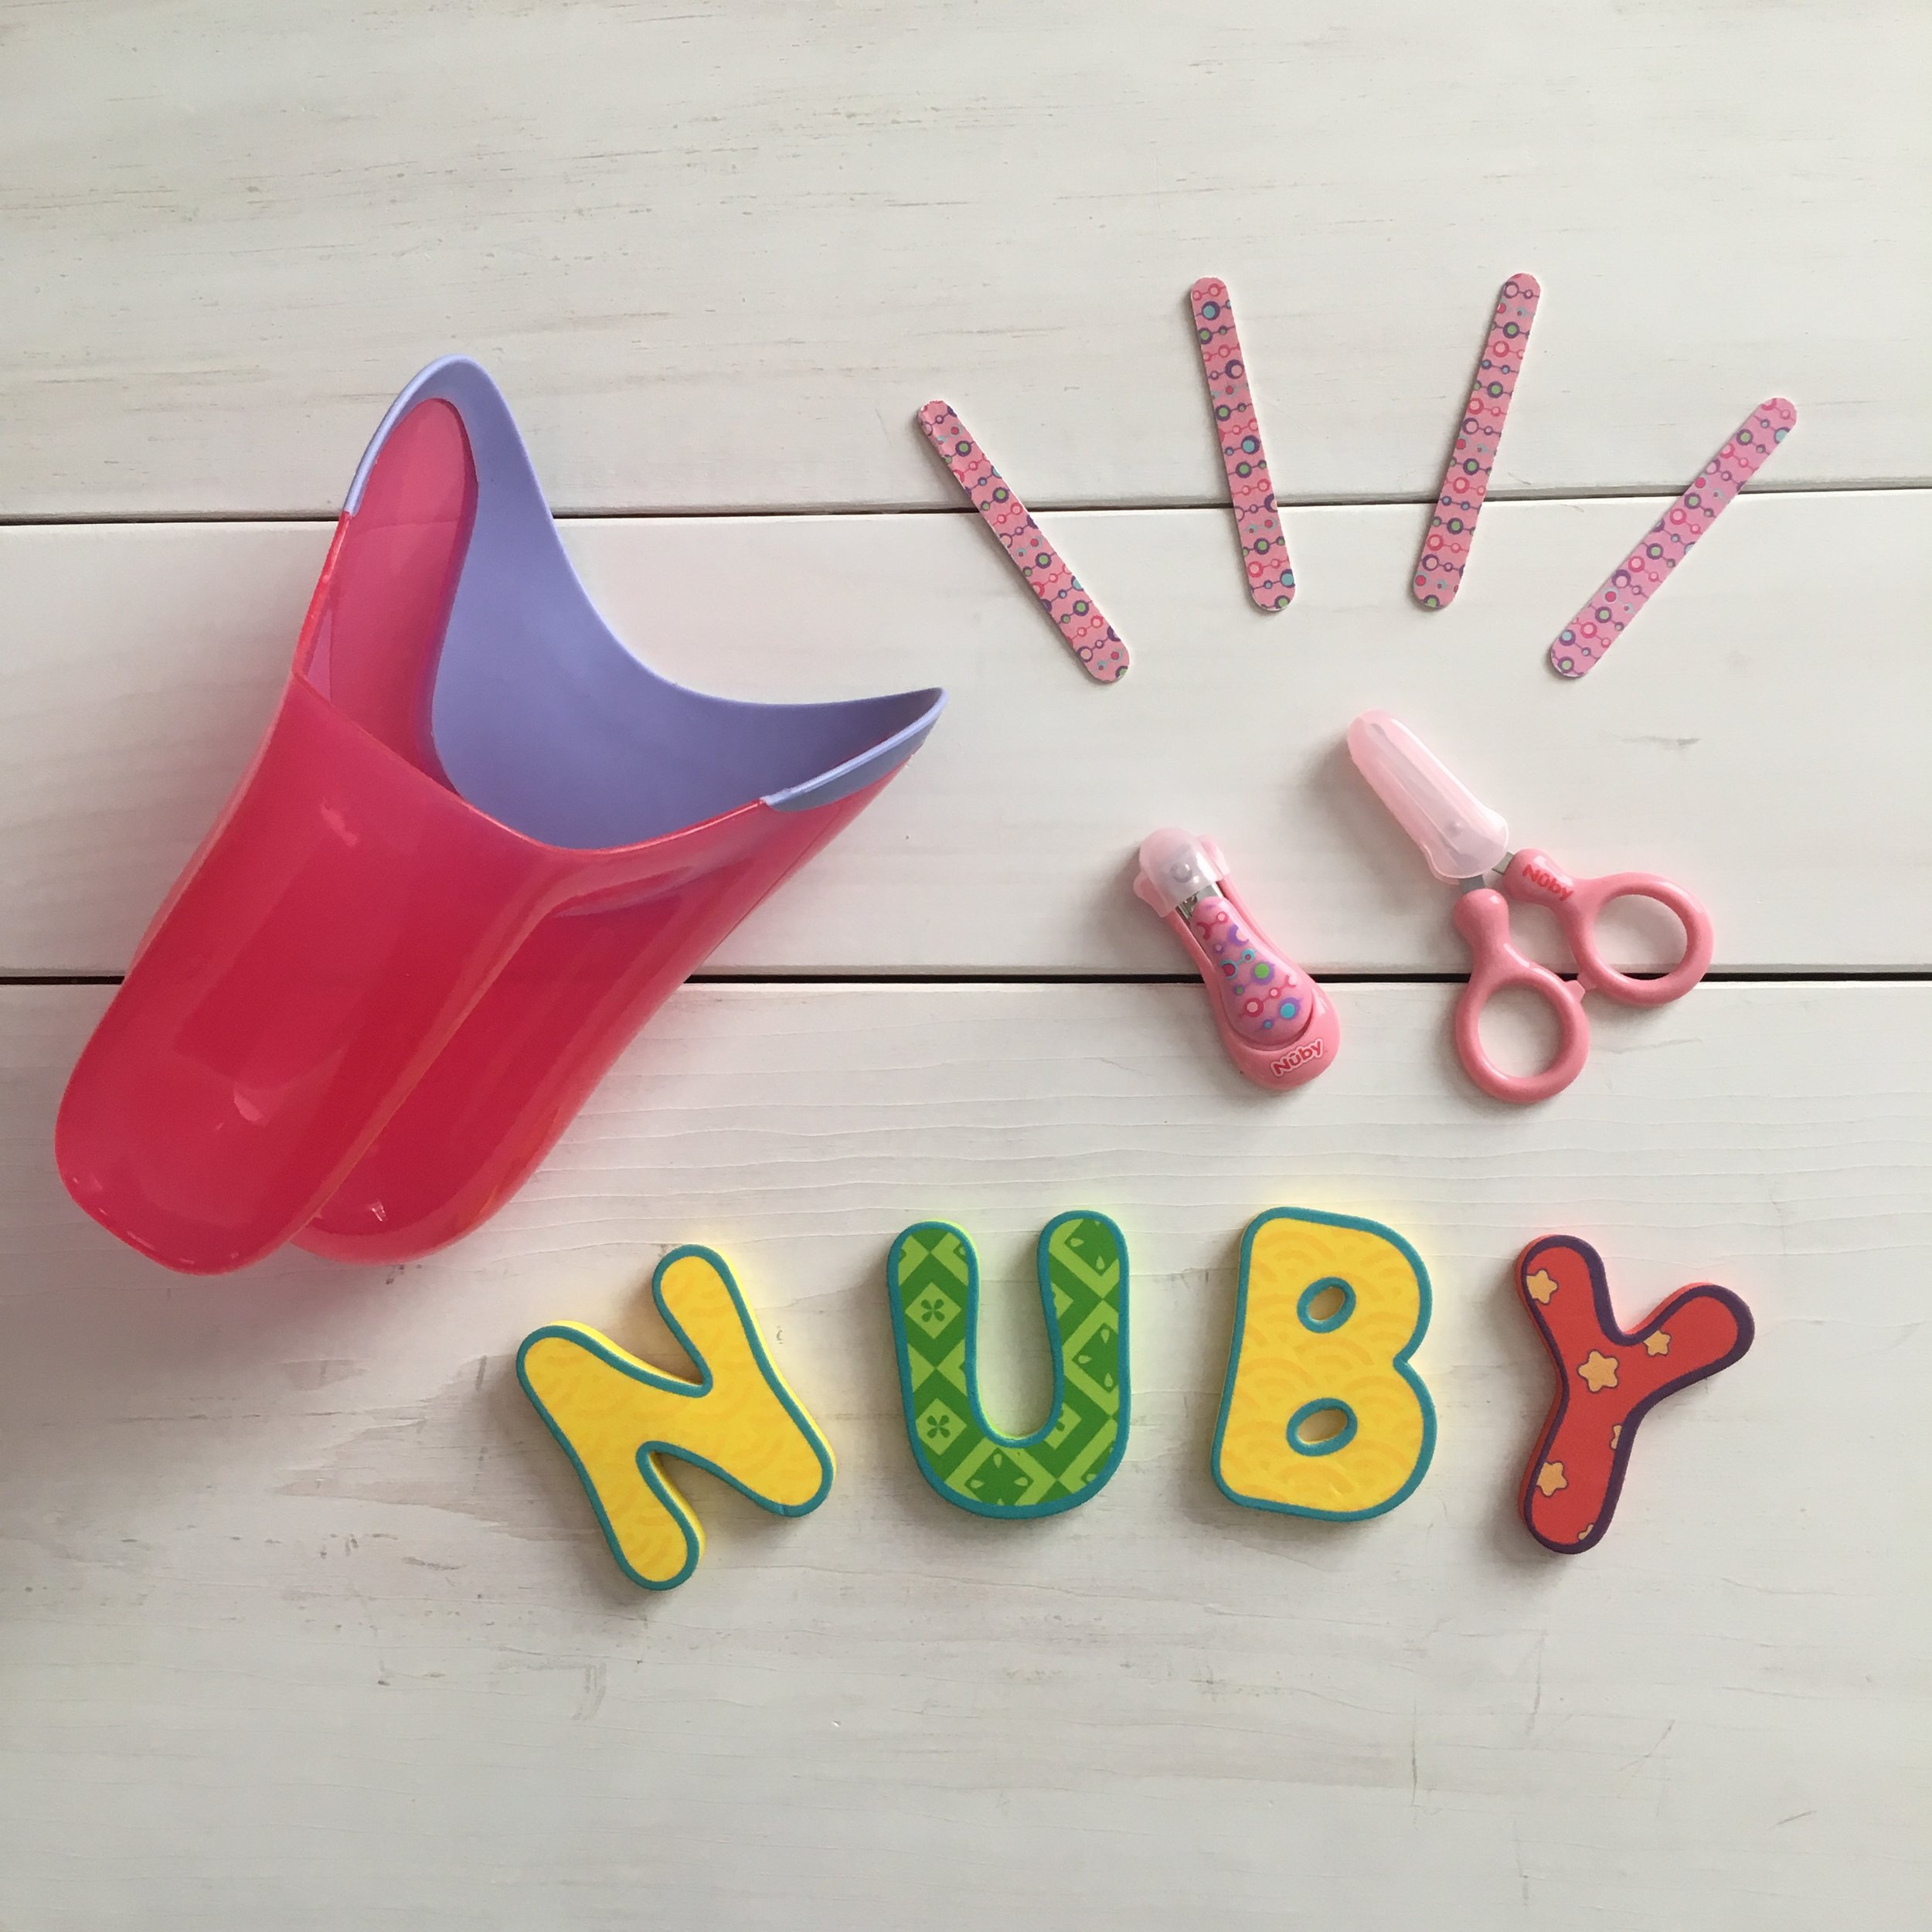
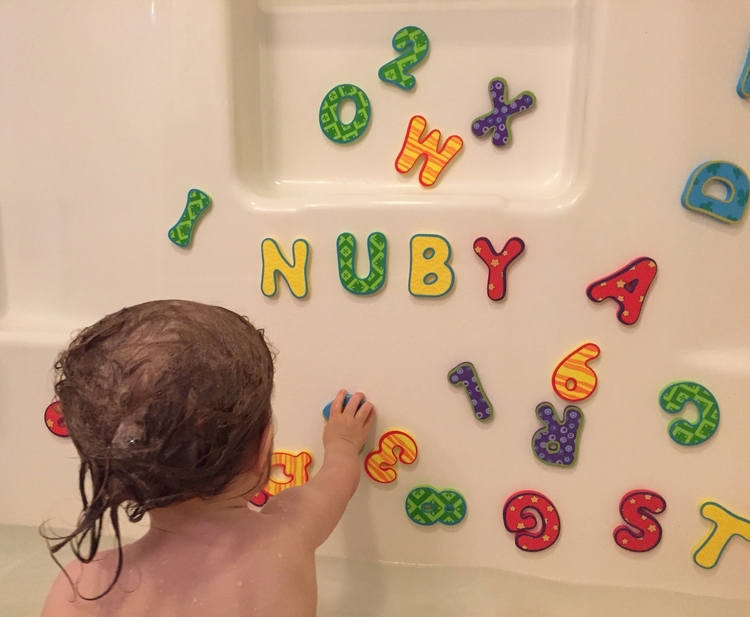
With both a toddler and a baby, I feel like we're constantly doing baths or trimming nails and any way we can make these chores easier is a huge help. Our toddler really loves Nûby's Foam Bath Letters and Numbers set - she's really into spelling and loves putting random letters together and asking "what does that spell?", even when it doesn't make a real word. She's really starting to get the hang of it though, and can spell several short words all on her own!

Nuby Tear Free Rinse Pail

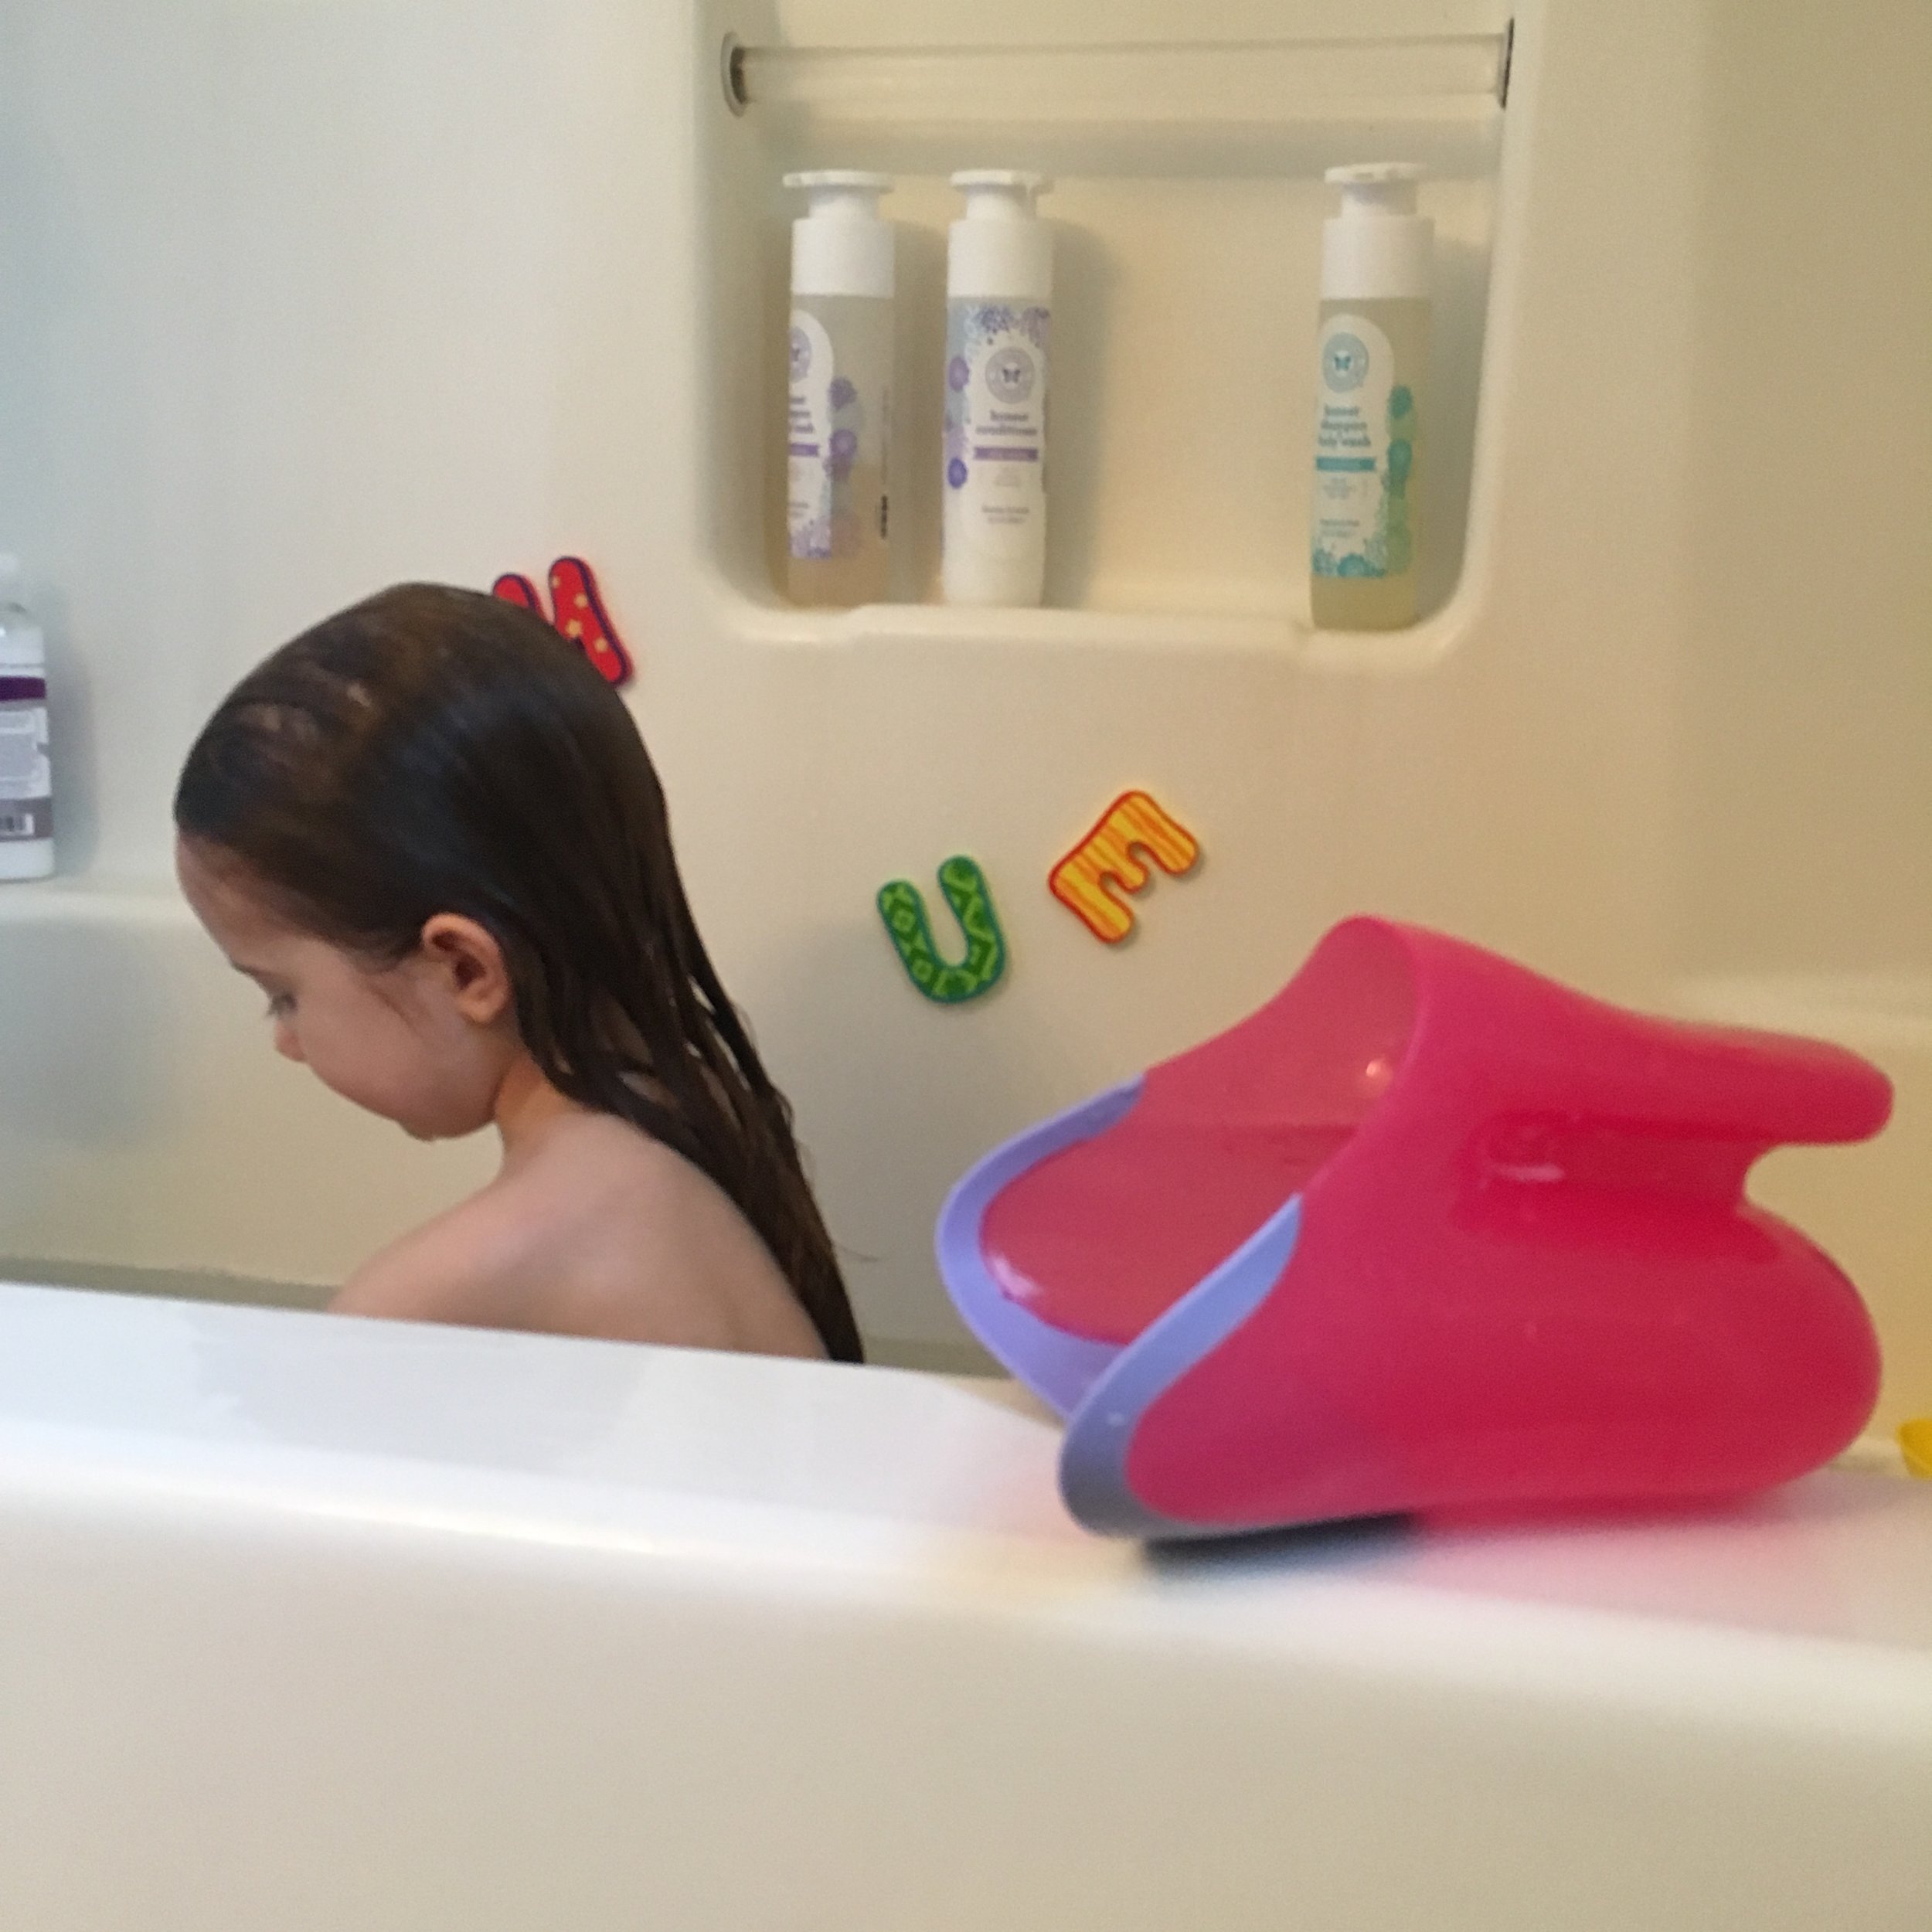
The Tear-Free Rinse Pail has also been a huge help at bath time, for both our toddler and our baby. No one likes getting soap or water in their eyes - especially little ones. So it's great that we can easily rinse the shampoo away without any tears. The rinse pail is BPA-free and features a soft rubber edge so you can comfortably fit it against your little one's forehead. It also holds a generous amount of water for quick rinsing!

Nuby Bath Letters and Tear-Free Rinse Pail
Nuby Bath Letters and Numbers Set

Finally nail cutting... ugh. Probably one of the most nerve wracking tasks a parent has to do for their baby! Thankfully Nûby's 6-Piece Nail Care Set has everything you need including scissors, nail clippers, and four emery boards sized for taking care of baby and toddler nails. Their perfect size helps make taking care of your wiggly baby's nails a little less intimidating.

Nuby Nail Care Set

*Giveaway!*  

Make sure to enter our Giveaway over on Instagram for the chance to win this great Bath Bundle from Nûby!  The winner will receive Nûby’s Tear-Free Rinse Pail, Nail Care Set, and Foam Bath Letters and Numbers Set. 
Just look for this photo in my Instagram feed and follow the directions to enter!  Good luck!  

Giveaway ends 2/28/18 at 5PM EST.  

Giveaway ends 2/28/18 at 5PM EST.  


Nuby Parent Blogger

- I received this item for review from Nûby but all opinions expressed are my own.  Please see our full Disclosure Policy for more information -   

Nûby's Foam Bath Letters & Numbers, Nail Care Set, and Tear-Free Rinse Pail can be found at many retailers including Amazon, Buy Baby Direct, and Babies 'R Us.  

KEEP UP WITH BIRCH LANDING HOME
|  Etsy  |  Facebook  |  Instagram  |  Pinterest  |  Bloglovin'  |  Hometalk  |

Easy DIY Wooden Bed Risers

In our master bedroom our bed sits on a standard metal bed frame.  Not only were the legs still visible under the bedskirt, but the bed was about an inch too low to fit underbed storage containers!  Not being able to store much under the bed was a huge inconvenience and after tripping over these containers in our walk-in closet for far too long I decided to make my own bed risers and fix the issue once and for all. 
| This post contains affiliate links |

Easy DIY Bed Risers

Now this isn't exactly a glamorous or high-end project, but I think you'll agree that the Before and Afters speak for themselves - it's a huge improvement over what was there and helps fit more under the bed for critical storage.  

The wrinkly, too-short bedskirt shows the ugly metal legs and the limited storage underneath.

The wrinkly, too-short bedskirt shows the ugly metal legs and the limited storage underneath.

Materials:  

  • ruler
  • chop saw or handsaw
  • 2x4 lumber
  • 1x5 lumber (or whatever size wood will cover the legs of your bed + the thickness of the 2x4)
  • woodglue
  • screws
  • drill/screw gun
  • sandpaper
  • stain or paint

How-To:  

Working on the DIY Bed Risers

First measure the height of the legs of the bed (in our case the back side of the leg has a support bracket which is why you'll see the back side of our risers are slightly shorter) and add this height to 1.5 (the actual thickness of a 2x4).  This is the height your side boards will be for the bed riser.  For us it came to about 5 inches along the front three sides and 4 inches in the back.  

Next cut your 2x4 to size to fit comfortably under the legs of your bed.  Then cut all the side pieces to size, creating a box around the 2x4 base.  

Before assembling, it's a good idea to lay it out under one of the legs of the bed to make sure everything fits properly (as you can see from the "cut-away" example I have below).  Here you can see how the leg sits on the 2x4 base with all the side pieces around it.  

DIY Bed Risers "Cut-Away" View

Once you have all your pieces cut to size, pre-drill, wood glue, and screw everything together.  We used black screws so they would blend in better with the dark stain we chose.  Make sure everything is attached sturdily then sand and stain/paint in the color of your choosing.  We went with a dark stain since the rest of our bedroom set is a darker wood.  

DIY Bed Riser built and ready for stain!
A finished riser.

After everything was dry, I had my husband help me by picking up one corner of the bed at a time so I could place a riser under each leg.  I also purchased a longer bedskirt that better fit the new height of the bed.  These risers aren't the most beautiful DIY project but they're pretty un-noticeable with the longer bedskirt - and the best part?  Now I can finally fit the storage totes under our bed!  

Disclaimer:  Always make sure the risers you build are appropriate for your bed and your situation.  Make sure it's safe and sturdy! Use at your own risk.

DIY Bed Risers - After!


Related Posts:

KEEP UP WITH BIRCH LANDING HOME
|  Etsy  |  Facebook  |  Instagram  |  Pinterest  |  Bloglovin'  |  Hometalk  |

Recharging Postpartum Hair with Maple Holistics

Having a baby really changes your hair, and after having two babies my hair is nothing like it used to be.  Hormones have totally changed the color and texture of my hair... in the past few years it's gone from bright blonde and wavy to ten shades darker and stick straight.  After our second baby my hair definitely needed some recharging and I was excited to try something new. 
| This post shares an honest review of products provided by Maple Holistics |

Recharging Postpartum Hair with Maple Holistics Tea Tree Shampoo and Conditioner

Recharging Postpartum Hair

Give your Hormones a Chance to Settle Down

Those first two months after baby, your hormones are raging and just about anything goes.  Don't be surprised if your hair suddenly gets super dry or super greasy, or starts shedding like crazy.  As frustrating as those first two months can be (and for so many reasons - dealing with a new baby and a healing body isn't easy!), try to roll with these hair hiccups and know that a lot of it will improve or get more predictable once your hormones settle down.  

Get a Haircut

Getting a new haircut or even just a trim can really help refresh your hair and give you a boost of confidence.  Getting rid of those split ends will give you a fresh start to learn about your new post-baby hair.  

Try a New Shampoo/Conditioner

Maple Holistics Tea Tree Shampoo

With all the new things going on with your hair, your old shampoo routine just might not cut it anymore. Now's a great time to switch it up and try something new! My hair really needed some perking up so I was super excited when Maple Holistics reached out to me and asked if I wanted to try their Tea Tree Shampoo and Conditioner.

Maple Holistics uses all-natural ingredients, and is both chemical free and cruelty free, which I love.  Using their tea tree shampoo gives you a cool, tingling sensation on your scalp that really helps you and your hair feel more refreshed and awake.  Afterwards my hair felt clean and lighter - I loved that the conditioner didn't leave it feeling heavy!  

If you want to try Maple Holitics' Tea Tree Shampoo or another one of their products, make sure to check out their Free Samples Program.

Recharging Postpartum Hair

- I received this item for review from Maple Holistics but all opinions expressed are my own.  Please read our full Disclosure Policy for more information - 

KEEP UP WITH BIRCH LANDING HOME
|  Etsy  |  Facebook  |  Instagram  |  Pinterest  |  Bloglovin'  |  Hometalk  |

Shop My Favorite Finds on Amazon!

We're huge Amazon fans in this house - living out in the boonies like we do means that a lot of home and grocery shopping is done online and you can't beat Amazon for their selection and Prime shipping!  | This page contains affiliate links |

I've created a page on Amazon to showcase some of our favorite Amazon finds - everything from home, to beauty, to baby and kid items.  Items with a "speech bubble" in the corner means I've added a note about that item, just give it a click to see what I have to say about it.  

Feel free to check our Favorite Amazon Finds often since I'll be continuing to add more items as they come up.  

KEEP UP WITH BIRCH LANDING HOME
|  Etsy  |  Facebook  |  Instagram  |  Pinterest  |  Bloglovin'  |  Hometalk  |

Goals for 2018

Every New Year, there's an inspiring urge to finally accomplish all that you've been meaning to do.  As someone who tends to get caught up in the everyday, I love this motivation to see the big picture and write down what I'd like to accomplish the coming year.  

Goals for 2018 - Birch Landing Home

First, lets look back at all the great things that 2017 brought! 

The biggest blessing of 2017 was definitely adding to our family with the birth of our second daughter at the end of the summer.  The pregnancy and new baby stage kept me pretty busy throughout the whole year, and so Birch Landing Home took a bit of a backseat for 2017.  Nevertheless, highlights for BLH this year have included being quoted in Parenting New Hampshire Magazine and adding another wholesale account to our roster.  I also got the opportunity to work with some of my favorite international brands including L.L. Bean, Nûby, and Safety 1st as well as many wonderful New England-based companies including Hills & Trails, Woodboogah, and Cobalt Sky Studio.  

Goals for 2018

I have a lot of professional and personal things I'd like to accomplish or improve for 2018 - here are some of them:  

Grow Birch Landing Home More

This past year, Birch Landing Home was put on the back burner while I focused on family.  Family always comes first, but this year I want to get back into the working groove and grow BLH more.  I have some great ideas for new products to add to the Etsy Shop and DIY projects to share on the blog.  I'd also love to do more work with both international brands and New England-based buisnesses. 
(I also have an incredibly exciting collaboration lined up for the spring that I can't wait to share with you all!)  

Get Back into Running

While I ran throughout my first pregnancy, this time around I just couldn't so I stopped running and haven't gotten back into it since.  I don't know if another Half is on the books for this year with the new baby, but I'd love to at least get back into a regular running routine and do a few fun 5Ks.  

Clean House

Going through the house and systematically purging everything in the beginning of the year is something I really look forward to.  It's so refreshing to go through everything and donate or sell whatever you haven't been using for the past year.  Now that we have two kids the amount of "stuff" has exploded and I'm looking forward to getting it under control.  

Make More Time for Family and Friends

We've been so busy with work and our own family we haven't had the chance to visit enough with family and close friends this past year.  We're way overdue to visit some great friends and you can never spend enough time with your family.  This is an important priority for us in the new year.  

Get Up Early

Getting up early before the rest of the house really helps me get a jump on my day.  This was something that had been part of my routine but has fallen by the wayside over the last few months.  There's just something so motivating about getting up before everyone else, enjoying a cup of coffee in the peace and quiet, planning out your day, and getting a jump start on your to-do list.  Days when I get up early are so much more productive and let me focus more on the kids and other important tasks the rest of the day.  

Get Outside More

I'm really looking forward to more hiking and camping trips with family and friends this year.  There have been a couple of hikes that have been on our "to-do list" forever and it's high time we finally do them!  There's nothing better than getting outside to recharge. 

Explore New England! 

One of our favorite things to do as a family is day trips and weekend trips around New England to explore all the great things this area has to offer.  Usually we do a couple trips every year and this year I'd love to do even more if we can - especially in Maine and Vermont.  I'd also like to share our knowledge and put together more New England Travel Guides for the blog.  

What are some of your goals for the New Year? 

Photo from Free Nature Stock

KEEP UP WITH BIRCH LANDING HOME
|  Etsy  |  Facebook  |  Instagram  |  Pinterest  |  Bloglovin'  |  Hometalk  |

New England Humidifier

I shared this photo on my Instagram Stories earlier and got so many comments I figured it was worth explaining!  Here in New England during winter, things get sooo dry indoors with the freezing cold temps outside and heat cranking inside - as a result your skin and throat really suffer, feeling constantly dry and scratchy.  | This post contains affiliate links |

New England Humidifier - a pot of water on the wood stove or radiator.

One solution is to get a humidifier to put some moisture back into the dry air. In fact we do have a cool mist humidifier upstairs that we run at night when it's particularly dry or we're sick, but otherwise you can't beat the price and efficiency of an old fashioned "New England Humidifier" - a.k.a. a pot of water on the wood stove or radiator.

It works by simply adding moisture into the air by letting the water evaporate.  It's most efficient when you put the pot of water on the heat source so it evaporates a bit quicker, but if you don't have a stove or radiator you can also leave the pot by a heating vent or just in the room with you.  If you do leave the pot on your stove or radiator, just make sure it doesn't go dry (you want to take it off when you leave the house too) otherwise you might end up with a scorched pot!  

Disclaimer:  Use this tip at your own risk.  

KEEP UP WITH BIRCH LANDING HOME
|  Etsy  |  Facebook  |  Instagram  |  Pinterest  |  Bloglovin'  |  Hometalk  |

Cataloging Past Family Christmas Cards

Creating our family's Christmas card each year is a tradition I greatly look forward to.  I especially love looking back at past years to see how much everyone has grown.  I used to tuck these old cards away in a drawer but I've found it much more accessible and enjoyable to put them within reach, displayed in a special photo album.  | This post contains affiliate links |

Cataloging Past Family Christmas Cards

Luckily, we've always done 5x7 inch photo cards which fit perfectly inside a festive perfectly-sized photo album I found on Amazon. If you've done different sized or odd-sized cards through the years, it might make the most sense to use a big scrapbook to chronicle them. Just make sure to order an extra card to add to the album each year and cherish the memories!

Cataloging Past Family Christmas Cards
TIP:  Create a photo album with your family's yearly Christmas Cards

KEEP UP WITH BIRCH LANDING HOME
|  Etsy  |  Facebook  |  Instagram  |  Pinterest  |  Bloglovin'  |  Hometalk  |

Safety 1st Premium Baby Care Kit

Having a newborn means there's a lot of little essentials you're going to need - and even though this is our second baby, things like new combs, thermometer, and teether are always needed.  Safety 1st was kind enough to send us their Precious Memories Premium Baby Care Set for our newest addition to the family and I wanted to share with you all the wonderful things that are included. 
| This post contains an honest review of products provided to us from Safety 1st.  This post also contains affiliate links. | 

Safety 1st Premium Baby Care Kit with Milestone Baby

First of all I just wanted to point out what a great value the Premium Baby Care Kit is! It includes all the items seen below - including a fox wash mitt, booger sucker, cradle cap brush, thermometer, toothbrush, comb, brush, teether, nail clippers, and photo cards. Whew. And it's all boxed up neatly in a sturdy wooden box that can easily be reused as handy storage in the nursery. All-in-all it's a $75 value but retails for less than half of that on Amazon! This would make the perfect affordable and easy baby shower gift for a friend or coworker (or for yourself!).

Safety 1st Premium Baby Care Kit with Milestone Baby

The kit also comes with these really sweetly illustrated "First Cards" by Milestone Baby.  These are perfect for documenting those special firsts with your baby.  I also love that there's a little spot to record the date as well so the cards can be kept and tucked away in your memory box after.  

Safety 1st Premium Baby Care Kit with Milestone Baby
FullSizeRender.jpg

We've been using these items for a few weeks now and our favorites so far have definitely been the cute fox washing mitt (which our four-year-old has claimed as hers) as well as the cradle cap brush which we use religiously with each bath for our baby.  I just love how the brush really scrubs off the the flaky skin without being too tough on your baby's sensitive scalp!  It really does a wonderful job.  

IMG_4718.JPG

- I received this item for review from Safety 1st/Milestone Baby but all opinions expressed are my own.  Please read our full Disclosure Policy for more information - 

Safety 1st's Premium Baby Care Kit can be found at various retailers including Amazon and Babies 'R Us.
Don't forget to follow @Safety_1st and @Milestonebaby on Instagram to see their latest products!

KEEP UP WITH BIRCH LANDING HOME
|  Etsy  |  Facebook  |  Instagram  |  Pinterest  |  Bloglovin'  |  Hometalk  |