I'm a wife, stay-at-home mom, crafter, and blogger living in rural New England. As seen in Martha Stewart Living, Food Network Magazine, and more! | Tutorials, DIY, crafts, parenting tips, recipes, money saving tips, product reviews, local product features, New England living, intentional living, and more! |
Thank a Veteran, today and every day. Veterans don't get nearly enough credit for the sacrifices they gave and still give for us to have the freedoms we do.
For those of you who haven't seen "Honor Flight" yet, watch it tonight. It's a documentary about a volunteer group who's mission is to honor the Greatest Generation by flying them to see their WWII Memorial in Washington, DC. It's such a beautiful, moving documentary and the inspiring stories it tells will make you shed a tear.
I've included the link to "Honor Flight" below or you can request it from your local library. It will certainly move you and remind you of how lucky we are to have such brave men and women come before us.
Just dropped off an order of our Hand-Etched Ornaments at The Straw Cellar in Wolfeboro, NH! Owner Carrie is working hard to carry more locally-made products in her shop and I'm so honored to be a part of that. Be sure to check out this beautiful store next time you're in the Lakes Region and #shoplocal.
Wendy from Life on the Shady Grove will be sharing her Christmas home tour and hosting a HUGE series of giveaways in December featuring 32 crafters, including Birch Landing Home! She's just posted a little introduction to some of the participantson her blog so you can get a preview of some of the makers and items involved.
I can't wait to see how she styles our hand-etched ornaments in her home and I'm looking forward to sending the lucky winner their own set of ornaments to use this Christmas!
Don't worry, I'll let you know when Wendy's gorgeous home tour is up on her blog and when her 12 Days of Christmas Giveaways begin! But in the meantime, don't forget to follow her on Instagram (@lifeontheshadygrove) so you don't miss another inspiring home decor post.
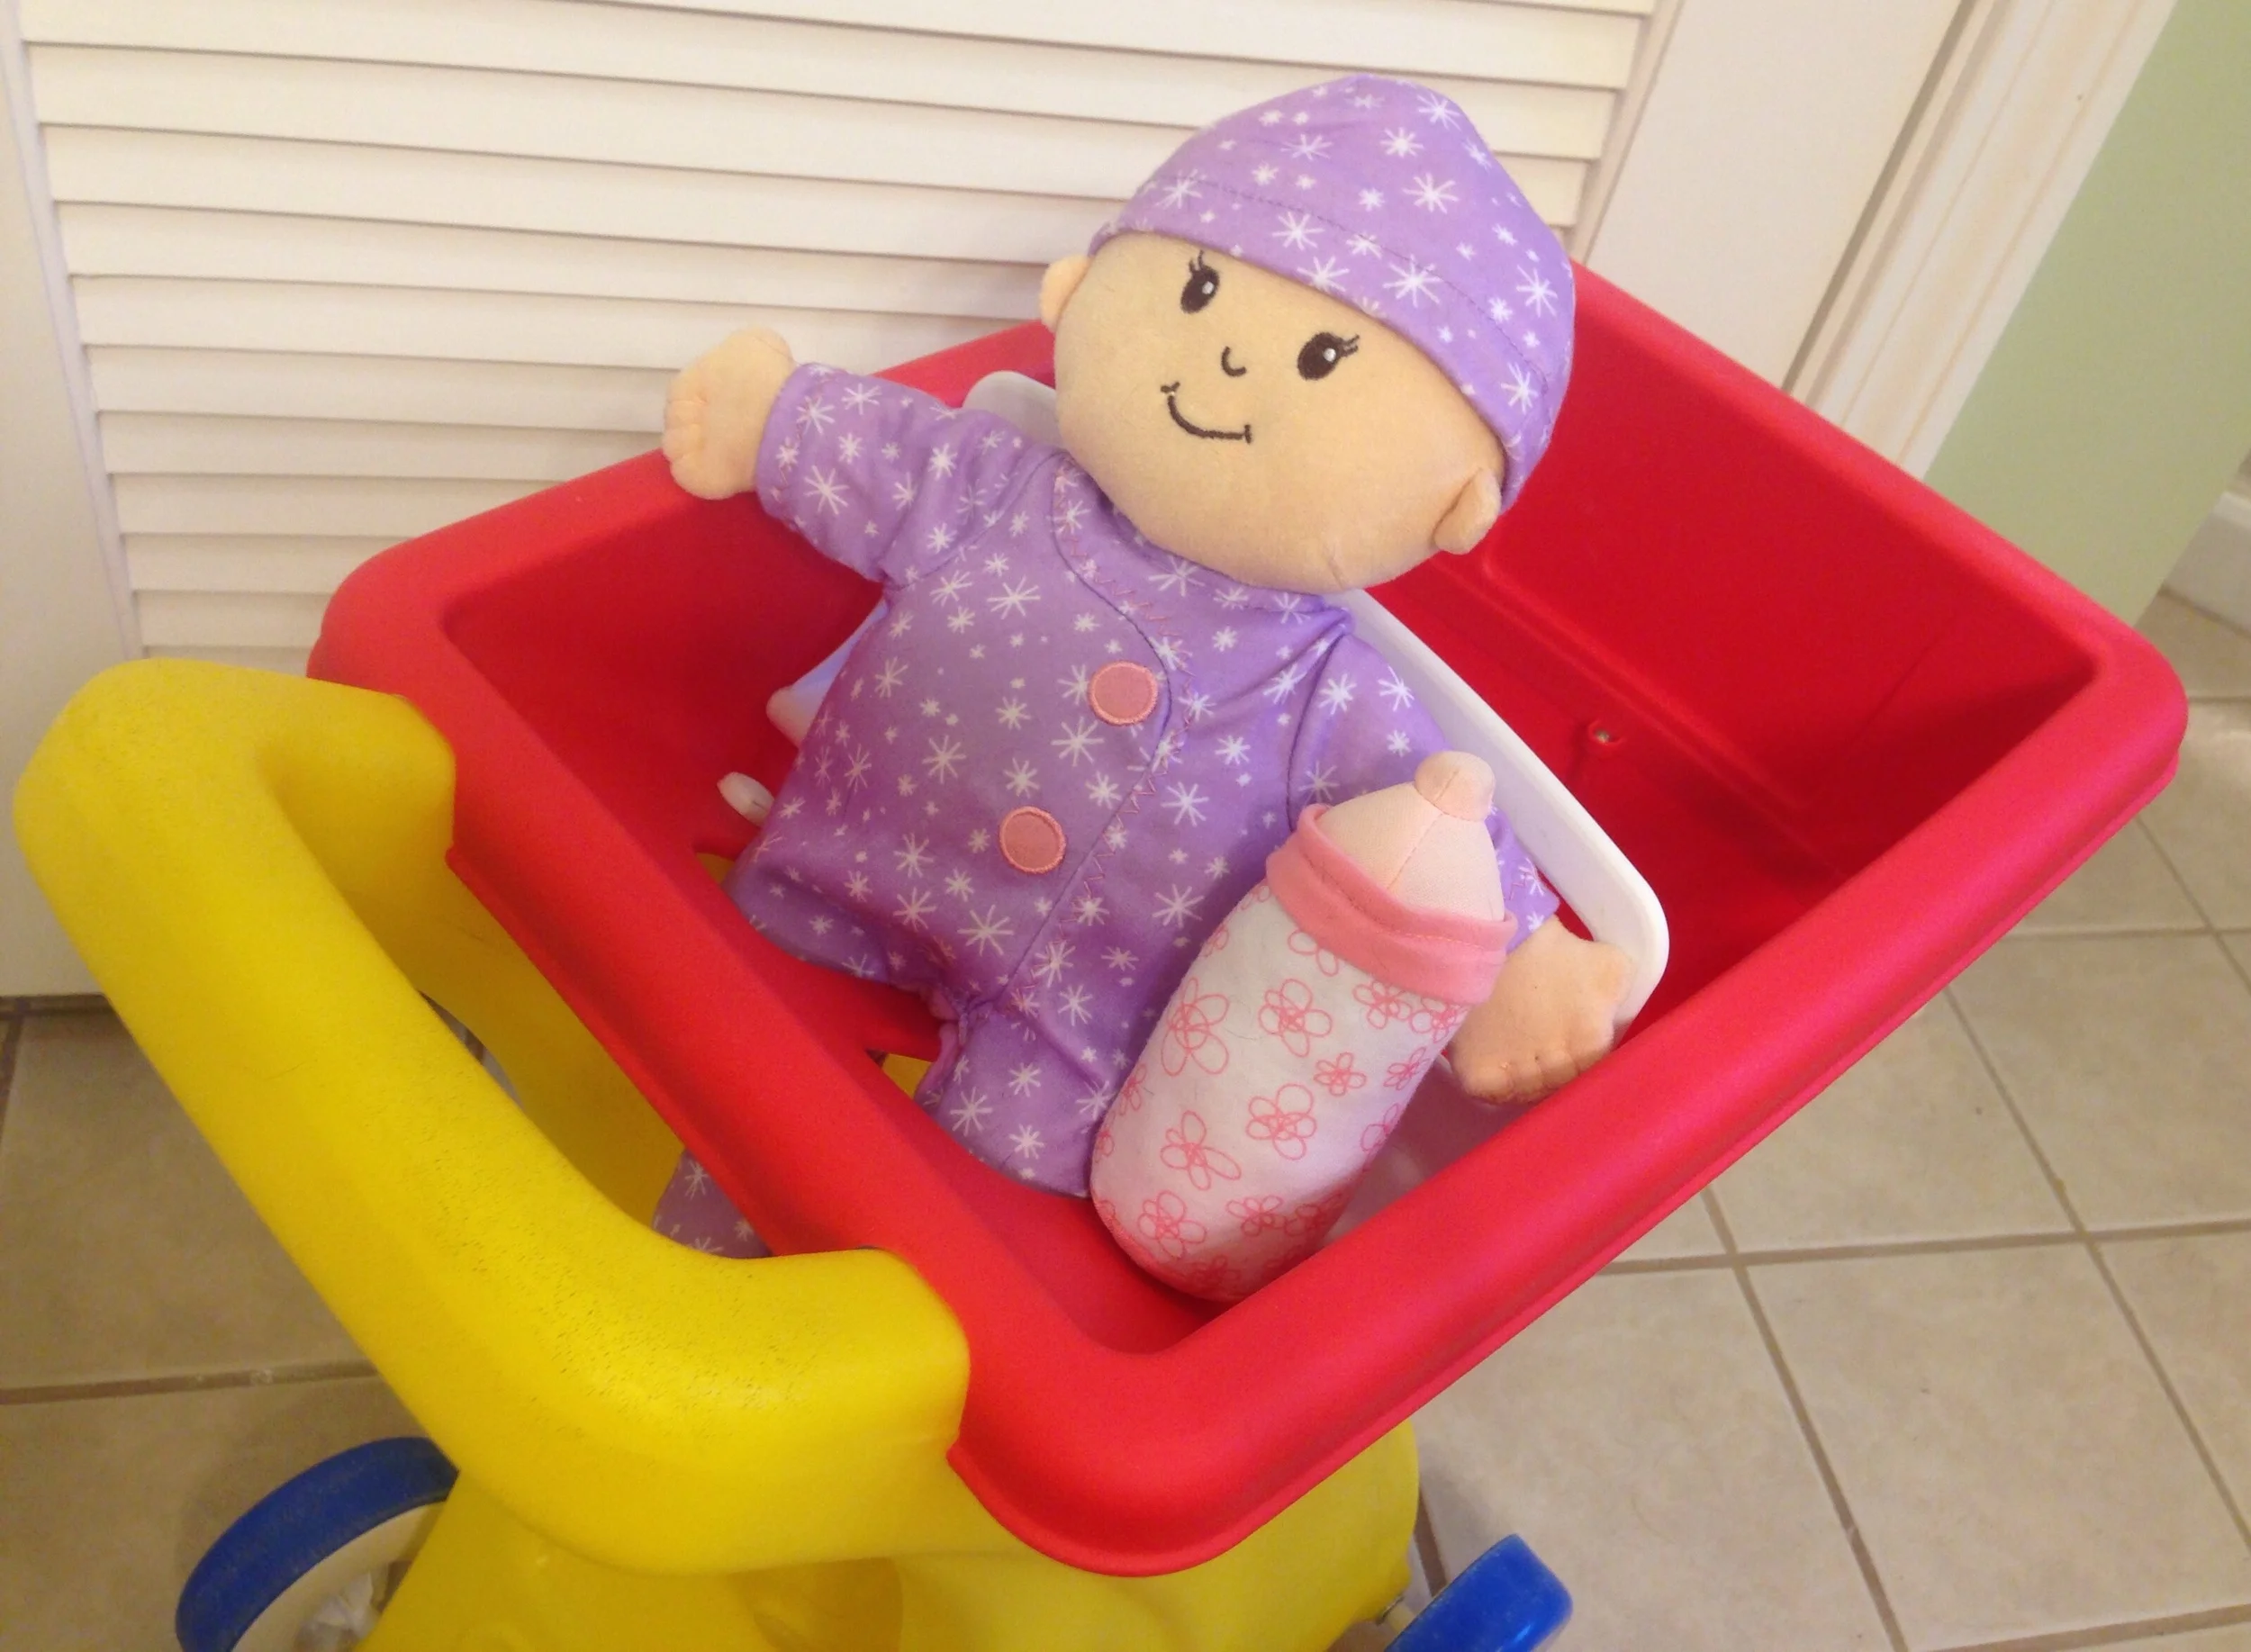
If you're not familiar with Pampers Rewards, you can check my previous post here for all the details - but essentially it's a program to earn free gifts for buying Pampers diapers! I've been saving up our points for awhile now and decided to turn them in for this great Little Tikes Shopping Cart. | This post contains affiliate links |
This rugged little shopping cart has been a huge hit with our little one. She's been pushing around her baby dolls and filling the cart up with anything and everything she can find, including blocks, shoes, and stuffed animals. It's been a great way to keep her busy and she's really enjoying "shopping" around the house.
And, of course the best part about it was it was free! I didn't even have to pay shipping, which was amazing (note: some items you do have to pay shipping for). I'm looking forward to ordering more free gifts.. just have to remember to keep entering my codes!
We purchased this great Baby Stella Doll from Amazon, but Pampers has a similar one as a Reward as well!
Want to see what else we got from Pampers Rewards? Check out my other posts:
Okay, so I struggled for a bit whether to blog about this little DIY closet makeover. I really loved the project and I think it came out great, but it was just SO impossible to photograph. This closet is at the end of a narrow hallway with no natural light, and there's no way to photograph the whole thing in a single picture. So please forgive me for the poor photos - they aren't to the standard I like to try to keep for the blog but the project and message were just too good not to share. | This post contains affiliate links |
When we moved into our home we quickly realized we needed a "drop zone" by the back door. It was really the only door we used and we needed a place to put all our stuff as we came and went. Thankfully there was an under-utilized pantry here and while we can always use more storage, for us it was more important have a mudroom/drop zone. After surfing Pinterest we decided to turn it into a mini mudroom complete with beadboard, a shelf, hooks, a built-in bench with metal baskets underneath for shoes, mail organizer - the works. And so within weeks of moving in we took the door off the pantry and it became our temporary drop zone while we planned... and there it stayed for three years (yikes).
Embarrassing, right?
You see, our dream mini mudroom would have cost big bucks and we kept sidelining it for other, more important things (furnace fixes, putting in a vegetable garden, repairing the driveway..). And then we got a puppy. And then we had a baby. And then spending big bucks on a teeny mudroom was just absurd. And the closet stayed the way it was, and just looked ugly and cluttered.
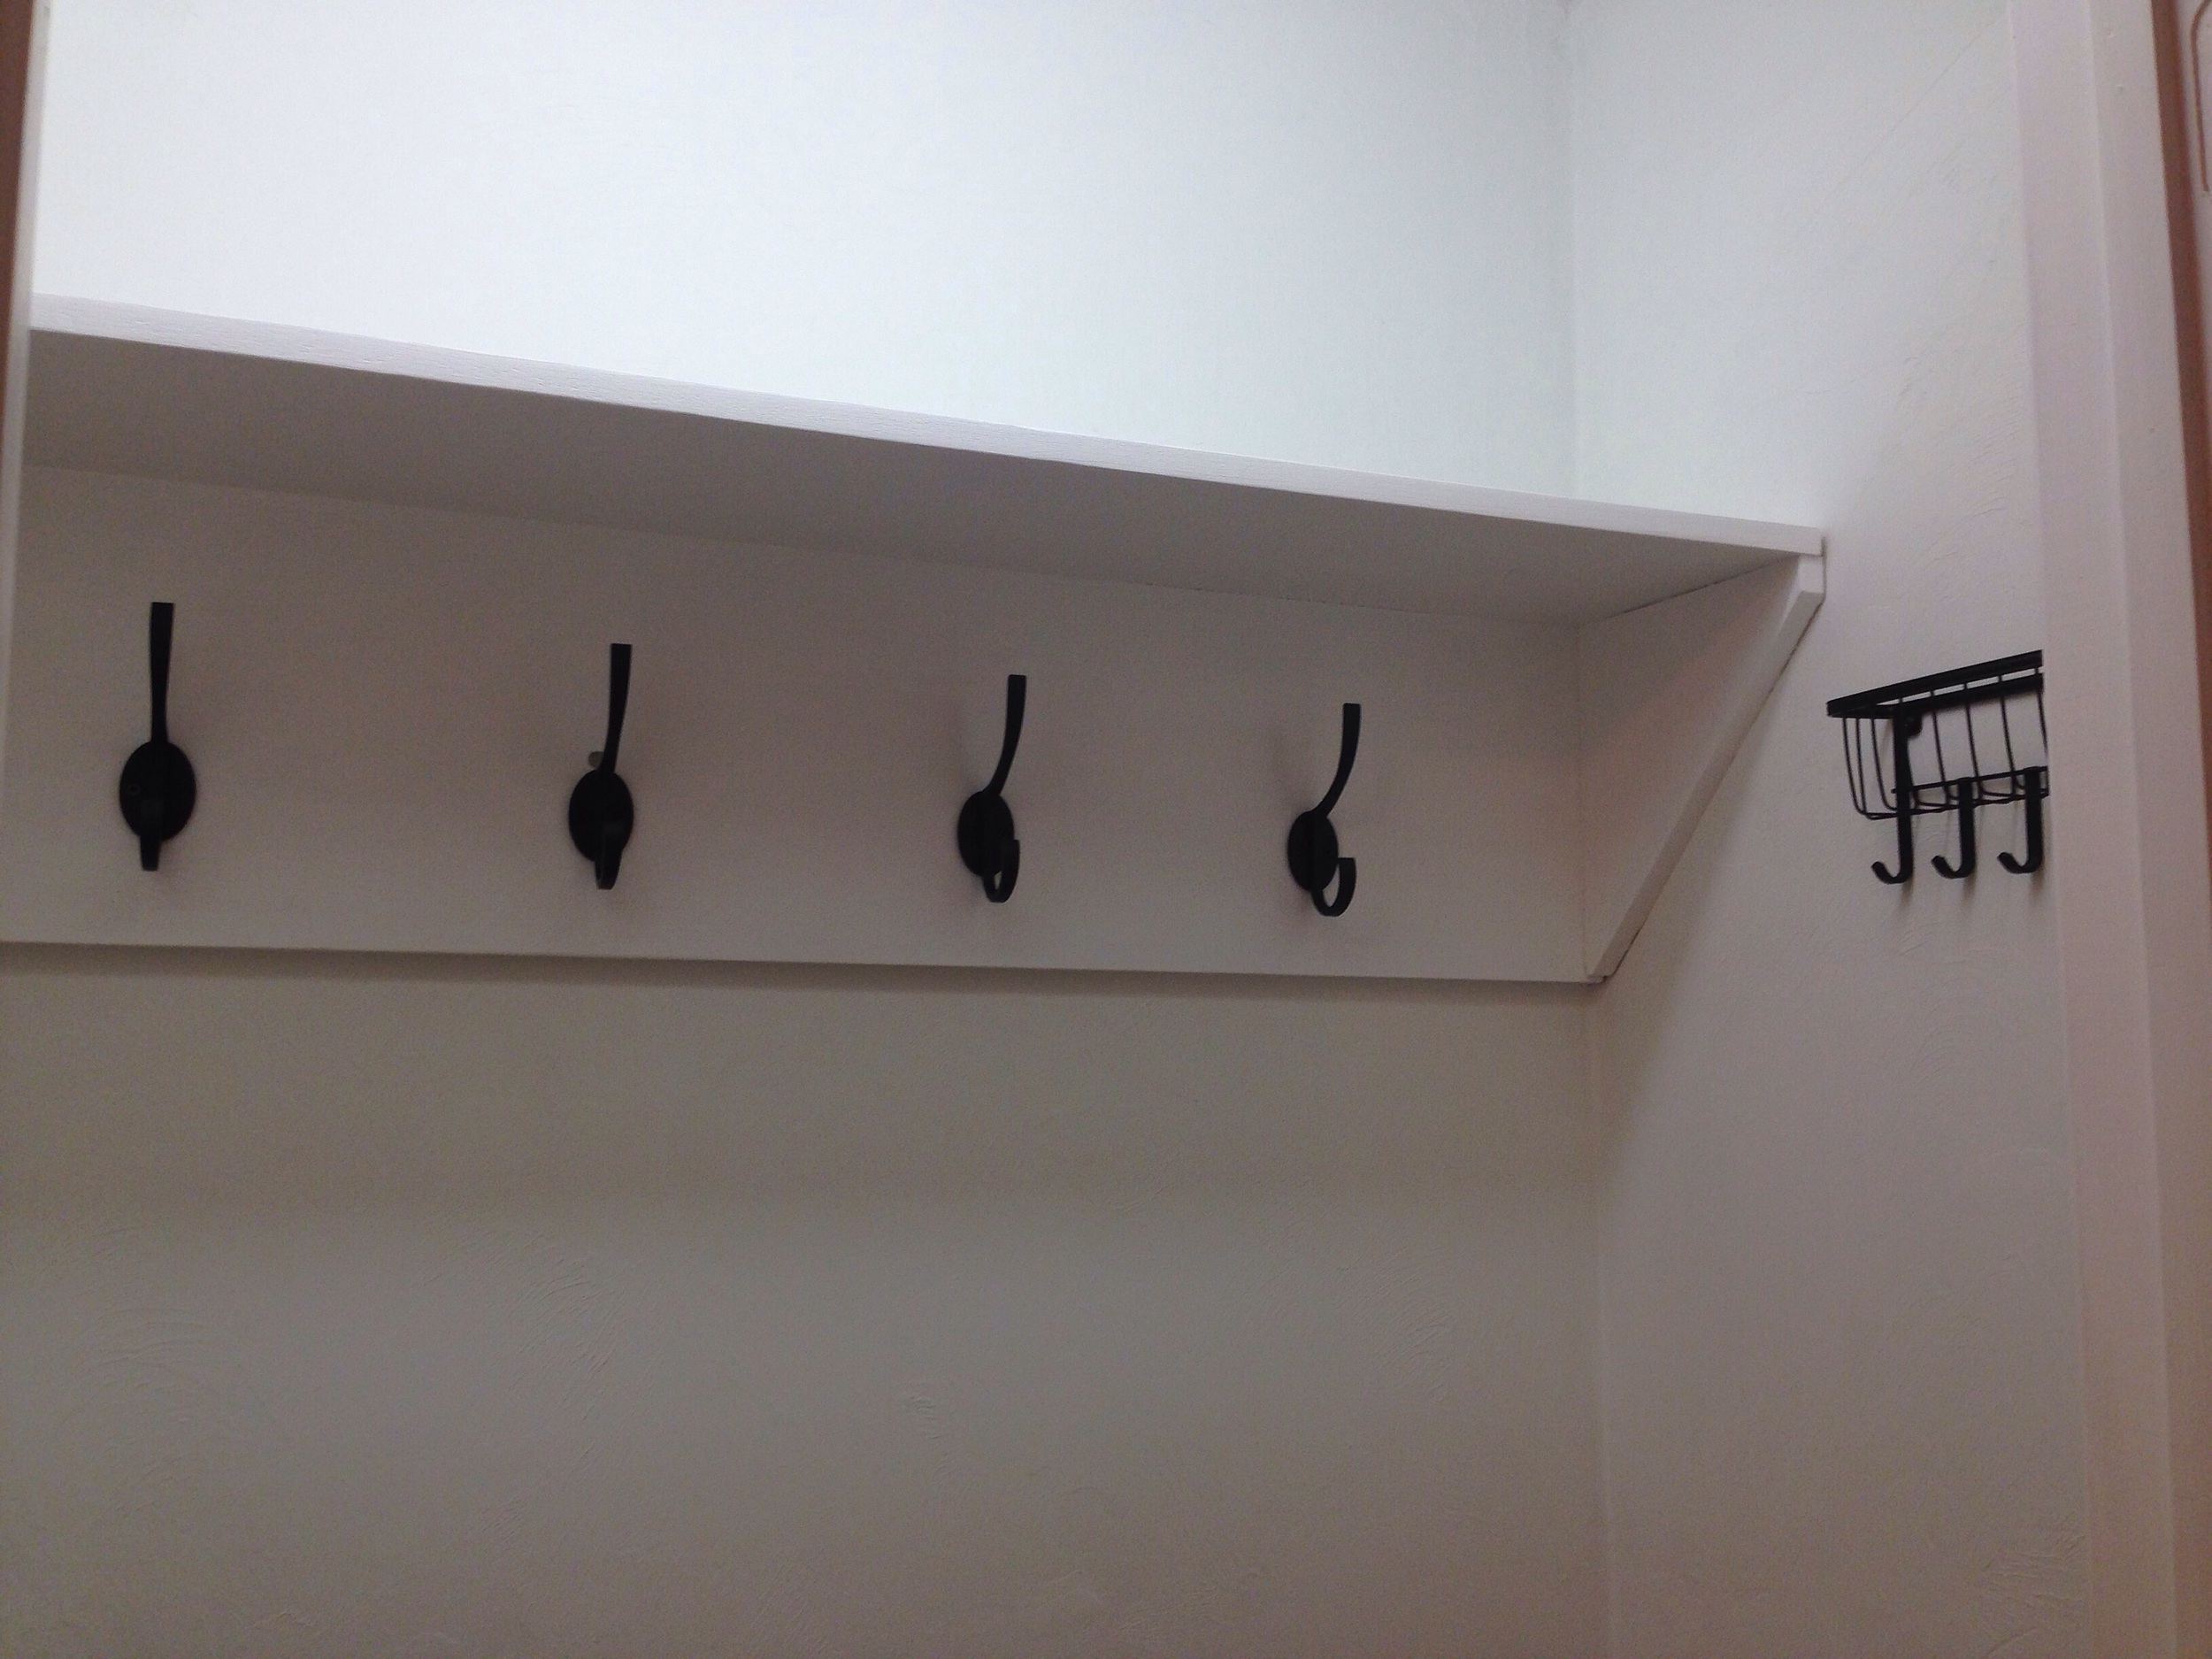
Then we realized: it's great to dream big for make-overs and remodels but what's more important is to assess what's realistic now. Realistically we couldn't afford now what we wanted to do originally but we still needed a mudroom - so the design got cut to the very basics. We needed a shelf, hooks, and mail/key organizer; the beadboard, bench, baskets, and accessories would have to wait.
The first step was removing the Closet Maid shelving system. To do this, I used a flat head screwdriver and needle nose pliers to pull out the pins and drywall anchors that held the shelves and supports in place. We saved all the shelves and supports in case we want to add more shelving to another closet down the road. We were left with a ton of holes to fill, but some drywall patch and light sanding filled the holes in fine.
Afterwards I repainted the walls of the closet with some white ceiling paint we had in the basement. My goal was to use as much materials as we had already and I didn't want to buy a new can of paint just to do this little area. The ceiling paint covered great and it only needed one coat.
Then I marked the studs with painters tape and cut a 1x12 (given to us by my father-in-law who had scrap boards in his basement) down to the length of the back of the closet, attaching it into the studs with long screws.
I cut the angled side supports down and cut another board to make the top shelf (all cuts were made with just a chopsaw). Everything was glued, screwed, and nailed into place so it was nice and sturdy. Then I patched all the screw holes and lightly sanded before painting the shelf with trim paint, which we already had on-hand.
Once the paint was dry, I added the hardware - the only items we actually had to buy for this project! The four coat hooks were from Lowes and cost about $4 each, the two accessory hooks were also from Lowes and were less than $1.50 each, and the mail/key organizer was from Amazon and cost about $10. All-in-all since we reused paint and wood we already had we spent around $30 for everything! Someday I'd still like to add a bench, baskets, and cover the textured walls with beadboard but in the meantime we have a functional, simple, efficient mudroom which is what we really needed from the beginning. I'm kicking myself for living with the messy old closet for so long when doing a simplified mudroom was so achievable this whole time!
Dropped off an order of ornaments at the wonderful Wyler's in Brunswick, Maine yesterday! This boutique has lots of unique gifts for all ages (the kids section was so fun!) - and there's even an adjoined specialty food and coffee shop.. why ever leave?
So excited to have partnered with the lovely Seagate Studio for a great giveaway! Winner will receive one of their beautiful vintage lantern pillows and a set of our hand-etched birch ornaments. See @seagate.studio's original post on Instagram for details and to enter! Good luck :)
This is one of my favorite hearty side dishes for anytime of year, though it probably is best suited for Fall. Very quick and easy to put together too! | This post contains affiliate links |
I call it my Harvest Side Dish because it's basis is Trader Joe's Harvest Grains Blend. I'm a huge fan of this mix, even on it's own. It makes a great side to dinner any night of the week and adding some of my favorite fall foods in there just makes it even more harvest-y (that's a word, right?).
Harvest Side Dish
Prep time 10 mins | Cook time 25 mins | Serves up to 8
Ingredients
1/2 a package of Trader Joe's Harvest Grains Blend (if not available you can substitute a mix of Israeli couscous, orzo, baby garbanzo beans, and red quinoa, totaling 1 1/4 cups)
1 small onion
1 apple
1 package of apple chicken sausage
1/2 tsp sage
salt and pepper to taste
Directions
Cook Harvest Grains Blend (or your substitution) according to package directions.
While that's cooking, cut up sausage and onion and saute in pan until cooked through, seasoning with sage, salt, and pepper. Add in chopped apples towards the end (I like them soft but not mushy).
Once all your cooked ingredients are finished, mix together in a large bowl and serve hot.