I'm a wife, stay-at-home mom, crafter, and blogger living in rural New England. As seen in Martha Stewart Living, Food Network Magazine, and more! | Tutorials, DIY, crafts, parenting tips, recipes, money saving tips, product reviews, local product features, New England living, intentional living, and more! |
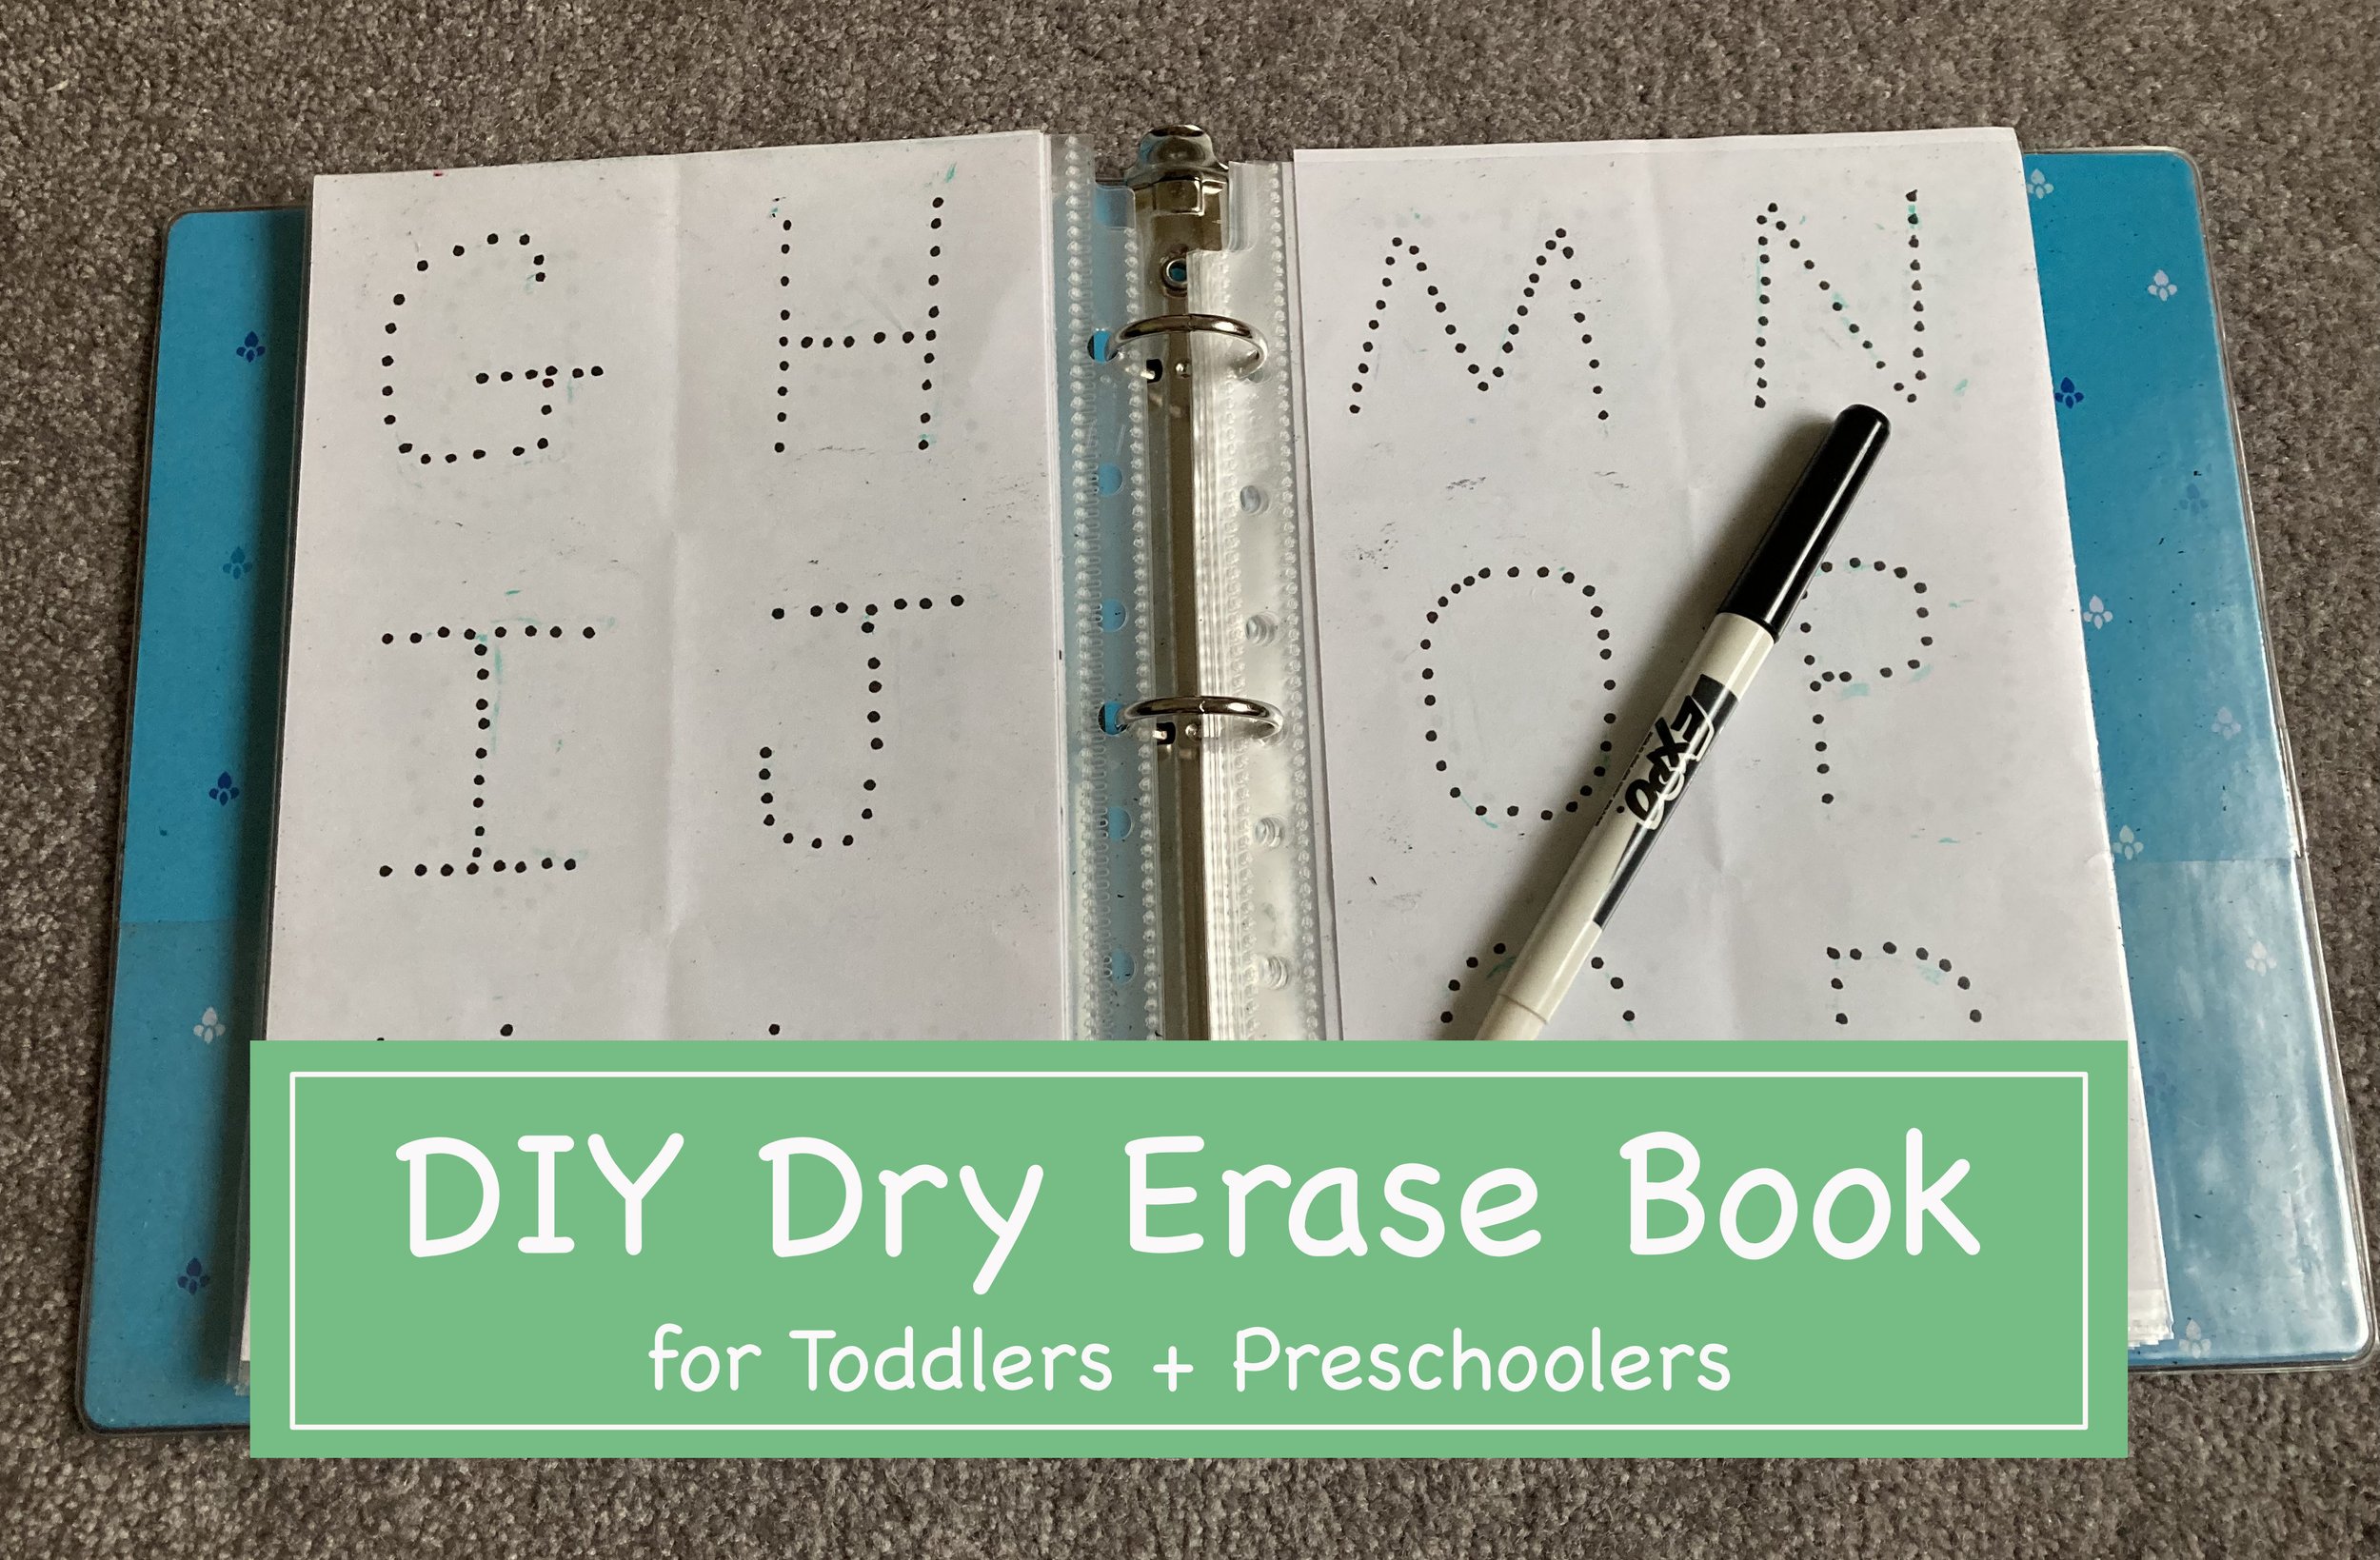
I was just refreshing the little books and toys we keep in our car, when I realized I had never shared about this Dry Erase Activity Book I made for our first kid years ago (and now our youngest uses it). It was incredibly easy to make and tailor to each child with what stage they were at/needed to work on. Here’s the super easy how-to, hopefully it will inspire you to make one yourself! | This post contains affiliate links |
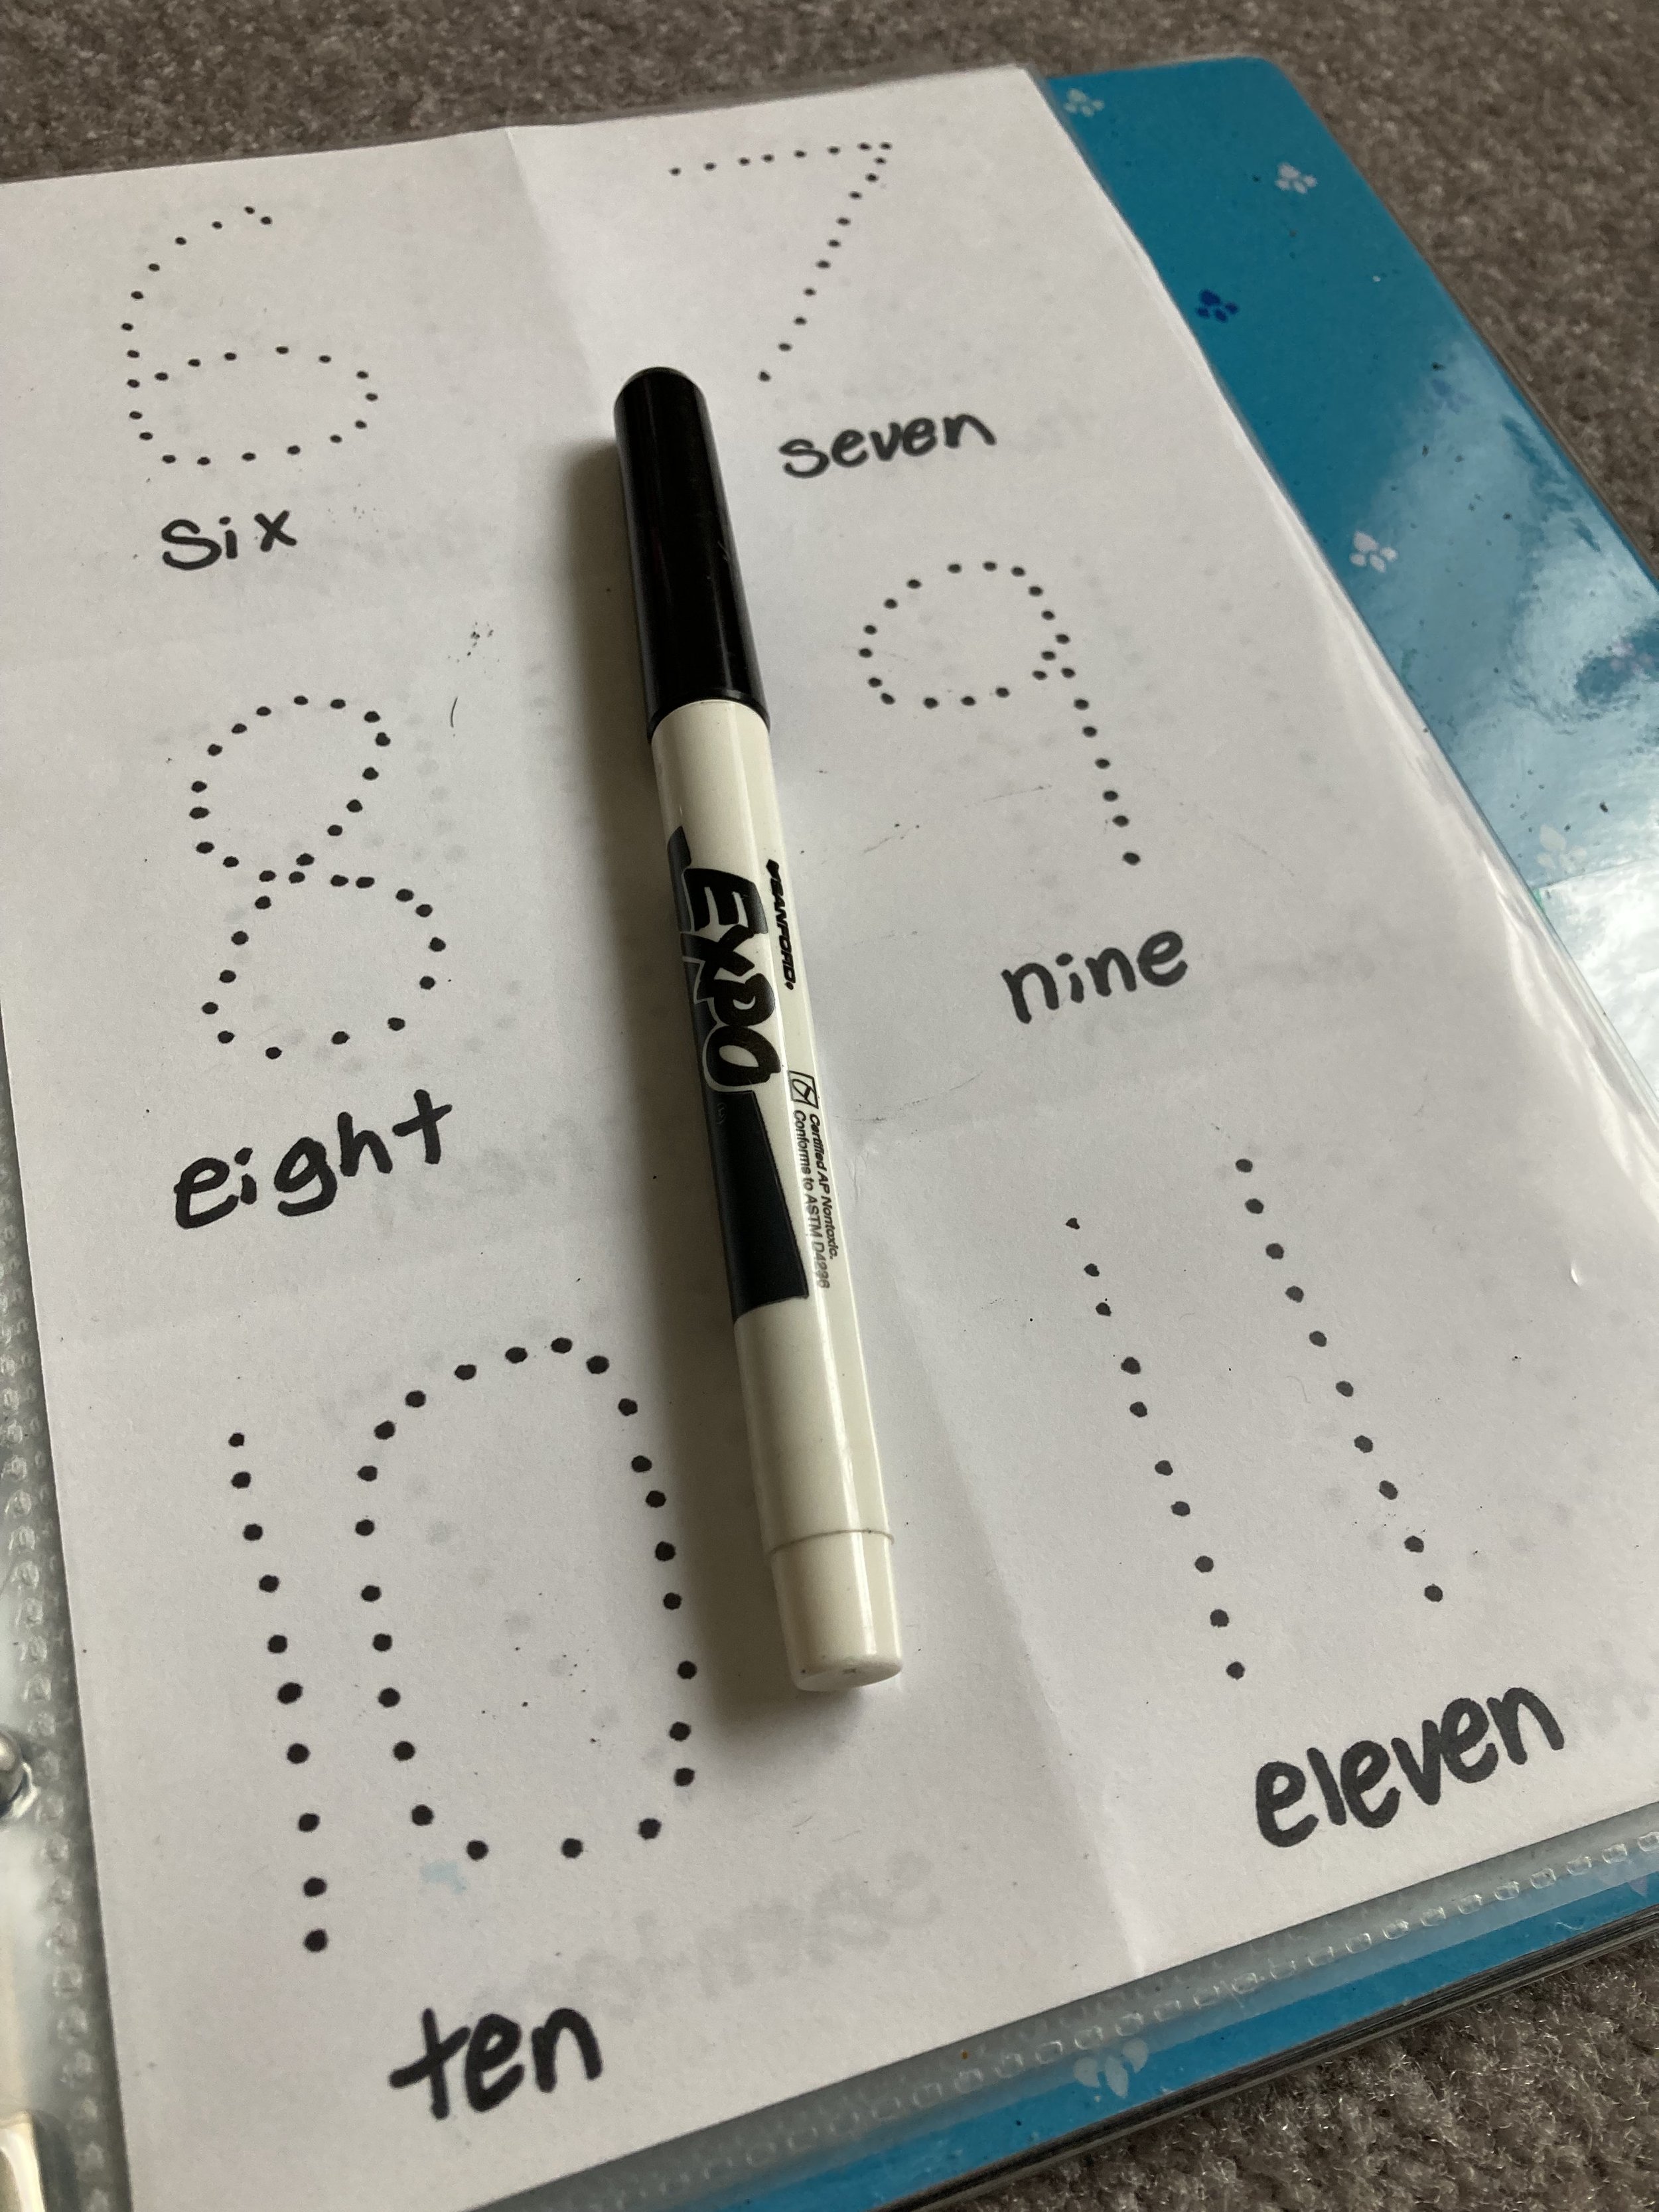
Really the how-to could not be easier! All you have to do is cut the computer paper in half to make it the correct size to fit in the sheet protectors, and then create your worksheets however you would like. I used dots for the kids to trace as well as made some free-draw pages and pages for them to practice writing out their whole names. In the pocket we keep a dry erase marker and some folded up paper towels to wipe the pages when they’re done.
We love this as a car toy and activity to do while the oldest is doing soccer practice, etc. And as your child grows you can update the pages with anything - math problems, maps to label, spelling practice, etc. Have fun tailoring it your kids and their age groups - we love that this can grow with our kids.
Page Ideas (for both young kids and older kids):
tracing shapes
tracing letters (uppercase and lowercase)
tracing numbers
writing name (all uppercase as well as with lowercase)
free draw pages
matching
math problems
spelling practice
labeling maps
labeling planets
draw features (eyes, hair, etc) on a blank face
draw details on a landscape photo
come up with your own - the possibilities are endless!
This Car Seat Organizer where our DIY Dry Erase Activity Book lives (along with other various car toys/books).
We’re personally huge fans of consigning and shopping secondhand - in fact everything I’m wearing today is secondhand and name brand (blouse and jeans are Ann Taylor and the leather mocs are M.Gemi, which is a fancy Italian luxury brand I could never afford new). Right now I’m putting together a bag of winter consignments to bring to M&C Clothing and Gifts in Amherst, NH, one of our favorite consignment shops.
We love consigning because the money we earn from reselling our items can be spent at the consignment shops we use for new-to-us clothing and other items - it’s like trading up what we don’t want anymore for what we do. Reduce-Reuse-Recycle.
If you’ve been thinking of giving consignment shopping/selling a try, check out my past blog post where I share some tips on the process:
We’re getting ready to send our oldest back to school in person for the first time in about 18 months and I don’t know who’s more nervous - me or her. Nevertheless, we’re trying hard to be positive and prepare her as best we can for the return to school. I thought I would share some of the things we’re packing in the event it helps other parents think of things to pack too. | This post contains affiliate links |
Disclaimer: I am not giving medical advice… please consult the CDC, your doctor, etc for what supplies your child should need for themselves and their school situation.
Some Ideas for Back to School Supplies 2021
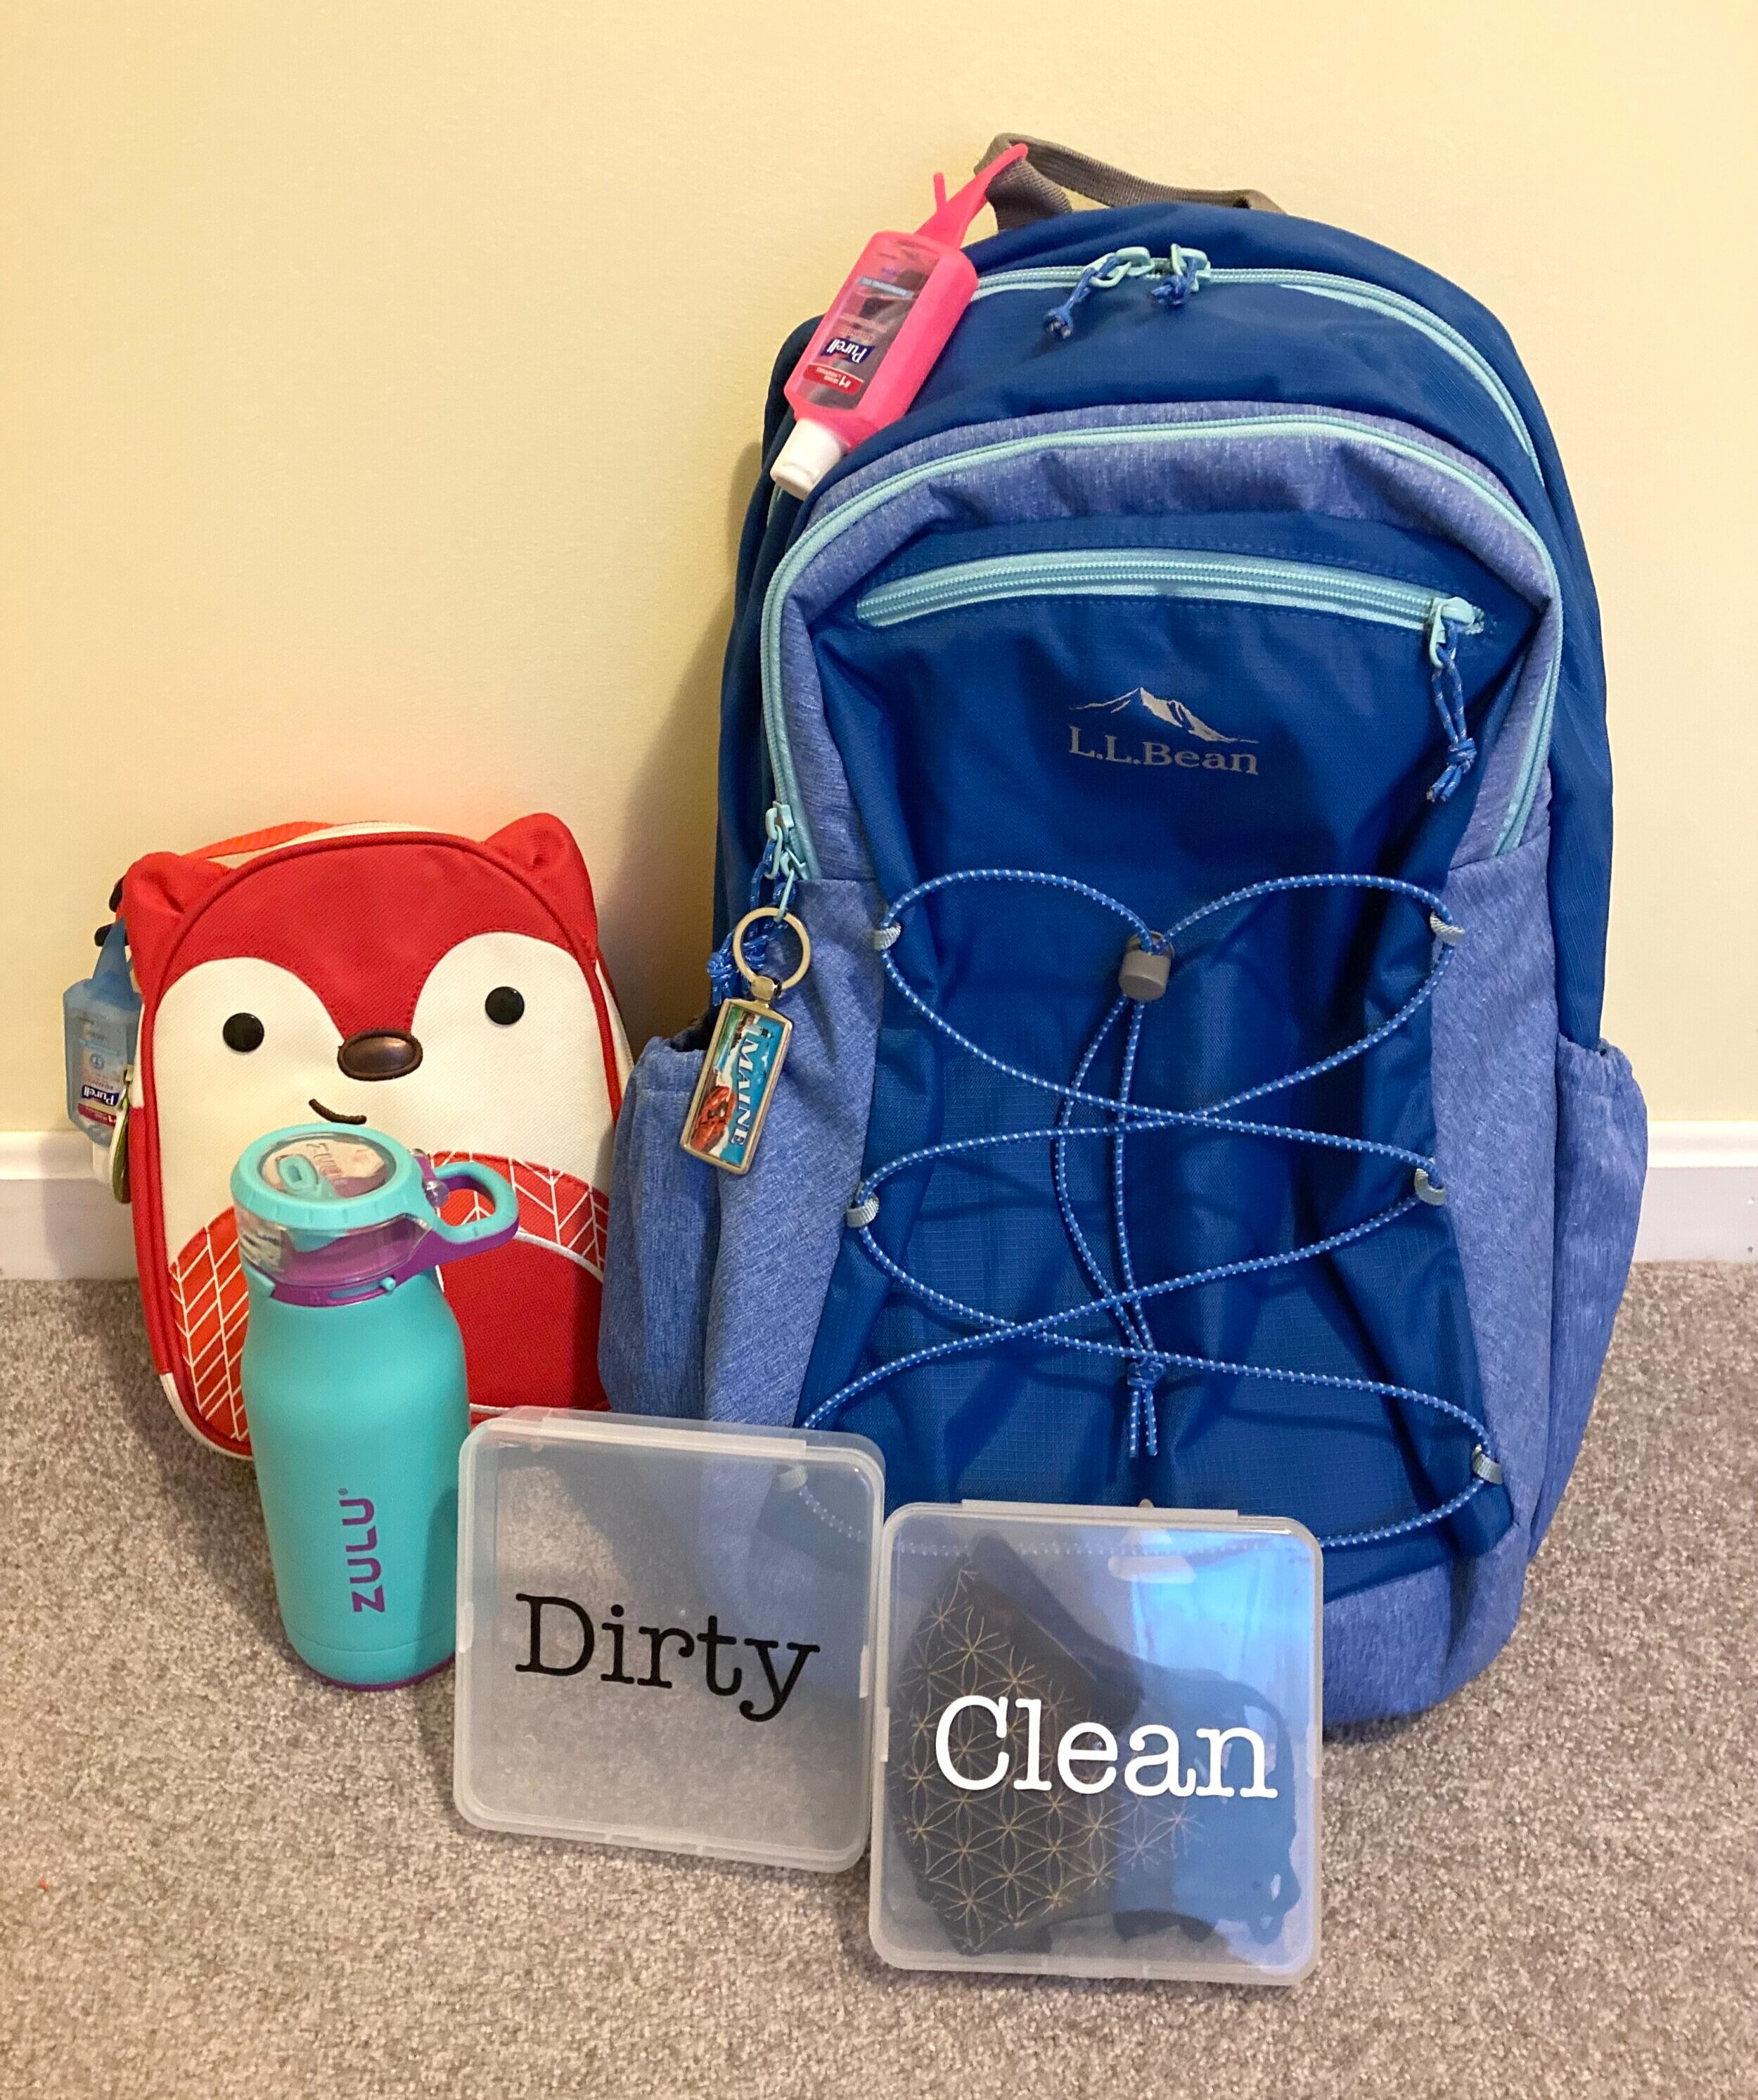
Sturdy Backpack - We're huge fans of L.L. Bean backpacks. They're built to last so we buy a size bigger than our kids need in order to last them many years to come. Since our school does a lot with computers we made sure to pick a backpack that also has a built-in laptop sleeve. (Side note: We always add some added visibility to our kids' gear with Gear Aid Reflective Patches.)
Hand Sanitizer - We got some small "key chain" hand sanitizer dispensers to attach to both her backpack and her lunch box so cleaning her hands whenever she needs to will be easy, especially important before adjusting or taking off masks and before eating/drinking.
Covered Water Bottle - This was a small upgrade we thought might be useful this year. In the past our daughter always used reusable water bottles with an exposed spout, however we thought it might be a better idea to have one that keeps the spout covered when not in use to help keep it cleaner.
Good Masks - We did our best to try to find better masks for this year that are supposed to have better filtration. We have some child-sized "M95" ones as well as some cloth masks that have special filters that go inside of them.
Mask Cases/System - I have no idea if this system will be practical, but we're going to give it a try! I ordered these clear mask cases from Amazon and cut labels for them on my Cricut. We'll be packing one with extra clean masks, and the other will be empty for dirty masks to come home in. Since we invested in some better quality masks I wanted to make sure they stay in cases when not in use to keep them in good shape.
Breakaway Mask Lanyard - These can be handy during times when masks come down (lunch/snack, mask breaks outside, etc).
Label Everything - Pandemic or not, it's important to label all the things when kids go to school. We love this label maker for making quick and easy labels for water bottles, cases, sports gear, etc.
I hope that gave you some ideas of things you may want to pack for your children too, I hope you all have a safe, happy, and healthy school year!
This September my husband and I celebrate 10 years of marriage. Originally we were hoping to plan a big getaway… maybe out west somewhere to one of the National Parks, or overseas - but when we were planning this past spring Covid was still a big concern so we decided to plan a short getaway closer to home. In the end it all worked out, because as another surge is coming upon us we feel like we just snuck in our little trip in time before Lockdown 2.0 (though hopefully it doesn’t come to that again). Overall we had an amazing three days on Georgetown Island, Maine and I wanted to share about where we stayed, what we did, and where we ate.
Seguin Tree Dwellings
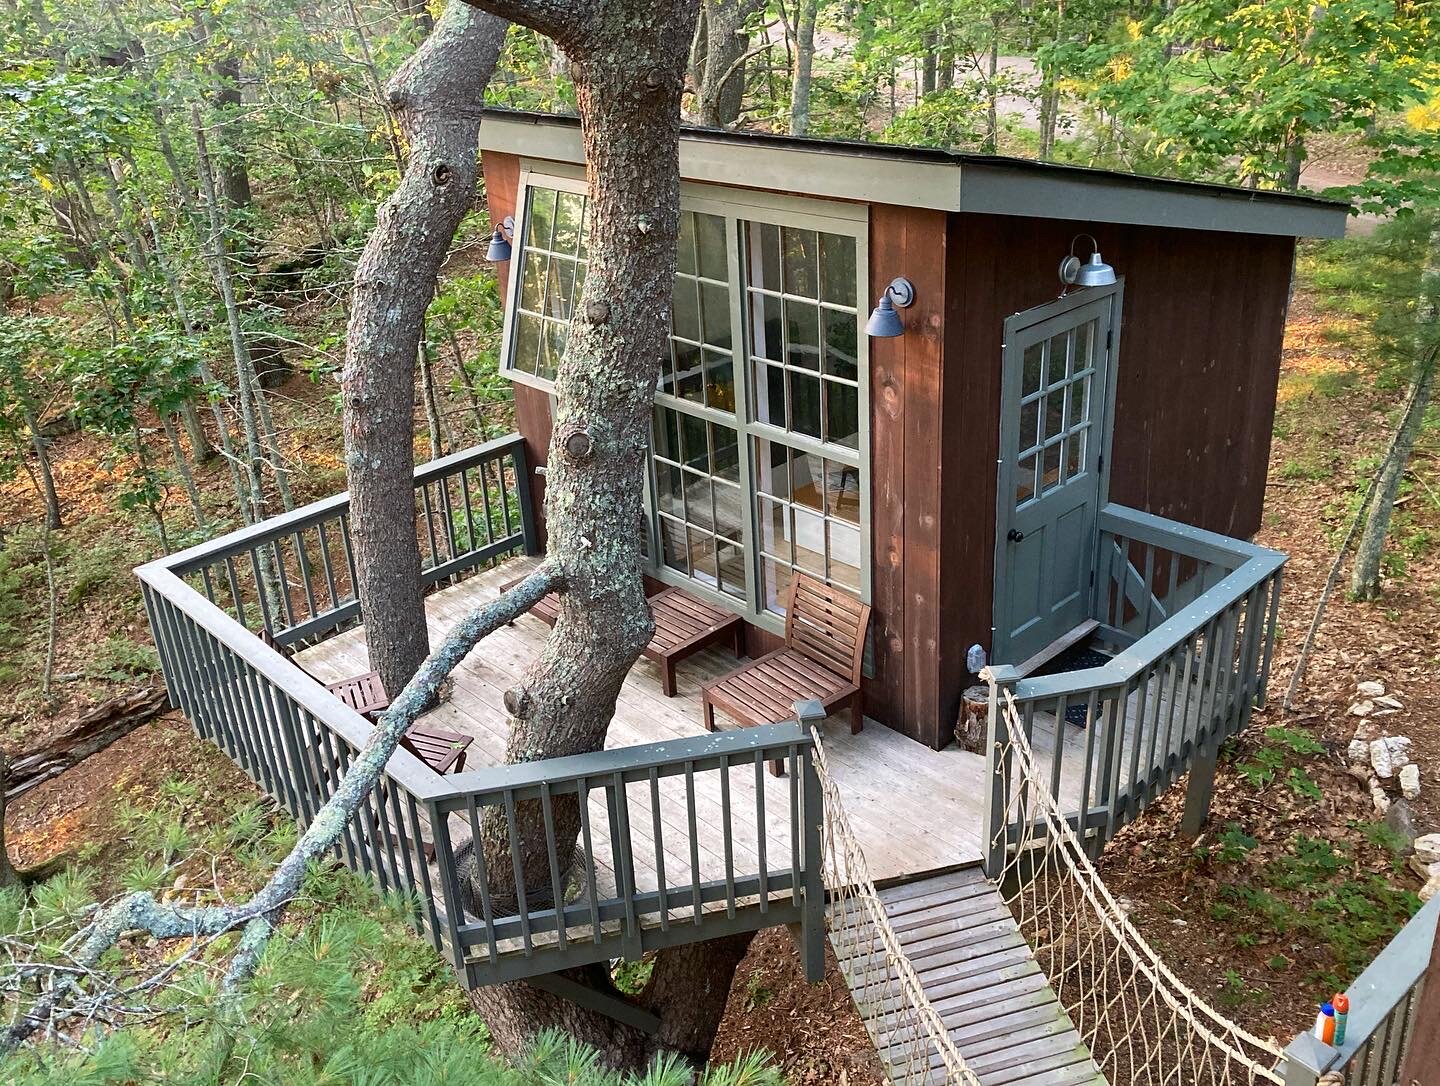
When we were searching for a New England-based getaway we lucked out that Seguin Tree Dwellings had a cancellation for August (they are usually quite booked), so we jumped at the opportunity to stay here. We’ve seen photos of this magical-looking place for years and always wanted to check it out. We stayed at the Souhegan Treehouse which is arguably the most Instagrammed of the three treehouses at Seguin.
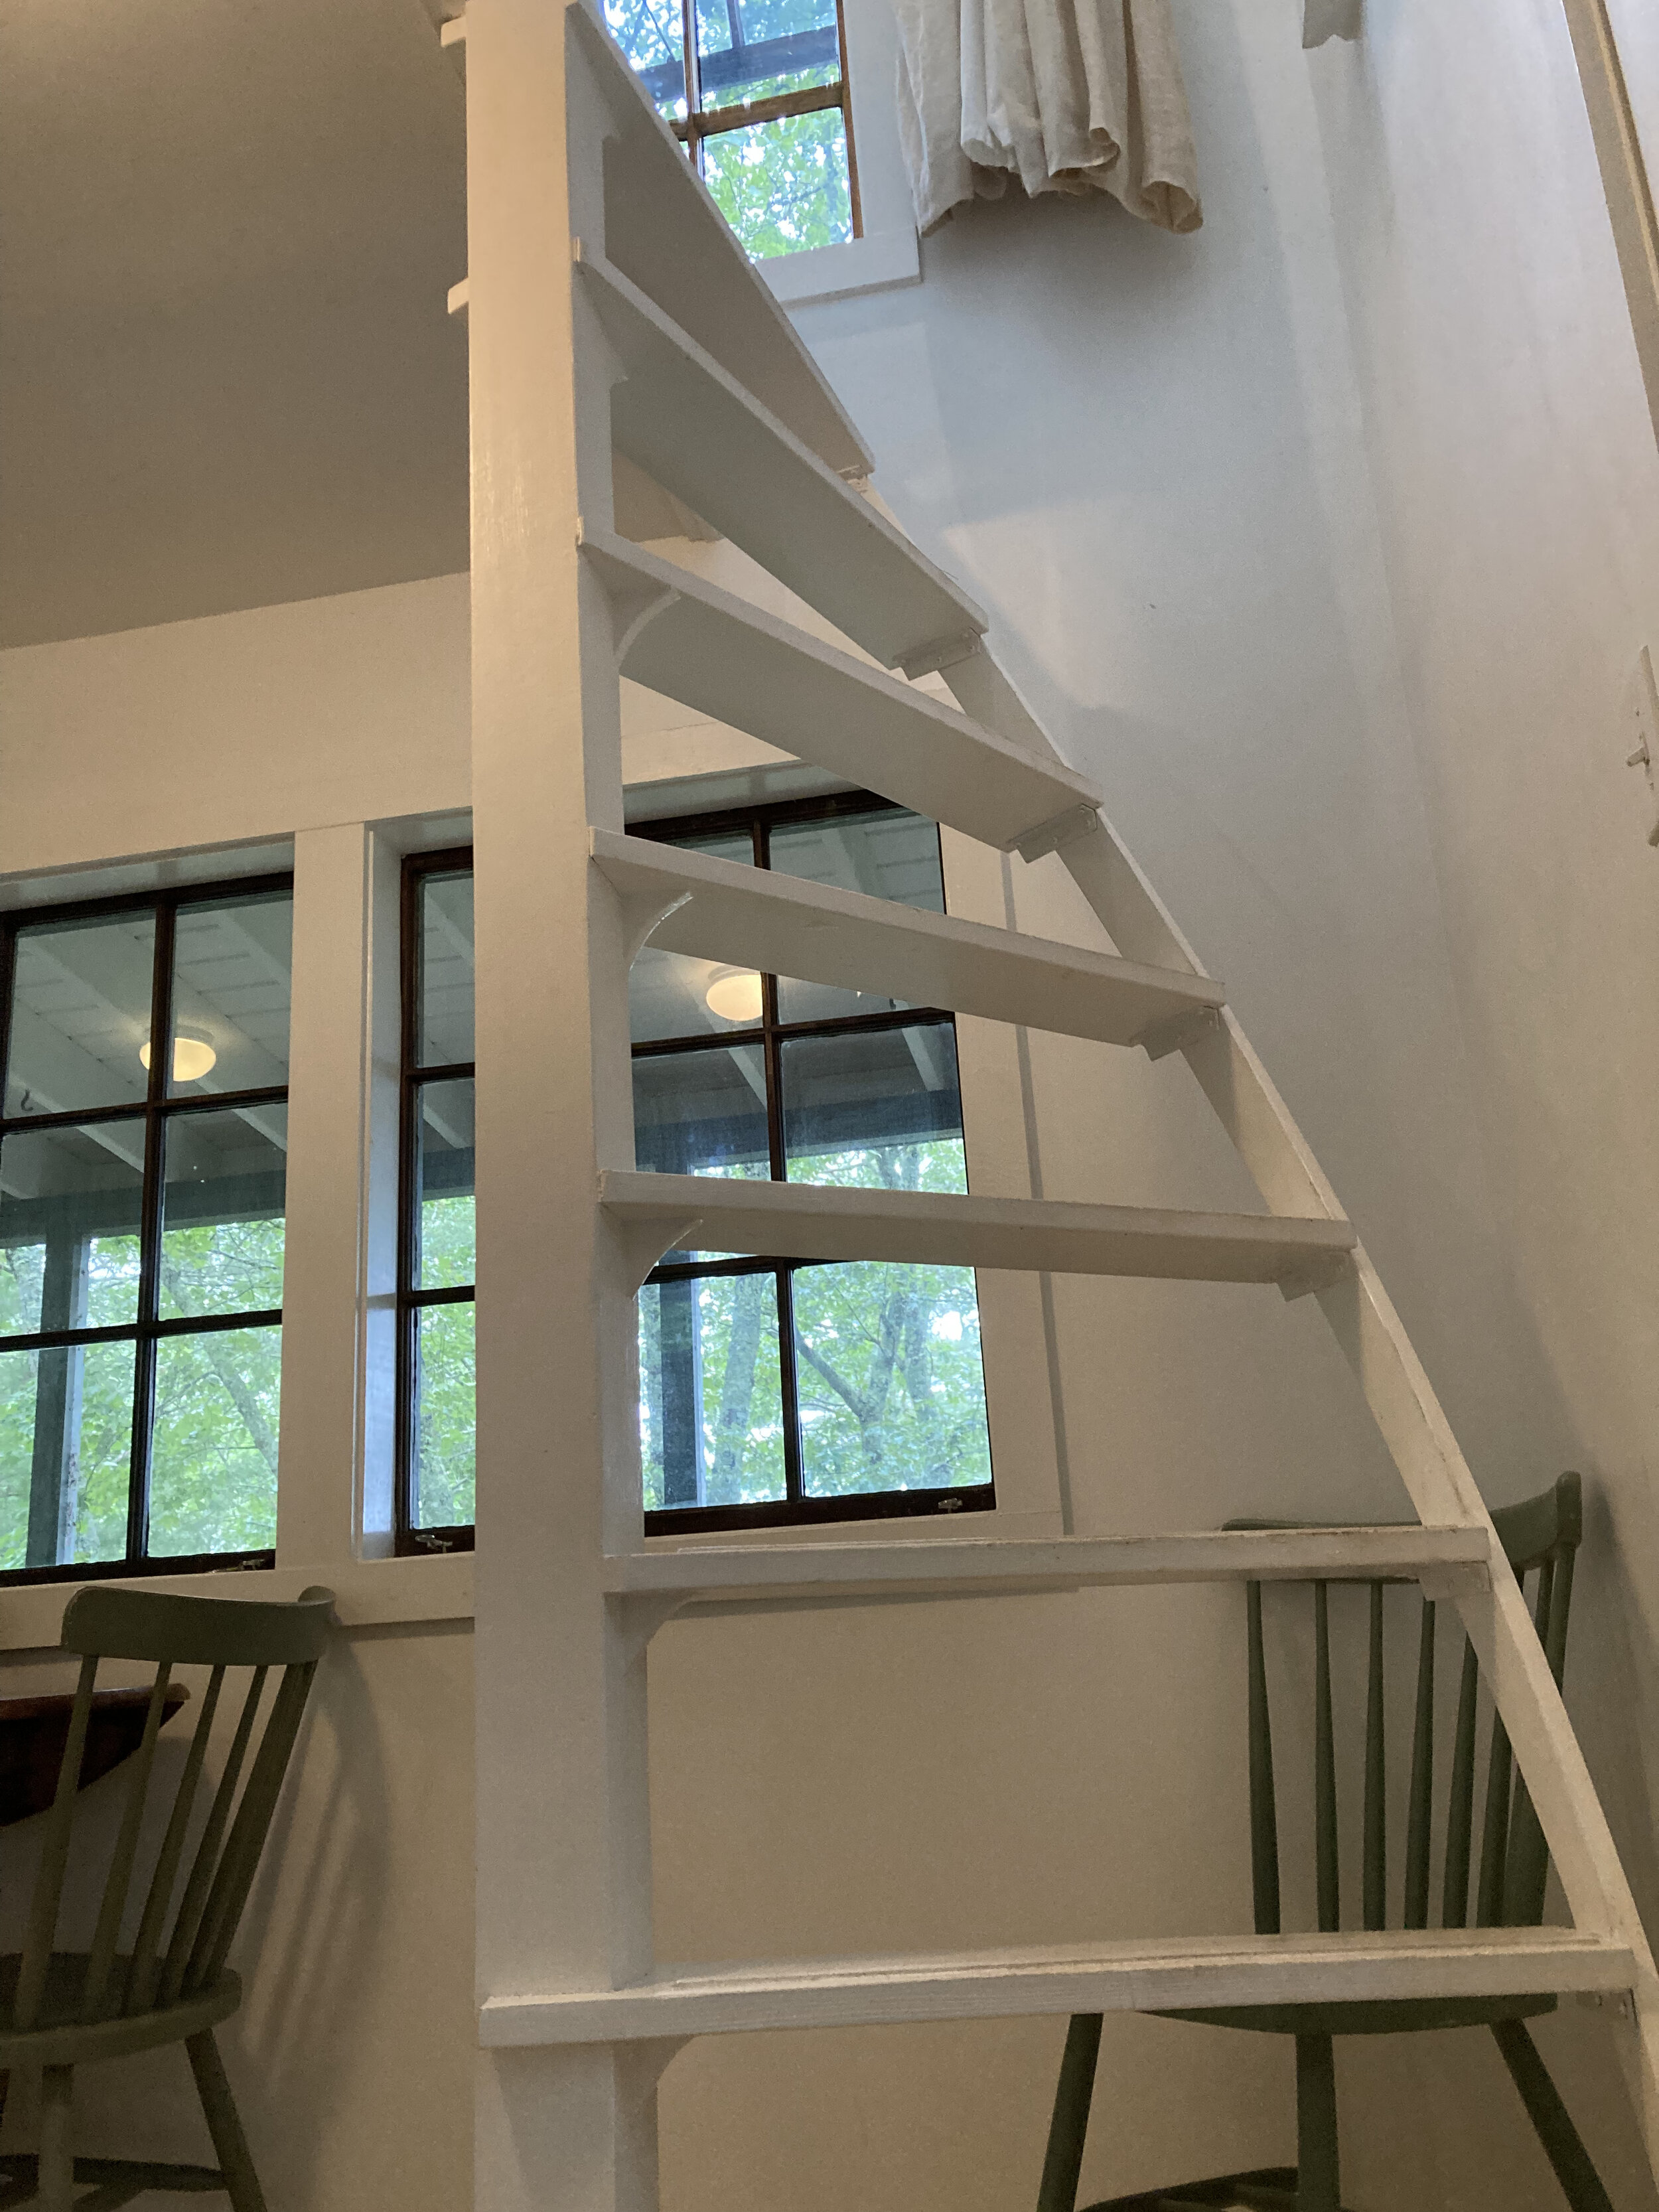
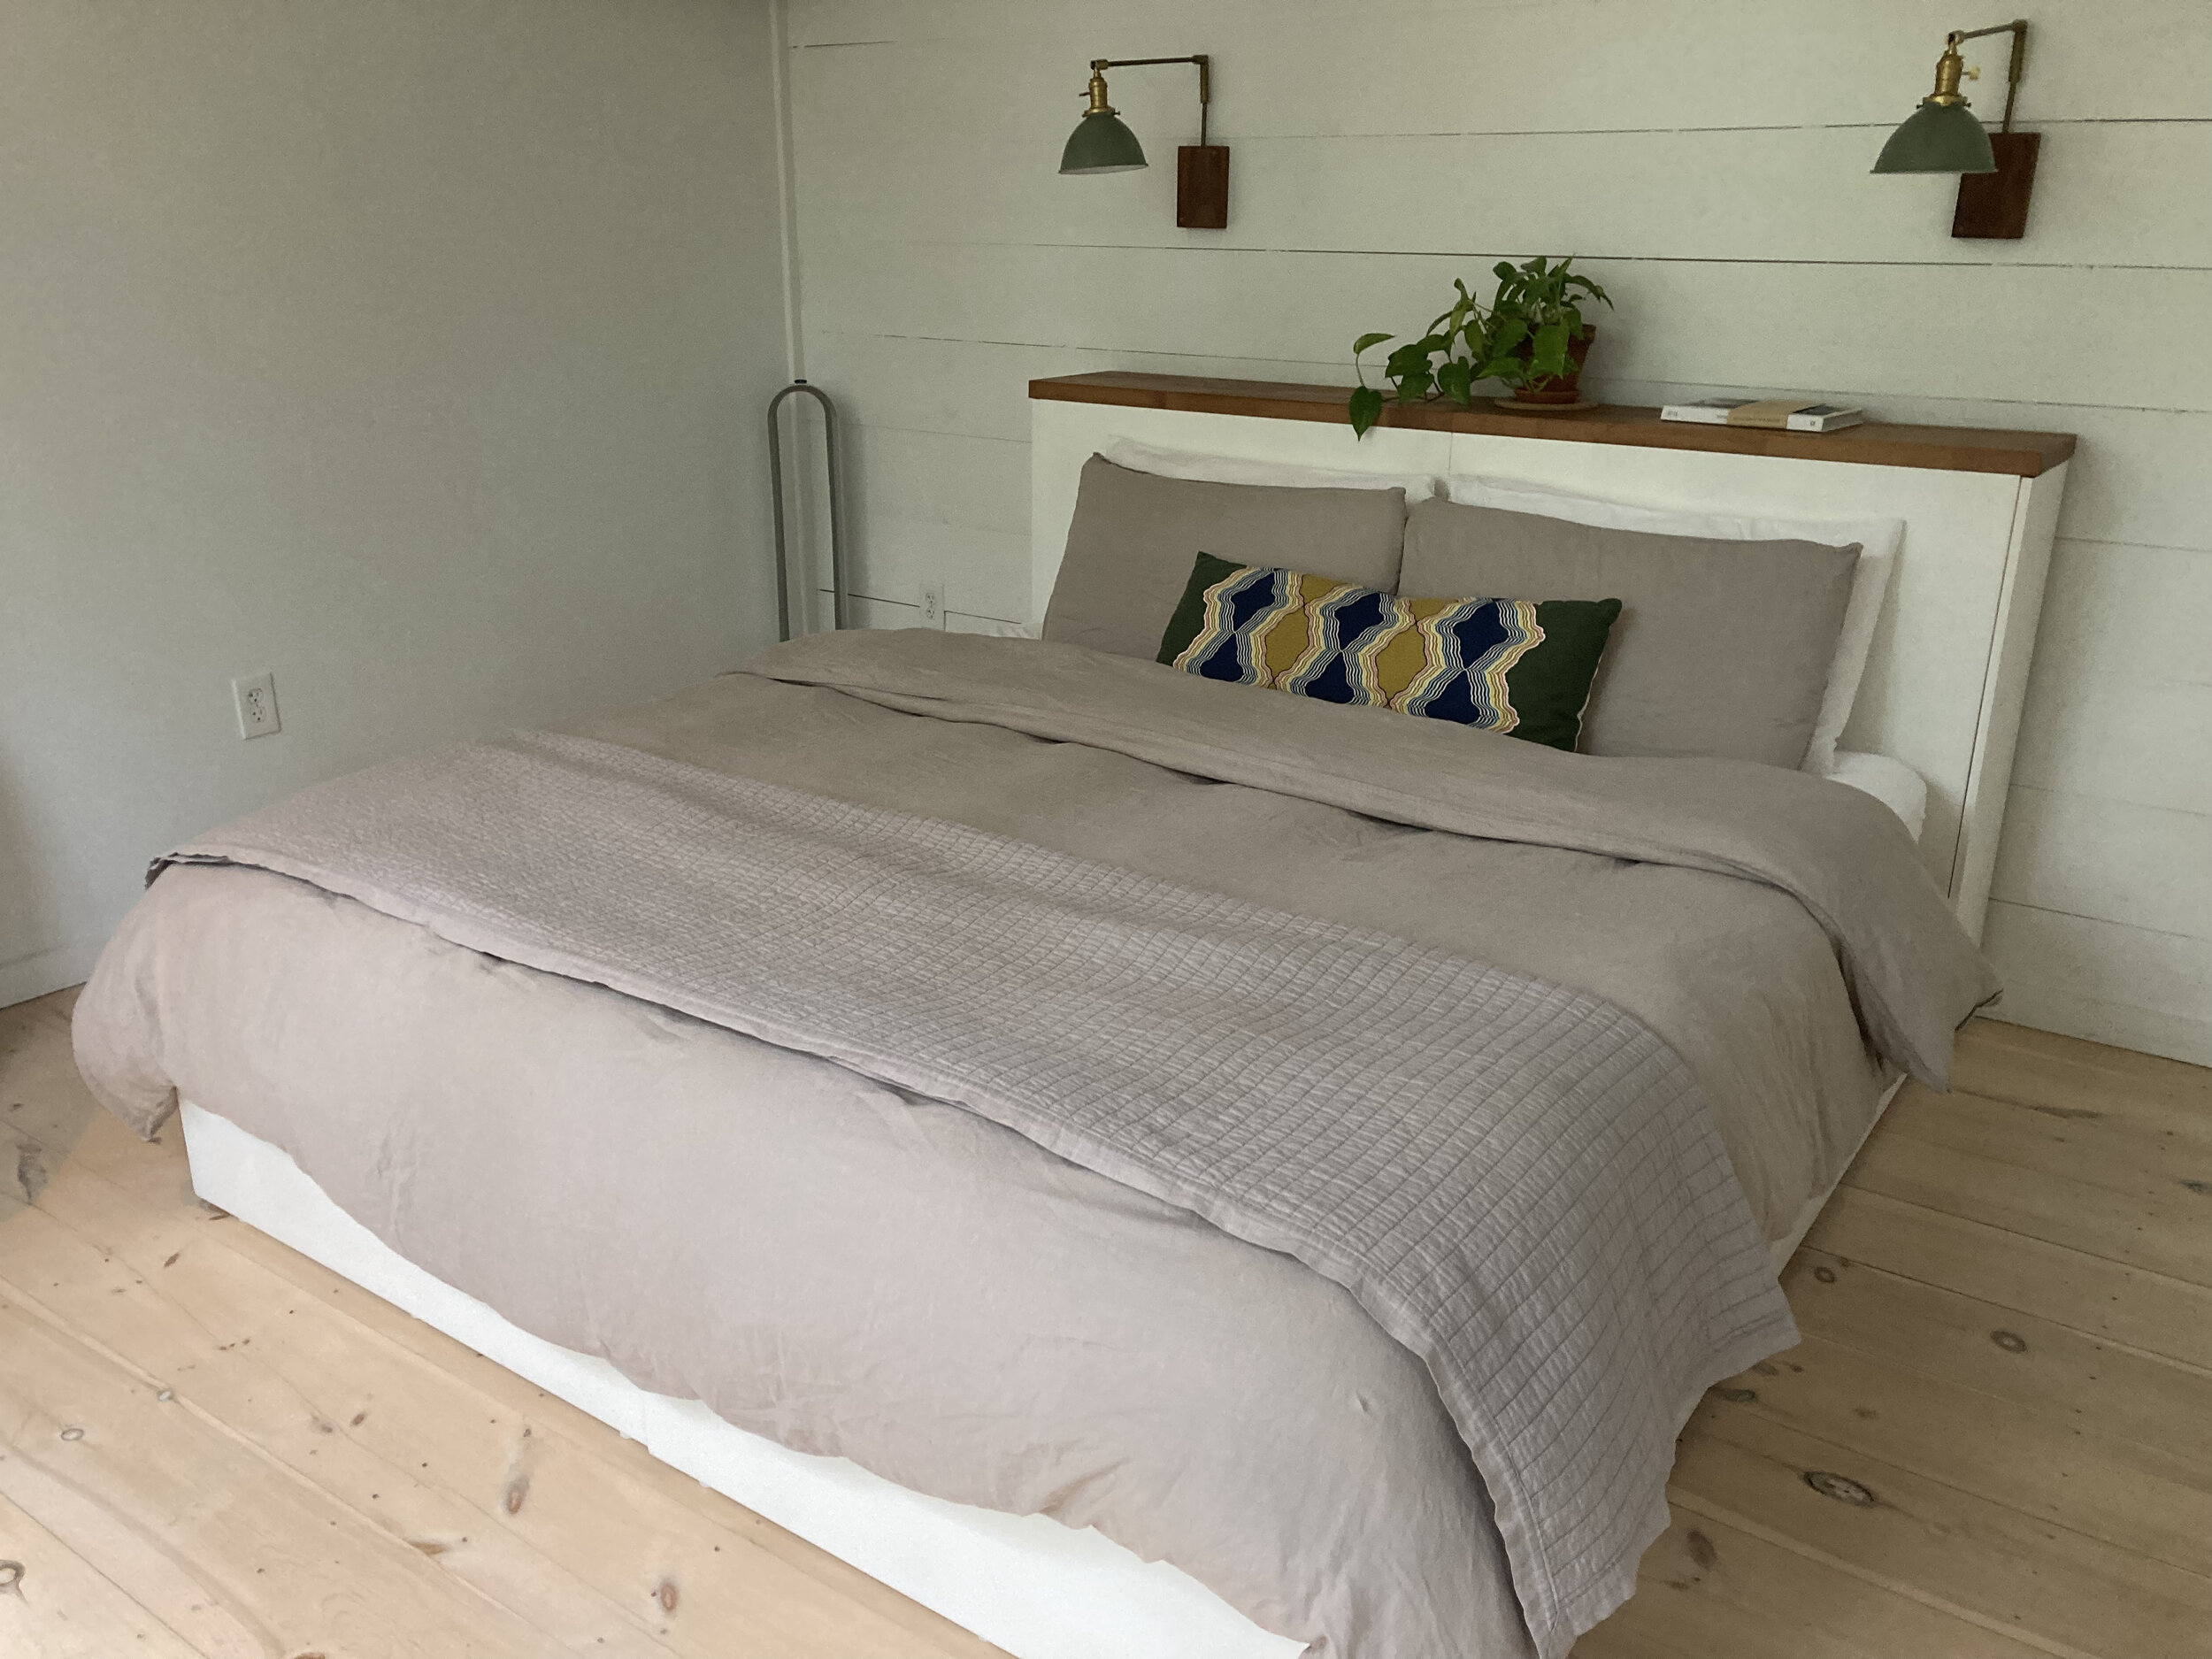
Our treehouse had three “sections”: the main house which was two stories tall and had a small kitchenette/dining area, full bathroom, and screened porch on the first floor; on the second floor up a twisty ladder was the bedroom loft and balcony with views of the tidal Black River.
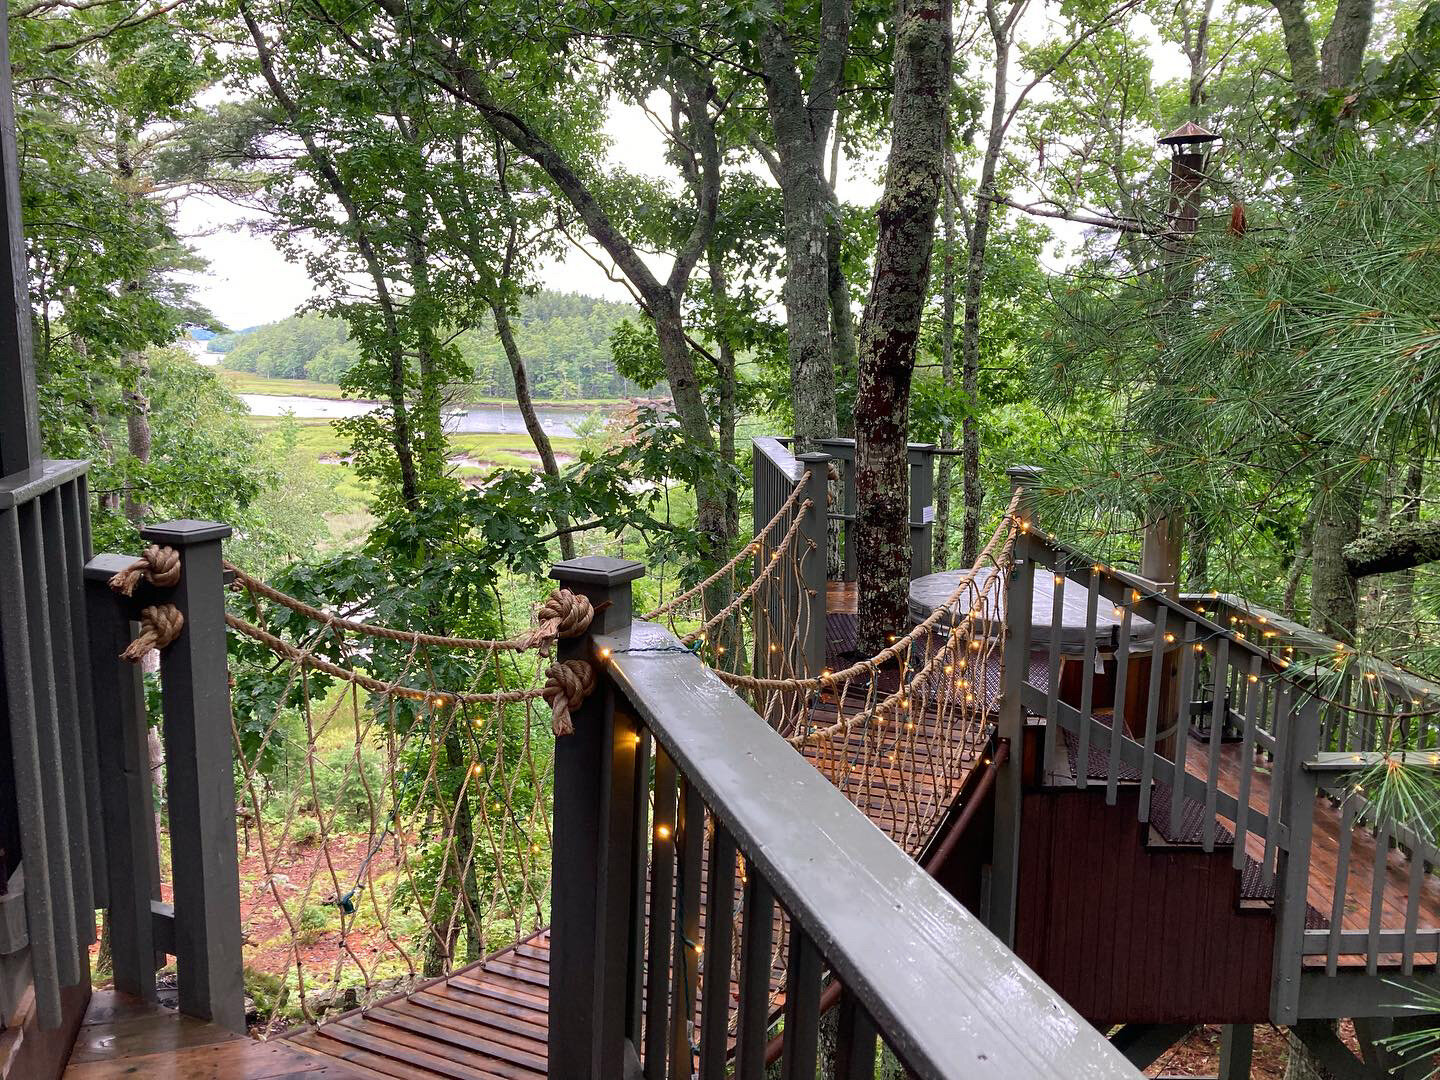
Then attached to the main house by swinging rope bridges was a second smaller treehouse with a balcony that we had set up as a sitting room (though it can be converted to a second bedroom if you had more people in your group, or if you didn’t want to use the loft bedroom). We enjoyed the sitting room a lot - we brought magazines and books and it was so relaxing to just sit back and read and not be distracted by our phones (which we never even signed into the WiFi).
Finally, the coolest (in my opinion) part of the tree house - the cedar wood-fired hot tub! And yes - that is a hot tub, in a tree, with a swinging bridge to get it to it. Does it get any cooler? We spent every evening watching the sun go down over the Black River and relaxing in the hot tub. It was just picture perfect.
Seguin also had canoes and kayaks available for guests and we spent one morning paddling along the Black River, watching herons fish and taking in the landscape. The whole time out we only saw one other boat - it was so beautiful and so peaceful.
Red’s Eats
One of the absolute highlights of our trip was getting lunch one day at Red’s Eats which is just down the road a-ways in Wiscasset, so not technically on Georgetown Island but well worth the trip for sure! It was a rainy weekday - we got there about 30 mins before opening and the line had already started, though it wasn’t long yet. We patiently waited our turn and I just have to say the food was amazing and the service was even better (is that possible?!). Deborah and her crew handed out fried shrimp samples to eat and sanitized umbrellas to borrow while we waited in line in the rain. They also got on the intercom and gave some shout-outs to other local area shops and restaurants, which I thought was so kind of them. I ordered Fried Haddock and my husband got one of their world-famous Lobster Rolls as well as a Crab Cake. I wish I got a photo of the food but we gobbled it up too fast, it was so good. Red’s Eats definitely lived up to its stellar reputation and we will be back for sure next time we’re in the area.
Harborside General Store
One day we popped in to Harborside General Store at the very end of 5 Islands Road. It was super cute (check out that amazing view out the window too!). We chit chatted with the shopkeeper and found out she was originally from our area, what a small world. We picked up a picture book about boats to give to our kids when we got home and they loved it.
The Coastline
What is a trip to Maine without checking out the coastline? Most of our trip was a kind of rainy/overcast, but we didn’t mind - give me a rainy beach day anytime! We had the whole place to ourselves and it was so enjoyable to take in the sights and sounds of the ocean without tons of people around.
Five Islands Farm
During our stay, we popped over to Five Islands Farm a few times to grab some snacks or drinks. They had a great selection of gourmet foods, local produce, and gifts. One night we just bought a pint of ice cream there and split it for dinner at the beach - no rules on vacation! Right? Right. ;)
Doubling Point Lighthouse
Unfortunately I don’t have a picture of this lighthouse, but I recommend checking it out if you get the chance! We went early one morning to check it out, only to be met with a sign saying the grounds opened at 9AM… we were tempted to go check out this picturesque lighthouse with a long dock leading to it, but the home there looked like it was a private residence and we wanted to be respectful of those that lived there, so we left without seeing it up close. It’s important to note that to get there you take a narrow dirt residential road and there is only room for 2-3 cars to park.
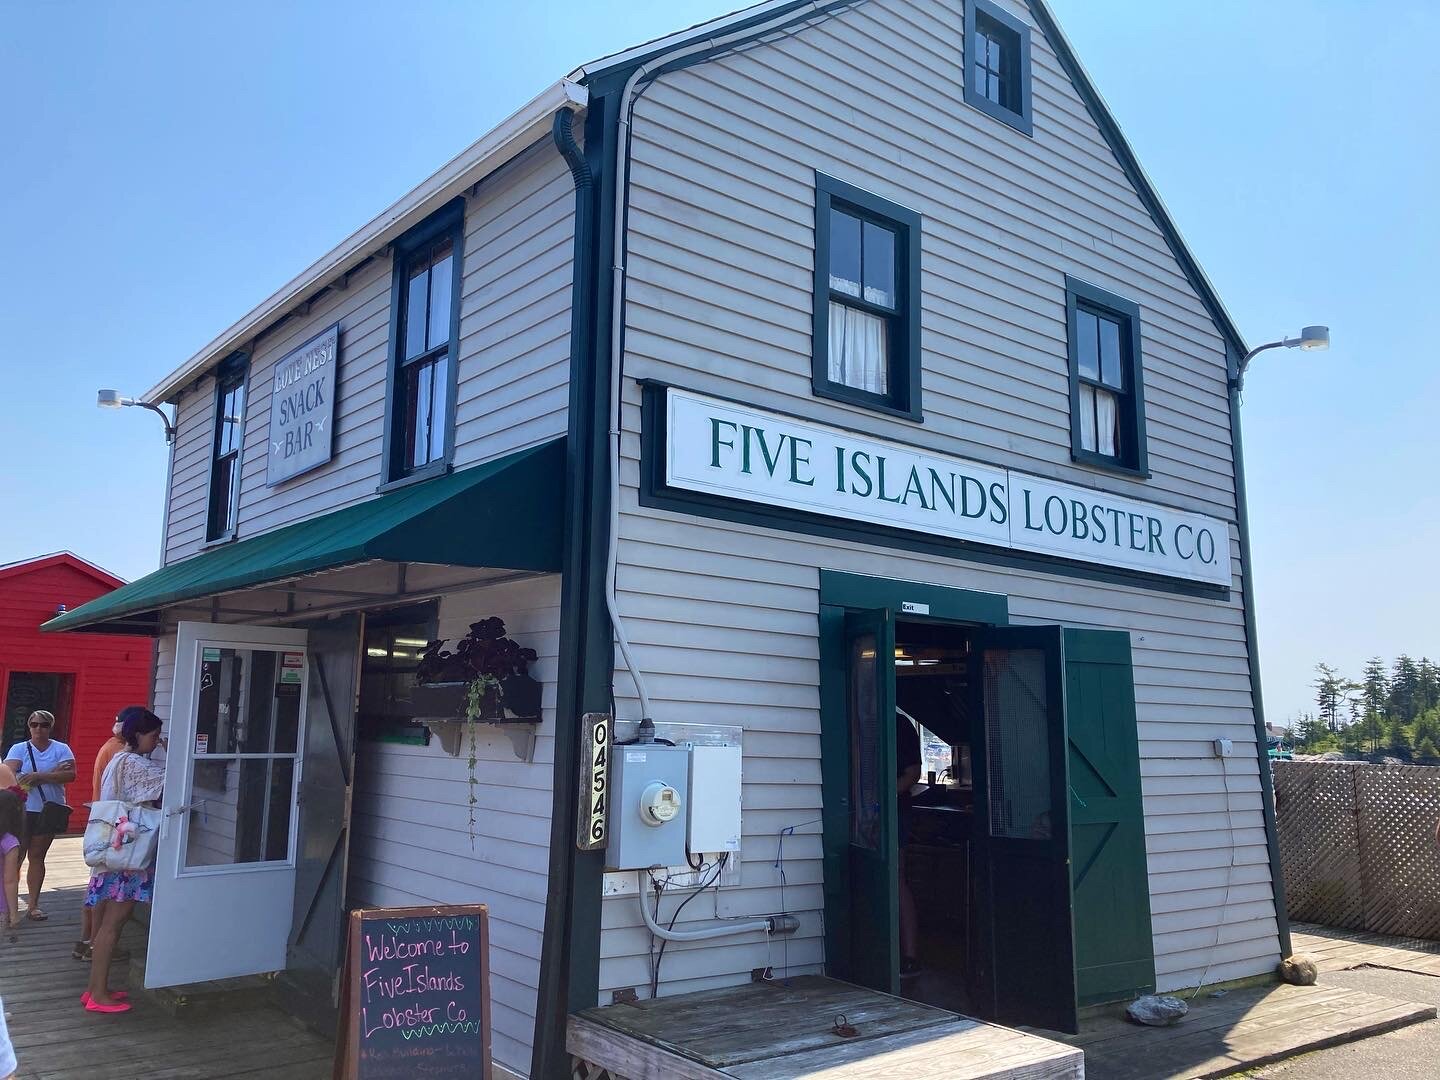
Five Islands Lobster Co.
One day for lunch we went to Five Islands Lobster Company, which is located on a working wharf on the Sheepscot River. The place was hopping! So much so that we couldn’t find parking anywhere so my husband dropped me off to get food while he waited a mile or two down the road to come pick me up later. I enjoyed the wait though, it was a beautiful day and it was so interesting watching the hard-working fishermen come and go. We got scallops and haddock and brought them back to enjoy at our treehouse at Seguin Tree Dwellings.
Georgetown Pottery
We also stopped into Georgetown Pottery to browse - so many beautiful pieces in a wide variety of styles. I particularly loved the ones with birch trees on them (no surprise). They also had some amazing sculpture pieces for the garden outside.
Winnegance Restaurant & Bakery
One thing we did struggle with finding on Georgetown Island was breakfast options… so for breakfasts we hopped over to the Bath, Maine area which was just a short drive away and got breakfast to-go from Winnegance Restaurant & Bakery every morning. We loved Winnegance for it’s small-town diner feel, with local regulars eating breakfast there each morning. We brought our breakfasts to the South End Boat Launch to enjoy breakfast with a view of the Kennebec River and Doubling Point Lighthouse across the way.
On the drive to and from Winnegance you get to pass Bath Iron Works which is always so impressive to behold, and The Maine Maritime Museum which we want to visit next time we’re in the area.
Overall we had an amazing and relaxing three days in the Georgetown Island area and we’re looking forward to another trip back there again in the future.
We make this super easy Flag Cake every year on the Fourth of July - it’s a little cheesy but it’s fun, delicious, and a tradition our kids look forward to. It’s never picture-perfect but it doesn’t have to be, just enjoy and have a Happy Fourth :) | This post contains affiliate links |
Really this “recipe” couldn’t be any easier! You just need a few very basic ingredients/pre-made items and you’re good to go!
Ingredients:
box of lemon cake mix and whatever you need to make it according to package directions (eggs, oil, etc). If you don’t like lemon you can use white or yellow cake mix too.
Cool Whip or other whipped topping
blueberries
sliced strawberries
How To:
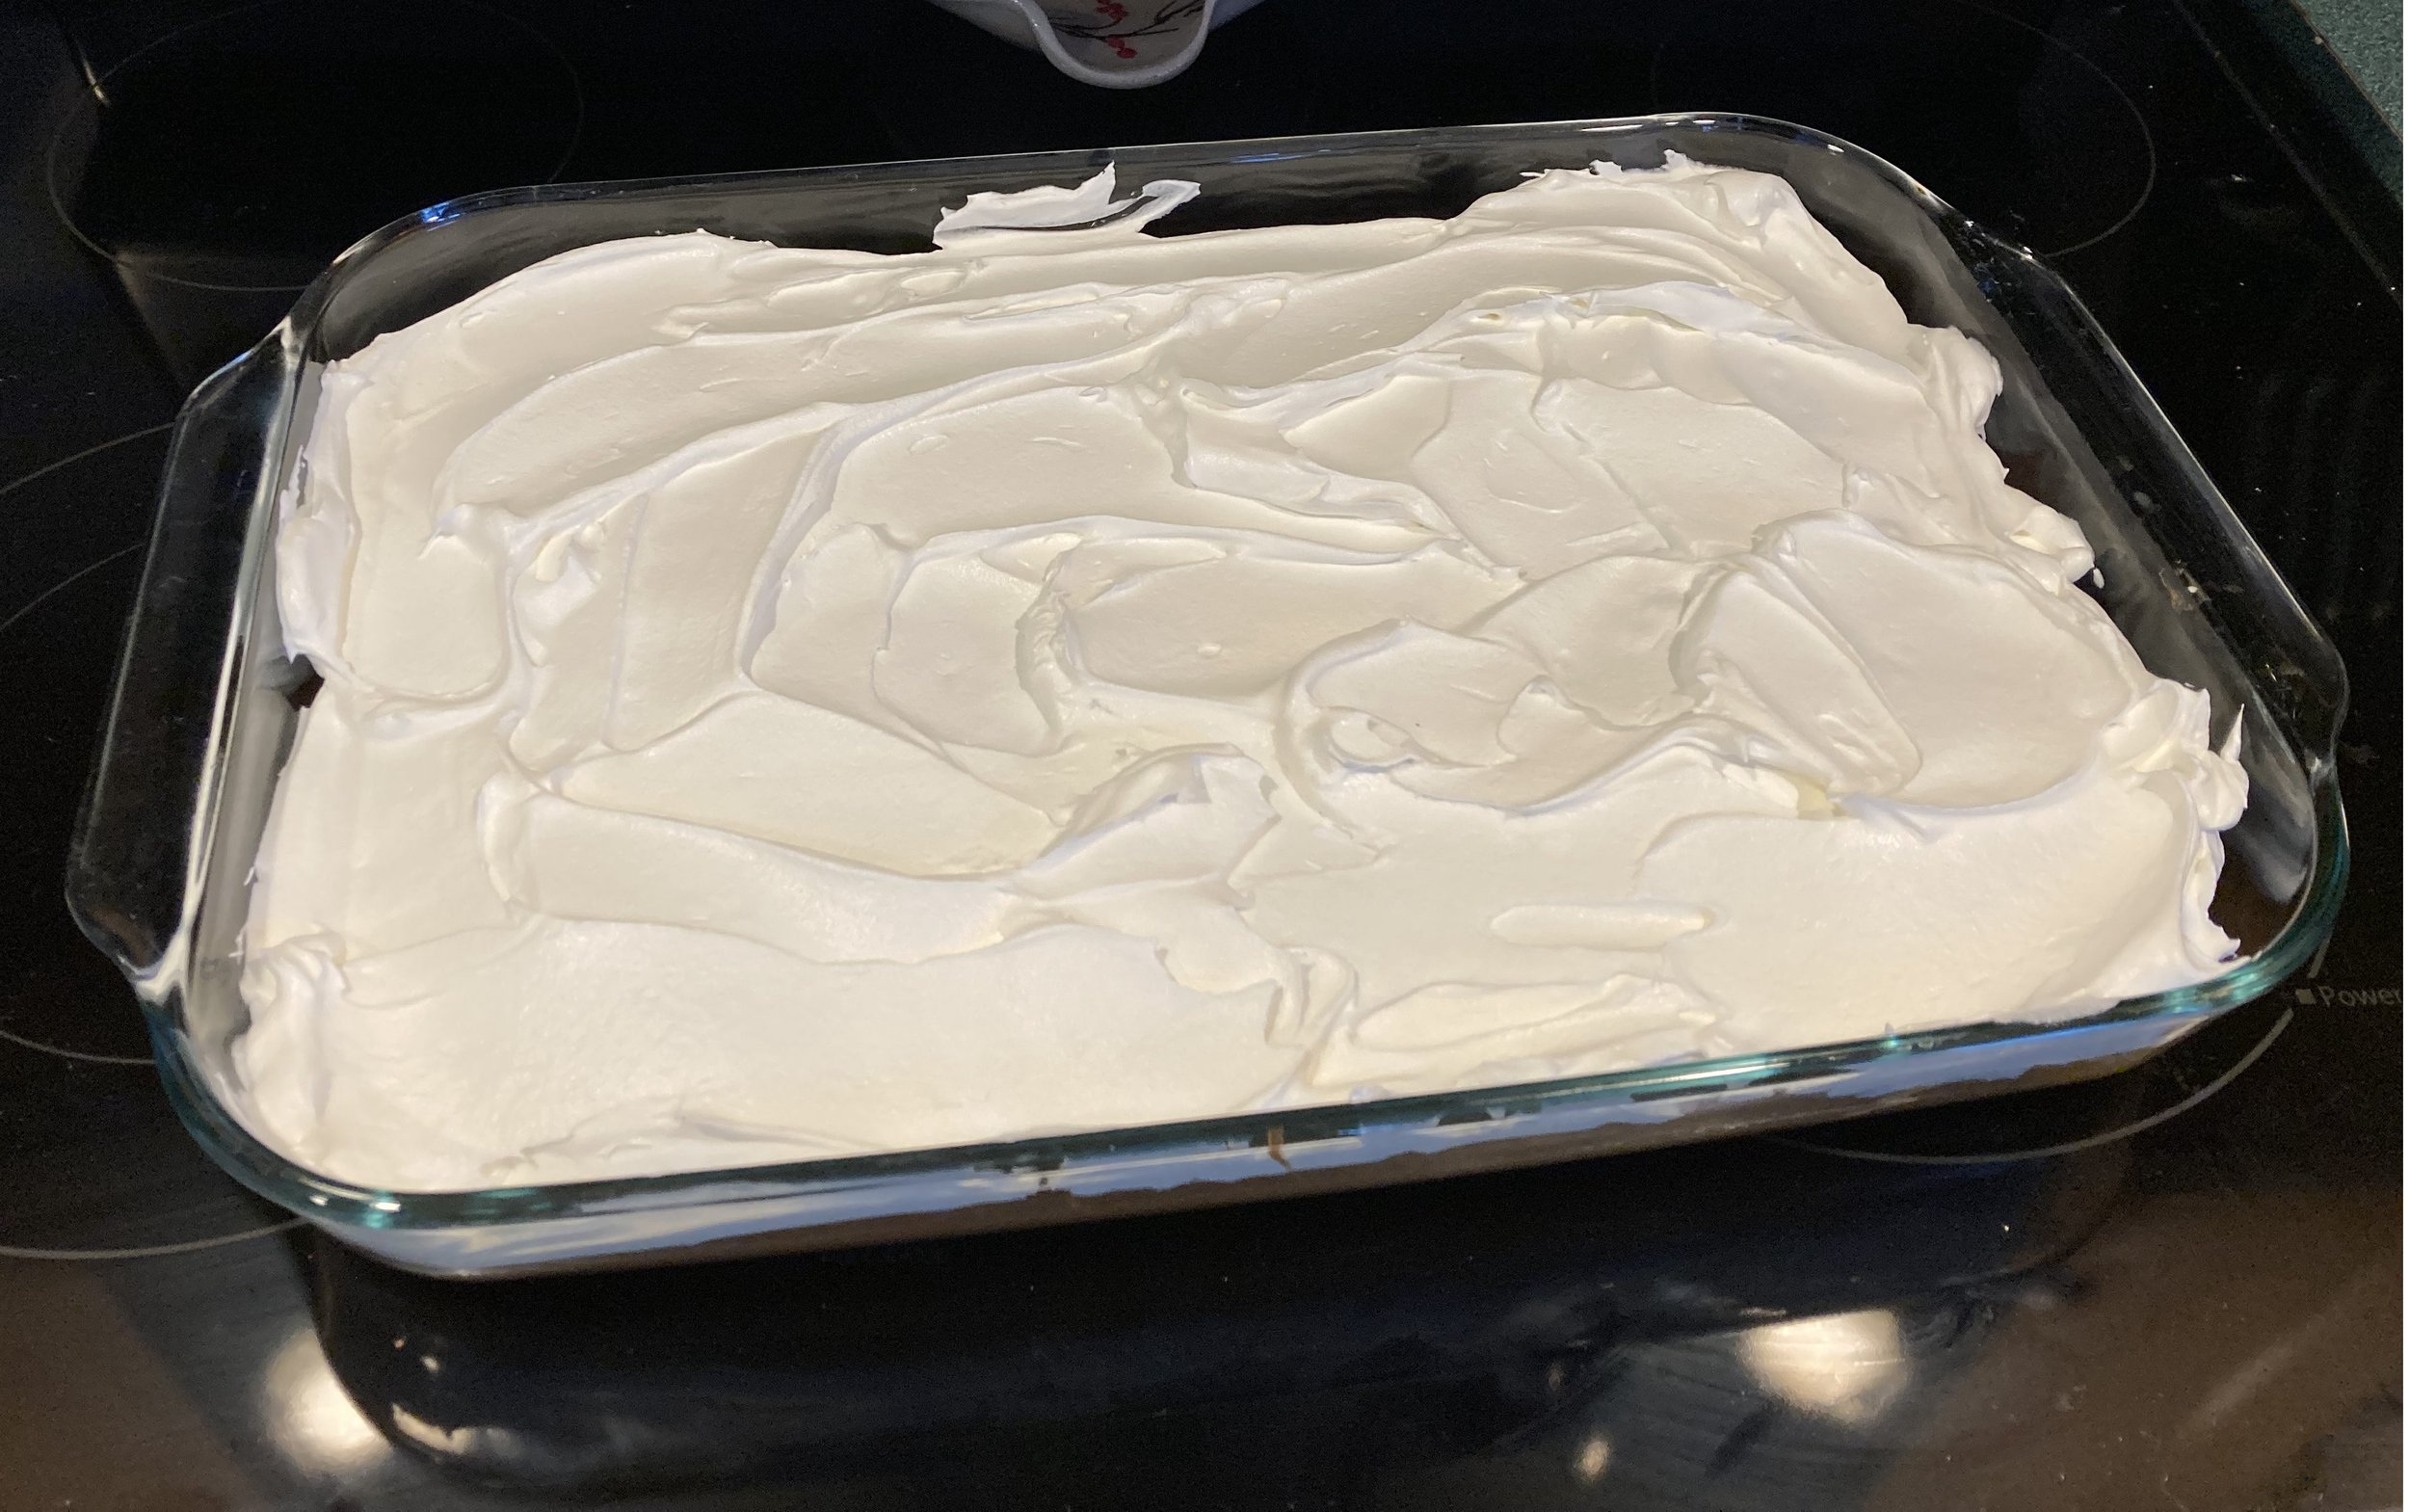
First bake your cake mix according to package directions in a rectangular baking dish/sheet pan.
Once it has cooled completely, add your whipped topping. We always use Cool Whip but you could use homemade or store bought whipped cream too.
Once the cake is covered in your whipped topping, it’s time to make the flag! In the upper left corner, lay out the blueberries in a square shape. Then arrange sliced strawberries in lines to make the stripes. We use a strawberry slicer to make the process go quickly (I confess when I first got this strawberry slicer as a gift I thought I would never use it, but it's actually super handy and I've used it more times than I can count! It especially came in handy with young toddlers for cutting their fruit up). Don’t worry about trying to fit in 13 stripes, we’re going for simplistic here - just fit in as many as you can that look nice.
And that’s it! Super simple, super easy, and a great dessert to make with the kids. We absolutely love that combination of lemon cake, whipped cream, and berries - yum! I hope you all have a wonderful, healthy and happy Fourth!
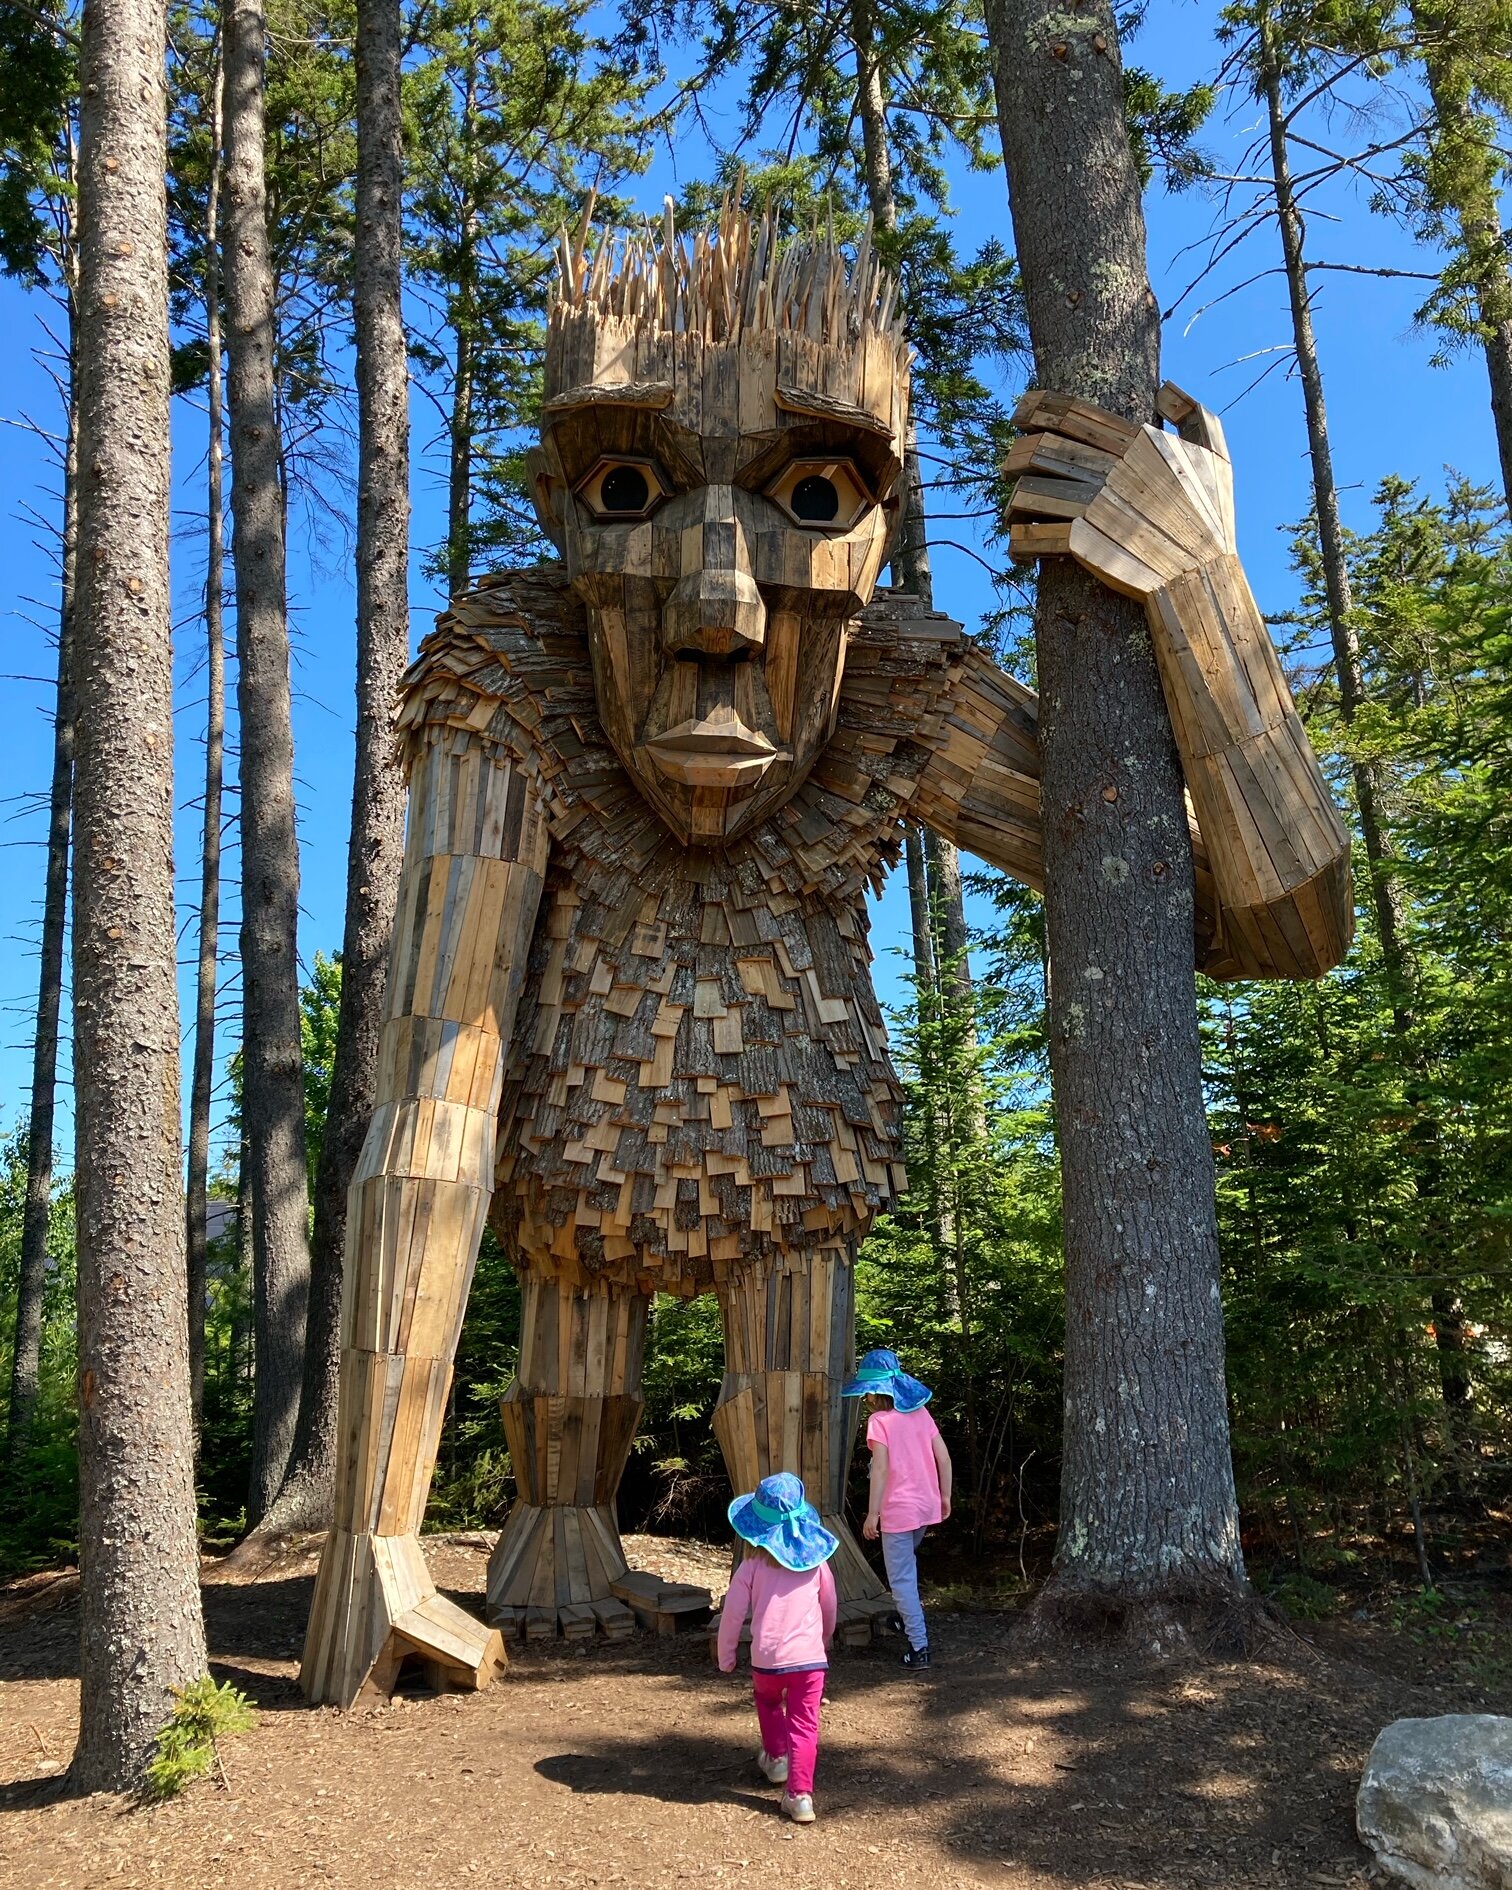
This past weekend we took a much needed day trip up to Boothbay, Maine to finally see the amazing Coastal Maine Botanical Gardens and its new art installation of giant trolls by Danish artist Thomas Dambo. The whole visit was beautiful and so fun. I’ve included a few photos here but they don’t do this magical place justice - the Gardens and the trolls must be seen in person if you ever have the chance! Here are a few tips and items of note from our trip. | This post contains affiliate links |
Tickets
Currently at this time Coastal Maine Botanical Gardens are requiring advanced purchased tickets only and your entry is timed (I believe this is for COVID precautions to help spread out visitors and limit the amount of visitors coming in at any one time to help reduce crowding). We purchased ours for one of the first time slots of the day and it was perfect. We found that the park was getting rather crowded by lunch so earlier was definitely better.
Masks
There were signs asking non-vaccinated guests to wear masks inside buildings, however we did not see that enforced. Nevertheless, we have been very COVID-cautious ourselves and made sure our kids put on their masks when we passed through the entrance building and when we left, also we had them put them on whenever we went into any other enclosed spaces.
The Trolls
There are five giant Trolls tucked away in the woods throughout the park. The map in the brochure was a bit confusing and it was difficult to tell exactly which paths some of them were on, but after a quick conversation with a very helpful gardener we had a good plan to see them all. At most of the trolls there were groups gathered to take photos but everyone was very respectful, waited their turn, and gave space so each group could take good photos with the trolls which was very nice.
So Much to Explore
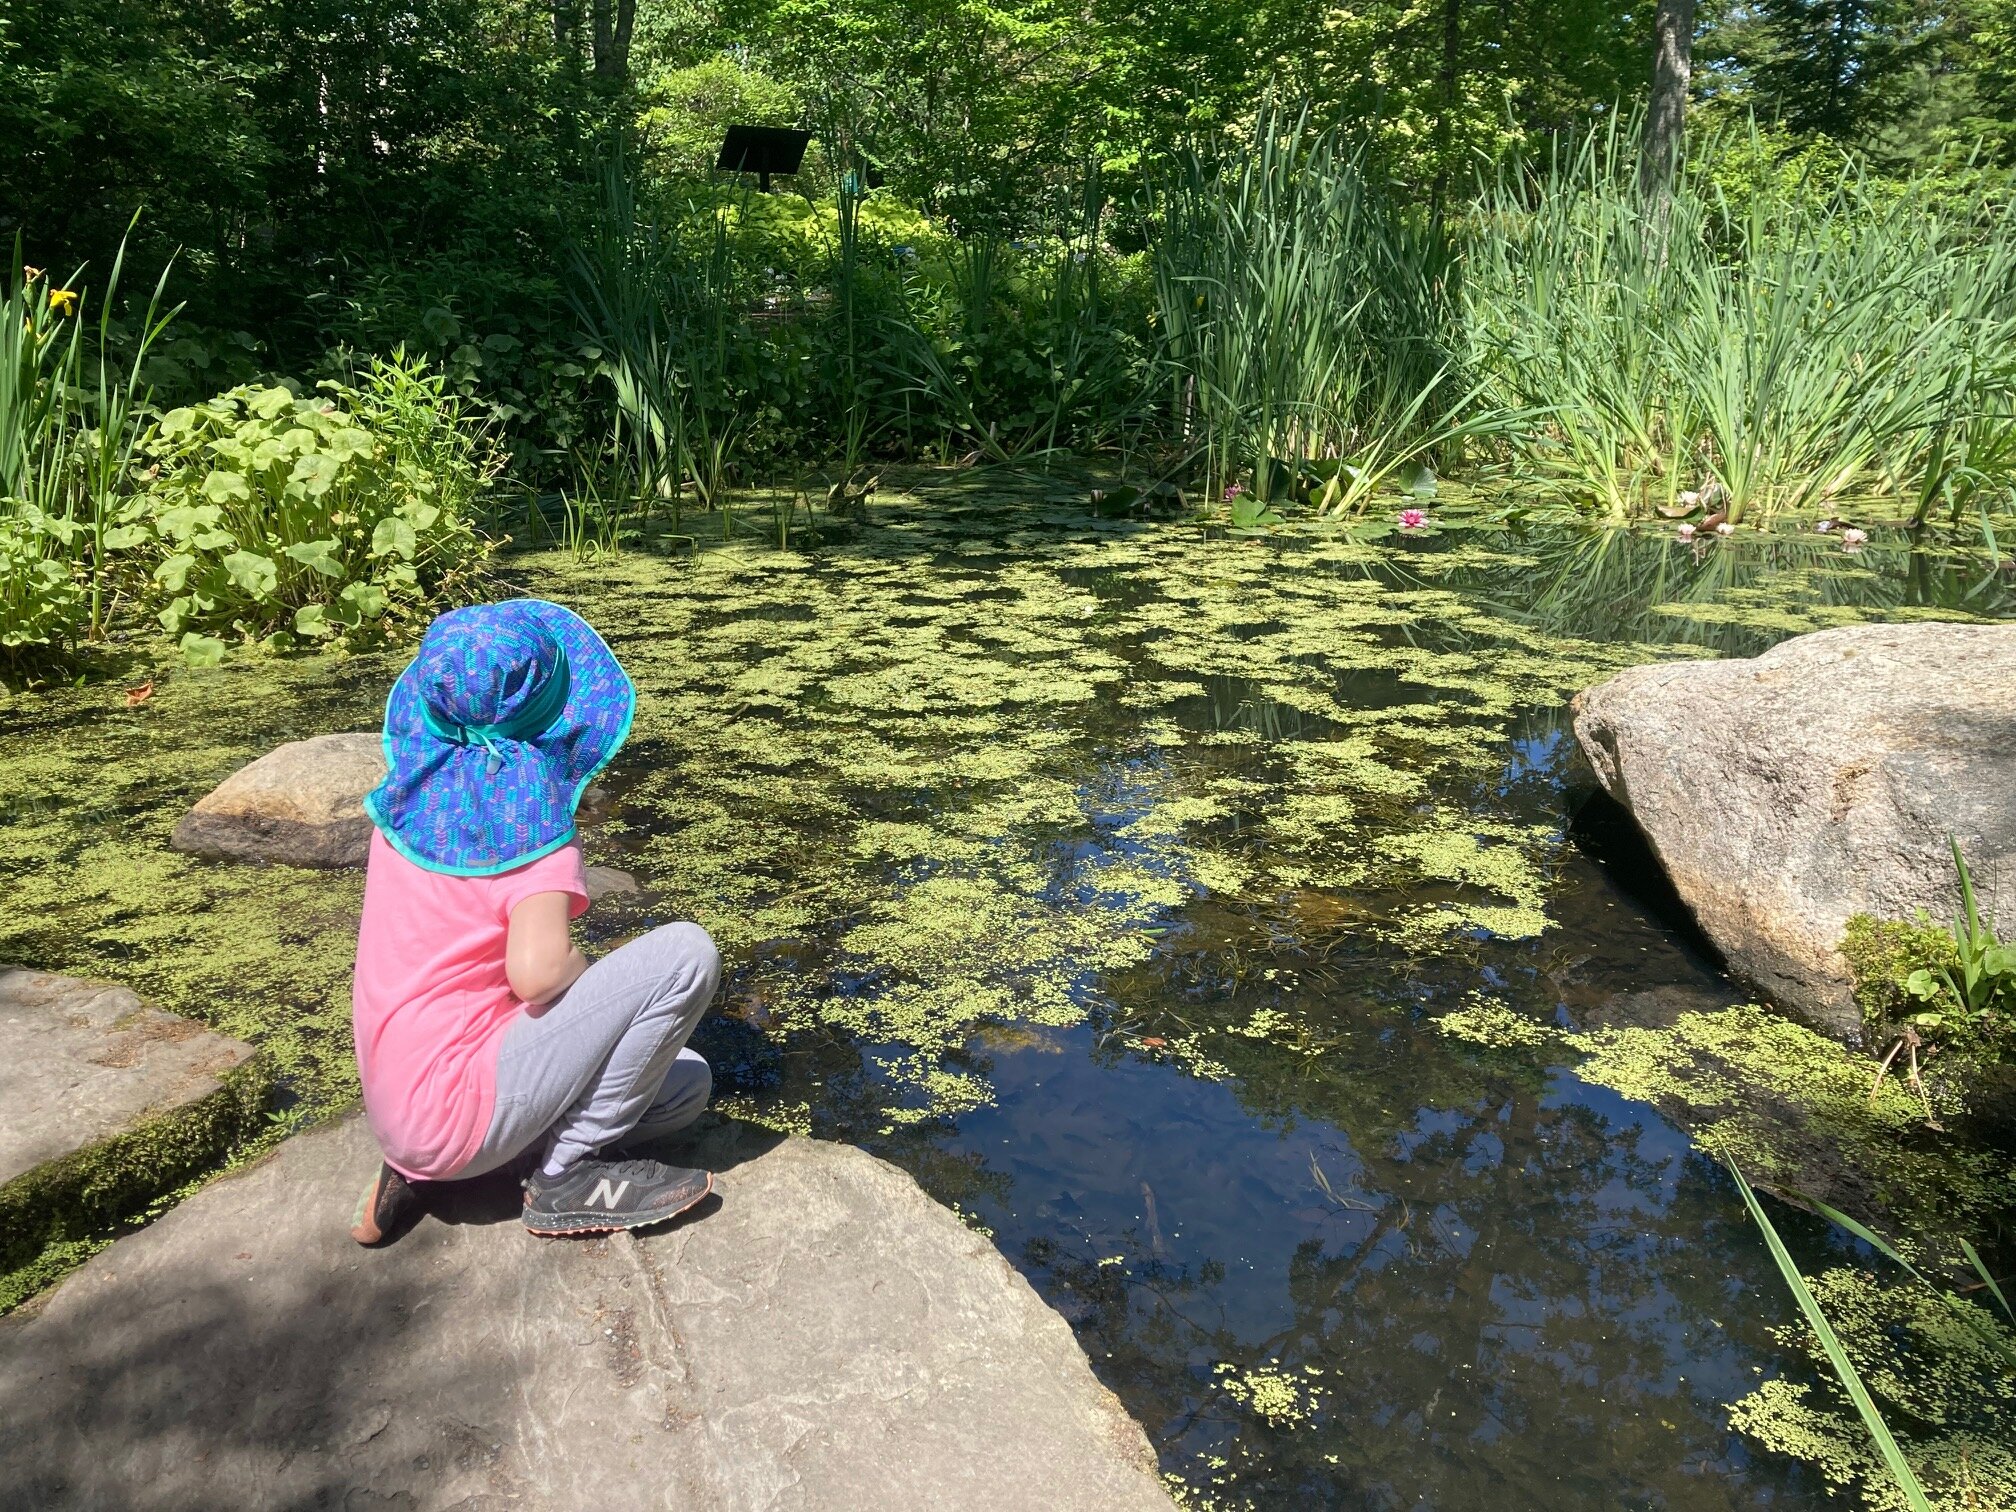
Besides the incredible trolls, there are miles of hiking trails and so many gardens to explore. We spent several hours there and didn’t even see most of them. Our favorite areas were the Children’s Gardens with its whimsical flowers, buildings, and animals, and the various ponds and fountains. Our kids especially loved watching the tadpoles (SO many tadpoles!) and turtles in the ponds.
We got lots of compliments on our kids' matching sunhats too! They are our absolute favorite ones by Sunday Afternoons.
Lunch
We headed out early afternoon when it started to get very hot and crowded but we easily could have stayed and explored longer! There was an on-site cafe that had grab-n-go food that looked great but we decided to forgo that and opt for seafood on the way home (when in Maine). We would have loved to stop at Red’s Eats in Wiscasset but the line was down the block when we went by, so we got takeout from Sea Basket instead and ate our weight in fried seafood and lobster rolls - it hit the spot.
Overall it was a beautiful day to get out and explore this beautiful place with our family - we’re already planning on coming back later in the summer to see everything with different plants in bloom.
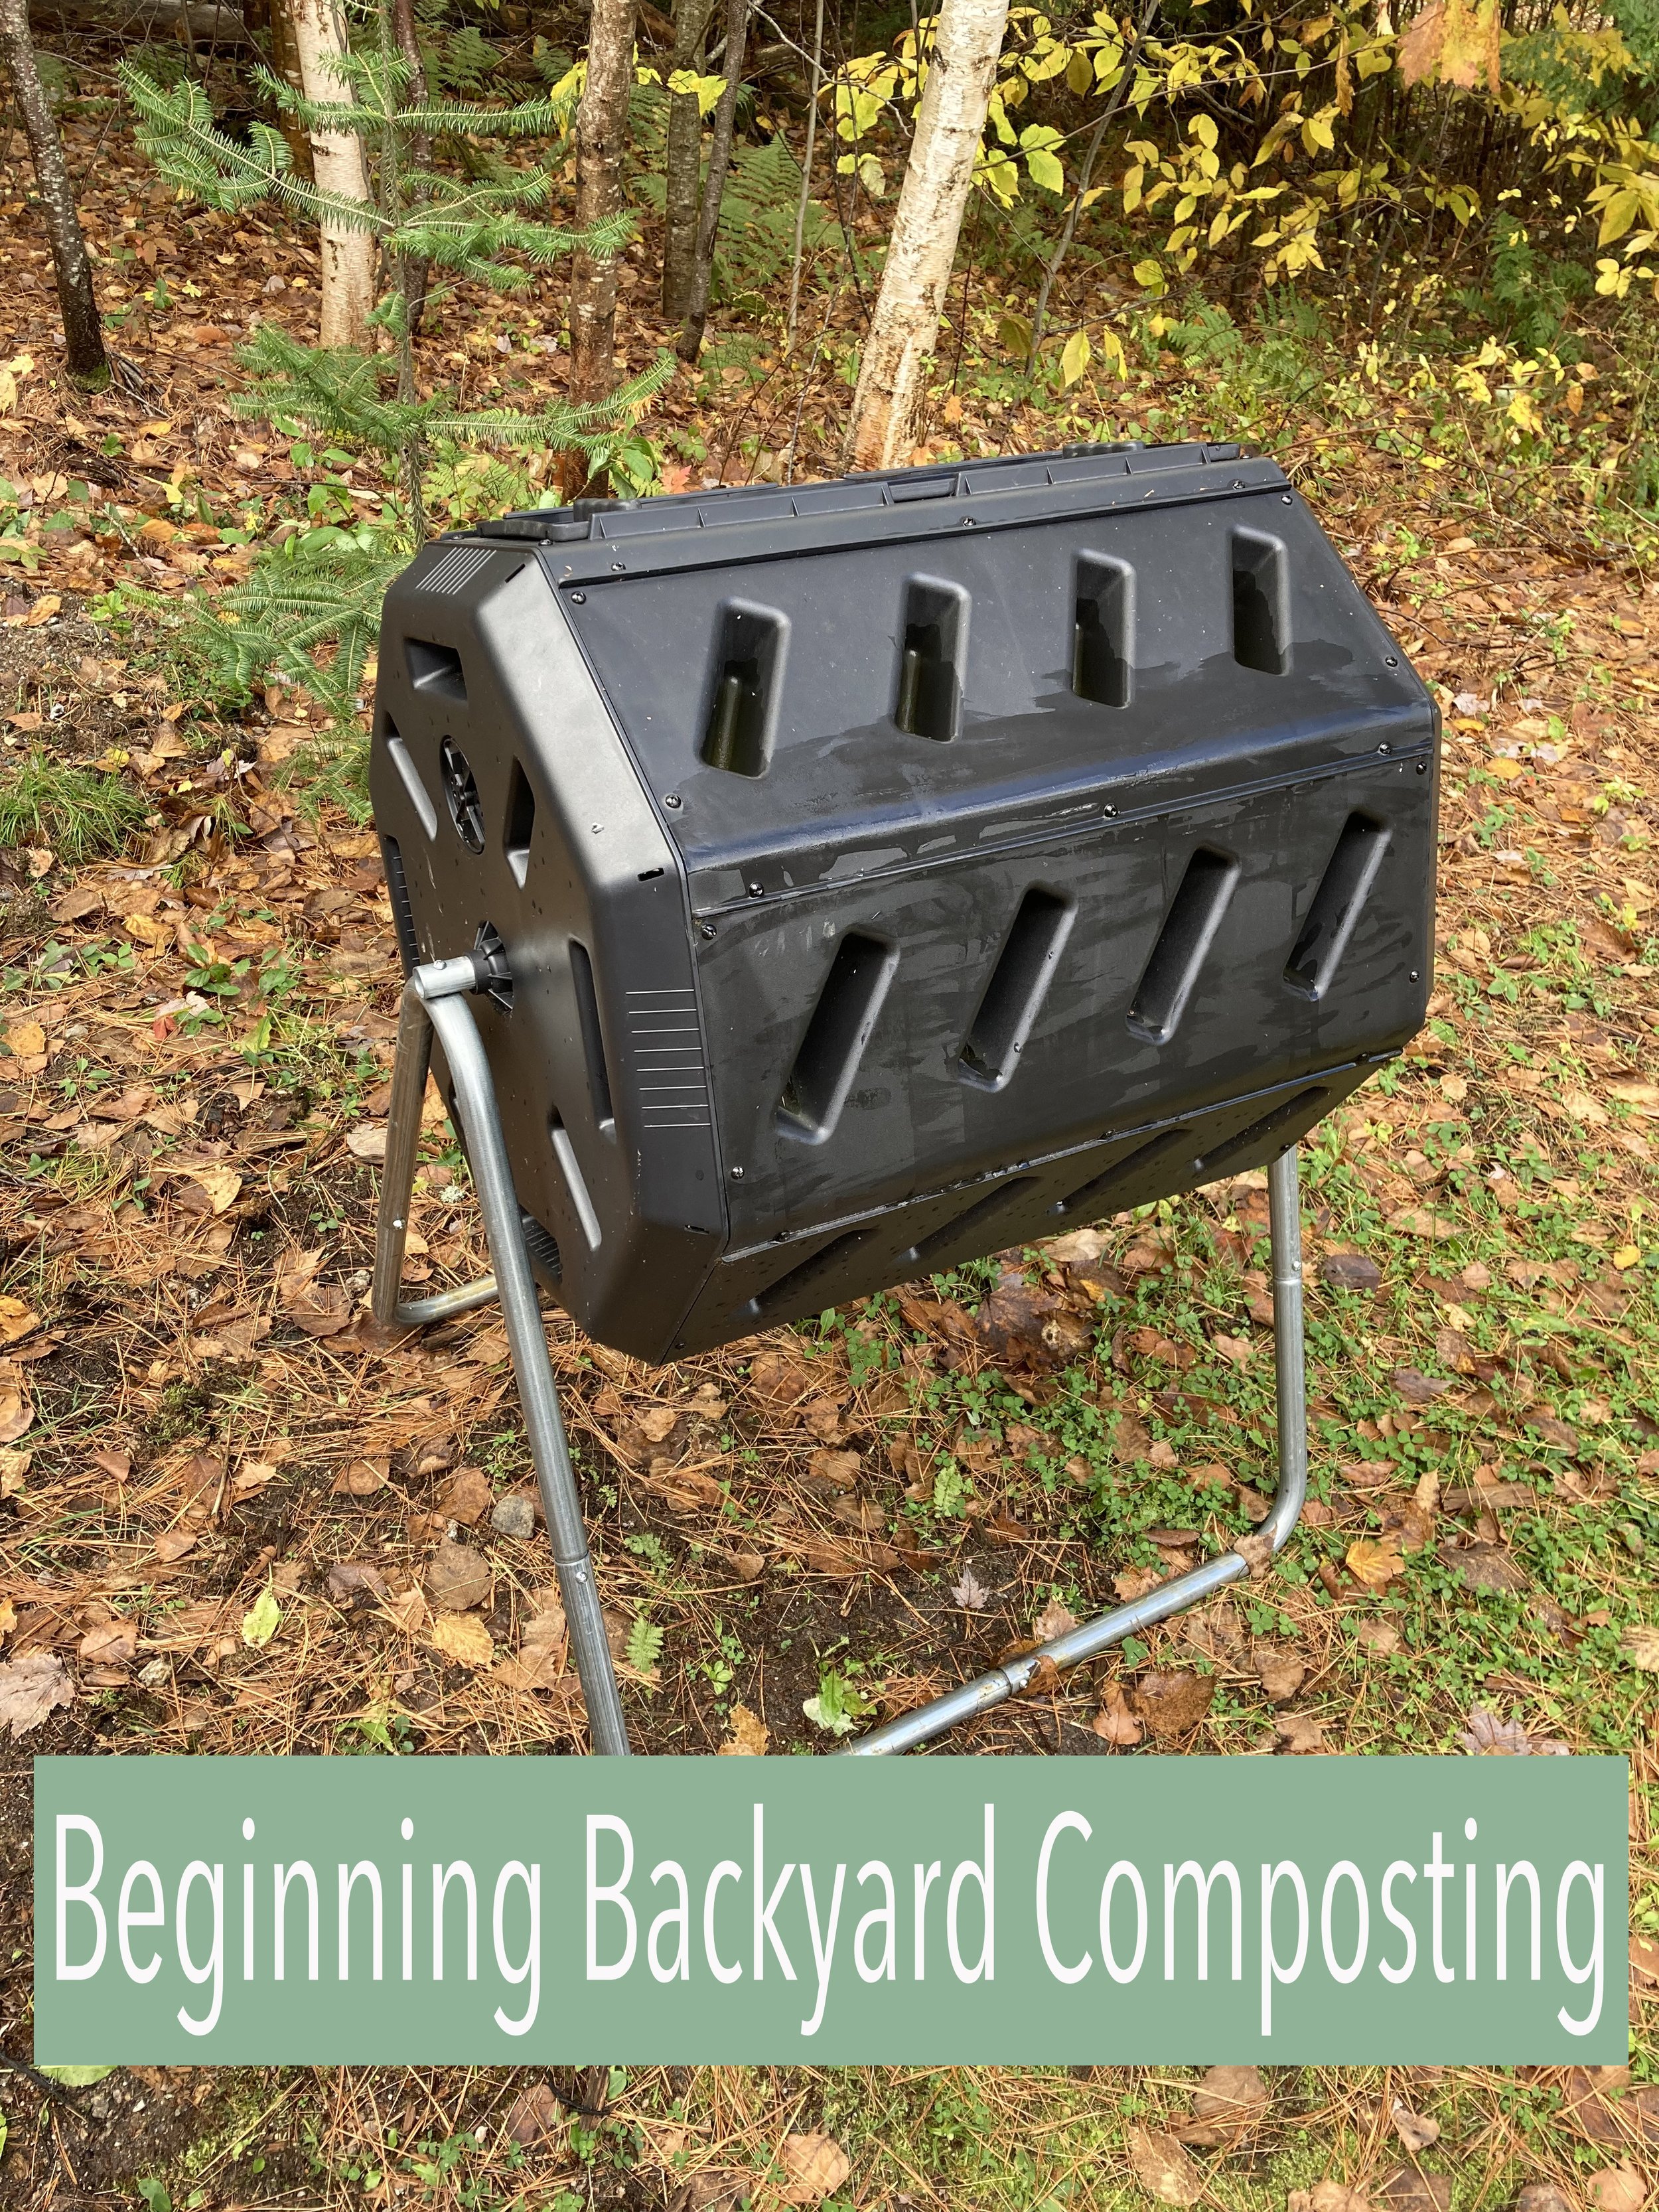
This year we finally jumped on the backyard composting bandwagon. We’ve been wanting to make more eco-friendly choices around our home and decided a big step we could make would be trying to eliminate as much food waste going into our household trash as possible. | This post contains affiliate links |
Composting has a lot of benefits. Some of which include reducing the amount of decomposing matter filling our landfills as well as producing nutrient-rich garden soil to benefit your own yard and garden.
Getting Set Up
When it comes to composting, you could just make a pile in the corner of your yard or make your own bin with some scrap wood or fence. However, we decided to opt for a tumbler-style bin since we were looking for something compact, self-contained, and efficient.
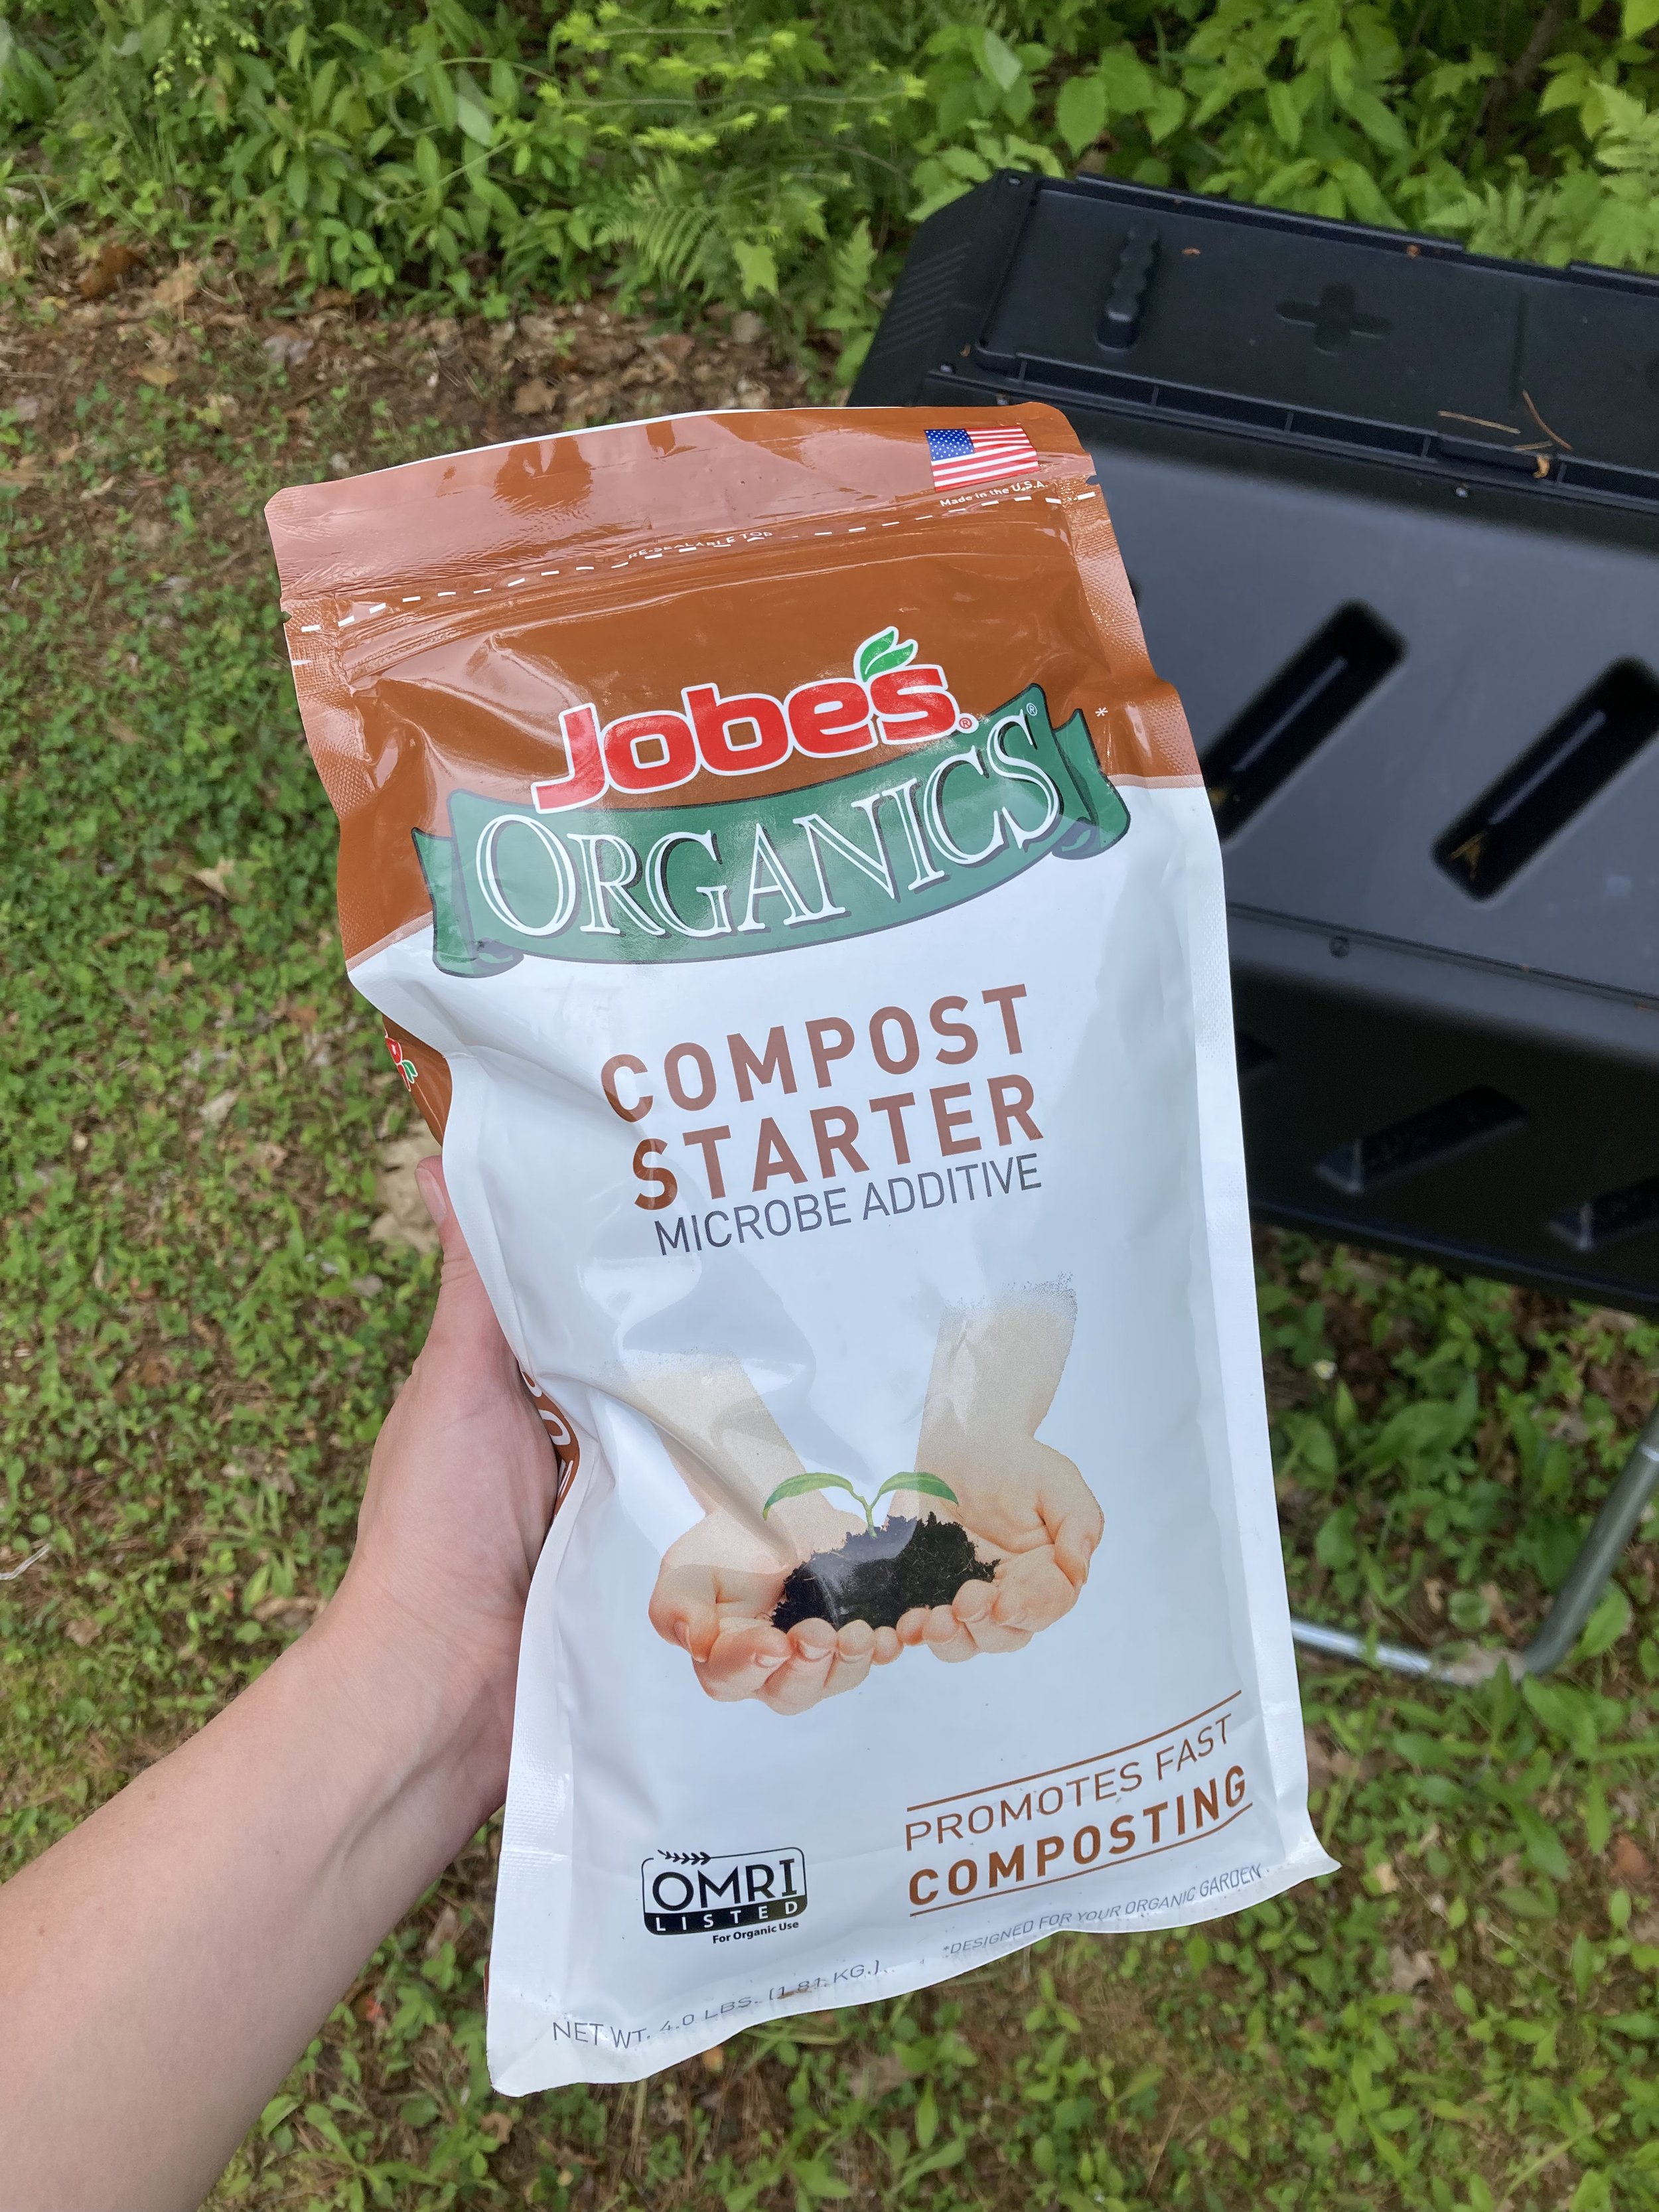
Once you decide on your compost set-up it's important to add some good microbes to "get the party started" and create a good environment for breaking down your food and yard waste. To do this you can add a shovel-full of garden dirt from your own garden to introduce some microbes, or you can buy some specialty compost starter to add to your composter (just follow the package directions).
Composting
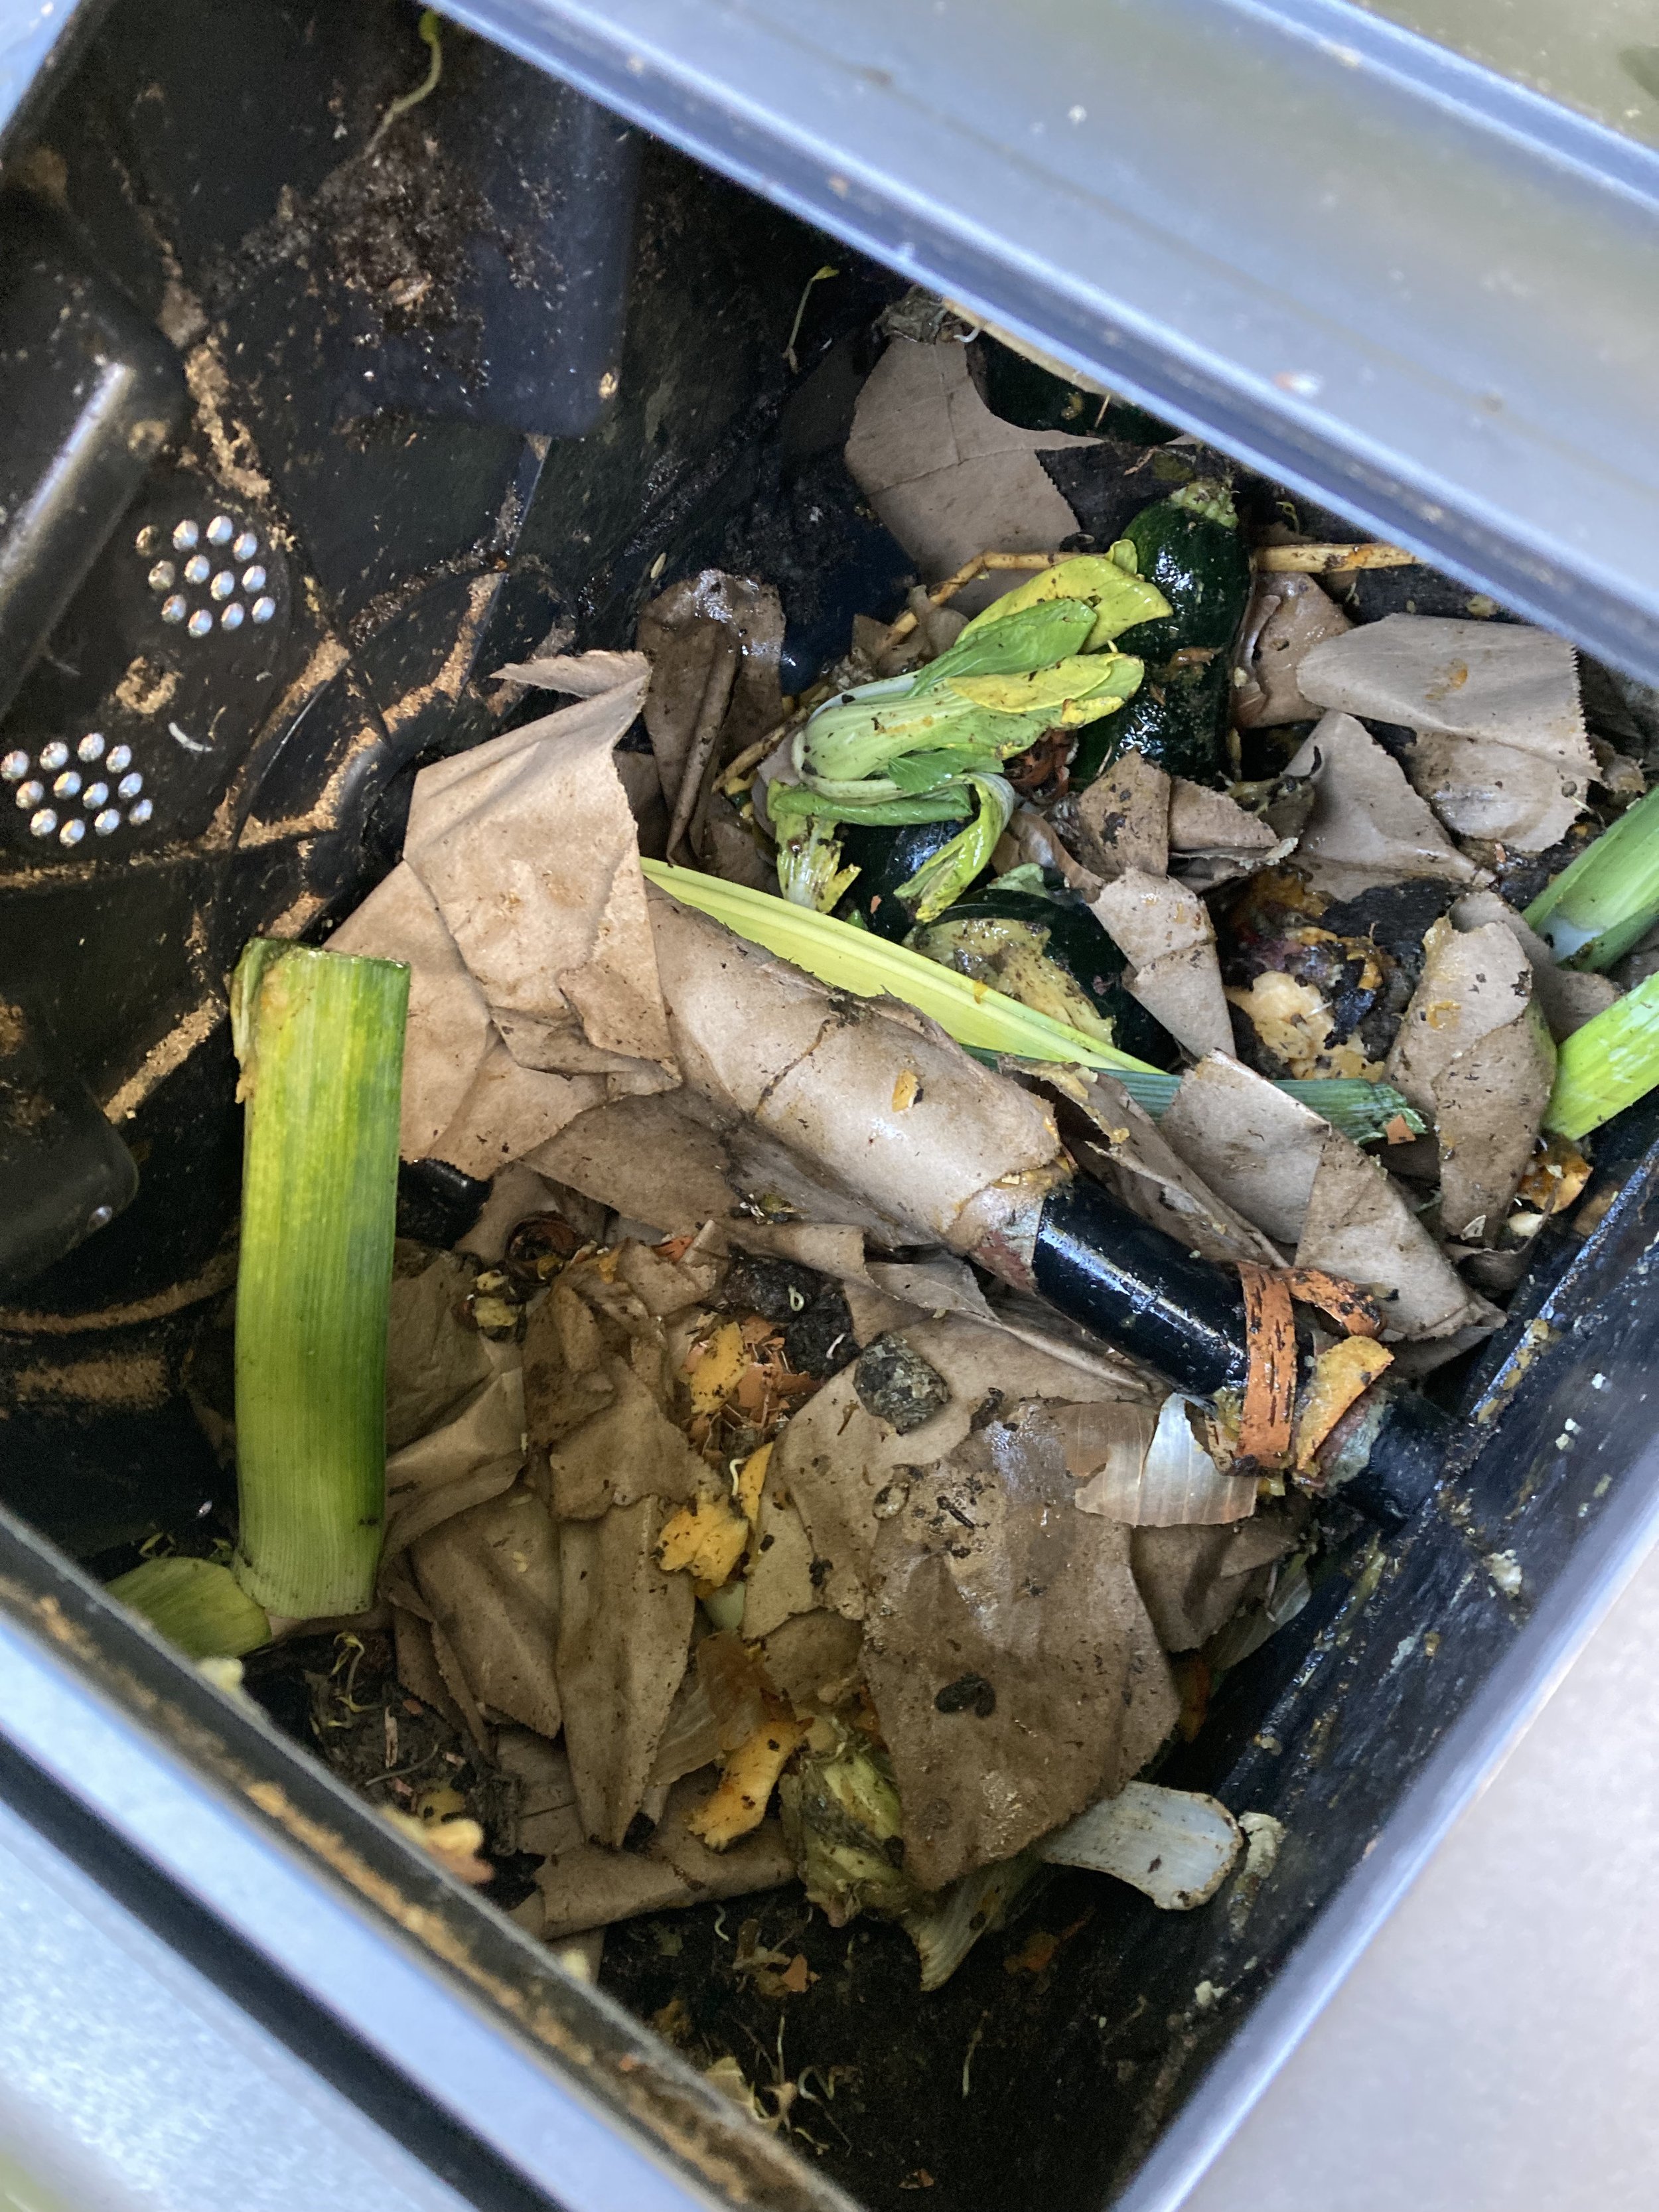
Once you have it set up, just keep on adding food/yard waste and periodically turn your compost over (by hand if yours is a pile or by spinning the drum if it’s a tumbler-style). The trickiest part for me is keeping the ratios right - ideally your compost pile should be about 1 part “greens” (these would be fruit/veggie scraps, coffee grounds, etc… I like to think of them as wet items) and 2 parts “browns” (leaves, newspaper, brown paper bags, etc… I like to think of them as dry items). We personally tend to teeter from too dry to too wet in our compost bin but it seems to average out eventually.
I typically toss our kitchen scraps in a bowl on the counter as I'm cooking and promptly empty it into the compost bin outside. This has worked well for us so far since the weather has been mild. Once it turns winter here I will probably invest in a kitchen countertop compost container so I don't need to walk outside across the icy/snowy yard several times a day, and instead can just empty the kitchen container into the outside compost bin periodically as it fills up.
What to Compost
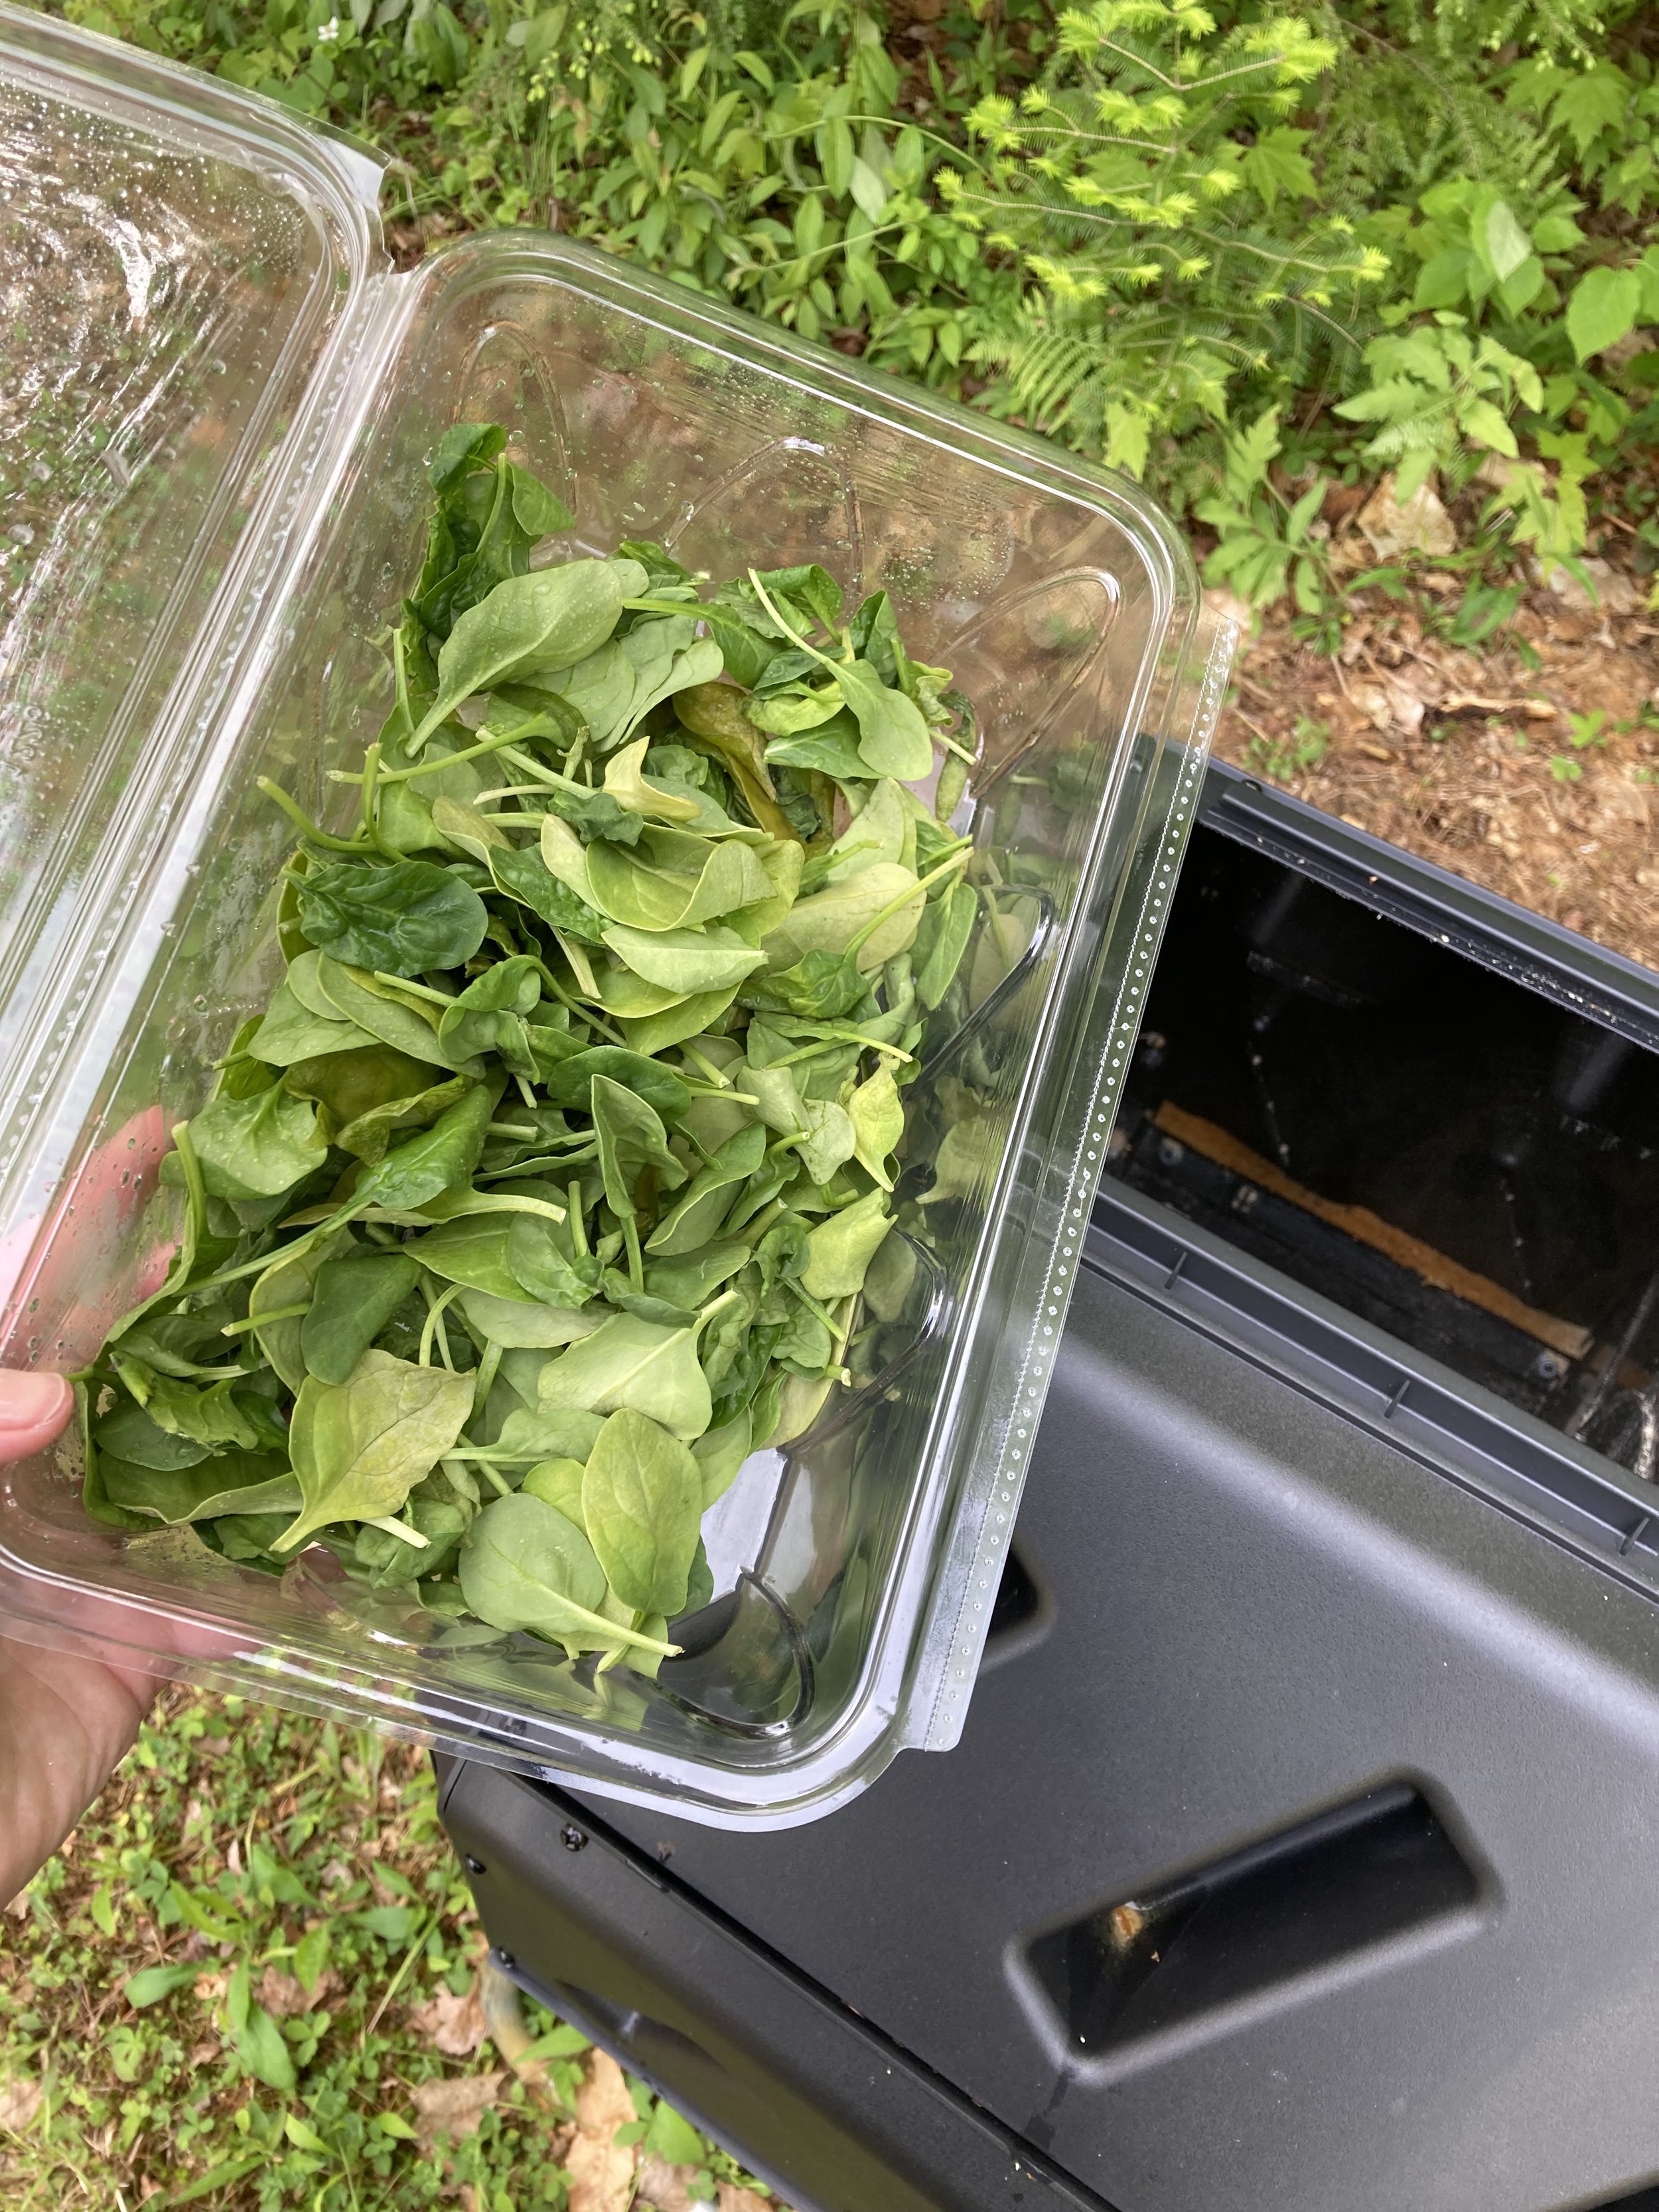
Slimy spinach in your fridge? Toss it in the composter and then recycle the container!
Here’s a short list of things you can potentially compost:
fruit
vegetables
inedible portions of fruit/veggies (i.e. - rinds/cores)
coffee grounds
egg shells
disease-free, non-invasive plants
shredded newspaper
shredded brown paper bags
shredded paper (non-glossy)
untreated sawdust (I make a lot of ornaments for my Etsy shop and compost the sawdust)
toilet paper rolls
leaves, grass clippings
small sticks
The smaller you make the items in your compost bin (cut them up or shred them), the quicker they should decompose and compost.
What NOT to Compost
Do NOT Compost:
x plastic or household trash x meat x dairy x cooked food x glass or metal x animal waste or used animal bedding/shavings x invasive or diseased plant materials - compost very strong smelling fruit/veggies with caution (i.e. citrus/bananas) if you live in an area with bears or raccoons that are an issue
Good luck in your composting adventure! I hope you enjoy the process and be proud in your efforts to be a little more eco-friendly in your home.
Disclaimer: I am sharing my experiences with what we’ve learned in the composting process so far. If you’d like expert or more detailed and specific information, I’d recommend contacting your local garden center or university cooperative for more information. Your local town or city may have composting programs to join or guidelines to follow too.
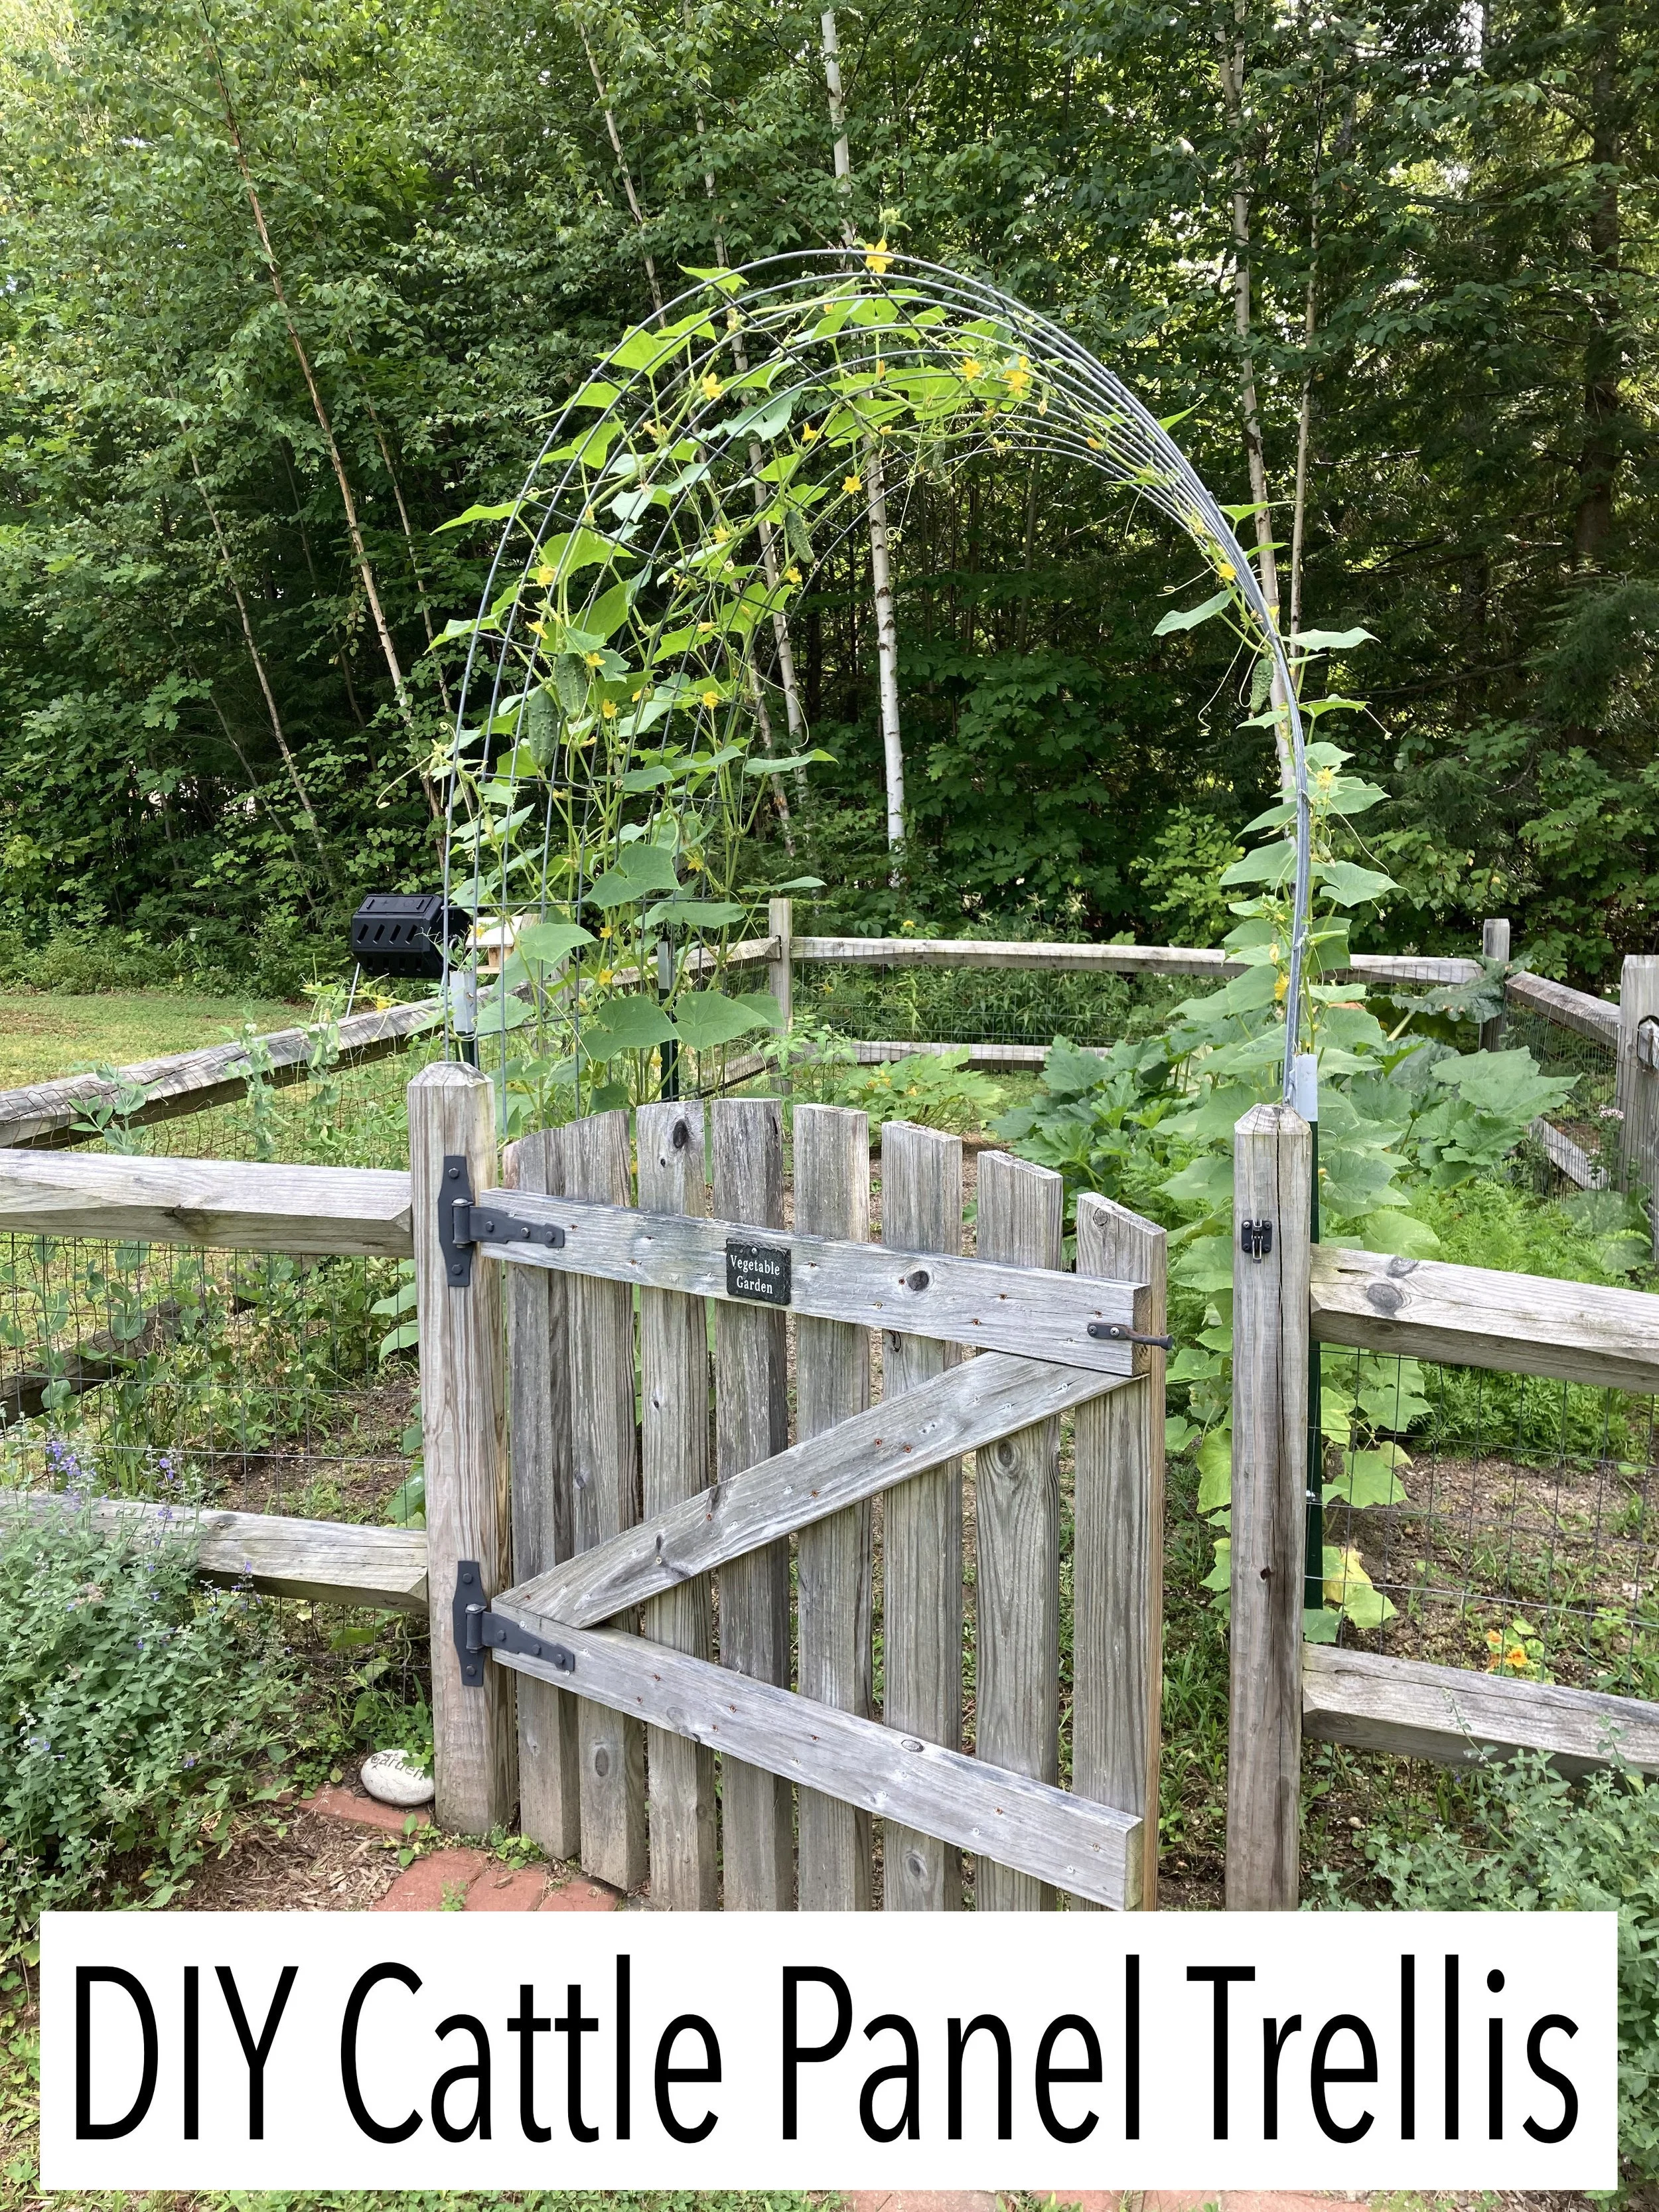
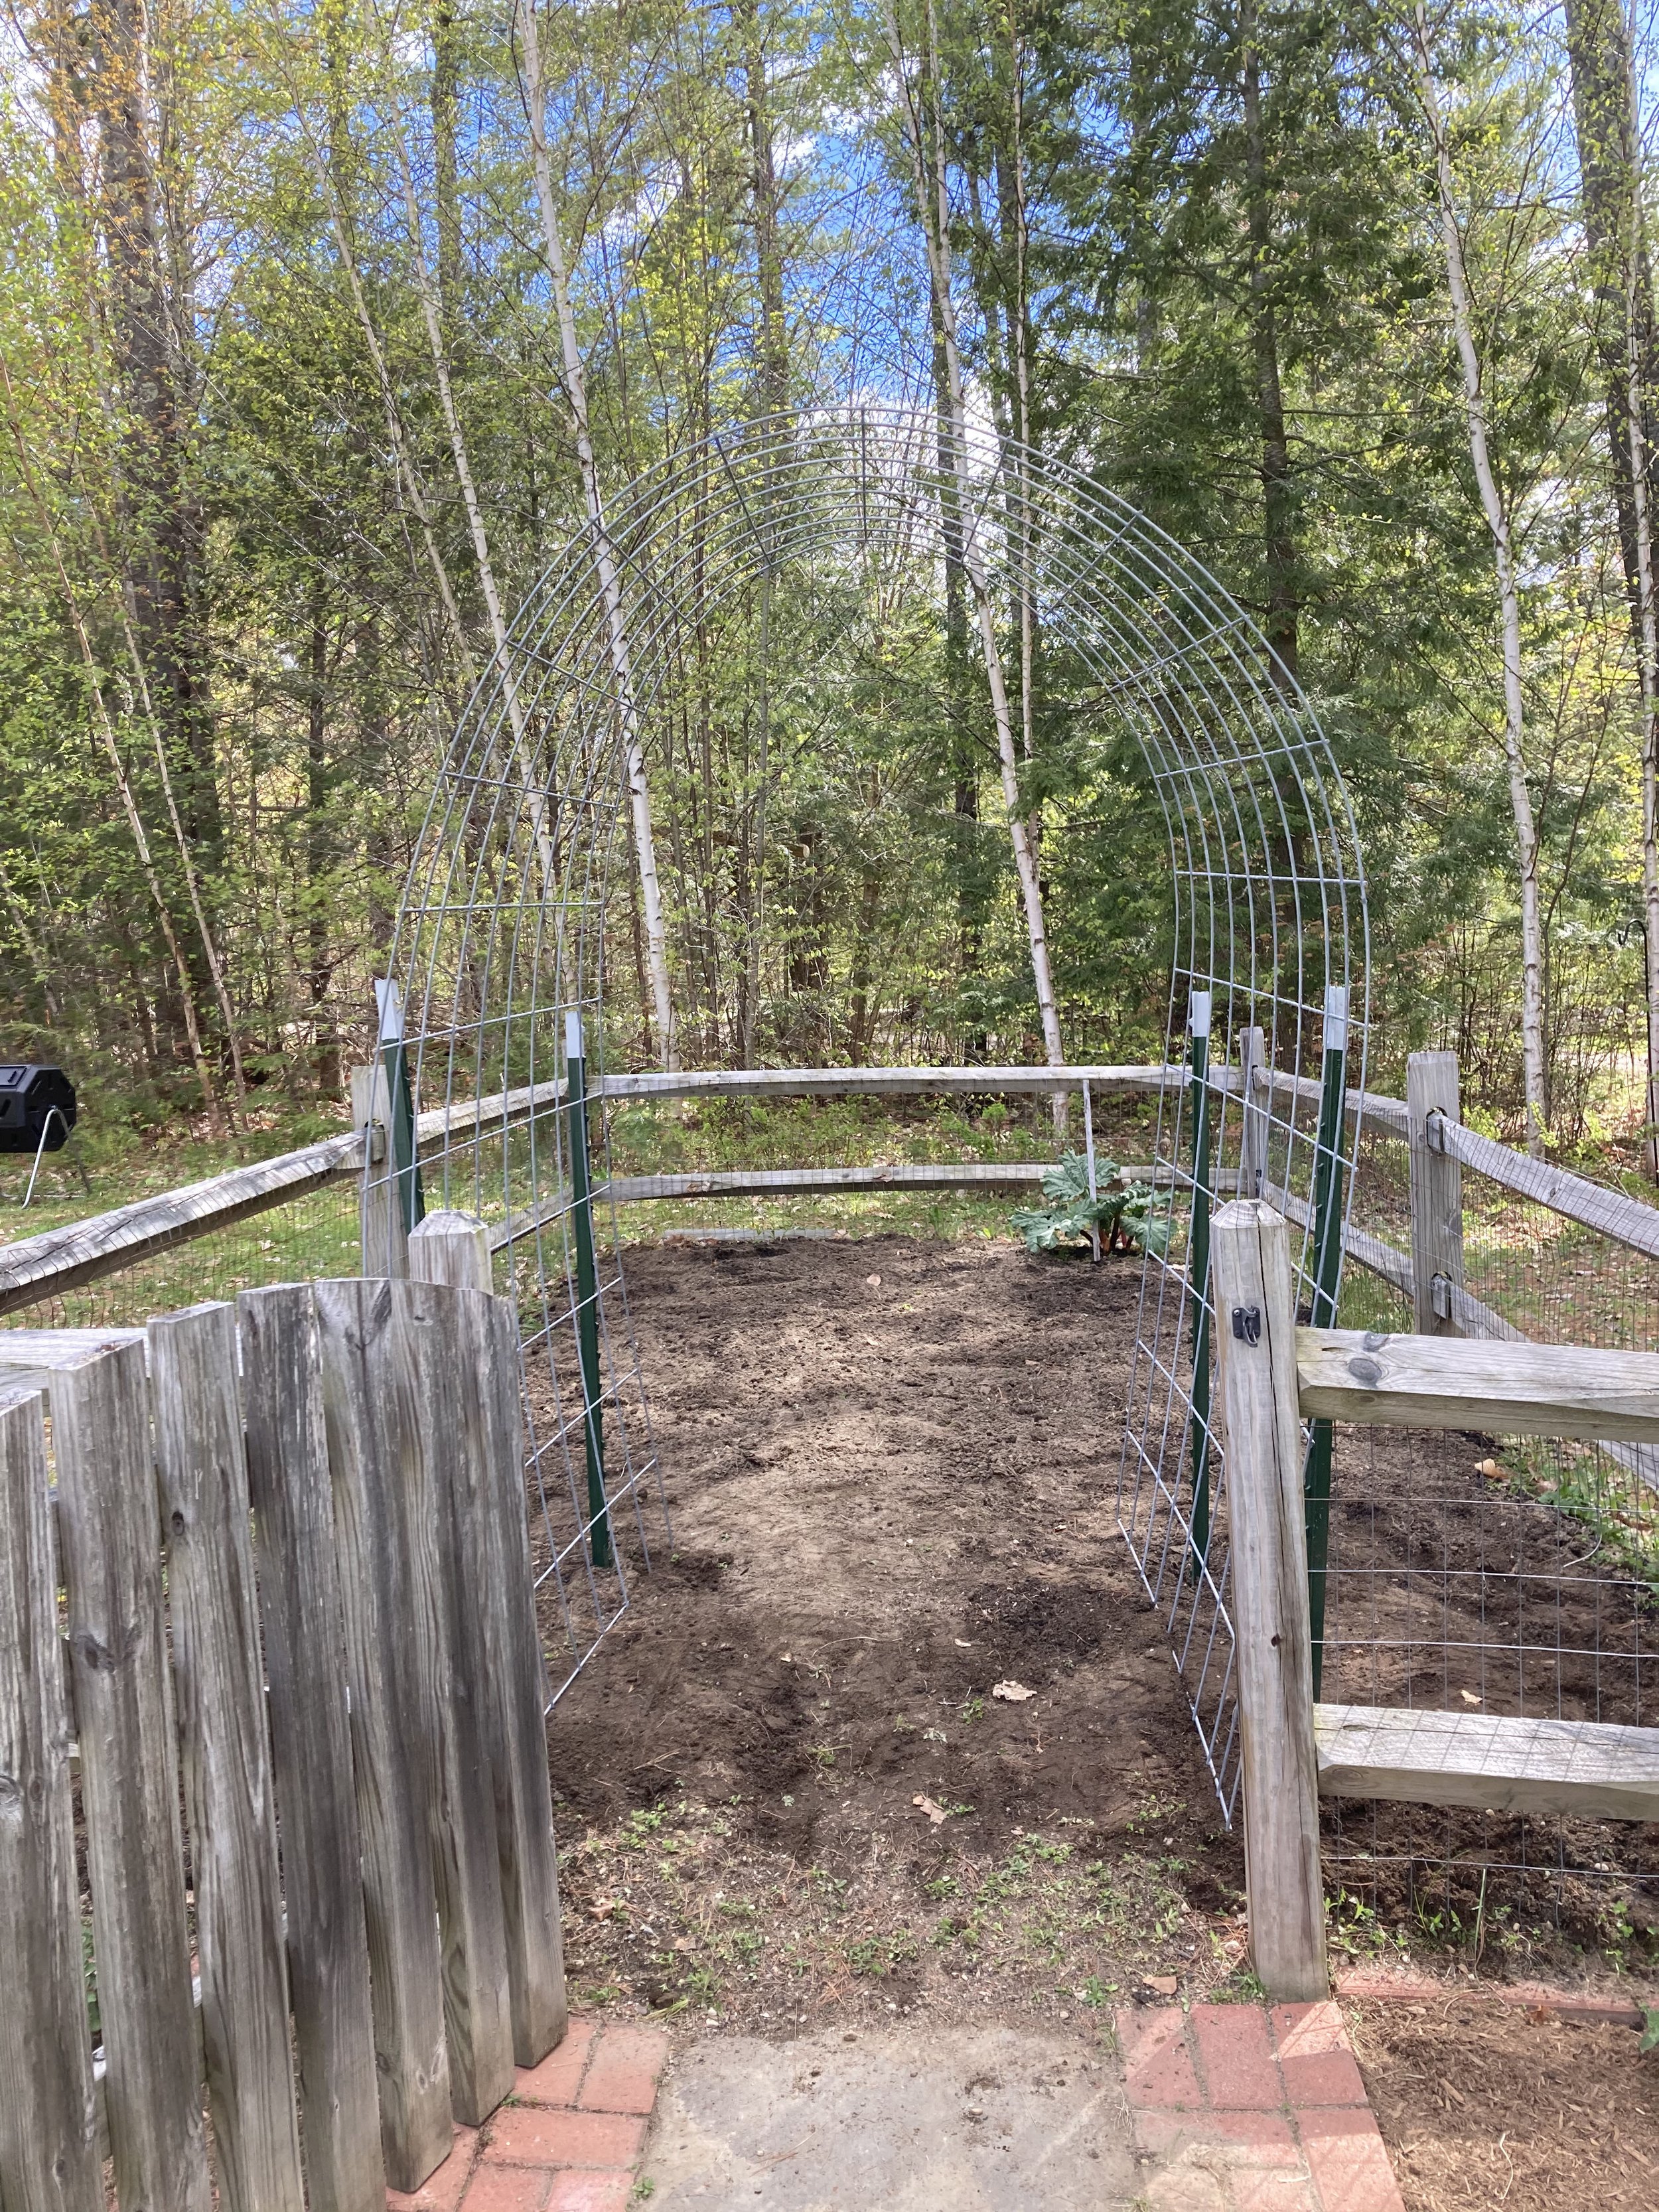
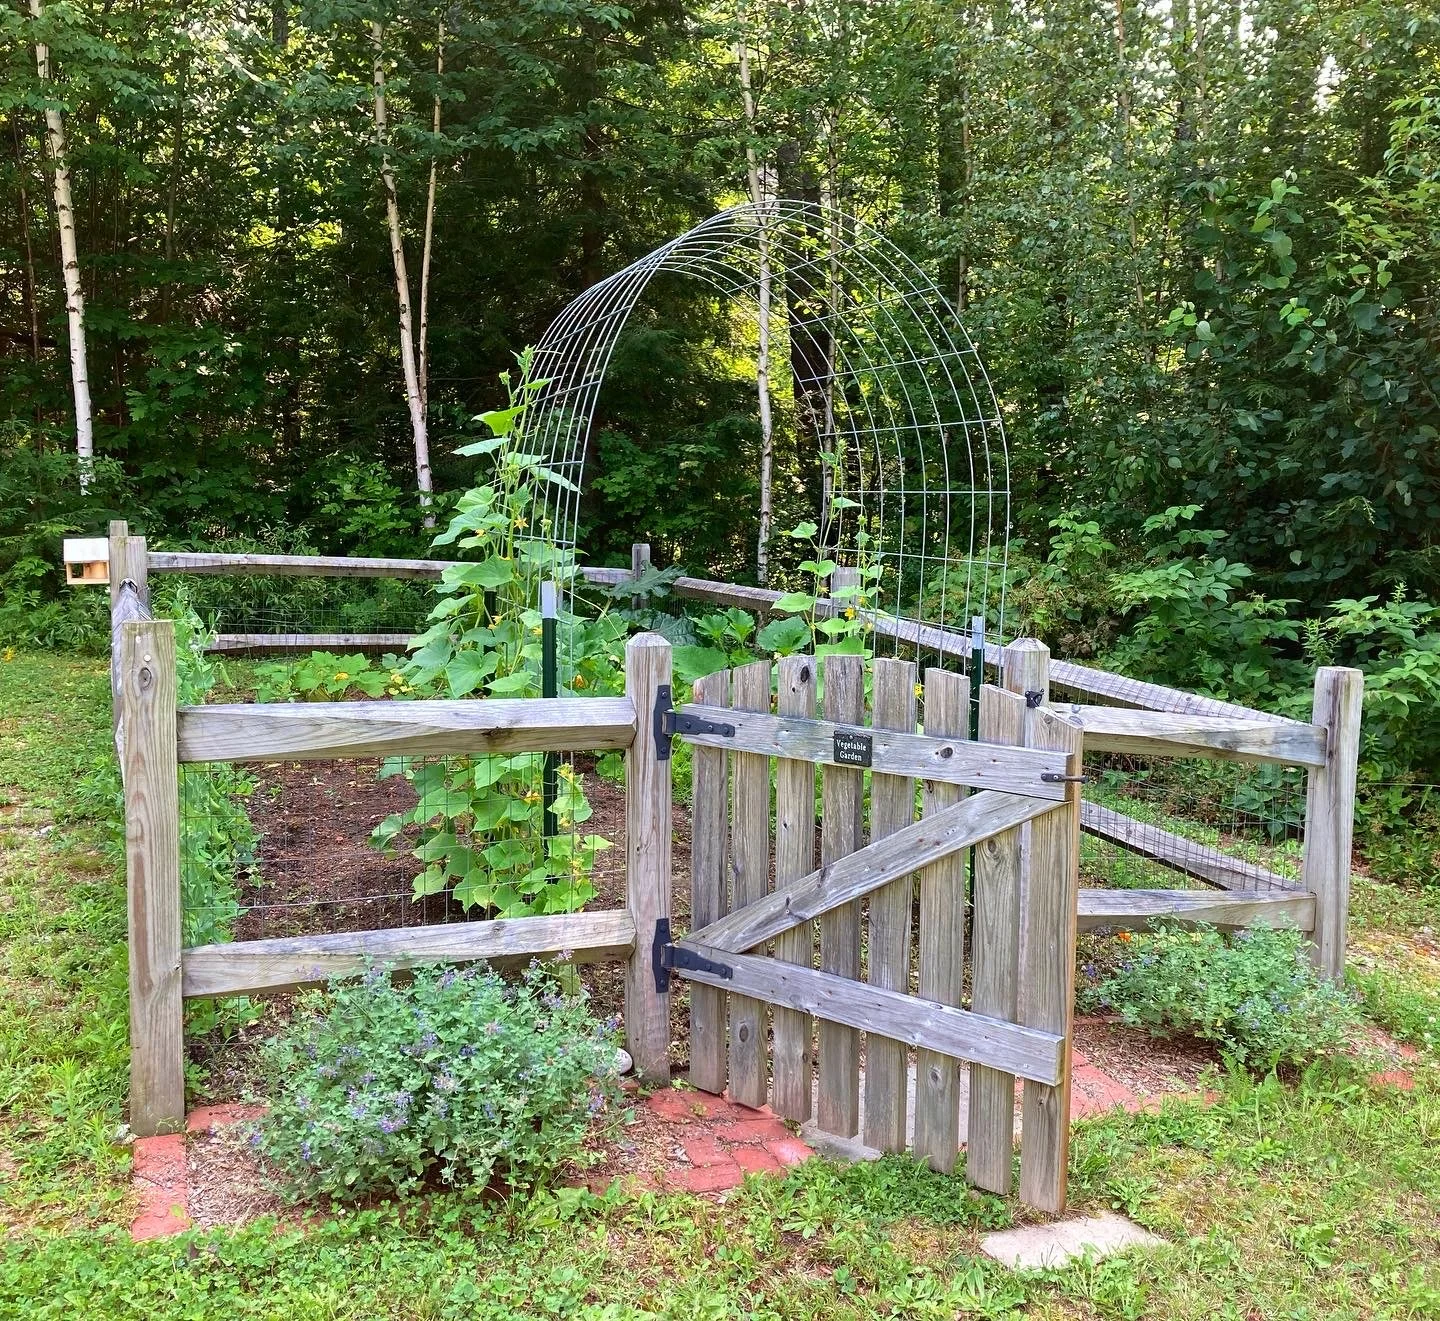
Last summer Pinterest blew up with DIY Cattle Panel Trellises and I decided I was going to jump on this bandwagon next season… And so here we are - it’s spring and I’m excited to get this set up and document my garden’s progress this year. | This post contains affiliate links |
- This post will show how we built our Cattle Panel Arch and I will also add progress photos to this post as our garden grows -
To make a Cattle Panel Trellis, you really only need a few things. We picked up most of our materials at a local Tractor Supply store but you could find these materials at other farm/garden centers too or order online. The trickiest part was getting everything home since the cattle panel is fairly large. Thankfully my father-in-law has a pickup truck and was able to pick up the items for us.
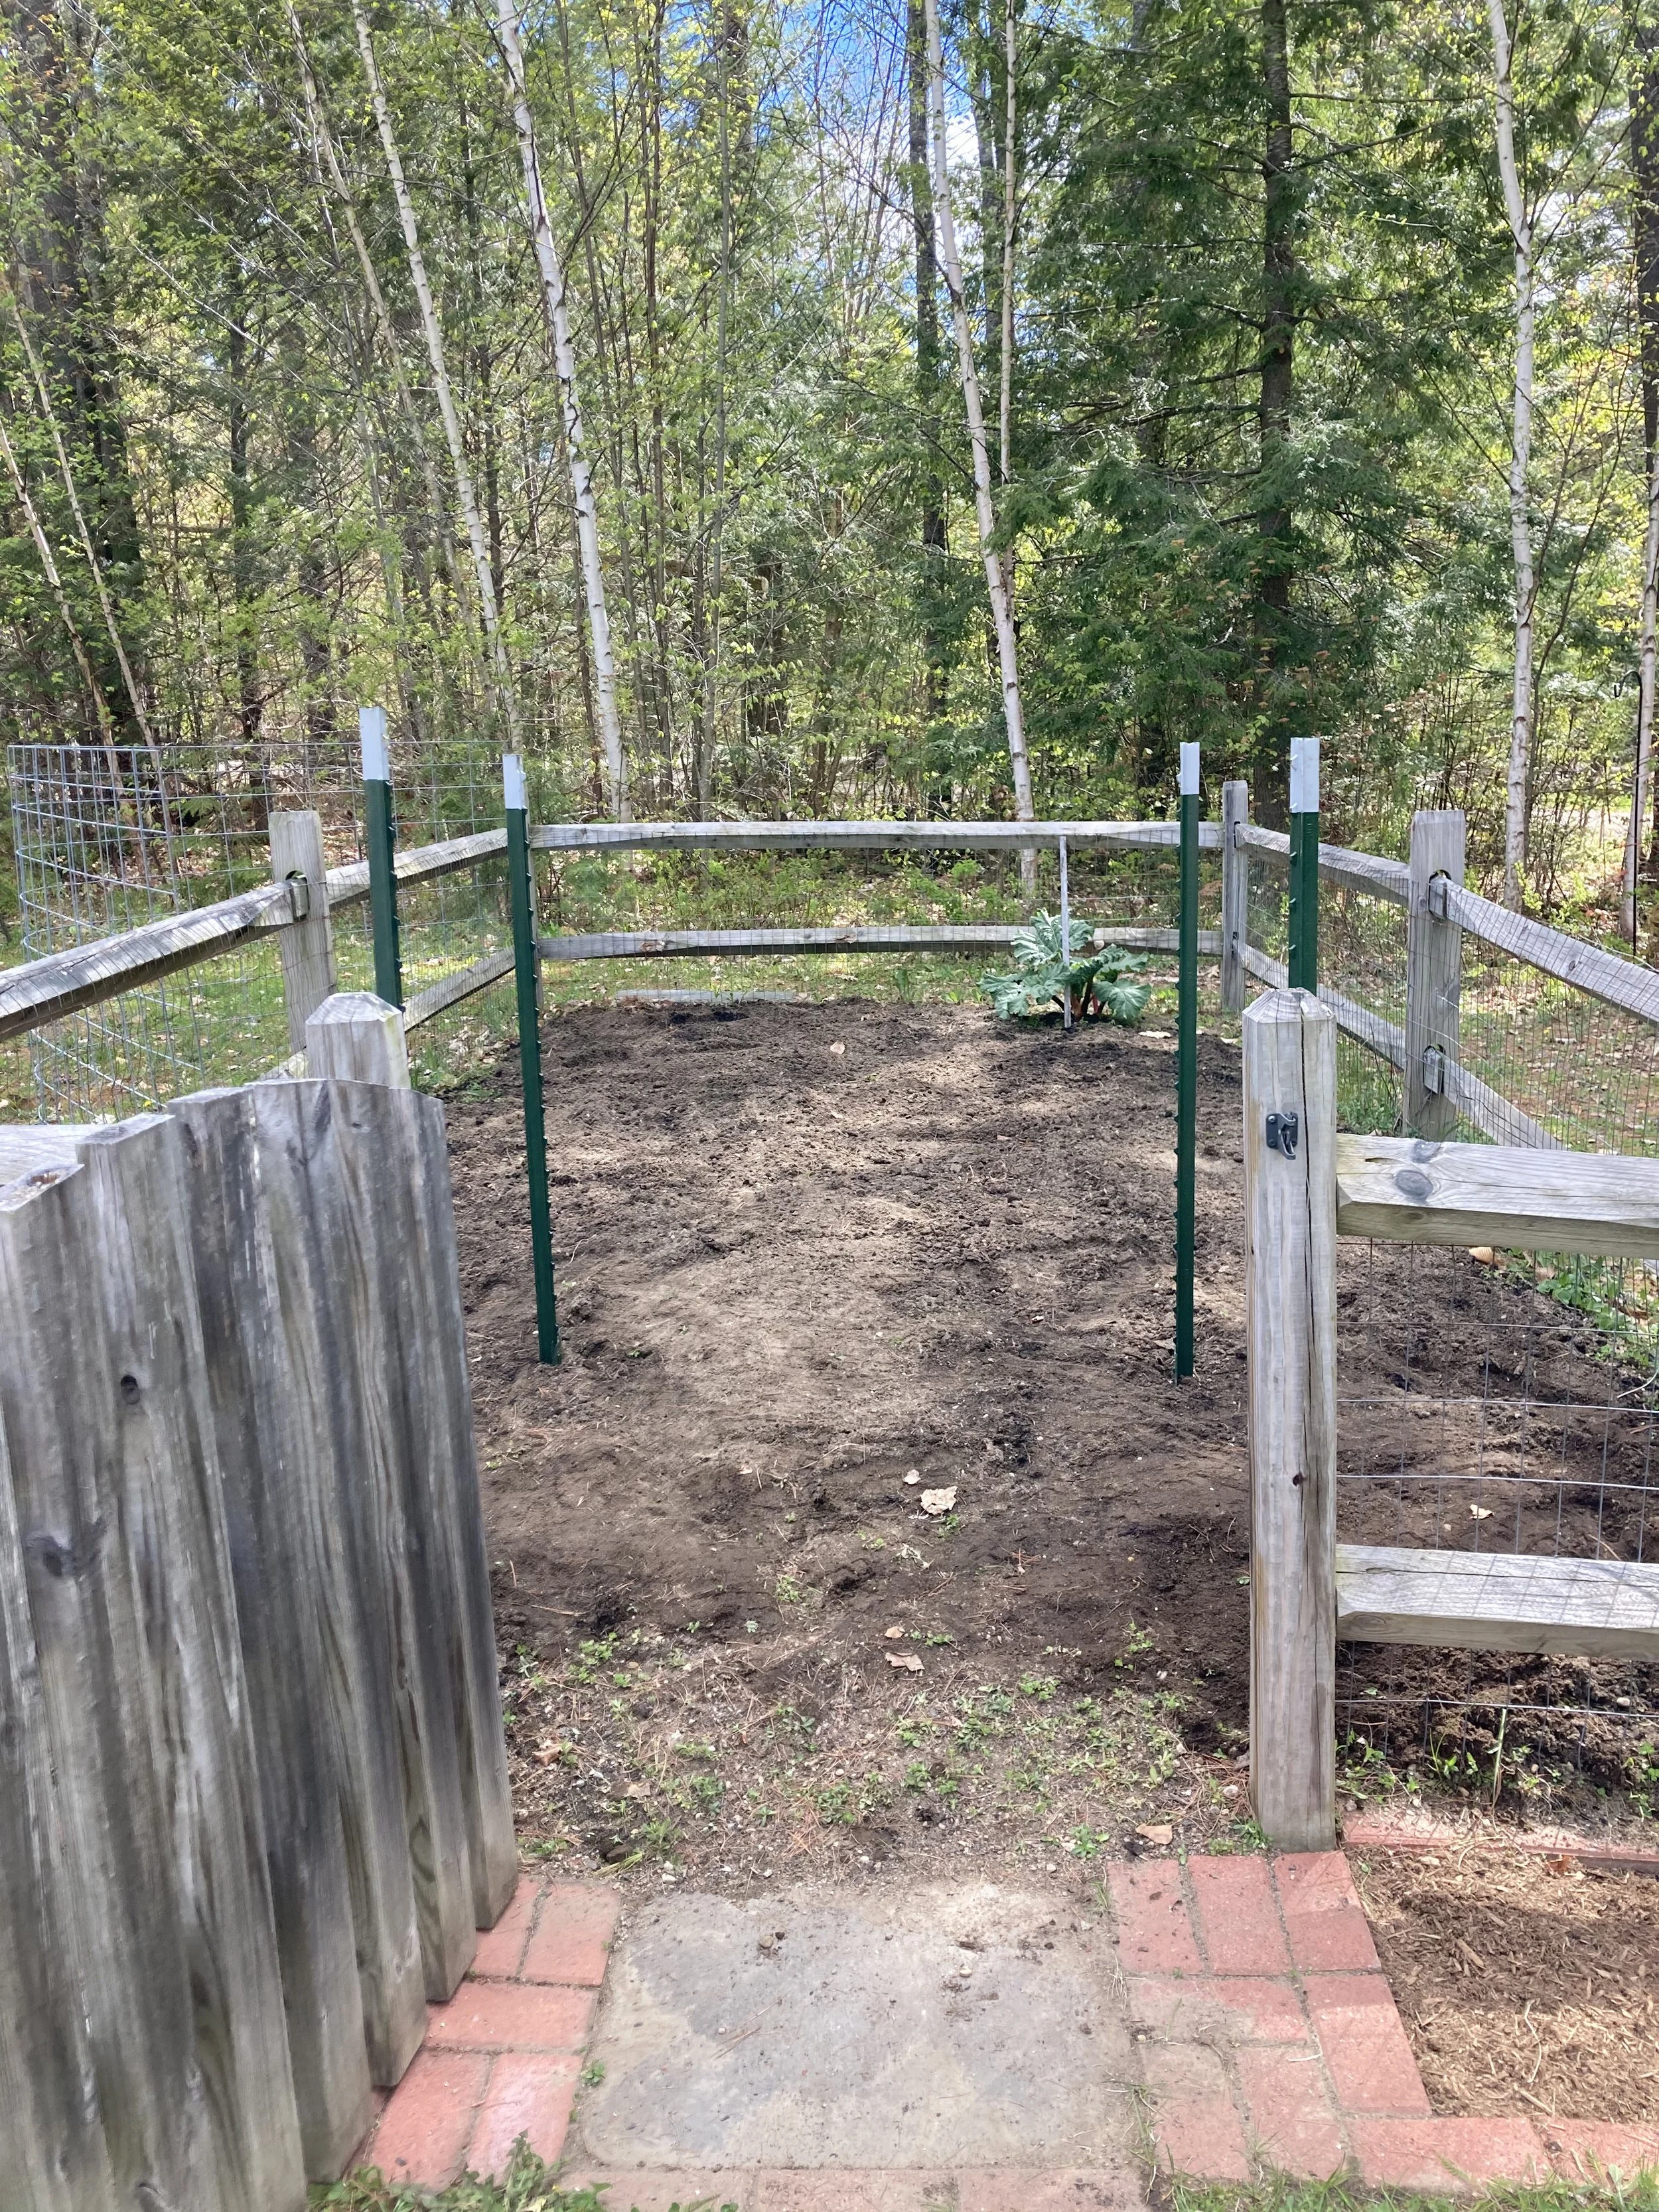
First, figure out where you want your arch to go. For us we put it just inside our garden gate to frame the entrance. It’s also on the north side of our garden so it won’t shade the other veggies too much.
Once you have it laid out and square, drive the t-posts in with a hammer or post driver until they’re deep and sturdy. This was easier-said-than-done with our rocky soil here in NH, so one post couldn’t go in quite as deep as the others but it was sturdy enough still.
Next gently bend the cattle panel into a “rainbow” and set it inside the square you made. (Next year we might move our t-posts out a little wider to get a more gentle and less-tall arch, but this worked fine for us too as-is.)
Once you get it in place, secure it with hose clamps, heavy duty wire, or some rope so it stays in place.
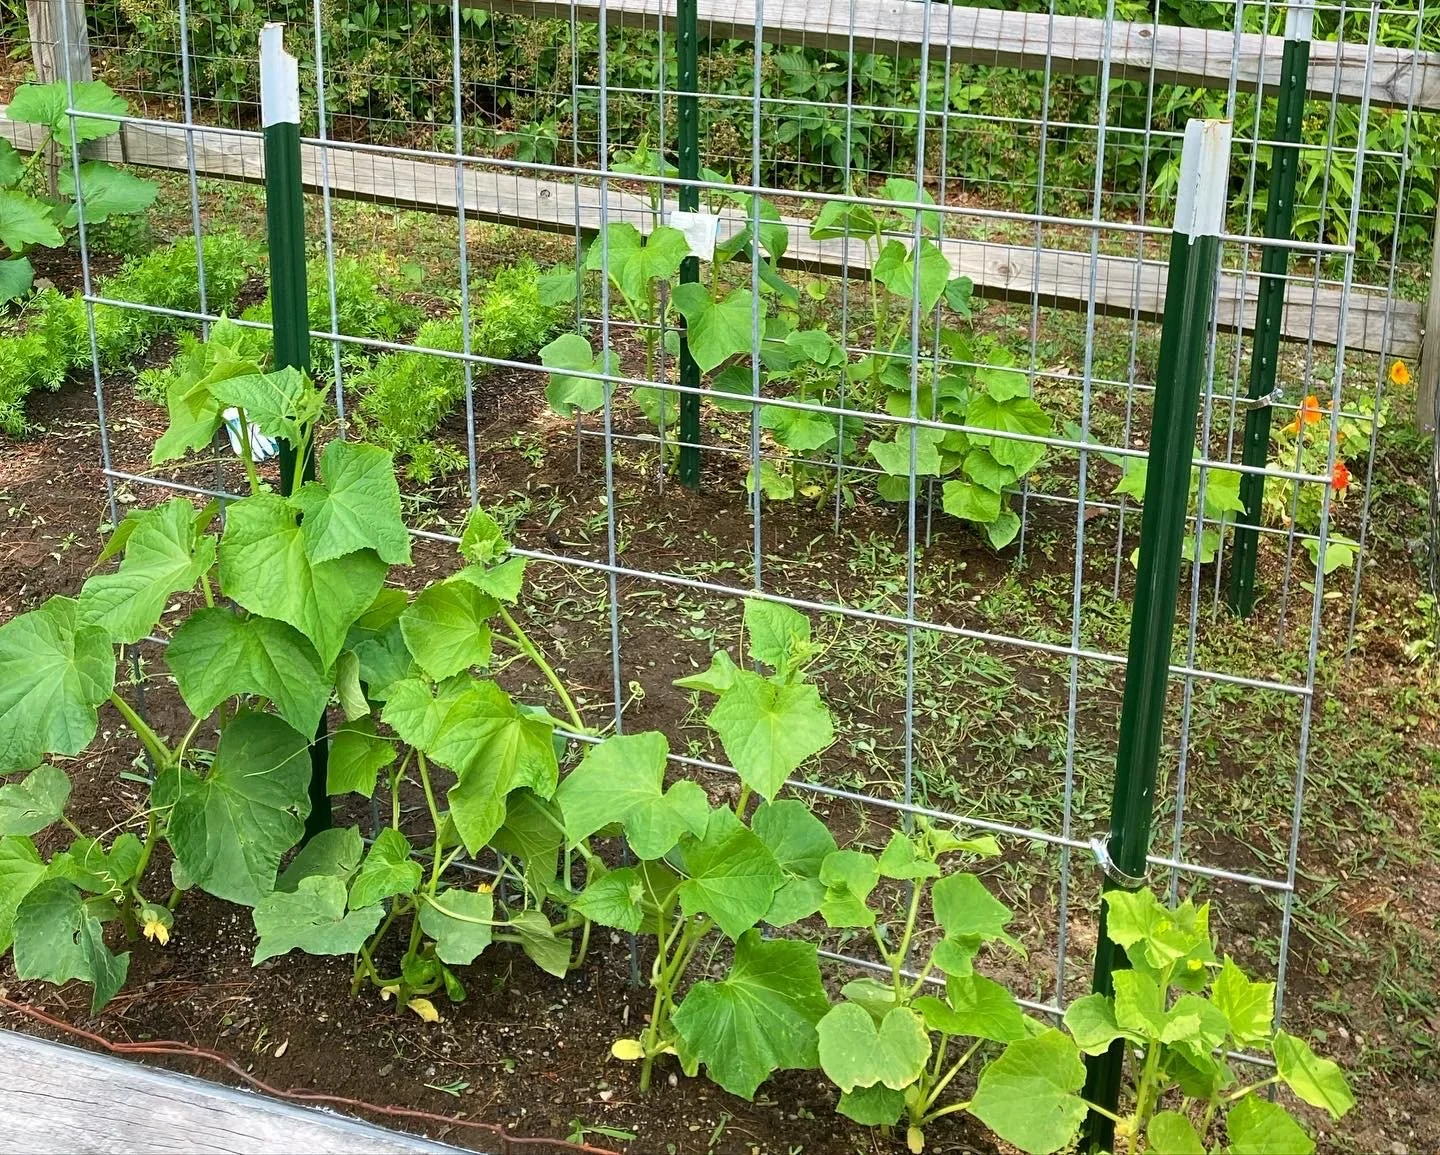
Now you can plant! We planted ours with vining cucumbers, but you could plant just about any vining plant on these - including peas, squash, ornamental gourds, flowers, etc.
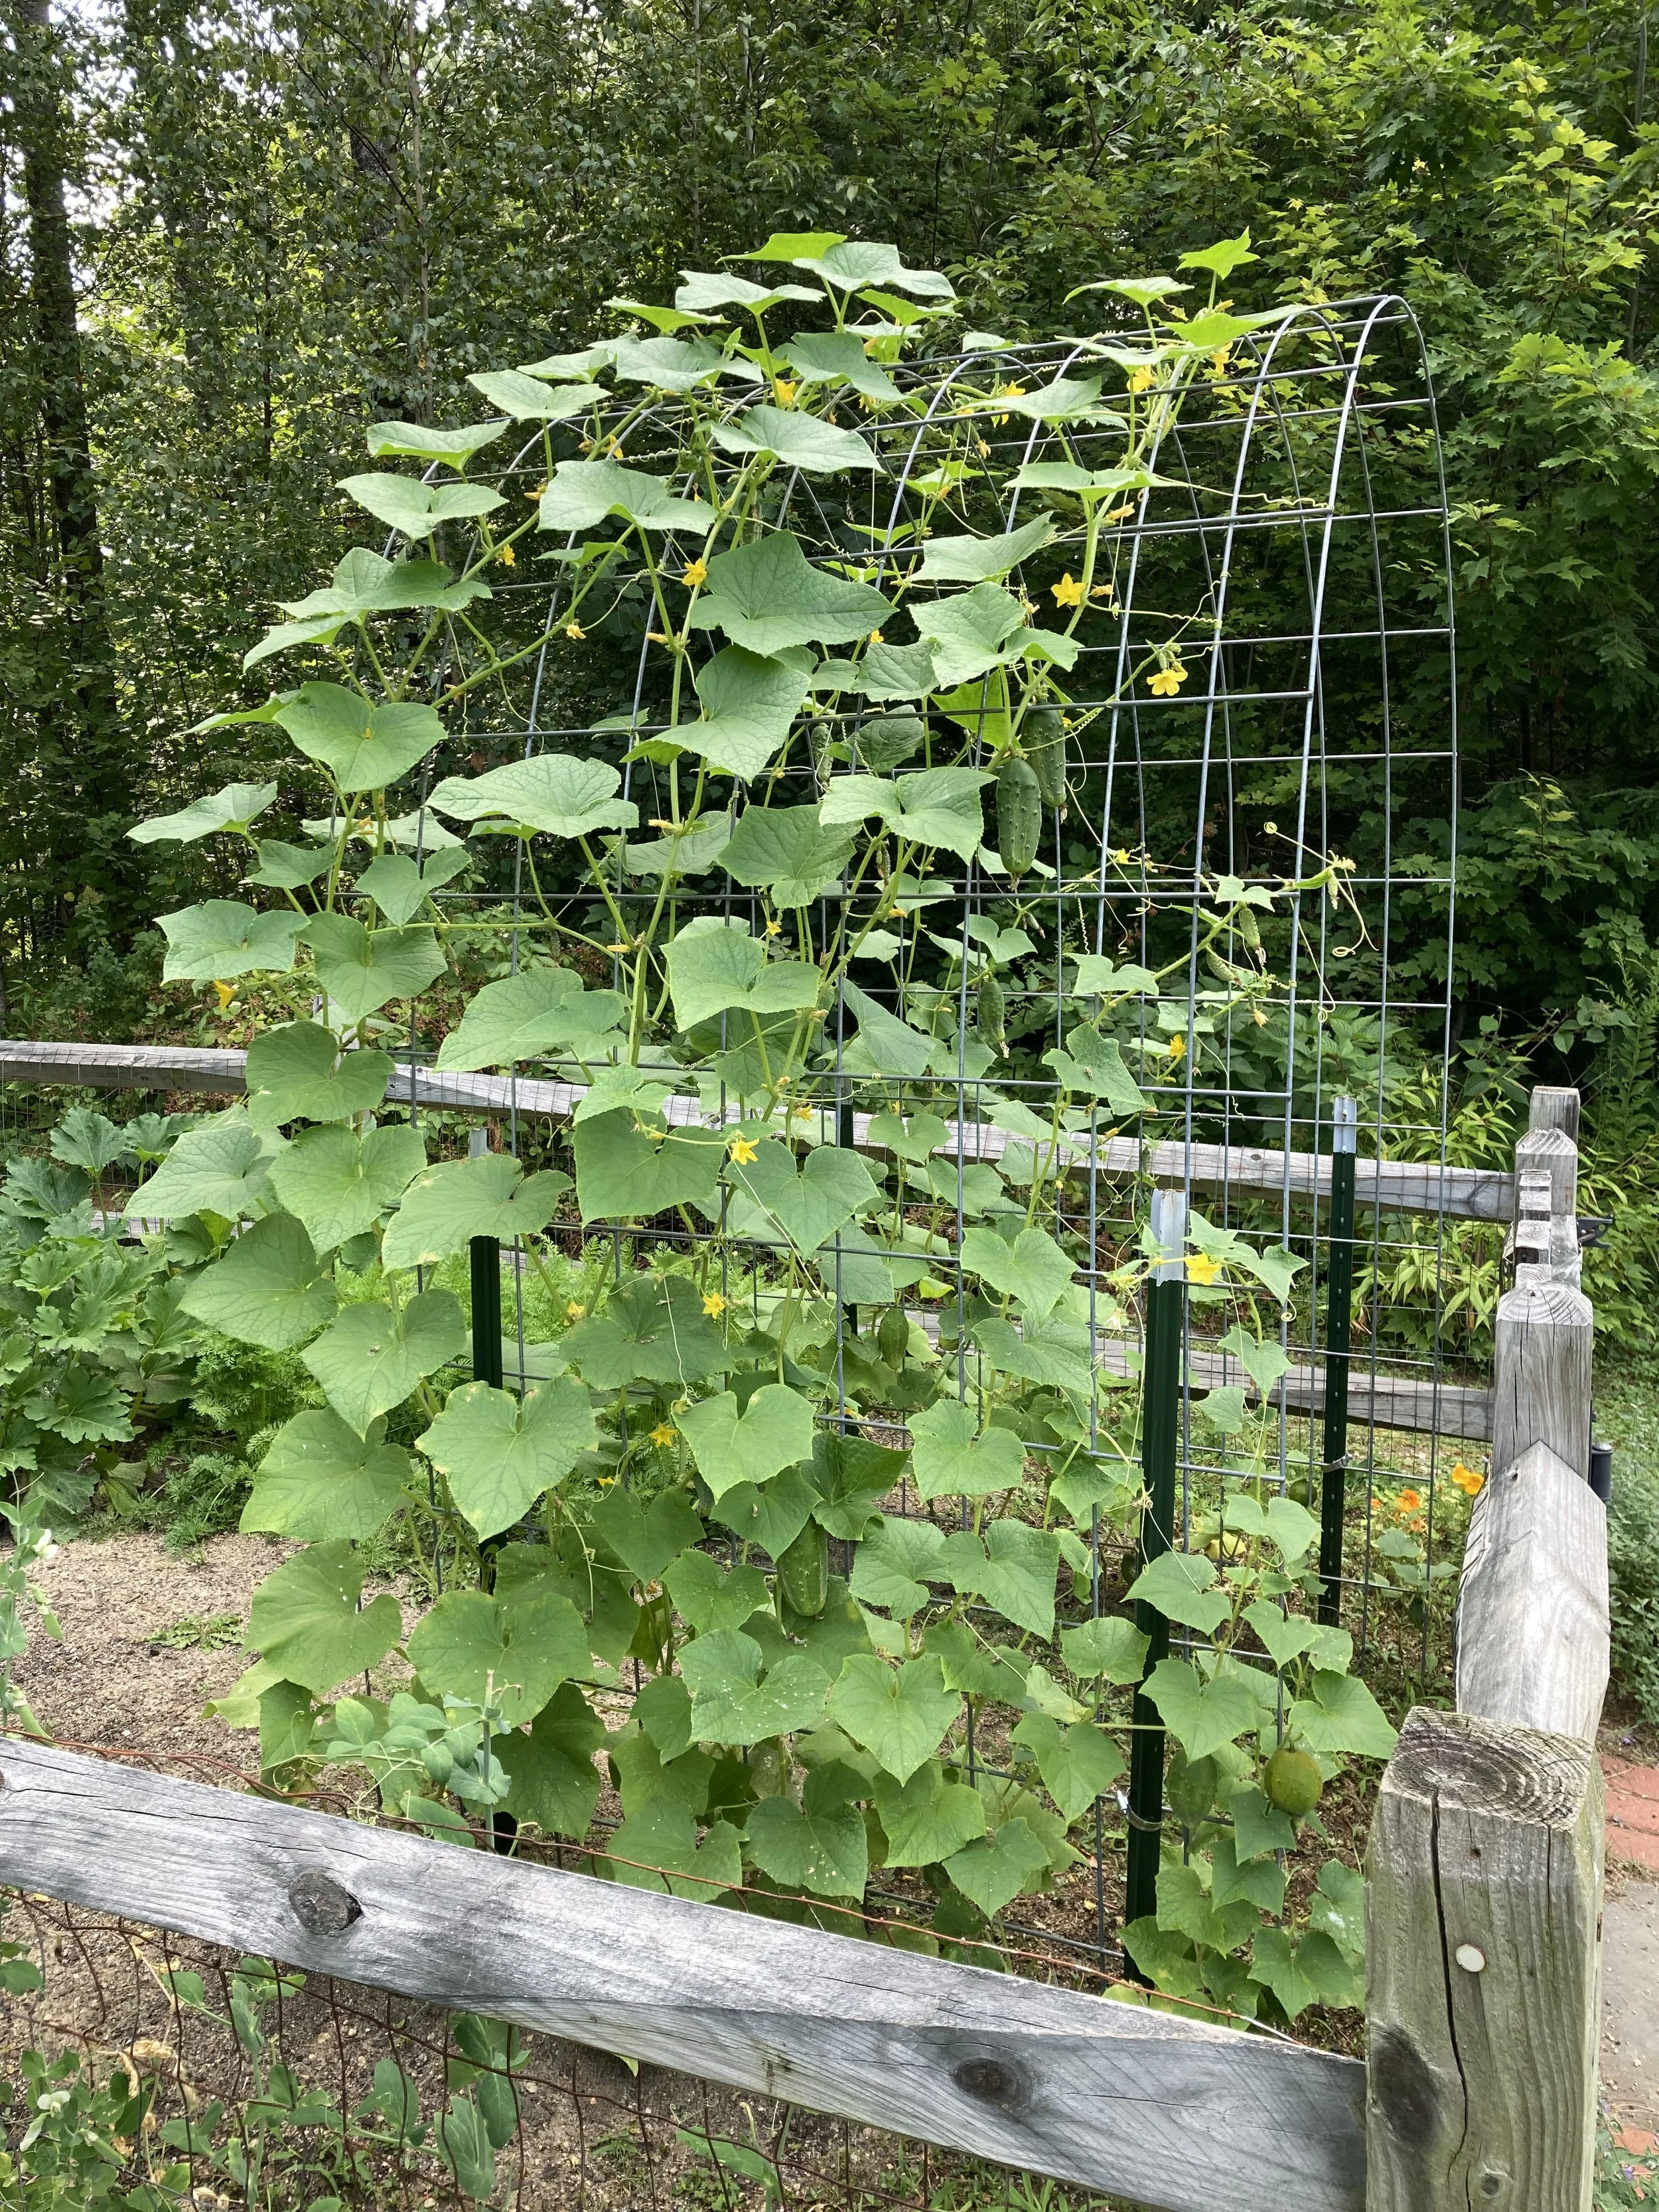
The vines do a great job climbing the arch on their own, but it’s a good idea to check them daily and gently guide the vines where you want them. There’s always a rogue vine that will try to go the other way! They will especially need some help being trained to follow along the top of the arch since their natural inclination will be to continue growing straight up rather than bending around the curve at the top.
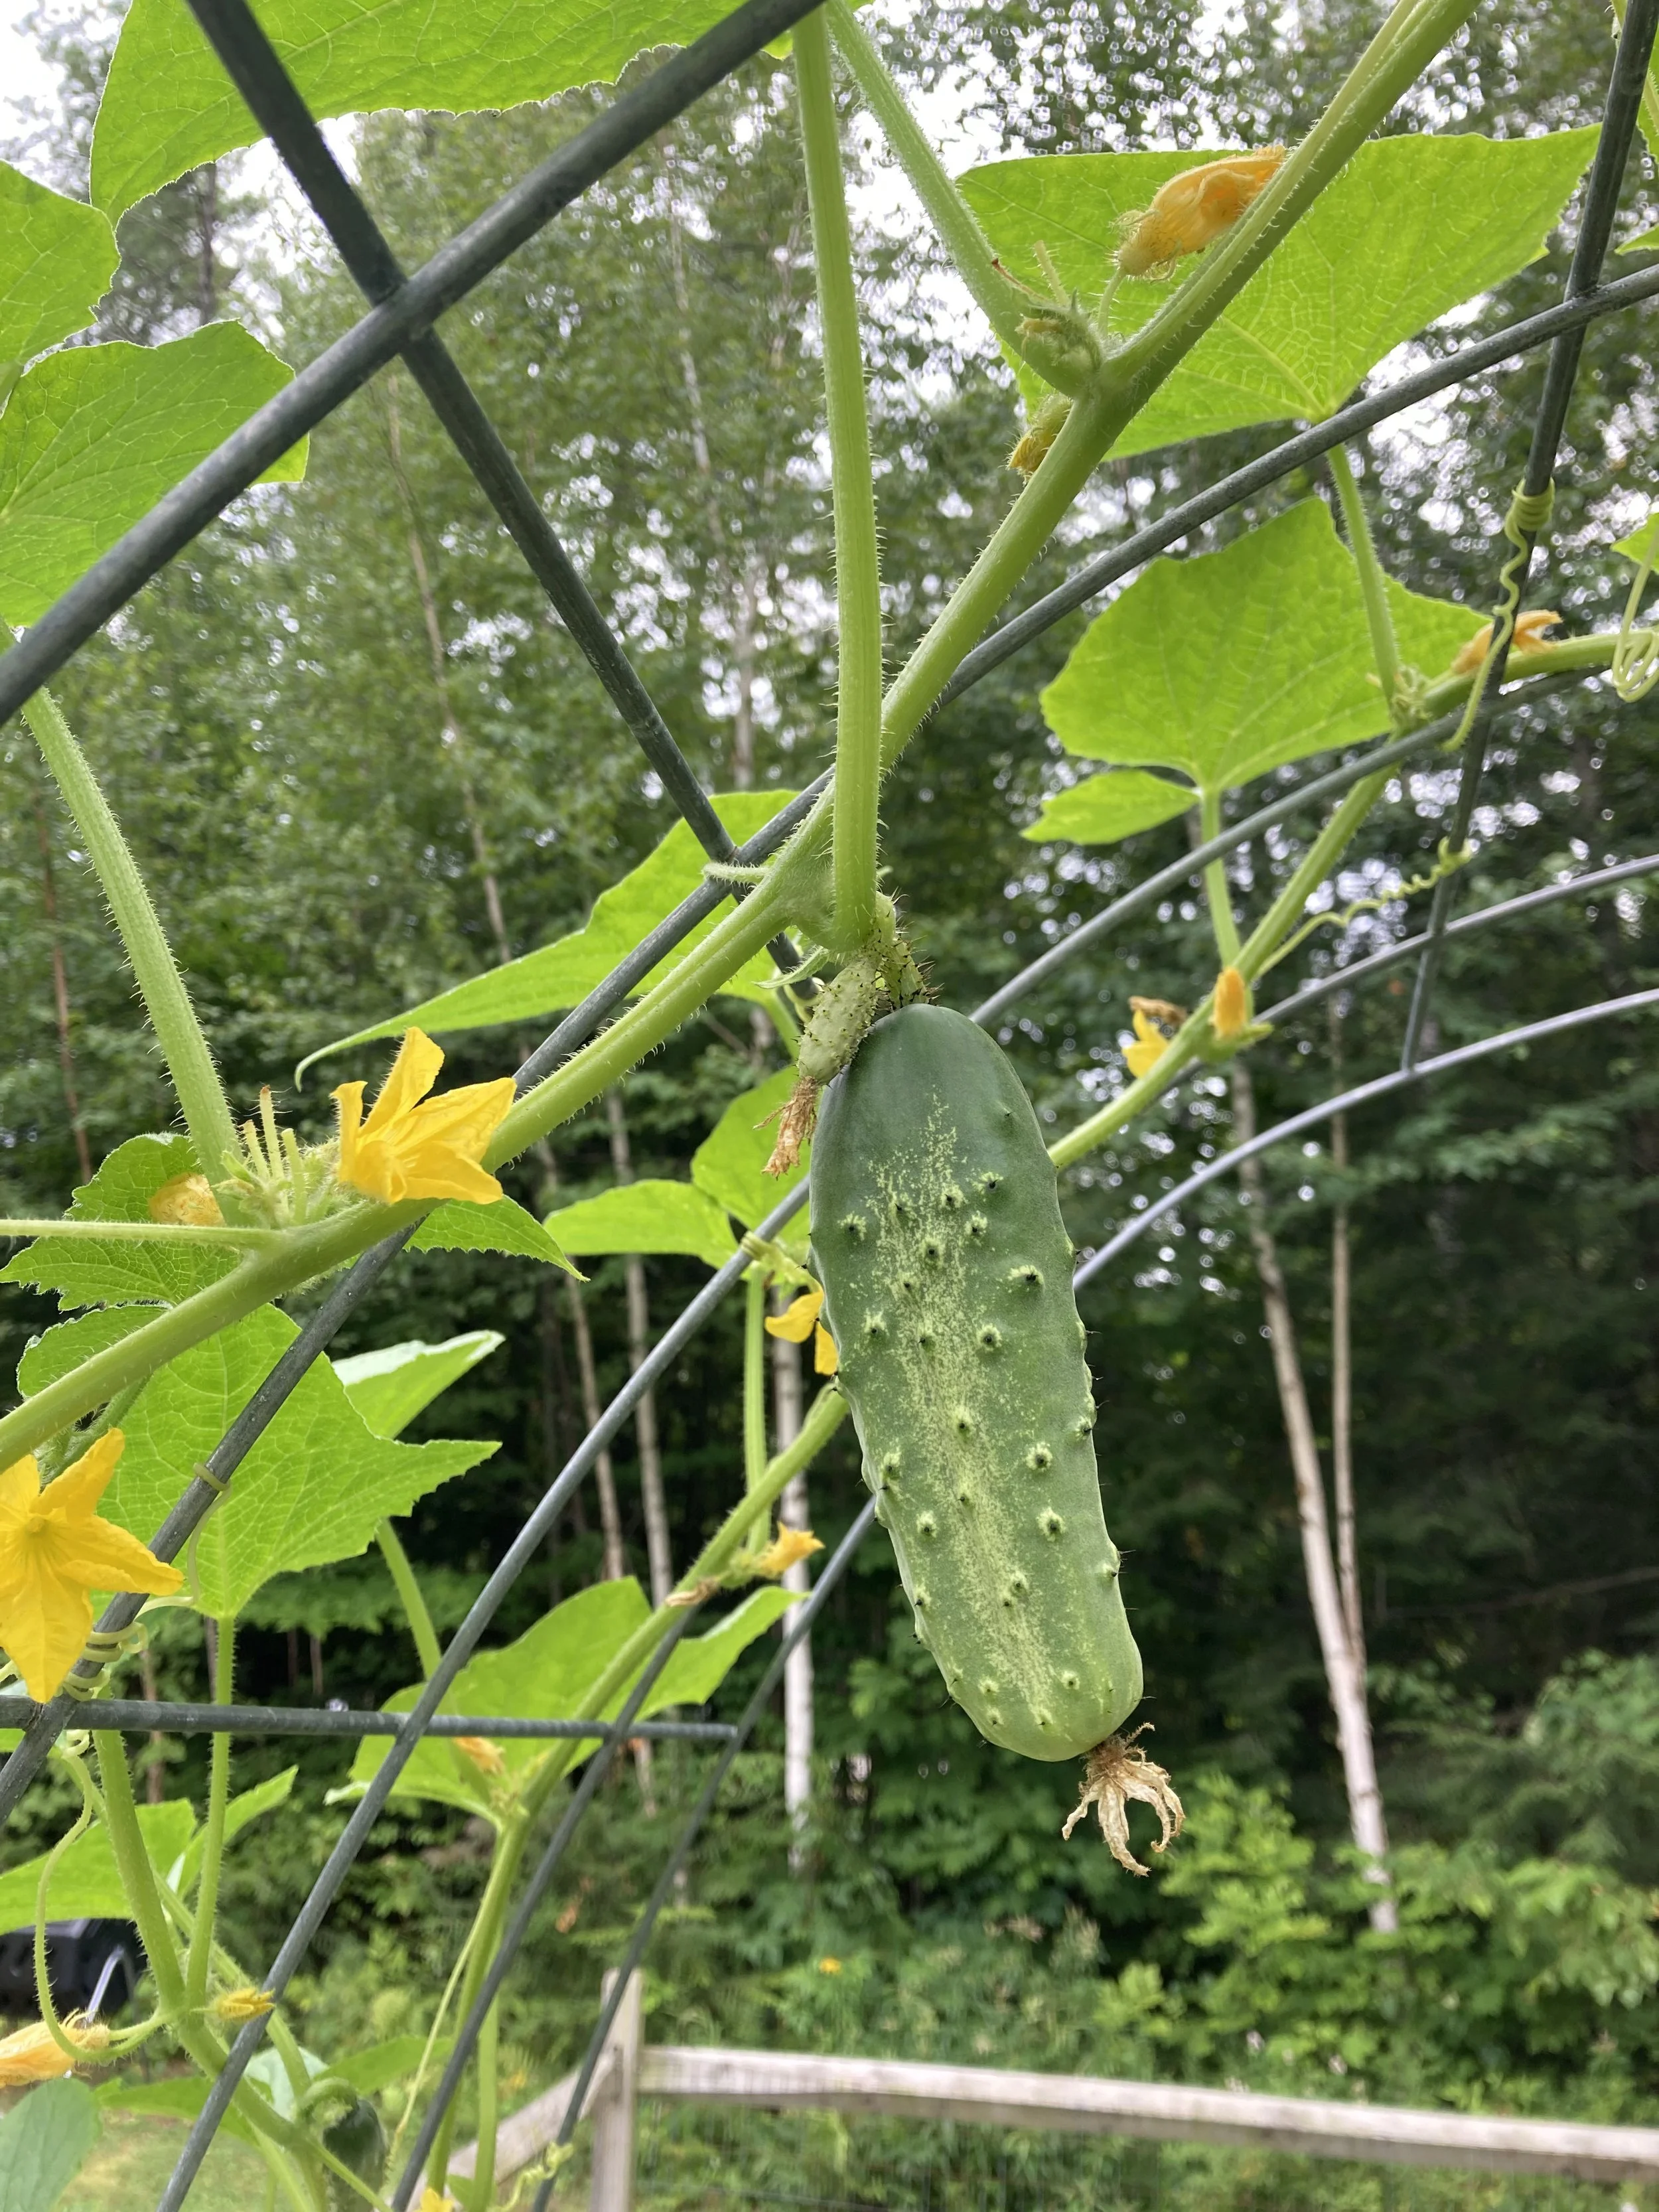
And that’s it! Overall it was a very easy project and one we will definitely continue with in the future. I also noticed a huge benefit for our pollinators too - the bees were able to reach the flowers easily and we had a bumper crop of cucumbers this year. They were also very easy to pick hanging down from the arch.
Good luck on your cattle panel trellis adventure!
From earlier in the season, before the vines reached the top.