I'm a wife, stay-at-home mom, crafter, and blogger living in rural New England. As seen in Martha Stewart Living, Food Network Magazine, and more! | Tutorials, DIY, crafts, parenting tips, recipes, money saving tips, product reviews, local product features, New England living, intentional living, and more! |
Two of my favorite blogs, WillowCrowns and Olive & Tate, recently posted their views on how they work to protect their kids online and it opened my eyes to some of the new weird stuff that's going on out there (like baby role-playing, so creepy). Everybody has their own opinion of what's okay or safe to share or not to share and I have to warn I take a much more overly-cautious approach than most. I encourage you to read Megan and Stephanie's posts to see their tips, which I think would be of help for most bloggers who still want to share a lot of personal photos with the world.
For me, I try very hard to keep public photos of our little one to an extreme minimum. I don't have her in my profile pictures or cover photos and all my personal accounts are locked down to "friends only." Even still, I try not to post too many photos of her even on my private accounts. Instead I do share a lot of photos with family and close friends in texts or e-mails (sorry for filling up your inboxes, guys!). I feel like I have a lot more control over who has access to the pictures I share this way.
I know as a blogger the best way to make a personal connection with your audience is to share personal photos and stories of your life, and while many of the blogs I enjoy reading most do just that I'm not willing to risk putting all that out there.
I'm certainly not an internet privacy expert, and my tips aren't 100% fool-proof, but I encourage you to read on for some basic tips I feel are very important for everyone.
Basic Internet Safety Tips
If you have a blog or a business, create separate accounts (Facebook, Twitter, Instagram) for personal use and for public use. Make sure all your personal accounts are locked down to "private."
Never use photos of your children or your home in your profile or cover photos.
Go through your friends list and make sure you're okay sharing information with everyone on it. If not, consider un-friending people or moving them to a "Restricted/Limited Profile" List (this feature is available on Facebook).
Turn off Geotagging on photos which could be used to pinpoint the exact places your photos are taken, even right down to your living room. A quick explanation and how-to video on how to turn it off can be found here.
Never publicly check-in or add locations to photos - and don't use the "Name this Location" feature on Instagram (at least not publicly), even to put in witty headlines. I don't know how many times I've seen a fellow blogger use the Name this Location field on Instagram to put in a plug for their website or a sale. However, if you're not careful, it records exactly where you posted that picture from. If someone clicks on that field it then brings up a map and you can zoom right down to the street view of wherever the picture is posted from (in other words, you just showed everyone on the internet exactly where you live).
If you have a blog or business, get a PO Box and don't use your home address. Make sure to use the PO Box for all business correspondence, return addresses on product you're shipping out, and to receive products for collabs or to review.
Am I a little over-protective? Probably. But watermarks can be photoshopped out, photos can be stolen, locations can be pinpointed.. unfortunately it's the age we live in and I think everyone - blogger or not - needs to be aware and a little more wary.
Do you have any other basic internet privacy tips to add? Please share them below.
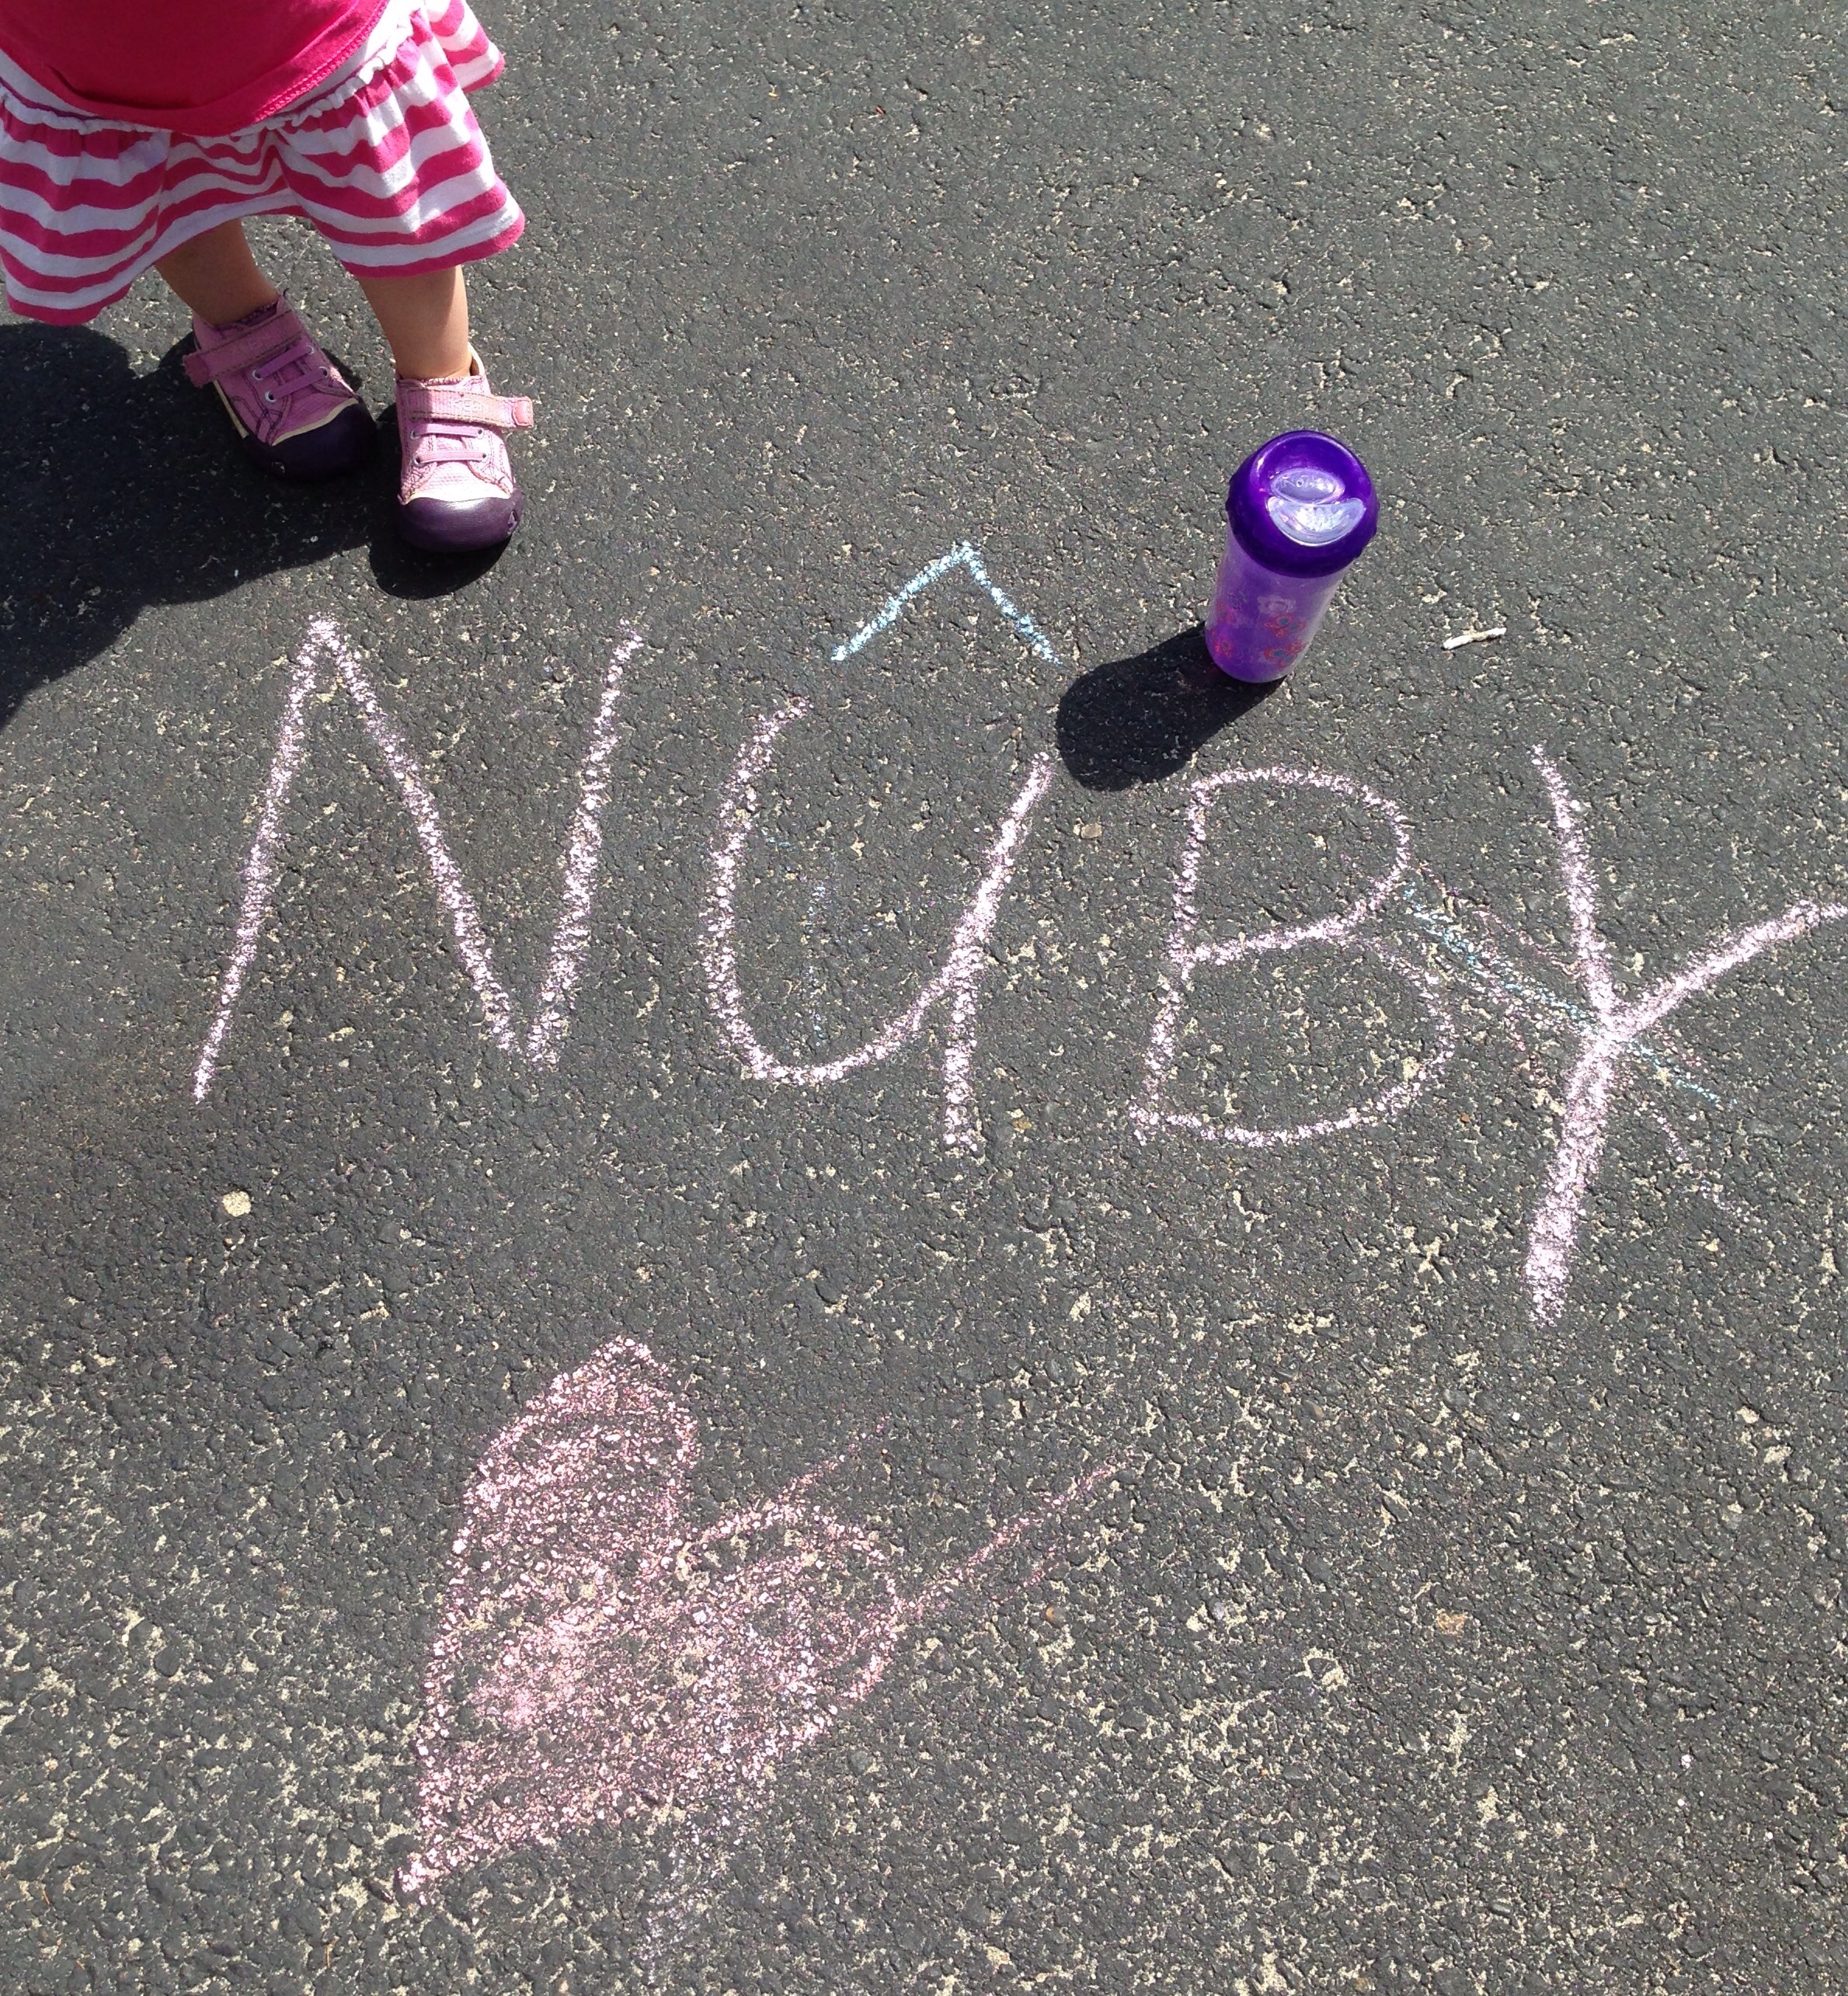
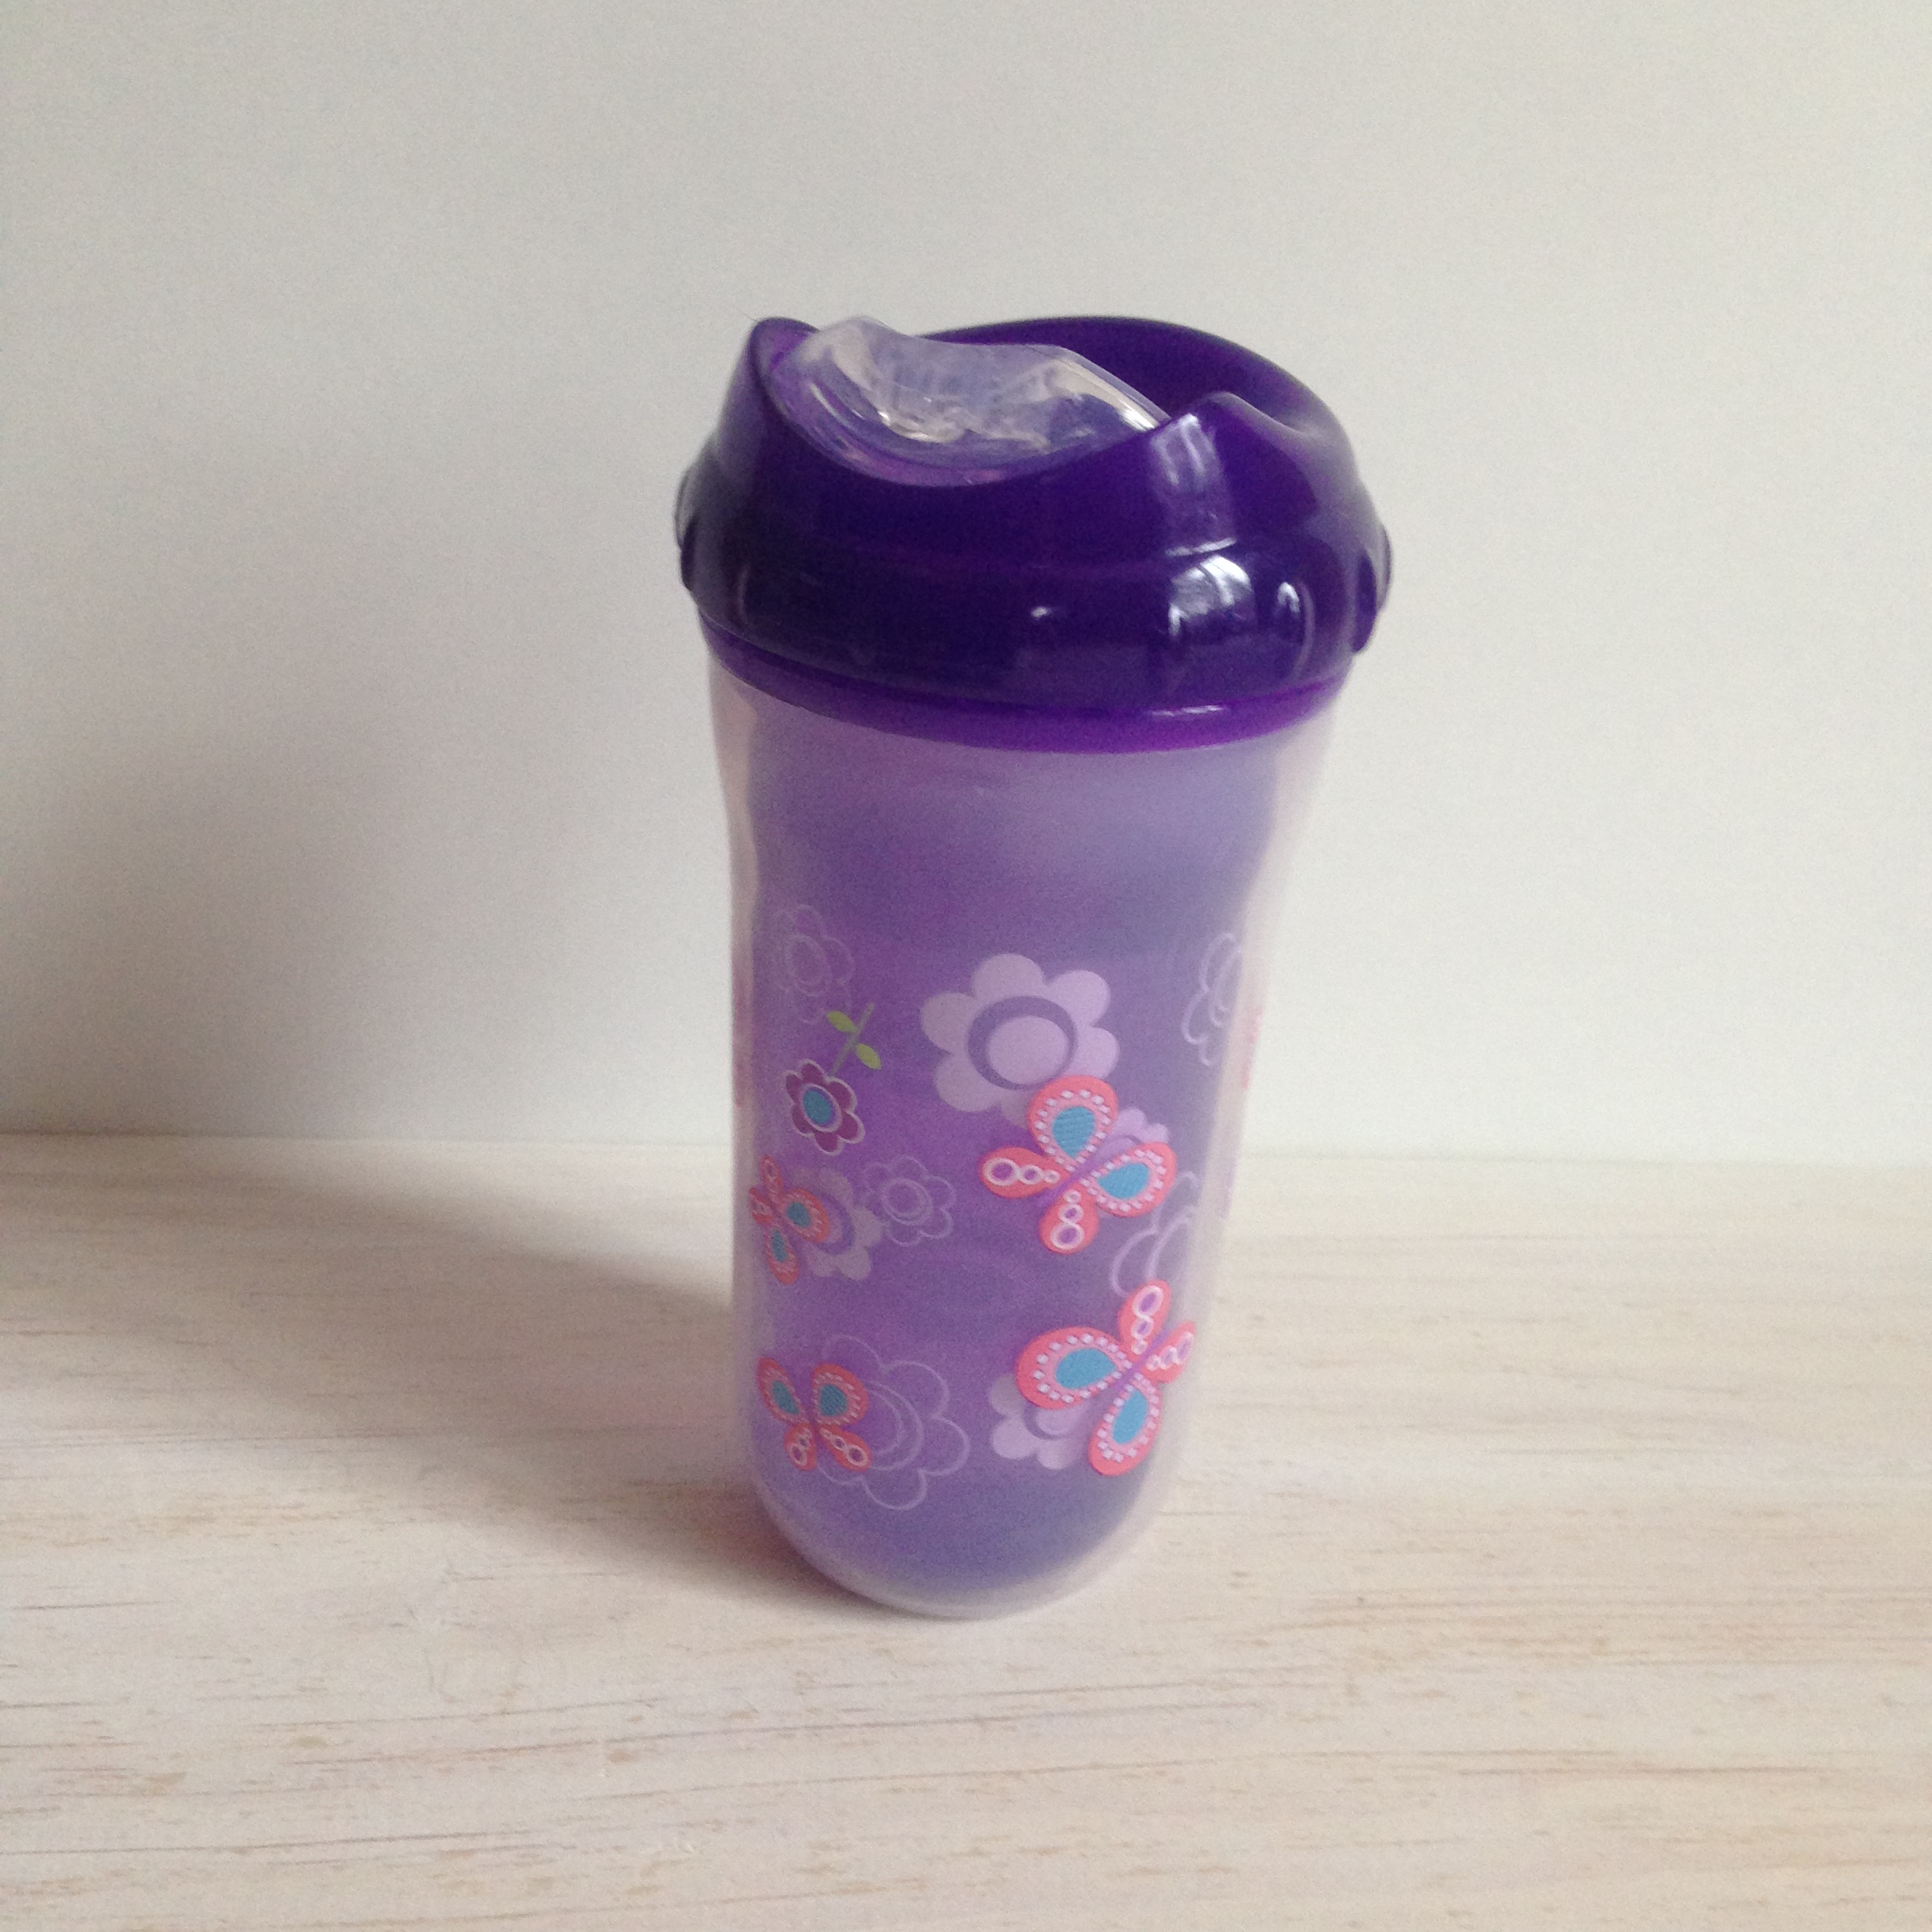
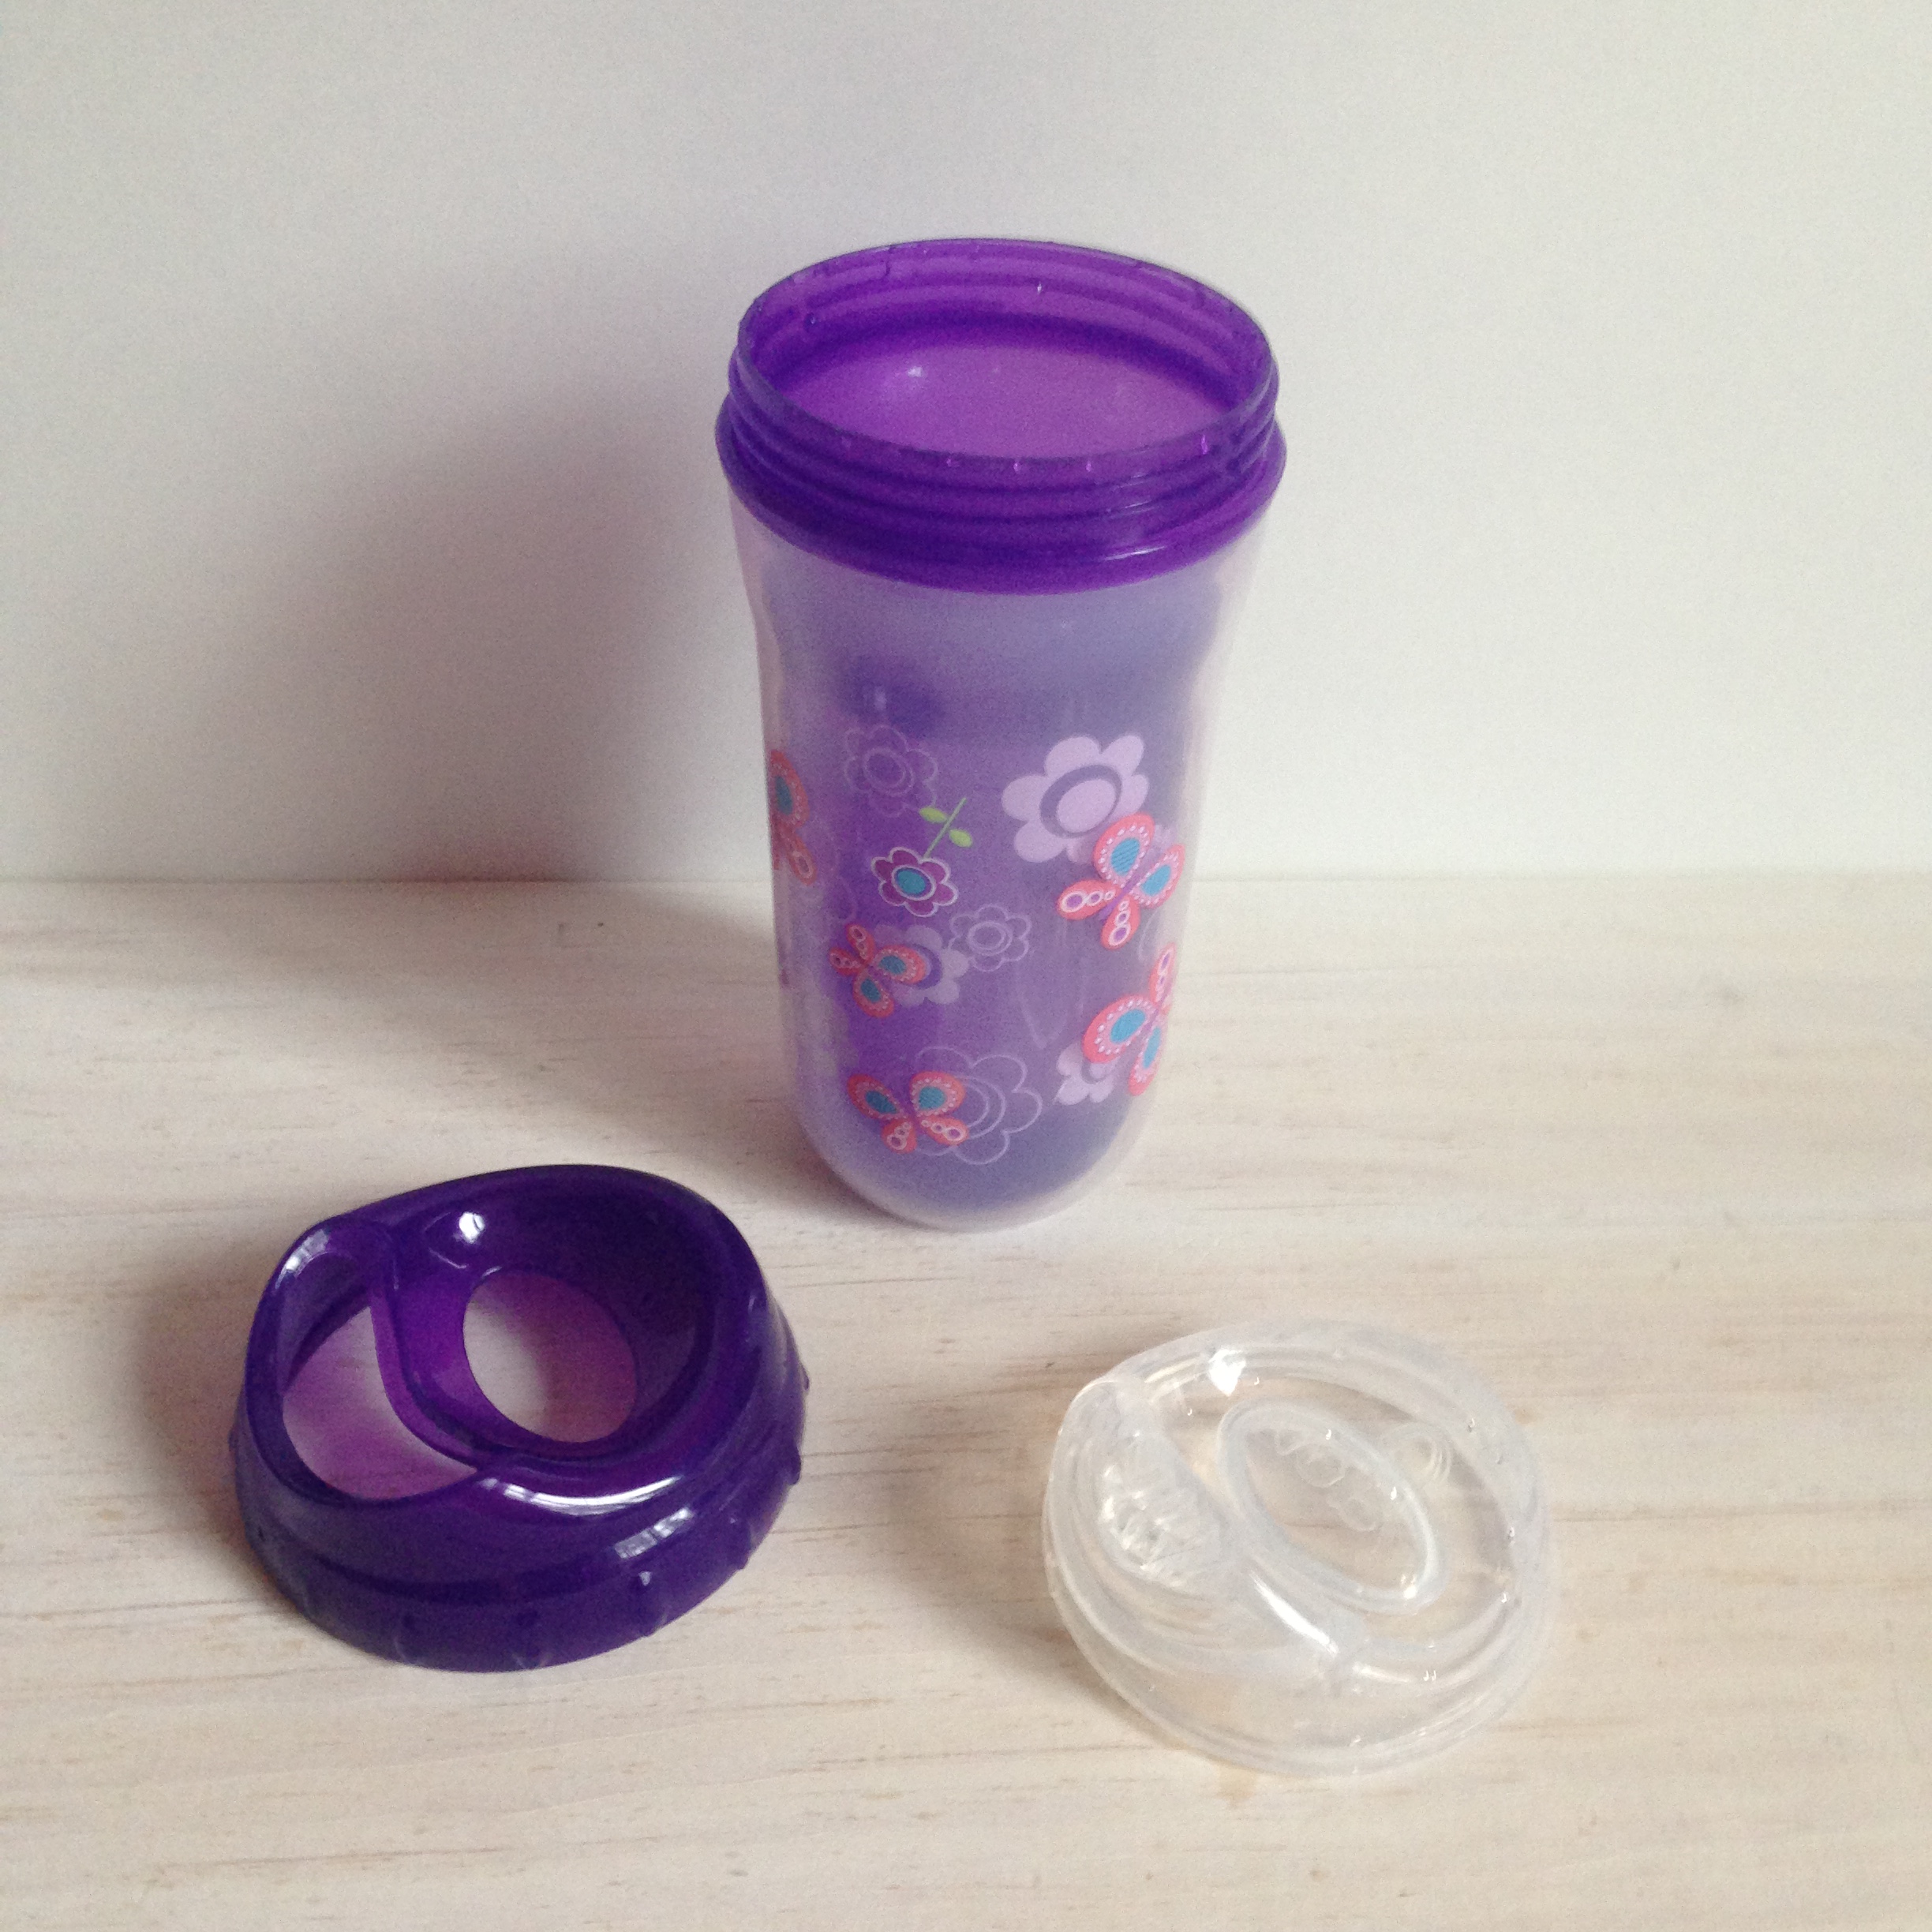
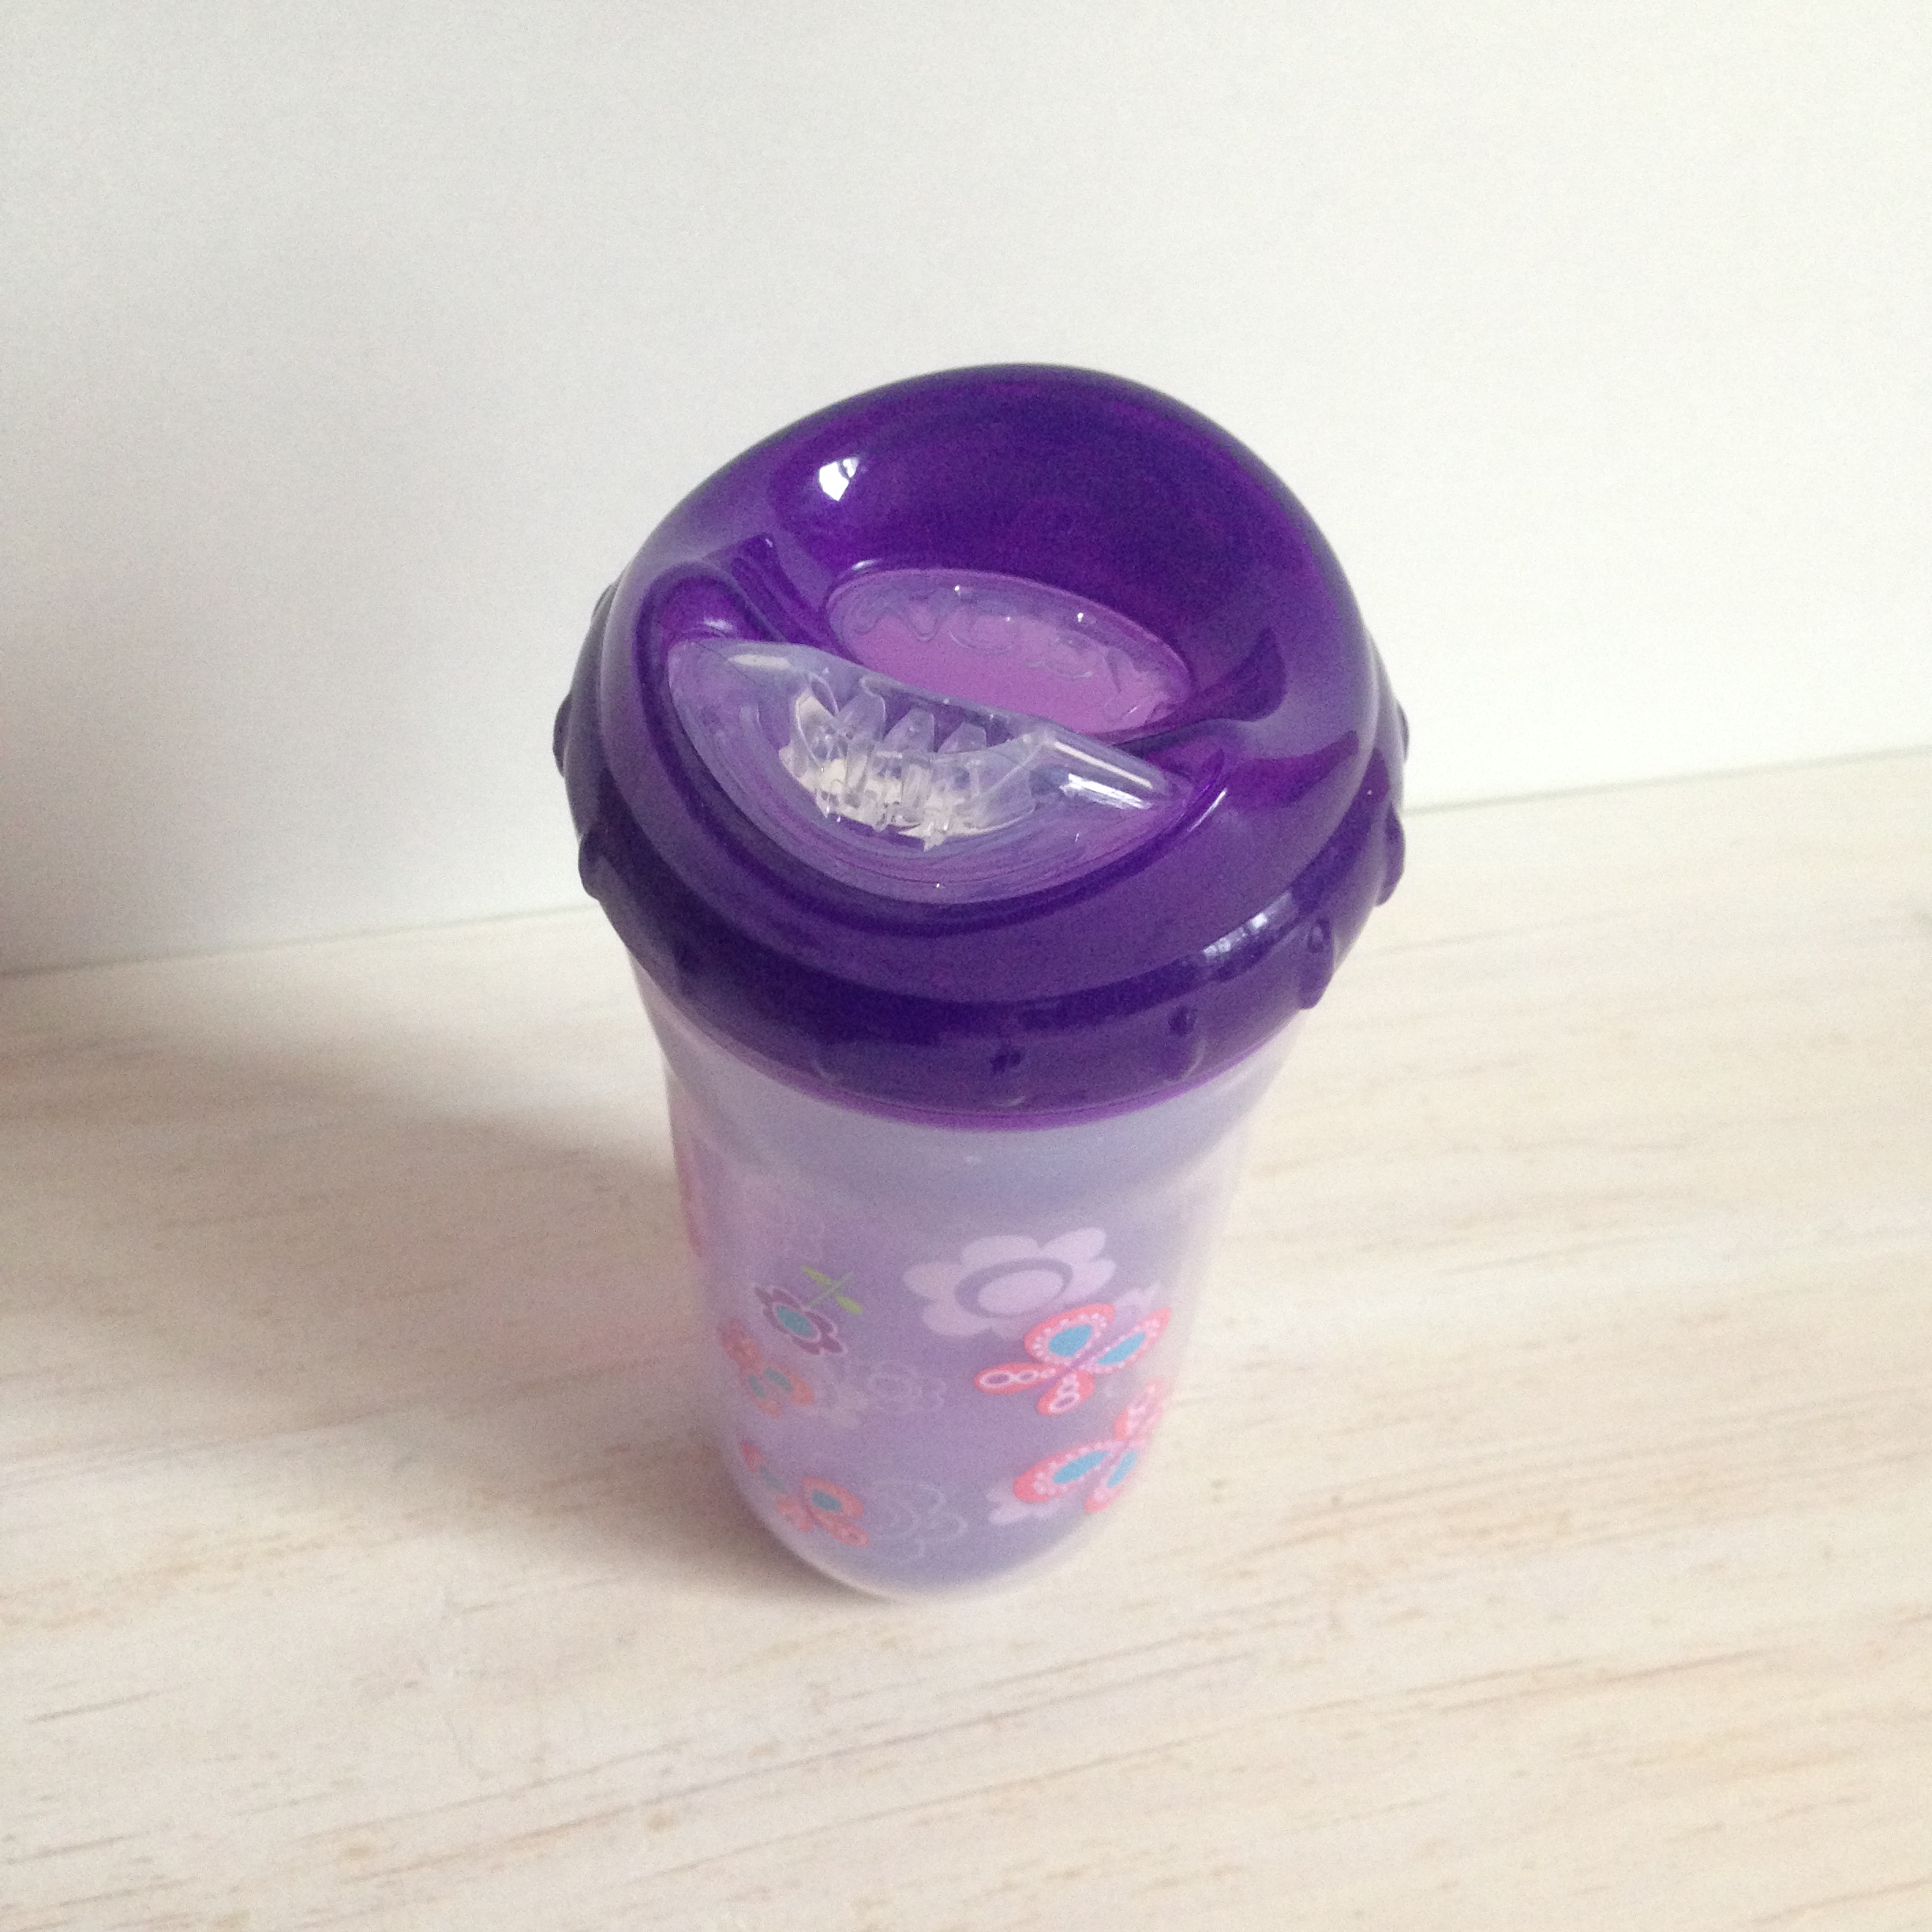
The last few days have been hot in New England and it (finally) feels like spring. Even the last bit of snowbank in our yard has finally melted too - hooray! I thought a warm day like today would be a great time to review our Nûby No-Spill Insulated Cool Sipper Cup. | This post contains affiliate links and an honest review of products provided by Nûby |
This cup is a Step 4 training cup and is recommended for ages 18-months+. Maddie is almost 17 months old and I think for most toddlers you could introduce this cup to them a little early if they seem ready. Maddie has always been a bit behind in her oral development and so it took her a little longer than I think it would for most kids to get the hang of how to tip the cup up and sip through the spout, but she did it. I can certainly see how this cup helps transition little ones to drink from an open cup.
The cup has an insulated base which helped keep Miss M's water cold while we were drawing with chalk out on the hot pavement. It has a soft silicone spout and is BPA-free which is very important to us. I really liked that the cup only has three parts (cup, spout, and threaded top), which is so much easier to clean than the straw cups with a million parts that Maddie is currently using. I'd say the only improvement that could make it easier to clean would be to make it dishwasher safe.
- I received this item for review from Nûby but all opinions expressed are my own. Please read our full Disclosure Policy for more information. -
Nûby's No-Spill Insulated Cool Sipper can be purchased at Amazon and Big Lots.
This is my first Nûby review and I am so excited to be a part of their Parent Blogger Network! Maddie has been a huge fan of their sippy cups from the beginning, and for the longest time their Flip 'N Sip Straw Cup was the only kind she'd use. They've sent me a few products to try and share with you, the first of which is their Octopus Floating Bath Toy.
This little floating octopus comes with 3 fun-shaped rings to "toss" on his arms in the bath, and while the rings are too small to actually toss them on successfully it is a great toy to work on hand-eye coordination with. Our little one loved taking the rings on and off repeatedly.
The bright, fun colors and shapes of the octopus were also a big hit; Maddie was particularly drawn to his big googly-looking eyes. In fact, when she was playing with it she pointed to his eye, looked at me, and said "eyeee" - the first time she's ever done that!
One thing I loved about the design of this toy was that it didn't have a hole in the bottom, as most bath toys do. Bath toys with a hole tend to hold moisture inside and grow mold so it's great that this one was fully enclosed.
The one thing that really disappointed me about this toy though was that it's made out of PVC, a material that we consciously try to limit in our house - in fact we go as far as to only buy PVC-free shower curtains. I didn't realize that it was made out of PVC until after her bath. It's really unfortunate because Maddie loved the Octopus but the material is something we choose not to use.
- I received this item for review from Nûby but all opinions expressed are my own -
Nûby's Octopus Floating Bath Toy can be purchased at various retailers including Amazon and Kohl's.
Excited to announce that I'll be joining the Nûby Parent Blogger Network!
What does that mean? Well, I'll be writing some reviews of Nûby products and maybe even doing the occasional giveaway right here on the blog! Stay tuned.. :)
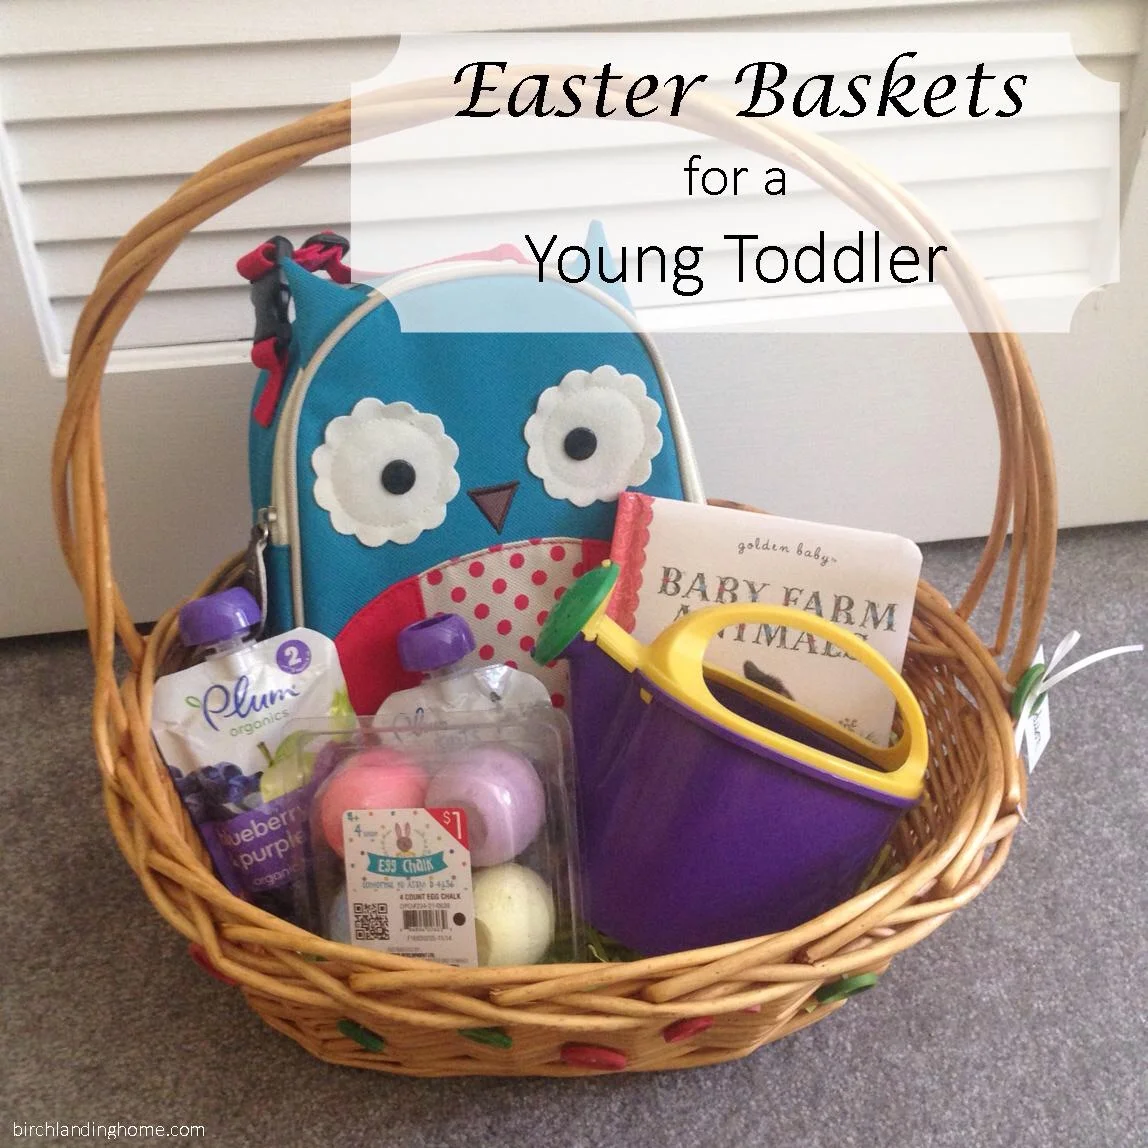
Today I thought I'd share what we'll be putting in our little one's Easter Basket. My goal was to spend less than $20 and fill it with practical and fun items. | This post contains affiliate links |
Our little girl is only 15 months old, has more than enough toys, and doesn't eat candy yet so I was a little stumped as to what to put in her Easter basket at first. After some thought I decided to fill it with some items she needed anyway and a few things to use outside once the warmer weather comes (someday soon, I hope).
I started with the Easter basket I made for her last year (you can read my post on making her Button Easter Basket here). First I filled the bottom with paper Easter grass - having a toddler and a dog, it's so important to use the paper Easter grass over plastic just in case any gets eaten. The paper grass is also a lot more eco-friendly.
I love what I found to put in her basket!
In her basket:
Owl Lunchbox by SkipHop. She desperately needed a new lunchbox (hers broke) and this owl one from Amazon was just the cutest. There are many other animal styles to choose from too if owls aren't your thing.
Purée pouches by Plum Organics. What toddler doesn't love snacks? We picked these up last time we were at Target but they can be found at just about any grocery store or purchased by the case from Amazon.
Baby Farm Animals board book by Golden Books. We actually got this book for free from the local library (they were clearing out duplicates) but you can usually find inexpensive board books on Amazon or on sale at your local book store.
Child's Watering Can. We got this from the Dollar Store, but these can also be found at your local pharmacy. (Similar one here.)
Egg-Shaped Chalk. These came from the dollar bins at Target, and I love them because they're easy for little hands to hold. (Similar ones here.)
Since I got the board book for free I spent right around $15 for everything - wahoo!
Other basket ideas for a one-year old or young toddler:
All of these items can be done for a girl or a boy, and are easy to tweak if you wanted to tailor it more to your own child. I hope I've given you some ideas of what to put in your little one's Easter basket - Happy Easter!
Looking for more Easter ideas? Check out our other Easter posts:
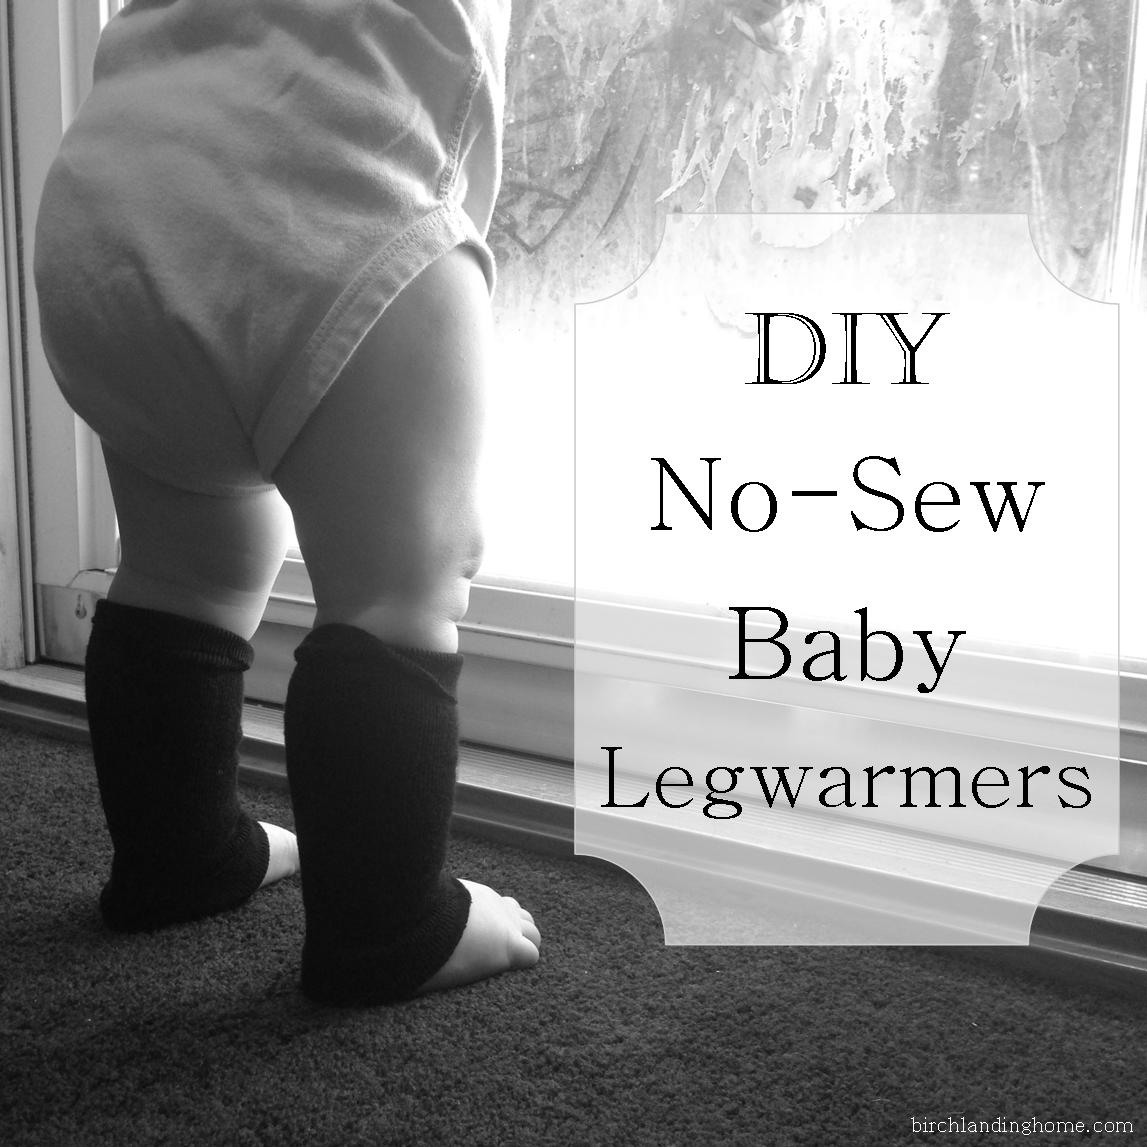
Baby legwarmers are huge right now, and with good reason - they're just too cute on those chubby little legs!
Today I have the easiest no-sew DIY on how to make your own baby legwarmers from something you already have in the house. In fact it's so easy that I made these this morning before I even finished my first cup of coffee - now that's saying something!
Materials:
Tall socks (preferably knee socks)
scissors
How-to:
Take an old pair of tall socks (I used a pair of tall dress socks that I never wear), and cut off the feet... that's it! (See? I told you it was easy!) Then use the tube portion of the socks for baby's little legwarmers.
These would be especially cute made with tall, slouchy tube socks in fun colors or patterns. Target always has fun socks for a dollar or two and I know I'll be picking some up next time I go to make more of these for our little one.
You most likely won't have to hem these legwarmers but depending on the material and weave of the socks, you may want to.
These little legwarmers would look especially cute paired with a wrap headband like those from Andy Sachs or Rascal & Roo. I tried to put one on Miss M this morning for these pictures, but she wasn't having it.. typical toddler ;)
(Excuse the frosty toddler handprints and puppy noseprints on the glass.. it's a never-ending battle.)
We decided to try our hand at making our own toddler art Valentine cards to send to family and friends - it was so easy and a lot of fun! | This post contains affiliate links |
heart-shaped stencil (I just used a cookie cutter from the kitchen)
glue
How-to:
For our little one to make her art, I taped some big sheets of finger painting paper to our kitchen floor and let her go to town! This was also her first painting experience, and it's safe to say that she really enjoyed it... though I think she may have been just as interested in trying to pull the tape off the floor.
Even though I was an art education major, I'd never used special paper for finger painting and I was a bit skeptical at first. The paper touts being "glossy and non-absorbent" and I wasn't sure how the paint would stay on the paper or if it would dry well. Nevertheless, it worked great! The non-absorbency and glossiness is perfect for finger painting - a little paint goes a long way since it isn't absorbed into the paper and the smooth glossy surface makes it easy for little fingers to move the paint around. Drying time was pretty fast too and the paint stayed well on the paper, no flaking or peeling.
Once the paintings were dry, I used a heart-shaped cookie cutter to trace out the hearts and cut them out.
I glued the hearts onto a folded piece of white stationery from C.R. Gibson, then added a little handwritten note inside and they were done. Now to mail them off to family and friends!
What's the one thing you should always do before you dress your baby? It may sound silly, but check their clothing for loose threads.
Infant clothing is notorious for poor workmanship. Those adorable outfits and layettes are inexpensive to buy and not meant to last. Long threads could potentially wrap around a baby's toe causing harm, and loose threads could become a choking hazard if baby were to pull them free and try to eat it.
You will almost always find loose threads on your little one's new outfits and after the first time they've been washed. After that, it's a good idea to give their clothes a quick once-over before you dress them to make sure there's no new loose threads or weak seams.
I always keep a pair of baby nail clippers handy by the changing table, that way I can easily clip any loose threads I happen to see.