I'm a wife, stay-at-home mom, crafter, and blogger living in rural New England. As seen in Martha Stewart Living, Food Network Magazine, and more! | Tutorials, DIY, crafts, parenting tips, recipes, money saving tips, product reviews, local product features, New England living, intentional living, and more! |
A few years ago we built a detached garage on our property which we nicknamed “the barn.” We were on a tight budget when we had it built so we kept everything very basic - basic windows, basic doors, etc. Now that we’ve lived with it for a few years we’re slowly upgrading what we can with easy and cheap DIYs, like this two minute garage door makeover - no tools needed! | This post contains affiliate links |
The front of our barn just looked so plain and boring... it definitely needed "something" to give it more character and the basic builder-grade garage door just wasn't cutting it. One day while I was on Amazon I came across these magnetic faux hinges and handles with amazing reviews and thought that was perfect!
To install them I wiped down the garage door real quick first to remove any dirt and then just stuck the hinges to the door right from the box. There are several magnets on the back of each item so they’re easy to stick on and reposition as needed.
The faux hinges and handles are made from thick plastic so they won’t rust - but they certainly don’t look plastic! Even up close they have a lot of texture and really look like forged metal. The handles even fooled my kids and they totally thought they were real! And if you want to keep your doors more simple you could easily just put the hinges up or just the handles and leave it at that.
This quick addition to our plain garage door really has made a difference in making our “barn” look more finished and giving it better curb appeal. Hopefully next year we’ll get the driveway paved up to it and add some landscaping and then it really will be done.
Looking for more cheap and easy DIY’s? See our previous Blog Post on how I added “window panes” to our basic builder-grade windows and it’s made such a difference. They’re still up years later and look as good as the day I first put them up.
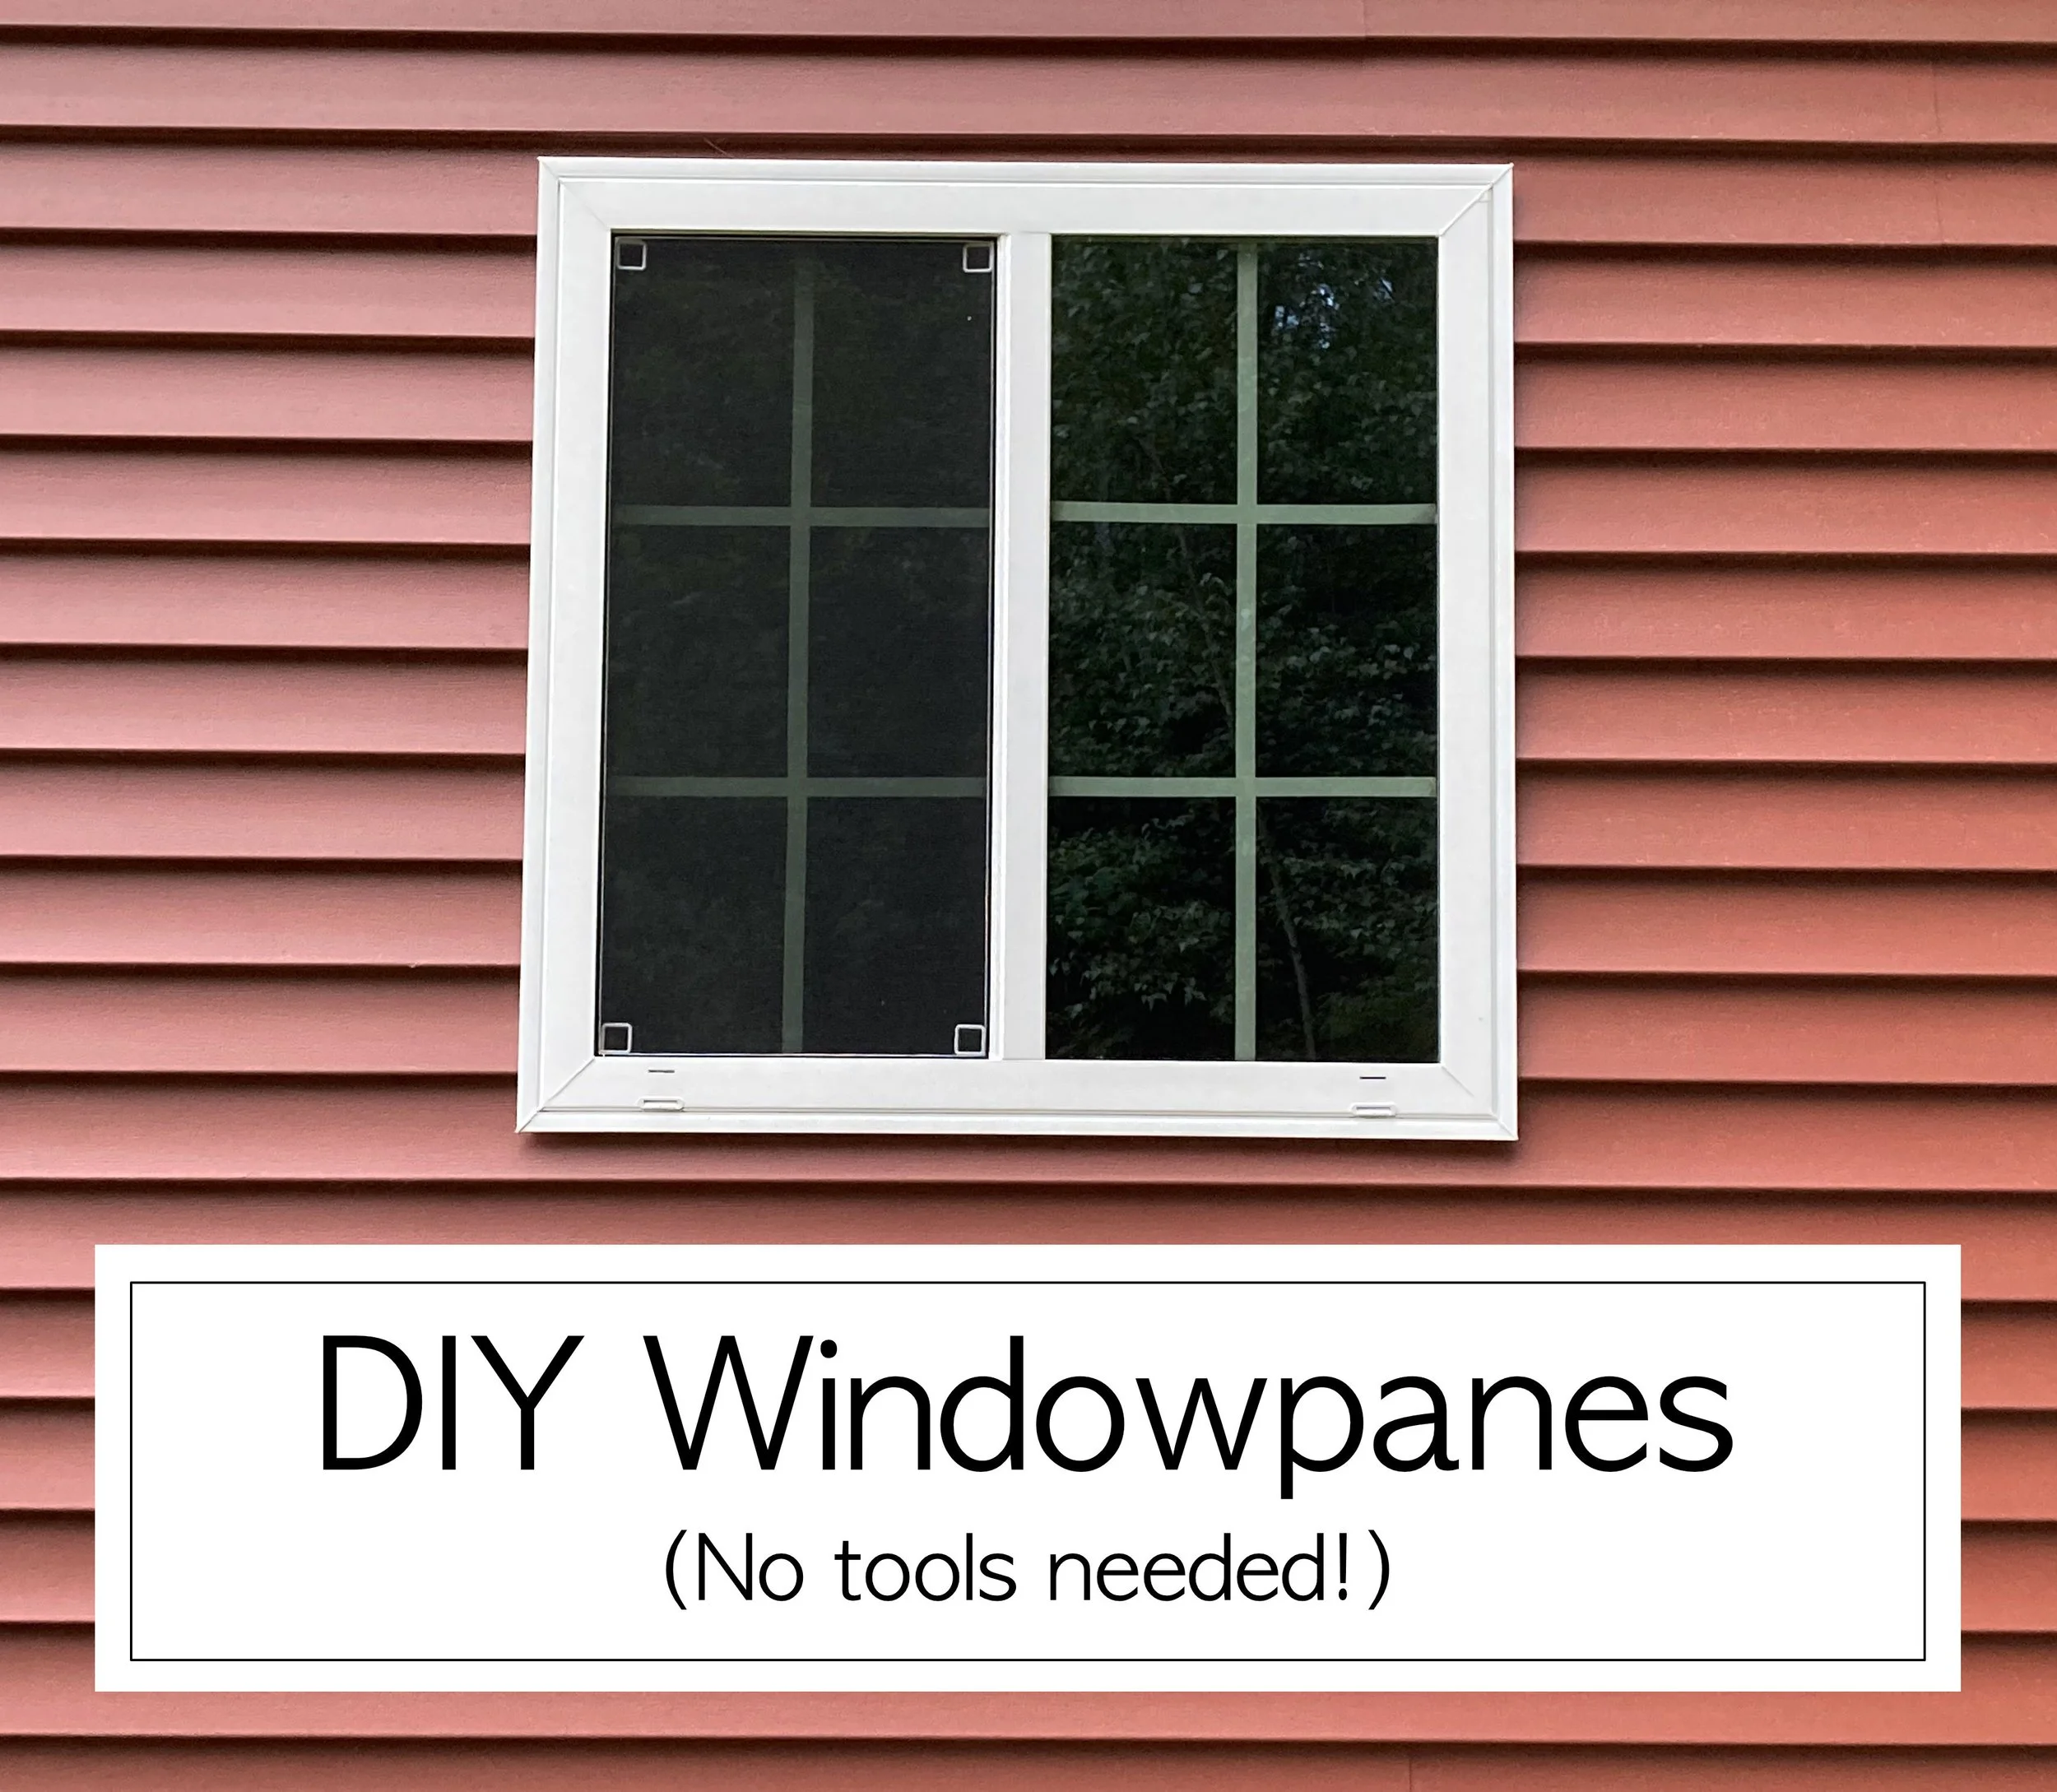
This past fall we had a detached garage built on our property. Being what construction costs are these days we went with basic vinyl windows with no window panes since it was cheaper. We thought “Meh, it’s just a garage - it doesn’t have to match our house perfectly.” But after the garage was done we realized it really was missing something with the basic plain windows, and adding panes was just what it needed. | This post contains affiliate links |
I considered a bunch of different ways to make the panes, including using thin scraps of wood painted and set within the window frame on the inside - but all of that was pretty labor-intensive. In the end I realized using thin strips of vinyl or tape would probably be the easiest - and so that’s what I did!
Using white electrical tape ended up being the perfect solution in our situation - it was to be used in a little-used area, it was the right width, and it was the right color.
Materials:
white electrical tape (though if your window sashes are black or a different color you can buy different colored tape to match)
scissors
tape measure
How-To:
To apply, I first washed and dried the windows well. Then I measured out how to divide the window in an aesthetically pleasing way. For the small windows I did 4 panes across and 3 panes down, and for the big window (not pictured) I ended up doing 4 panes across and 4 panes down.
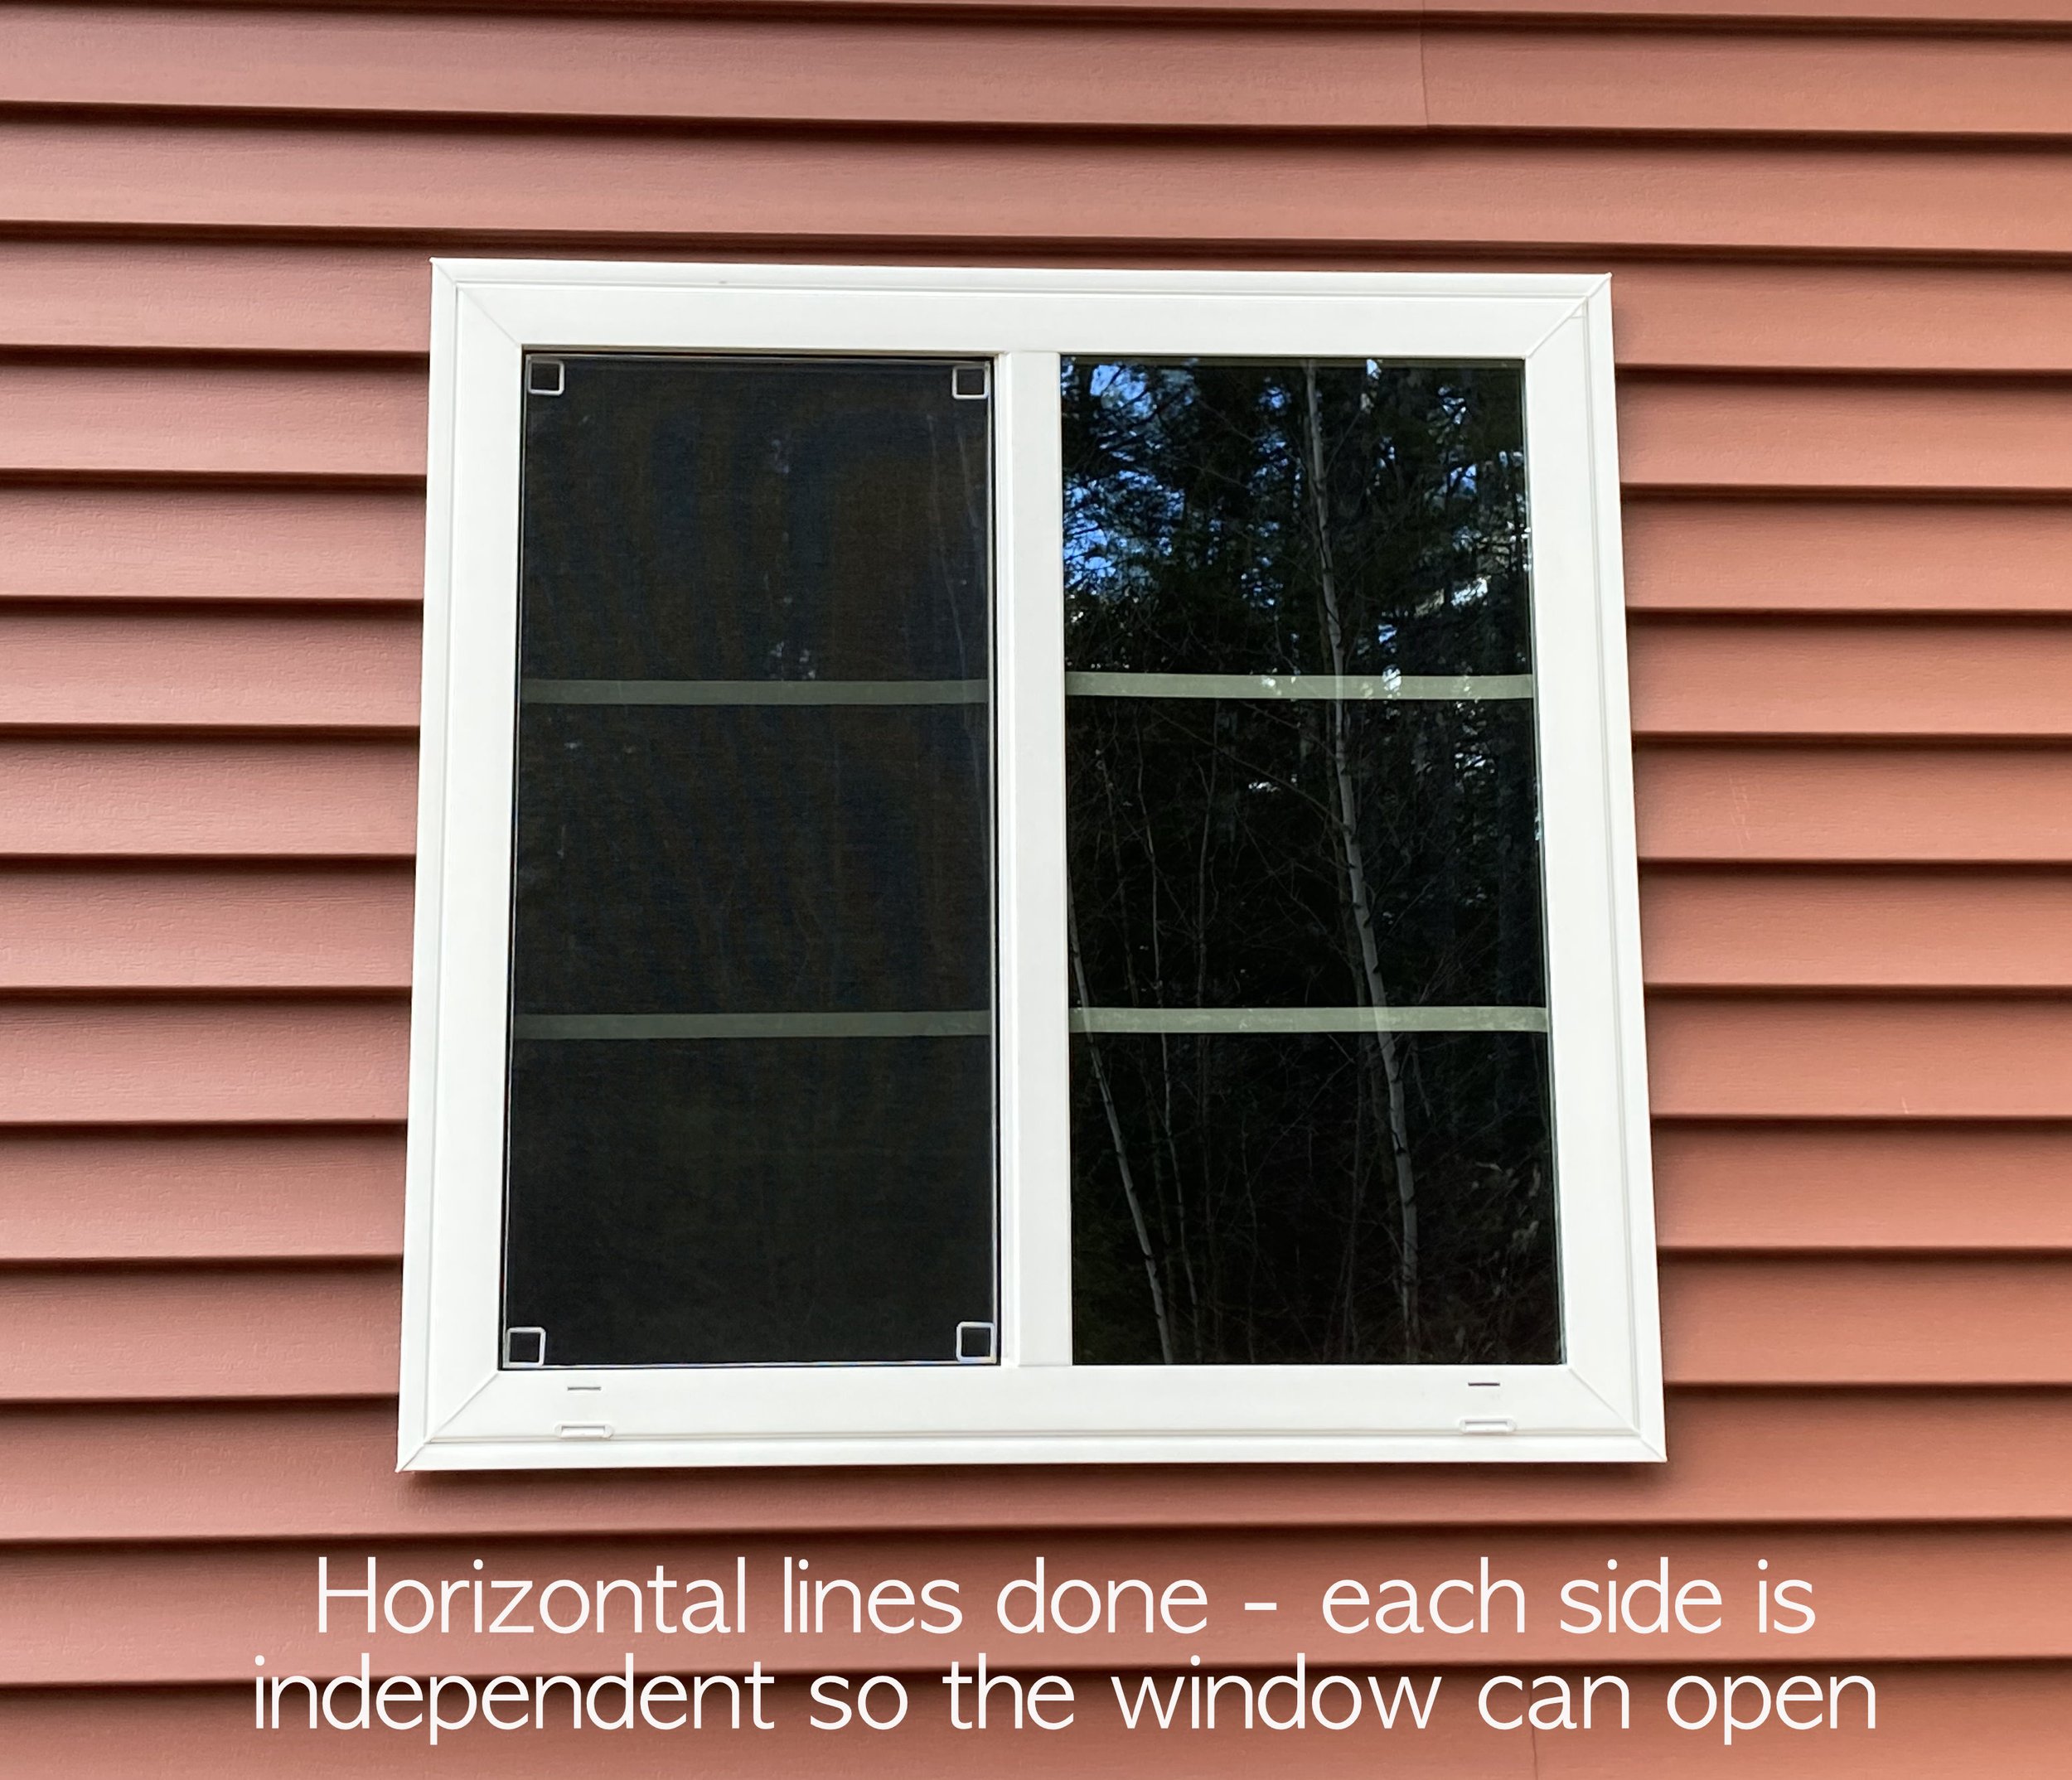
I measured out my spacing and then made small marks with a pencil on the edge of the window where I was going to place my tape lines, then carefully pulled the tape across the window (I applied the tape on the inside of the window). I did the shorter, horizontal runs of tape first because I found them to be easier and help keep the longer, vertical runs straighter since it was easier to line them up straight with those horizontal reference points.
When pulling your tape lines make sure to go slow and pull the tape out straight. Electrical tape is rather stretchy and it’s easy to distort the lines and make them wonky. Taking your time is key and don’t be discouraged if you have to redo some of the lines! I had to redo a bunch of mine, especially at the beginning while I was getting the hang of it.
TA-DA! In just a short amount of time you now have easy and cheap windowpanes, and the best part was no tools were needed. The style windowpane I tried to mimic was “colonial” in order to match our house, but if you wanted to get fancy you could try laying out your lines in a different style (diamond, prairie, etc).
DISCLAIMER: Please note that the electrical tape I used for this project does have a Prop 65 warning on the package. You may want to do your own research regarding this. We used it since it was a non-living area in a detached garage. I also made sure to wash my hands well after handling it. Use at own risk.
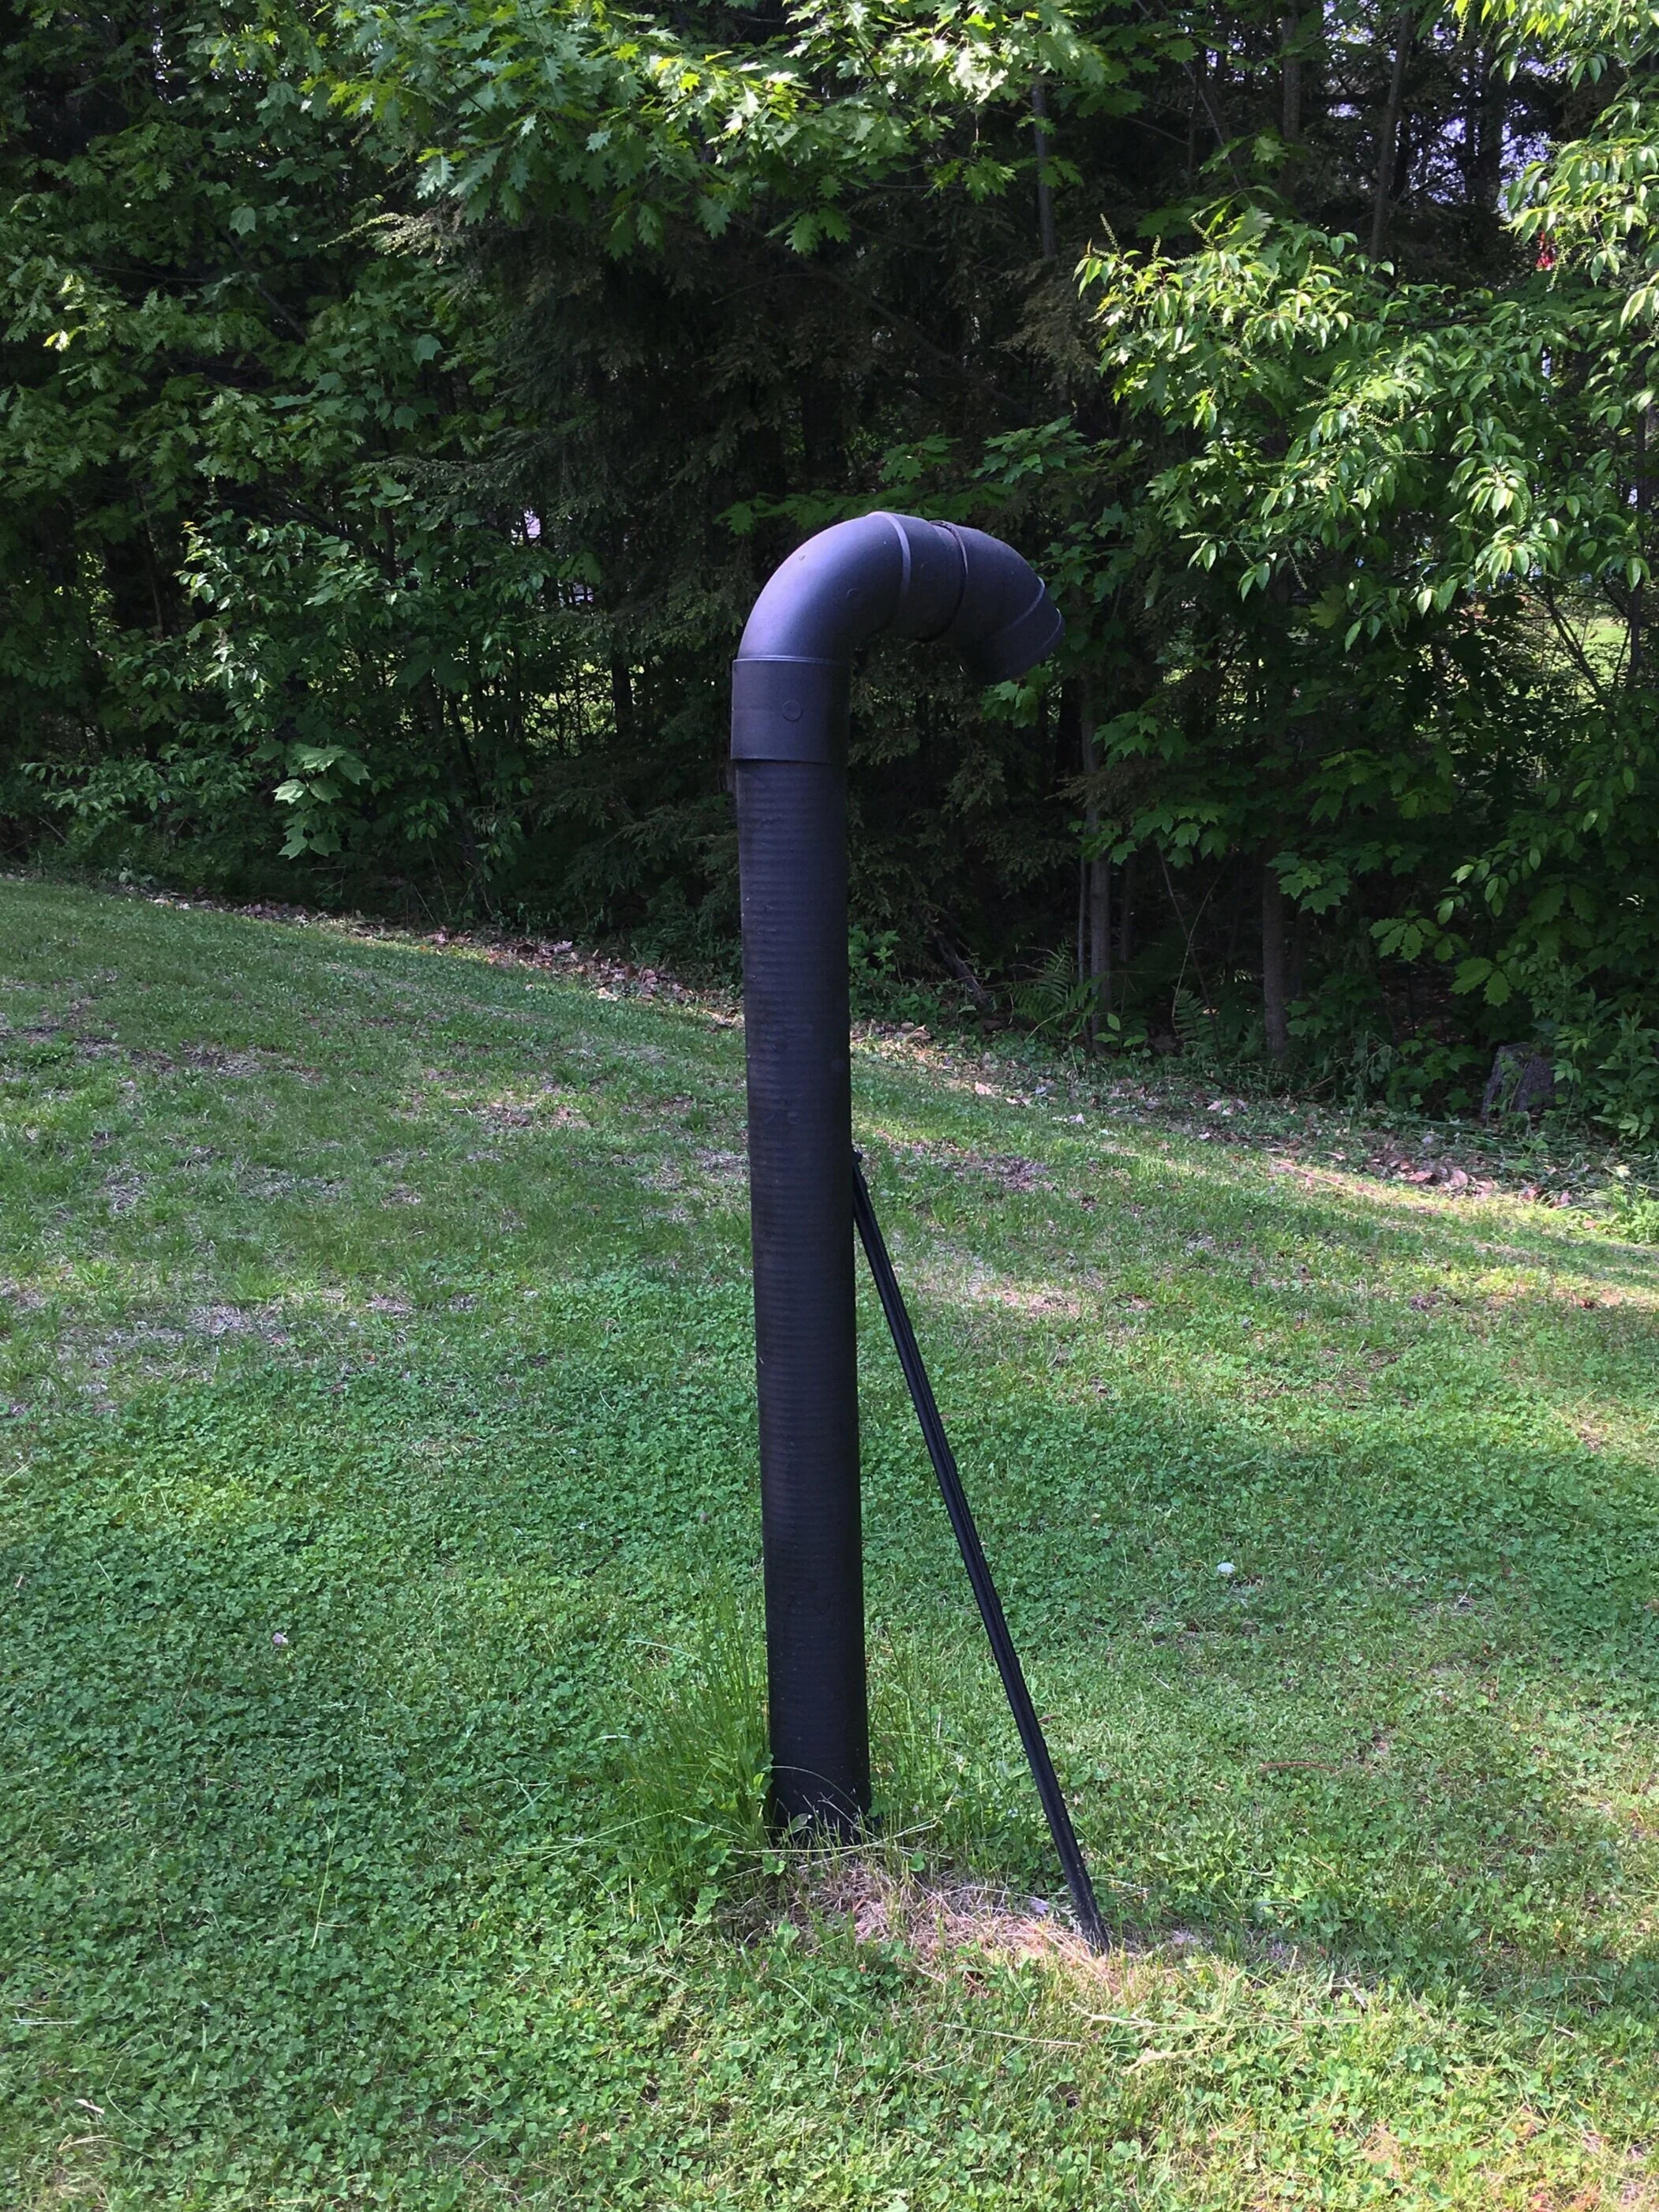
Okay, so I don’t know if “makeover” is the right word here because it’s not a huge change but it certainly helps! So in our area, most homes have septic tanks/leach fields with terribly ugly white or sea foam green PVC vent pipes that stick out like a sore thumb in their lawn. They can be tricky to hide because you don’t want to plant or build anything too heavy or substantial around them and risk damaging the leach field underground or diminish their venting capabilities… so we were limited on options on how to “make it over.”
In any case, I decided to pick up some outdoor rated matte black spray paint from our local hardware store and give our vent pipe a quick coat of black paint and it’s made a huge difference! The black definitely makes the pipe look more industrial and blends in with the grass and trees better than a bright white pipe. Like I said before, it’s certainly not a huge change but it’s a small one that’s made a big difference in my opinion.
AFTER: I forgot to take a “Before” photo but this is the After! The black definitely helps the pipe blend in with the trees and background much better than a white pipe.
School is starting back up and that means it's back to the daily grind of packing lunches for most parents. Parenting New Hampshire magazine interviewed myself and few other NH-based bloggers for our "Brown-Bag Makeover" tips and tricks.
You can pick up a copy of this publication at many locations across the state, or read the article HERE online.
"Brown-Bag Makeover" | Parenting New Hampshire Magazine
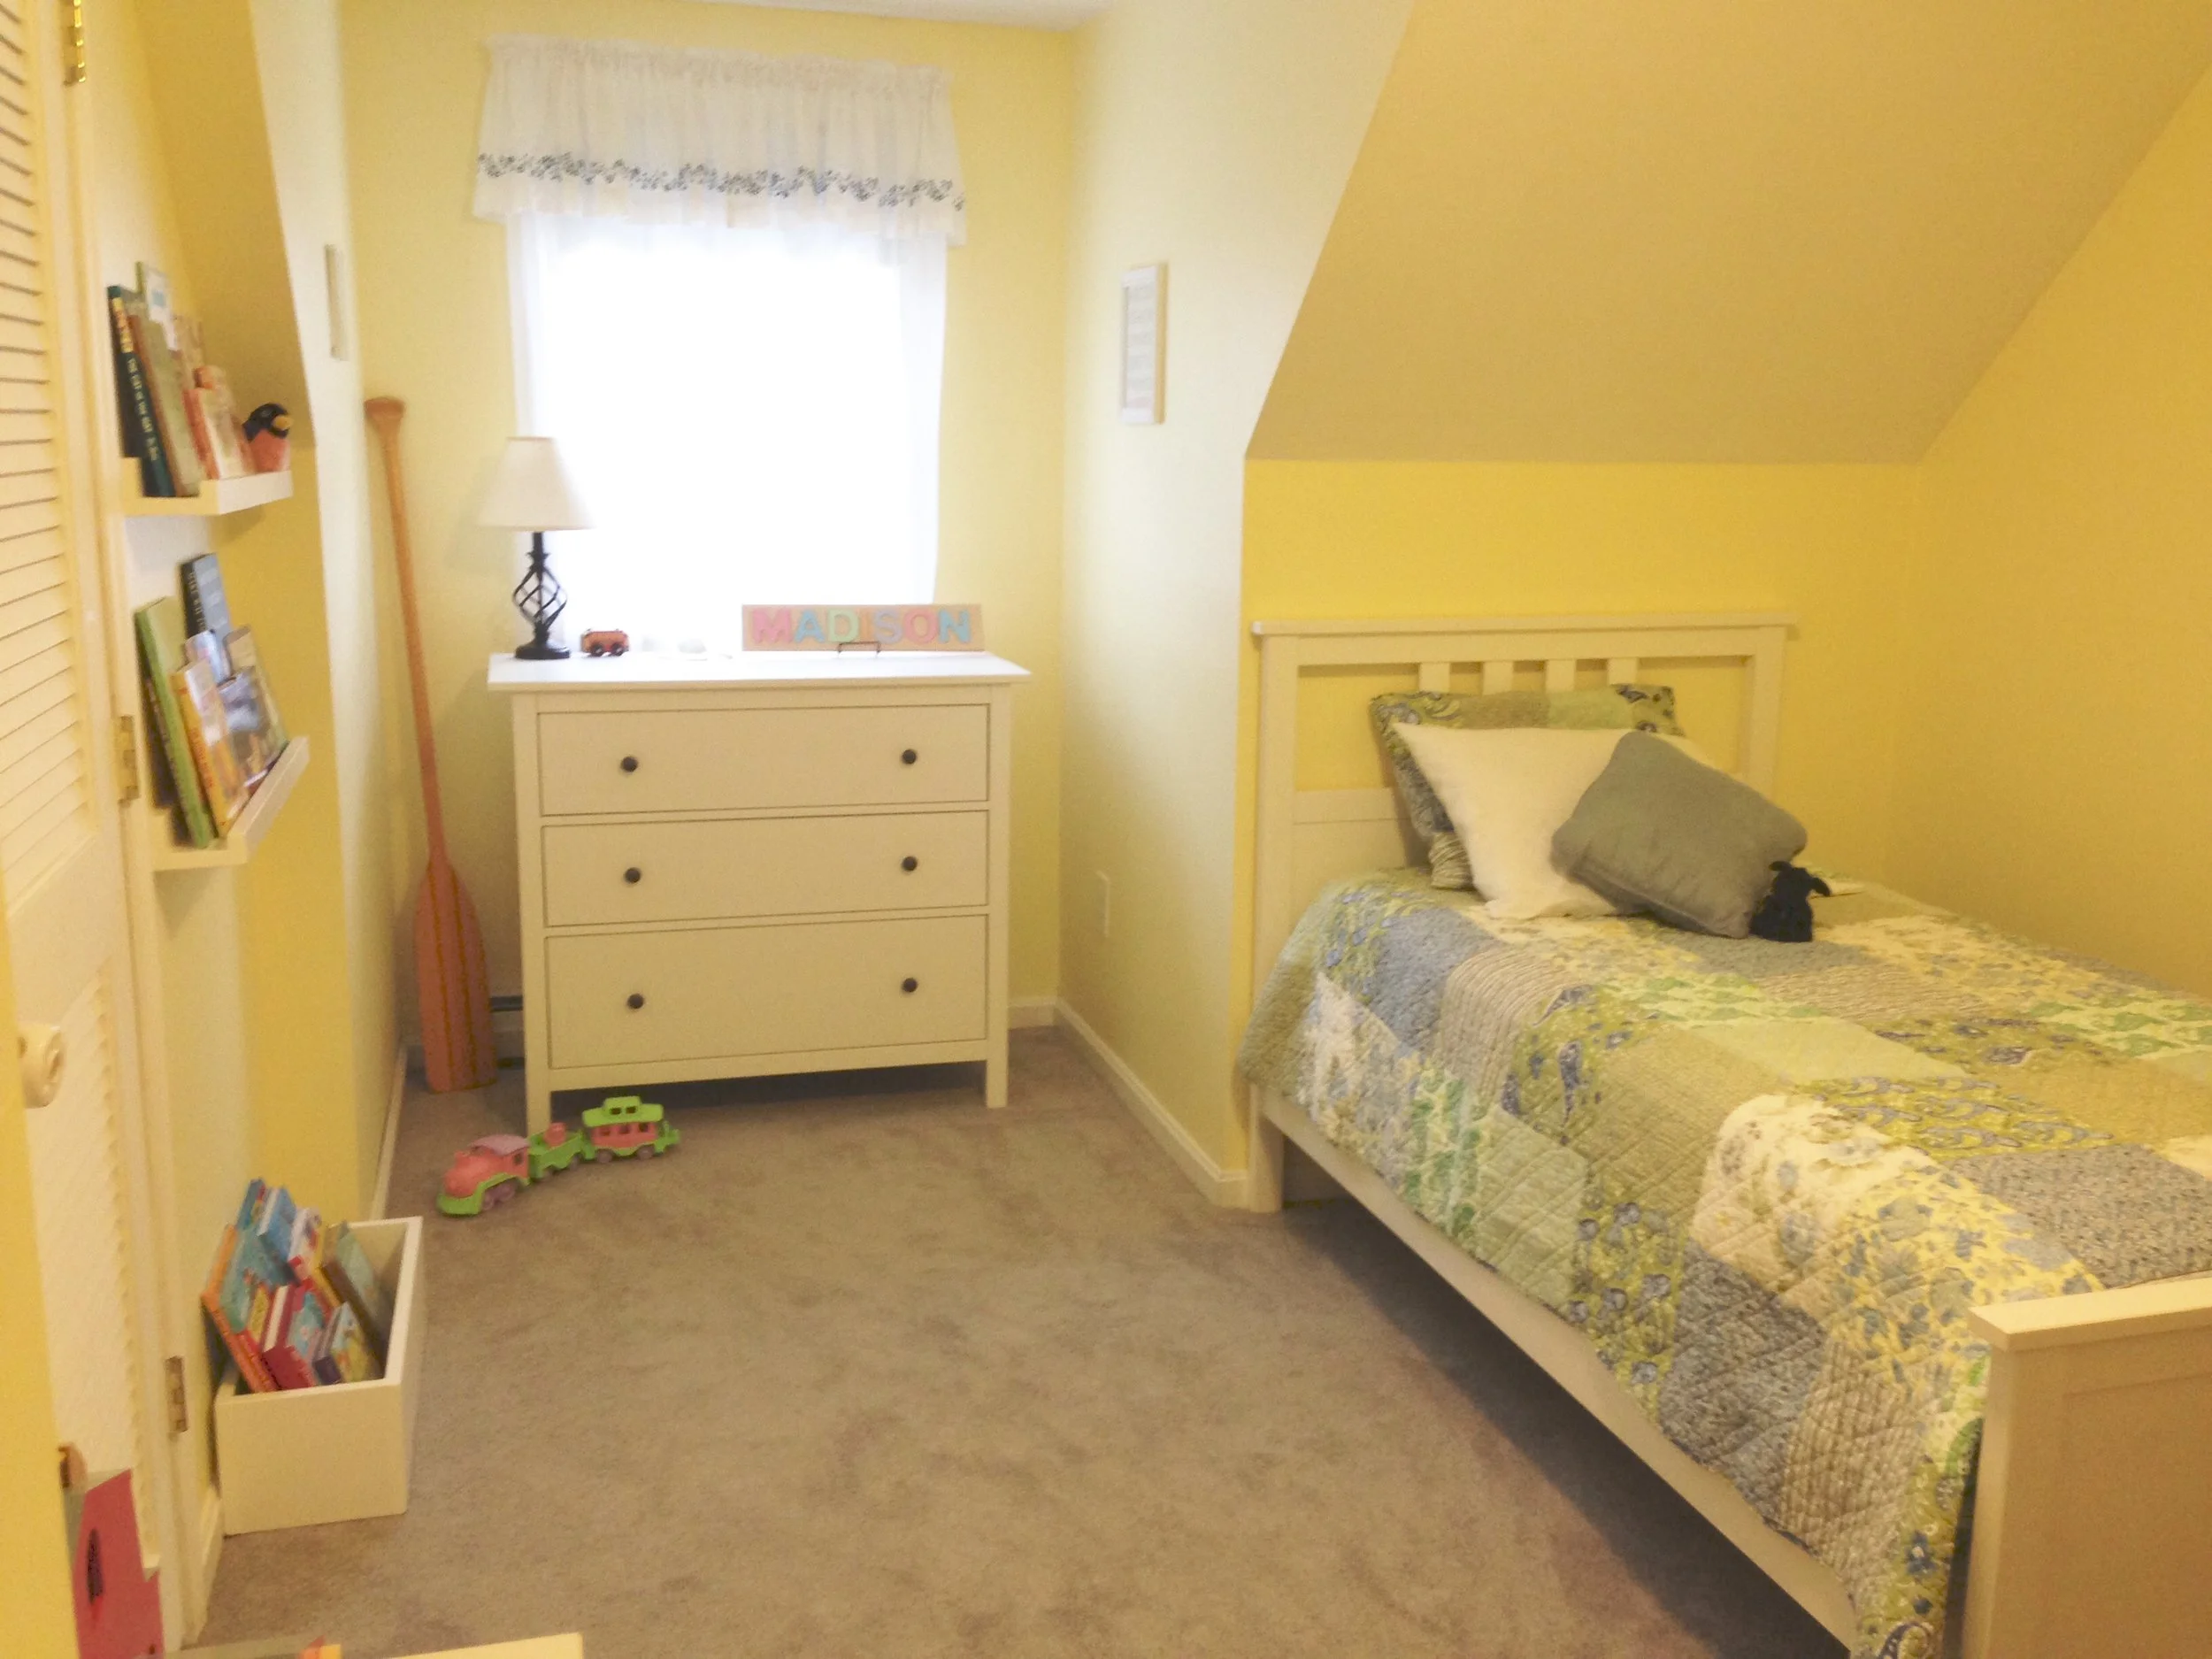
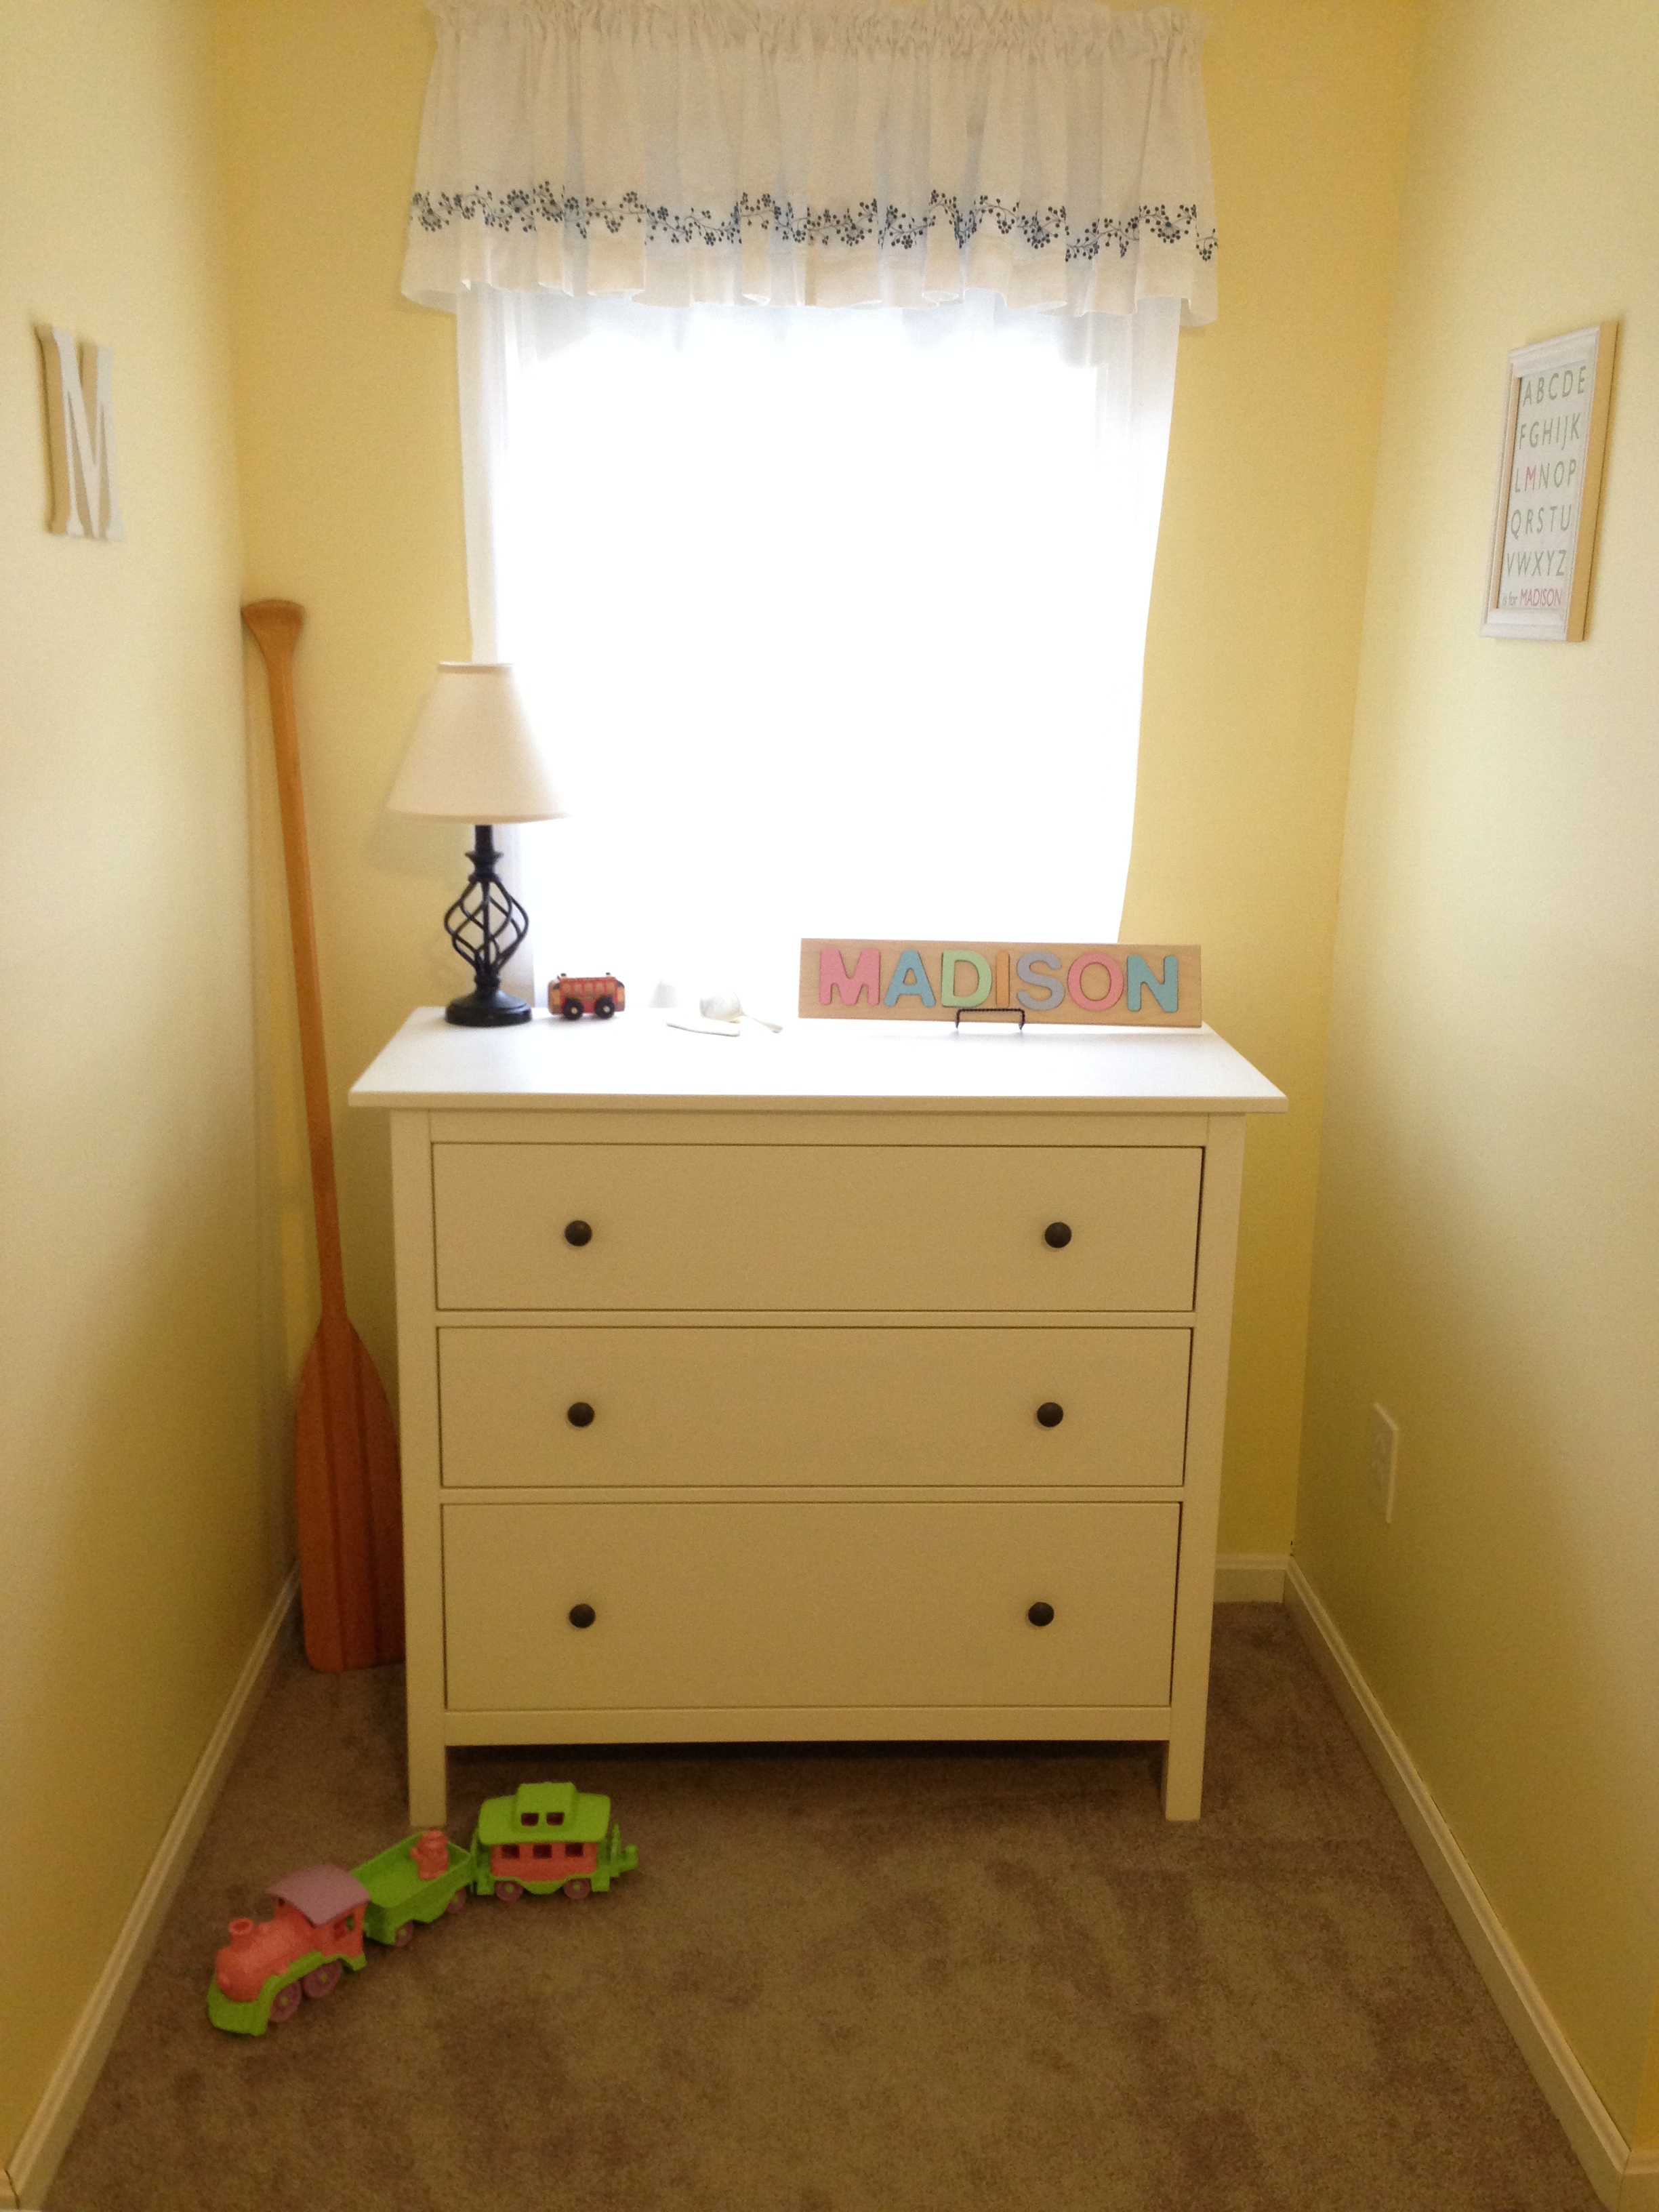
It's been a long time coming, but we've finally moved our little one up to her "big girl room"! Decorating and organizing this space has been a challenge since it's such a tiny room. And while arrows, deer, and gold polka dots are all the rage right now, we wanted to get the biggest bang for our buck and go with a timeless, classic theme that our daughter can grow into. | This post contains affiliate links |
We decided to go with a blue, white, and yellow color scheme (which always reminds me of Cape Cod) and just a few decorative touches that can easily be changed out as our little one grows and tastes change. Keeping everything pretty light in the room helps make it feel just a little bit bigger too.
The bed and dresser came from Ikea and were very reasonably priced. In fact, these were my first purchases from Ikea EVER (gasp) and I was very impressed with the quality and sturdiness of them. While not shown in these photos, we have under-mattress bedrails that are typically on the bed so she doesn't roll out.
The bedding was one of the most reasonably priced quilt sets I could find and came from Amazon (*at the moment it's listed for double what I had paid, but Amazon pricing can change often so hopefully the price will come down again soon). I just love all the different blues, greens, and creams in the bedspread! It keeps with the Cape Cod color scheme and adds a country touch.
The "love you to the moon & back" sign was made by me and will be coming to our Etsy shop soon ;)
This little dormer was the perfect spot to tuck the dresser in as well as some decorative touches like the wooden oar, which was a freebie find. The custom name puzzle is from Amazon, and both the lamp and the curtains are from Wal-Mart.
We also added this Personalized Alphabet Printable from my Etsy shop as well, and our daughter loves finding the letters from her name in it.
This Moon Bed was a custom creation from my brother and sister-in-law as a gift for our baby shower - it makes the perfect spot for snuggling up with a good book and some stuffed animals. The starfish watercolor painting is by New England artist Jen Scully of Mack & Ro. I love how it compliments this corner with the "moon and stars" theme but also fits in perfectly with the overall coastal vibe of the room.
What's New England without a farm? This little Pottery Barn table was a yard sale find (score!) and makes the perfect spot for a barnyard scene. The wooden barn is from Melissa and Doug but the animals are Little People (all yard sale finds again). The woven rope basket to hold accessories for the farm adds a coastal touch. This rope basket is old, but I've linked a very similar one here.
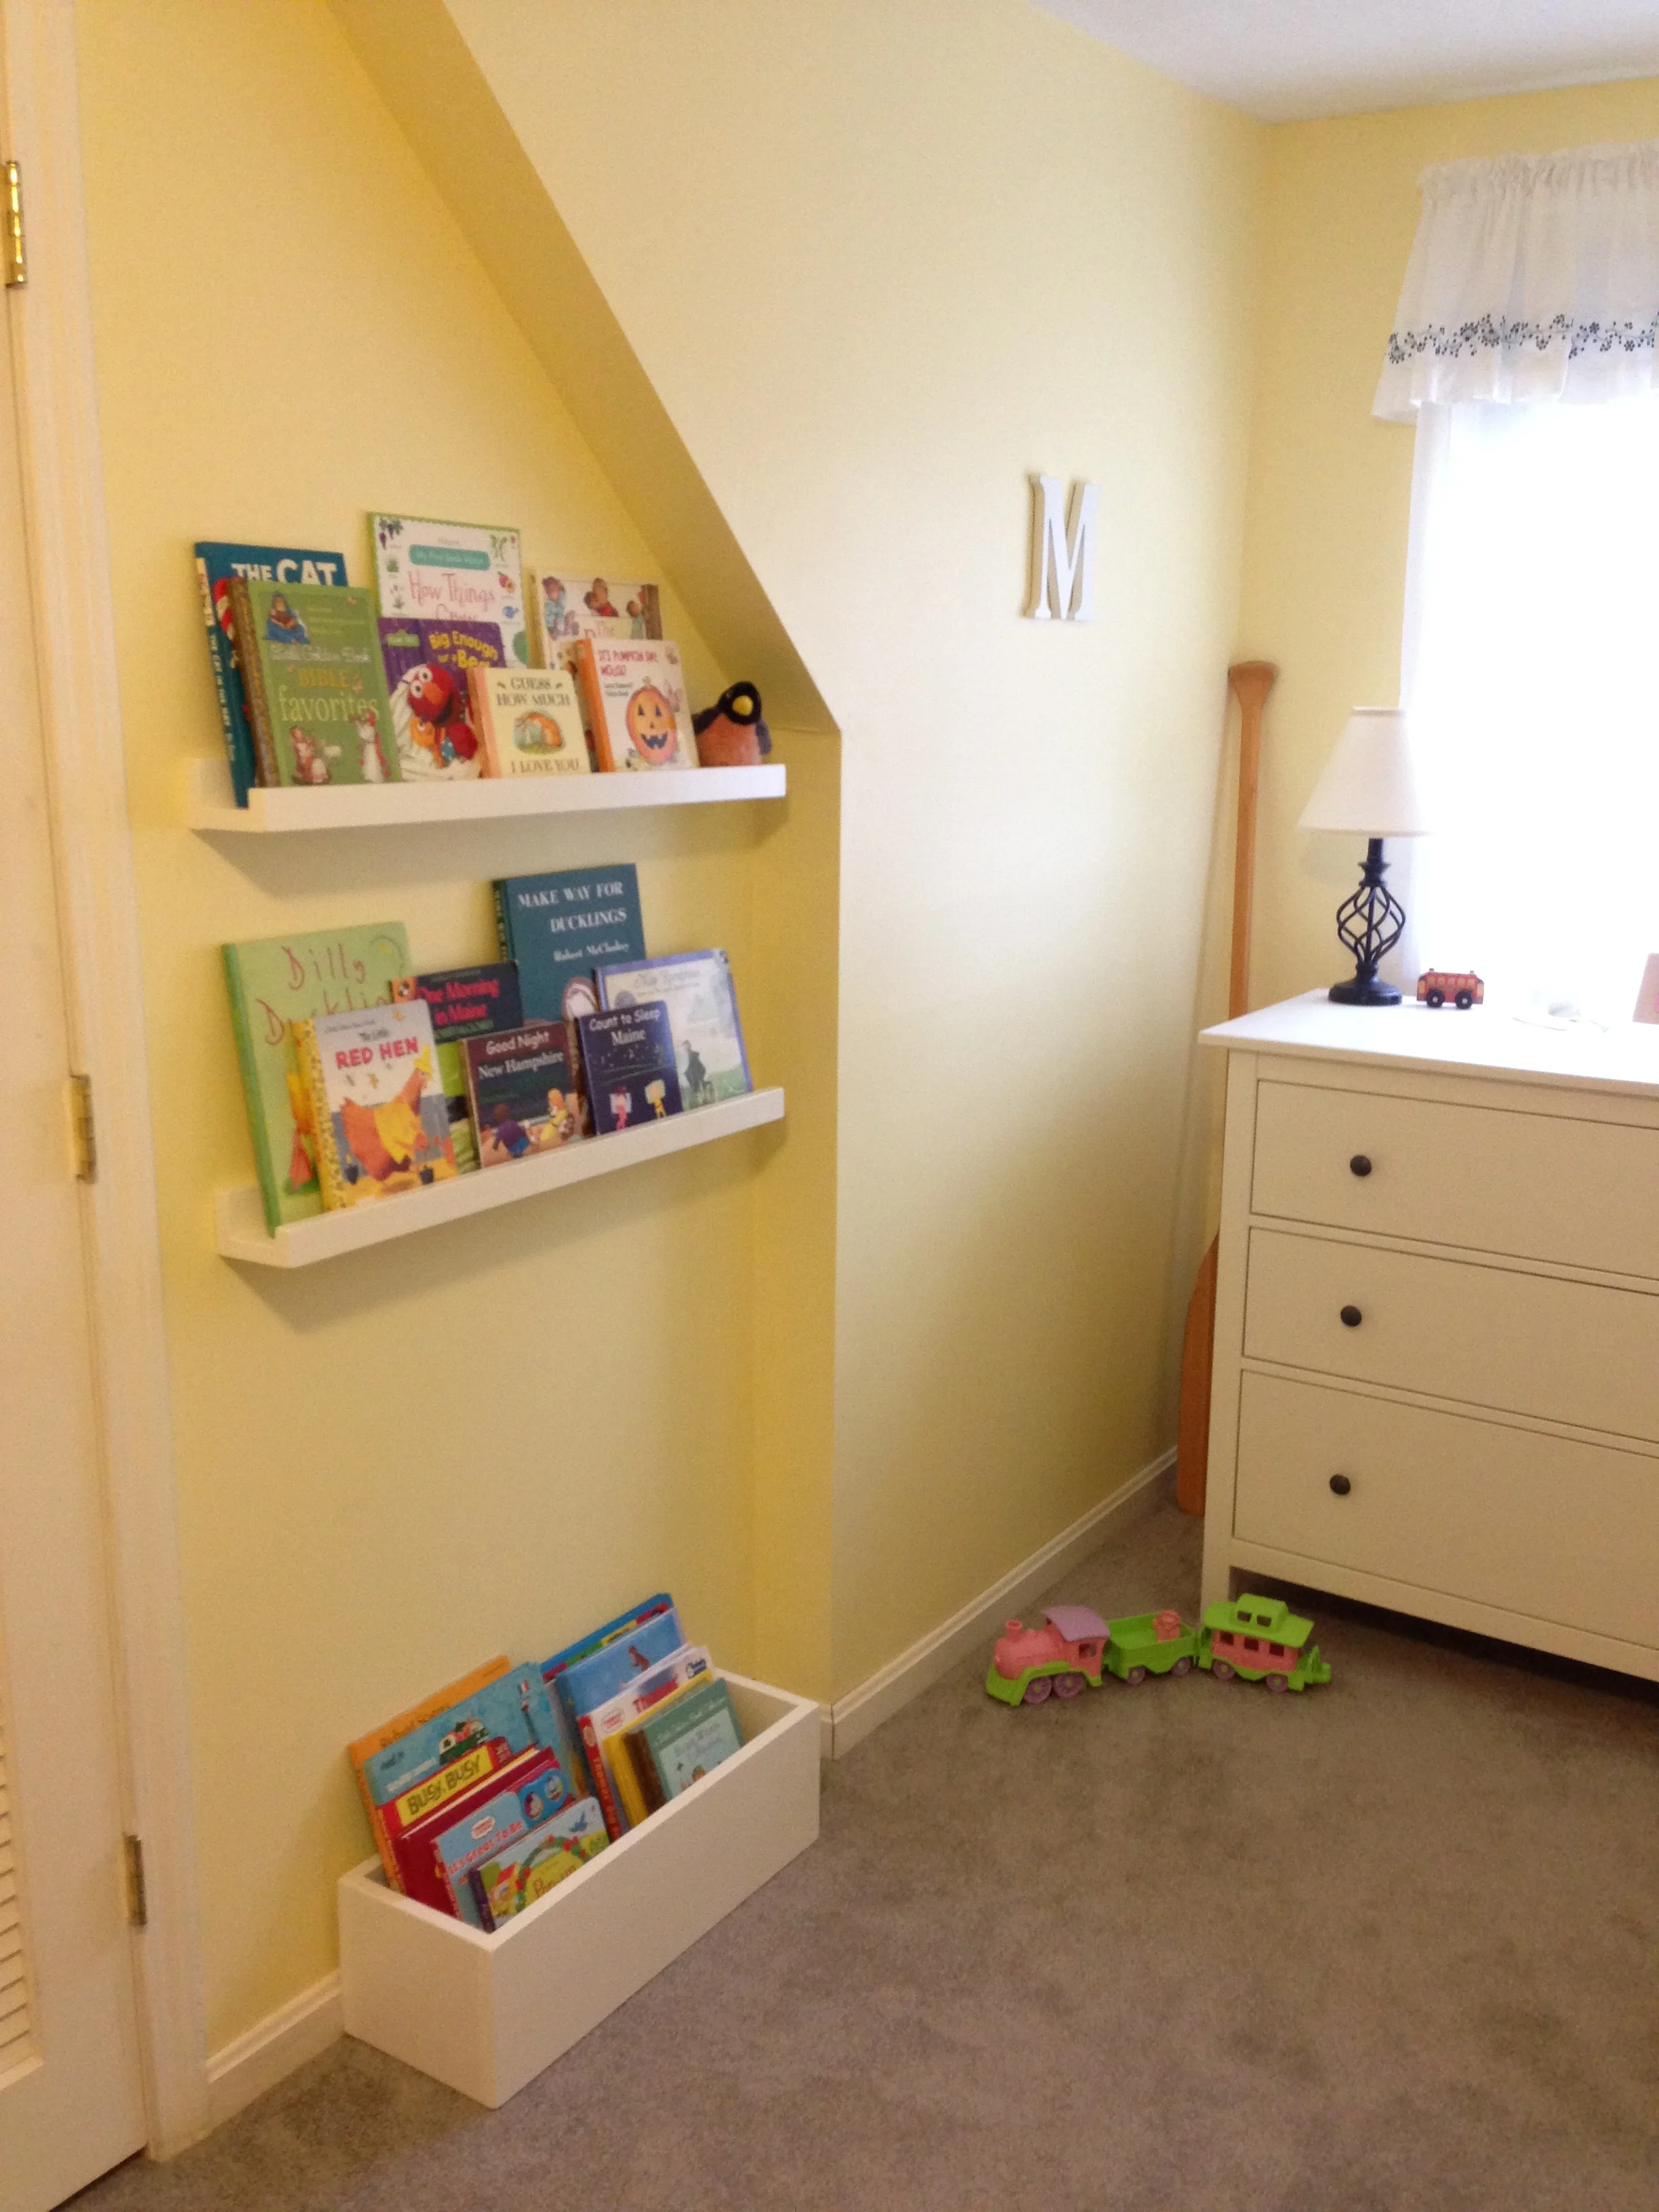
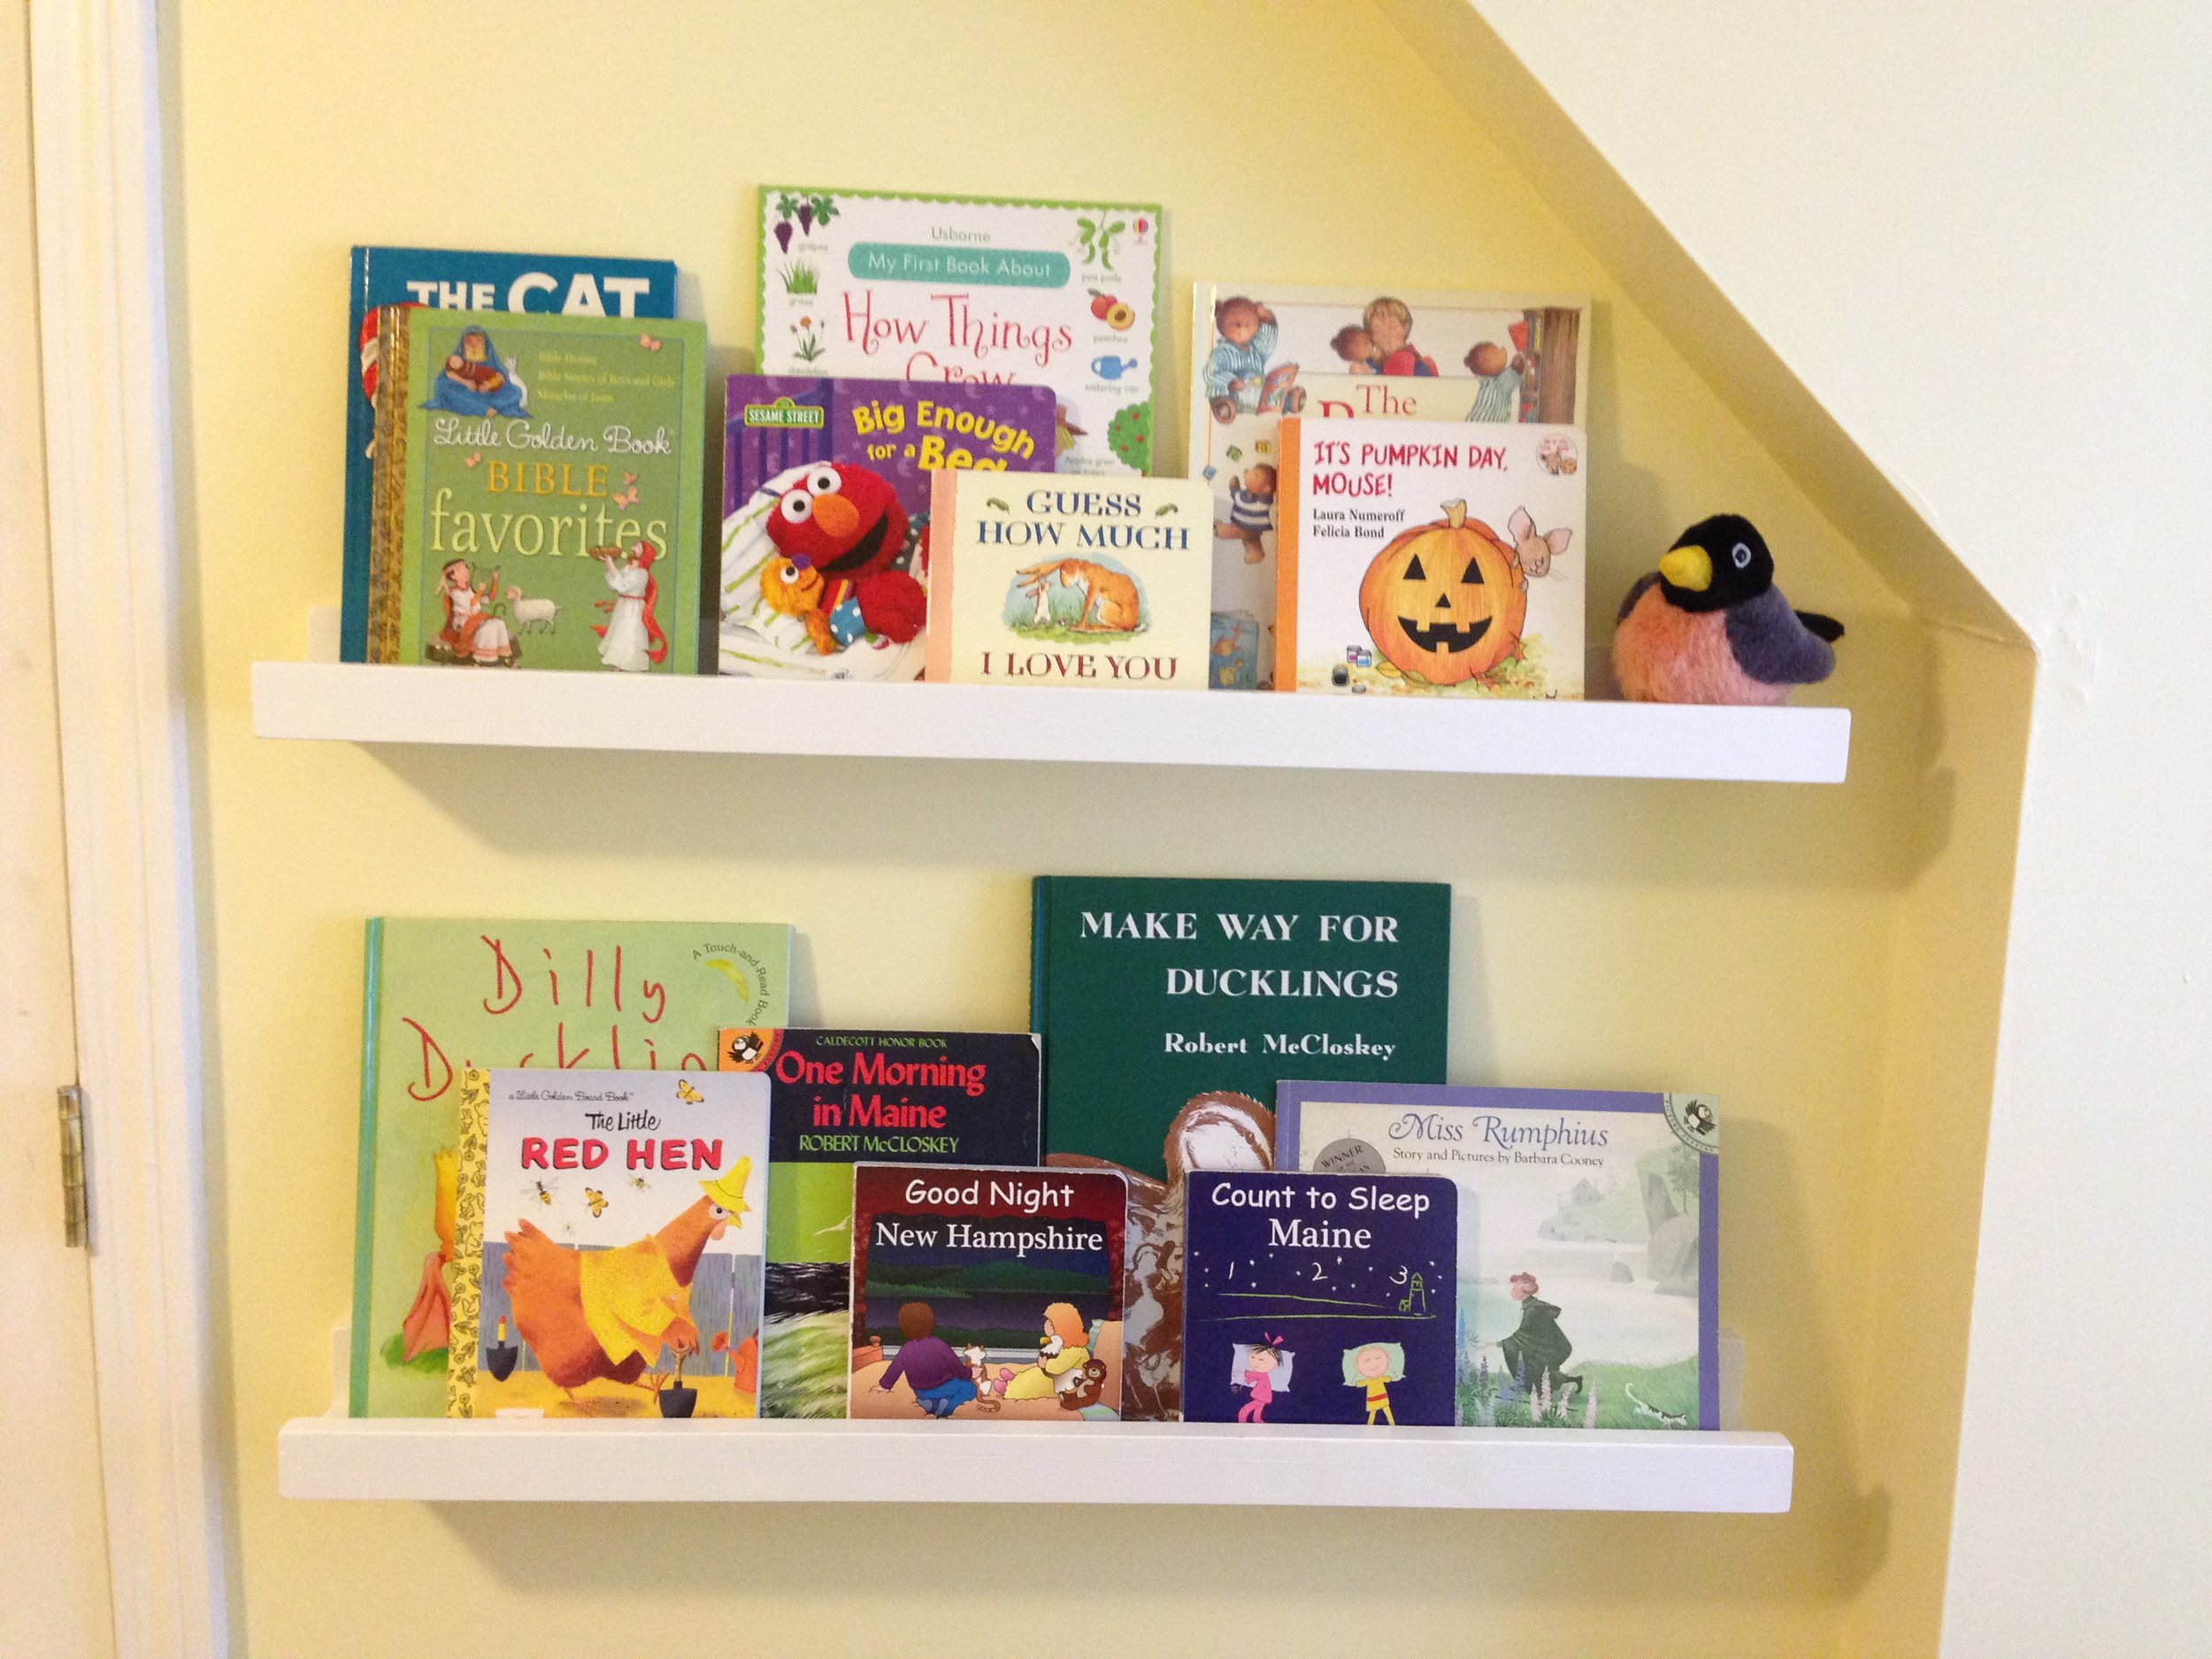
This room has a very shallow alcove and to make the most of the space I built custom book rails in it for storage and display. I debated on putting one more rail down lower but decided against it since I know our toddler would try to climb it like a ladder. Instead, I made a custom narrow wooden crate to sit on the floor and hold her heavier books that I didn't want to put up on the wall.
The book rails make for great storage that doesn't take up a lot of room, as well as gives us a chance to show of some of our current favorite books (including some fun New England-themed ones).
And last but not least, possibly the most important addition to our daughter's big girl room, the
Ready to Wake Clock! I was a bit skeptical at first, but this clock really has been a lifesaver (and no, this is not a sponsored endorsement). Our daughter used to get up between 4-5AM everyday, but once she learned that she needs to stay in bed until the clock turns green she now sleeps to the decent hour (6:45AM) that we set her clock to (thank goodness!).
I've tried to link all my sources for the room but if there's anything I'm missing that you have a question on, please send me a message.
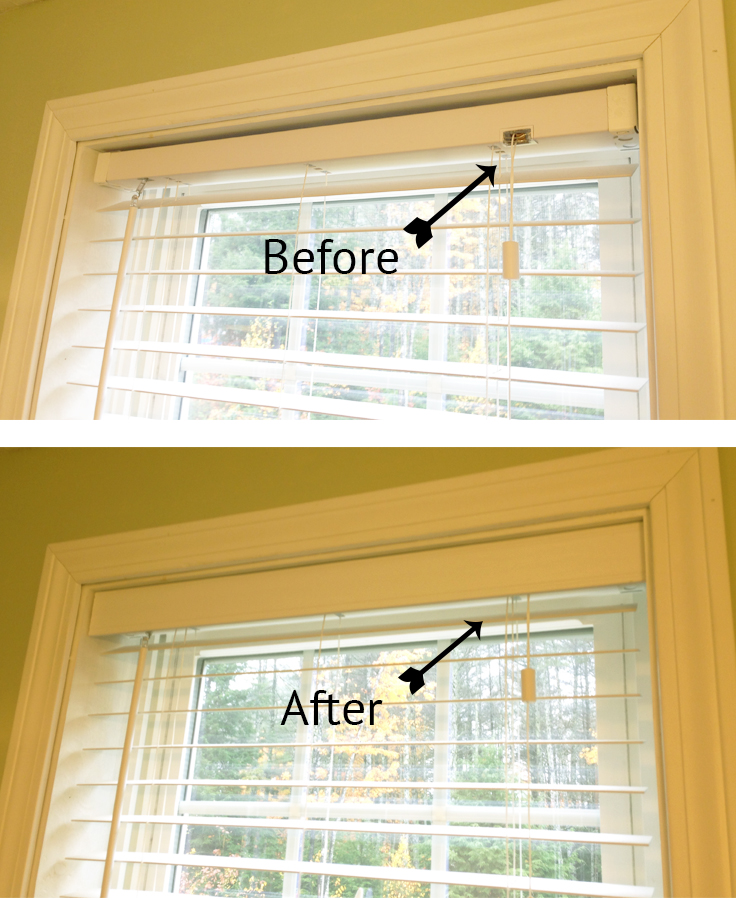
Wooden blinds are a great window treatment option, but finishing them off can be tricky, especially if you don't want to hang curtains too. Today I'm sharing my easy, no hardware-needed solution for dressing up the blinds. | This post contains affiliate links |
All you need is a thin piece of wood or trim (about 1/4" thick) painted to match your blinds and adhesive velcro - that's it! I cut down our trim board myself, but if you don't have a saw you could ask your hardware store to cut it to the width of your blinds when you purchase it.
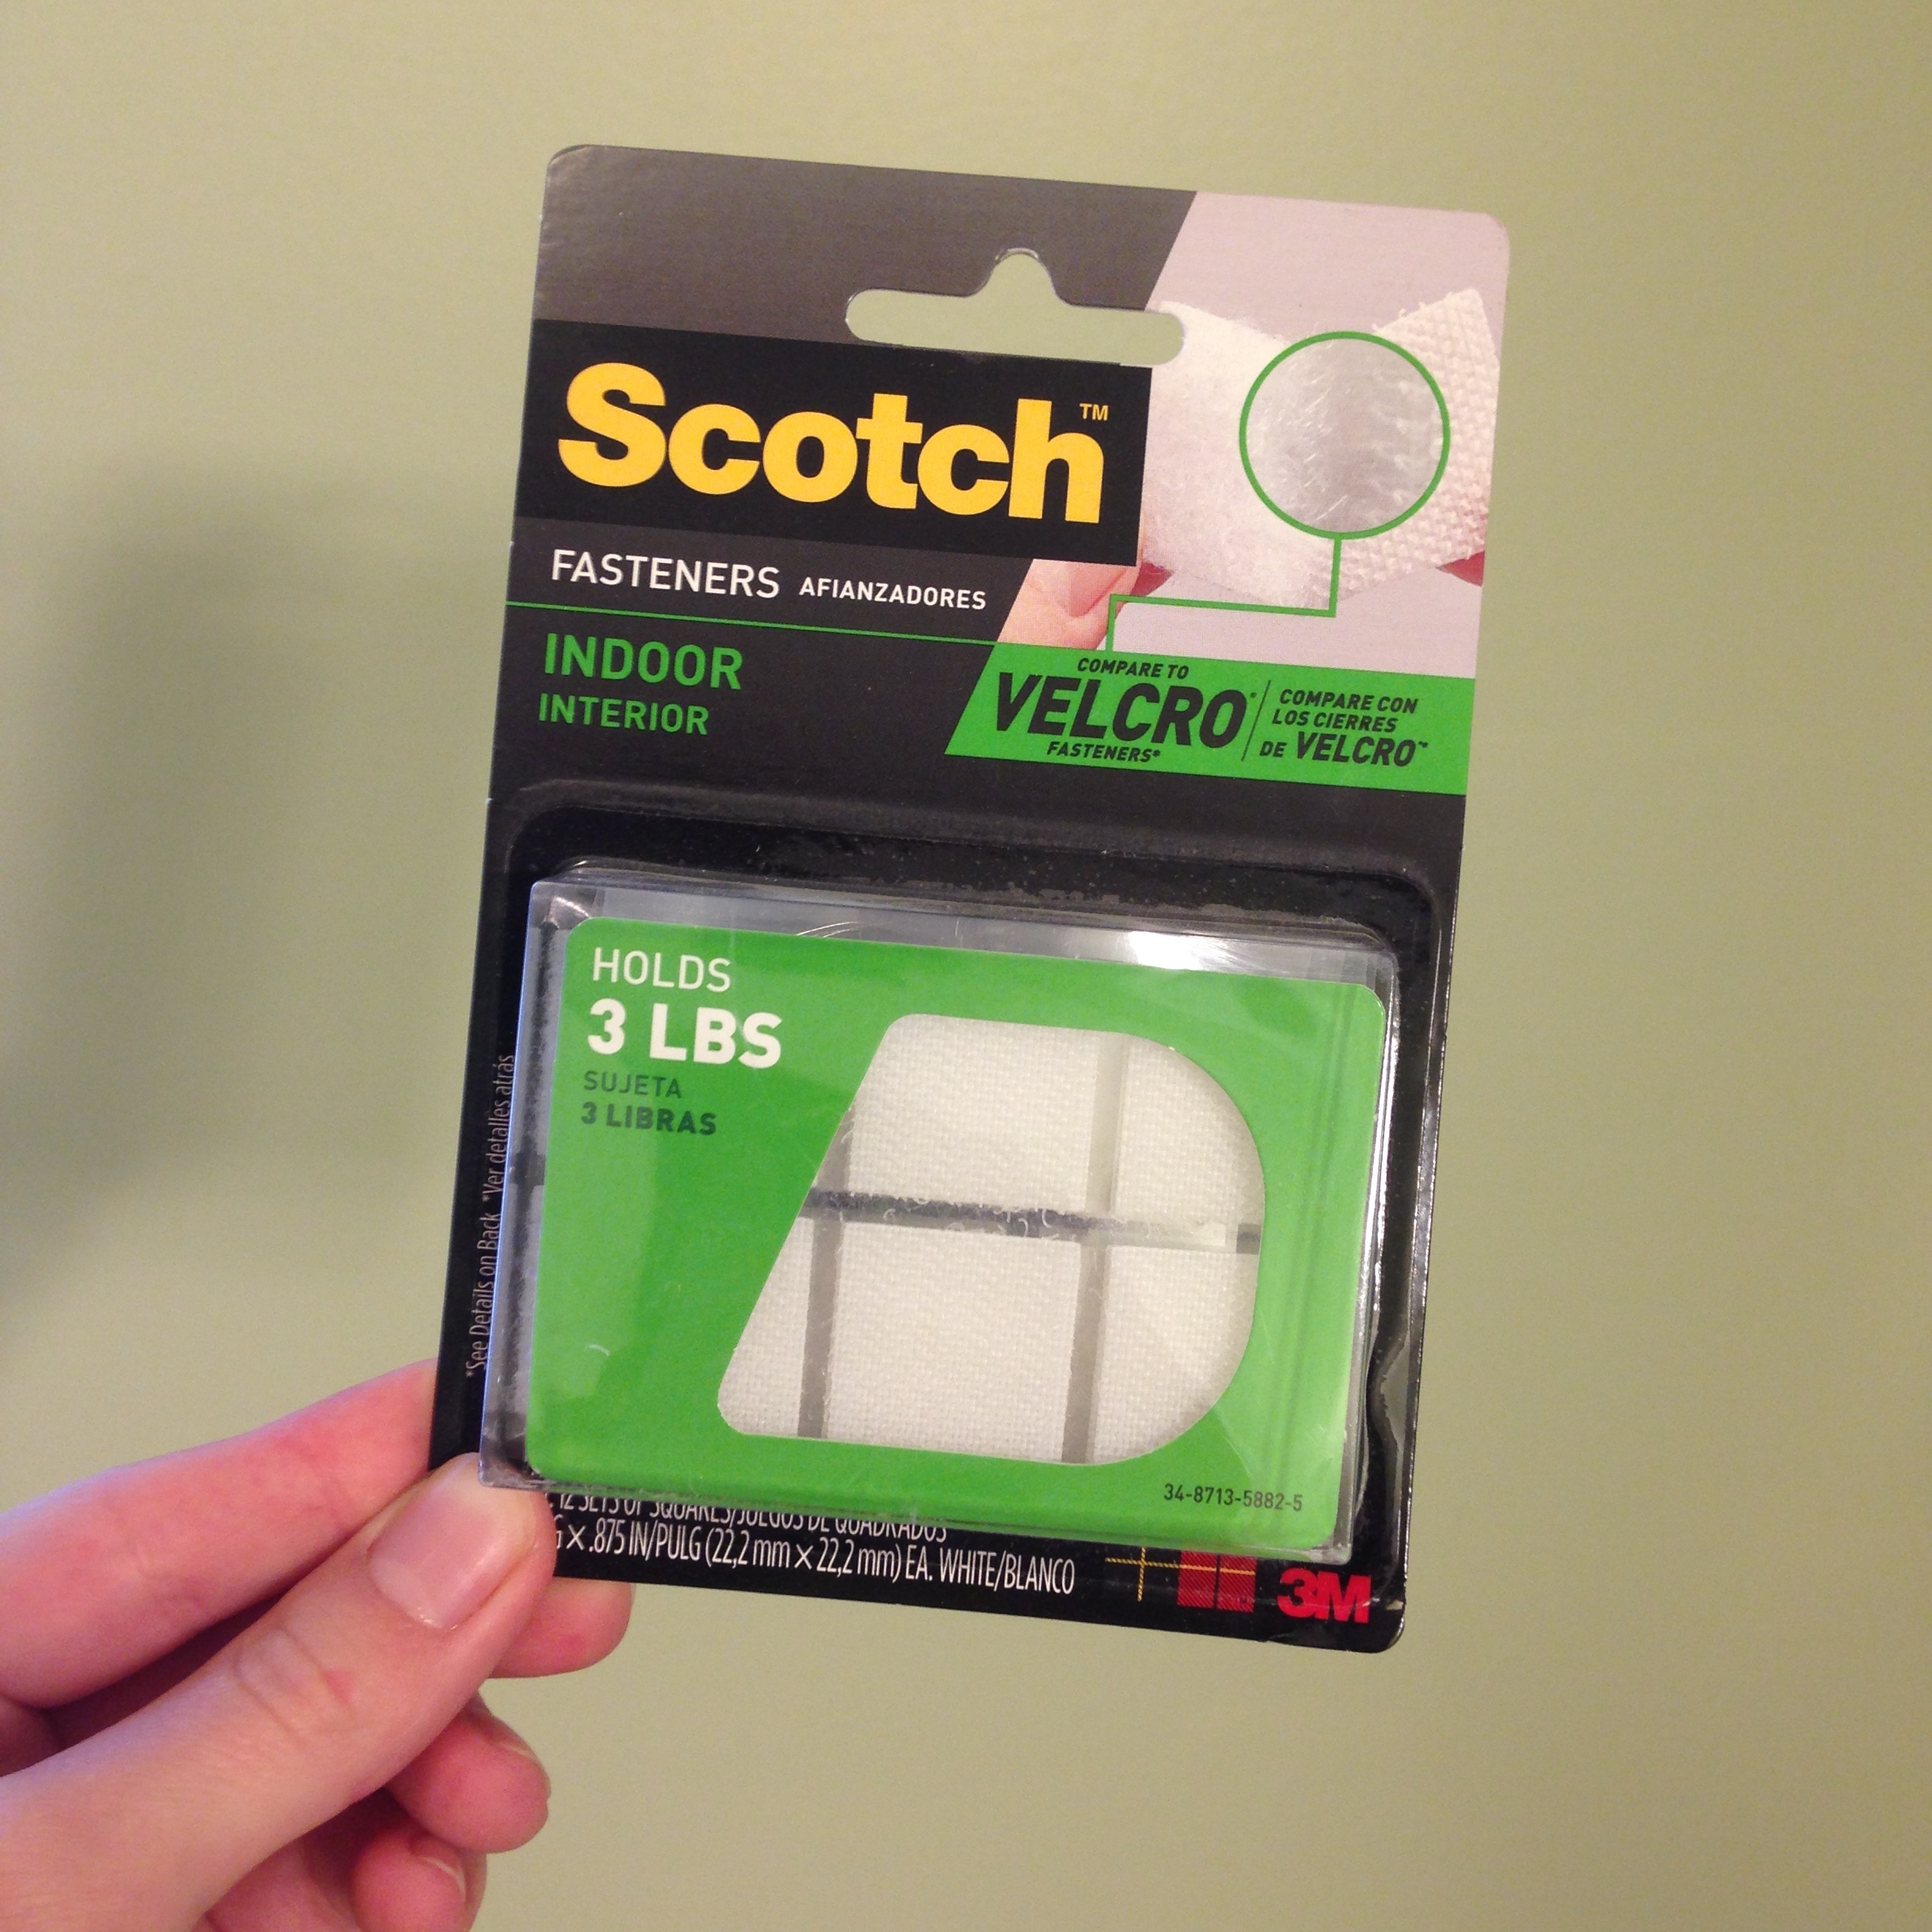
For velcro I used Scotch Indoor Velcro Squares. They have a 3 lb weight limit which is more than enough needed for our project, but I made sure to use three to four velcro tabs per window for a secure hold.
To hang, I just put the adhesive velcro tabs along the top assembly of the blinds and pressed the trim board on top securely. That's it!
This makes for a quick and professional finish to the blinds but still allows you to easily take it down to access the mounts for the blinds for window maintenance and cleaning.
Okay, so I struggled for a bit whether to blog about this little DIY closet makeover. I really loved the project and I think it came out great, but it was just SO impossible to photograph. This closet is at the end of a narrow hallway with no natural light, and there's no way to photograph the whole thing in a single picture. So please forgive me for the poor photos - they aren't to the standard I like to try to keep for the blog but the project and message were just too good not to share. | This post contains affiliate links |
When we moved into our home we quickly realized we needed a "drop zone" by the back door. It was really the only door we used and we needed a place to put all our stuff as we came and went. Thankfully there was an under-utilized pantry here and while we can always use more storage, for us it was more important have a mudroom/drop zone. After surfing Pinterest we decided to turn it into a mini mudroom complete with beadboard, a shelf, hooks, a built-in bench with metal baskets underneath for shoes, mail organizer - the works. And so within weeks of moving in we took the door off the pantry and it became our temporary drop zone while we planned... and there it stayed for three years (yikes).
Embarrassing, right?
You see, our dream mini mudroom would have cost big bucks and we kept sidelining it for other, more important things (furnace fixes, putting in a vegetable garden, repairing the driveway..). And then we got a puppy. And then we had a baby. And then spending big bucks on a teeny mudroom was just absurd. And the closet stayed the way it was, and just looked ugly and cluttered.
Then we realized: it's great to dream big for make-overs and remodels but what's more important is to assess what's realistic now. Realistically we couldn't afford now what we wanted to do originally but we still needed a mudroom - so the design got cut to the very basics. We needed a shelf, hooks, and mail/key organizer; the beadboard, bench, baskets, and accessories would have to wait.
The first step was removing the Closet Maid shelving system. To do this, I used a flat head screwdriver and needle nose pliers to pull out the pins and drywall anchors that held the shelves and supports in place. We saved all the shelves and supports in case we want to add more shelving to another closet down the road. We were left with a ton of holes to fill, but some drywall patch and light sanding filled the holes in fine.
Afterwards I repainted the walls of the closet with some white ceiling paint we had in the basement. My goal was to use as much materials as we had already and I didn't want to buy a new can of paint just to do this little area. The ceiling paint covered great and it only needed one coat.
Then I marked the studs with painters tape and cut a 1x12 (given to us by my father-in-law who had scrap boards in his basement) down to the length of the back of the closet, attaching it into the studs with long screws.
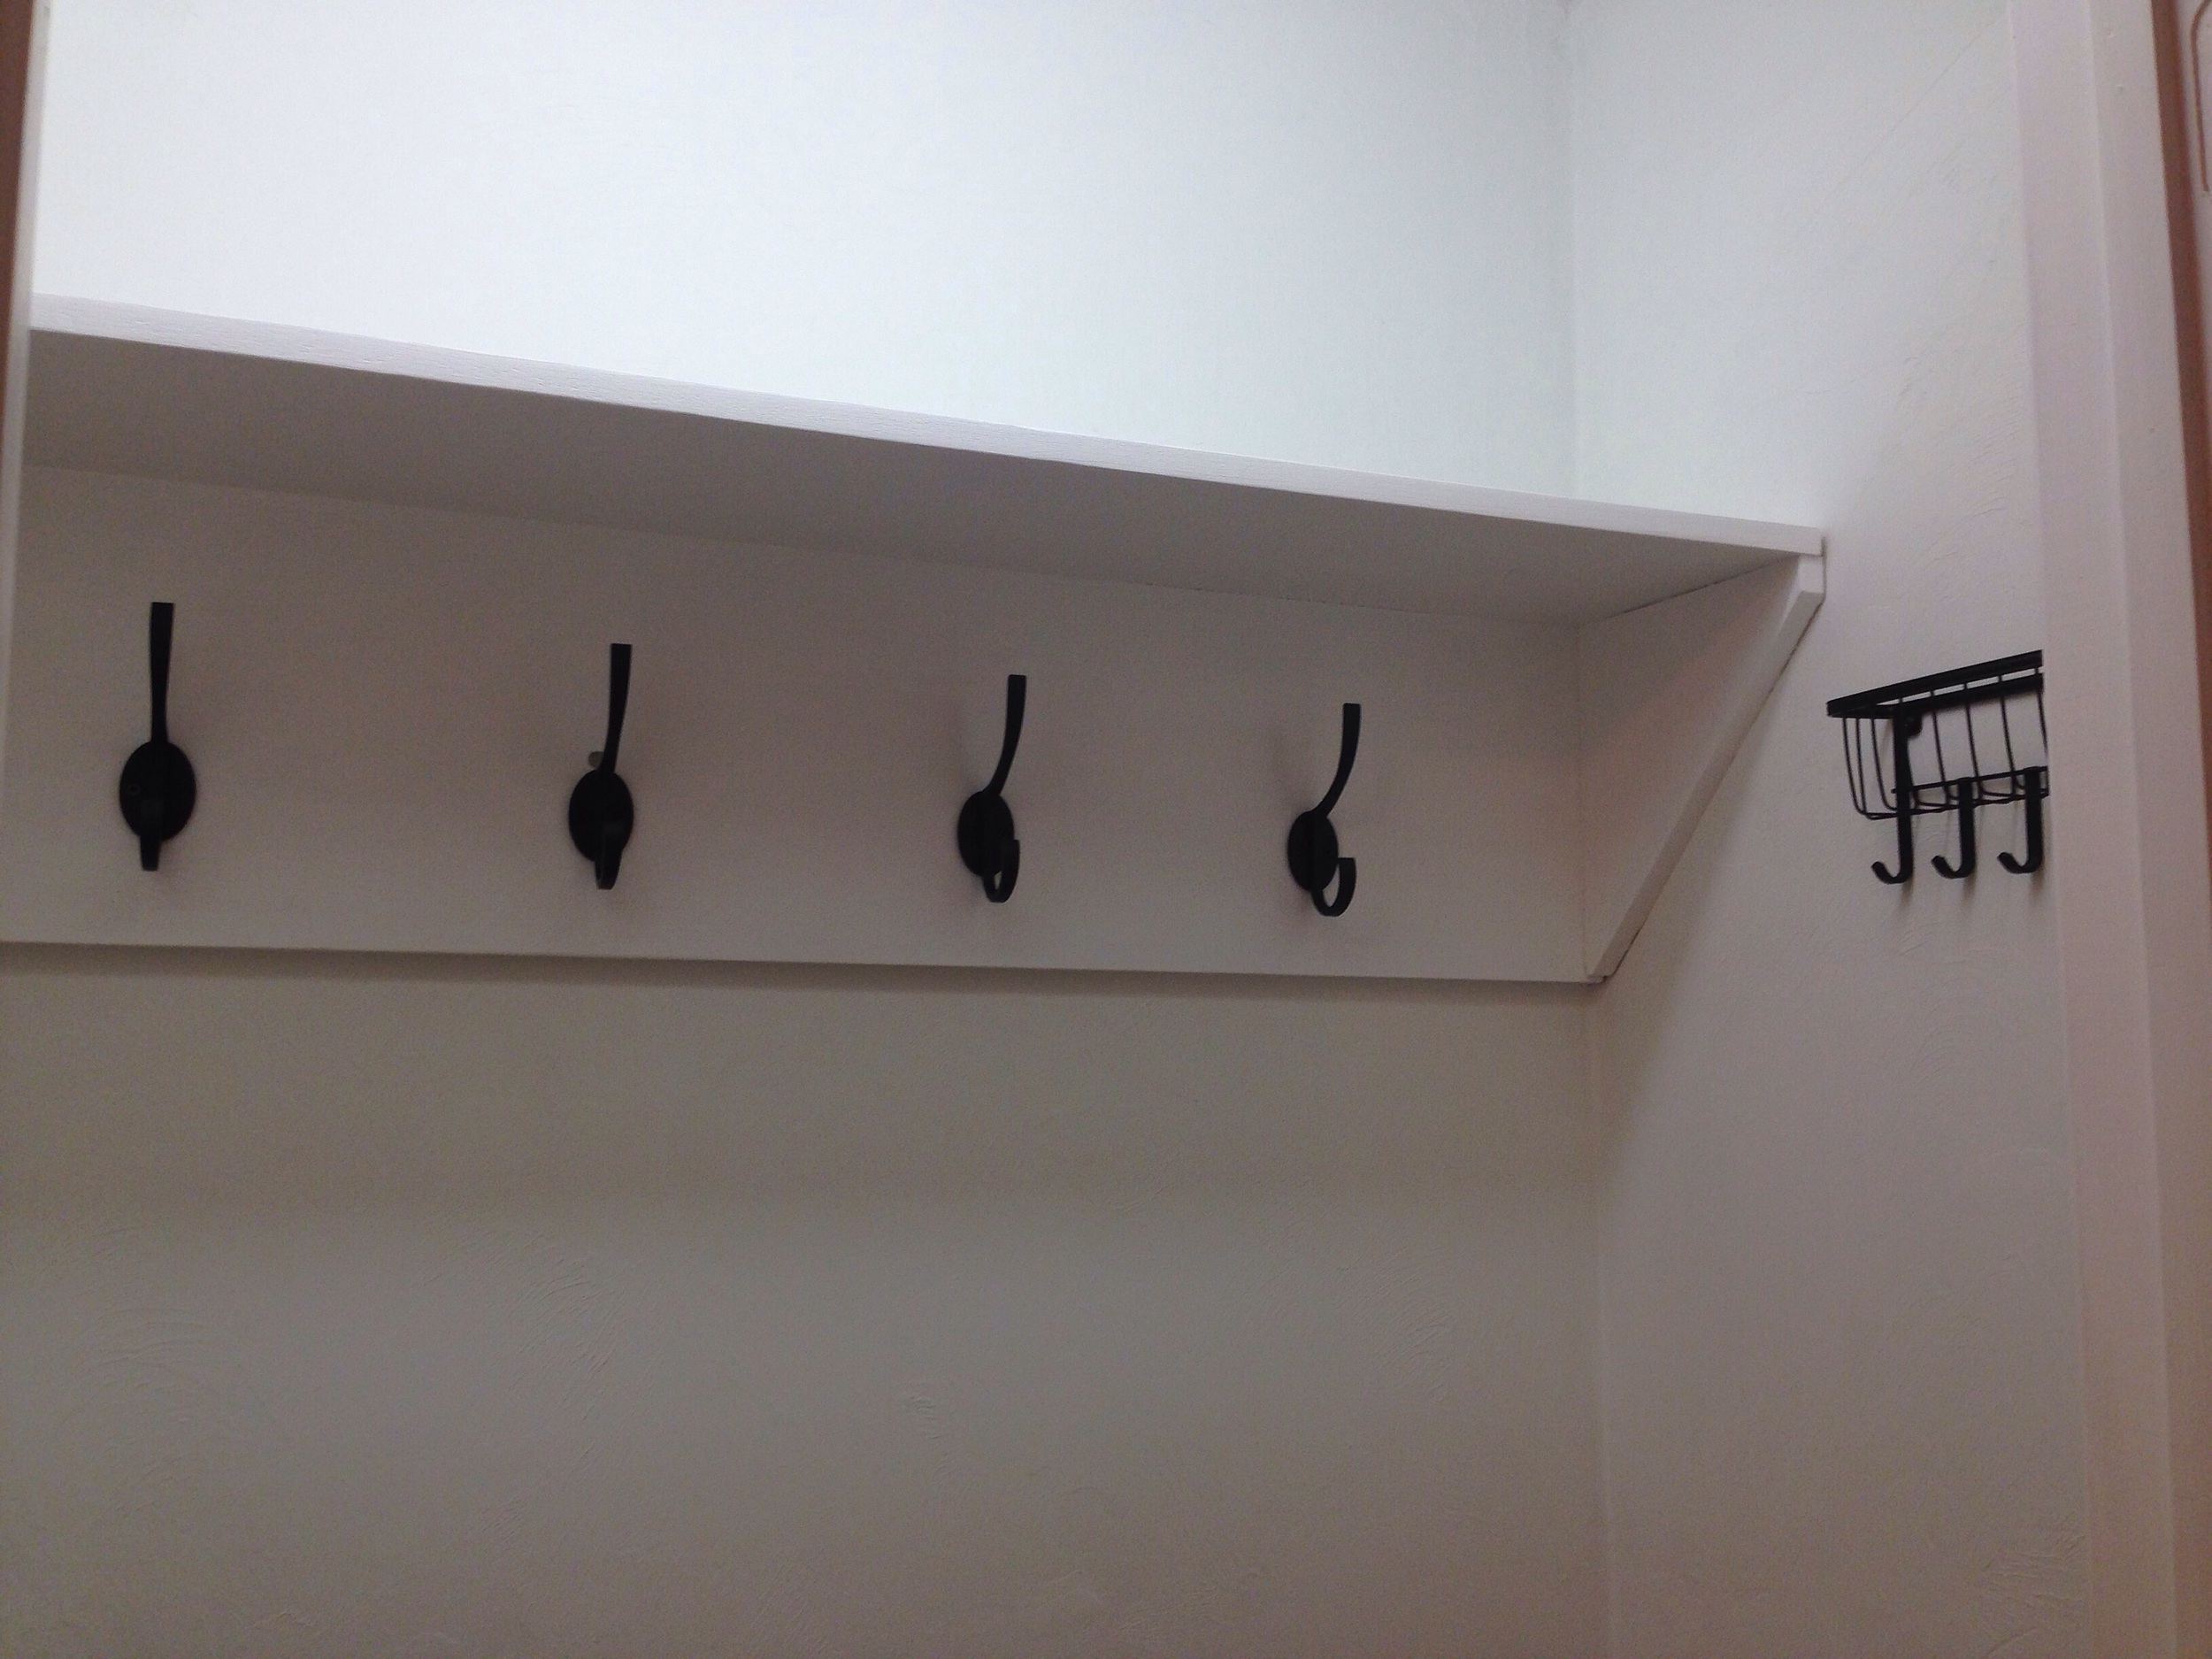
I cut the angled side supports down and cut another board to make the top shelf (all cuts were made with just a chopsaw). Everything was glued, screwed, and nailed into place so it was nice and sturdy. Then I patched all the screw holes and lightly sanded before painting the shelf with trim paint, which we already had on-hand.
Once the paint was dry, I added the hardware - the only items we actually had to buy for this project! The four coat hooks were from Lowes and cost about $4 each, the two accessory hooks were also from Lowes and were less than $1.50 each, and the mail/key organizer was from Amazon and cost about $10. All-in-all since we reused paint and wood we already had we spent around $30 for everything! Someday I'd still like to add a bench, baskets, and cover the textured walls with beadboard but in the meantime we have a functional, simple, efficient mudroom which is what we really needed from the beginning. I'm kicking myself for living with the messy old closet for so long when doing a simplified mudroom was so achievable this whole time!