Story Land Tips & Tricks (from Long-Time Season Pass Holders) - New Hampshire

Post updated for 2026 Season | We’ve been going to Story Land for forever it seems - I went yearly as a child back in the 80’s and 90’s, and now we’ve been season pass holders for the last 10+ years. This may be our last year as season pass holders as our kids are getting too old to make Story Land trips a regular occurrence, but we’ve learned a lot over the years and I thought I would share some of our tips, tricks, and hacks with you. | This post is not sponsored. Contains personal opinion/reviews and affiliate links |

Story Land Tips & Tricks (From Long-Time Season Pass Holders); image of kids going up to Cinderella Castle

Disclaimer: This post shares opinions and tips based on our personal experiences. Please be aware that you may encounter things differently and things are subject to change. Please do your own research.

Story Land is a family-focused storybook themed amusement park in Glen, NH.

Consider Season Passes

If you’re a New Hampshire local (like us), or come up to the area at least 2-3x a year, Season Passes are definitely the way to go! They can pay for themselves in just two visits. Make sure to pay attention to levels of passes when purchasing as some have blackout dates and some have different perks - like free parking, discounts for food or merchandise, free or discounted “Buddy Passes,” or tickets to Living Shores Aquarium next door. It’s also really nice not feel pressure to do or see it all when we’re at Story Land because we know we can catch something next time; it gives us a lot of flexibility to just come for a few hours when we want.
PRO TIP: Buy season passes ahead of time for the following season on Black Friday! That’s typically when prices are lowest.

Season Pass Monthly Perks

If you are Season Pass holders, Story Land typically has bonus pass perks that change every month on top of your regular season pass perks! It could be something like 50% one souvenir for a certain month, or “buy one get one free” ice cream for a particular month. These bonus monthly perks change month-to-month and are announced at the beginning of every month (in other words, it’s a surprise what the next month’s perks are going to be).

Buy Day Tickets Ahead (if not Season Pass Holders)

If possible, NEVER buy tickets at the gate - always buy ahead online. Buying ahead gives you the best deal on day tickets. Sometimes they can be be 50% or more off depending on current offers, though you may have to buy a week or more in advance to get the best deal.

Go Midweek if you Can

Weekends can be insanely busy at Story Land. We highly recommend going Tuesday, Wednesday, or Thursday if you can - those definitely seem to be the lighter days.

“Final Three = Next Day Free!”**

Story Land often has a promotion where if you first enter the park in the final 3 hours of operation you can come back the next day for free! This is a great way to get some extra time in the park, especially if you’re from out of the area and staying in a hotel locally.
**NOTE: We have seen this offer come and go over the years — some years they offer it, some years they don’t. Do your research and confirm with customer service in writing if they are currently honoring that offer and how best to use it with dated tickets before you try to use it.
**EDIT 2026: This year I saw an offer where you can come for the last three hours the day before your
dated ticket, so it’s backwards of what it used to be. DEFINITELY CALL/EMAIL AND CONFIRM HOW IT WORKS BEFORE YOU TRY TO USE IT.

Paid Parking

New in 2024, Story Land is now asking you pay to park in certain lots (namely all the ones surrounding the park), though free parking is included with Season Passes. Parking across the street in the dirt lot is still free and there is a pedestrian tunnel under the road to safely cross. (Personal note: I am really disappointed about this change.)

Bag Policy

Make sure to check Story Land’s bag policy before coming. It’s new in the last few years, but be prepared for security to check your bags on the way in and limitations on the size of bags brought in (exceptions can be made for diaper bags or medical supplies). You may also have to go through a metal detector as well. And just like before, Story Land still does not allow glass bottles/containers or hard sided coolers brought in.

Now that I don't need a diaper bag these days I pack light and simple - a quality belt bag with wallet, phone, keys, and hand sanitizer. That's really all you need and it's small enough to wear on almost all rides.

Story Land is Cash-Free

Starting a few years ago Story Land became a cash-free park. This means they ONLY accept credit card/debit cards for payments at all places (food, gift shops, concession stands, etc) in the park - so make sure to bring your plastic with you ;) If you forget or don’t have a credit card, there are machines in the parks that can transfer cash onto pre-paid gift cards that can be used instead.

Story Land Tips & Tricks (from Long-Time Season Pass Holders)

Pack a Lunch

This is an easy way to save big if you come frequently - make sure to pack your lunch to avoid paying for over priced food and drinks in the park. You can leave your lunch cooler in your car and go out* and have a “parking lot picnic” (*don’t forget to get your hand stamped on the way out so you can re-enter the park!) or you can bring your lunch into the park with you as long as it fits in with Story Land’s bag policy and doesn’t contain glass containers. When our youngest was a baby we used to always eat our lunch on the train - that way the baby could take her time finishing her bottle while my oldest ate her sandwich and no one felt like we were missing out on anything - we’d just ride the train in circles until everyone was done.

Buying Food in the Park

If you do buy food in the park, it’s worth scoping out what the different food stalls have. There is a Dunkin Donuts when you first come in if you need that coffee/breakfast fix. For lunch, Food Fair in the center of the park has all the standard items but can get very busy on crowded park days. Some stand alone stalls like Barn Yard Pizza or The Farm Stand may have different offerings than any other food stall in the park and often shorter lines too. While you’re walking the park in the morning it’s worth checking out their menus as you pass by to decide what everyone is interested in eating for snacks or lunch. Keep in mind some food stalls may not be open during the shoulder seasons or due to staffing on certain days so it’s important to stay flexible. Offerings can also change seasonally. (Occasionally Story Land also has food trucks in the park or manning one of the food stands which is a fun change and always really good food!)
PS - if you’re a Season Pass holder, don’t forget to scan your season pass if you have food discounts as a Park Perk! (Note: Discounts aren’t available for food trucks vendors/3rd party vendors.)

Consider Baby Wearing Over a Stroller

I have been doing Story Land for years - with babies, pregnant, not pregnant, with toddlers, with pre-teens, etc. - and I am solidly in the camp “no stroller.” Personally I find it so much easier to just have everything on my person and not have to worry about watching a stroller or coming back for a stroller if we decide to get off at a different train stop, etc - and not to mention it’s much easier navigating crowds and the giant hill in the middle of the park (which is avoidable if you choose to go around - but it’s a nice shortcut) without a stroller. Story Land also isn’t a huge park, it’s very walkable and doable without a stroller for most people. I always wore our baby/toddler in a front carrier and then carried a backpack as a diaper bag that had all the essentials - diapers, lunch, bottles, etc. Obviously everyone has their own preferences and if you decide to use a stroller or wagon that’s totally fine but this is what I found to be the best for our family in this park.

Many families choose to take strollers or wagons into Story Land. Please keep in mind that they are subject to search and go through the metal detector when you enter the park. It's also not a bad idea to AirTag your stroller or wagon too, just in case.

(Personal note: I loved using the Boba Baby Carrier when our kids were small. It's good for infants through toddlers and very comfortable to wear. I would also carry a modest-sized backpack diaper bag, similar to this one so I could keep my hands free and move around the park easily.)

Plenty to Do and See with Infants or While Pregnant

If you’re pregnant or have an infant it will limit what you can do - no rollercoasters or thrill rides for example. However there is still a reasonable amount of things to see and do - make sure to check the ride information boards at each ride to see if it’s suitable for infants or pregnant women and obviously use your best judgement and advice from your doctors on what you can/can’t do. It’s better to play it safe.

Walk Up to Cinderella’s Castle, Then Ride Down

This is a simple tip I’ve realized over the years - WALK UP to Cinderella’s Castle, and then ride the Pumpkin Coach DOWN. Most people feel the need to ride up to Cinderella’s Castle to get the full effect, but if you don’t mind doing it a little backwards you can walk up to the Castle (over a really pretty bridge, mind you), meet Cinderella, and then get in line to ride the Pumpkin Coach back down. The line at the top to ride back down is almost always considerably shorter than the line at the bottom to ride up - and often there isn’t even a line at the top at all!

Take Your Own Picture with Cinderella

At Cinderella’s Castle you can stand in line to meet her and get your photo taken by a staff photographer, which is available for purchase afterwards at a little desk by the exit. Thankfully though you can take your own cell phone photo while you’re there and aren’t obligated to buy the Story Land photo which is rather expensive.

Some Rides Don’t Open Until 10:30

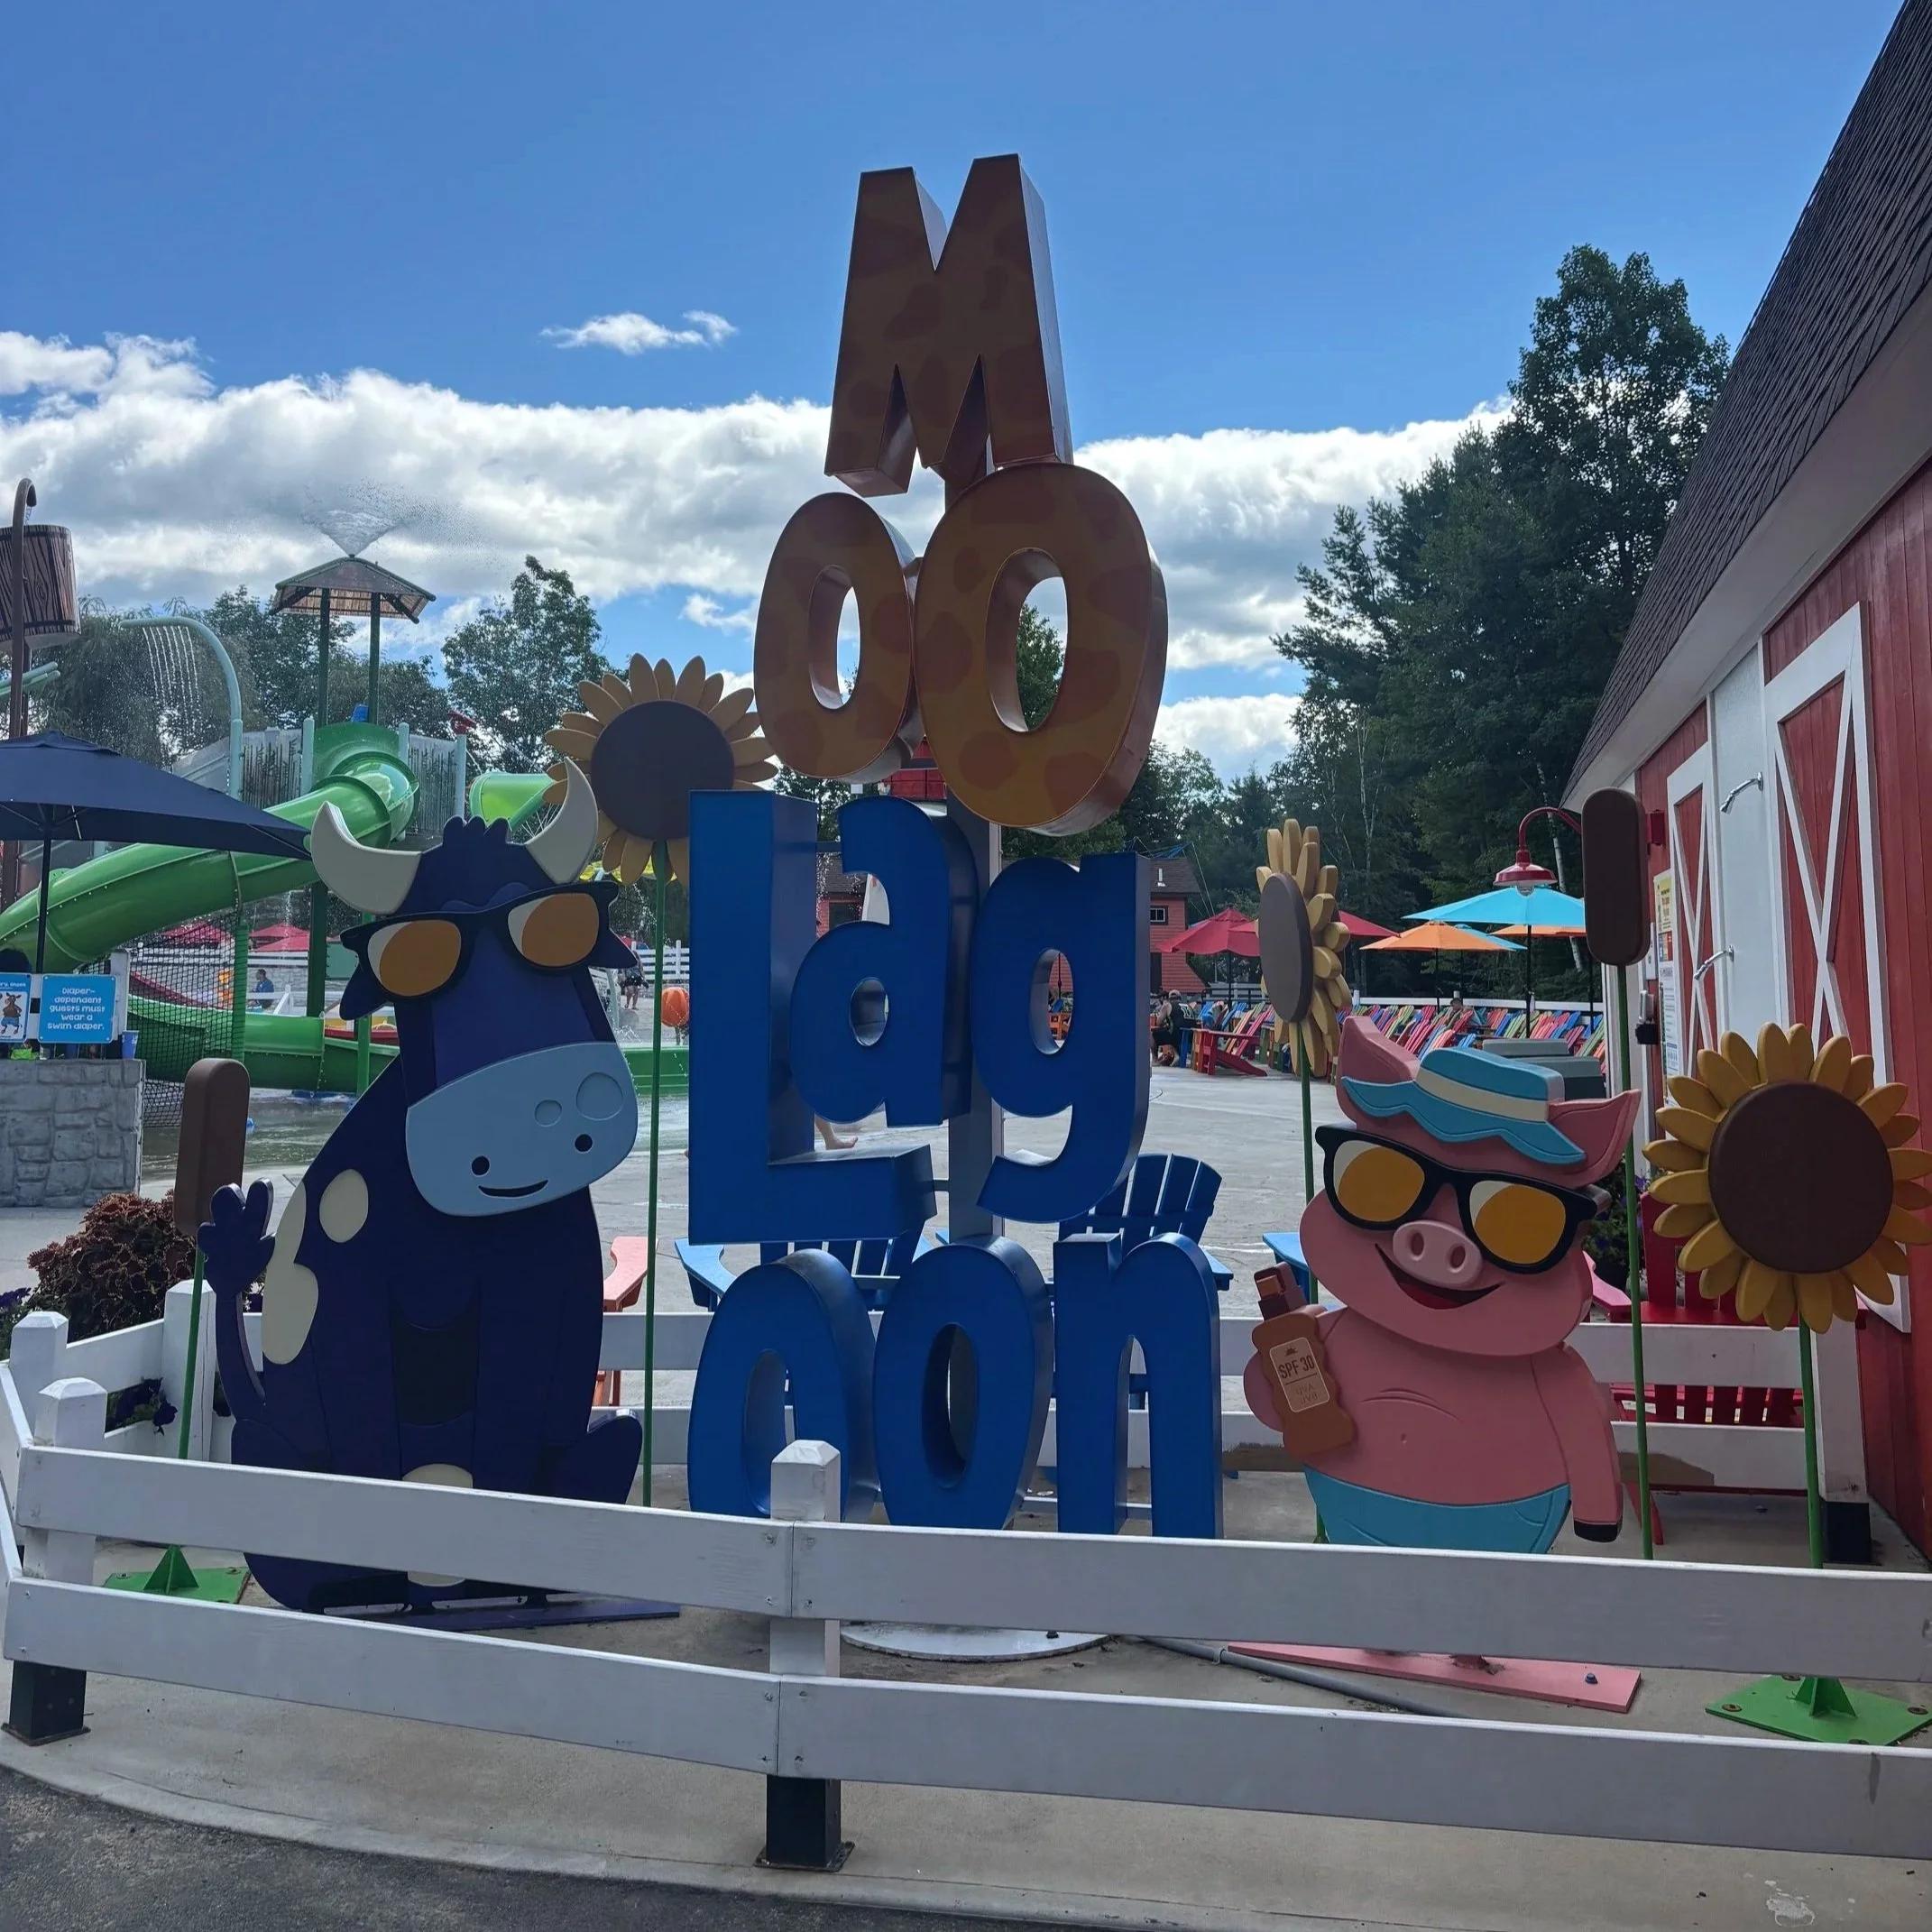
Story Land typically opens at 10AM, but keep in mind that the water rides (Dr. Geyser’s Remarkable Raft Ride and Bamboo Chutes) and the back section of the park that includes Moo Lagoon do not open until 10:30. We recommend doing one or two other dry rides first before circling back to catch those.

And Some Rides are Temperature Dependent

Keep in mind that most of the water rides and Moo Lagoon won’t run if it’s below 70 degrees. These rides also may not operate early in the season or after Labor Day.

The Roar-O-Saurus is ROUGH

The Roar-O-Saurus is the wooden rollercoaster in the back of the park; it has highest height requirement of all the rides at Story Land and is meant for older kids and adults. It’s a great wooden roller coaster and quite thrilling - but be warned it’s ROUGH riding it. The ride is very jolting and “jittery.” There are signs on the loading dock warning you to take everything out of your pockets and leave it in cubbies on the platform because they will be shaken out (my husband can attest to that… his wallet shook right out of his pants pocket once!). They used to even have a white board tally behind the operator logging how many items have been lost so far that season on the ride.
(Personal Note: Unfortunately this ride hurts my neck so I typically don’t ride it.)

EDIT Fall, 2025: Be warned - as of October, 2025 they will no longer let you even wear RX glasses on the Roar-A-Saurus. I usually don’t ride this ride because it bothers my neck, but my daughter needed someone to ride with her on our last trip of the season so I agreed to go on it with her. I was surprised and disappointed that I was told I could not wear my glasses on the ride, which has never been an issue before. I tried explaining that I am legally blind without them (literally, I am) and I’ve never had to take them off in all the years of riding it but it was non-negotiable on their part. We decided to get off the ride at that point because I can’t be parted from my glasses.. it was very disappointing. I understand where they’re coming from that they’ve had too many people loose items on this ride, but properly fit RX glasses will not fall off and it’s unfortunate they won’t allow even those on the ride anymore.

Pack Your Swimsuit for Moo Lagoon

Moo Lagoon, which opened in 2024, is a splash pad/water slide park located where the old Oceans of Fun Splash Pad was. If you’d like to take advantage of Moo Lagoon make sure to wear or bring your swimsuit to change into. Appropriate swim wear without buckles or anything that can “catch” is needed to use the water slides - and they don’t allow you to wear glasses of any kind on the waterslides, including prescription eyeglasses.
One thing to note is that the entrance stairs to the three tallest slides are outside of the main Moo Lagoon area. This makes it tricky to always have eyes on your little ones so keep that in mind.
Never Busy at Cuckoo Clockenspiel
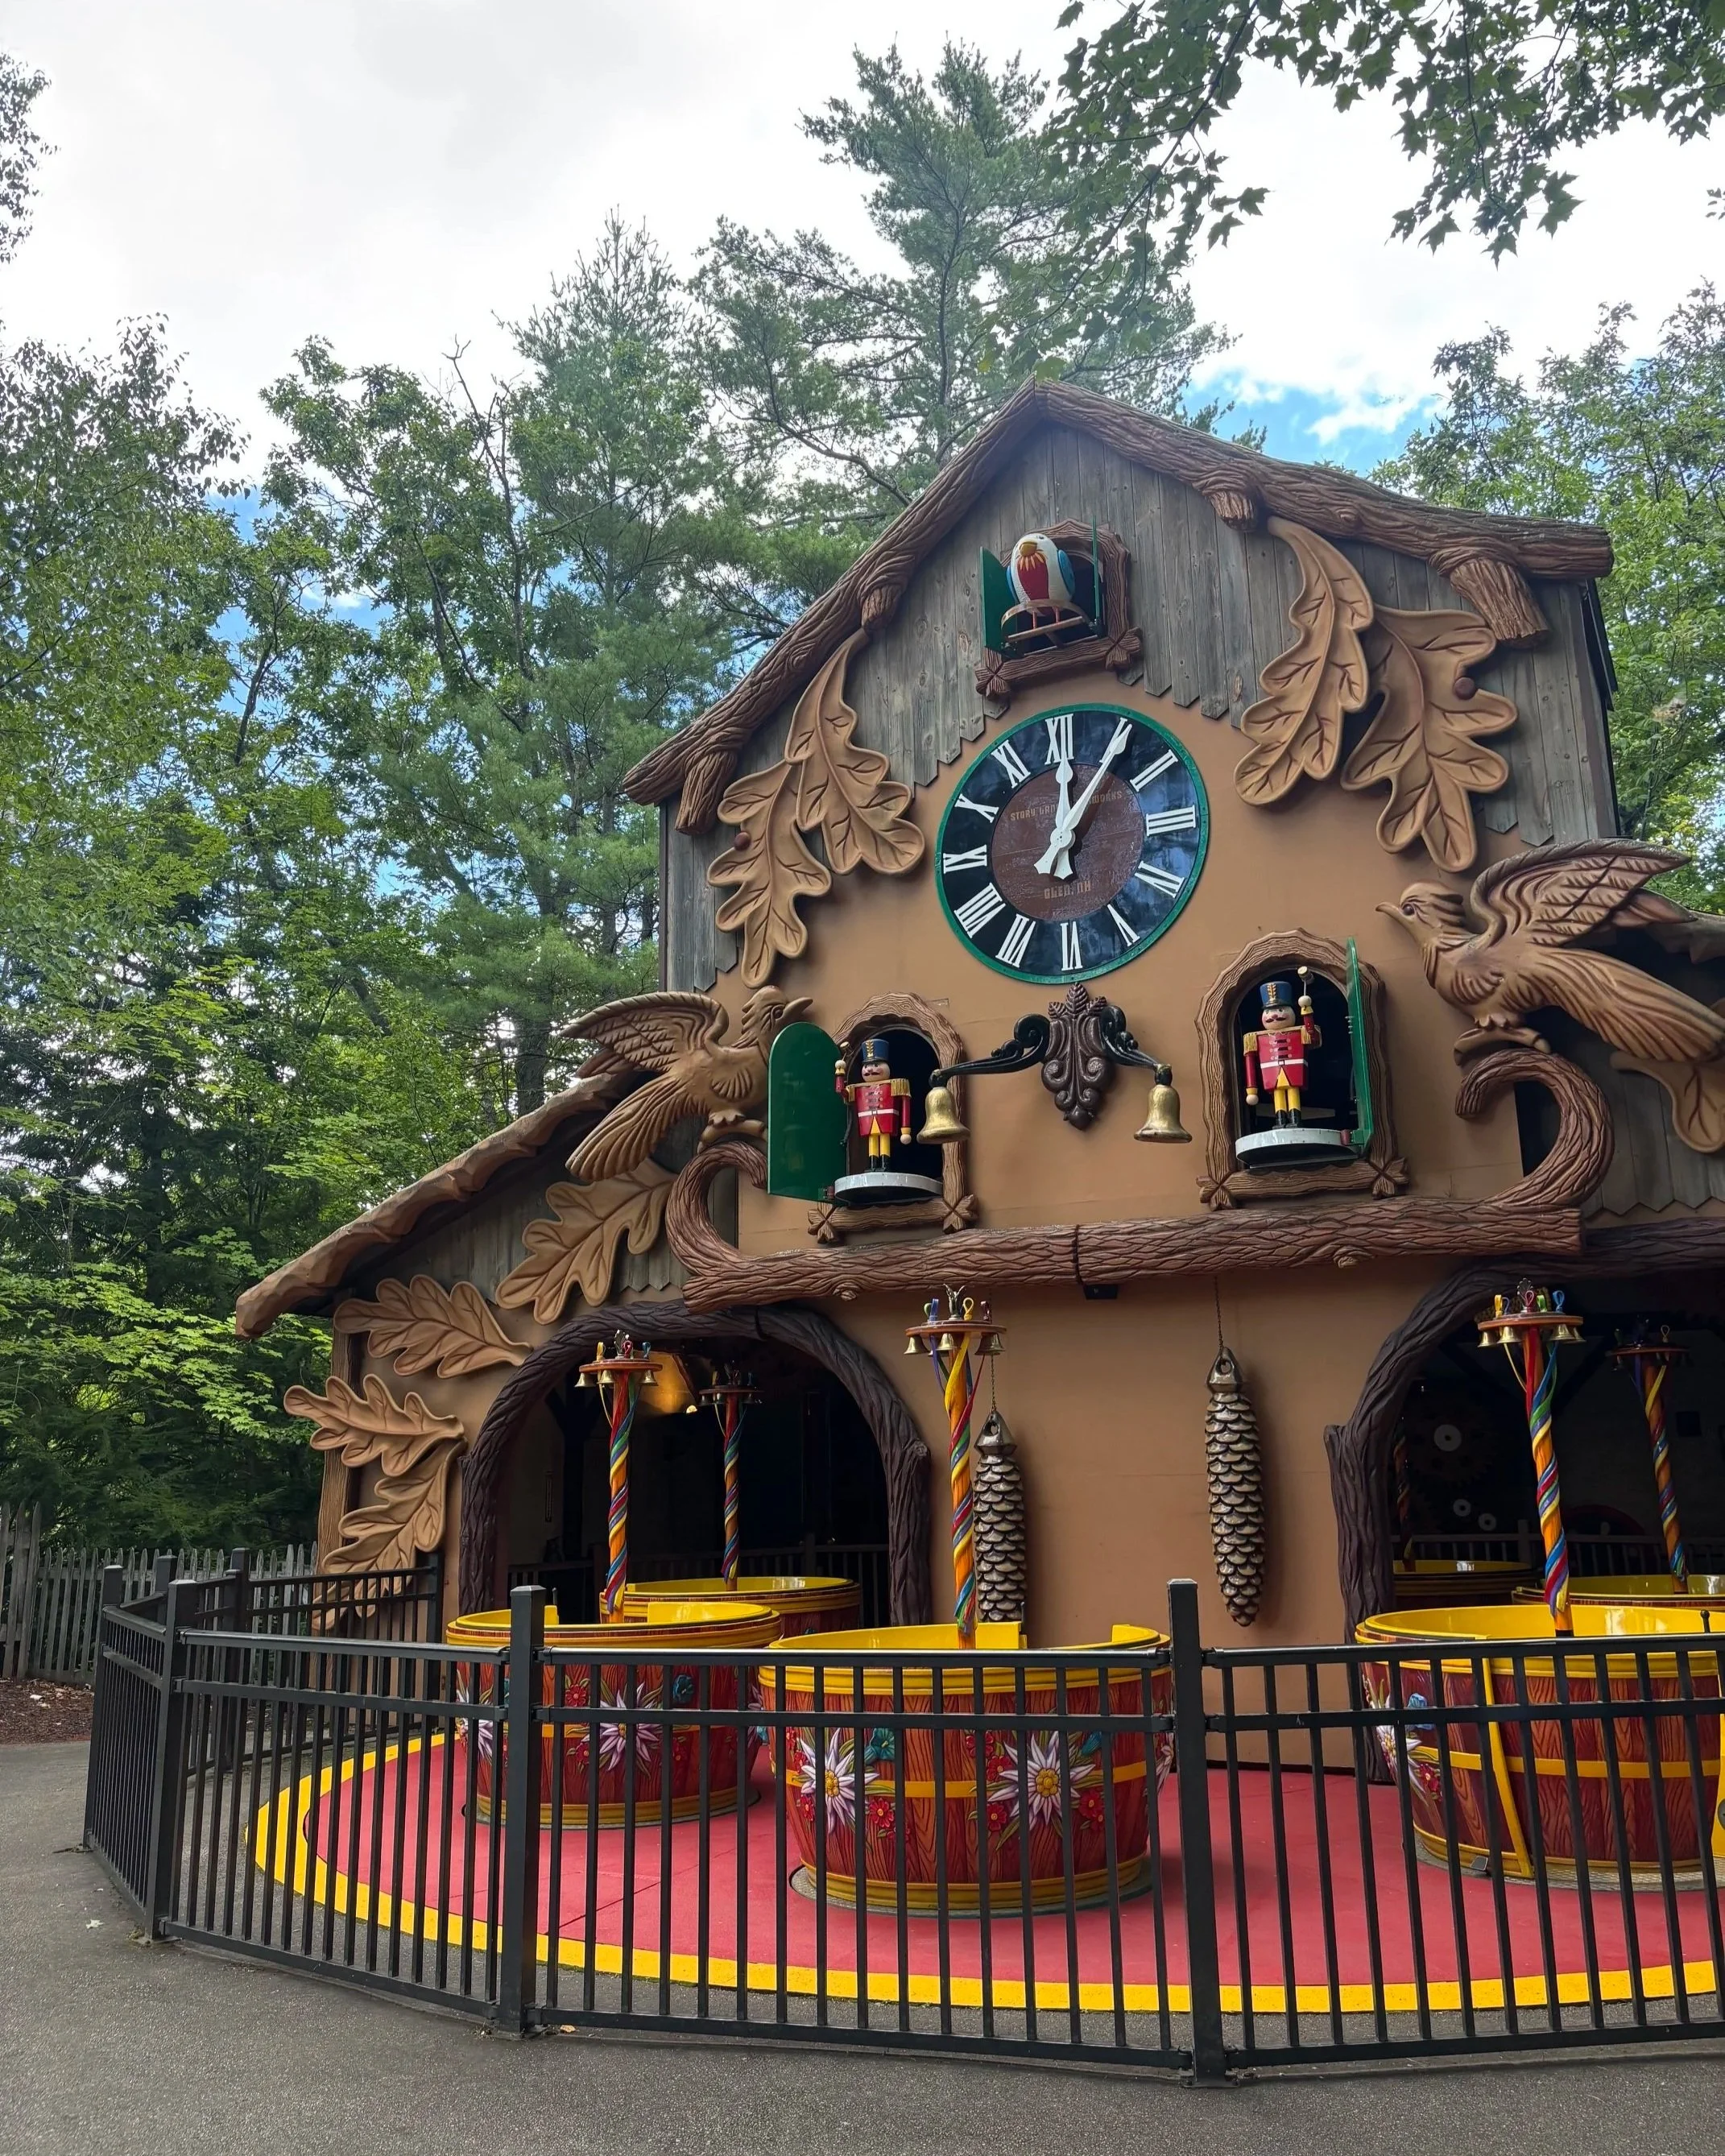
Pro Tip: Even when the park is slammed and there’s crazy lines at every ride, there never seems to be line at the Cuckoo Clockenspiel! Seriously, so many times we’ve attended on insanely busy days and my kids have been the only ones on the Cuckoo Clockenspiel ride. This ride is located at the top of the giant hill that’s kind of in the middle of the park (maybe that’s why everyone misses it?). The ride itself is a beautiful giant cuckoo clock and you ride in barrels that spin (like tea cups) along the bottom. You can control how fast your barrel spins by turning the center wheel, so it’s up to you if it’s a leisurely spin or a crazy top that makes you super dizzy. (Note: Now that I shared the secret of it never being busy that may change things… maybe it’ll suddenly be busier now!)

Don’t Sleep on the Live Shows!

The live shows at Story Land are always fun too - there’s usually several different shows a day, throughout the day. They have musical shows with live singing, a Farm Follies show with characters and animatronics, Daniel Tiger shows, and more. In past years they used to have a magician show which we really enjoyed (and I hope they’ll bring back again). Make sure to check the schedule to see what shows are when. The shows can be great for downtime and cooling off in the AC on hot days too!

Update 2026 Season: We’re sad to see they have cut back on some of the free live shows and now one of them is a paid add-on experience.

Add-On Experiences

Story Land also offers some add-on experiences like a Character Breakfast or Tea with Cinderella. These are booked and paid for in addition to your day ticket or Season Pass. We’ve done the Cinderella Tea with both of our kids and even packed play princess dresses for them to put on over their clothes for the tea party. It was definitely a cute experience to give them when they were younger and the Cinderella Tea was pretty reasonably priced in my opinion. (We haven’t done the Character Breakfast yet so I can't give personal feedback on that.)

Be Wary of Rain Park Closure

Years ago Story Land would sometimes close the park early for really bad weather - I’m talking like lighting and hail kind of weather. These days they seem to close the park a lot more often due to weather - sometimes just for what seems like moderate rain. This is something to keep in mind when you make your trip there - if it’s a rainy day there is the possibility the park will close early (or maybe not even open for the day at all!). The good news is that if the park does close early you should be able to request a rain check ticket to come back another day - make sure to stop at the Customer Service desk and ask. If it’s a full closure for the entire day you should be able to use your dated park tickets for any other day that season, but it’s worth reaching out to Customer Service to confirm details.

Get your Hand Stamped if you want to Re-Enter!

Super important to know - if you’re planning on leaving Story Land and re-entering that day you need to get your hand stamped on the way out! Make sure to ask the cashier at Yum Yum Junction (the gift shop you exit through on the way out) for a hand stamp. Story Land will not honor your ticket or season pass if you try to come back in the same day, you really do need that hand stamp.

Special Needs & Autism Awareness
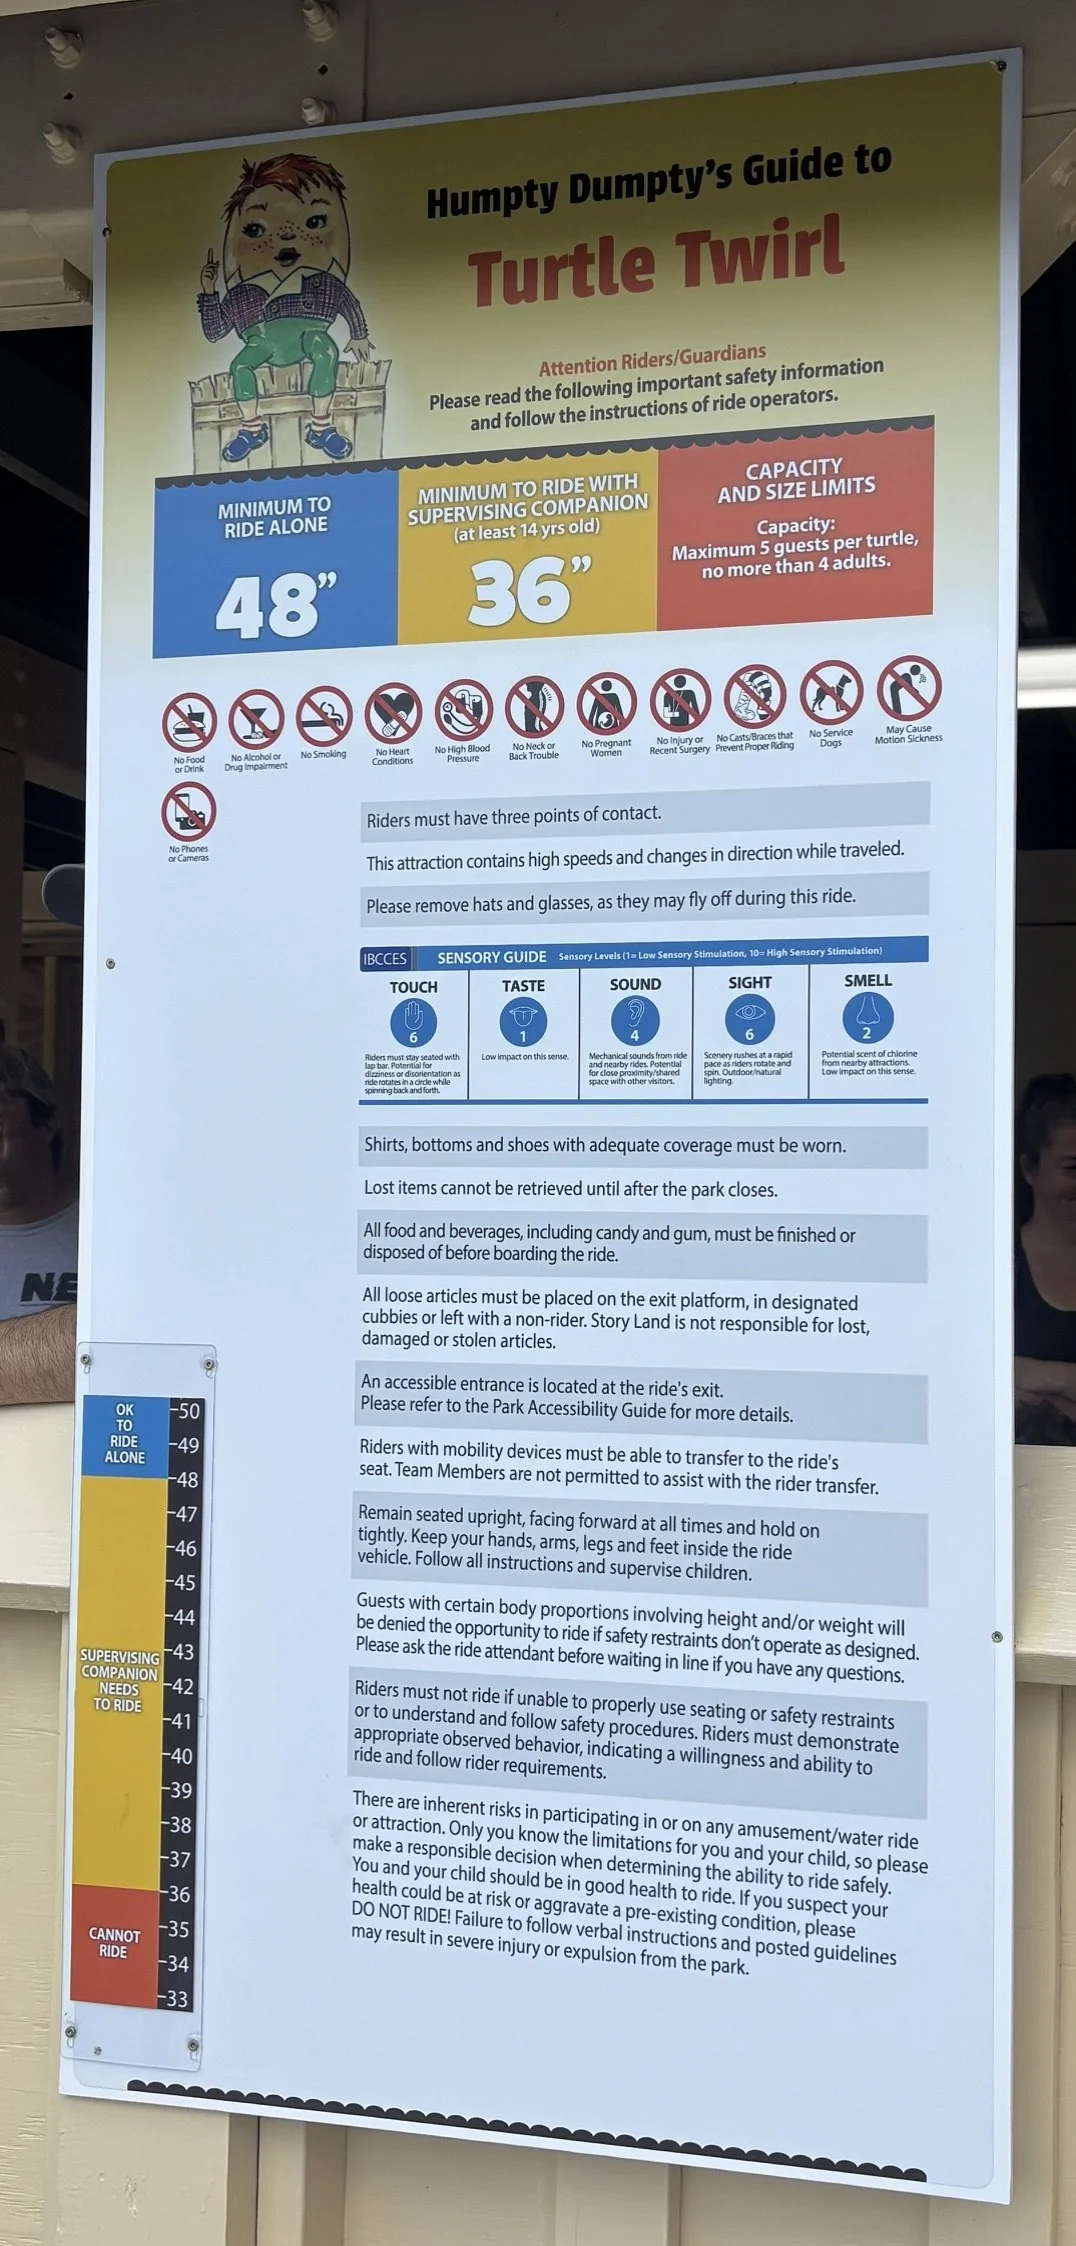
Story Land Tips & Tricks:  Example of IBCCES Sensory Guide on Ride Sign

For those that have special needs or sensory issues, Story Land is a Certified Autism Center (CAC) with staff trained for awareness and signage available at every ride entrance that describes in detail what to expect on each ride as well as it’s IBCCES Sensory Guide (Touch, Taste, Sound, Sight, Smell) rating for each ride. In the past Story Land used to have Sensory Friendly Weekends where they would turn off or down the music in the park and on rides, however we haven’t noticed that on the calendar lately. If someone in your party is unable to wait in lines, they may qualify for the Alternative Access Program (in other words a special medical pass that lets you skip the line one time for certain rides) - you must see Customer Service to apply for this and see if you qualify when you enter the park.

There is also an adult changing room and quiet space at the front of the park behind Humpty Dumpty.

See Story Land's Accessibility Page for more information and definitely reach out to customer service if you have questions.

Nostalgia Nights

On certain nights during the season, Story Land has been offering “Nostalgia Nights” for grown-ups (age 21+). This is a separate ticketed event, though some levels of Season Passes include admission for Nostalgia Nights for those of age. During these nights Story Land is open late for the grown-ups to relive their childhood, enjoy the rides, listen to live music, and enjoy some adult beverages (available for purchase - drinks/food are not included in admission). (Personally I have never attended a Nostalgia Night myself so I can’t give specific feedback on these events.)

PS - 90's throwback t-shirts and outfits are encouraged!

Happy Hauntings

Happy Hauntings (started in 2024) are special themed weekends in October. They offer trick-or-treating, seasonal food offerings for purchase at the concession stands, seasonal decor, a new themed live show, and some rides open. We have attended during Happy Hauntings - it was very cute and our kids had fun but we felt as though the ride offerings were extremely limited — personally I don’t think I would buy day tickets to the event because you’d miss out on so many rides that are closed for the season, but as a Season Pass Holder it was a fun way to end our season. (I would also avoid Columbus Day weekend - it was insanely packed.)

Happy Hauntings weekends are a great time to wear a costume or a fun Halloween shirt!

TimeSaver Pass (New for 2026)
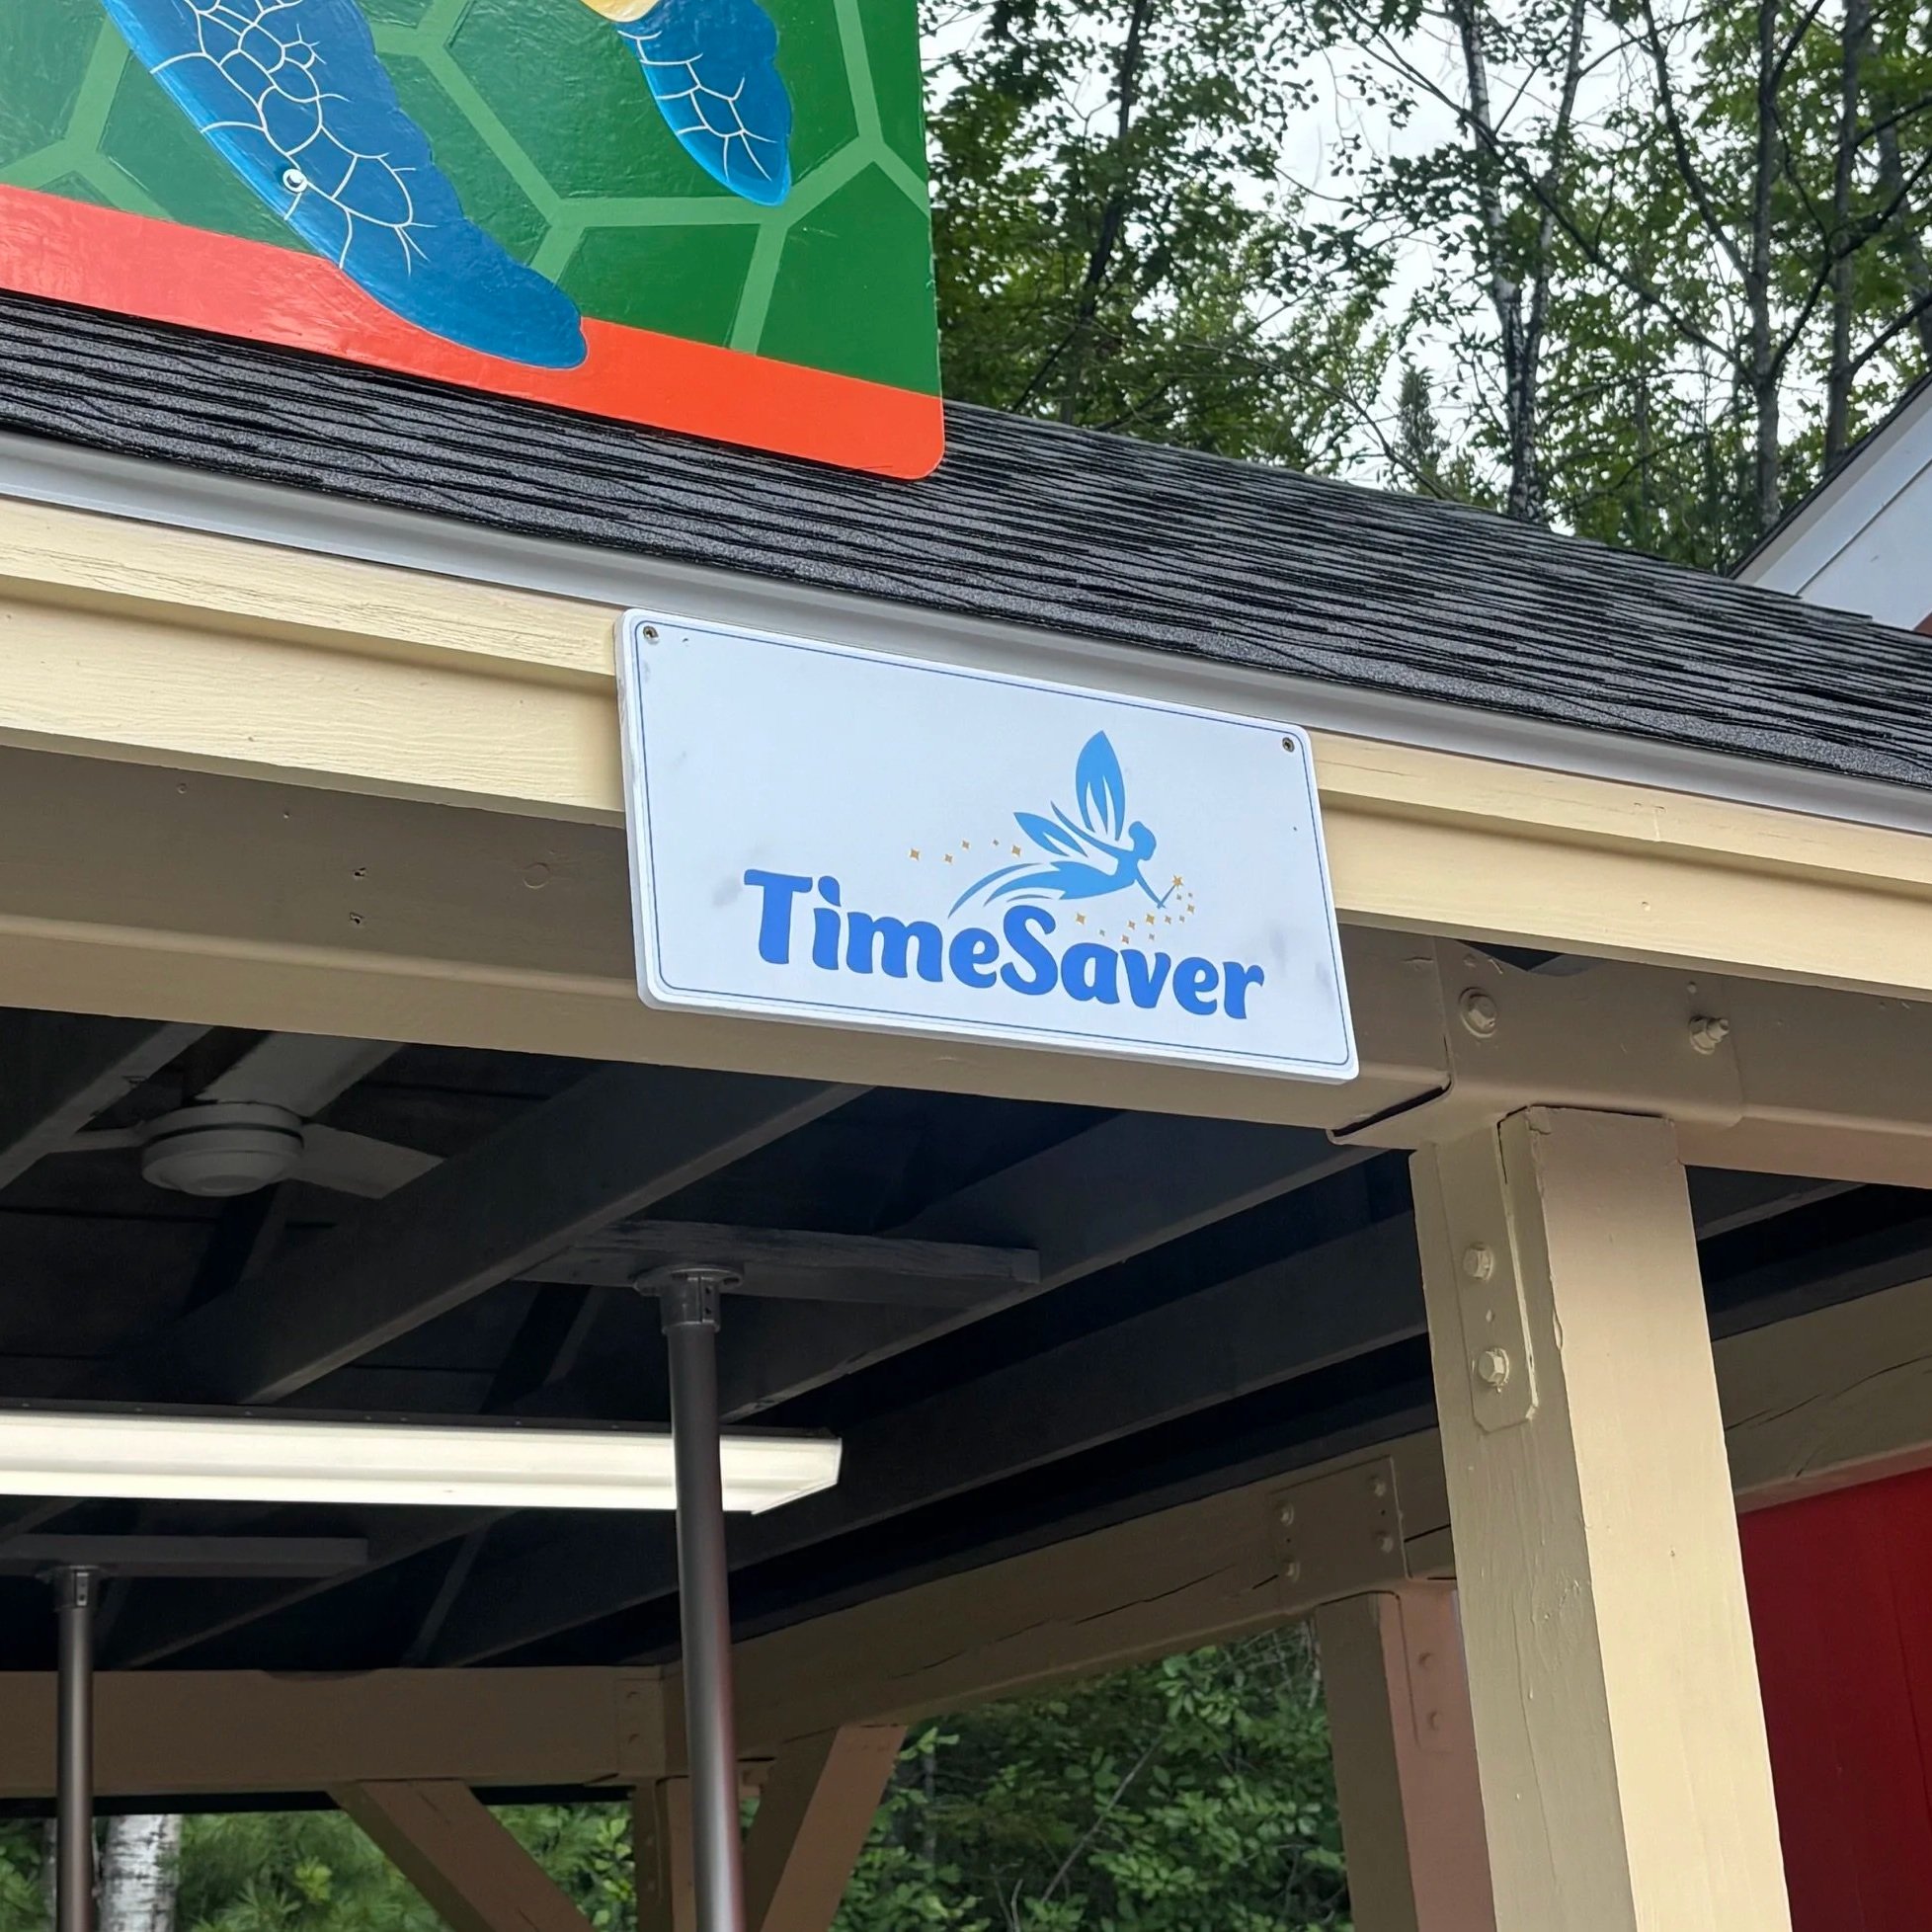
New for 2026: Story Land has introduced a TimeSaver Pass (kind of like Disney’s Lightning Lane Fast Passes). These passes are expensive and will let you skip the line on some of the most popular rides. Personally, I am really disappointed to see Story Land go in this direction. Thankfully though we have not seen many people utilize these yet so it hasn’t affected our wait times.


Living Shores Aquarium

Next door is Living Shores Aquarium, which opened in 2019 - it’s owned by Story Land but please note that admission is not included with your regular ticket in most cases! Sometimes they offer bundle deals so if you’re interested in visiting Living Shores as well definitely look into current offers when purchasing your tickets.

Living Shores is rather small and can easily be done in about two hours. There are a lot of touch tanks and birds to visit with, along with some fish and animals that are for viewing-only. Overall it’s really cute and worth doing at least once. It’s also open year-round if you’re looking for something to do in Story Land’s off-season!

Disclaimer: This post shares opinions and tips based on our personal experiences. Please be aware that you may encounter things differently and things are subject to change. Please do your own research.


Check out our Related Posts:
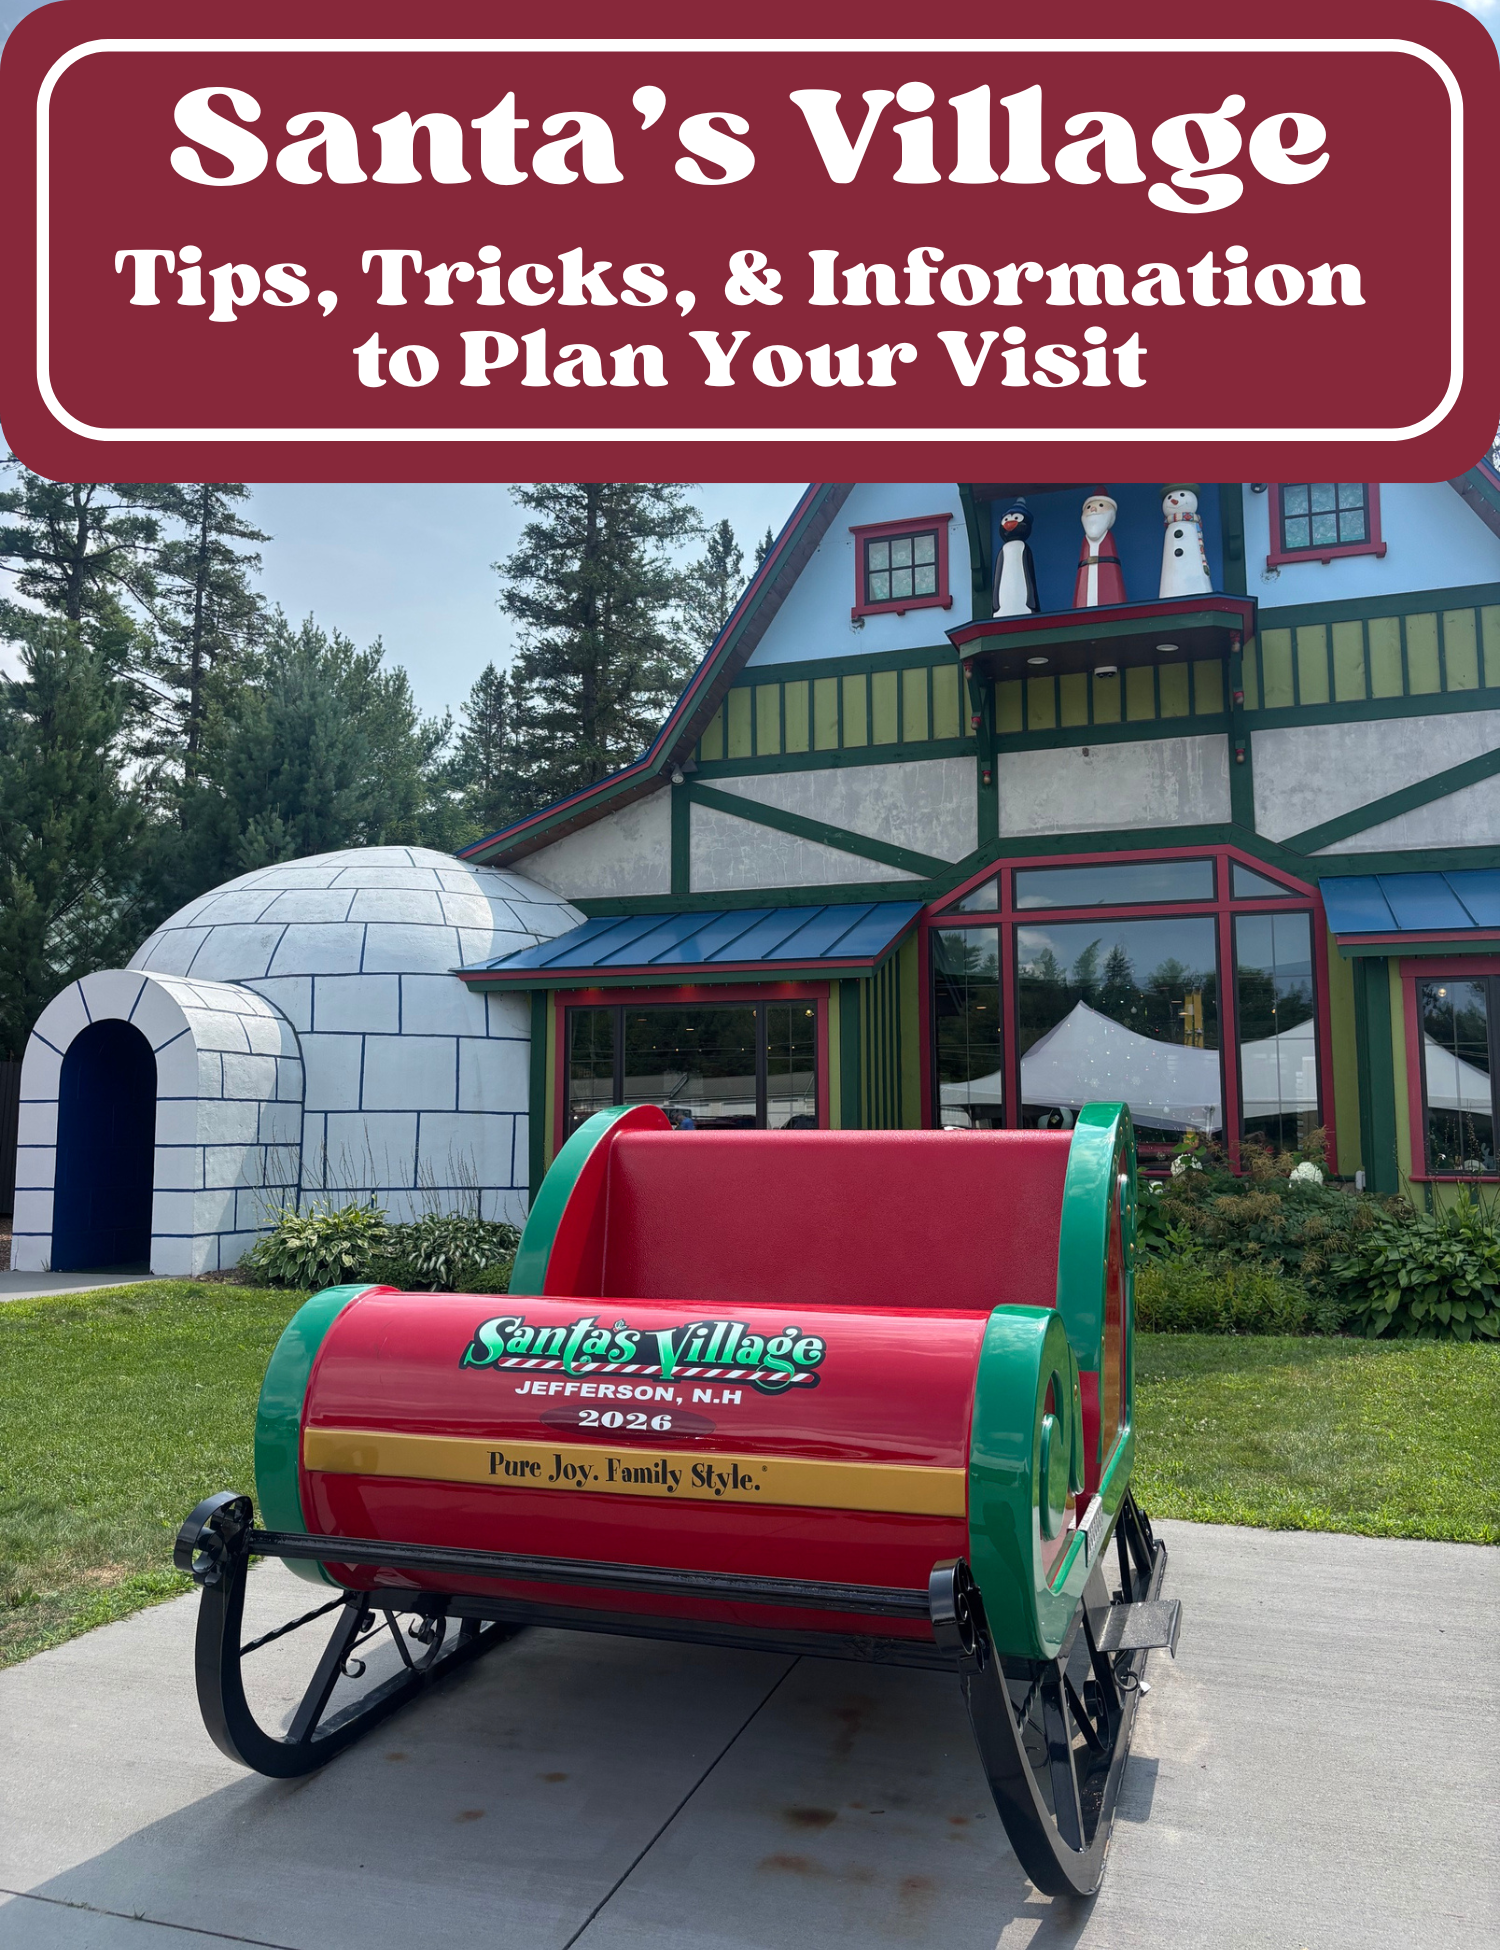

Our Theme Park Must-Haves:

Scroll sideways to see more —>

KEEP UP WITH BIRCH LANDING HOME
|  Etsy  |  Facebook  |  Instagram  |  Pinterest  |  Bloglovin'  |  Hometalk  |

PERFECT FIT Oval Frames for Disney World Silhouettes - on Amazon!

We recently came back from the most amazing and magical trip to Disney World! It was our family’s first trip and we had such a wonderful time and learned so much along the way (separate blog post coming soon to share more on all that we learned). One of my top must-dos for the trip was to get a silhouette portrait of our girls done as a souvenir. | This post contains affiliate links |

PERFECT FIT Oval Frames for Disney World Silhouettes - on Amazon!; What frame fits Disney Silhouette Portrait

At the time of writing this post, they currently have Silhouette Artists at Magic Kingdom and at Disney Springs. We tried twice at Magic Kingdom to get them done but the first time we went was towards the end of the day and the line was long and our kids were tuckered out so we had to skip that day. The second time we went to Magic Kingdom during the middle of the day and it was a success - a short line that moved fast and it was so amazing to watch the Silhouette Artist work! The subject sits in a chair across from the artist (many artists can also work from a side view picture if it’s a good one - they can even do pet portraits this way), and then they get to work snipping the paper with sharp little scissors. They cut two sheets of paper at once and you end up with two sets of portraits (mirror imaged). The artist did both our kids within minutes and it’s a perfect likeness to them, I was so impressed!

Where else to buy oval frames for Disney silhouettes

Afterwards when it's time to pay you have the option to buy the frames there if you would like. I had every intention of buying oval frames there but at the time they were sold out of ovals and only had rectangular frames which I just wasn't interested in. So we got our silhouettes to-go in a little gift bag (tip: it would be a good idea to bring a large ziplock bag to protect the silhouettes a little more).

When it came time to pack up and go home at the end of the week I was actually very thankful we didn't buy the frames in Disney - we traveled with carry-ons only and there was no way we would have had room for the frames in our carry-ons.

where to buy oval frames for Disney silhouettes

| Oval Frames that fit Disney World Silhouettes (they also come in other colors too!) |

Once we got home I shopped around online to find oval frames that fit the silhouettes. After reading a lot of mixed reviews I ordered several different frames to find the one that fit best. After some trial and error I found the PERFECT FIT oval frames for the Disney World Silhouettes right on Amazon - and they come as a set of two! It was meant to be ;)

I recommend taking out the plexiglass piece and using that as a guide to trace and cut out your silhouette to fit in the frame (I did not use the oval mat that came with the frame - and don’t forget to remove the protective plastic film from both sides of the plexiglass). It worked perfectly for us! We kept one portrait for ourselves and gave the other one to the grandparents as a thank you for house sitting for us. It’s such a special souvenir that we’ll treasure!

Disclaimer: I found that these frames fit the Silhouettes we got this year (Fall, 2024) at Disney World perfectly. I would think they should also fit the Silhouettes from Disneyland and Disney Springs too, but I cannot confirm that because I haven’t tried it yet myself.


Shop Some of my Theme Park Trip Must-Haves:

Scroll sideways to see more —>

KEEP UP WITH BIRCH LANDING HOME
|  Etsy  |  Facebook  |  Instagram  |  Pinterest  |  Bloglovin'  |  Hometalk  |

"Anything But a Backpack" Day Ideas

Having worked at a middle/high school for a few years now I’ve experienced a few “Anything But a Backpack” Days for Spirit Week and they can be pretty hilarious. …What does that mean? you might wonder - well, it pretty much means what it says - leave your backpack at home that day and come up with a creative way to carry your things around school for the day. I thought I’d share a list of some of the favorites I’ve seen or have heard about form others - some are quite creative and ridiculous. | This post contains affiliate links |
Disclaimer: always make sure you check with your school for any parameters or rules for this event as every school will have different expectations as to what’s acceptable or not.

“Anything But a Backpack” Day Ideas

  • laundry basket
  • hamper
  • stroller
  • car seat
  • remote control car
  • PowerWheels
  • wagon
  • toy shopping cart
  • real shopping cart
  • Easter basket
  • pizza box
  • toolbox
  • bucket
  • a really ugly/tacky purse or bag (can be found cheap at a local thrift shop!)
  • tool chest
  • mini fridge
  • microwave (that has to be heavy!)
  • a car bumper (very tricky to put your stuff in - and yes, I have seen this one myself!)
  • a kayak
  • Cozy Coupe
  • a canoe (very awkward to get up the stairs)
  • golfbag
  • milk crate
  • horse saddle bag
  • office chair
  • cooking pot
  • cat carrier
  • birdcage
  • wheelbarrow
  • guitar case
  • suitcase (the ones with the wheels are handy!)
  • fishing net
  • traffic cone
  • stuffed animal that has a zippered pocket
  • trick-or-treat bag or container
  • trash bag or trash can (just make sure your stuff doesn’t get thrown out by accident!)
  • a younger sibling (I have seen this at another school - the student and their family got permission and everyone was okay with it. The younger sibling had fun carrying their older sibling's Chromebook and tagging along for the day. This is one where you DEFINITELY would need to check with school administration beforehand)

I will add to this list as I see more ideas every year. What have you done for “Anything But a Backpack” Day?

Check out our Spirit Week Theme Day Ideas blog post for other theme day ideas!

Disclaimer: Always make sure you check with your school for any parameters or rules for this event as every school will have different expectations as to what’s acceptable or not. This list is for ideas/entertainment purposes only.


Teaching Curated Picks:

Scroll sideways to see more —>


KEEP UP WITH BIRCH LANDING HOME
|  Etsy  |  Facebook  |  Instagram  |  Pinterest  |  Bloglovin'  |  Hometalk  |
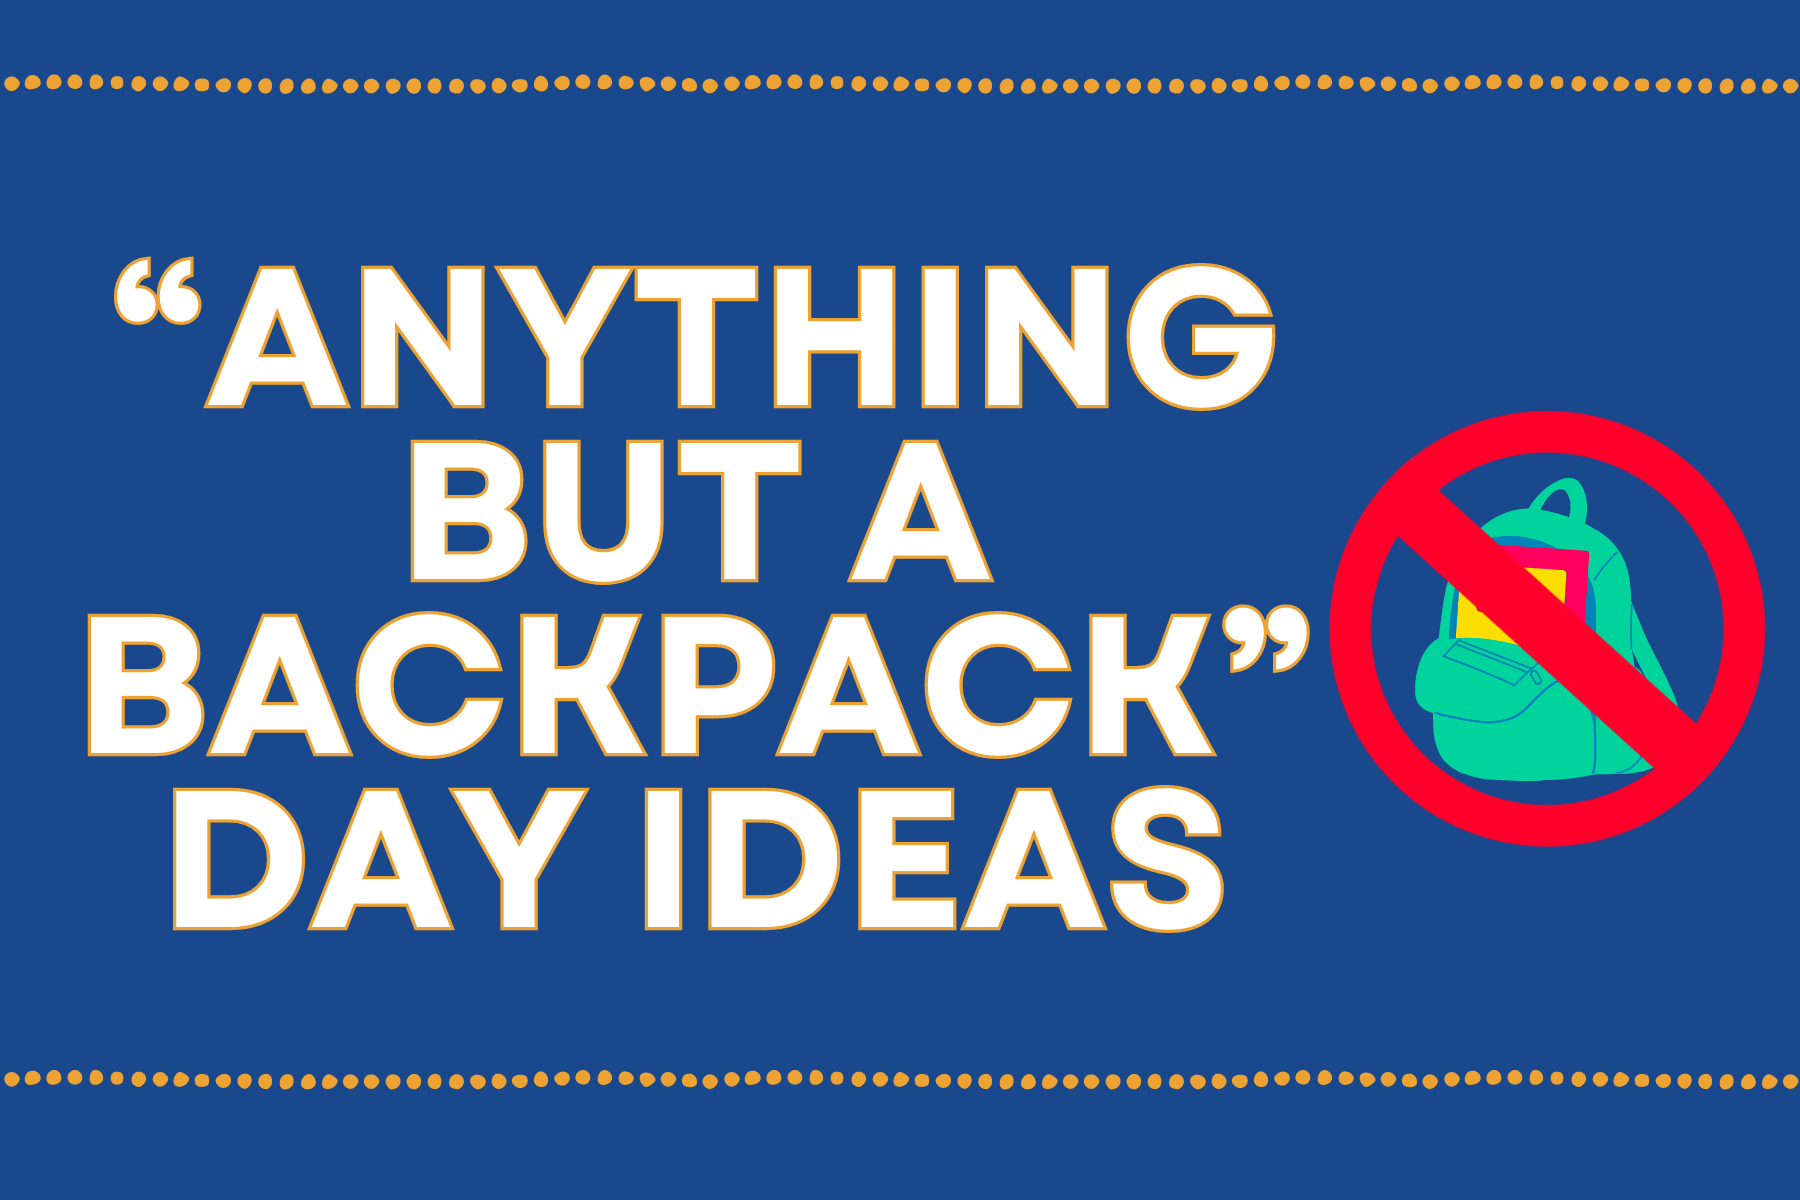
Sheet and Towel Stripping How-To

While home for Quarantine, I’ve seen a lot of people posting about “stripping” their towels and bedsheets and showing disgusting After photos of dirty water - I was intrigued! Stripping the linens is supposed to get rid of any kind of build-up on them (whether that’s laundry detergent, body oil/sweat, hard water mineral deposits, etc). So I decided to give it a try myself and share the easy process - and let me tell you, it was a disgusting and oddly satisfying Quarantine Project. | This post contains affiliate links |

Sheet and Towel Stripping How-To

Apparently one should consider stripping their linens when they aren’t as absorbent as they used to be, they look or feel dingy, or they start to smell musty.

Supplies:

Everyone seems to be using more or less the same supplies, which are:

  • 1/4 cup Borax Powder
  • 1/4 cup washing soda (or 1/4 cup baking soda if you're in a pinch and don't have washing soda.. I used baking soda)
  • 1/2 cup laundry detergent

How-To:

Fill a bath tub with hot water and dissolve the Borax, washing soda or baking soda, and laundry detergent in it. Next add your towels and sheets (make sure to only do similar colors together… in some cases it can cause some colors to run. We only have done our white and light colored linens so far.)

Then leave them to soak for the next four or so hours, stirring occasionally. You should see the water turn from clear to a gross yellowish-dirty color.

Once the water cools, drain the tub and squeeze the water from the linens, rinsing them with some fresh water. Then put in the washing machine (with no detergent - your items will already have absorbed detergent and Borax and you want to rinse everything out, not add more soap at this point), and run through the “wash” cycle to rinse everything out thoroughly.

After that you can put them in the dryer, or re-run the washing machine with detergent like you normally would to give them a fresh wash before drying.

Draining the dirty water after stripping. Ew.

Draining the dirty water after stripping. Ew.

Our Personal Results:

So it wasn’t the magical night-and-day change across the board that I was expecting, visually anyways - and some items definitely had better results than others. OVERALL - Our linens definitely felt cleaner, and looked a little brighter - however, our old white towels (which have turned very off-white over the years), did not magically turn luminous white again like I was hoping. But again, that’s probably too much to expect as they are 10+ years old and have had many years to get discolored in the regular laundry. Nevertheless, just SEEING the dirty water after we stripped the linens makes me feel a lot better about doing this process - visually not everything looks perfectly white again, but I know it’s cleaner after removing all that invisible gunk and that makes me feel a lot better.

Okay, so the old white towels are still off-white, but I know they’re cleaner than before after seeing the dirty water after the stripping process.

Okay, so the old white towels are still off-white, but I know they’re cleaner than before after seeing the dirty water after the stripping process.

It’s my understanding that you can repeat this process as needed, and I can see myself doing this maybe up to 2-4x per year going forward to try to keep build-up at bay.

Disclaimer: Try at your own risk. In some cases this process may make colored fabrics run and may not be suitable for all fabrics.

Want to see another satisfyingly gross example…?

Here’s a photo my sister sent me after she did her sheets - wow!

Here’s a photo my sister sent me after she did her sheets - wow!


Shop some of our Organization + Cleaning Picks:

Scroll sideways to see more —>

KEEP UP WITH BIRCH LANDING HOME
|  Etsy  |  Facebook  |  Instagram  |  Pinterest  |  Bloglovin'  |  Hometalk  |

DIY Ribbon and Trophy Display

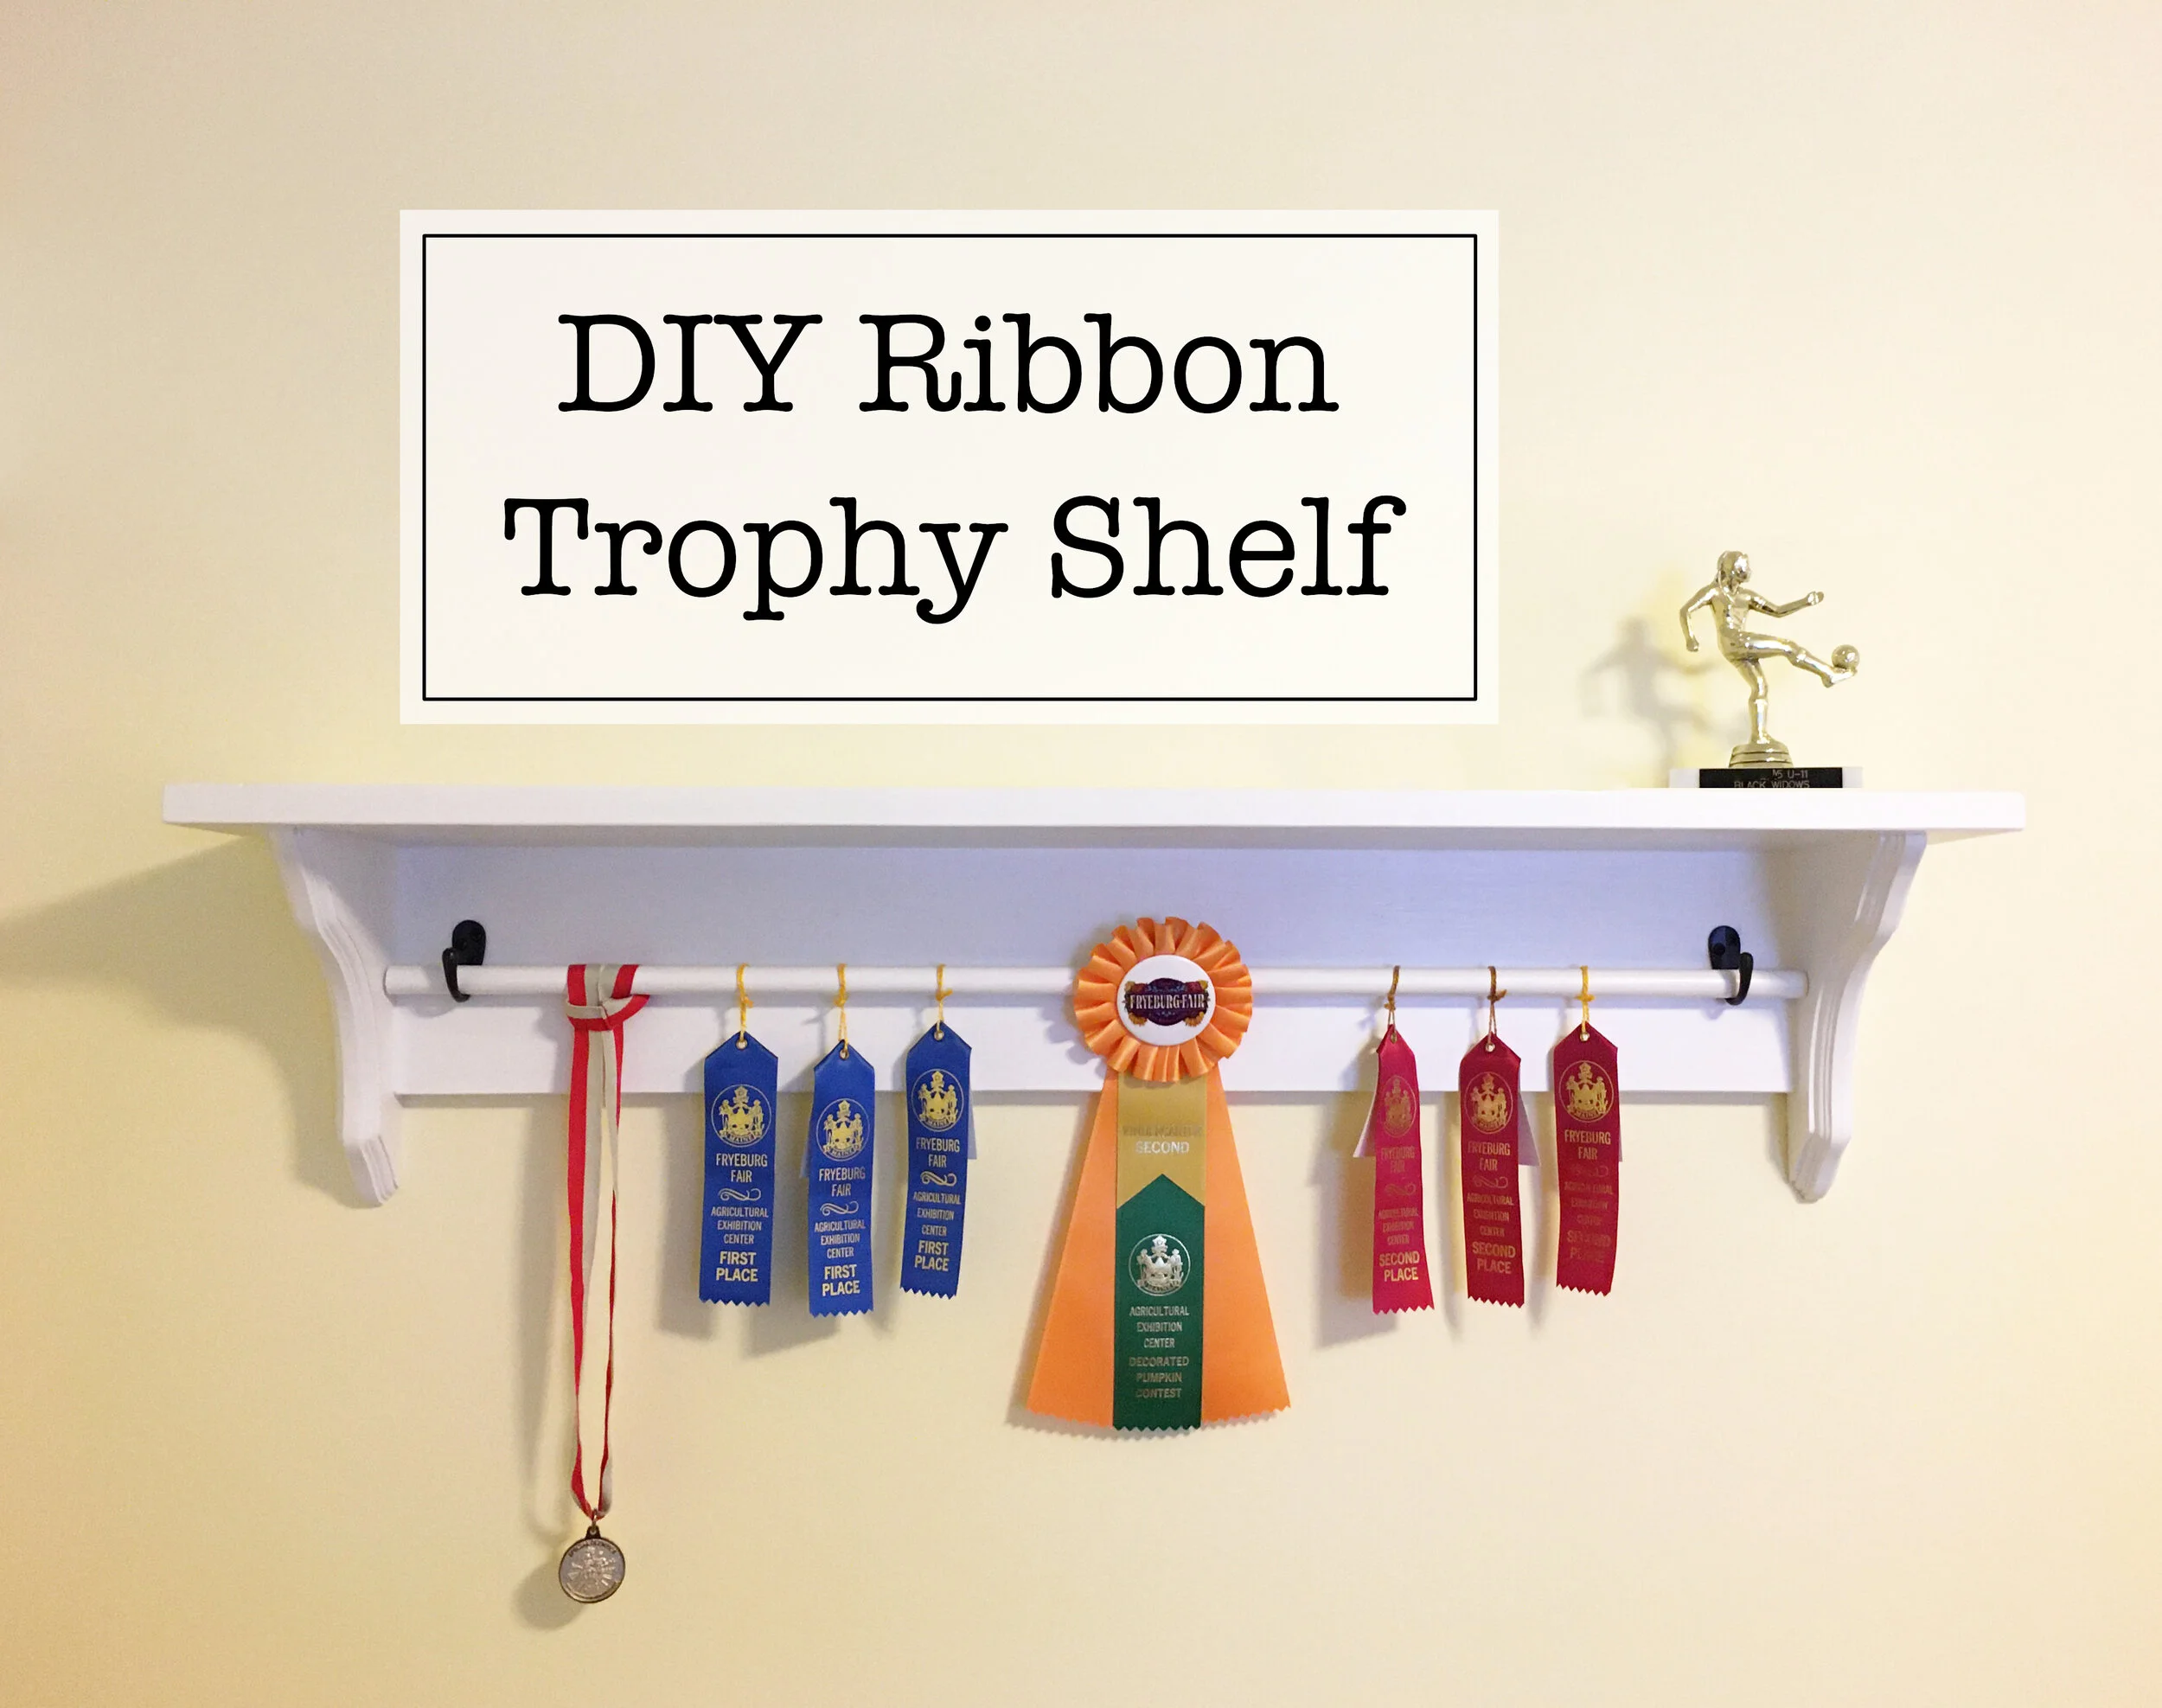
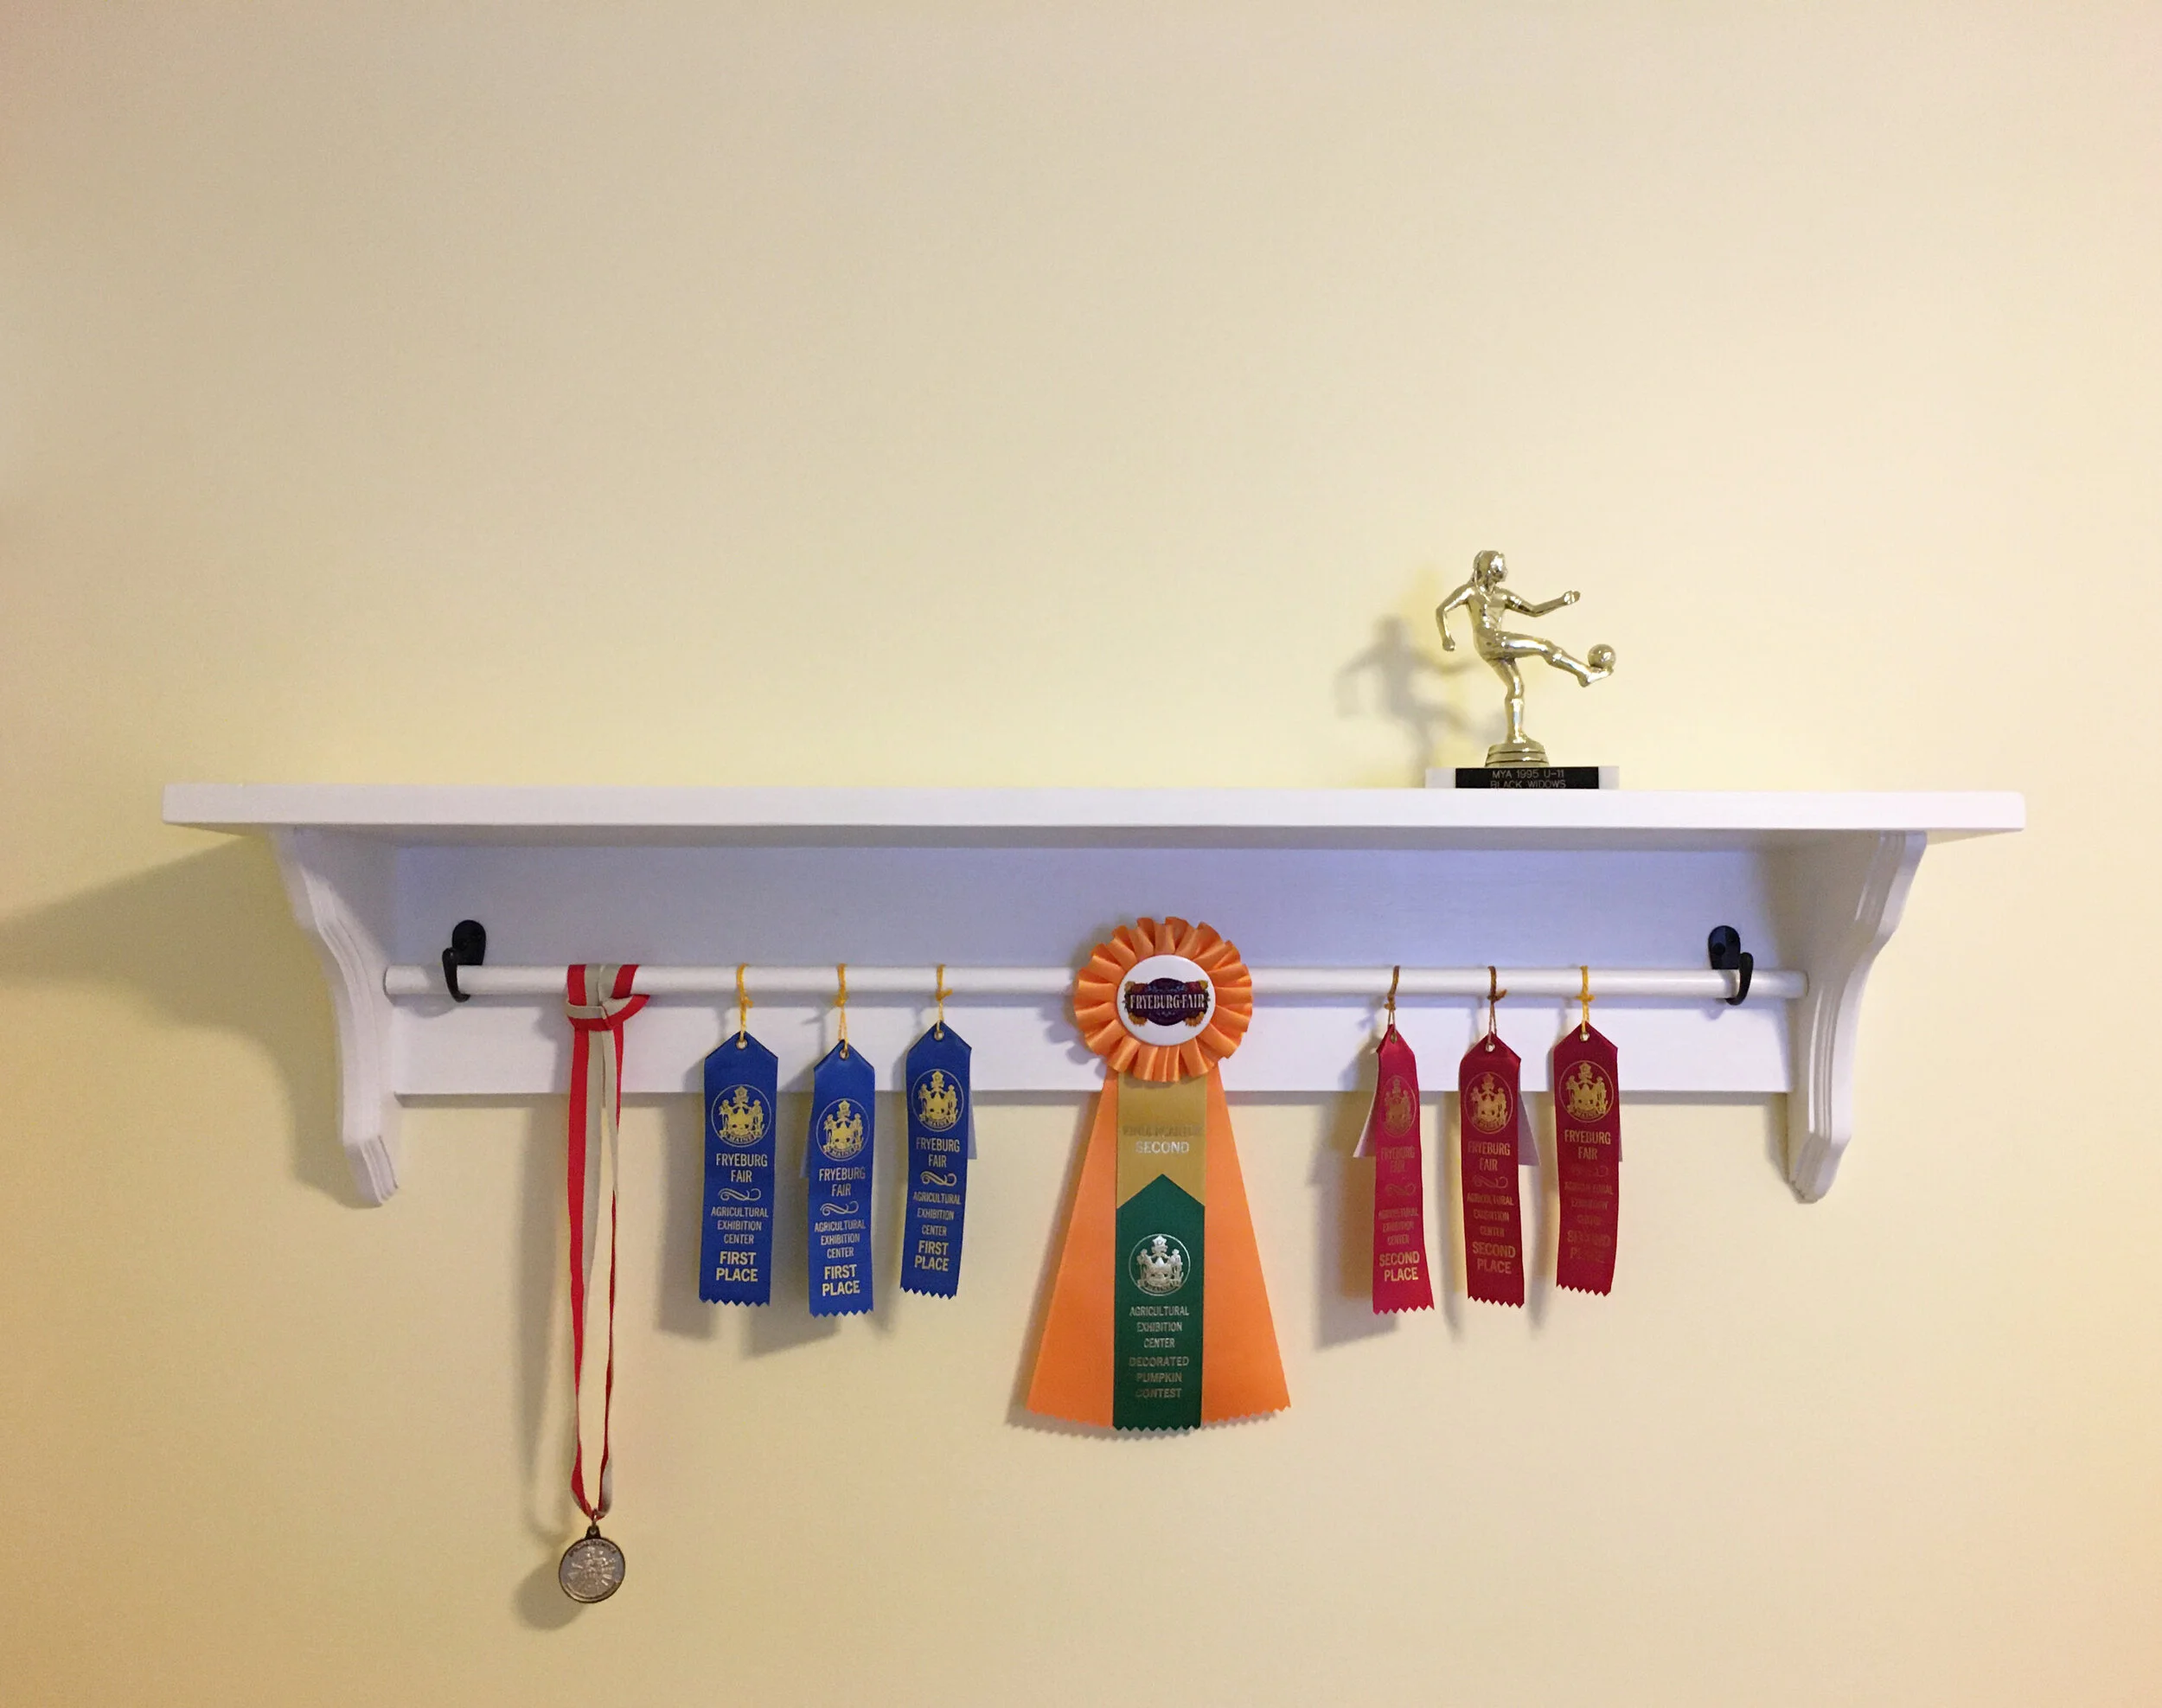
It seems kind of weird and petty to write about fun DIY projects during a Pandemic, but maybe fun projects to work on at home is just what we need right now :) I did this project about two months ago when I was looking for a nice way to display our oldest’s growing collection of award ribbons and medals but couldn’t find a display setup that I liked or was remotely affordable.
The whole project was super easy and done start-to-finish within two days. Here’s hoping for things to go back to normal someday soon so she can continue to add to her award collection. | This post contains affiliate links |

DIY Ribbon and Trophy Display

Materials:

DIY Ribbon and Trophy Display

How-To:

First decide how long you want the overall shelf to be (in our case I decided on making it 3ft wide). Then cut your shelf top to that length.

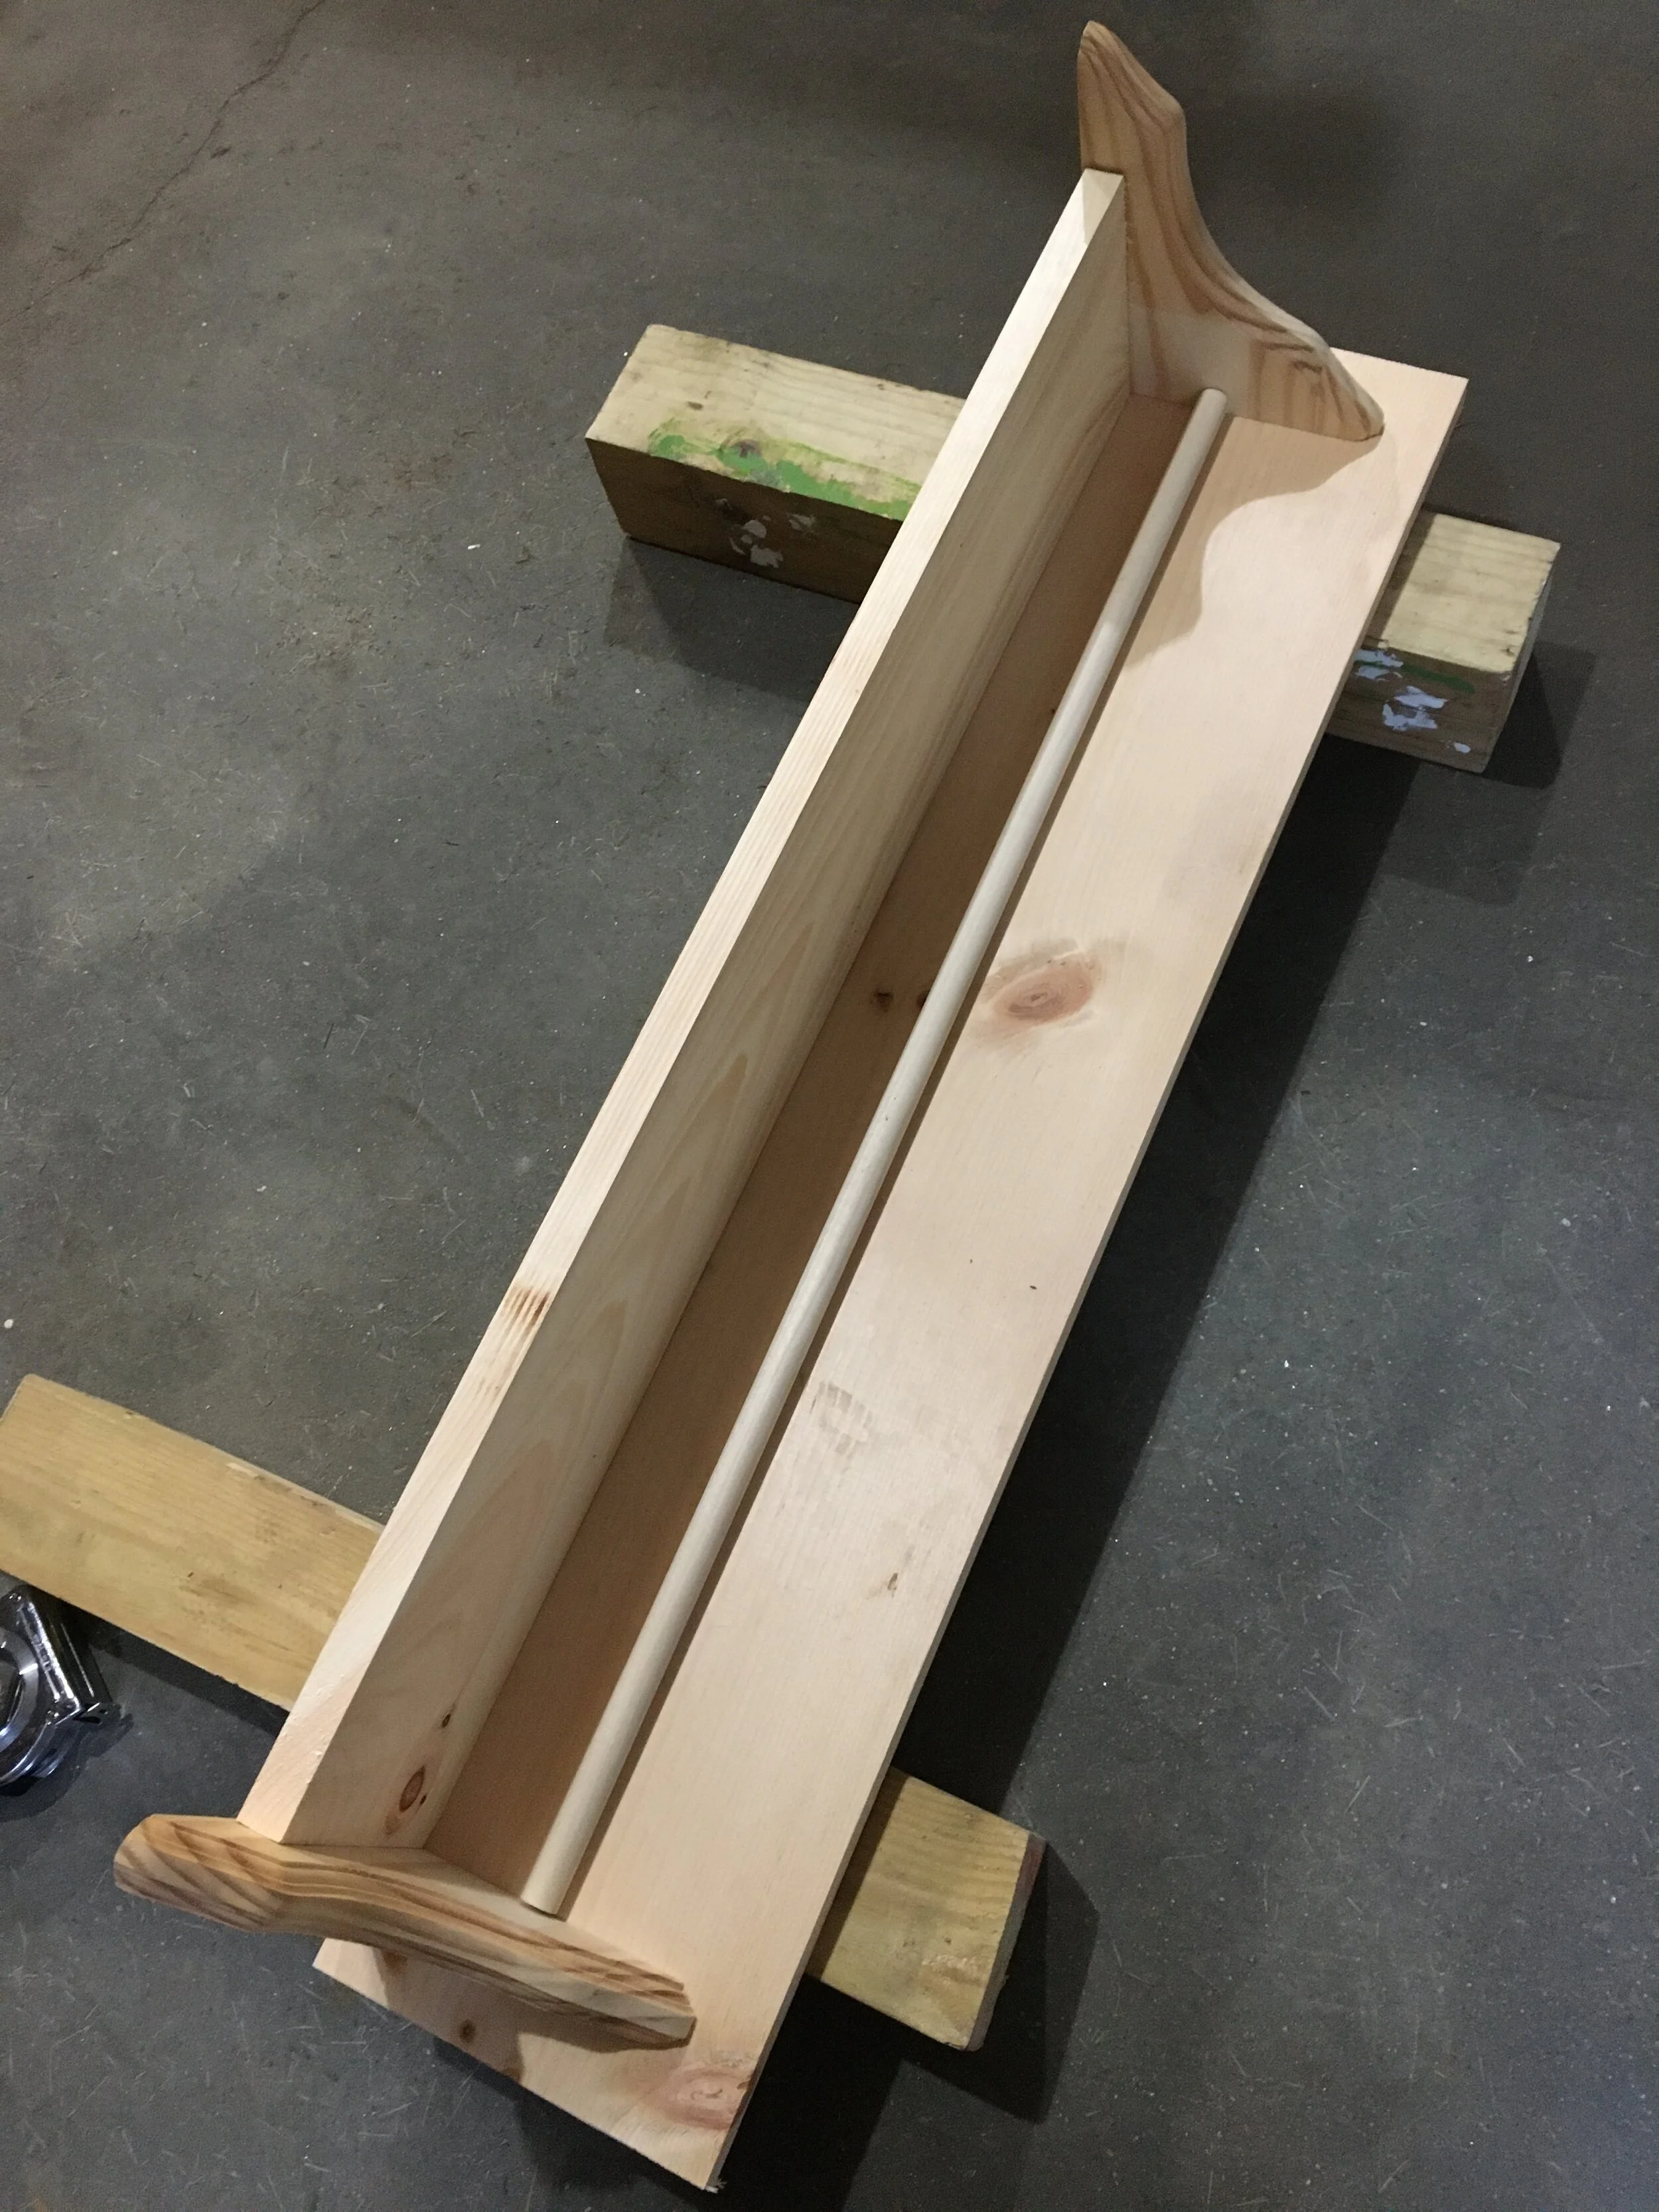
(Nothing is screwed in yet here… just laying everything out to make sure it will fit like I want it to.)

(Nothing is screwed in yet here… just laying everything out to make sure it will fit like I want it to.)

Next decide how wide you want the shelf back to be - remember that the self back plus the brackets should fall within your overall shelf top length. Ultimately how long you cut the shelf back is your preference though. But visually I think that the shelf back and the brackets look best if they fall within about 2 inches of the shelf top on each side.

(Side note: If you have a router you can cut a dovetail channel along the back of the shelf back now to make for easier hanging… I do not have one of those handy so I skipped this step and will hang our shelf another way.)

Once you have everything laid out, cut your dowel to about 1/8” less than your shelf back length so it will fit comfortably within that space.

DIY Ribbon and Trophy Display

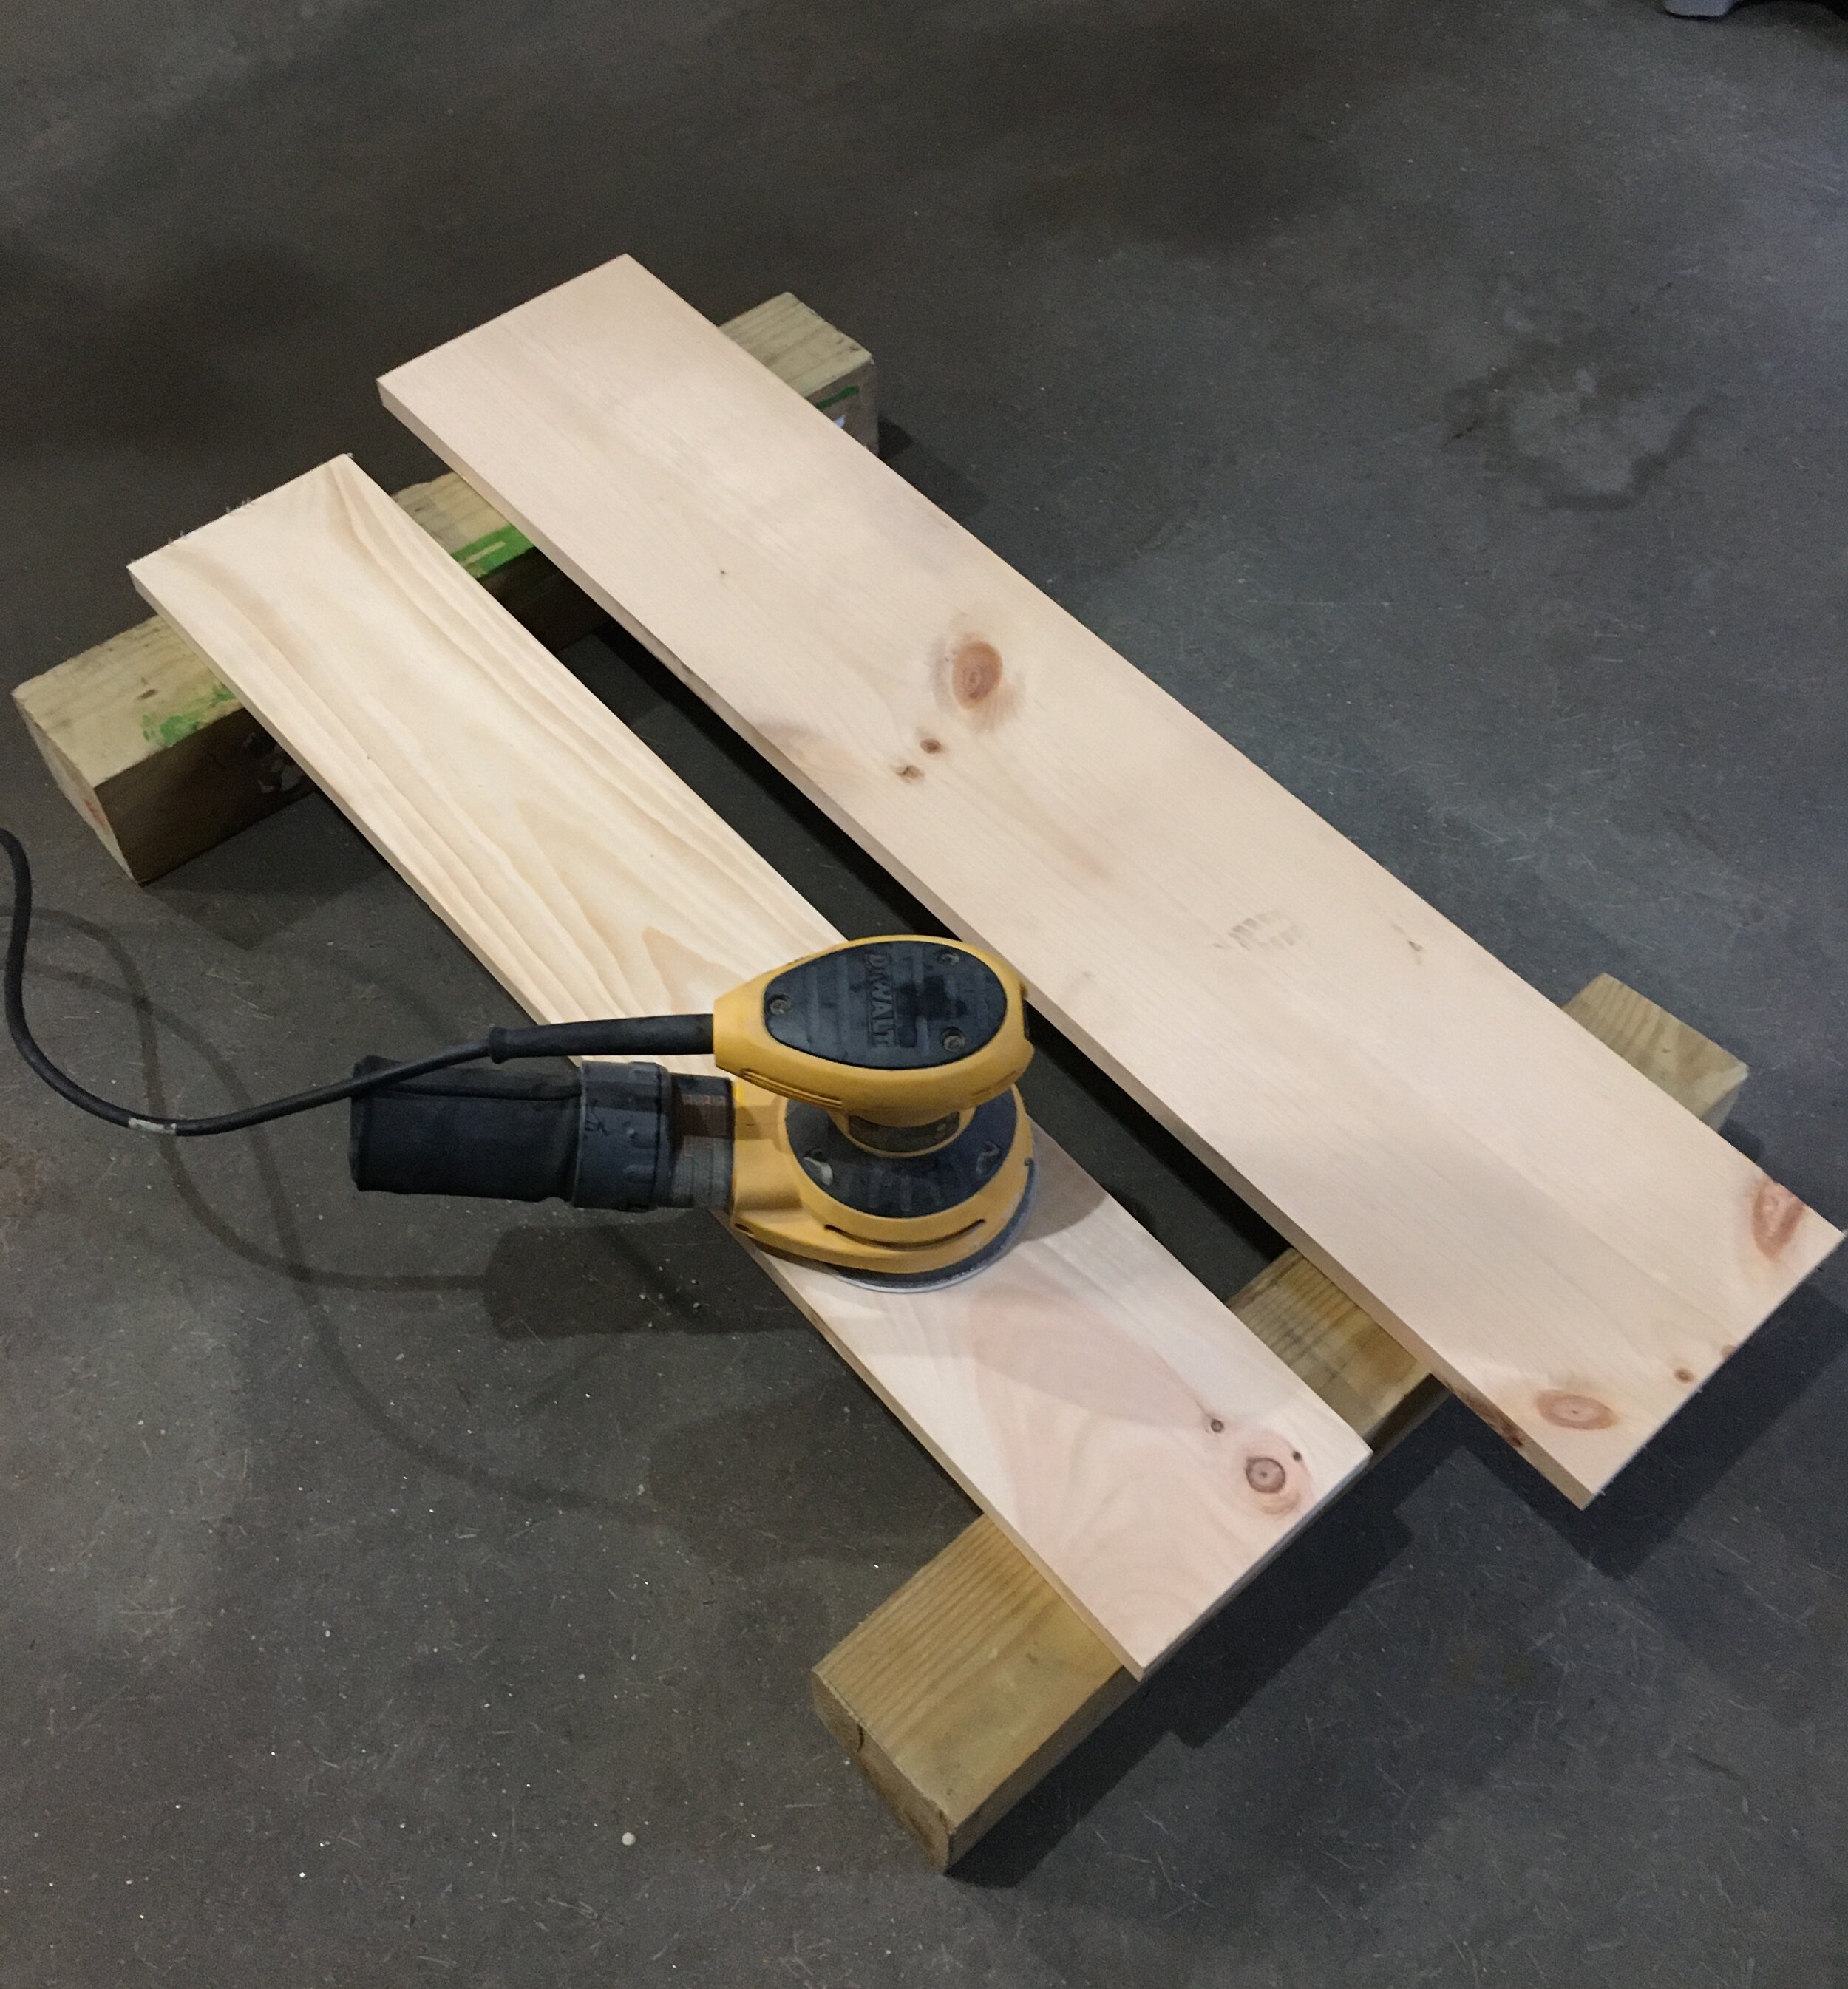
After everything is cut, I recommend sanding everything first before you assemble. I love using our orbital sander - it makes for quick work and does a nice job.

DIY Ribbon and Trophy Display

Next start assembling. Screw the shelf supports to the backing first, making sure everything is lined up and flush.

DIY Ribbon and Trophy Display

Next carefully center the shelf top, making sure it’s flush with the back and screw in.

DIY Ribbon and Trophy Display

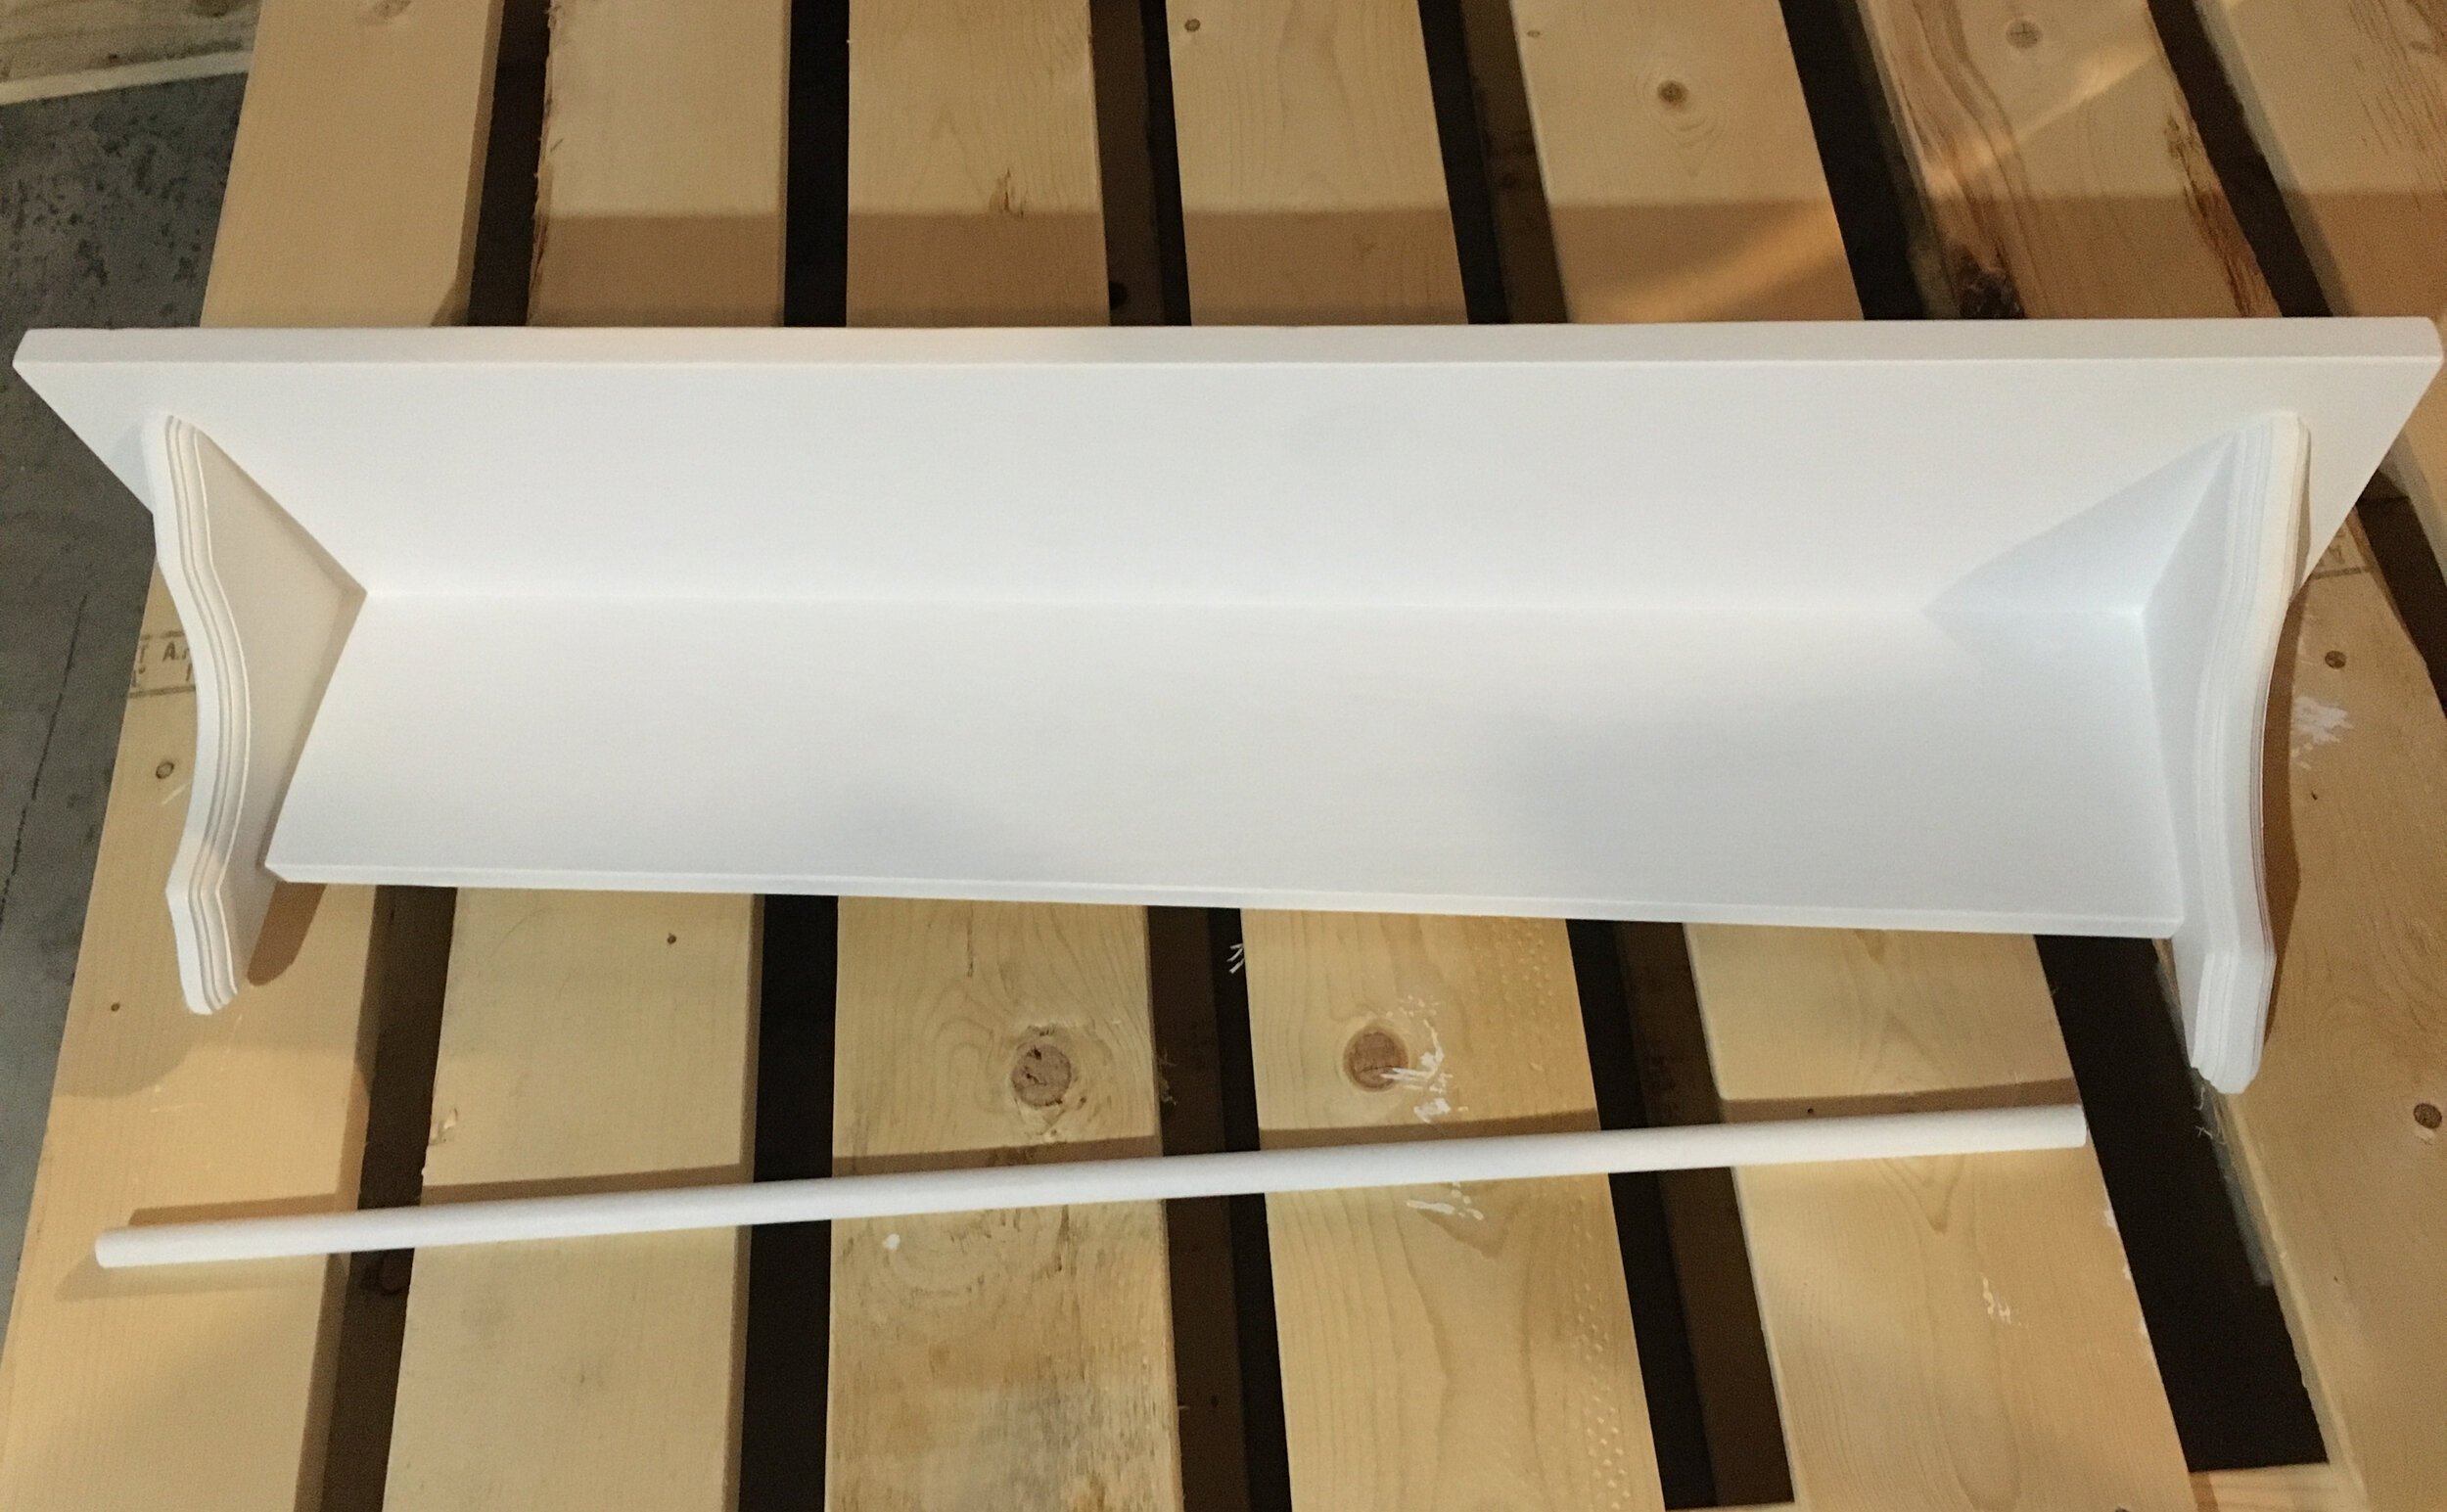
Now for the fun part - paint! I did one coat of primer and then three coats of semi-gloss white paint, though you could choose any color you wish. I like semi-gloss paint since it has a slight sheen to it and is easier to dust and keep clean.

DIY Ribbon and Trophy Display

For hanging - first I measured this wall side-to-side to figure out where the shelf should fall within that space to be centered. Then I marked the studs with a stud finder.

To be honest I usually use two different kinds of stud finders when I have to hang something - I use a magnetic stud finder first to identify exactly where the stud is and then a digital one to find the edges of the stud. I’ve found that sometimes the digital ones can be finicky so it’s nice to know where the studs are first rather than get a false stud reading when it could be something else (a pipe, a thick area of plaster on the wall, etc).

Then using a level to make sure the shelf was level, I screwed directly into the wall studs through the shelf back making sure to place the screws where they would be hidden by the dowel once I installed it.

DIY Ribbon and Trophy Display

Next I hung the dowel by centering it and adding a simple hook to support it on each side, as shown above (this also hides the screws I used to hang it). And now the project is finished and ready to display ribbons, medals, and trophies!

DIY Ribbon and Trophy Display

To hang the ribbons and medals you can easily lift the dowel up and string them on, or loop them around the dowel like I did here.

I hope you liked the project and we look forward to when this Pandemic is over and there will be sport and fair ribbon awards again - stay well!

DIY Ribbon and Trophy Display

UPDATE:

Years later our kids are still using the DIY Ribbon and Trophy Displays but they’re getting a little full. In order to spread things out a bit I bought these simple medal holders (similar one linked), so they could hang their medals on these and keep the DIY Display just for their ribbons/trophies. It’s working great!


Similar Posts:


Shop some of our Outdoors + Sports picks:

Scroll sideways to see more —>

KEEP UP WITH BIRCH LANDING HOME
|  Etsy  |  Facebook  |  Instagram  |  Pinterest  |  Bloglovin'  |  Hometalk  |
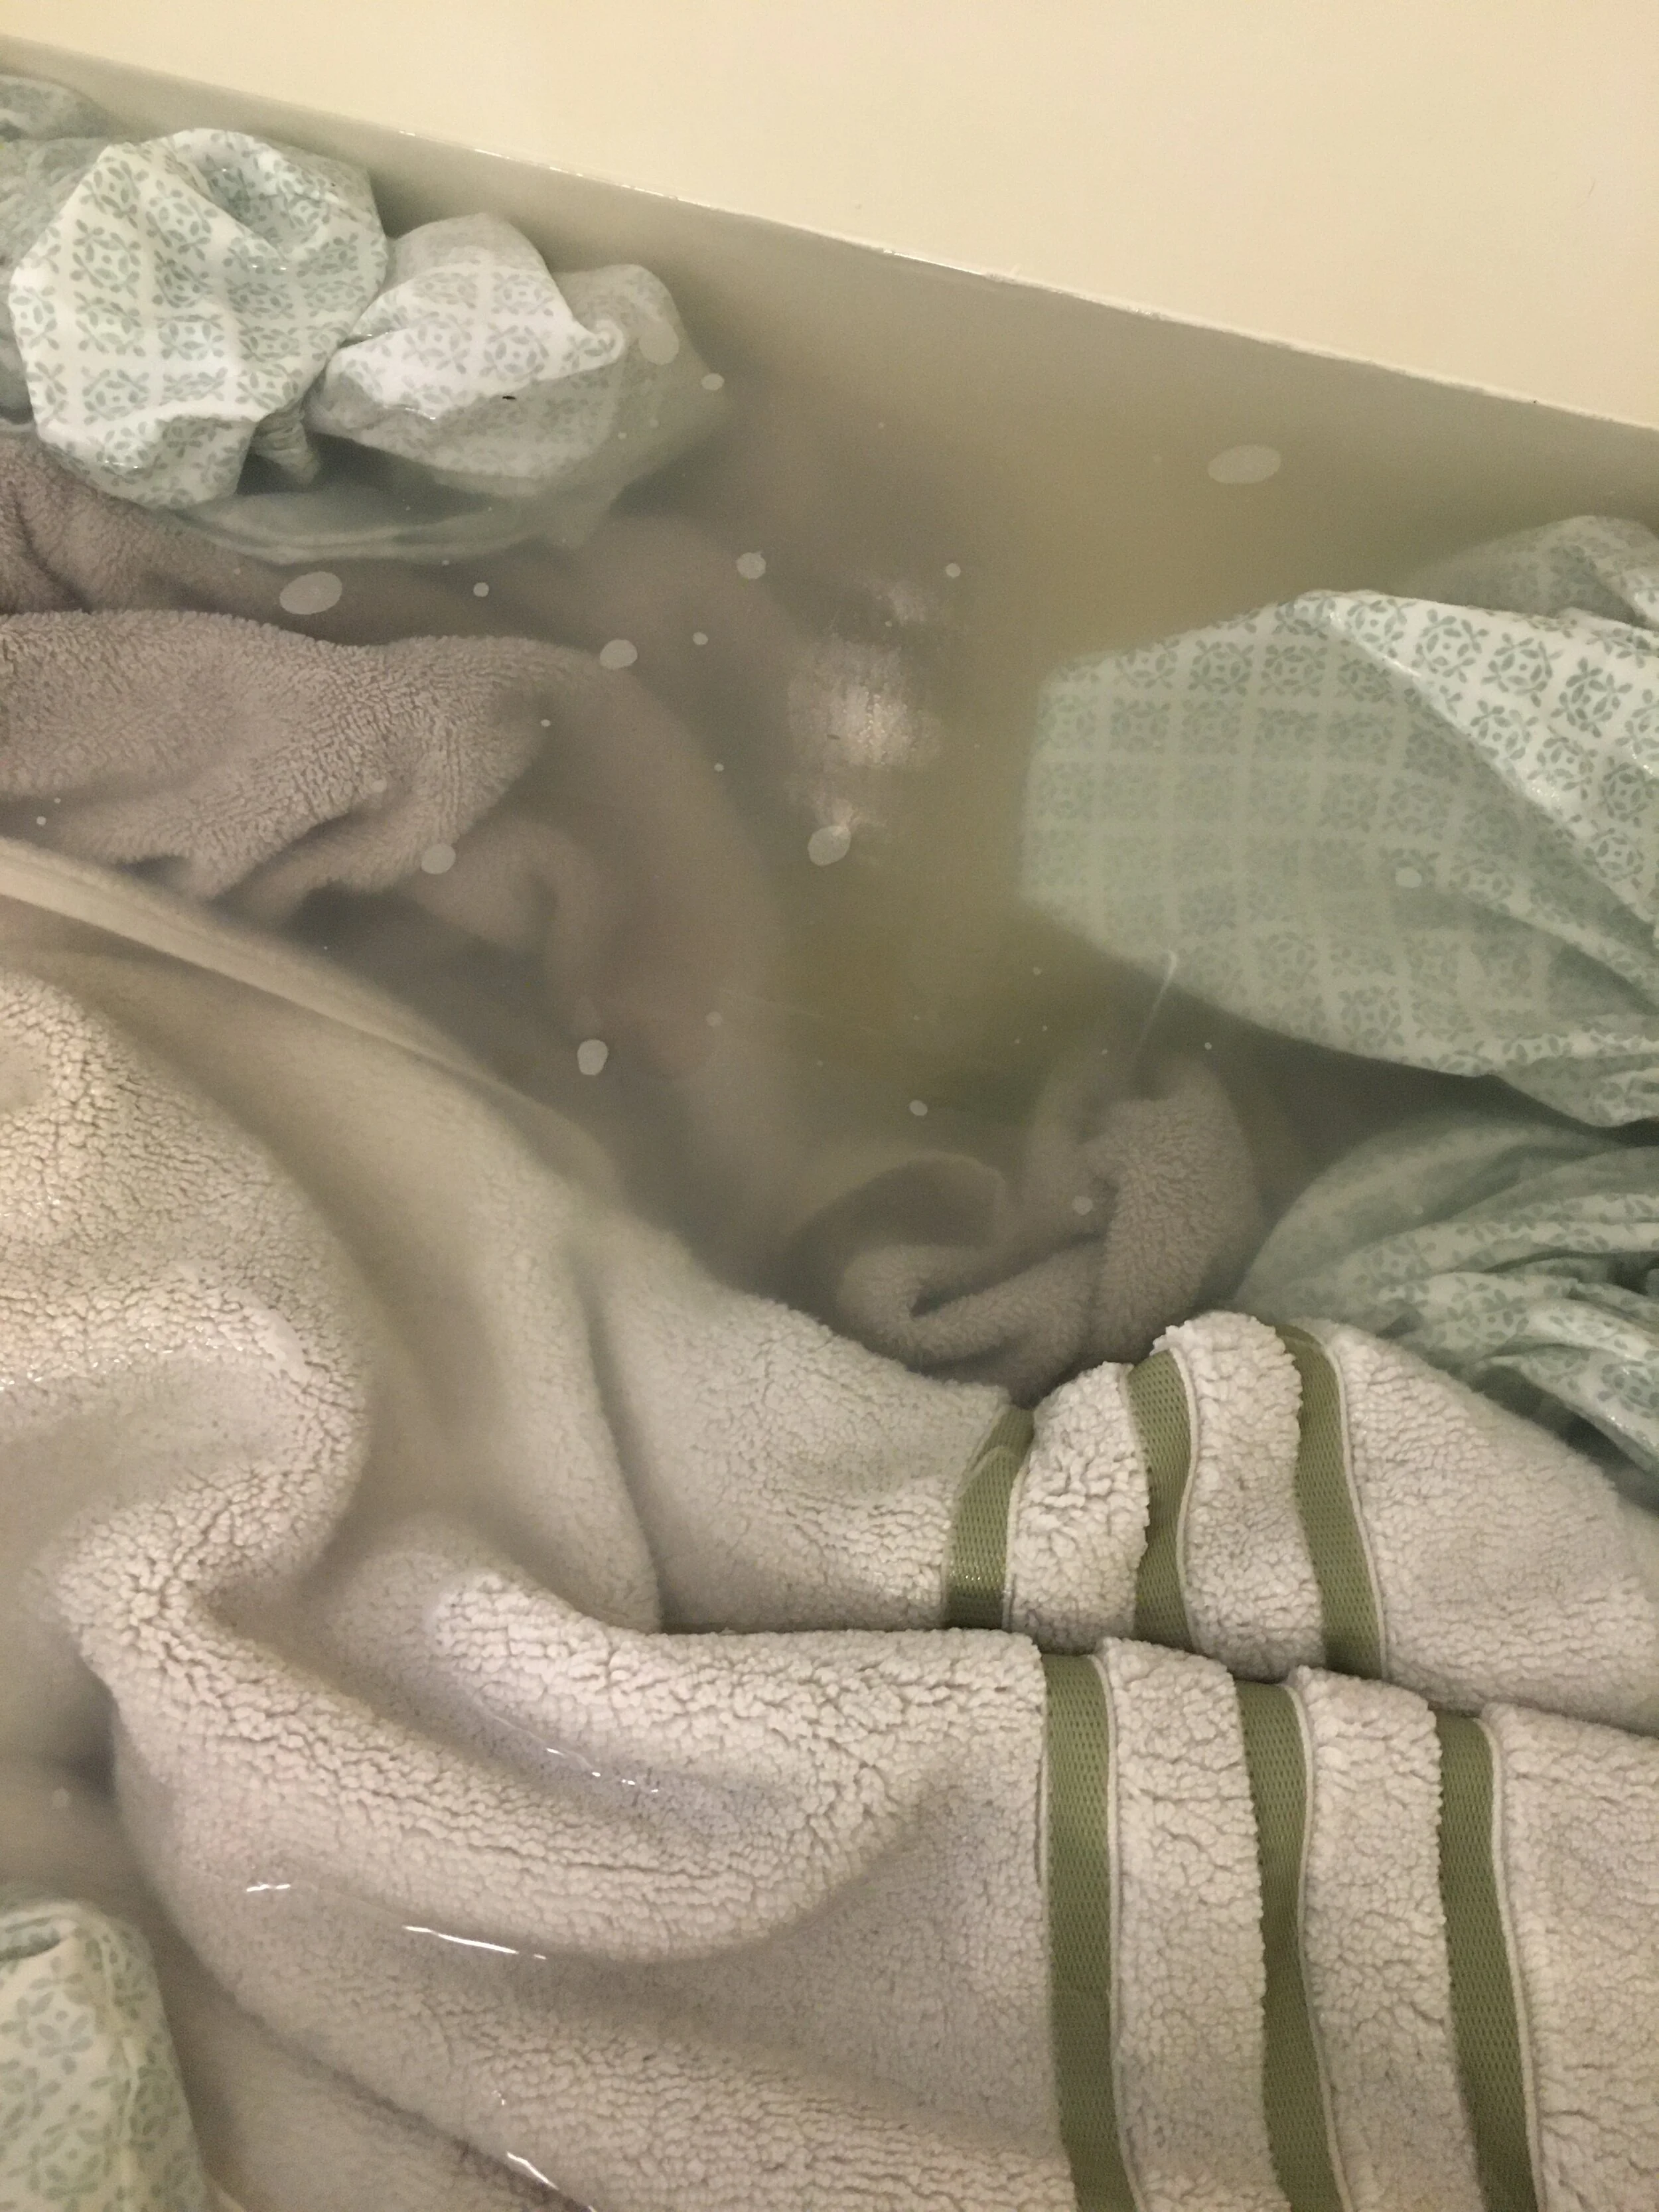
How we Turned a Coat Closet into a Functional, Organized Pantry

Our kitchen was lacking a pantry, so we often kept canned goods and backstock on a shelving unit at the foot of our stairs in the basement. But because half of our food and snacks were downstairs and half were upstairs it made for frequent mistakes when buying groceries… it was hard to visualize exactly what we had and where so we often ended up overbuying certain things and forgetting to buy others. Tired of wasting money, food, and time running up and down the stairs I decided to make over a coat closet into a functional pantry. | This post contains affiliate links |

How we Turned a Coat Closet into a Functional Pantry

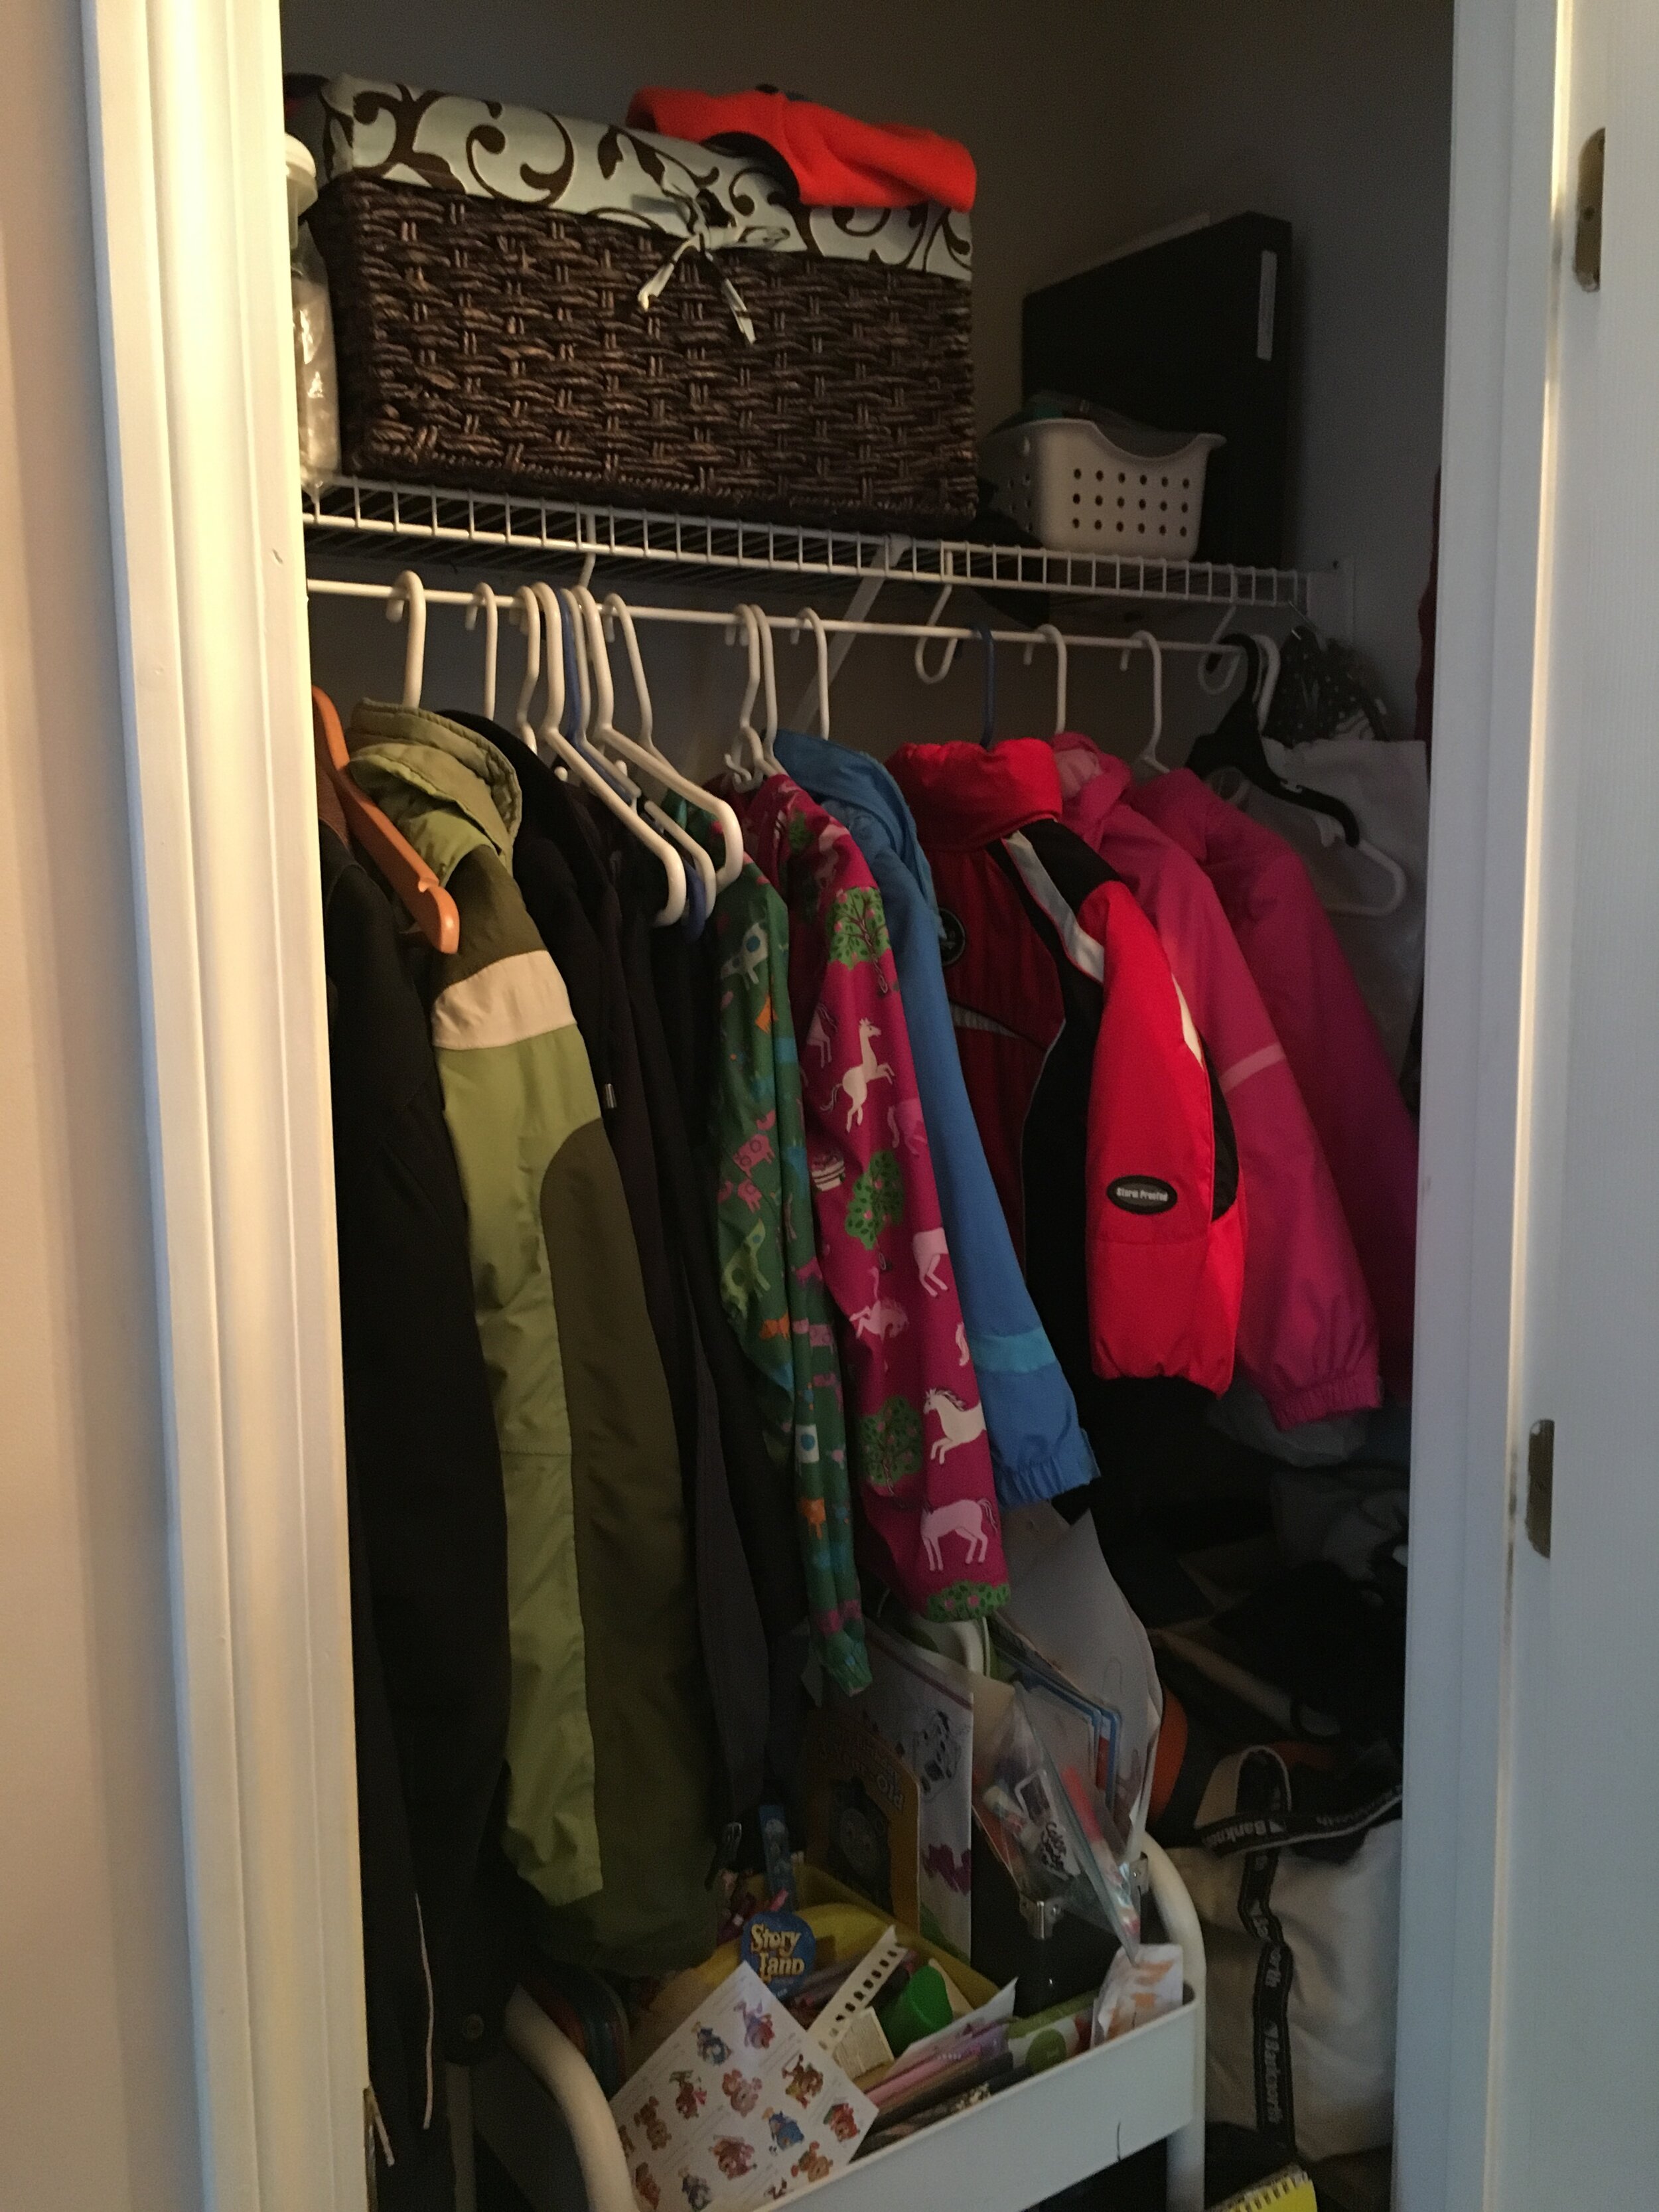
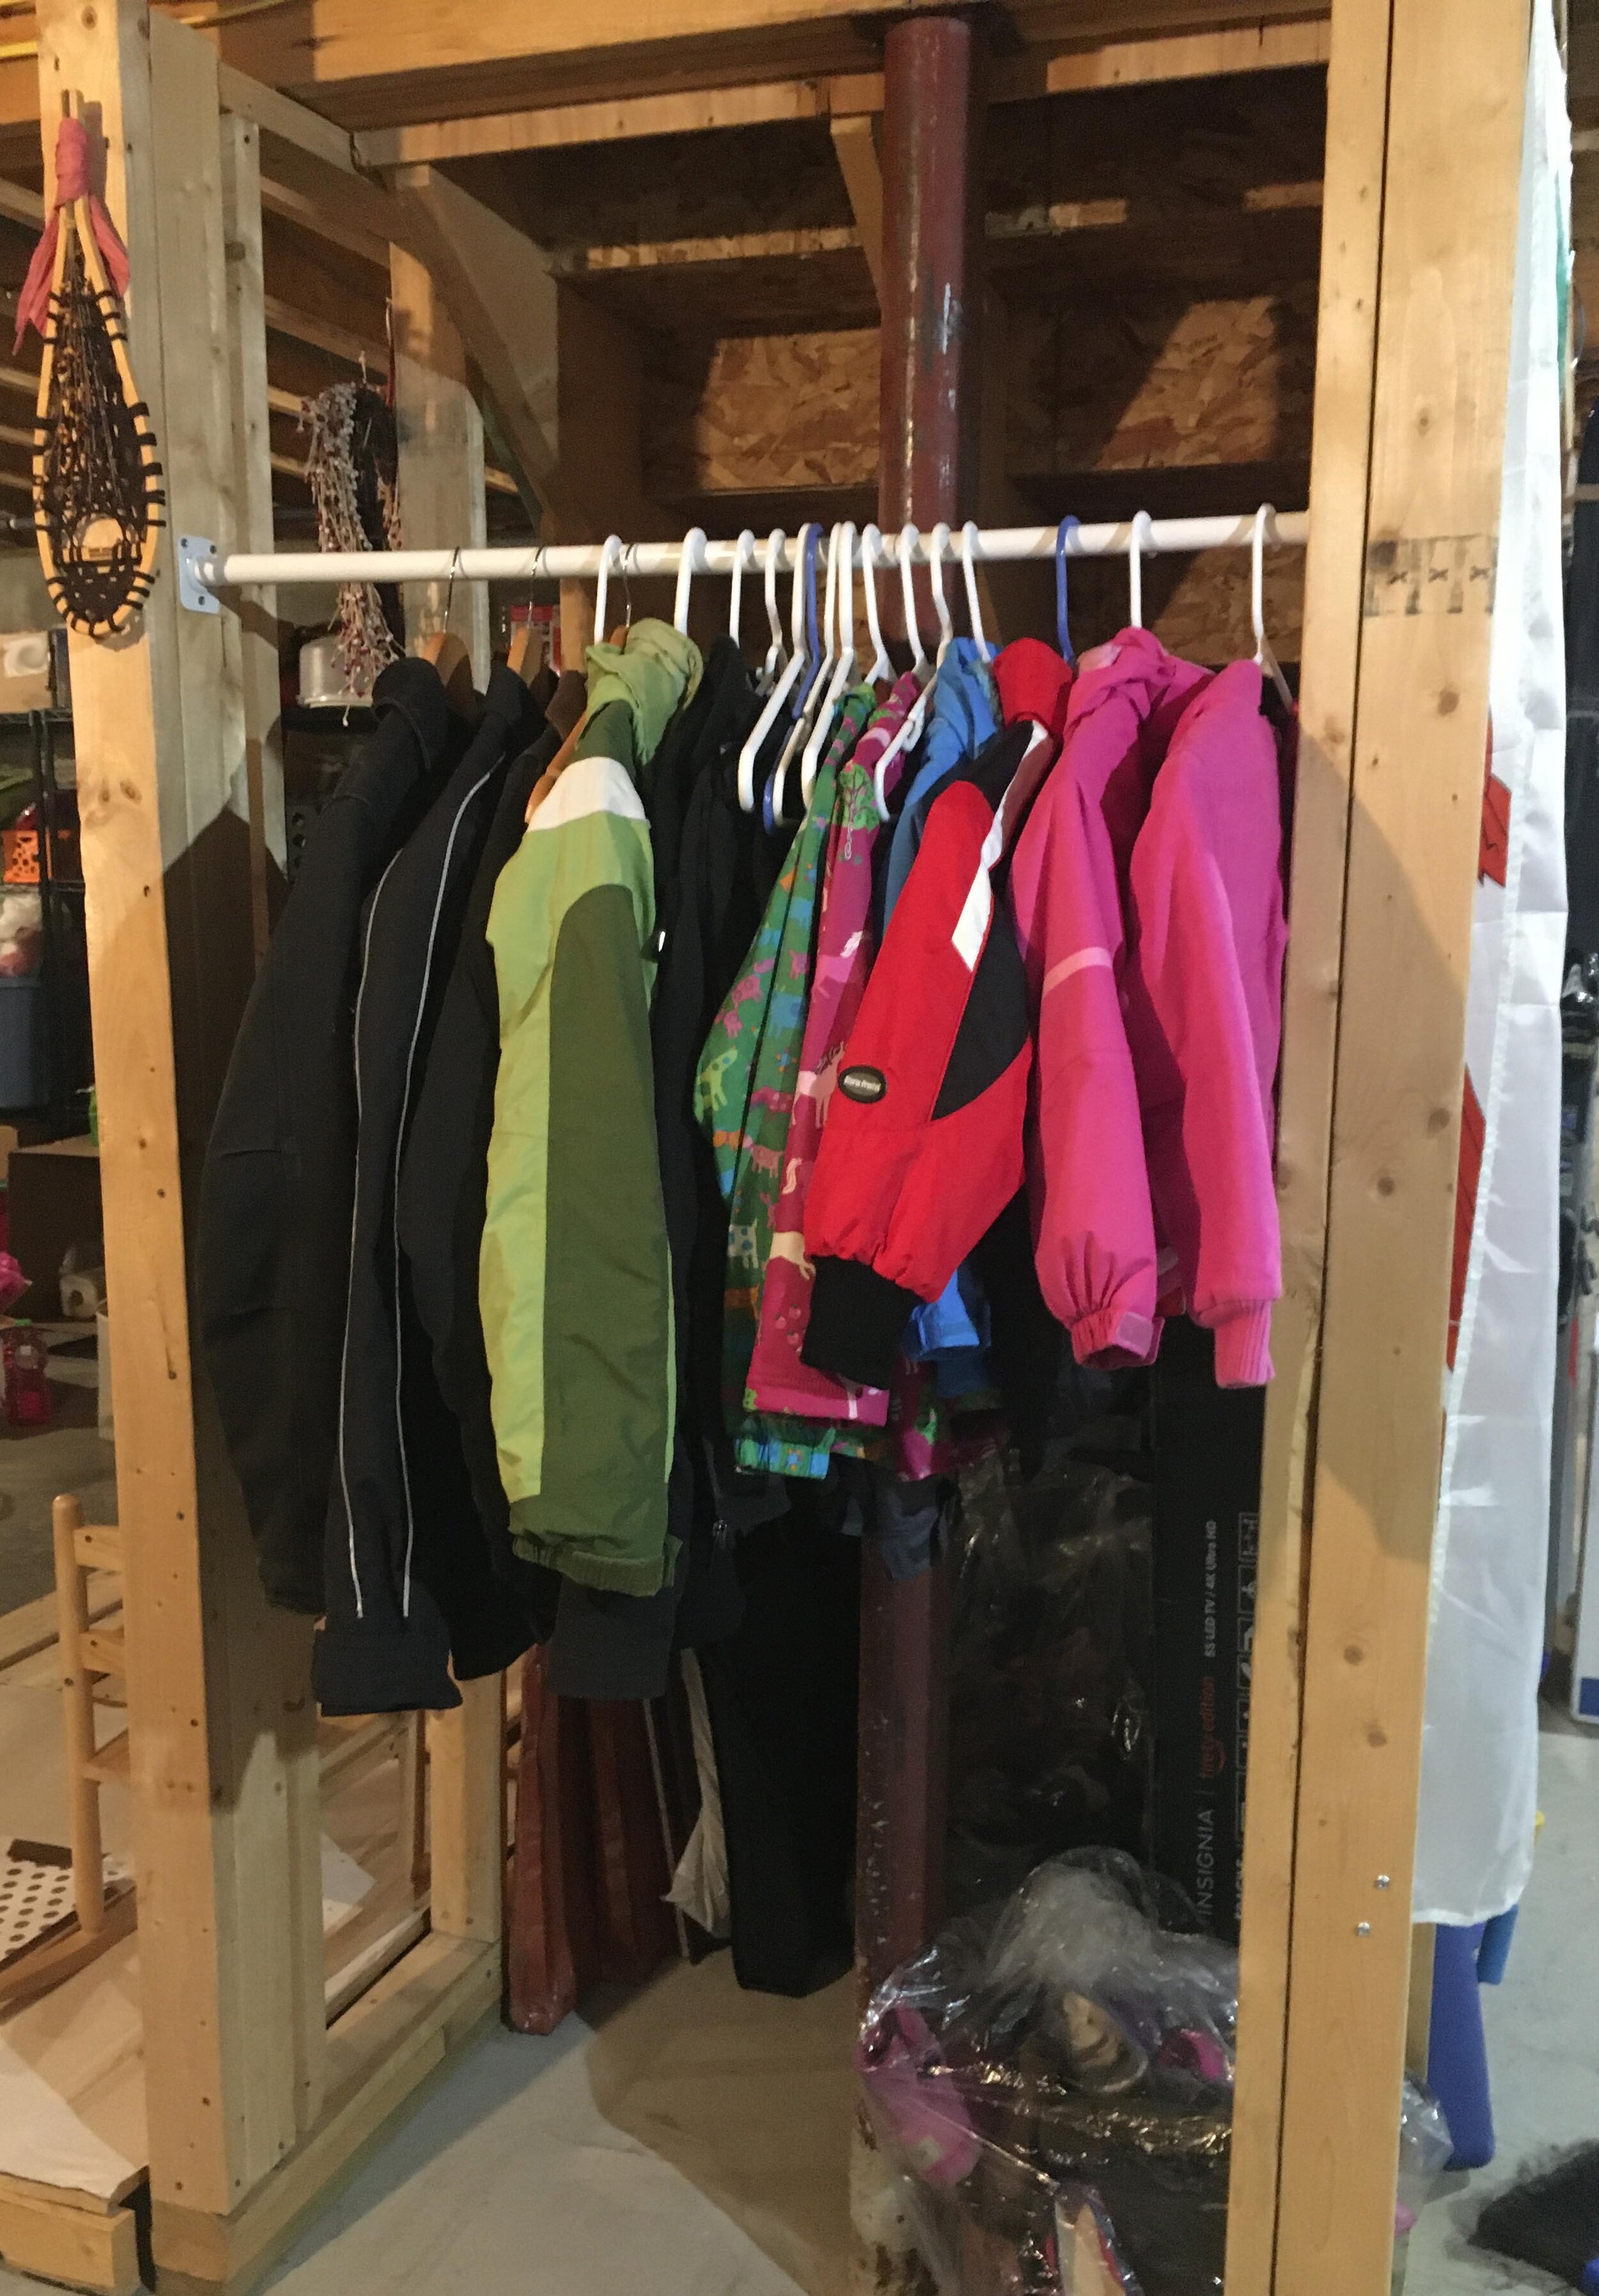
Now while this coat closet (pictured below) was pretty jammed full, it was very underutilized. It’s where we kept our off-season coats, hats, and boots as well as some hiking gear and my daughters’ Art Cart - most things we did not need to use daily, or often at all. My solution to this was to relocate all these items to our basement - I hung a closet rod under the basement stairs and moved all our off-season clothing and gear to this new space where it was still easily accessible but out of the way.

How we Turned a Coat Closet into a Functional Pantry

The next step was to pull out the old wire shelf and closet rod system, patch the holes, and repaint the inside of the closet. Thankfully I already had spackle and some leftover white paint so I was able to get the closet to a clean slate easily and it didn’t cost a dime.

How we Turned a Coat Closet into a Functional Pantry

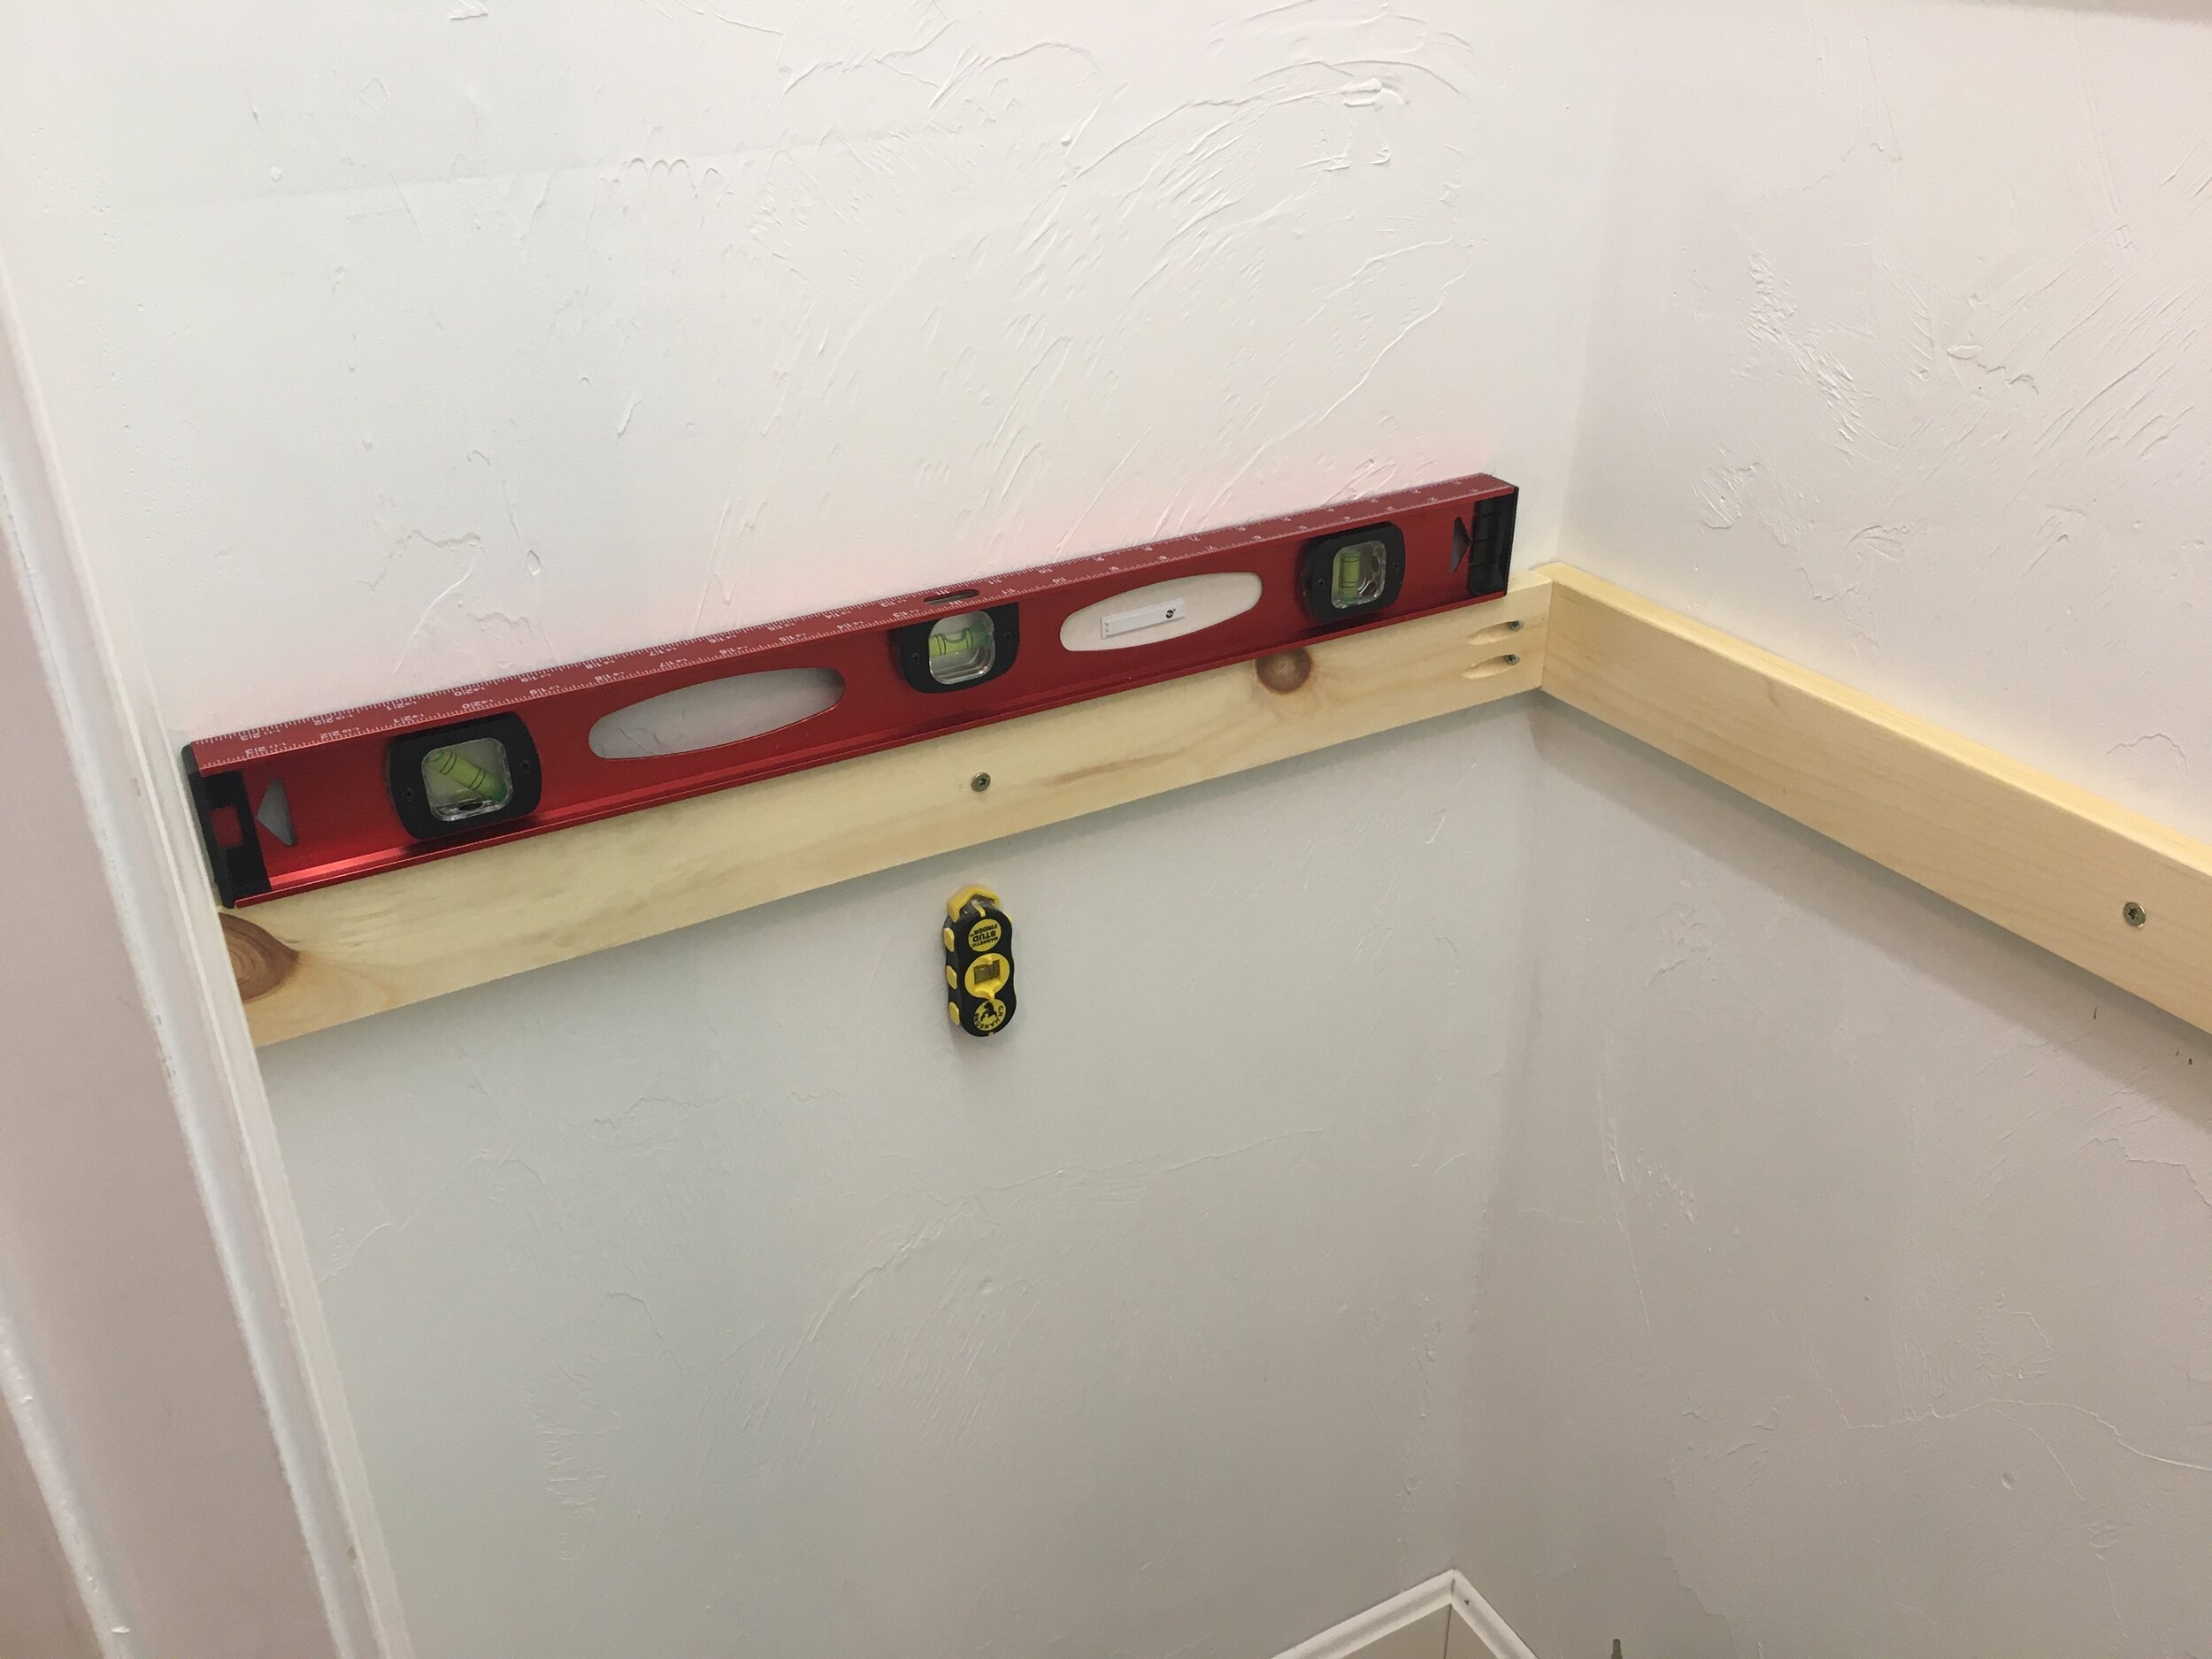
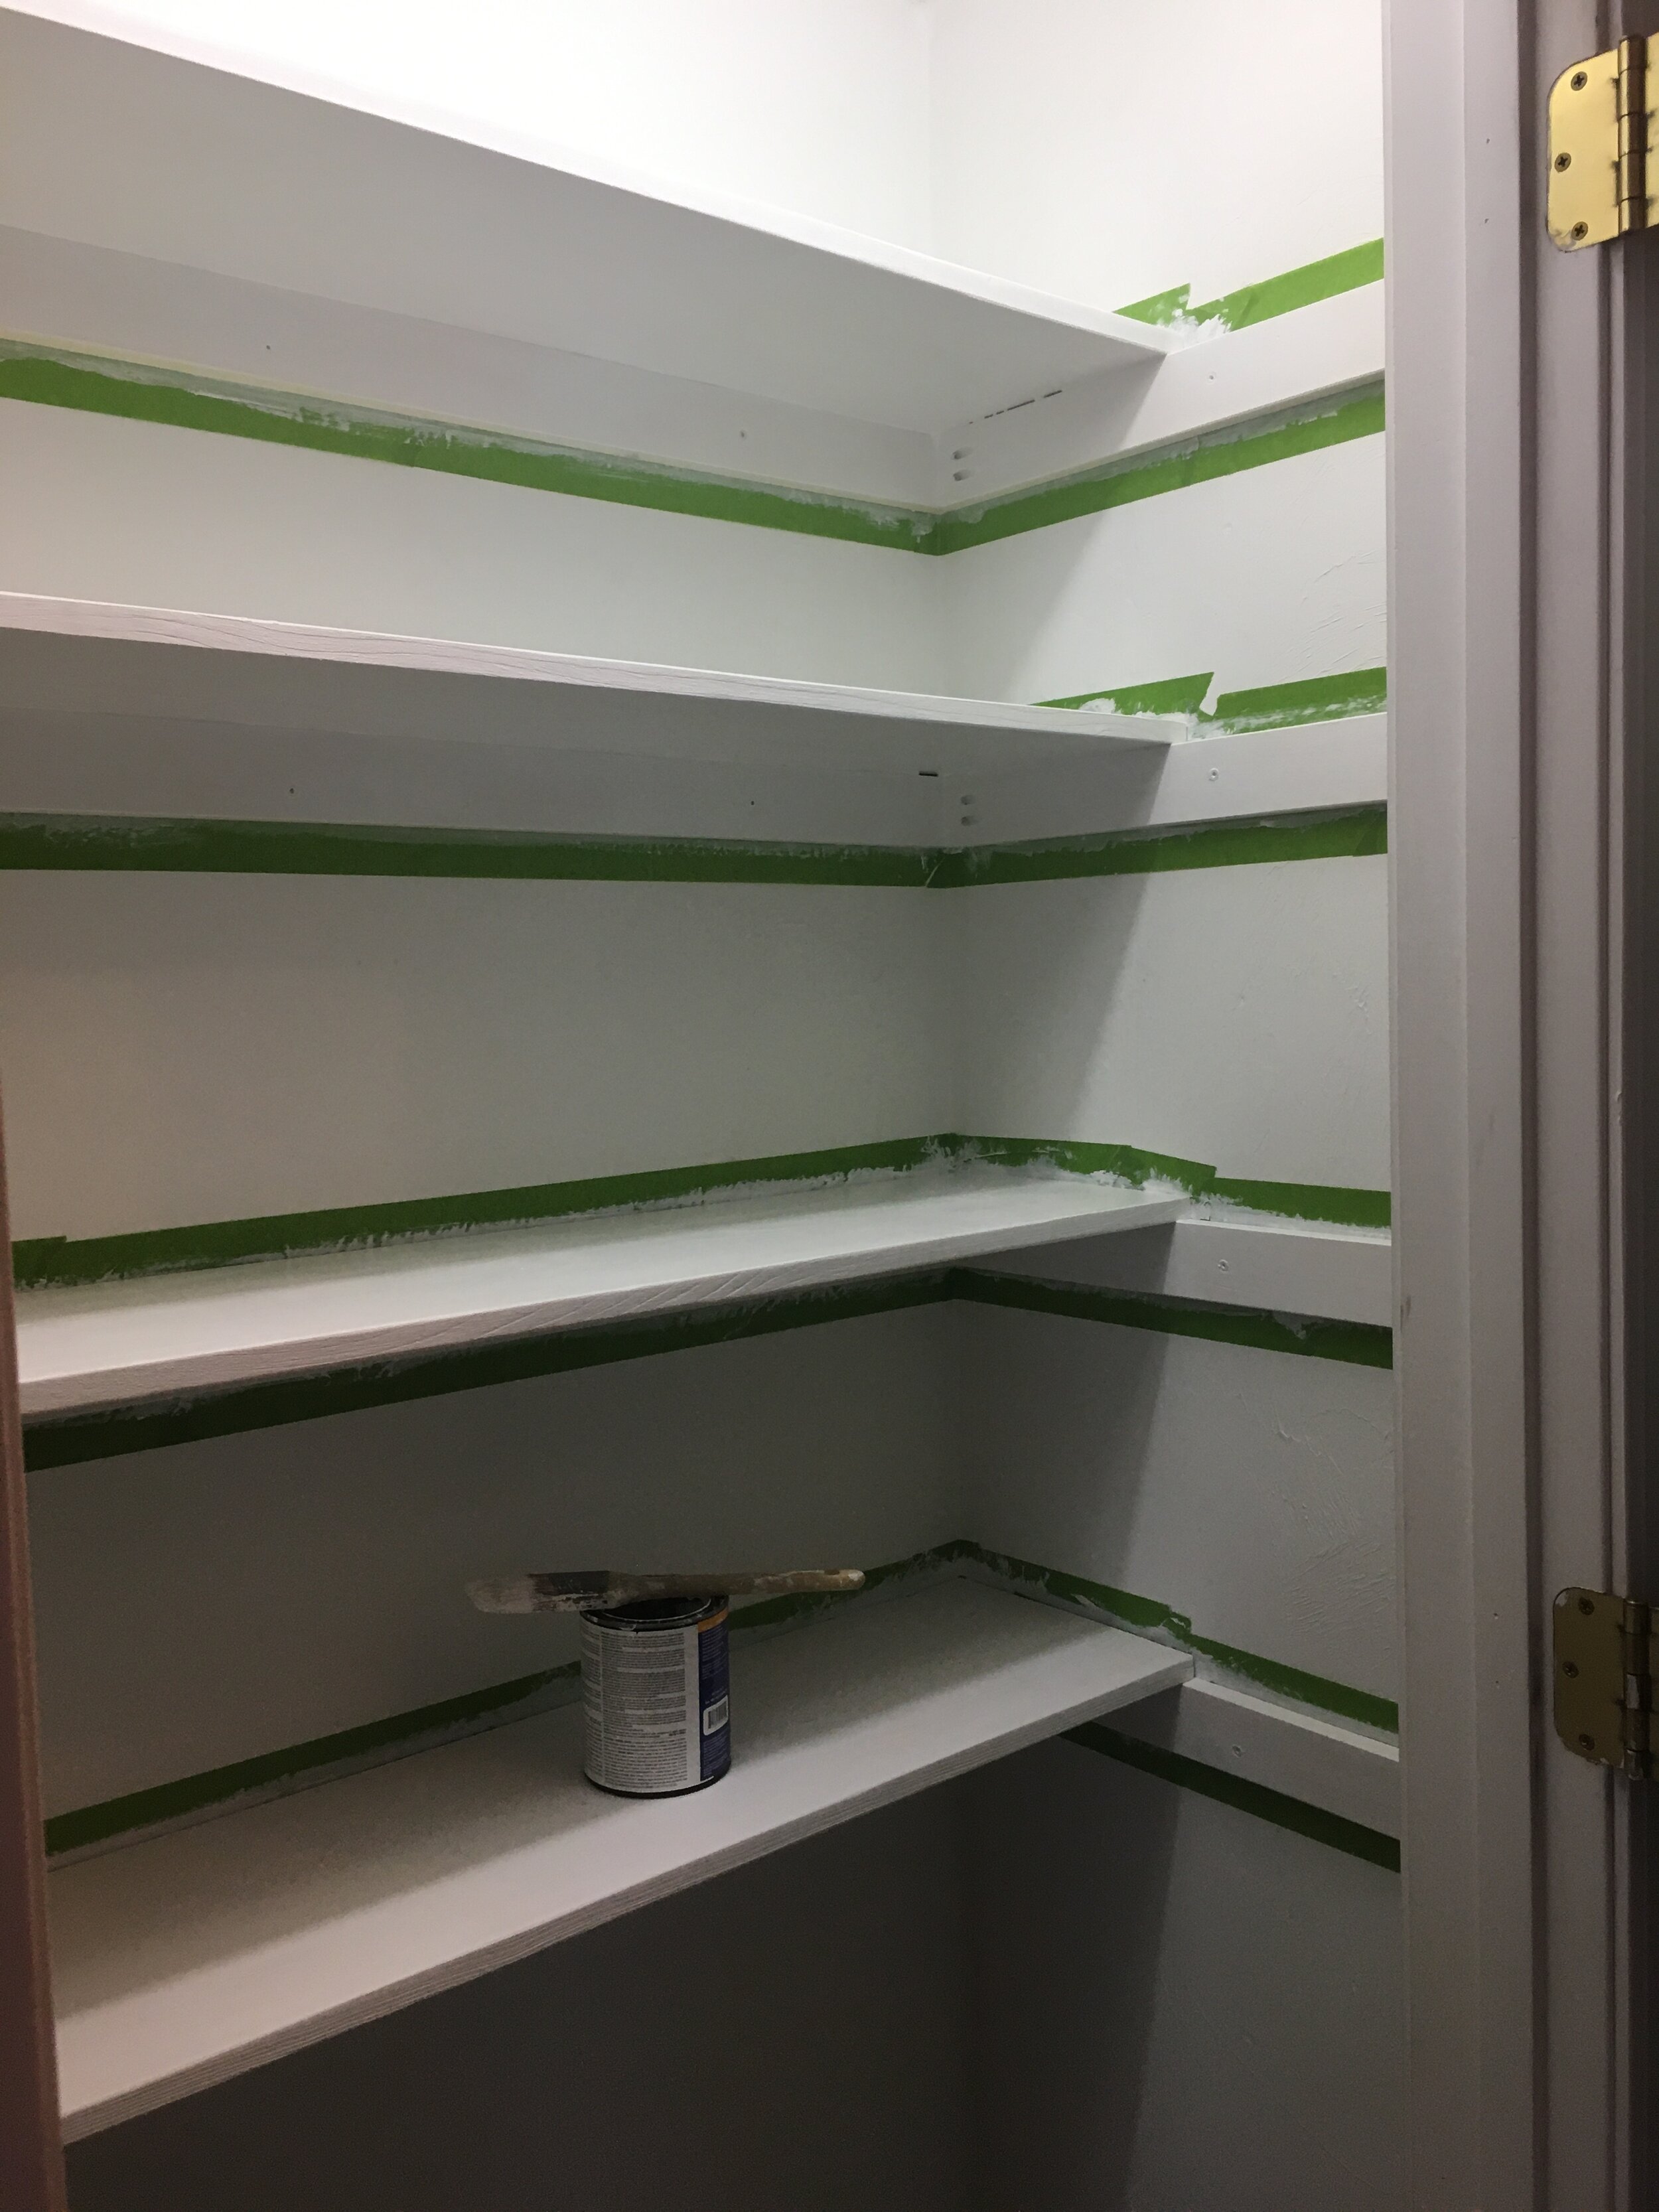
Now for the fun part! I got to decide how many shelves I wanted and the spacing, so I laid it out with painters tape to play with how I wanted it before I made a final decision. For our setup I decided on four shelves starting at about waist-height. I wanted to leave the bottom open to accommodate the dog food bin, the Art Cart, step stool, etc. Then I screwed in 1x3 inch “runners” that would support the shelves along the back wall. I used a stud finder to make sure I was screwing the runners into studs and a level to make sure everything was square.

How to build pantry shelves in a closet

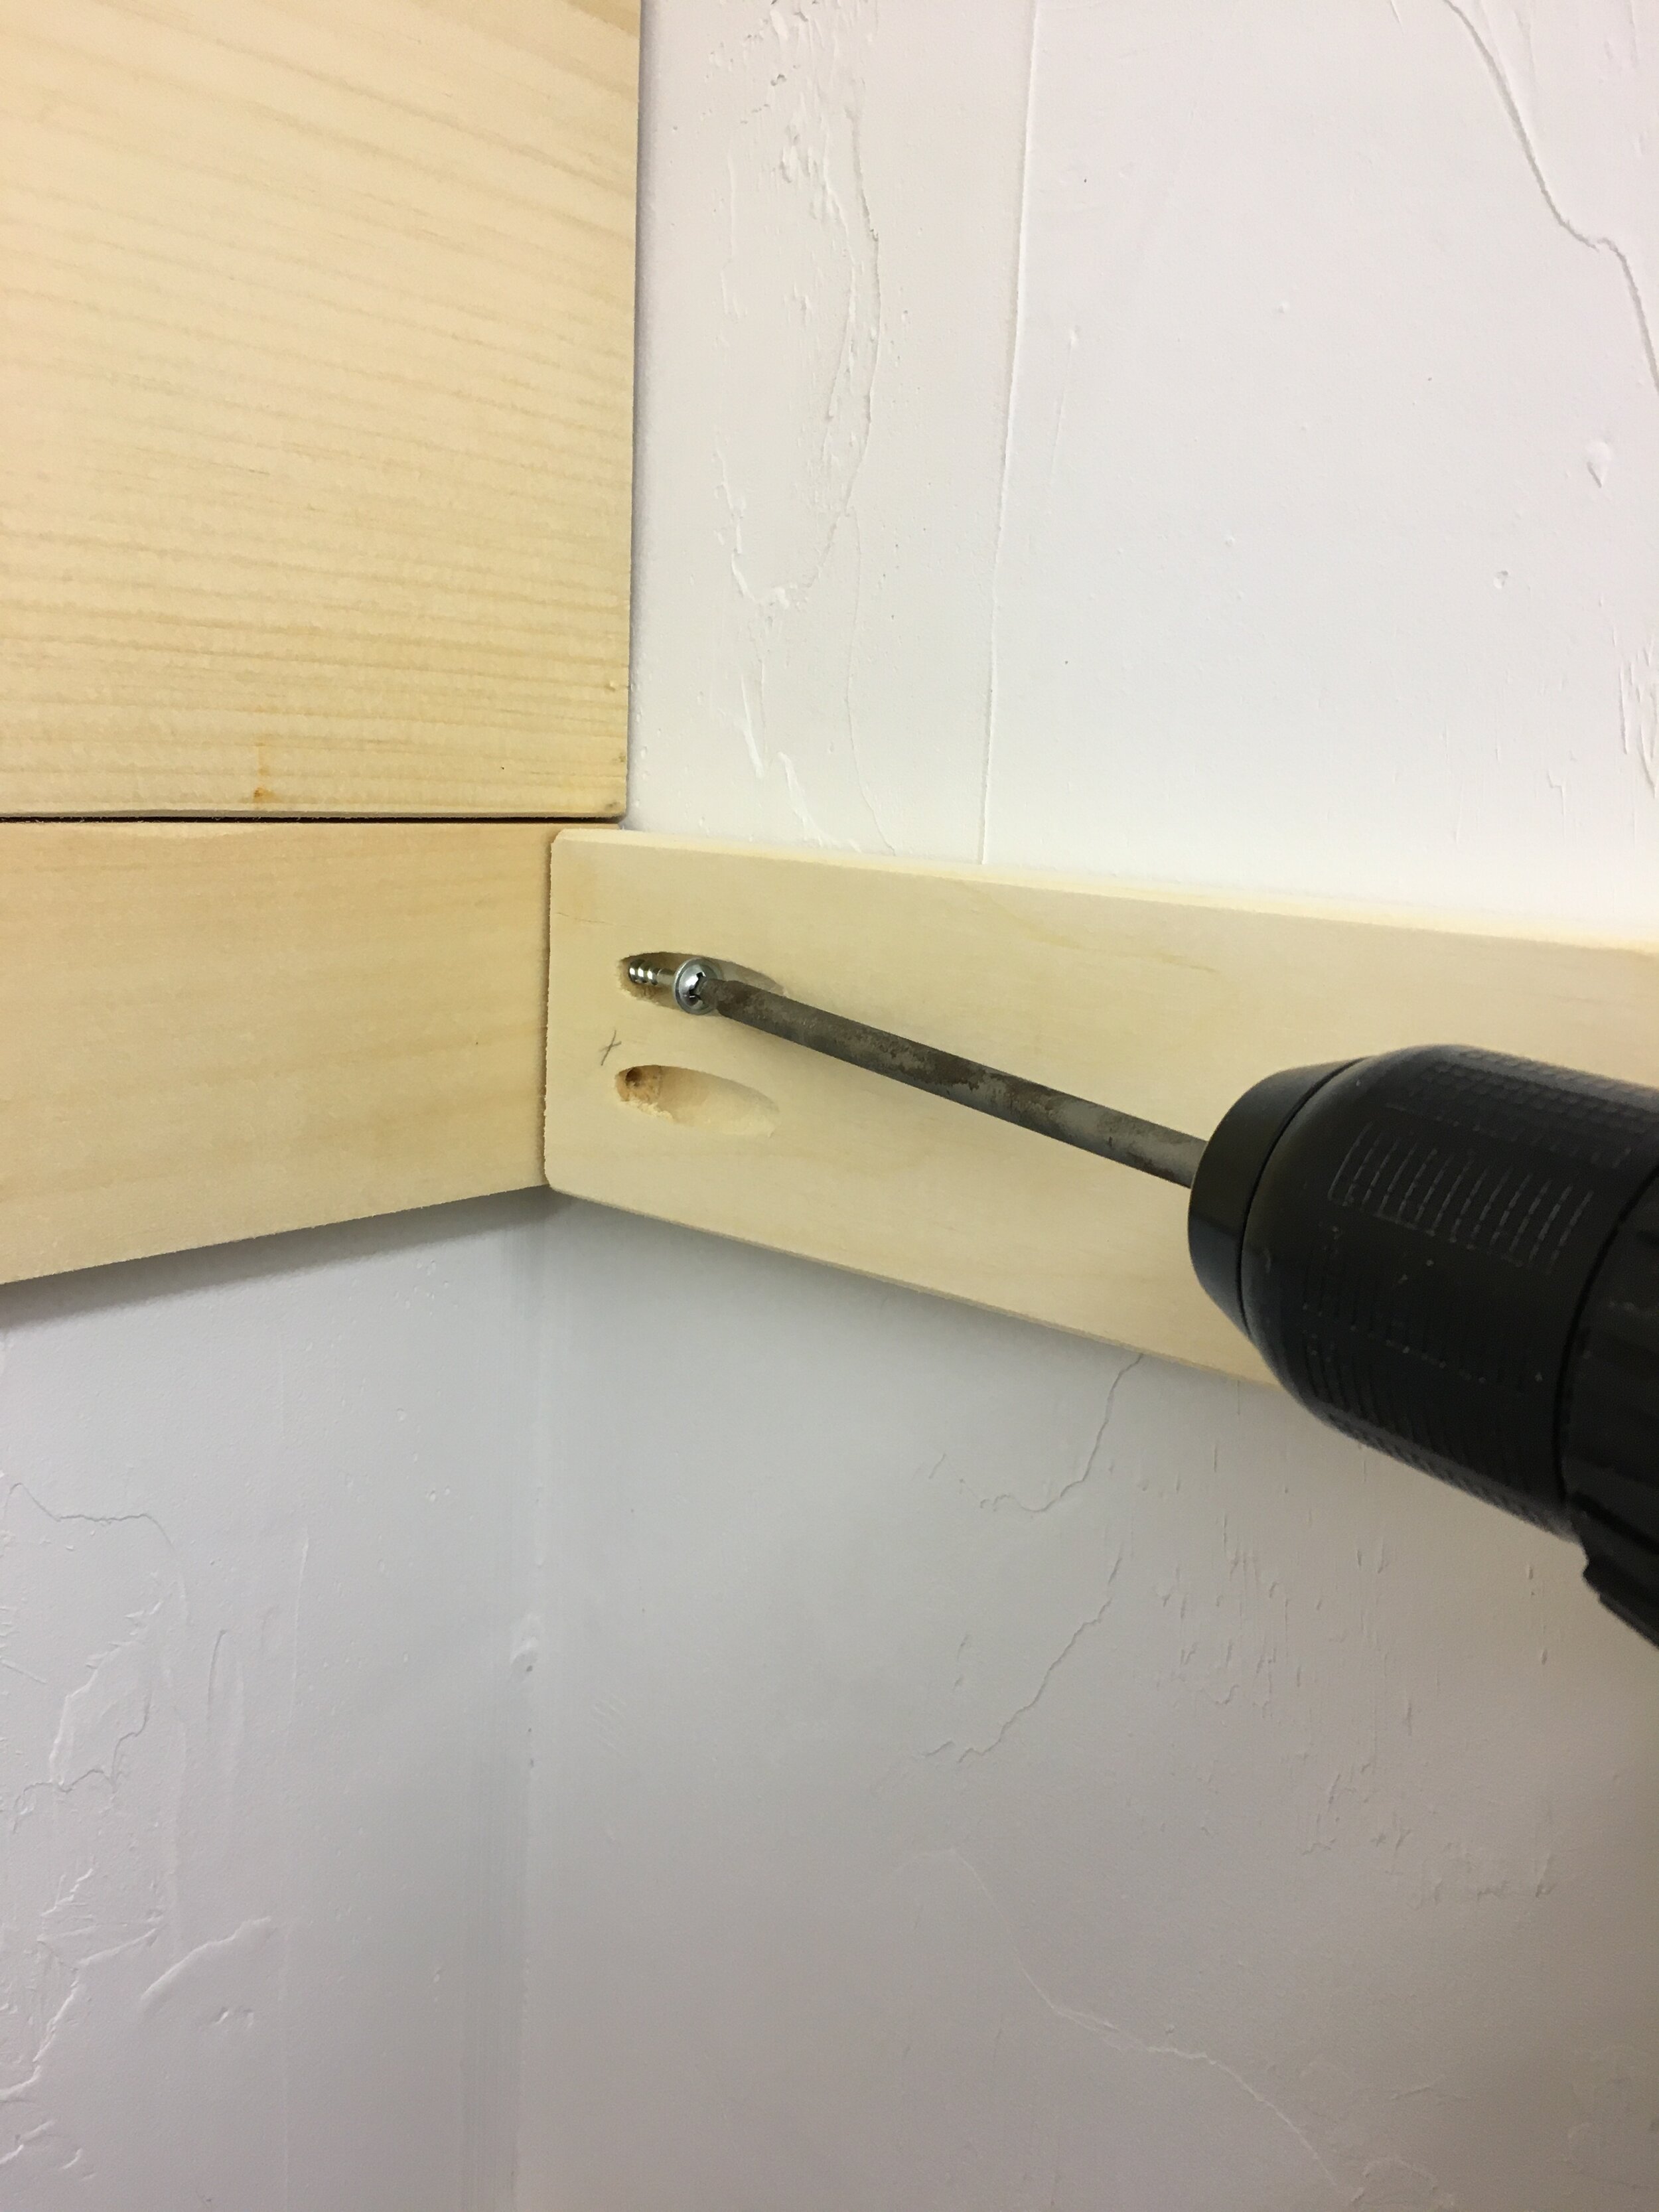
Then I added runners to one side of the closet next, following the same routine - but with these pieces I had pre-drilled pocket holes with our Kreg Jig first so it would make for a clean and secure joint in the corners.

How we Turned a Coat Closet into a Functional Pantry

Before installing the runners on the opposite side of the closet, it’s wise to keep in mind how you will be able to maneuver the shelf boards in once all the runners are in place (it would be very difficult to get the top shelf in with all the runners installed, for example). So before installing the opposite side’s runners I slipped some of the trickier shelf boards into place first (I used 1x12”s cut to length for the shelves) before I finished screwing in all the side runners.

How we Turned a Coat Closet into a Functional Pantry

I secured the shelves into place with some finishing nails, then taped off the shelves and runners to get ready for paint. I used primer and then several coats of white semi-gloss paint since it’s a little easier to wipe down and keep clean.

How we Turned a Coat Closet into a Functional Pantry

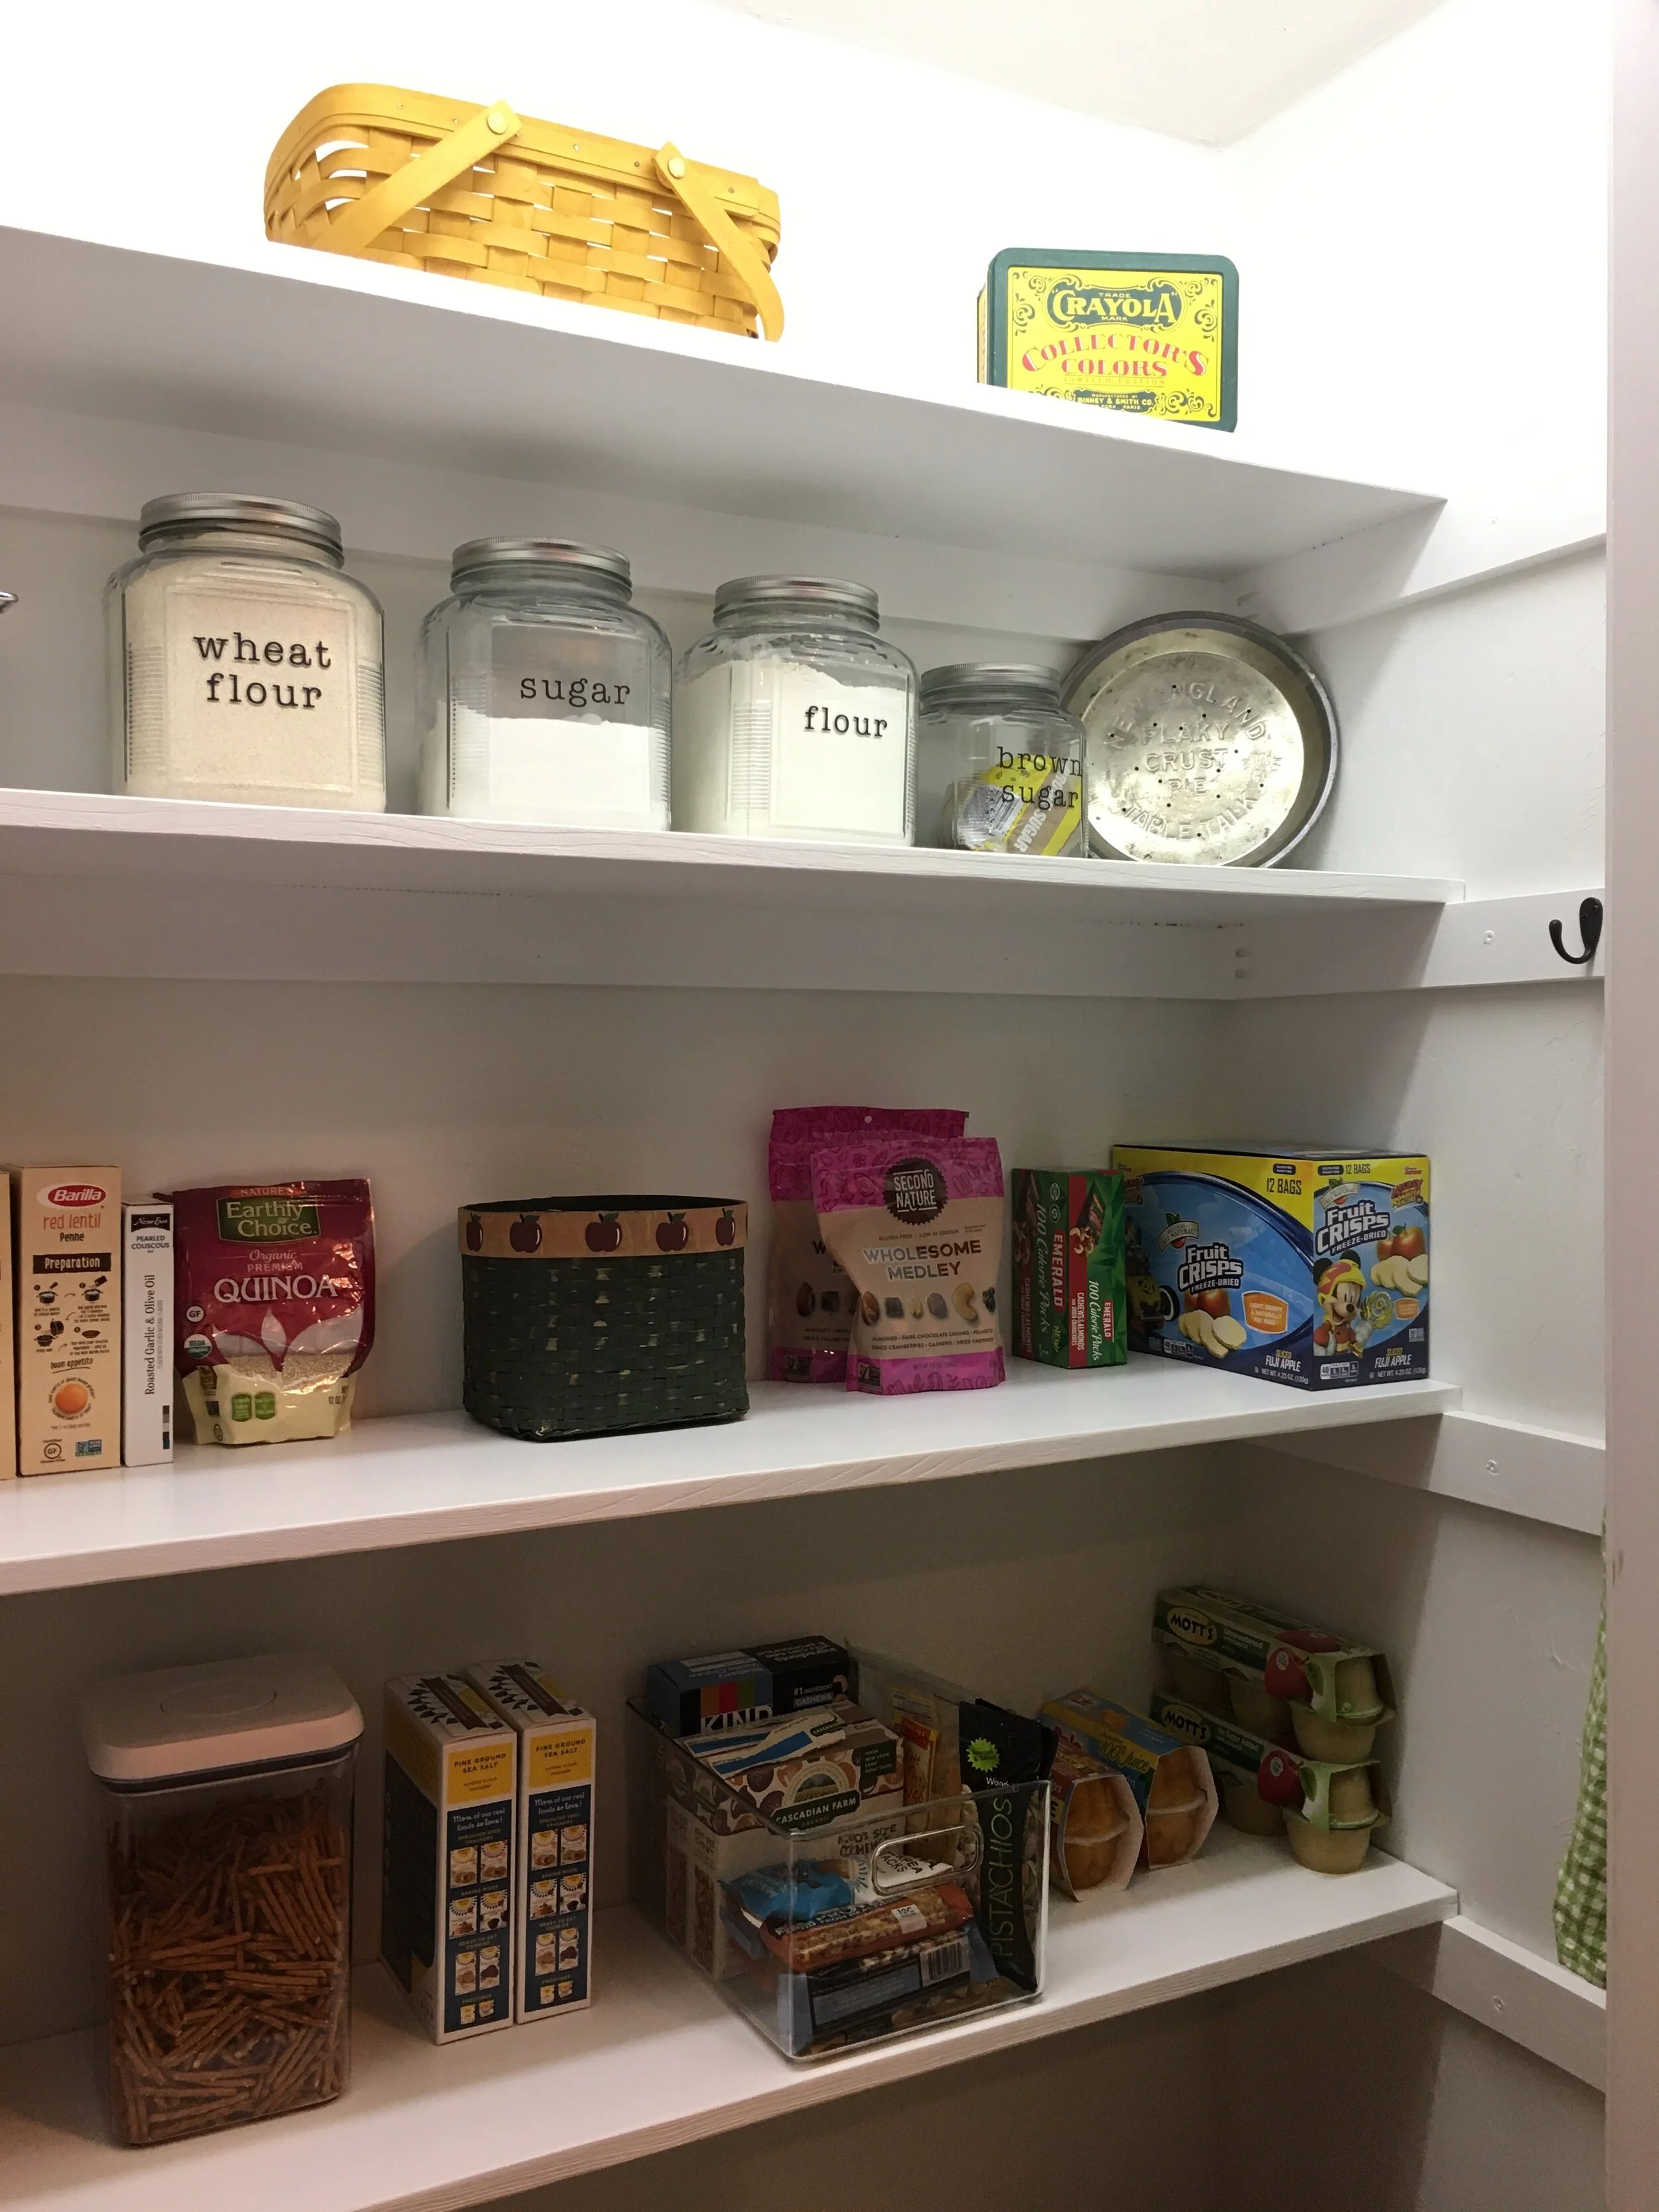
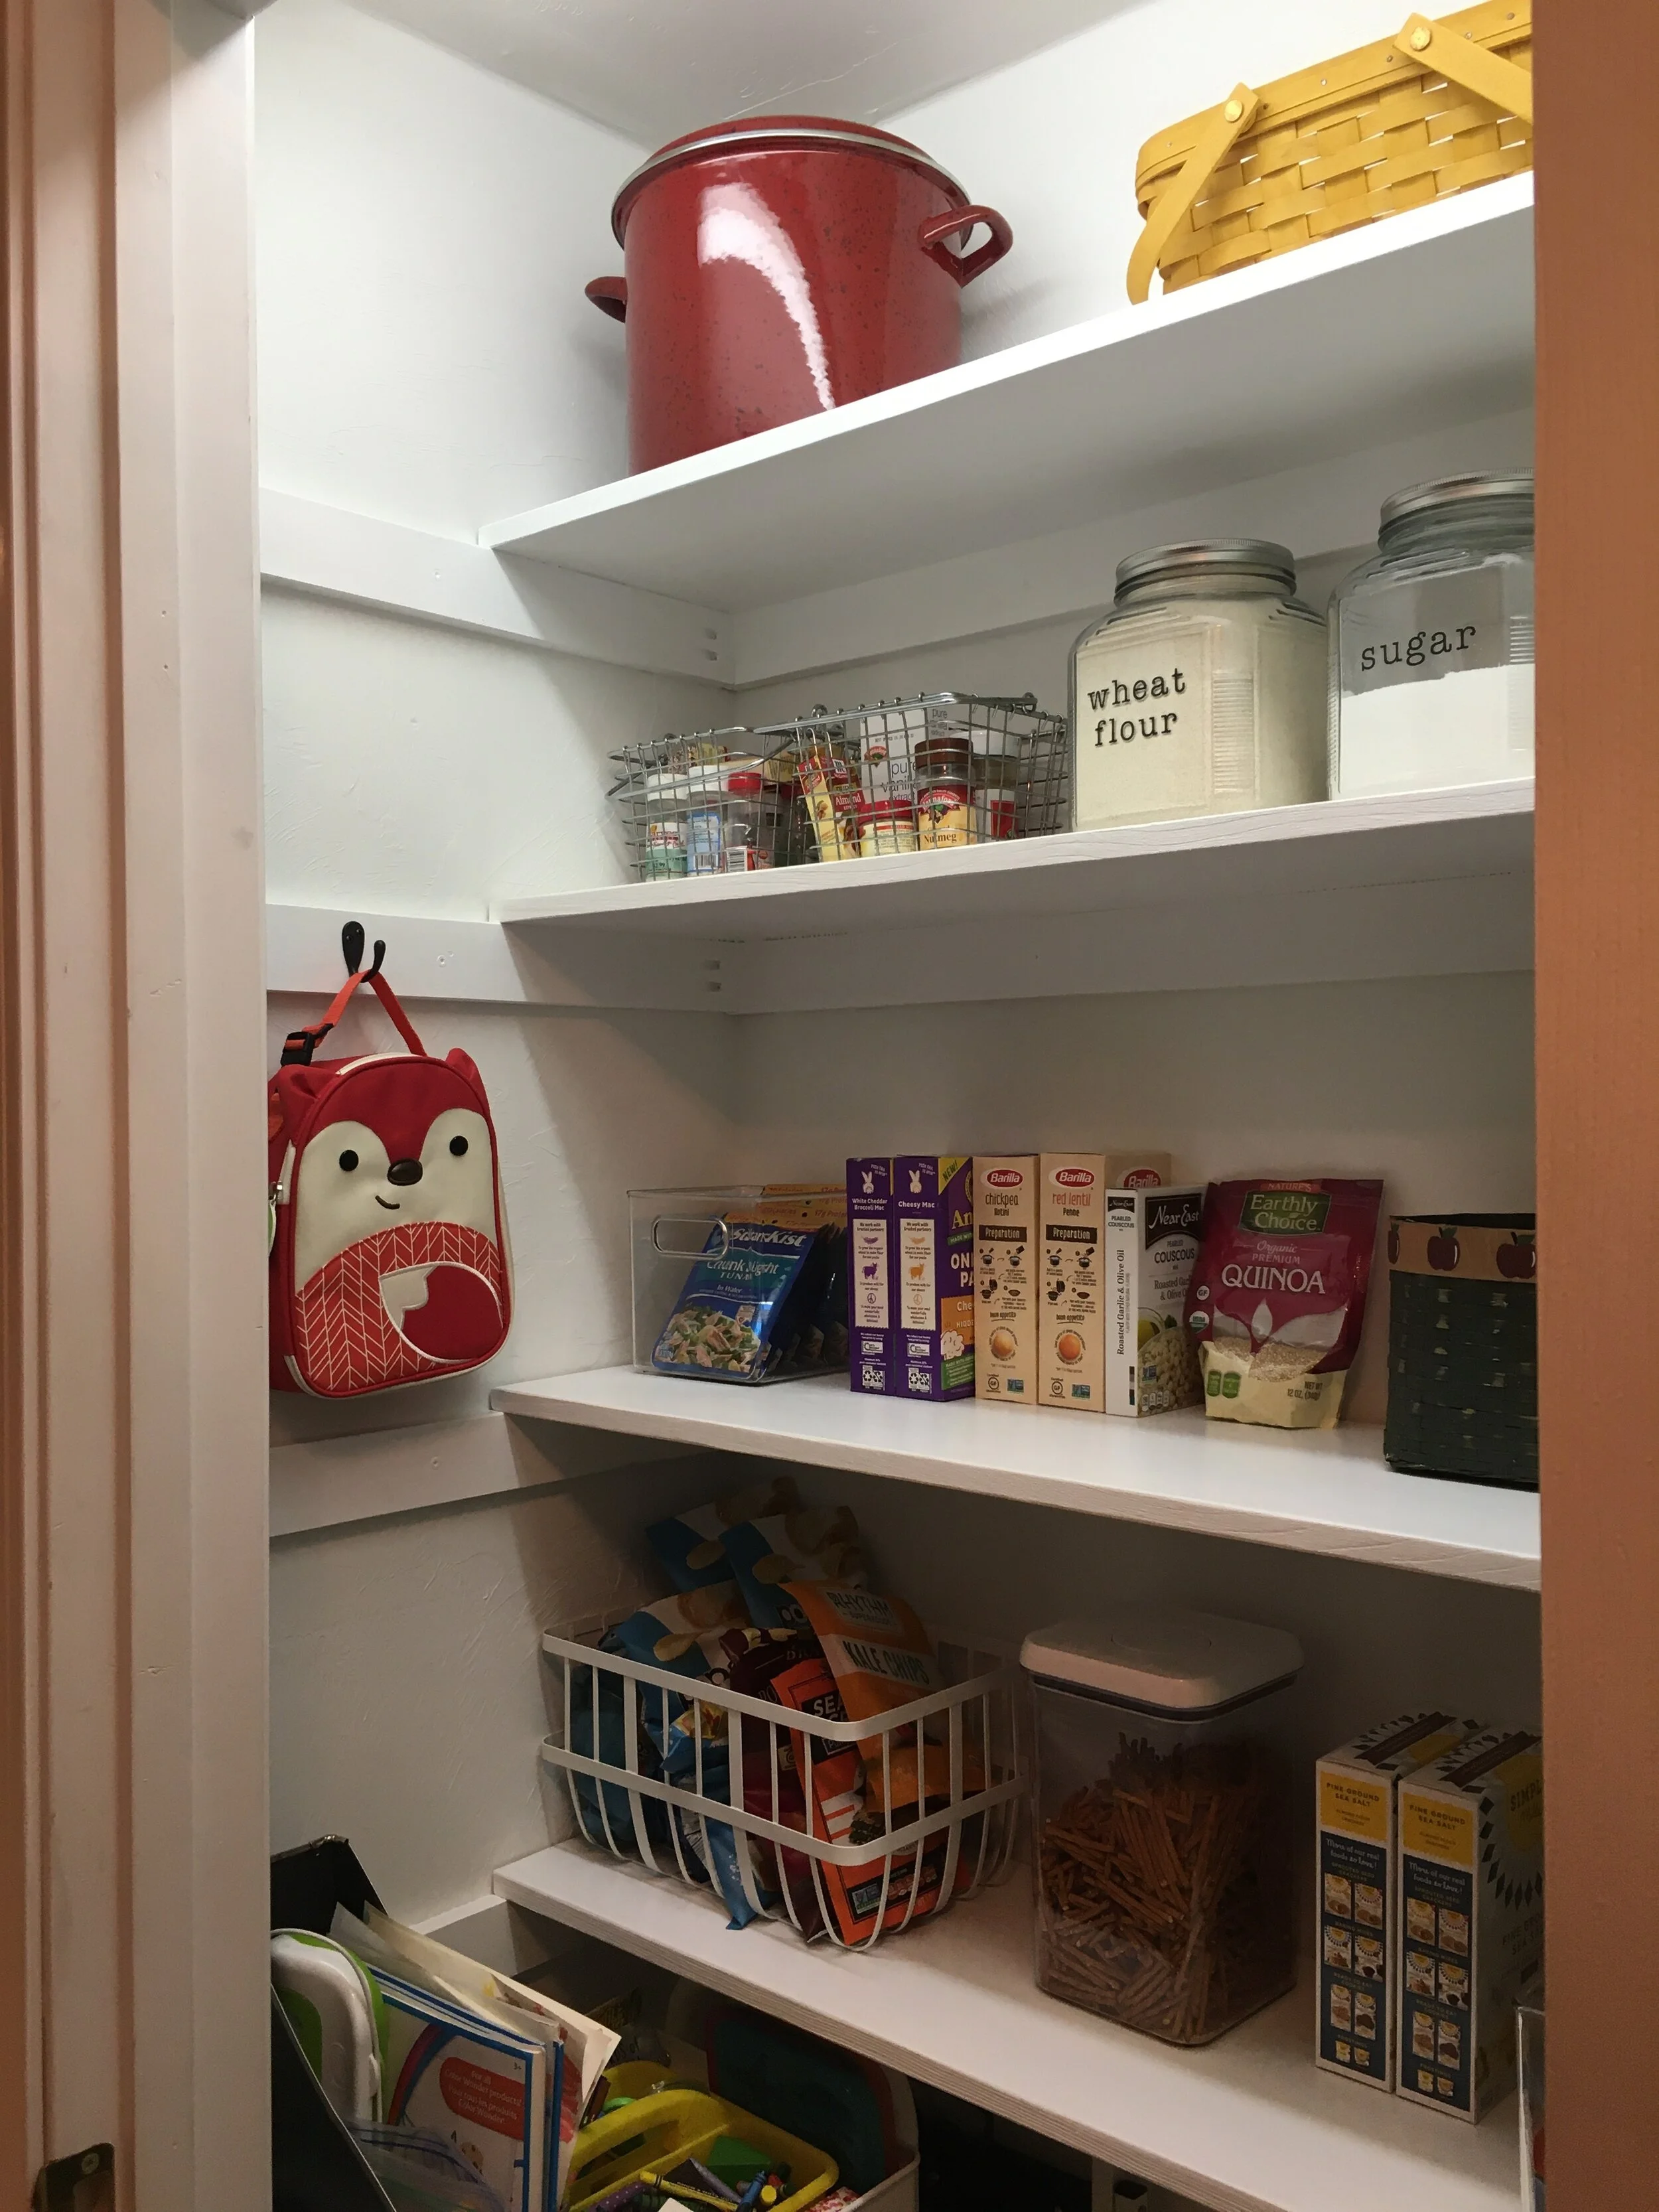
I just love how farmhouse and “Shaker” the exposed rails on the sides look and I wanted to play it up. Once the paint was dry I added some functional hooks to hang aprons, lunchboxes, etc on the side rails.

How we Turned a Coat Closet into a Functional Pantry

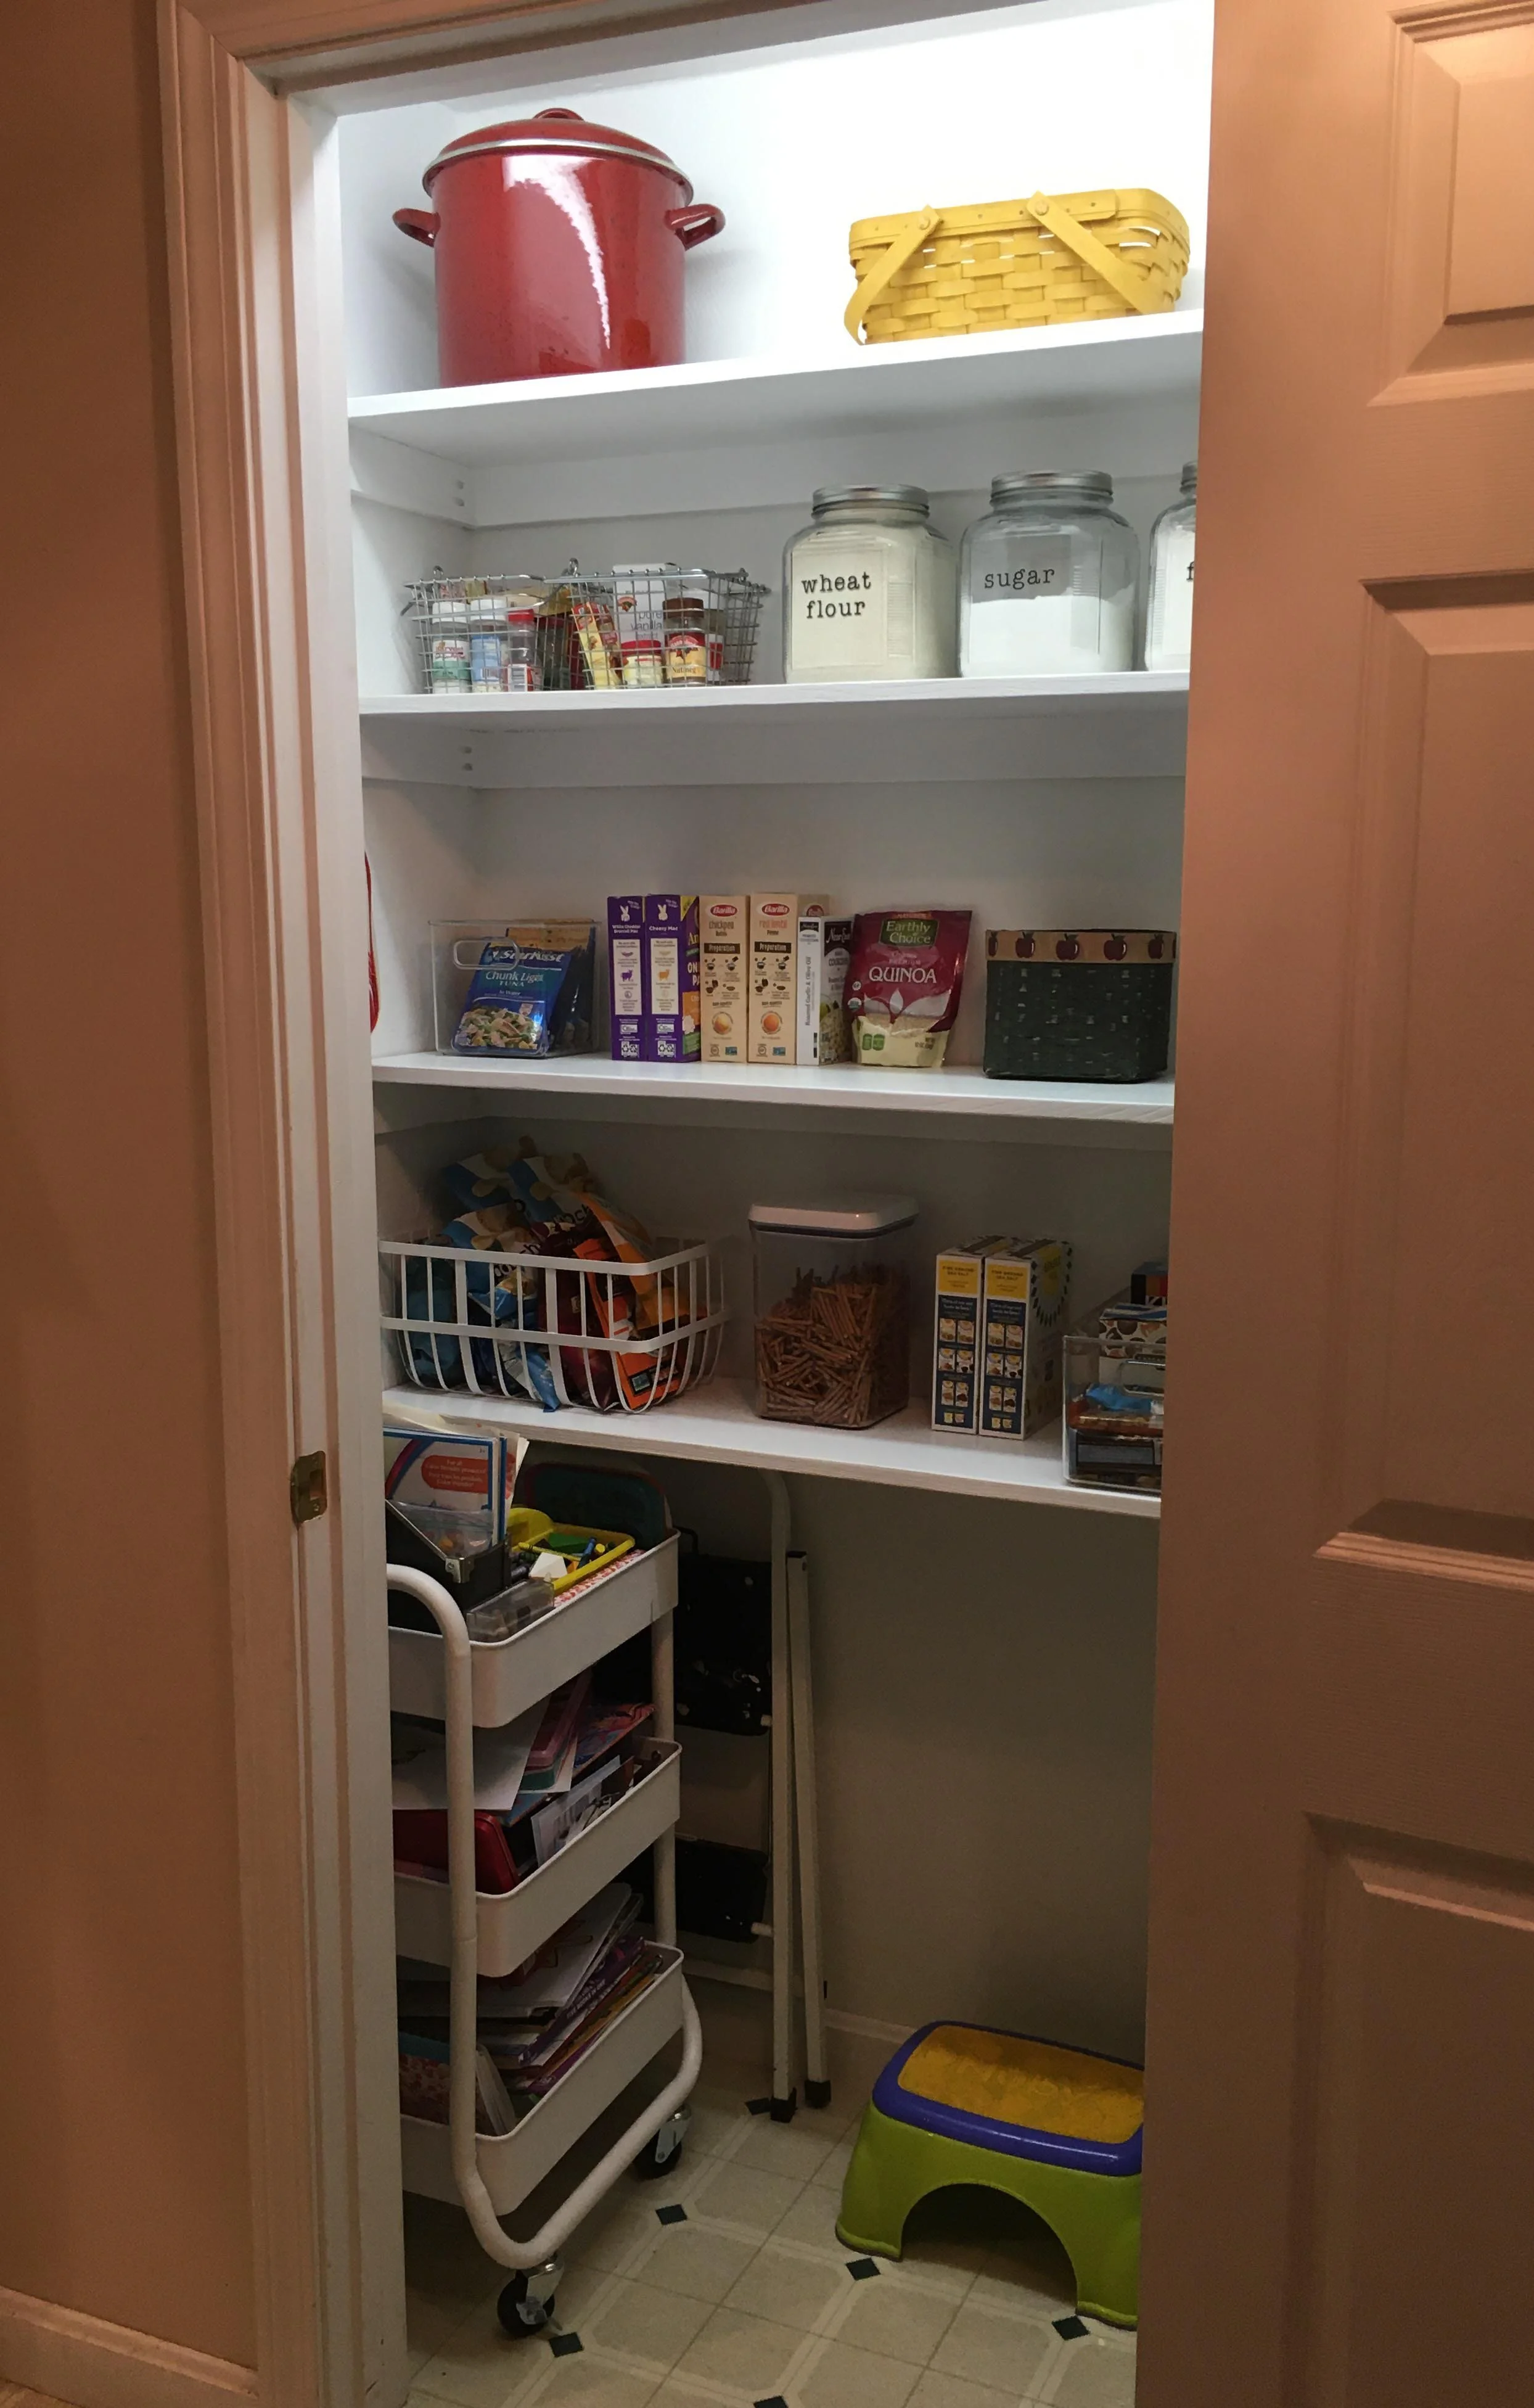
And now the project is complete! I am so happy with how it turned out and it’s wonderful to have everything in one place. I can see this project saving us money on groceries in the long run now as everything will be in one place now and we’ll be less apt to waste food.

Eventually, I would love to replace the closet door with a fun screen door and get some more glass jars and baskets for a cleaner looking pantry - but all in good time.

How we Turned a Coat Closet into a Functional Pantry

| Similar Clear Plastic Storage Bins | Dog Food Container (on the floor, just out of the picture) |

How we Turned a Coat Closet into a Functional Pantry

| Flour, etc. jars were made using Cracker Jars with custom vinyl labels I made on my Cricut | Vintage Pie Tins |

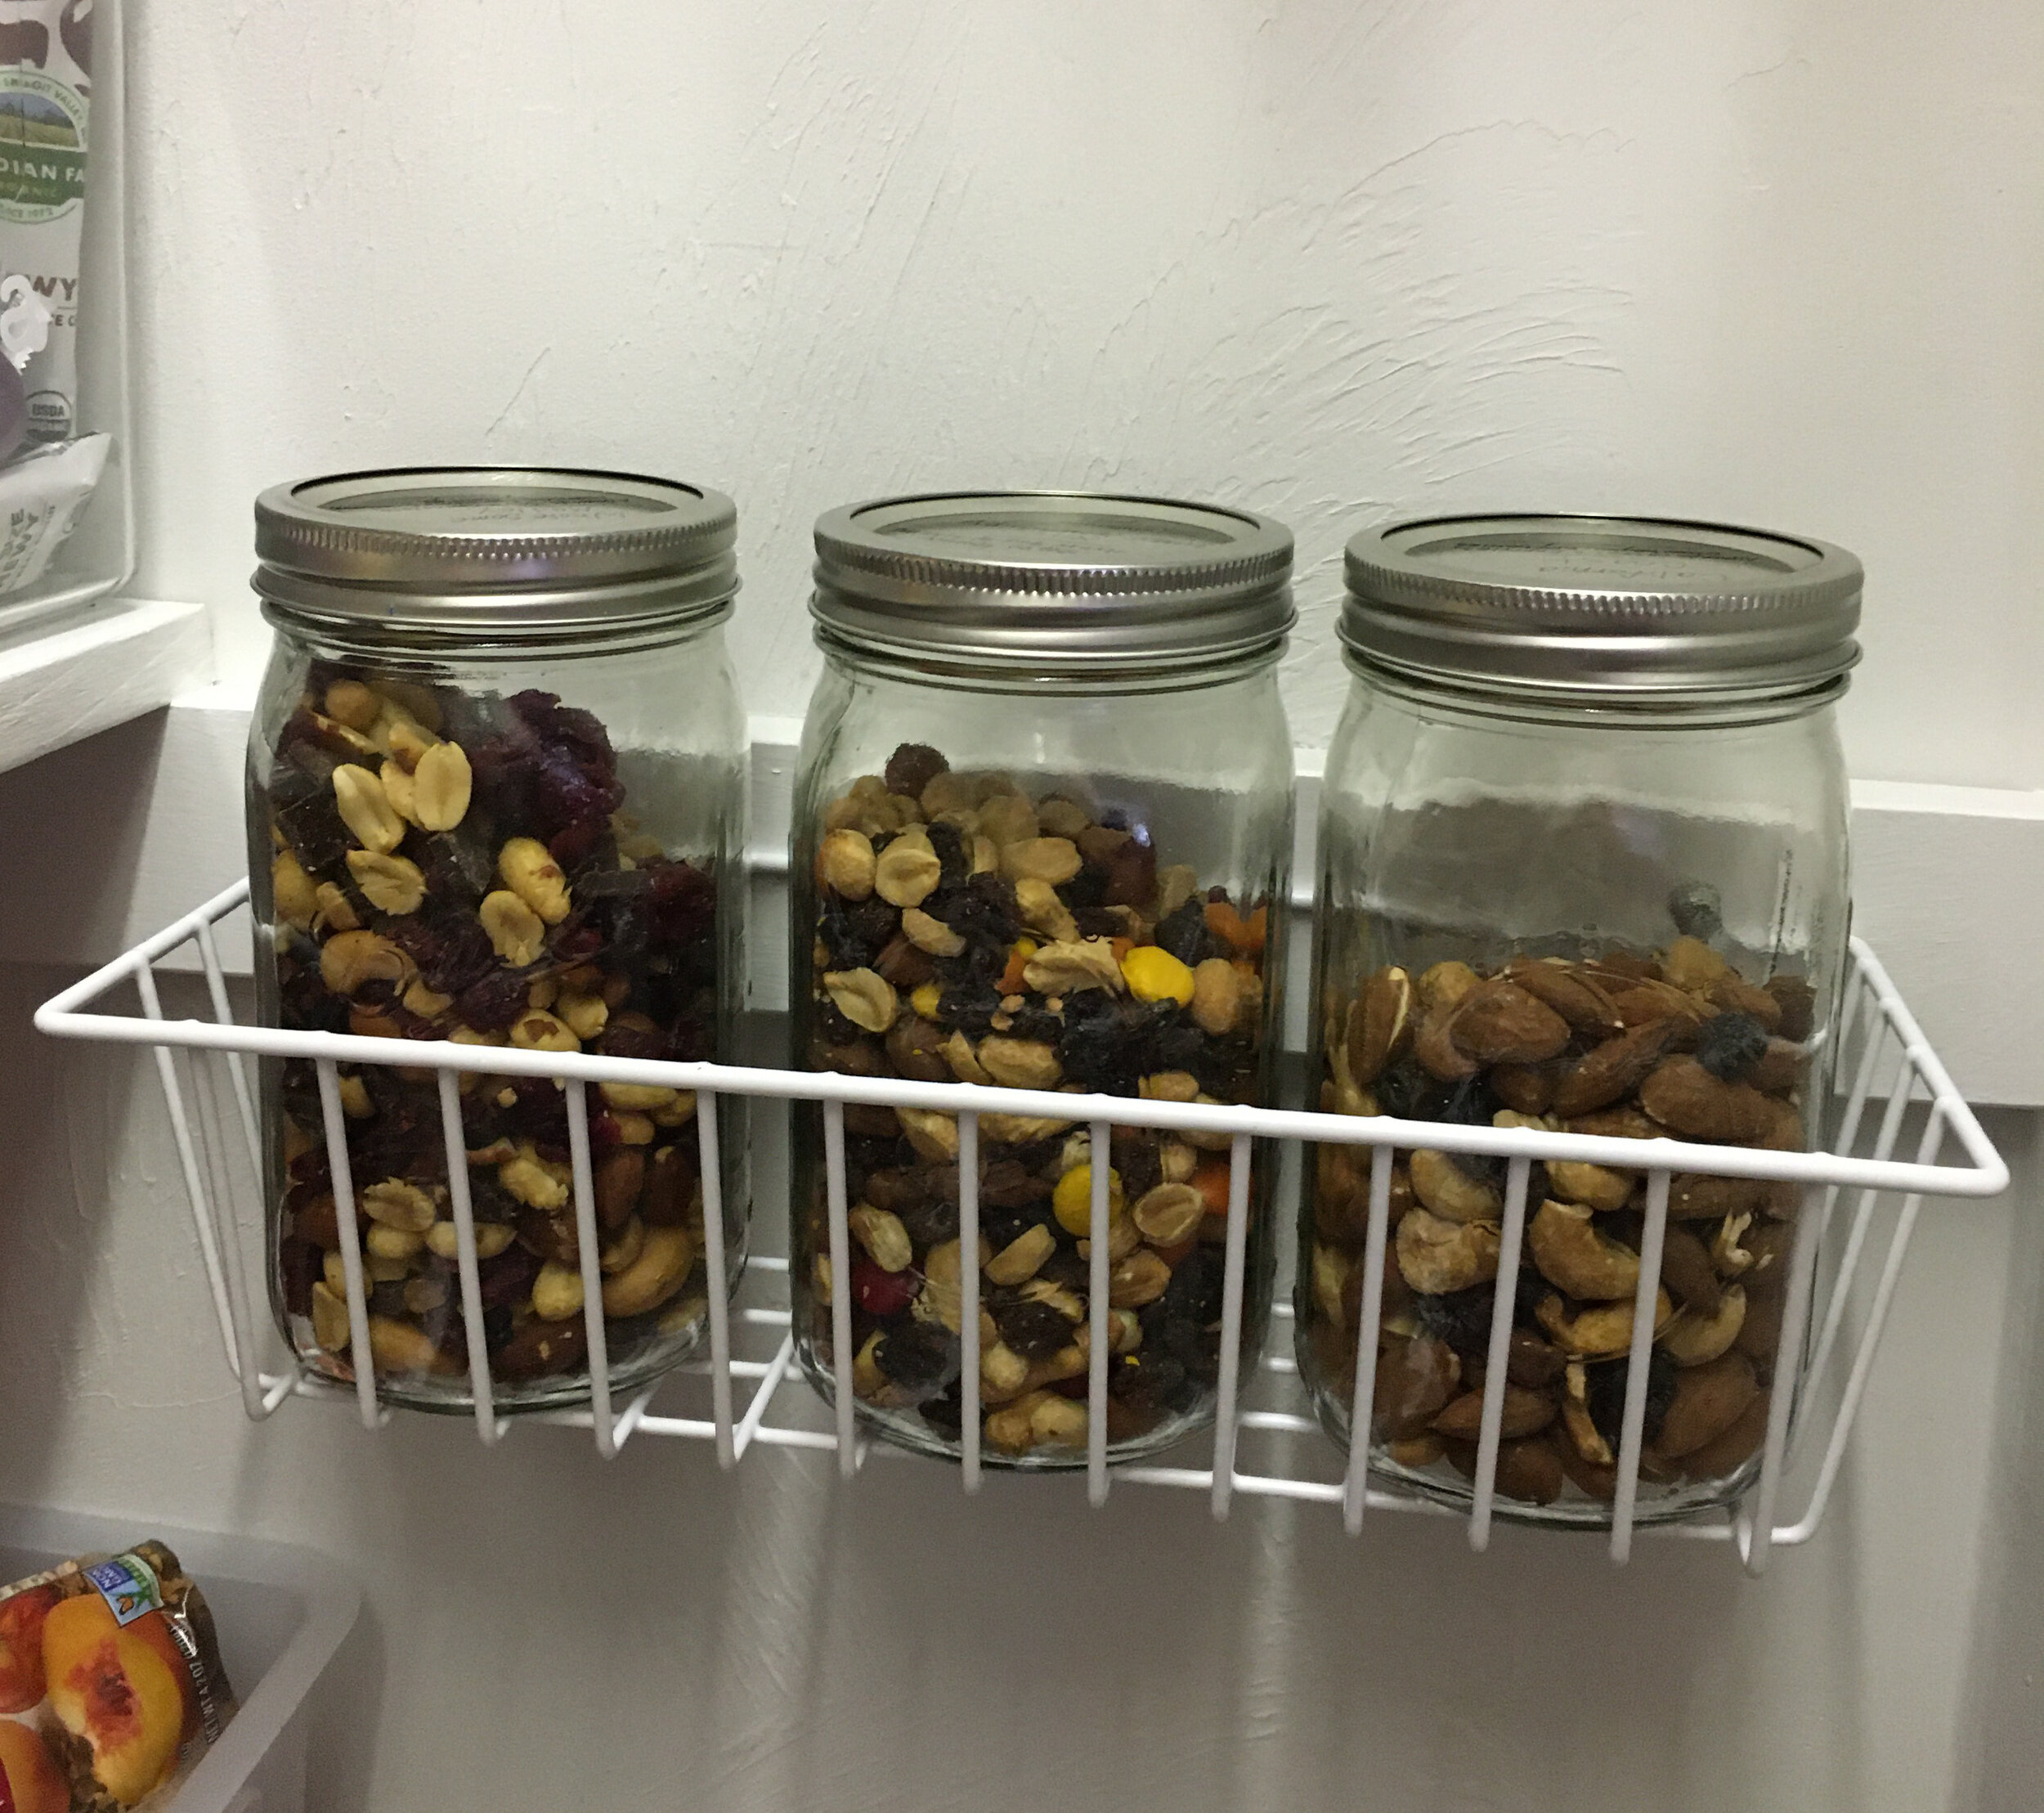
Over this past winter I added a few simple add-on organizers to our pantry to maximize the space and love how functional they are. Here they are below (and please excuse the glimpses of clutter in the pantry… as it now holds extra groceries and our family board games too - because, real life):

Additional Storage for the Walls

How We Turned a Coat Closet into a Functional Pantry

| Similar Wire Wall Basket | Mason Jars to store Trail Mix |

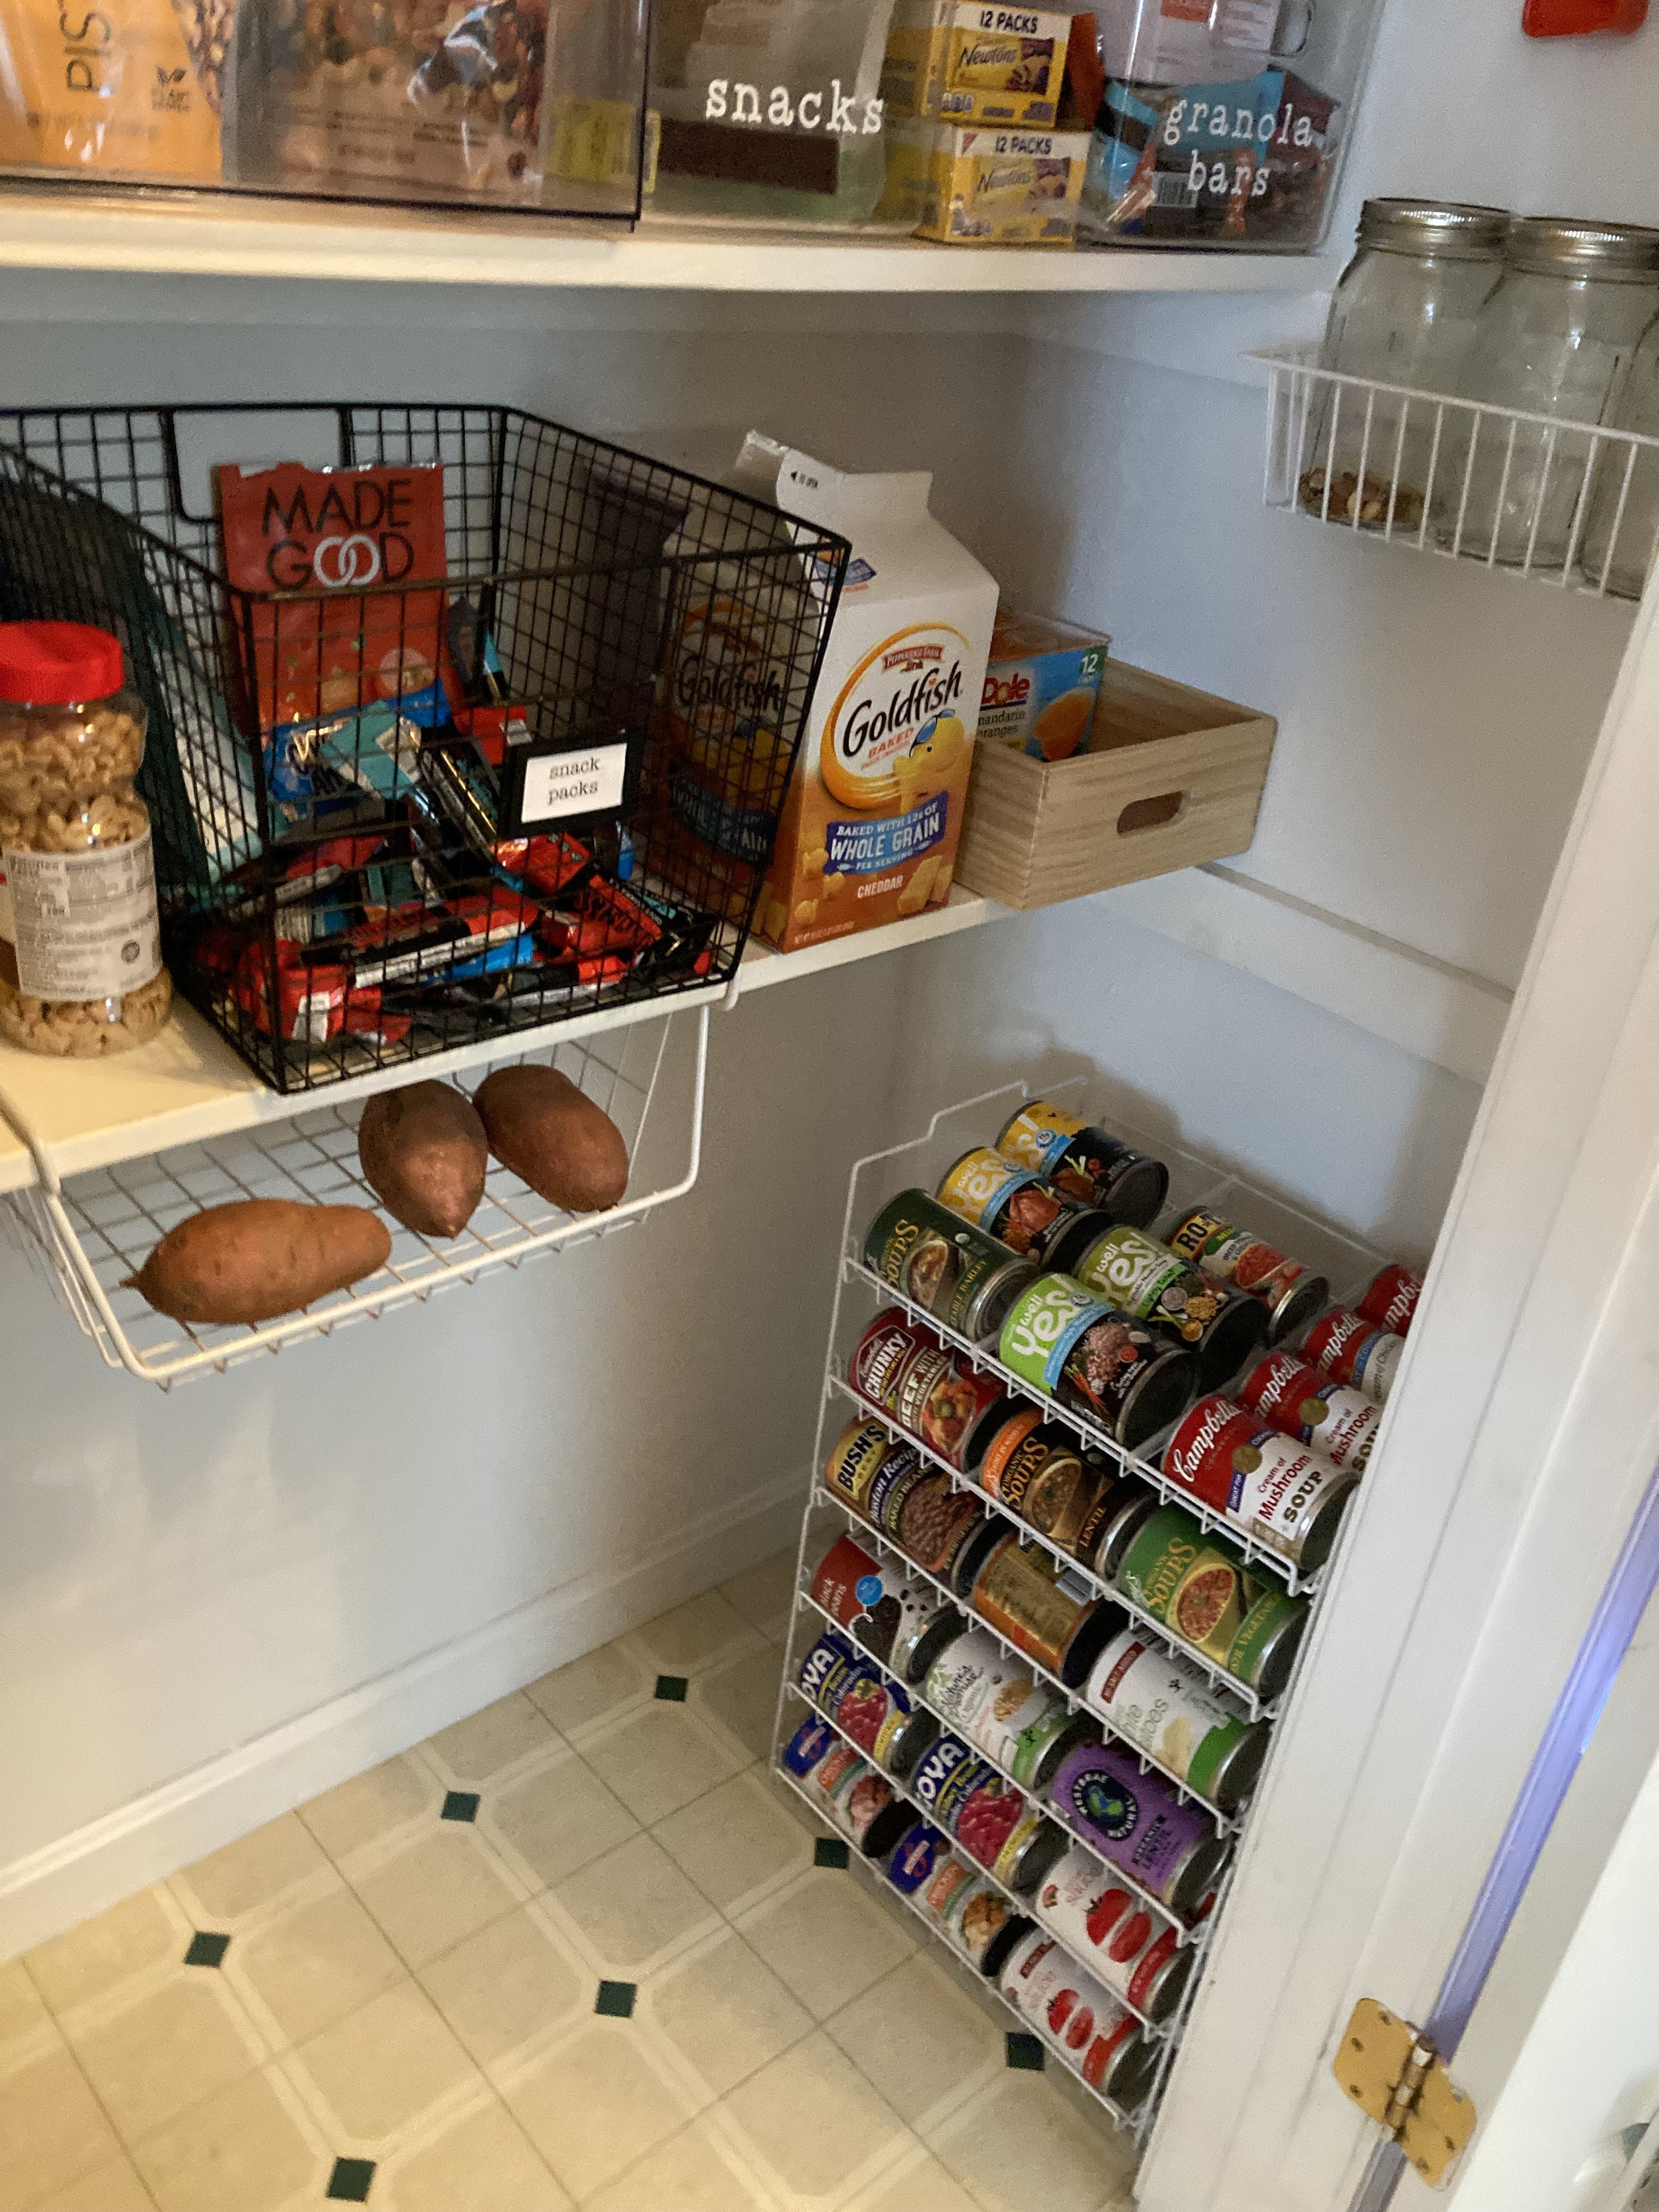
Under-Shelf Storage

How We Turned a Coat Closet into a Functional Pantry

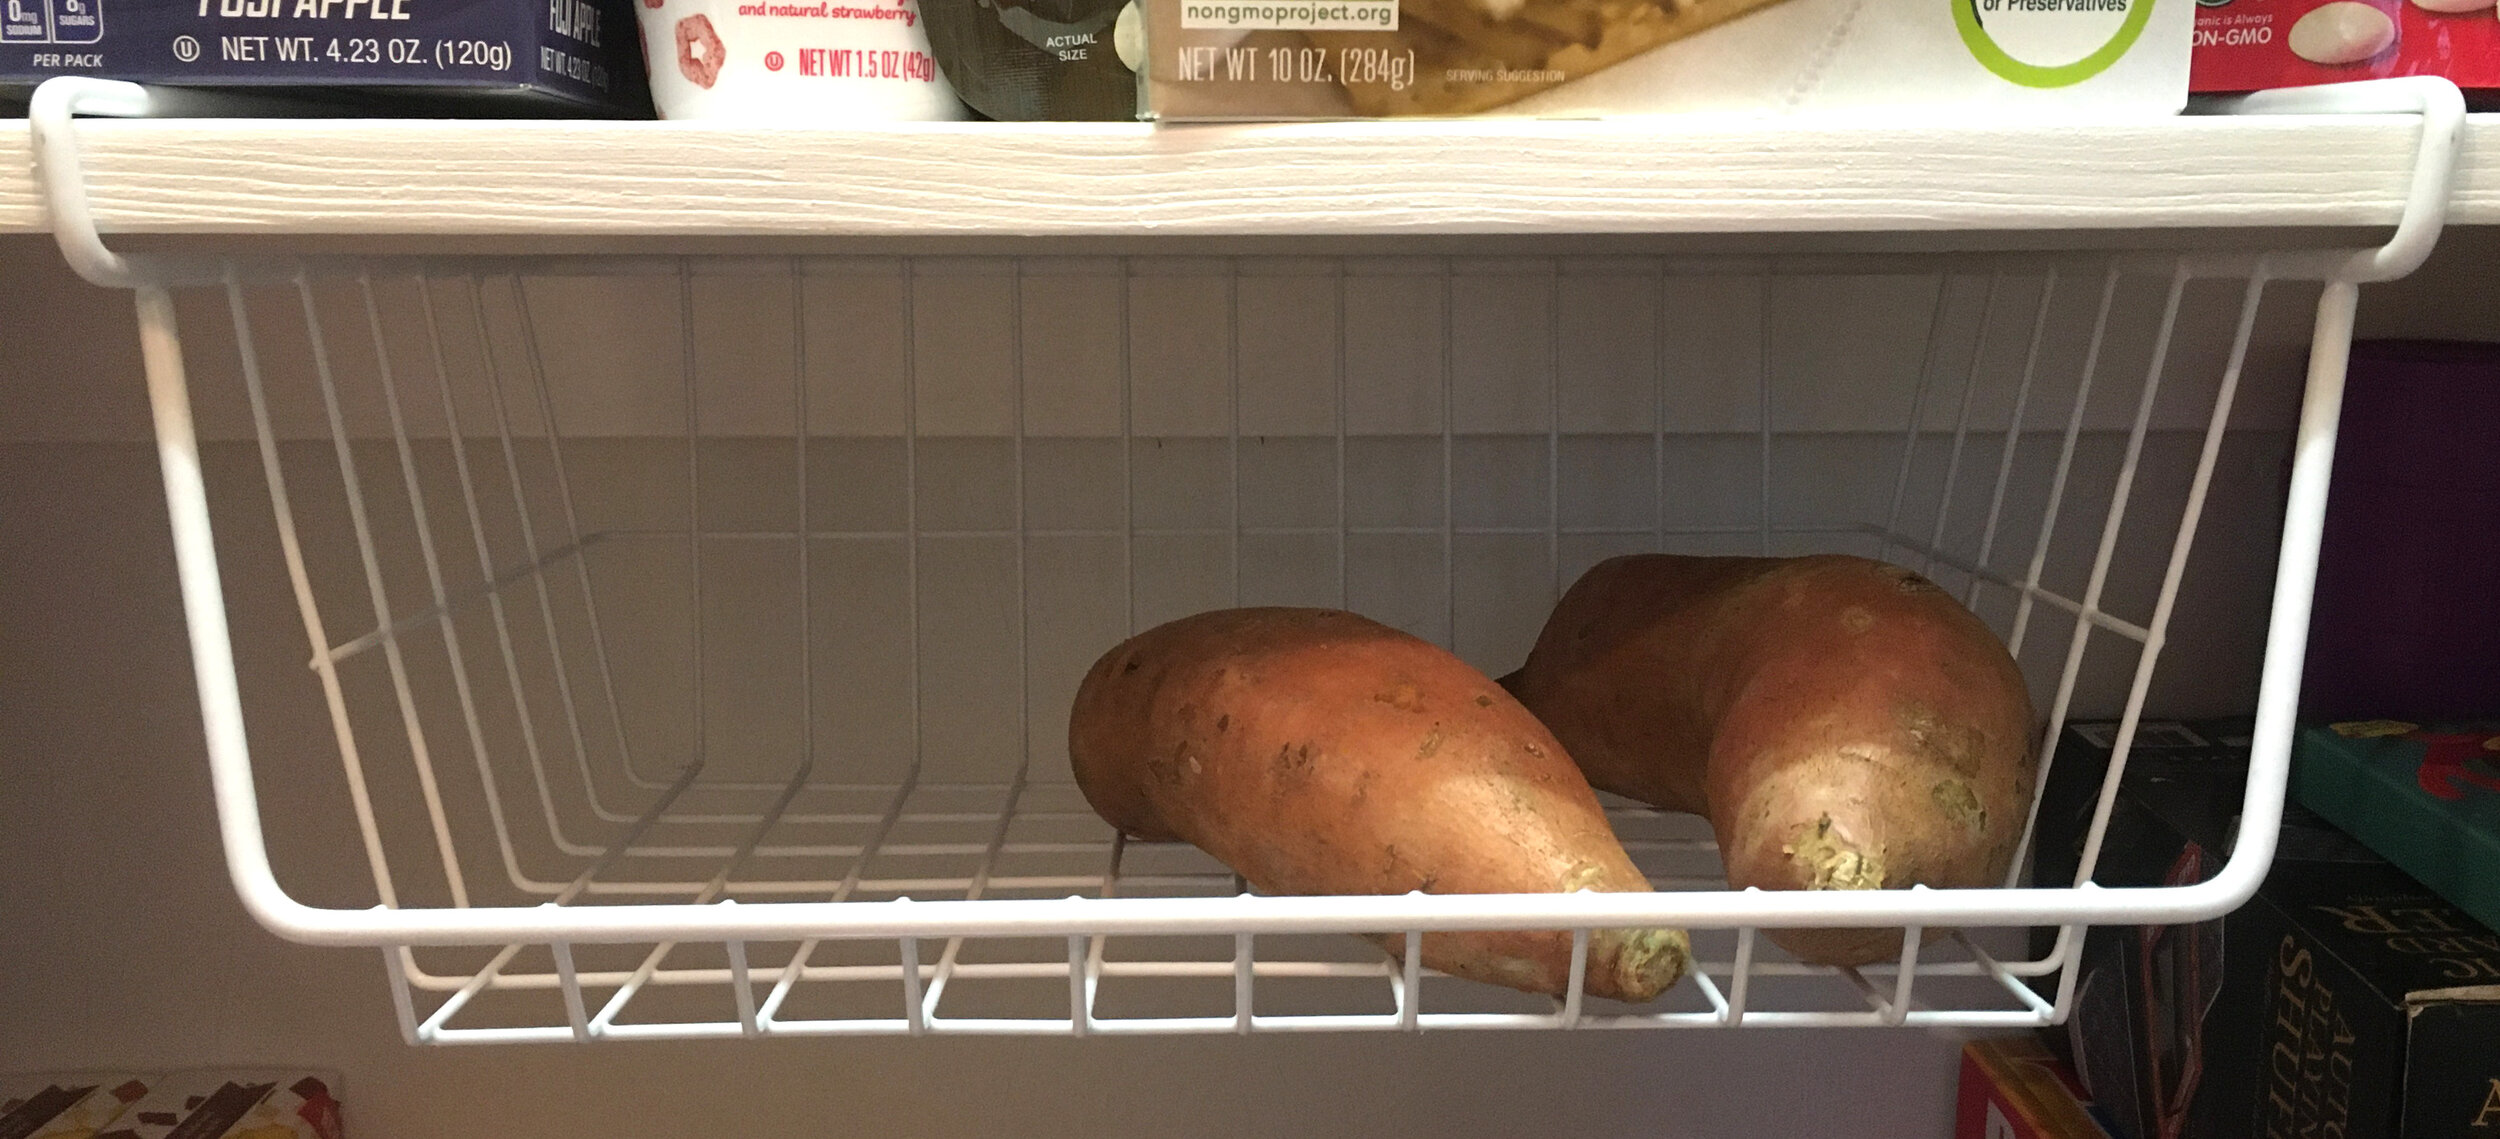
| Wire Under-Shelf Basket - Perfect for Storing Potatoes! |

Decal for Pantry Door

How we Turned a Coat Closet into a Functional, Organized Pantry

It turns out our door is an odd size and in order to get a screen door for it we would have to custom order one (at a cost of about $300+! Yikes). So instead I decided to cut a custom vinyl label to stick to the door to make it more finished. I could have designed my own but I found a design I really liked on Etsy and bought the digital design file. After purchasing the design file, I used my Cricut and 651 Permanent Vinyl to make the label and then transferred it to the door. In hindsight I probably should have made it slightly smaller, but overall I love how it came out and how budget-friendly it was since I already owned a Cricut Machine and the vinyl.

| Pantry Digitial Design File | Cricut Machine | 651 Permanent Vinyl in Matte Black |

Back of Door Organizer

How+we+Turned+a+Coat+Closet+into+a+Functional%2C+Organized+Pantry

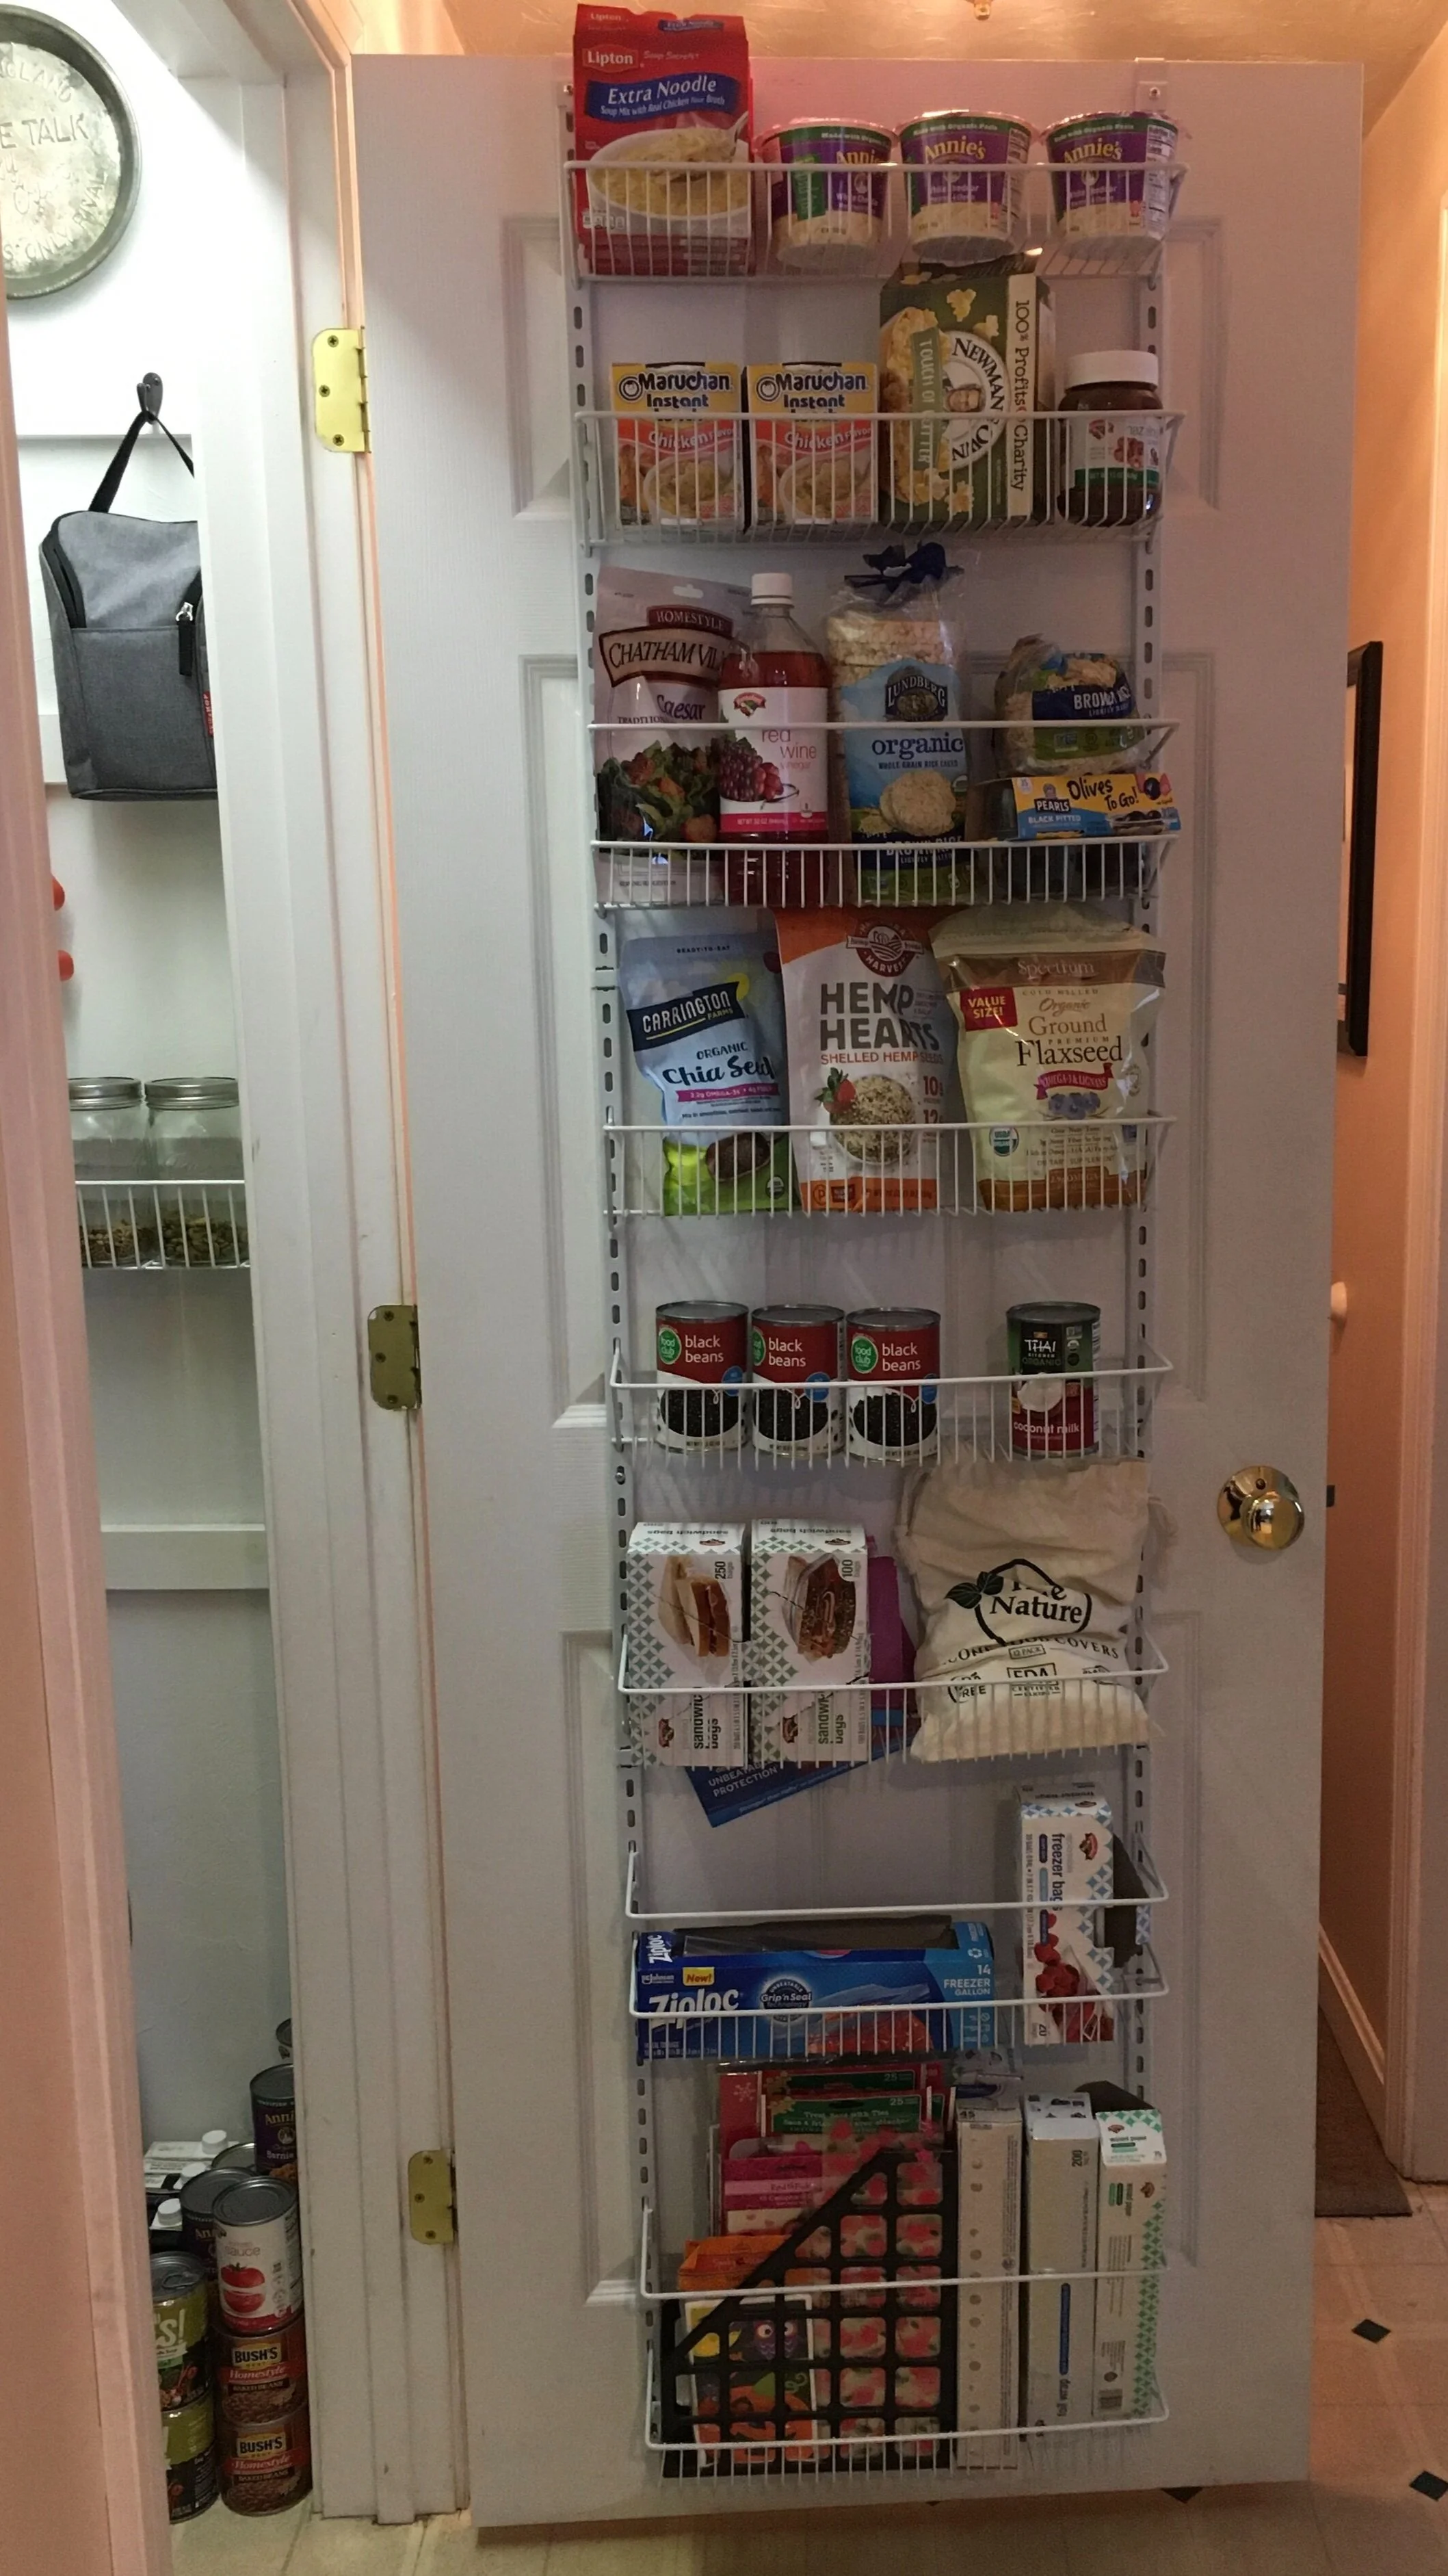
Finally, we decided to add a ClosetMaid Adjustable Organizer to the back of the pantry door to fully utilize the space. It was very simple to install and I am impressed with how sturdy it is once it's assembled and screwed in. We used the lower baskets for foil, parchement paper, ziplocks, silicone bowl covers, etc. The middle baskets we designated for frequently used canned goods, smoothie mix-ins, as well as salad fixings and rice cakes. Finally on the top two baskets we put convenience foods that we rarely use since I'm so short. Note: If you have a hollow-core door, you might want to use a specialty set of anchors/screws to attach it to the door for stability, rather than just screw into the door with regular screws.

| ClosetMaid Adjustable Organizer (18 inch) | True Nature Silicone Food Covers |

Stackable Canned Goods Organizer

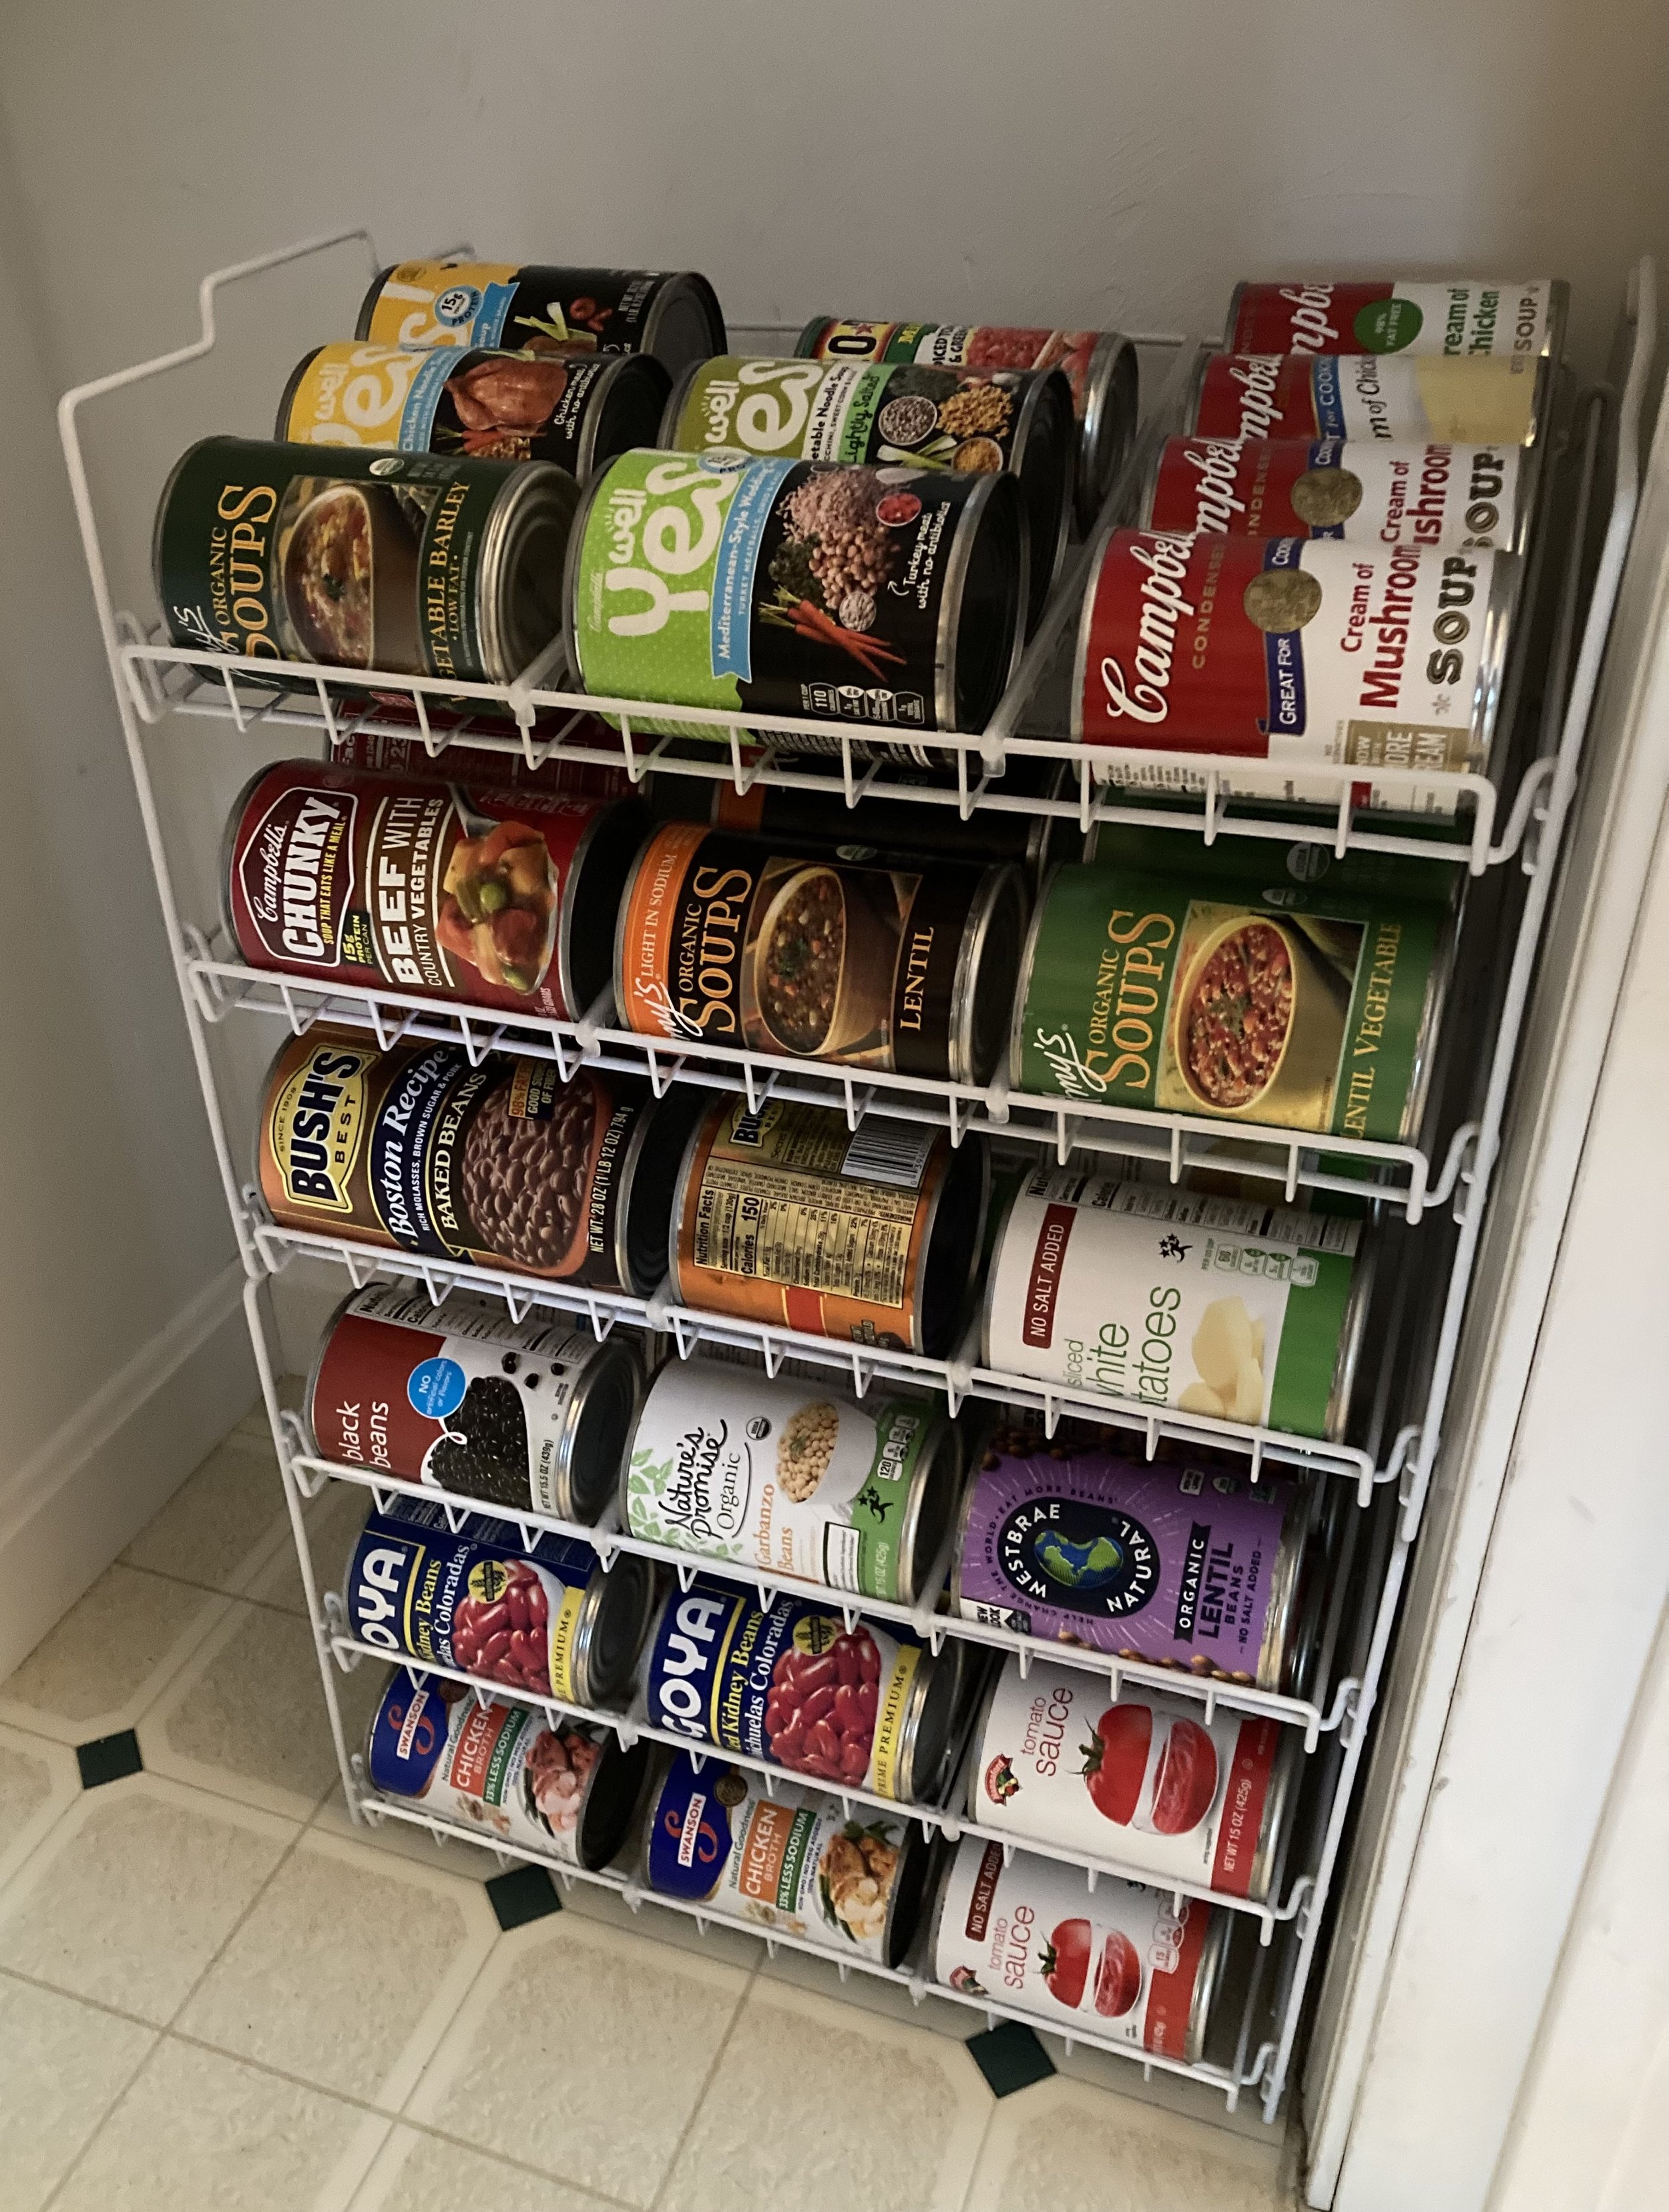
Another later addition to our pantry organization are these amazing stackable can racks for organizing canned goods. Before I had quite a few canned goods just sitting on the floor of the pantry and in a separate kitchen cupboard, but I never could see everything at once and often cans in the back got forgotten -- Now everything is in one spot where I can see them and I can meal plan more efficiently.

| Stackable Can Rack Organizer (I have two racks stacked here) |

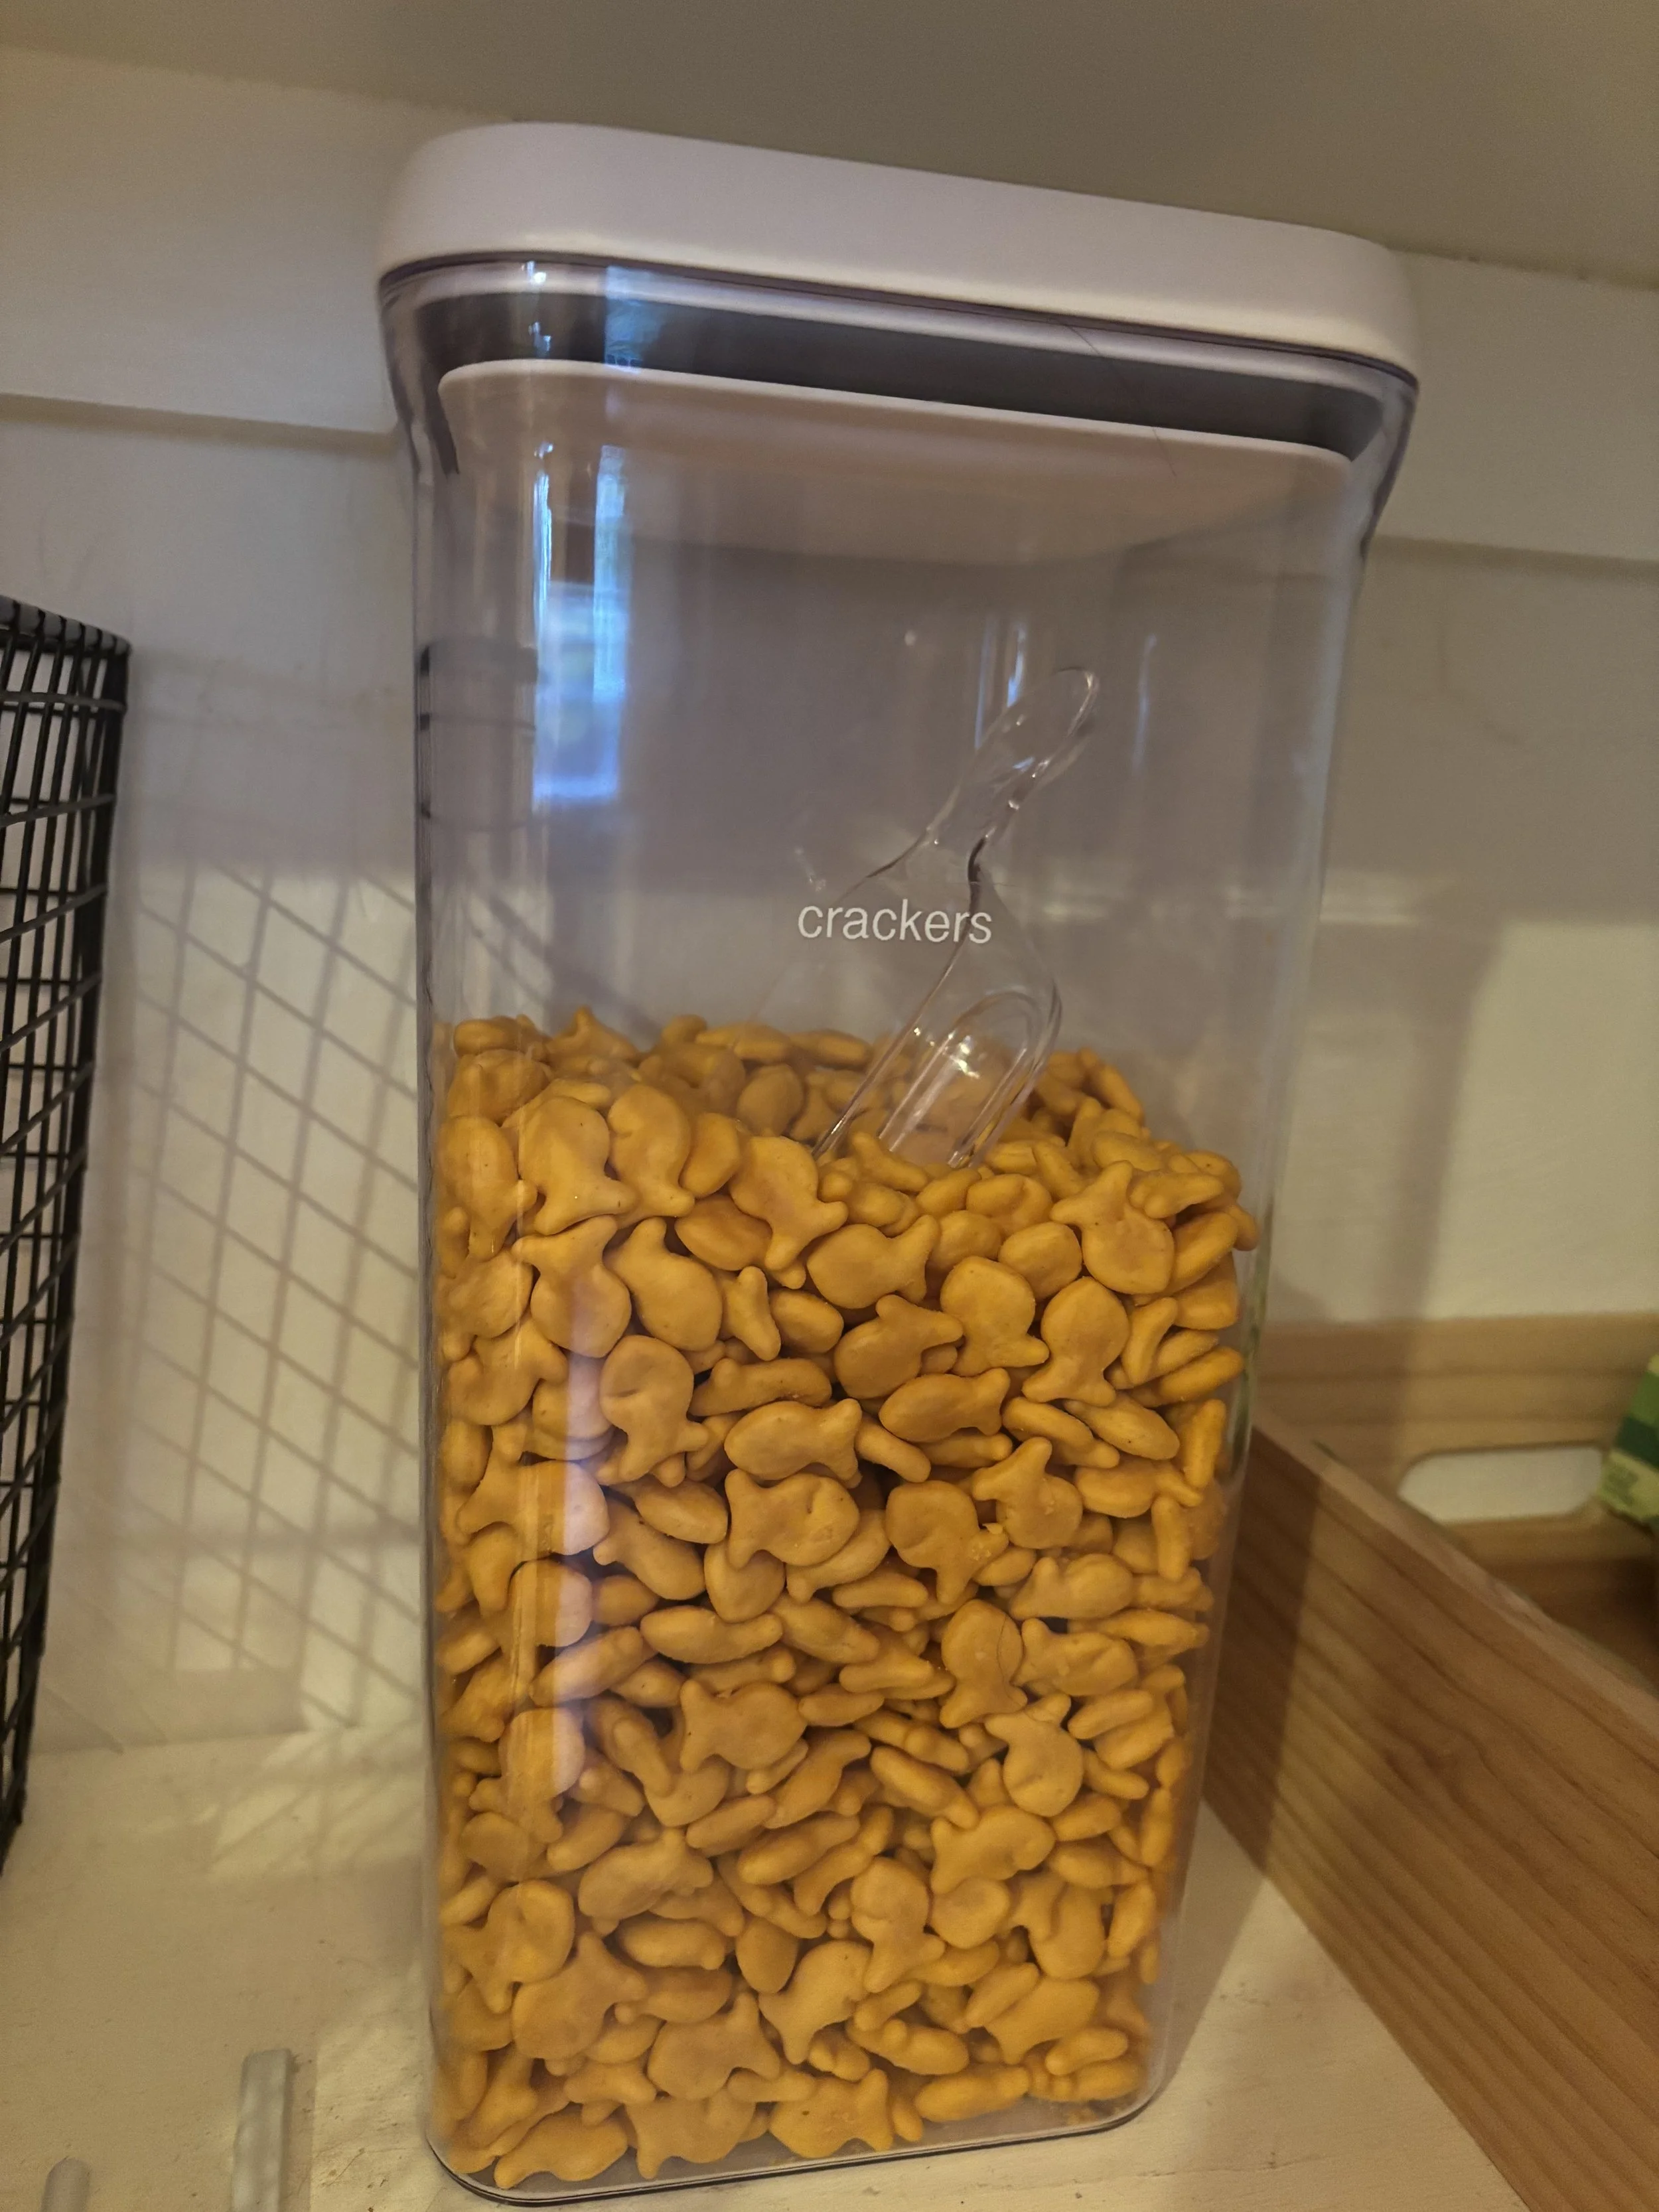
OXO POP Containers with Scoops for Snacks

OXO Containers with Scoop

Another thing that's been a huge game changer is moving dry snacks into OXO POP Food Storage Containers. We love these for our snack crackers and pretzels. They keep everything fresh and it's easy to see if you're starting to run low on these staples. To keep the kids from going too wild with serving sizes we added clear OXO 1/2 Cup Scoops in each container too - making it easy to grab a serving.
I used my Brother Label Maker to make labels for the containers. These can easily be peeled off and relabeled as needed.

| OXO POP Food Storage Containers | OXO 1/2 Cup Scoops | Brother Label Maker |

Disclaimer

This website shares personal opinions and experiences regarding a variety of topics. Please do your own research regarding all things and use information/opinions stated here at your own discretion and risk.


Shop Some of my Picks for Kitchen + Pantry:

Scroll sideways to see more —>


Check out our Related Posts:

KEEP UP WITH BIRCH LANDING HOME
|  Etsy  |  Facebook  |  Instagram  |  Pinterest  |  Bloglovin'  |  Hometalk  |

DIY Potting Bench - Based on Plans by Ana White

I’ve been wanting a potting bench for a while now - something by the back door to display some decor, use as an outdoor work station, and double as a place for UPS to leave packages. After looking around online and at local stores, I couldn’t find anything that I liked that fit the narrow space - so I did what any #woodworkingmom would do, I decided to build it myself. | This post is not sponsored but does contain affiliate links |

DIY Potting Bench - Based on Plans by Ana White

{ Note: The plans I worked from were from Ana White and can be found HERE }

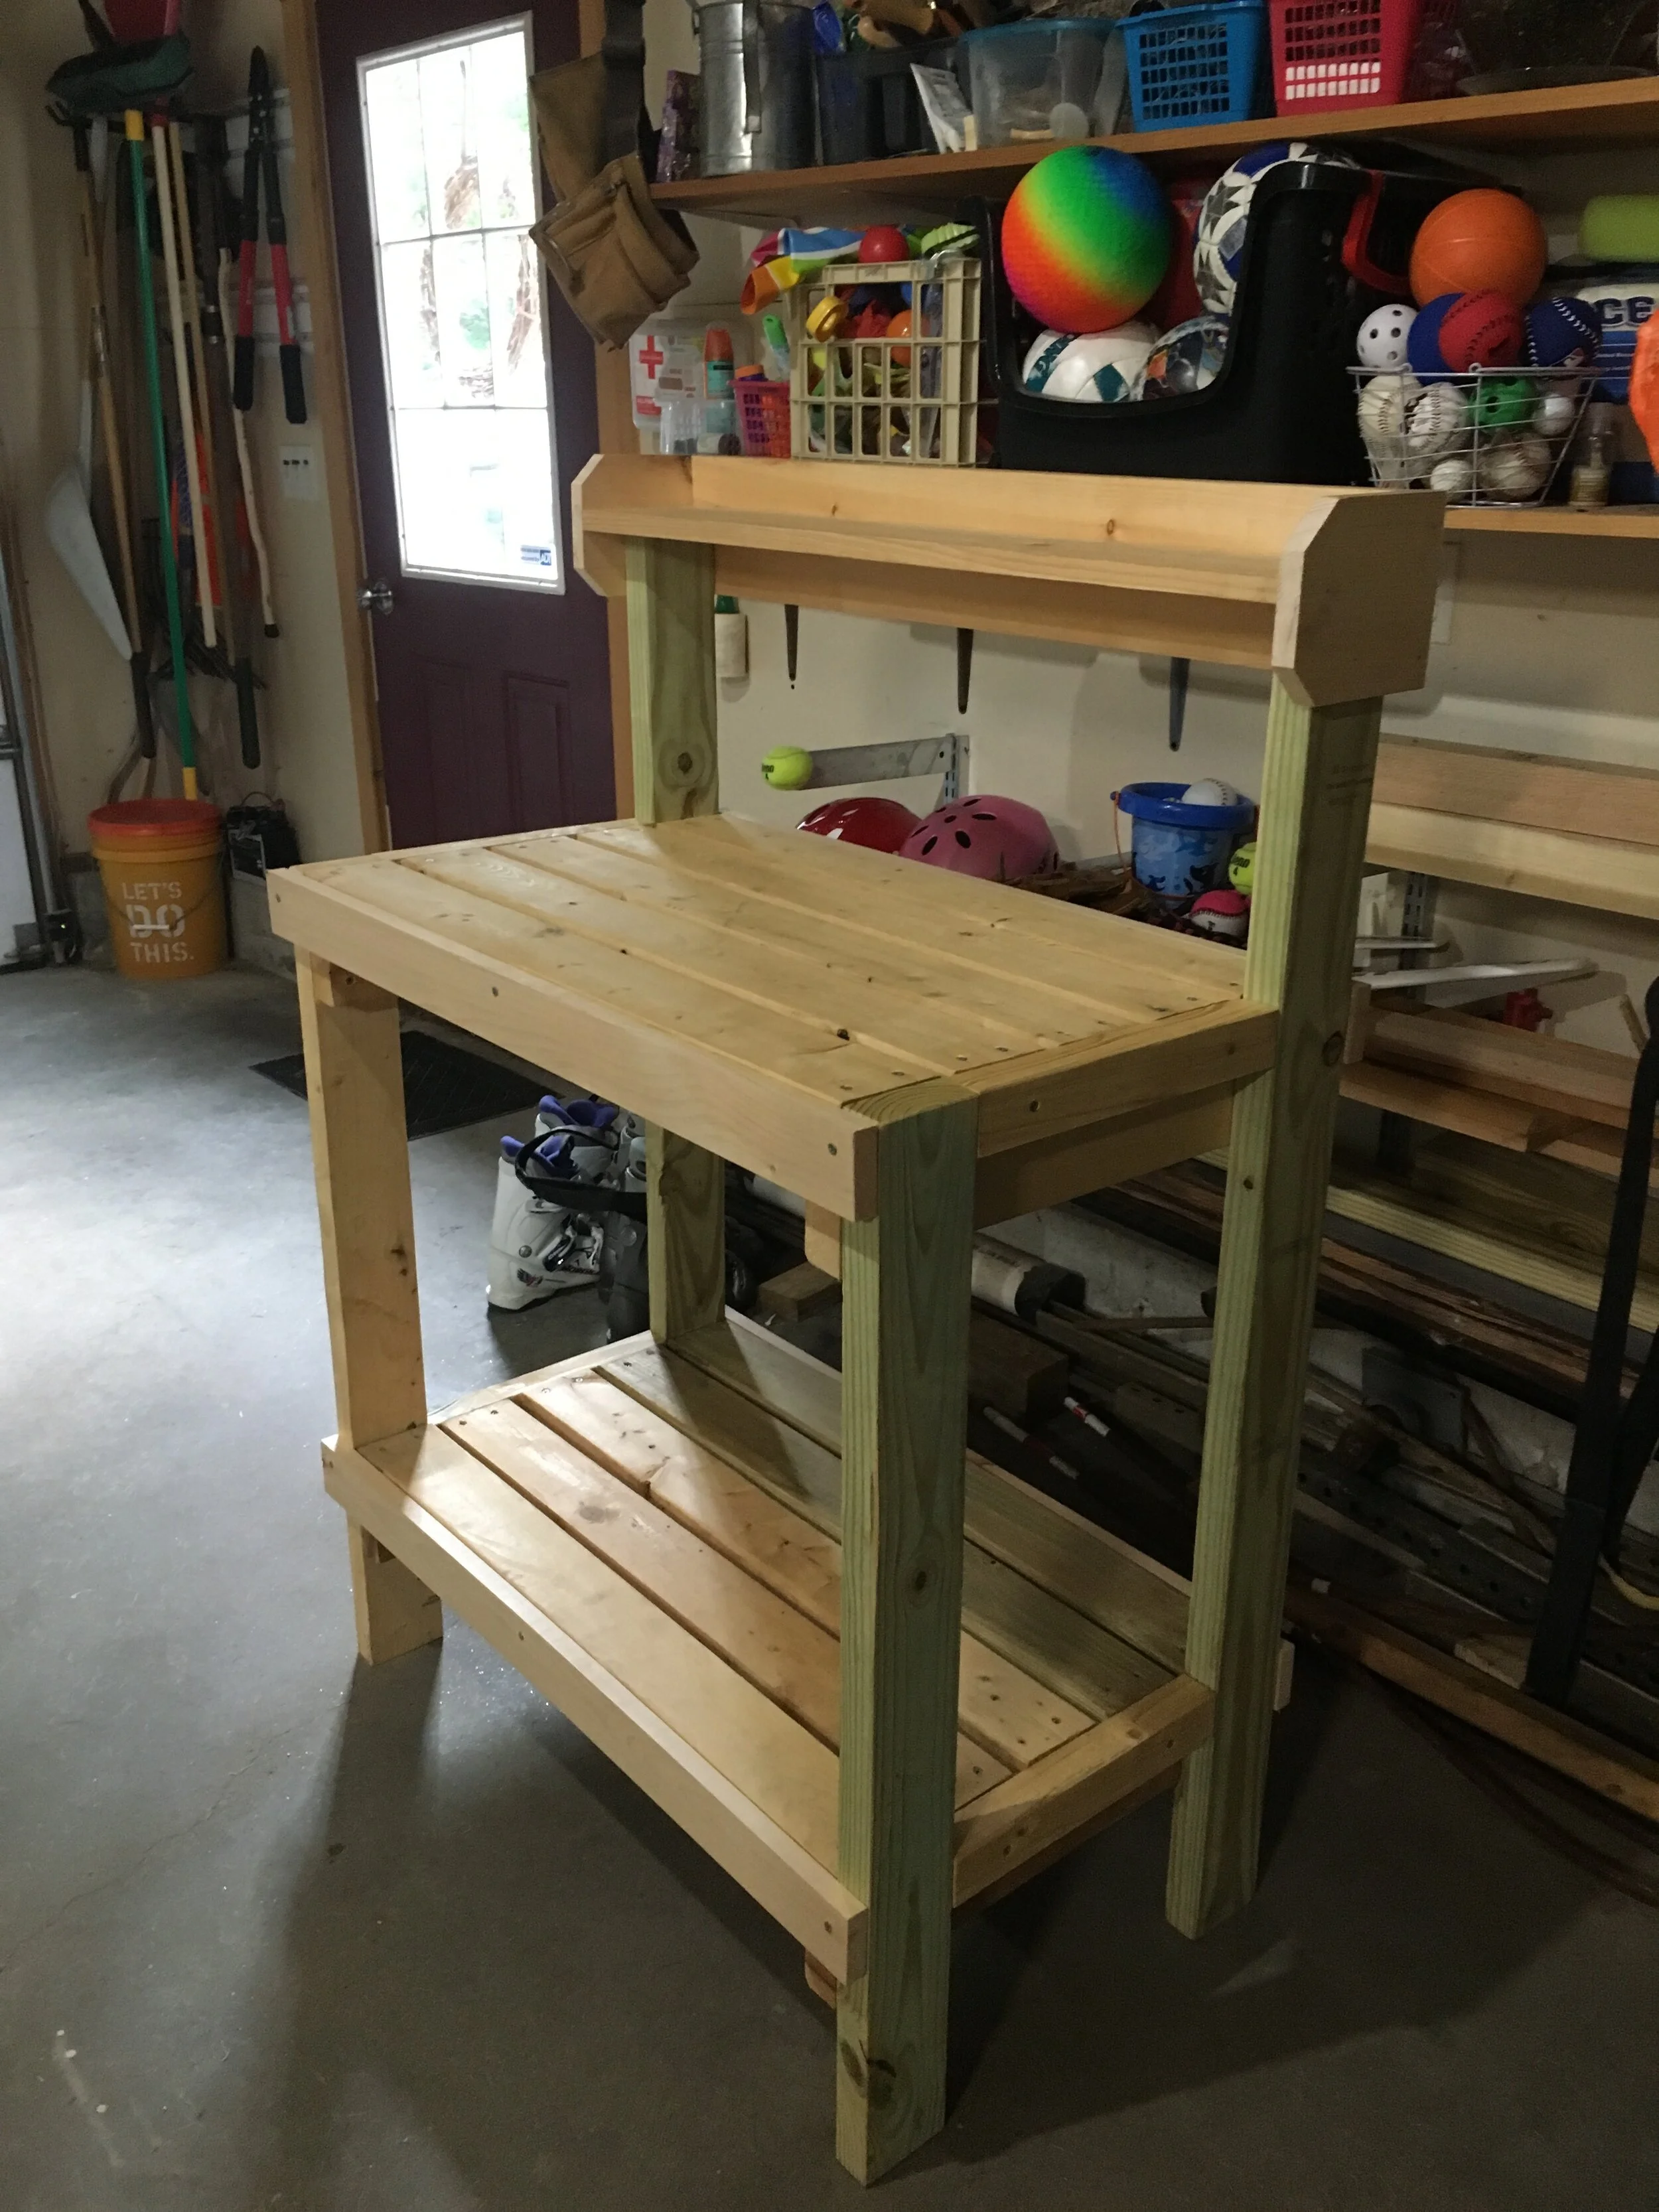
I came across these Ana White plans for a Simple Potting Bench on Pinterest and thought it was perfect! It was exactly the simple, rugged style I was looking for and easy to tailor to our space too. Most of the wood needed were 2x4’s, which are sturdy and cheap - and thankfully between our garage and my father-in-law’s garage we had all the wood scraps I needed to piece together this project. Since I used leftover wood we already had, this project cost me nothing which was pretty amazing!

Since I only used what wood we had on hand, I had to make do - some of the wood was pressure-treated, some was not, some had knot holes or gashes, and not all of it was “true” (straight). But that was fine by me as this was to be a rustic piece for outside.

DIY Potting Bench - Based on Plans by Ana White

Before I started building, I followed Ana White’s “cut list,” cutting and making piles of all the wood in the dimensions I would need to build the project. I carefully chose the lumber for each section to minimize how the knot holes, gashes, or crooked pieces would be seen in the final piece. For our potting bench I made it 4 inches narrower so it would fit against the small wall next to our back door and because of this I had to adjust my cut list and refigure some of the overall dimensions.

DIY Potting Bench - Based on Plans by Ana White

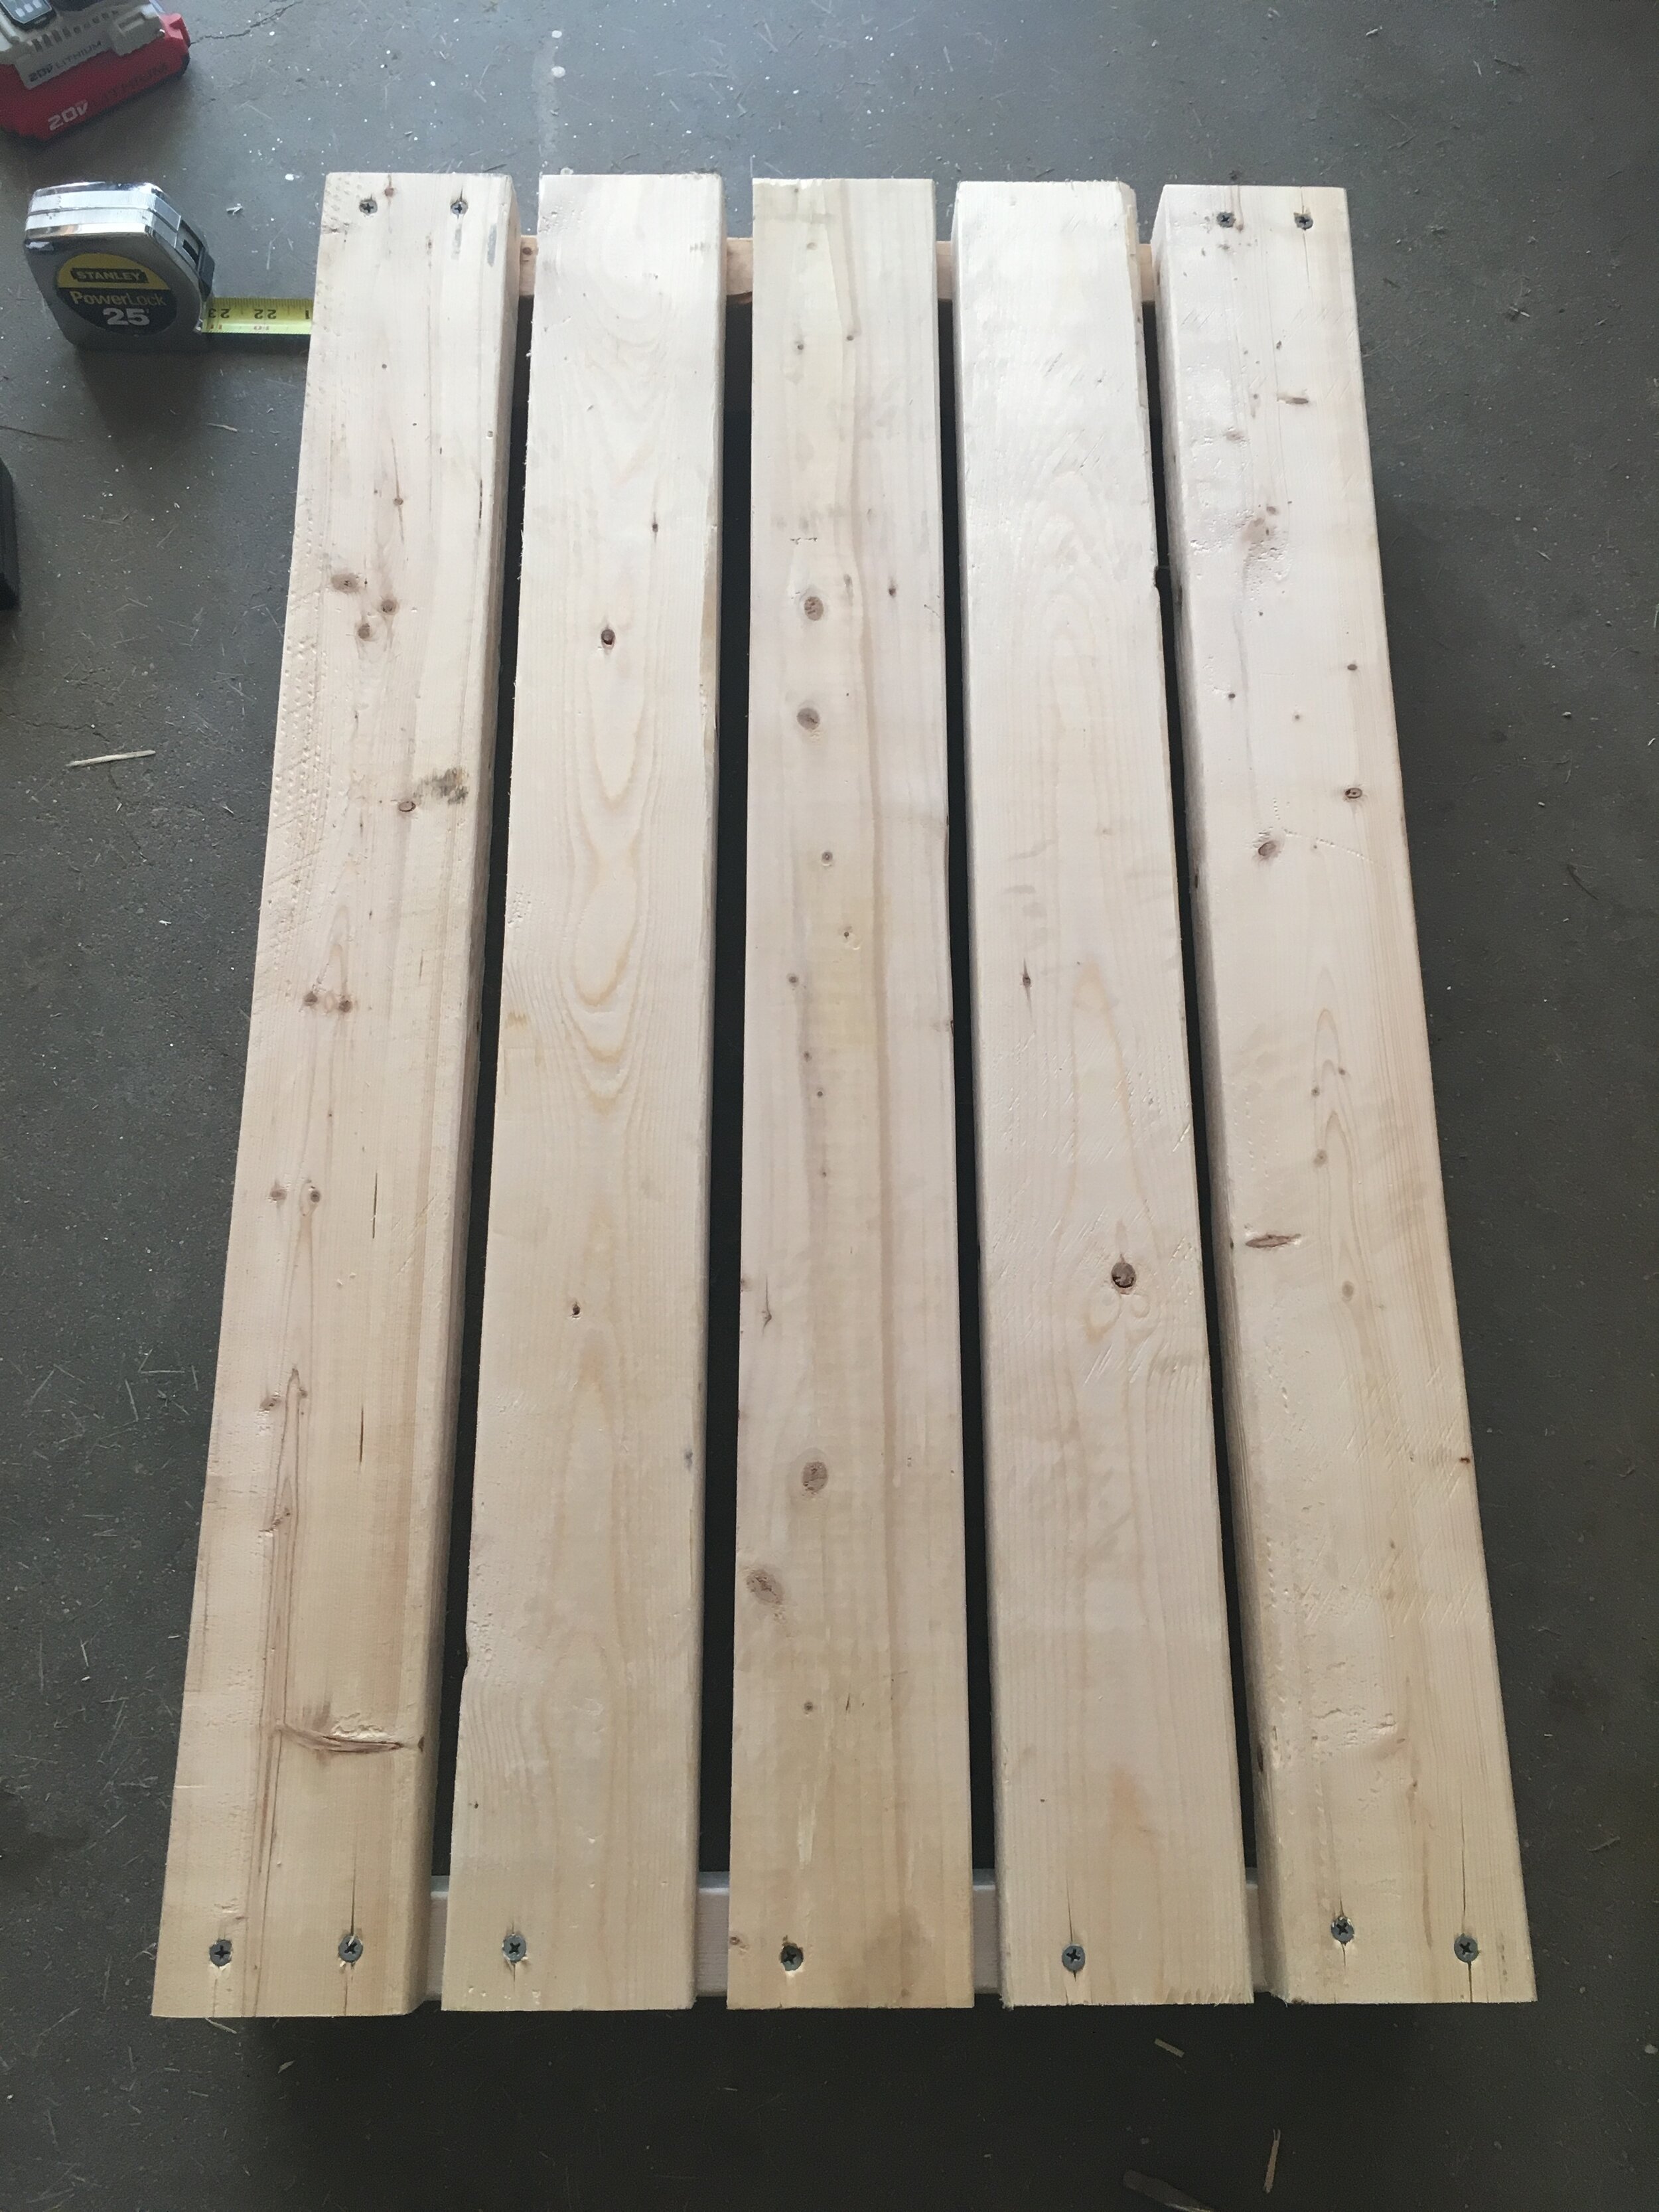
The next step was constructing the shelves individually - attaching the outer planks first, checking for square, then spacing out the middle planks and attaching them. To build this whole project I used an Impact Driver, which made the entire project go much quicker and easier.

DIY Potting Bench - Based on Plans by Ana White

To attach the legs, I laid the project on it’s side and carefully measured the distances between the legs as well as up the legs before attaching the shelves to makes sure everything would be as level and as square as possible.

DIY Potting Bench - Based on Plans by Ana White

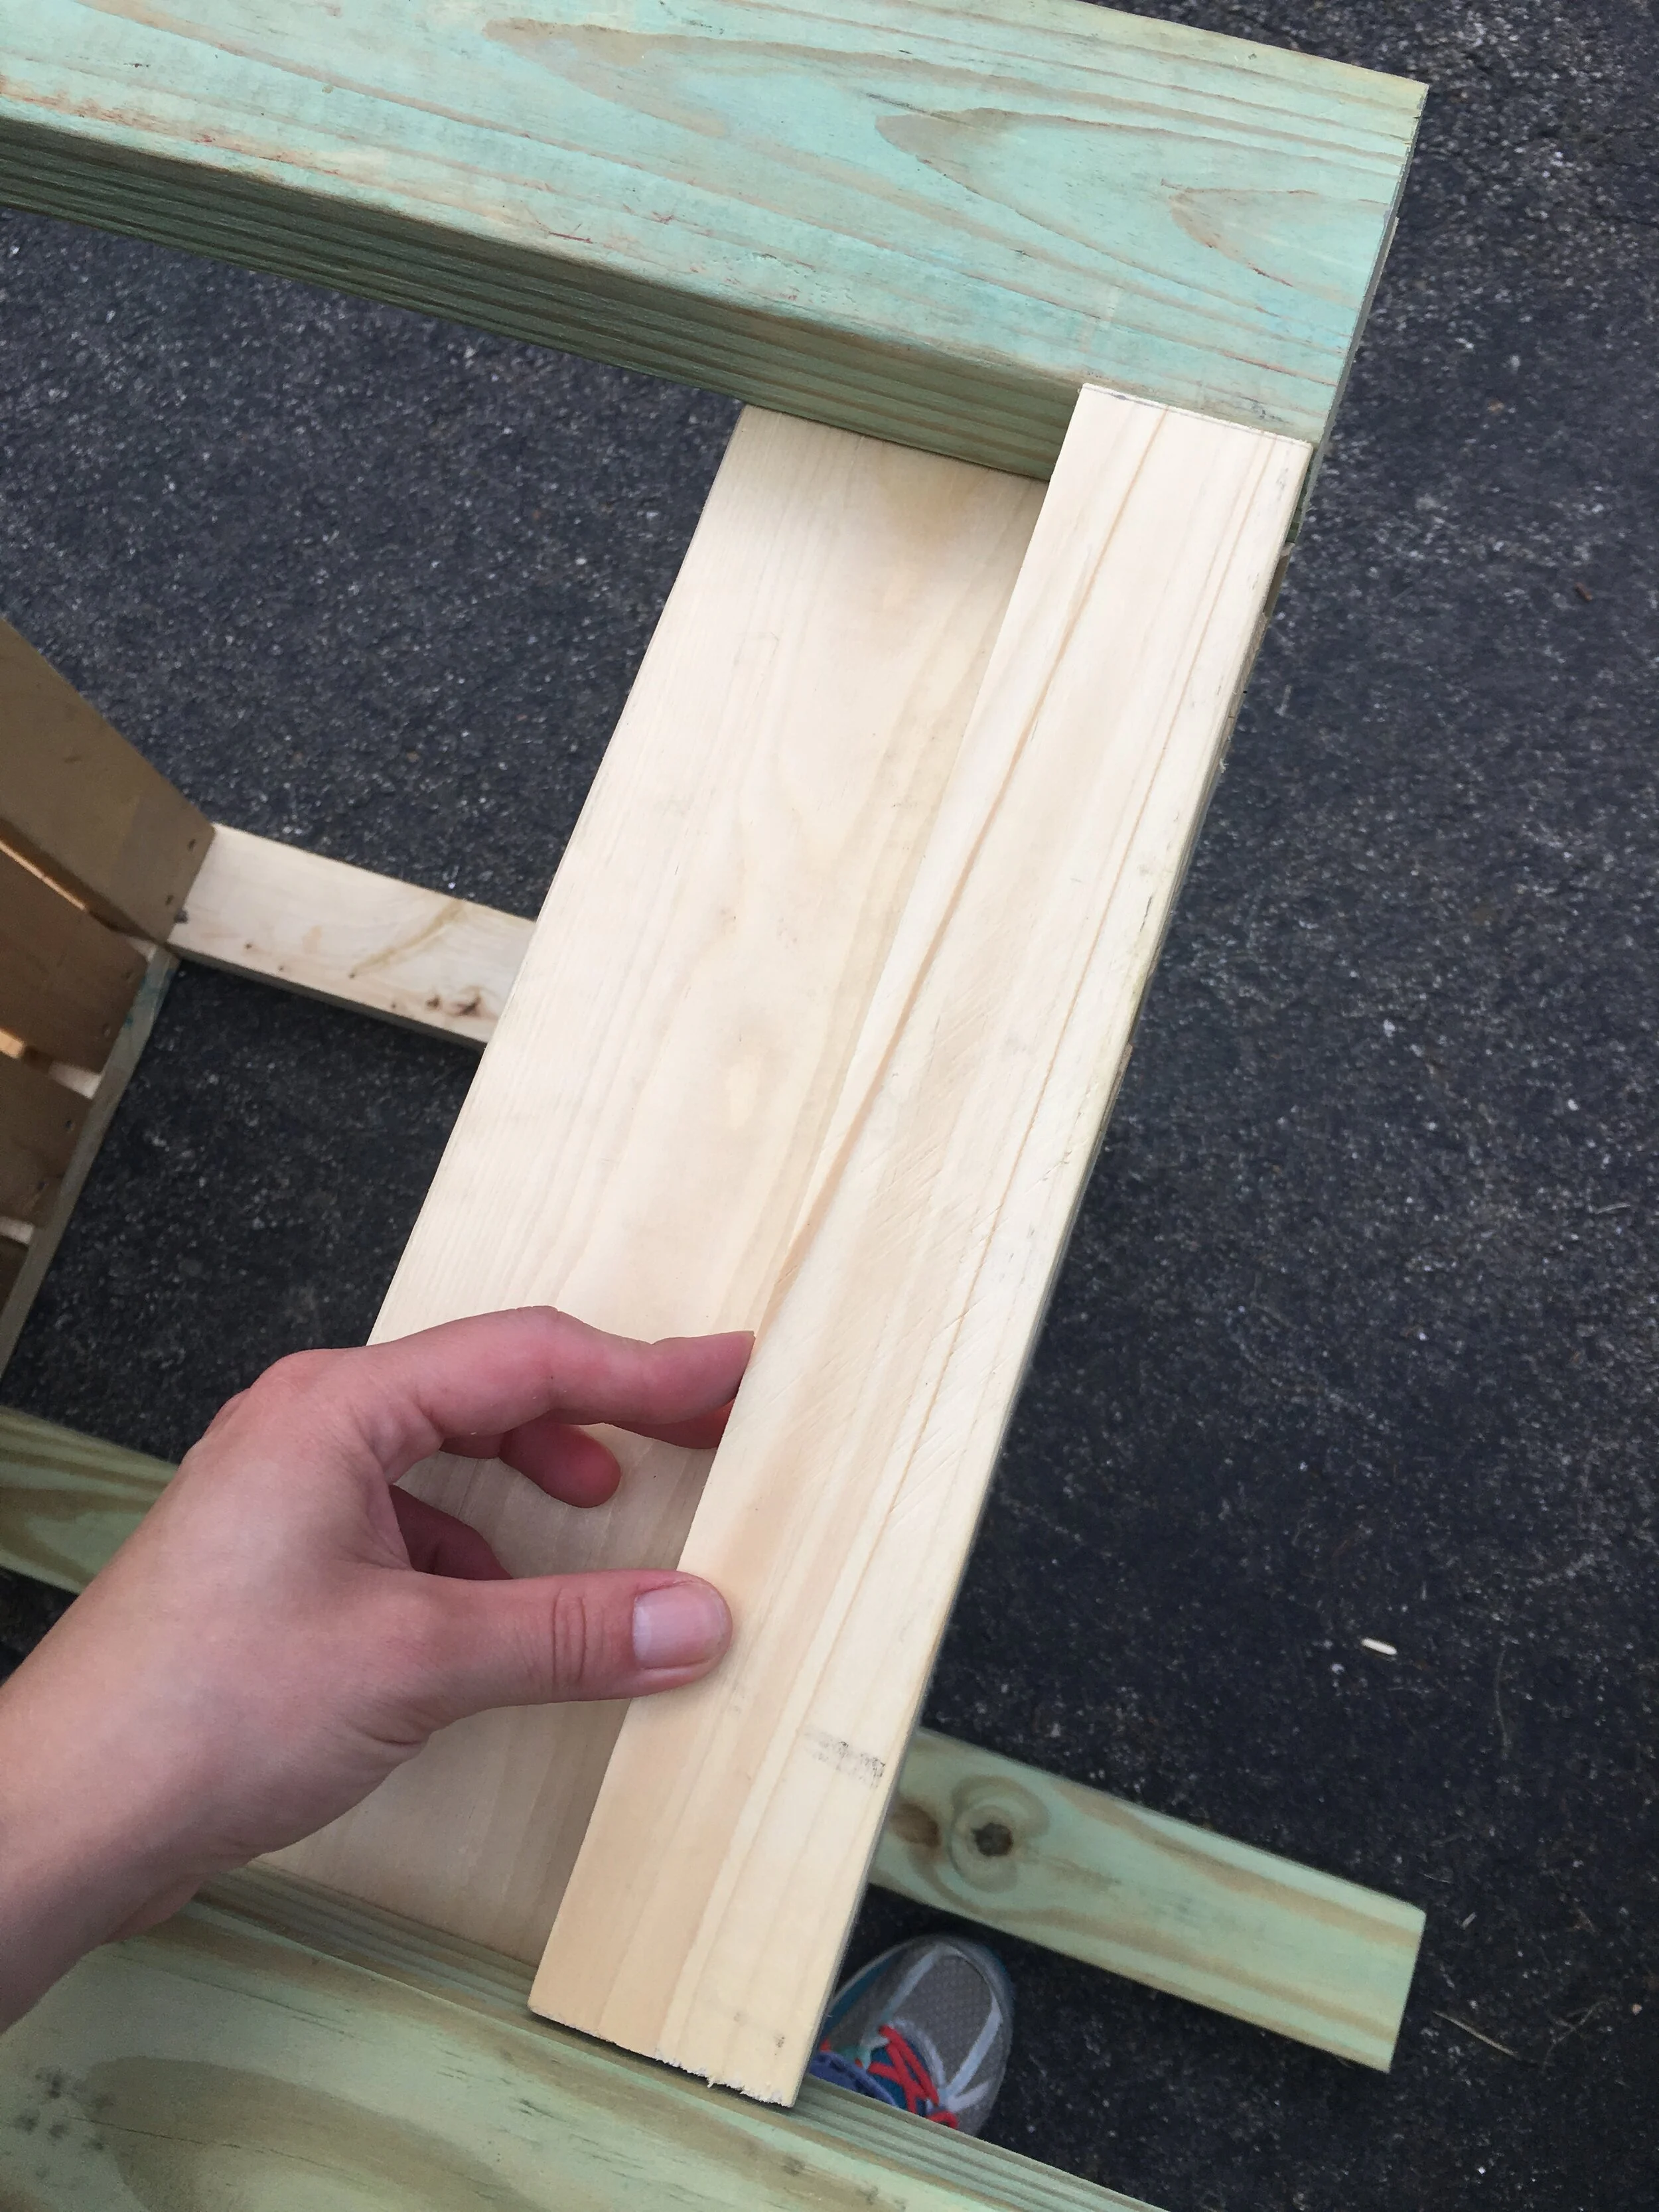
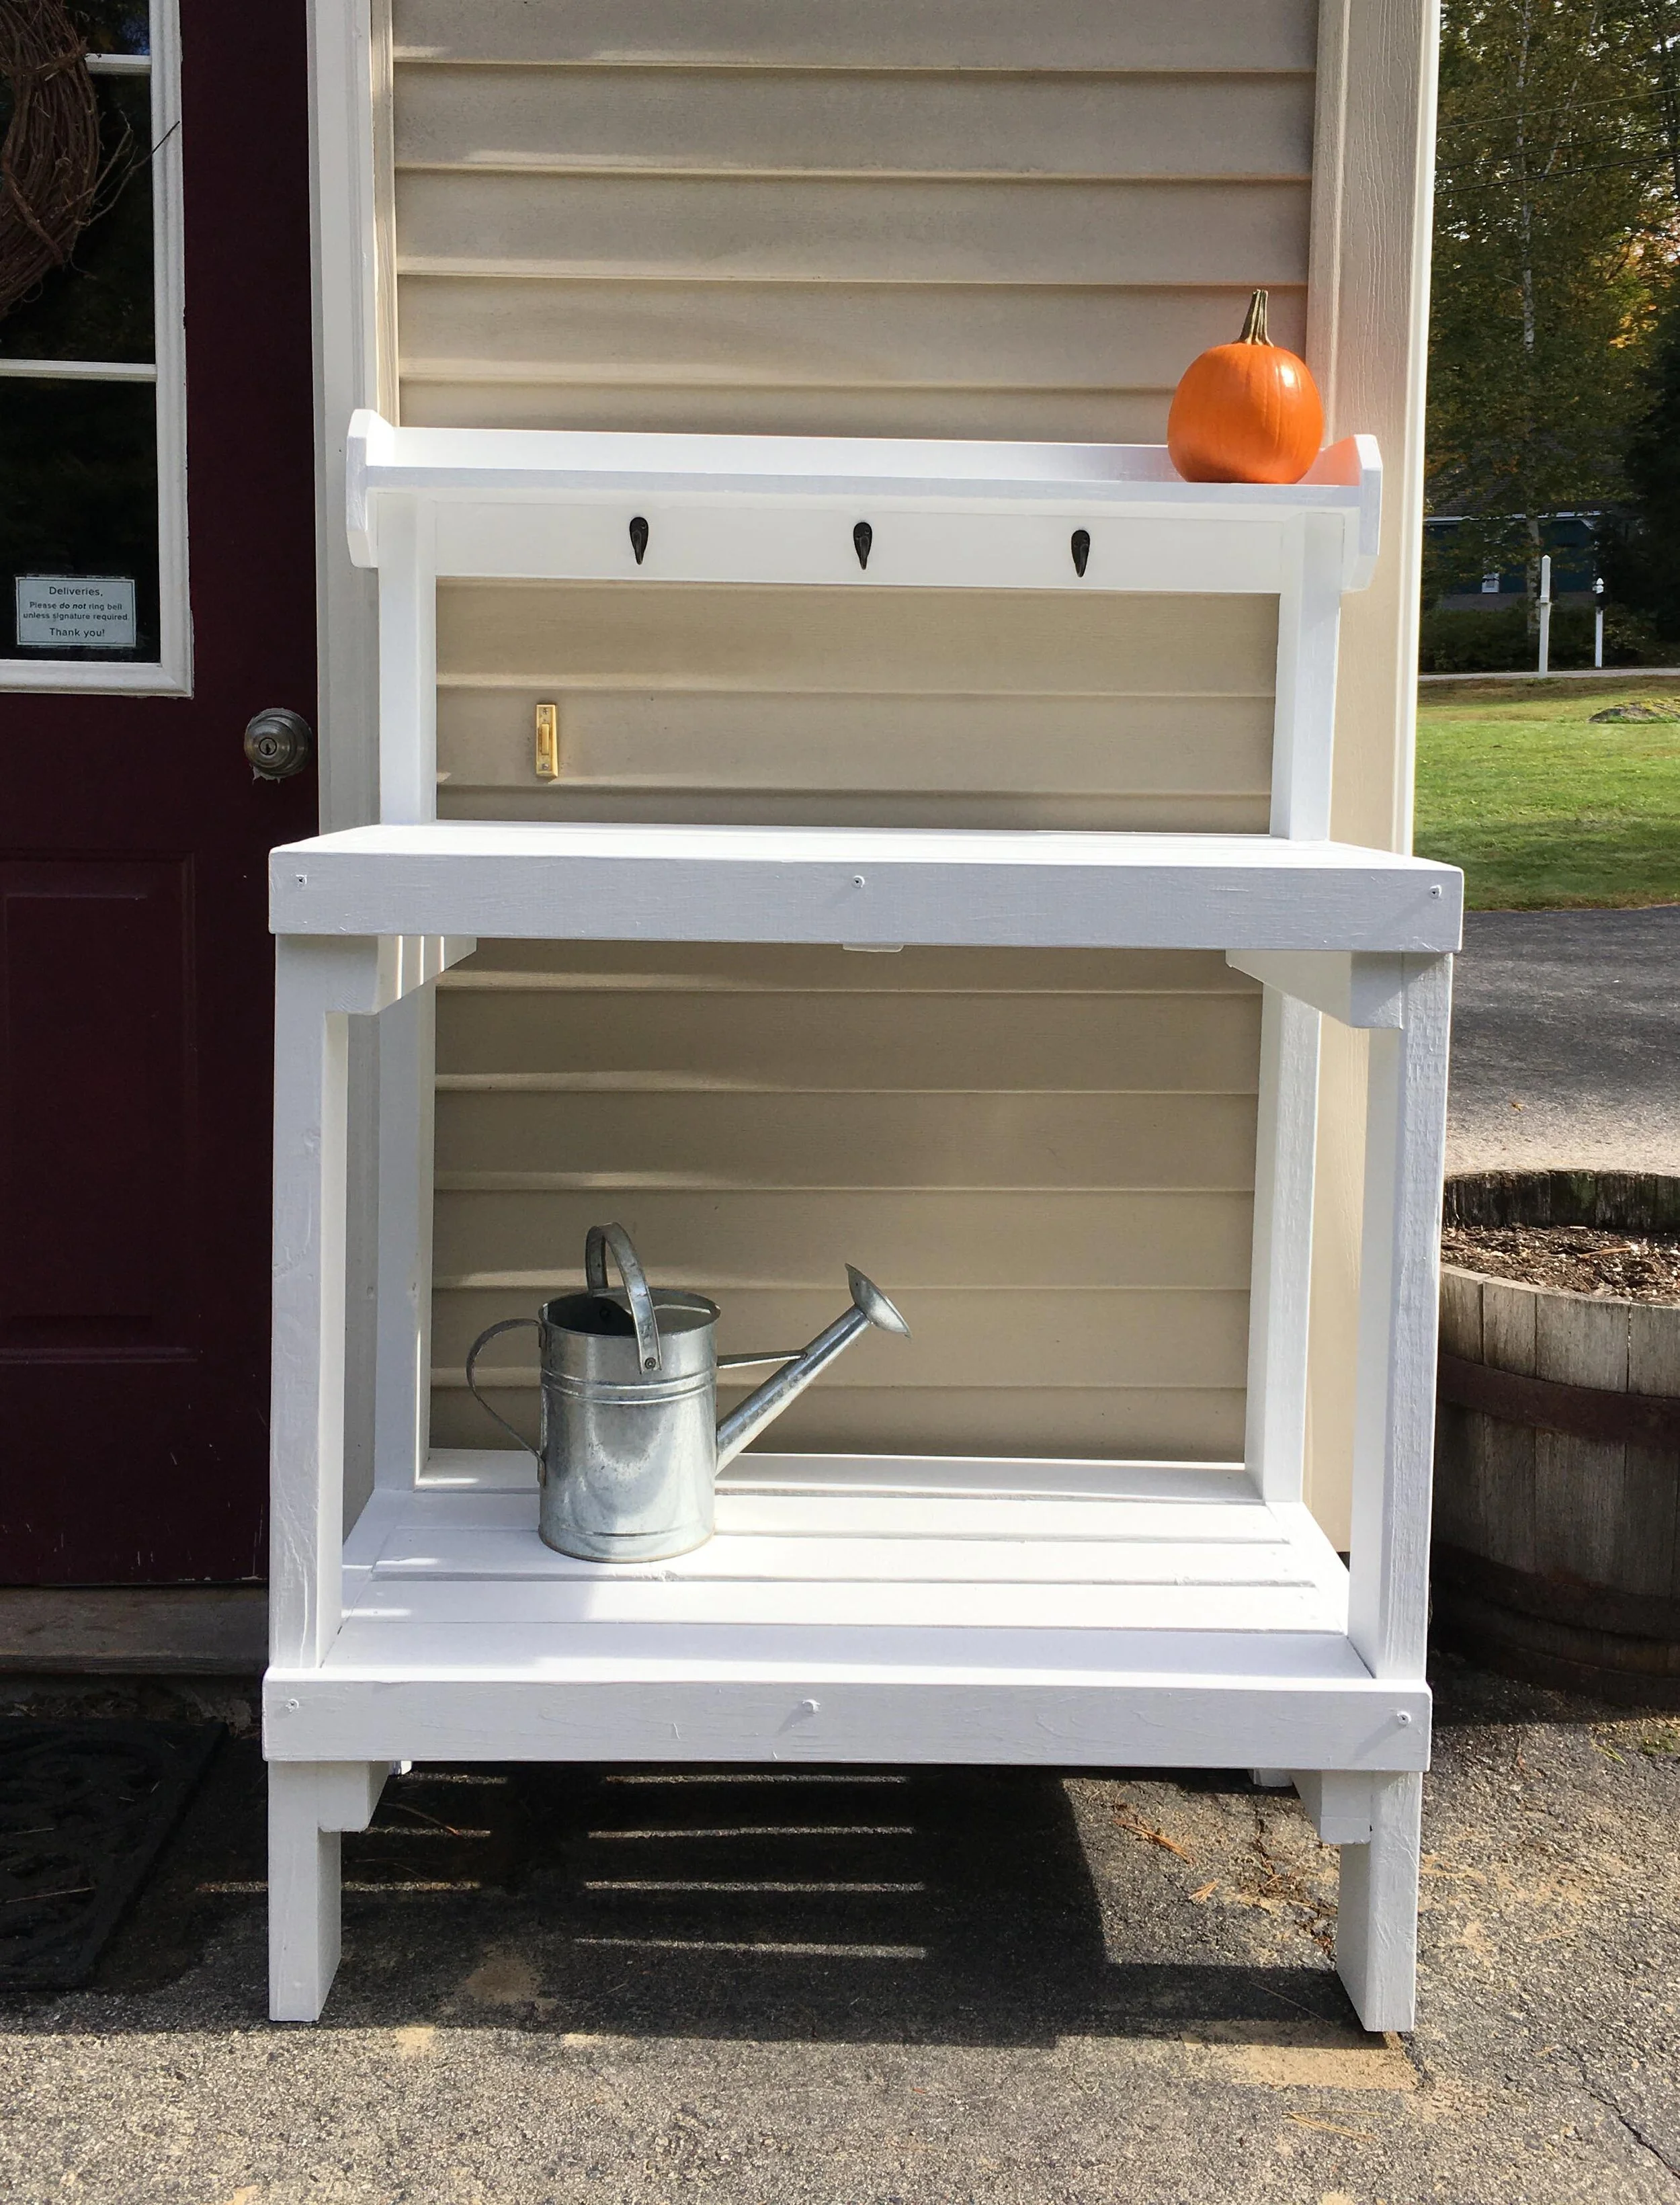
Finally to make the project look more “finished” I added some wood scraps to the sides of the project to conceal the butt ends of the shelves and make it look a little more polished.

DIY Potting Bench - Based on Plans by Ana White

I also decided to add some 1x3”s to the front of the shelves to make it look a little more polished from the front as well. (I did not counter-sink these screws, but I should have as they were more noticeable than I was expecting in the finished piece.)

DIY Potting Bench - Based on Plans by Ana White

Then came time for painting - I chose to paint the whole potting bench in several coats of my favorite Valspar Stainblocking Bonding Primer/Sealer. This stuff has great coverage and really covers and seals well. My one regret was not giving all the wood pieces a single coat of paint before assembling - as once everything was assembled it was a huge pain to get in all the nooks and crannies.

DIY Potting Bench - Based on Plans by Ana White

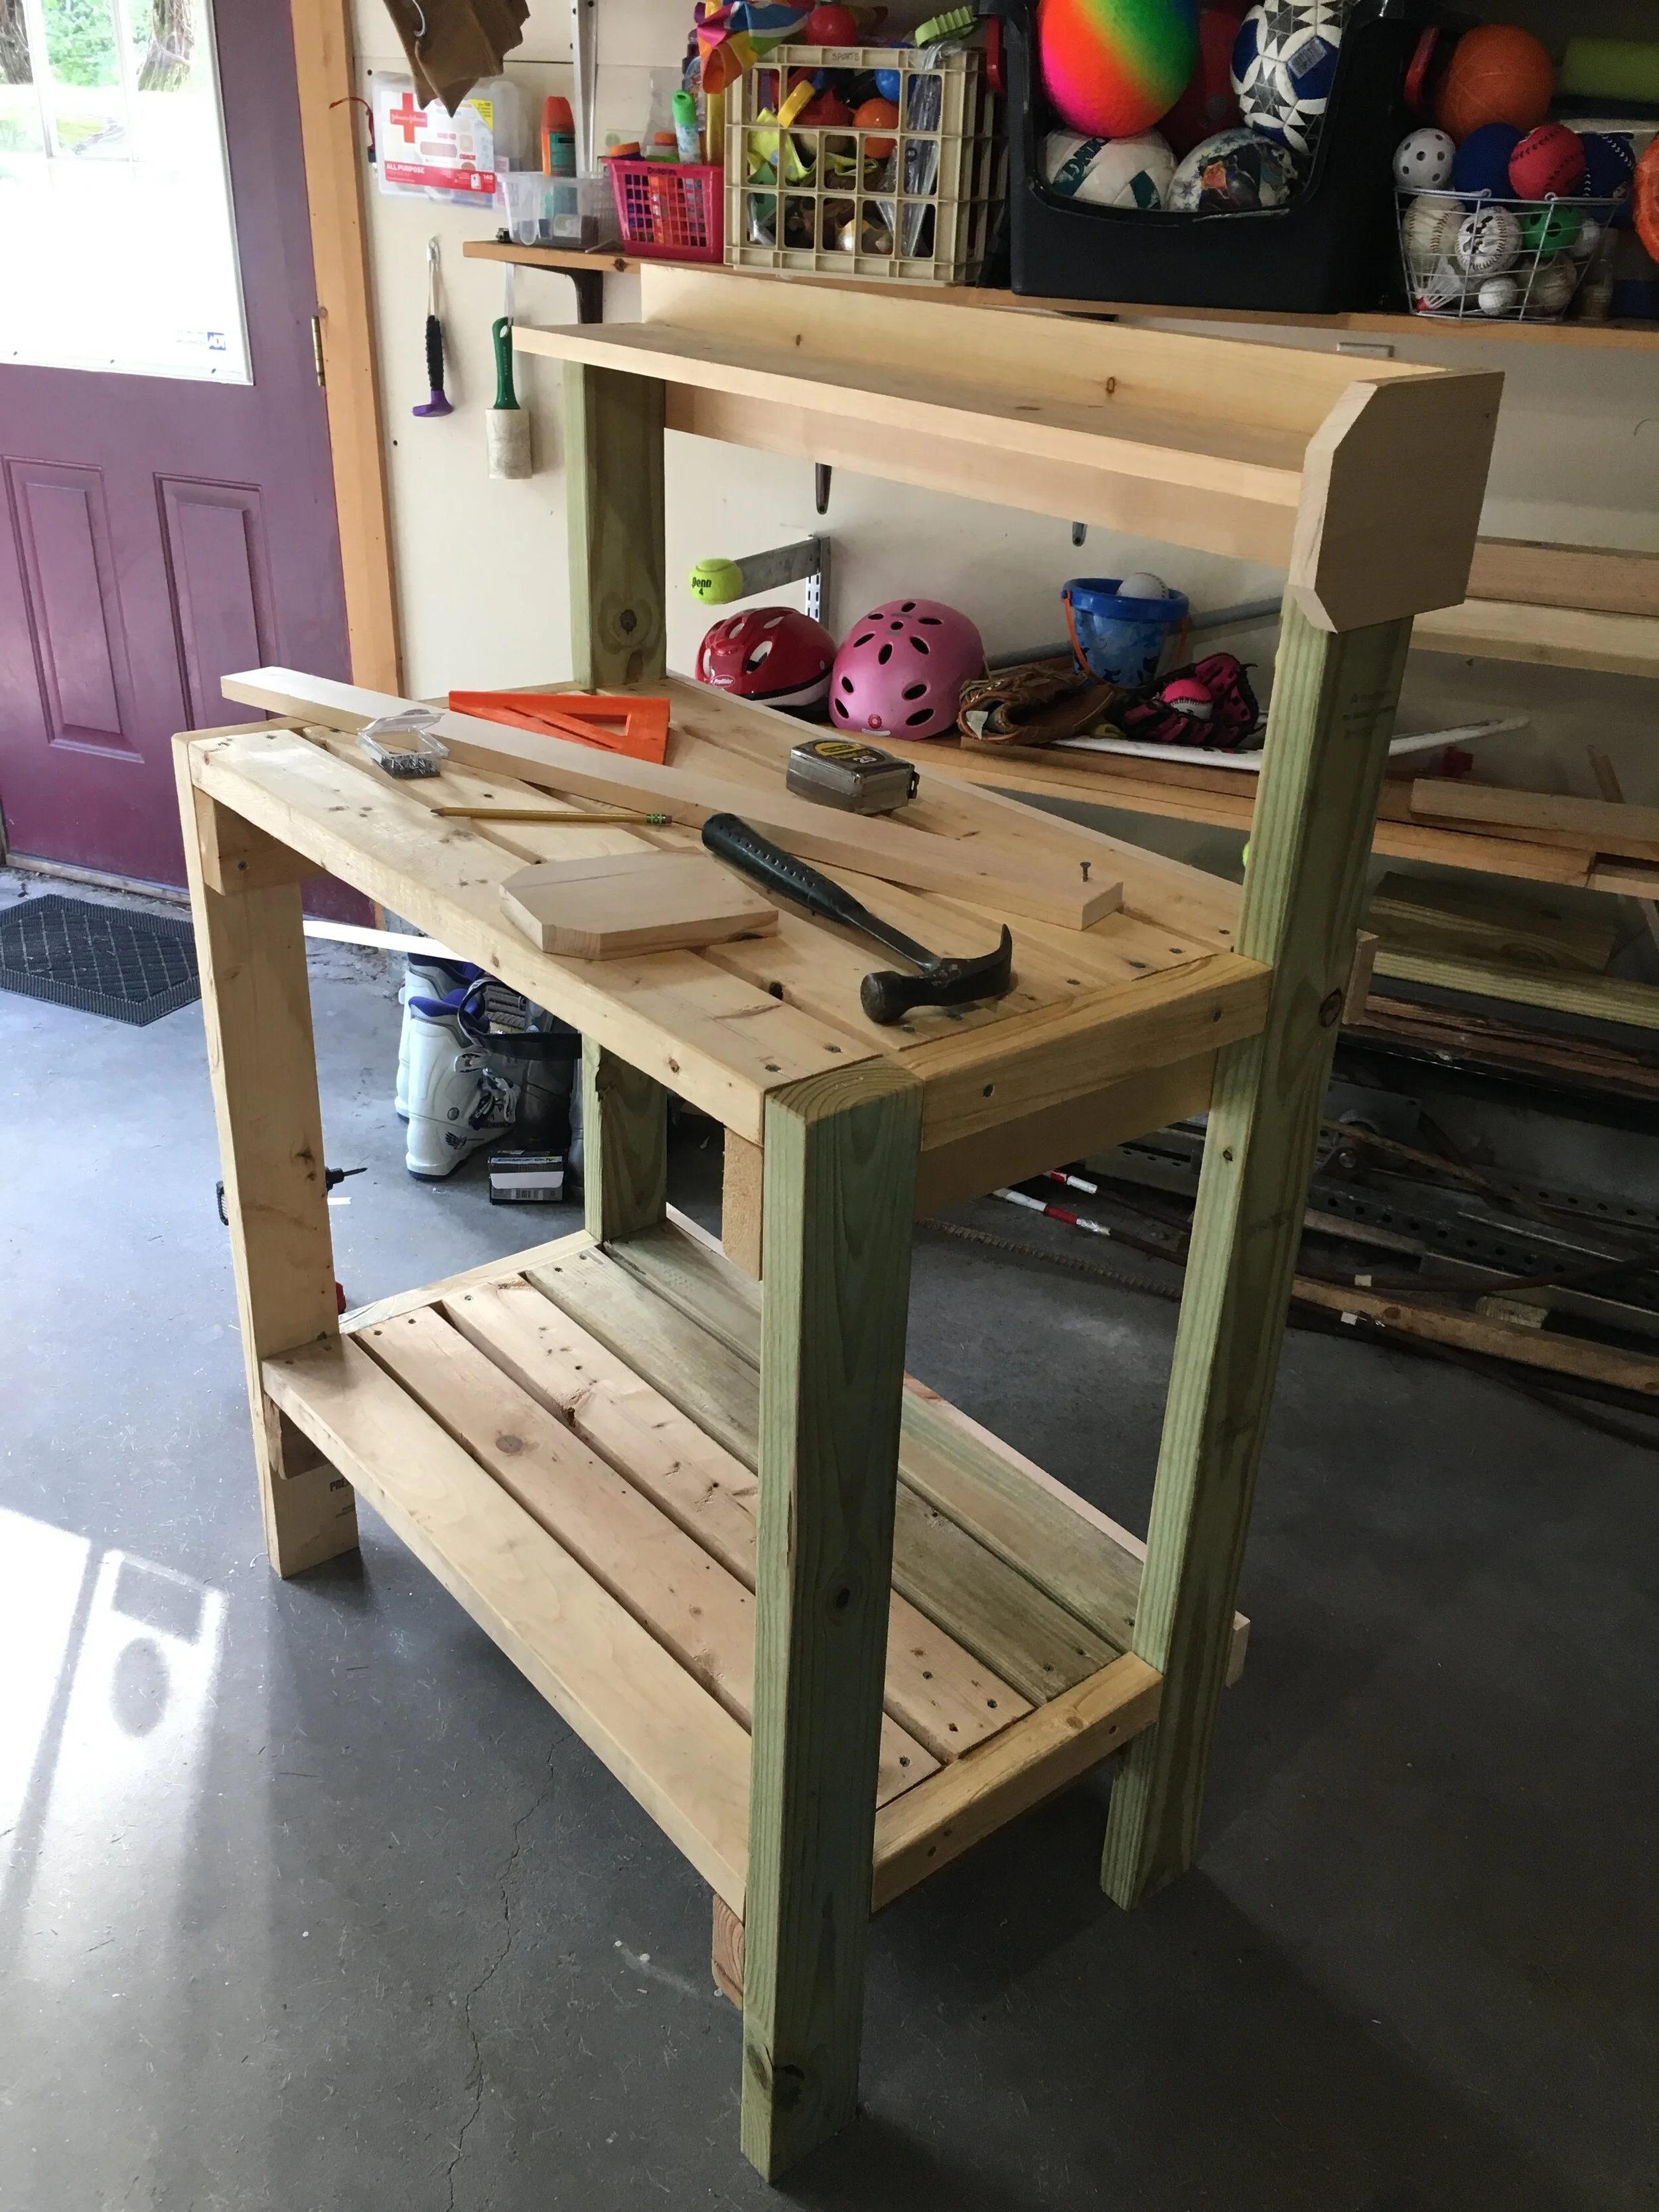
Finally I finished the project by adding a few little hooks underneath the shelf (very similar hooks linked here), from which I can hang tools or decor. I’m really happy with how this came out and how quickly it came together. I can’t wait to decorate it with some plants come next spring!

PS - I’m thinking this potting bench would also be great for parties and BBQ’s! It would be perfect on a patio or deck as a makeshift buffet table.

DIY Potting Bench - Based on Plans by Ana White

UPDATE: Spring, 2020

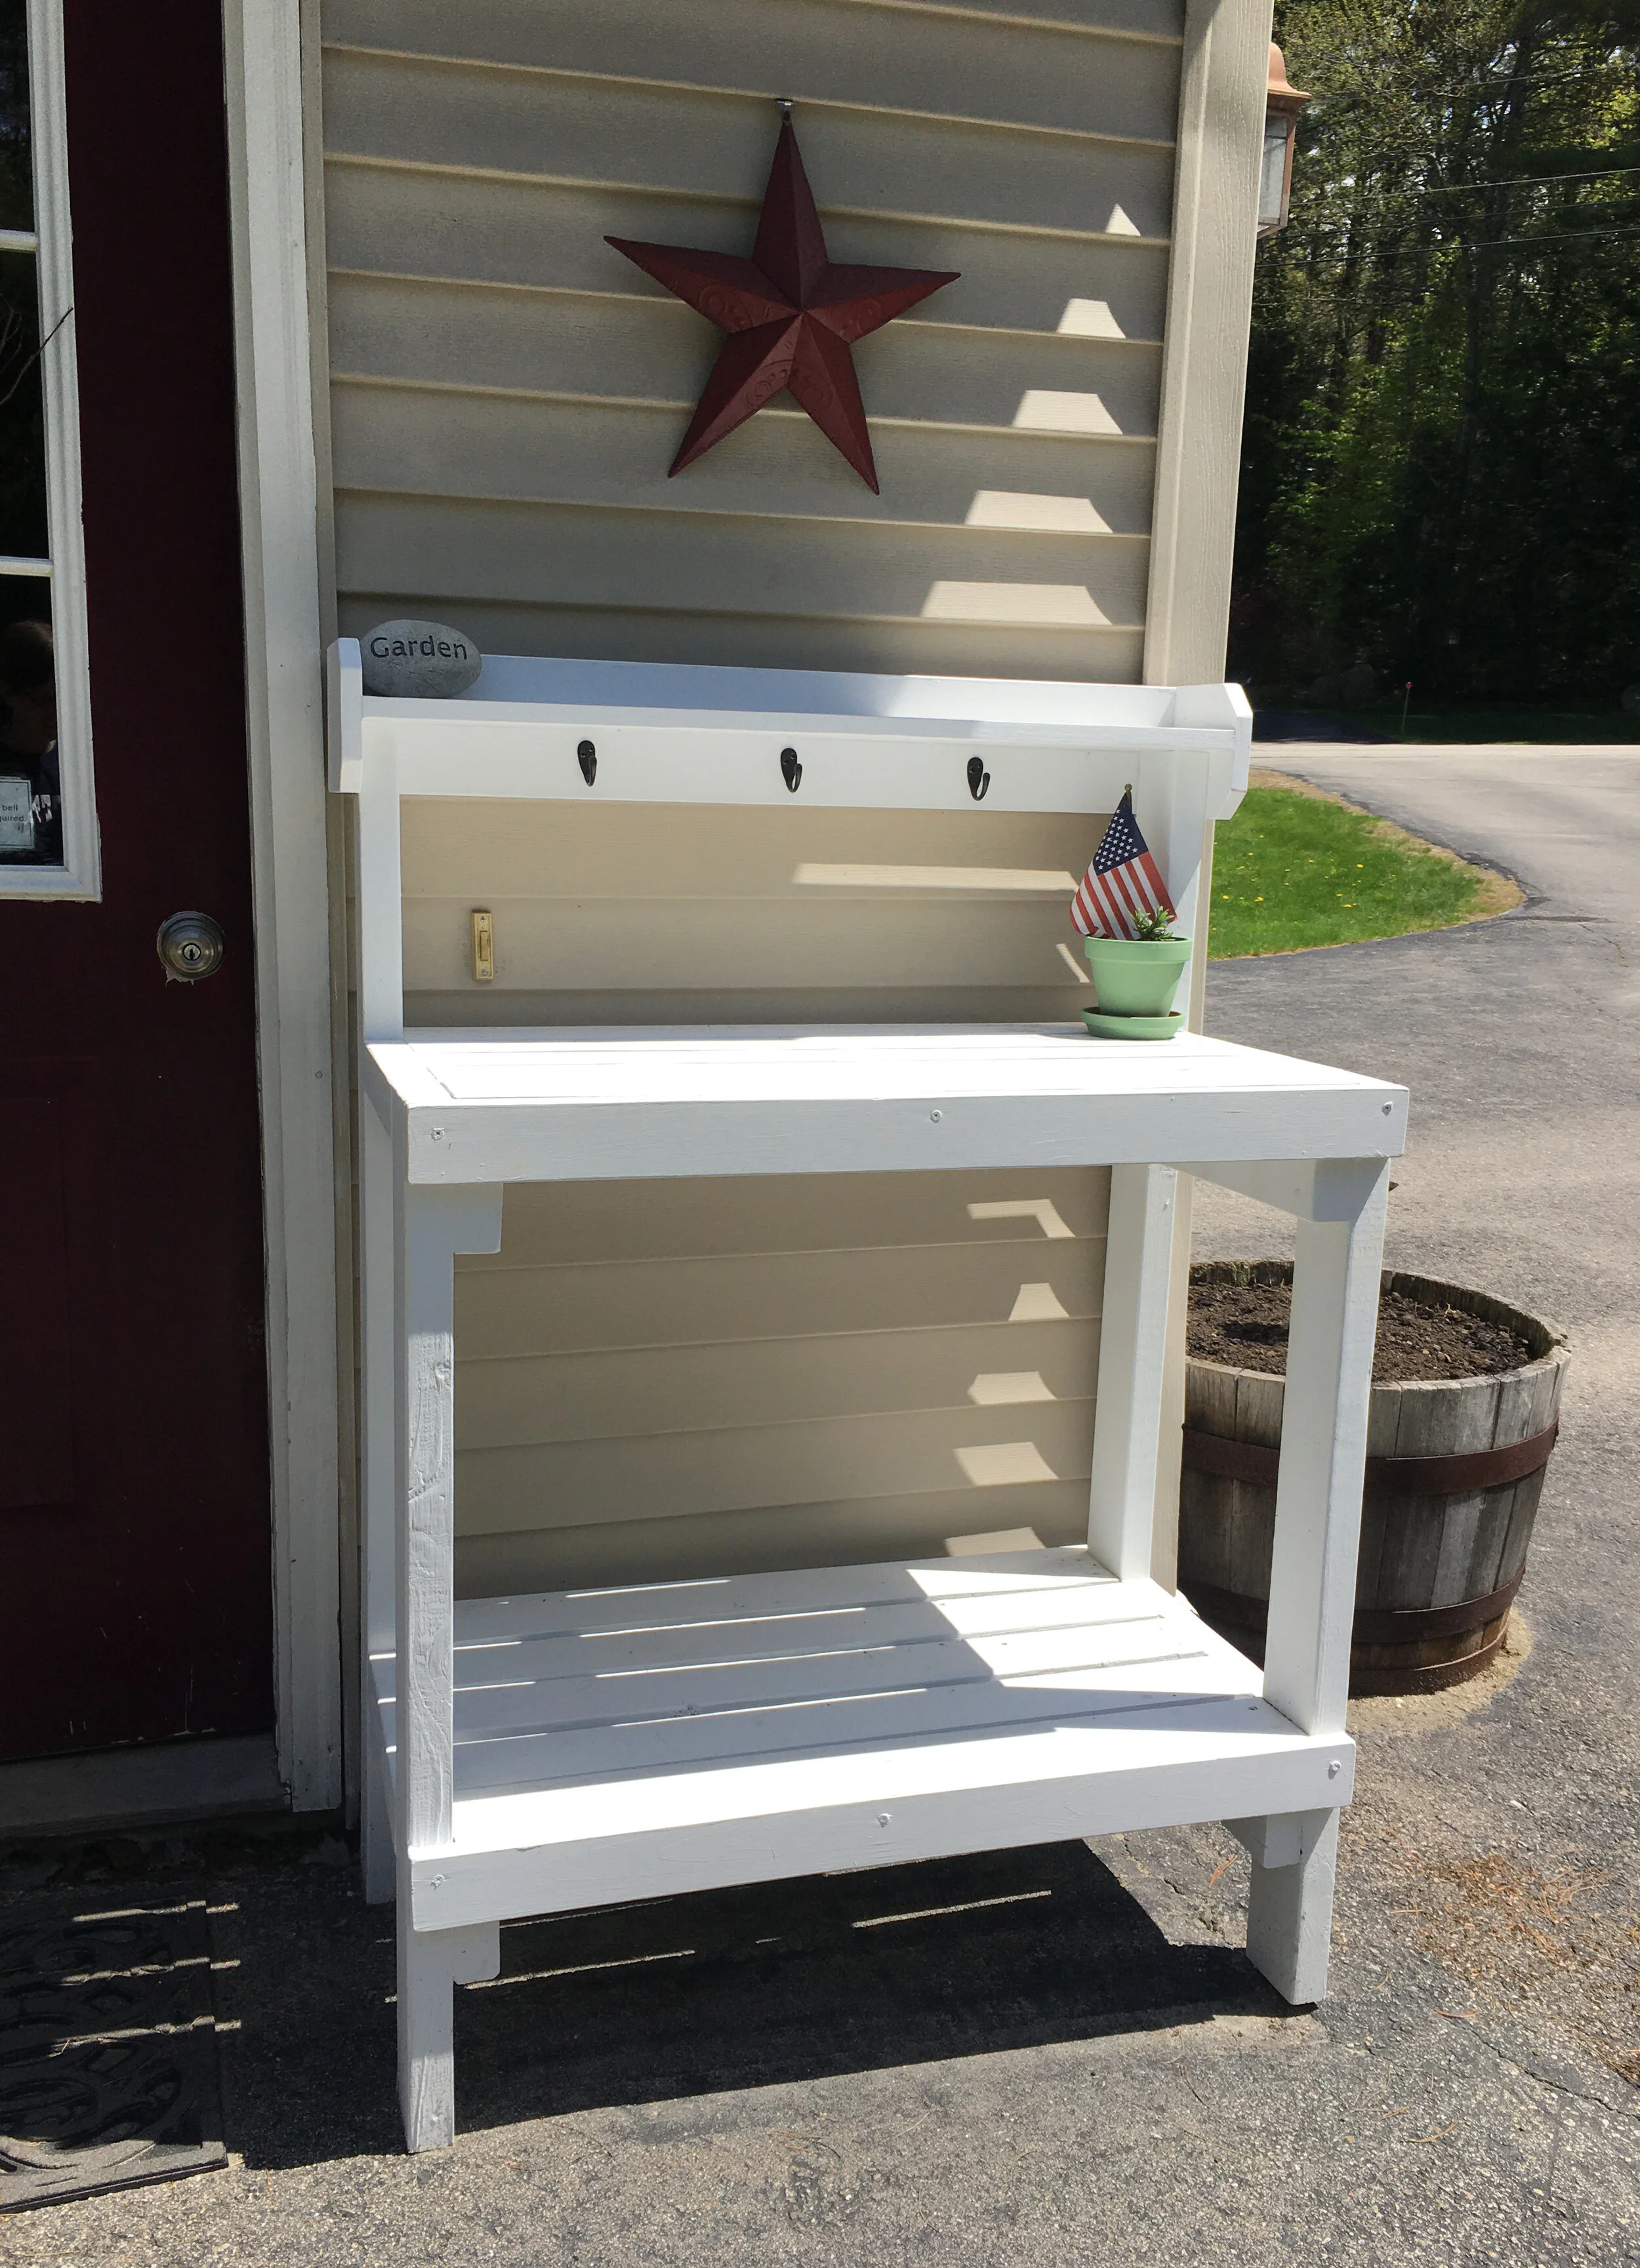
Just wanted to give a quick update after I made the potting bench last Fall: Over winter we decided to store it in our shed, just so we wouldn’t have to snow blow and shovel around it all winter, but as soon as the threat of snow passed in early Spring we brought it right back out. It’s been wonderful to have for planting and working on outside this spring, and due to the current Pandemic situation we’re getting more packages than ever so it’s great to have a designated spot for deliveries (and right in view of our security camera too).

DIY Potting Bench - Based on Plans by Ana White

For decor right now I'm keeping it very simple, especially since the potting bench is utilized daily for mail - there's just a garden rock, a metal barn star (hung from a special hook that doesn't damage vinyl siding), and a small potted lavender plant with an American flag - all items we already had around our house.

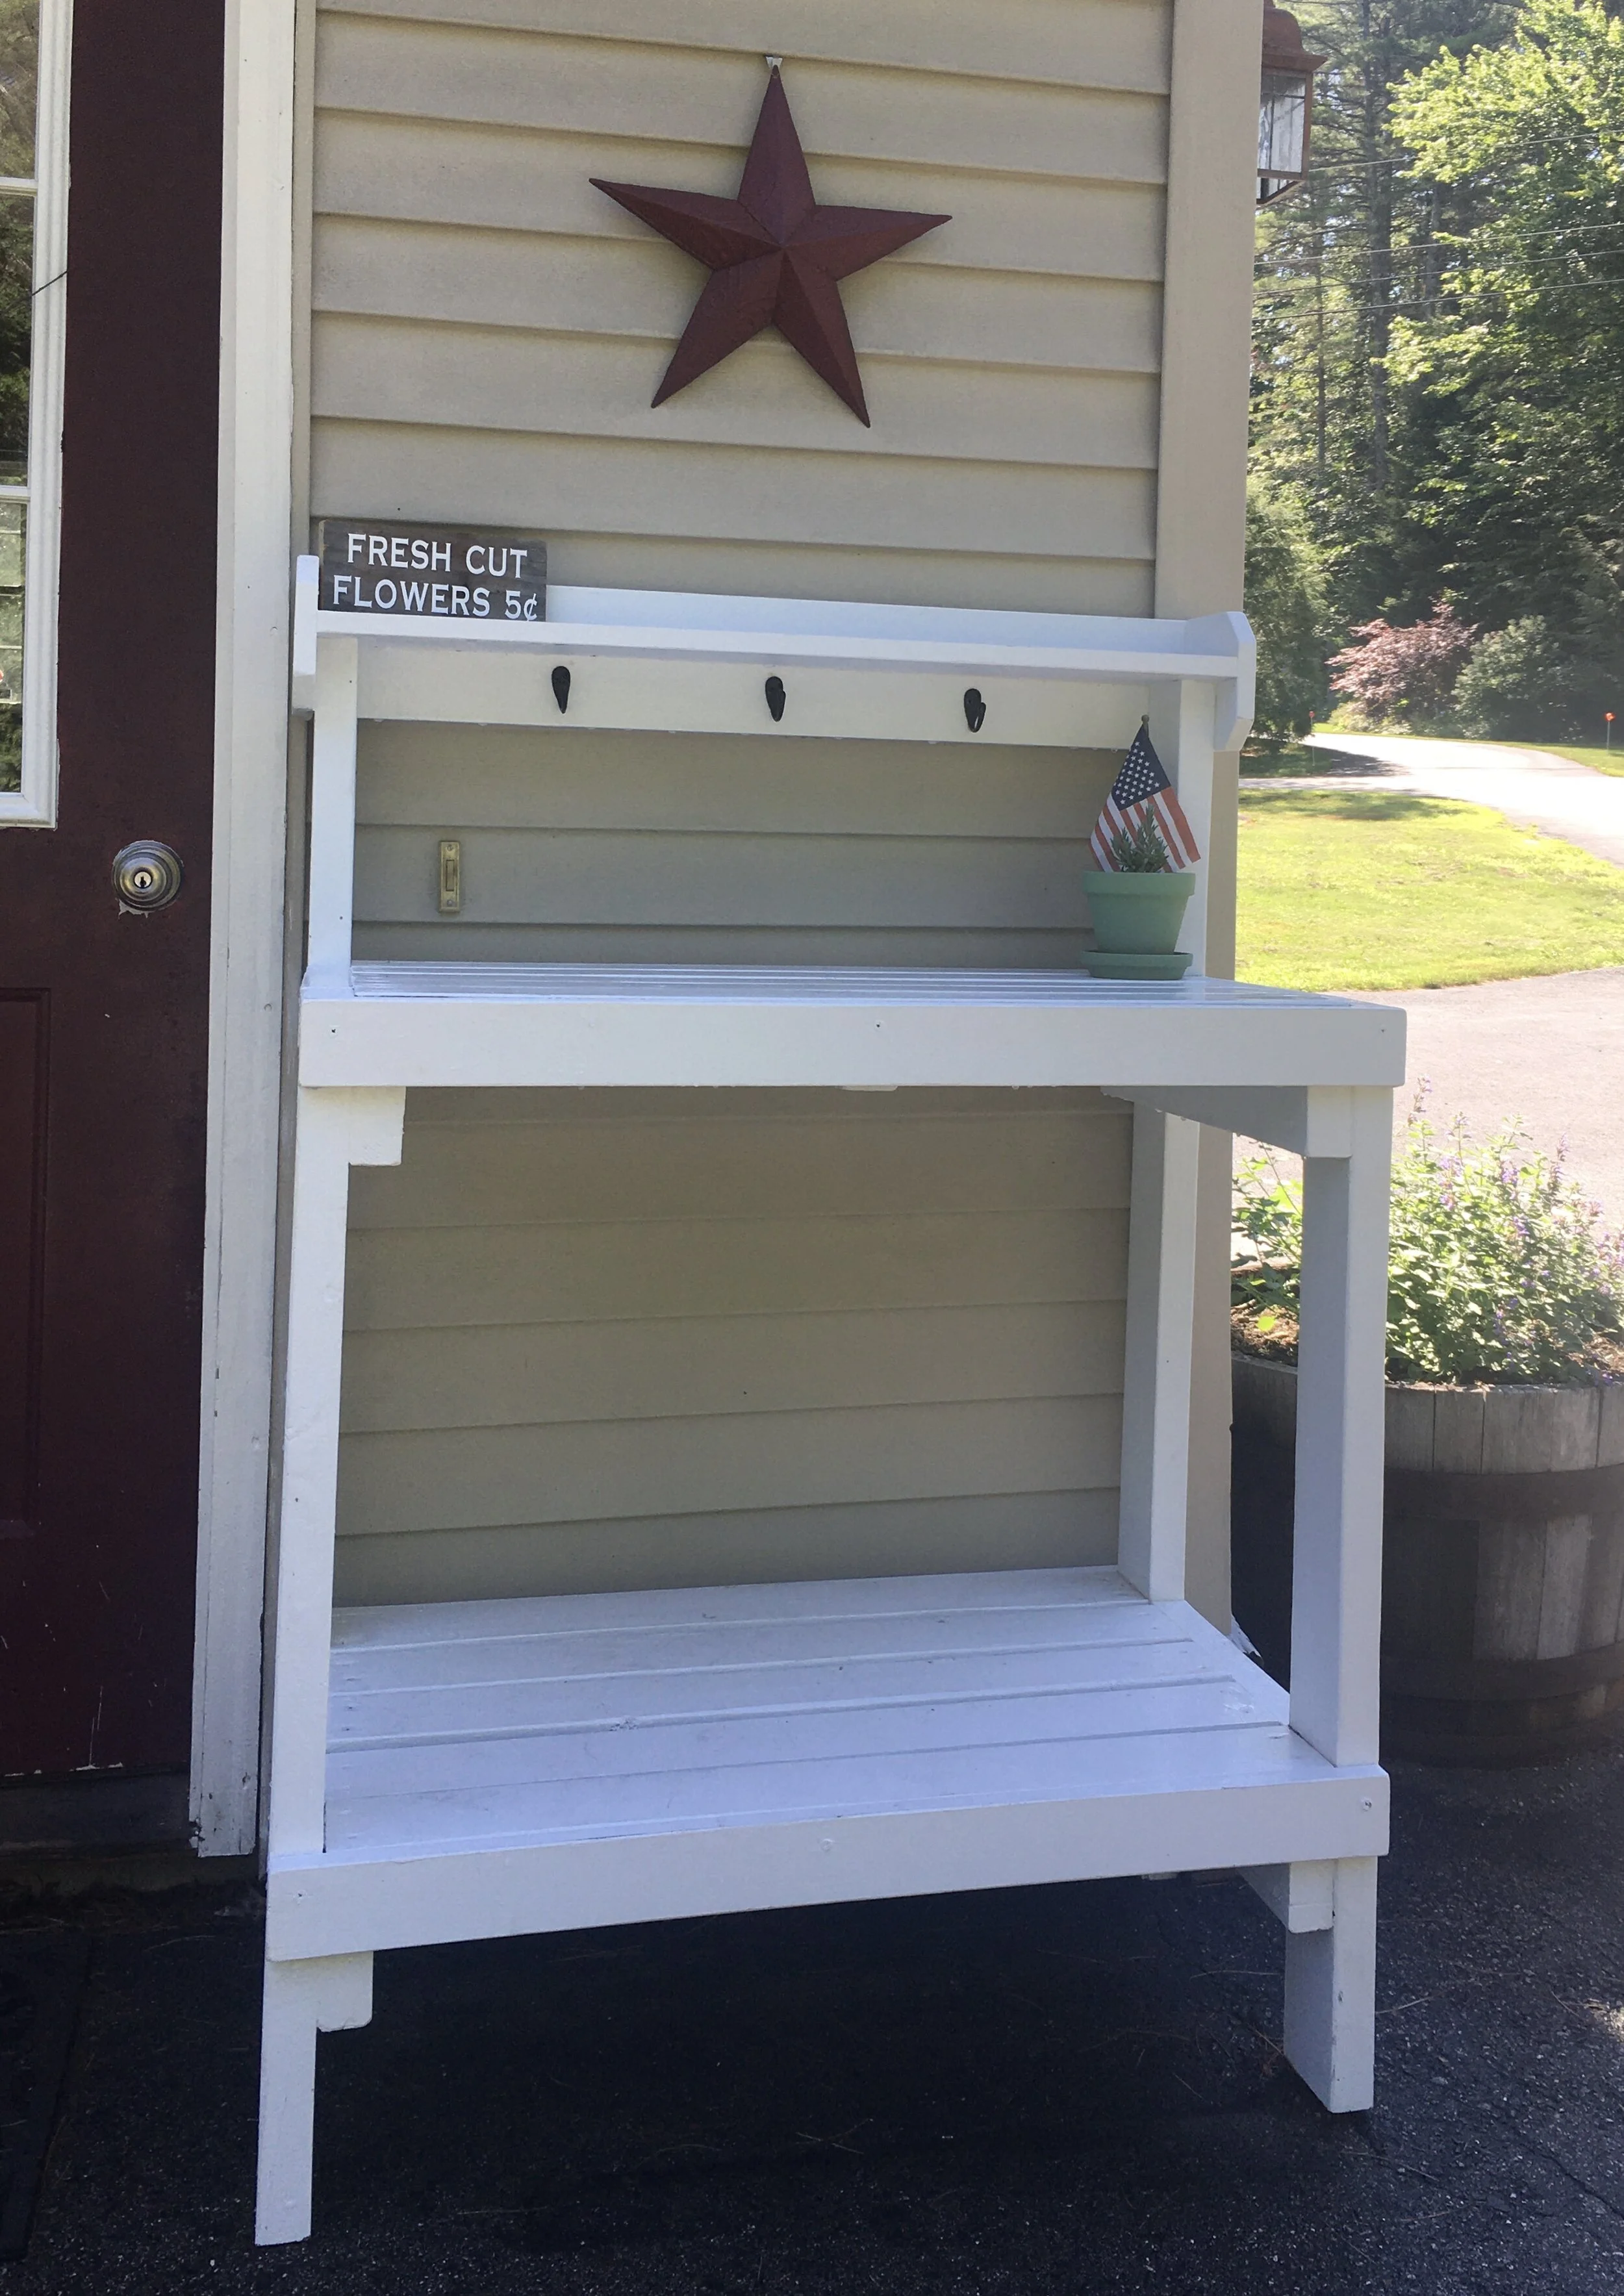
Summer, 2020 - sharing another little decor update for the potting bench:

DIY Potting Bench - Based on Plans by Ana White

I found this weathered piece of wood in our scrap bin and thought it would make a cute sign for the potting bench. I used my Cricut Machine to design and cut a stencil that said "Fresh Cut Flowers 5¢" and used it to paint the sign. I think it looks cute and it's a great finishing touch!

Shop some of our Garden + Patio picks:

Scroll sideways to see more —>


Check out our Similar Posts:

KEEP UP WITH BIRCH LANDING HOME
|  Etsy  |  Facebook  |  Instagram  |  Pinterest  |  Bloglovin'  |  Hometalk  |
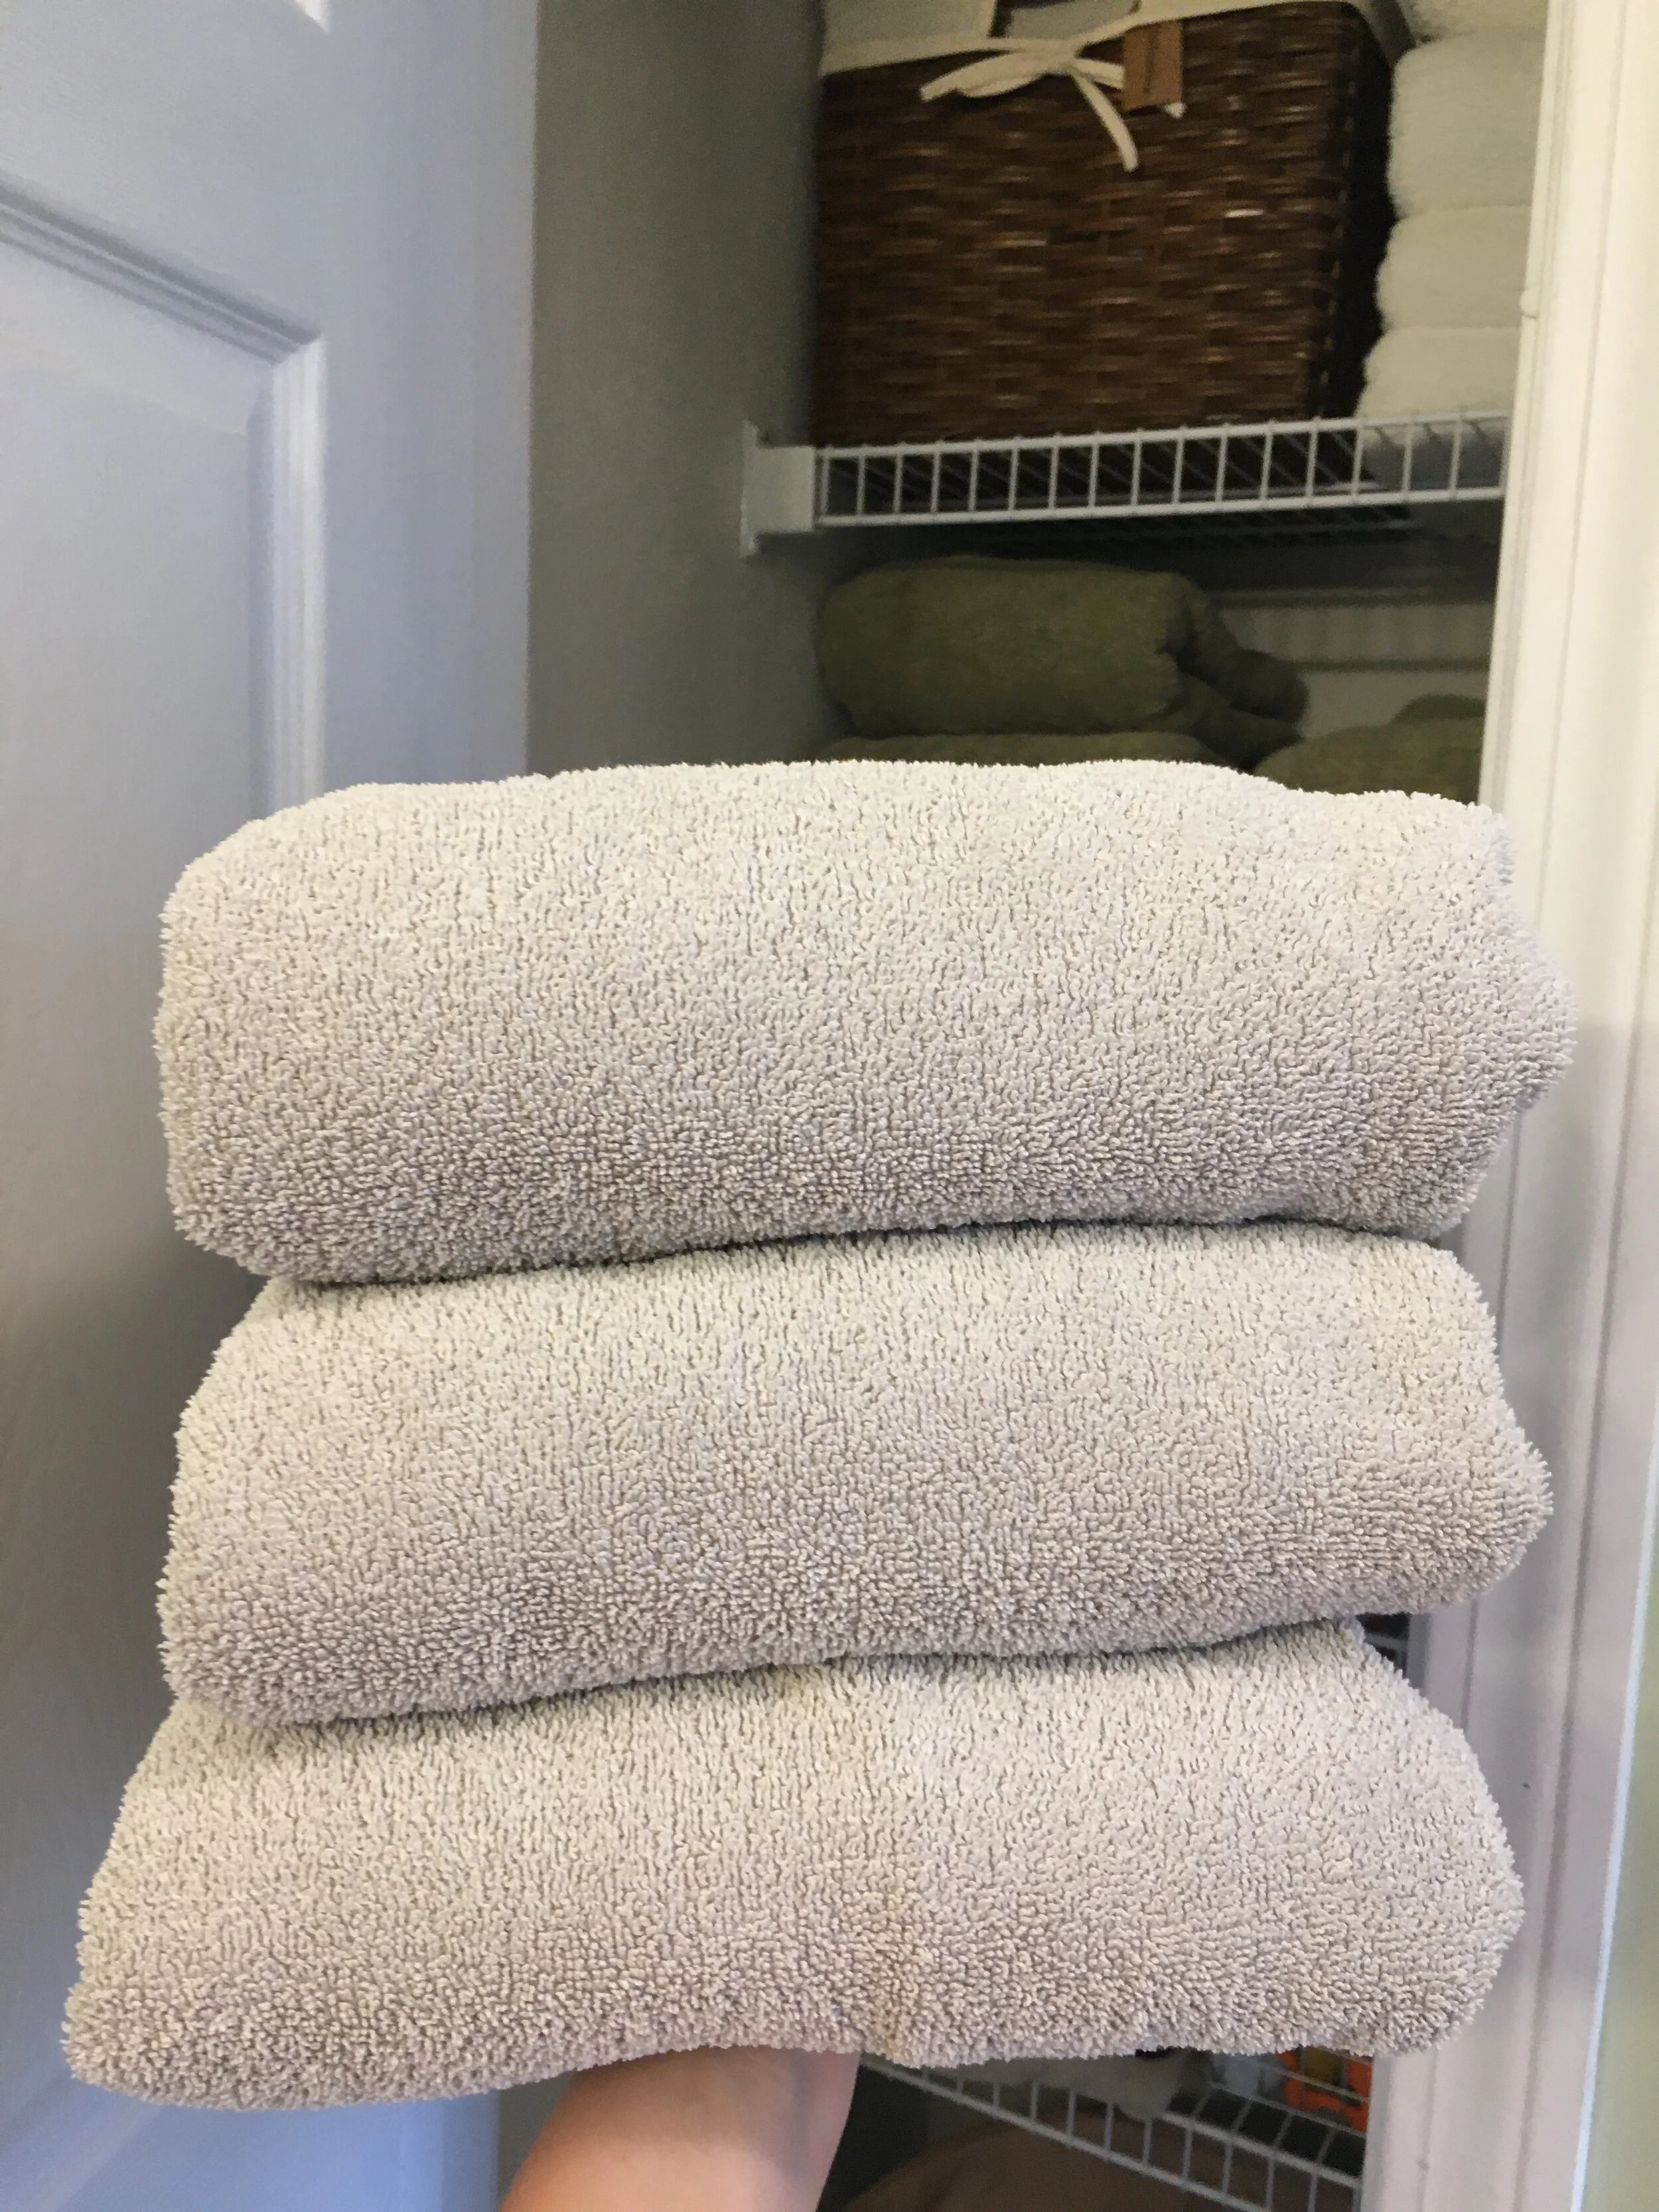
How to Hang Decor on Vinyl Siding - with NO DRILLING! (Tips for Brick Surfaces Too)

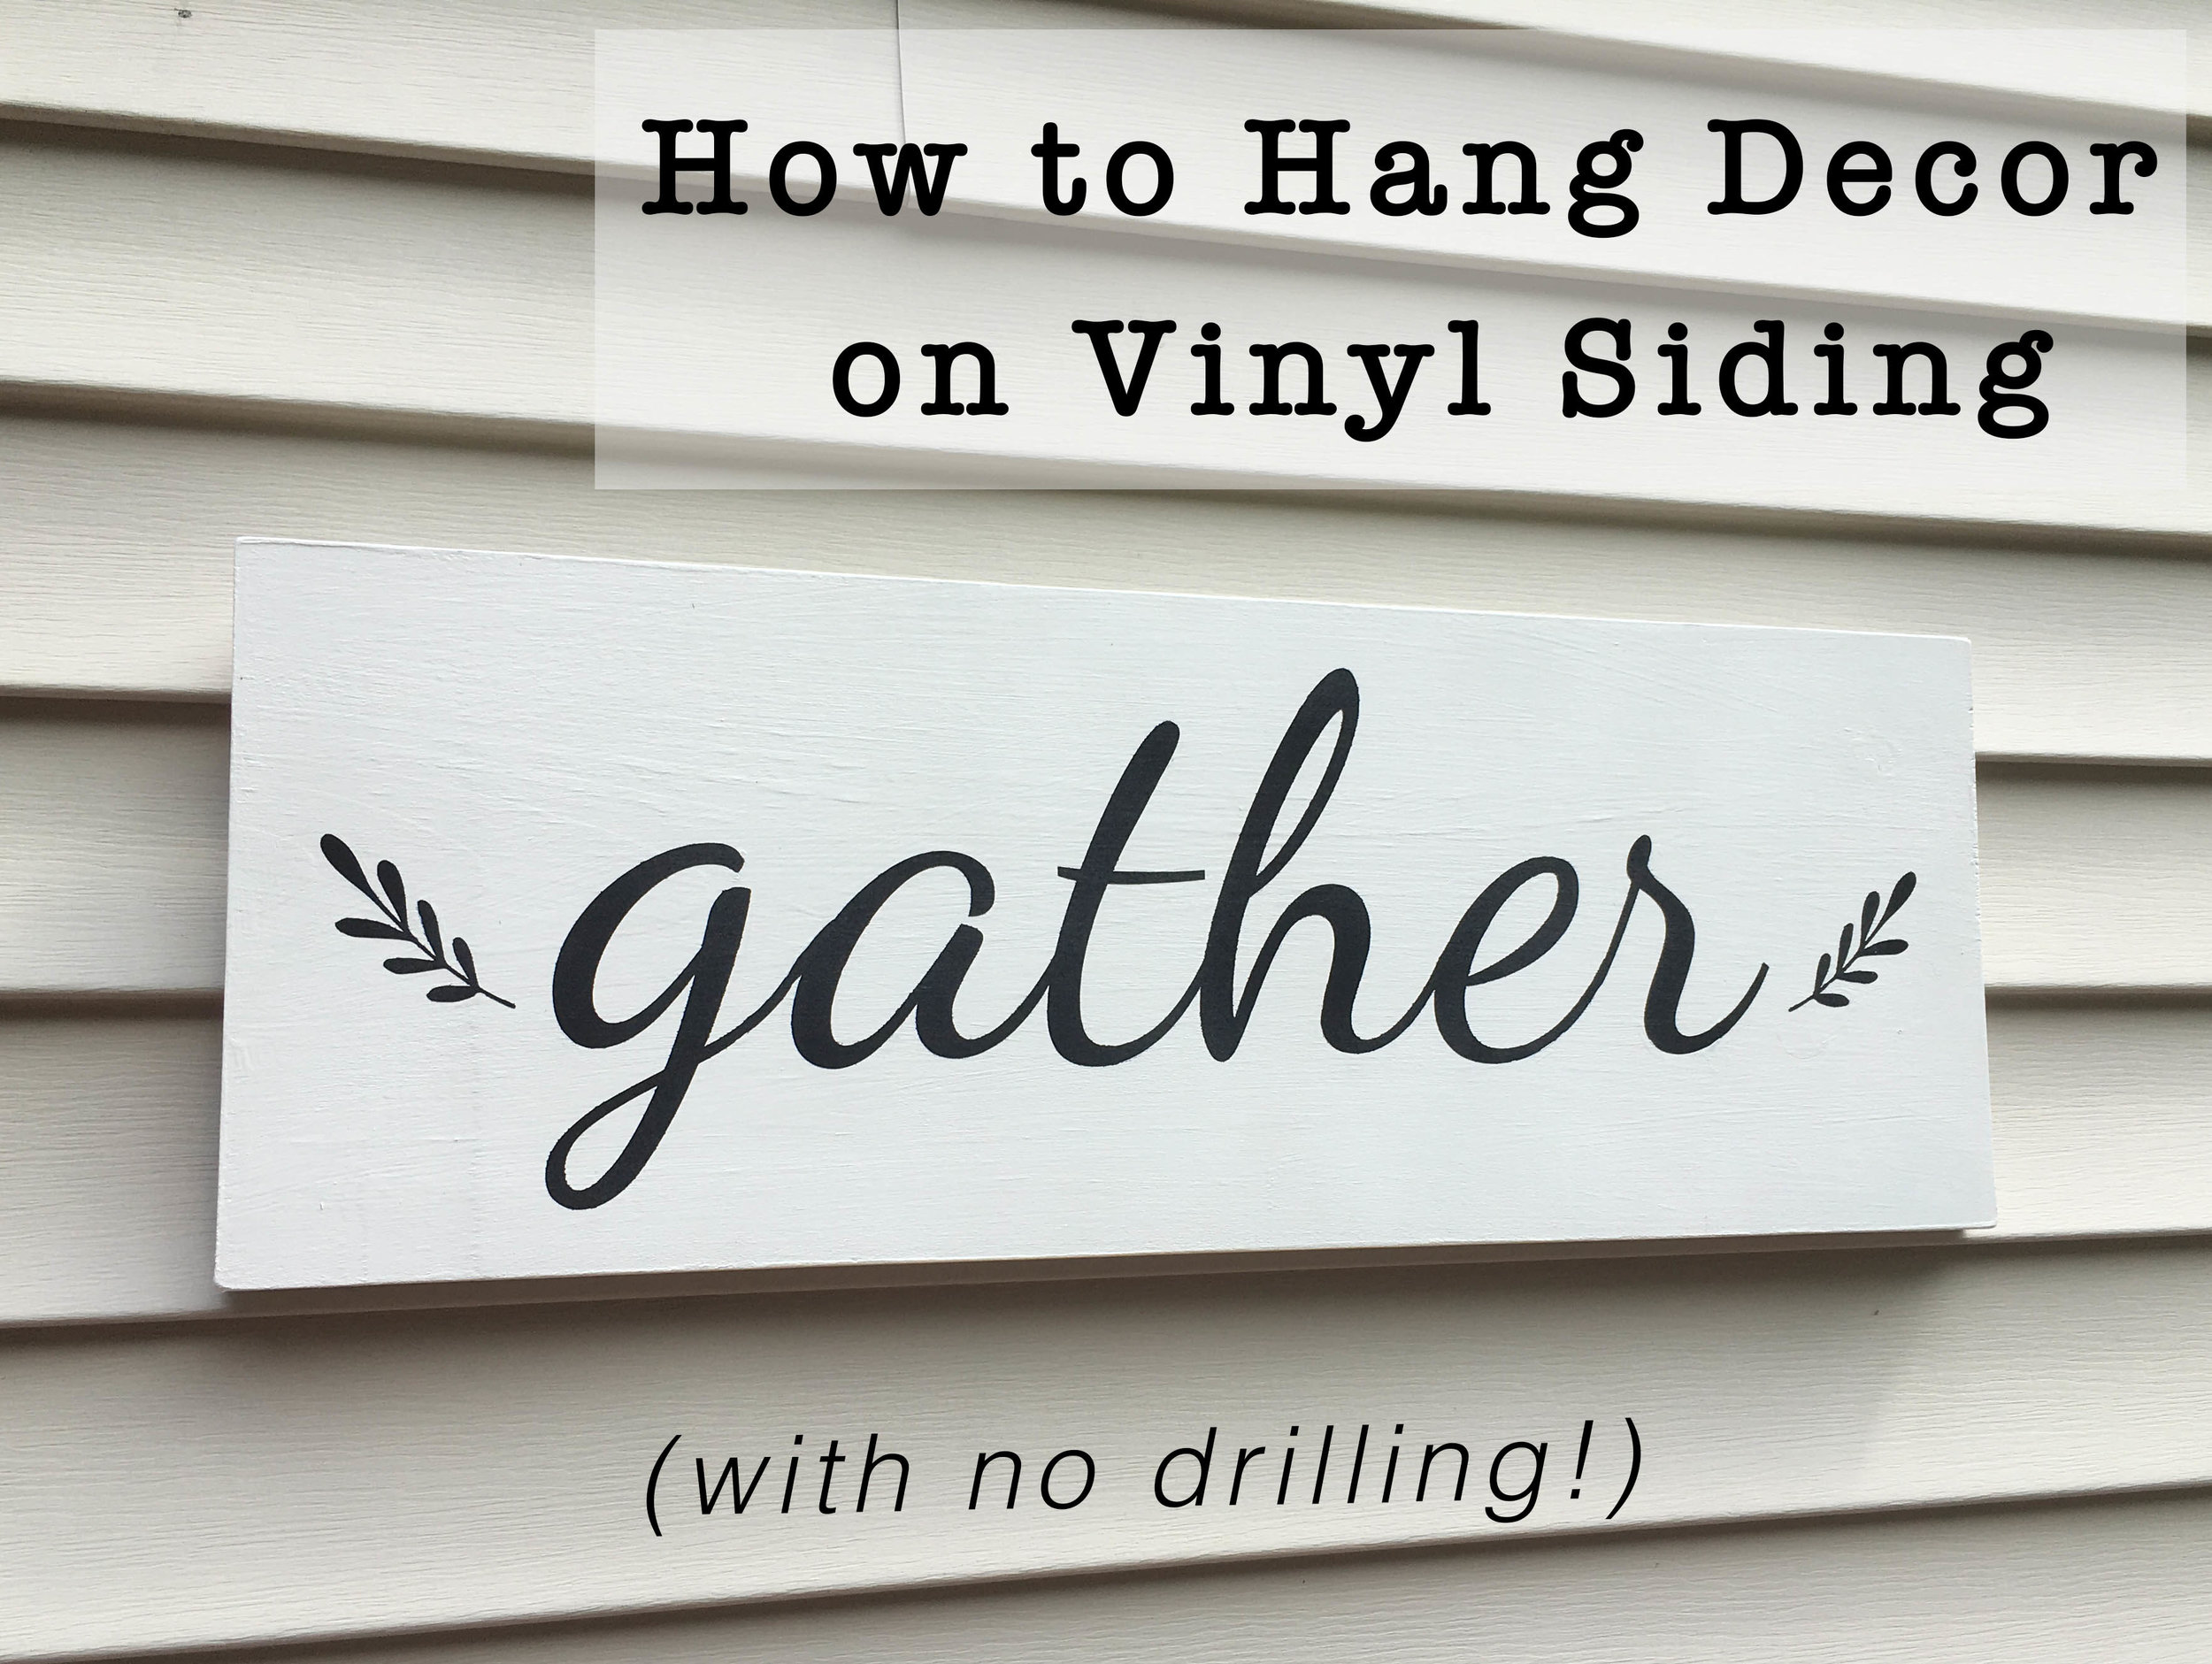
I’ve been wanting to hang a few decorative signs on the outside of our house… a welcome sign by the door and this “gather” sign on our back deck. However, with vinyl siding I was very hesitant… I didn’t want to drill into it or make a mess of it. Which is why I was so happy when I came across this incredibly simple, no tools needed solution!
| This is
not a sponsored post, but an honest independent review of a product. This post contains affiliate links |

How to Hang Decor on Vinyl Siding - with NO DRILLING!

Vinyl Siding

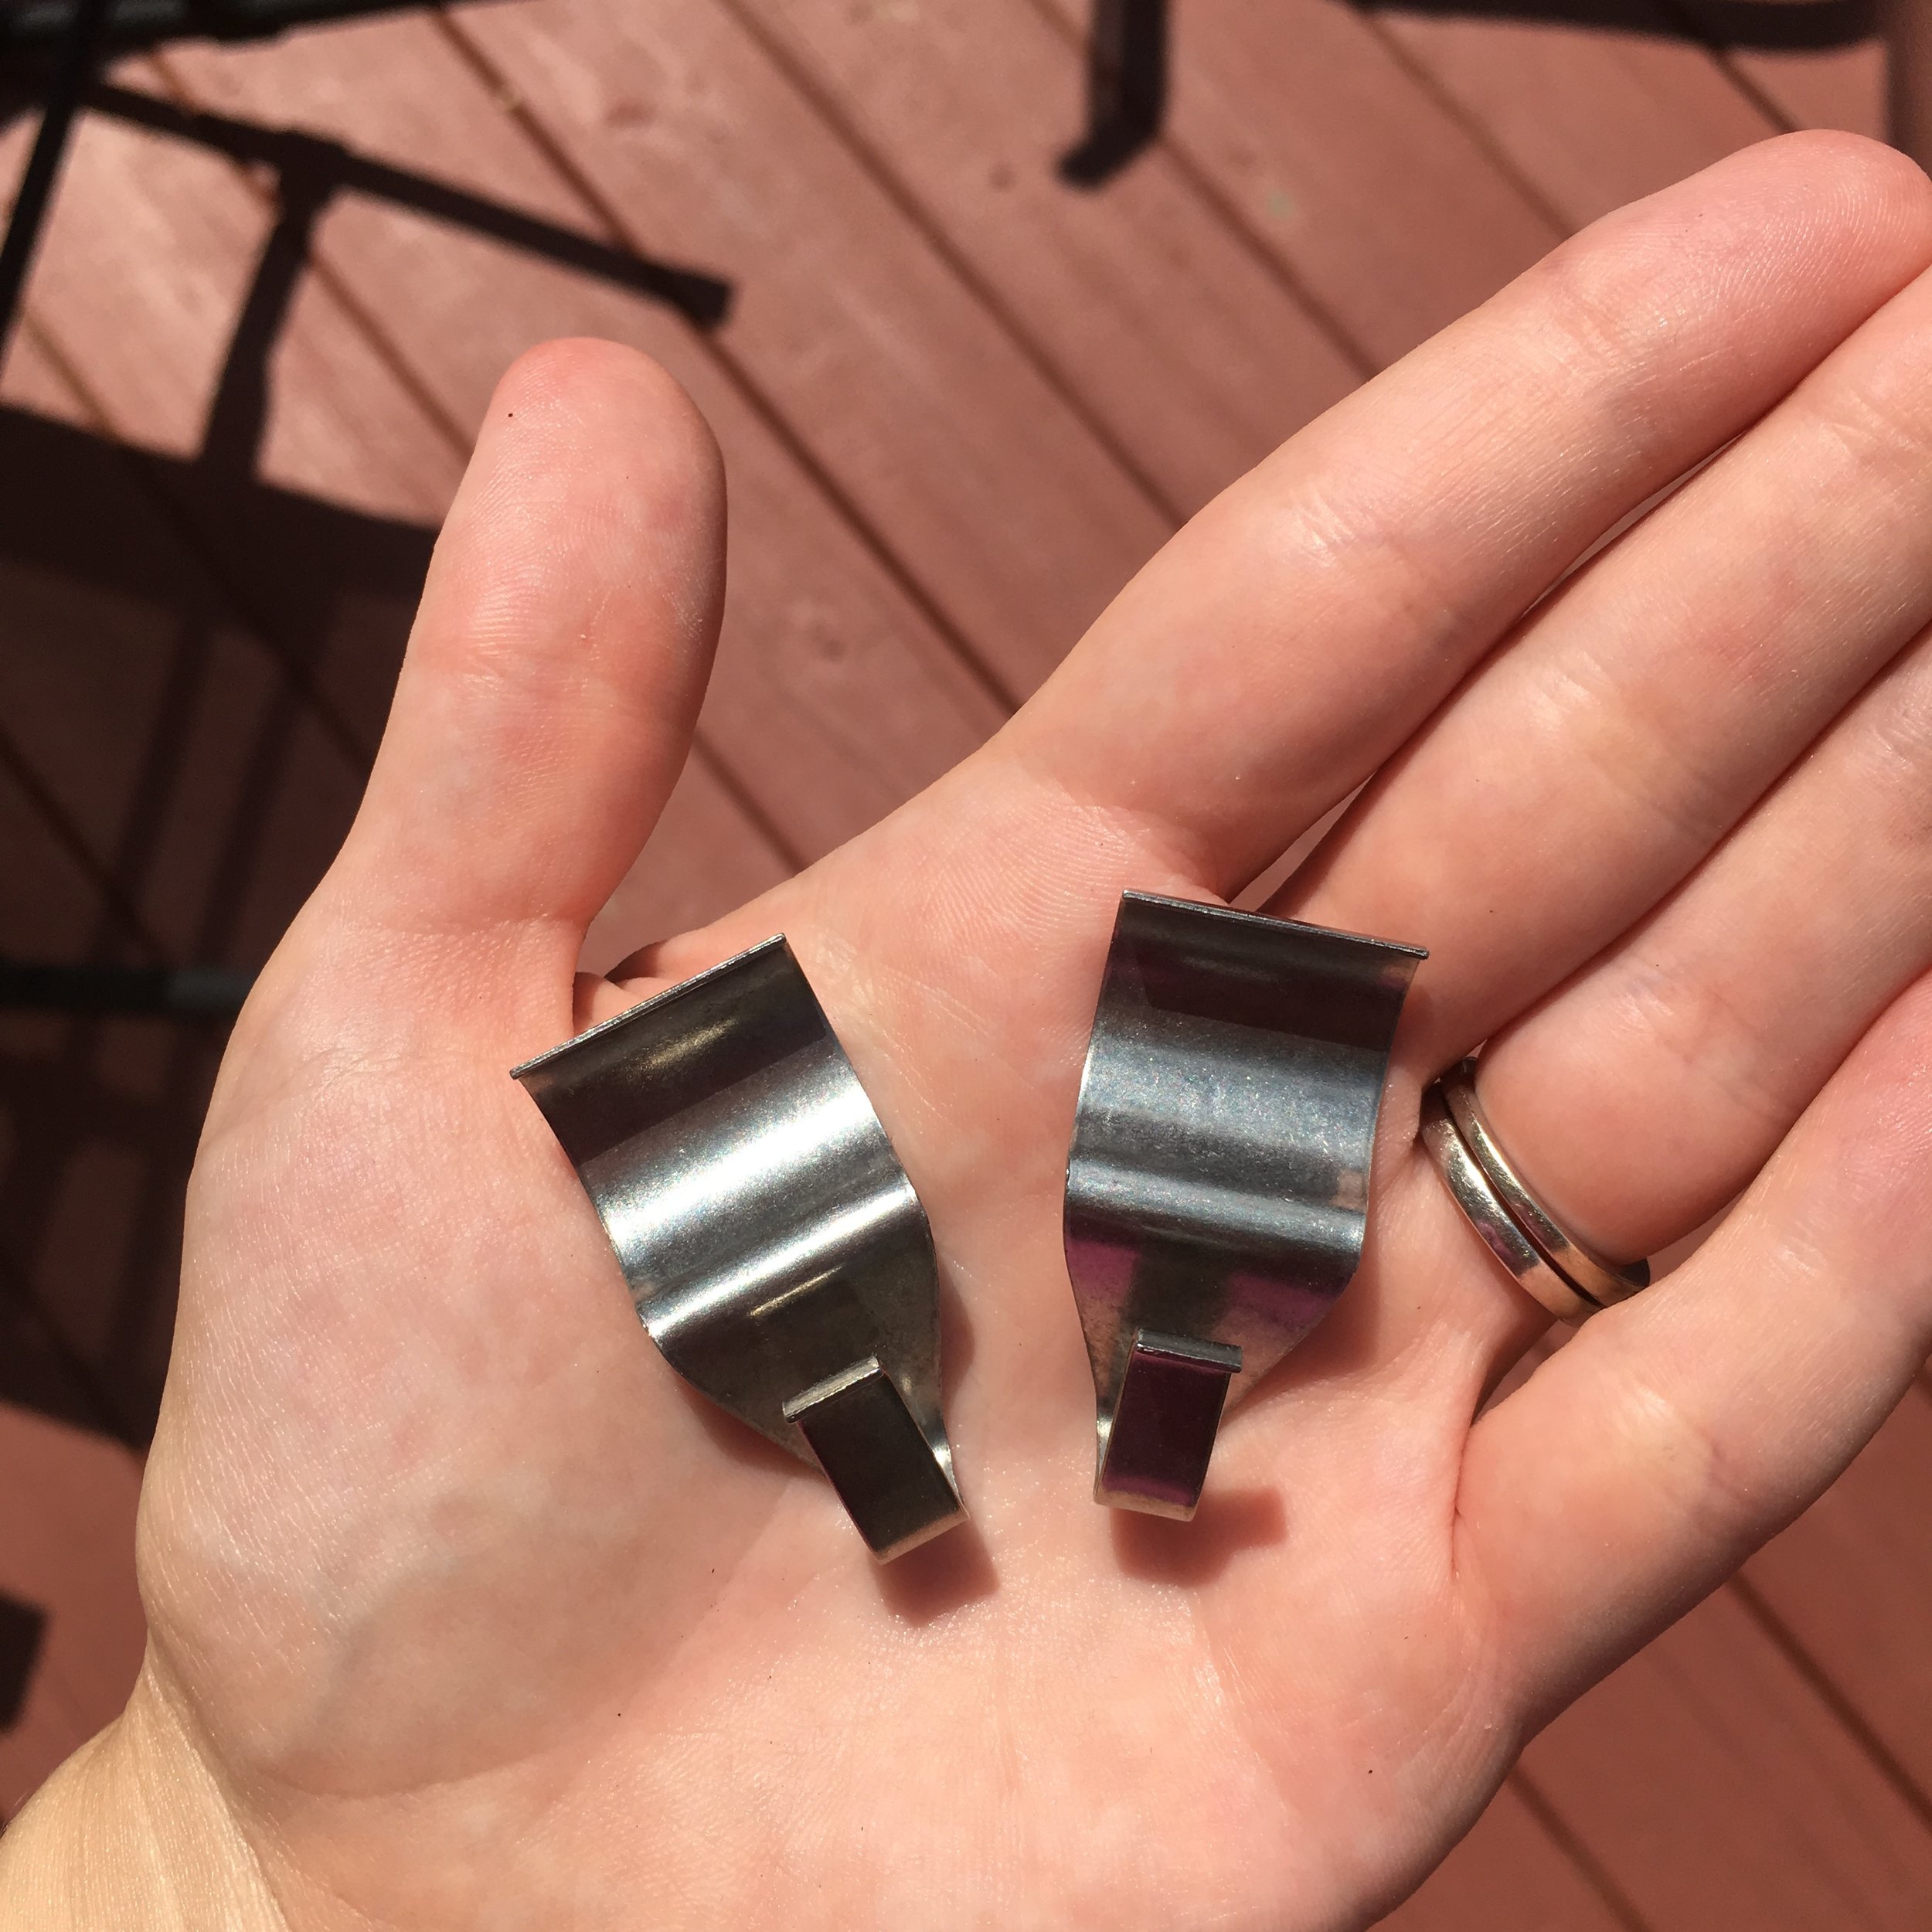
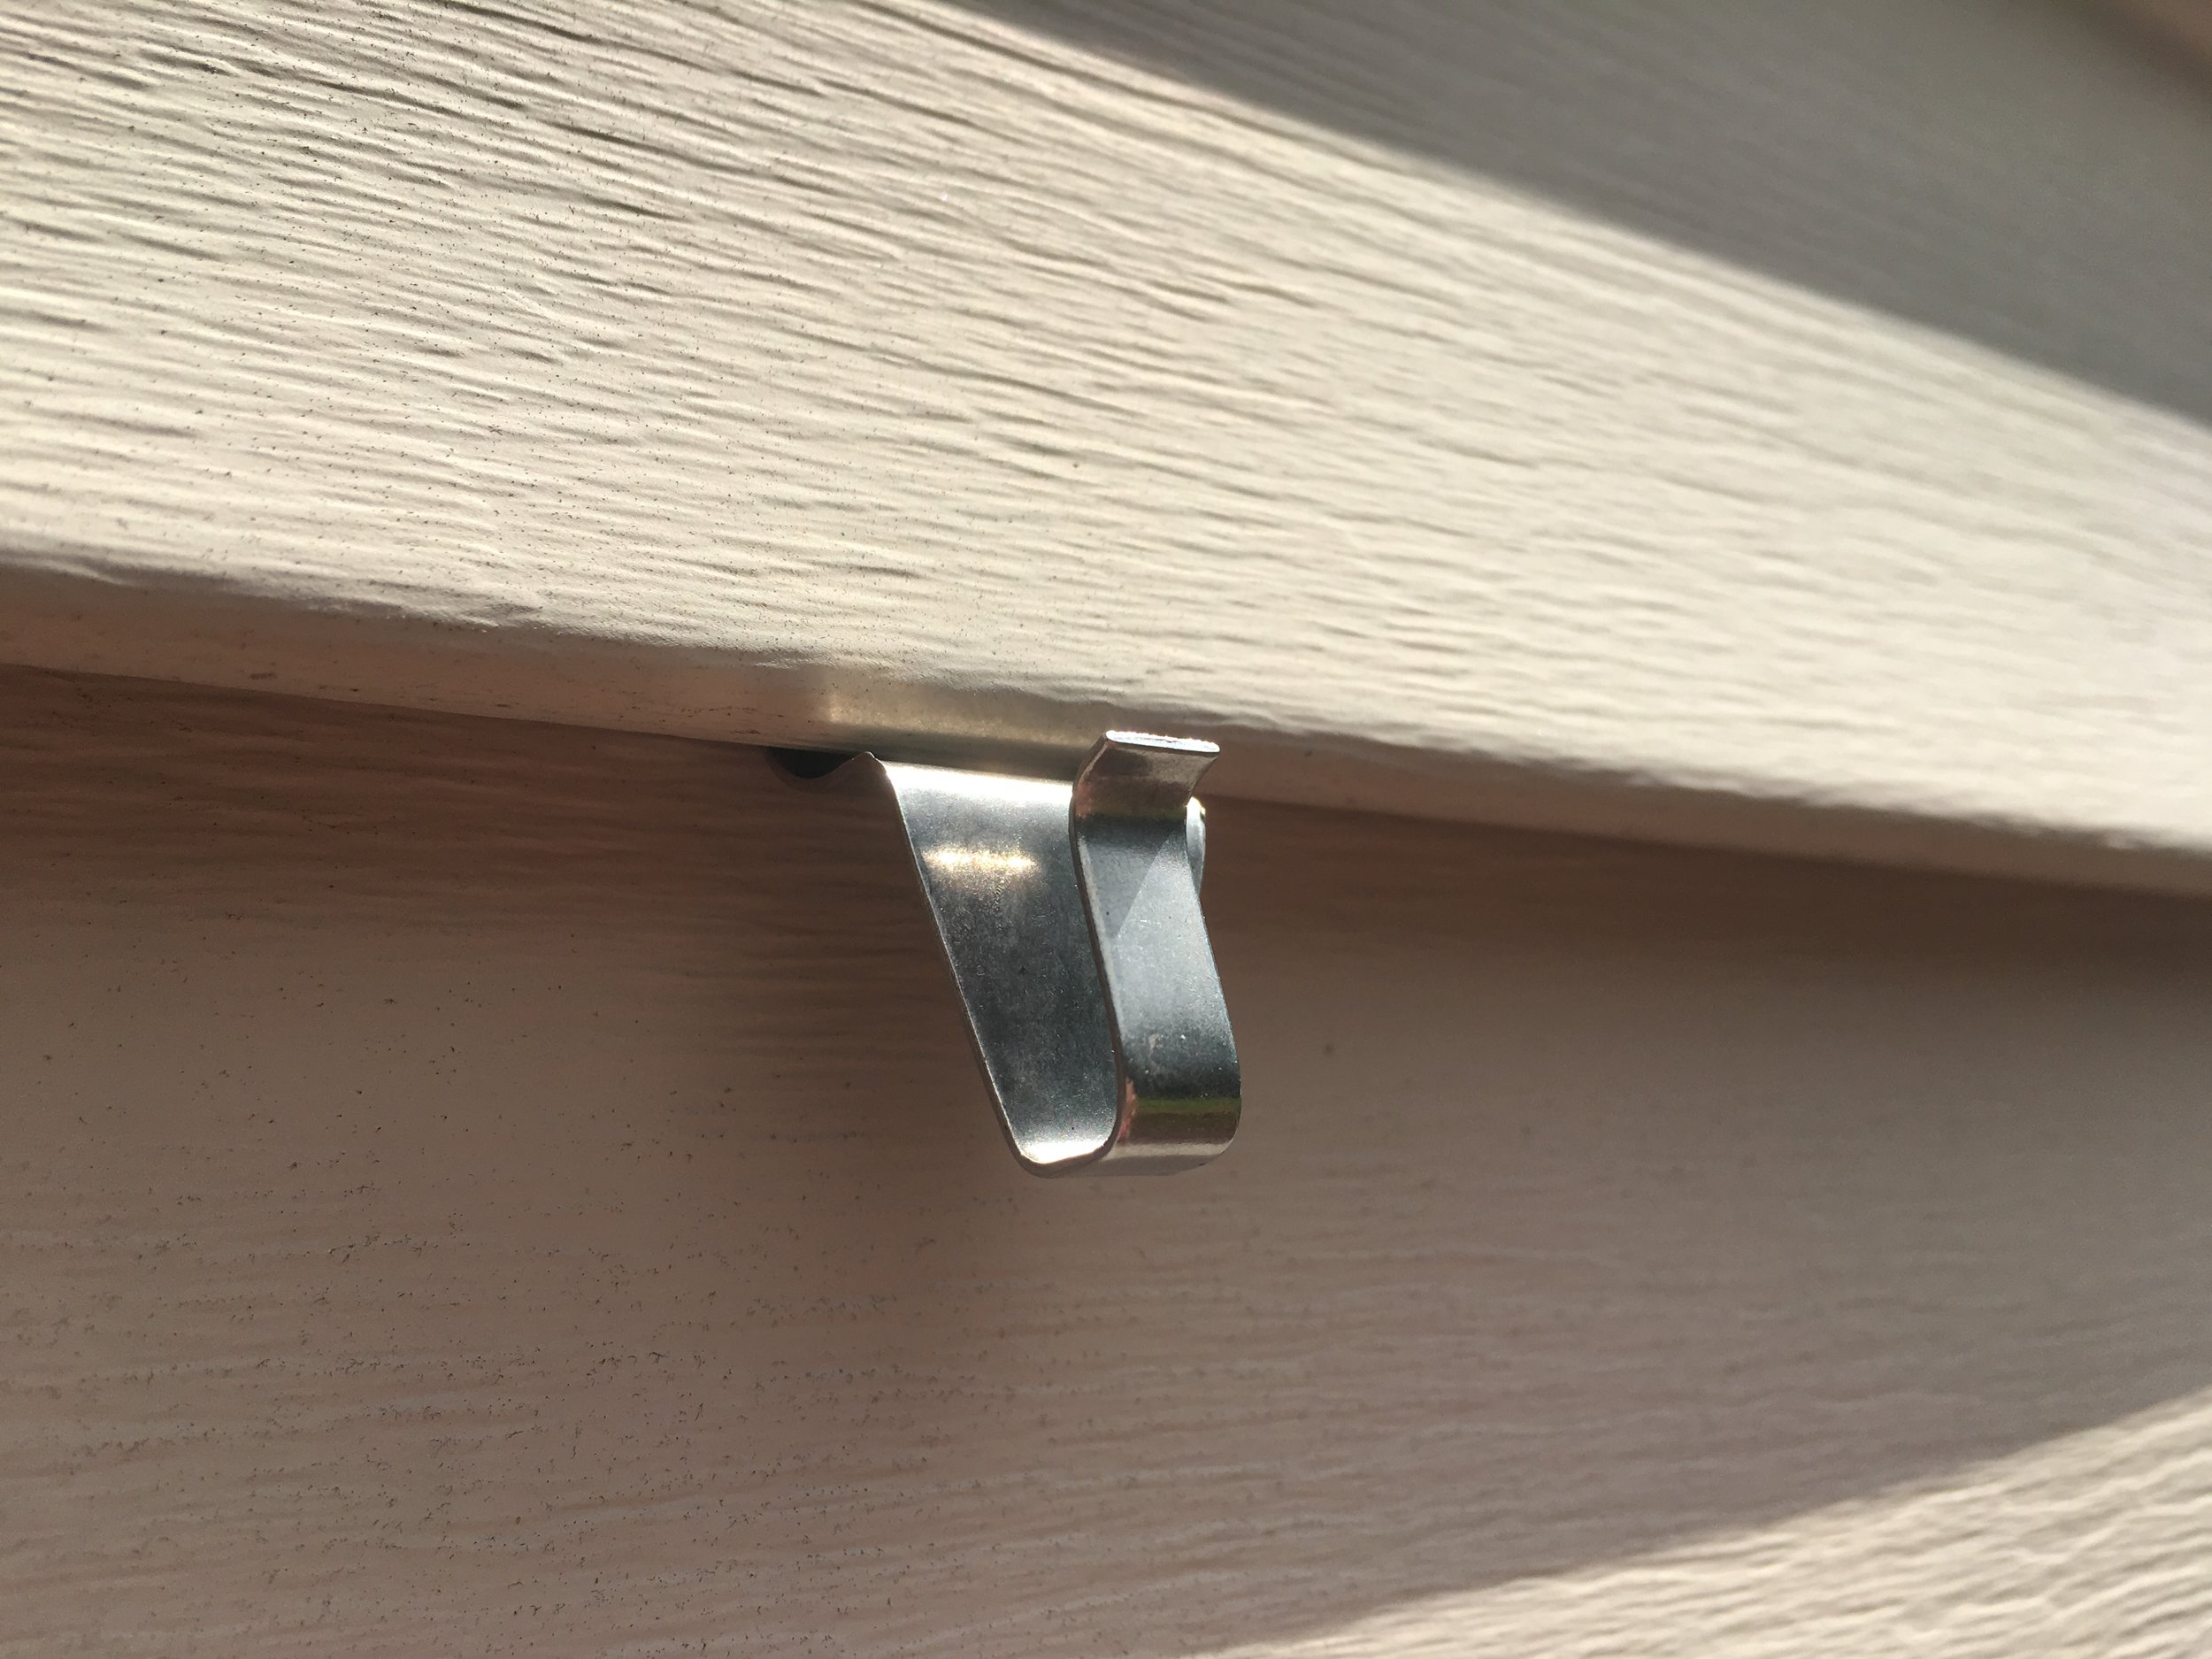
After some searching on Amazon I came across these "No-Hole Hooks" and it seemed to be the perfect solution! These are special stainless-steel hooks that are meant to "roll" under the lip of your vinyl siding and hang lightweight decor. Just what I needed!

How to Hang Decor on Vinyl Siding - with NO DRILLING!

I measured out the distance between the hangers on the back of my sign, placed the hooks at the correct distance, and hung the sign - ta-da! It couldn’t have been easier! I’m really happy with how easy it was.

It seems that as long as you have good condition (not sun brittle), quality siding and hang only light-weight items, this would be a great solution over drilling into your siding. I also love that if we decide to take down the decor, it leaves no holes behind!
I’ve had these signs up for a few months now and I’ve been really happy with how these have worked and held up.

How to Hang Decor on Vinyl Siding - with NO DRILLING!

Bricks

Similarly there is a no-drill product to hang items on bricks too! We do not have any brick surfaces at our home, so I personally haven't tried them myself but these Brick Hook Clips are well rated and meant to hang decor on brick surfaces, indoors or outdoors. Just make sure to follow the manufacturer's instructions regarding installation and weight limits.

| "Brick Hook Clips" |

Disclaimer: This is not a sponsored post, but an honest independent review of a product. Always follow manufacturer’s guidelines when using and use product at your own risk. Not liable for any damages or improper use.


KEEP UP WITH BIRCH LANDING HOME
|  Etsy  |  Facebook  |  Instagram  |  Pinterest  |  Bloglovin'  |  Hometalk  |