I'm a wife, stay-at-home mom, crafter, and blogger living in rural New England. As seen in Martha Stewart Living, Food Network Magazine, and more! | Tutorials, DIY, crafts, parenting tips, recipes, money saving tips, product reviews, local product features, New England living, intentional living, and more! |
Since we moved into our home several years ago we’ve been trying to establish more pollinator-friendly areas in our yard. We planted perennial flower beds wrapping around our house which are now well established, and we also have a veggie garden we plant every summer. One item that we’ve been wanting to add has been a solitary bee house to help make our space even more bee-friendly. Thankfully Kind Bee Farms was kind enough to send me one of their all-inclusive bee kits to try! | This post contains an honest review of product provided by Kind Bee Farms |
Kind Bee Farms is unique in that it's an all-inclusive bee experience - you don't just get the solitary bee house, but you get baby leafcutter bee cocoons to hatch too!
The whole kit is well packaged and thought out and comes with everything you need to get started. Since our kids will be home this year remote learning/homeschooling, we thought this would be a great project for science enrichment too.
Once you open your kit, you have the choice whether to let your cocoons start the hatching process inside or outside. We opted for inside so our kids could get to see them come out their cocoons - and don’t worry, letting these bees hatch inside your house isn’t as scary as it sounds! The cocoon box comes with a breathable window so you can see the process and keep them contained. Once 1-5 bees have hatched it’s time to bring the box outside, take the lid off, and put it in the loft of your bee house.
Once our bees started to hatch, we moved the cocoon box out to the bee house. We loved how the bee house looked on our potting bench but realized the afternoon sun was too intense here so we ultimately decided to hang it on our garden fence. This worked out well so our kids could keep a good eye on the bees too. These bees are non-aggressive so I’m personally not worried about our kids watching them up close.
Hello little bee friend!
We’ve had a few bees hatch over the last few days and I’m excited to see the rest of them hatch, move in, and pollinate our fall flowers and veggie garden!
End of Season Update: Ultimately we only had a few bees hatch and then they stopped… I was worried maybe a brief cool spell we experienced had done them in but after hearing back from Kind Bee Farms I found out that they unfortunately had some warehouse and processing delays due to COVID restrictions which affected their cocoon timing. They were kind enough to offer those who didn’t have a great hatching experience free cocoons next year which I thought was great customer service. I’m really looking forward to trying again next year and am sure we will have great results next time!
- I received this item for review from Kind Bee Farms but all opinions expressed are my own. Please see our full Disclosure Policy for more information -
Wiglesworth’s Mercantile is a brand new shop coming to Portsmouth’s Market Street next month and I am so excited to share that they’ll be carrying some of our ornaments and other small crafts! The owner Anne has a great vision of making it a place catered to carrying locally-made New England products. (You know how much I love local products, and I can’t wait to visit this wonderfully curated store once it’s open!)
Being home 24/7 and trying to limit grocery trips and ordering really makes you evaluate how quickly you’re going through supplies in your home. With two little kids, paper products were something we were blowing through and made me wonder how we could change this for the better. | This post is not sponsored but does contain affiliate links |
Now when I say "paper products" in this post I'm talking about paper towels and paper napkins. To greatly reduce our usage of these things we made the switch to reusable "unpaper" towels and aren't looking back. (And before you ask... yes, reusable toilet paper/wipes do exist too - but that's not for us, though if the toilet paper shortage continues who knows...).
“Unpaper” towels are cloths that you can use like paper towels but wash and reuse for a long time. You could really use just about any kind of cloth - wash cloths, tea towels, cloth napkins, pieces of flannel, etc. Hopefully you have something around the house already that you can use, but if you don’t and decide to purchase some we’ve found them to be worth the investment. For the price of a large package of throw-away paper towels, you can purchase of set of reusable ones that will last you a very, very long time and will eventually pay for themselves.
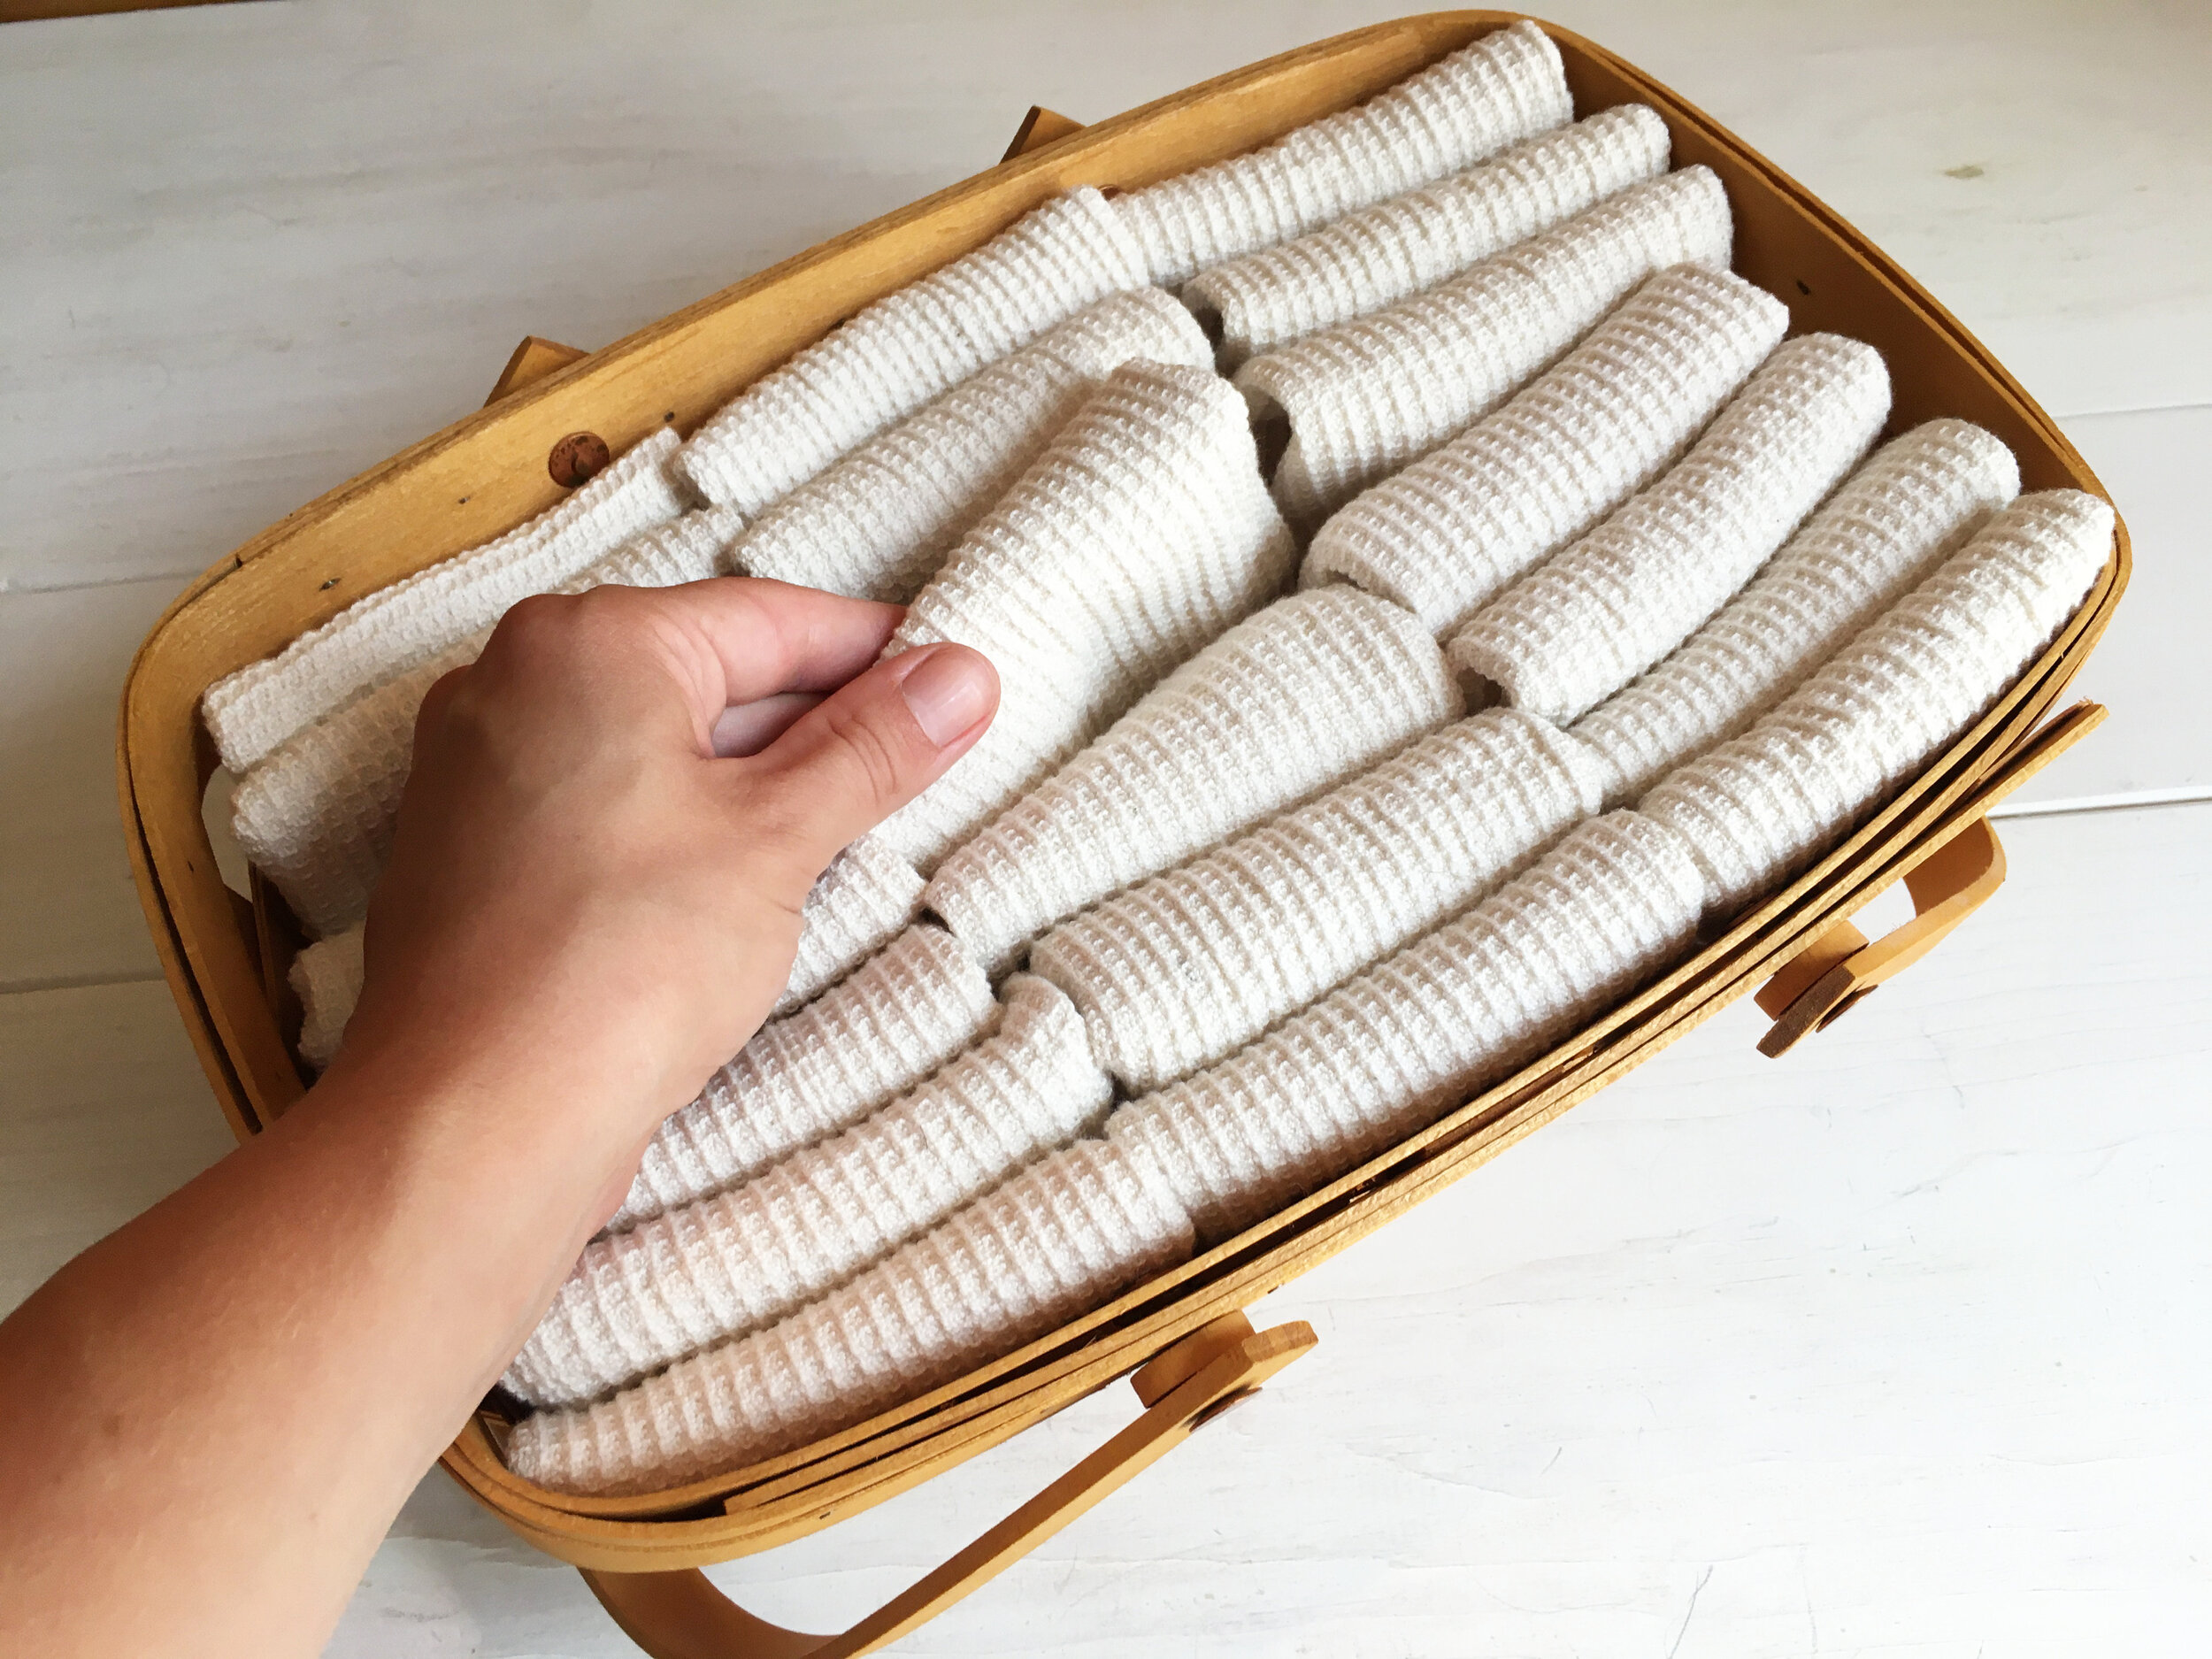
We thought about just using our current dishtowels but we use them regularly already for dishes and big spills (which happen a lot with two small kids). We were primarily looking for something smaller that would function like a paper towel and also wouldn’t fill our washing machine quickly (something else to consider), which is why we settled on these modestly-sized, organic bamboo cloths.
Some people will roll them on a paper towel holder and use them in place of ALL paper towels, completely eliminating paper towels in their home. For our household we decided to fold them and place them in a basket on our counter, next to our roll of paper towels. That way we’d be constantly reminded to grab a cloth instead of a paper towel whenever we had to wipe a dirty face or sticky fingers, but we’d still have paper towels at the ready if we really needed them. I even hung a little note over the paper towel holder to remind us to use less of them.
Since starting this system we’ve cut down on our paper towel usage big time. This has saved us money on our grocery bill and we feel like we’ve made a positive long-term change that’s more eco-friendly.
Cleaning Unpaper Towels: I hung a small mesh laundry bag on the doorknob of our laundry closet, which is conveniently right off the kitchen, to toss the used unpaper towels in to be washed. Whenever I start a load of laundry, I just throw the mesh bag in with the rest of the washing. You could also easily hang a mesh bag or small basket on the inside of a cupboard door with a Command Hook too if that is a more convenient spot.
Hopefully I’ve inspired you to find a reusable, money-saving solution to something in your home like we have found unpaper towels to be for us.
This post is not sponsored but contains my personal opinion as well as affiliate links.
We are still waiting to hear the final plans for our local school district (whether that’s in-person learning only, remote learning only, or a choice/combination between the two) - but whatever our school district decides, we’ve already made our decision. Because of the unknowns regarding COVID and how things will play out this fall and winter, we have decided to keep our kids home either way. | This post contains affiliate links |
We are waiting to hear what our district offers before we purchase a curriculum… if they offer remote learning then we will likely do that and supplement on our own with what we feel our kids need more help with or are interested in learning more about. But if they don’t offer remote learning then we will choose a curriculum and officially homeschool.
I recommend looking into what your state requires regarding homeschooling as every state is different. In New Hampshire we have a lot of flexibility and pretty basic requirements… I find this to be a blessing and curse - it’s great because it’s very open-ended… but it also makes it very difficult to choose what to do because, well - it’s very open-ended. Right now I’m in the process of looking into different curriculums (in fact I’m attending an “e-open house” online tomorrow for our 1st grader). A family member also offered to loan us some of their homeschool books from a few years ago which is very helpful. But since our kids are only going to be entering 1st grade and preschool I’m not too stressed about choosing the right curriculum for them… what they need to learn is very basic and could be taught on our own if needed without following a specific curriculum (which could be okay in our situation). Regardless, I have more homework to do in the coming weeks to decide how we’re going to handle everything.
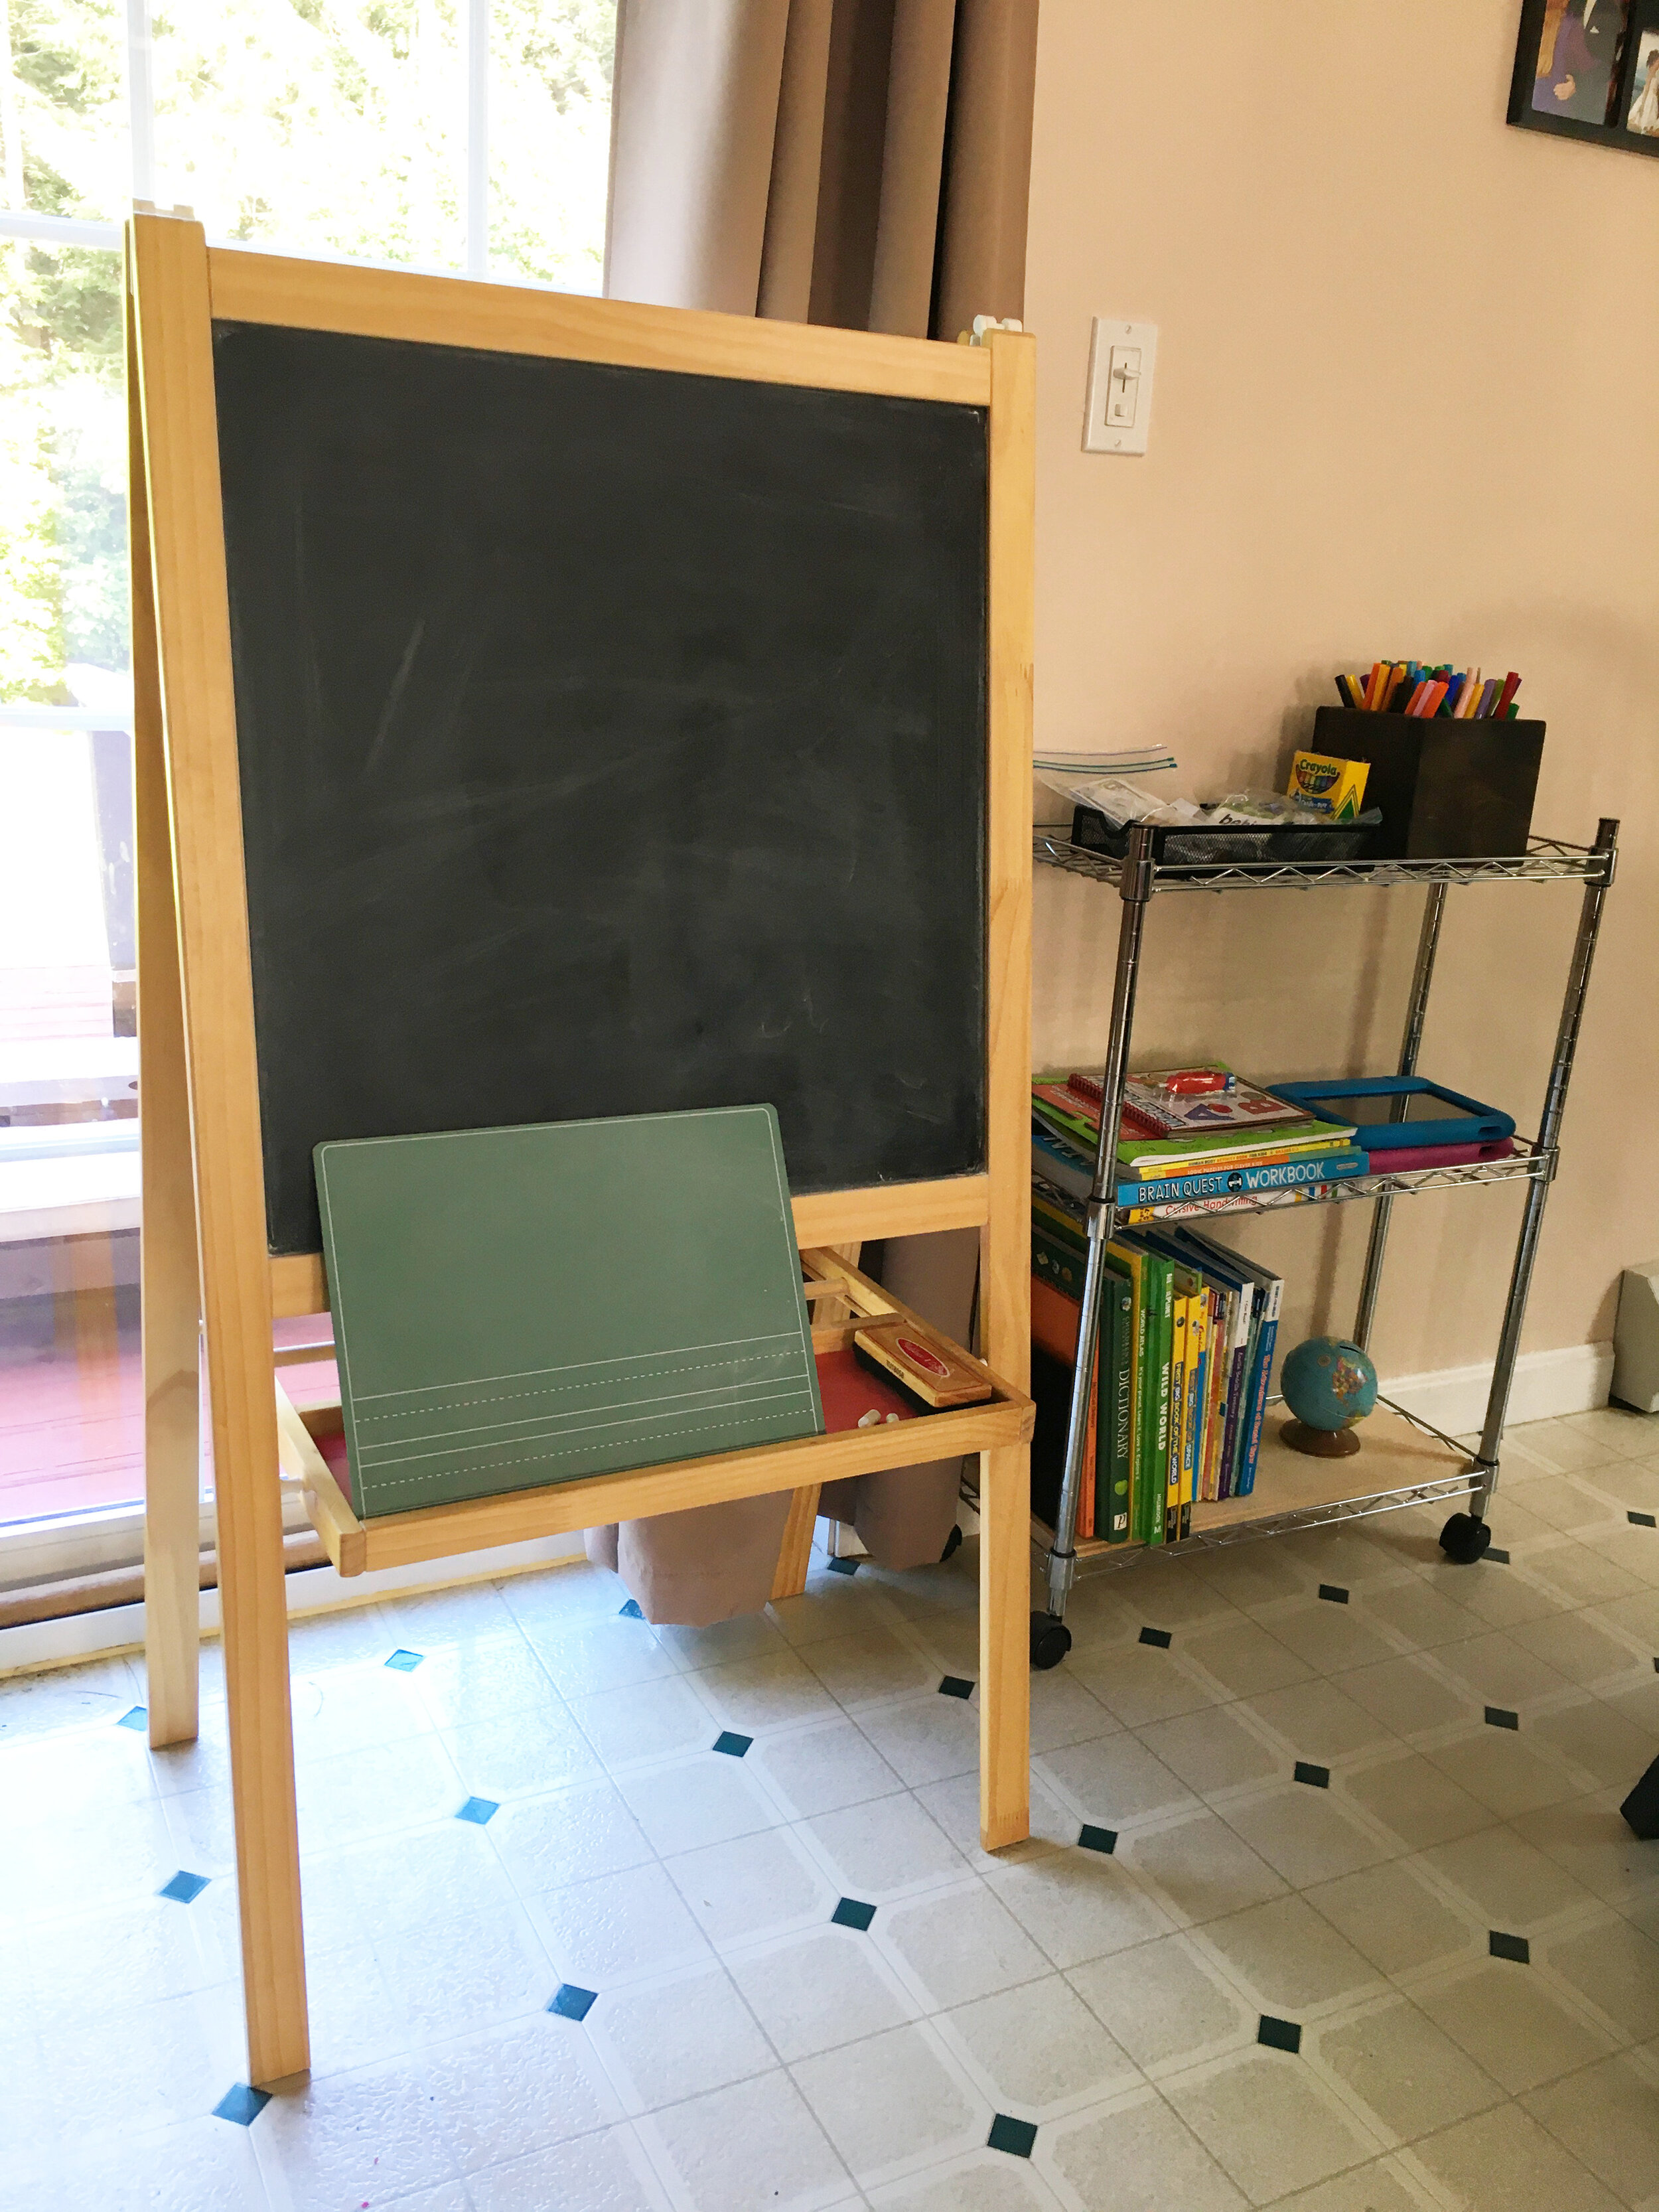
In the meantime though, I thought it would be a good idea to start setting up our homeschool area in our home. Ideally I would love to get our 1st grader her own desk and designated school space but we just don’t have the room. Instead we worked with what we had and decided to dedicate one corner of our dining room to be our homeschool area.
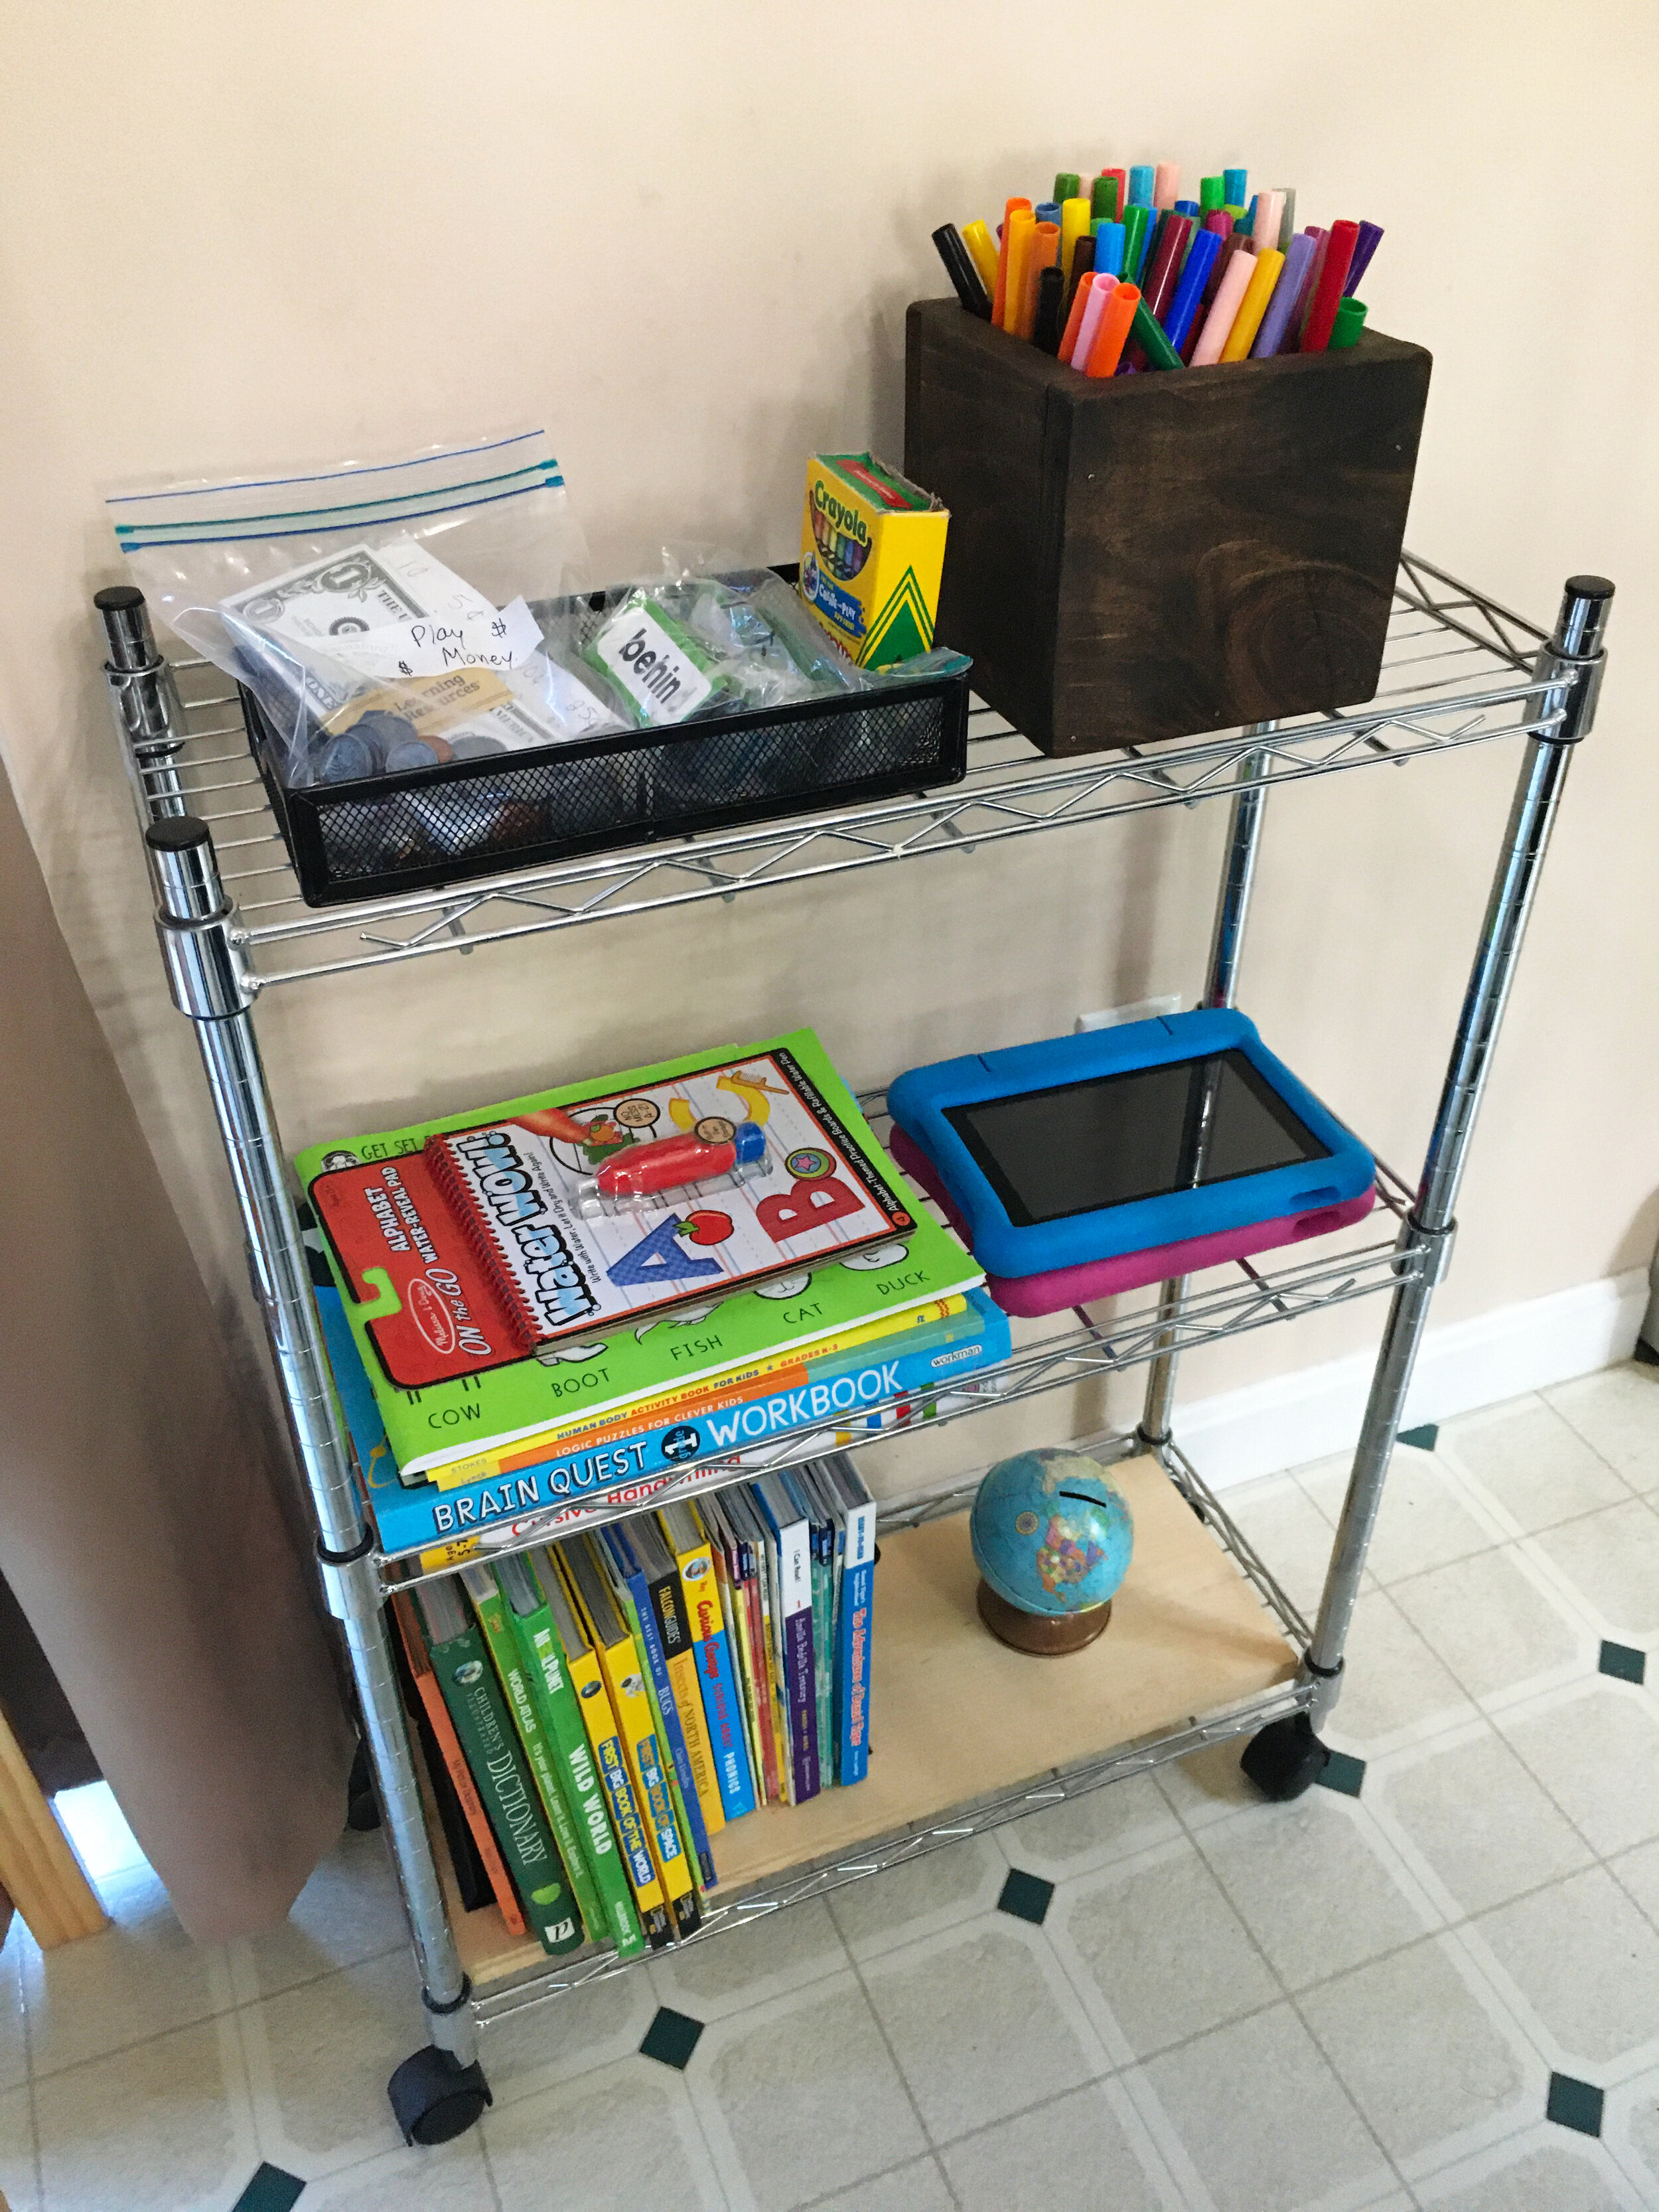
The cart will hold most of our supplies for homeschooling. On the top shelf we have play money, sight word cards, and some basic art supplies. On the middle shelf we have a collection of workbooks for both kids as well as their Kids Kindle Fires. We love the Kindles for playing age-appropriate educational games for each kid, and reading books for our first grader. On the bottom shelf we have a small collection of reference books for kids, some early reader books, and a small globe. I lined the bottom of this shelf with a wooden board so the books would stand up easier.
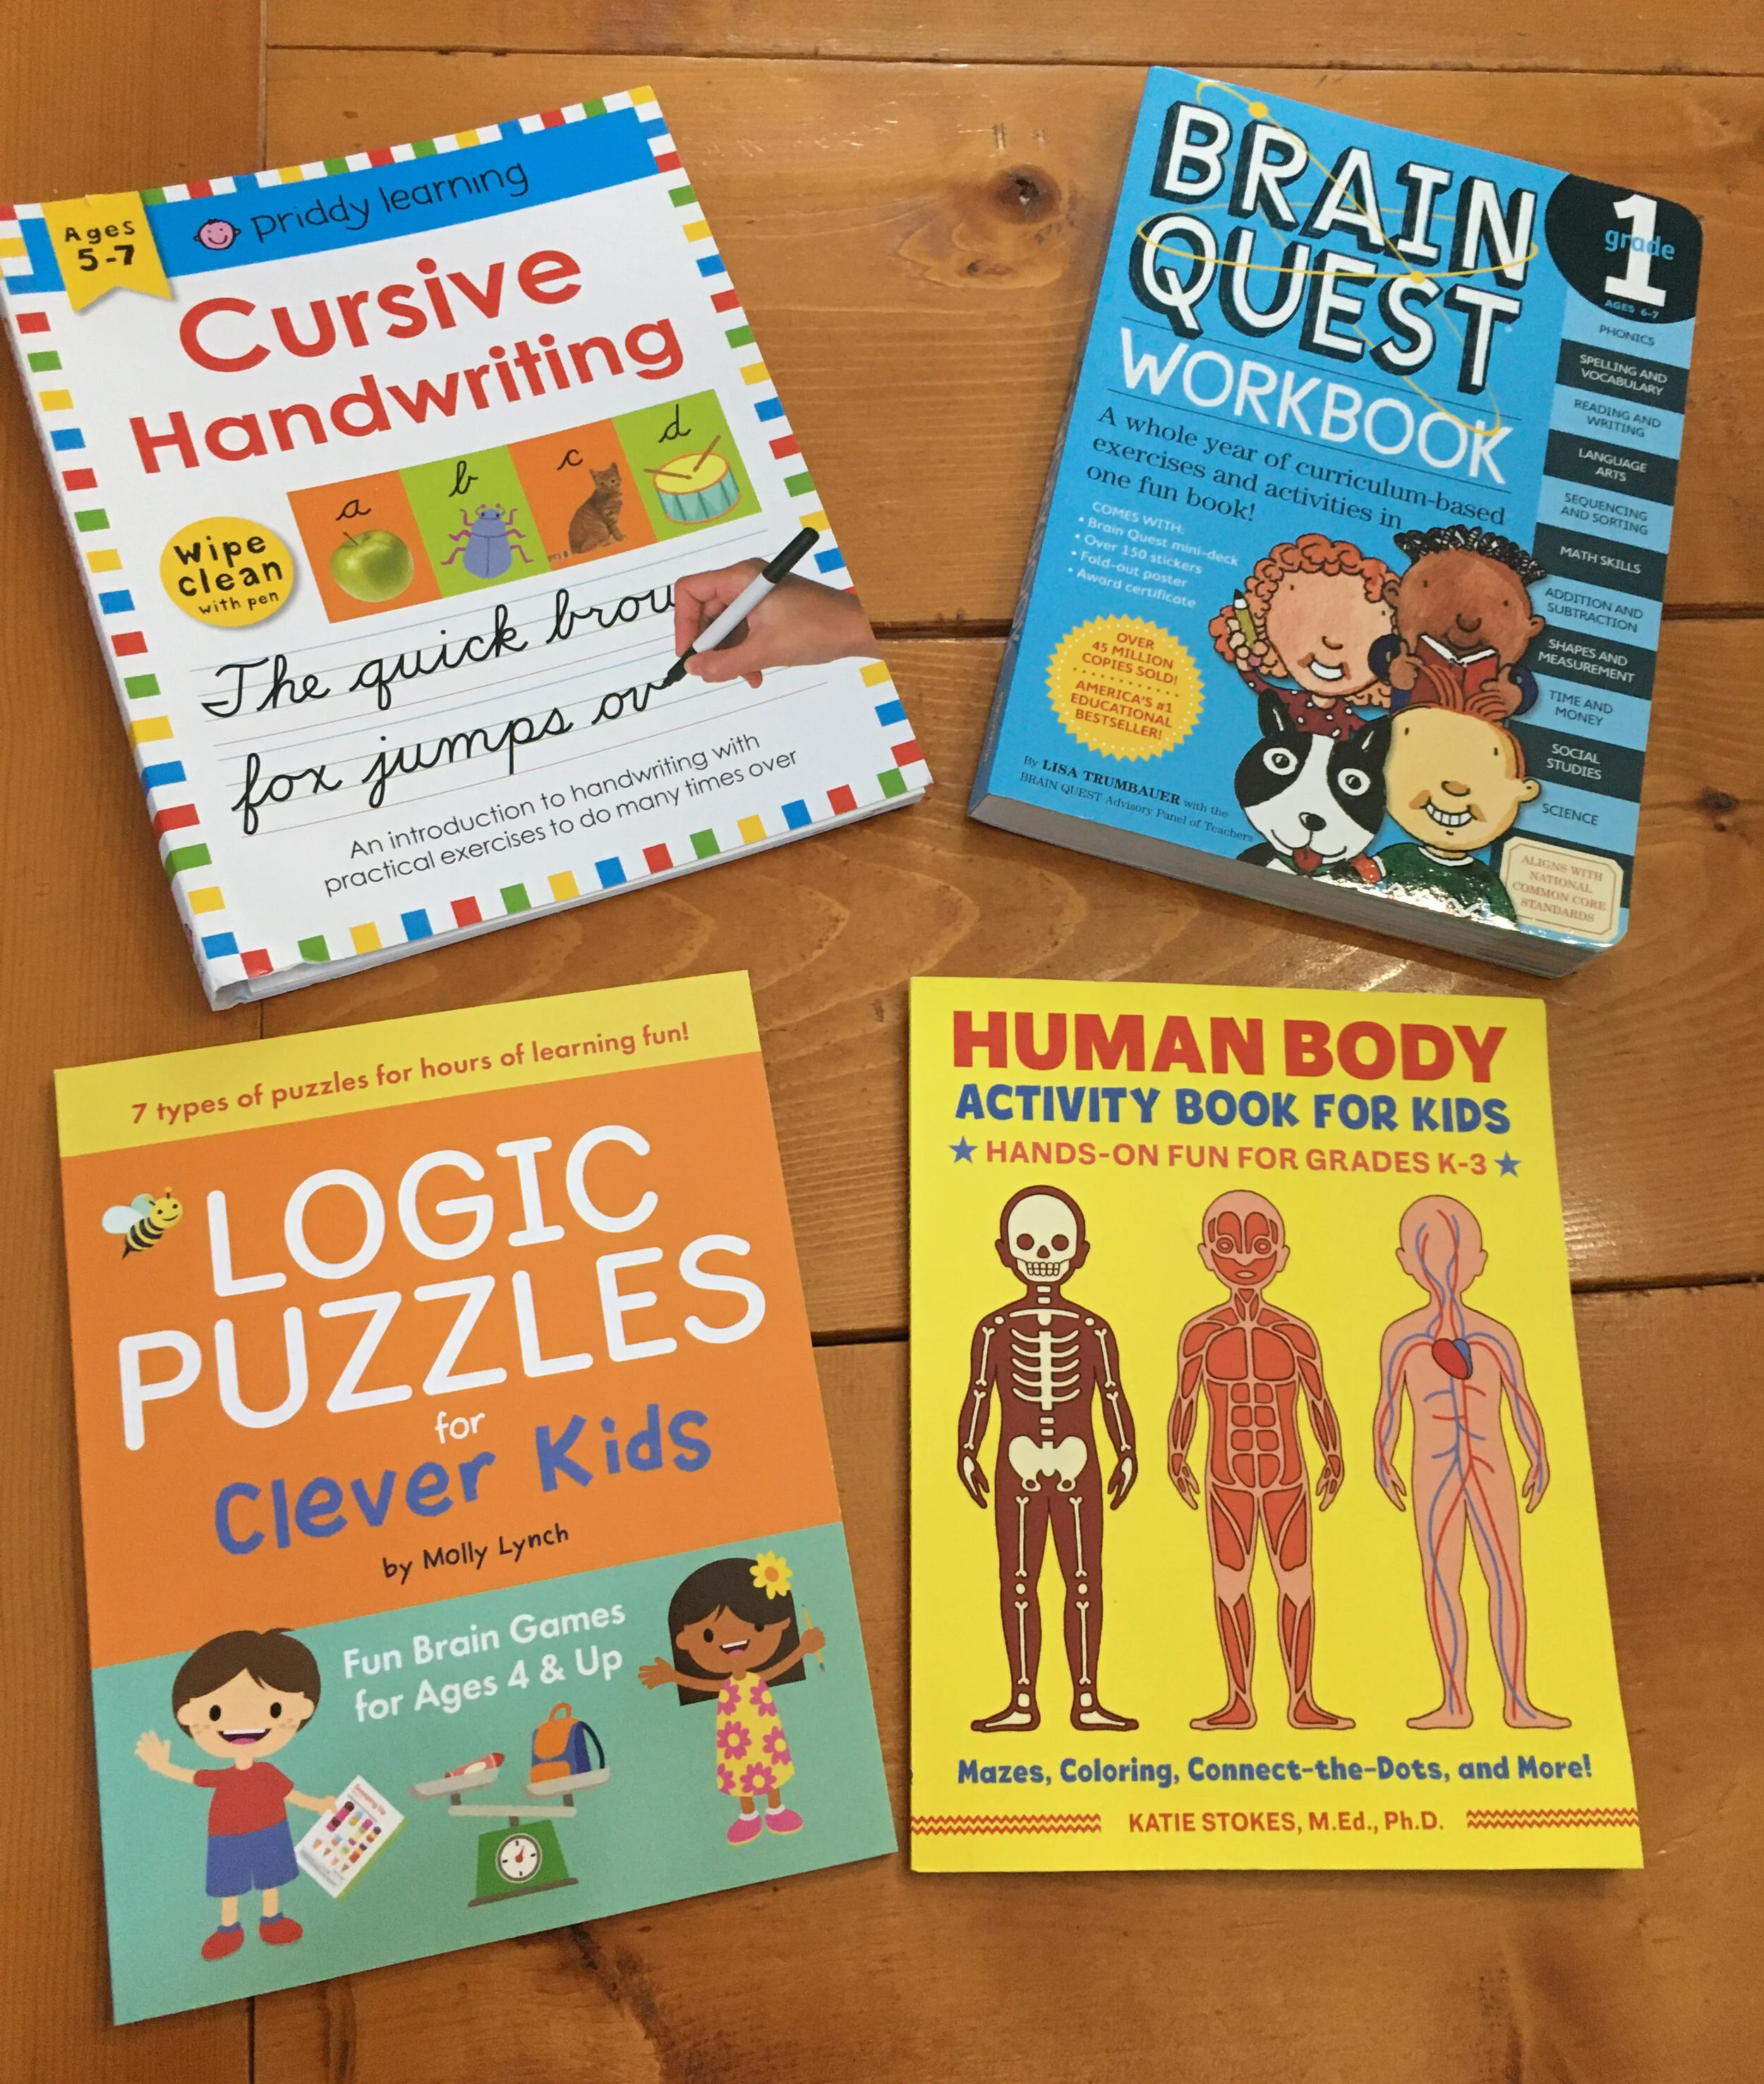
FIRST GRADER | Again, we still haven't picked a curriculum yet - but here are some supplemental workbooks we've gotten for our 1st grader so far: Cursive Handwriting (this isn't something that is typcially taught in first grade here but our daughter has expressed an interest in learning, so this is more of a fun bonus activity we plan on working on if she feels like it), Brain Quest Workbook: Grade 1 (we love this series of workbooks for fun, educational worksheets that cover a variety of subjects), Logic Puzzles for Clever Kids (age-appropriate logic puzzles are great for everyone to practice thinking and problem solving skills), and Human Body Activity Book for Kids (we chose this to cover some science and health basics).
For our First Grader we also ordered this set of play money. Getting kids familiar with money is so important on many levels - not only will they need to learn our currency and what everything is called and what it's worth, money is also great for teaching math concepts of addition, subtraction, and equivalences.
PRESCHOOL | For our preschooler, we're keeping it VERY basic. At this age I think it's best to mostly learn through playing, but we're going to work on reinforcing and learning some very basic things like letters, numbers, colors, and how to write her name. For her I purchased "My First School Book" from Learning Without Tears, which came very highly recommended to me. I also got a Melissa & Doug Water Wow ABC Book as a fun reusable resource to reinforce her ABCs.
A computer is also SUPER important in most remote learning/homeschooling situations these days... I upgraded my Macbook last year so our daughter has been using my old Macbook for school but a basic Chromebook is a great option for most. It's also a very good idea to have a printer available to print out worksheets and activities that can't be done online.
You also may want to consider some "school decor" to help set the stage for them to help it feel more like school. A calendar center might be a good idea for younger grades, or some laminated maps. I picked up some maps for us that I will hang up soon - our daughter has been really interested in maps and learning about the world and I personally think it's important to teach them about the bigger world out there, especially since we're so closed off at home these coming months.
Not pictured is our Art Cart which we keep in our pantry - it's well stocked with art supplies, pencils, crayons, glue, rulers, coloring books, paper, and just about anything they might need for hands-on activities or creativity.
We still have a lot to figure out but now that we have our classroom space starting to shape up I feel like we're heading in the right direction. Whatever you decide for the coming school year, know you’re not alone - it’s definitely a difficult and stressful decision no matter what you choose. Best of luck and stay healthy!
We’re still social-distancing very seriously but all our favorite outdoor spaces (hiking trails, lakes, beaches, camping areas, etc) have been totally overrun lately with people looking for a change of scenery. This unfortunately makes it impossible to social-distance safely, so we tend to just stay home. | This post contains affiliate links |
In order to make our weekends more special we started a weekend tradition early on during Quarantine to “camp at home” every weekend. During the colder months and bad weather, this meant camping in our living room every Saturday night with sleeping bags and staying up late watching a family-friendly movie. Sunday mornings we make a special breakfast, usually of pancakes or egg sandwiches.
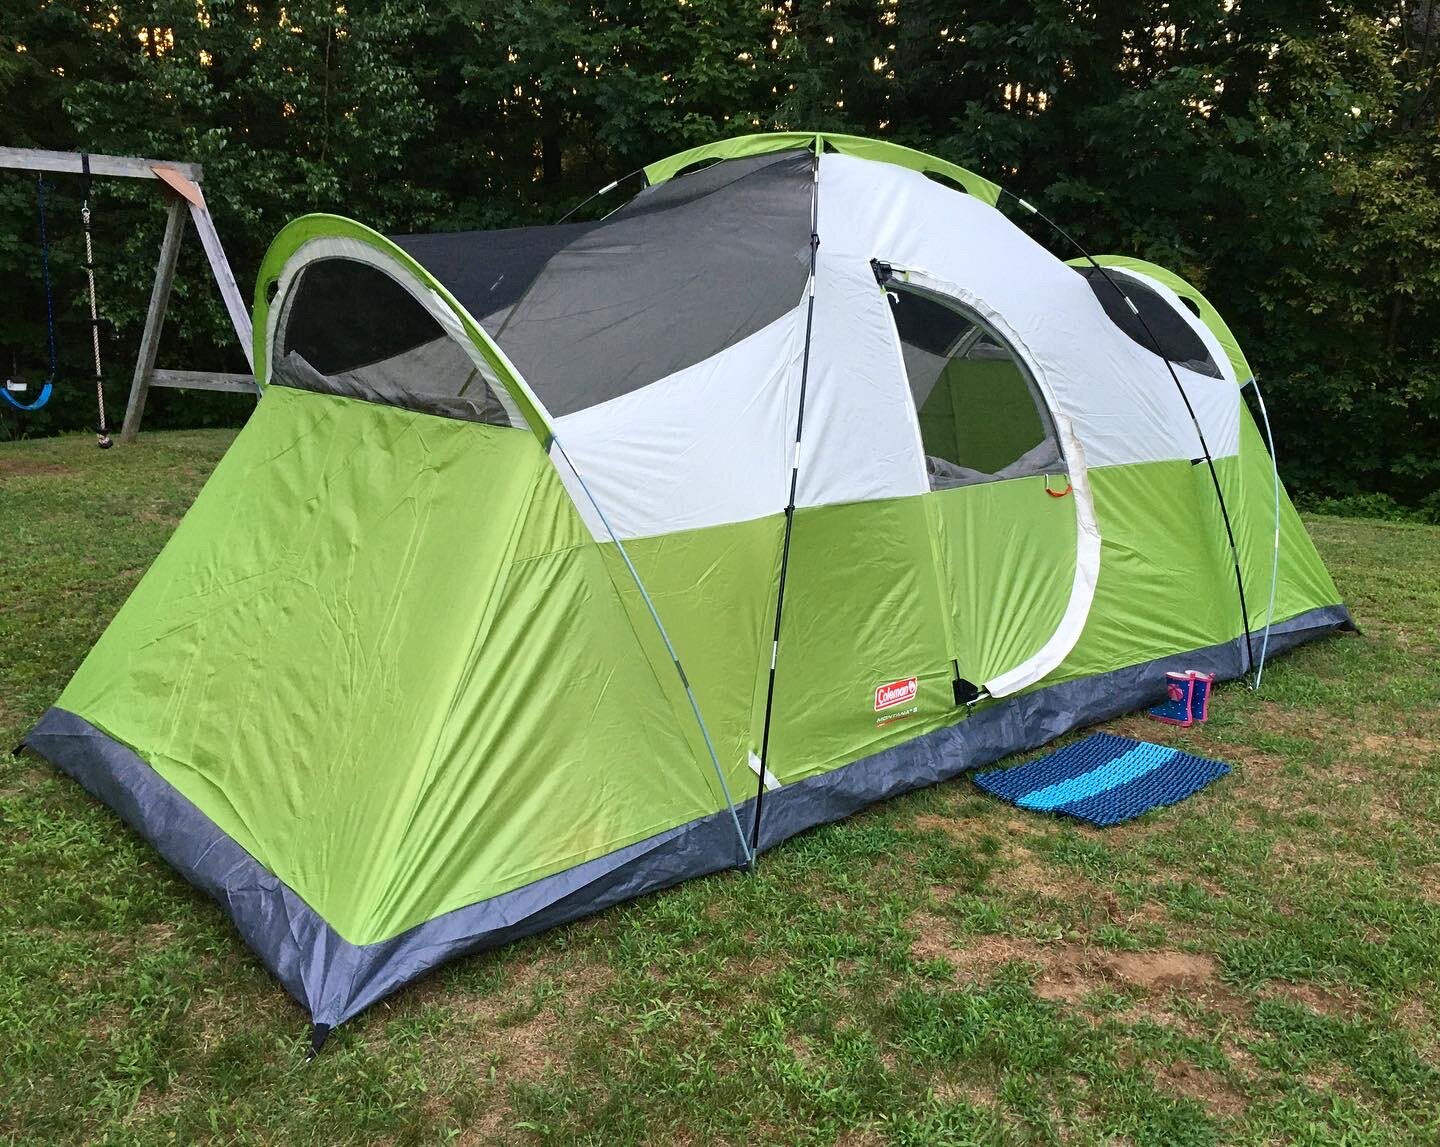
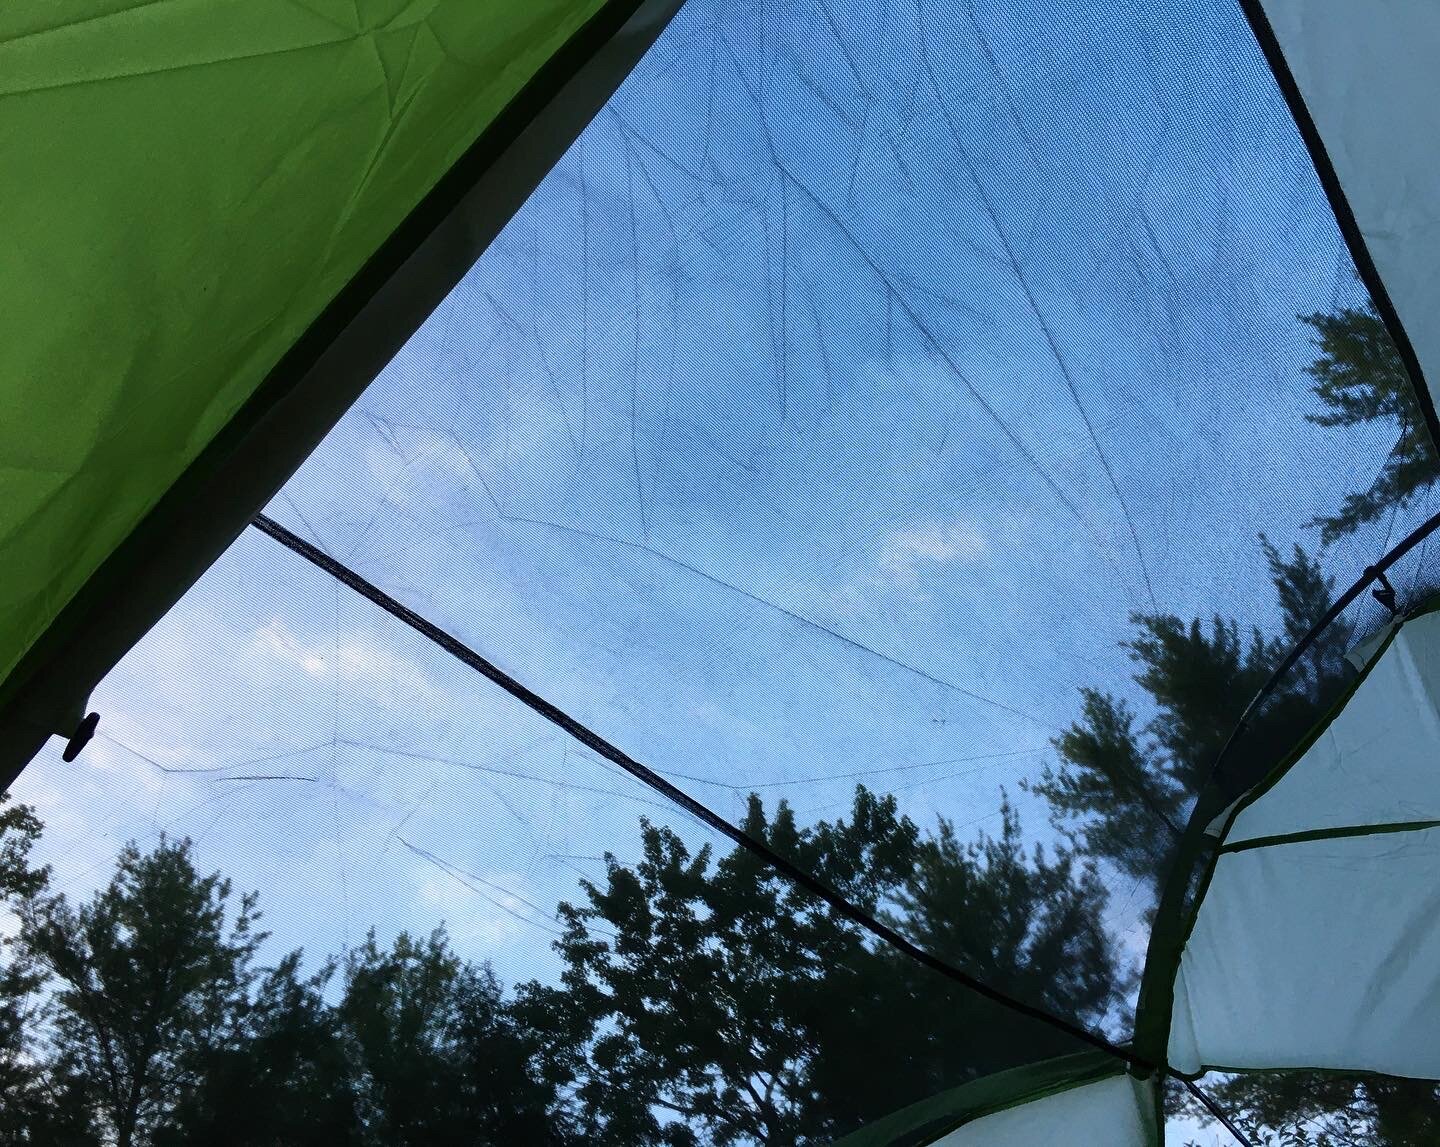
Now that the weather is warmer, we’re doing more backyard camping. Our large tent is nice and roomy for all of us to spread out - and the extra large screen areas on the top mean we can leave the rainflap off in nice weather so we can see the stars and watch the fireflies (which is what we typically do). It feels really magical and the kids love it! When we set up the tent we typically try to camp for at least two nights in a row to get more out of it.
(Pro-tip: Put a doormat outside your tent to help keep grass and sand from getting tracked in - We purchased our mat from one of our favorite companies, Maine Rope Mats.)
We may be stuck at home, but that doesn’t mean we still can’t make special memories. I hope you can find a fun tradition to start at home during this time too - stay well!
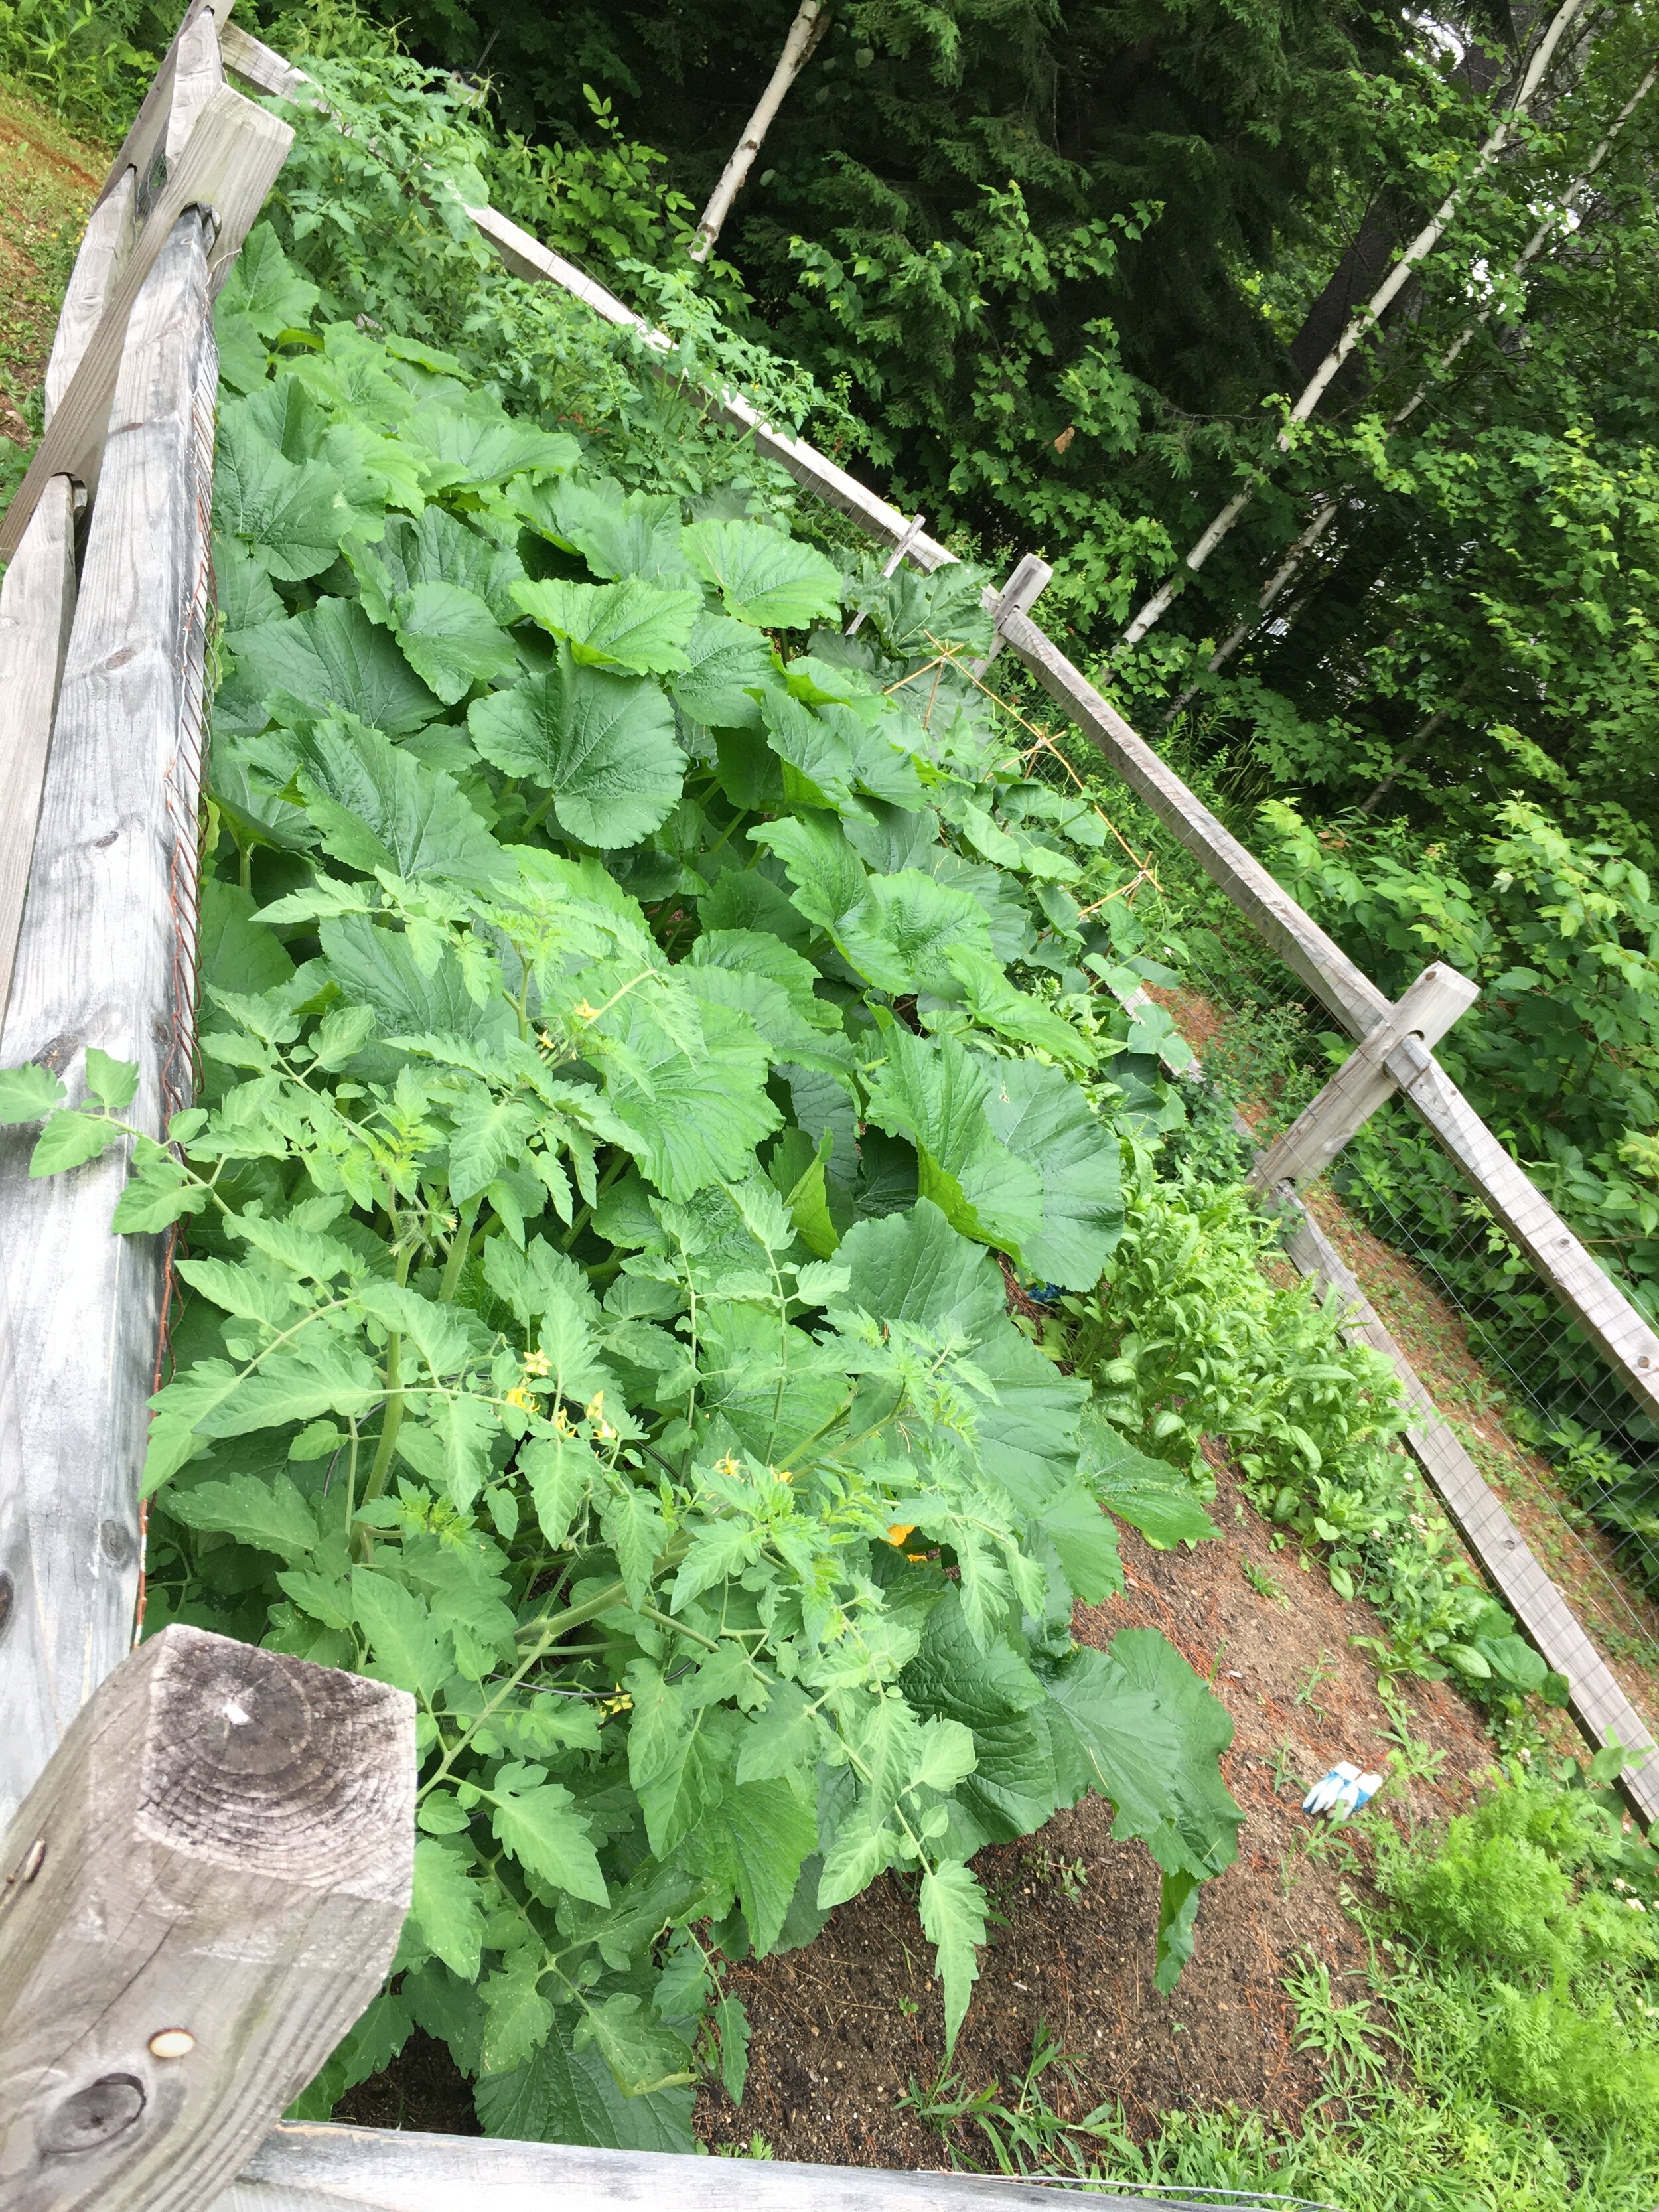
So our garden isn’t magazine-worthy (and it definitely could use a good weeding - the spot by the gate gets so over-run with crab grass I can never seem to keep up) - but it’s been doing really well this year and I thought I would give a quick tour and share some things we’ve been doing in our Victory Garden. New England, Zone 4-5. | This post contains affiliate links |
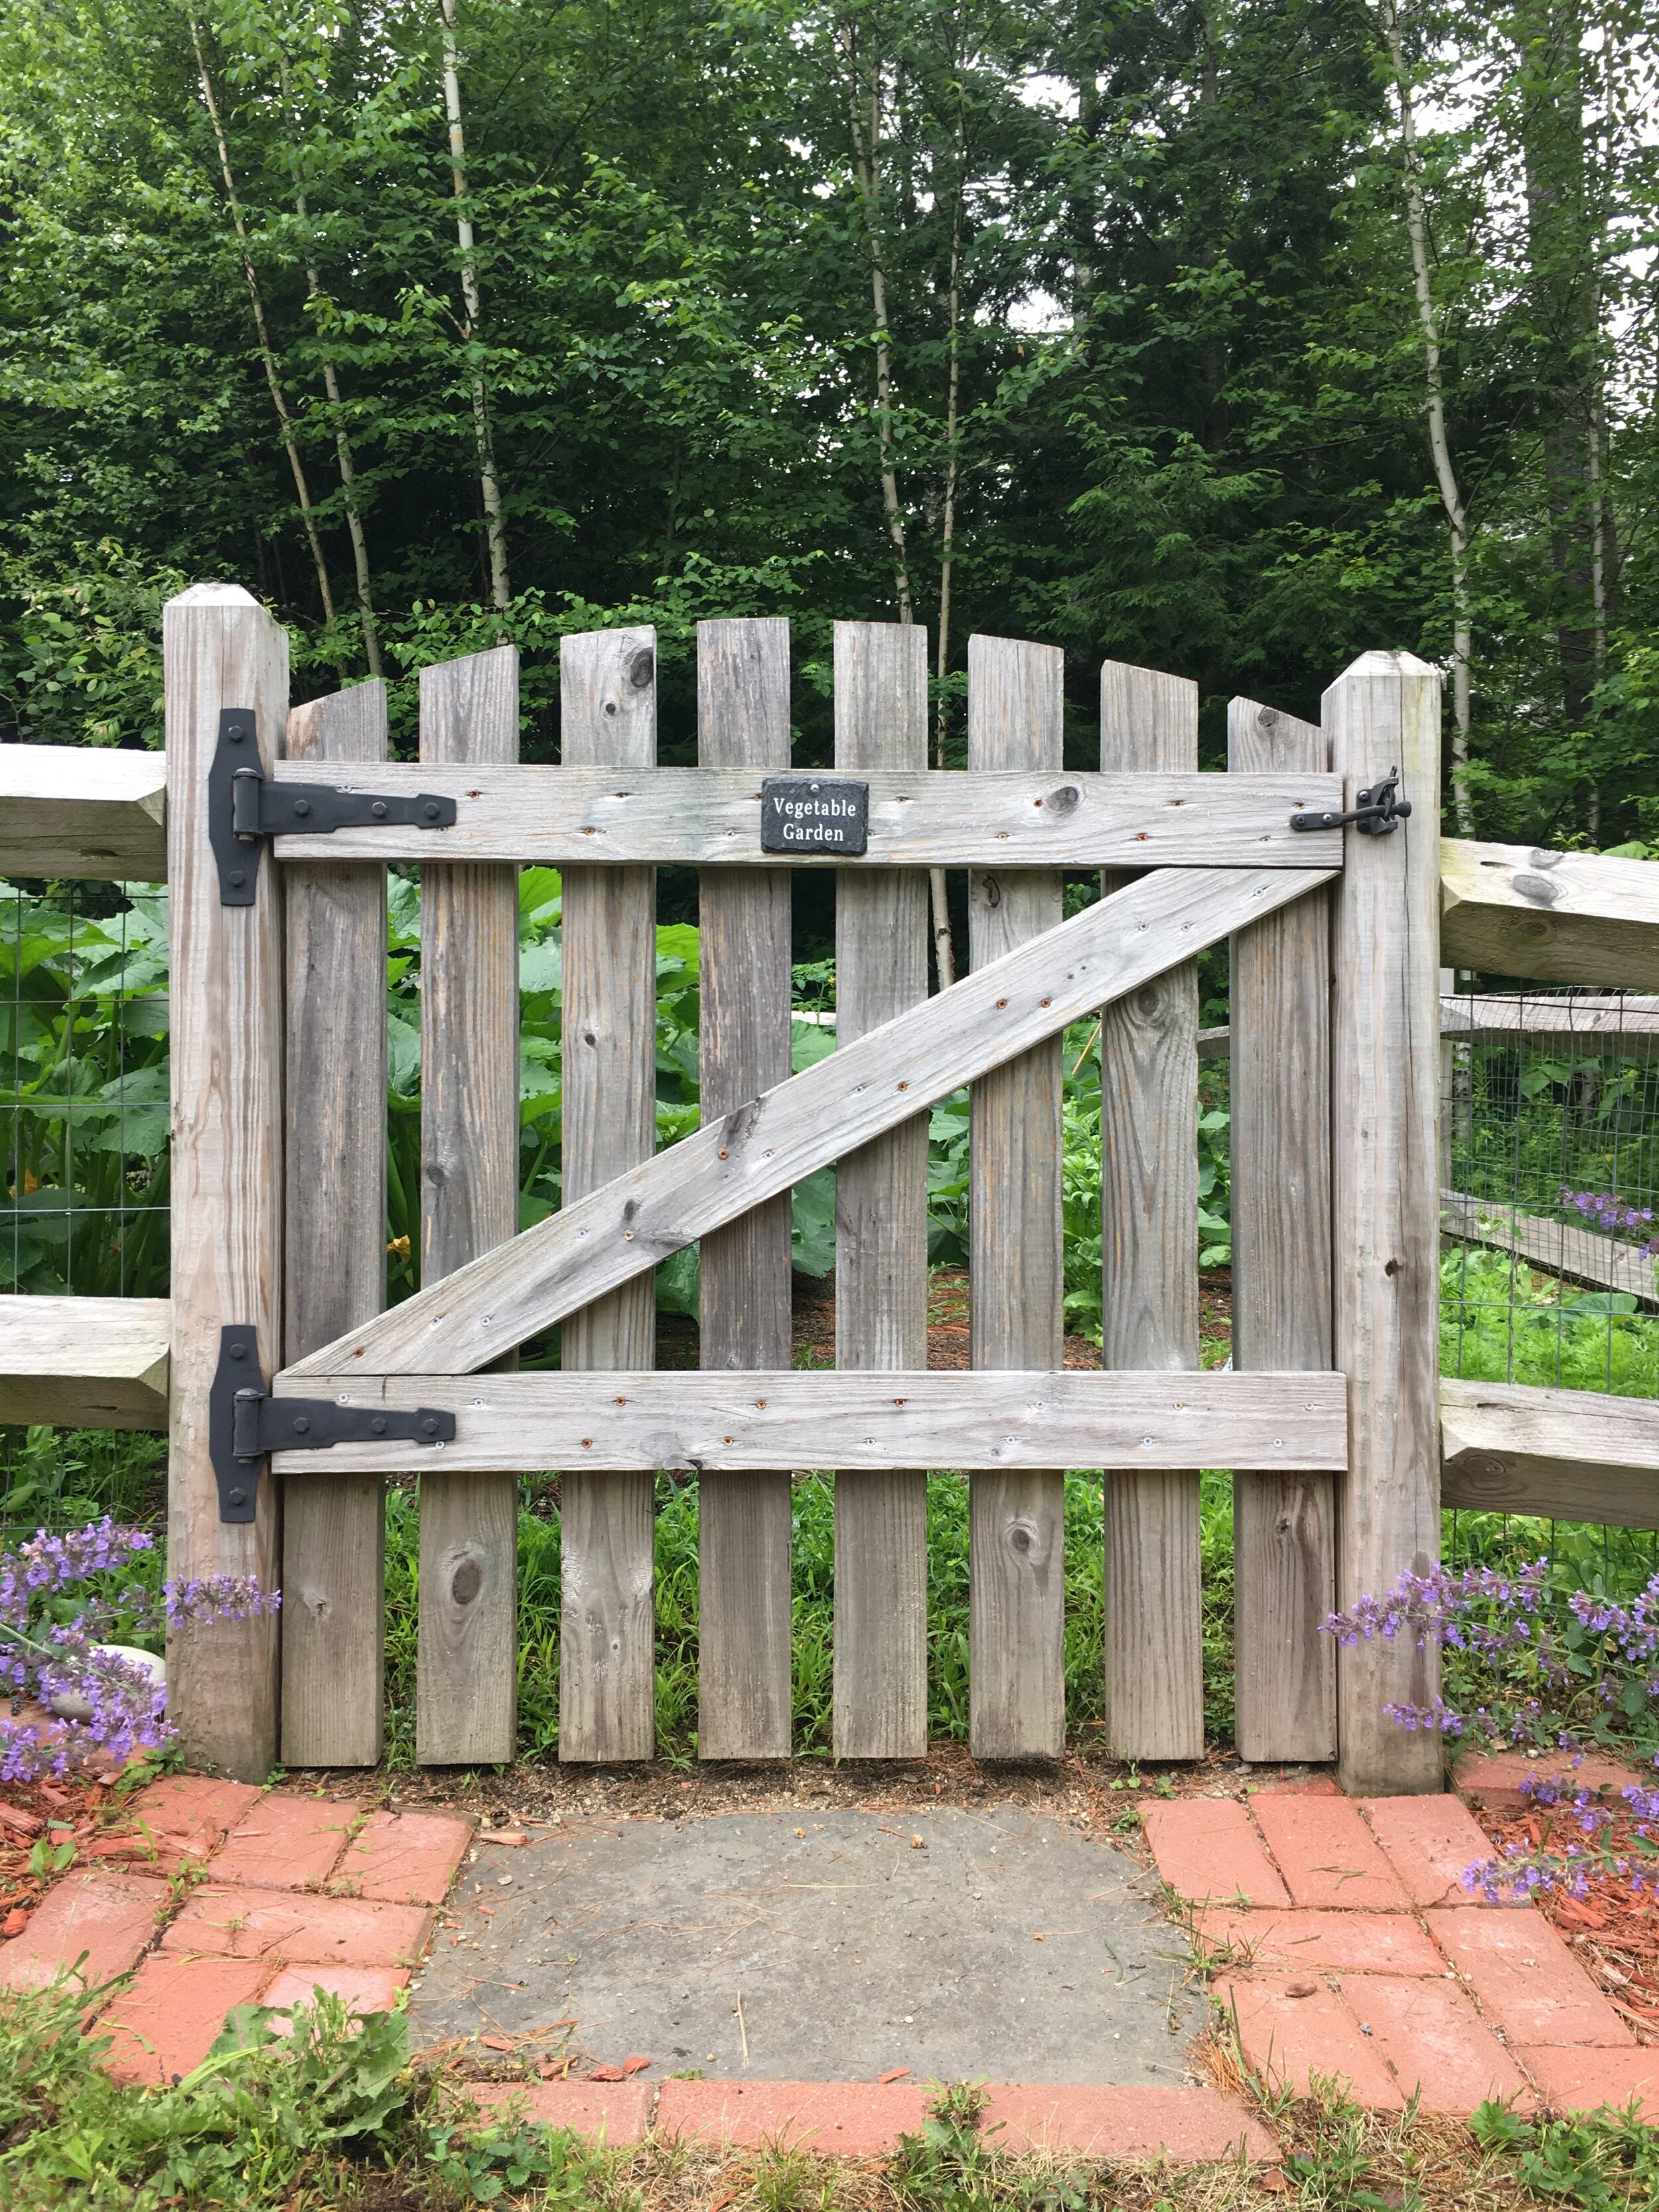
Our garden is approximately 12x24 feet. My husband built the enclosure seven years ago with split-rail fence lined with garden wire fencing (to help keep critters out) and then designed and built the gate himself - the gate is absolutely my favorite part! At the front of the garden I inlayed bricks and pavers (all of which we had on our property left over from the previous owner years ago) to create a little stepping stone walkway leading up to the entrance of the garden and a small flower bed on each side.
Inside the garden everything was planted from seed and directly sown into the ground mid-May with the exception of the Rhubarb plant (it’s a perennial) and the Tomato plants (I purchased them as seedlings from a local garden center).
For fertilizer we put a few bags of composted cow manure in before rototilling in the spring, and then after planting the seeds I sprinkled a small amount of 10-10-10 Fertilizer across the garden.
In each of the front flower beds I planted Catmint which is a perennial and a great pollinator plant! The blooms attract lots of bees and butterflies and help encourage pollination in the vegetable garden. I also just love how wild and cottage-y they look. They’re also very drought tolerant and hardy - a great no-care plant once they’re established.
Soon I would like to also get some type of Mason Bee House to add to the garden to further ecourage pollinators to come to the garden.
Just inside the garden, along either side of the front, I planted Snap Peas against the fence so they would have something to climb. I also planted Carrots along this front area on each side as well.
When I directly sow the seeds into the ground, I usually stake the empty seed packet with a twig (seen above for the Snap Peas), to mark where I’m planting and so I can reference when the seeds should start to sprout, mature, etc as they grow. Now that my plants are mature I could take all these out but I haven’t just yet.
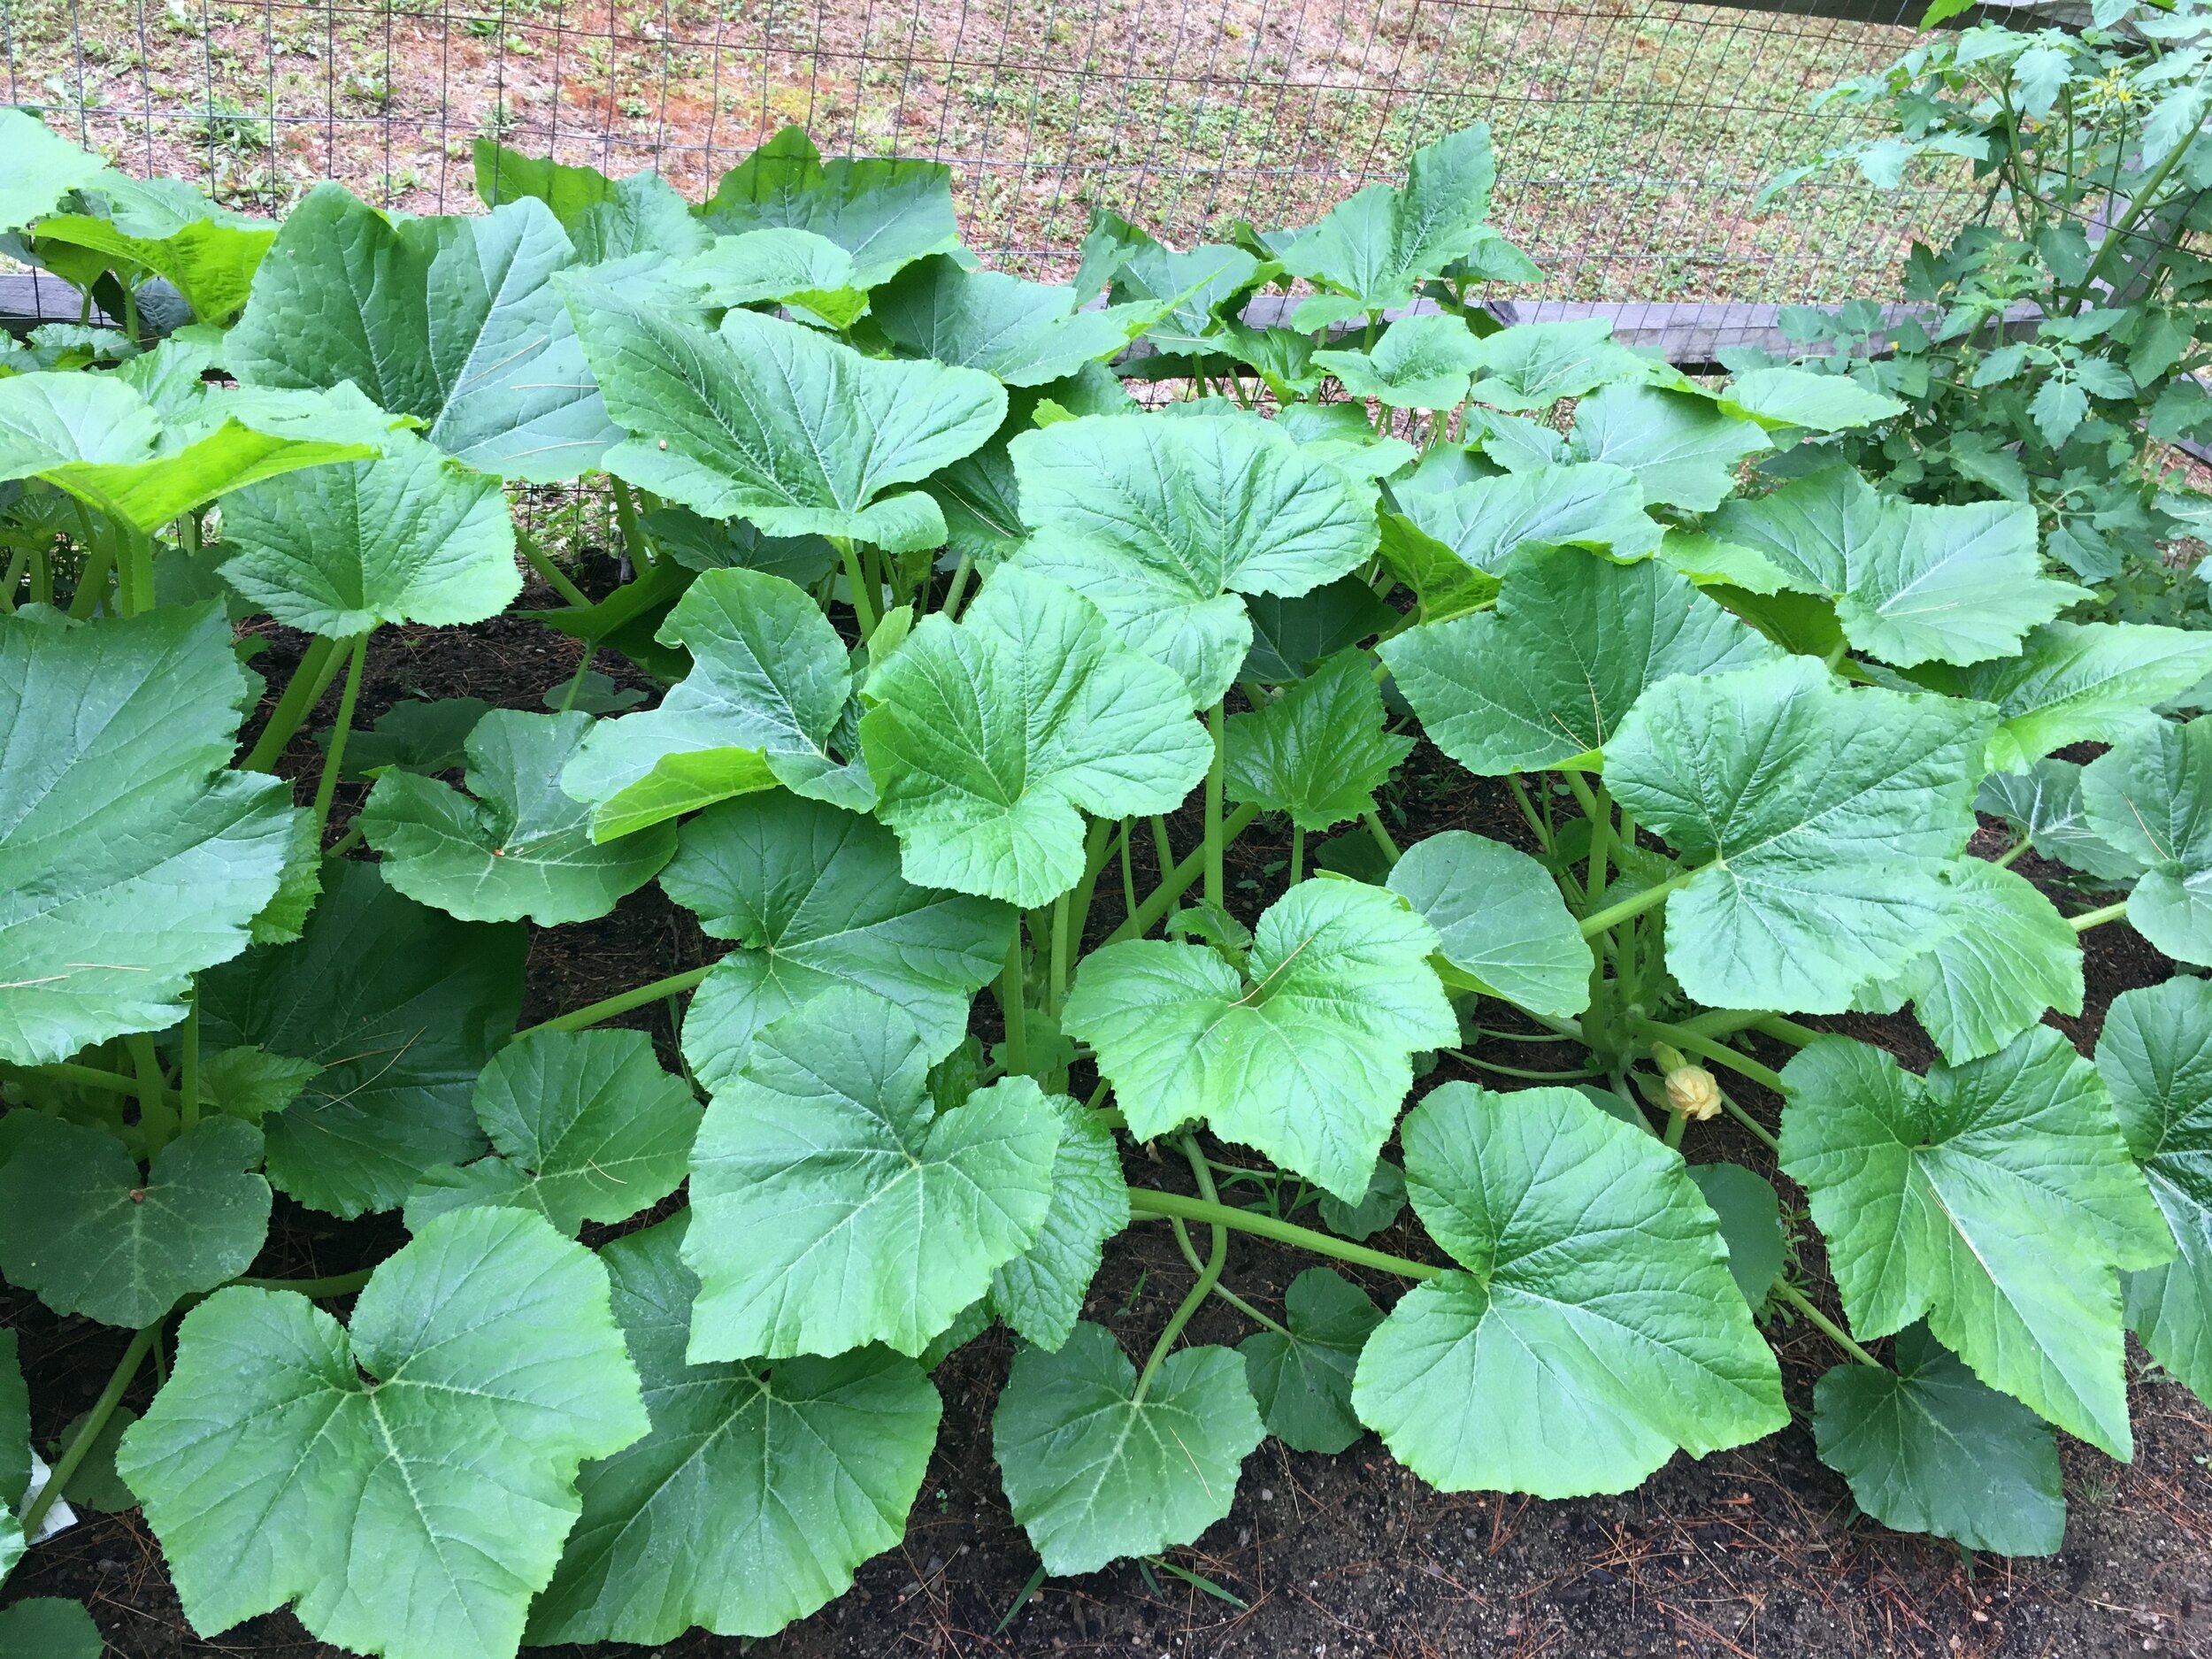
The Zucchini plants are huge this year! Right up to the top of the fence… though I do need to thin out some of the lower leaves on the ground soon for better air flow and access for pollinators (it also can help keep your plants from getting disease/mildew from the ground too).
Here are my Summer Squash plants, which are a bit smaller than the Zucchini ones but doing really well overall. I also need to thin out some of the lower leaves on these as well.
Spinach are cold weather plants and these ones pictured above are sadly done (I actually pulled them out after I took these photos). Once it starts getting hot they tend to “bolt” or grow upwards really fast and flower. Once they do that the leaves are bitter and don’t taste good. This spinach crop is done for now - though I will try to plant more Spinach late summer/early fall to get another harvest in the Fall.
Cucumbers are doing well too. It's a bit hard to see in this photo but I made a small trellis out of Bamboo Stakes and twine for them to grow on. The trellis may look flimsy, but bamboo is actaully really strong (and eco-friendly) so it's great to use in the garden to help support plants.
Along the back I have several Tomato plants growing, both cherry tomato and slicing tomato varieties; behind these along the fence I also have some Sunflowers growing too.
Now for the “showstopper” of the garden - our Rhubarb plant! This is definitely the plant that gets the most interest and questions about in our garden because it’s so big. Rhubarb is a perennial and will come back each year - so make sure to plant it somewhere out of the way where it will have room to grow. We planted this one in the back corner of our garden and marked the area with a stake so we don’t rototill over it in the spring.
While I’m honestly not a huge fan of Rhubarb myself (it’s very sour), growing it is a tradition in our family… when I was growing up we had a very large garden with at least 16 Rhubarb plants. We had so much Rhubarb that we would pick literally garbage bags full of it to give to neighbors and people at Church.
I transplanted this Rhubarb plant from my parents’ garden so I’m not sure on the variety… though from reading around online I’m guessing it’s some type of Canadian or Siberian variety. It can get very large with thick stalks and leaves over two feet across. If you decide to grow Rhubarb, make sure to read up on how to harvest it - you don’t want to over-pick the plant and the leaves are inedible (they’re actually somewhat toxic), it’s just the stalks that can be used.
Across the yard we also have some wine barrels that we’re using for an herb garden. Some of the more hardy herbs (Chives, Garlic Chives, Peppermint, Oregano) come back yearly, despite the fact the wine barrels freeze solid in the winter. I bought the blank slate garden markers on Amazon (and here is the how-to post on how I made them).
This year we also added two blueberry bushes to our landscaping since we didn’t have any fruit trees or bushes yet. It’s recommended to have two different varieties of blueberry bushes to encourage cross-pollinating and better fruit production, so we planted two different kinds near each other. We are already getting a few large berries from them which is very exciting! Here’s hoping they continue to do well in the years to come.
And that’s our little garden tour - thanks so much for following along! I’m no expert by any means, but if you have any questions please let me know.
We’re definitely living in different times right now… and it’s becoming clearer that it looks as though we will have to co-exist with the COVID-19 virus for the foreseeable future. Because of that anything we can do that might mitigate the risk of virus transmission, like always wearing face masks or face coverings when outside our homes, have become a part of our “new normal.” Since mask-wearing should be part of your new routine whenever you leave your house, it’s a good idea to have a system in place to make sure you always have clean masks at the ready and you never leave home without one. | This post contains affiliate links |
Disclaimer: I am not giving medical advice. Make sure to always consult the CDC and local health officials for up-to-date recommendations on mask wearing, storage, and care. Cloth masks are not considered medical grade and should be washed in between each use… check with individual mask makers/companies on the best way to store/wash/care for your masks.
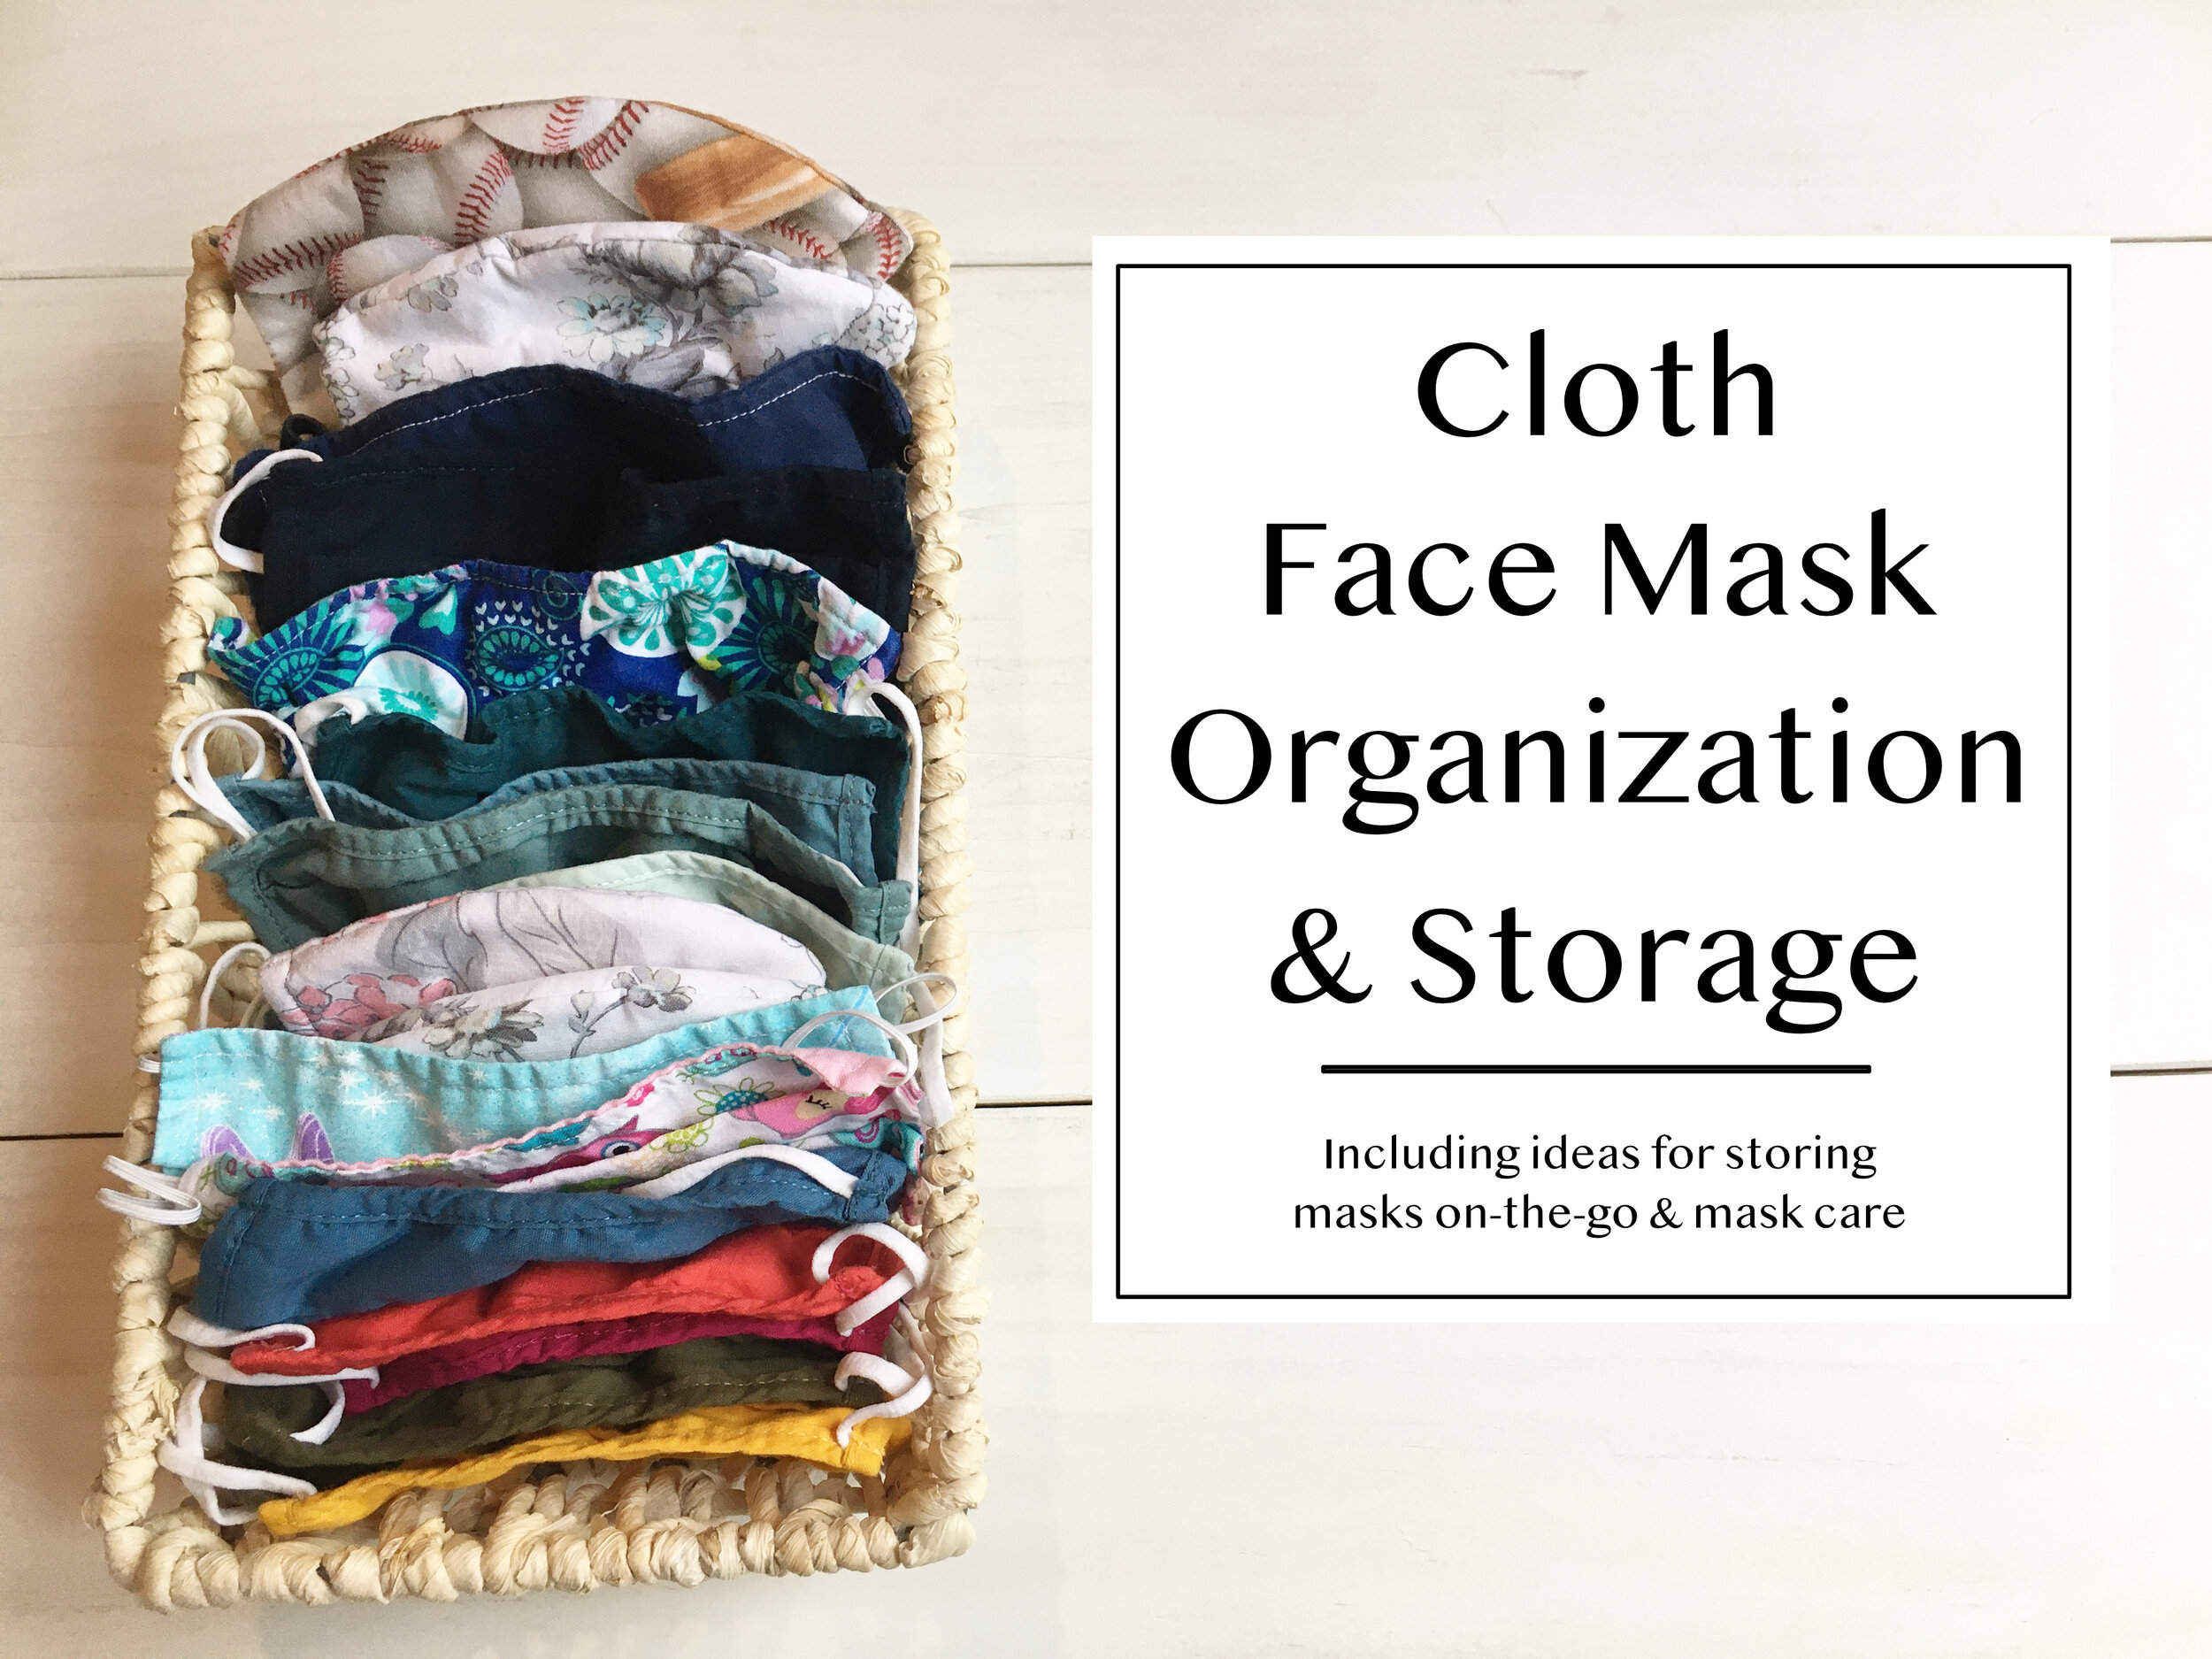
Mask Storage at Home
It’s a good idea to keep your clean masks in a designated area of your home, preferably in a place where you’ll be sure to grab one on your way out the door to do errands, go to work, etc. At first glance it might look like we have a lot of masks, but we really don't considering we're a household of four and it's essential to have enough masks to get through between laundry loads. We're still staying home and social-distancing very seriously, but whenever we have to do an essential errand/appointment or just go for a drive to get out of the house, we always make sure to have a clean mask for everyone that’s leaving the house.
In our home, we've designated a special basket that sits up high on our mudroom shelf, full of clean masks. We put the adult masks towards the back, and then kids masks in the front. I was unable to find a basket the same size on Amazon to link to, but I did find this
sleek bamboo box that looks to be the perfect size. If you don't have shelf space for a basket, you could alternatively use wall-mounted baskets for storage. Our masks are a mix of ones made with love for us by family members, as well as ones purchased from
Old Navy
and
Miss Harlow VT
(one of the local makers I featured in my "Masks by New England Makers" blog post).
If you don't like the idea of using a basket like we do and would rather hang your masks by the door, another option would be using
a small set of hooks
such as a set of compact coat hooks or key rack - or even just simple
Command Hooks.
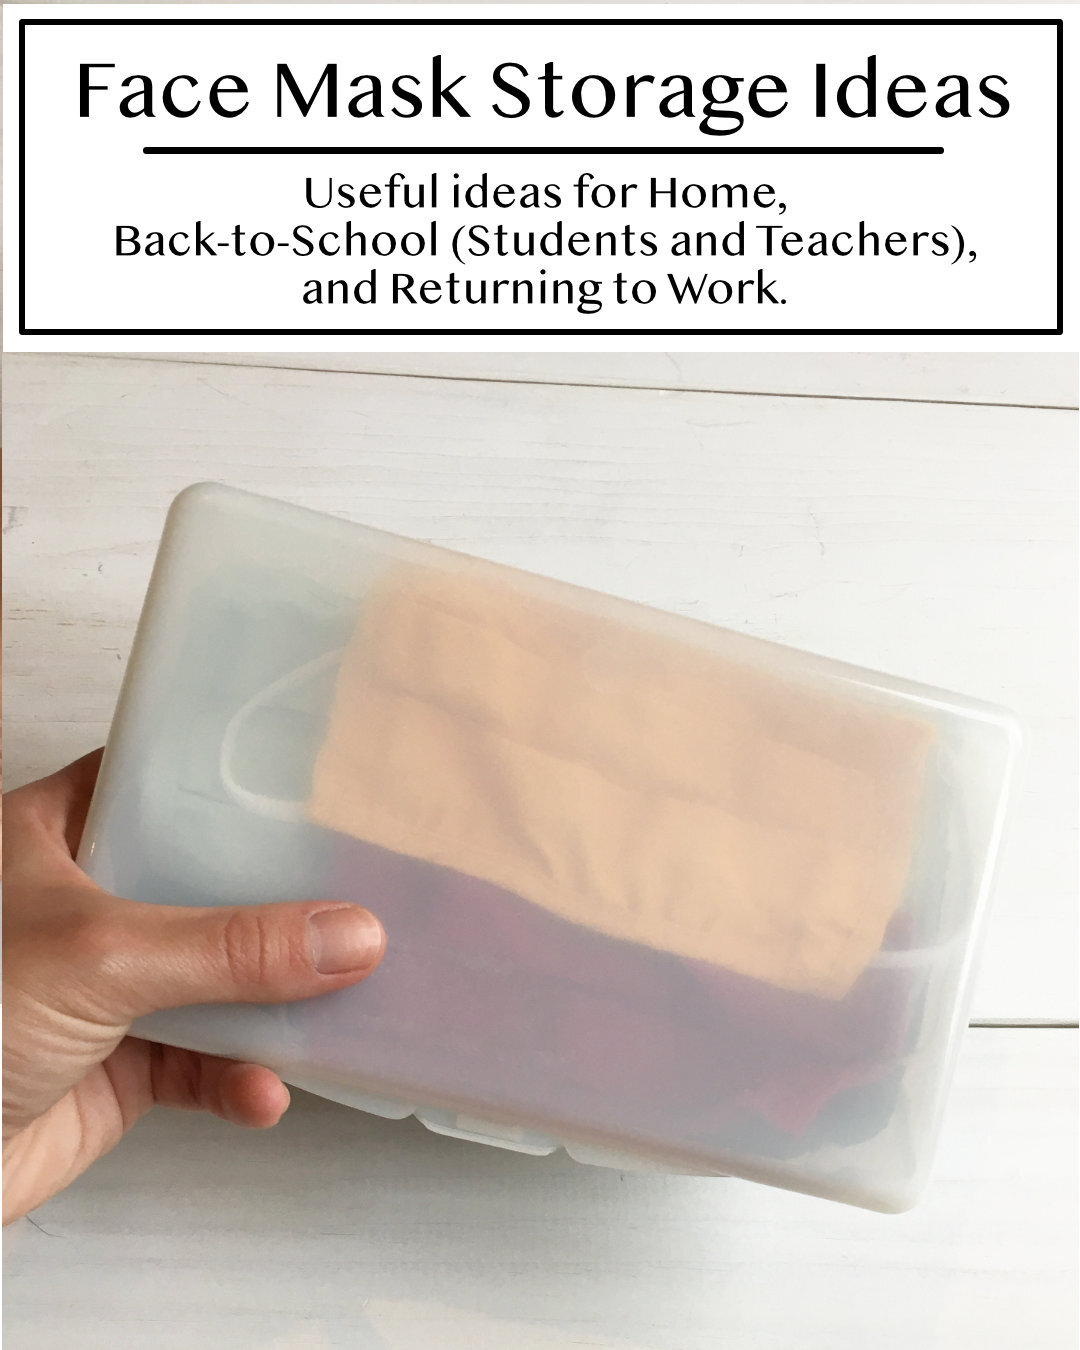
Mask Storage On-The-Go
We have found a
slim wipes container
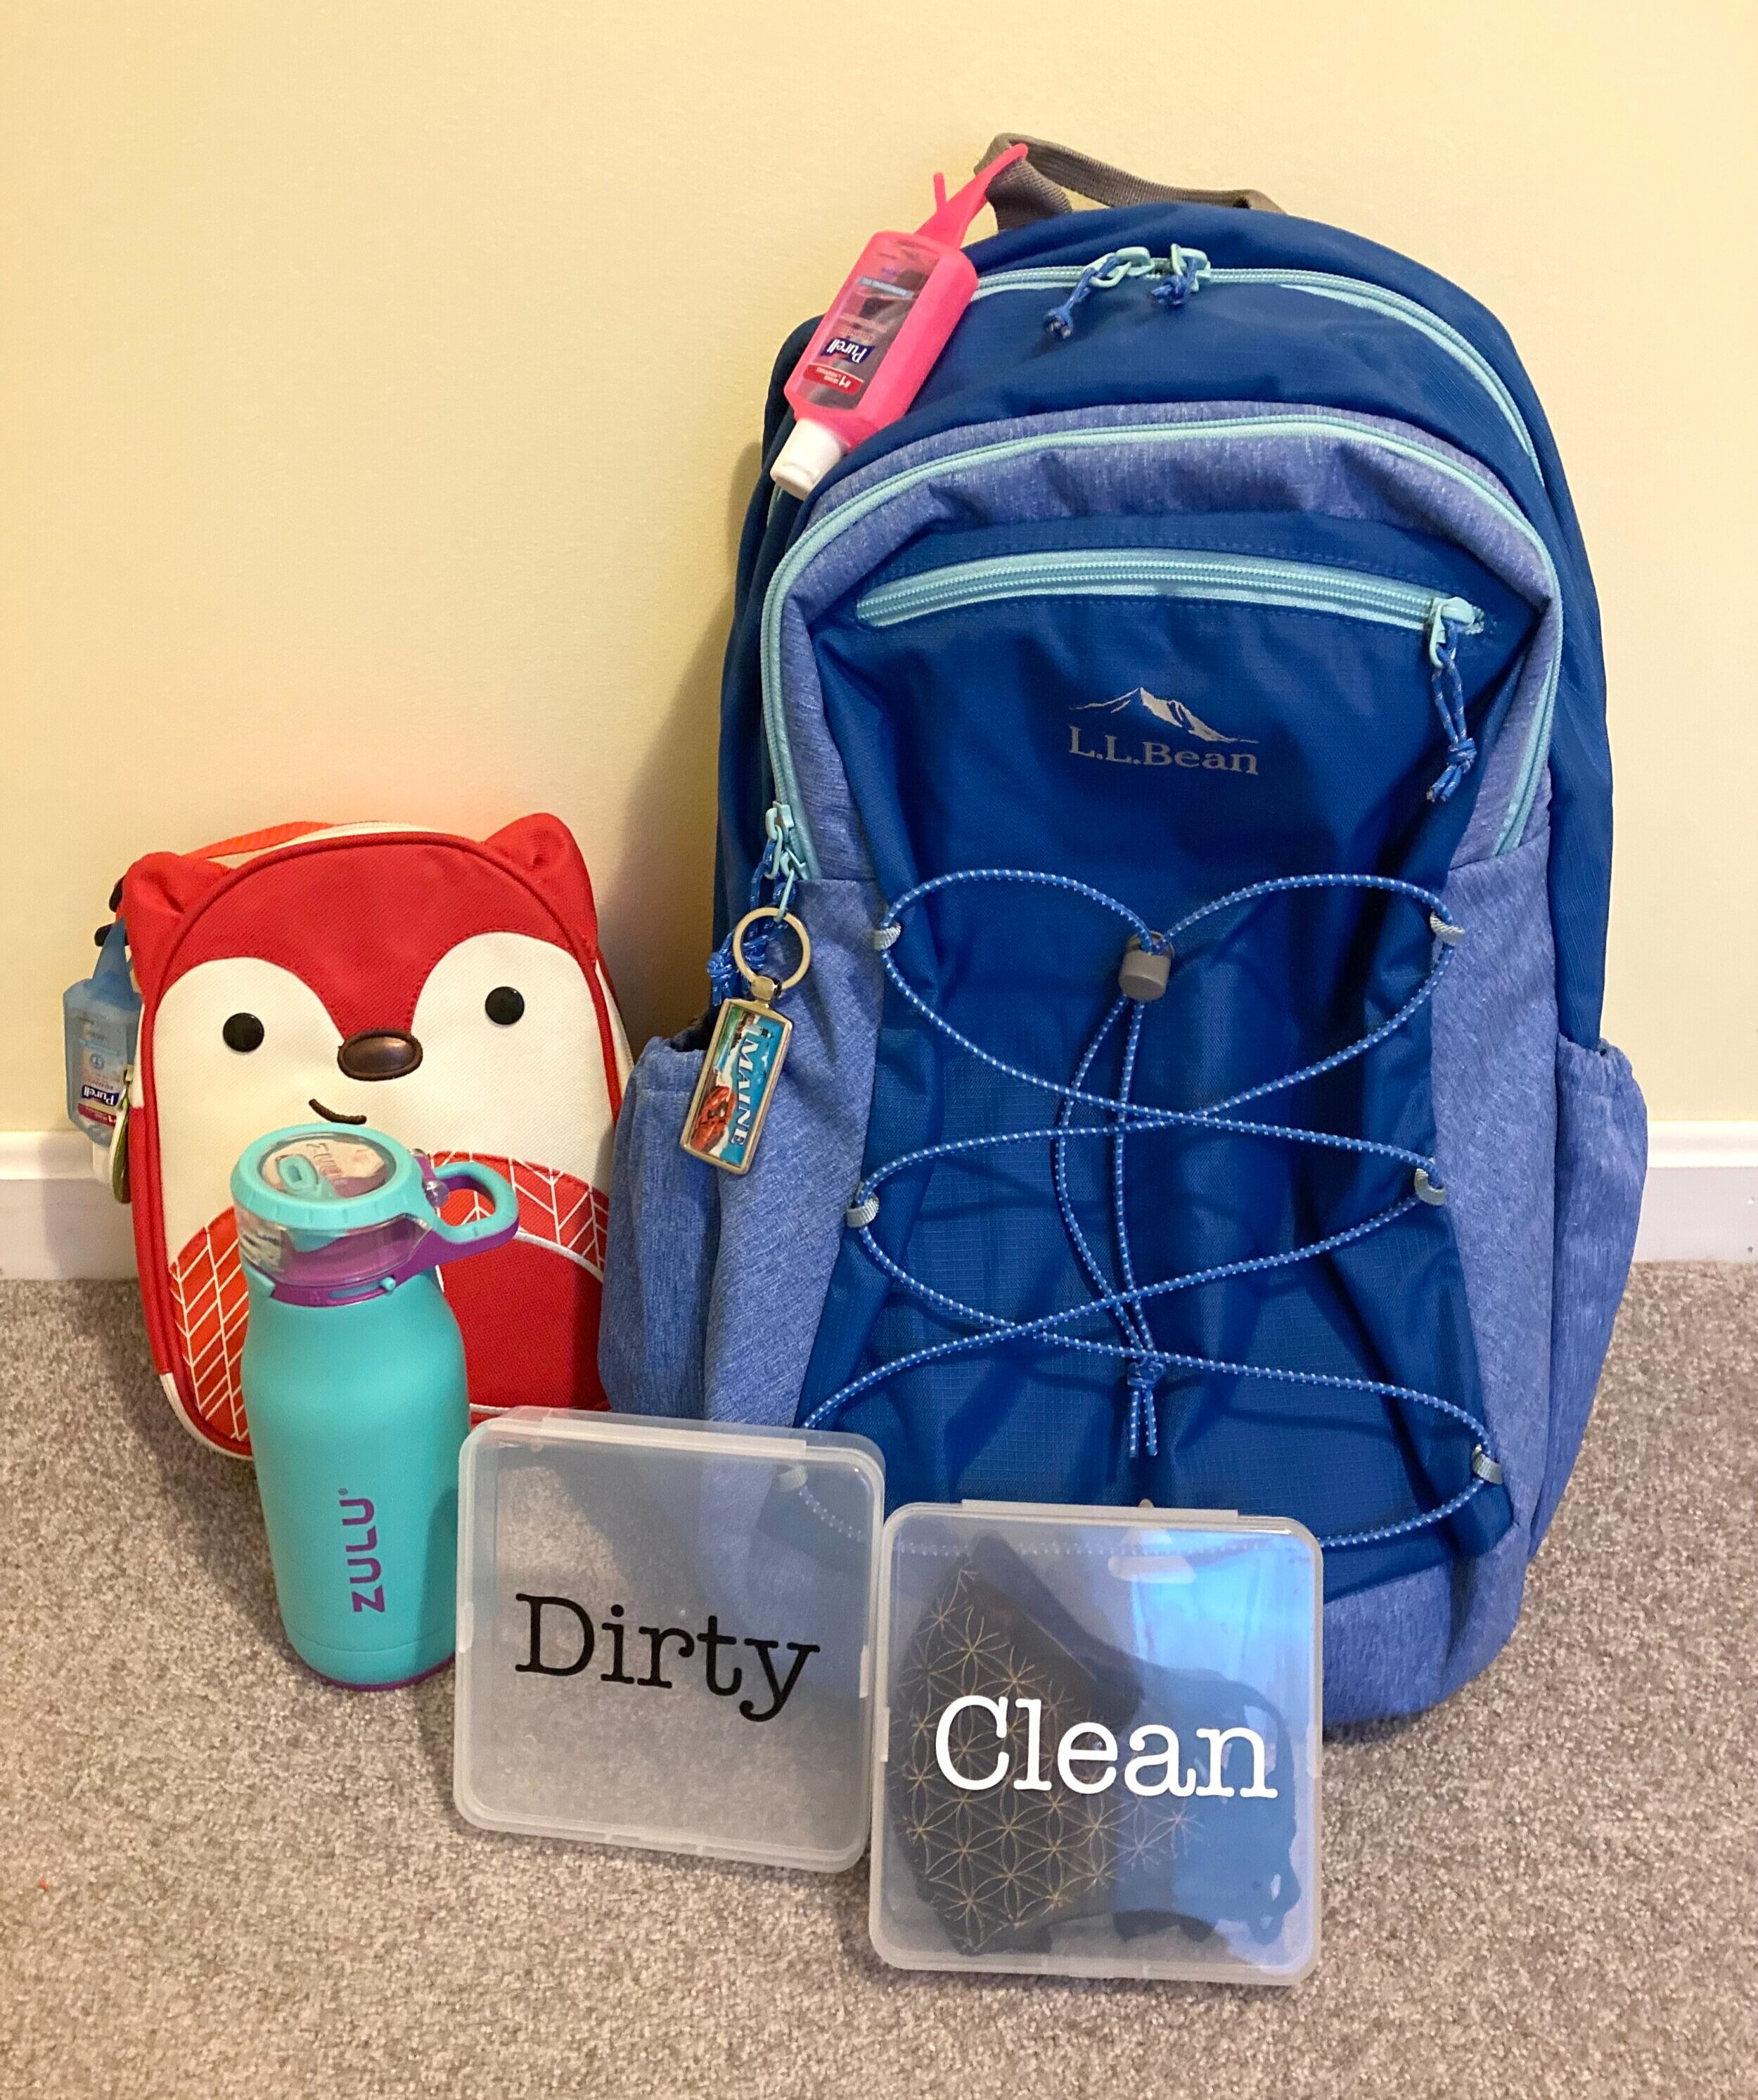
is the perfect size for holding several face masks on-the-go! In fact, we always make sure to leave our case packed with an extra mask for each family member in the car. That way we're always covered if we forget one or need to change masks while we're out of the house. I think this would be a great way to carry extra face masks in your bag for work, or your child's backpack whenever they return to school. It would probably be a good idea to also keep a ziplock bag or separate sealed container in your bag in case you have a dirty/used mask that needs to be brought home to wash.
And if you wanted to take it a step further and have an organzied mask system on-the-go to put in your work bag or child's backpack, you might want to consider having two cases - one for clean masks and one for dirty masks. I ordered these clear mask cases from Amazon and cut labels for them on my Cricut. We'll be packing one with extra clean masks, and the other will be empty for dirty masks to come home in. Since we recently invested in some better quality masks I wanted to make sure they stay in cases when not in use to keep them in good shape.
Alternatively, if you don't have any slim wipes containers hanging around you could also use
Small Craft Storage Cases
, which come in clear and a variety of colors. This might be more cost effective too if you needed multiple cases - especially if you needed one or more cases for each family member, or if you were a teacher and wanted to make a case for each student in your class.
You can also easily label any of these cases with a
label maker.
We always make sure to keep the car stocked with our plastic case of extra face masks, hand sanitizer, and disinfectant wipes to help protect ourselves when we’re out doing errands.
Mask Care
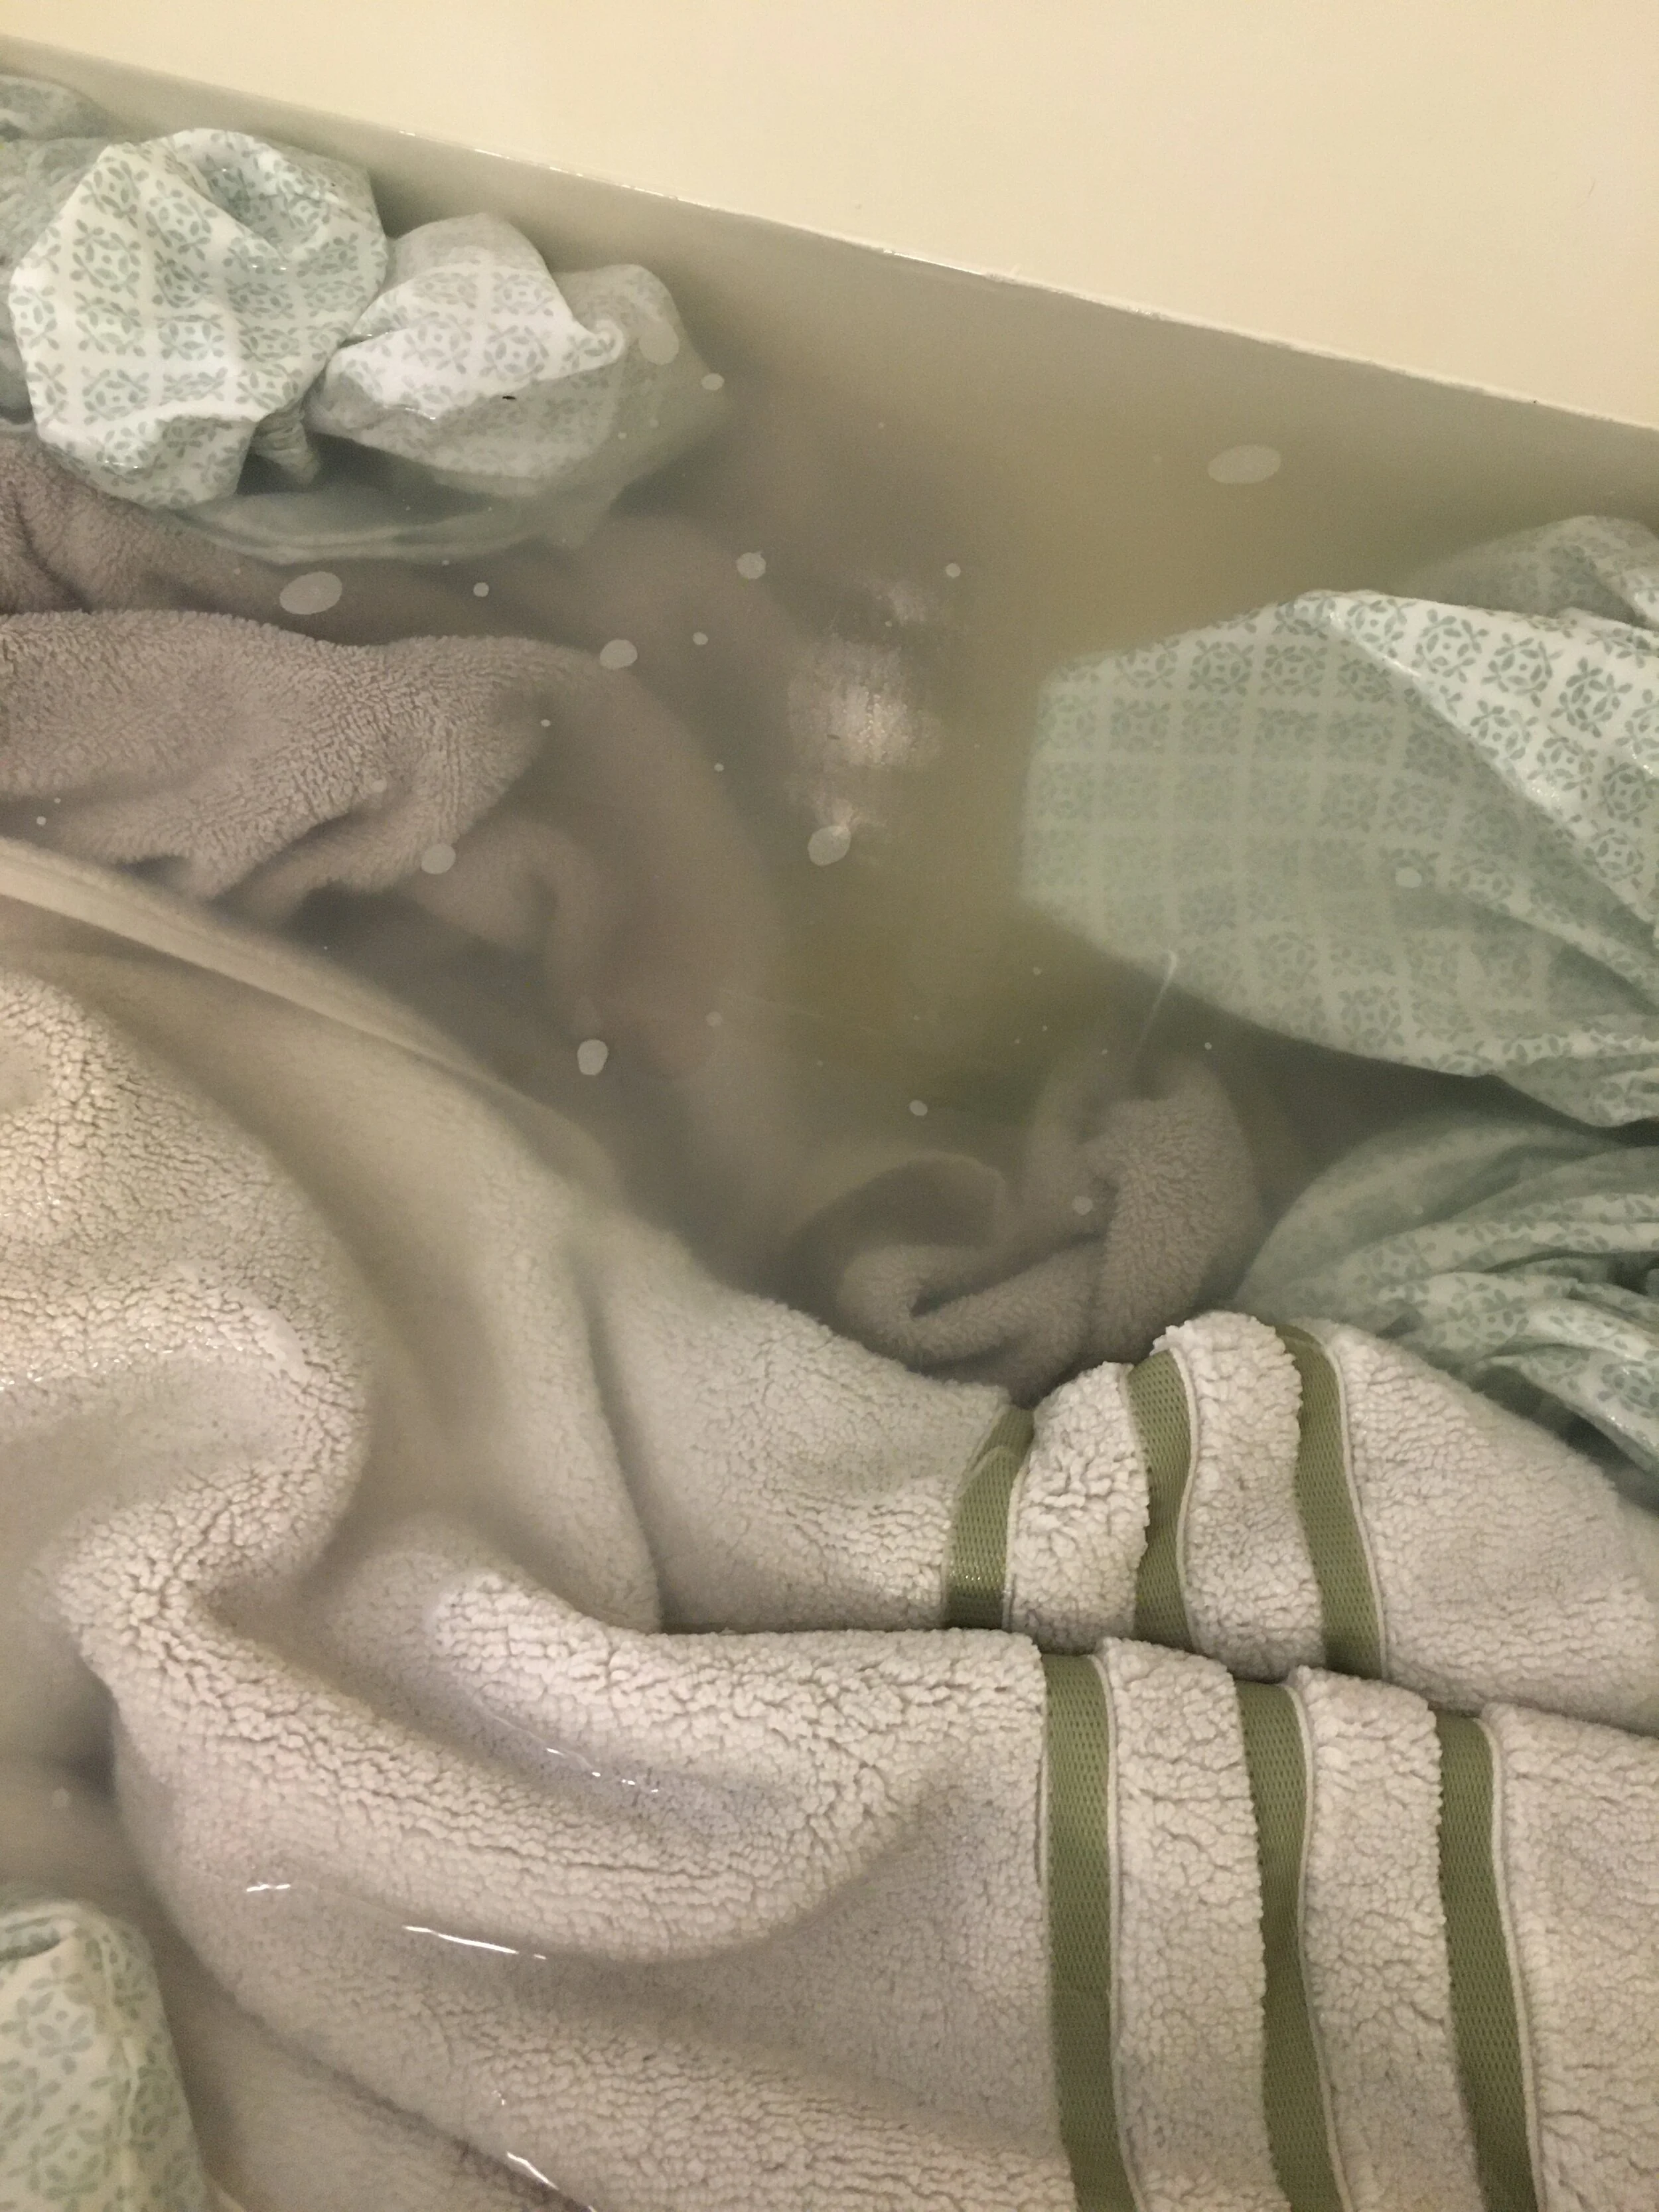
Always refer to individual mask makers/companies on the best way to care for each of your masks (hand wash only vs machine wash, line-dry vs dryer, etc.) But in general, all masks should be washed and allowed to thoroughly dry in between each use.
Since all of our masks are machine washable, we've found using a mesh lingerie laundry bag is perfect for keeping the masks from getting lost in the wash or caught on other items.
Quick Adjustment Tips
If you feel like your face mask is a little large or isn’t fitting as closely to your face as you would like, you can typically adjust it very easily by making a small knot in the ear loop elastics (as shown above) to make it smaller.
One mask accessory that we've found super helpful lately are
Mask Lanyards. We personally use them most often when we're out hiking or going for a long walk, that way the time we're out alone we can keep our masks down, however in the event we see someone coming up we can easily put them on if we need to pass others on the trail. We made a point to choose lanyards that have a breakaway safety feature, but use at your own discretion/risk.
Disclaimer: I am not giving medical advice. Make sure to always consult the CDC and local health officials for up-to-date recommendations on mask wearing, storage, and care. Cloth masks are not considered medical grade and should be washed in between each use… check with individual mask makers/companies on the best way to store/wash/care for your masks.
Vaccination Card Protector
Vaccinated? You may want to consider getting a Vaccination Card Protector for your vaccine card to help keep them protected and clean at home or while you're traveling. These are nice because you can remove your vaccine card to record updates/boosters if needed.
Now that we’re always eating at home and not going out for breakfast it’s great to have a fast and easy no-mess egg sandwich that you can make quicker than than it would take you to sit in the drive-thru line. This trick will make the perfect fluffy egg sandwich start-to-finish in just about ONE MINUTE. For reals. | This post contains affiliate links. |
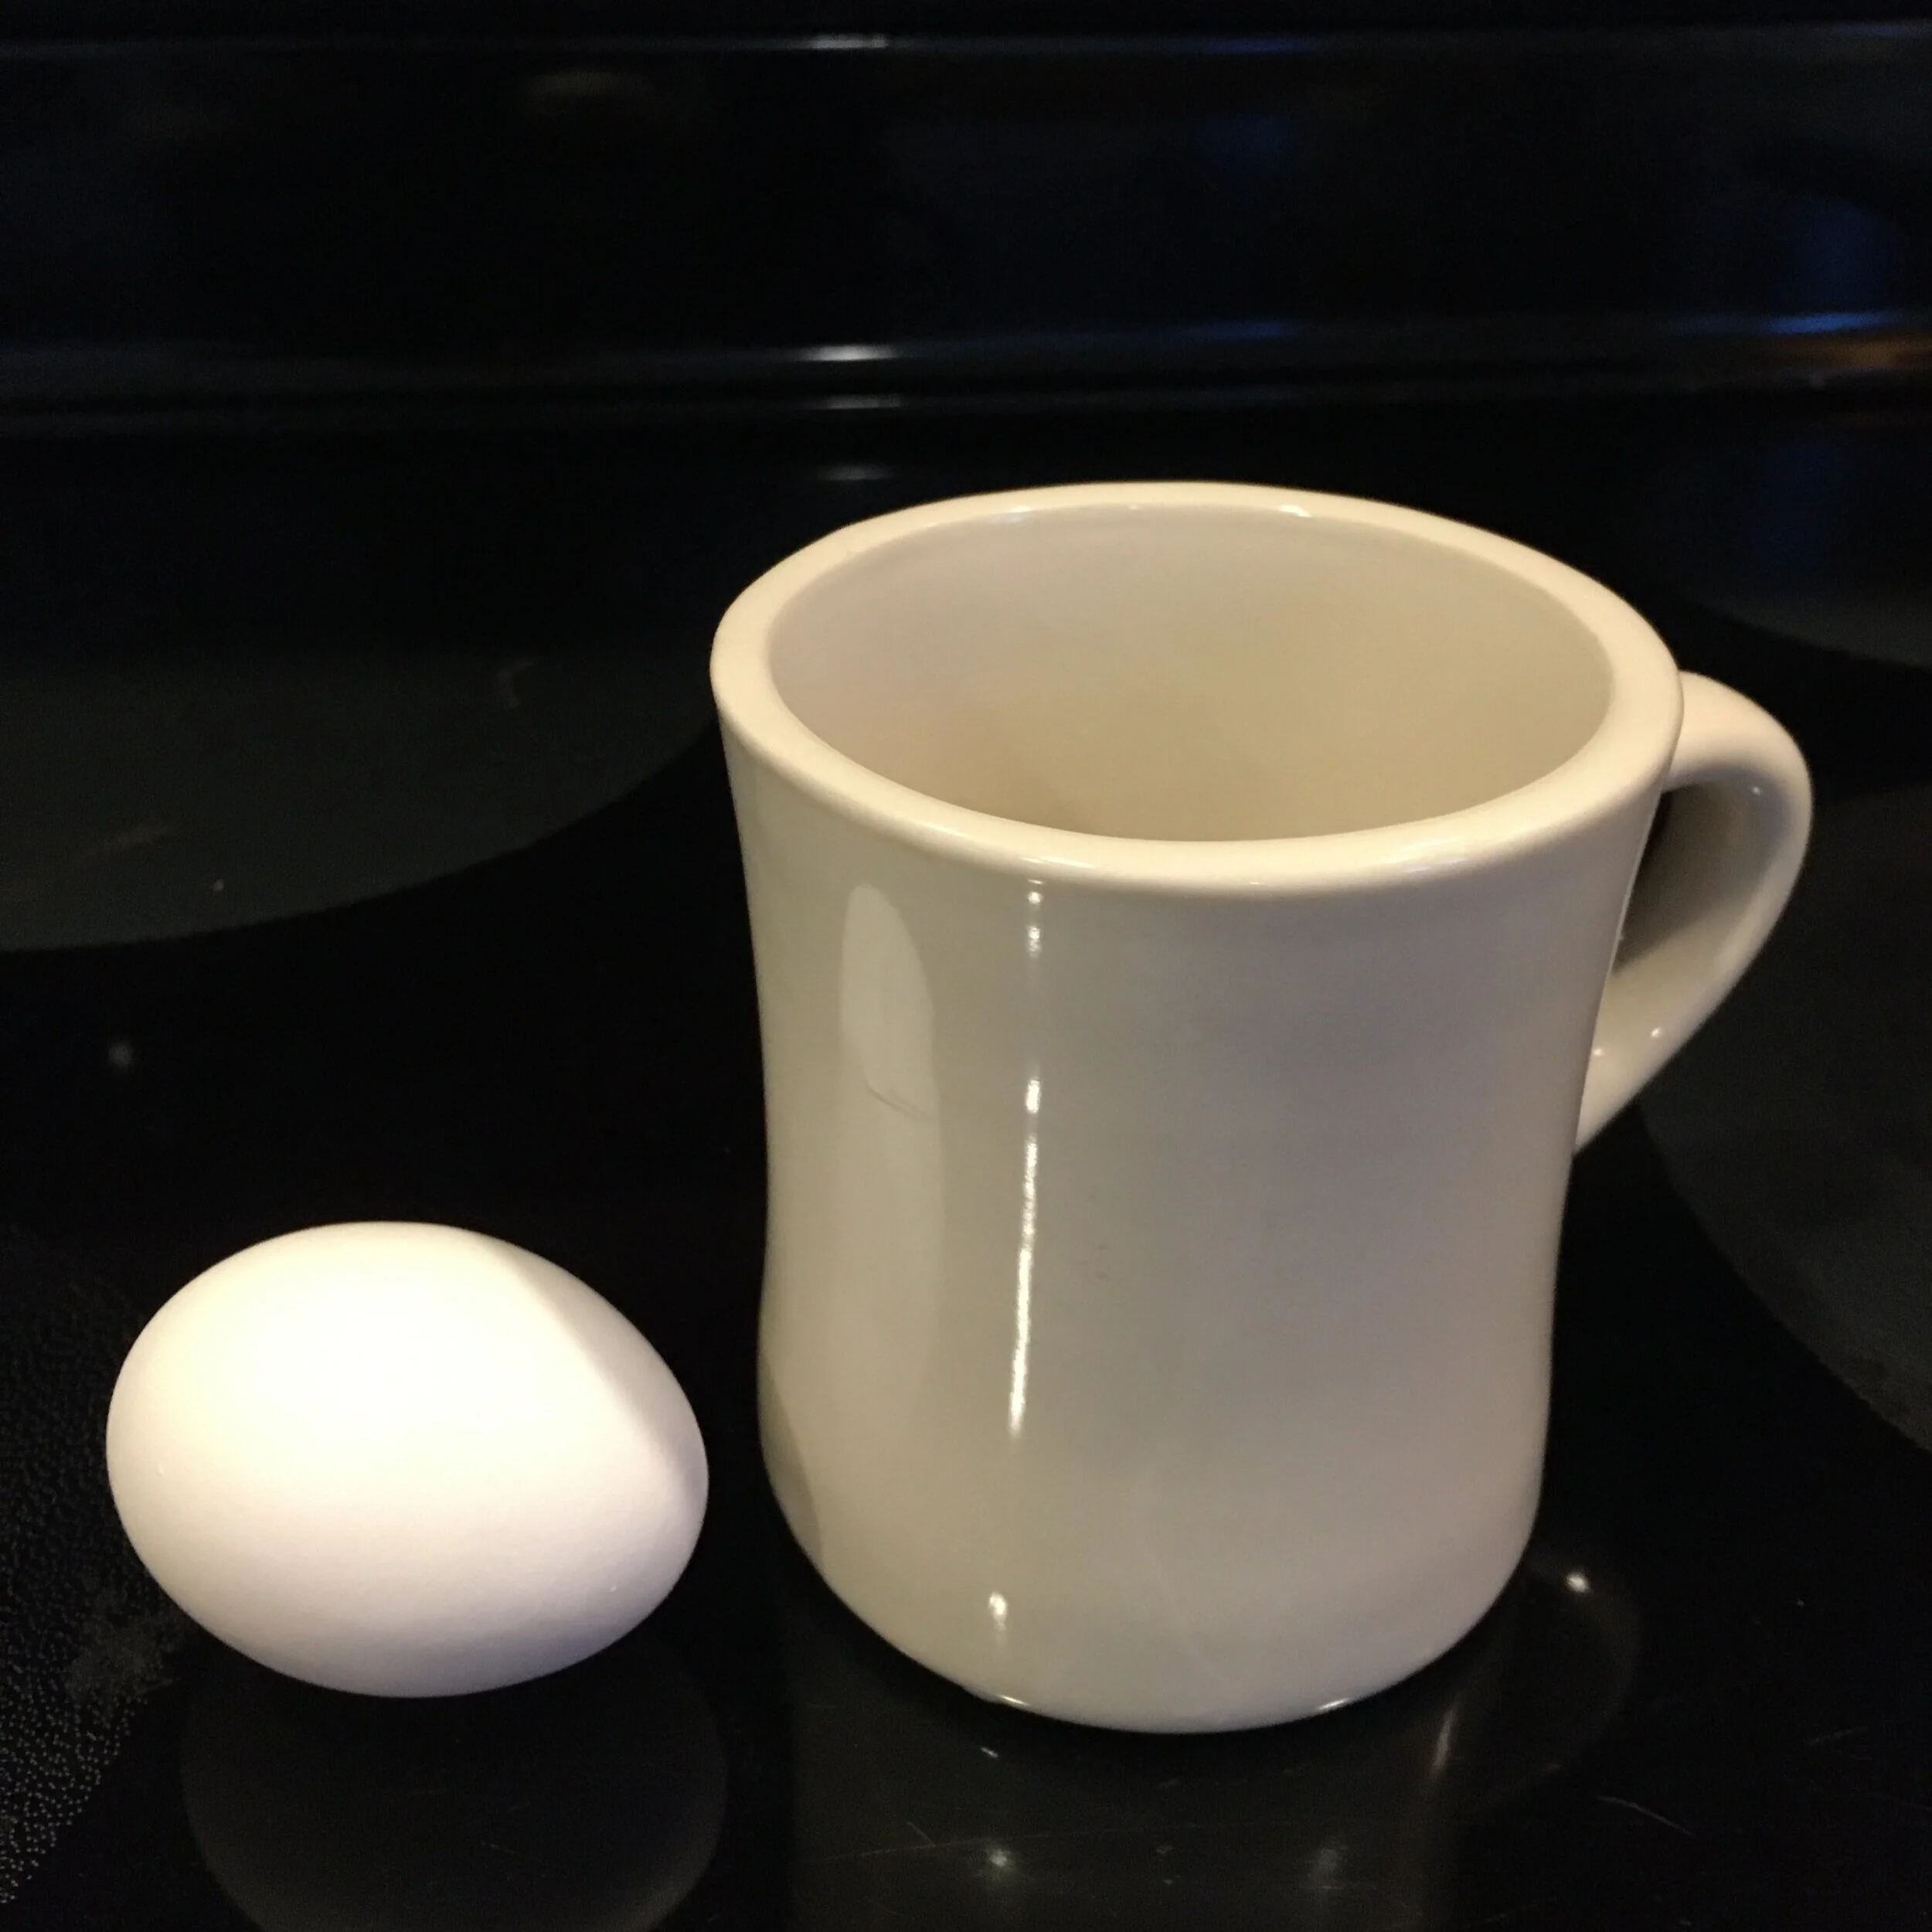
Really, this “recipe” couldn’t be any easier… the bottom line is you will need an egg, an English muffin (or some type of bread), a microwave-safe coffee mug, and a microwave. That’s it!
You might also want some shredded cheese handy, small diced precooked veggies (leftovers from the night before work great), hot sauce - or any other topping of your choice.
First, crack the egg into your microwave-safe coffee mug and “whisk” with a fork to break up the yolk. Now is also the time to add a generous pinch of shredded cheese (shown here) or a small amount of chopped pre-cooked veggies (leftovers work great). Put the mug in the microwave and cook on high/normal for one minute* (*please note that depending on your microwave model and what you add, you may need to adjust your cook time. Also DO NOT microwave fork.) While the egg is cooking you can toast your bread, if desired.
Once the egg is done make sure it is cooked throughly (it’s opaque with no runny spots and steaming all the way through) by checking with a clean fork and loosen it from the mug. Then simply turn the egg out onto your bread and add any condiments you desire - I personally can’t eat eggs without hot sauce.
And that is it! Once the coffee mug cools, just soak it in the sink to loosen any stuck-on egg and run through the dishwasher like normal. No pans to heat up or clean after which is a huge plus in my book. Enjoy your easy breakfast :)
Disclaimer: Please note that depending on your microwave model and what you add, you may need to adjust your cook time. Make sure your egg is fully cooked before eating.