Easy Bike Helmet Storage DIY

After getting sick of our family’s bike helmets constantly tumbling around the garage I thought it was high time we figure out a solution to keeping them corralled and within easy reach. The best part? It cost me nothing since I already had the hardware and scrap wood kicking around. | This post contains affiliate links |

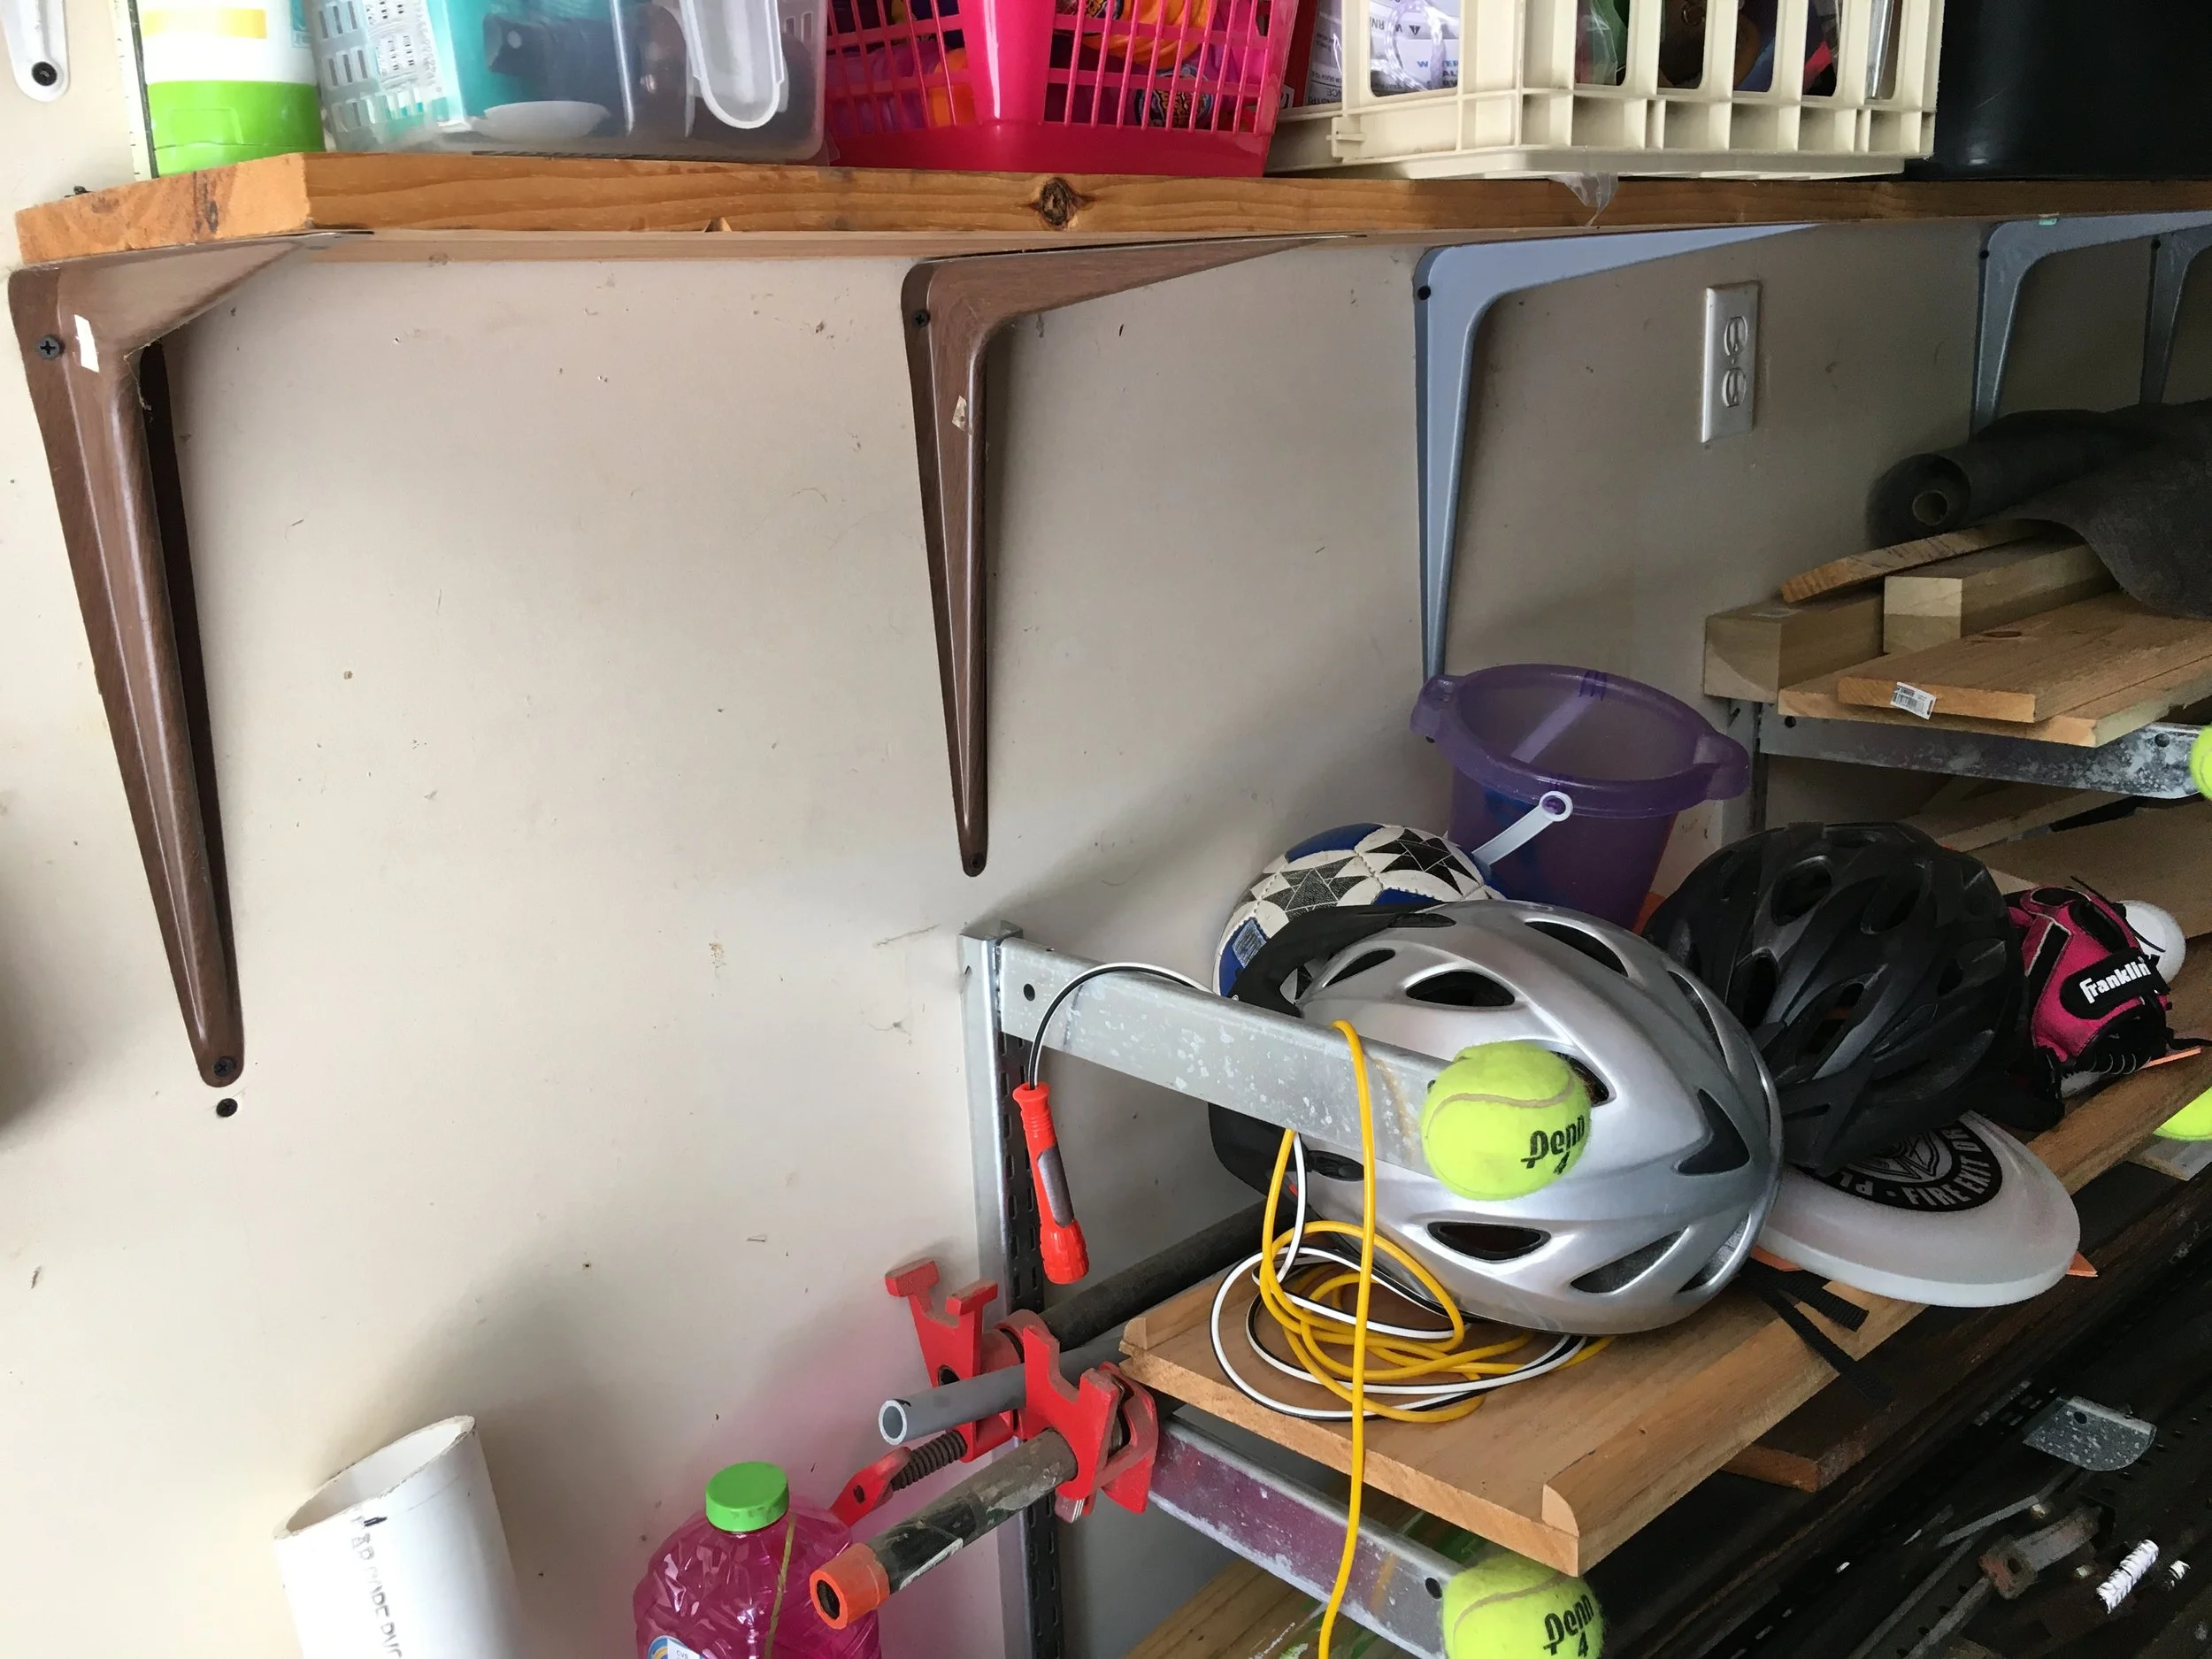
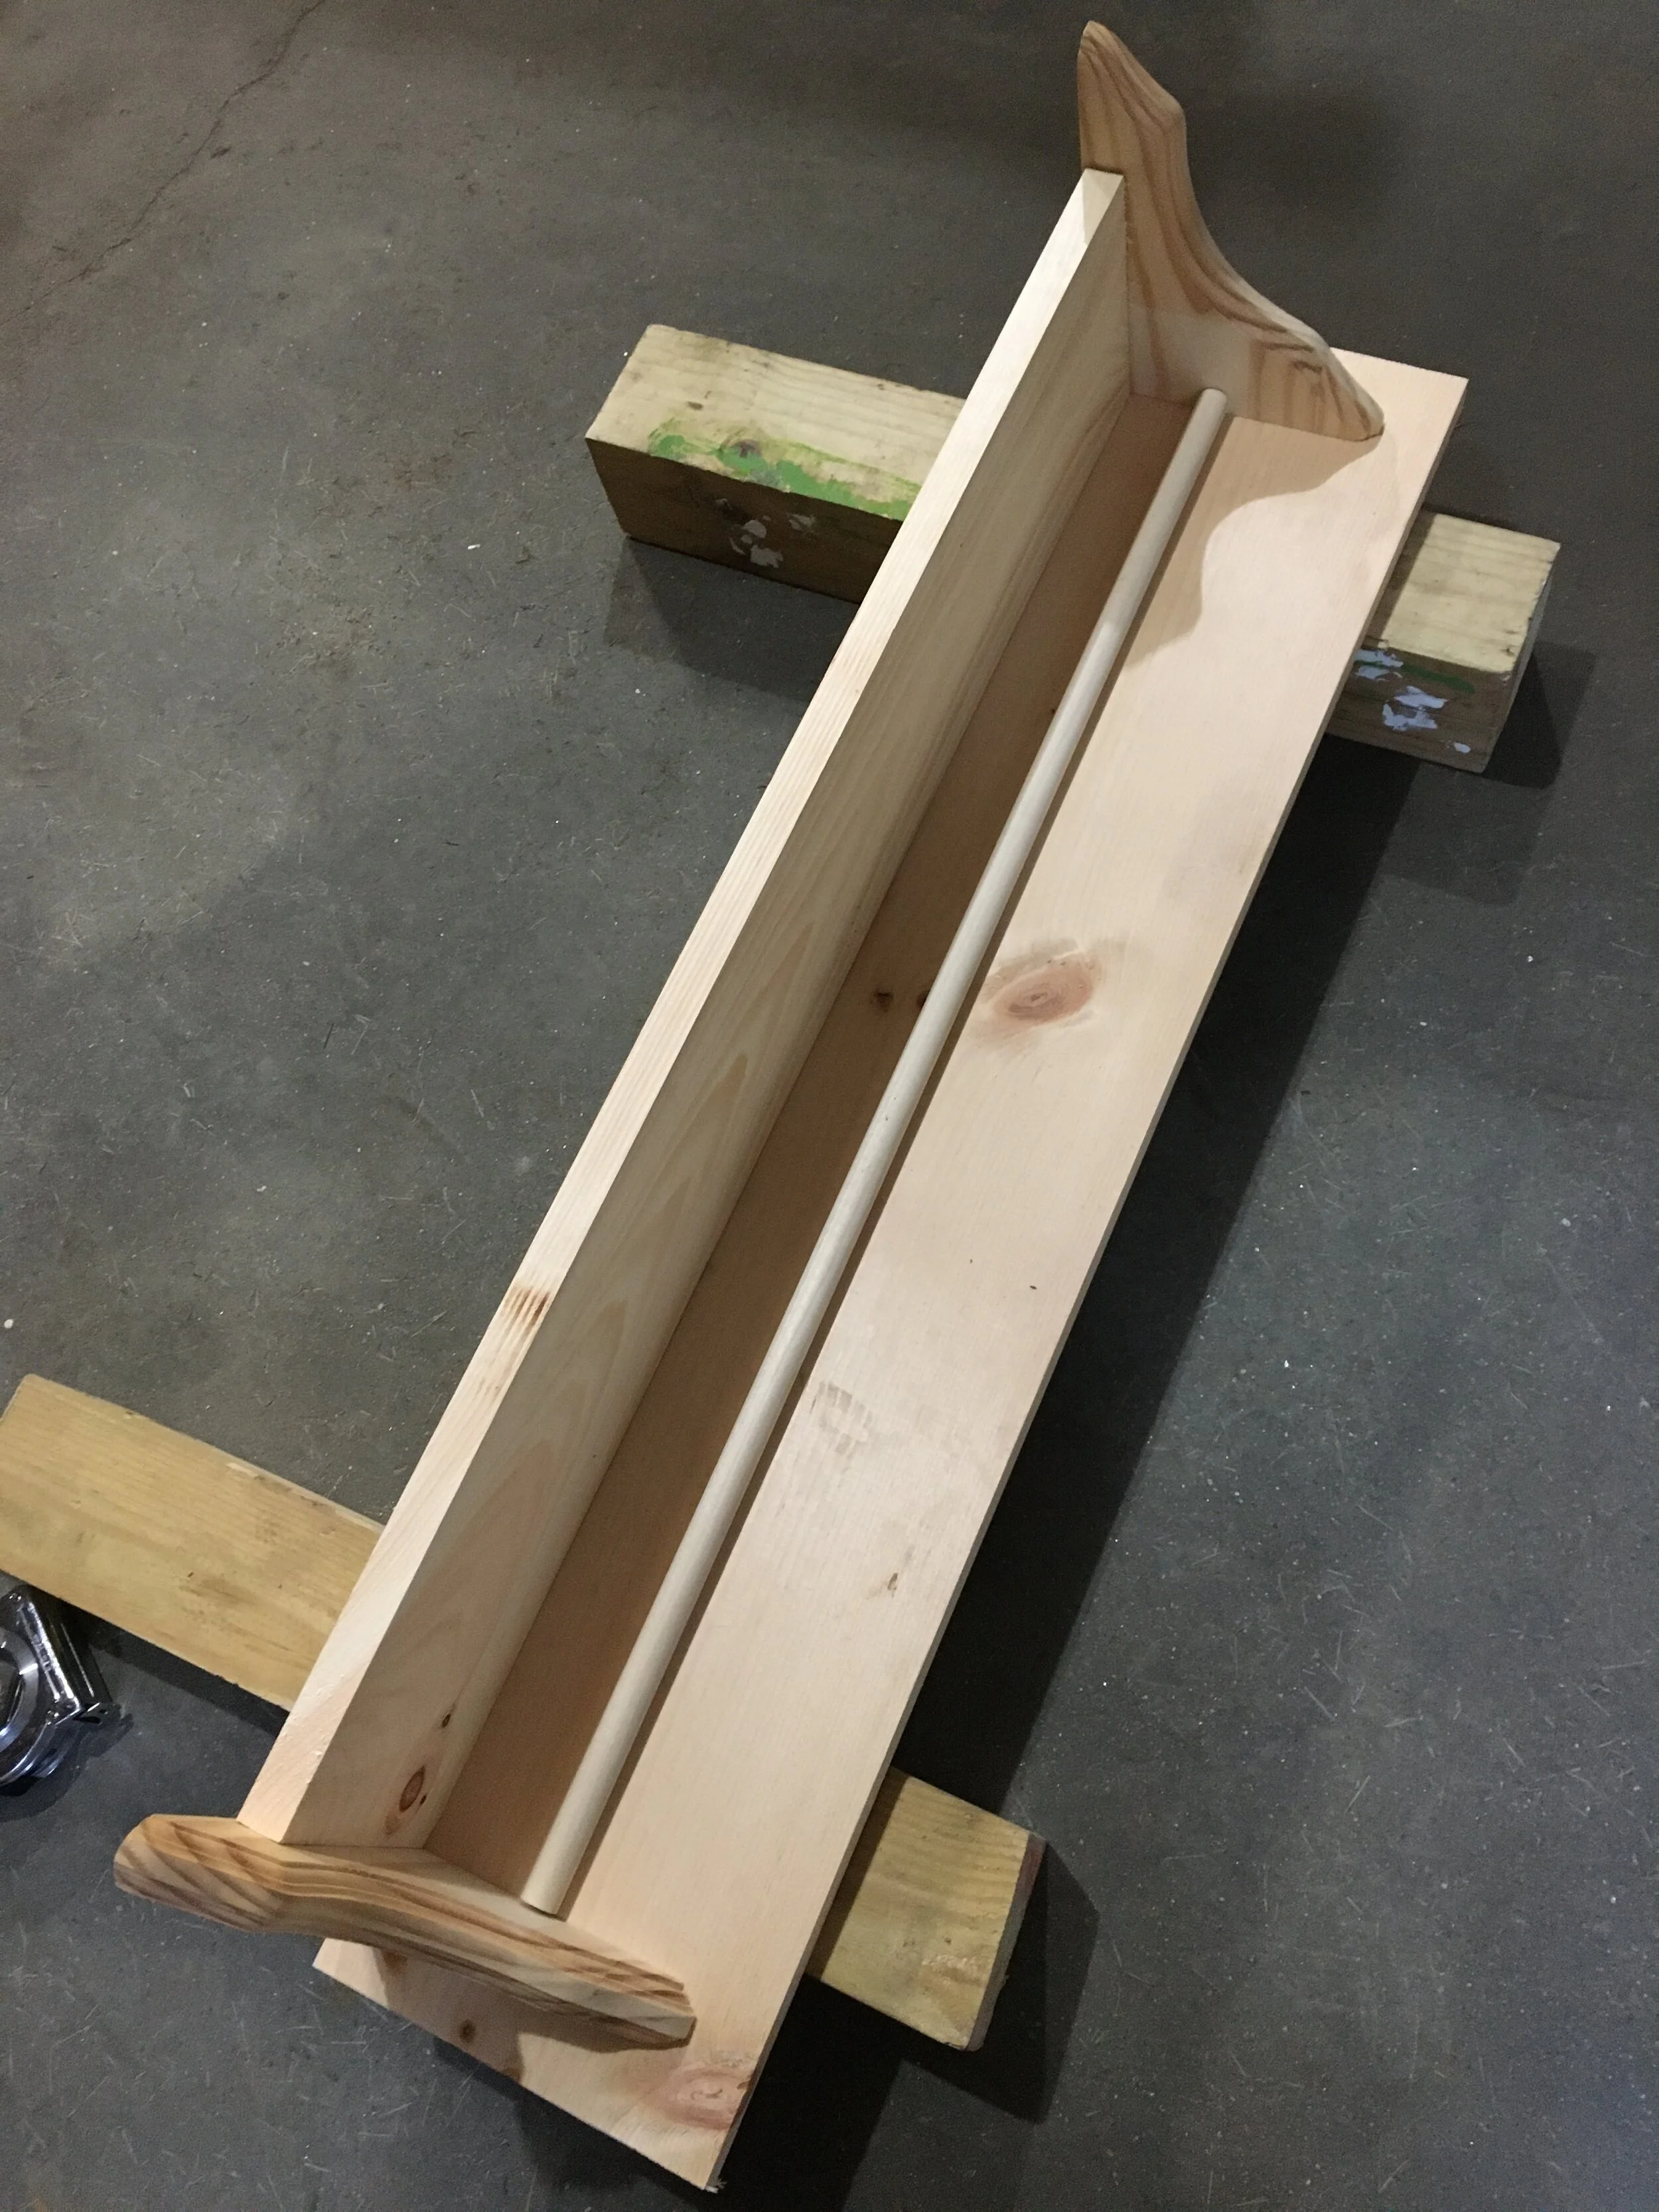
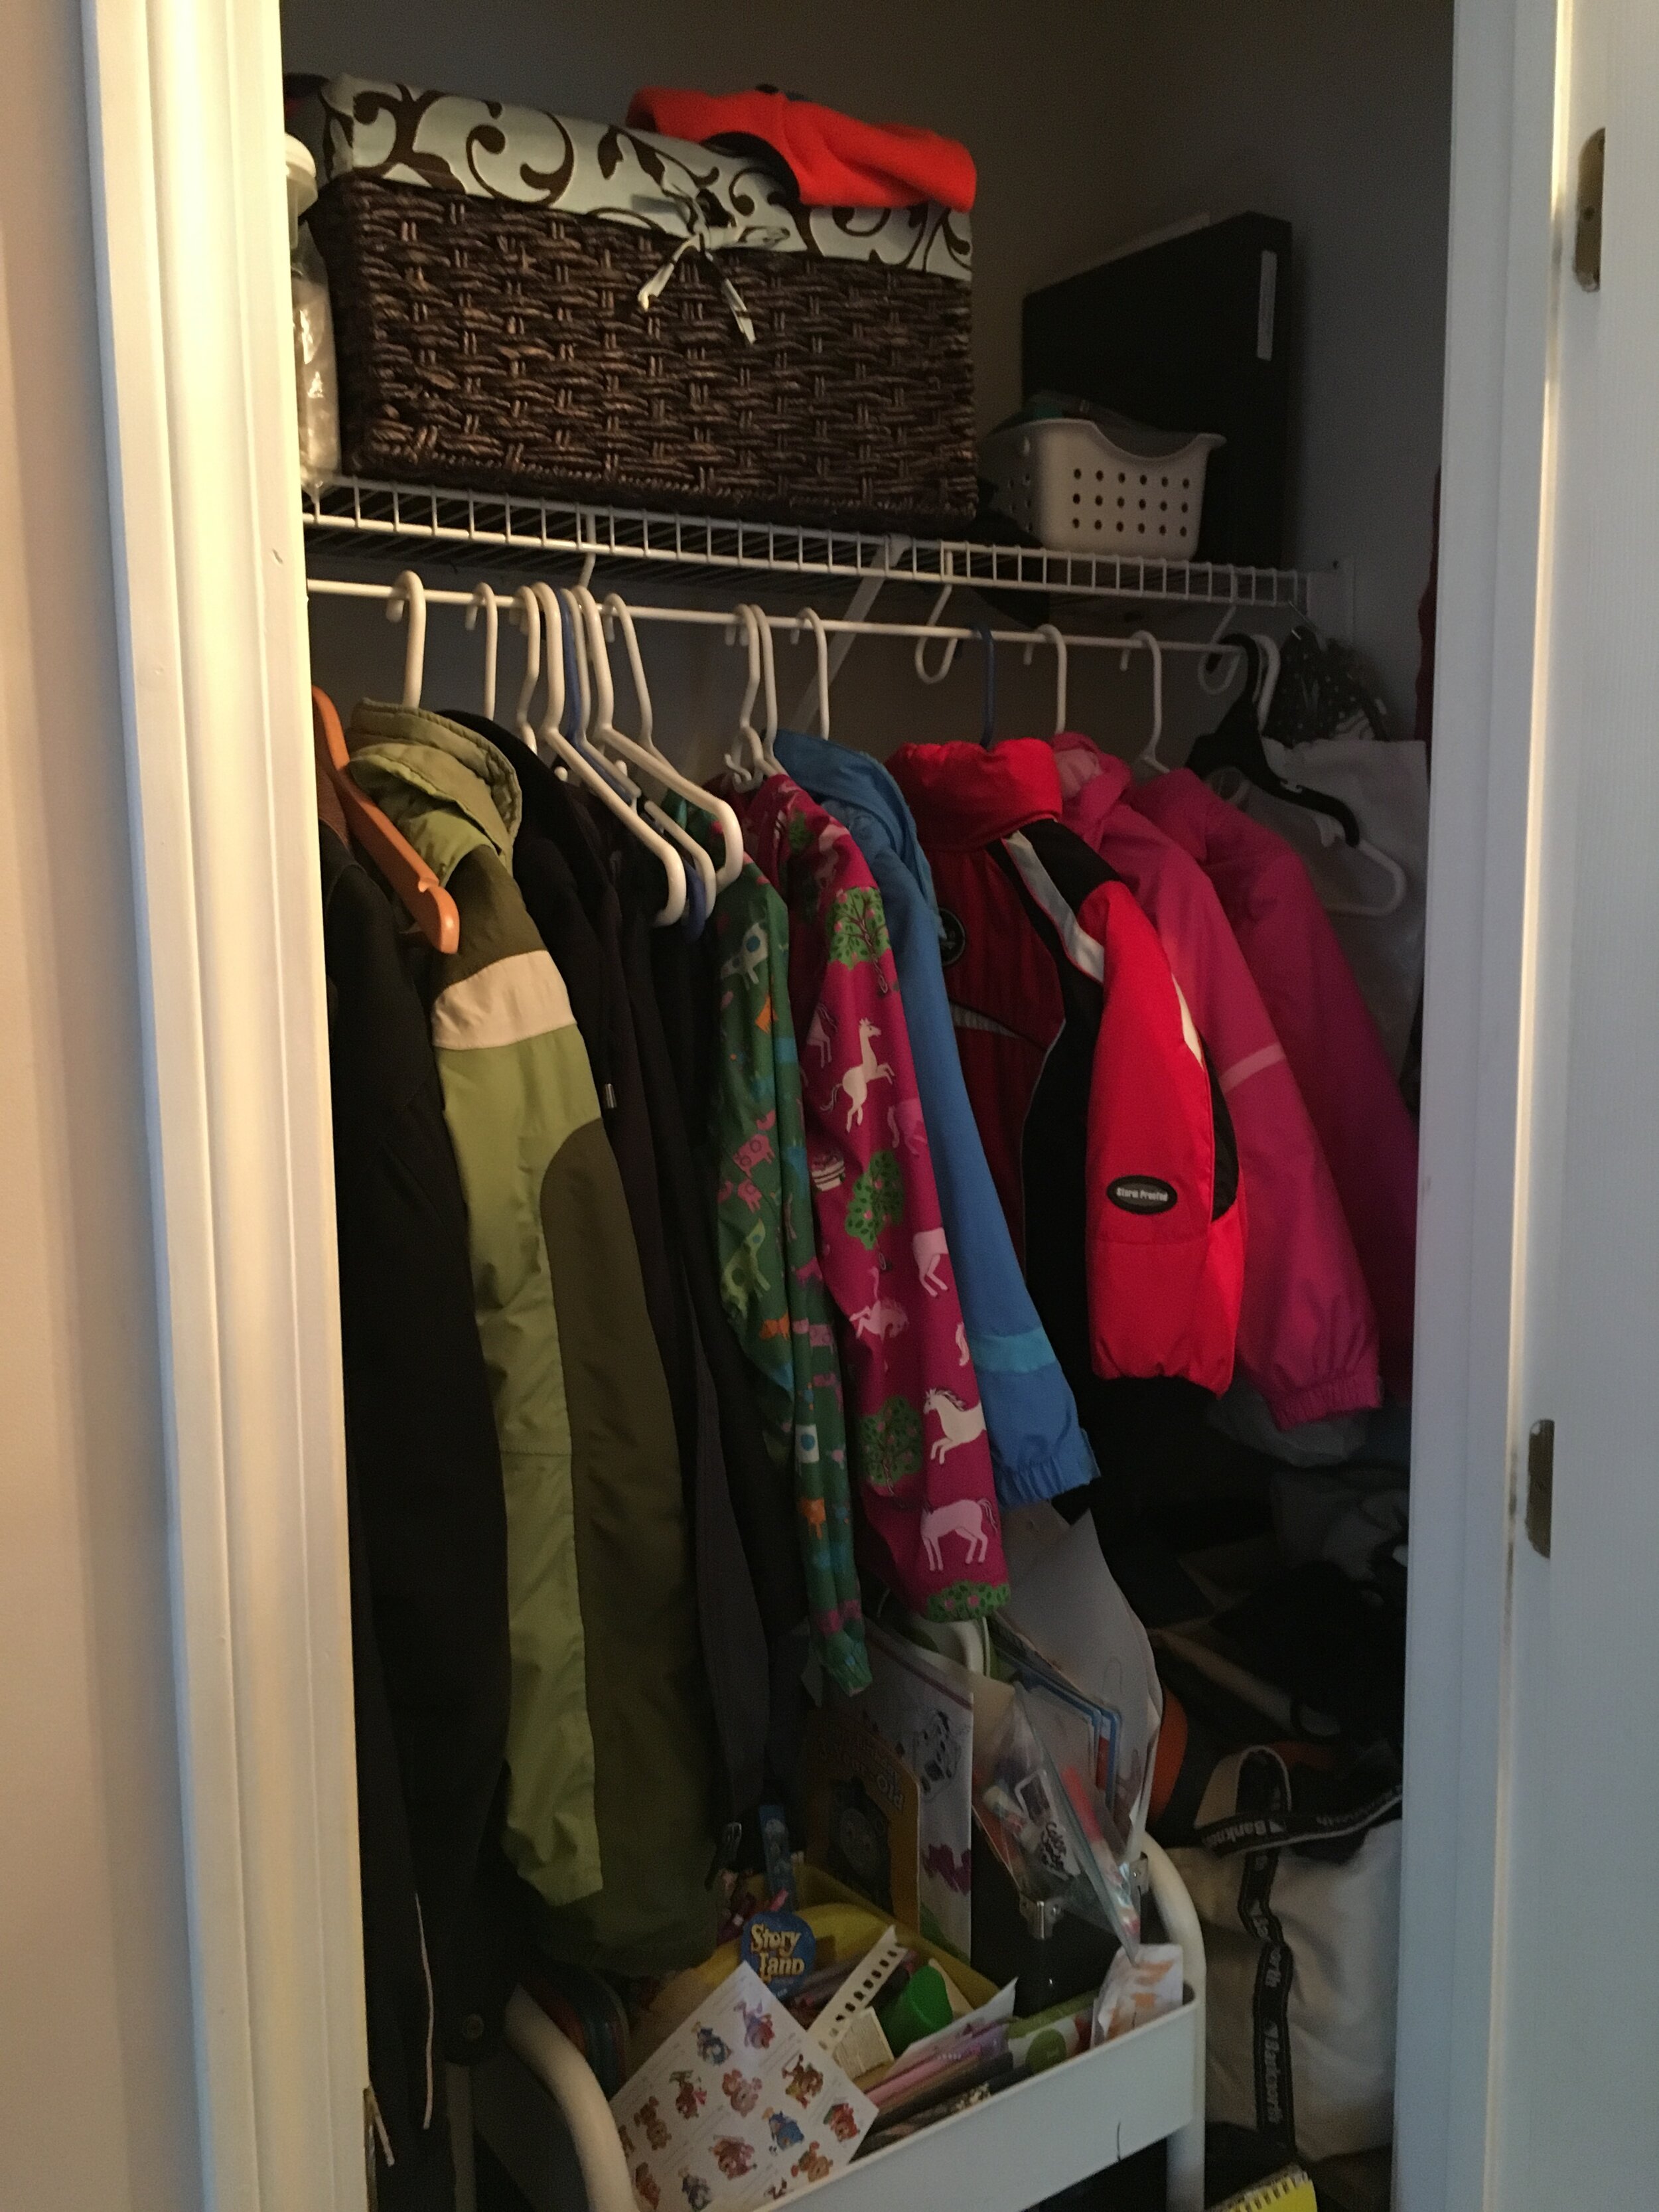
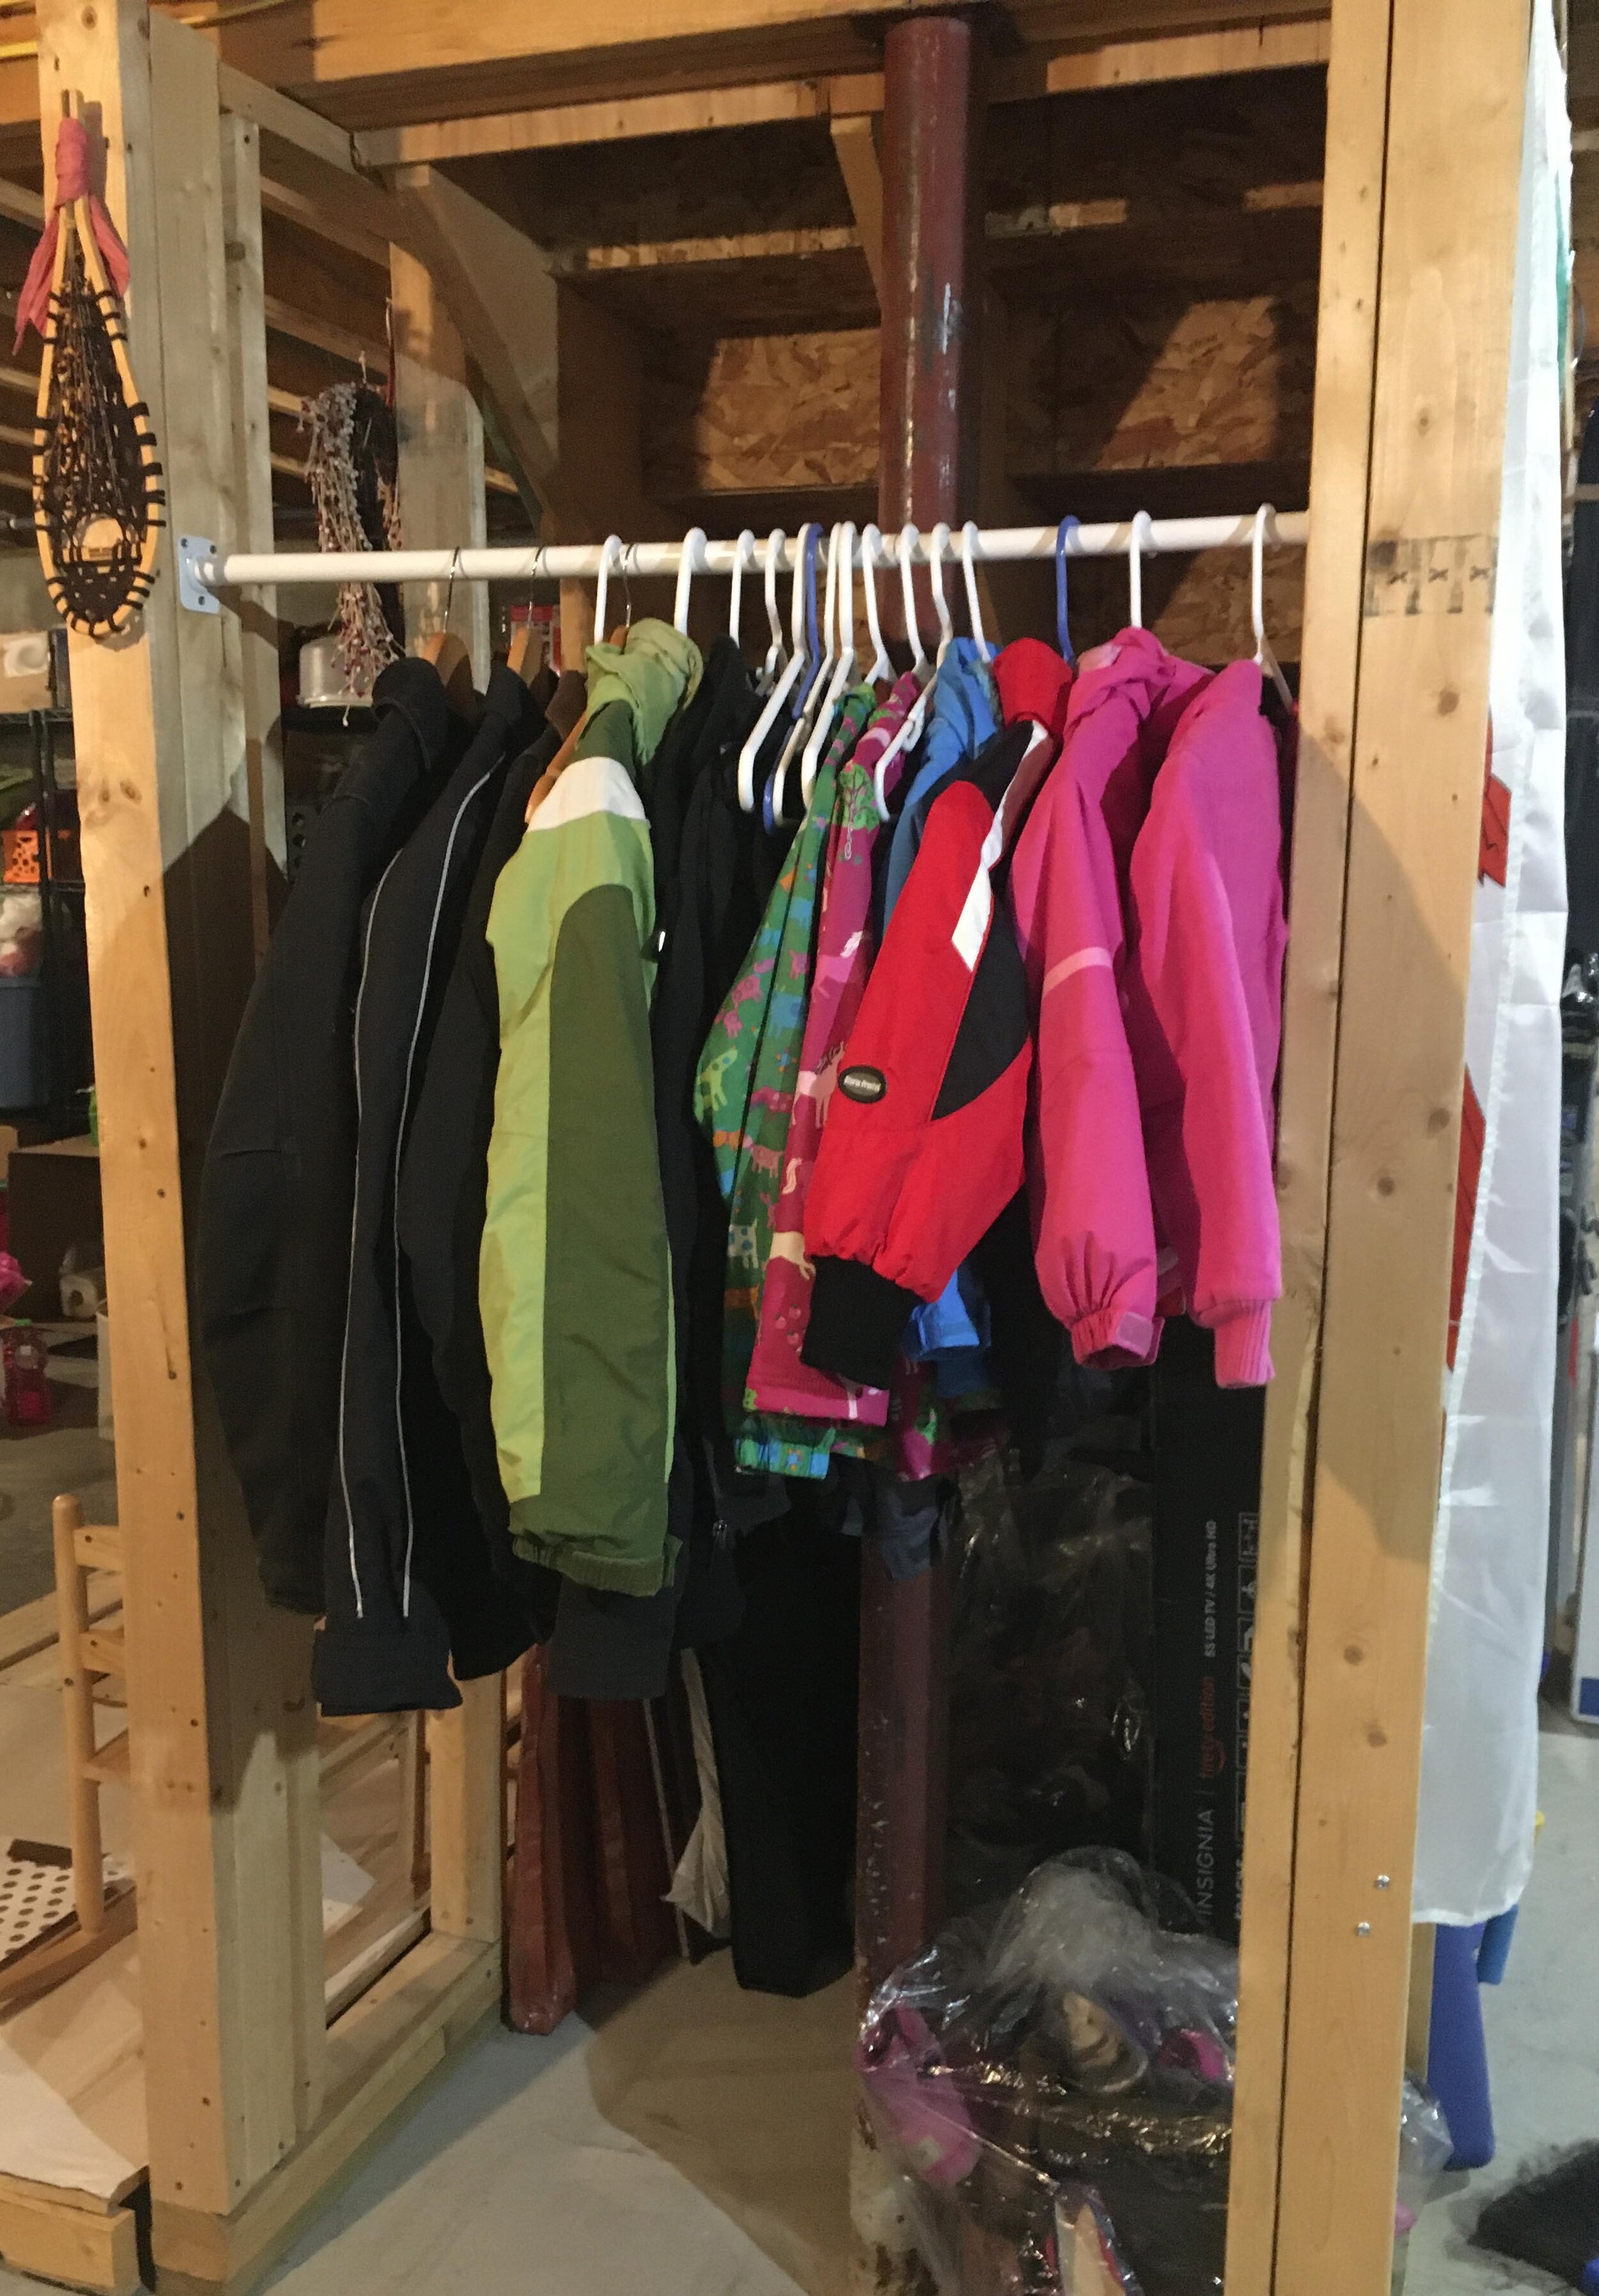
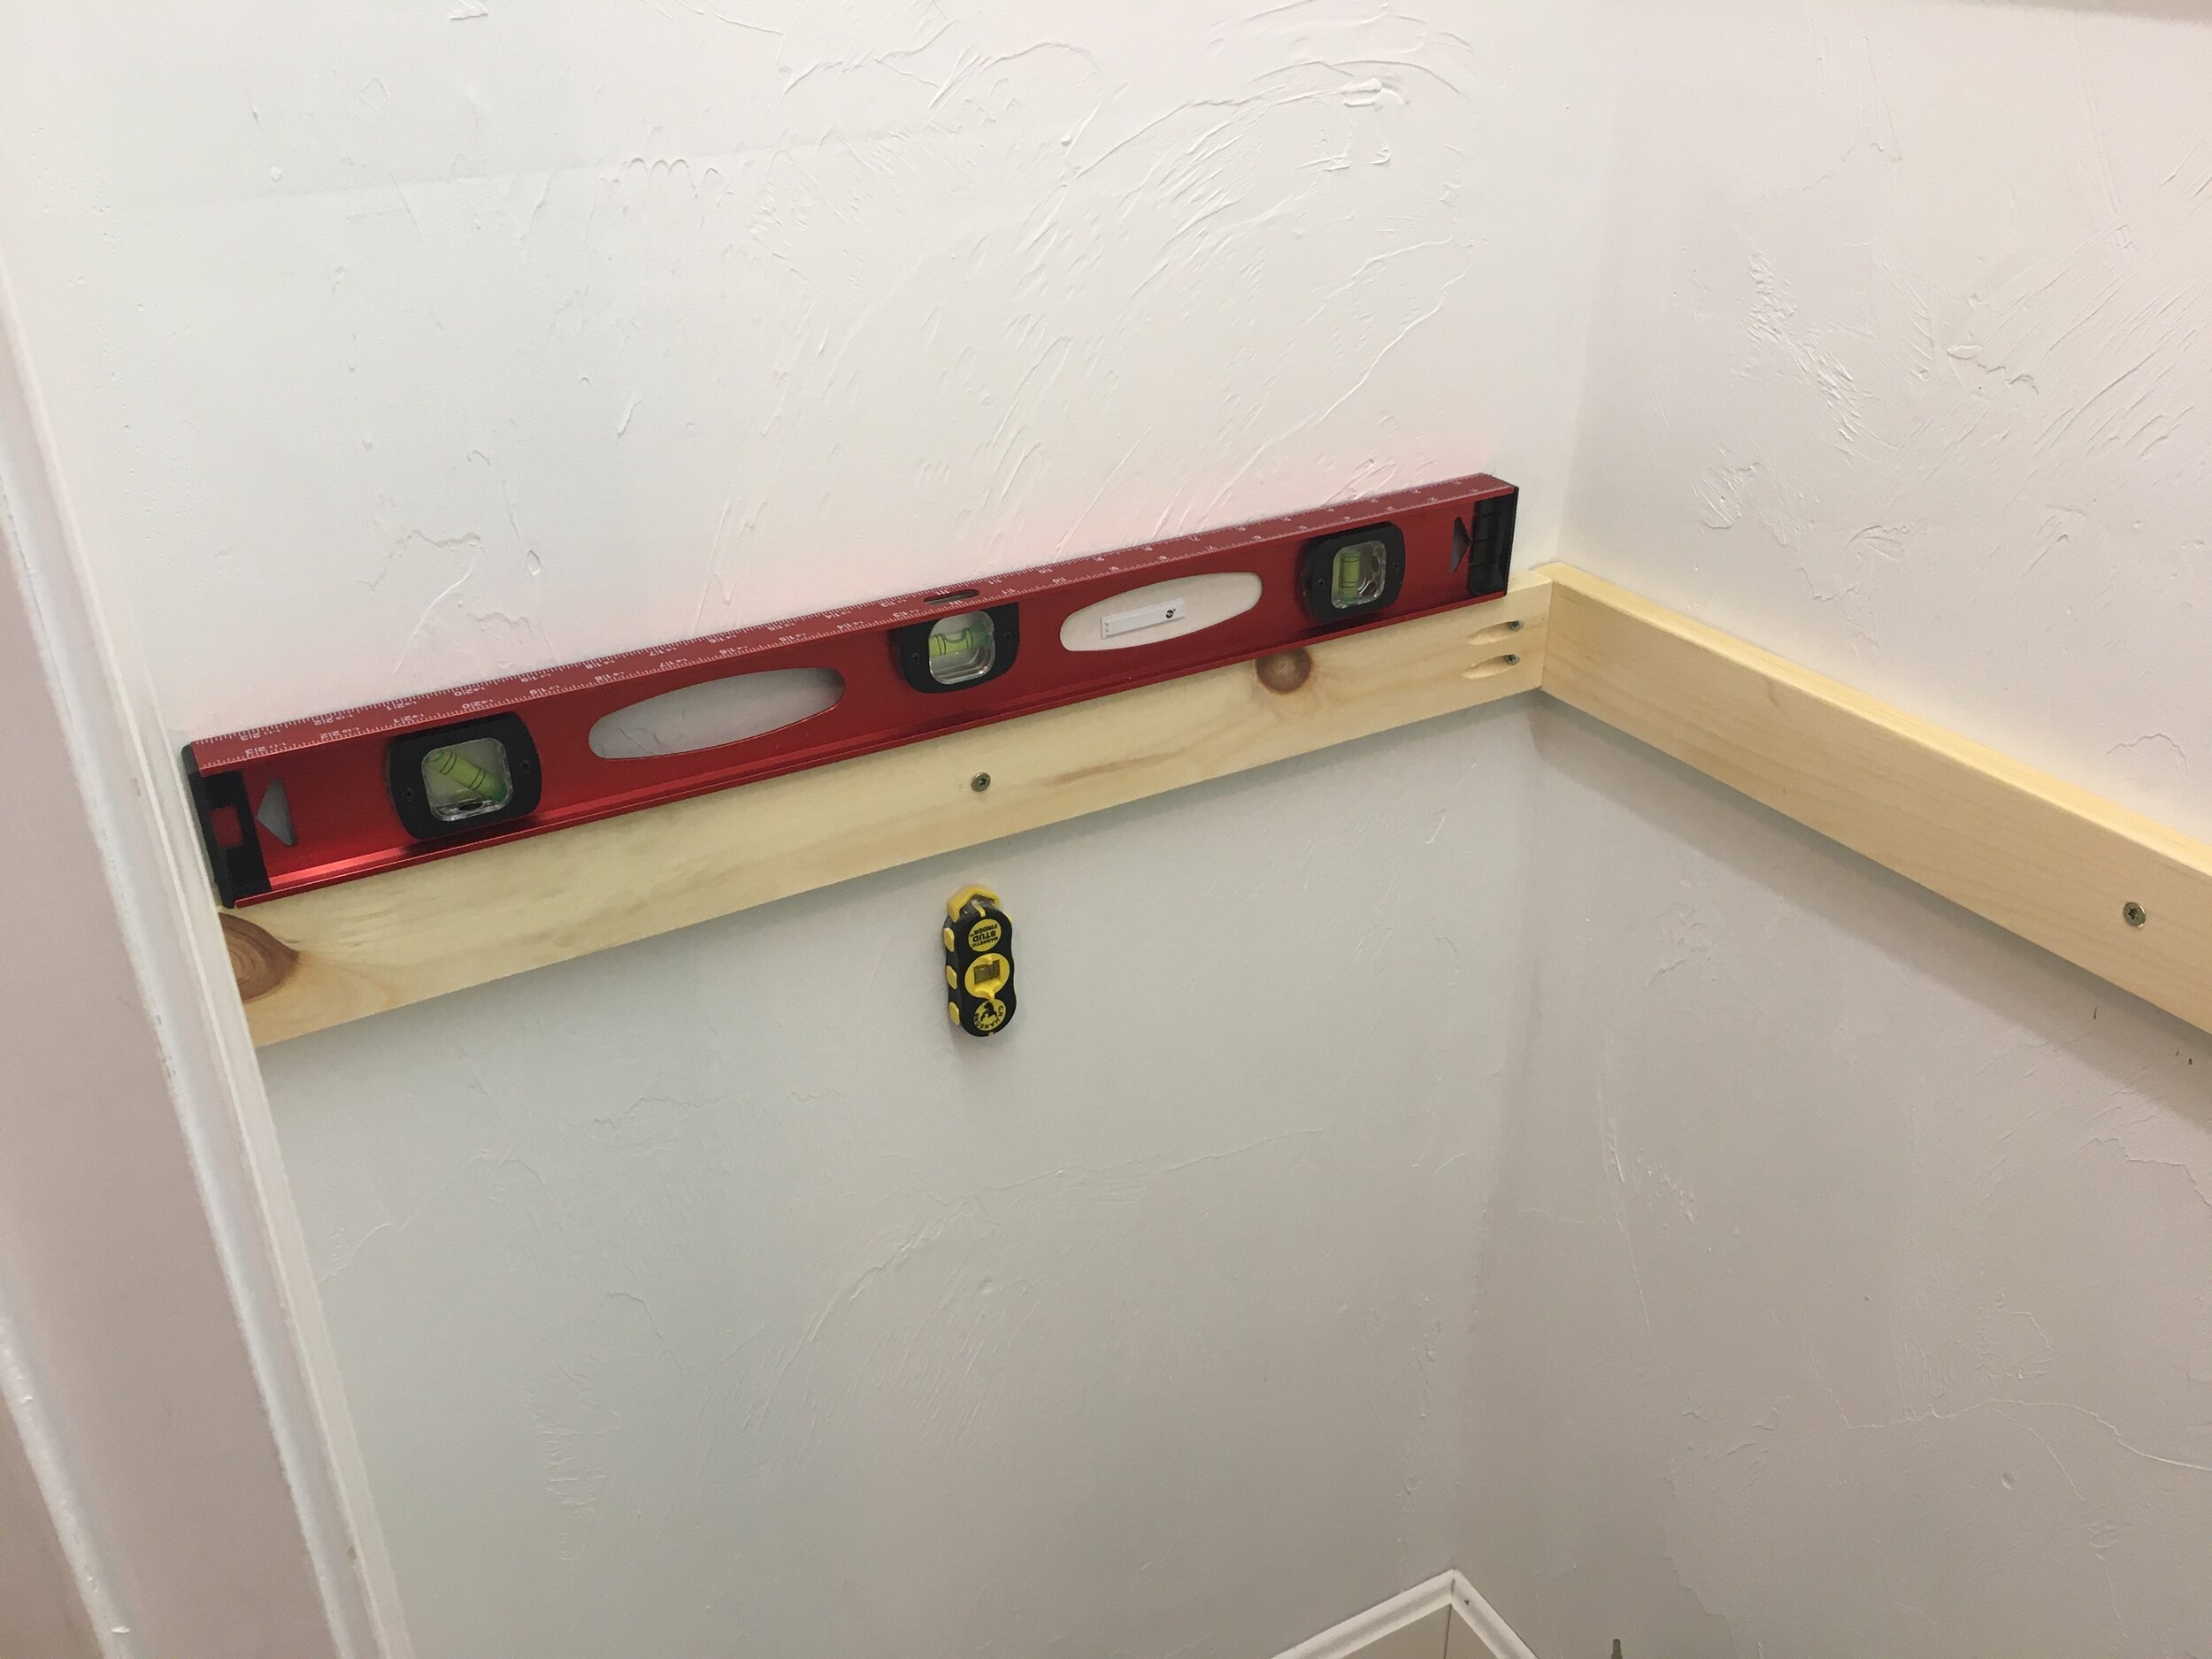
This is the before…. the helmets usually got strewn about on our lumber rack because the shelves were too high for the kids to reach and it was a convenient spot by the back door. I could have made a low coat hook type rack for the helmets to hang from, but since the shelves and the wood rack are in the way all the available studs were blocked/used and I didn’t have anything to anchor into. So - I had to get creative. I decided to cut down some 1x3 scrap wood and anchor them from the bottom of the shelves to act as the back piece to the rack.

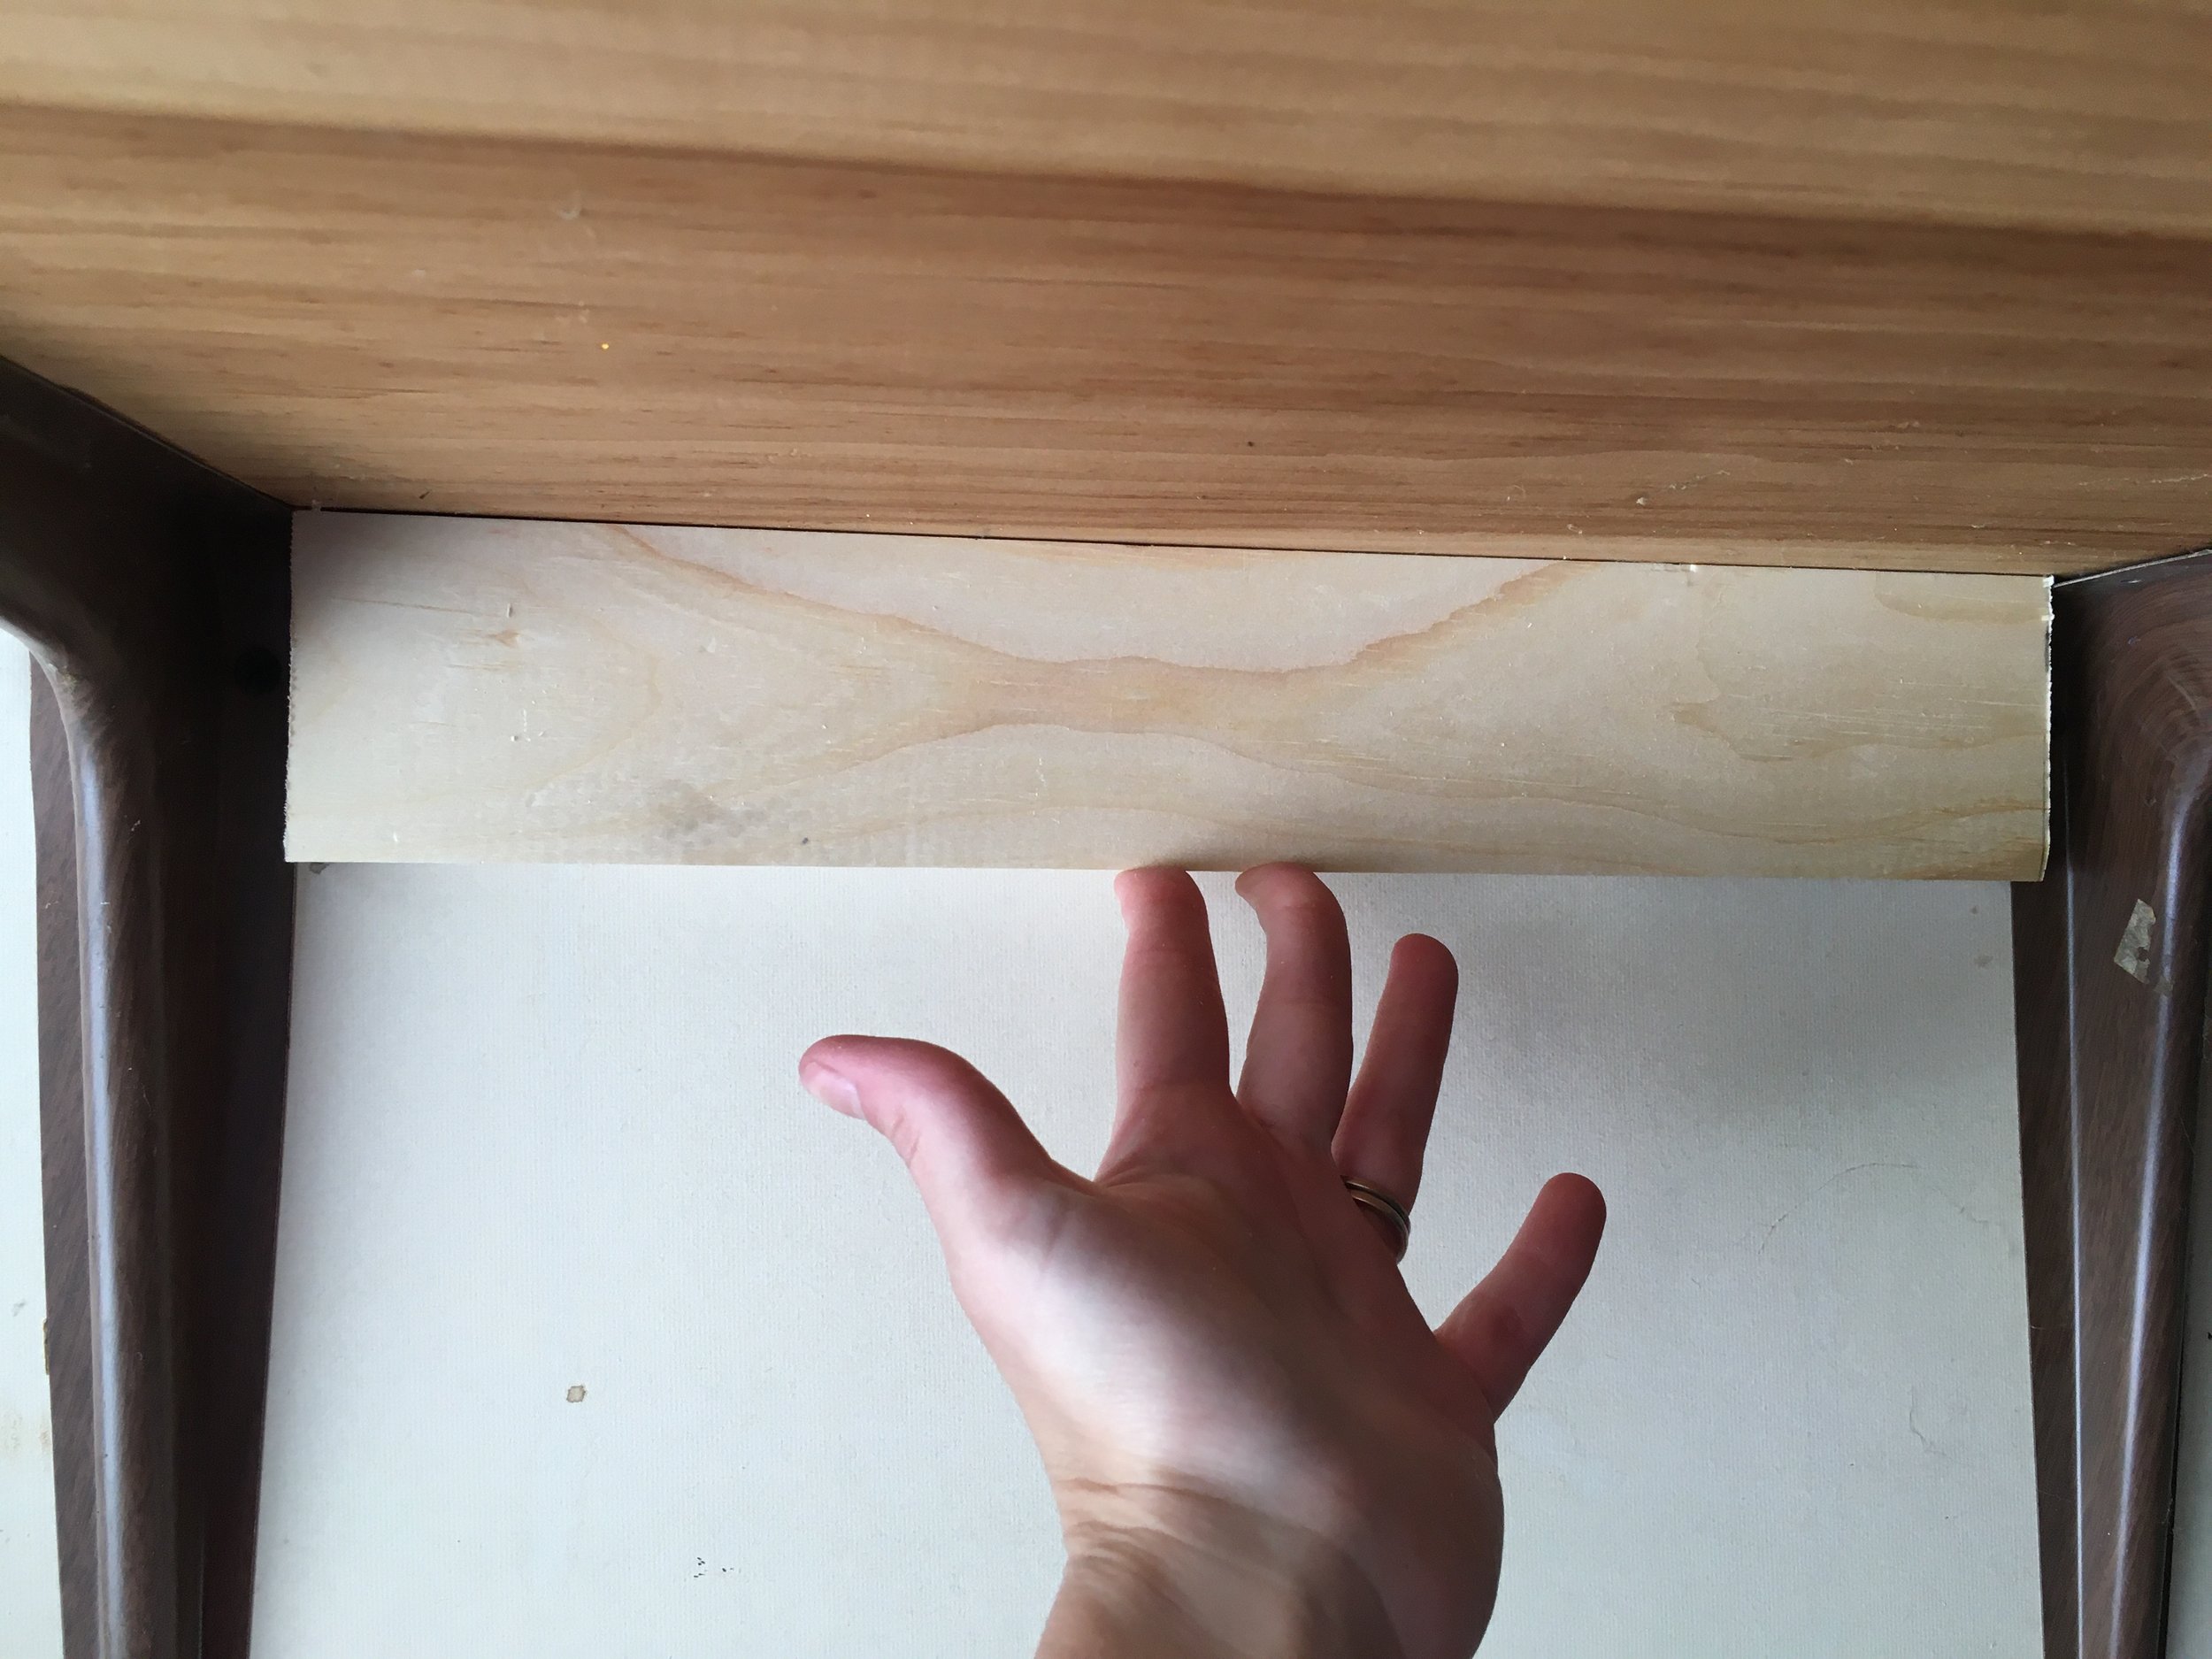
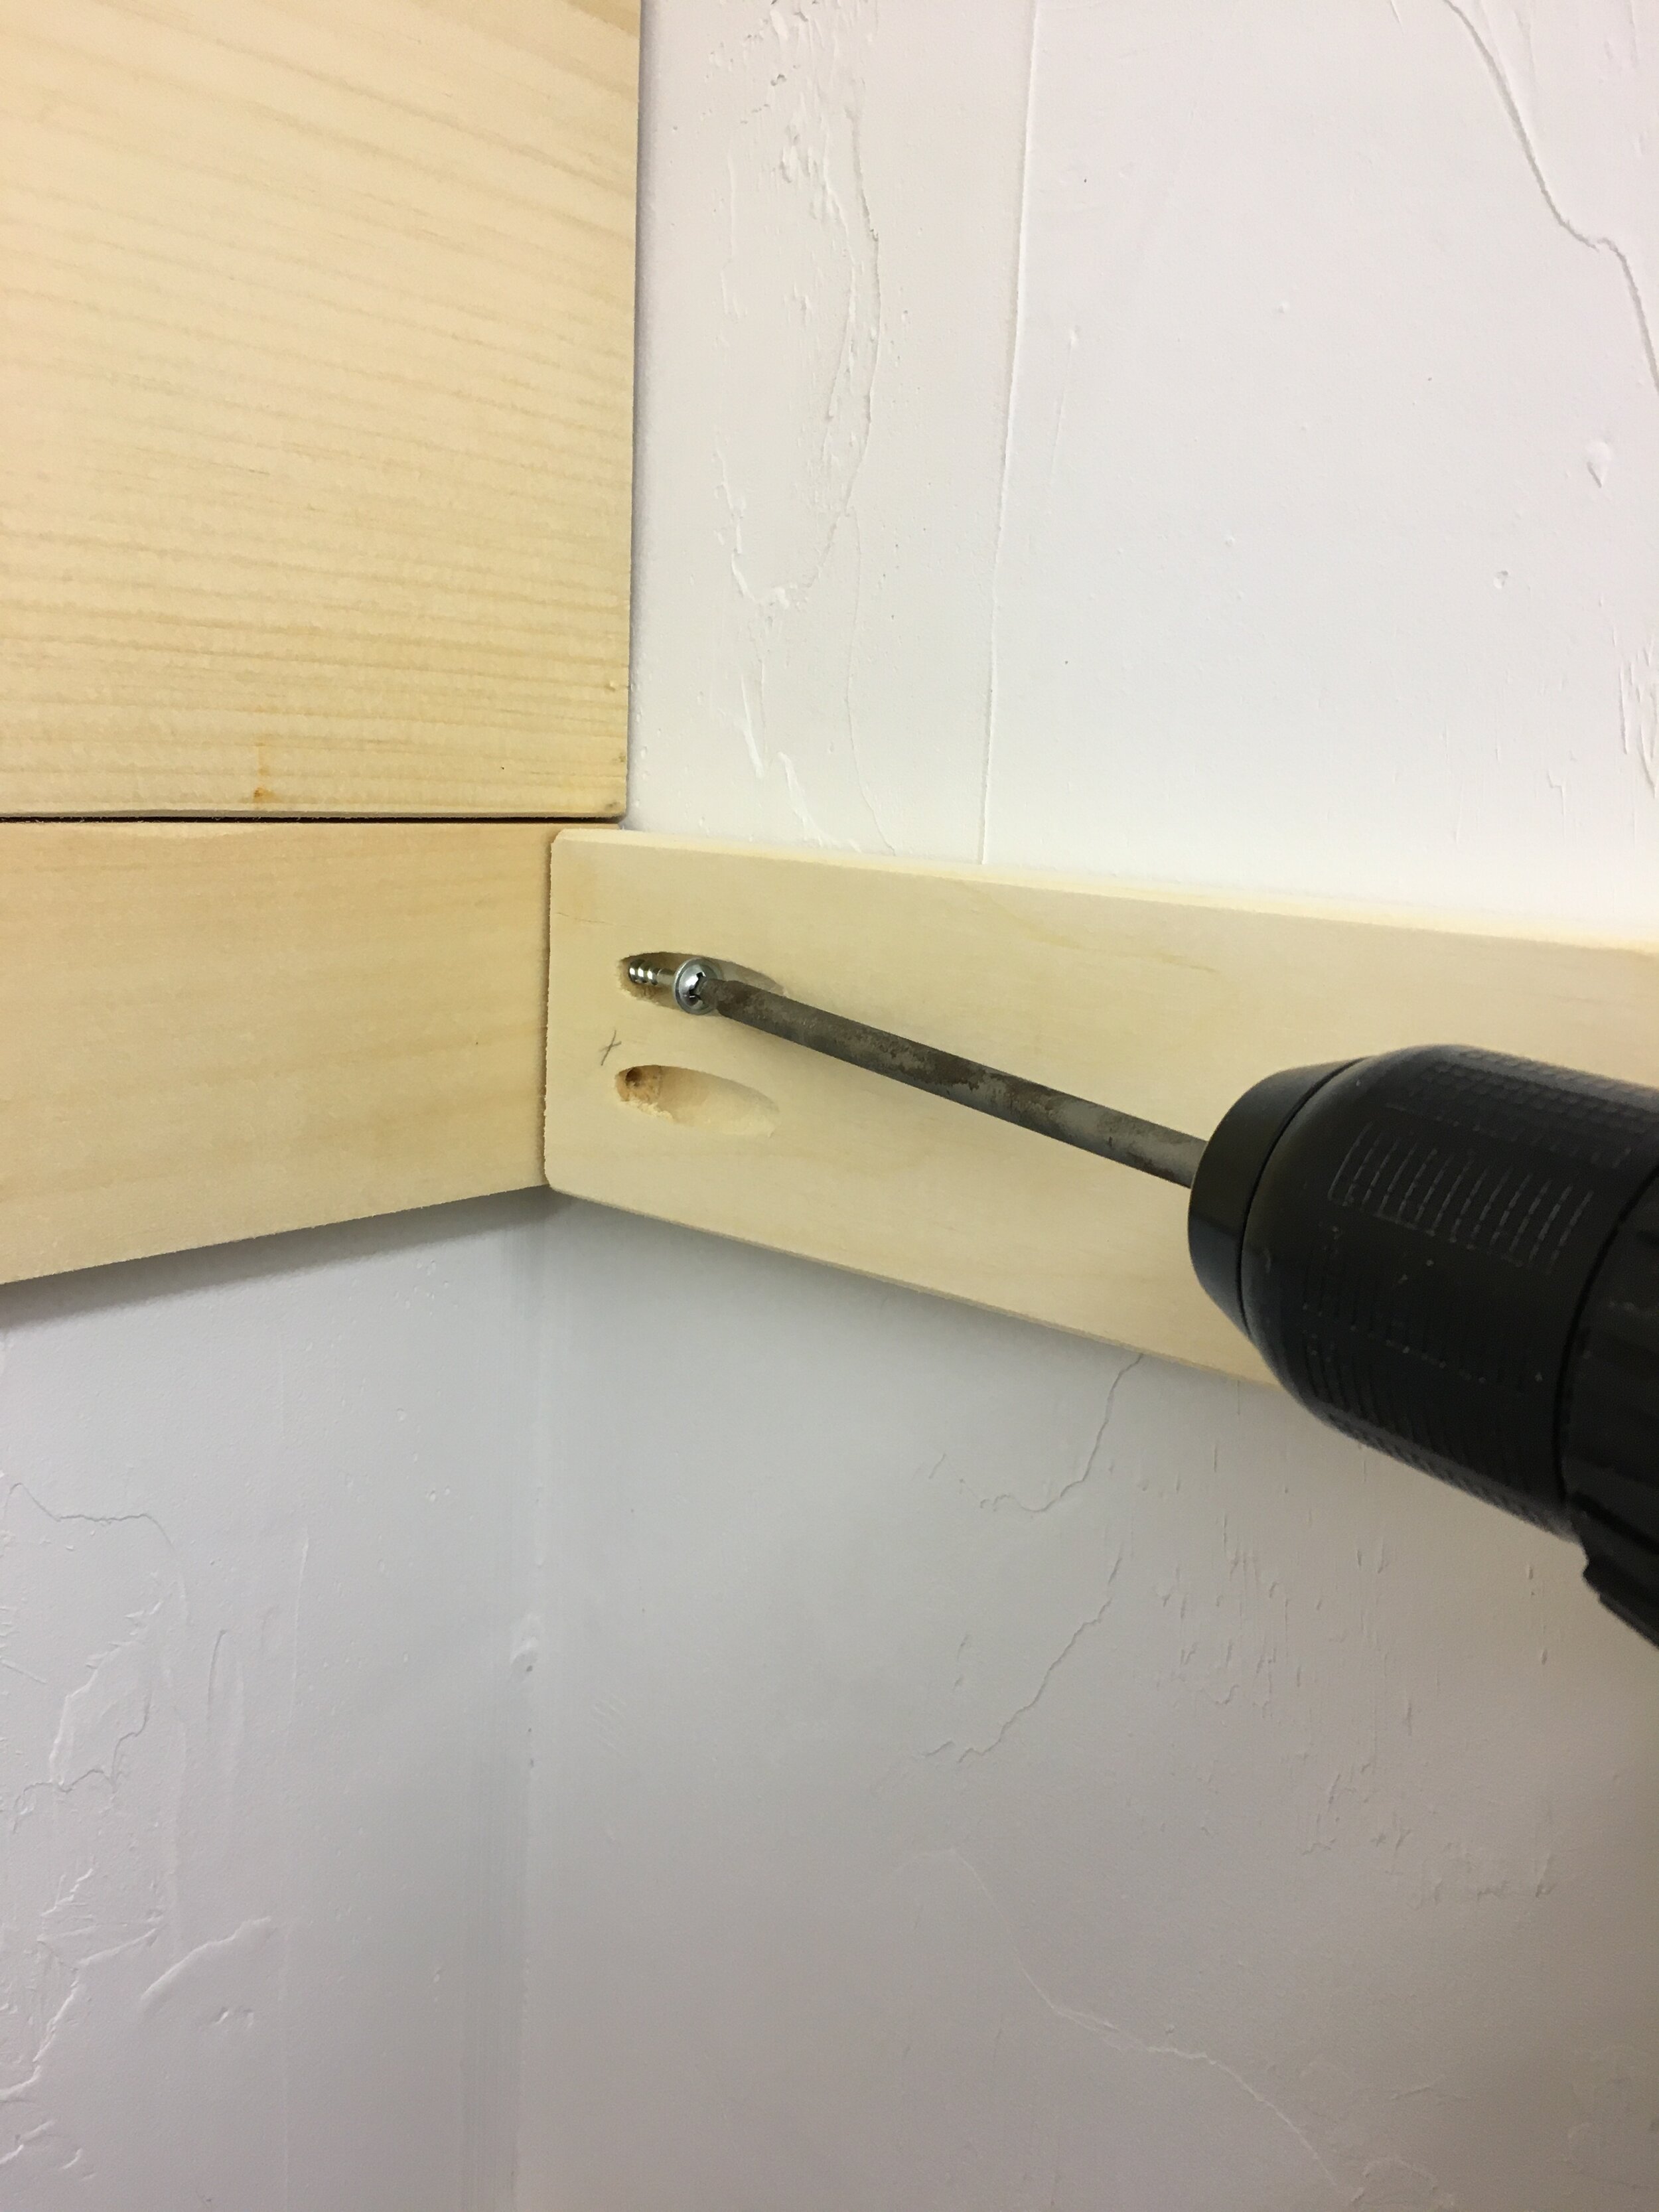
After cutting down the scraps and pre-drilling through the top of the wooden shelves, I simply screwed the back boards right into shelf from the top down.

After that, it was a simple matter of screwing in small hooks from which to hang the helmets from. I had a bunch of these small coat hooks left over from previous projects and they were perfect for this job. (I love these coat hooks because they're cheap and come in a big pack - great for adding random hooks around the house for keys, accessories, etc.)

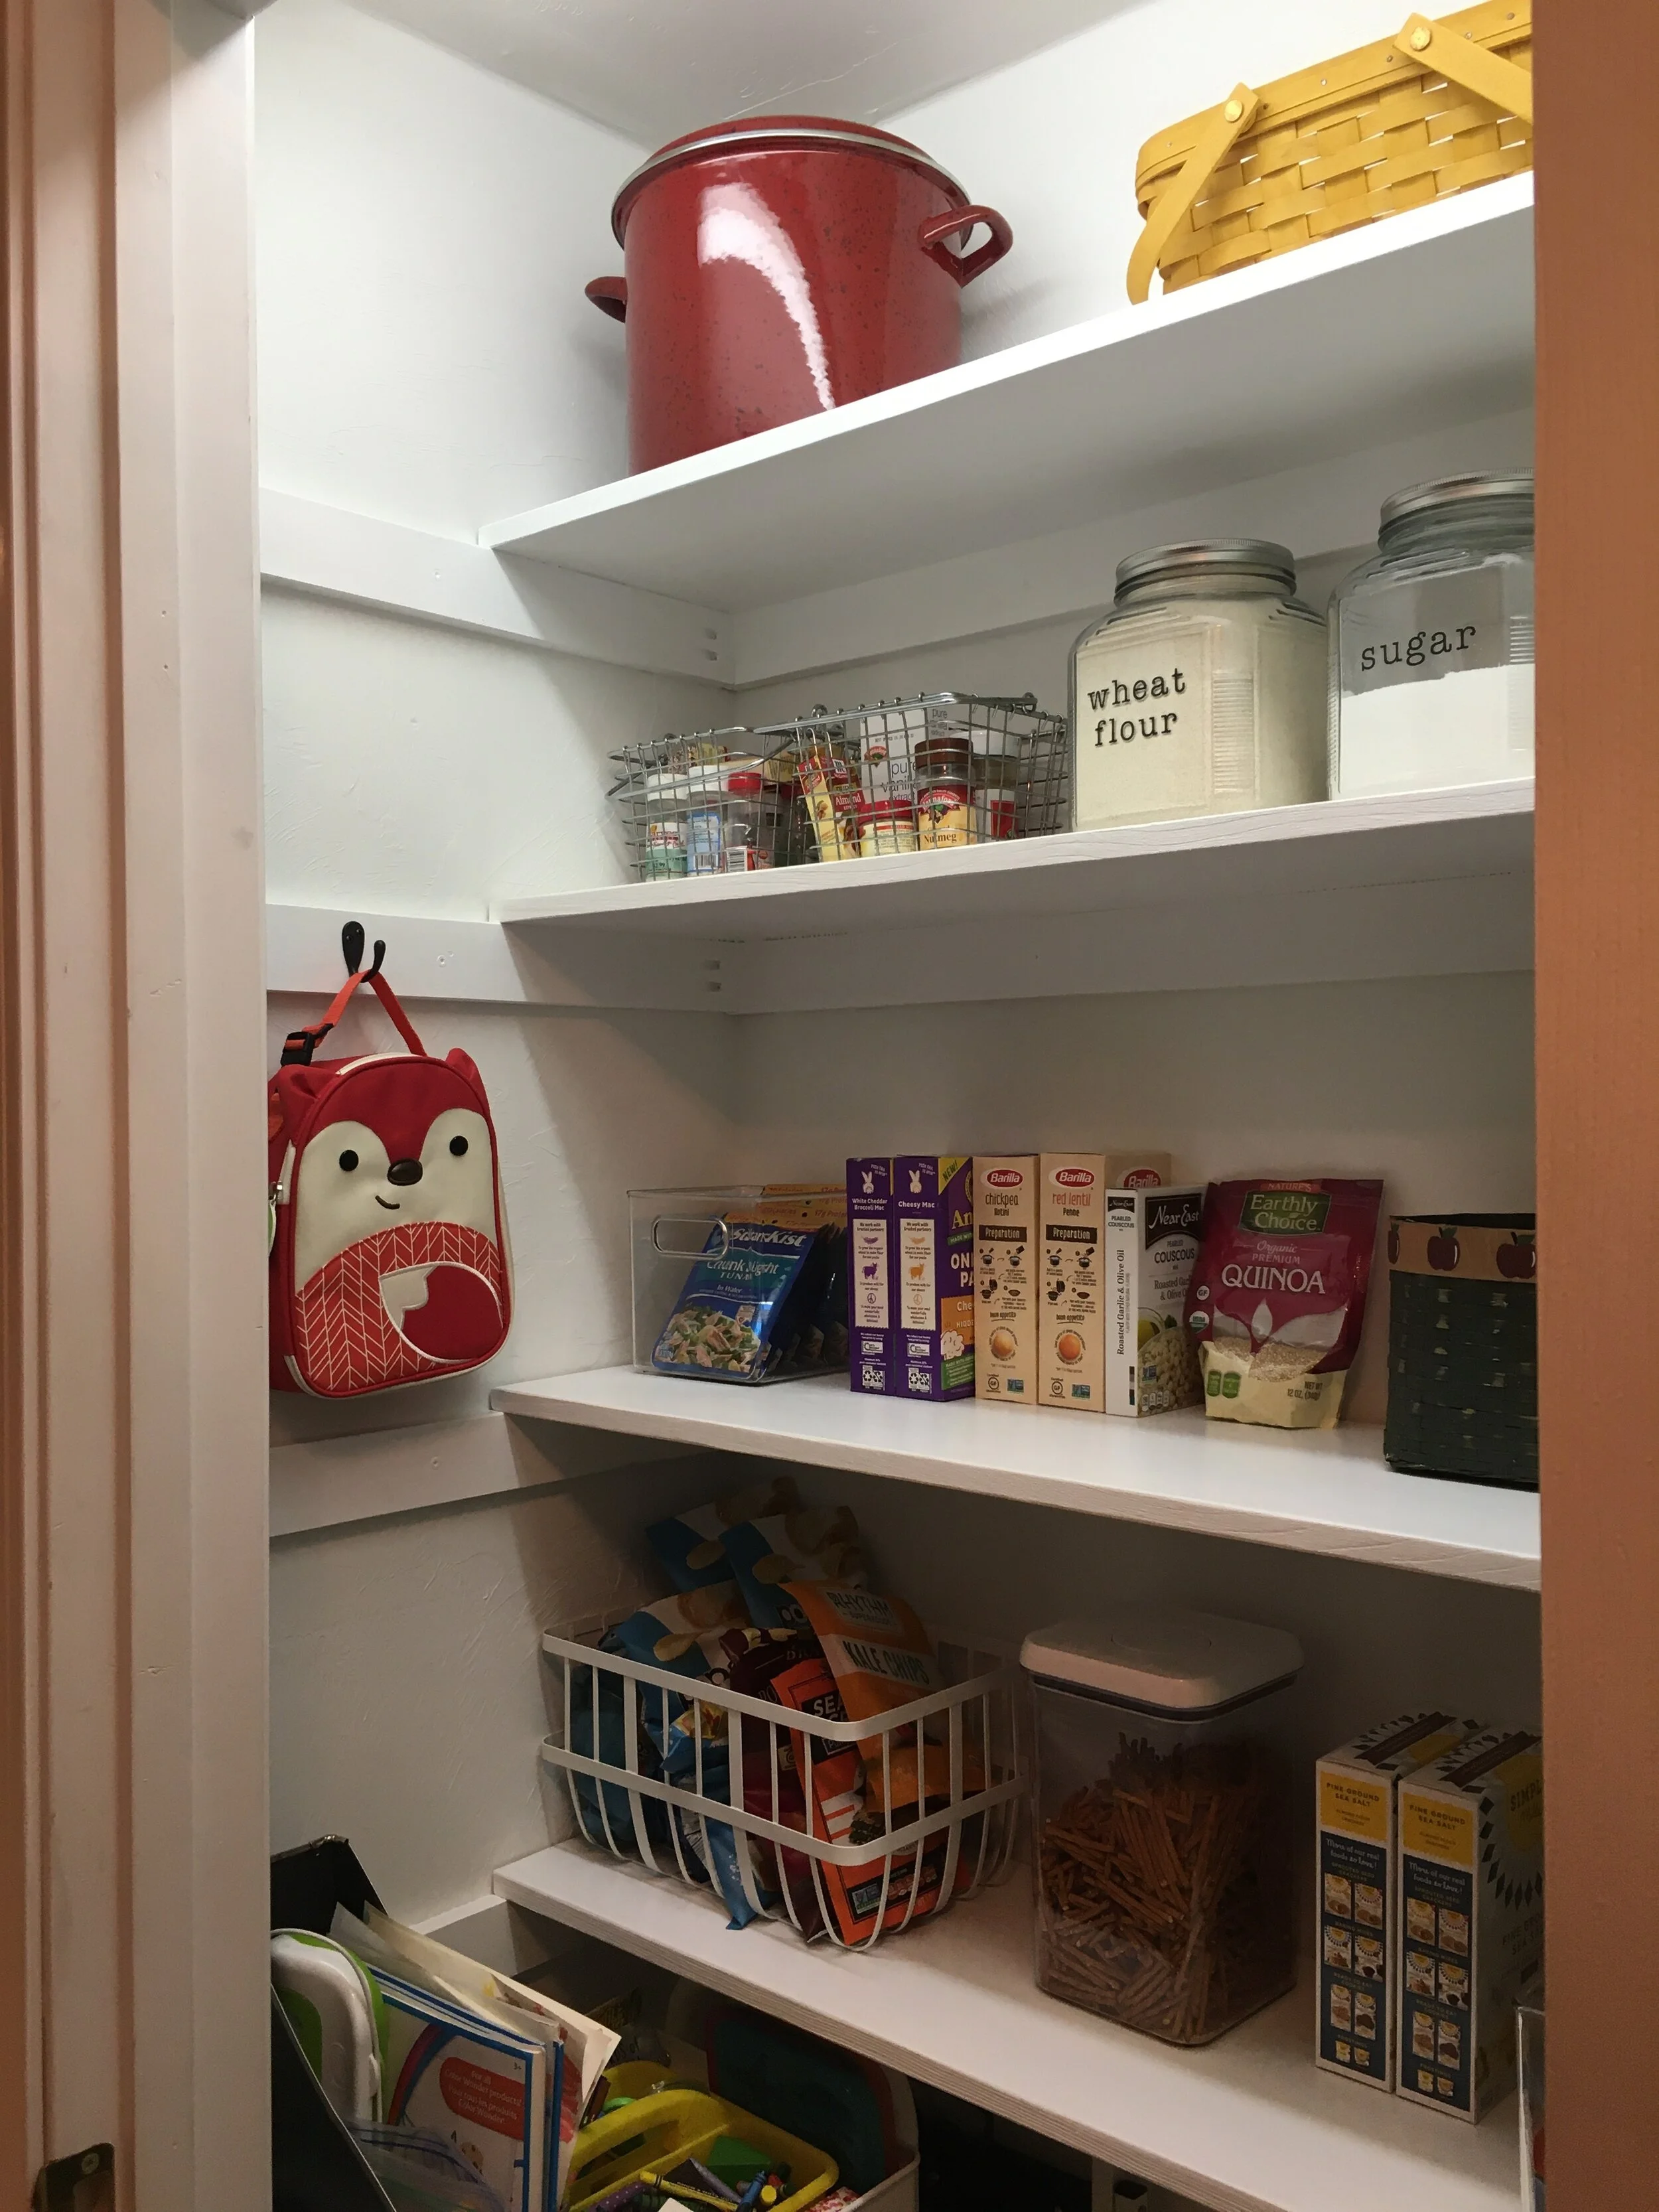
The helmet rack has been working wonderfully and is a great, practical addition to our garage!

| Reflective Stickers we added to our helmets - these are also great for adding additional visibility to backpacks, jackets, bikes, gear, etc. |

KEEP UP WITH BIRCH LANDING HOME
|  Etsy  |  Facebook  |  Instagram  |  Pinterest  |  Bloglovin'  |  Hometalk  |

Sheet and Towel Stripping How-To

While home for Quarantine, I’ve seen a lot of people posting about “stripping” their towels and bedsheets and showing disgusting After photos of dirty water - I was intrigued! Stripping the linens is supposed to get rid of any kind of build-up on them (whether that’s laundry detergent, body oil/sweat, hard water mineral deposits, etc). So I decided to give it a try myself and share the easy process - and let me tell you, it was a disgusting and oddly satisfying Quarantine Project. | This post contains affiliate links |

Sheet and Towel Stripping How-To

Apparently one should consider stripping their linens when they aren’t as absorbent as they used to be, they look or feel dingy, or they start to smell musty.

Supplies:

Everyone seems to be using more or less the same supplies, which are:

  • 1/4 cup Borax Powder
  • 1/4 cup washing soda (or 1/4 cup baking soda if you're in a pinch and don't have washing soda.. I used baking soda)
  • 1/2 cup laundry detergent

How-To:

Fill a bath tub with hot water and dissolve the Borax, washing soda or baking soda, and laundry detergent in it. Next add your towels and sheets (make sure to only do similar colors together… in some cases it can cause some colors to run. We only have done our white and light colored linens so far.)

Then leave them to soak for the next four or so hours, stirring occasionally. You should see the water turn from clear to a gross yellowish-dirty color.

Once the water cools, drain the tub and squeeze the water from the linens, rinsing them with some fresh water. Then put in the washing machine (with no detergent - your items will already have absorbed detergent and Borax and you want to rinse everything out, not add more soap at this point), and run through the “wash” cycle to rinse everything out thoroughly.

After that you can put them in the dryer, or re-run the washing machine with detergent like you normally would to give them a fresh wash before drying.

Draining the dirty water after stripping. Ew.

Draining the dirty water after stripping. Ew.

Our Personal Results:

So it wasn’t the magical night-and-day change across the board that I was expecting, visually anyways - and some items definitely had better results than others. OVERALL - Our linens definitely felt cleaner, and looked a little brighter - however, our old white towels (which have turned very off-white over the years), did not magically turn luminous white again like I was hoping. But again, that’s probably too much to expect as they are 10+ years old and have had many years to get discolored in the regular laundry. Nevertheless, just SEEING the dirty water after we stripped the linens makes me feel a lot better about doing this process - visually not everything looks perfectly white again, but I KNOW it’s cleaner after removing all that invisible gunk and that makes me feel a lot better.

Okay, so the old white towels are still off-white, but I know they’re cleaner than before after seeing the dirty water after the stripping process.

Okay, so the old white towels are still off-white, but I know they’re cleaner than before after seeing the dirty water after the stripping process.

It’s my understanding that you can repeat this process as needed, and I can see myself doing this maybe up to 2-4x per year going forward to try to keep build-up at bay.

Disclaimer: Try at your own risk. In some cases this process may make colored fabrics run and may not be suitable for all fabrics.

Want to see another satisfyingly gross example…?

Here’s a photo my sister sent me after she did her sheets - wow!

Here’s a photo my sister sent me after she did her sheets - wow!


KEEP UP WITH BIRCH LANDING HOME
|  Etsy  |  Facebook  |  Instagram  |  Pinterest  |  Bloglovin'  |  Hometalk  |

Monogrammed L.L. Bean Boat and Totes for the Whole Family

Because someday the kids will go back to school… (Right..? Right! fingers crossed) I ordered our youngest her own pink monogrammed L.L. Bean Boat and Tote to match Mama and big sis for when she hopefully starts school in the Fall. I love that each will have her own tote for school to stay organized and carry snow gear and sports things, and that these bags are something that will grow with them and be used for many years to come.

Here’s looking to better, healthier days ahead!

Monogrammed L.L. Bean Boat and Totes for the Whole Family
A bag for each of us and each of us has our own color to keep us organized. Our oldest’s bag has been through the wash many times and is a bit softer and more broken in :) These bags get better with use!

A bag for each of us and each of us has our own color to keep us organized. Our oldest’s bag has been through the wash many times and is a bit softer and more broken in :) These bags get better with use!

L.L. Bean Fashion

| This particular post is not sponsored by L.L. Bean but contains affiliate links and my personal opinions |


KEEP UP WITH BIRCH LANDING HOME
|  Etsy  |  Facebook  |  Instagram  |  Pinterest  |  Bloglovin'  |  Hometalk  |

DIY Ribbon and Trophy Display

It seems kind of weird and petty to write about fun DIY projects during a Pandemic, but maybe fun projects to work on at home is just what we need right now :) I did this project about two months ago when I was looking for a nice way to display our oldest’s growing collection of award ribbons and medals but couldn’t find a display setup that I liked or was remotely affordable.
The whole project was super easy and done start-to-finish within two days. Here’s hoping for things to go back to normal someday soon so she can continue to add to her award collection. | This post contains affiliate links |

DIY Ribbon and Trophy Display

Materials:

DIY Ribbon and Trophy Display

How-To:

First decide how long you want the overall shelf to be (in our case I decided on making it 3ft wide). Then cut your shelf top to that length.

(Nothing is screwed in yet here… just laying everything out to make sure it will fit like I want it to.)

(Nothing is screwed in yet here… just laying everything out to make sure it will fit like I want it to.)

Next decide how wide you want the shelf back to be - remember that the self back plus the brackets should fall within your overall shelf top length. Ultimately how long you cut the shelf back is your preference though. But visually I think that the shelf back and the brackets look best if they fall within about 2 inches of the shelf top on each side.

(Side note: If you have a router you can cut a dovetail channel along the back of the shelf back now to make for easier hanging… I do not have one of those handy so I skipped this step and will hang our shelf another way.)

Once you have everything laid out, cut your dowel to about 1/8” less than your shelf back length so it will fit comfortably within that space.

DIY Ribbon and Trophy Display

After everything is cut, I recommend sanding everything first before you assemble. I love using our orbital sander - it makes for quick work and does a nice job.

DIY Ribbon and Trophy Display

Next start assembling. Screw the shelf supports to the backing first, making sure everything is lined up and flush.

DIY Ribbon and Trophy Display

Next carefully center the shelf top, making sure it’s flush with the back and screw in.

DIY Ribbon and Trophy Display

Now for the fun part - paint! I did one coat of primer and then three coats of semi-gloss white paint, though you could choose any color you wish. I like semi-gloss paint since it has a slight sheen to it and is easier to dust and keep clean.

DIY Ribbon and Trophy Display

For hanging - first I measured this wall side-to-side to figure out where the shelf should fall within that space to be centered. Then I marked the studs with a stud finder.

To be honest I usually use two different kinds of stud finders when I have to hang something - I use a magnetic stud finder first to identify exactly where the stud is and then a digital one to find the edges of the stud. I’ve found that sometimes the digital ones can be finicky so it’s nice to know where the studs are first rather than get a false stud reading when it could be something else (a pipe, a thick area of plaster on the wall, etc).

Then using a level to make sure the shelf was level, I screwed directly into the wall studs through the shelf back making sure to place the screws where they would be hidden by the dowel once I installed it.

DIY Ribbon and Trophy Display

Next I hung the dowel by centering it and adding a simple hook to support it on each side, as shown above (this also hides the screws I used to hang it). And now the project is finished and ready to display ribbons, medals, and trophies!

DIY Ribbon and Trophy Display

To hang the ribbons and medals you can easily lift the dowel up and string them on, or loop them around the dowel like I did here.

I hope you liked the project and we look forward to when this Pandemic is over and there will be sport and fair ribbon awards again - stay well!

DIY Ribbon and Trophy Display

Similar Posts:


KEEP UP WITH BIRCH LANDING HOME
|  Etsy  |  Facebook  |  Instagram  |  Pinterest  |  Bloglovin'  |  Hometalk  |

Preparing for the Novel Coronavirus

Whether you believe the extent of the hype about the Novel Coronavirus (COVID-19) or not, you should still take it very seriously. This is unprecedented for our generation and a lot of people are in denial that something may be so out of our control.

Preparing for the Novel Coronavirus (COVID-19)

I wanted to share this link to a post by Scientific American that I found - I felt like this was a really calm and helpful perspective on why we should prepare now - and no, you don’t have to go overboard. We personally bought extra groceries this week, along with diapers, dog food, and the OTC medicine our toddler takes daily. I'm also planning on taking this opportunity to potty train her so we hopefully don't run out of diapers.
I pray this virus doesn't become a widespread issue but it's best to prepare now.

The whole point of being cautious and complying with “social distancing measures” is to keep our hospitals and medical personnel with their heads above water - because if this outbreak becomes large it will overwhelm our capabilities, which would be bad for everyone but especially our vulnerable populations (elderly, those with chronic illness, etc). So please, I ask you to take it seriously and prepare - then hope and pray for the best. Stay healthy out there! <3


KEEP UP WITH BIRCH LANDING HOME
|  Etsy  |  Facebook  |  Instagram  |  Pinterest  |  Bloglovin'  |  Hometalk  |

Emergency Preparedness: Preparing, Sheltering in Place, Having a "Go Bag," and Evacuating

God forbid you or your family ever encounter an emergency situation, evacuation, natural disaster, etc. But if you do, it’s best to be prepared. Now, you probably can’t prepare for everything but even some level of preparedness is much better than none. In this post I’m sharing some general ideas on ways you can prepare your home and your family if you’re stuck or need to evacuate, but please do your own homework and contact local authorities for the best advice on what situations are most likely to arise for you. | This post contains affiliate links |

Emergency Preparedness ideas for your Family and Home.

Disclaimer: I am not a survival or emergency expert, but just sharing my opinion on ideas and discussion points on how you might prepare. Do your own research and contact local authorities on the best way to prepare your home and your family for any emergency situation which could arise.

Prepare Your Home

First let’s talk about the home front - it’s a good idea to make sure you have a generator (correctly installed and well ventilated) and extra fuel (safely stored) in the event you’re without power for awhile. Make sure you have shovels, flashlights, extra food that doesn’t need to be cooked (like crackers, canned goods, etc), pet food, water, blankets, matches, and candles too. Some people recommend filling bathtubs and sinks with water prior to bad weather coming so that you have a supply of water for cooking/drinking/washing/flushing toilets. Make sure phones and electronics are charged and you have extra charging packs.

Whether you have a generator or not to run your refridgerator or freezer during a power outage, it's a good idea to keep thermometers inside both fridge and freezer to monitor the temperature for food safety. Do not open the doors unless you really need to (opening them lets the precious cold air out), but by having thermometers in place you can make sure your food is still safe to eat after a prolonged outage.

Have a battery-operated or crank radio on hand - if the power or cellphone/internet services are disrupted you’ll want to be able to listen to the radio to get updates.

It’s also important to have a First Aid Kit and enough medications on hand if someone has a pre-existing medical condition, as well as general medications that you and your family may need like fever/pain reducers. If someone in your family has an allergy or restricted diet, make sure you have a backup of enough “safe” foods in the house for them to have. It’s also a good idea to have medical information for your family posted in the house for first responders if needed.

Make sure to also have working smoke detectors, carbon monoxide detectors, and fire extinguishers in your home. Keep important documents in a Fireproof Safe.

In the event of a local outbreak of illness (flu, stomach bug, - edited to add COVID-19 too), it’s a good idea to have basic over-the-counter medications on hand as well as disinfectant supplies and face masks.

Decide Where and How You May Need to Shelter In Place

Think about different scenarios that could ever happen, which is probably most dependent on where you live. If you live in tornado or hurricane-prone area, maybe you need to have a plan in place to quickly bring in lawn furniture and other items that could go air-born, shut your storm shutters, and shelter in the basement or bathroom. If you live in a city, maybe a scenario that’s more likely is you may have to shelter in place due to violence or riots - where would be the safest place in your home or apartment to do that? If you live in winter-storm prone area, maybe that’s making sure your heating vents stay clear from snow and you have a roof rake and shovels ready to make sure your roof doesn’t get overloaded and you can shovel your way out of your front door. If you live in an earthquake-prone area, maybe that’s being aware where the safest place in your house to shelter would be (maybe a strong doorway), or know if it would be safest to evacuate the building entirely and wait it out outside.


What is a “Go Bag” and Why Your Family Should Have One

A “Go Bag” is something you have packed and ready in the event you needed to evacuate your home immediately and potentially survive outside (in the woods or on the road in your vehicle) on your own for several days… situations that may arise where you may be put in that situation could be quick moving storms, flash floods, wild fires, etc. A Go Bag is something that is ready to go with emergency supplies including food, water or a water flirtation system, survival blankets, first aid kit, personal medications that you/your family may need, medical ID cards, masks (to help filter smoke/dust/germs), etc. It’s also a good idea to have local maps in there as well, as phones and internet may not work.

You can put your own Go Bag together or order a pre-made Go Bag and add what personal things you may need to it.

Have an Evacuation Plan

First, it goes without saying you should have plans for things like Fire Drills. Consult your local fire department for tips, but in general make sure you and your family (including kids) understand what a fire/evacuation drill is, how to safely and quickly exit the building, what to do if you get trapped, and where to meet outside afterwards. Practice this a few times a year so it’s second nature, but hopefully you never ever need to do it for real.

Now to take that one step further - take some time to think through different scenarios that could happen where you might have to evacuate your area/town (God forbid they ever do), and plan how you would react. If a wild fire or flood was happening nearby, how would you and your family evacuate your area? Take some time to familiarize yourself with area roads and which ones would be the best to evacuate by - make sure you also come up several backup plans too as your first choice exit plan may be blocked off. Also be aware of which roads may be most prone to fall victim to a natural disaster - for example, a low-lying road near a stream would be likely to flood, and probably shouldn’t be counted on as an exit road in a weather emergency. Keep maps in your car too as phones/GPS may not work and it would be beneficial to have a paper map to consult. It's also important to have cash on hand as ATMs/credit card machines may be down as well.

Always try to keep your car gas tank fairly full too, that way you’ll be ready to go anytime and won’t have to worry about running out of gas or being able to buy gas (as gas stations may be out of gas or there could be long lines) wasting valuable time for your family to make an efficient exit.

Hopefully you will never fall into a scenario where you’ll ever have to use any of your emergency supplies or shelter/evacuation plans, but it’s best to be prepared. Make sure to re-evaluate your plans and supplies regularly as roads and situations can change and supplies will expire over time (check those expiration dates on medicine, first aid items, and food/water). May you all stay safe and well!

Disclaimer: I am not a survival or emergency expert, but just sharing my opinion on ideas and discussion points on how you might prepare. Do your own research and contact local authorities on the best way to prepare your home and your family for any emergency situation which could arise.


KEEP UP WITH BIRCH LANDING HOME
|  Etsy  |  Facebook  |  Instagram  |  Pinterest  |  Bloglovin'  |  Hometalk  |

How we Turned a Coat Closet into a Functional, Organized Pantry

Our kitchen was lacking a pantry, so we often kept canned goods and backstock on a shelving unit at the foot of our stairs in the basement. But because half of our food and snacks were downstairs and half were upstairs it made for frequent mistakes when buying groceries… it was hard to visualize exactly what we had and where so we often ended up overbuying certain things and forgetting to buy others. Tired of wasting money, food, and time running up and down the stairs I decided to make over a coat closet into a functional pantry. | This post contains affiliate links |

How we Turned a Coat Closet into a Functional Pantry

Now while this coat closet (pictured below) was pretty jammed full, it was very underutilized. It’s where we kept our off-season coats, hats, and boots as well as some hiking gear and my daughters’ Art Cart - most things we did not need to use daily, or often at all. My solution to this was to relocate all these items to our basement - I hung a closet rod under the basement stairs and moved all our off-season clothing and gear to this new space where it was still easily accessible but out of the way.

How we Turned a Coat Closet into a Functional Pantry

The next step was to pull out the old wire shelf and closet rod system, patch the holes, and repaint the inside of the closet. Thankfully I already had spackle and some leftover white paint so I was able to get the closet to a clean slate easily and it didn’t cost a dime.

How we Turned a Coat Closet into a Functional Pantry

Now for the fun part! I got to decide how many shelves I wanted and the spacing, so I laid it out with painters tape to play with how I wanted it before I made a final decision. For our setup I decided on four shelves starting at about waist-height. I wanted to leave the bottom open to accommodate the dog food bin, the Art Cart, step stool, etc. Then I screwed in 2x3 inch “runners” that would support the shelves along the back wall. I used a stud finder to make sure I was screwing the runners into studs and a level to make sure everything was square.

How we Turned a Coat Closet into a Functional Pantry

Then I added runners to one side of the closet next, following the same routine - but with these pieces I had pre-drilled pocket holes with our Kreg Jig first so it would make for a clean and secure joint in the corners.

How we Turned a Coat Closet into a Functional Pantry

Before installing the runners on the opposite side of the closet, it’s wise to keep in mind how you will be able to maneuver the shelf boards in once all the runners are in place (it would be very difficult to get the top shelf in with all the runners installed, for example). So before installing the opposite side’s runners I slipped some of the trickier shelf boards into place first (I used 1x12”s cut to length for the shelves) before I finished screwing in all the side runners.

How we Turned a Coat Closet into a Functional Pantry

I secured the shelves into place with some finishing nails, then taped off the shelves and runners to get ready for paint. I used primer and then several coats of white semi-gloss paint since it’s a little easier to wipe down and keep clean.

How we Turned a Coat Closet into a Functional Pantry

I just love how farmhouse and “Shaker” the exposed rails on the sides look and I wanted to play it up. Once the paint was dry I added some functional hooks to hang aprons, lunchboxes, etc on the side rails.

How we Turned a Coat Closet into a Functional Pantry

And now the project is complete! I am so happy with how it turned out and it’s wonderful to have everything in one place. I can see this project saving us money on groceries in the long run now as everything will be in one place now and we’ll be less apt to waste food.

Eventually, I would love to replace the closet door with a fun screen door and get some more glass jars and baskets for a cleaner looking pantry - but all in good time.

How we Turned a Coat Closet into a Functional Pantry

| Similar Clear Plastic Storage Bins | Dog Food Container (on the floor, just out of the picture) |

How we Turned a Coat Closet into a Functional Pantry

| Flour, etc. jars were made using Cracker Jars with custom vinyl labels I made on my Cricut | Vintage Pie Tins |

Over this past winter I added a few simple add-on organizers to our pantry to maximize the space and love how functional they are. Here they are below (and please excuse the glimpses of clutter in the pantry… as it now holds extra groceries and our family board games too - because, real life):

Additional Storage for the Walls

How We Turned a Coat Closet into a Functional Pantry

| Similar Wire Wall Basket | Mason Jars to store Trail Mix |

Under-Shelf Storage

How We Turned a Coat Closet into a Functional Pantry

| Wire Under-Shelf Basket - Perfect for Storing Potatoes! |

Decal for Pantry Door

How we Turned a Coat Closet into a Functional, Organized Pantry

It turns out our door is an odd size and in order to get a screen door for it we would have to custom order one (at a cost of about $300+! Yikes). So instead I decided to cut a custom vinyl label to stick to the door to make it more finished. I could have designed my own but I found a design I really liked on Etsy and bought the digital design file. After purchasing the design file, I used my Cricut and 651 Permanent Vinyl to make the label and then transferred it to the door. In hindsight I probably should have made it slightly smaller, but overall I love how it came out and how budget-friendly it was since I already owned a Cricut Machine and the vinyl.

| Pantry Digitial Design File | Cricut Machine | 651 Permanent Vinyl in Matte Black |

Back of Door Organizer

How+we+Turned+a+Coat+Closet+into+a+Functional%2C+Organized+Pantry

Finally, we decided to add a ClosetMaid Adjustable Organizer to the back of the pantry door to fully utilize the space. It was very simple to install and I am impressed with how sturdy it is once it's assembled and screwed in. We used the lower baskets for foil, parchement paper, ziplocks, silicone bowl covers, etc. The middle baskets we designated for frequently used canned goods, smoothie mix-ins, as well as salad fixings and rice cakes. Finally on the top two baskets we put convenience foods that we rarely use since I'm so short. Note: If you have a hollow-core door, you might want to use a specialty set of anchors/screws to attach it to the door for stability, rather than just screw into the door with regular screws.

| ClosetMaid Adjustable Organizer (18 inch) | True Nature Silicone Food Covers |

Stackable Canned Goods Organizer

Another later addition to our pantry organization are these amazing stackable can racks for organizing canned goods. Before I had quite a few canned goods just sitting on the floor of the pantry and in a separate kitchen cupboard, but I never could see everything at once and often cans in the back got forgotten -- Now everything is in one spot where I can see them and I can meal plan more efficiently.

| Stackable Can Rack Organizer (I have two racks stacked here) |


Check out our Related Posts:

KEEP UP WITH BIRCH LANDING HOME
|  Etsy  |  Facebook  |  Instagram  |  Pinterest  |  Bloglovin'  |  Hometalk  |

Art Cart Solution for Kids' Craft Supplies

Our kids love arts and crafts, and at this age, they particularly love coloring and coloring books - however, the art supplies were totally taking over the house. In order to contain the chaos, I decided an “Art Cart” would be the perfect storage and organizational solution. | This post contains affiliate links |

Art Cart Organization

I picked up this cart at Target, but I've linked a very similar one here from Amazon. We decided to stash the coloring books on the bottom shelf, then the tins full of stickers and art kits on the second shelf, and finally the top shelf was reserved for our Art Supply Caddy full of crayons, colored pencils, stencils, etc.

Art Cart Caddy Organization

For the Art Supply Caddy, I used an inexpensive plastic caddy and made custom vinyl labels with my Cricut so that everything has a place.

Art Cart Storage Solution

Finally to store everything, the Art Cart tucks neatly into our pantry where it’s easily accessible but still out of the way. The kids can go in and help themselves to craft supplies whenever they like, and when we want to do a big project the whole thing can wheel out for even easier access. This storage hack has been a game changer in our home and I hope it does the same for you too :)

KEEP UP WITH BIRCH LANDING HOME
|  Etsy  |  Facebook  |  Instagram  |  Pinterest  |  Bloglovin'  |  Hometalk  |