I'm a wife, stay-at-home mom, crafter, and blogger living in rural New England. As seen in Martha Stewart Living, Food Network Magazine, and more! | Tutorials, DIY, crafts, parenting tips, recipes, money saving tips, product reviews, local product features, New England living, intentional living, and more! |
Donating my hair has been a bucket list item since Middle School and I finally did it! In the past I could never seem to get it long enough before needing to get it cut, or I had highlights at the time (most places will not accept blonde highlighted hair because of the bleach) - but finally it was long enough and highlight-free so I went for it :)
I’m sending these 10 inches in to Children with Hair Loss which provides hair pieces and wigs to children and young adults with medically-related hair loss at no cost. I hope it can be put to good use for someone who needs it.
We LOVE going camping, but camping with kids definitely adds to the amount of stuff you need to bring… like several complete changes of clothes per day for each kid, just in case. In order to keep our tent more organized and to help make outfit changes quick and easy (even in the middle of the night), we love using packing cubes! | This post contains affiliate links |
Each kid gets their own packing cube which makes finding clothes easy - no more digging to the bottom of a dark duffle bag to find a tiny pair of socks. I highly reccomend giving packing cubes a try on your next overnight trip, whether it's camping or a hotel stay, they're a game-changer!
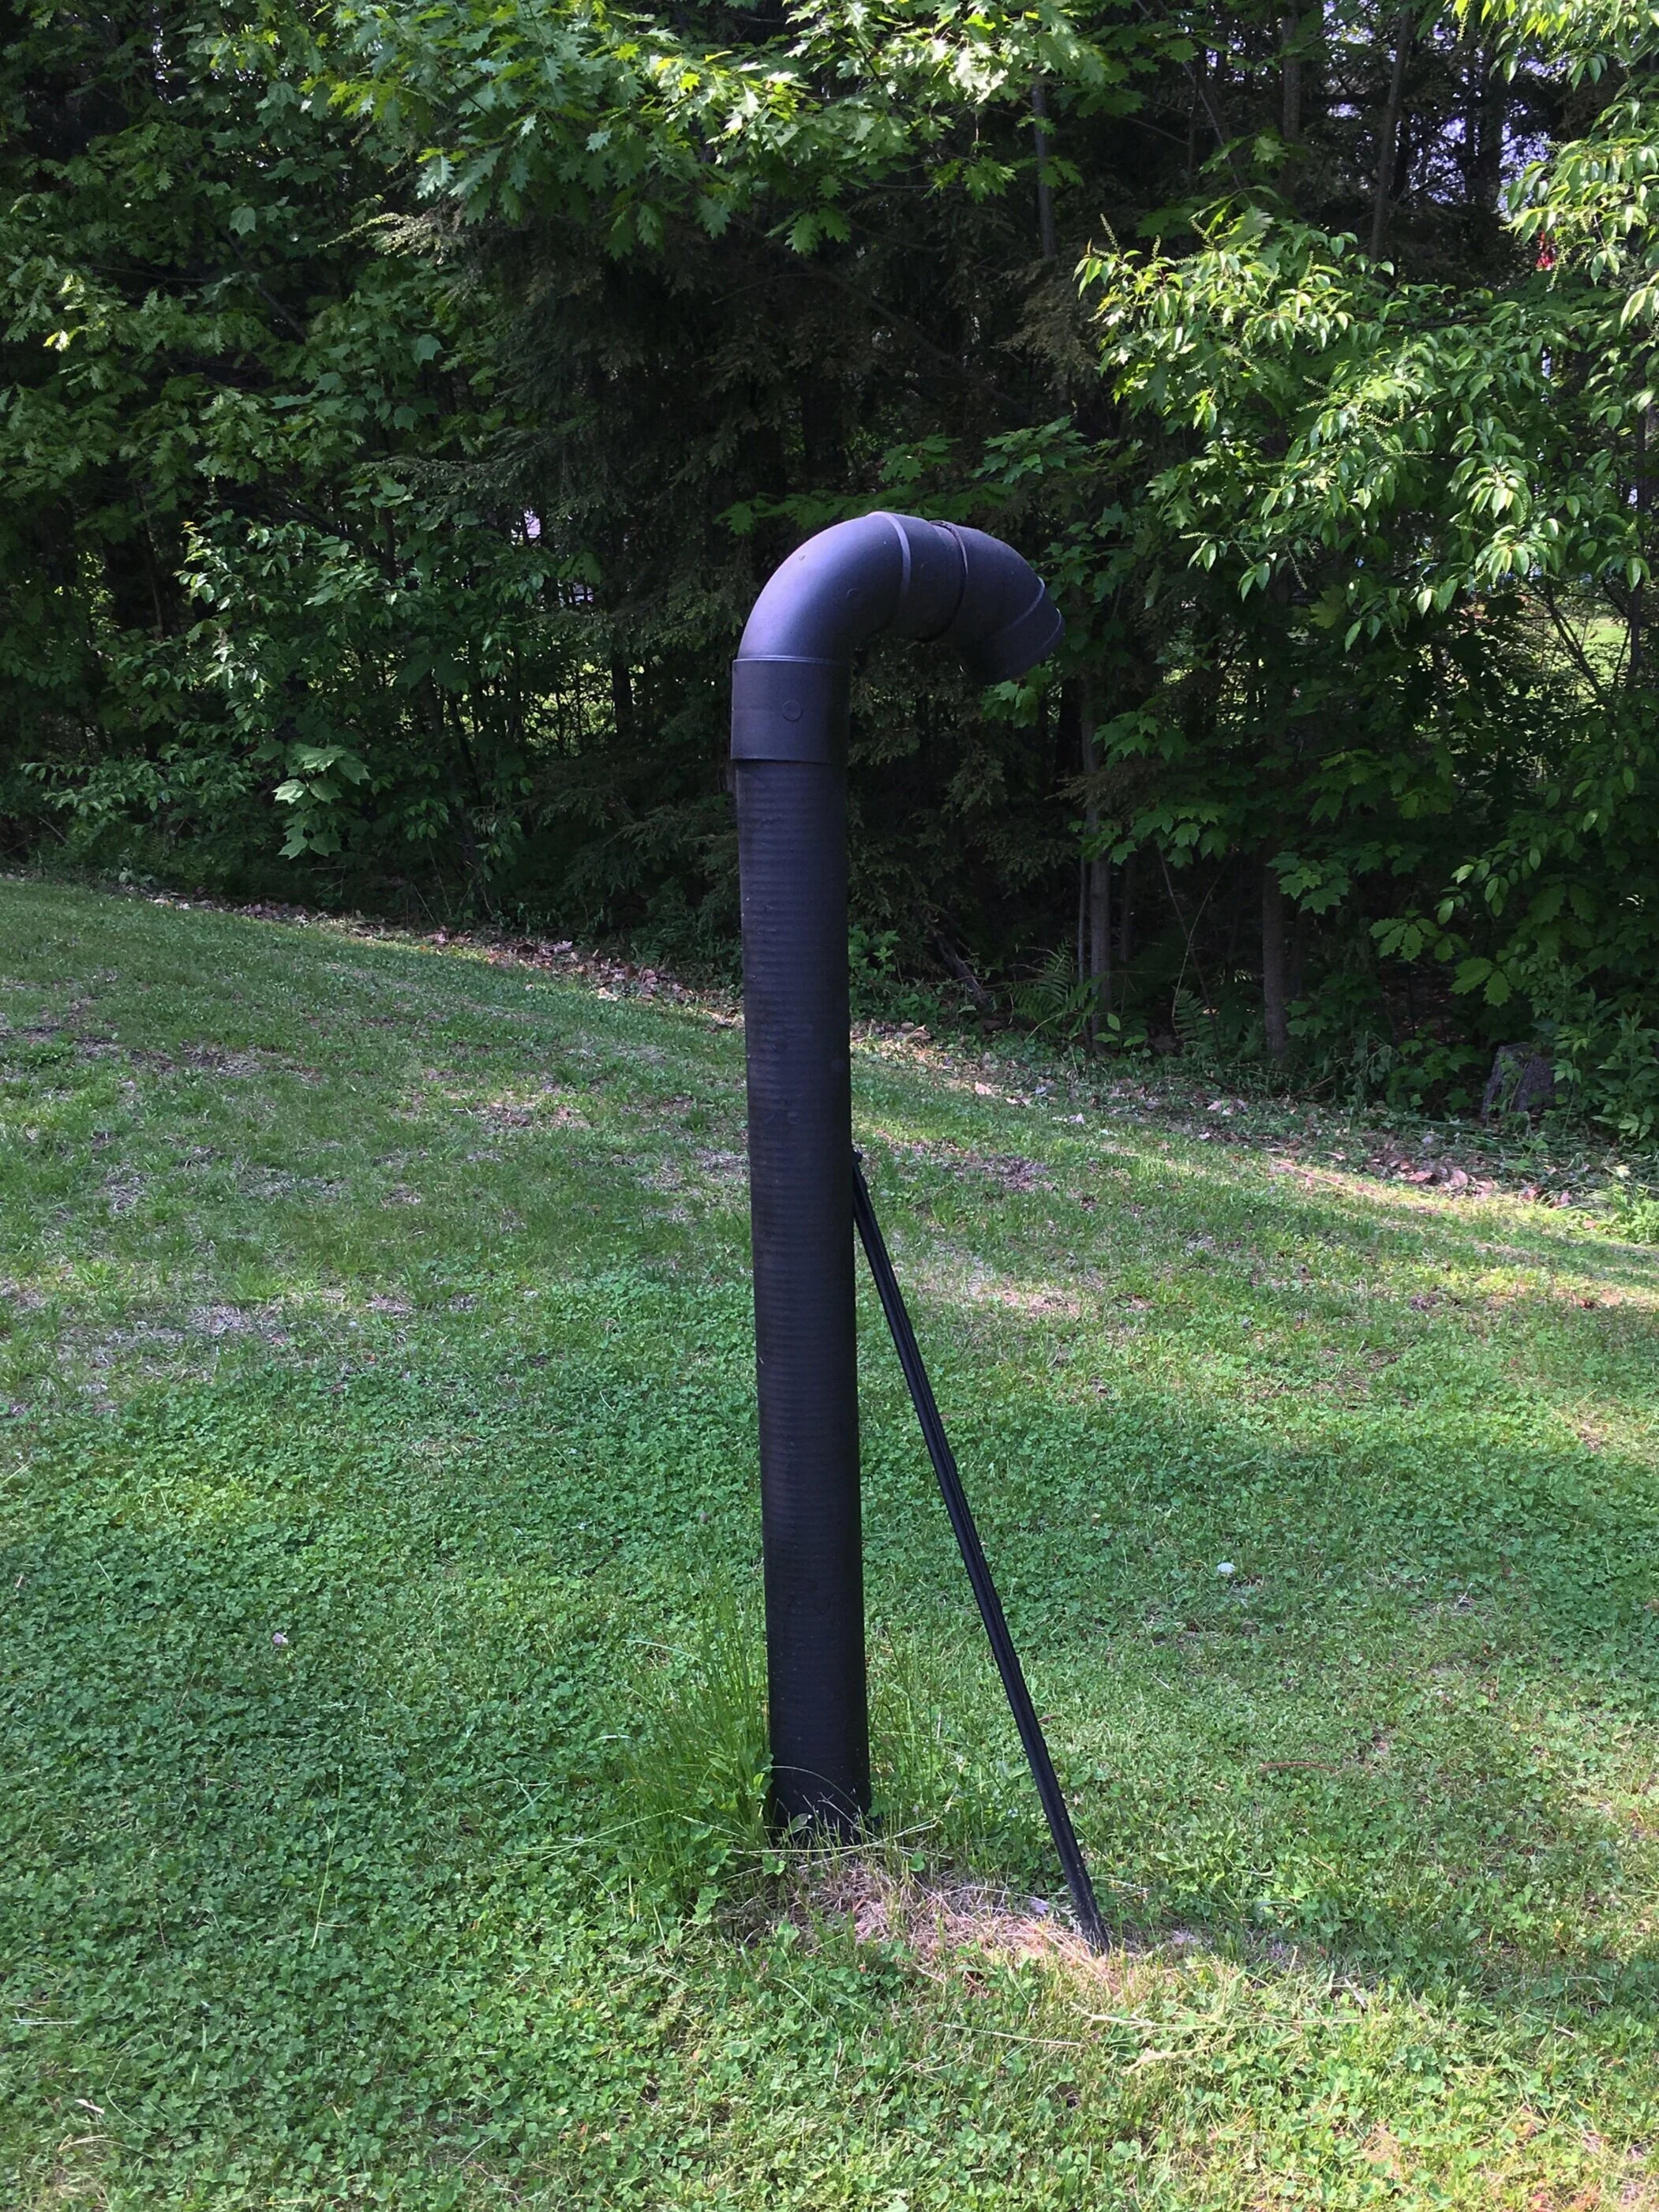
Okay, so I don’t know if “makeover” is the right word here because it’s not a huge change but it certainly helps! So in our area, most homes have septic tanks/leach fields with terribly ugly white or sea foam green PVC vent pipes that stick out like a sore thumb in their lawn. They can be tricky to hide because you don’t want to plant or build anything too heavy or substantial around them and risk damaging the leach field underground or diminish their venting capabilities… so we were limited on options on how to “make it over.”
In any case, I decided to pick up some outdoor rated matte black spray paint from our local hardware store and give our vent pipe a quick coat of black paint and it’s made a huge difference! The black definitely makes the pipe look more industrial and blends in with the grass and trees better than a bright white pipe. Like I said before, it’s certainly not a huge change but it’s a small one that’s made a big difference in my opinion.
AFTER: I forgot to take a “Before” photo but this is the After! The black definitely helps the pipe blend in with the trees and background much better than a white pipe.
Happy Earth Day! Today we stopped by the garden center to pick up some lavender plants for our deck. Lavender not only smells and looks beautiful but it can help as a natural bug repellent. Win-win!
I’ve also updated my Amazon Storefront to include a list of “Green Living” products and ideas to help you live like it’s Earth Day every day - because it is!
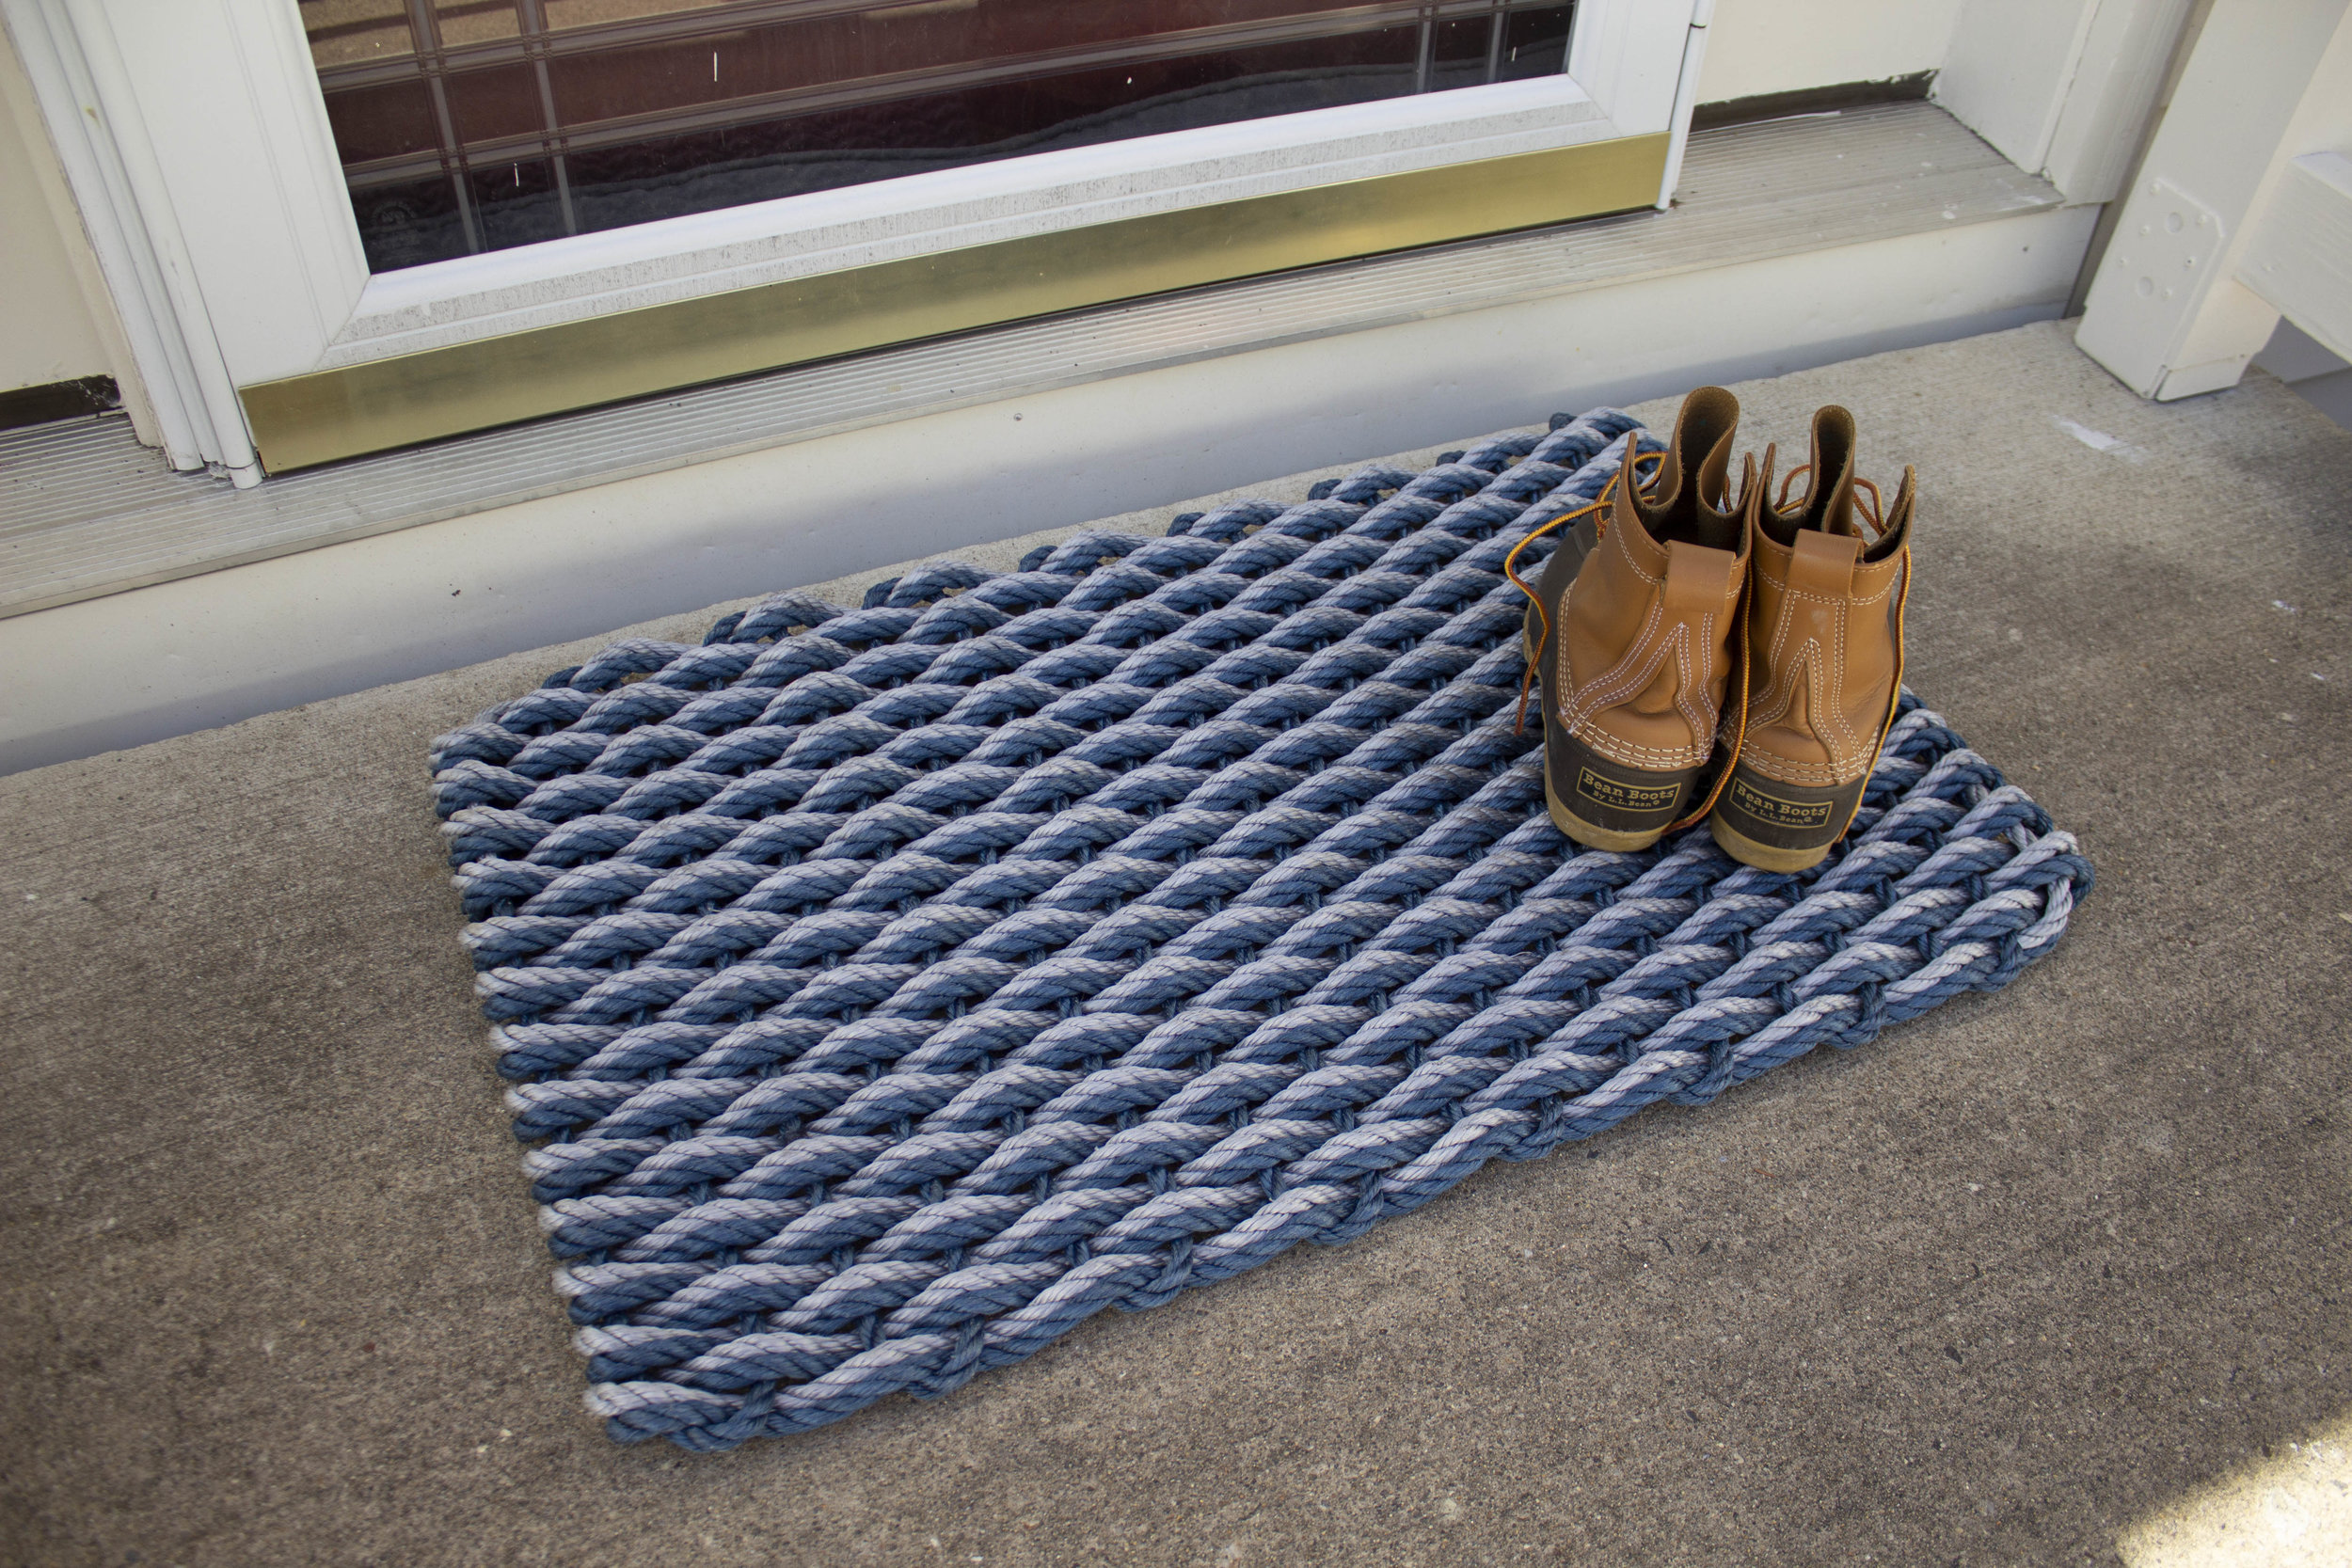
Despite what the three feet of snow in our yard says right now, Spring will be here soon! And Spring in New England means… Mud Season. You know, those weeks when everything is wet and muddy and you can’t get in your house without tracking buckets of mud and sand in. Thankfully Maine Rope Mats has us covered and was kind enough to send us one of their lobster rope doormats and give one away to a lucky follower too! | This post contains affiliate links and an honest review of product provided by Maine Rope Mats |
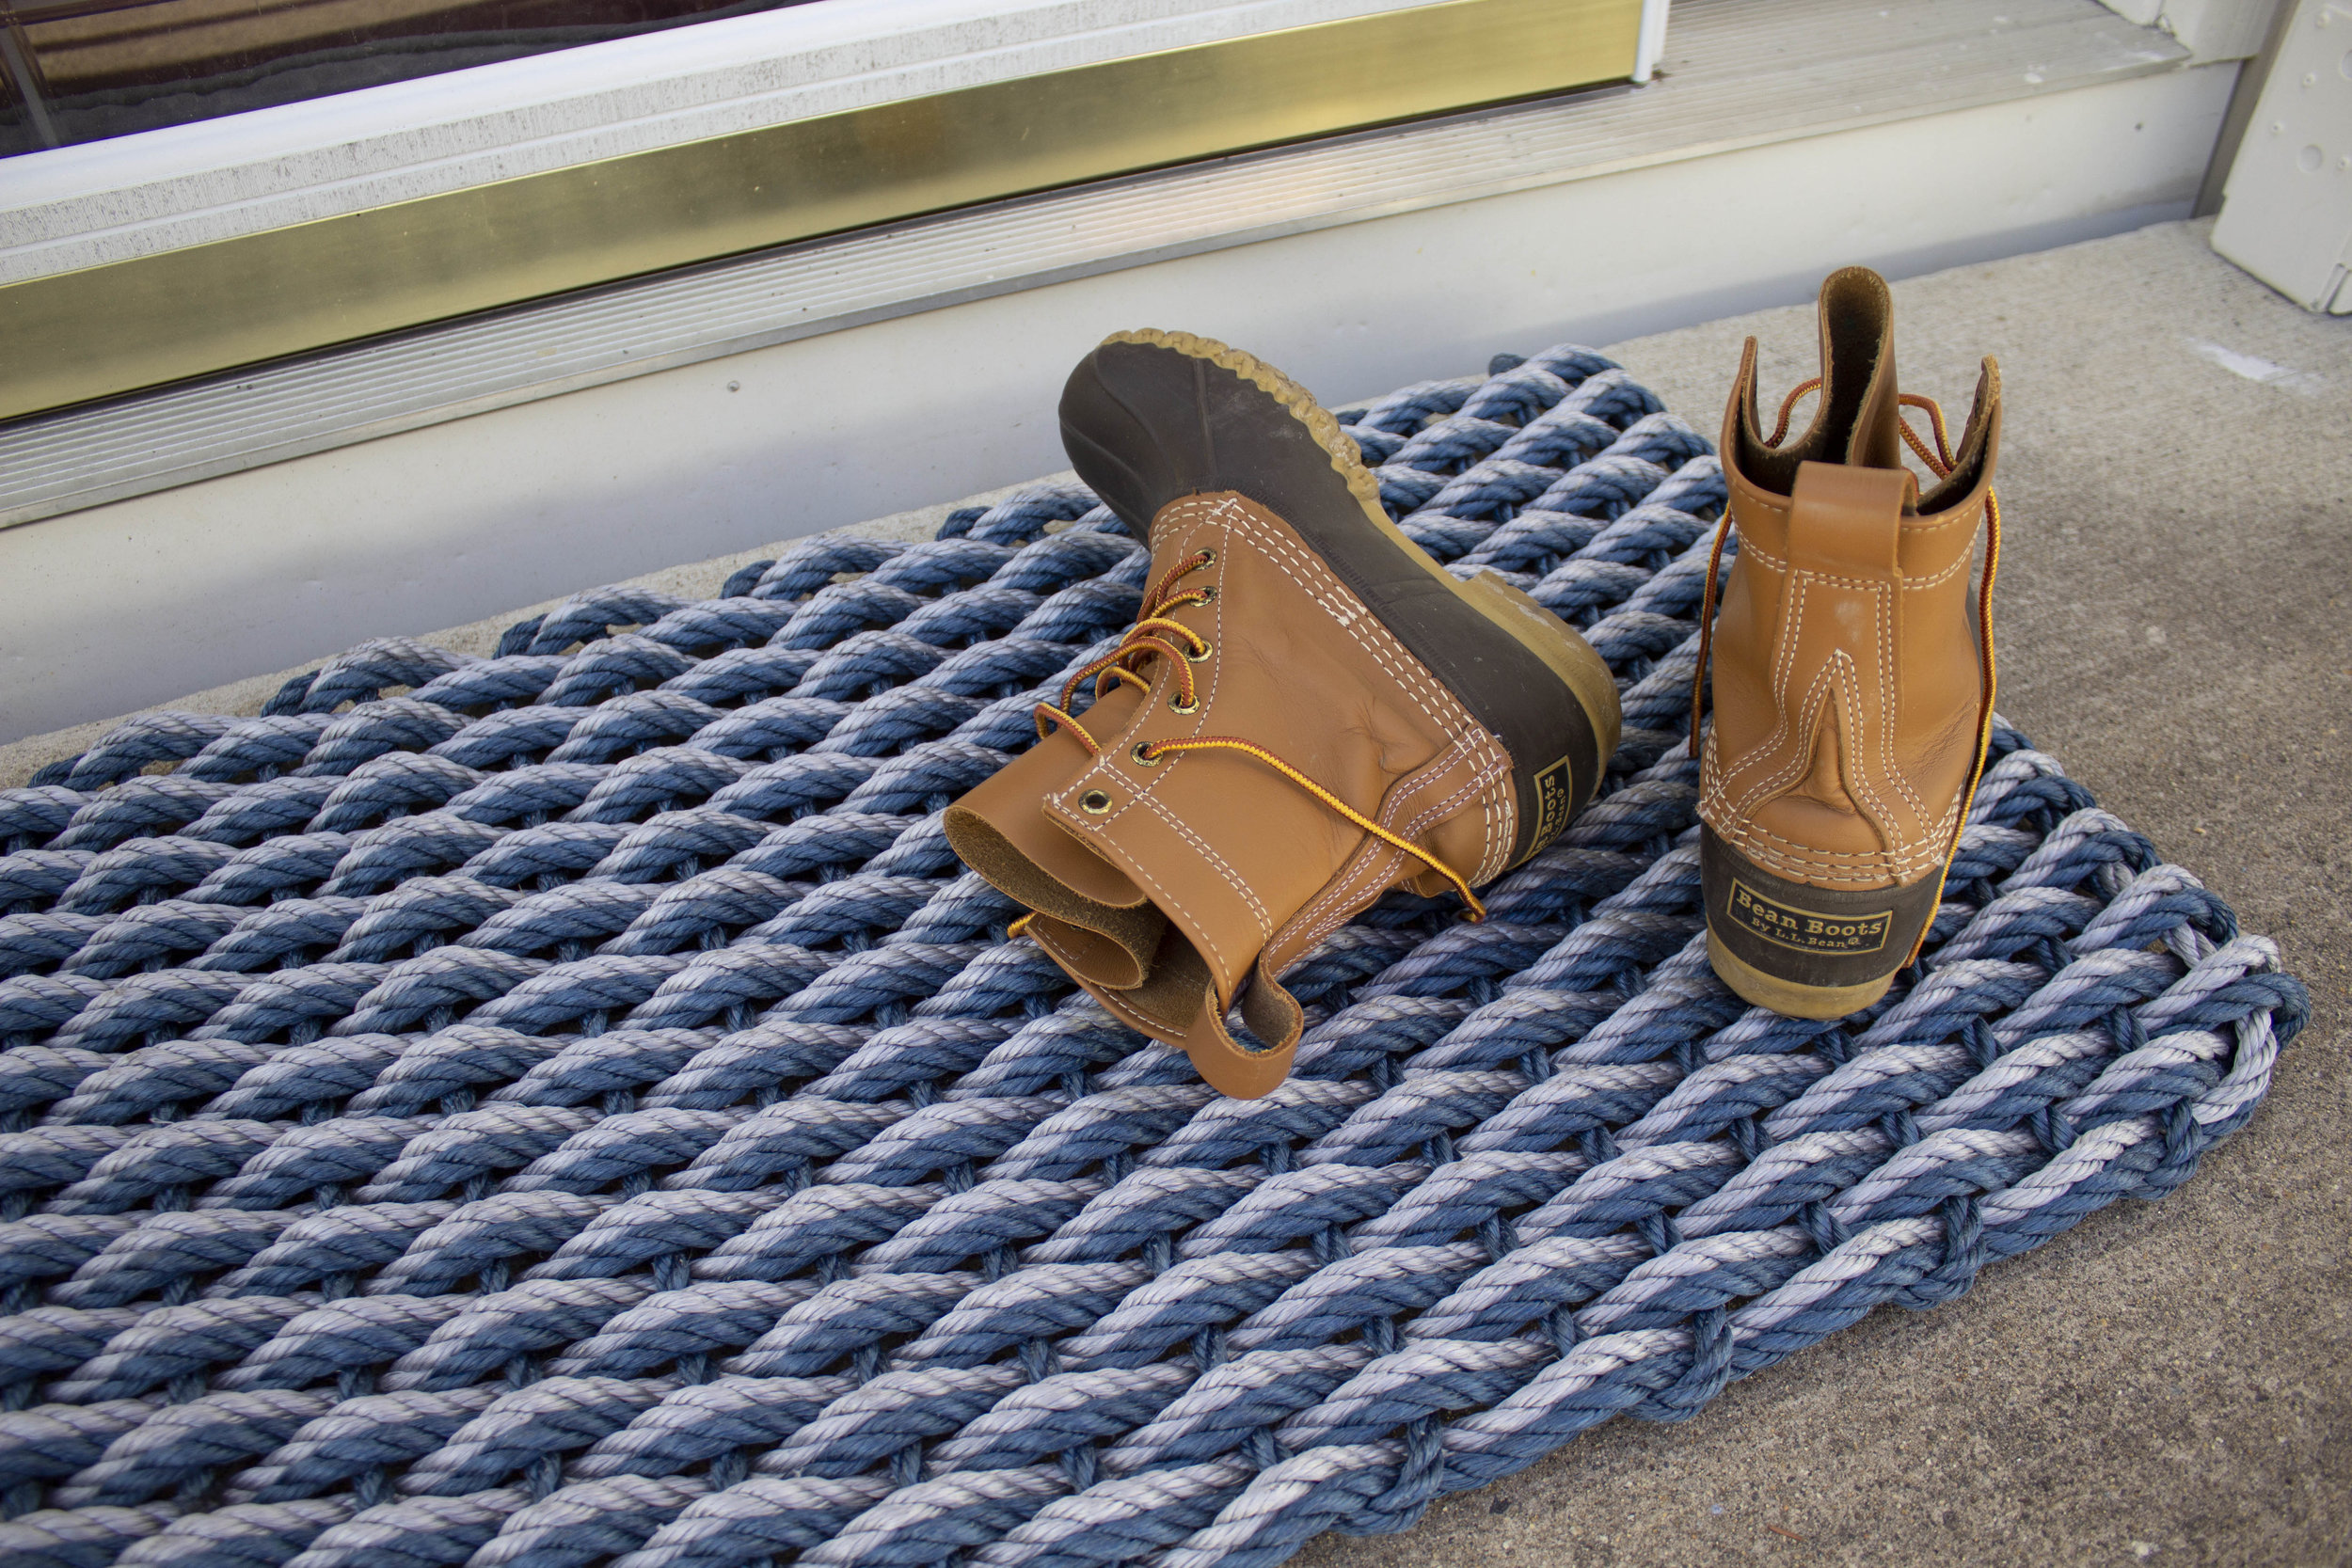
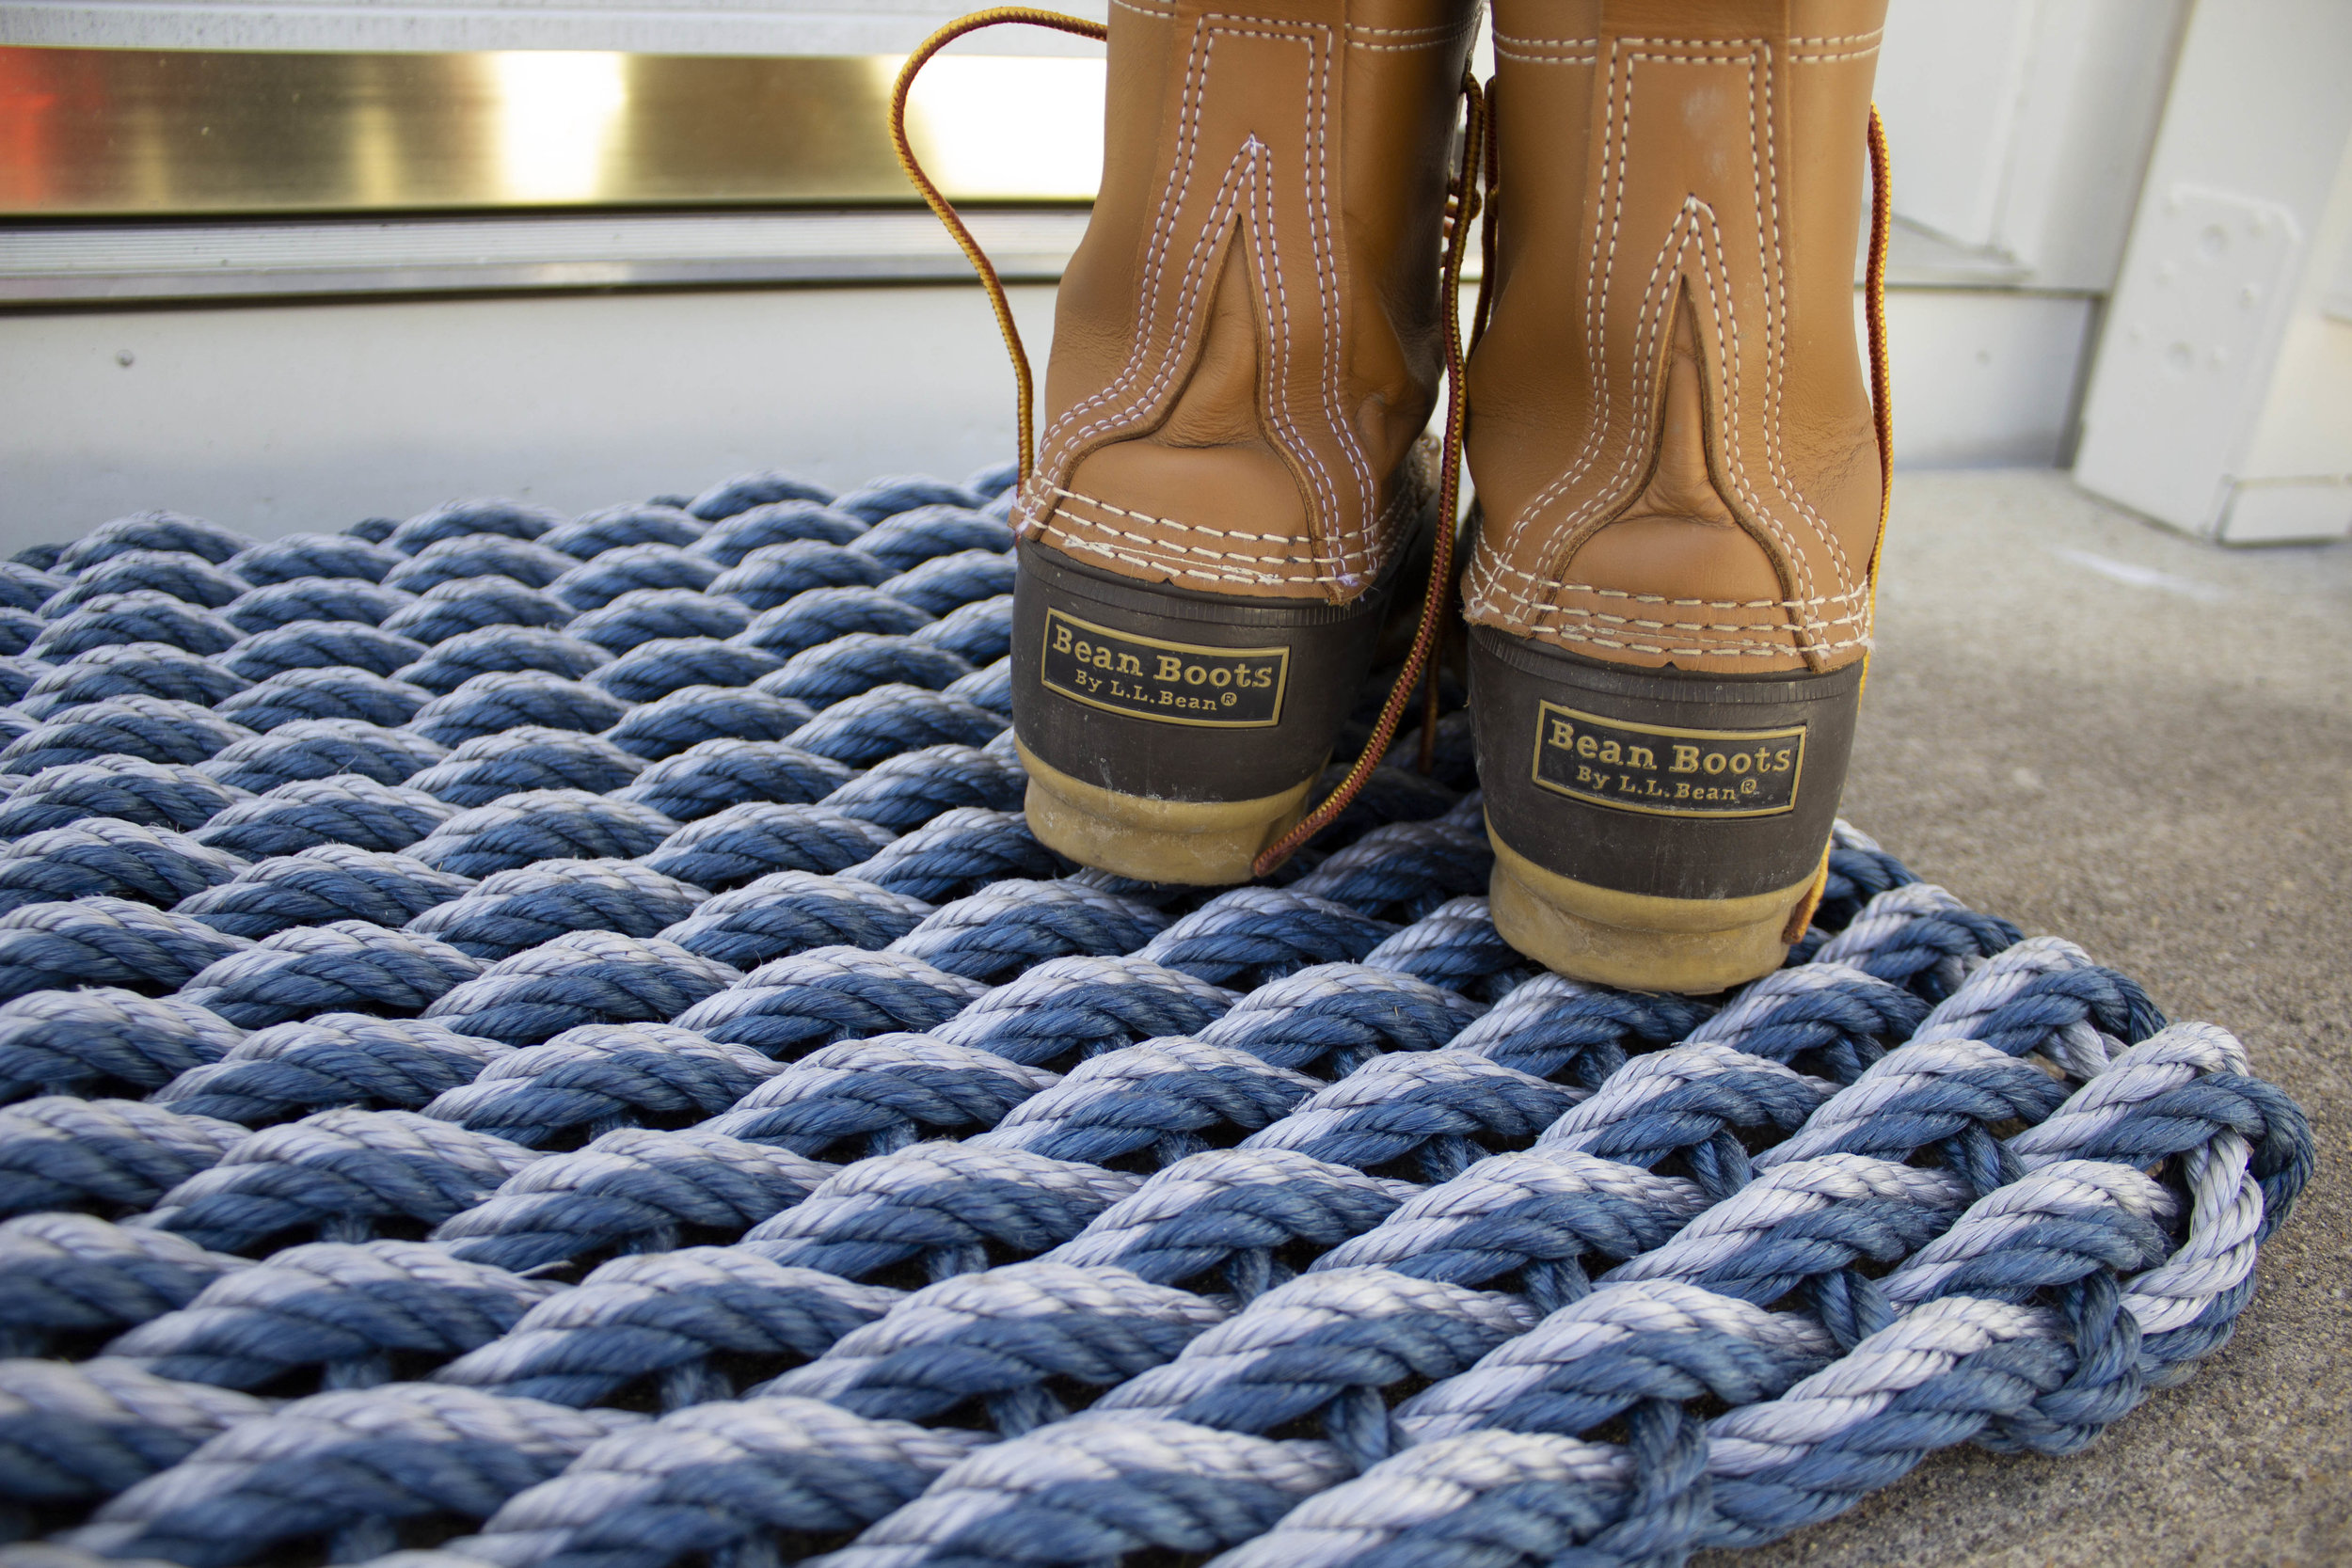
Trust us, you need a durable doormat year-round and especially during Mud Season - so why not make it fun and functional? Maine Rope Mats are all handmade in Waldoboro, Maine with colorful lobster fishing ropes in seemingly endless color combinations and designs to choose from; including flags, stripes, and the beautiful double-weave design we chose for our mat here.
These mats are made to last and will not rot, mildew, or fade and can easily be cleaned out with a garden hose (a must after the muddy season!). Maine Rope Mats also offers a line exclusively of recycled rope-only, which is a great way to re-use and recycle the lines that lobstermen can no longer use for their traps.
Maine Rope Mats also has lots of other great products made with lobster trap rope including dog leashes, baskets, bracelets, key chains, and dog toys - so many fun products to choose from!
We’re in love with our new Maine Rope Mat and are looking forward to using it and enjoying it for many years to come!
- I received this mat from Maine Rope Mats but all opinions expressed are my own. Please read our full Disclosure Policy for more information -
One year update…
Just wanted to hop on here real quick and add that we are still loving our Maine Rope Mat! In fact, we love it so much that I bought a second one in a different pattern for our back door too.
So excited to partner with our favorite baby food brand, Beech-Nut to give away three of our Pink Anchor Bracelets to some lucky followers! 40% of sales of our Pink Anchor Bracelet is donated to Susan G. Komen for the Cure at year-end for breast cancer research.
Please go check out Beech-Nut’s Instagram (@beechnutfoods) for details and to enter this fun giveaway! | Partner |
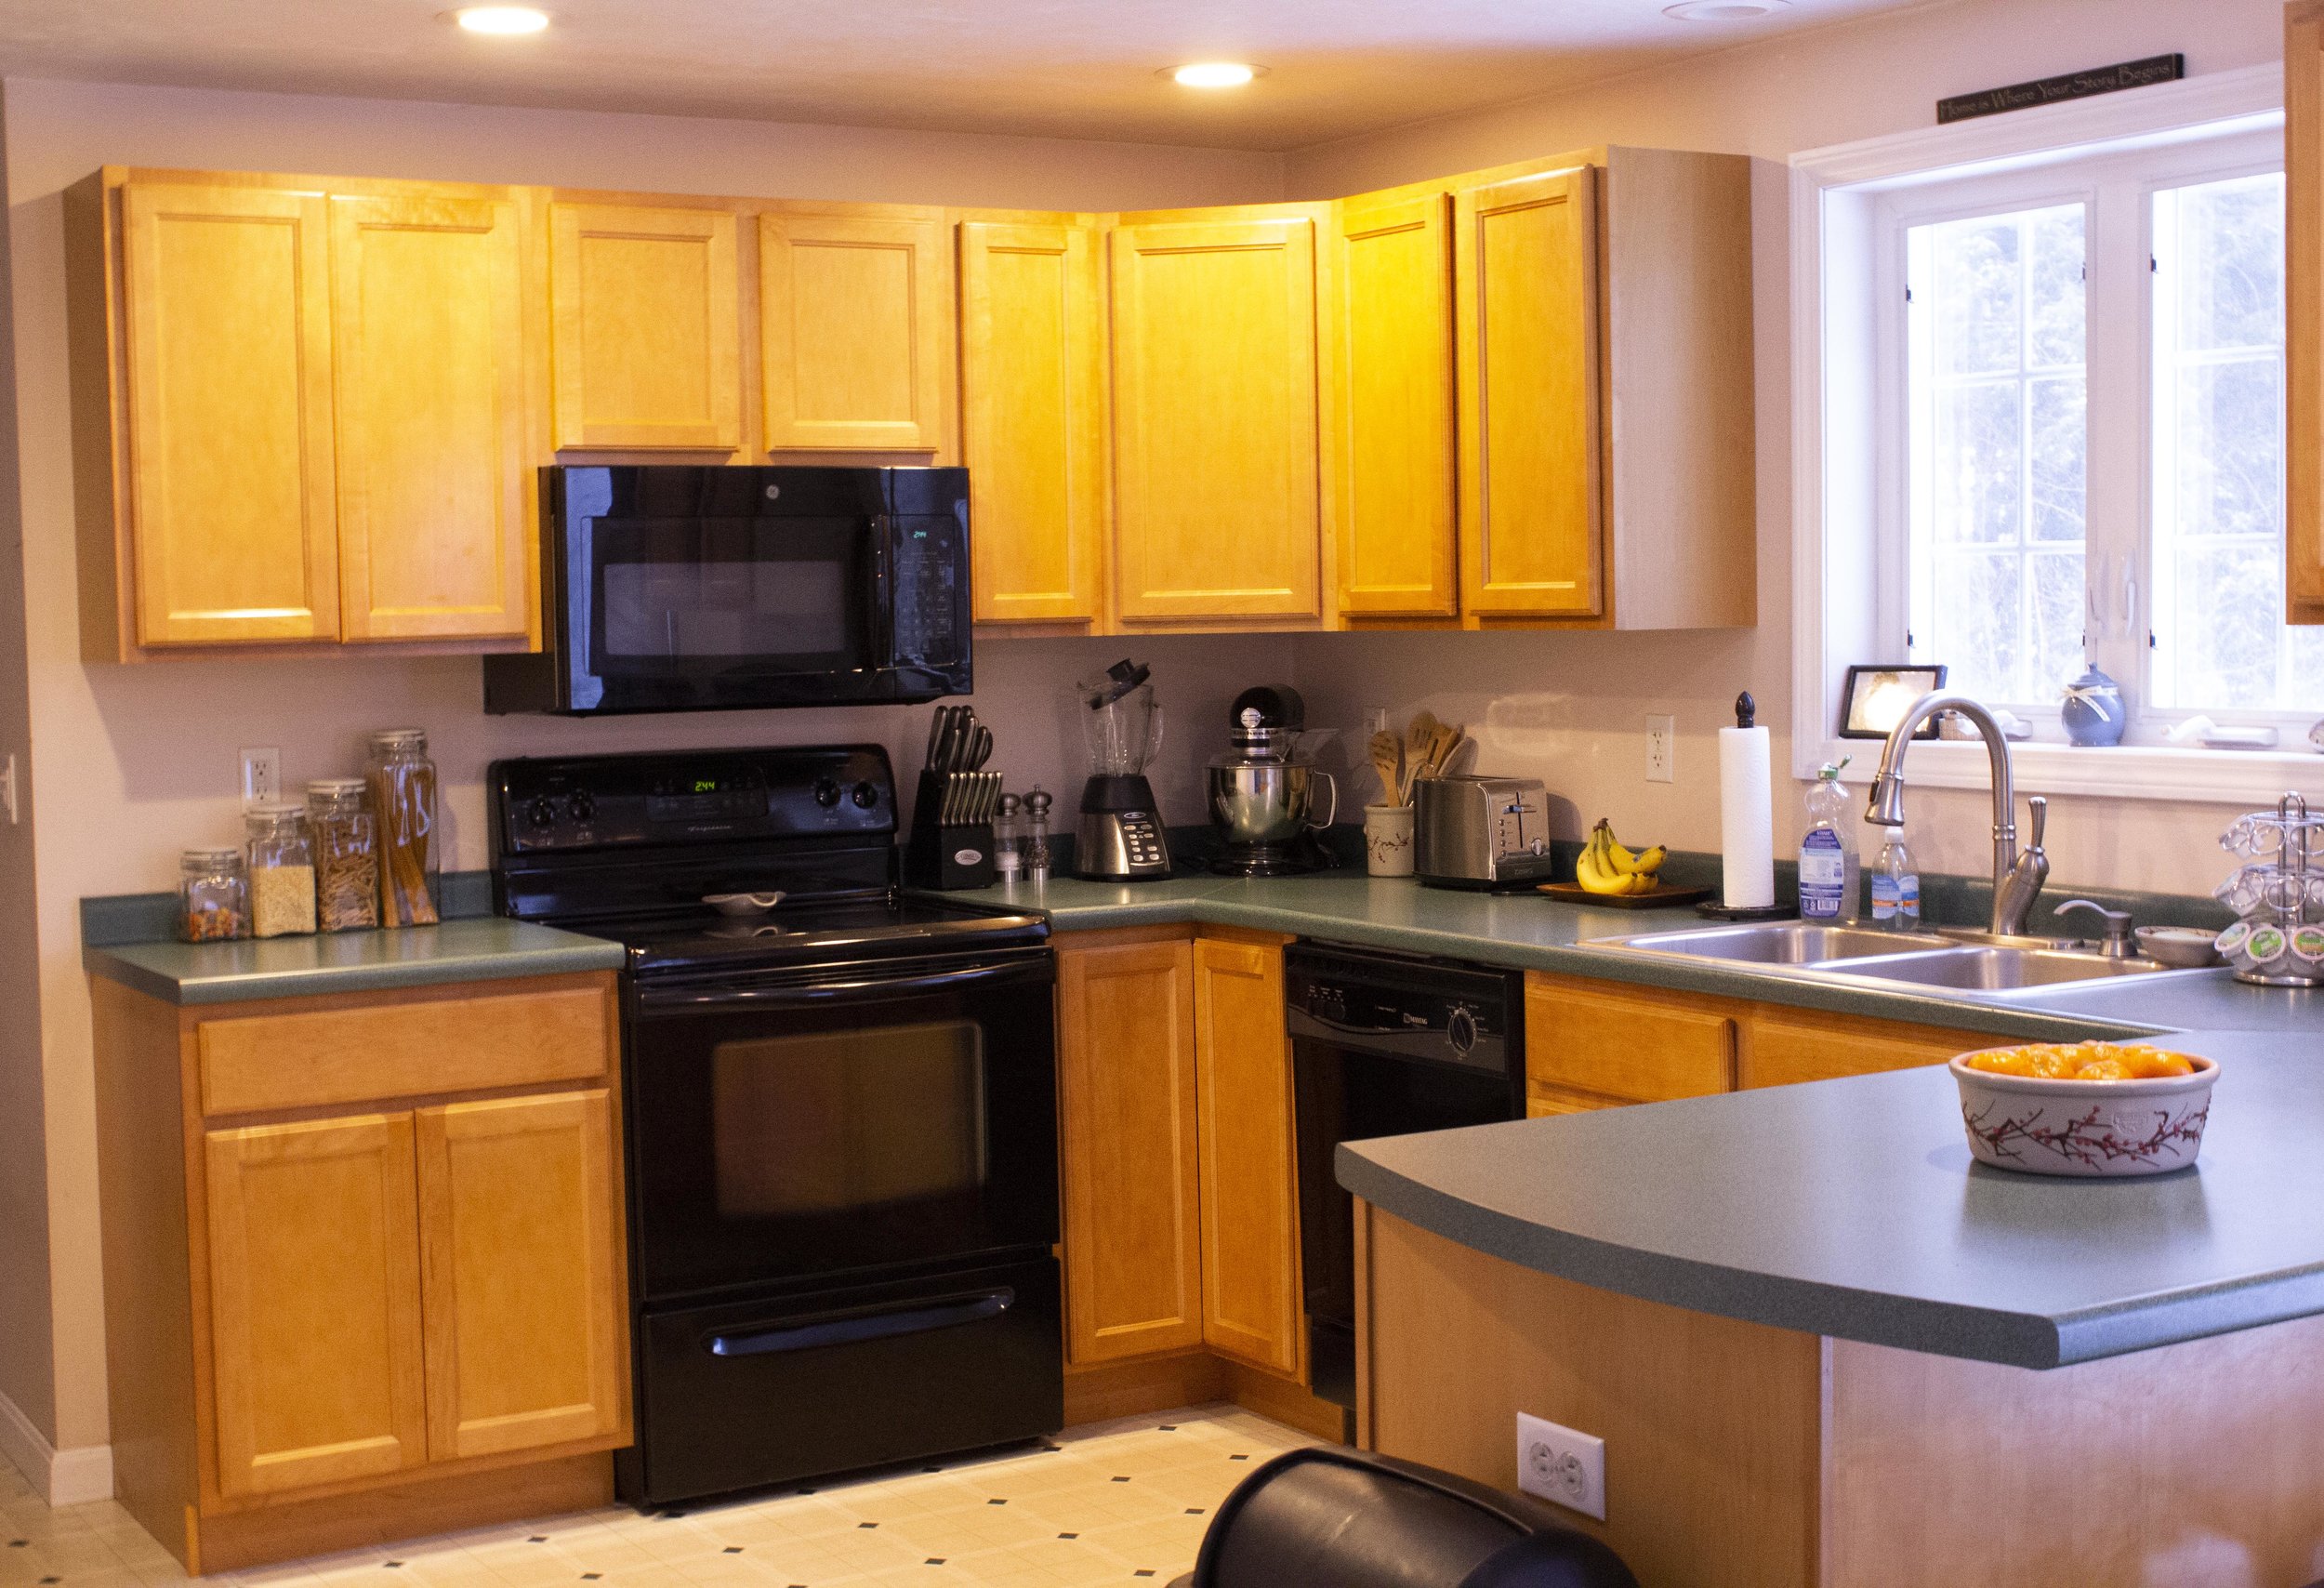
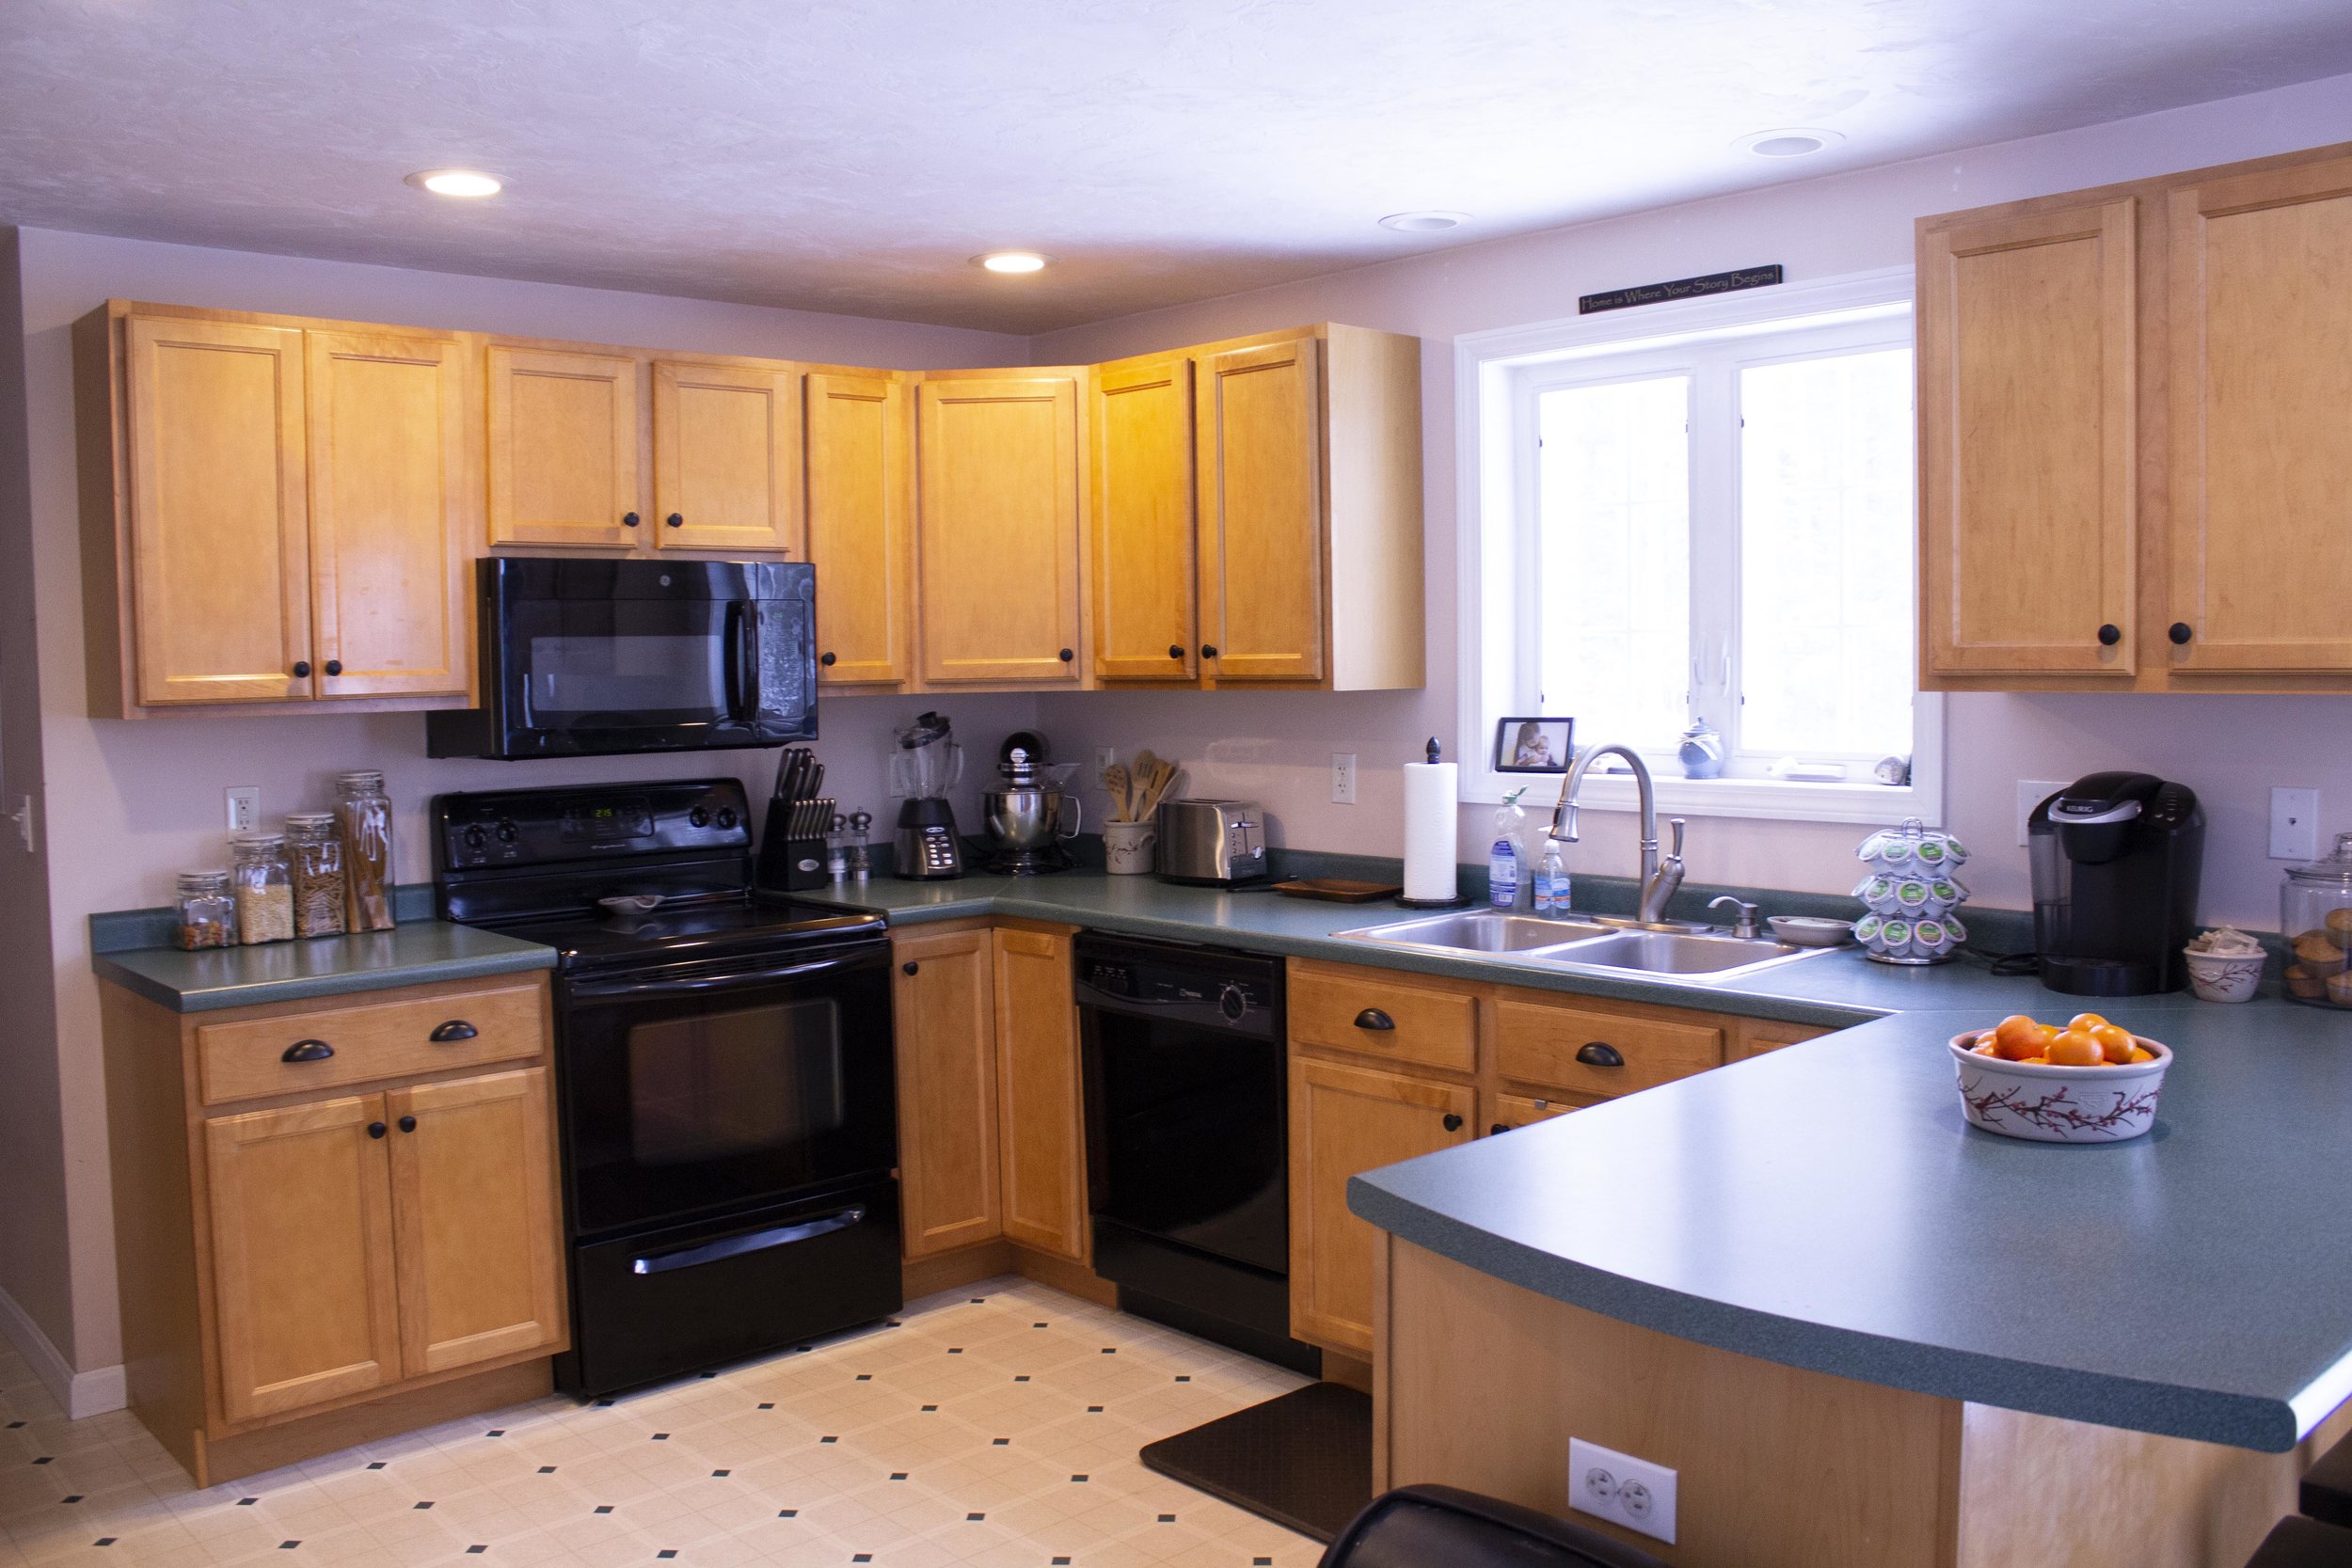
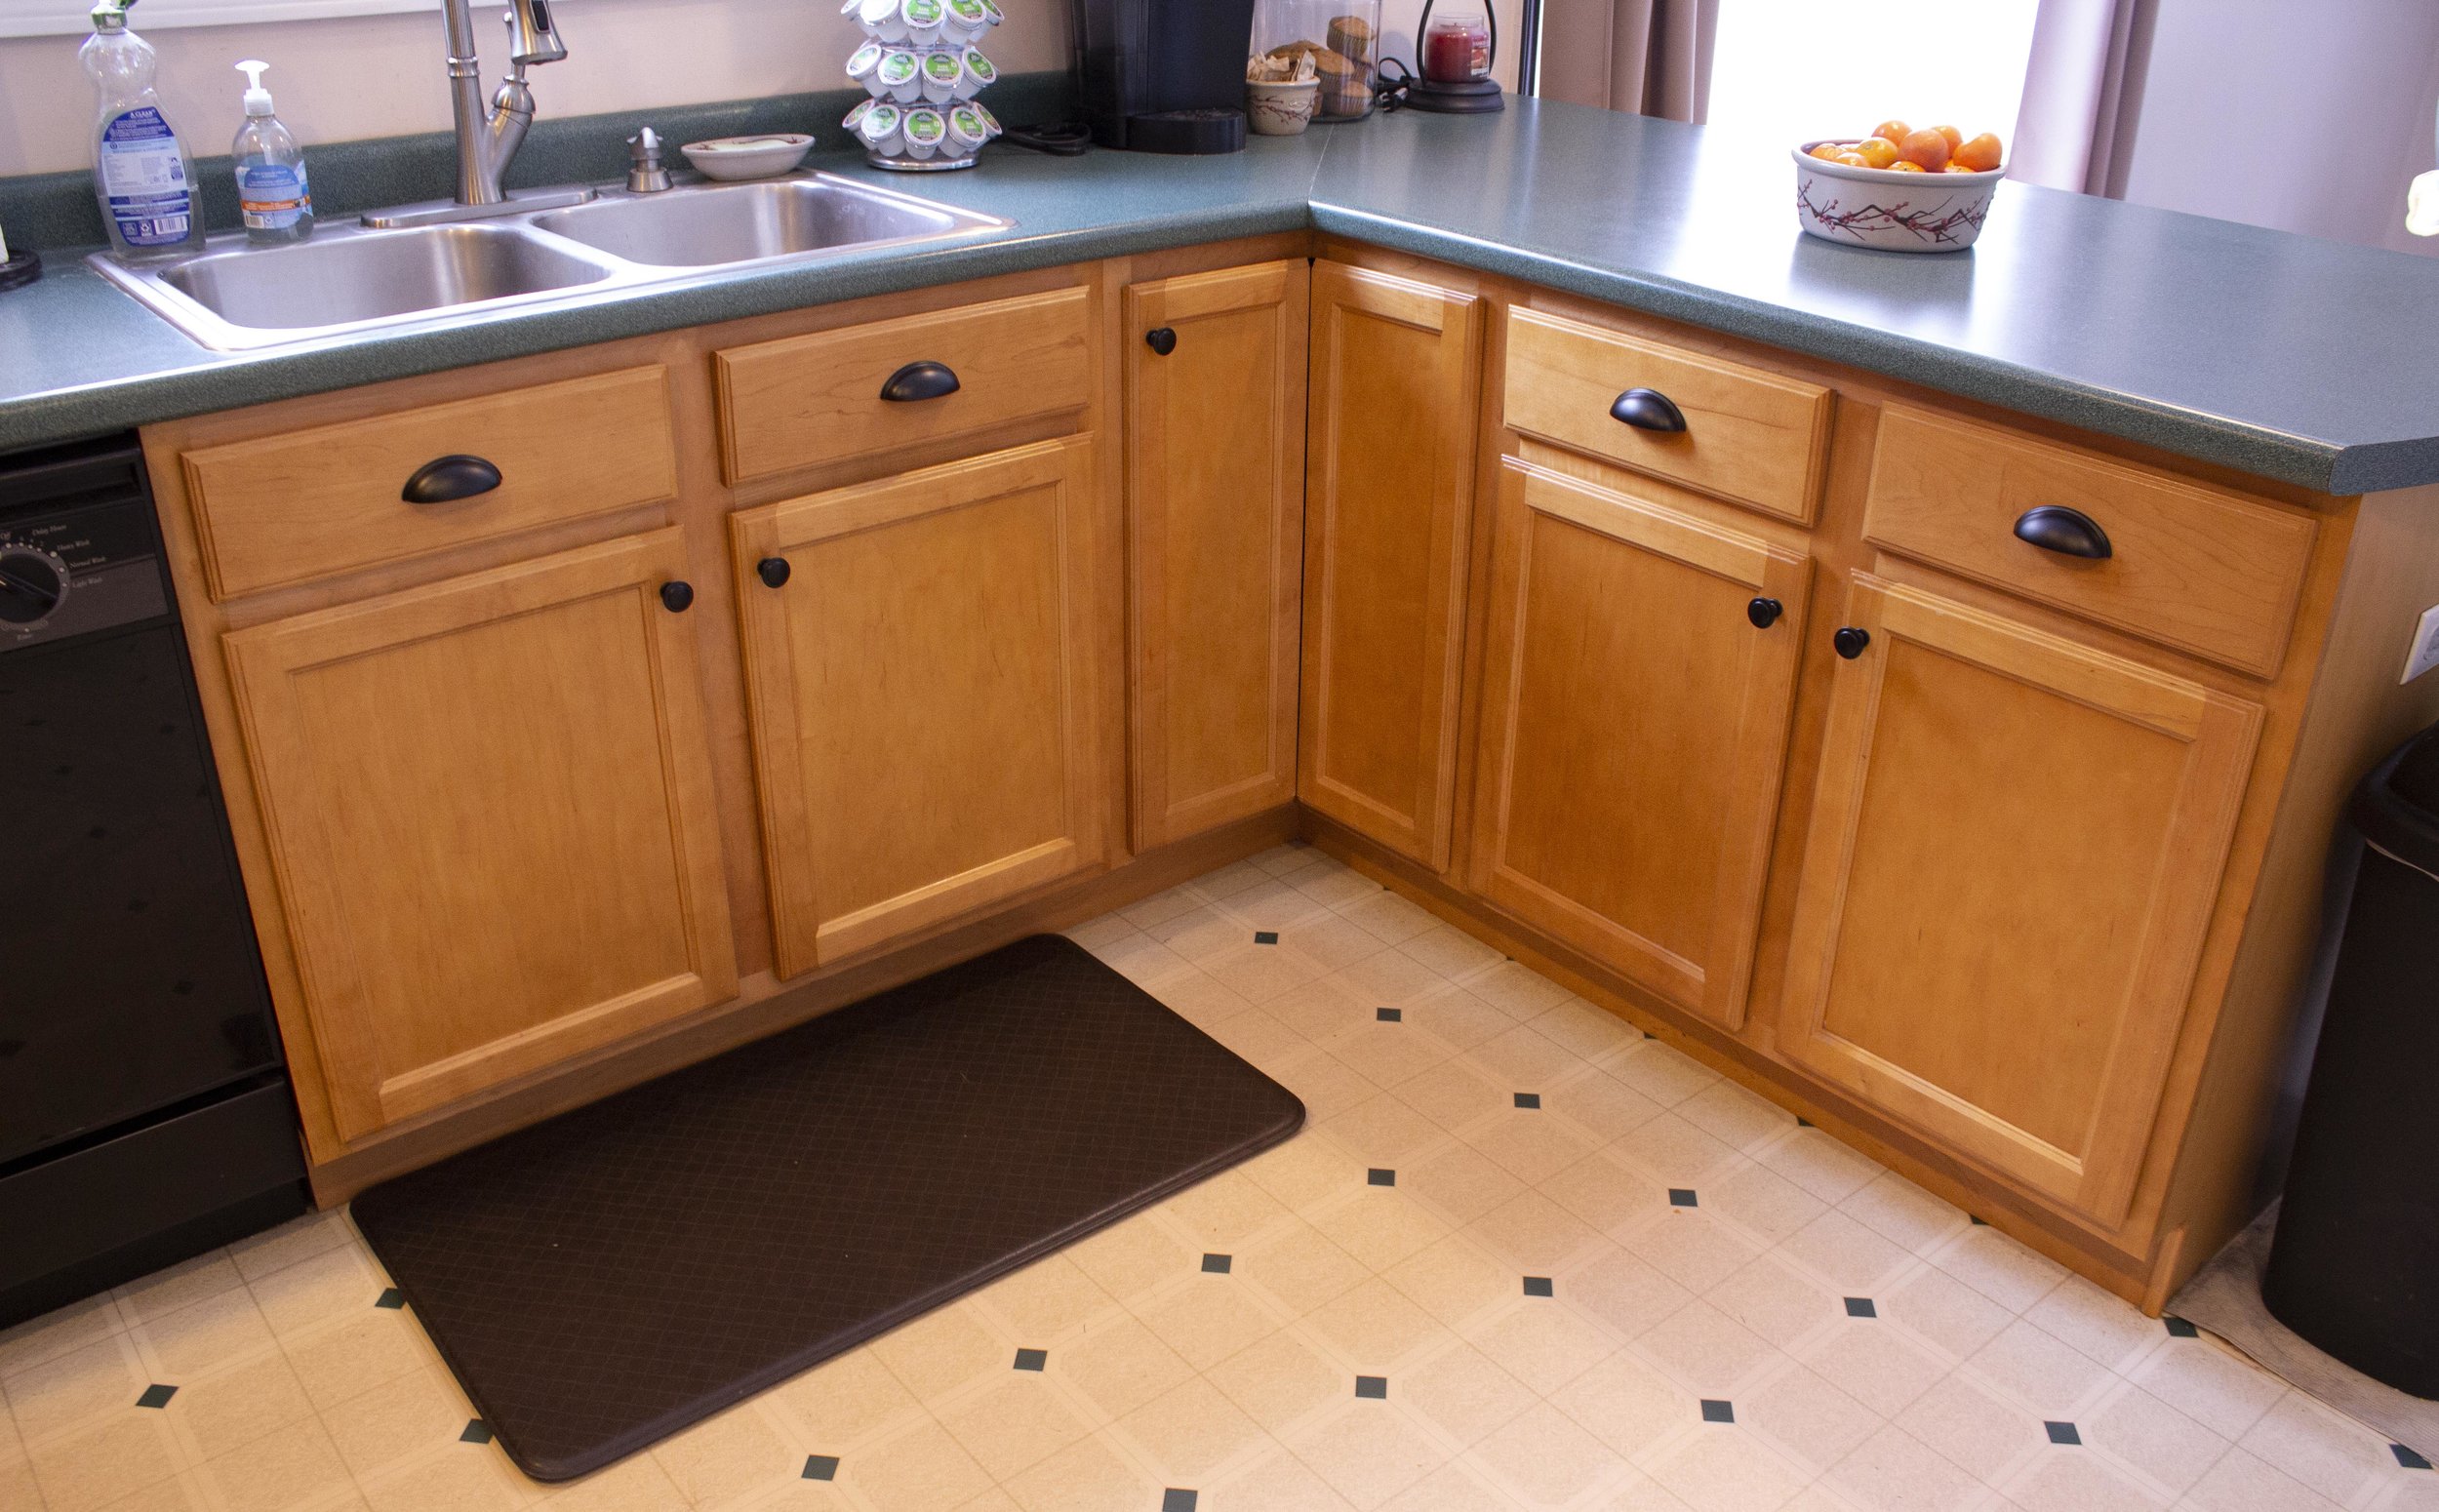
Our home came with a classic late 90’s “builder’s grade kitchen” - you know the type: honey-colored basic cabinets with no hardware and laminate counters. Someday we’d love to totally overhaul the space and paint the cupboards, trim them out, and install granite countertops - however all those things involve a lot of work and money and just aren’t in the budget right now. In the meantime we’re working on making small upgrades ourselves that will make the space look more finished. And what’s the easiest, budget-friendly way to update the look of your cabinets? Replace or install new hardware! If you’re installing new hardware on blank cabinets it can be a bit intimidating, so read on for my tips on installing for the first time. And don’t forget to enter our GIVEAWAY over on Instagram for a $50 Credit to Cosmas Hardware! | This post is sponsored by Cosmas Hardware and affiliate links |
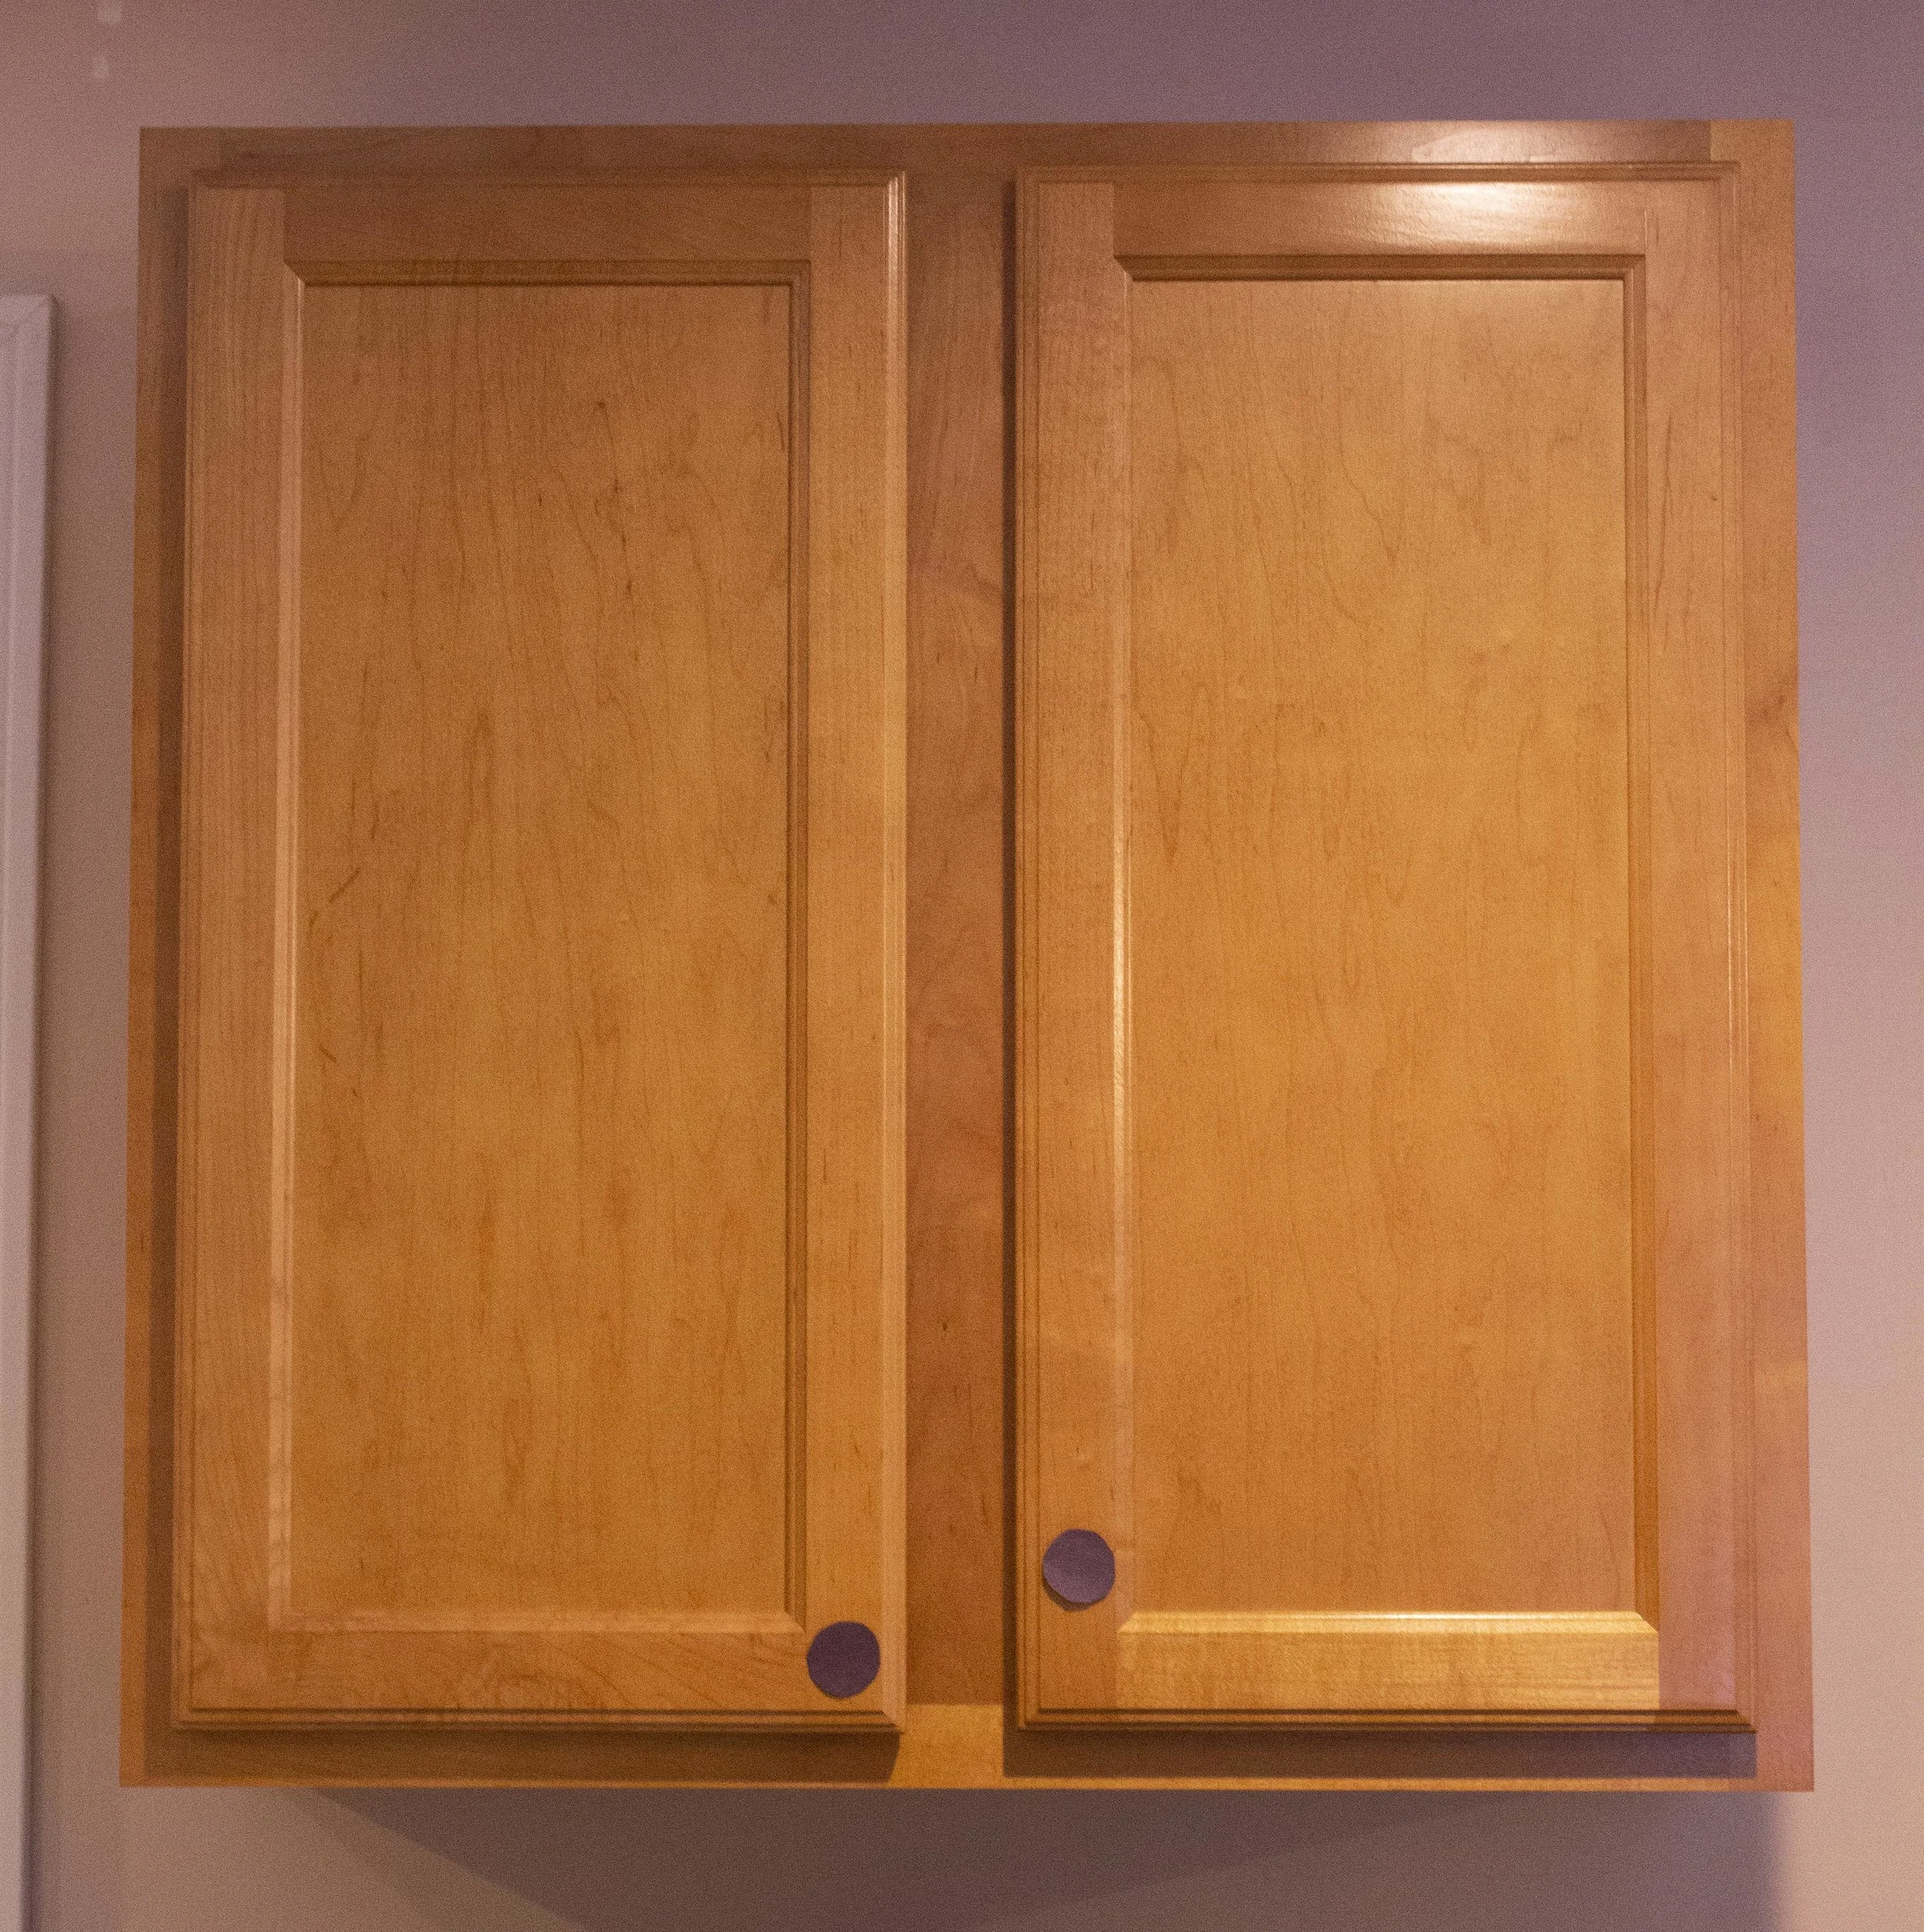
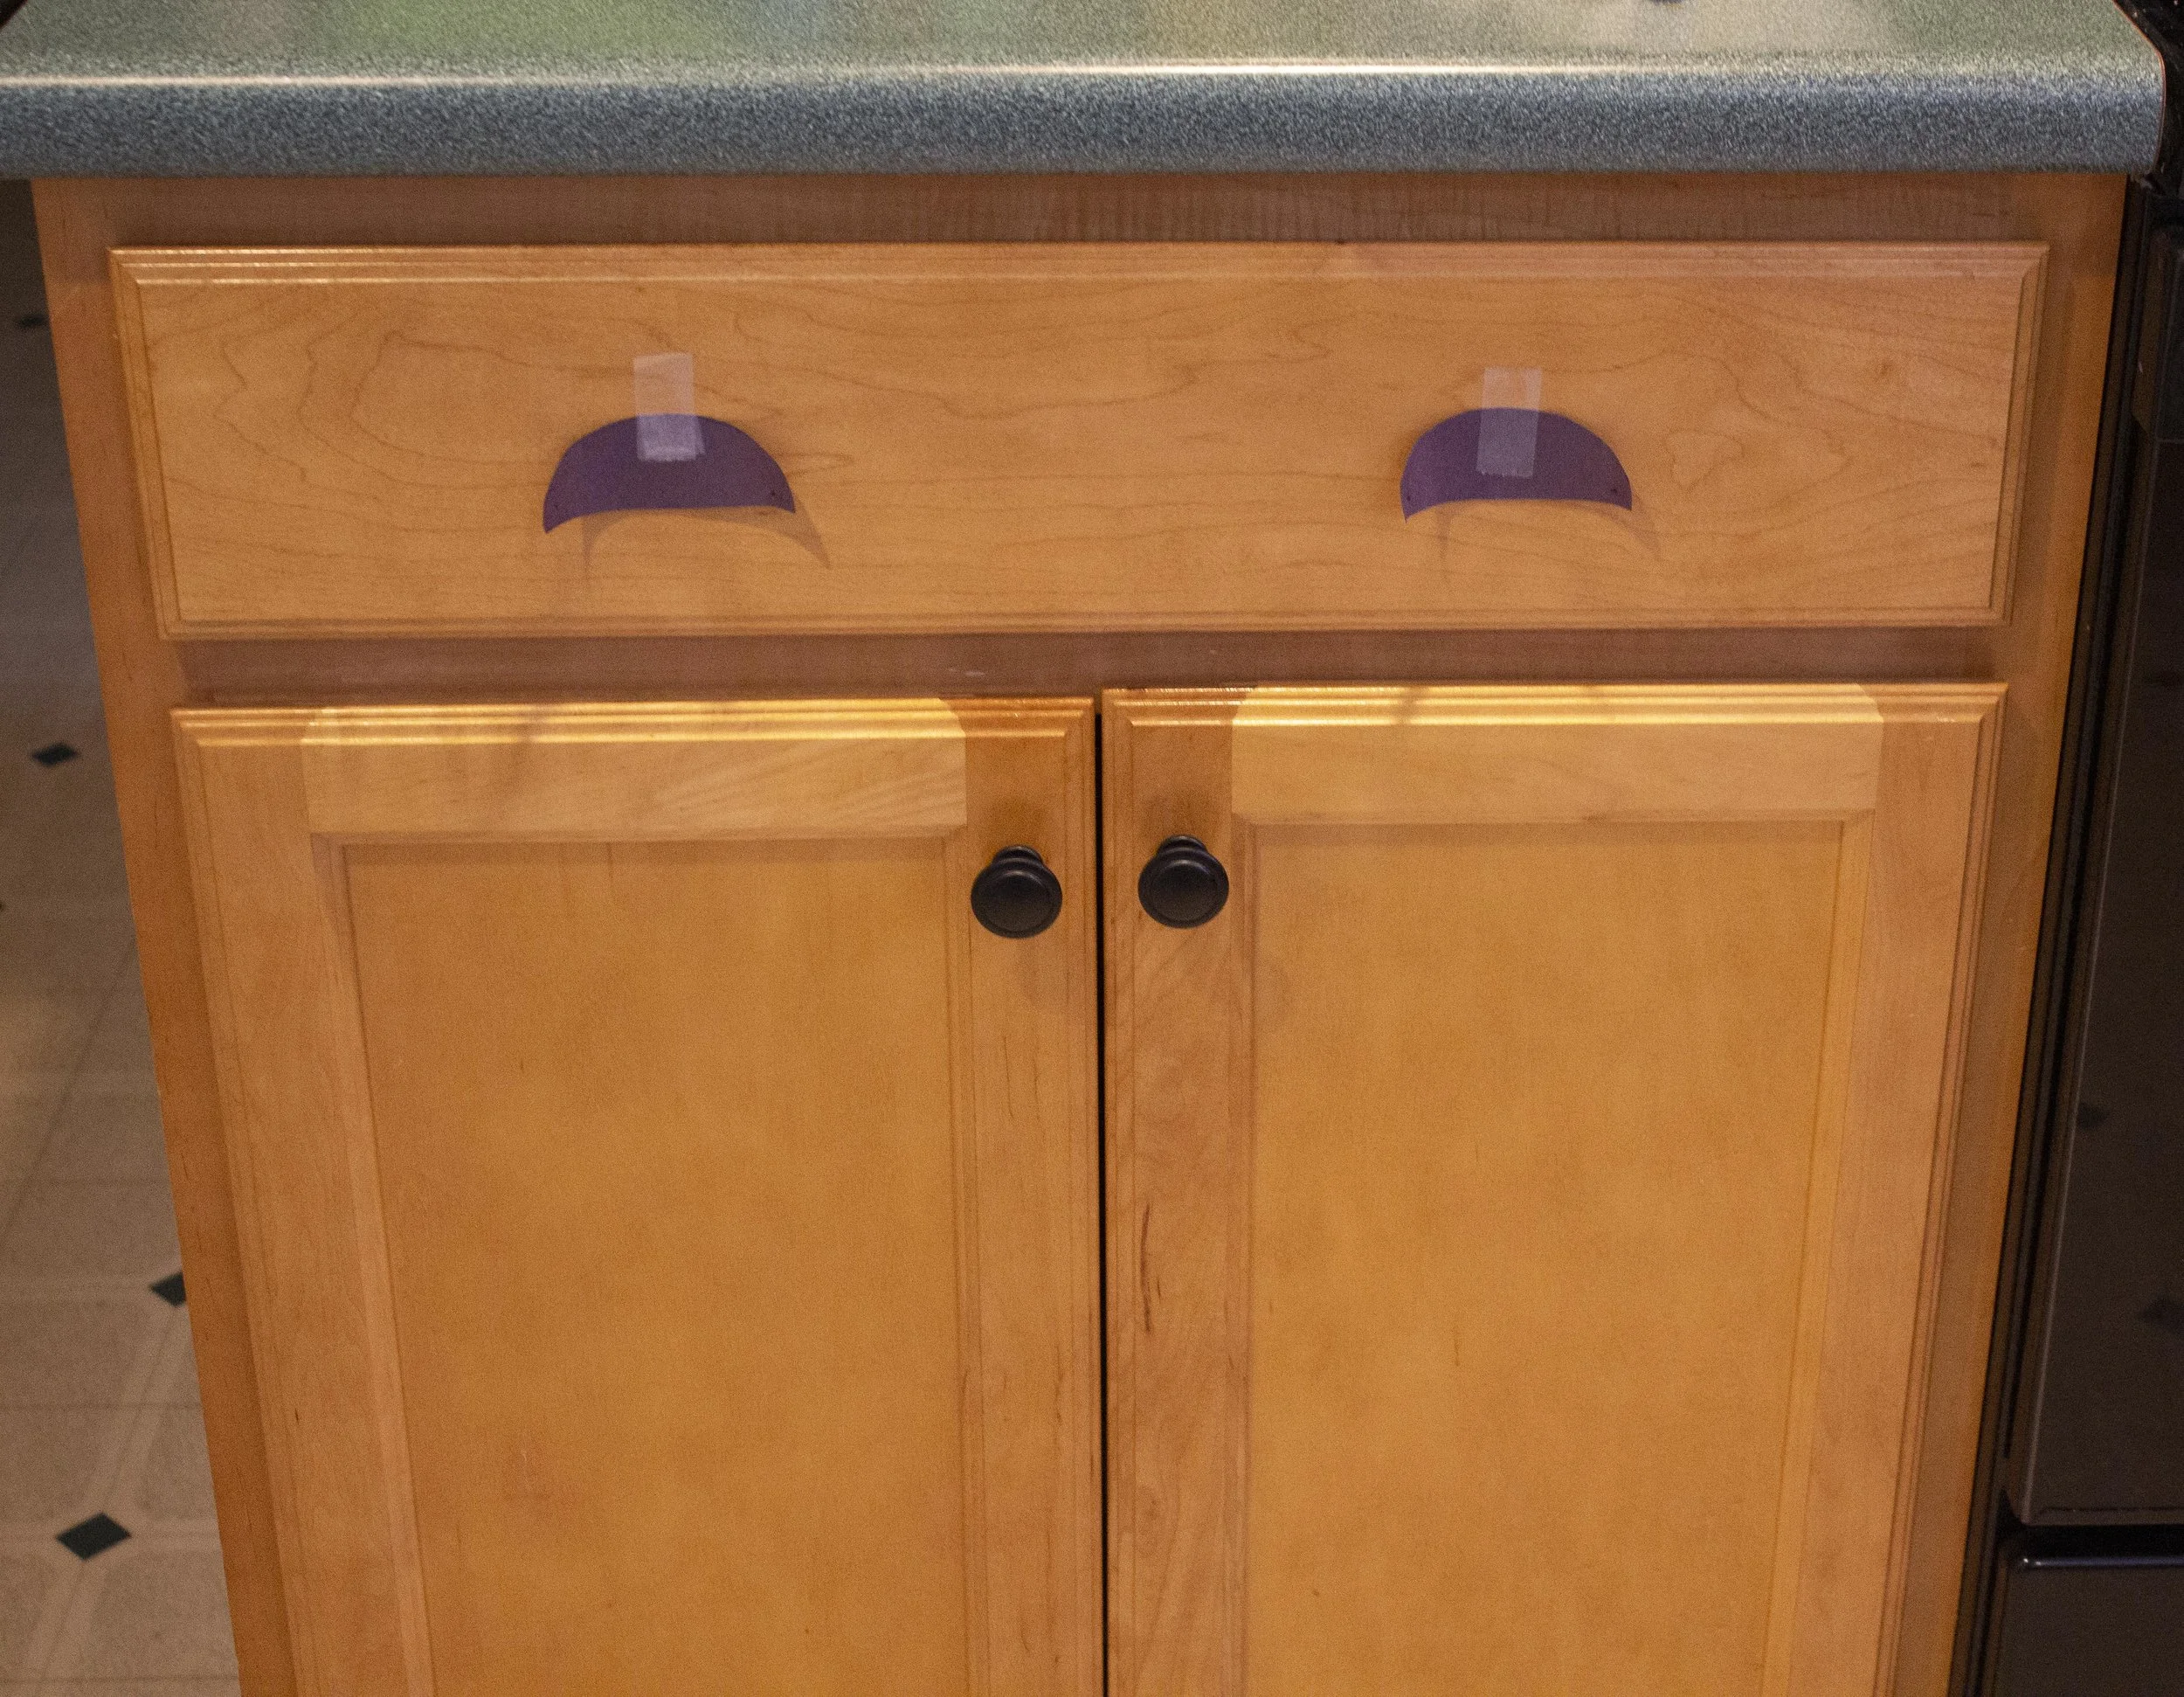
If you’re installing new hardware on a blank cabinet door, the first step is deciding hardware placement. I’m a very visual person so to help me decide on where things would go I first traced the hardware on a piece of black construction paper, cut it out, and taped them to the door and drawer fronts. This way I could step back and play around with the placement before I finalized it.
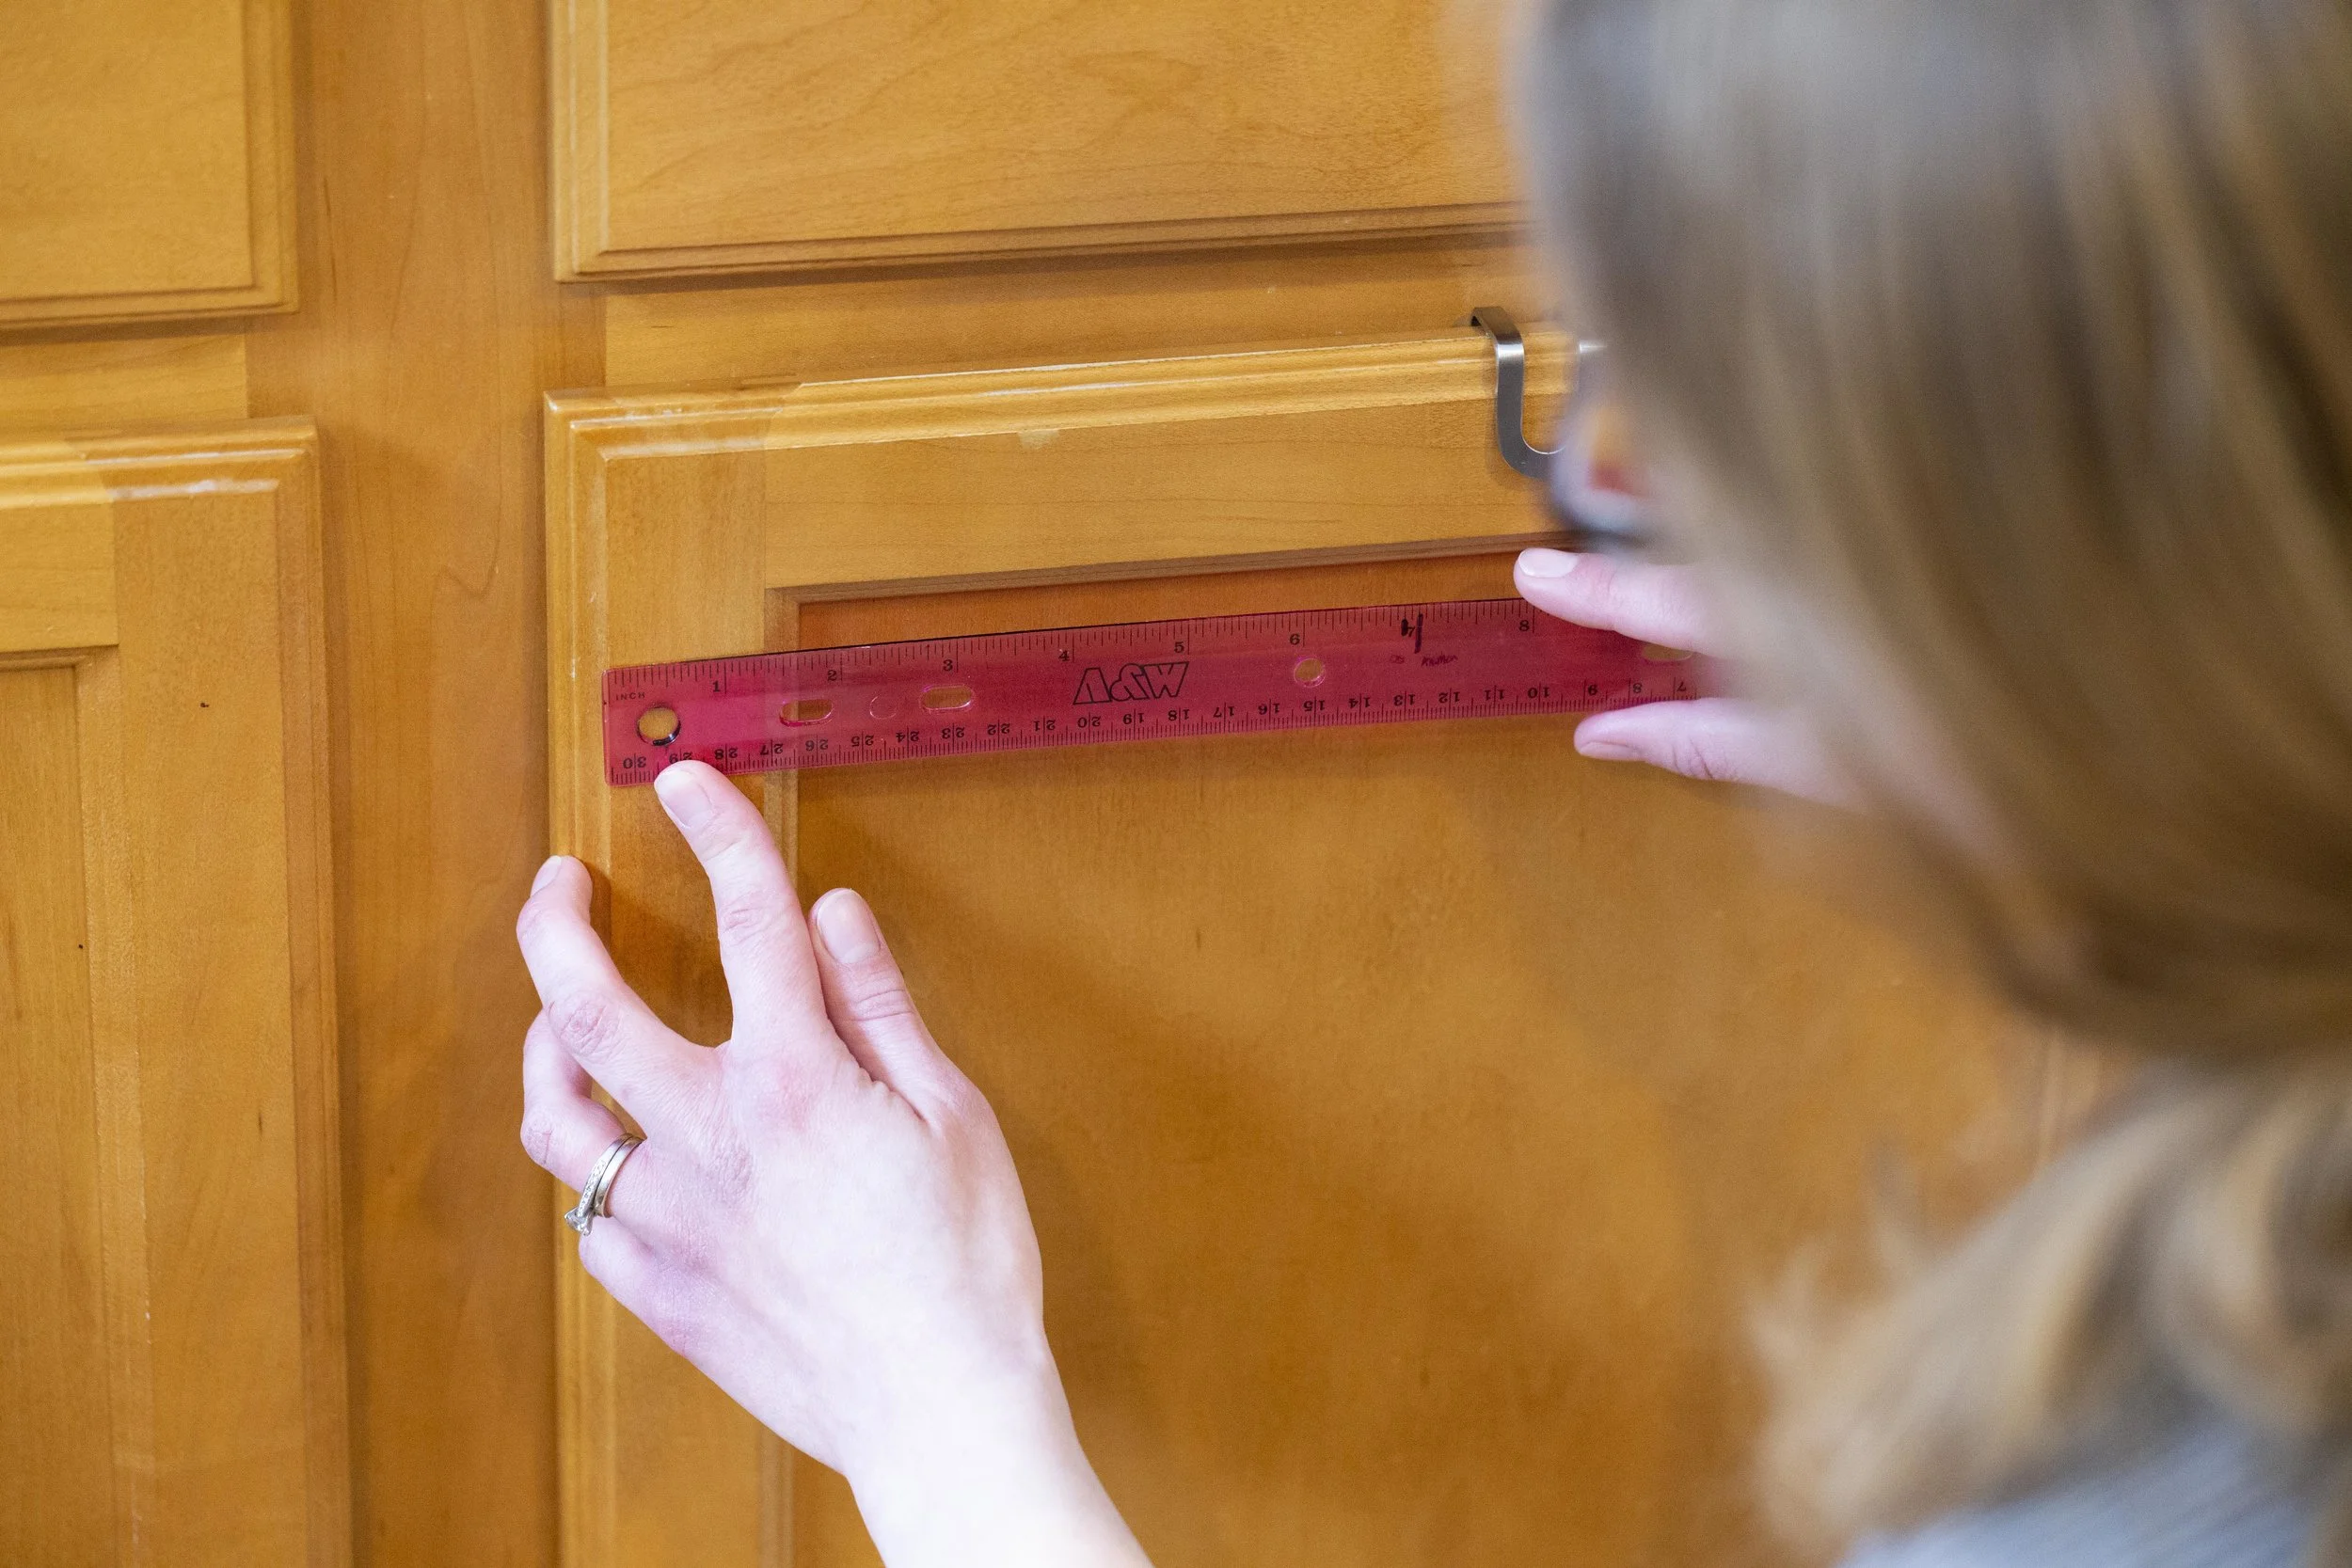
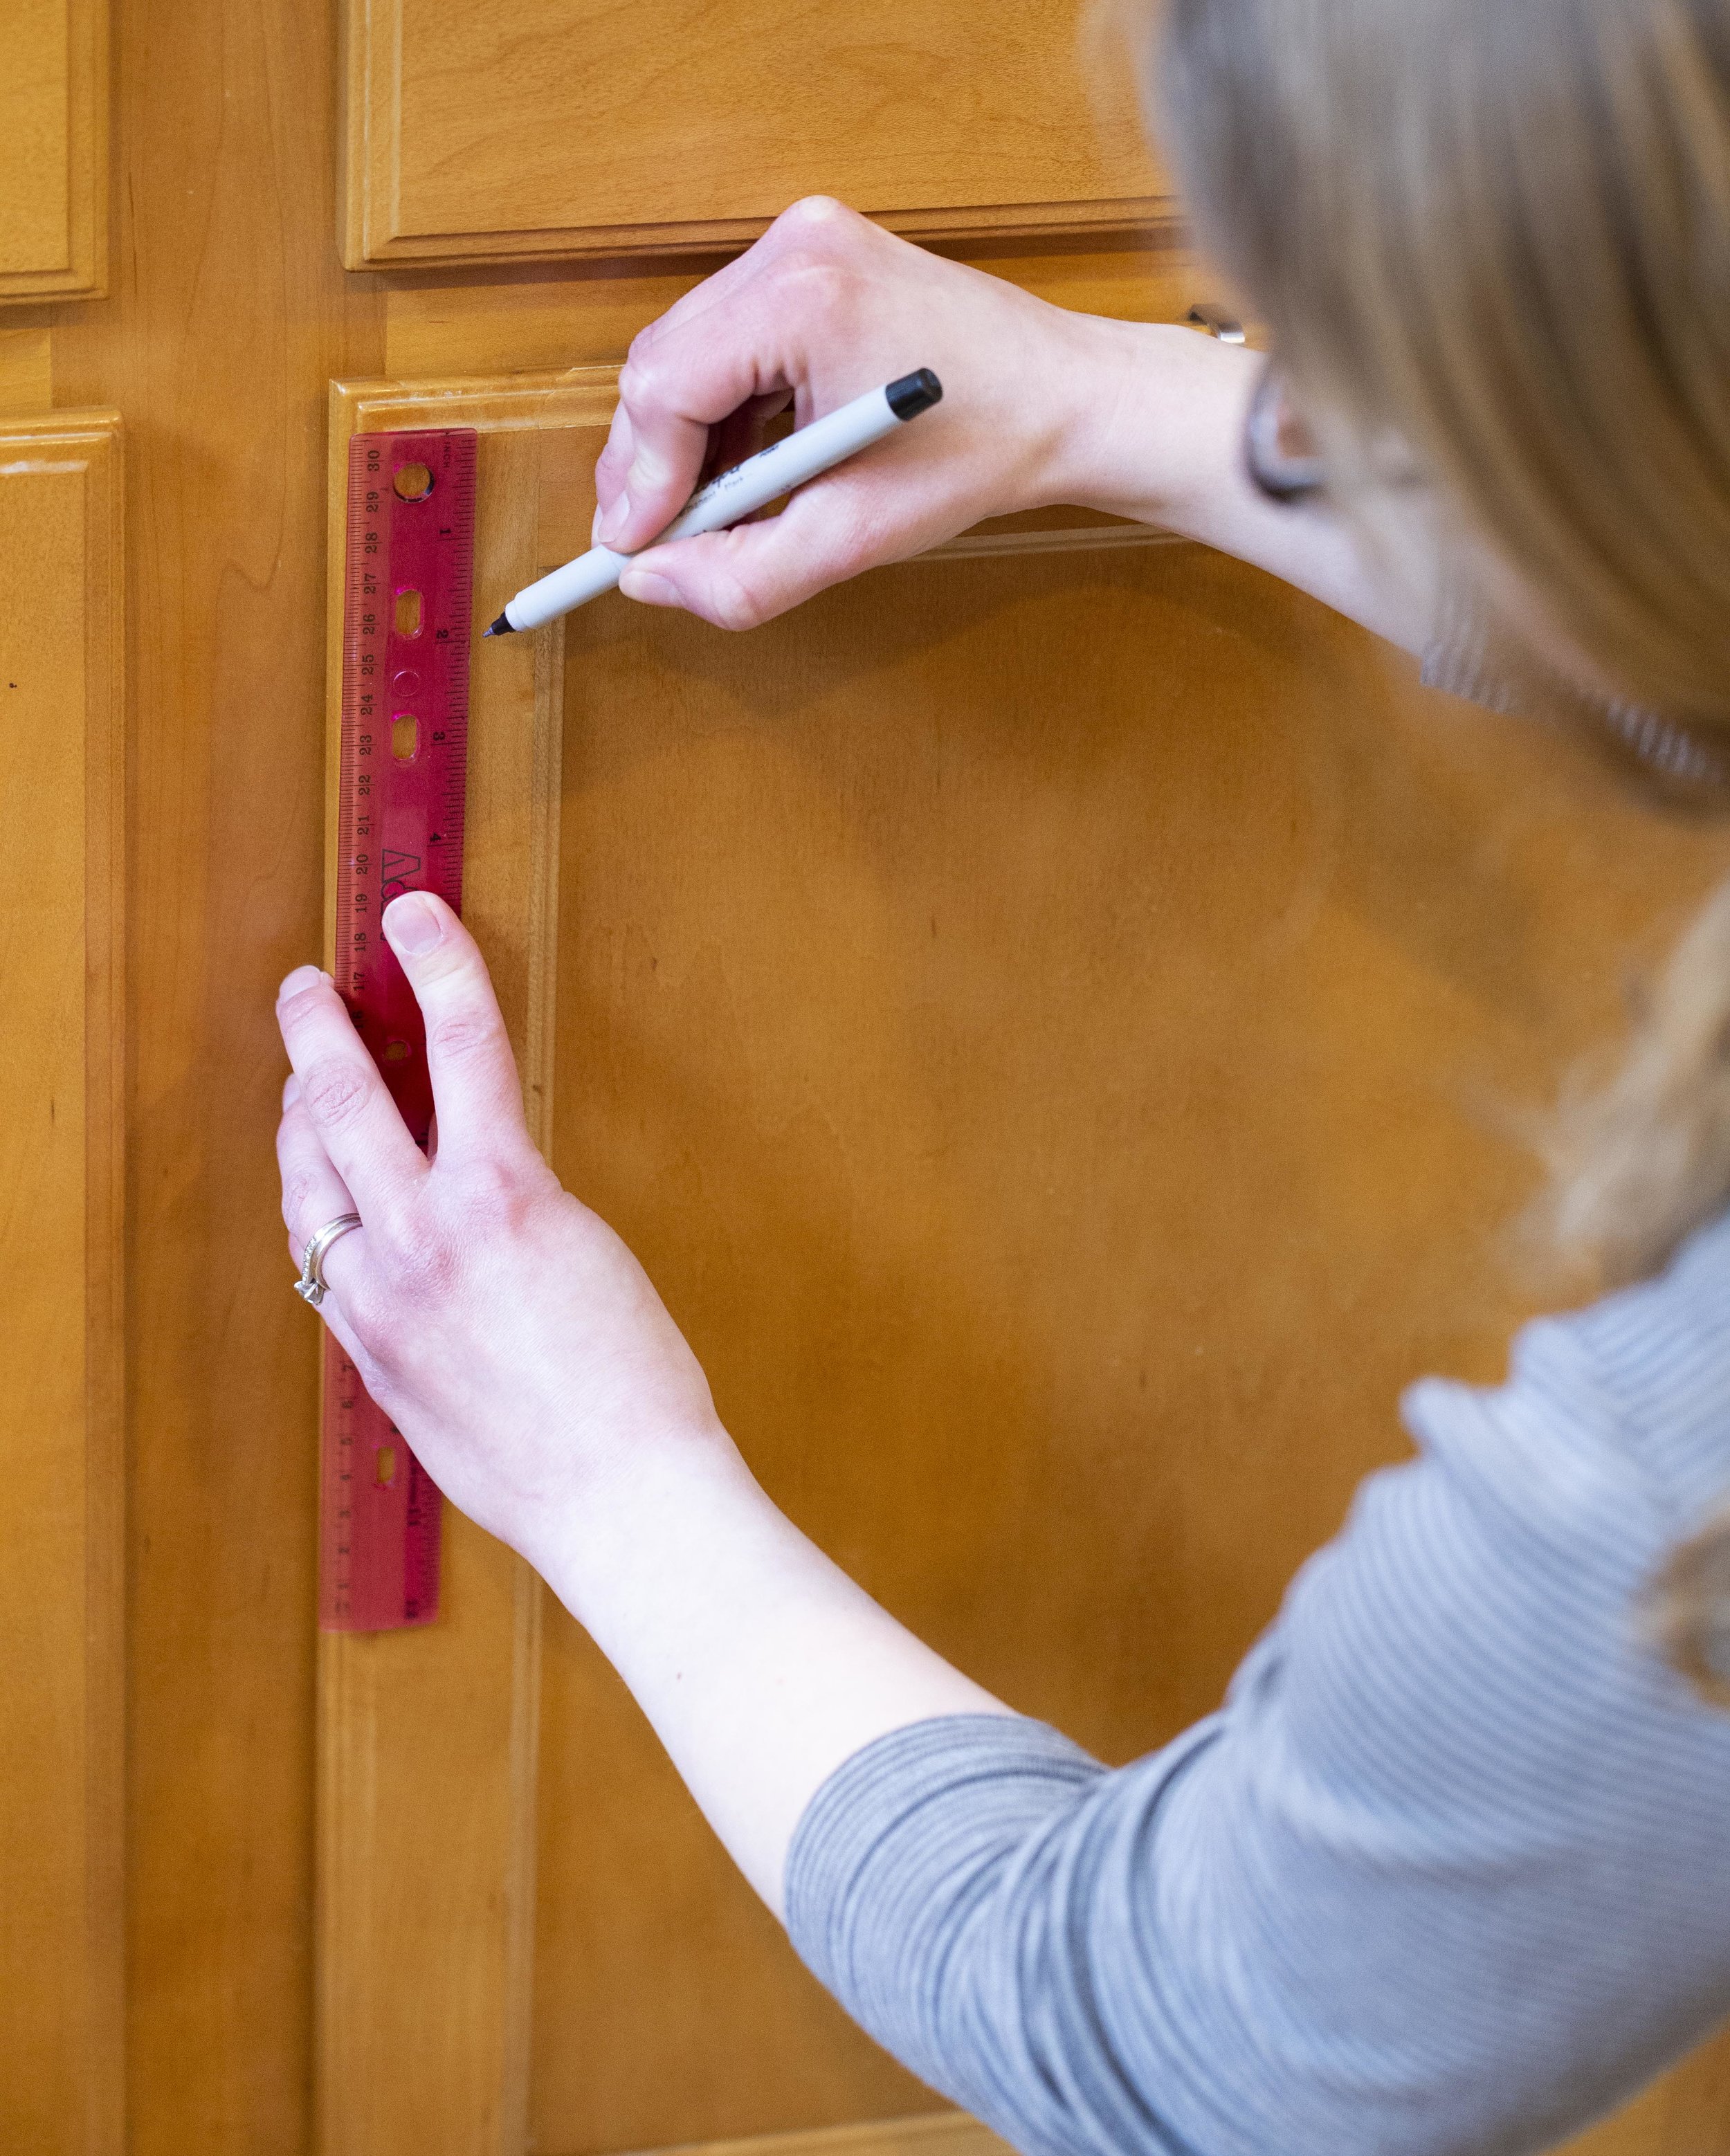
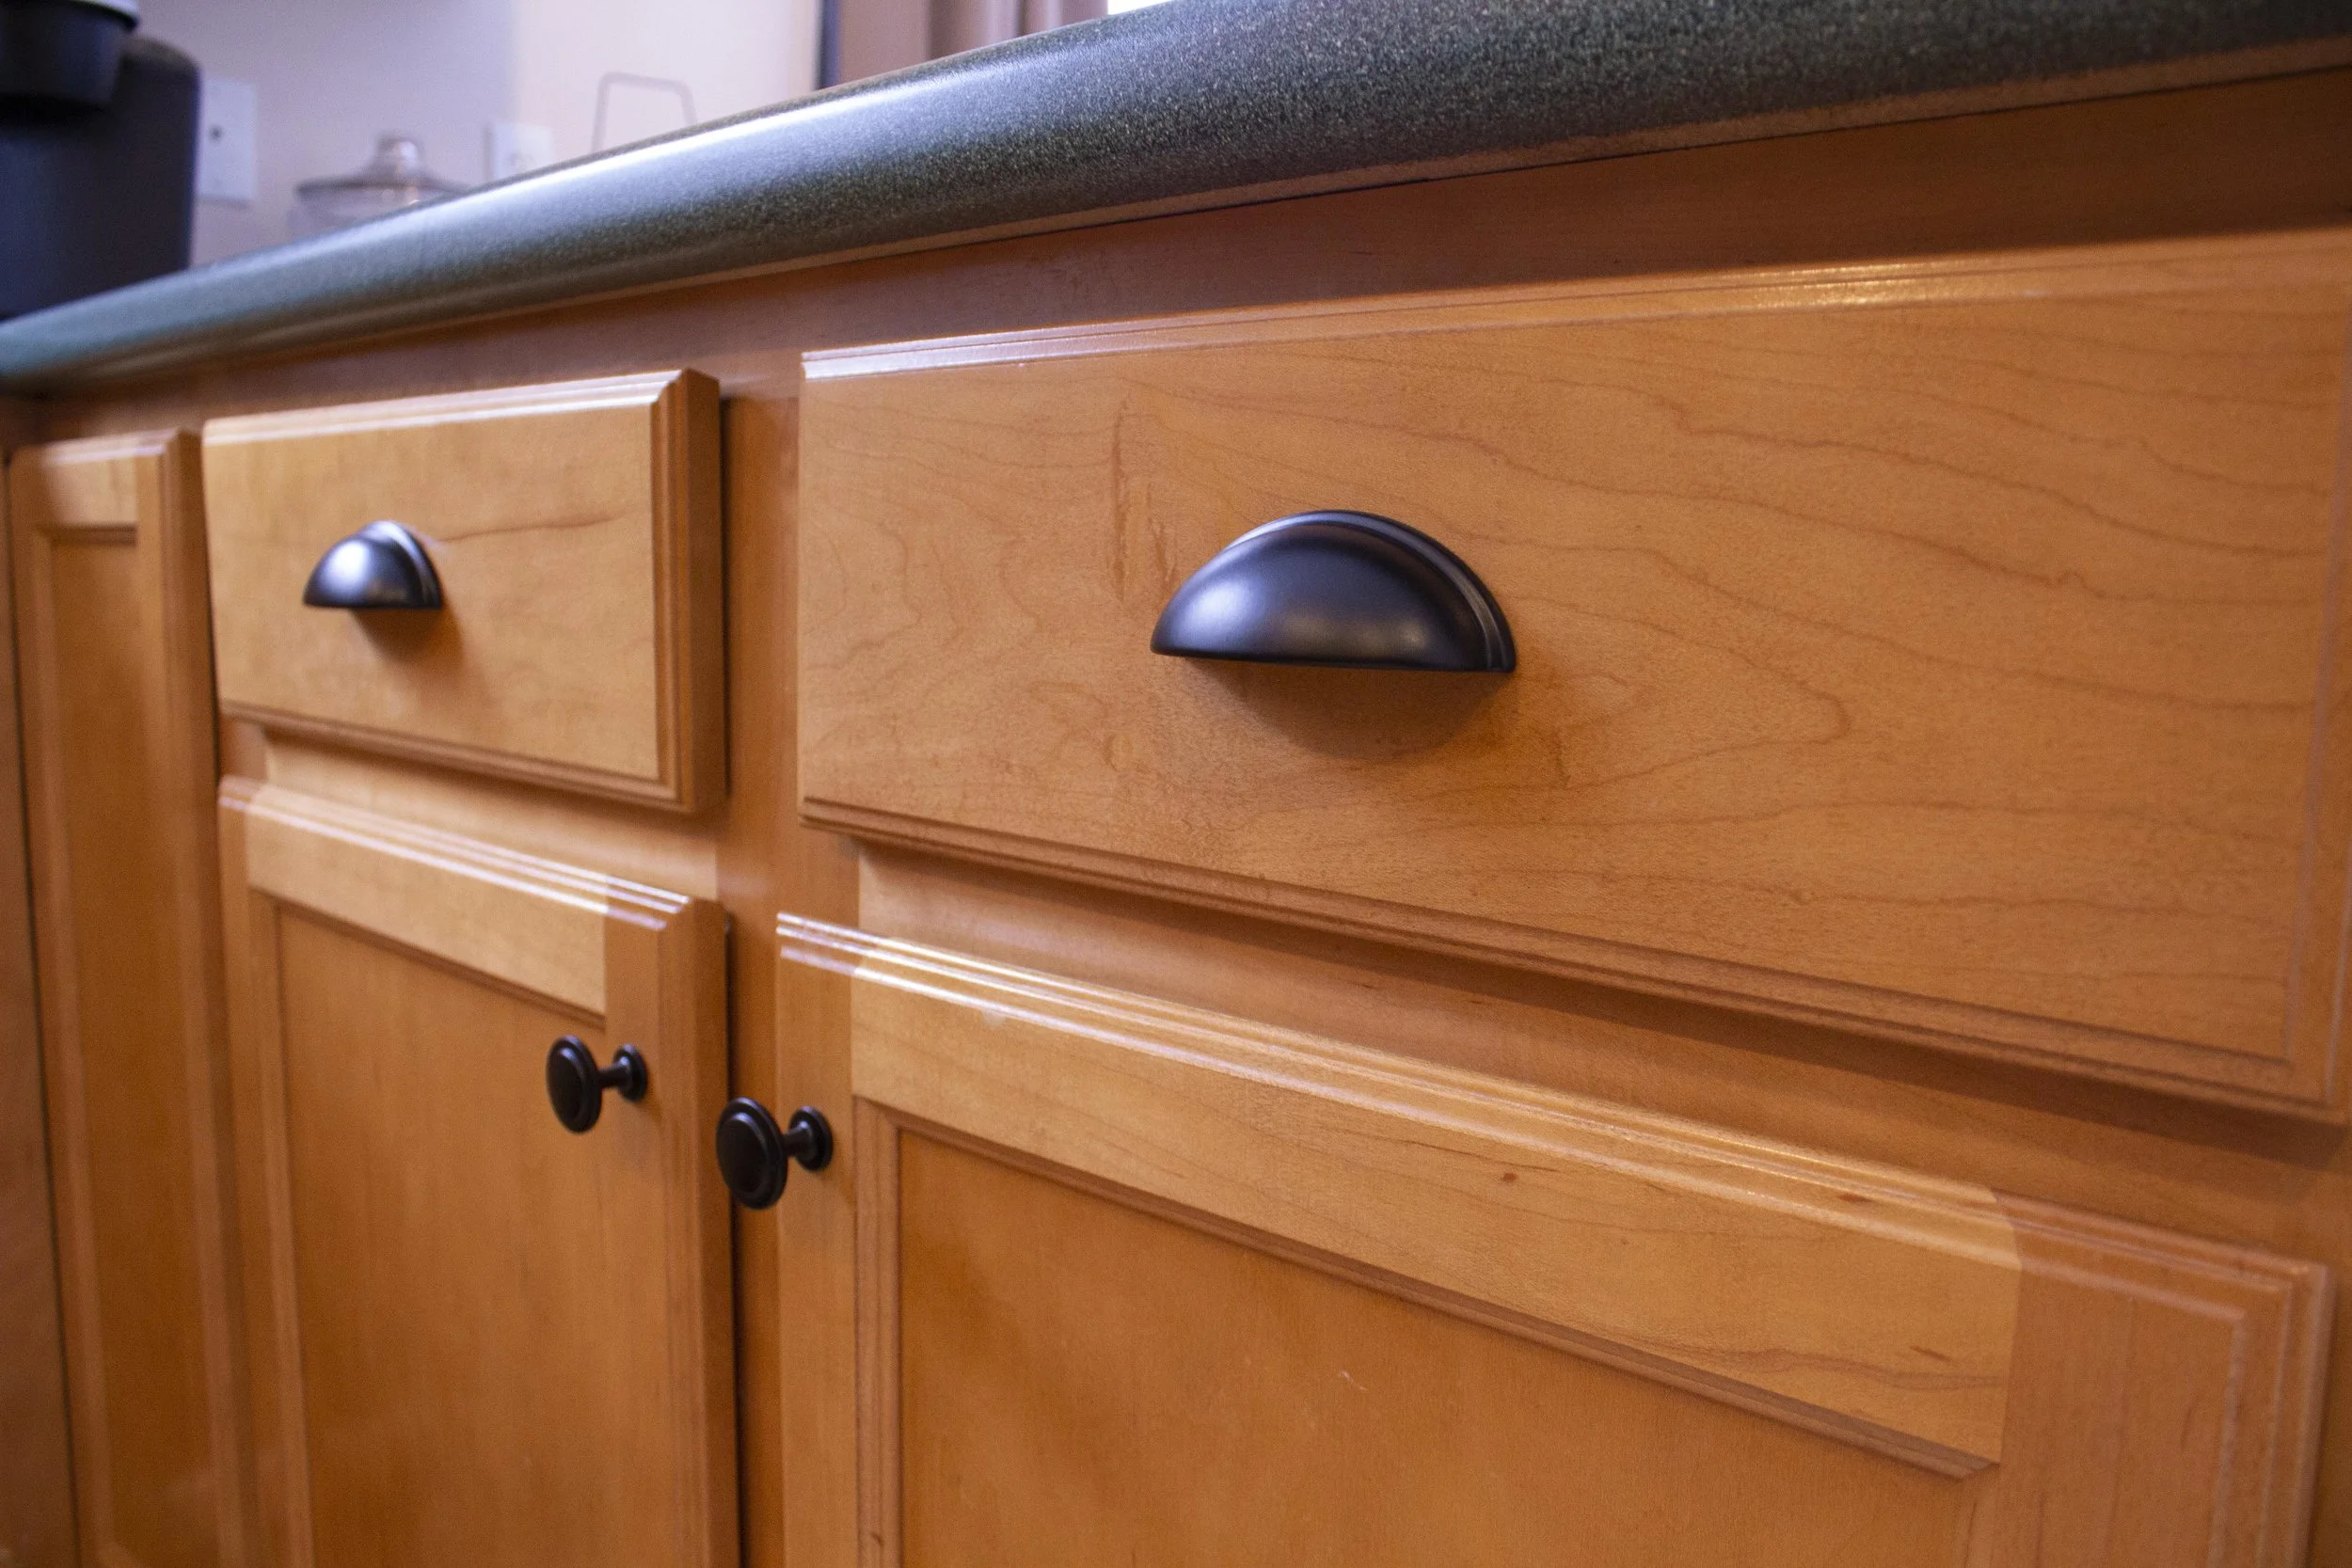
For our cabinets, we decided we liked the knobs two inches from the edge of the cabinet (not including the beveled edge). Once we decided on this placement, it was just a matter of measuring it out on all the cabinet doors so they were centered side-to-side on the trim piece as well as two inches in. Consistency is key to having uniform placement - and I made sure to measure multiple times in both directions before marking it with a pen
It’s important to measure the knobs on each door independently - if the doors aren’t hung evenly, it may look off initially but the hinges can be adjusted later so everything (the doors themselves as well as the hardware) will line up visually.
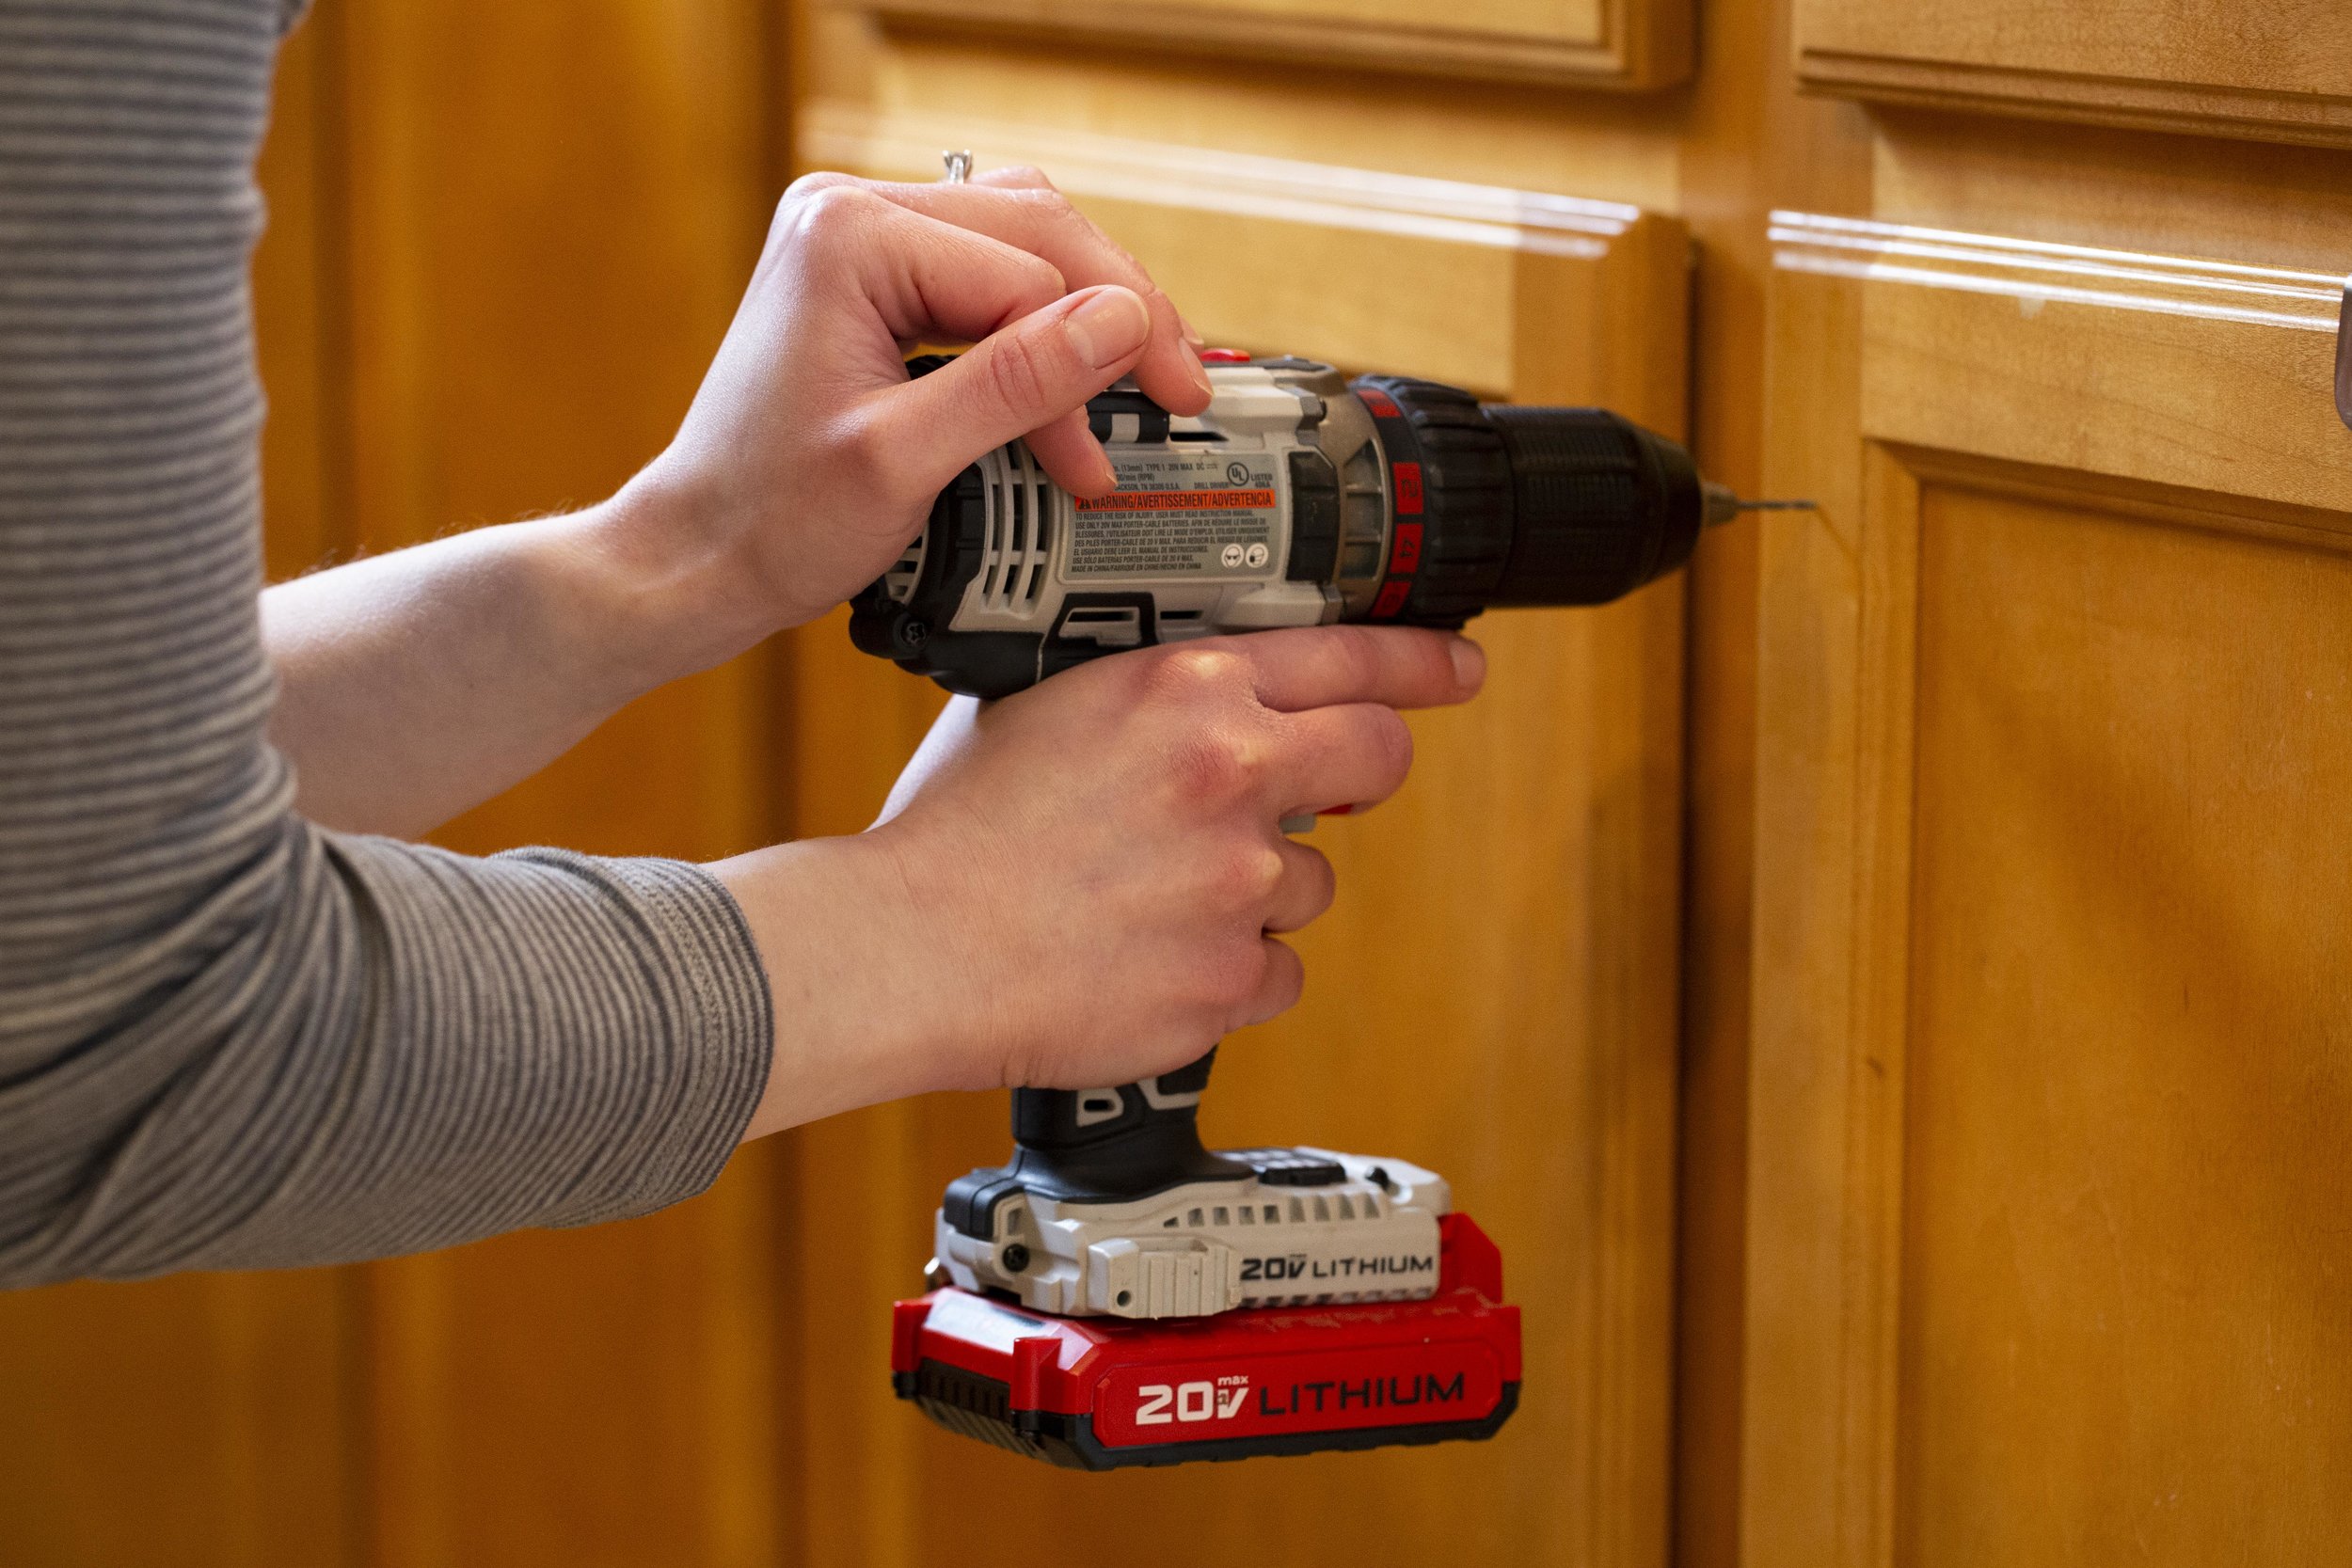
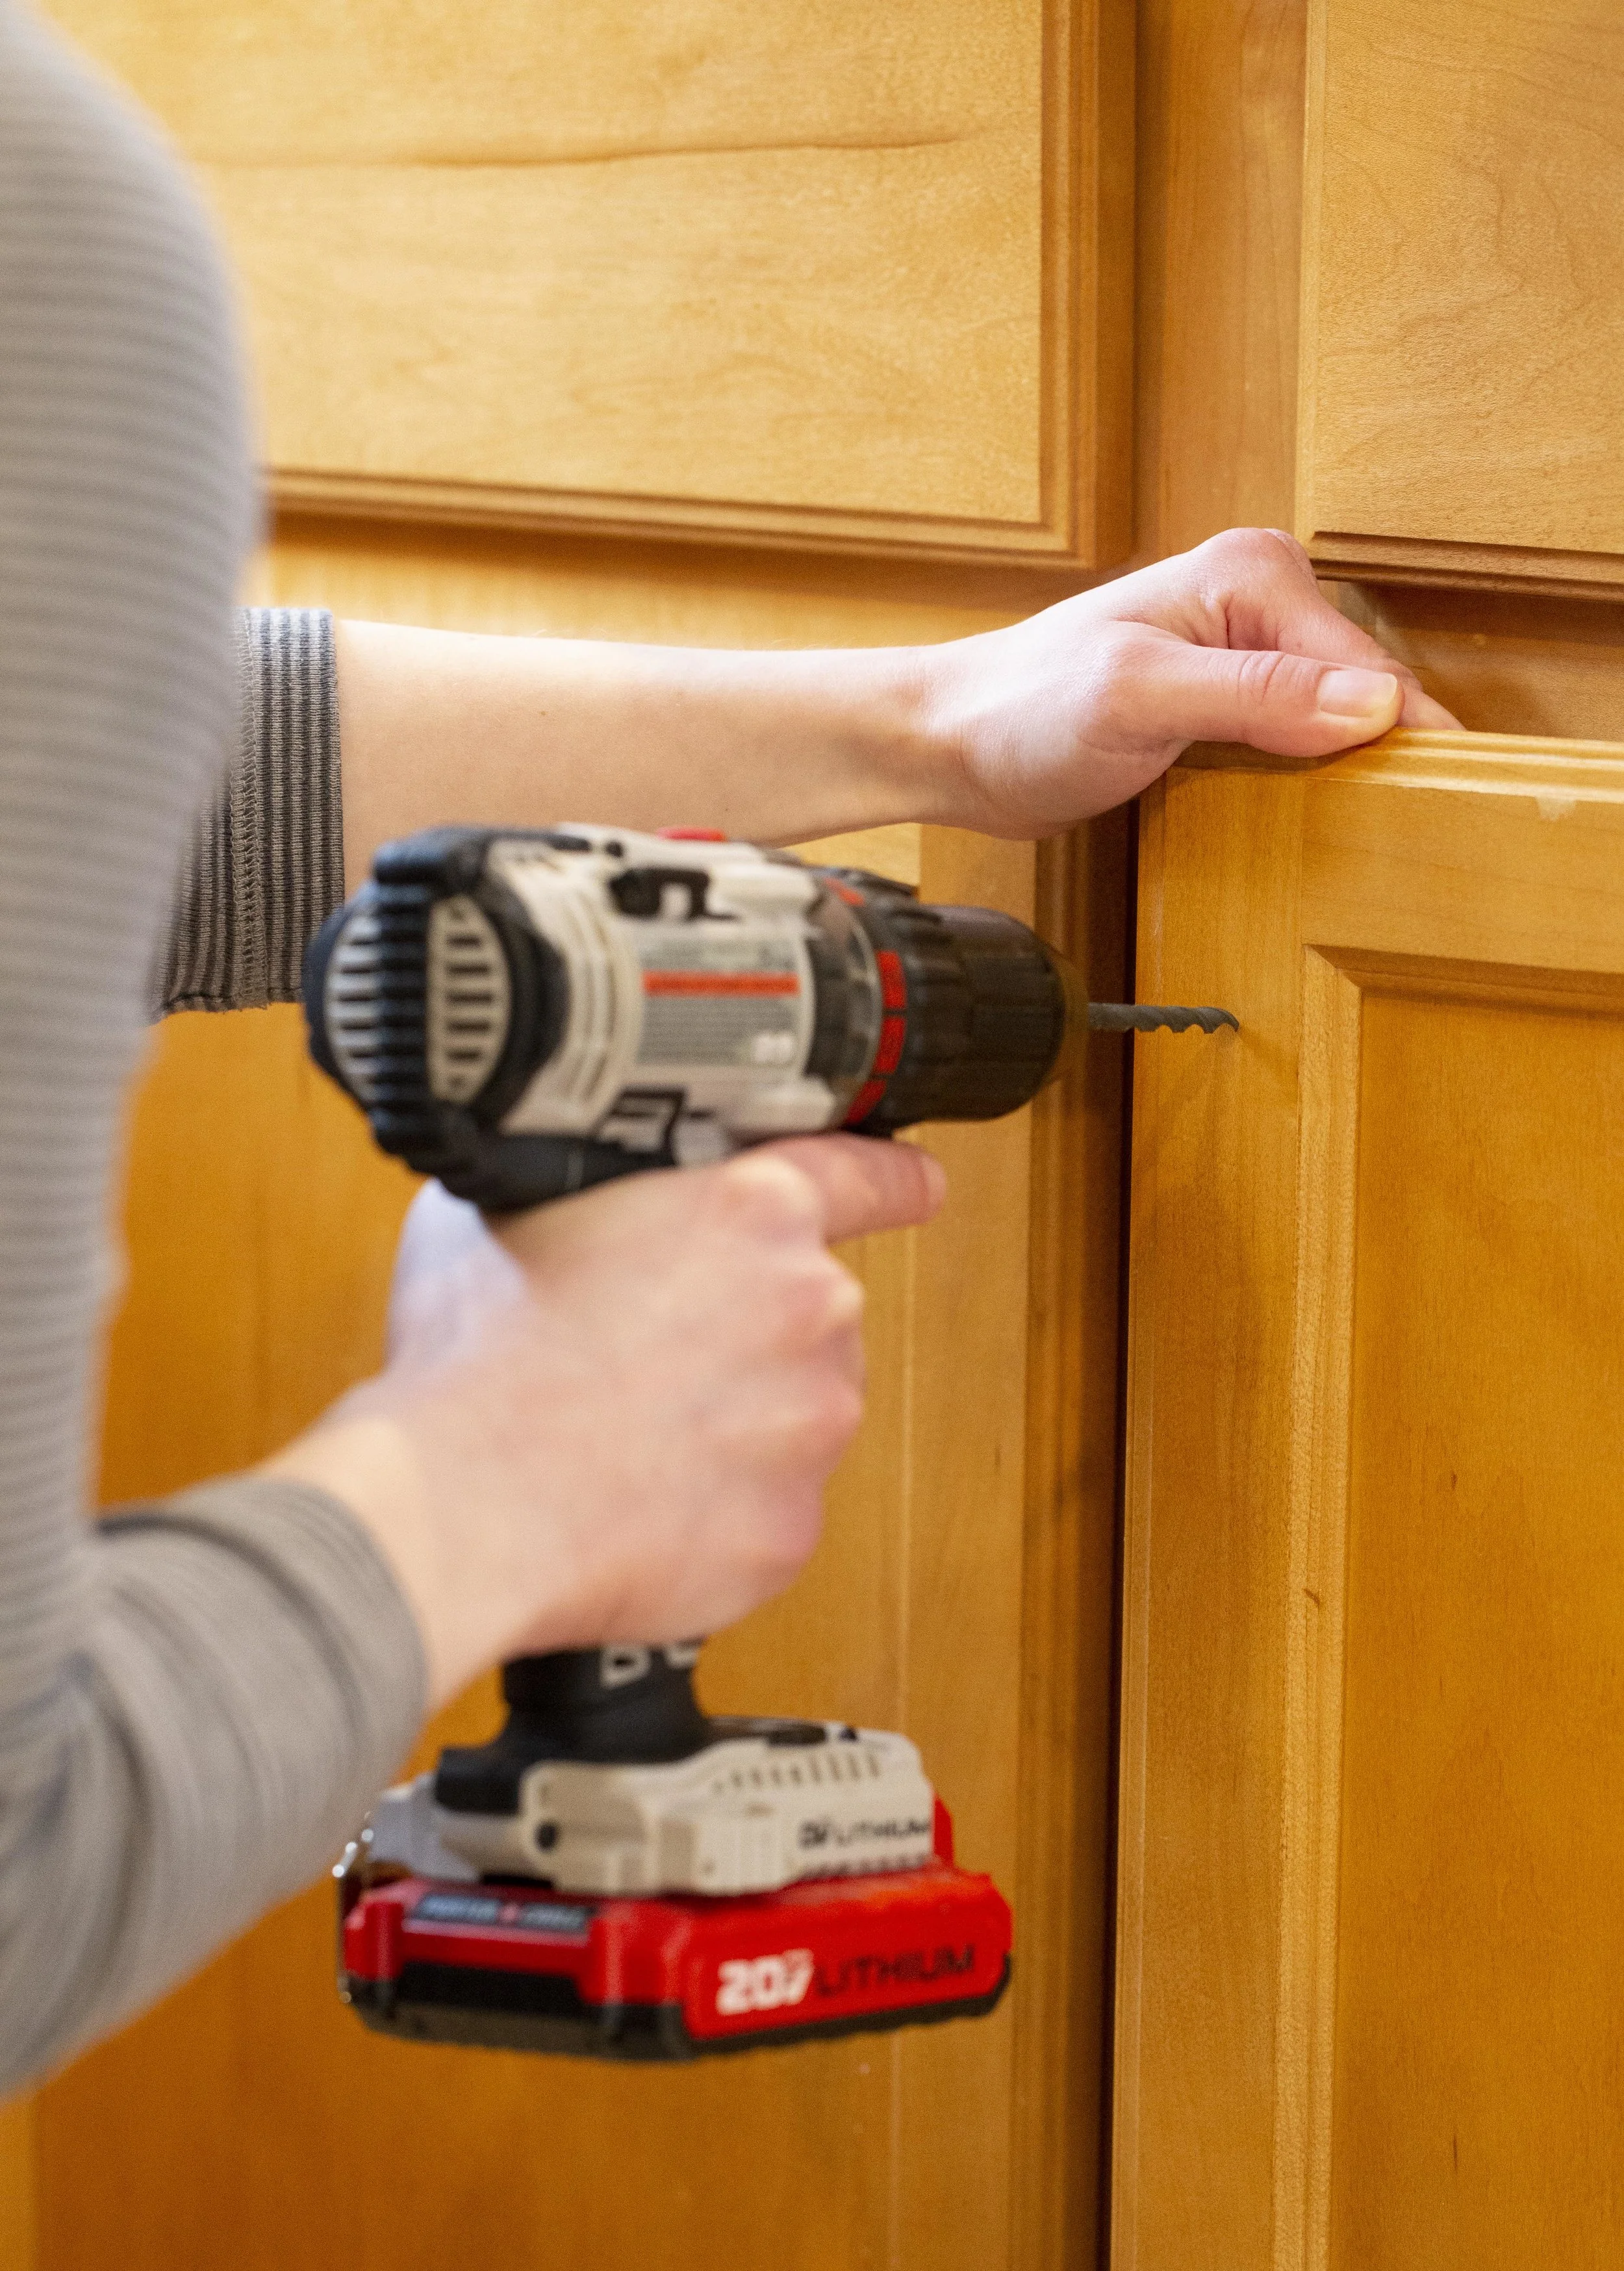
When it comes time to drill the holes, it’s important to make a small pilot (starter) hole before you drill the full size hole. There’s several reasons for this, but the two most important ones being that larger drill bits tend to “walk” when you drill on a smooth surface, and without drilling a pilot hole first you might end up off your mark. The other important reason is that pre-drilling the hole smaller first will help lessen the chance of the wood splitting. Be aware of what’s behind the cabinet front when you drill! Make sure you aren’t drilling into the cabinet frame or dishes that may be in the cabinet behind the door. For the larger hole you’ll want the drill bit diameter to be just barely bigger than the diameter of the screws that come with the hardware.
Once the larger hole is drilled, slide the screw in from the back and use a screwdriver to hold it in place while you thread the knob on snuggly.
Deciding on drawer pull placement. (Note that while the lower cabinet knobs are each in the correct place, they look off since the cabinet doors are uneven - this can be fixed by adjusting the cabinet door hinges, which I did once I was finished installing all the hardware.)
For the drawer pulls I followed a similar procedure as I did for the door fronts. One thing I had to keep in mind though is the drawer pulls I chose aren’t symmetrical top-to-bottom - the mounting screws are towards the bottom of of the pulls. Therefore, playing around with the placement of the drawer pulls was very important - the drawer pulls needed to look centered visually from top to bottom on the drawer fronts, even though that made for the screw placement to be slightly below center.
Once I liked the visual placement of the paper templates I carefully measured out the spacing on each side as well as down from the screw holes to make sure everything was accurate and even. These particular drawer pulls have screws 3” apart so I made sure that the spacing between the screw markings was accurate as well. (Once you get an idea of placement, you could also use a Cabinet Hardware Template here to help mark everything out.) In our kitchen the drawers are three different sizes, so this process needed to be repeated several times - on the shorter drawers I used one pull, and on the longer drawer I used two pulls.
After the hole placements were marked, I remeasured the spacings several times before drilling the pilot holes and then the screw holes. Then it’s simply a matter of screwing the screws in from the backside of the drawers with a screwdriver into the drawer pulls.
AFTER
And that’s it - the whole project took less than an afternoon to do and it really helps our kitchen look more finished. I just love how it came out! Once we replace our countertops with a more modern granite counter the space will really look sharp and the hardware will compliment it beautifully.
GIVEAWAY!
Head on over to our Instagram for details and to enter our Giveaway with Cosmas Hardware for a $50 shop credit so you can update the look of your kitchen too with the hardware of your choice!
- I received these items from Cosmas Hardware but all opinions expressed are my own. Please read our full Disclosure Policy for more information -
Disclaimer: Installing new cabinet hardware from scratch is something that most people can very easily do on their own and here I’ve shared my tips on the easiest way I’ve personally found to measure and install them. However, use your best judgement when installing your hardware - if you’re in doubt of your measuring or drilling skills, there’s no harm in consulting a professional before you tackle this or any project.
Warmer weather is coming and it’s time for a wardrobe and gear refresh! Here I’m sharing some of my favorite warmer weather and outdoor picks from L.L. Bean for Spring and Summer. | This post contains affiliate links |