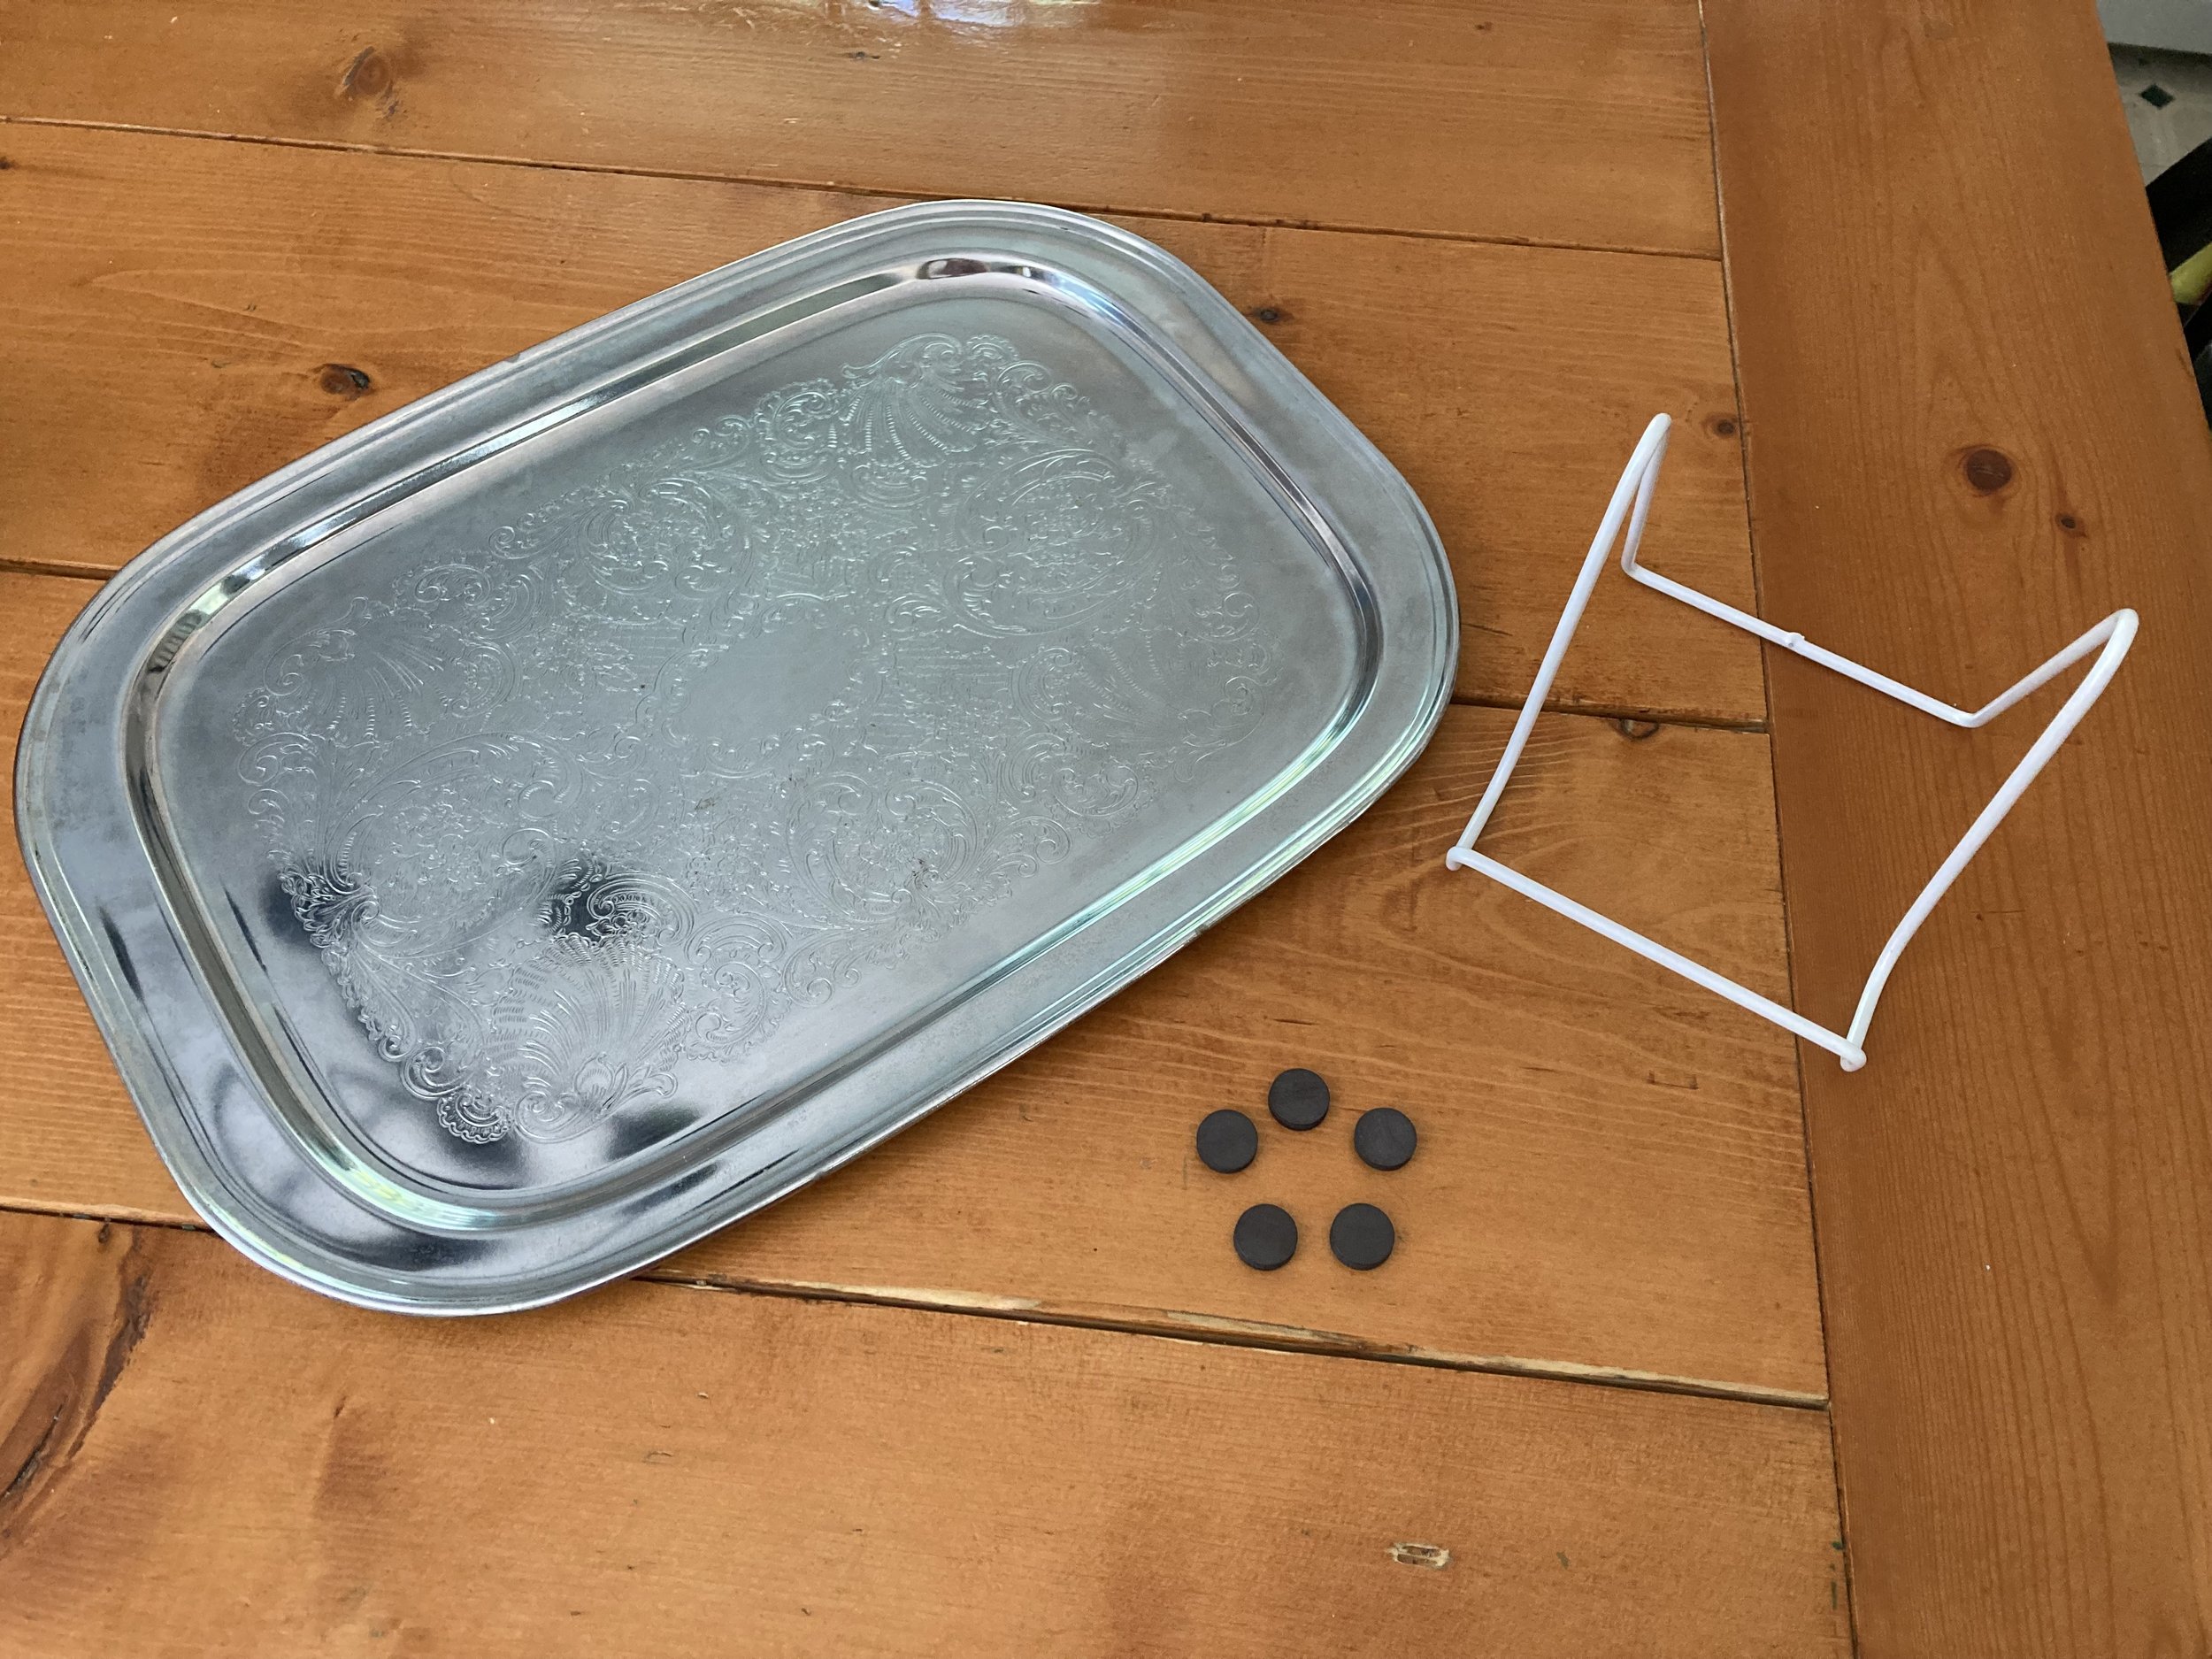
We’ve been slowly helping to clean out a family member’s attic and came across this old heavy “silver” (not actually silver) serving tray. Since not many people still use serving trays I thought it might be fun to repurpose it into something else - and since it seems to be made of some kind of steel (therefore magnetic), I thought it would make a fun magnetic memo board! | This post contains affiliate links |
- Vintage metal tray (check to make sure it's magnetic)
- plate stand big enough to support the tray (similar size stand linked)
- magnets
How To:
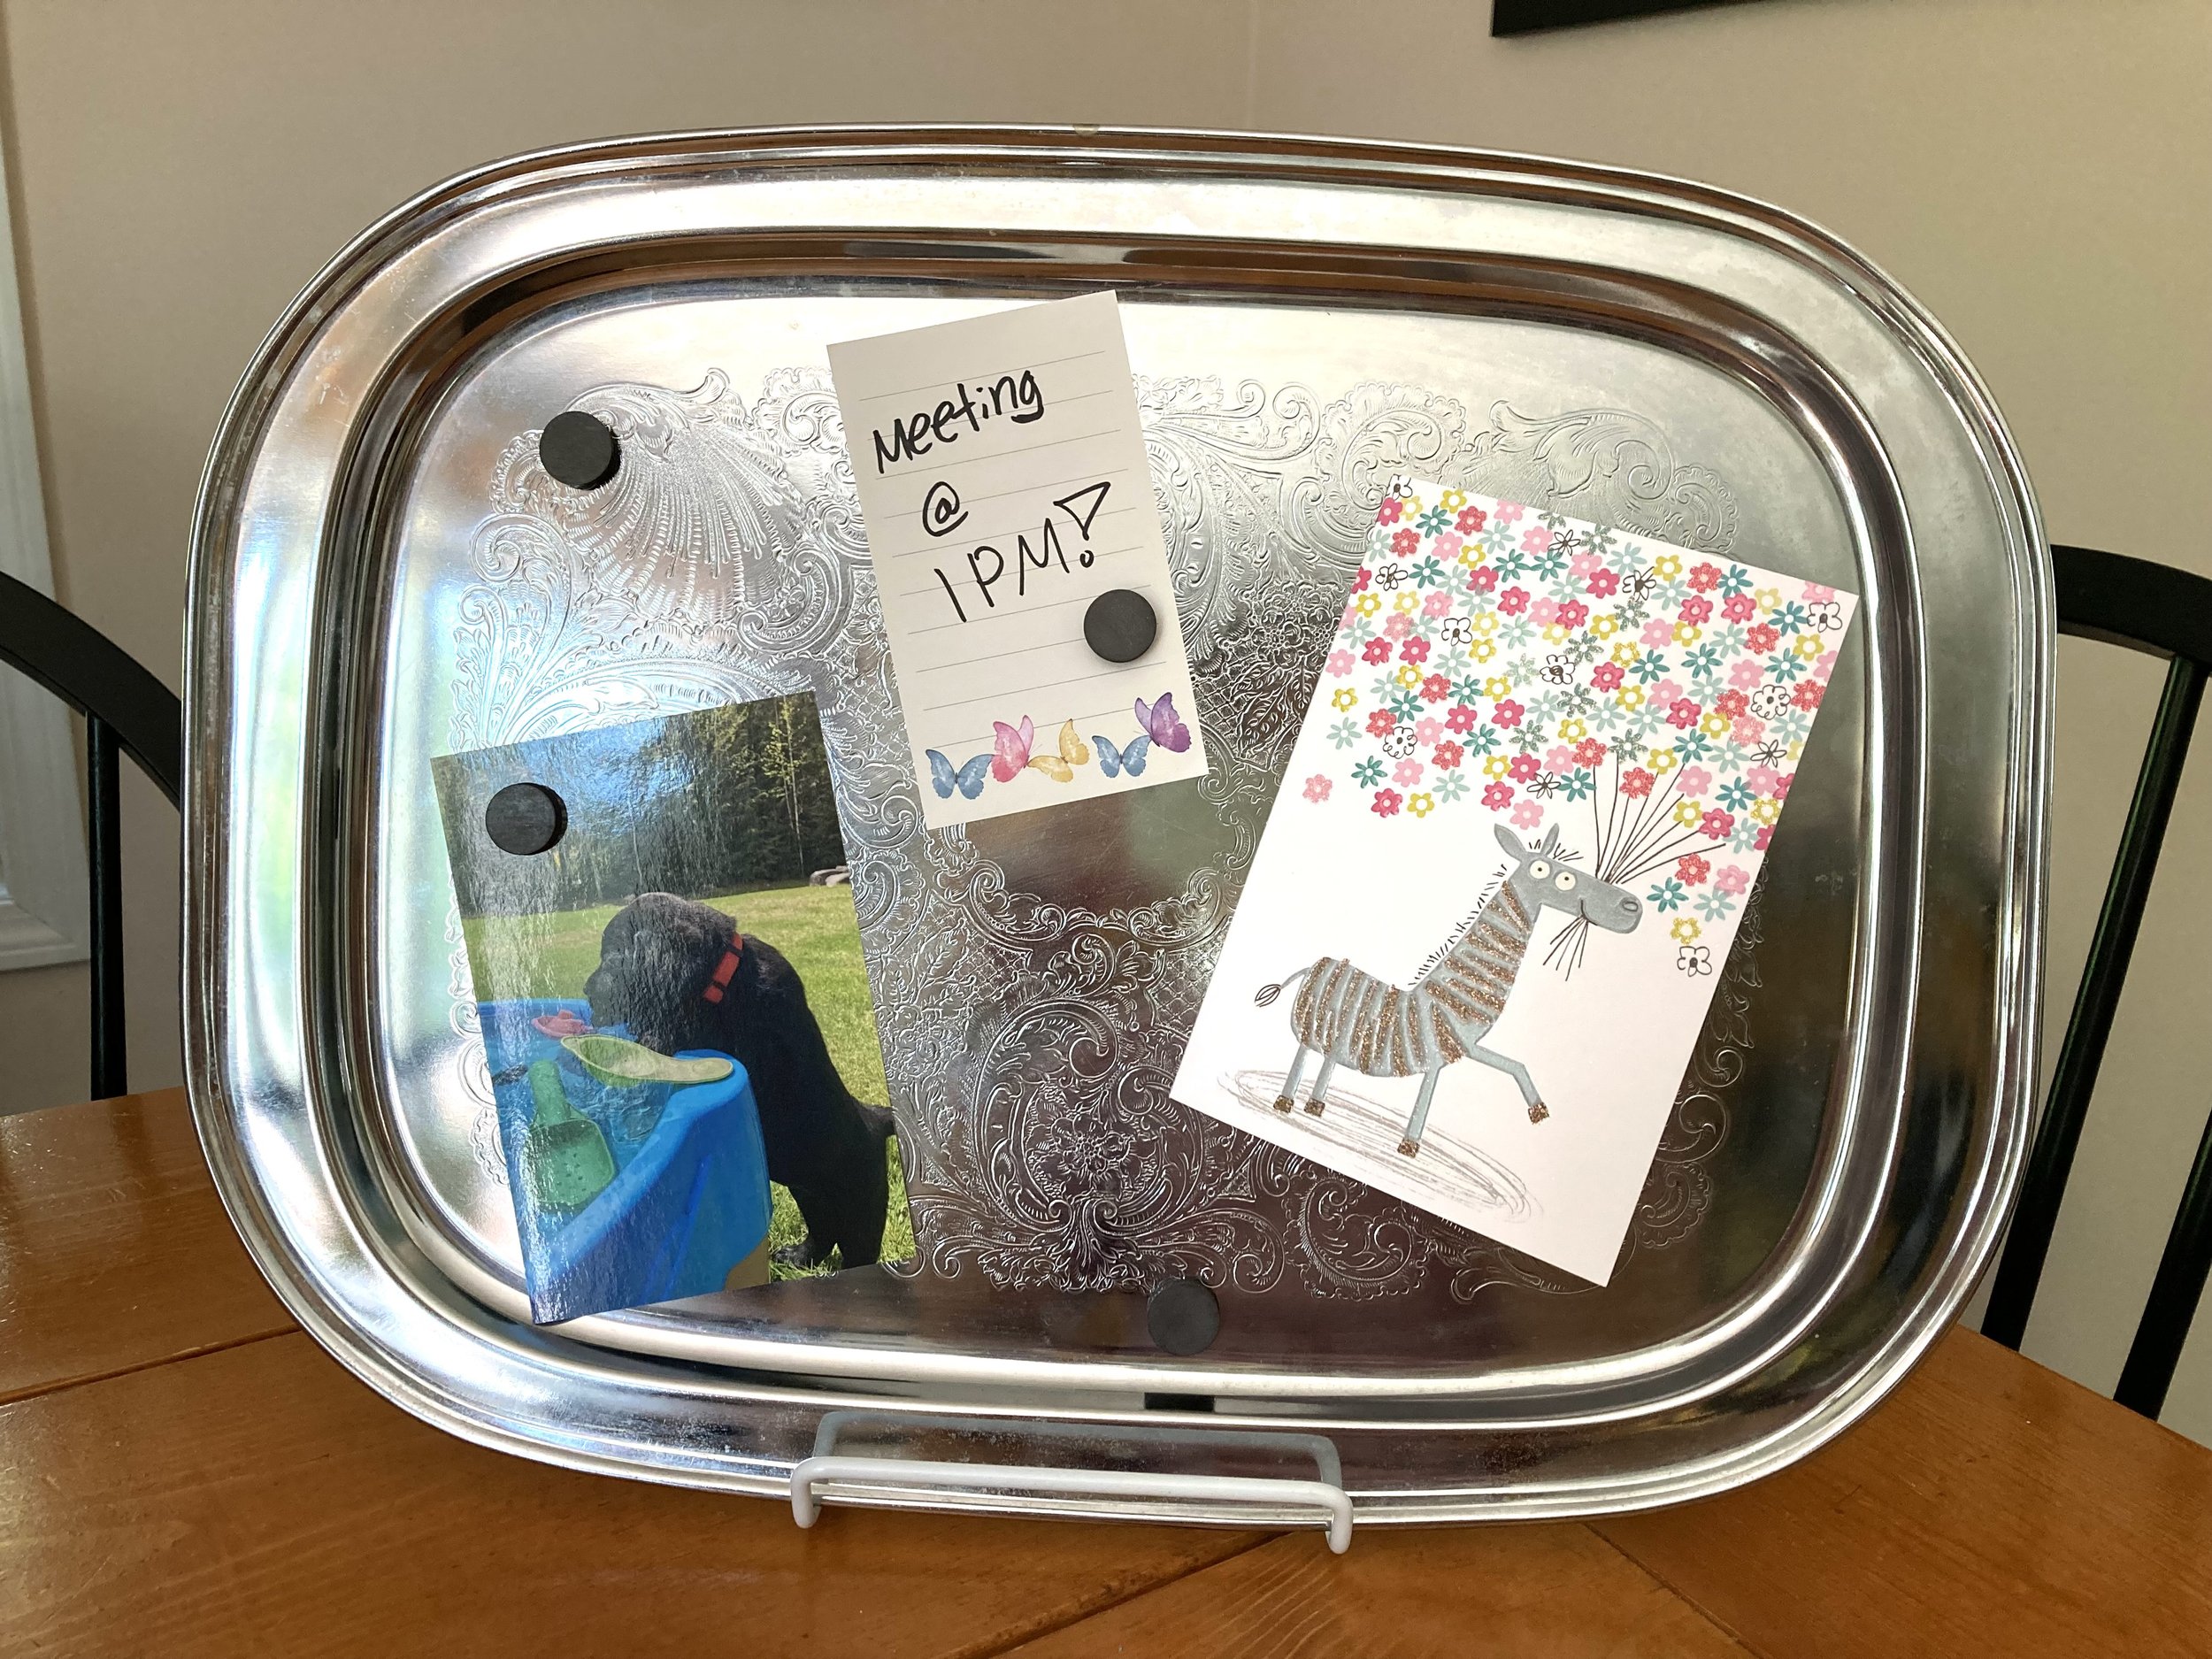
Really the how-to for this project could not be easier! Rest that serving tray on a plate stand that’s big enough/sturdy enough to support it, add some magnets, and BAM, you’re done! I think this project would look so cute on a dresser in a bedroom, a feminine office space, or on a desk nook in the kitchen. It can be used to hold reminders, photos, thank you notes, recipes, mementos, and more.
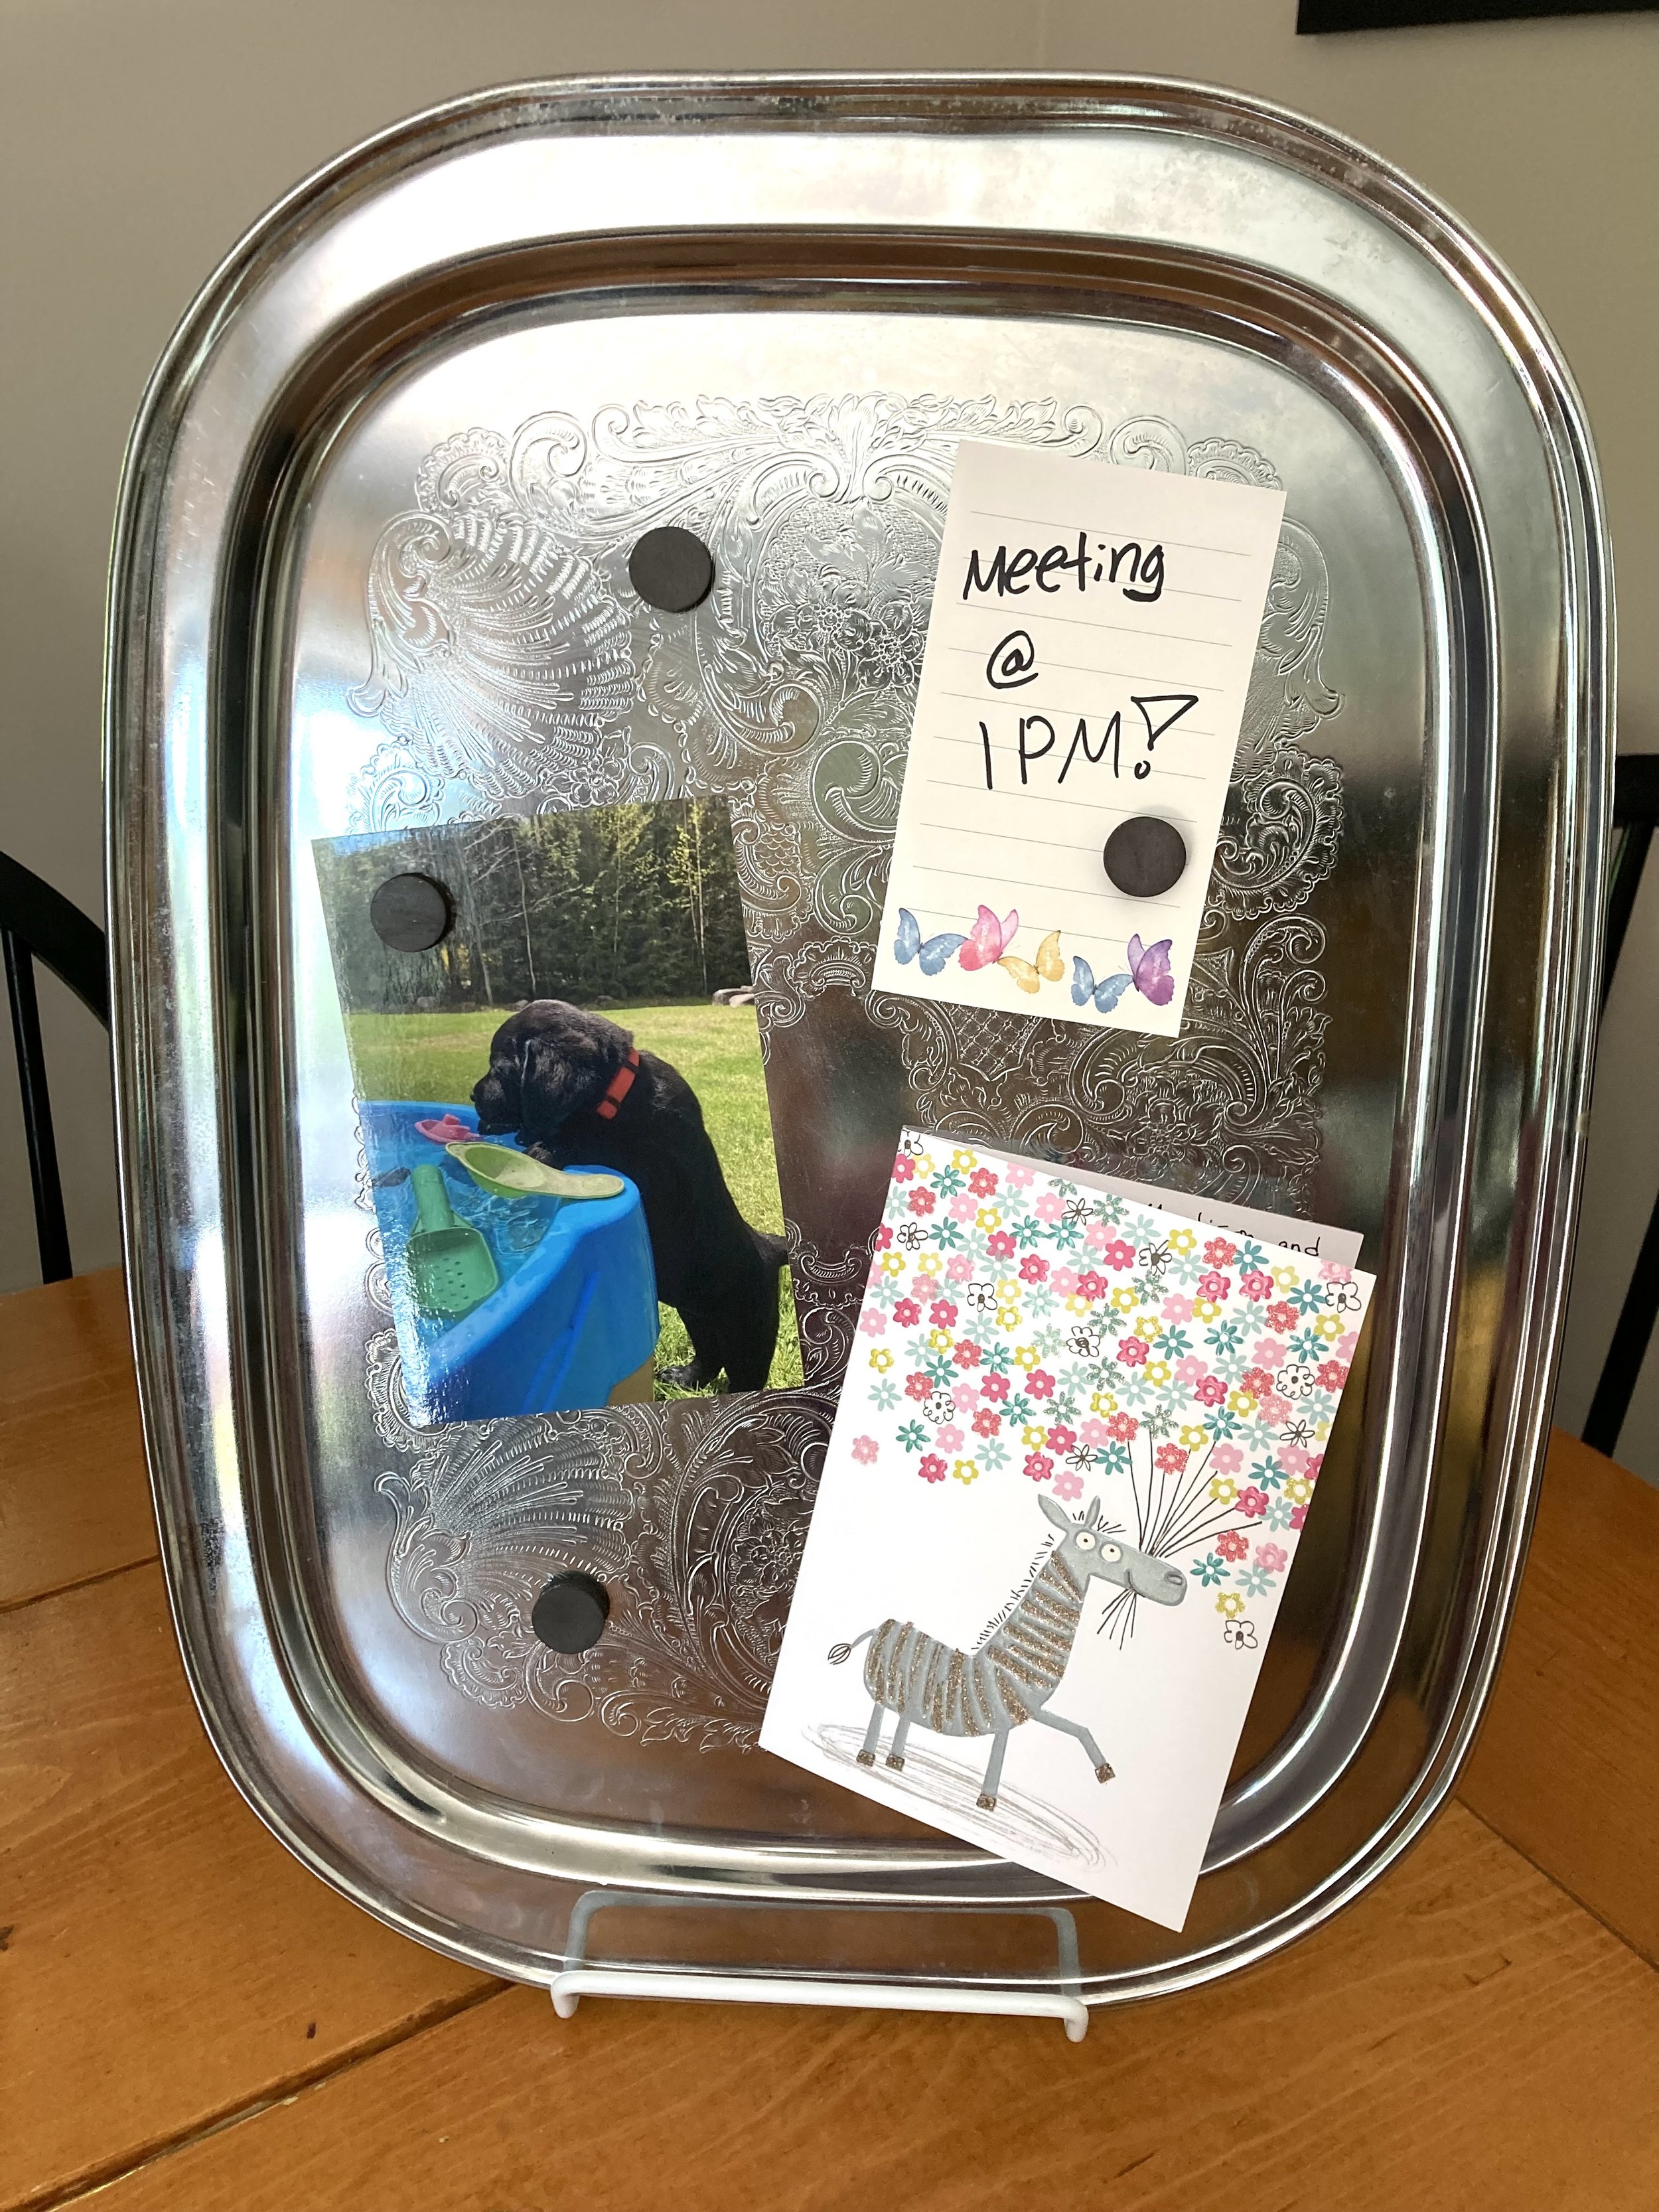
And if the horizontal orientation isn’t working for your space, just turn the tray and you instantly have a vertical memo board!
If you wanted to hang the tray on a wall instead, you could try using a tray hanger. Just make sure to buy the correct size hanger for your tray and make sure it's rated to support the weight of it.
PS - looking for vintage items like the serving tray in this post? Be sure to check out our Etsy Shop for some fun vintage finds! Our inventory is always changing so check back often :)
KEEP UP WITH BIRCH LANDING HOME
| Etsy | Facebook | Instagram | Pinterest | Bloglovin' | Hometalk |
Just wanted to hop on here real quick and share about this book we have been loving for teaching our 4-year-old how to read! | This post isn’t sponsored but does contain affiliate links |
Our 4-year-old has been asking us to learn to read for a little bit now. She sees her older sibling reading and wants to join in too… after researching around I decided to try this book "Teach Your Child to Read in 100 Easy Lessons", which came highly rated.
The book and its format took a little getting used to at first, but we quickly caught on and our little one is EXCELLING at it. The program starts small, and builds on letter sounds one-by-one. They start with the predictable sounds and add annotations to help differentiate different letter sounds and minimize letters that are silent. Your little one builds confidence and knowledge and slowly starts to decipher how words, sentences, and paragraphs are made. Our 4-year-old is now sounding out and reading small paragraphs all on her own, and we’re only a little more than 1/3 through the book! Her comprehension/recall still isn’t quite there (she often needs to be reminded about what the beginning of the paragraph was about by the end of the paragraph), but she is honestly enjoying being able to decipher words all on her own. She’s even starting to read and recognize words and sentences in other books that don’t have the sounds broken down like this book does.
I think this is a great jumpstart to reading if your child is ready and willing. I know it will definitely give our child more confidence and a jumpstart on learning to read before starting Kindergarten. We’ve been taking our time doing the lessons (we only do them 2-3x a week), but I’m really looking forward to see how well she reads by the end!
KEEP UP WITH BIRCH LANDING HOME
| Etsy | Facebook | Instagram | Pinterest | Bloglovin' | Hometalk |
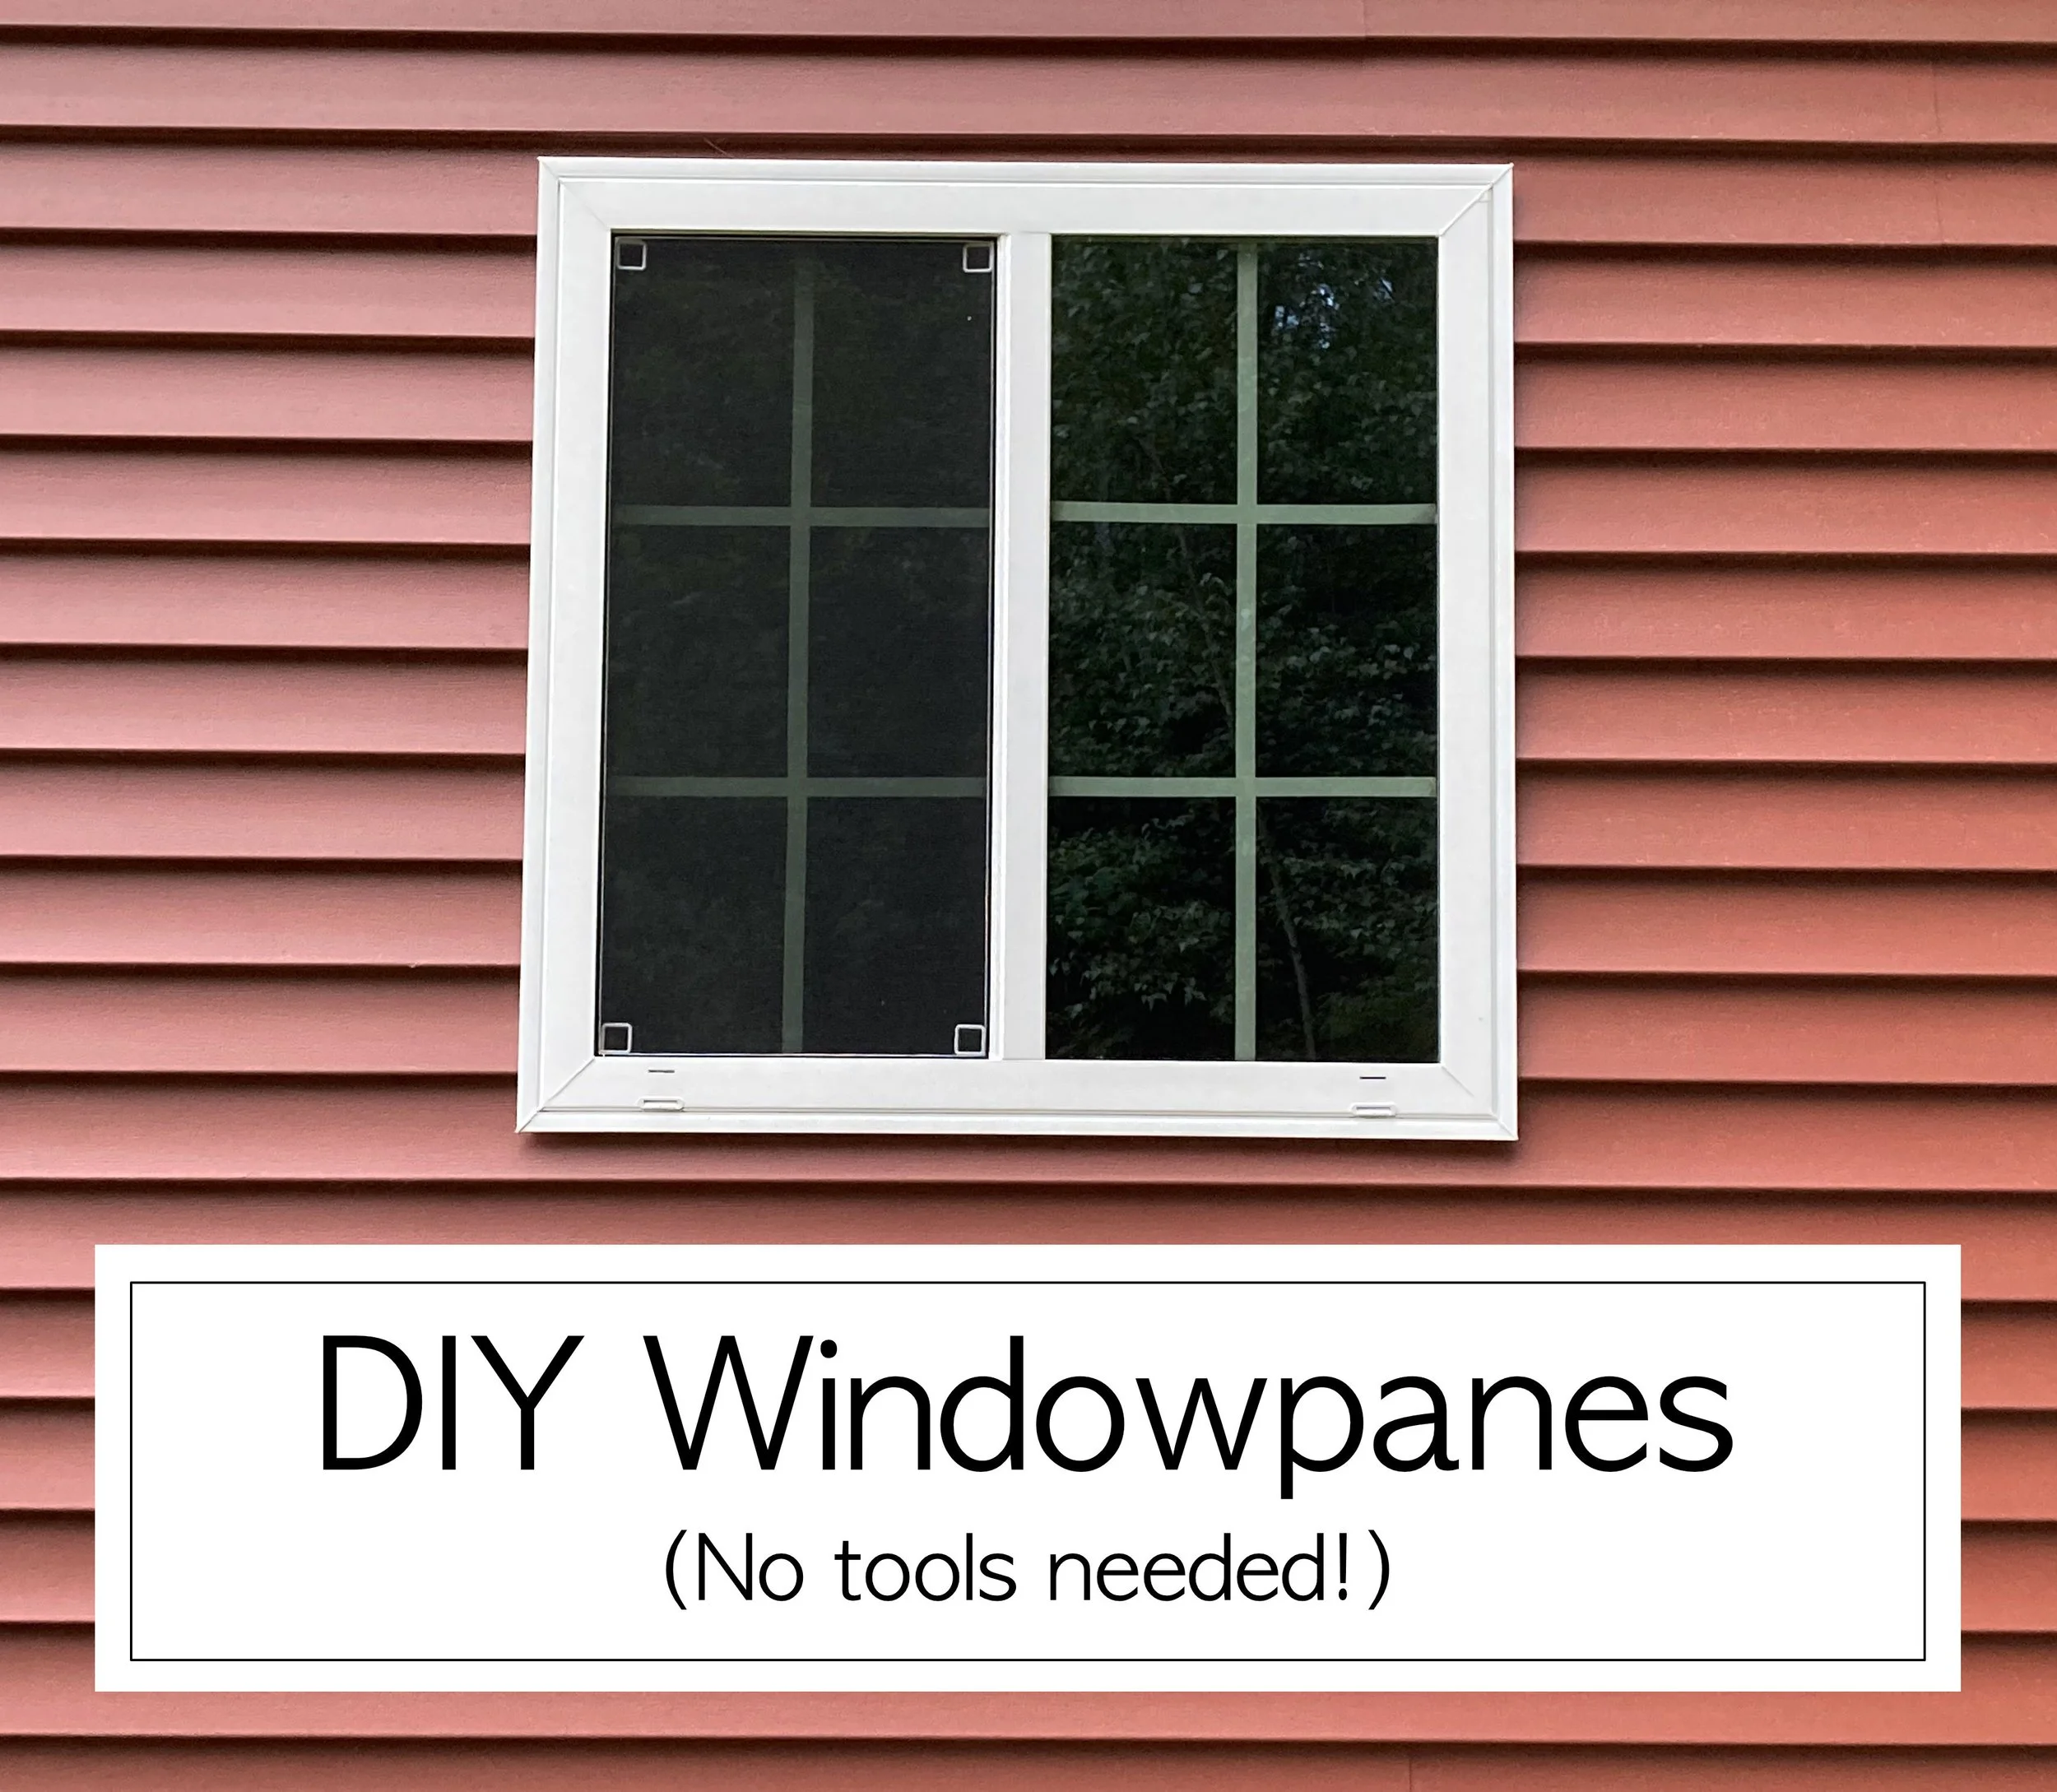
This past fall we had a detached garage built on our property. Being what construction costs are these days we went with basic vinyl windows with no window panes since it was cheaper. We thought “Meh, it’s just a garage - it doesn’t have to match our house perfectly.” But after the garage was done we realized it really was missing something with the basic plain windows, and adding panes was just what it needed. | This post contains affiliate links |
I considered a bunch of different ways to make the panes, including using thin scraps of wood painted and set within the window frame on the inside - but all of that was pretty labor-intensive. In the end I realized using thin strips of vinyl or tape would probably be the easiest - and so that’s what I did!
Using white electrical tape ended up being the perfect solution in our situation - it was to be used in a little-used area, it was the right width, and it was the right color.
- white electrical tape (though if your window sashes are black or a different color you can buy different colored tape to match)
- scissors
- tape measure
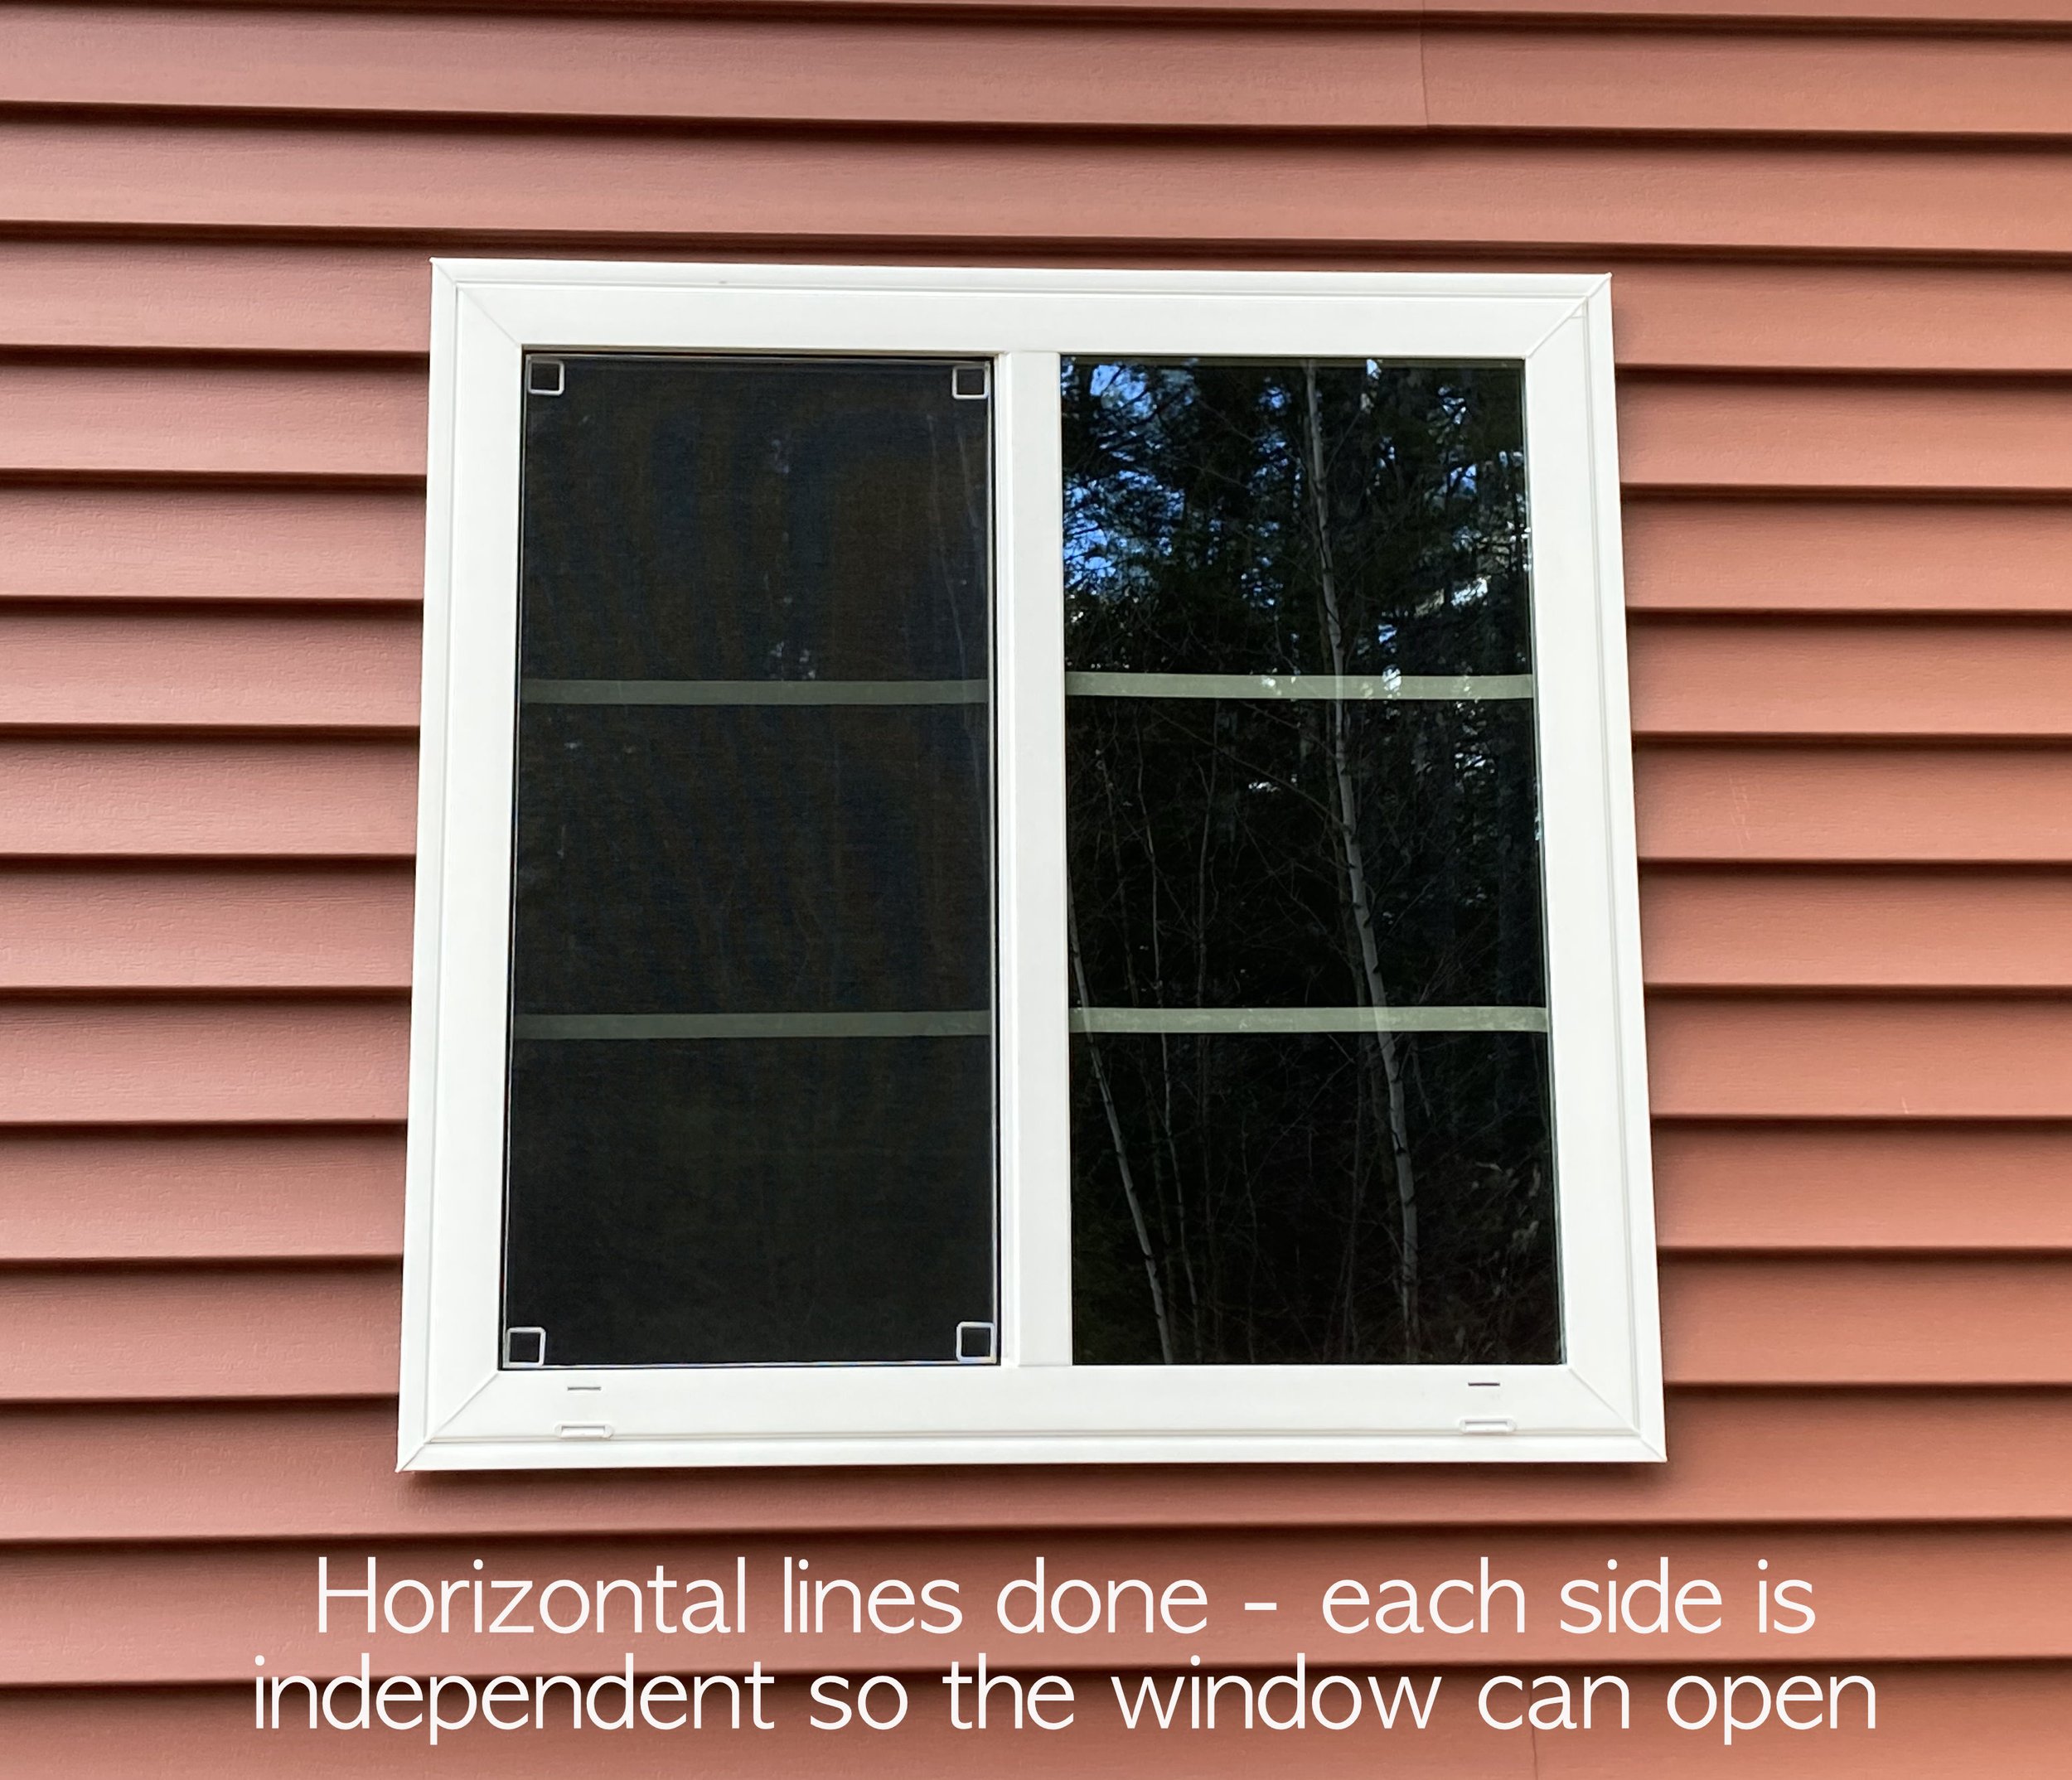
To apply, I first washed and dried the windows well. Then I measured out how to divide the window in an aesthetically pleasing way. For the small windows I did 4 panes across and 3 panes down, and for the big window (not pictured) I ended up doing 4 panes across and 4 panes down.
I measured out my spacing and then made small marks with a pencil on the edge of the window where I was going to place my tape lines, then carefully pulled the tape across the window (I applied the tape on the inside of the window). I did the shorter, horizontal runs of tape first because I found them to be easier and help keep the longer, vertical runs straighter since it was easier to line them up straight with those horizontal reference points.
When pulling your tape lines make sure to go slow and pull the tape out straight. Electrical tape is rather stretchy and it’s easy to distort the lines and make them wonky. Taking your time is key and don’t be discouraged if you have to redo some of the lines! I had to redo a bunch of mine, especially at the beginning while I was getting the hang of it.
TA-DA! In just a short amount of time you now have easy and cheap windowpanes, and the best part was no tools were needed. The style windowpane I tried to mimic was “colonial” in order to match our house, but if you wanted to get fancy you could try laying out your lines in a different style (diamond, prairie, etc).
DISCLAIMER: Please note that the electrical tape I used for this project does have a Prop 65 warning on the package. You may want to do your own research regarding this. We used it since it was a non-living area in a detached garage. I also made sure to wash my hands well after handling it. Use at own risk.
KEEP UP WITH BIRCH LANDING HOME
| Etsy | Facebook | Instagram | Pinterest | Bloglovin' | Hometalk |
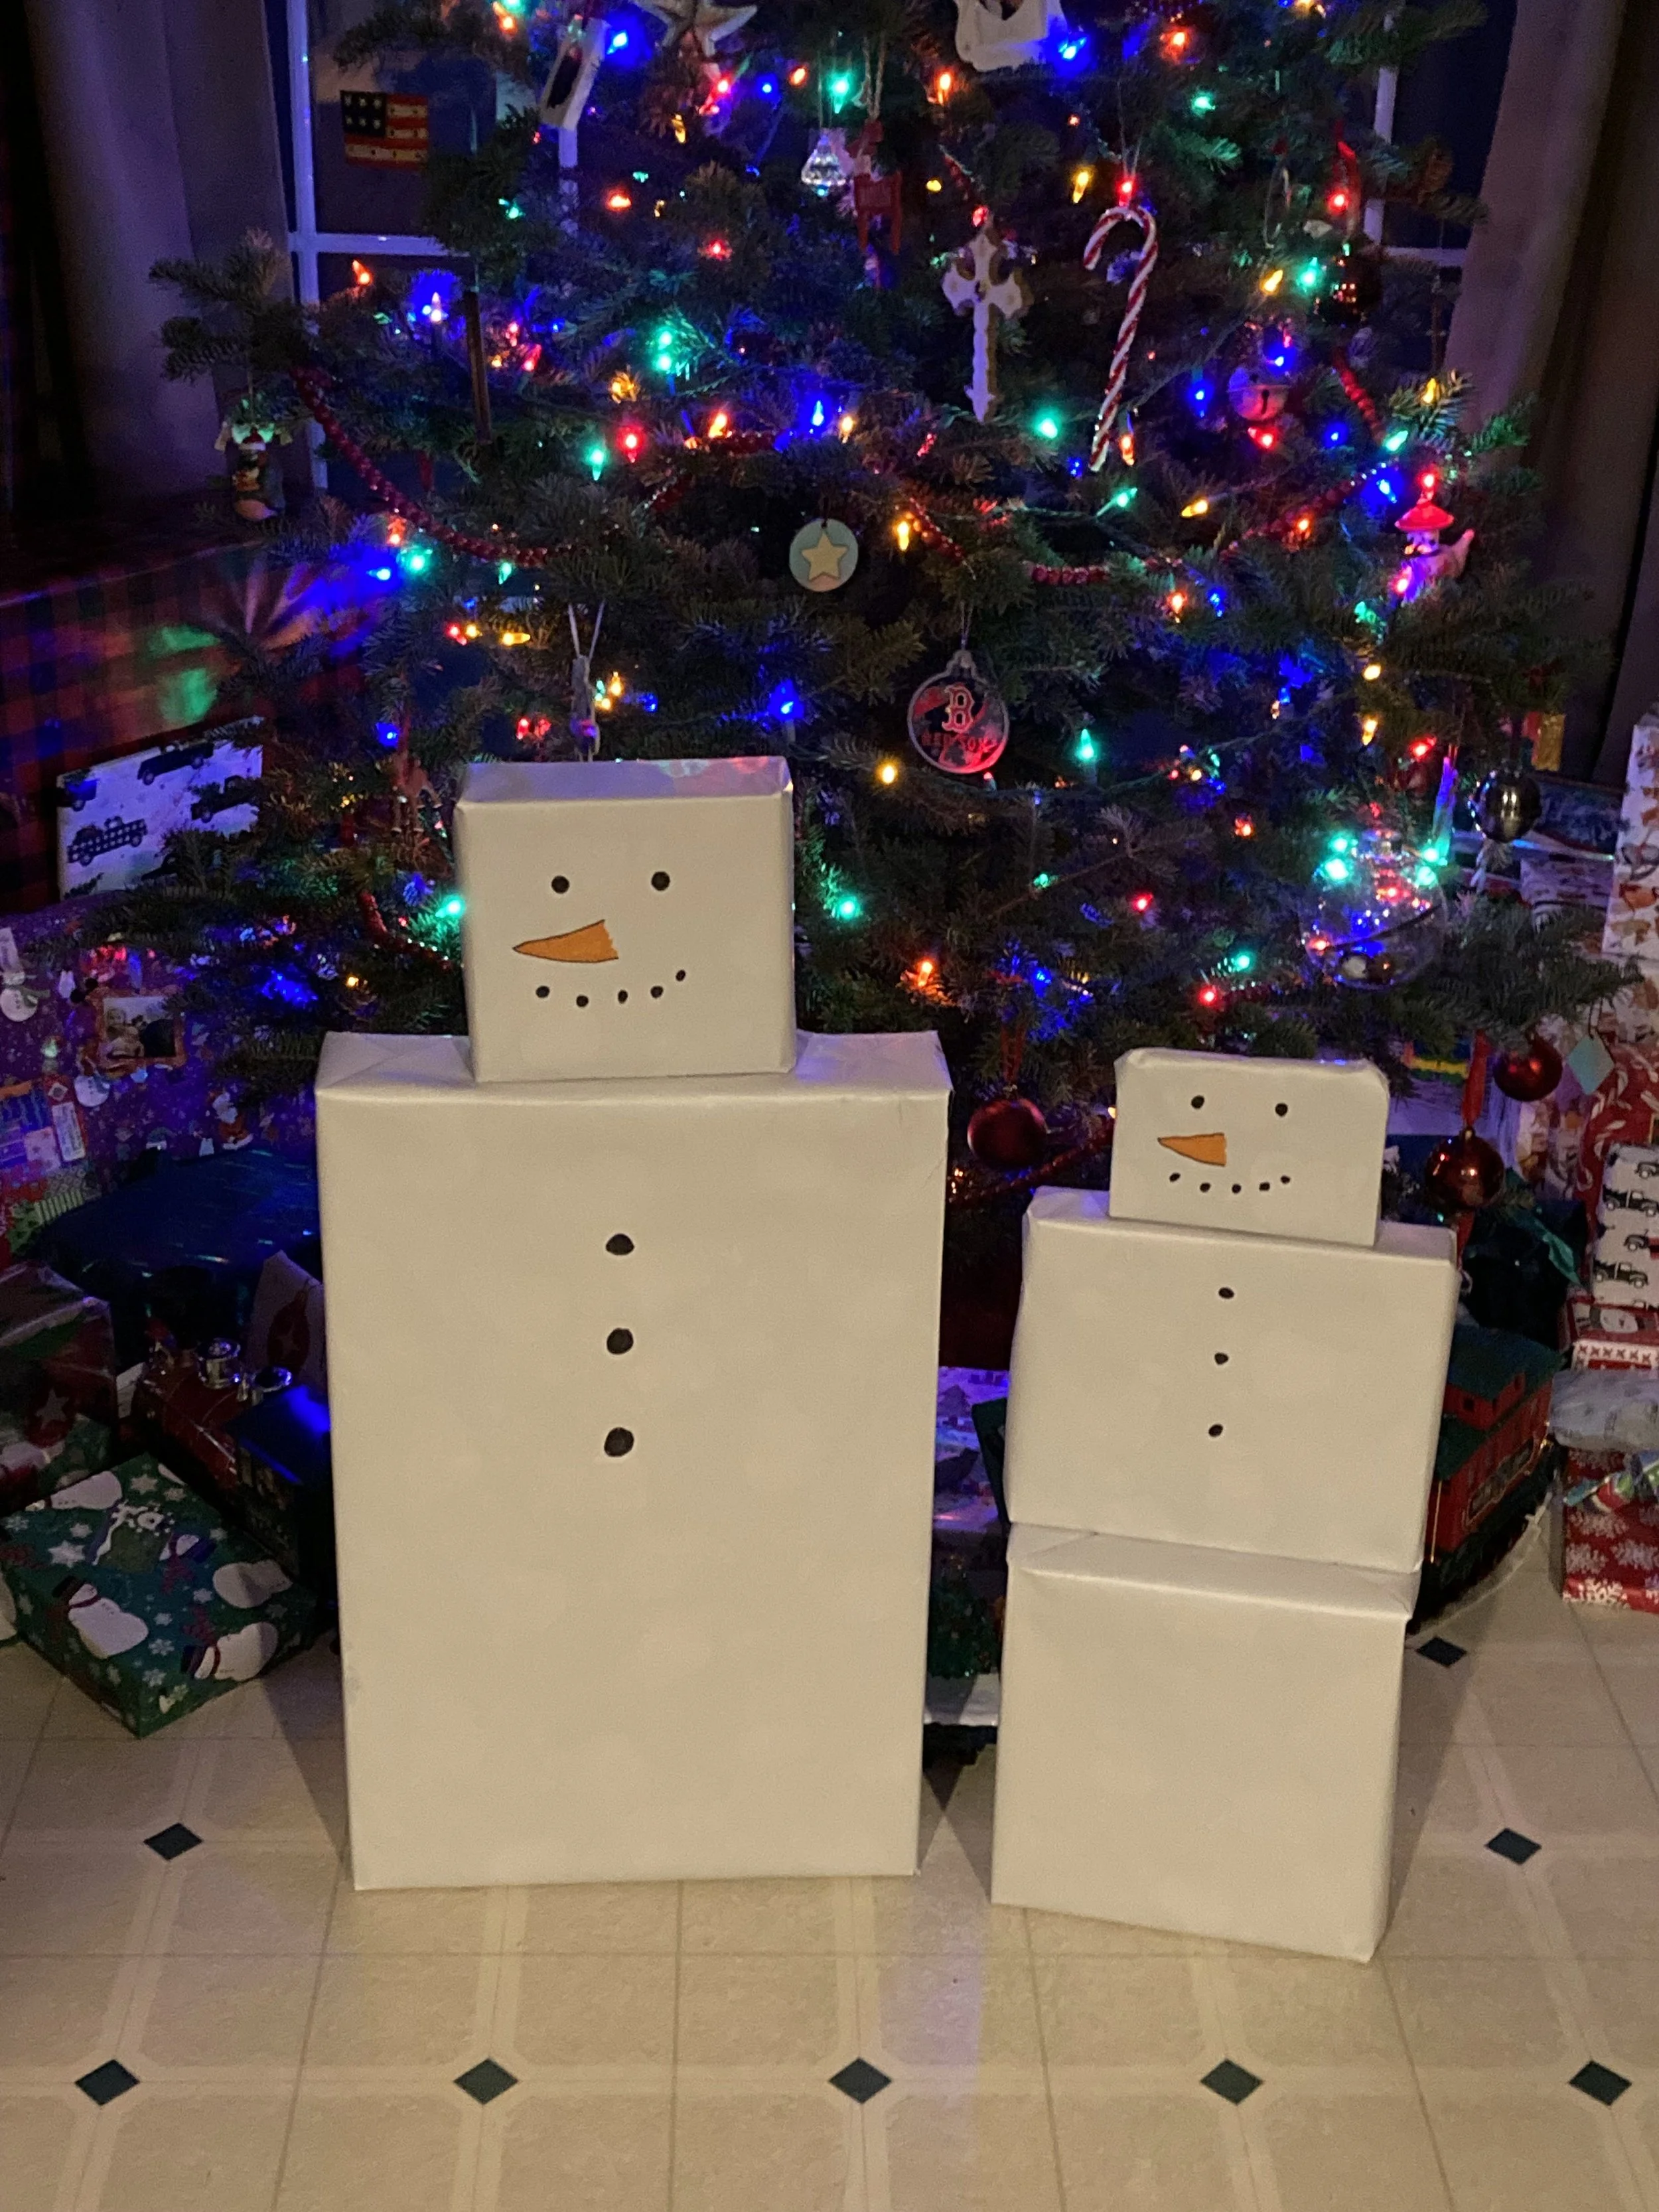
This year I was inspired by an old friend from high school - every year she makes themed “stacked characters” out of her family’s gifts. One year it was all Santas, another year all penguins, etc - complete with accessories! I thought it was such a cute idea and wanted to give it a try myself this year, but on a much simpler and smaller scale. So I opted to make each kid their own “present snowman” and they loved it! I think this has just become a yearly tradition in our family as well. | This post contains affiliate links |
To make the snowmen you don’t need to buy anything special - in fact I just used regular Christmas wrapping paper but wrapped the gifts inside-out so the plain white back of the wrapping paper was facing out! I chose 2-3 gifts for each child that stacked well on top of each other and wrapped them, white side facing out. Then I used a sharpie marker and orange colored marker to draw the face and buttons.
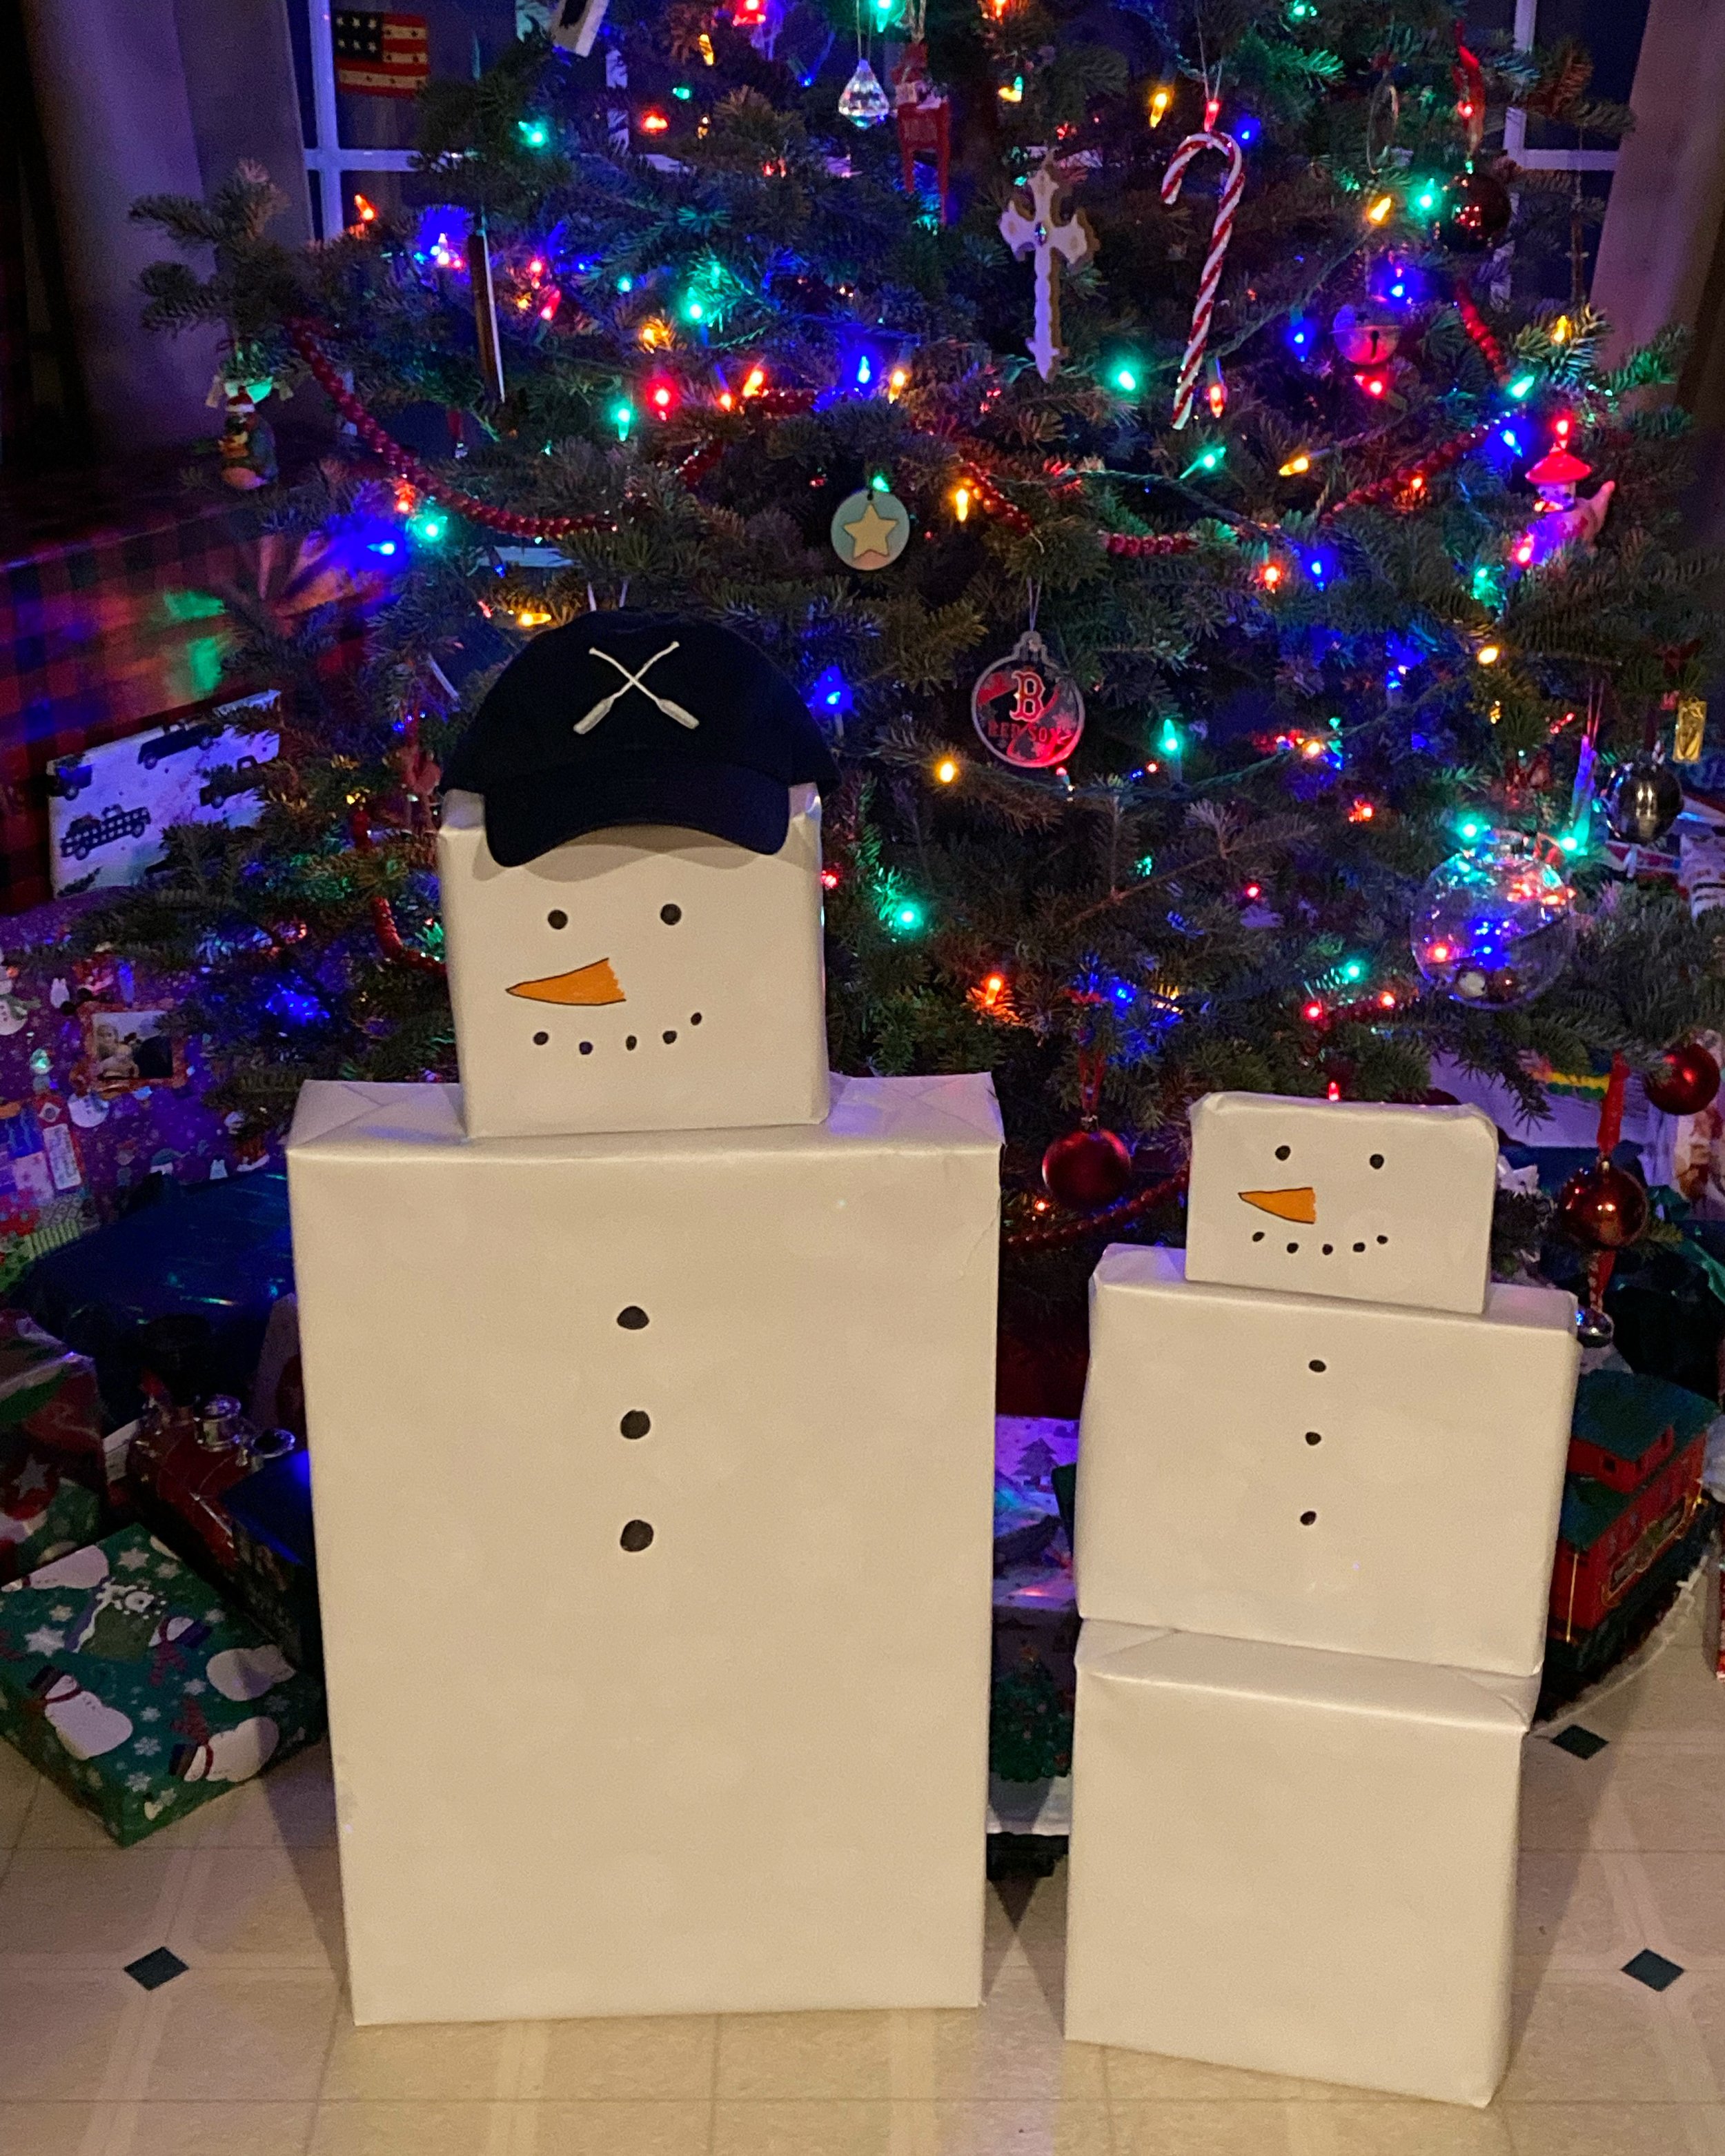
Our oldest daughter recently asked for one of our New England Lakeside Baseball Caps of her own so obviously we had to give her one for Christmas! The hat made the perfect finish for her Snowman and she got a huge kick out of it on Christmas morning.
This was such an easy and fun surprise and I hope you’ll give it a try too and make Christmas morning just a little more magical.
KEEP UP WITH BIRCH LANDING HOME
| Etsy | Facebook | Instagram | Pinterest | Bloglovin' | Hometalk |
Just wanted to share this easy, cute homemade gift idea for anyone with small kids in a snowy climate - DIY Simple Snowman Kits! Since we aren’t able to get together with a lot of family and friends again this year (thanks Covid), we decided to make and send these little kits so our kids could “help” their friends make their own snowmen from afar. | This post contains affiliate links |
Really there isn’t too much to explain for this project — we gathered some basic materials, painted them, and then packaged them together before including a little note from the kids.
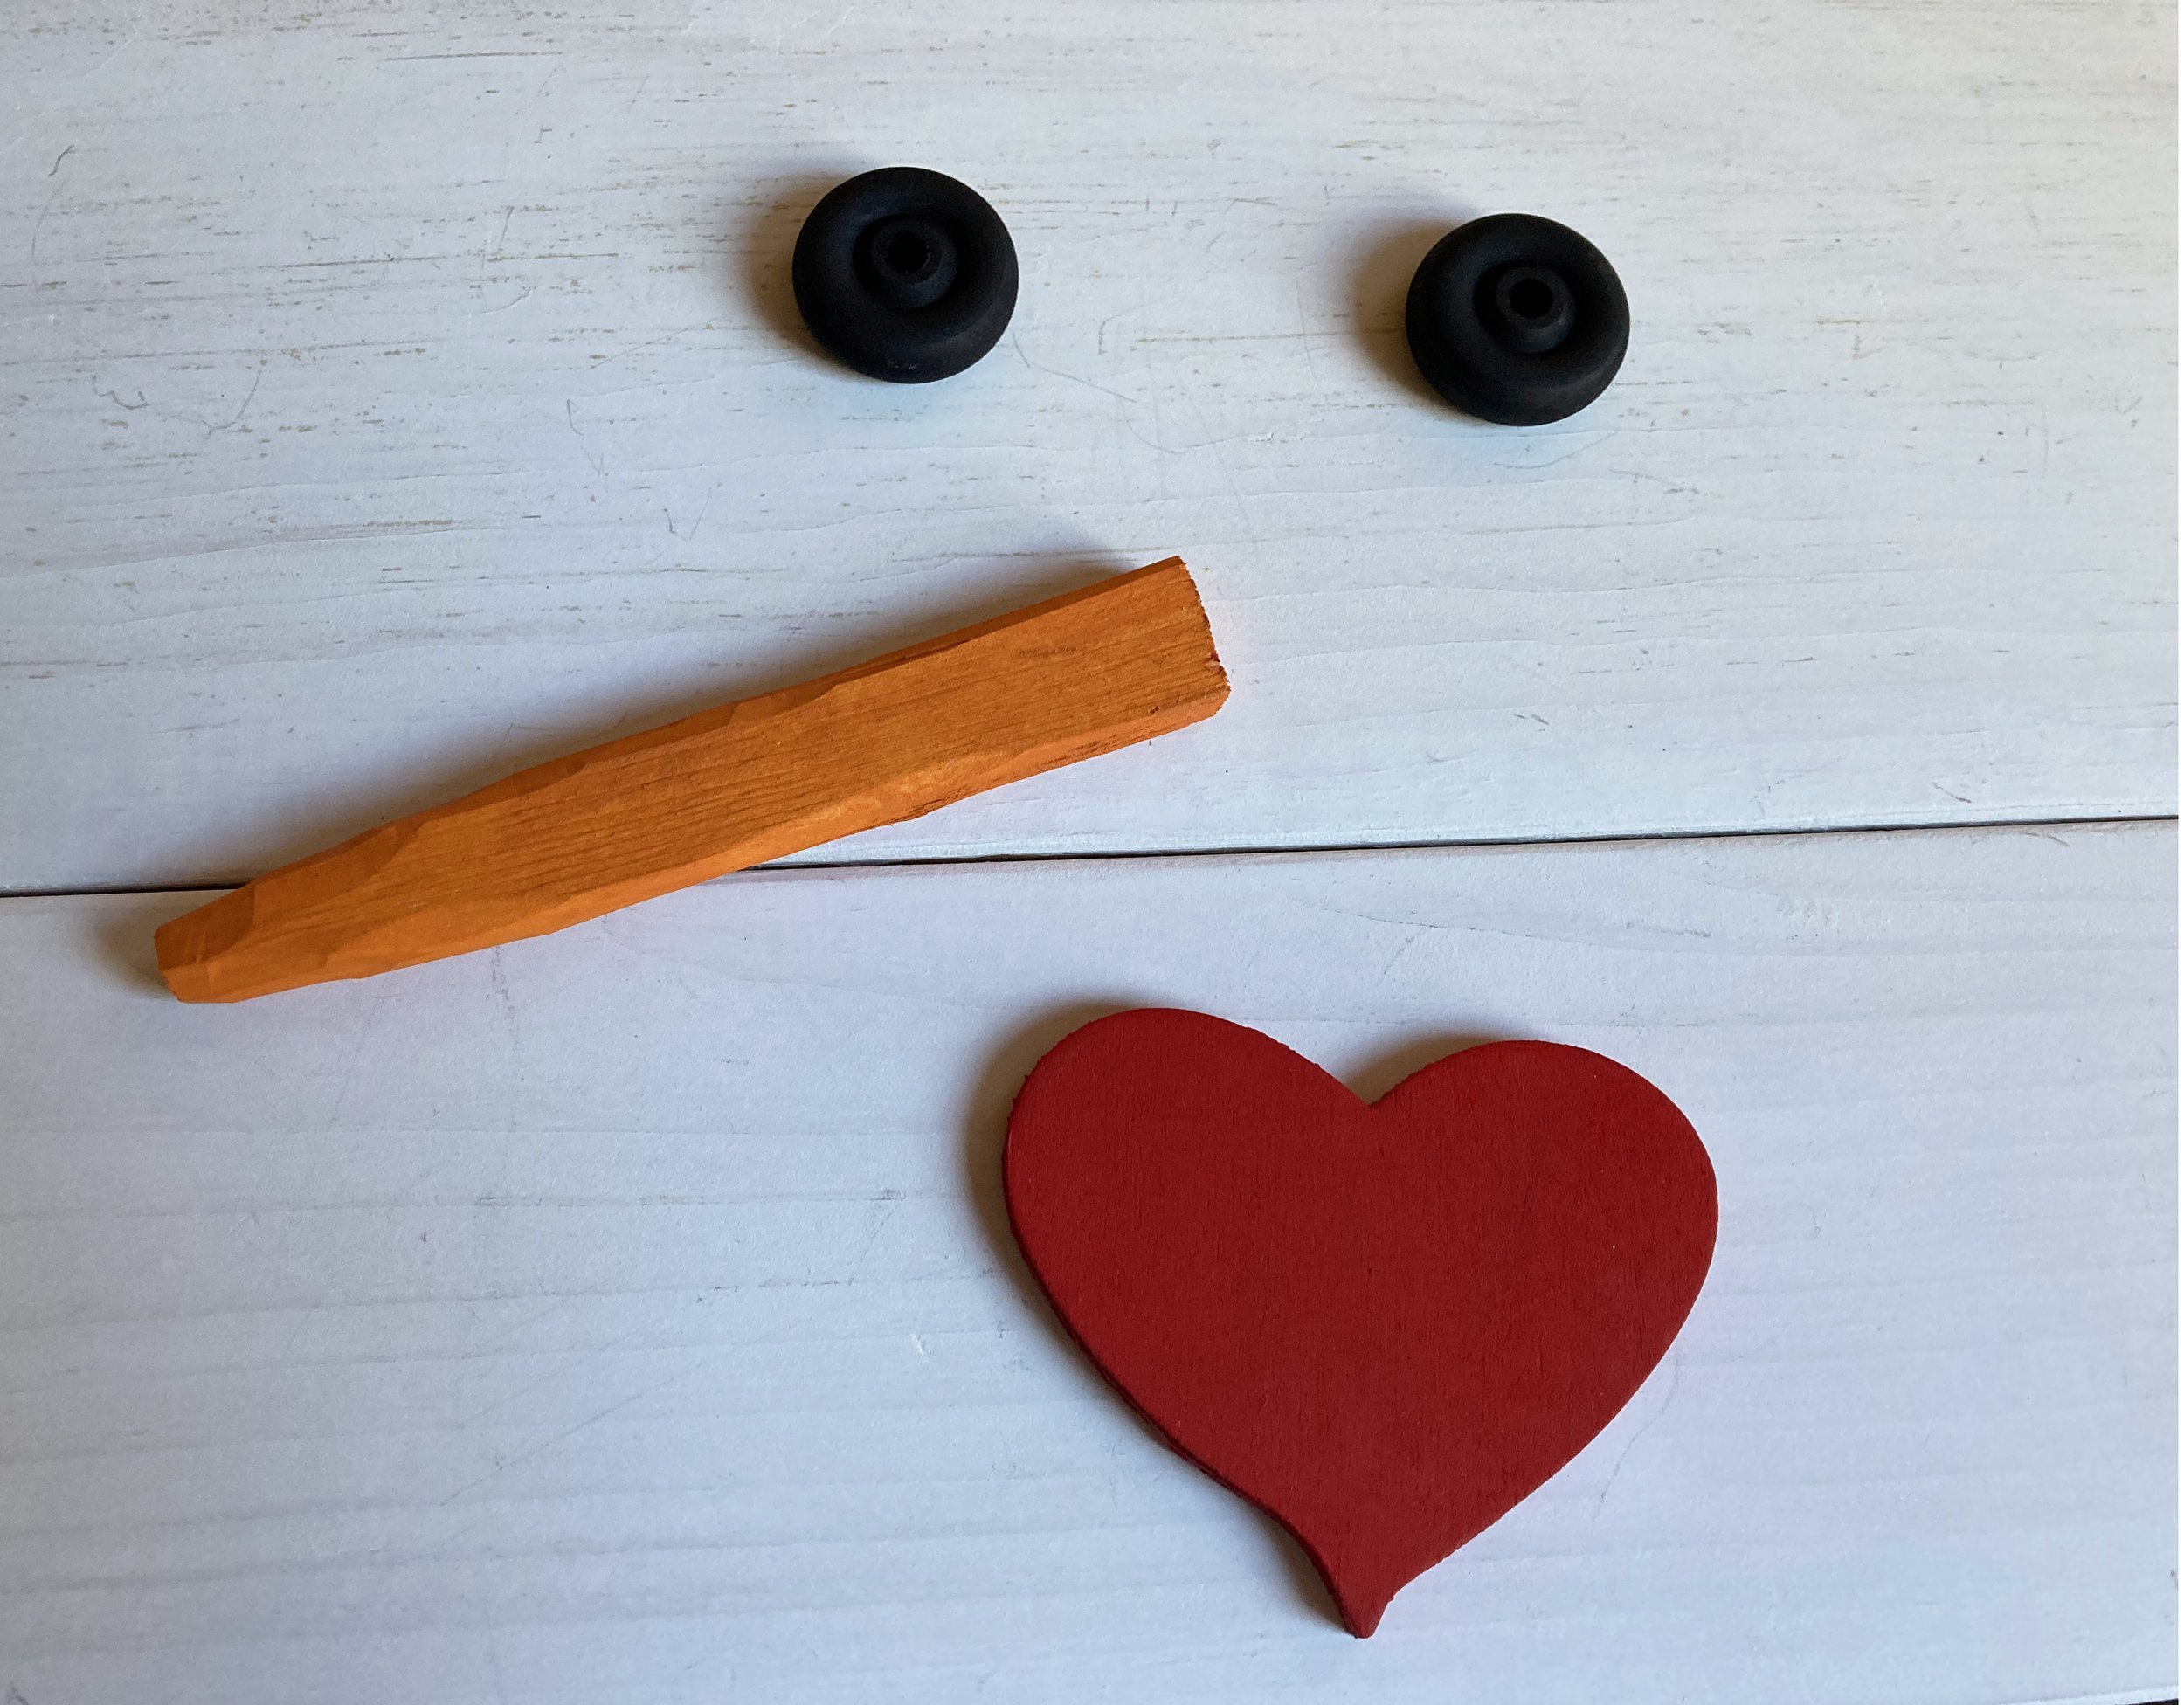
EYES: For the eyes we used wooden toy wheels from a craft store (similar ones linked) that we painted black - but you could use just about anything, including painted rocks or scrap wood.
NOSE: For the nose I whittled down some pieces of scrap wood into a rough carrot shape, then painted them orange.
HEART: For the hearts we glued together two layers of pre-cut balsa wood hearts we had picked up at a craft store (similiar ones linked), then painted them red.
BUTTONS (OPTIONAL): We did not include buttons in our kits but you can include painted rocks, small pieces of scrap wood, or actual large buttons in your kits to be used as buttons.
GIFT BAG: We packaged our kits up in some organza gift bags I had on hand (similar ones linked), but you could wrap them up in a number of ways including using a piece of fabric that could double as a scarf!
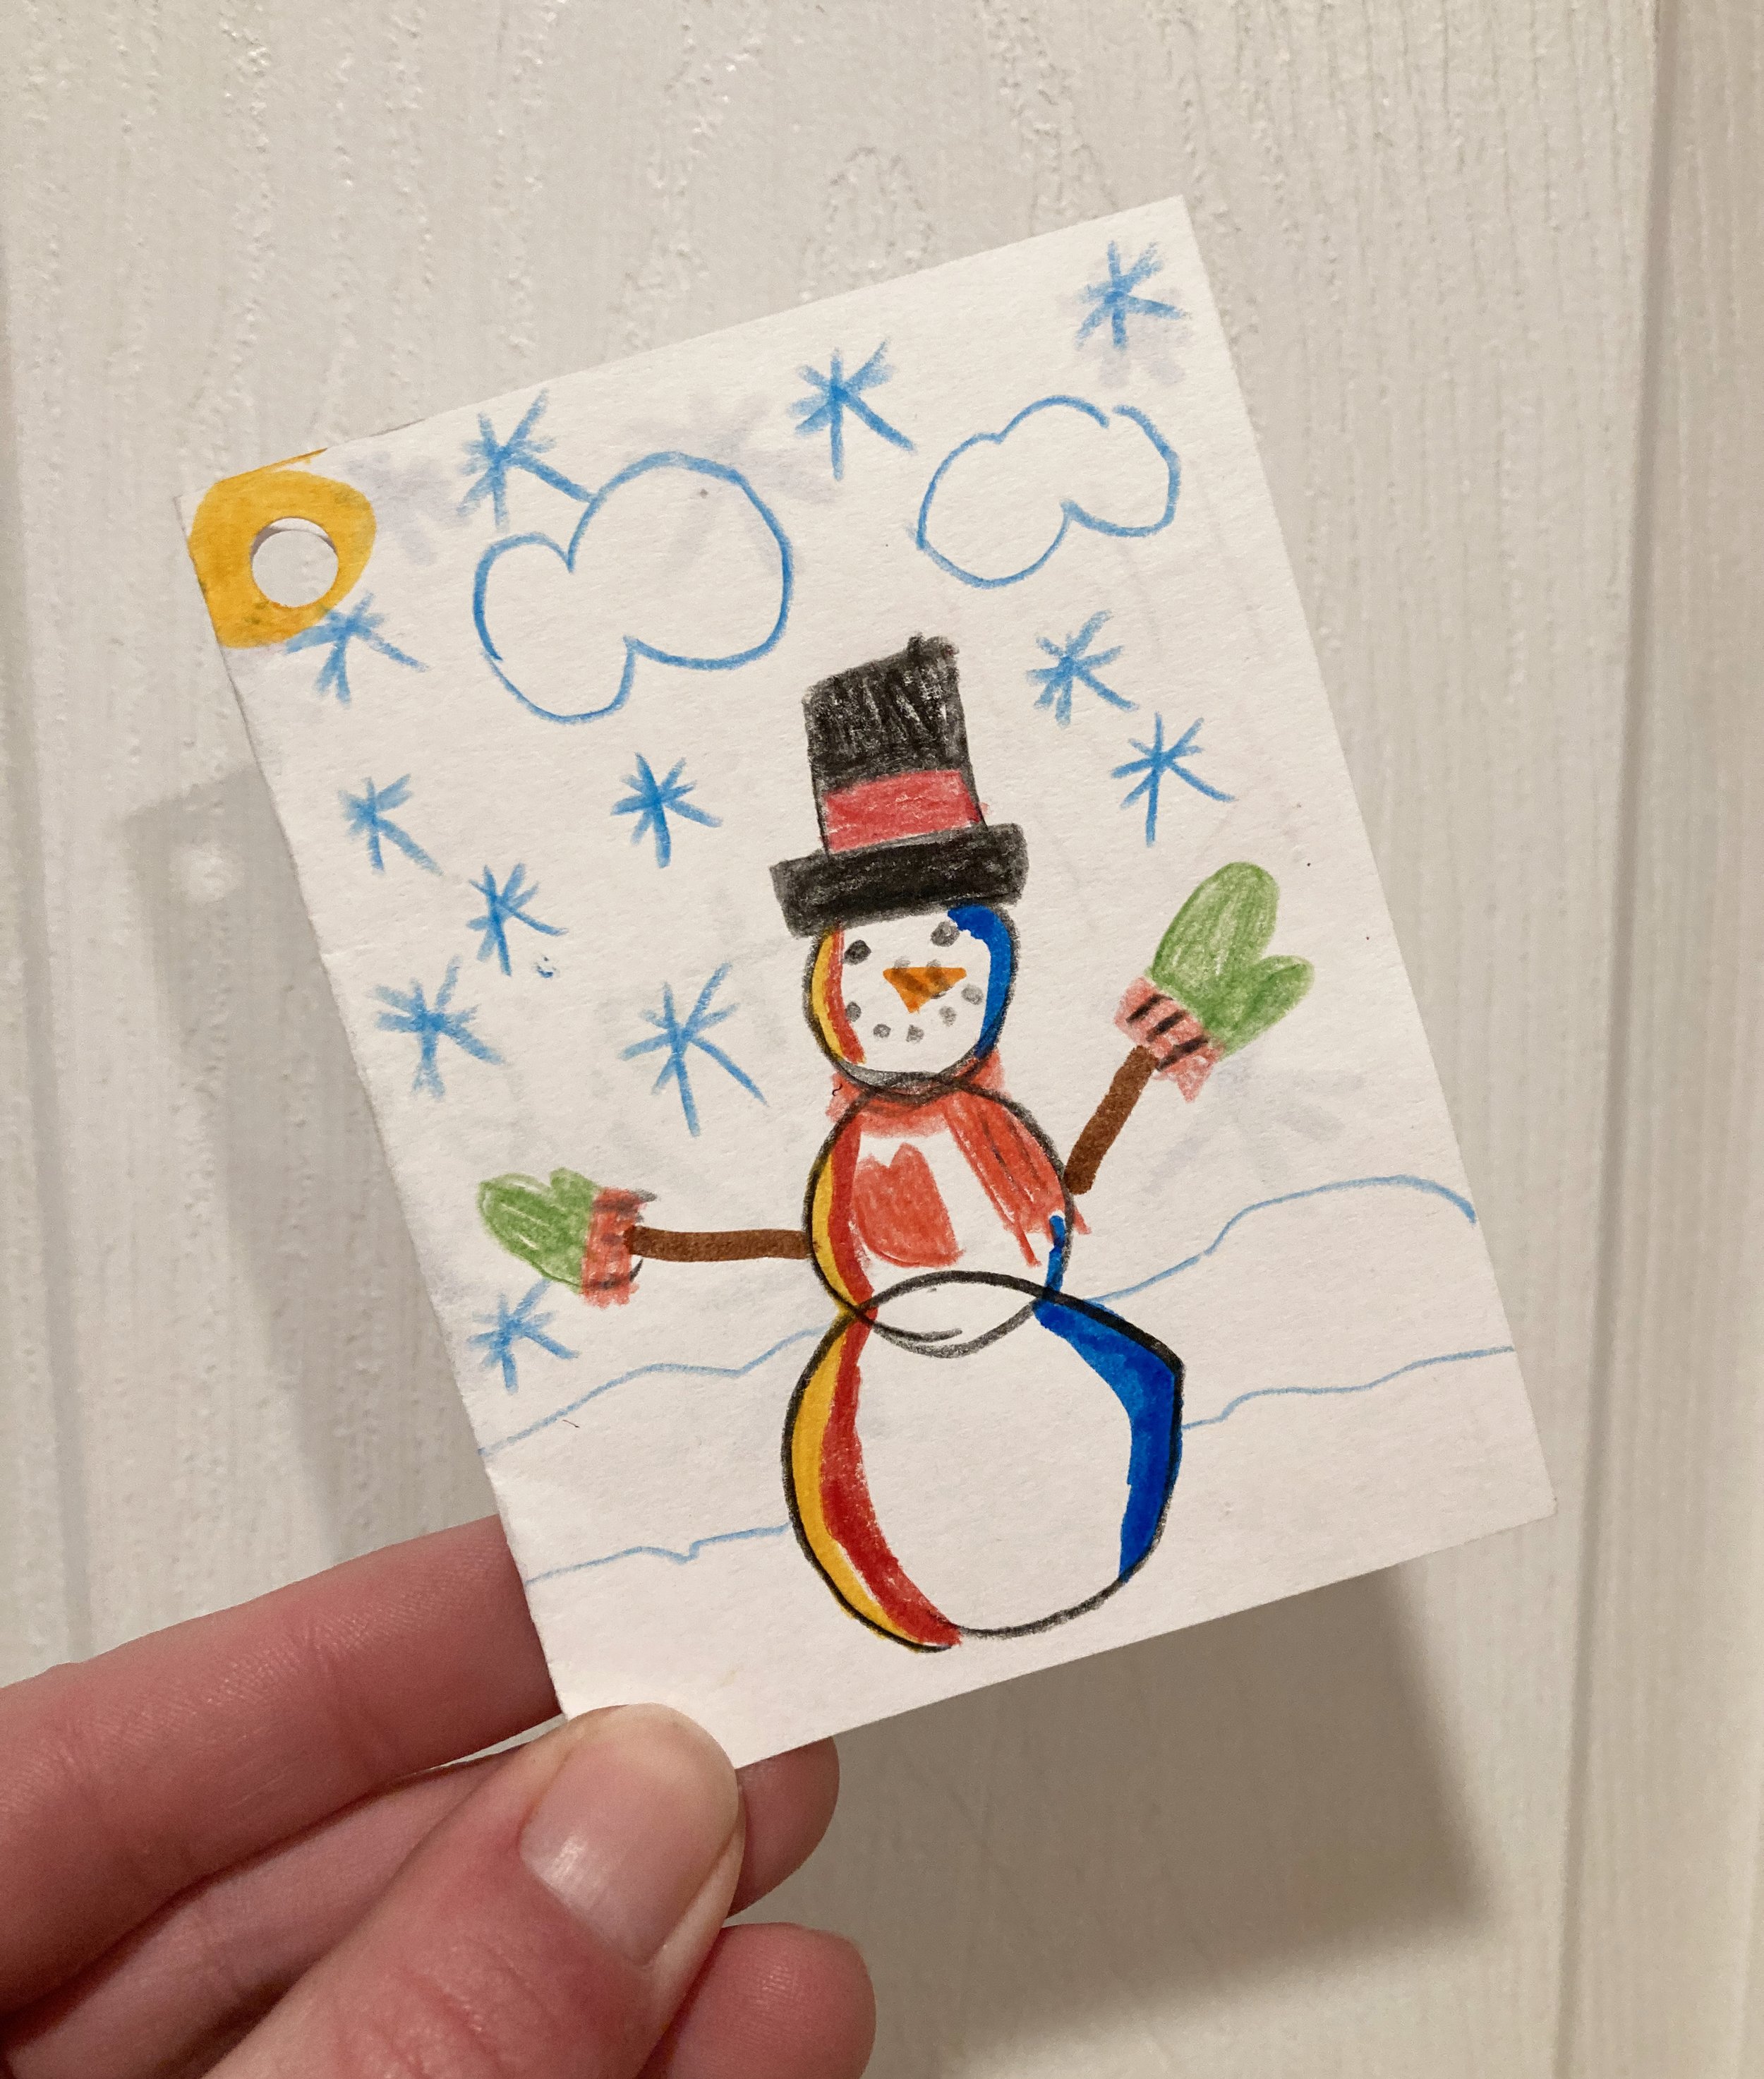
Then I had the kids make the gift tags and write notes to their friends - they loved coming up with special drawings and messages! Our friends really enjoyed getting these kits and I’m excited to see how their snowmen turn out. Hopefully these Snowmen supplies will be something they can reuse for future winters too! Just add snow… ;)
PS - I have a few kits left over listed for sale in my Etsy Shop if you would like to check them out. Just click the button below to shop:
KEEP UP WITH BIRCH LANDING HOME
| Etsy | Facebook | Instagram | Pinterest | Bloglovin' | Hometalk |
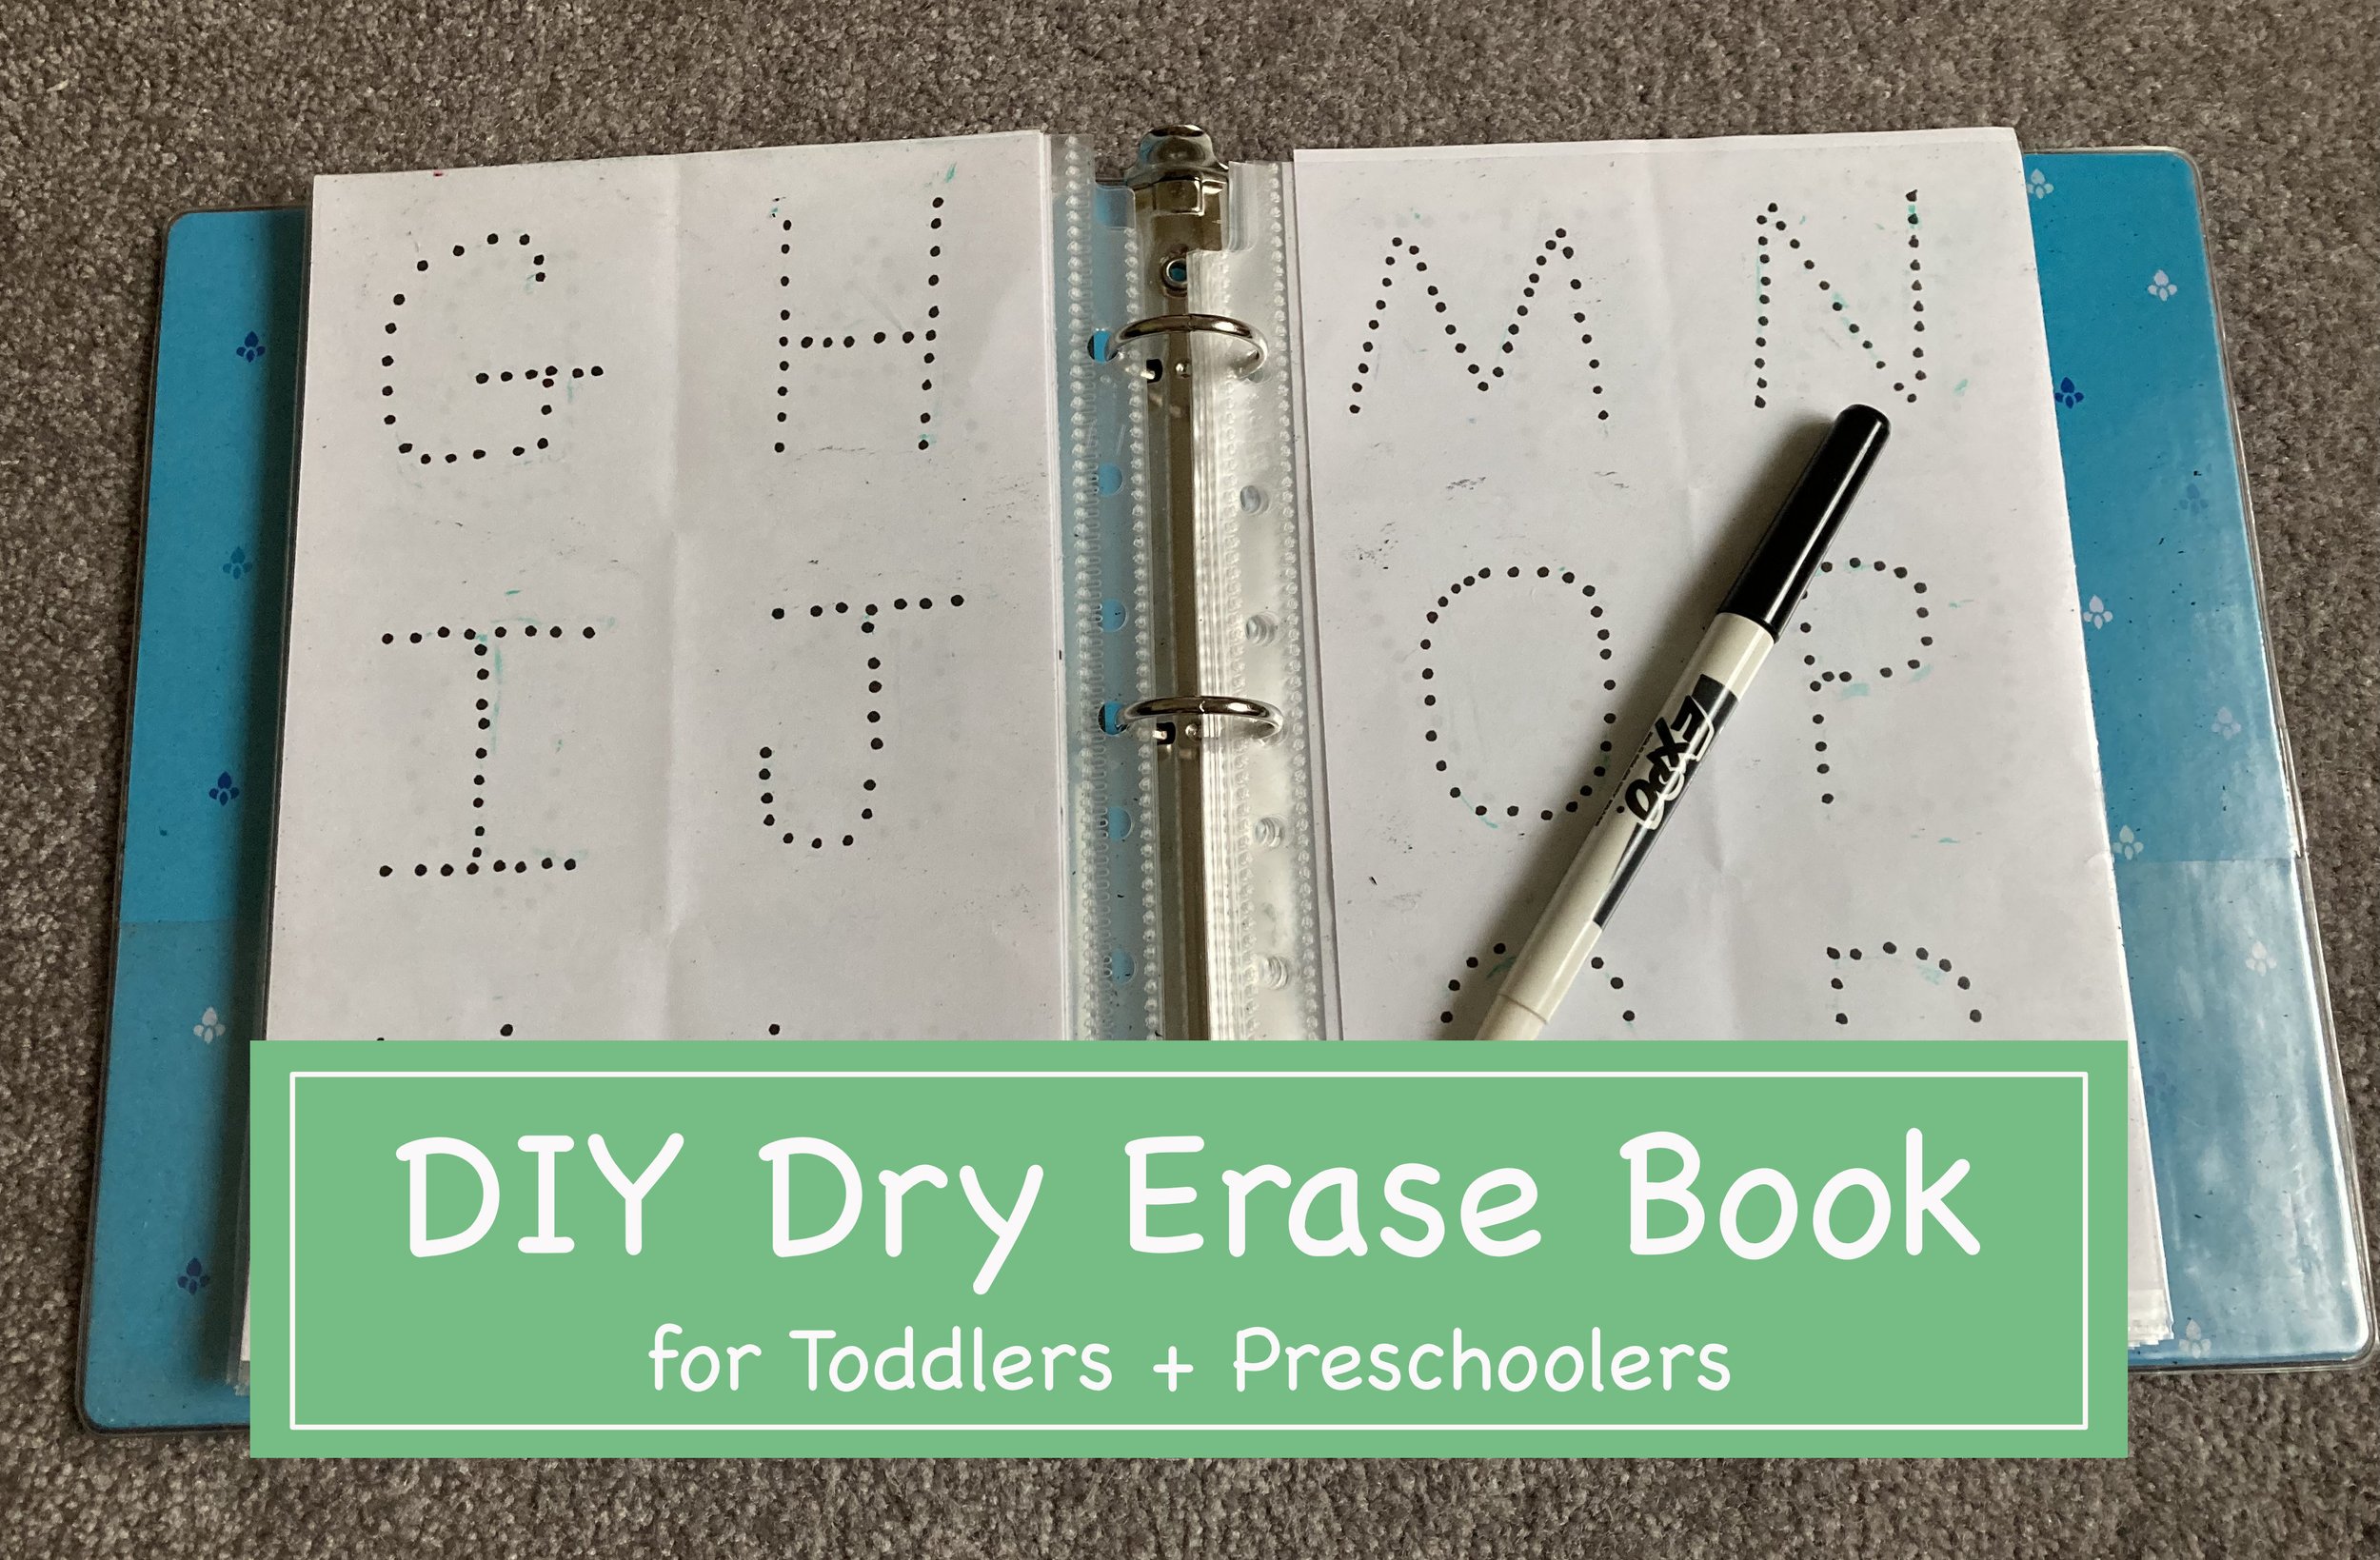
I was just refreshing the little books and toys we keep in our car, when I realized I had never shared about this Dry Erase Activity Book I made for our first kid years ago (and now our youngest uses it). It was incredibly easy to make and tailor to each child with what stage they were at/needed to work on. Here’s the super easy how-to, hopefully it will inspire you to make one yourself! | This post contains affiliate links |
How-To:
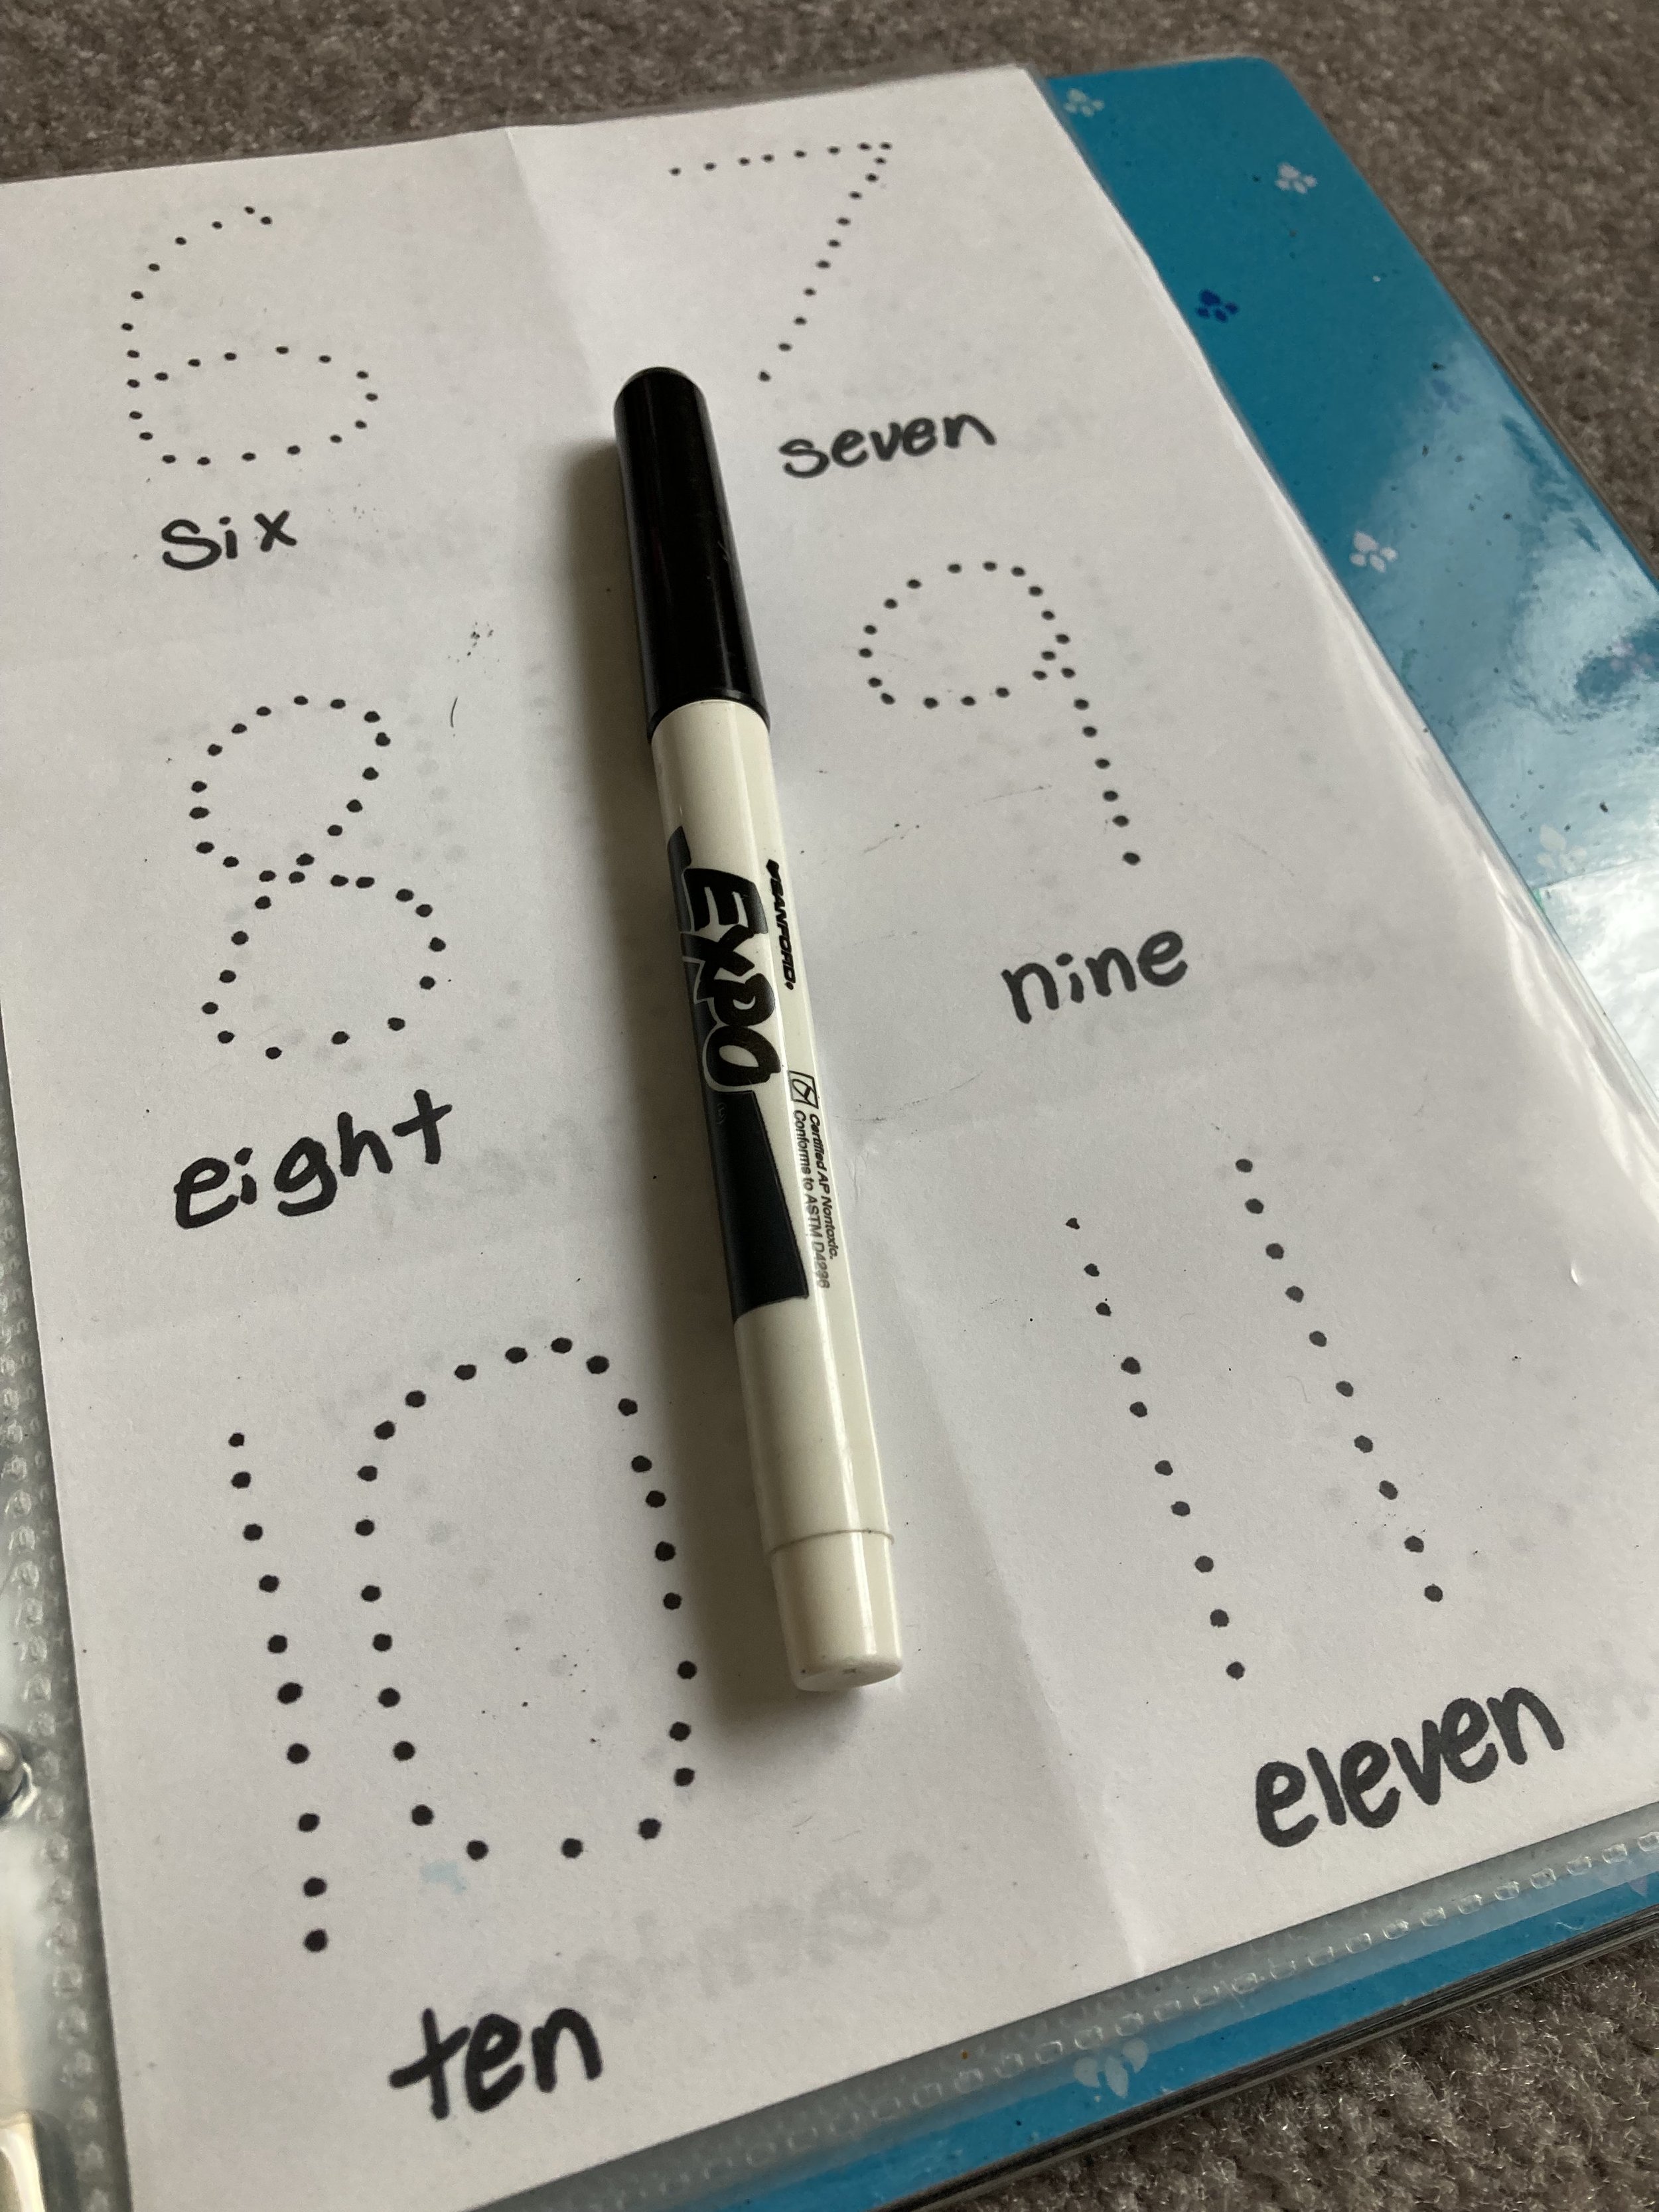
Really the how-to could not be easier! All you have to do is cut the computer paper in half to make it the correct size to fit in the sheet protectors, and then create your worksheets however you would like. I used dots for the kids to trace as well as made some free-draw pages and pages for them to practice writing out their whole names. In the pocket we keep a dry erase marker and some folded up paper towels to wipe the pages when they’re done.
We love this as a car toy and activity to do while the oldest is doing soccer practice, etc. And as your child grows you can update the pages with anything - math problems, maps to label, spelling practice, etc. Have fun tailoring it your kids and their age groups - we love that this can grow with our kids.
Page Ideas (for both young kids and older kids):
tracing shapes
tracing letters (uppercase and lowercase)
tracing numbers
writing name (all uppercase as well as with lowercase)
free draw pages
matching
math problems
spelling practice
labeling maps
labeling planets
draw features (eyes, hair, etc) on a blank face
draw details on a landscape photo
come up with your own - the possibilities are endless!
This Car Seat Organizer where our DIY Dry Erase Activity Book lives (along with other various car toys/books).
KEEP UP WITH BIRCH LANDING HOME
| Etsy | Facebook | Instagram | Pinterest | Bloglovin' | Hometalk |
Did you know it’s Secondhand September?
We’re personally huge fans of consigning and shopping secondhand - in fact everything I’m wearing today is secondhand and name brand (blouse and jeans are Ann Taylor and the leather mocs are M.Gemi, which is a fancy Italian luxury brand I could never afford new). Right now I’m putting together a bag of winter consignments to bring to M&C Clothing and Gifts in Amherst, NH, one of our favorite consignment shops.
We love consigning because the money we earn from reselling our items can be spent at the consignment shops we use for new-to-us clothing and other items - it’s like trading up what we don’t want anymore for what we do. Reduce-Reuse-Recycle.
If you’ve been thinking of giving consignment shopping/selling a try, check out my past blog post where I share some tips on the process:
KEEP UP WITH BIRCH LANDING HOME
| Etsy | Facebook | Instagram | Pinterest | Bloglovin' | Hometalk |
We’re getting ready to send our oldest back to school in person for the first time in about 18 months and I don’t know who’s more nervous - me or her. Nevertheless, we’re trying hard to be positive and prepare her as best we can for the return to school. I thought I would share some of the things we’re packing in the event it helps other parents think of things to pack too. | This post contains affiliate links |
Disclaimer: I am not giving medical advice… please consult the CDC, your doctor, etc for what supplies your child should need for themselves and their school situation.
Some Ideas for Back to School Supplies 2021
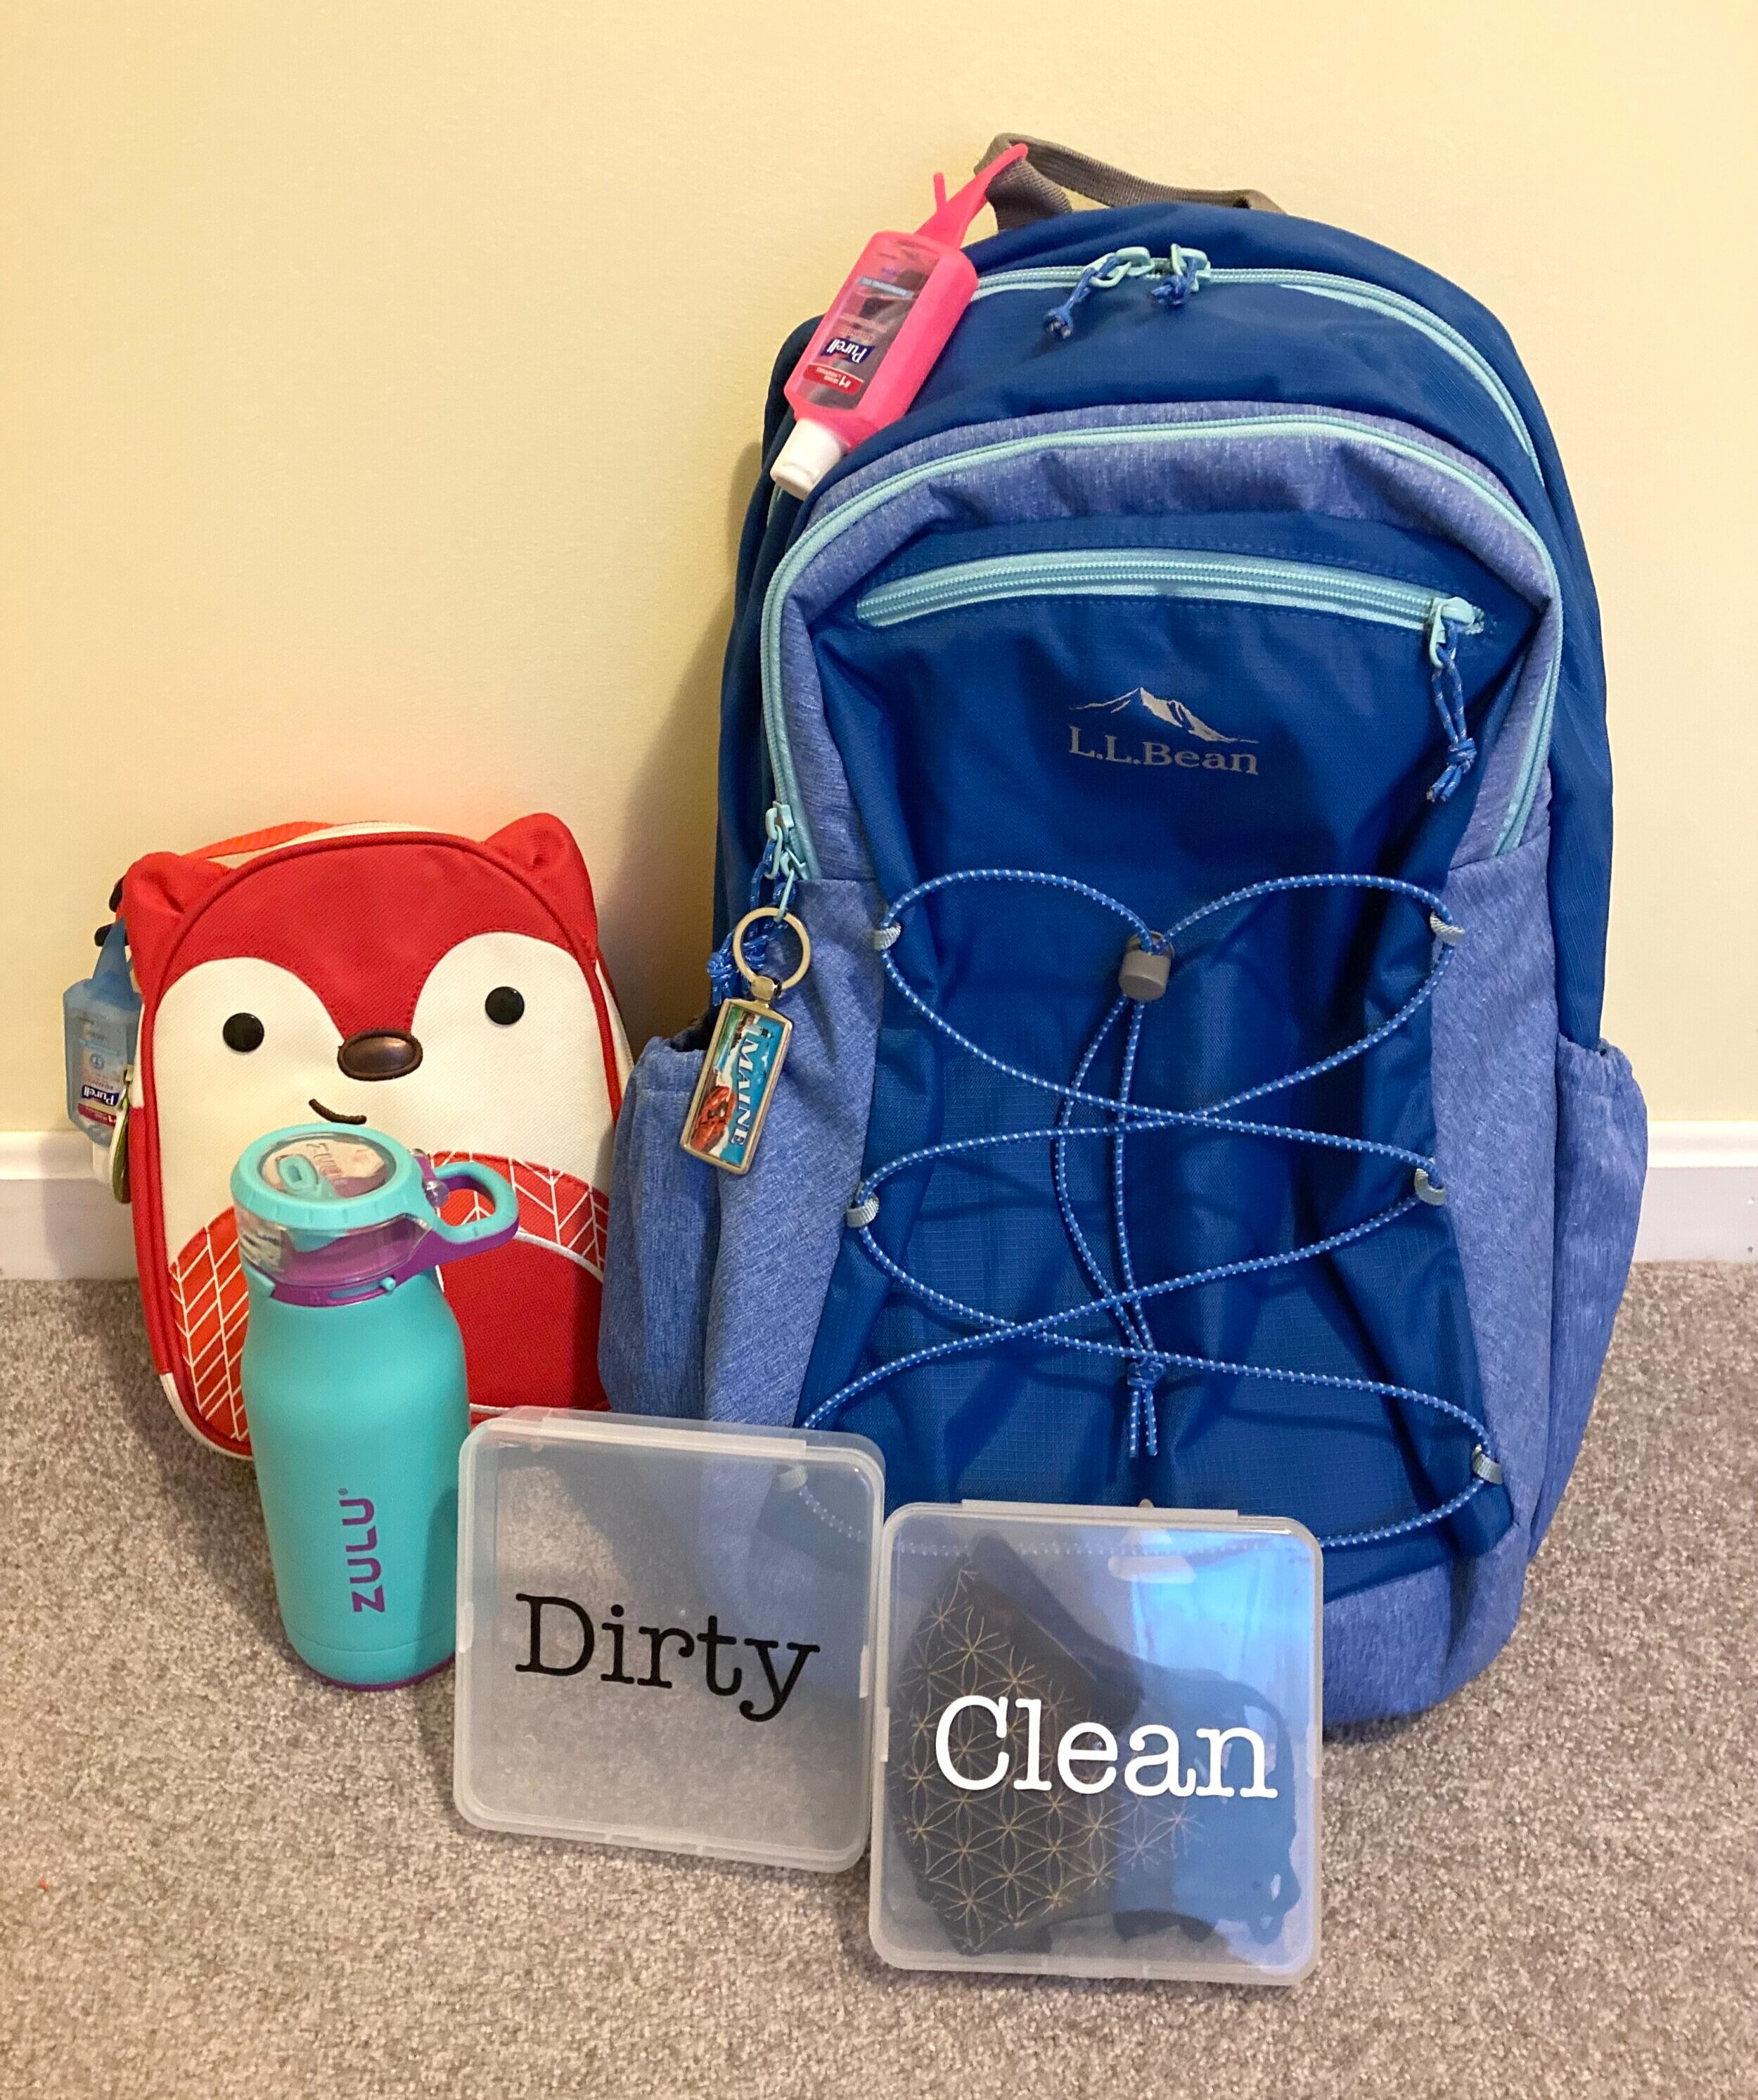
- Sturdy Backpack - We're huge fans of L.L. Bean backpacks. They're built to last so we buy a size bigger than our kids need in order to last them many years to come. Since our school does a lot with computers we made sure to pick a backpack that also has a built-in laptop sleeve. (Side note: We always add some added visibility to our kids' gear with Gear Aid Reflective Patches.)
- Hand Sanitizer - We got some small "key chain" hand sanitizer dispensers to attach to both her backpack and her lunch box so cleaning her hands whenever she needs to will be easy, especially important before adjusting or taking off masks and before eating/drinking.
- Covered Water Bottle - This was a small upgrade we thought might be useful this year. In the past our daughter always used reusable water bottles with an exposed spout, however we thought it might be a better idea to have one that keeps the spout covered when not in use to help keep it cleaner.
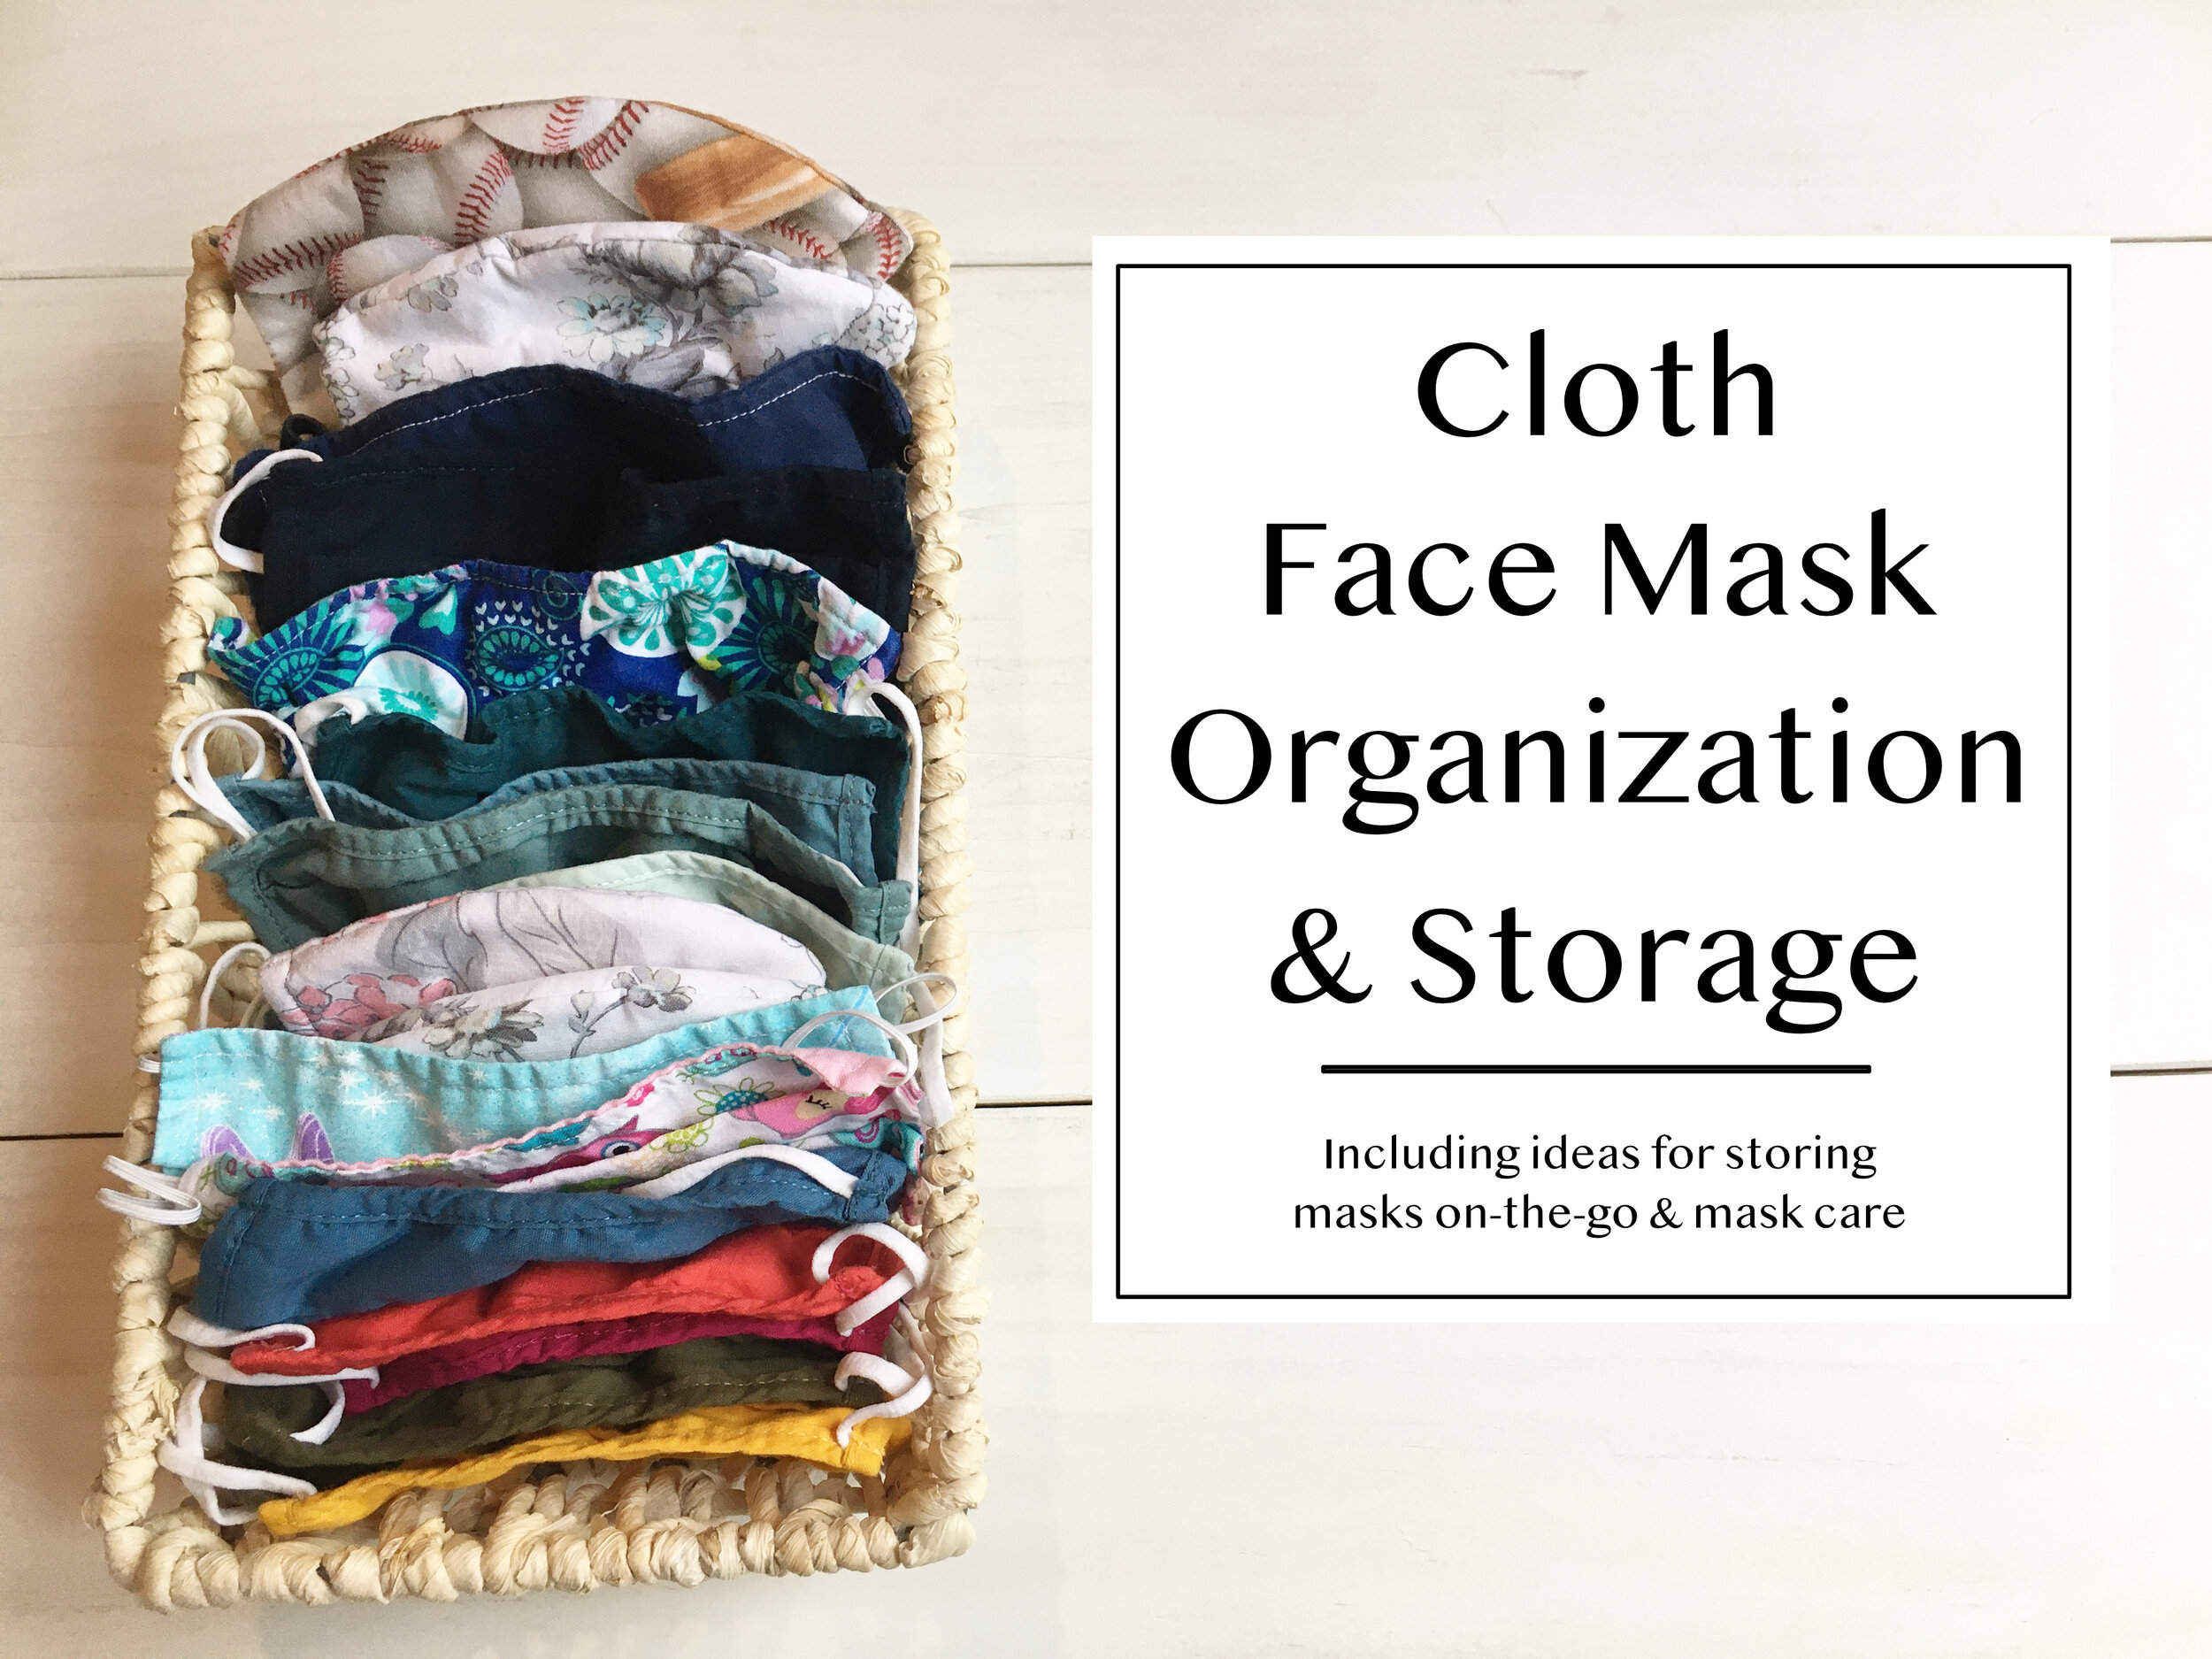
- Good Masks - We did our best to try to find better masks for this year that are supposed to have better filtration. We have some child-sized "M95" ones as well as some cloth masks that have special filters that go inside of them.
- Mask Cases/System - I have no idea if this system will be practical, but we're going to give it a try! I ordered these clear mask cases from Amazon and cut labels for them on my Cricut. We'll be packing one with extra clean masks, and the other will be empty for dirty masks to come home in. Since we invested in some better quality masks I wanted to make sure they stay in cases when not in use to keep them in good shape.
- Breakaway Mask Lanyard - These can be handy during times when masks come down (lunch/snack, mask breaks outside, etc).
- Label Everything - Pandemic or not, it's important to label all the things when kids go to school. We love this label maker for making quick and easy labels for water bottles, cases, sports gear, etc.
I hope that gave you some ideas of things you may want to pack for your children too, I hope you all have a safe, happy, and healthy school year!
KEEP UP WITH BIRCH LANDING HOME
| Etsy | Facebook | Instagram | Pinterest | Bloglovin' | Hometalk |