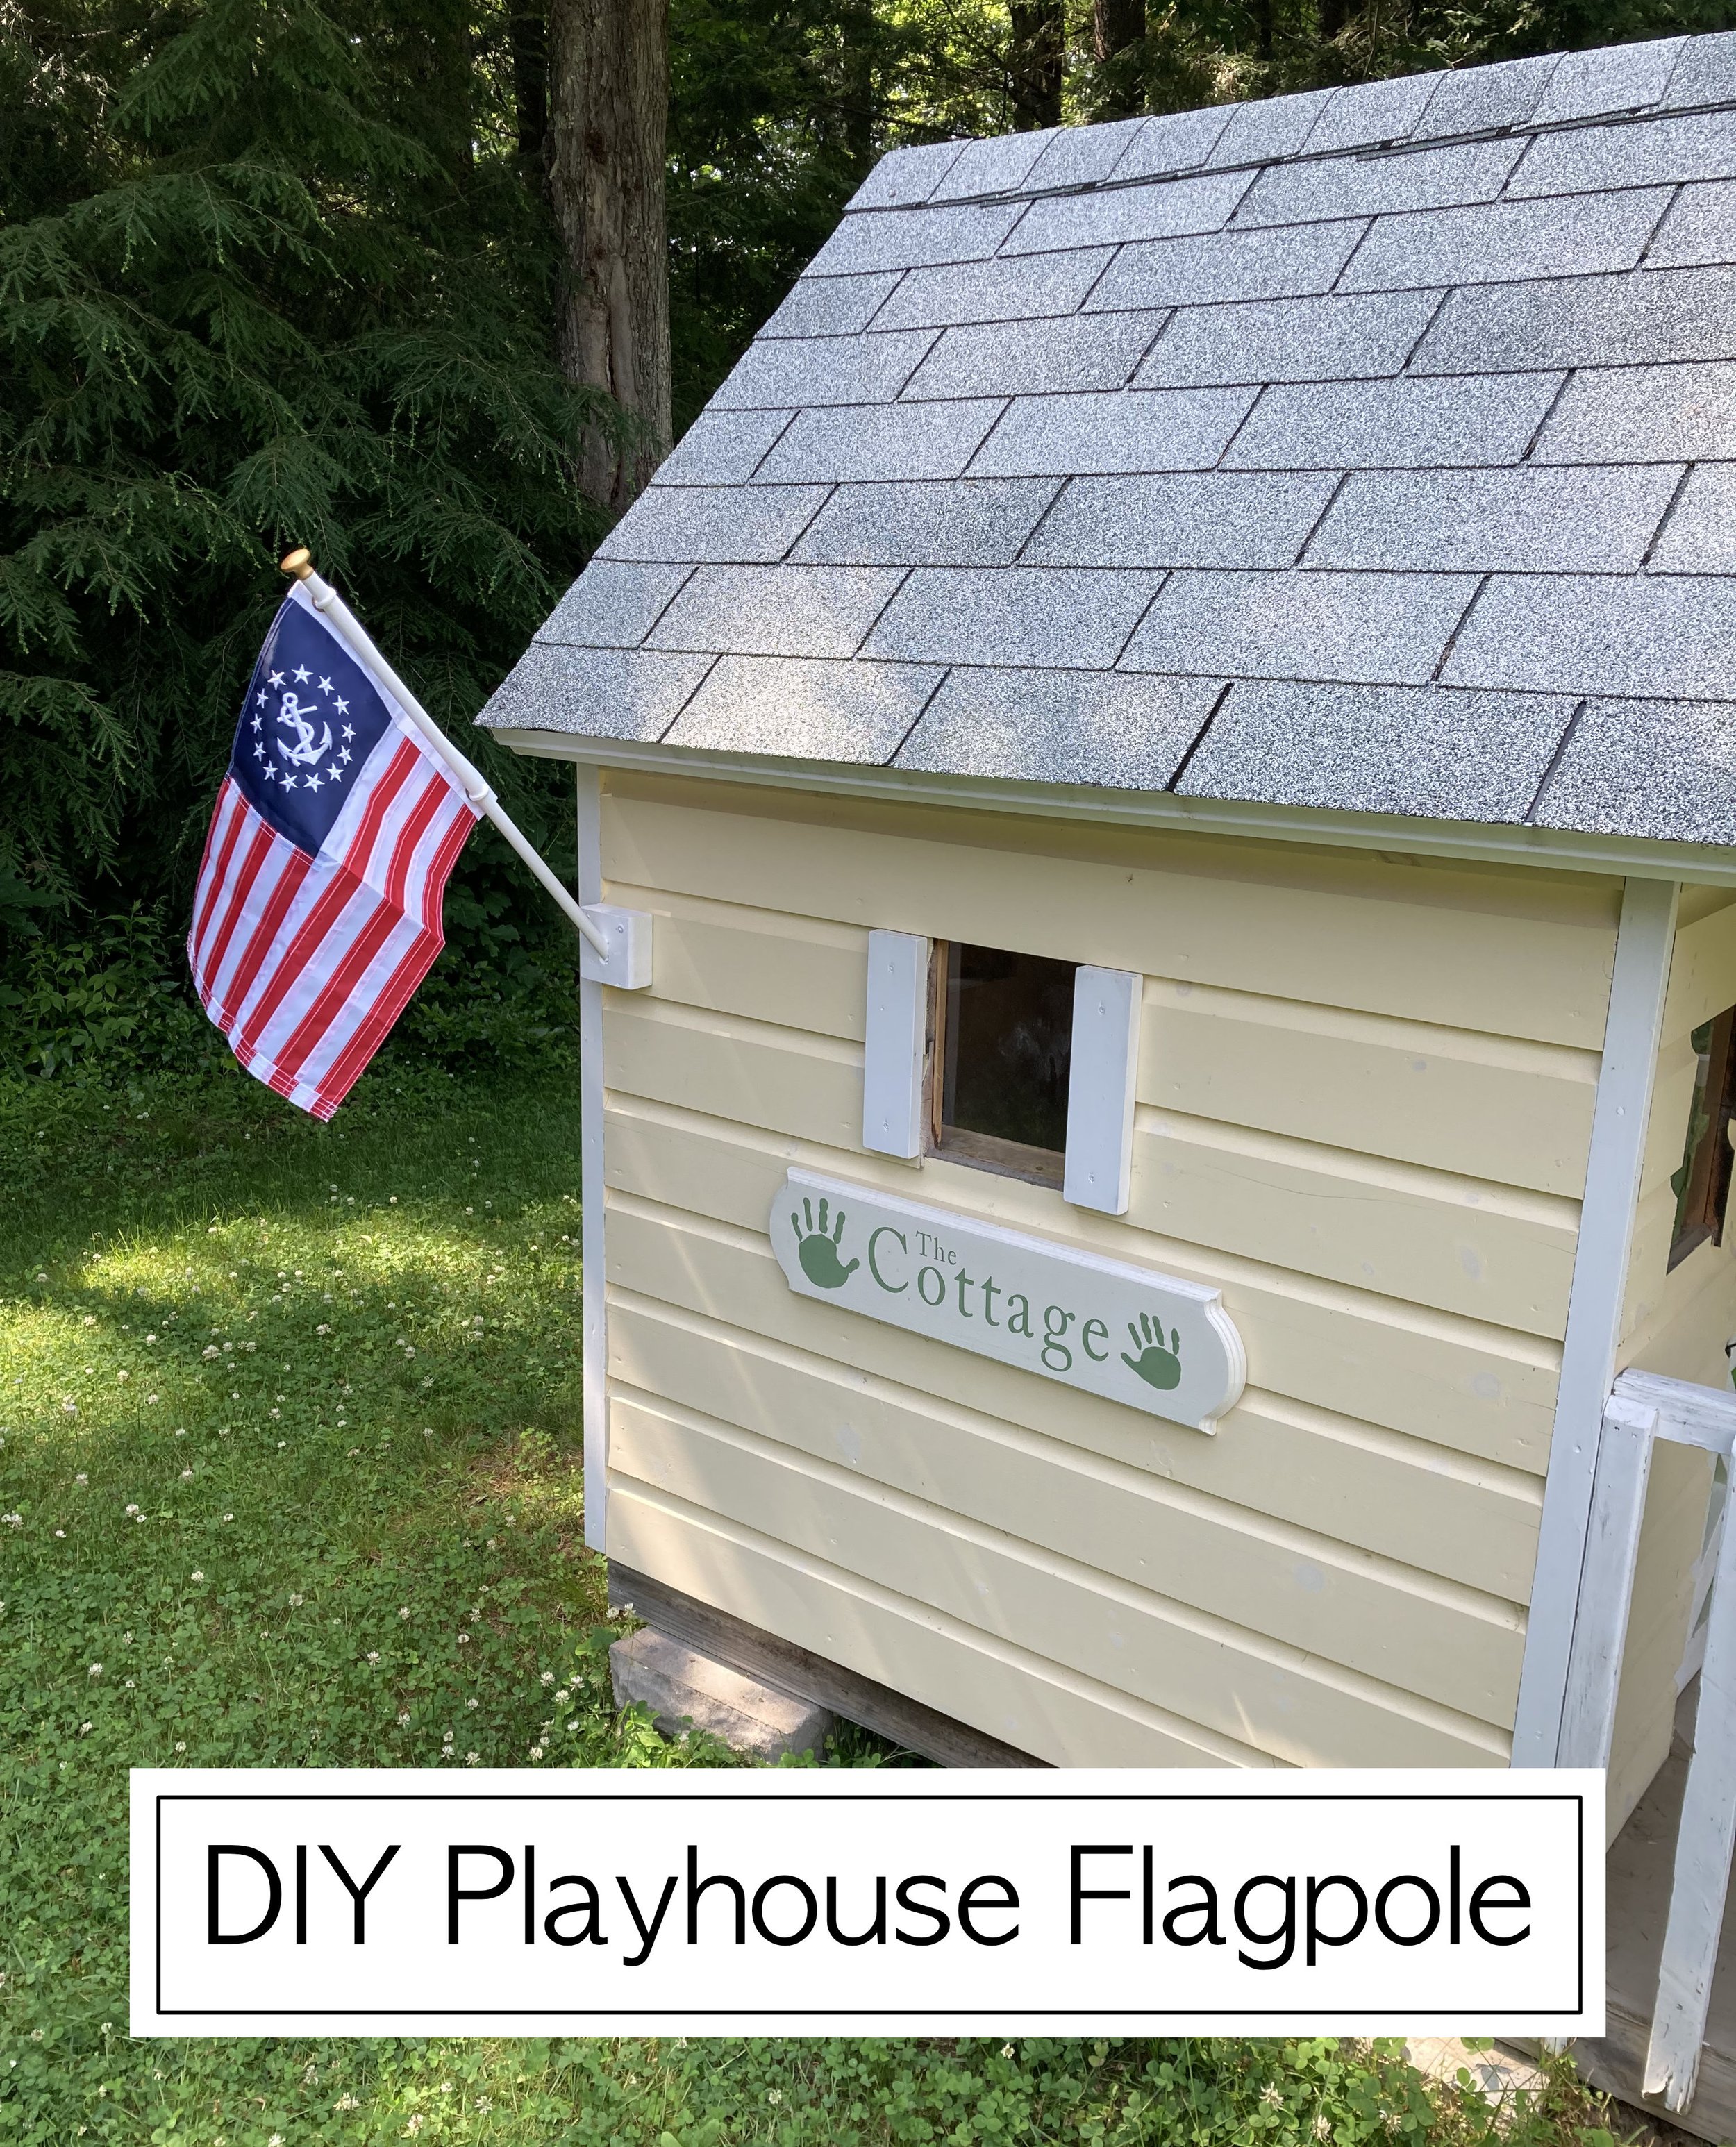
DIY Playhouse Flagpole

Our kids’ playhouse is pretty special - it was built for them by their Grandfather and the door was built by their Dad. It’s a special spot that has gotten a lot of use over the years and is always a hit when they have friends over. For awhile now I’ve wanted to add a little flagpole but wasn’t able to find an affordable boat flagpole in the dimensions I needed so I decided to make one myself. | This post contains affiliate links |

Materials:

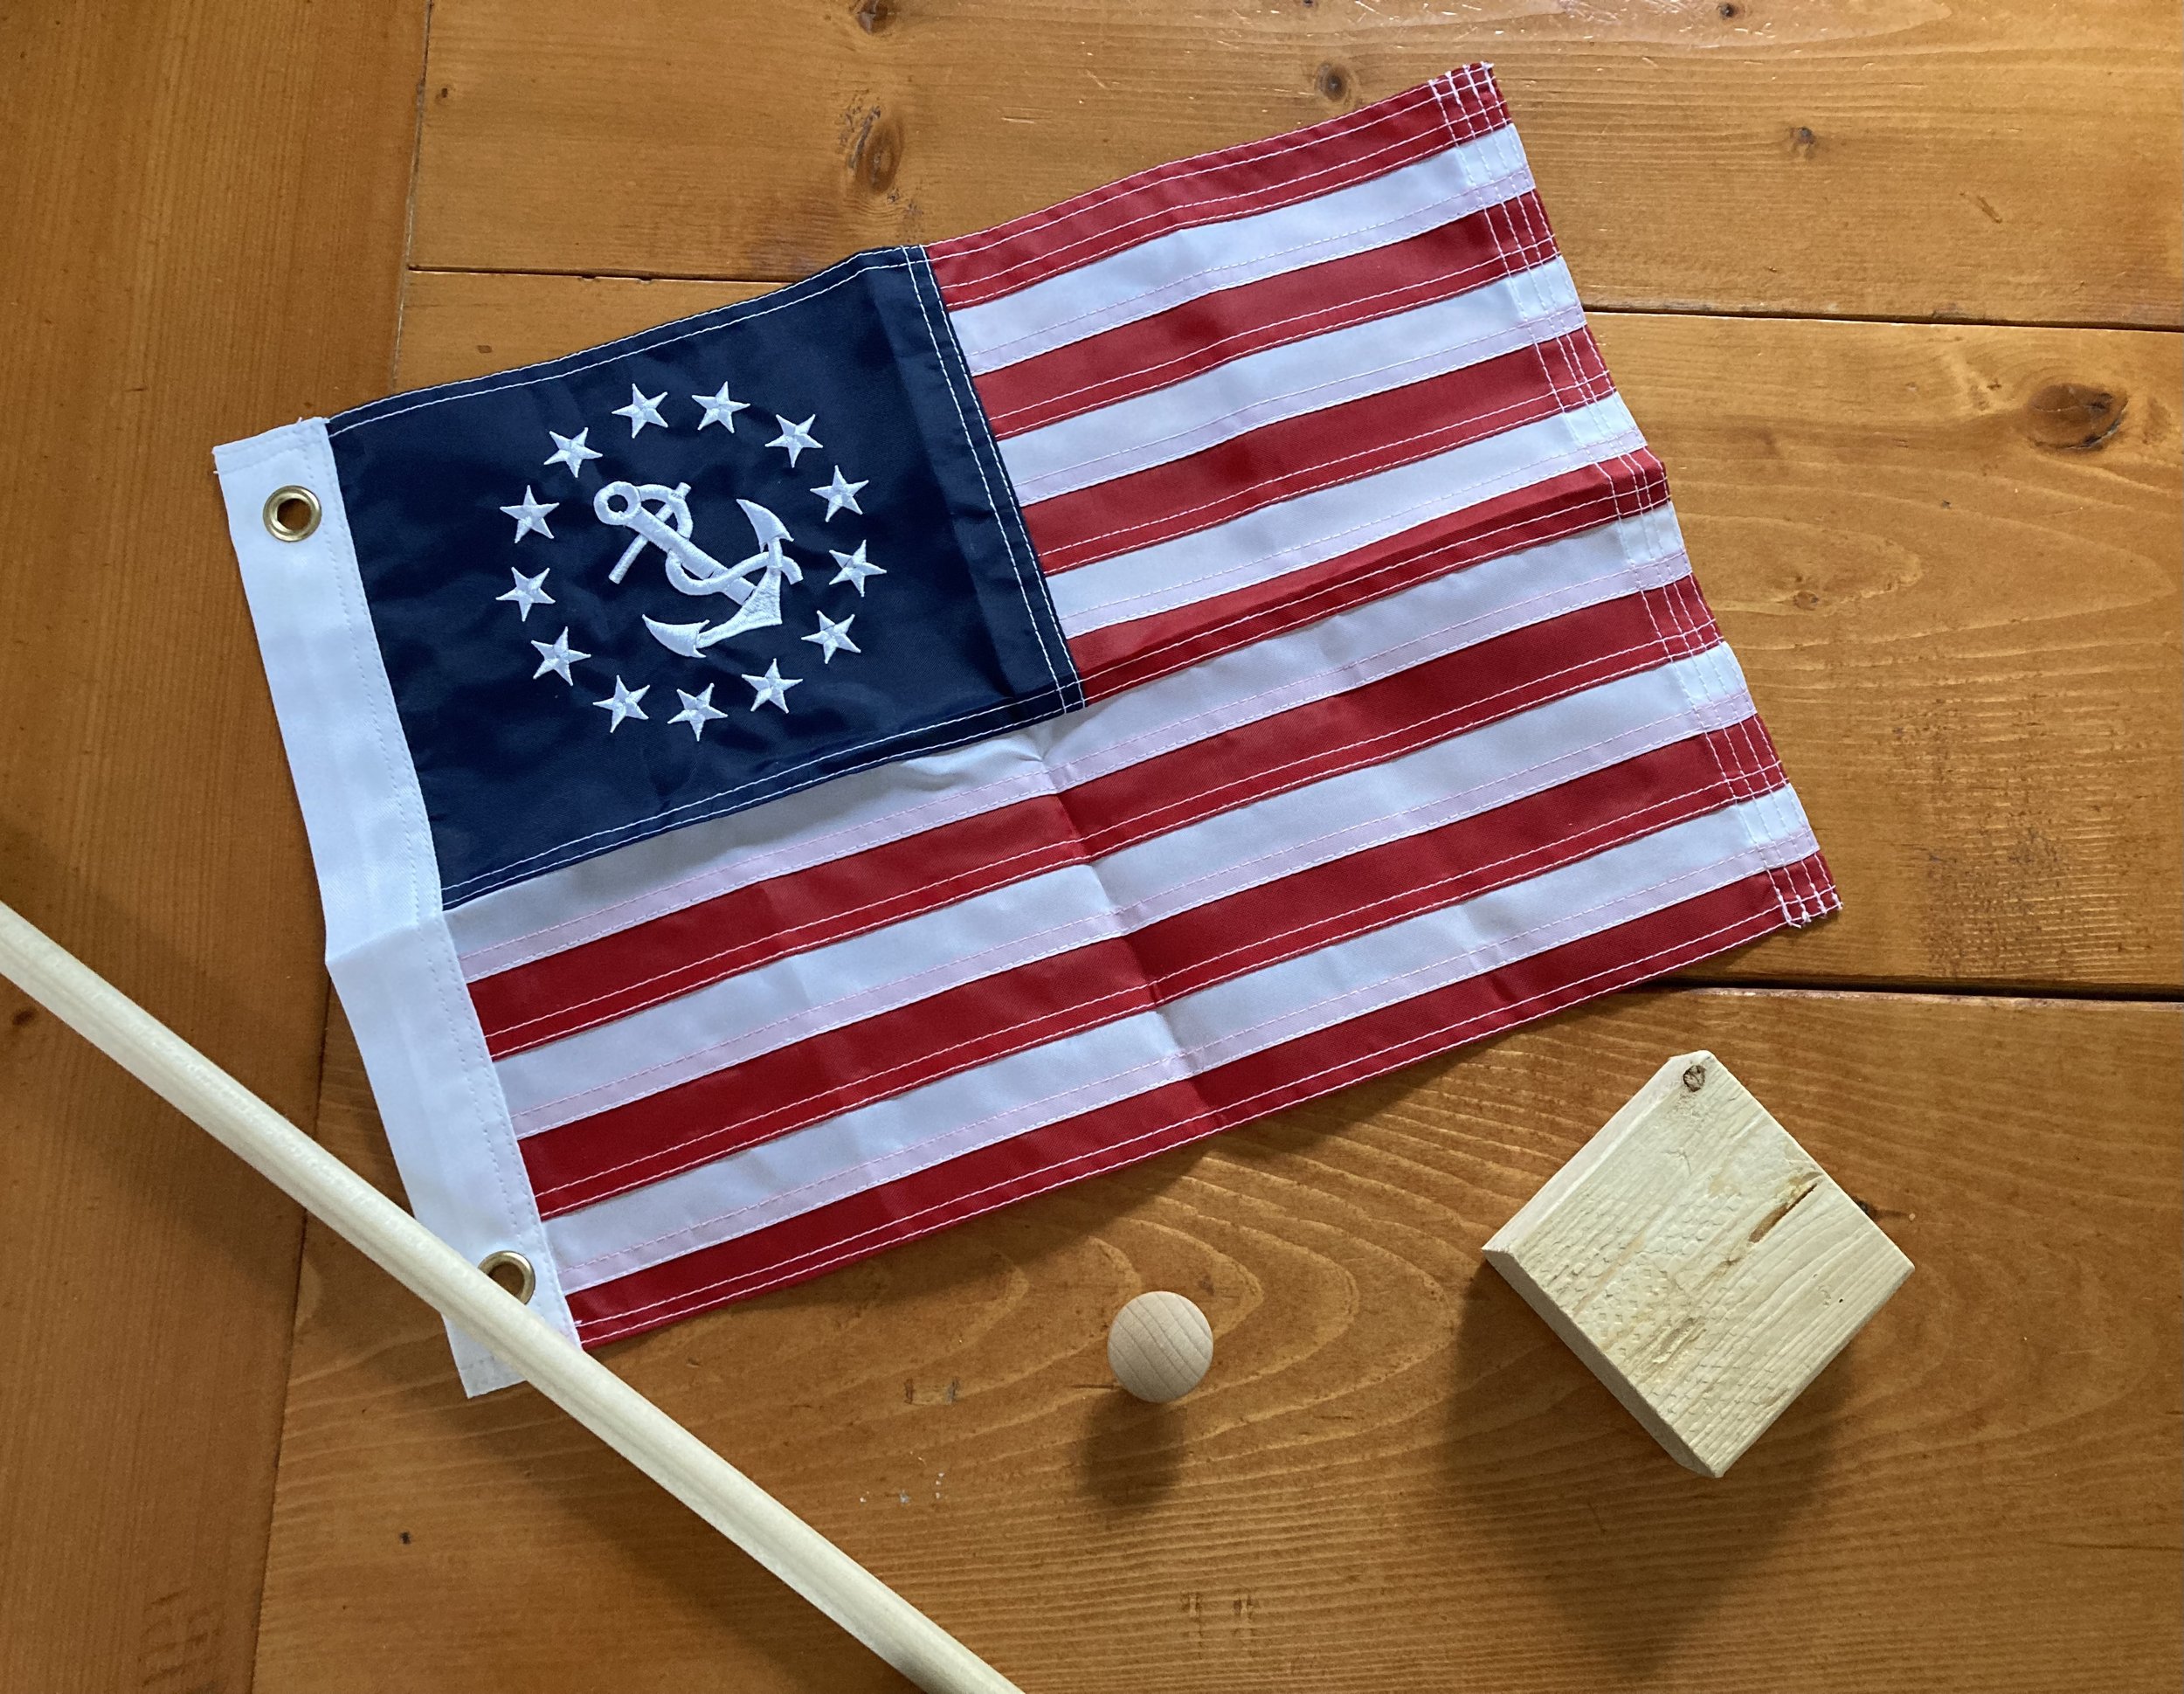
  • 12"x 18" boat flag (I used a nautical-inspired one but you could get a traditional American flag too)
  • dowel (I used 3/4")
  • small piece of 2x4
  • drill and screws
  • wooden knob that fits on end of dowel
  • paint (white and gold)
  • wood glue
  • clothes line rope
  • optional: you could use a boat flagpole and bracket kit if you wanted to make this quick and easy, but I was trying to make this project as inexpensively as possible and opted to make it myself with scrap wood we already had - I also wanted more control over the length of the pole and the angle which is another reason why I decided to make it myself.
DIY Playhouse Flagpole

How-To:

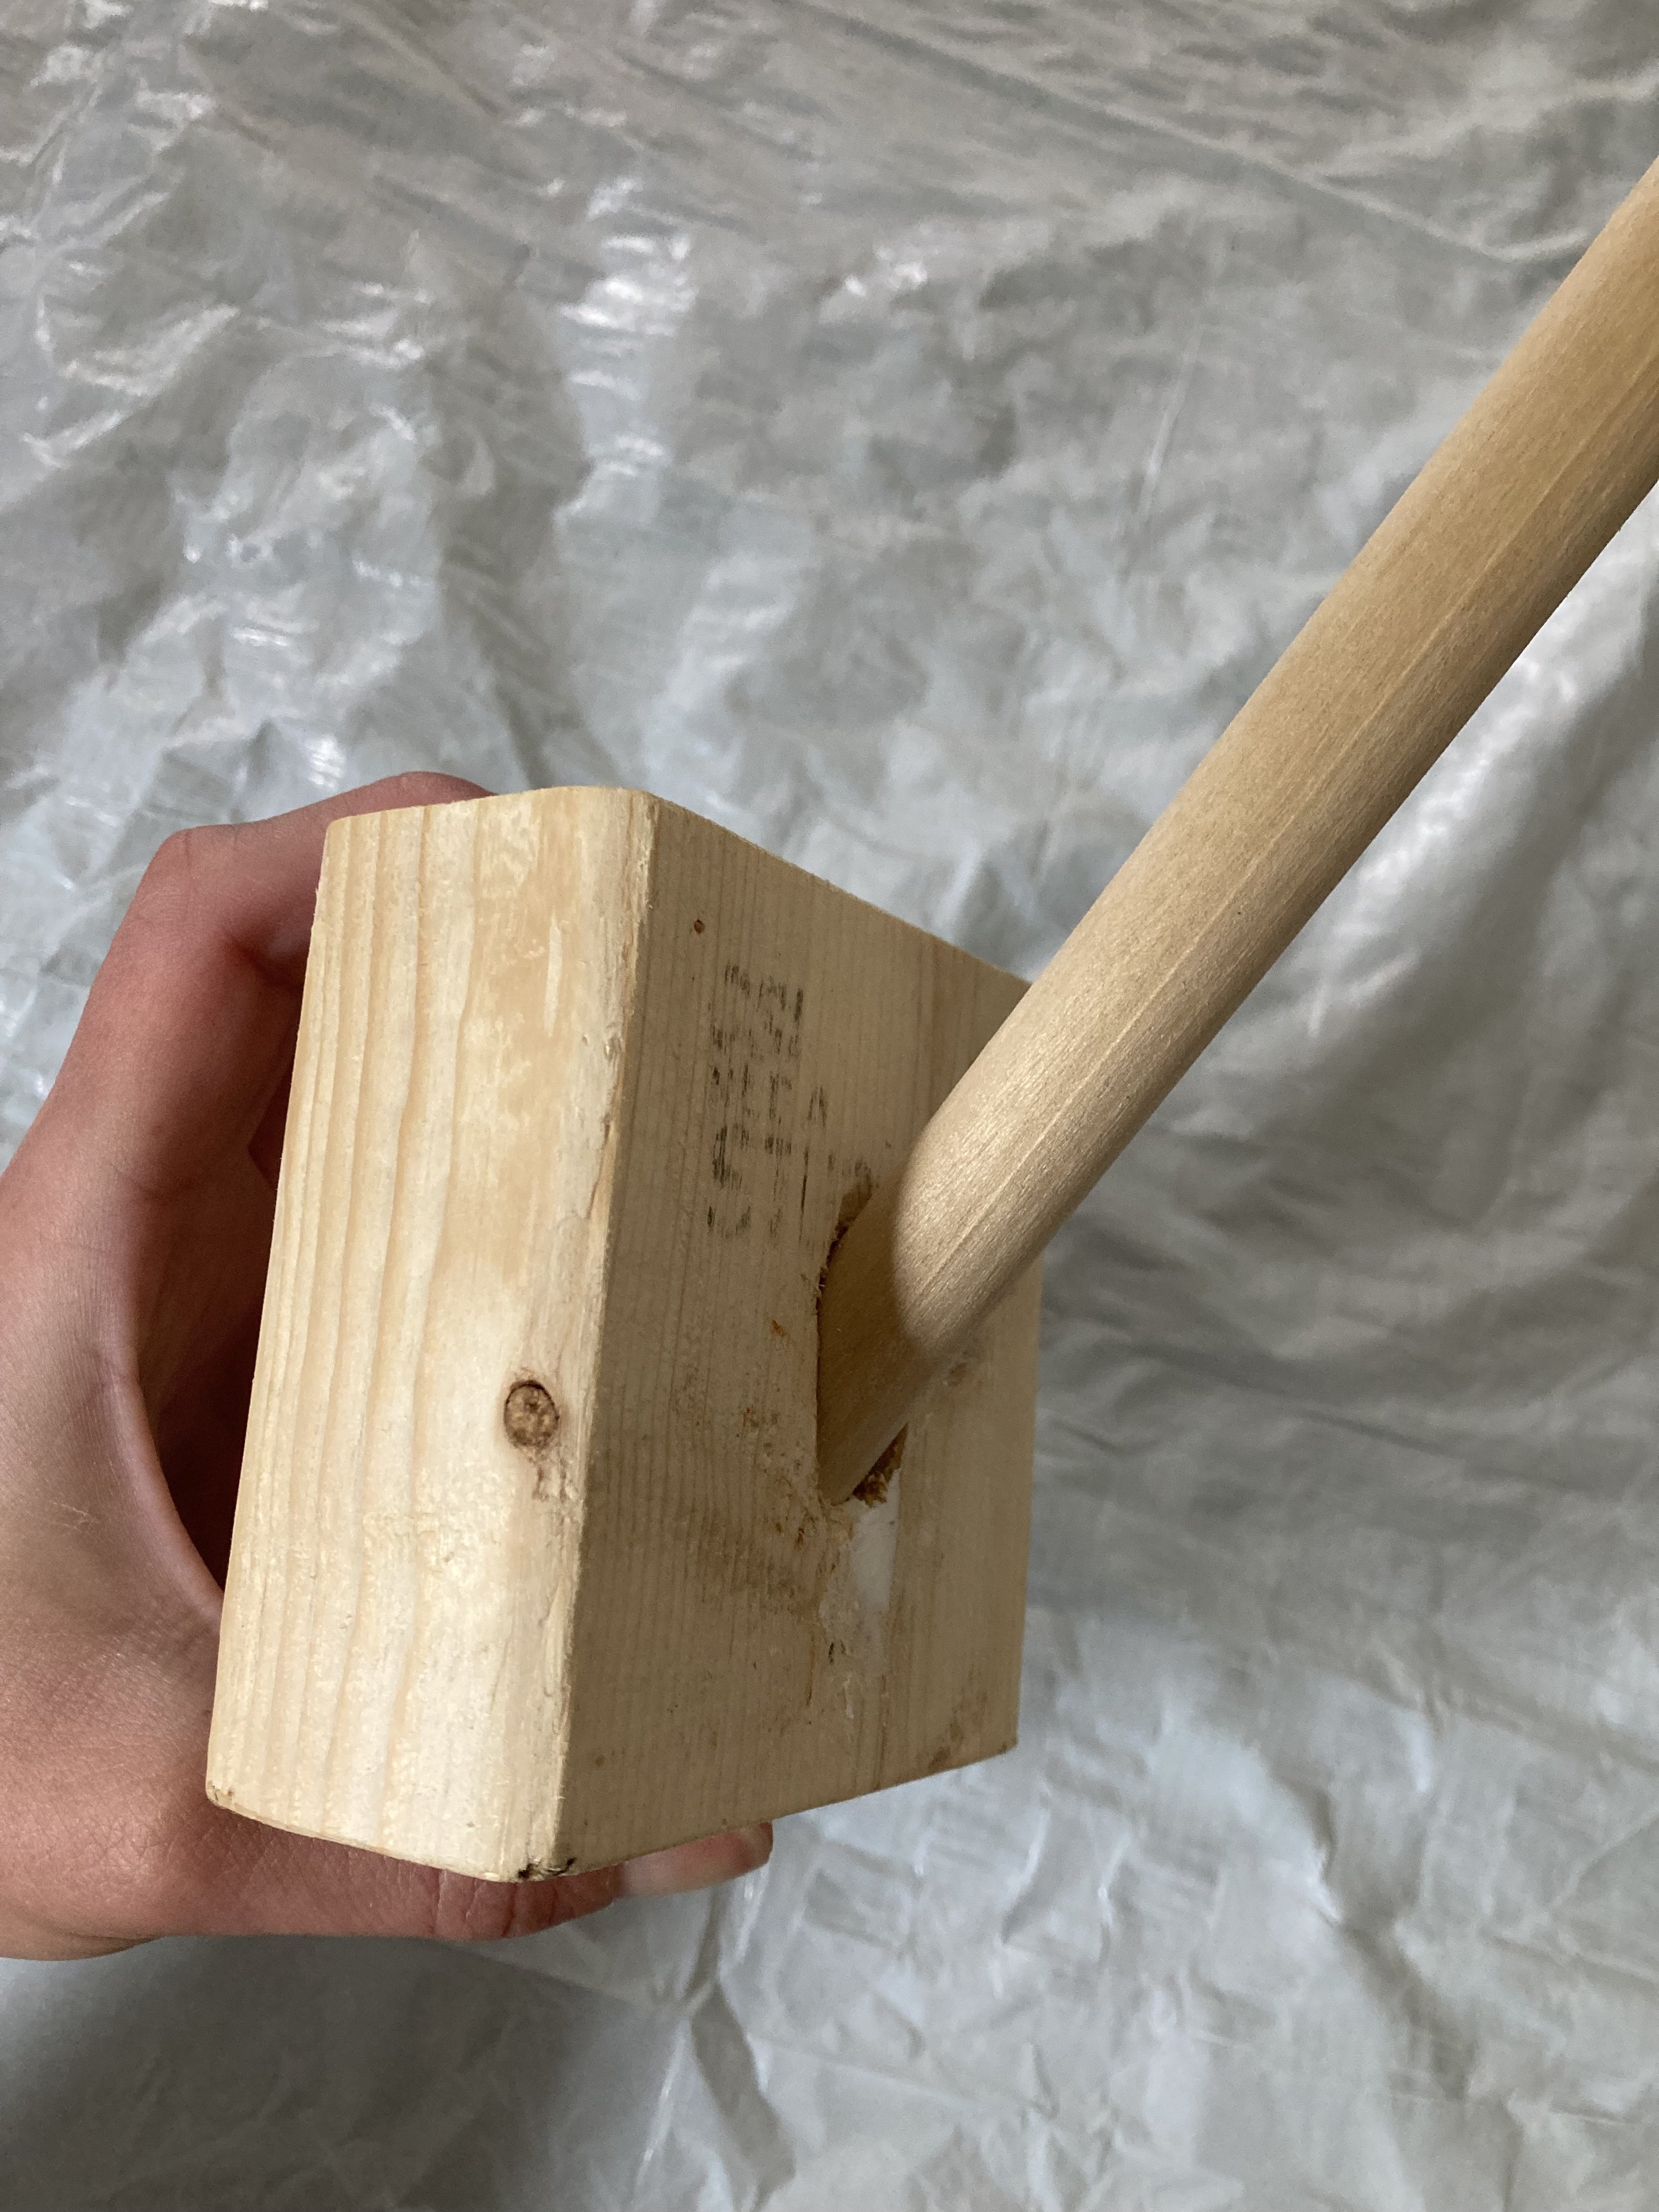
First, I decided on the angle of the dowel into the scrap piece of 2x4 and made a pilot hole at that angle with a small drill. Then I kept going up in drill sizes to make the hole the correct diameter. (Note: I do not recommend using a spade bit.. I tried that and it was terrible going in at an angle. We ended up borrowing a drill bit in correct final size to finish the hole.)

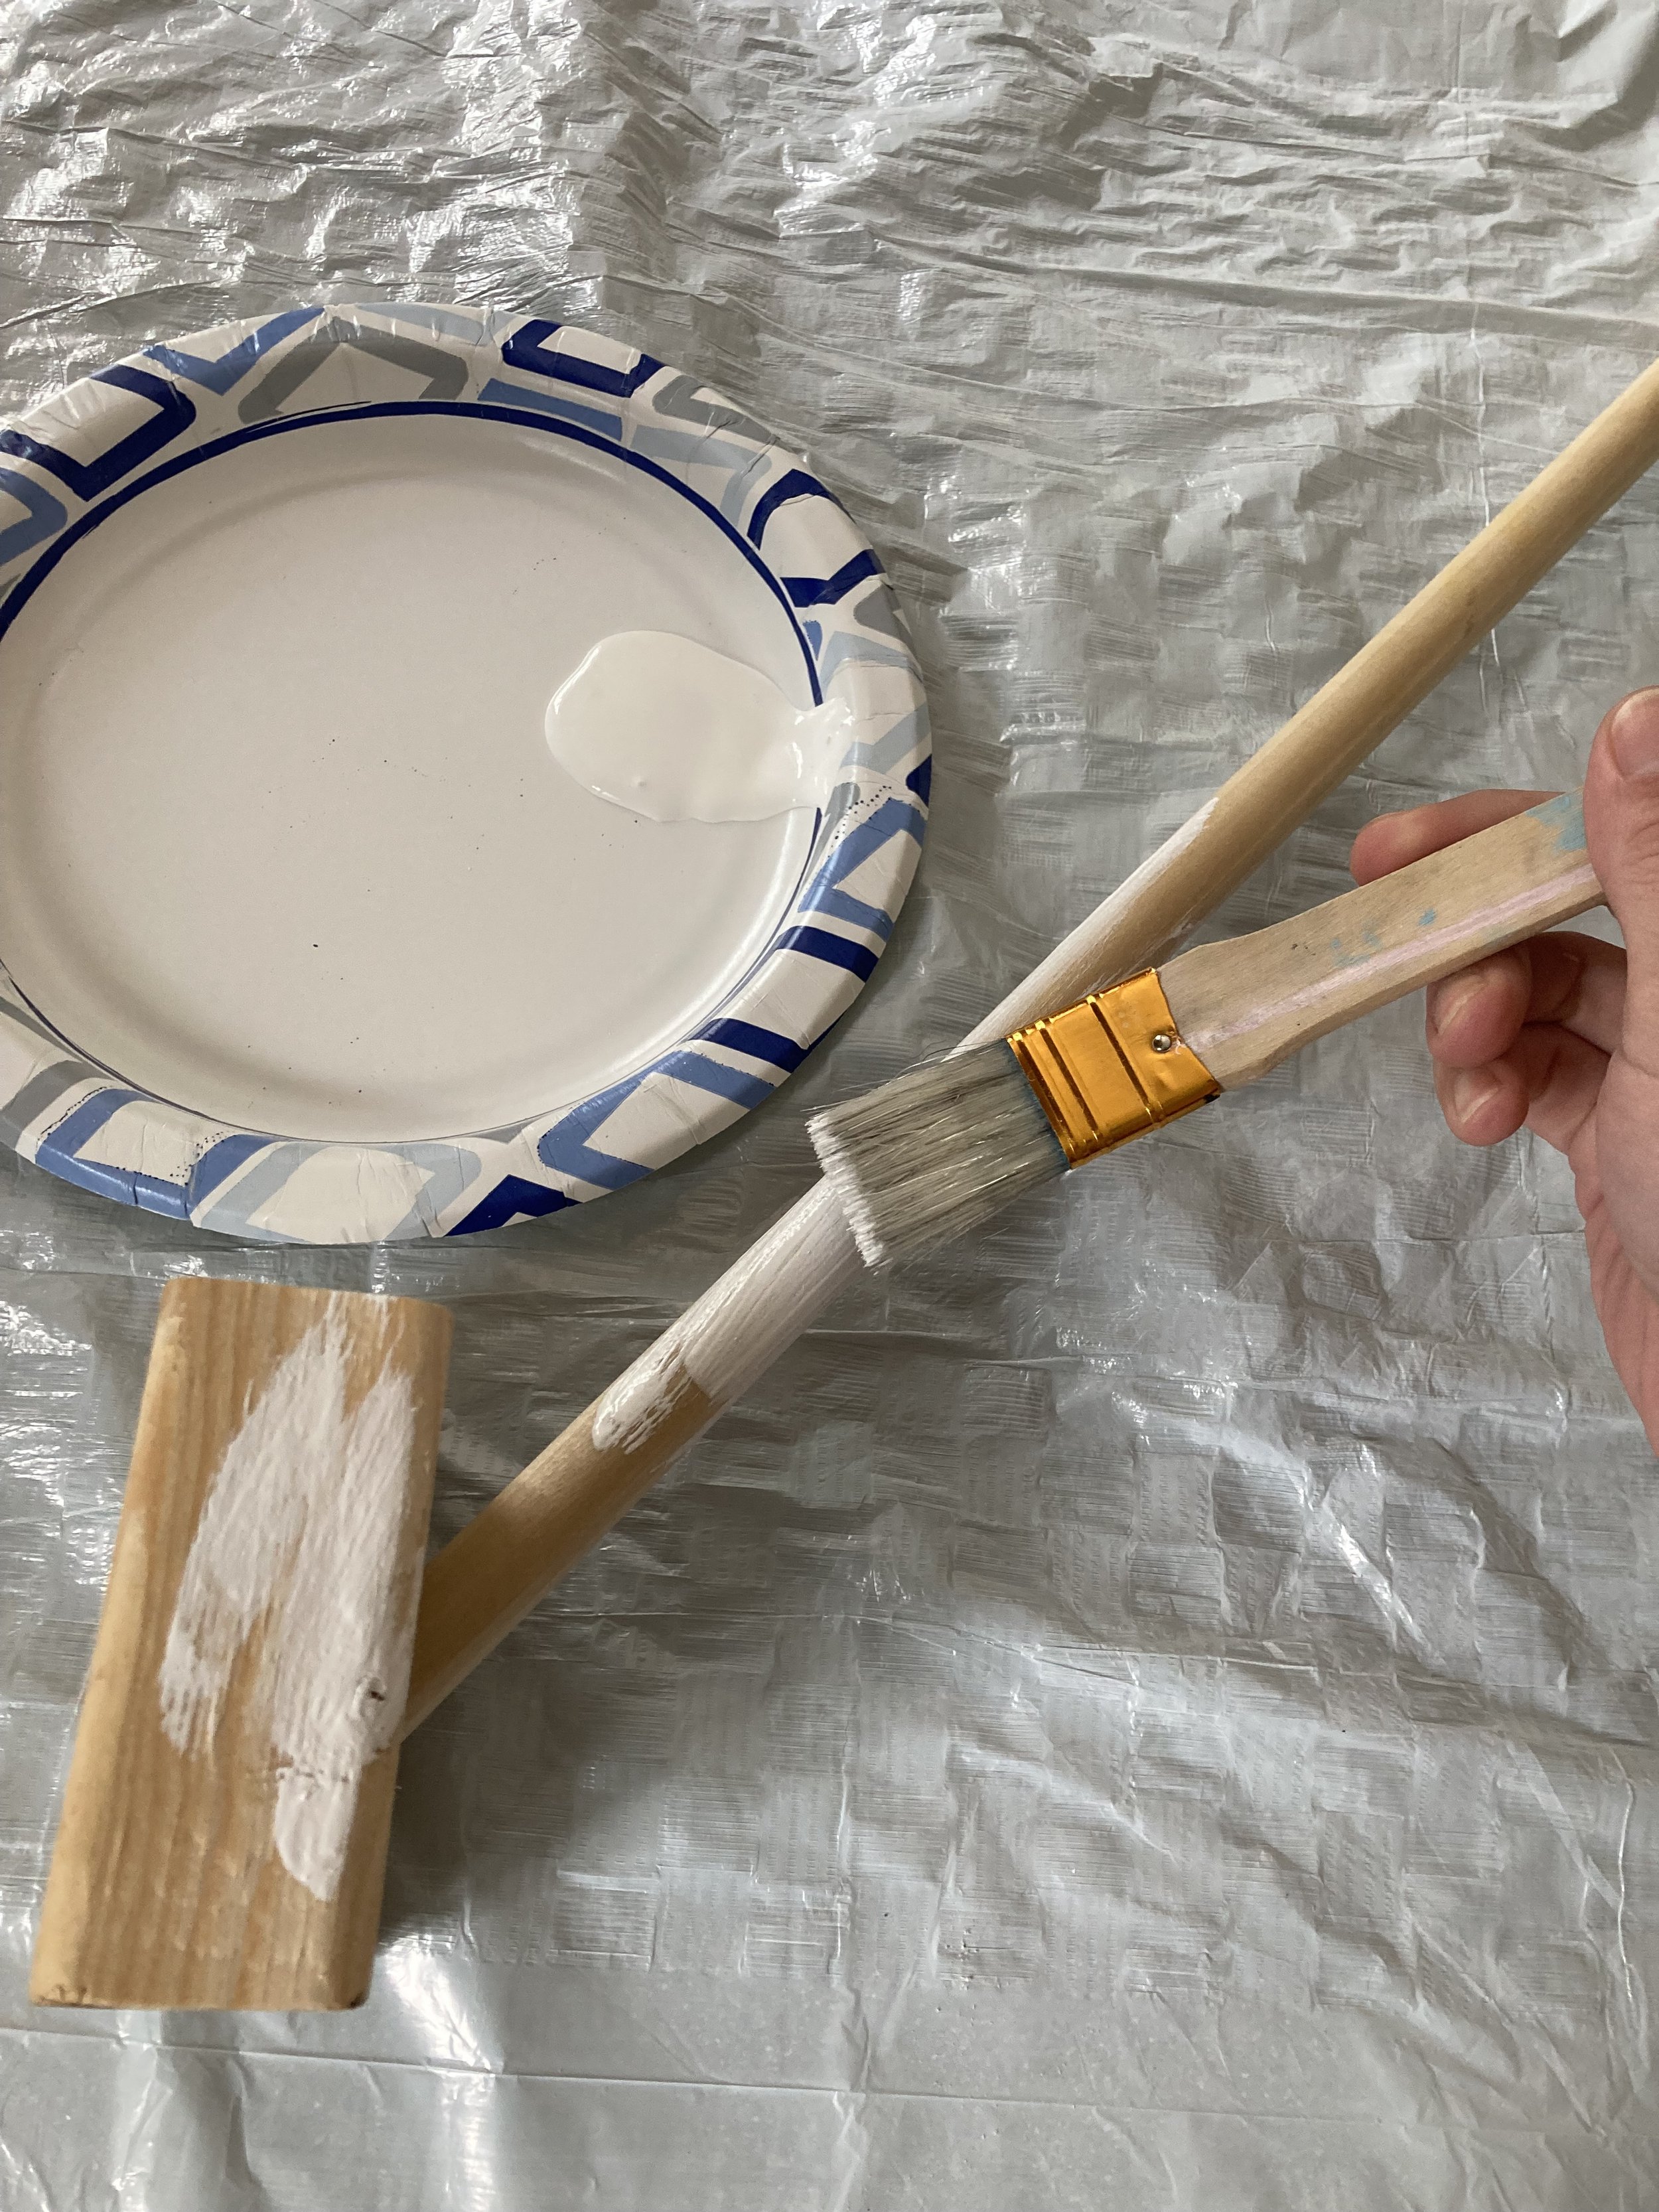
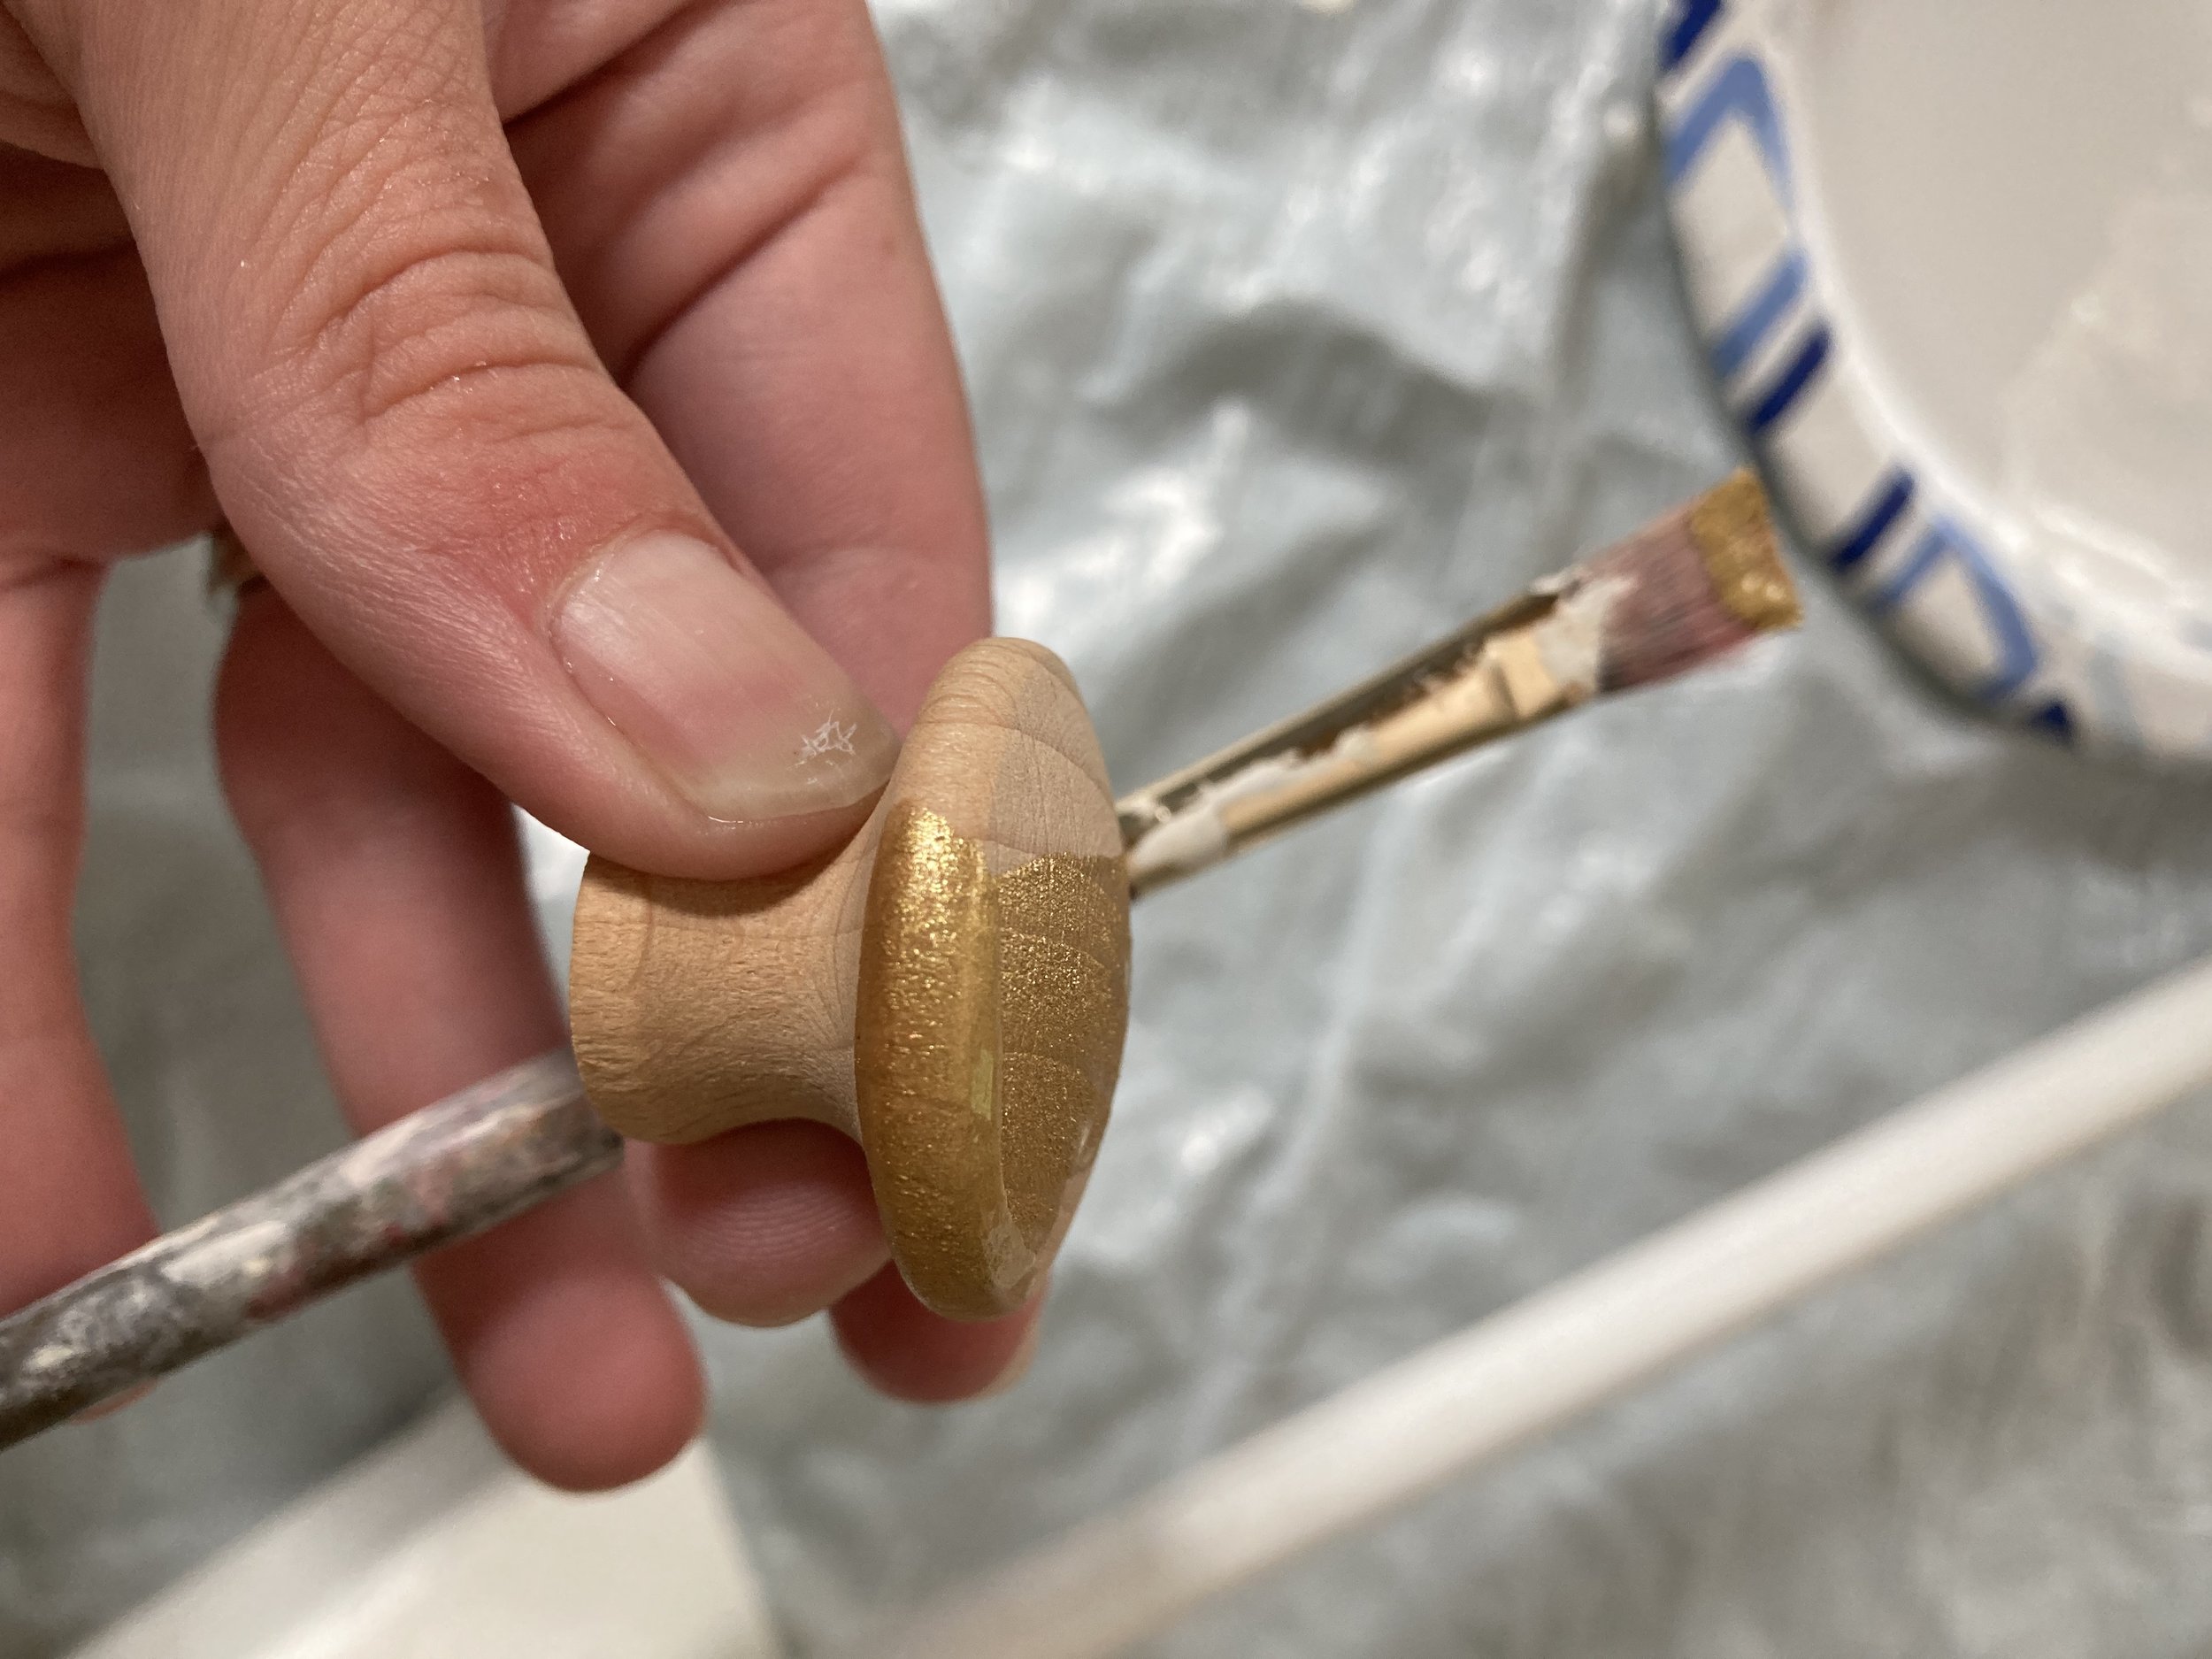
Once the hole was made I glued the dowel into it with some wood glue then painted it white with several coats of paint. While I was waiting for that to dry I moved on to painting the wooden knob with several coats of gold paint and then let that dry too.

Next I drilled a small hole into the end of the top of the flag pole and cut some toothpicks down to fit inside the hole but stick out far enough to also fit into the hole in the wooden knob. Then I added wood glue and put the knob onto the end of the flagpole. (Note: Using toothpicks to reinforce this joining is key - if just wood glue was used it would be at more risk to break off, but the toothpick reinforcement going through really helps!)

Adding the knob to the end of the flagpole.

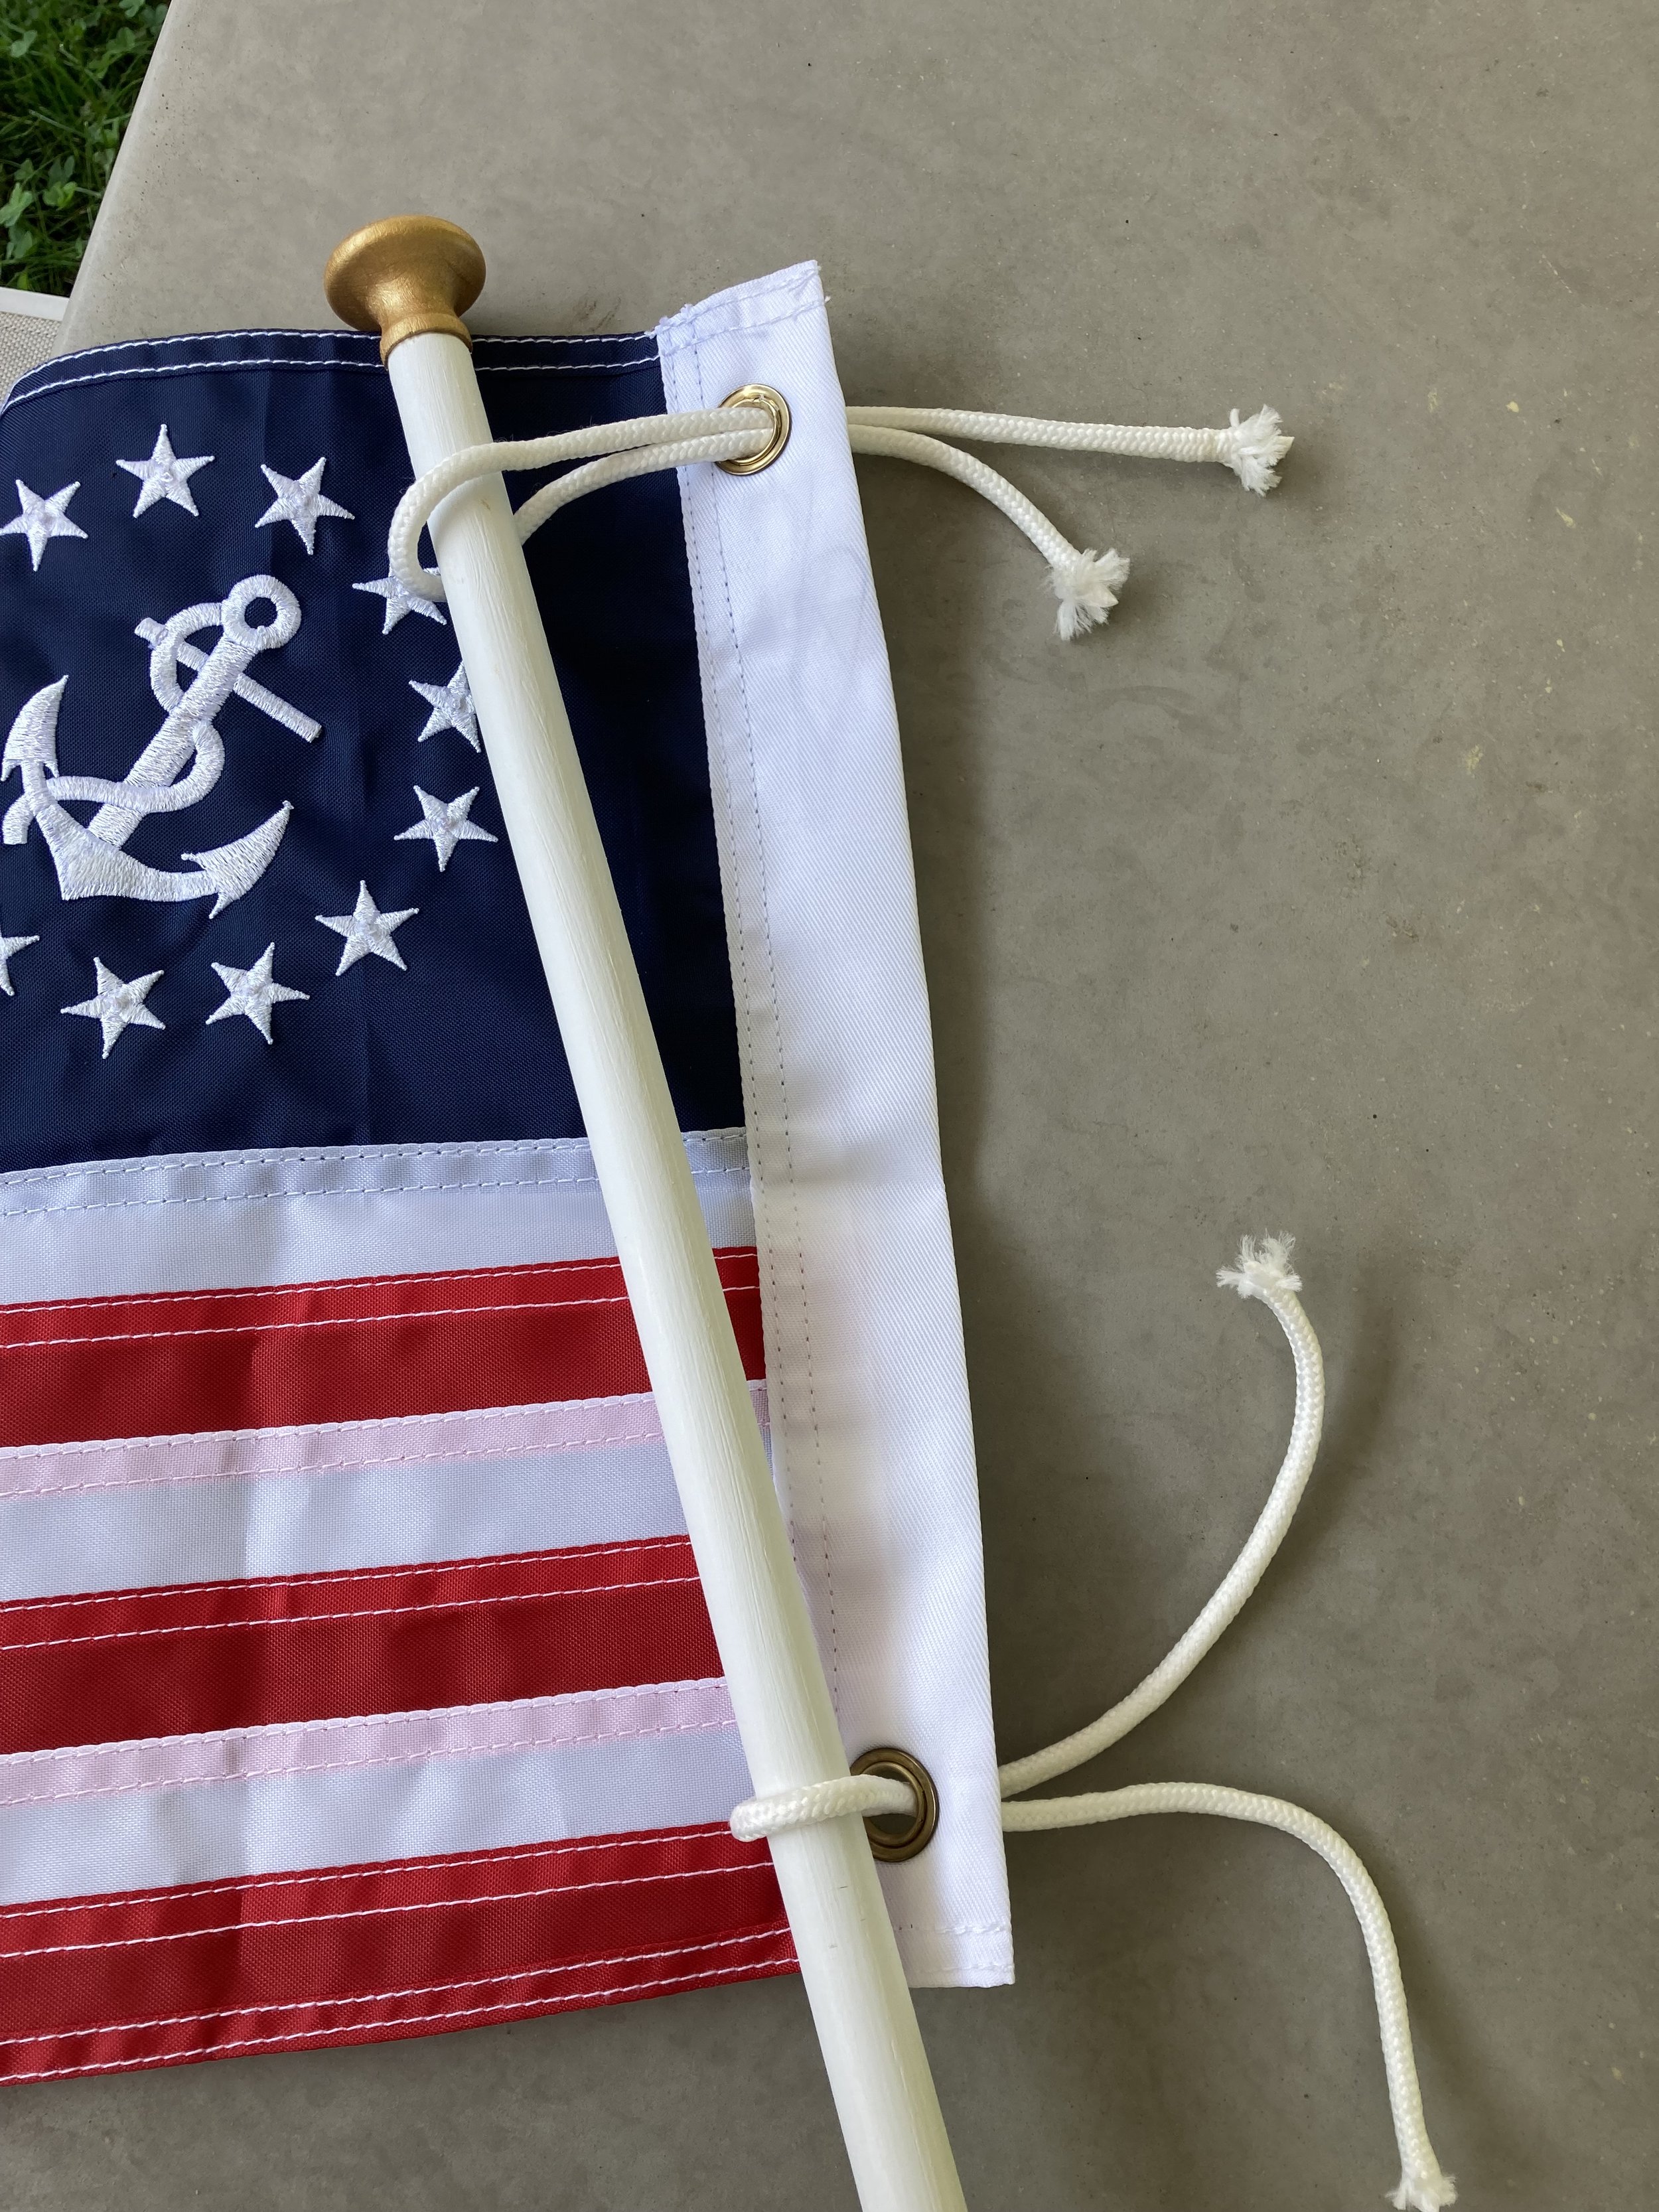
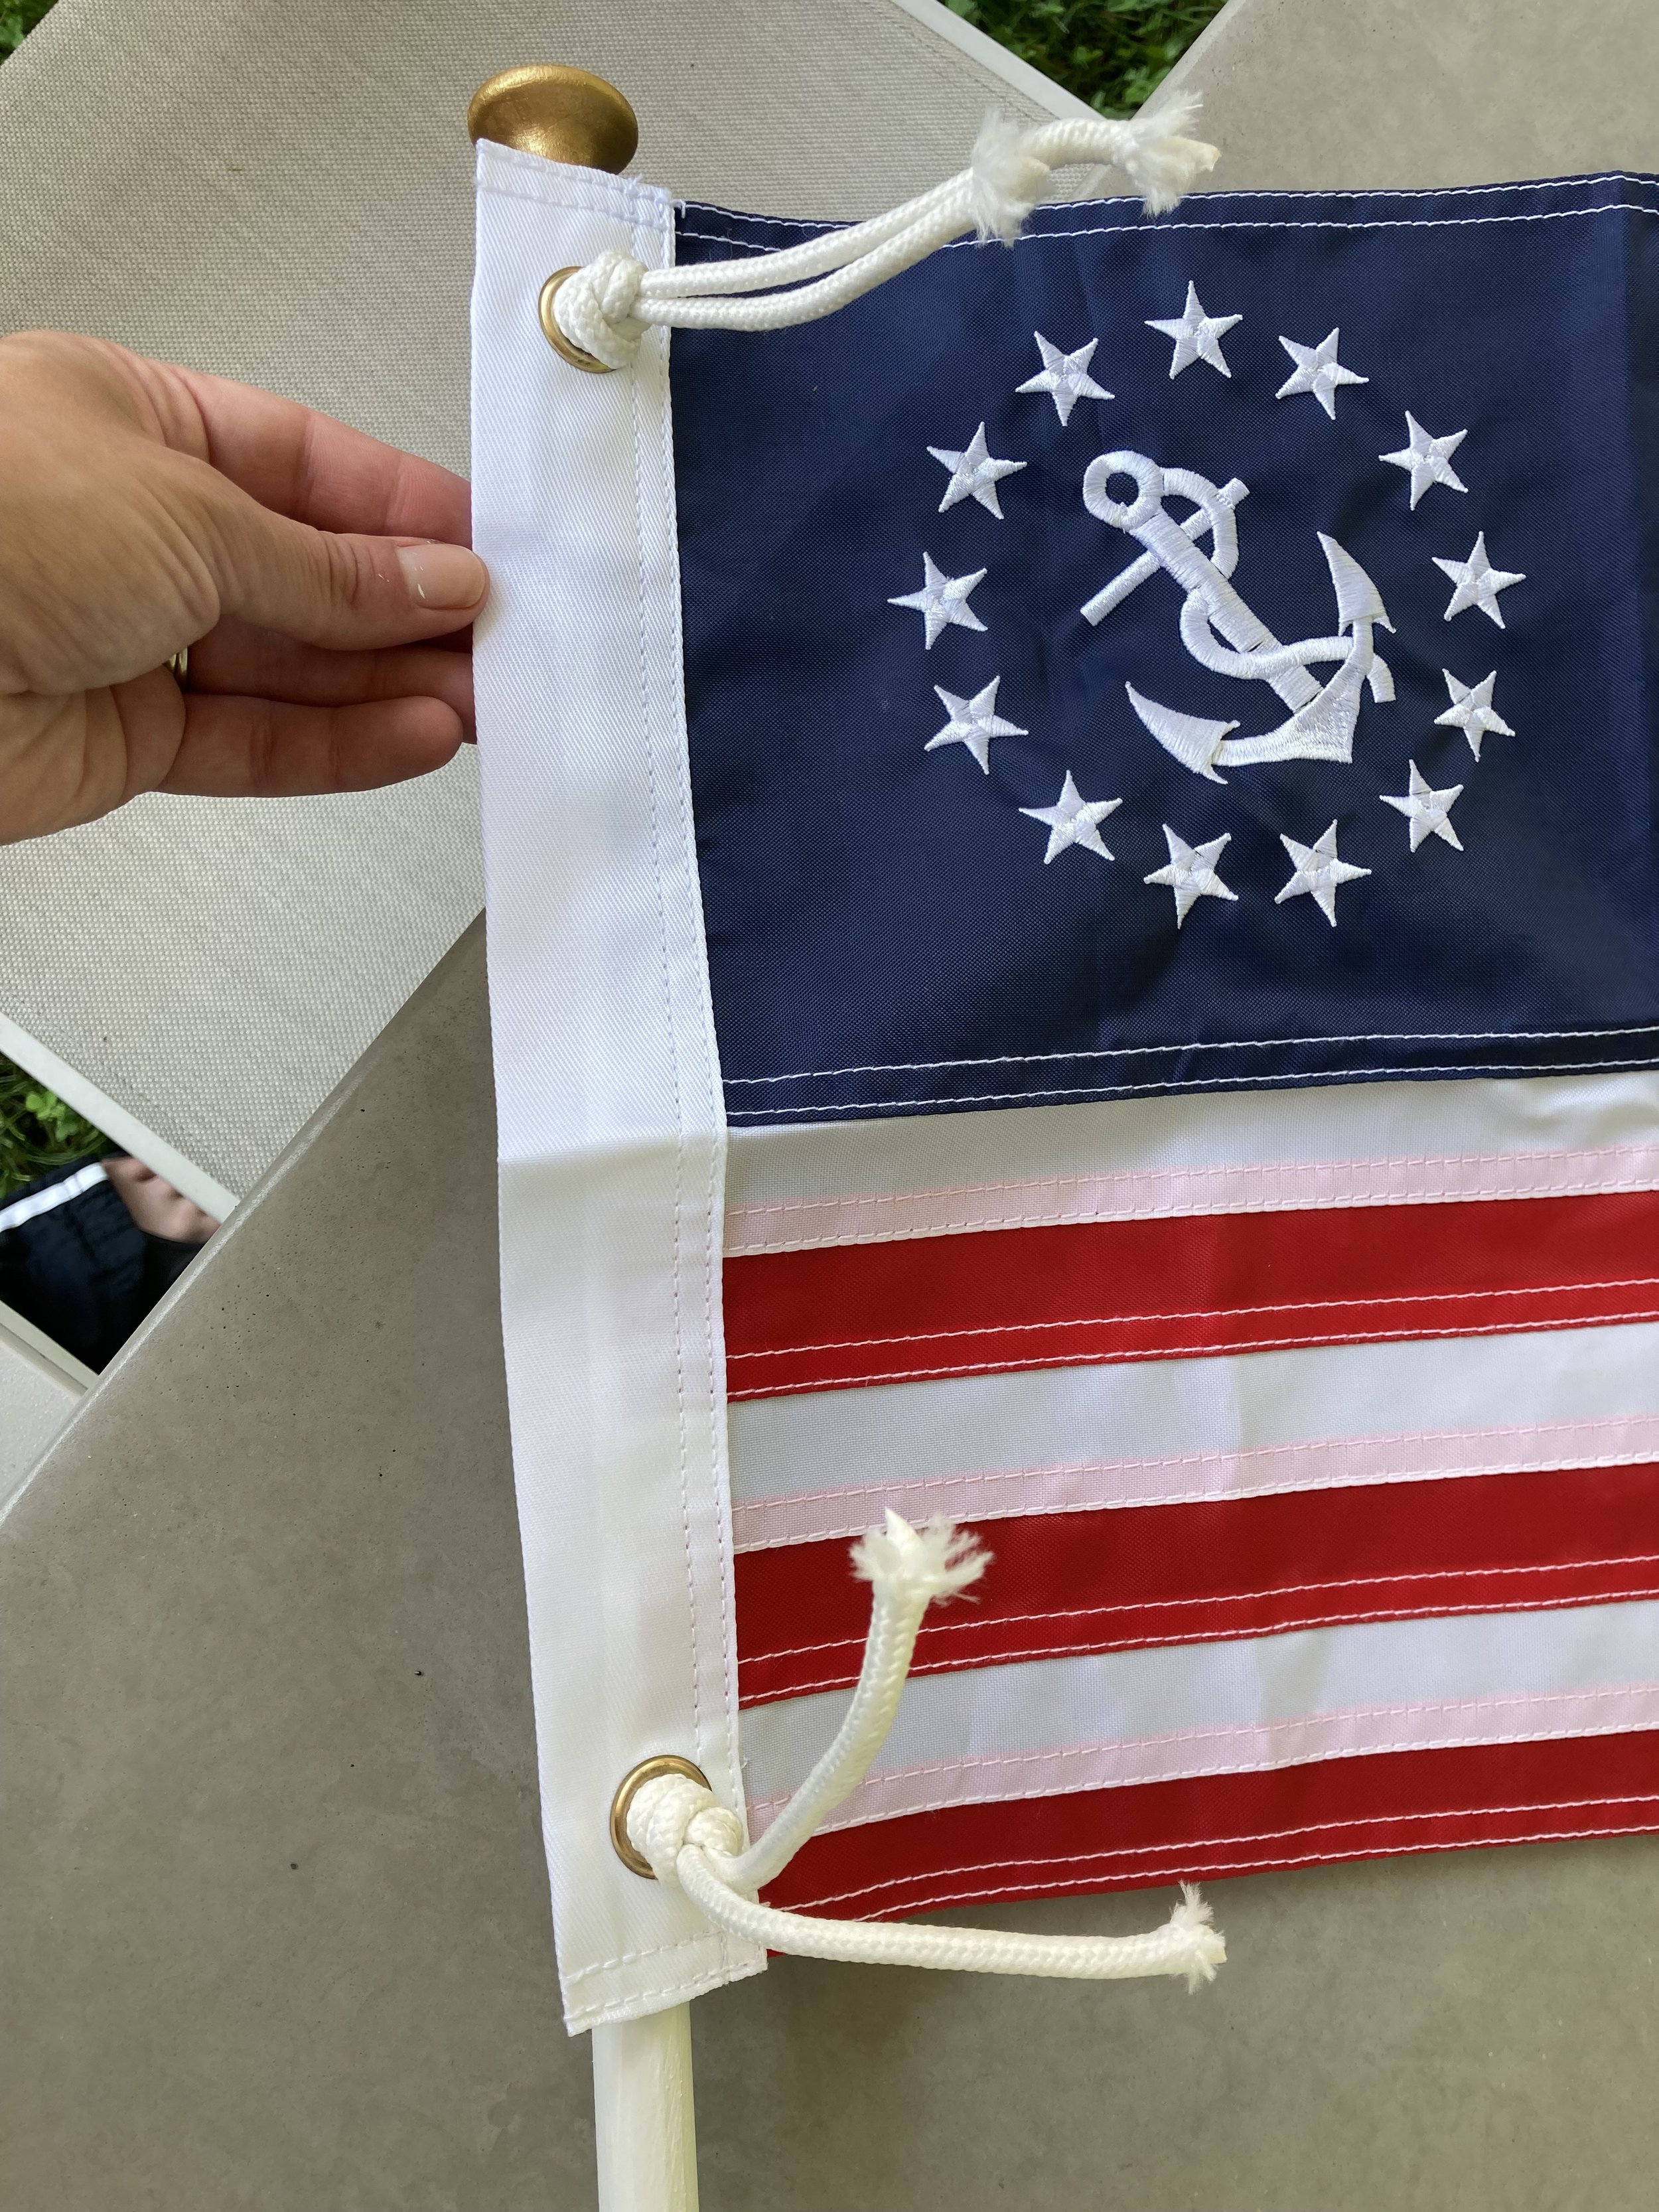
And now we can attach the flag! I just used some cotton clothes line rope to tie the flag to the flagpole. The wooden flagpole has enough grip and the flag is so small that we don’t have any issue with the flag sliding down or moving.

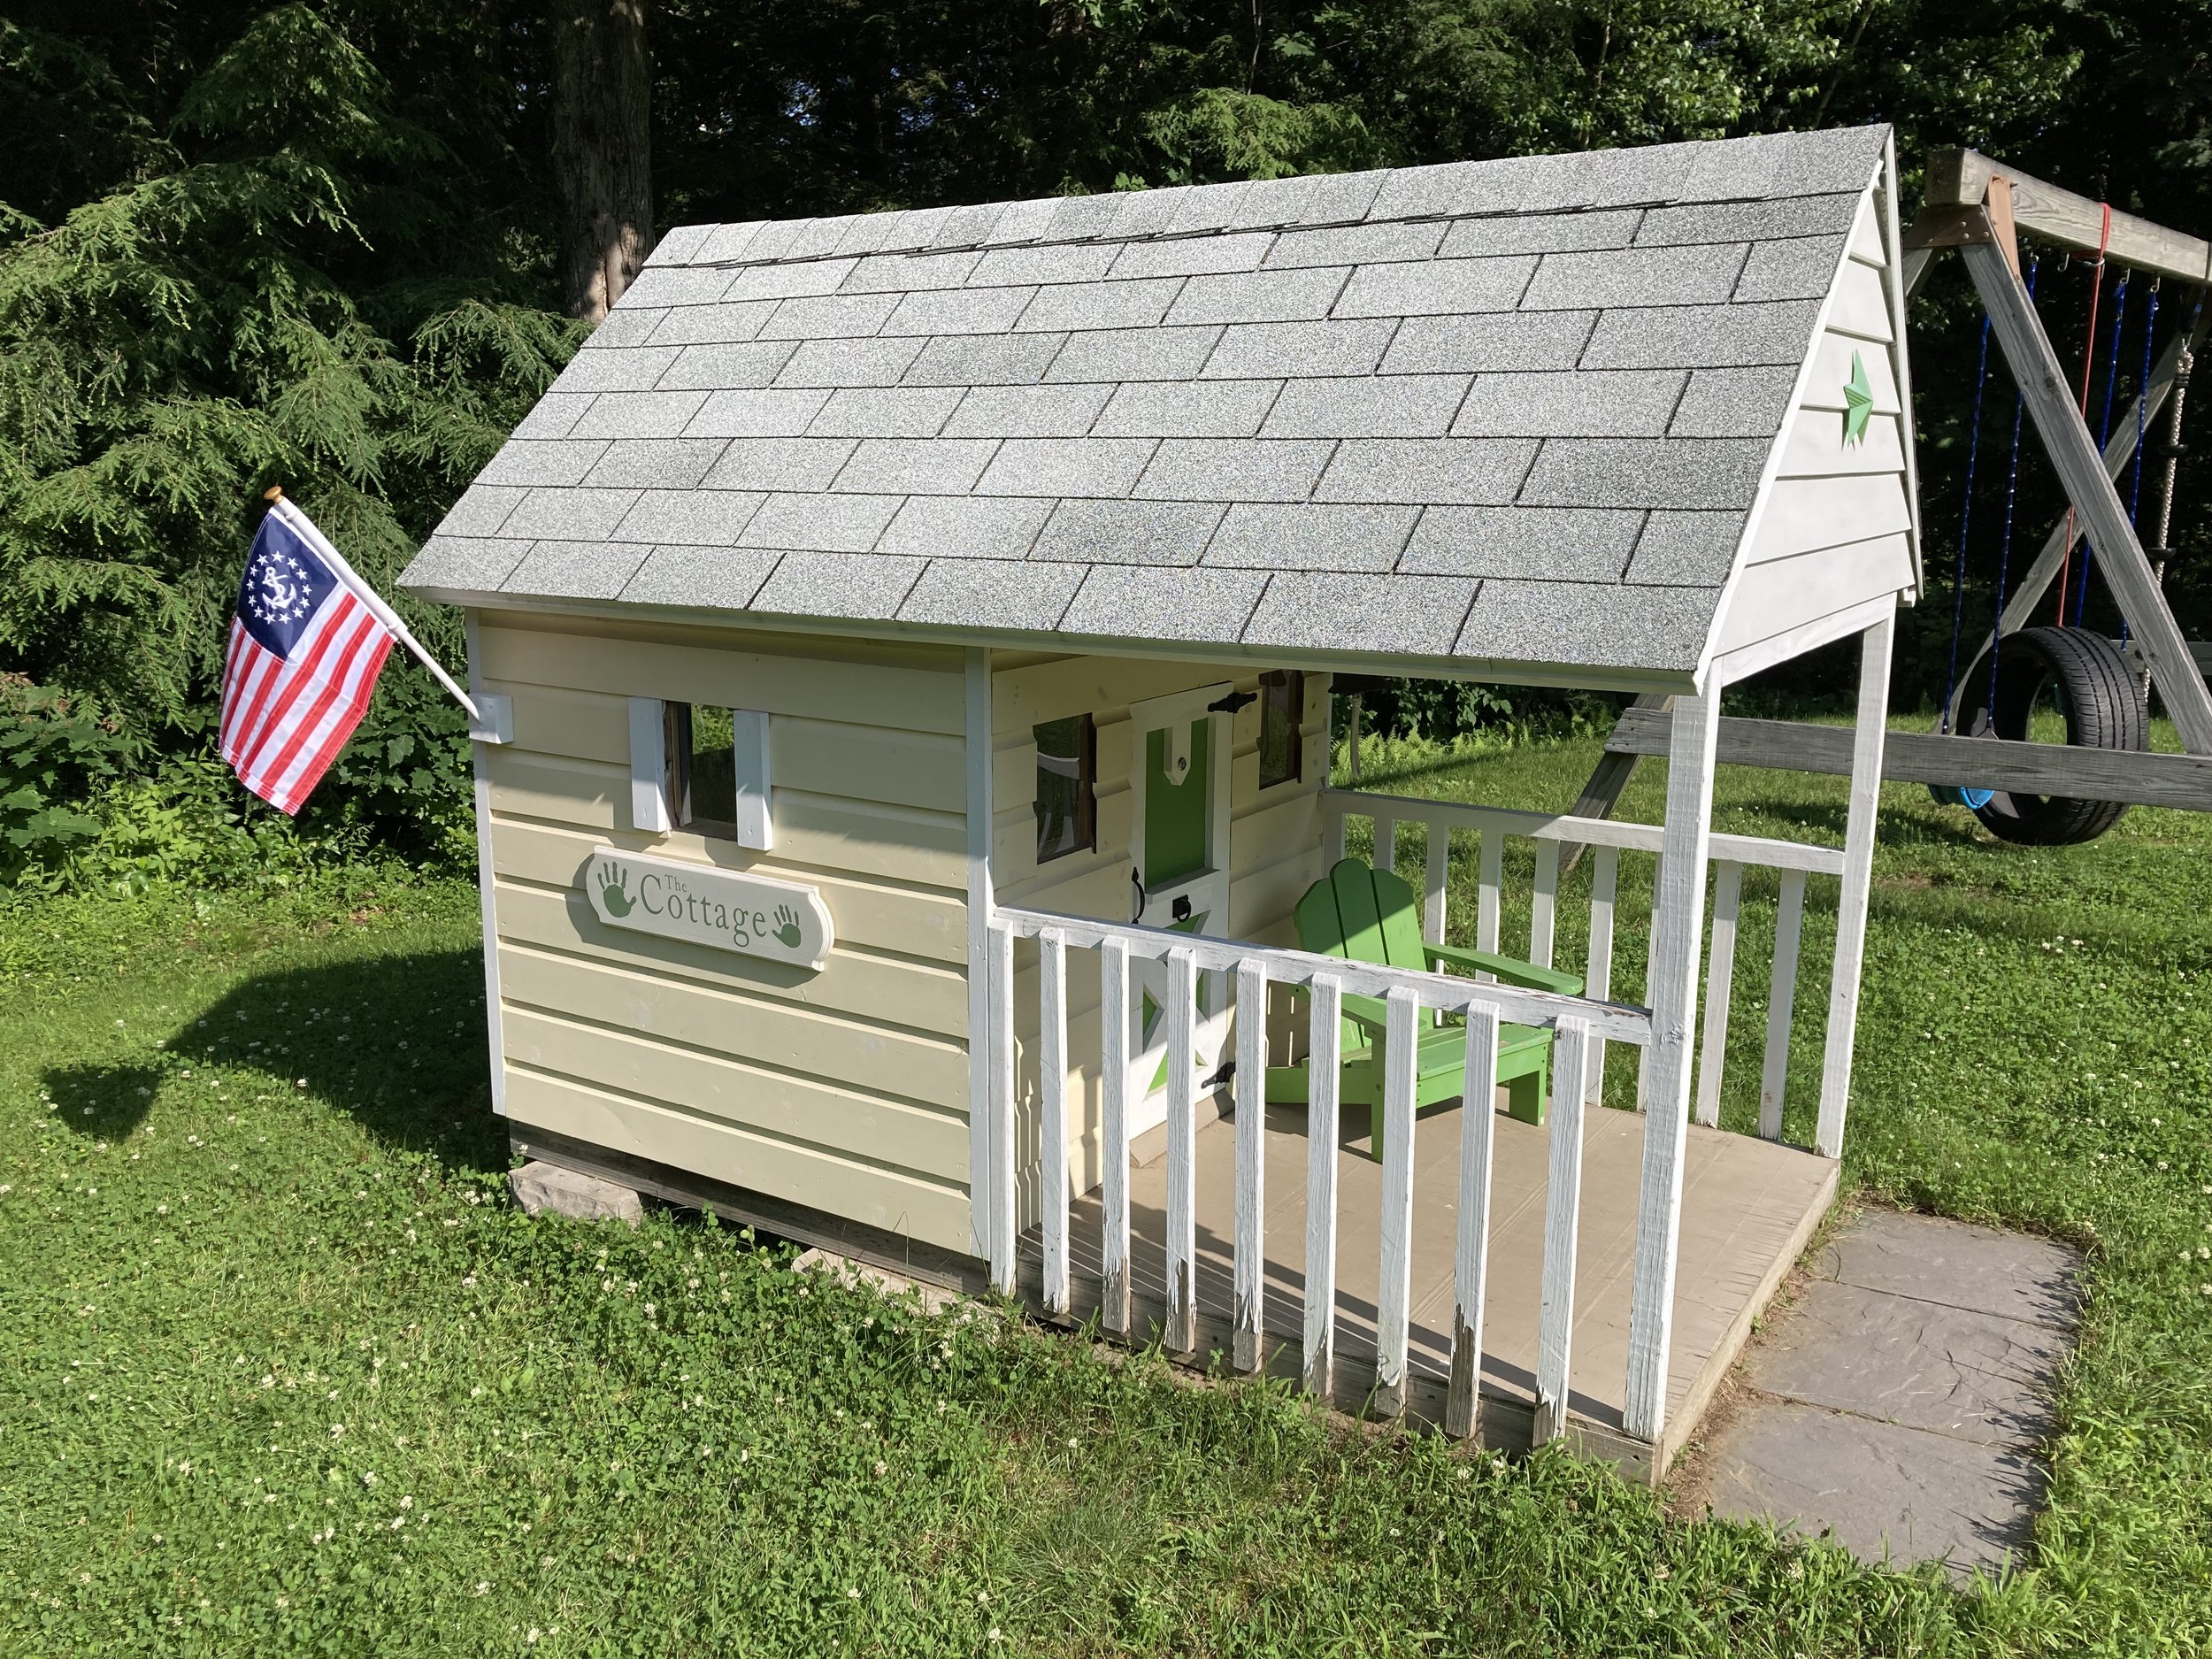
Now that your flag is assembled you just have to mount it. I screwed the base into the side of the playhouse then touched up the screw heads with white paint to help them blend in.

Attaching the flagpole

The finished product!

I will probably take the flag down come winter, as our harsh New England winters with heavy snow and ice would likely damage the pole but then I plan to put it right back up in the spring.

DIY Playhouse Flagpole

| "The Cottage" Sign - I made this a few years ago by making a stencil for the words using my Cricut and having the kids dip their hands in paint for the handprints. |

A few other Playhouse details…

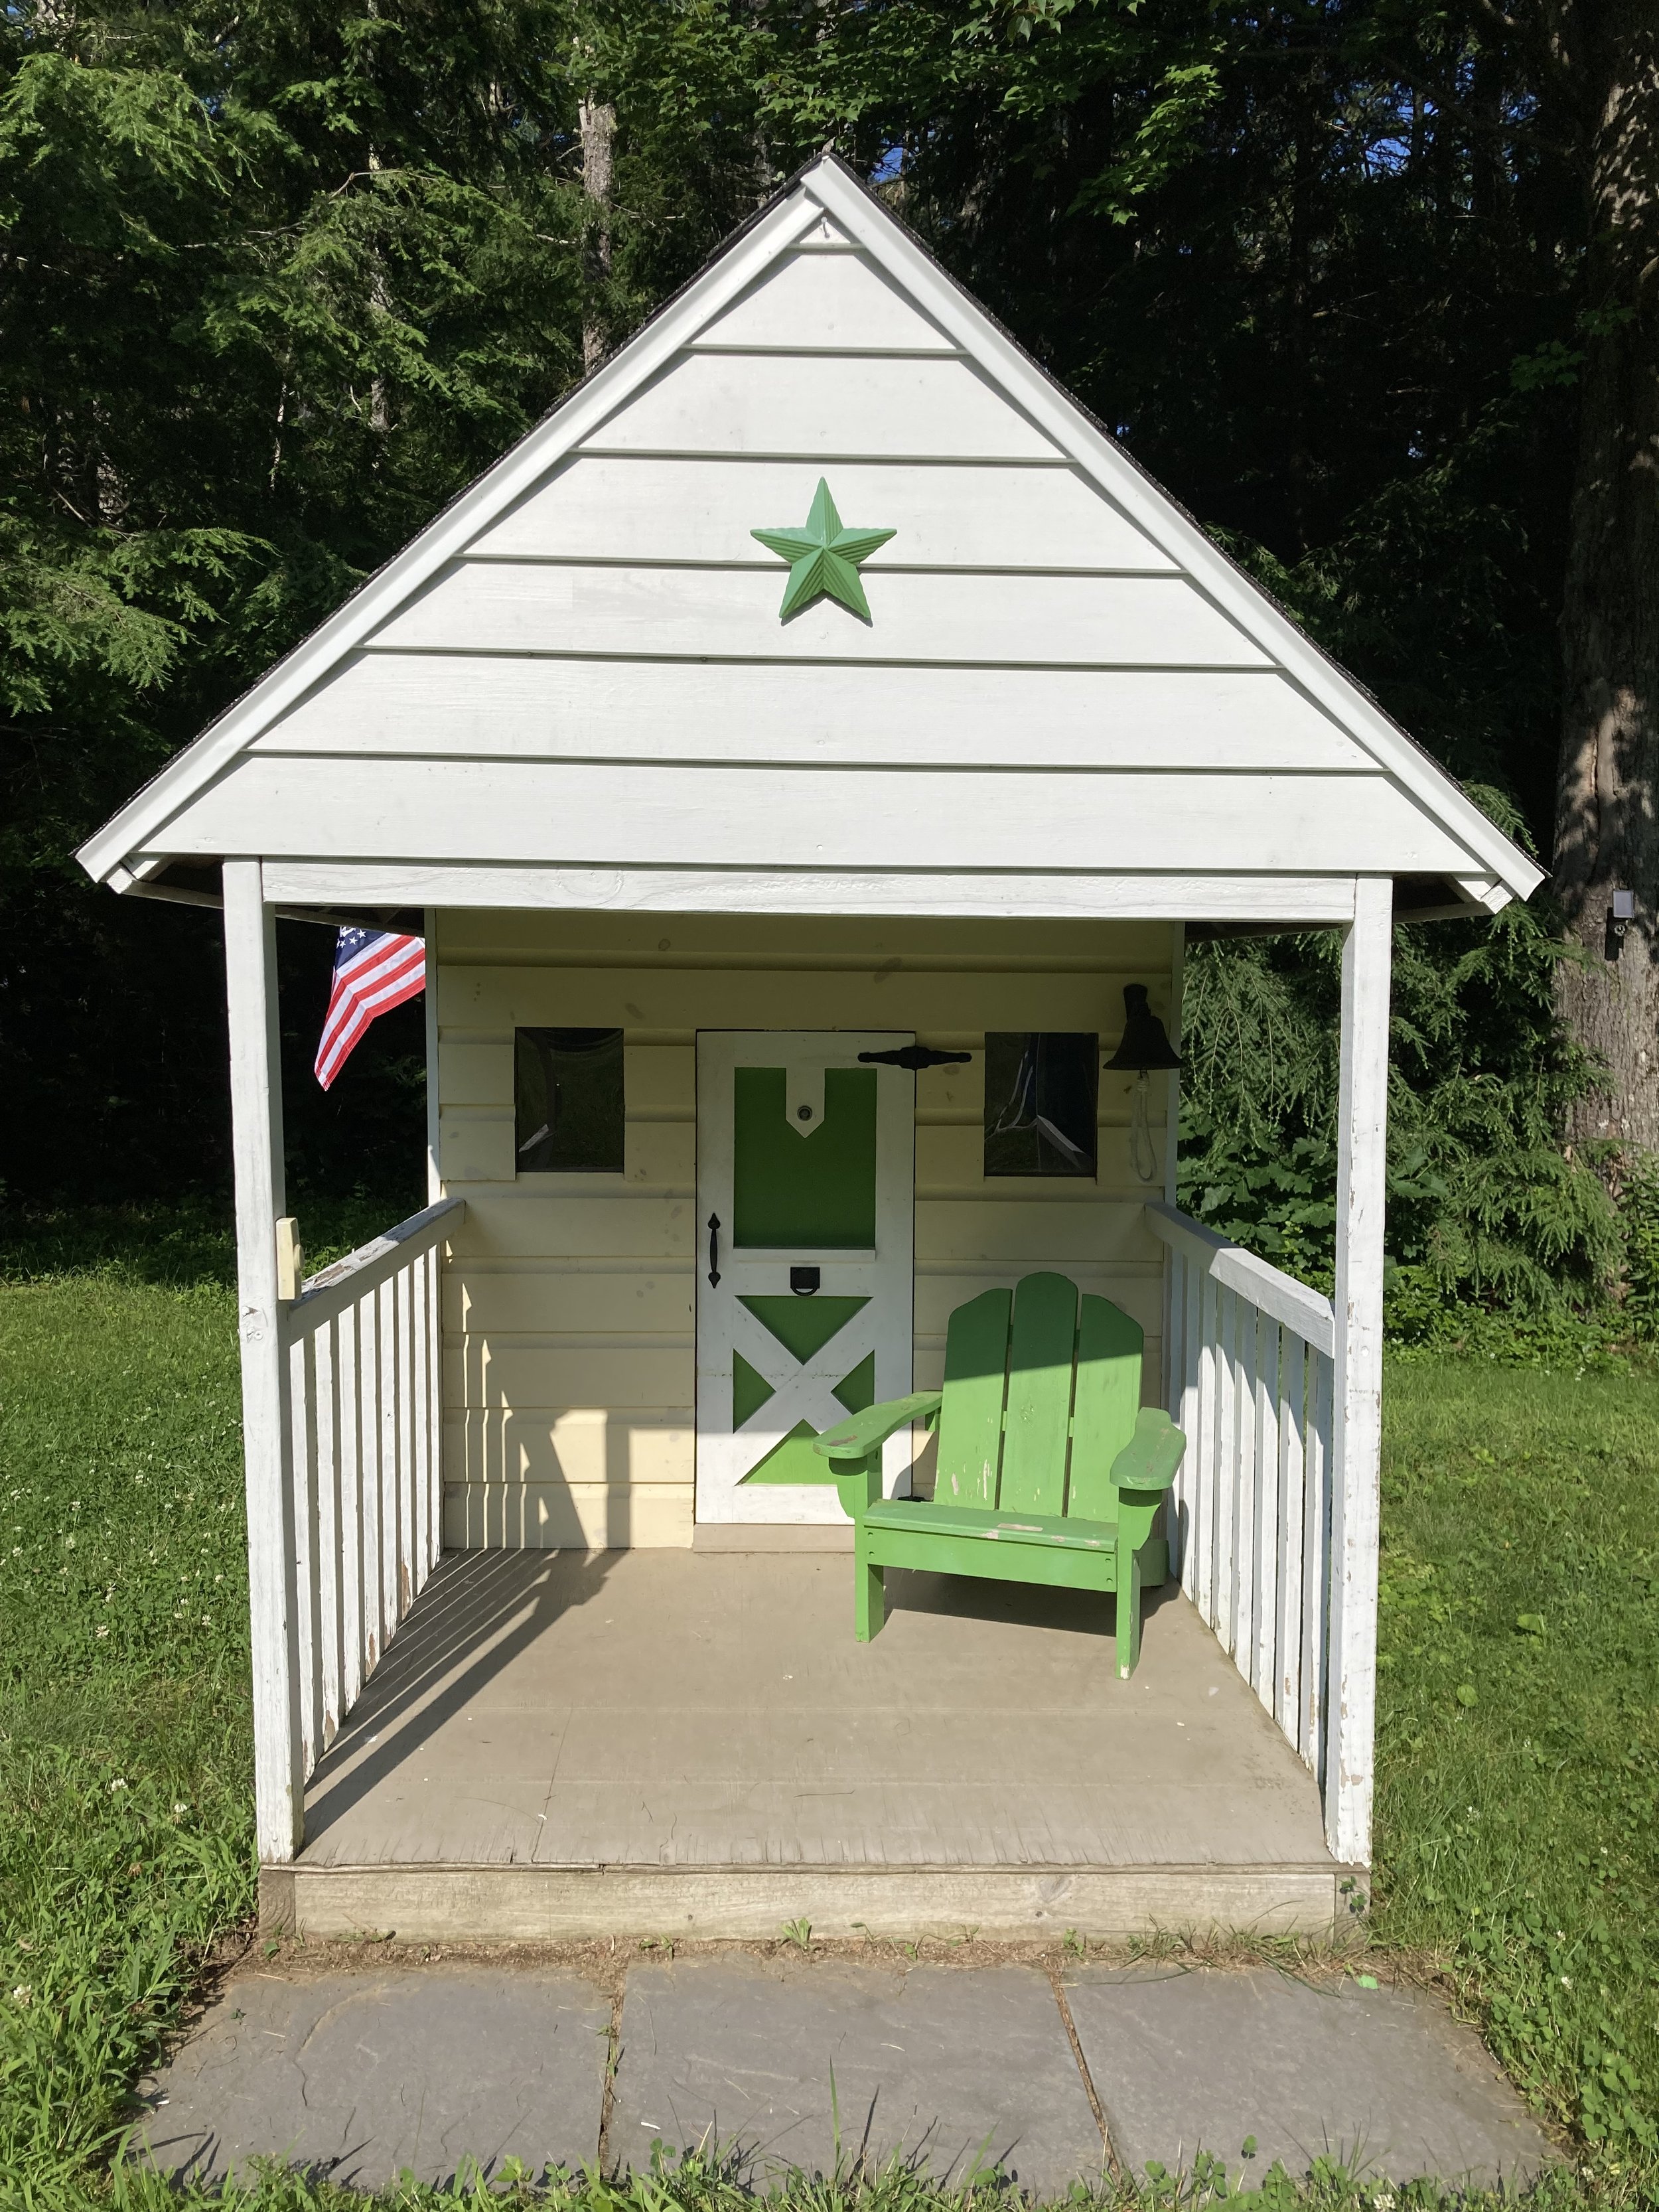
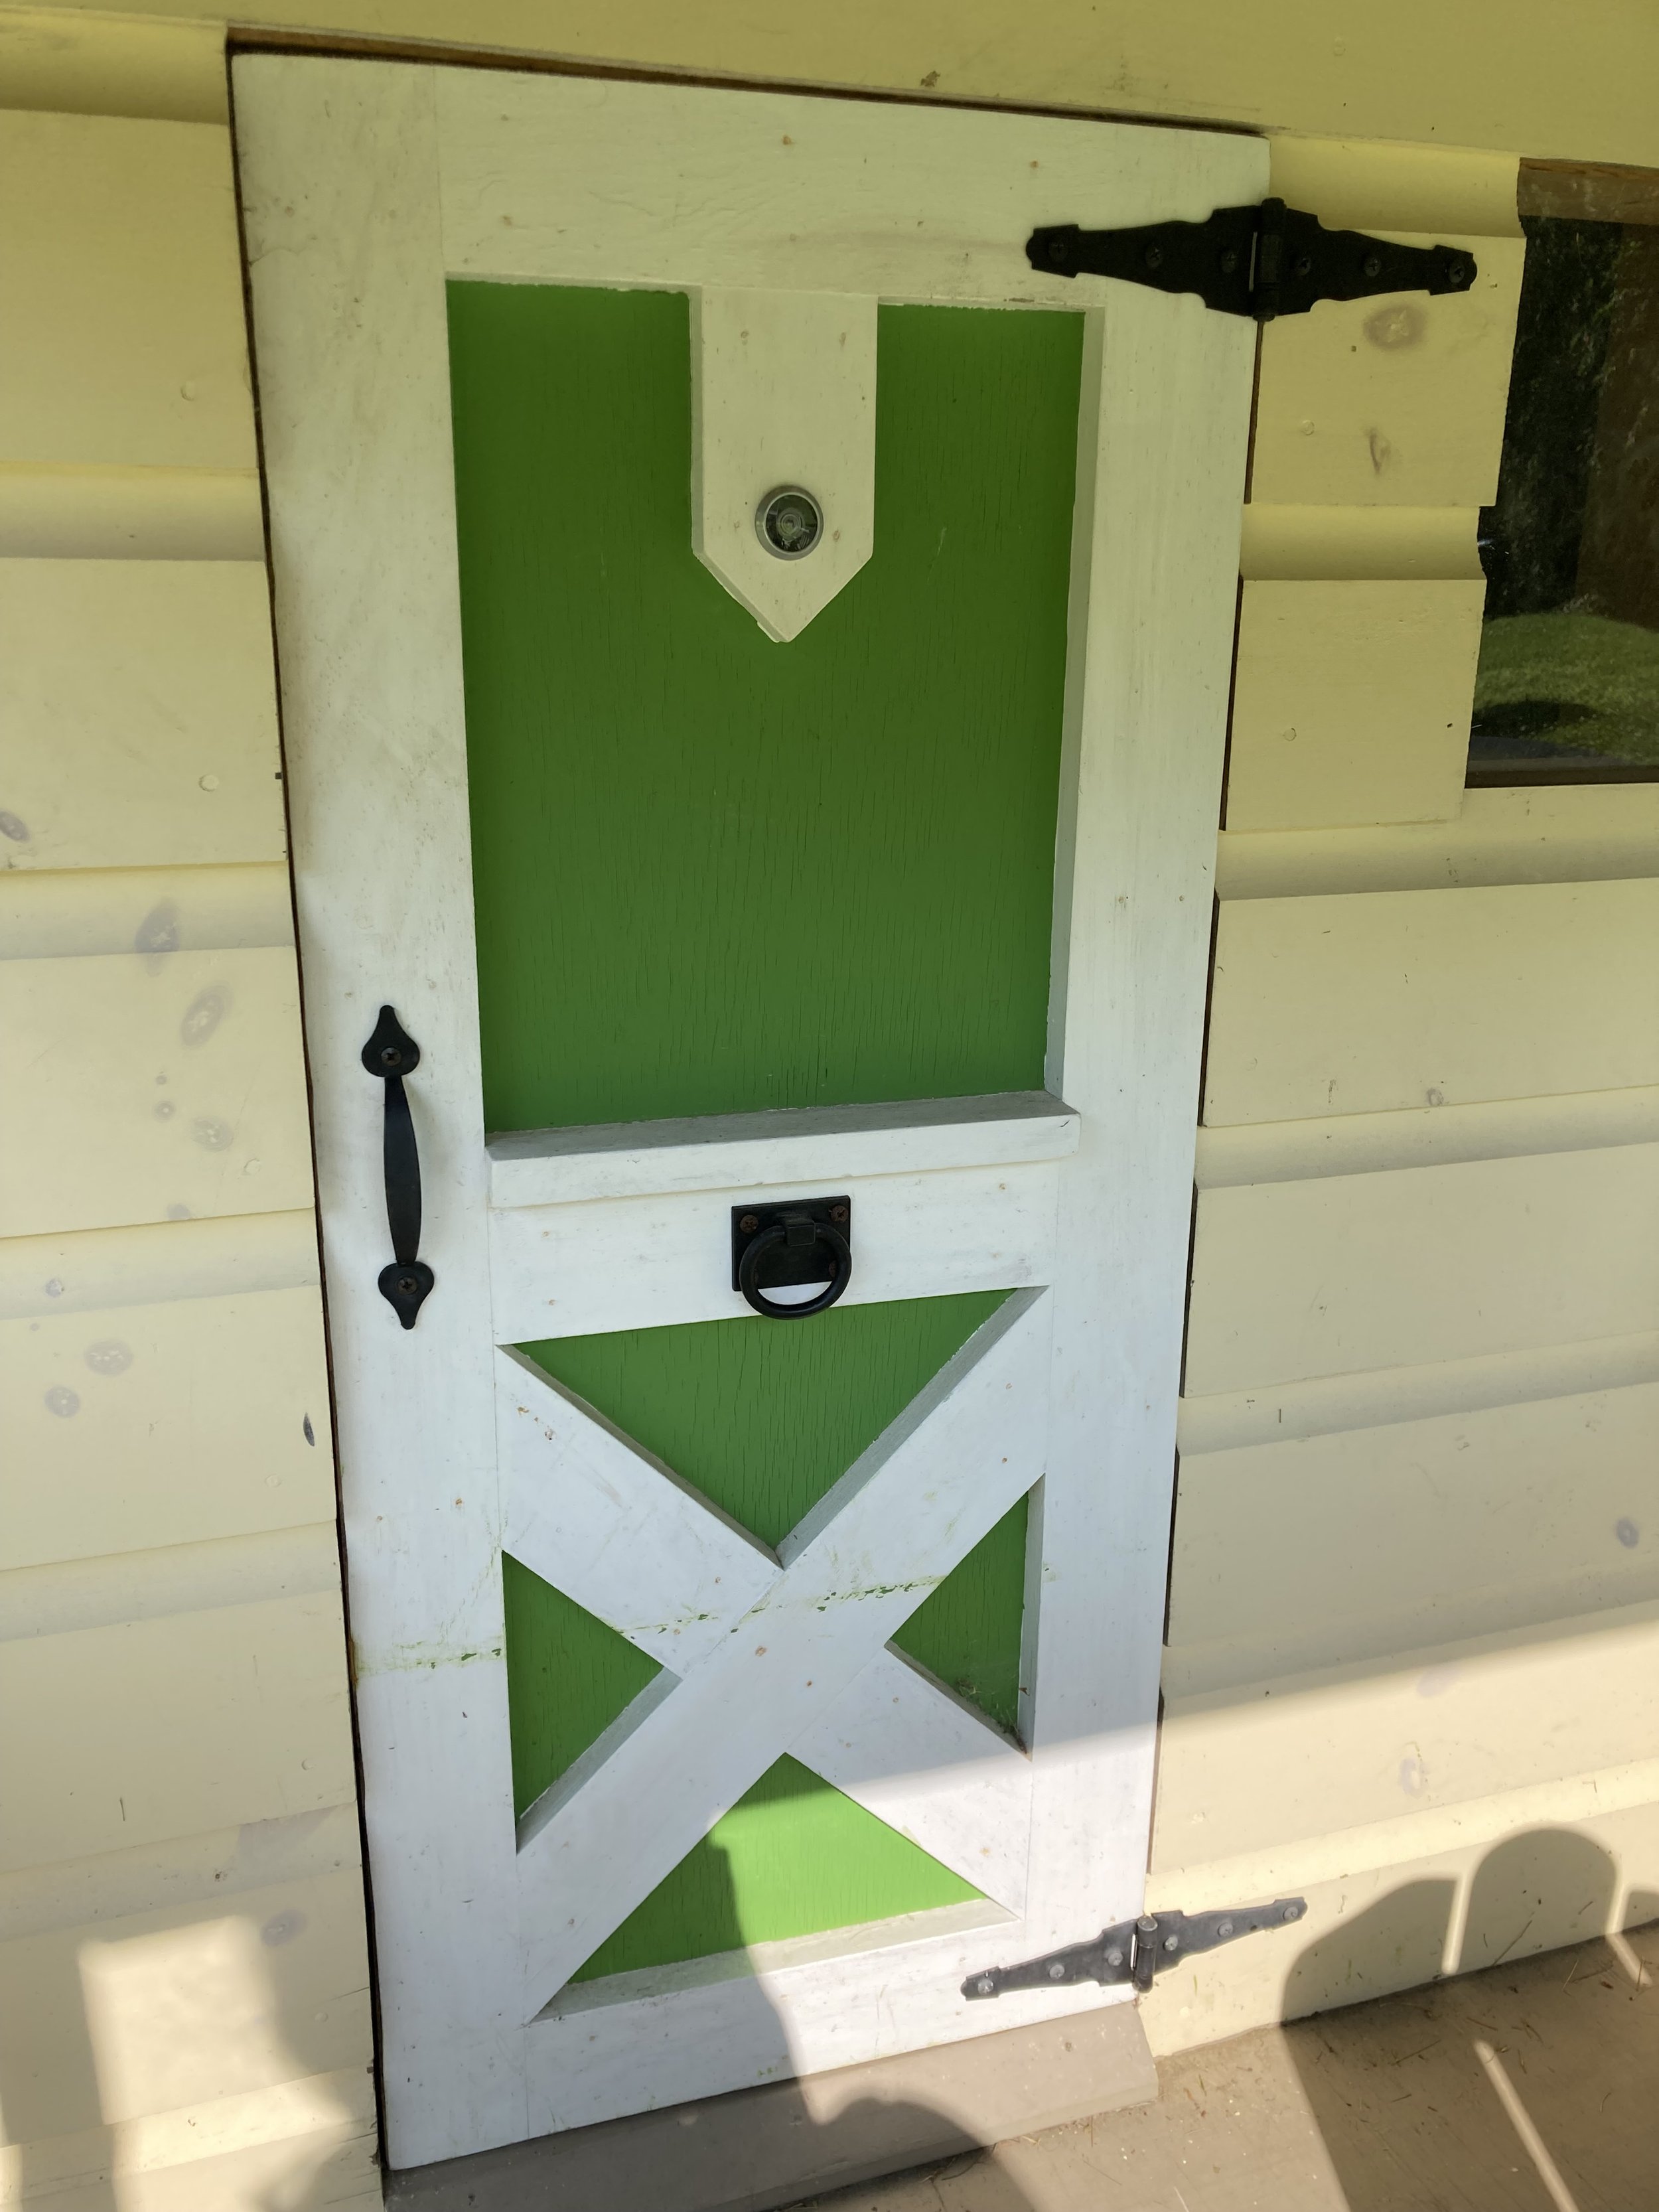
I just love the simple details of our little playhouse - my favorite being the amazing custom farm-style door my husband made for the playhouse.

Kids Playhouse Details

| Similar Wireless Doorbell - we put the button on the porch post and hung the box inside the playhouse so the kids can ring the doorbell to be let in. | Similar Kid-Sized Adirondack Chair - we got a kid-sized adirondack chair at a yardsale and painted it the same bright green that we painted the door (the original chair was yellow!). |

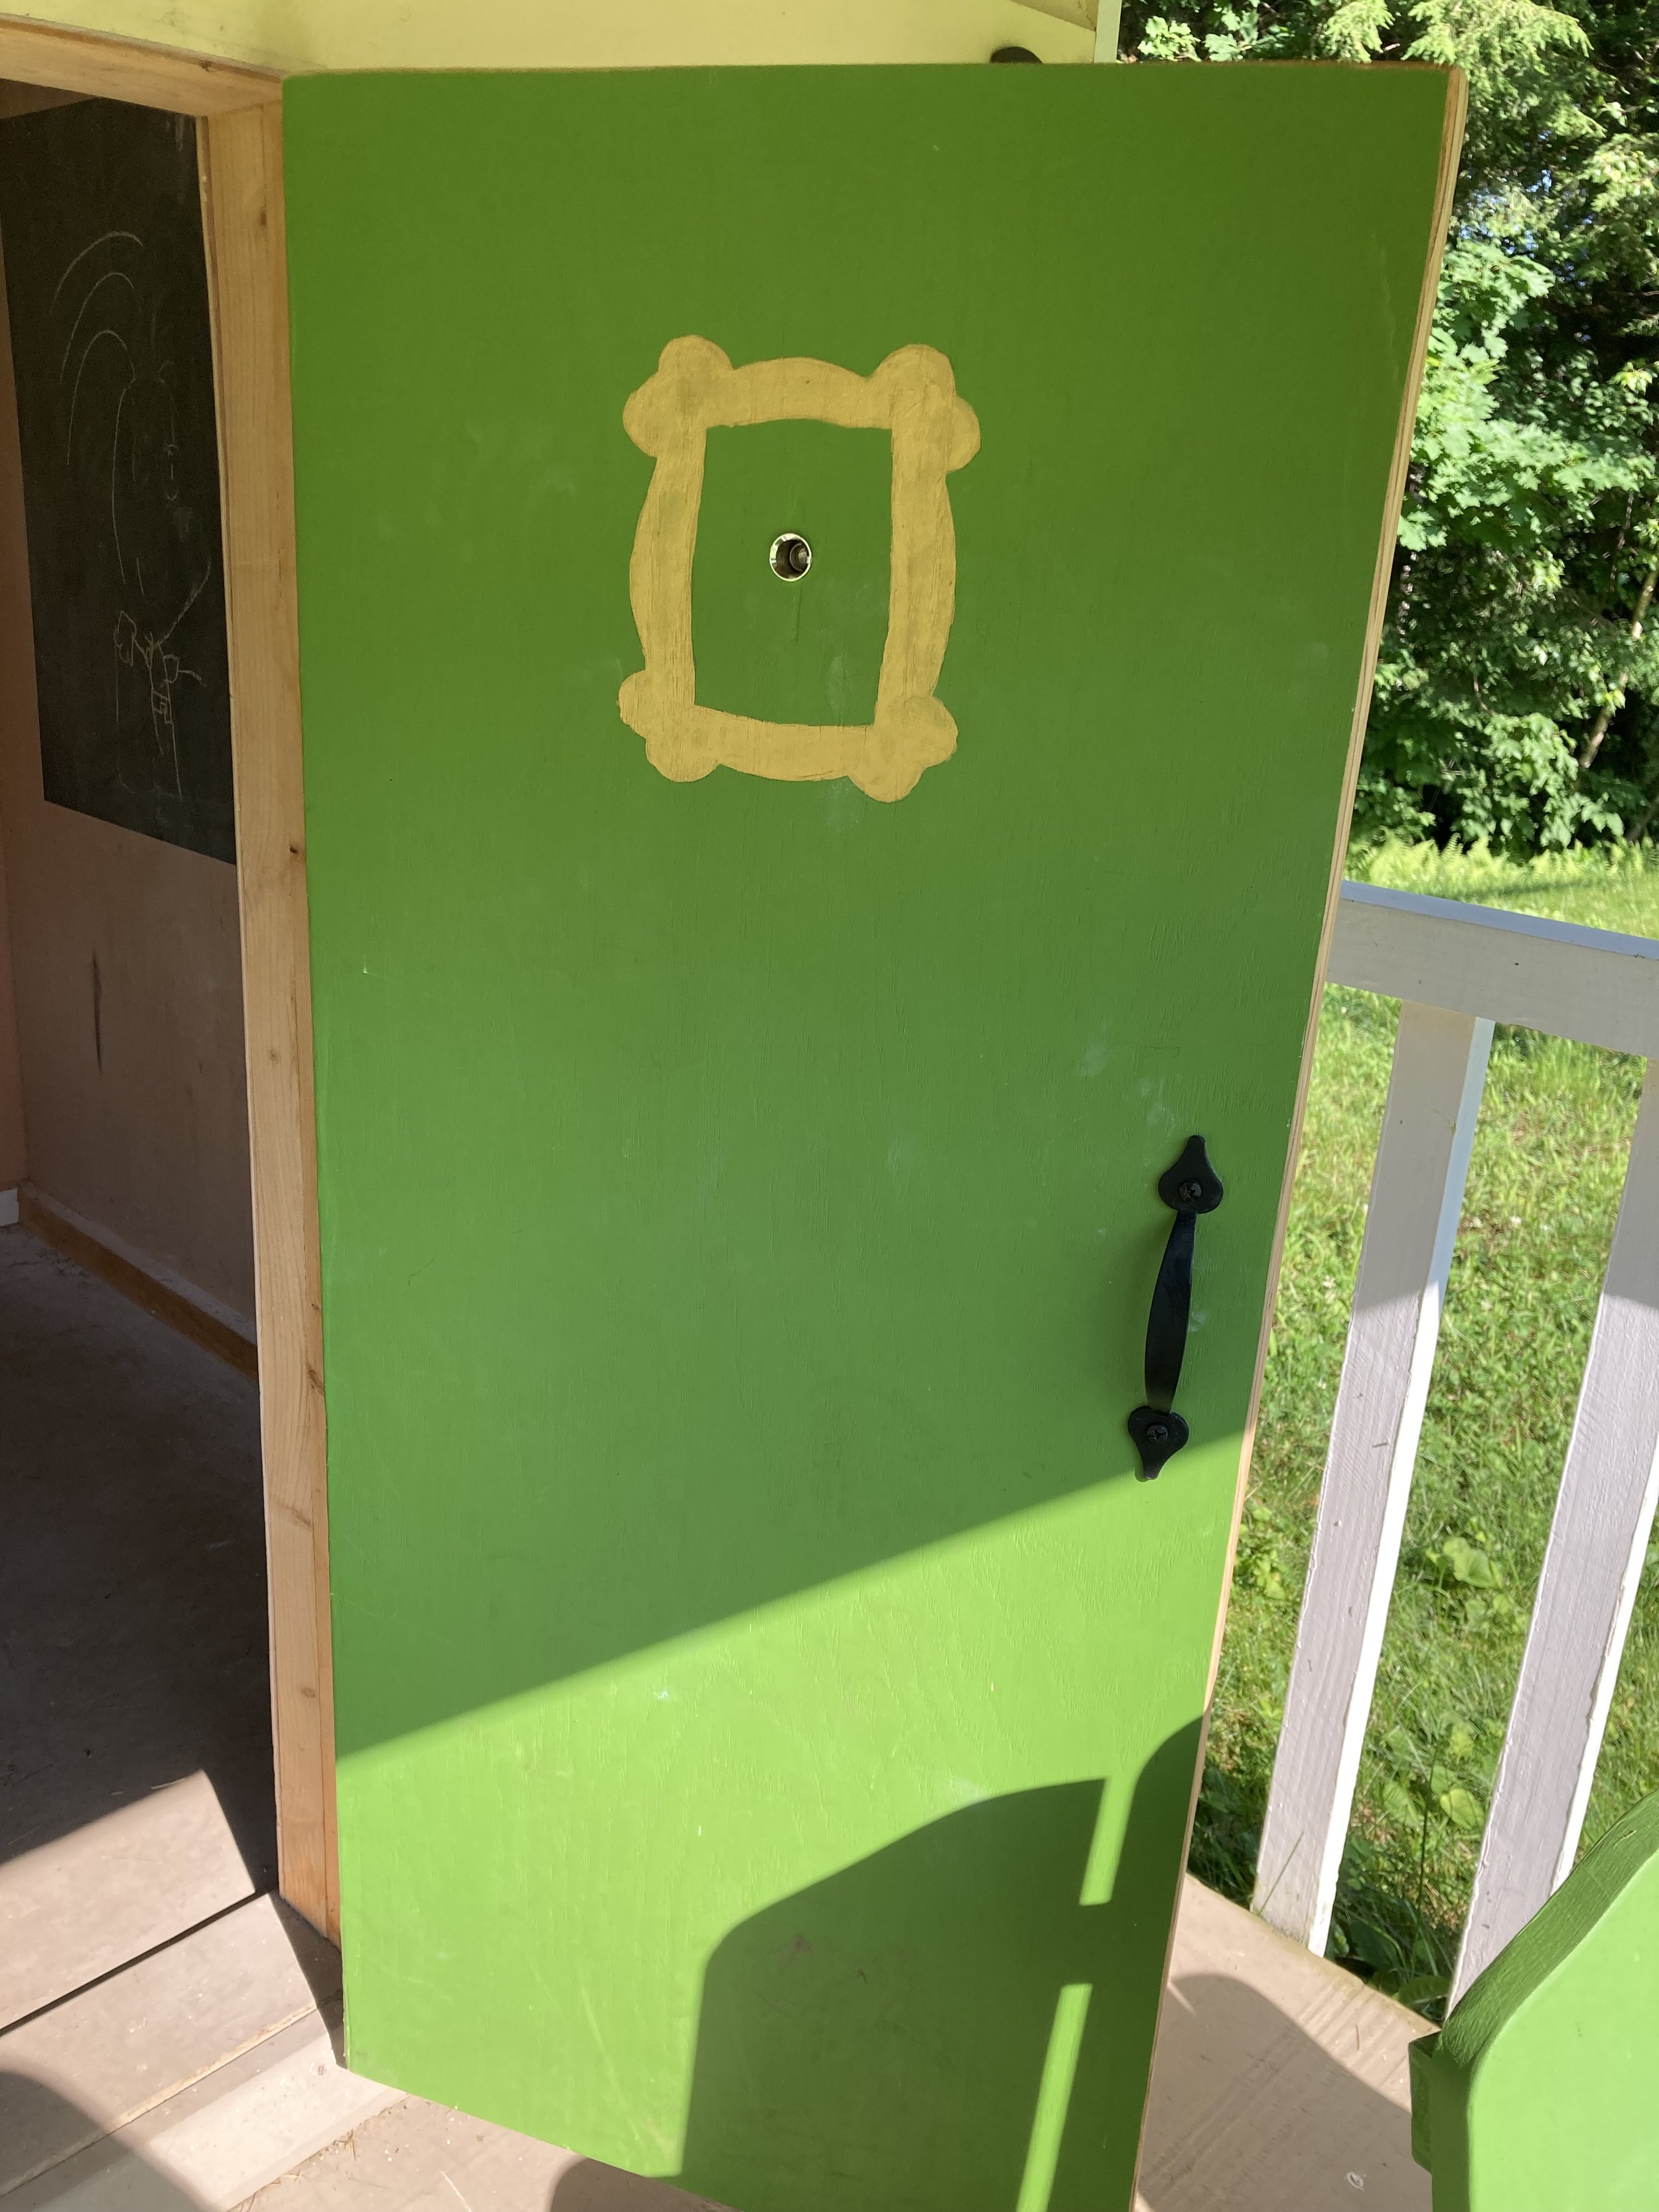
| Peep Hole - We added a peep hole to the playhouse door too. The kids love looking through it to see who's ringing the doorbell. | "Friends" Reference - I just had to paint a gold frame on the back of the door around the peep hole, just like on the TV show "Friends." |

Bell detail

| Porch Bell - the kids always get a kick out of ringing it to call their friends in from around the yard. |

Chalkboard inside the playhouse

| Chalkboard - Inside the playhouse I painted one wall in chalkboard paint so the kids have a space to draw. We just keep the chalk and eraser on one of the windowsills inside the playhouse. |

PS - At Christmas we even decorate the playhouse with solar Christmas lights and a wreath!

KEEP UP WITH BIRCH LANDING HOME
|  Etsy  |  Facebook  |  Instagram  |  Pinterest  |  Bloglovin'  |  Hometalk  |

Etsy Sale Through June 3rd

We’re joining the spring Home and Living Sales Event over on Etsy, everything in our shop is 10-20% off now through June 3rd! Happy Shopping :)

New England Lakeside Baseball Cap

KEEP UP WITH BIRCH LANDING HOME
|  Etsy  |  Facebook  |  Instagram  |  Pinterest  |  Bloglovin'  |  Hometalk  |
Giving Backyard Maple Sugaring a Try

We’ve lived in New England all our lives, but I’m ashamed to admit we’ve never tried maple sugaring ourselves until now. We have several family friends that own large-scale sugar shacks so we’re familiar with the process and had some great resources to ask questions. We kept it very small scale and simple, but you can get more technical with the process to make really consistent, great maple syrup. If you want to try this at home, I’d recommend doing your own research first to make sure your syrup is made safely and well. | This post contains affiliate links |

Trying Maple Sugaring at Home

I didn’t take too many photos of the process but we started by tapping the trees. We drilled into sugar maples at a slight upward angle so the sap will drip out, tapped in special metal spigots (also called spiles) with hooks, and hung buckets to catch the sap. It's important to do this at the right time of year when the sap is running, usually late winter/early spring when the days are above freezing and the nights are cold.

Once we got a total of 5 gallons of sap, which only took a day or two, we started boiling. It’s a good idea to boil outside as it takes a while and makes a lot of steam and you probably don’t want that much moisture inside your house. We used a stainless steel pot on a propane stove ring in our driveway to boil. Once the liquid was reduced by half, we added more sap, and just kept boiling it down until it was a good color/consistency.

Trying Maple Sugaring at Home

Serious maple sugar makers would reccomend you use a hydrometer to test the water content of your syrup to make sure it's at the right consistency. However, we totally just winged it and kept reducing until it looked pretty good. We prefer a lighter, more honey-tasting syrup so we didn't reduce it down to a dark amber syrup.

It takes a lot of sap to make a little syrup. We boiled down about 3+ gallons of sap to get the maple syrup you see in the jar. It takes a lot of work and a lot of time, but it was a fun experience for the kids and now we get to enjoy the fruits of our labor. Mmmmm, pancakes!

Disclaimer: This was a very quick overview on the process we did to make maple syrup. If you decide you would like to give it a try, I recommend researching it on your own and asking an experienced producer for advice before starting.

KEEP UP WITH BIRCH LANDING HOME
|  Etsy  |  Facebook  |  Instagram  |  Pinterest  |  Bloglovin'  |  Hometalk  |
Favorite Finds of 2020

I thought I would do a quick round up of my Favorite Finds of 2020. These are products or items that we loved or used frequently and were new to us this past year or became a staple in our routine - best of all, most are under $30! | This post contains affiliate links |

Favorite Finds of 2020

Favorite Finds of 2020

“Unpaper Towels”

Favorite Finds - Unpaper Towels

I know I've talked about this several times now, but making the switch to these "Unpaper Towels" has definitely been my top Favorite Find of 2020. They save us money every month on buying paper products and since they're reusable they're good for the environment in the long run. So happy we made the switch!

Stars Above Pajama Set

Favorite Find - Stars Above PJs

With the year that it's been having a cozy PJ set has been a must. I got this Stars Above Pajama Set from Target (just added it on to my online order) this winter and they have quickly become my favorite. They are SOO soft and luxurious feeling, perfect for lounging around at home.

OXO Cold Brew Coffee Maker

Favorite Find - OXO Cold Brew Maker

My husband got this OXO Cold Brew Coffee Maker as a birthday gift and we've both been enjoying it all year. Now that we can't go out for coffee all the time it's been really nice to be able to make our own cold brew concentrate right at home.

Mask Lanyards

Favorite Find - Mask Lanyards

Mask Lanyards have been the unsung accessory hero this year. We've been using them every time we go hiking so we can have our masks at the ready if we unexpectedly come across others. We chose ones with a breakaway feature for some added safety.

Aura Cacia Aromatherapy Spray

Favorite Find - Lavender Linen Spray

This year I've been using my Aura Cacia Lavender Aromatherapy Spray on our linens every night before we go to bed - it's so relaxing and spa-like and we find it helps us fall asleep. (Make sure to spot test on your linens first, but we've had no problems using it on our fabrics.)

Powdered Tide for Cleaning

Favorite Find - Powdered Tide

This year I jumped on the Powdered Tide bandwagon - for cleaning, not for laundry. Just a little Powdered Tide mixed with warm water does wonders for washing smudgy walls and built-up grime on surfaces. I keep it under my kitchen sink (in an airtight plastic bag so moisture doesn't get to it), so it's ready to use anytime. It's such a great cleaning hack!

Hug Patrol Shoulder Wrap

Favorite Finds - Hug Patrol

I mean, who couldn't use a hug this year? Hug Patrol makes weighted wraps, blankets, and more. I collaborated with them last January (you can read that previous post HERE), but the wrap became a wonderful addition to my routine. It's so peaceful and comforting to curl up on the couch with a good book and the weighted wrap across my shoulders.

L.L. Bean Sweater Fleece

Favorite Find - LL Bean Sweater Fleece

I've actually had this L.L. Bean Sweater Fleece for a few years now, but it's really gotten a lot of use this year as my go-to for "Driveway Visits" with family and friends. We've been having socially distant driveway visits (outside, everyone standing far apart and masked, no contact) to see our family and friends when we can. This Sweater Fleece has been great as a casual and cozy layer that still looks nice for those chilly visits outside.

KEEP UP WITH BIRCH LANDING HOME
|  Etsy  |  Facebook  |  Instagram  |  Pinterest  |  Bloglovin'  |  Hometalk  |

Cloth Face Mask Organization and Storage

We’re definitely living in different times right now… and it’s becoming clearer that it looks as though we will have to co-exist with the COVID-19 virus for the foreseeable future. Because of that anything we can do that might mitigate the risk of virus transmission, like always wearing face masks or face coverings when outside our homes, have become a part of our “new normal.” Since mask-wearing should be part of your new routine whenever you leave your house, it’s a good idea to have a system in place to make sure you always have clean masks at the ready and you never leave home without one. | This post contains affiliate links |

Cloth Face Mask Organization and Storage

Disclaimer: I am not giving medical advice. Make sure to always consult the CDC and local health officials for up-to-date recommendations on mask wearing, storage, and care. Cloth masks are not considered medical grade and should be washed in between each use… check with individual mask makers/companies on the best way to store/wash/care for your masks.

Mask Storage at Home

Cloth Face Mask Organization and Storage

It’s a good idea to keep your clean masks in a designated area of your home, preferably in a place where you’ll be sure to grab one on your way out the door to do errands, go to work, etc. At first glance it might look like we have a lot of masks, but we really don't considering we're a household of four and it's essential to have enough masks to get through between laundry loads. We're still staying home and social-distancing very seriously, but whenever we have to do an essential errand/appointment or just go for a drive to get out of the house, we always make sure to have a clean mask for everyone that’s leaving the house.

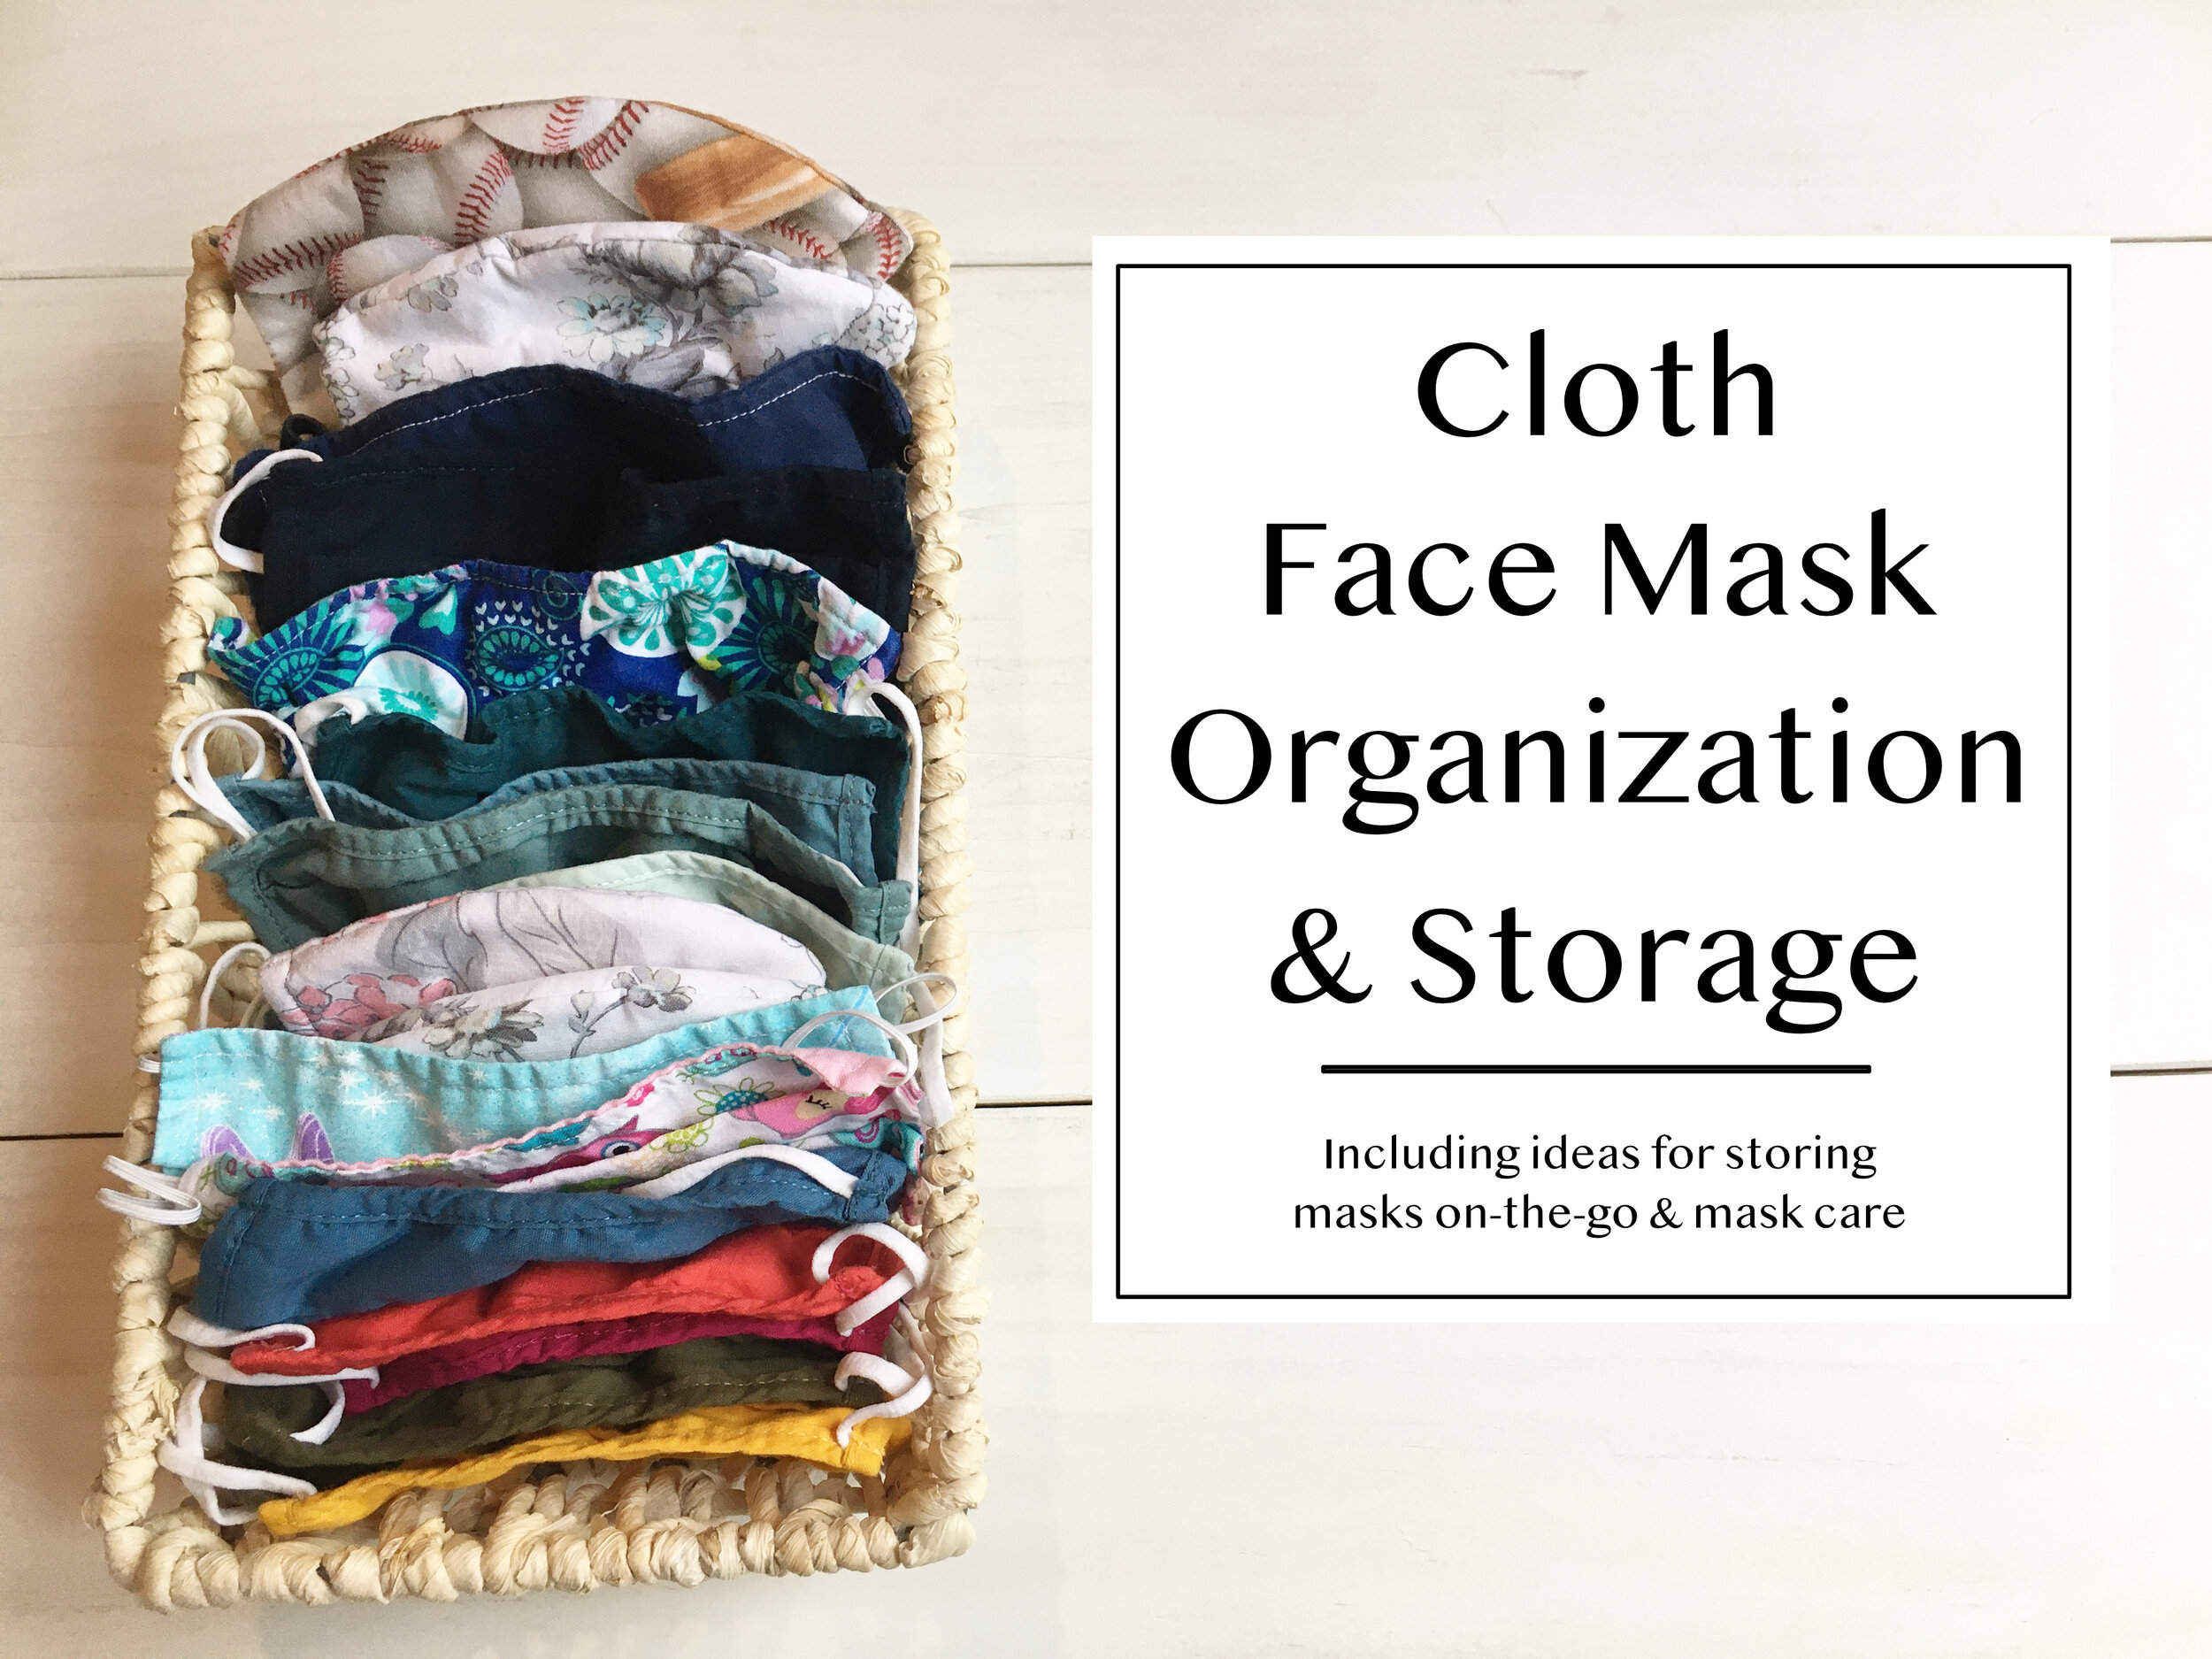
In our home, we've designated a special basket that sits up high on our mudroom shelf, full of clean masks. We put the adult masks towards the back, and then kids masks in the front. I was unable to find a basket the same size on Amazon to link to, but I did find this sleek bamboo box that looks to be the perfect size. If you don't have shelf space for a basket, you could alternatively use wall-mounted baskets for storage.
Our masks are a mix of ones made with love for us by family members, as well as ones purchased from Old Navy and Miss Harlow VT (one of the local makers I featured in my "Masks by New England Makers" blog post).

If you don't like the idea of using a basket like we do and would rather hang your masks by the door, another option would be using a small set of hooks such as a set of compact coat hooks or key rack - or even just simple Command Hooks.

Mask Storage On-The-Go

Cloth Face Mask Organization and Storage

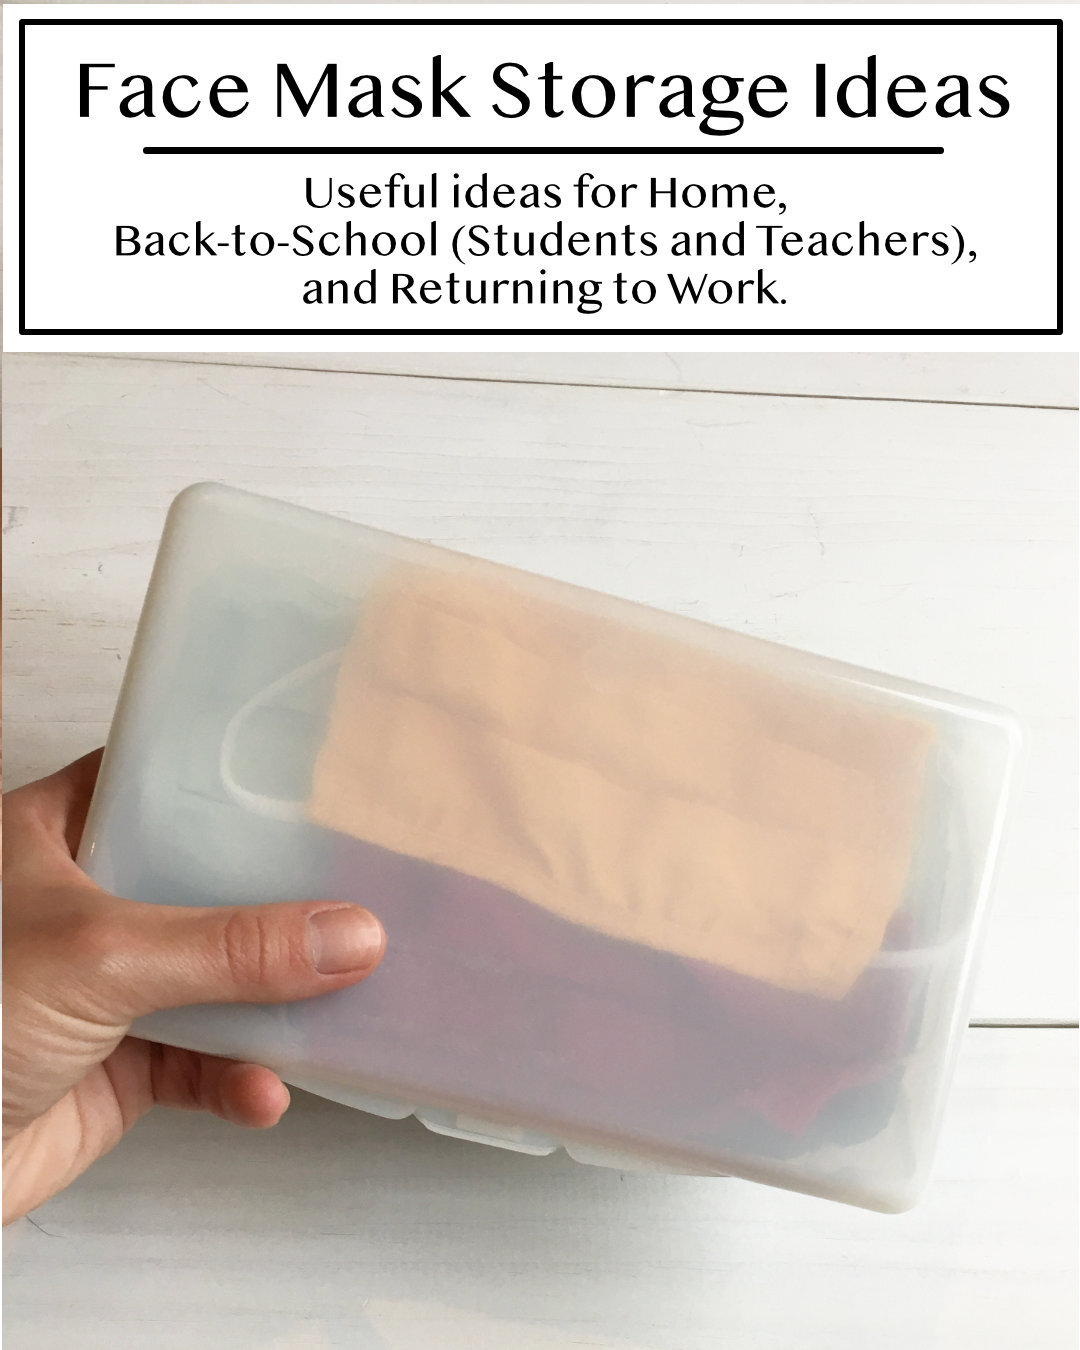
We have found a slim wipes container is the perfect size for holding several face masks on-the-go! In fact, we always make sure to leave our case packed with an extra mask for each family member in the car. That way we're always covered if we forget one or need to change masks while we're out of the house.
I think this would be a great way to carry extra face masks in your bag for work, or your child's backpack whenever they return to school. It would probably be a good idea to also keep a ziplock bag or separate sealed container in your bag in case you have a dirty/used mask that needs to be brought home to wash.

th Face Mask Organization and Storage

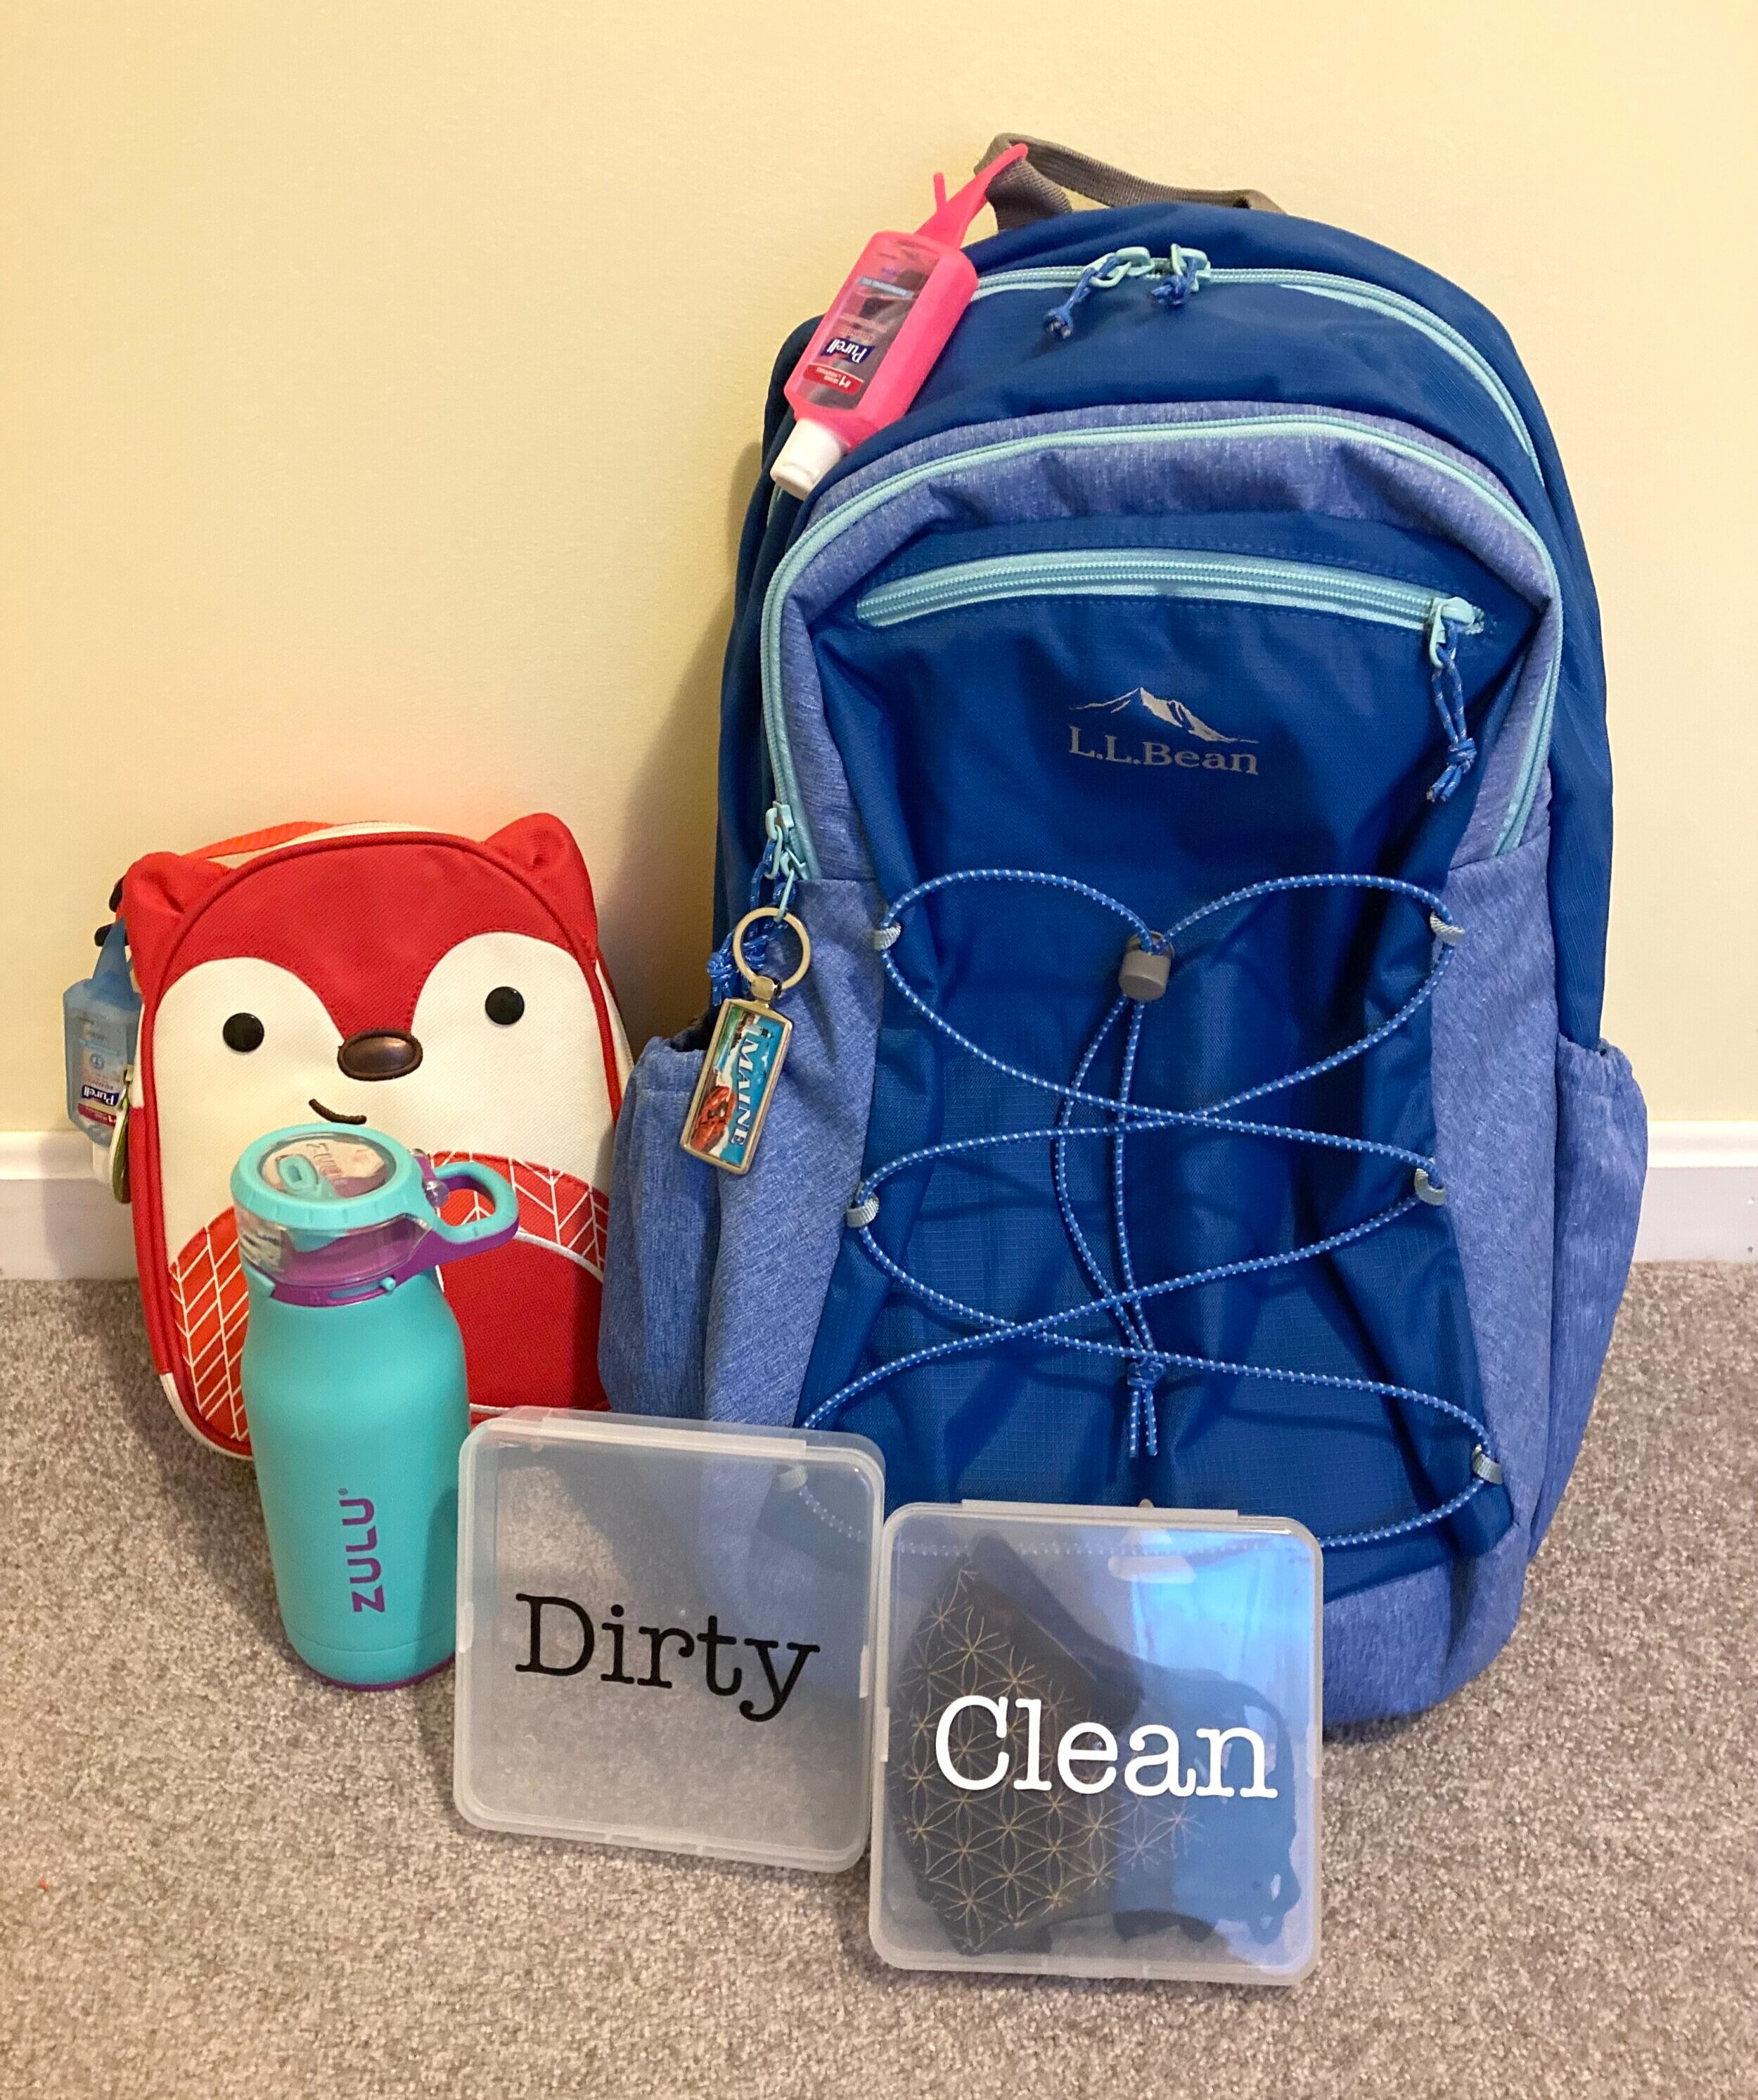
And if you wanted to take it a step further and have an organzied mask system on-the-go to put in your work bag or child's backpack, you might want to consider having two cases - one for clean masks and one for dirty masks. I ordered these clear mask cases from Amazon and cut labels for them on my Cricut. We'll be packing one with extra clean masks, and the other will be empty for dirty masks to come home in. Since we recently invested in some better quality masks I wanted to make sure they stay in cases when not in use to keep them in good shape.

Cloth Face Mask Organization and Storage

Alternatively, if you don't have any slim wipes containers hanging around you could also use Small Craft Storage Cases , which come in clear and a variety of colors. This might be more cost effective too if you needed multiple cases - especially if you needed one or more cases for each family member, or if you were a teacher and wanted to make a case for each student in your class.

You can also easily label any of these cases with a label maker.

Cloth Face Mask Organization and Storage

We always make sure to keep the car stocked with our plastic case of extra face masks, hand sanitizer, and disinfectant wipes to help protect ourselves when we’re out doing errands.

Mask Care

Cloth Face Mask Organization and Storage

Always refer to individual mask makers/companies on the best way to care for each of your masks (hand wash only vs machine wash, line-dry vs dryer, etc.) But in general, all masks should be washed and allowed to thoroughly dry in between each use.

Since all of our masks are machine washable, we've found using a mesh lingerie laundry bag is perfect for keeping the masks from getting lost in the wash or caught on other items.

Quick Adjustment Tips

Quick Face Mask Adjustment Tip

If you feel like your face mask is a little large or isn’t fitting as closely to your face as you would like, you can typically adjust it very easily by making a small knot in the ear loop elastics (as shown above) to make it smaller.

There are also lots of options for "ear saver" or "mask adjustment" straps available out there, though we have not personally tried any ourselves yet.

Cloth Face Mask Organization and Storage:  Mask Lanyard

One mask accessory that we've found super helpful lately are Mask Lanyards. We personally use them most often when we're out hiking or going for a long walk, that way the time we're out alone we can keep our masks down, however in the event we see someone coming up we can easily put them on if we need to pass others on the trail. We made a point to choose lanyards that have a breakaway safety feature, but use at your own discretion/risk.

Disclaimer: I am not giving medical advice. Make sure to always consult the CDC and local health officials for up-to-date recommendations on mask wearing, storage, and care. Cloth masks are not considered medical grade and should be washed in between each use… check with individual mask makers/companies on the best way to store/wash/care for your masks.


Vaccination Card Protector

Vaccinated? You may want to consider getting a Vaccination Card Protector for your vaccine card to help keep them protected and clean at home or while you're traveling. These are nice because you can remove your vaccine card to record updates/boosters if needed.


Related posts:


Face Mask Storage Idea for School and Work

KEEP UP WITH BIRCH LANDING HOME
|  Etsy  |  Facebook  |  Instagram  |  Pinterest  |  Bloglovin'  |  Hometalk  |
Sheet and Towel Stripping How-To

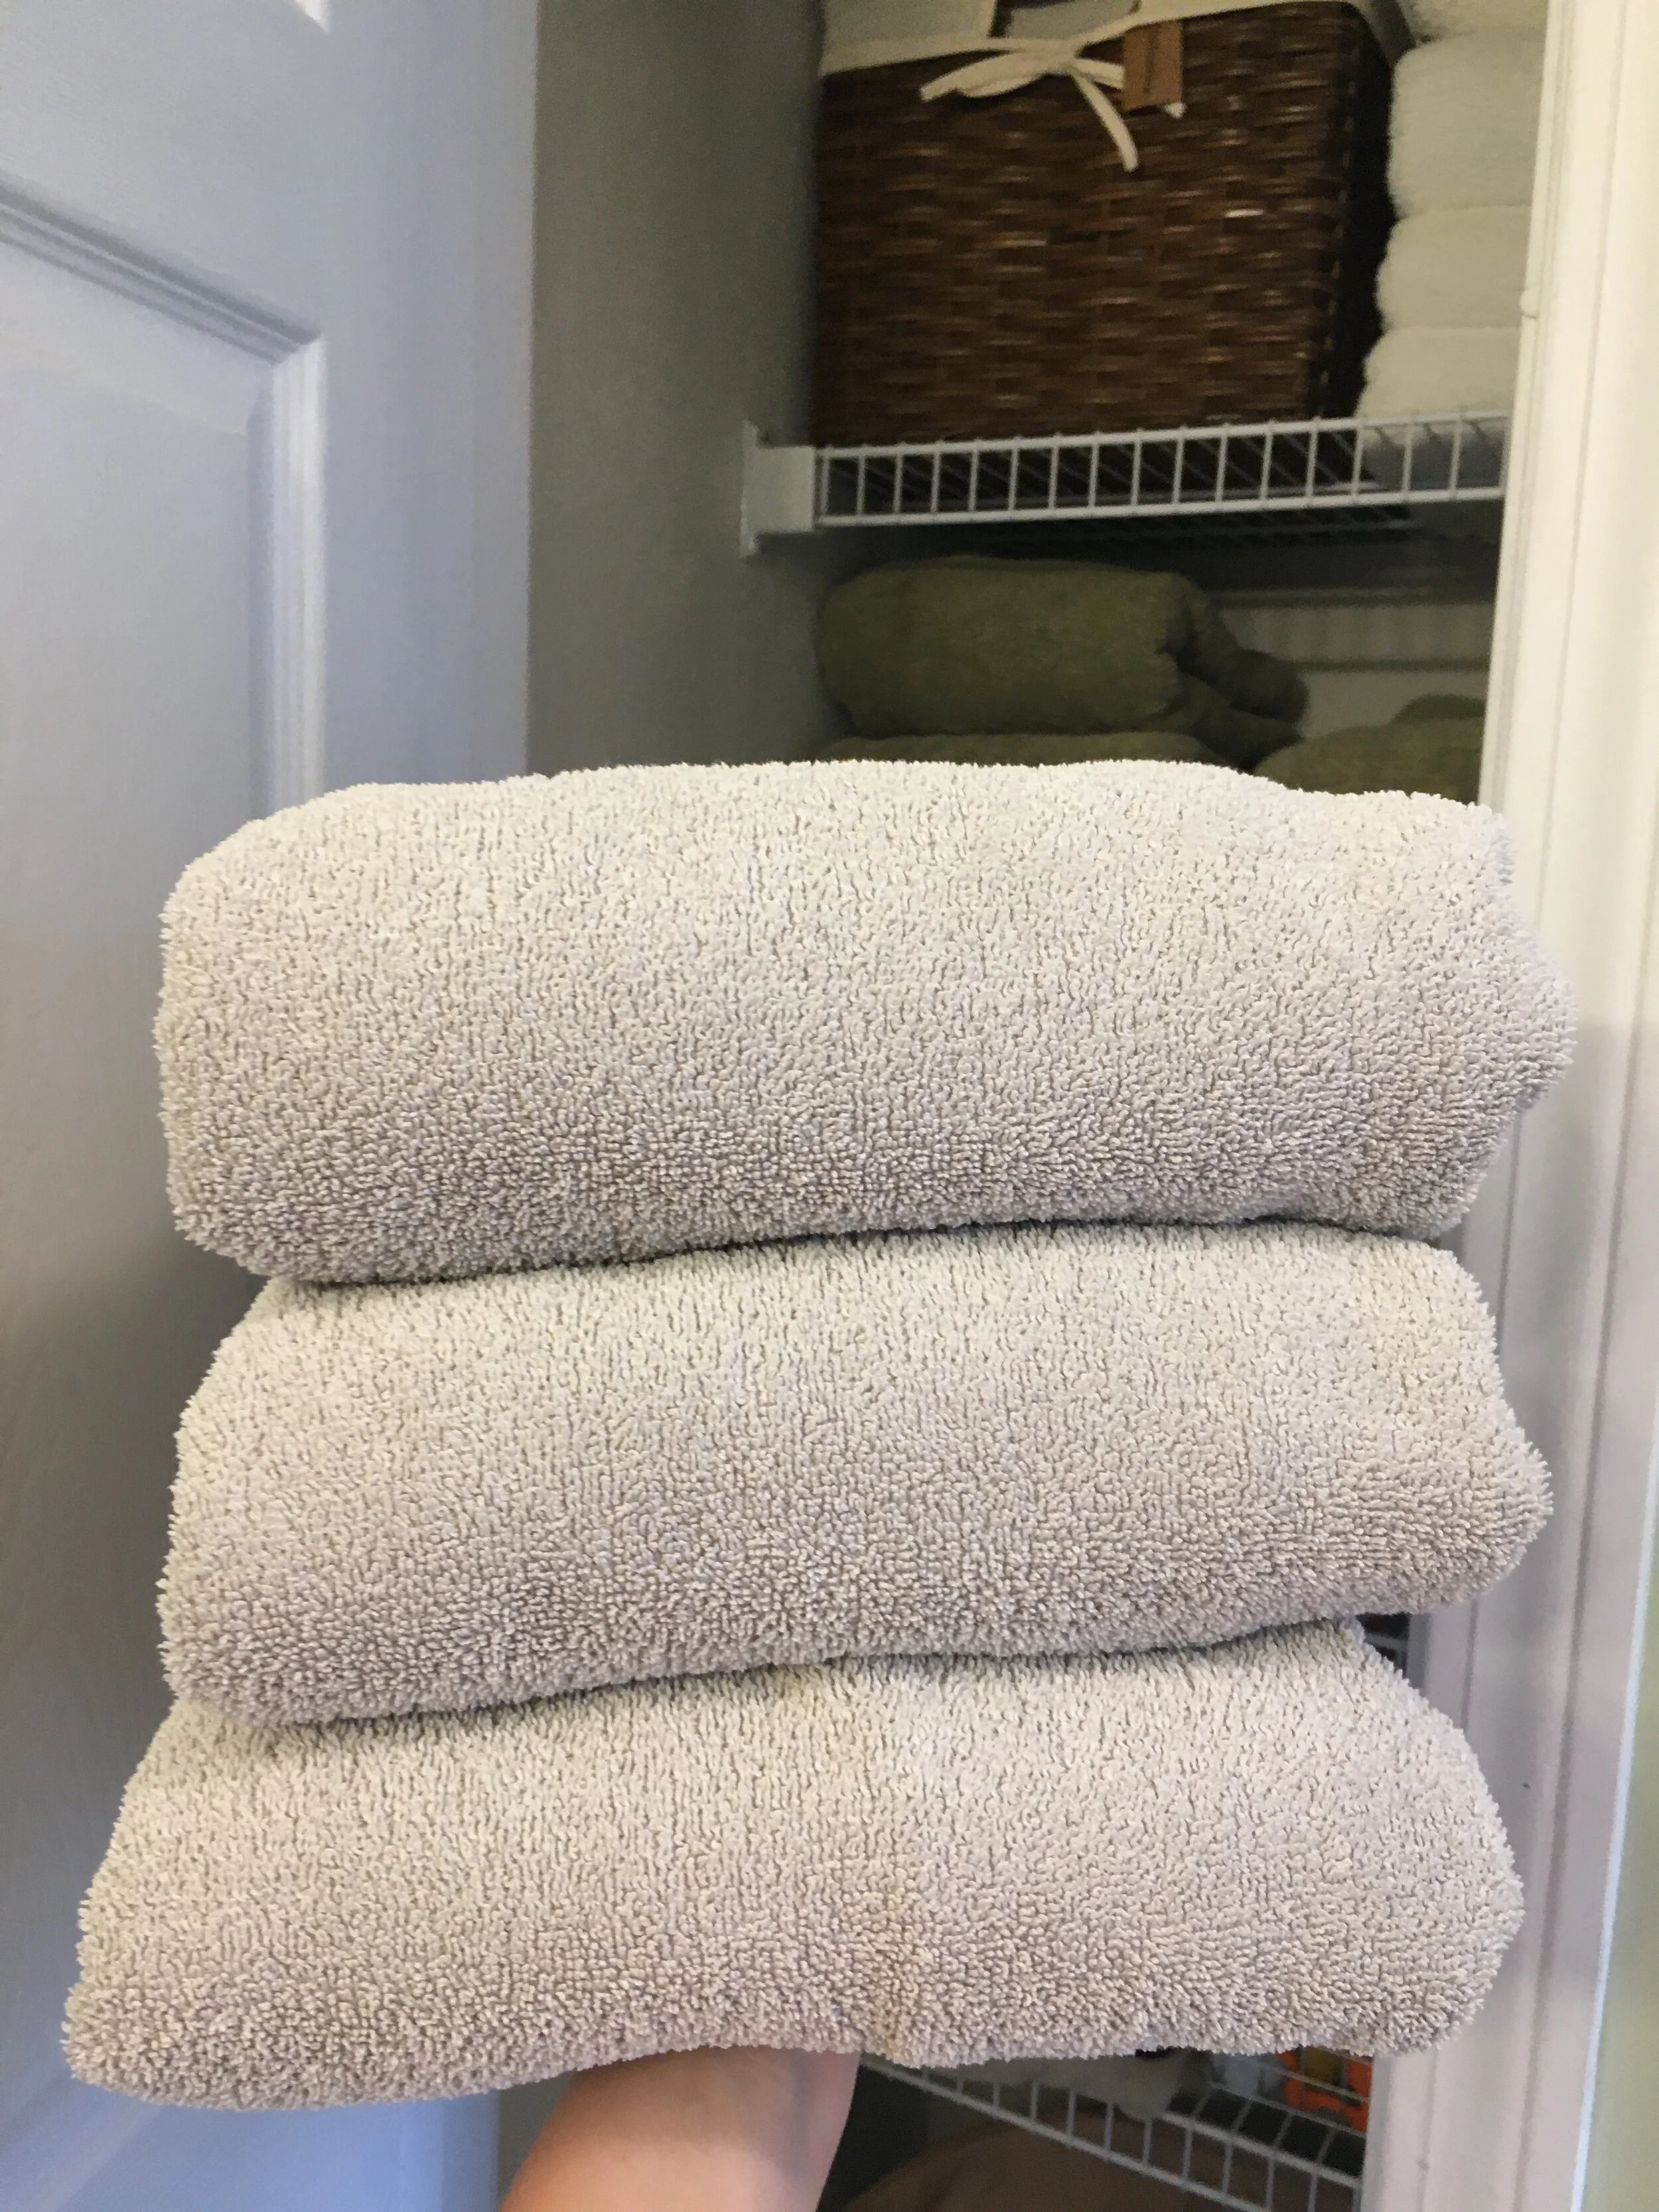
While home for Quarantine, I’ve seen a lot of people posting about “stripping” their towels and bedsheets and showing disgusting After photos of dirty water - I was intrigued! Stripping the linens is supposed to get rid of any kind of build-up on them (whether that’s laundry detergent, body oil/sweat, hard water mineral deposits, etc). So I decided to give it a try myself and share the easy process - and let me tell you, it was a disgusting and oddly satisfying Quarantine Project. | This post contains affiliate links |

Sheet and Towel Stripping How-To

Apparently one should consider stripping their linens when they aren’t as absorbent as they used to be, they look or feel dingy, or they start to smell musty.

Supplies:

Everyone seems to be using more or less the same supplies, which are:

  • 1/4 cup Borax Powder
  • 1/4 cup washing soda (or 1/4 cup baking soda if you're in a pinch and don't have washing soda.. I used baking soda)
  • 1/2 cup laundry detergent

How-To:

Fill a bath tub with hot water and dissolve the Borax, washing soda or baking soda, and laundry detergent in it. Next add your towels and sheets (make sure to only do similar colors together… in some cases it can cause some colors to run. We only have done our white and light colored linens so far.)

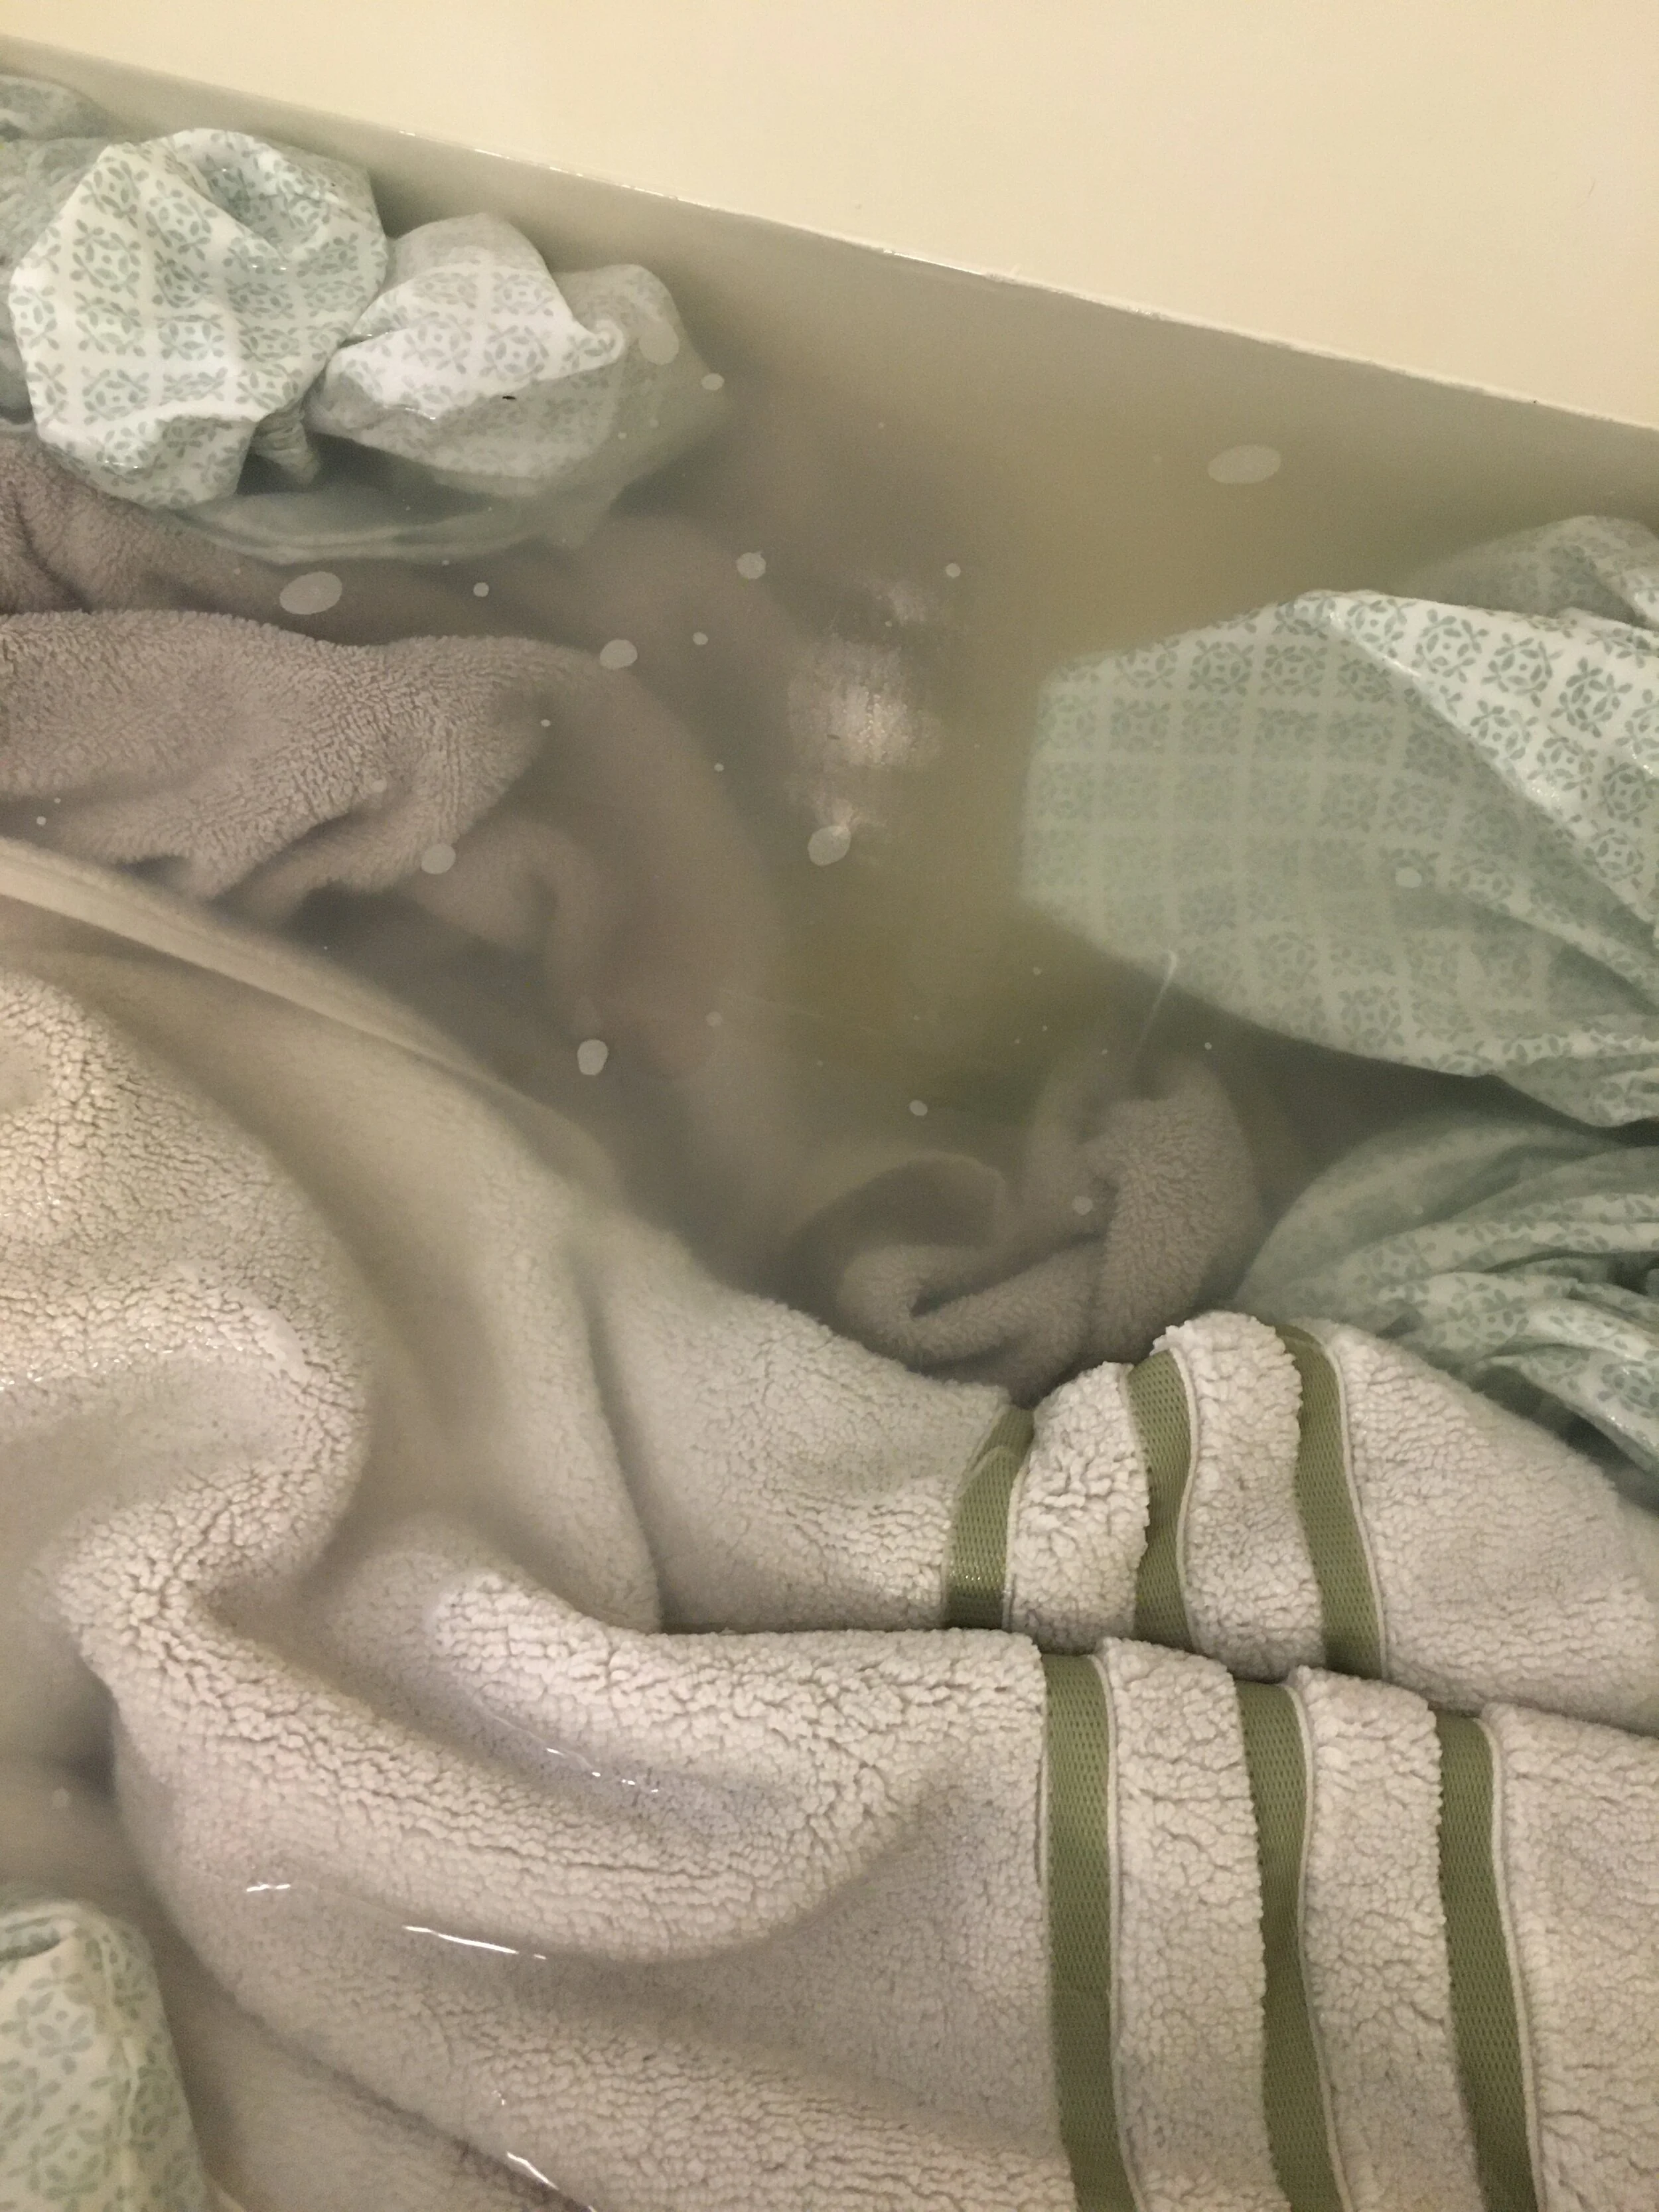
Then leave them to soak for the next four or so hours, stirring occasionally. You should see the water turn from clear to a gross yellowish-dirty color.

Once the water cools, drain the tub and squeeze the water from the linens, rinsing them with some fresh water. Then put in the washing machine (with no detergent - your items will already have absorbed detergent and Borax and you want to rinse everything out, not add more soap at this point), and run through the “wash” cycle to rinse everything out thoroughly.

After that you can put them in the dryer, or re-run the washing machine with detergent like you normally would to give them a fresh wash before drying.

Draining the dirty water after stripping. Ew.

Draining the dirty water after stripping. Ew.

Our Personal Results:

So it wasn’t the magical night-and-day change across the board that I was expecting, visually anyways - and some items definitely had better results than others. OVERALL - Our linens definitely felt cleaner, and looked a little brighter - however, our old white towels (which have turned very off-white over the years), did not magically turn luminous white again like I was hoping. But again, that’s probably too much to expect as they are 10+ years old and have had many years to get discolored in the regular laundry. Nevertheless, just SEEING the dirty water after we stripped the linens makes me feel a lot better about doing this process - visually not everything looks perfectly white again, but I KNOW it’s cleaner after removing all that invisible gunk and that makes me feel a lot better.

Okay, so the old white towels are still off-white, but I know they’re cleaner than before after seeing the dirty water after the stripping process.

Okay, so the old white towels are still off-white, but I know they’re cleaner than before after seeing the dirty water after the stripping process.

It’s my understanding that you can repeat this process as needed, and I can see myself doing this maybe up to 2-4x per year going forward to try to keep build-up at bay.

Disclaimer: Try at your own risk. In some cases this process may make colored fabrics run and may not be suitable for all fabrics.

Want to see another satisfyingly gross example…?

Here’s a photo my sister sent me after she did her sheets - wow!

Here’s a photo my sister sent me after she did her sheets - wow!


KEEP UP WITH BIRCH LANDING HOME
|  Etsy  |  Facebook  |  Instagram  |  Pinterest  |  Bloglovin'  |  Hometalk  |
Emergency Preparedness: Preparing, Sheltering in Place, Having a "Go Bag," and Evacuating

God forbid you or your family ever encounter an emergency situation, evacuation, natural disaster, etc. But if you do, it’s best to be prepared. Now, you probably can’t prepare for everything but even some level of preparedness is much better than none. In this post I’m sharing some general ideas on ways you can prepare your home and your family if you’re stuck or need to evacuate, but please do your own homework and contact local authorities for the best advice on what situations are most likely to arise for you. | This post contains affiliate links |

Emergency Preparedness ideas for your Family and Home.

Disclaimer: I am not a survival or emergency expert, but just sharing my opinion on ideas and discussion points on how you might prepare. Do your own research and contact local authorities on the best way to prepare your home and your family for any emergency situation which could arise.

Prepare Your Home

First let’s talk about the home front - it’s a good idea to make sure you have a generator (correctly installed and well ventilated) and extra fuel (safely stored) in the event you’re without power for awhile. Make sure you have shovels, flashlights, extra food that doesn’t need to be cooked (like crackers, canned goods, etc), pet food, water, blankets, matches, and candles too. Some people recommend filling bathtubs and sinks with water prior to bad weather coming so that you have a supply of water for cooking/drinking/washing/flushing toilets. Make sure phones and electronics are charged and you have extra charging packs.

Whether you have a generator or not to run your refridgerator or freezer during a power outage, it's a good idea to keep thermometers inside both fridge and freezer to monitor the temperature for food safety. Do not open the doors unless you really need to (opening them lets the precious cold air out), but by having thermometers in place you can make sure your food is still safe to eat after a prolonged outage.

Have a battery-operated or crank radio on hand - if the power or cellphone/internet services are disrupted you’ll want to be able to listen to the radio to get updates.

It’s also important to have a First Aid Kit and enough medications on hand if someone has a pre-existing medical condition, as well as general medications that you and your family may need like fever/pain reducers. If someone in your family has an allergy or restricted diet, make sure you have a backup of enough “safe” foods in the house for them to have. It’s also a good idea to have medical information for your family posted in the house for first responders if needed.

Make sure to also have working smoke detectors, carbon monoxide detectors, and fire extinguishers in your home. Keep important documents in a Fireproof Safe.

In the event of a local outbreak of illness (flu, stomach bug, - edited to add COVID-19 too), it’s a good idea to have basic over-the-counter medications on hand as well as disinfectant supplies and face masks.

Decide Where and How You May Need to Shelter In Place

Think about different scenarios that could ever happen, which is probably most dependent on where you live. If you live in tornado or hurricane-prone area, maybe you need to have a plan in place to quickly bring in lawn furniture and other items that could go air-born, shut your storm shutters, and shelter in the basement or bathroom. If you live in a city, maybe a scenario that’s more likely is you may have to shelter in place due to violence or riots - where would be the safest place in your home or apartment to do that? If you live in winter-storm prone area, maybe that’s making sure your heating vents stay clear from snow and you have a roof rake and shovels ready to make sure your roof doesn’t get overloaded and you can shovel your way out of your front door. If you live in an earthquake-prone area, maybe that’s being aware where the safest place in your house to shelter would be (maybe a strong doorway), or know if it would be safest to evacuate the building entirely and wait it out outside.


What is a “Go Bag” and Why Your Family Should Have One

A “Go Bag” is something you have packed and ready in the event you needed to evacuate your home immediately and potentially survive outside (in the woods or on the road in your vehicle) on your own for several days… situations that may arise where you may be put in that situation could be quick moving storms, flash floods, wild fires, etc. A Go Bag is something that is ready to go with emergency supplies including food, water or a water flirtation system, survival blankets, first aid kit, personal medications that you/your family may need, medical ID cards, masks (to help filter smoke/dust/germs), etc. It’s also a good idea to have local maps in there as well, as phones and internet may not work.

You can put your own Go Bag together or order a pre-made Go Bag and add what personal things you may need to it.

Have an Evacuation Plan

First, it goes without saying you should have plans for things like Fire Drills. Consult your local fire department for tips, but in general make sure you and your family (including kids) understand what a fire/evacuation drill is, how to safely and quickly exit the building, what to do if you get trapped, and where to meet outside afterwards. Practice this a few times a year so it’s second nature, but hopefully you never ever need to do it for real.

Now to take that one step further - take some time to think through different scenarios that could happen where you might have to evacuate your area/town (God forbid they ever do), and plan how you would react. If a wild fire or flood was happening nearby, how would you and your family evacuate your area? Take some time to familiarize yourself with area roads and which ones would be the best to evacuate by - make sure you also come up several backup plans too as your first choice exit plan may be blocked off. Also be aware of which roads may be most prone to fall victim to a natural disaster - for example, a low-lying road near a stream would be likely to flood, and probably shouldn’t be counted on as an exit road in a weather emergency. Keep maps in your car too as phones/GPS may not work and it would be beneficial to have a paper map to consult. It's also important to have cash on hand as ATMs/credit card machines may be down as well.

Always try to keep your car gas tank fairly full too, that way you’ll be ready to go anytime and won’t have to worry about running out of gas or being able to buy gas (as gas stations may be out of gas or there could be long lines) wasting valuable time for your family to make an efficient exit.

Hopefully you will never fall into a scenario where you’ll ever have to use any of your emergency supplies or shelter/evacuation plans, but it’s best to be prepared. Make sure to re-evaluate your plans and supplies regularly as roads and situations can change and supplies will expire over time (check those expiration dates on medicine, first aid items, and food/water). May you all stay safe and well!

Disclaimer: I am not a survival or emergency expert, but just sharing my opinion on ideas and discussion points on how you might prepare. Do your own research and contact local authorities on the best way to prepare your home and your family for any emergency situation which could arise.


KEEP UP WITH BIRCH LANDING HOME
|  Etsy  |  Facebook  |  Instagram  |  Pinterest  |  Bloglovin'  |  Hometalk  |
DIY Potting Bench - Based on Plans by Ana White

I’ve been wanting a potting bench for a while now - something by the back door to display some decor, use as an outdoor work station, and double as a place for UPS to leave packages. After looking around online and at local stores, I couldn’t find anything that I liked that fit the narrow space - so I did what any #woodworkingmom would do, I decided to build it myself. | This post is not sponsored but does contain affiliate links |

DIY Potting Bench - Based on Plans by Ana White

{ Note: The plans I worked from were from Ana White and can be found HERE }

I came across these Ana White plans for a Simple Potting Bench on Pinterest and thought it was perfect! It was exactly the simple, rugged style I was looking for and easy to tailor to our space too. Most of the wood needed were 2x4’s, which are sturdy and cheap - and thankfully between our garage and my father-in-law’s garage we had all the wood scraps I needed to piece together this project. Since I used leftover wood we already had, this project cost me nothing which was pretty amazing!

Since I only used what wood we had on hand, I had to make do - some of the wood was pressure-treated, some was not, some had knot holes or gashes, and not all of it was “true” (straight). But that was fine by me as this was to be a rustic piece for outside.

DIY Potting Bench - Based on Plans by Ana White

Before I started building, I followed Ana White’s “cut list,” cutting and making piles of all the wood in the dimensions I would need to build the project. I carefully chose the lumber for each section to minimize how the knot holes, gashes, or crooked pieces would be seen in the final piece. For our potting bench I made it 4 inches narrower so it would fit against the small wall next to our back door and because of this I had to adjust my cut list and refigure some of the overall dimensions.

DIY Potting Bench - Based on Plans by Ana White

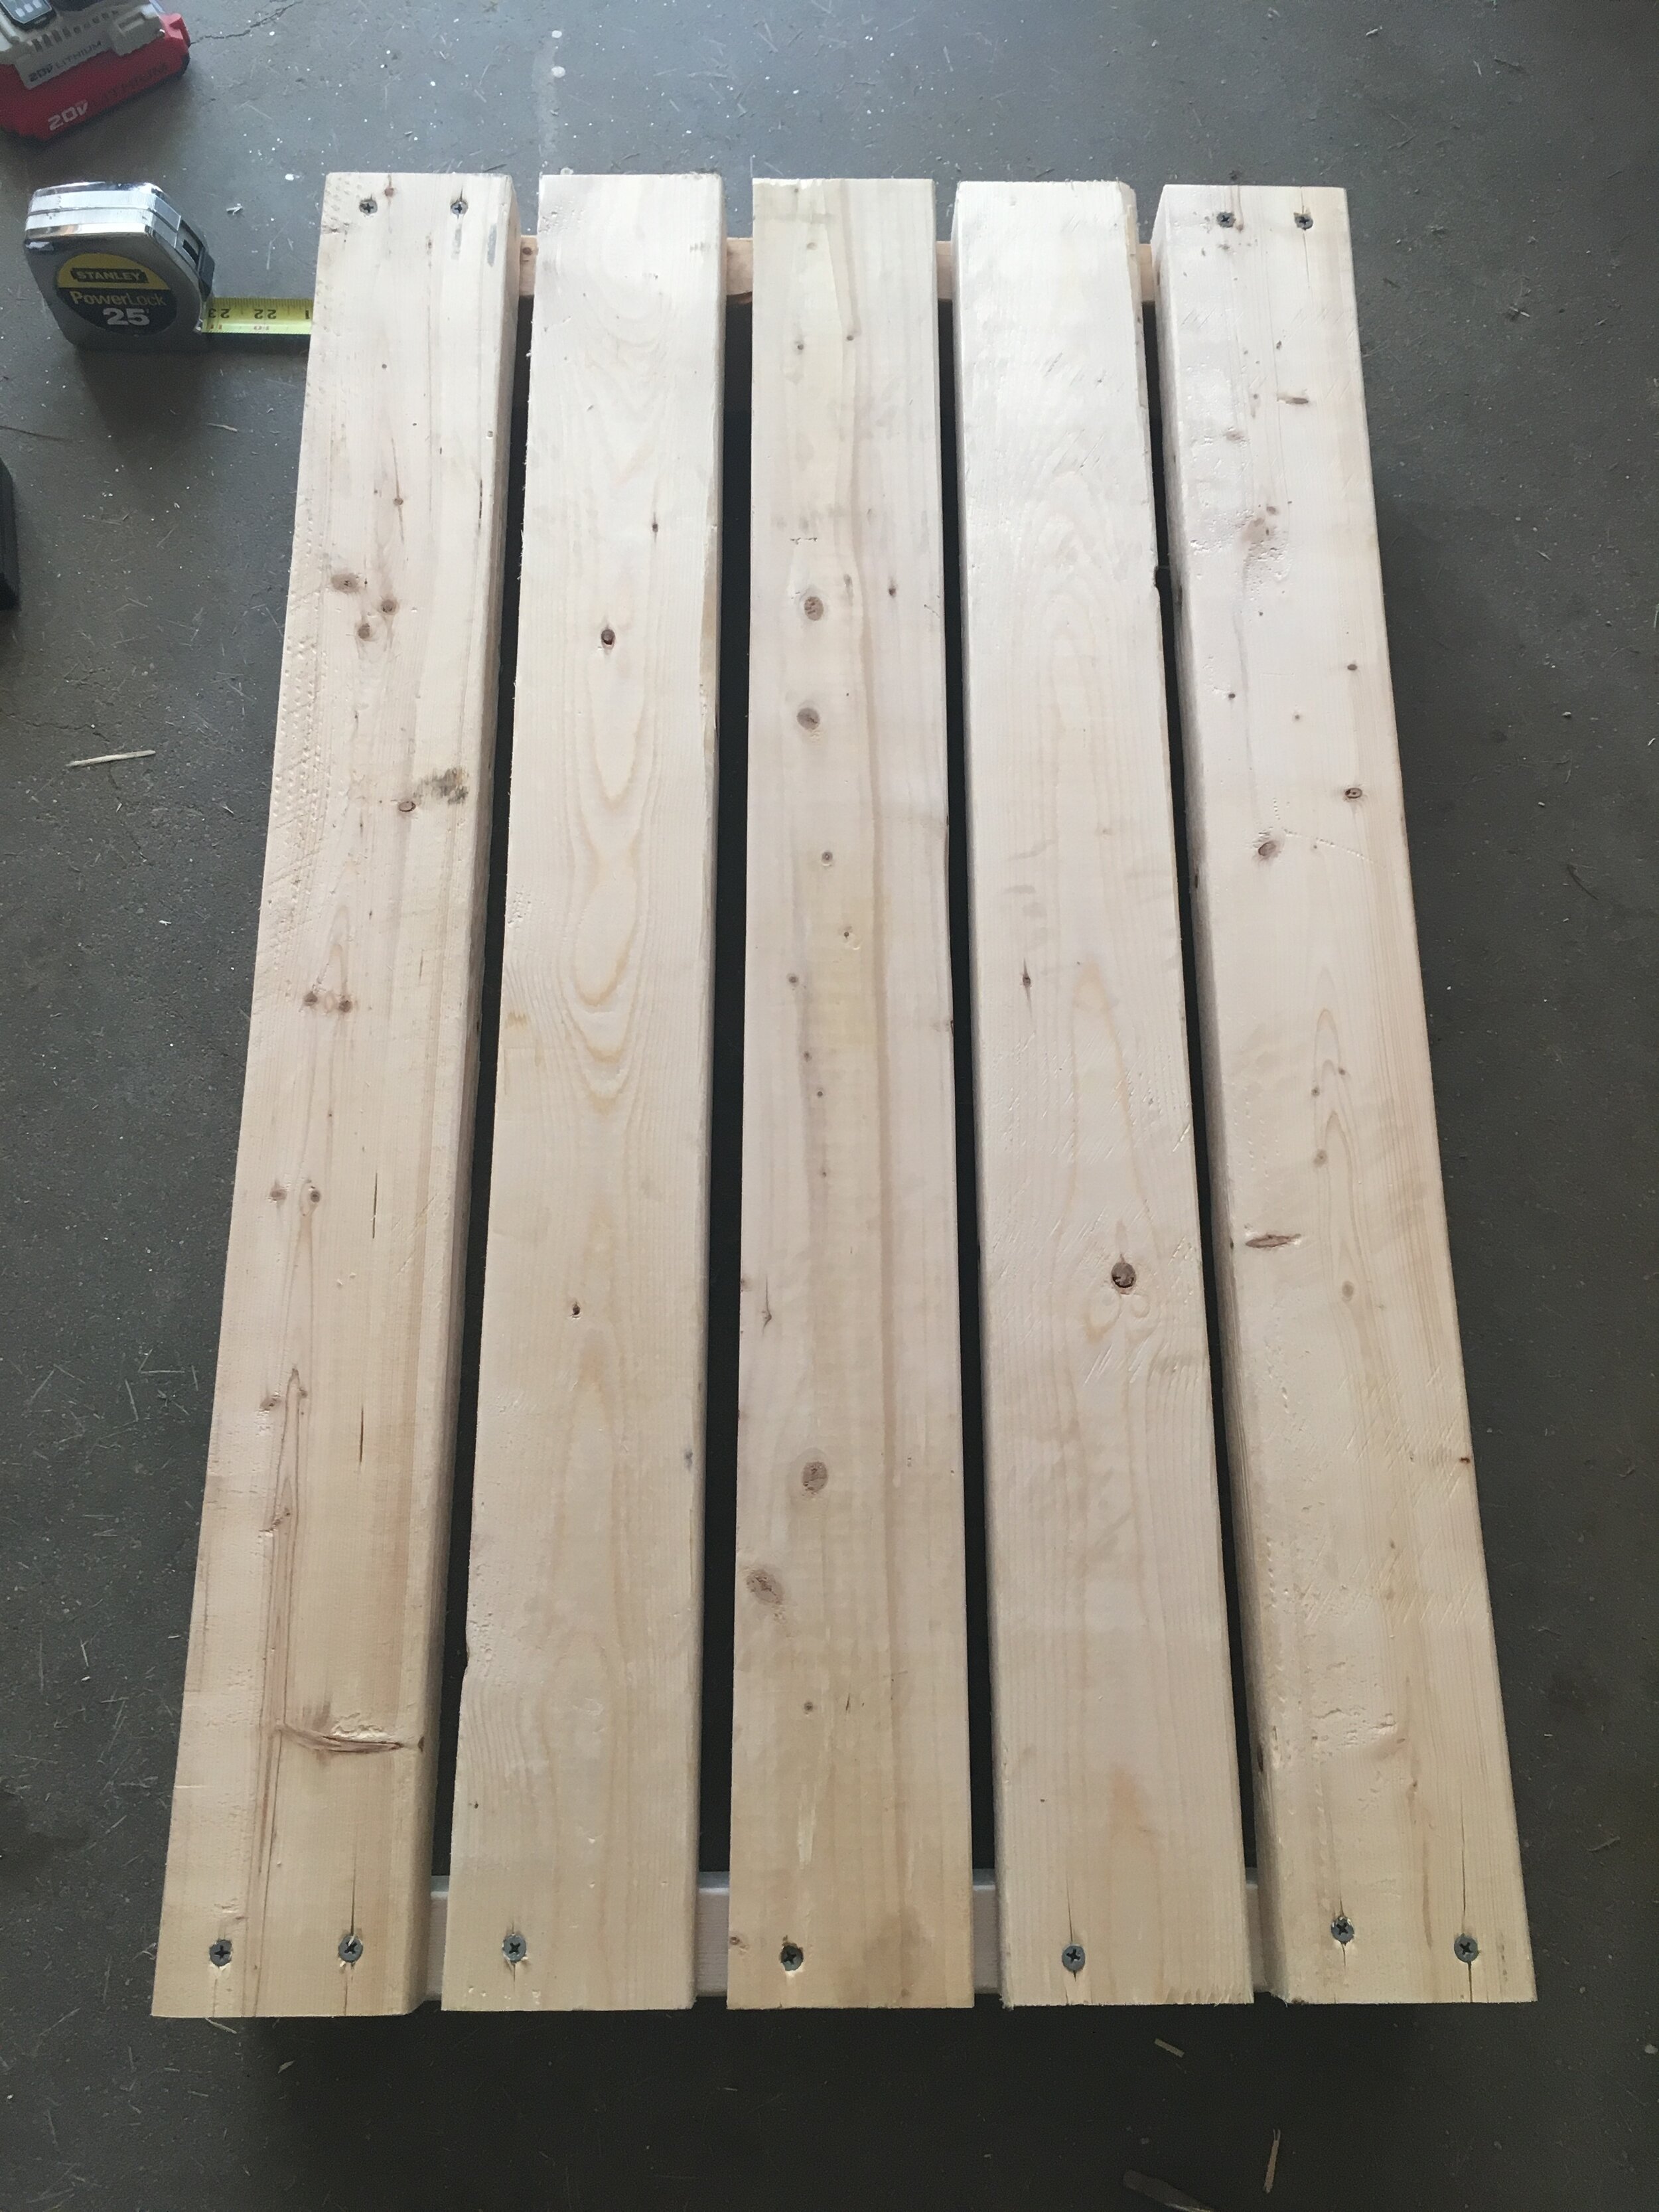
The next step was constructing the shelves individually - attaching the outer planks first, checking for square, then spacing out the middle planks and attaching them. To build this whole project I used an Impact Driver, which made the entire project go much quicker and easier.

DIY Potting Bench - Based on Plans by Ana White

To attach the legs, I laid the project on it’s side and carefully measured the distances between the legs as well as up the legs before attaching the shelves to makes sure everything would be as level and as square as possible.

DIY Potting Bench - Based on Plans by Ana White

Finally to make the project look more “finished” I added some wood scraps to the sides of the project to conceal the butt ends of the shelves and make it look a little more polished.

DIY Potting Bench - Based on Plans by Ana White

I also decided to add some 1x3”s to the front of the shelves to make it look a little more polished from the front as well. (I did not counter-sink these screws, but I should have as they were more noticeable than I was expecting in the finished piece.)

DIY Potting Bench - Based on Plans by Ana White

Then came time for painting - I chose to paint the whole potting bench in several coats of my favorite Valspar Stainblocking Bonding Primer/Sealer. This stuff has great coverage and really covers and seals well. My one regret was not giving all the wood pieces a single coat of paint before assembling - as once everything was assembled it was a huge pain to get in all the nooks and crannies.

DIY Potting Bench - Based on Plans by Ana White

Finally I finished the project by adding a few little hooks underneath the shelf (very similar hooks linked here), from which I can hang tools or decor. I’m really happy with how this came out and how quickly it came together. I can’t wait to decorate it with some plants come next spring!

PS - I’m thinking this potting bench would also be great for parties and BBQ’s! It would be perfect on a patio or deck as a makeshift buffet table.

DIY Potting Bench - Based on Plans by Ana White

UPDATE: Spring, 2020

Just wanted to give a quick update after I made the potting bench last Fall: Over winter we decided to store it in our shed, just so we wouldn’t have to snow blow and shovel around it all winter, but as soon as the threat of snow passed in early Spring we brought it right back out. It’s been wonderful to have for planting and working on outside this spring, and due to the current Pandemic situation we’re getting more packages than ever so it’s great to have a designated spot for deliveries (and right in view of our security camera too).

DIY Potting Bench - Based on Plans by Ana White

For decor right now I'm keeping it very simple, especially since the potting bench is utilized daily for mail - there's just a garden rock, a metal barn star (hung from a special hook that doesn't damage vinyl siding), and a small potted lavender plant with an American flag - all items we already had around our house.

Summer, 2020 - sharing another little decor update for the potting bench:

DIY Potting Bench - Based on Plans by Ana White

I found this weathered piece of wood in our scrap bin and thought it would make a cute sign for the potting bench. I used my Cricut Machine to design and cut a stencil that said "Fresh Cut Flowers 5¢" and used it to paint the sign. I think it looks cute and it's a great finishing touch!


Check out our Similar Posts:

KEEP UP WITH BIRCH LANDING HOME
|  Etsy  |  Facebook  |  Instagram  |  Pinterest  |  Bloglovin'  |  Hometalk  |