Favorite Finds of 2020

I thought I would do a quick round up of my Favorite Finds of 2020. These are products or items that we loved or used frequently and were new to us this past year or became a staple in our routine - best of all, most are under $30! | This post contains affiliate links |

Favorite Finds of 2020

Favorite Finds of 2020

“Unpaper Towels”

Favorite Finds - Unpaper Towels

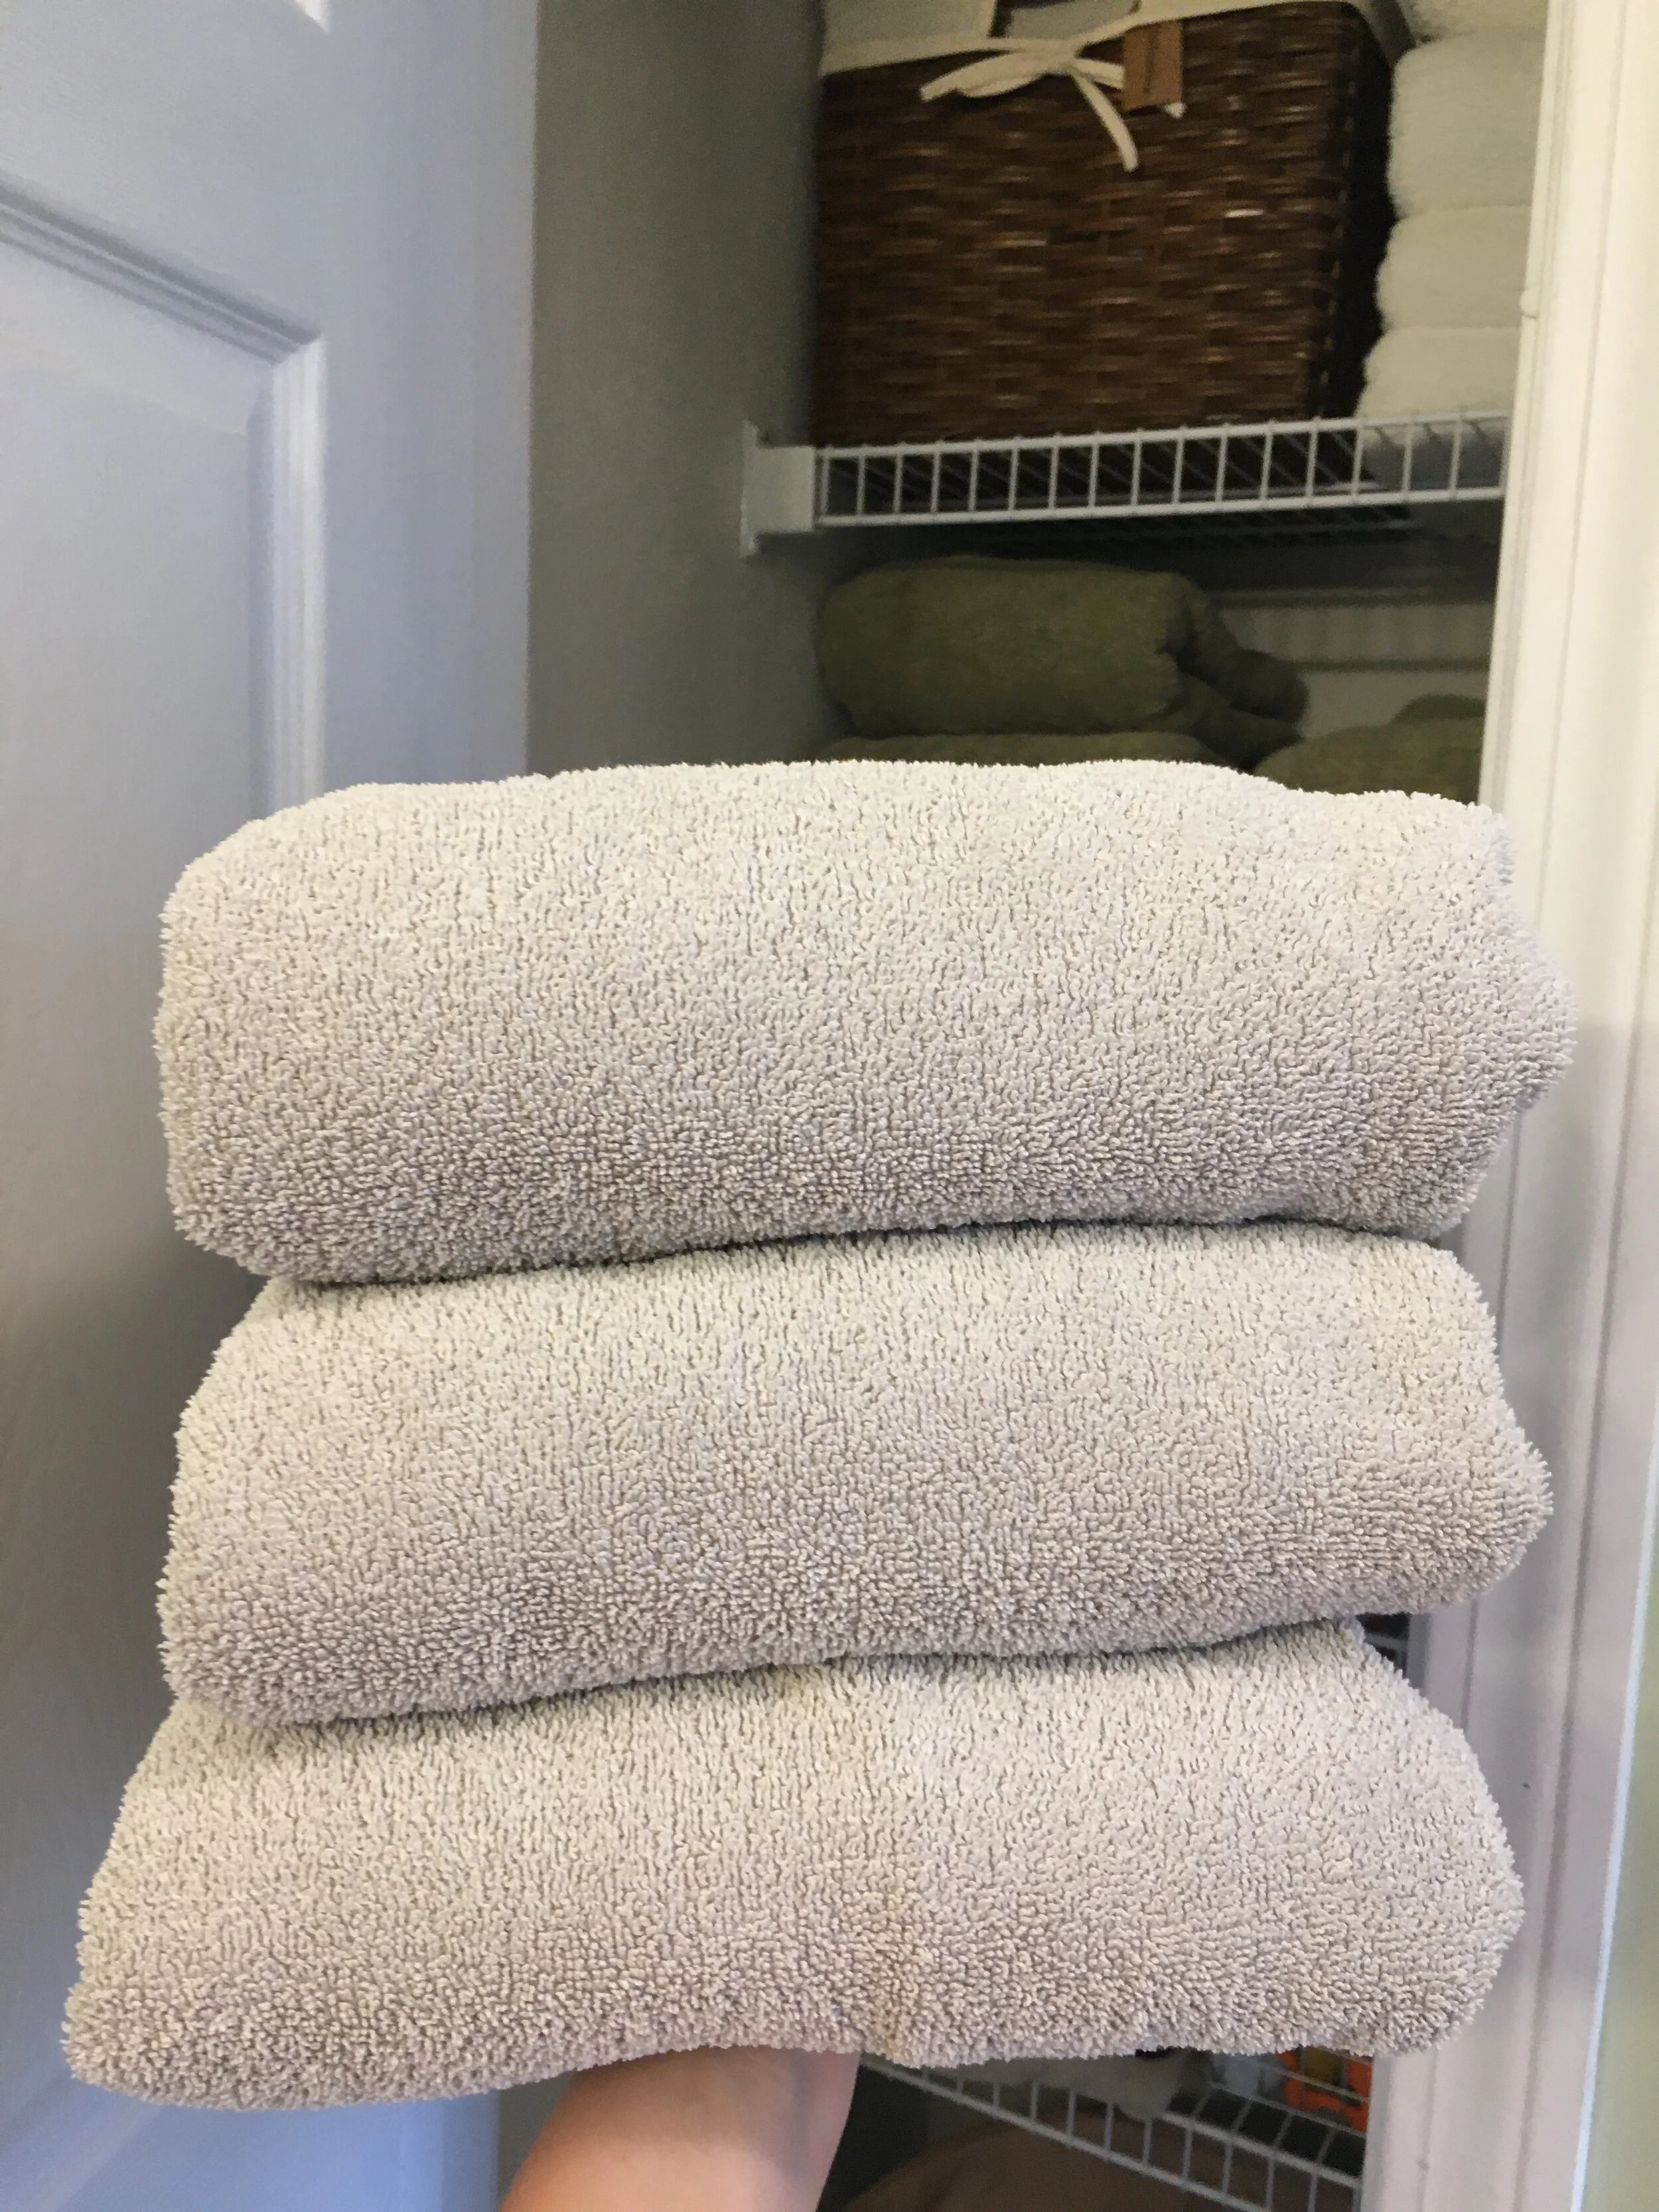
I know I've talked about this several times now, but making the switch to these "Unpaper Towels" has definitely been my top Favorite Find of 2020. They save us money every month on buying paper products and since they're reusable they're good for the environment in the long run. So happy we made the switch!

Stars Above Pajama Set

Favorite Find - Stars Above PJs

With the year that it's been having a cozy PJ set has been a must. I got this Stars Above Pajama Set from Target (just added it on to my online order) this winter and they have quickly become my favorite. They are SOO soft and luxurious feeling, perfect for lounging around at home.

OXO Cold Brew Coffee Maker

Favorite Find - OXO Cold Brew Maker

My husband got this OXO Cold Brew Coffee Maker as a birthday gift and we've both been enjoying it all year. Now that we can't go out for coffee all the time it's been really nice to be able to make our own cold brew concentrate right at home.

Mask Lanyards

Favorite Find - Mask Lanyards

Mask Lanyards have been the unsung accessory hero this year. We've been using them every time we go hiking so we can have our masks at the ready if we unexpectedly come across others. We chose ones with a breakaway feature for some added safety.

Aura Cacia Aromatherapy Spray

Favorite Find - Lavender Linen Spray

This year I've been using my Aura Cacia Lavender Aromatherapy Spray on our linens every night before we go to bed - it's so relaxing and spa-like and we find it helps us fall asleep. (Make sure to spot test on your linens first, but we've had no problems using it on our fabrics.)

Powdered Tide for Cleaning

Favorite Find - Powdered Tide

This year I jumped on the Powdered Tide bandwagon - for cleaning, not for laundry. Just a little Powdered Tide mixed with warm water does wonders for washing smudgy walls and built-up grime on surfaces. I keep it under my kitchen sink (in an airtight plastic bag so moisture doesn't get to it), so it's ready to use anytime. It's such a great cleaning hack!

Hug Patrol Shoulder Wrap

Favorite Finds - Hug Patrol

I mean, who couldn't use a hug this year? Hug Patrol makes weighted wraps, blankets, and more. I collaborated with them last January (you can read that previous post HERE), but the wrap became a wonderful addition to my routine. It's so peaceful and comforting to curl up on the couch with a good book and the weighted wrap across my shoulders.

L.L. Bean Sweater Fleece

Favorite Find - LL Bean Sweater Fleece

I've actually had this L.L. Bean Sweater Fleece for a few years now, but it's really gotten a lot of use this year as my go-to for "Driveway Visits" with family and friends. We've been having socially distant driveway visits (outside, everyone standing far apart and masked, no contact) to see our family and friends when we can. This Sweater Fleece has been great as a casual and cozy layer that still looks nice for those chilly visits outside.

KEEP UP WITH BIRCH LANDING HOME
|  Etsy  |  Facebook  |  Instagram  |  Pinterest  |  Bloglovin'  |  Hometalk  |

Sheet and Towel Stripping How-To

While home for Quarantine, I’ve seen a lot of people posting about “stripping” their towels and bedsheets and showing disgusting After photos of dirty water - I was intrigued! Stripping the linens is supposed to get rid of any kind of build-up on them (whether that’s laundry detergent, body oil/sweat, hard water mineral deposits, etc). So I decided to give it a try myself and share the easy process - and let me tell you, it was a disgusting and oddly satisfying Quarantine Project. | This post contains affiliate links |

Sheet and Towel Stripping How-To

Apparently one should consider stripping their linens when they aren’t as absorbent as they used to be, they look or feel dingy, or they start to smell musty.

Supplies:

Everyone seems to be using more or less the same supplies, which are:

  • 1/4 cup Borax Powder
  • 1/4 cup washing soda (or 1/4 cup baking soda if you're in a pinch and don't have washing soda.. I used baking soda)
  • 1/2 cup laundry detergent

How-To:

Fill a bath tub with hot water and dissolve the Borax, washing soda or baking soda, and laundry detergent in it. Next add your towels and sheets (make sure to only do similar colors together… in some cases it can cause some colors to run. We only have done our white and light colored linens so far.)

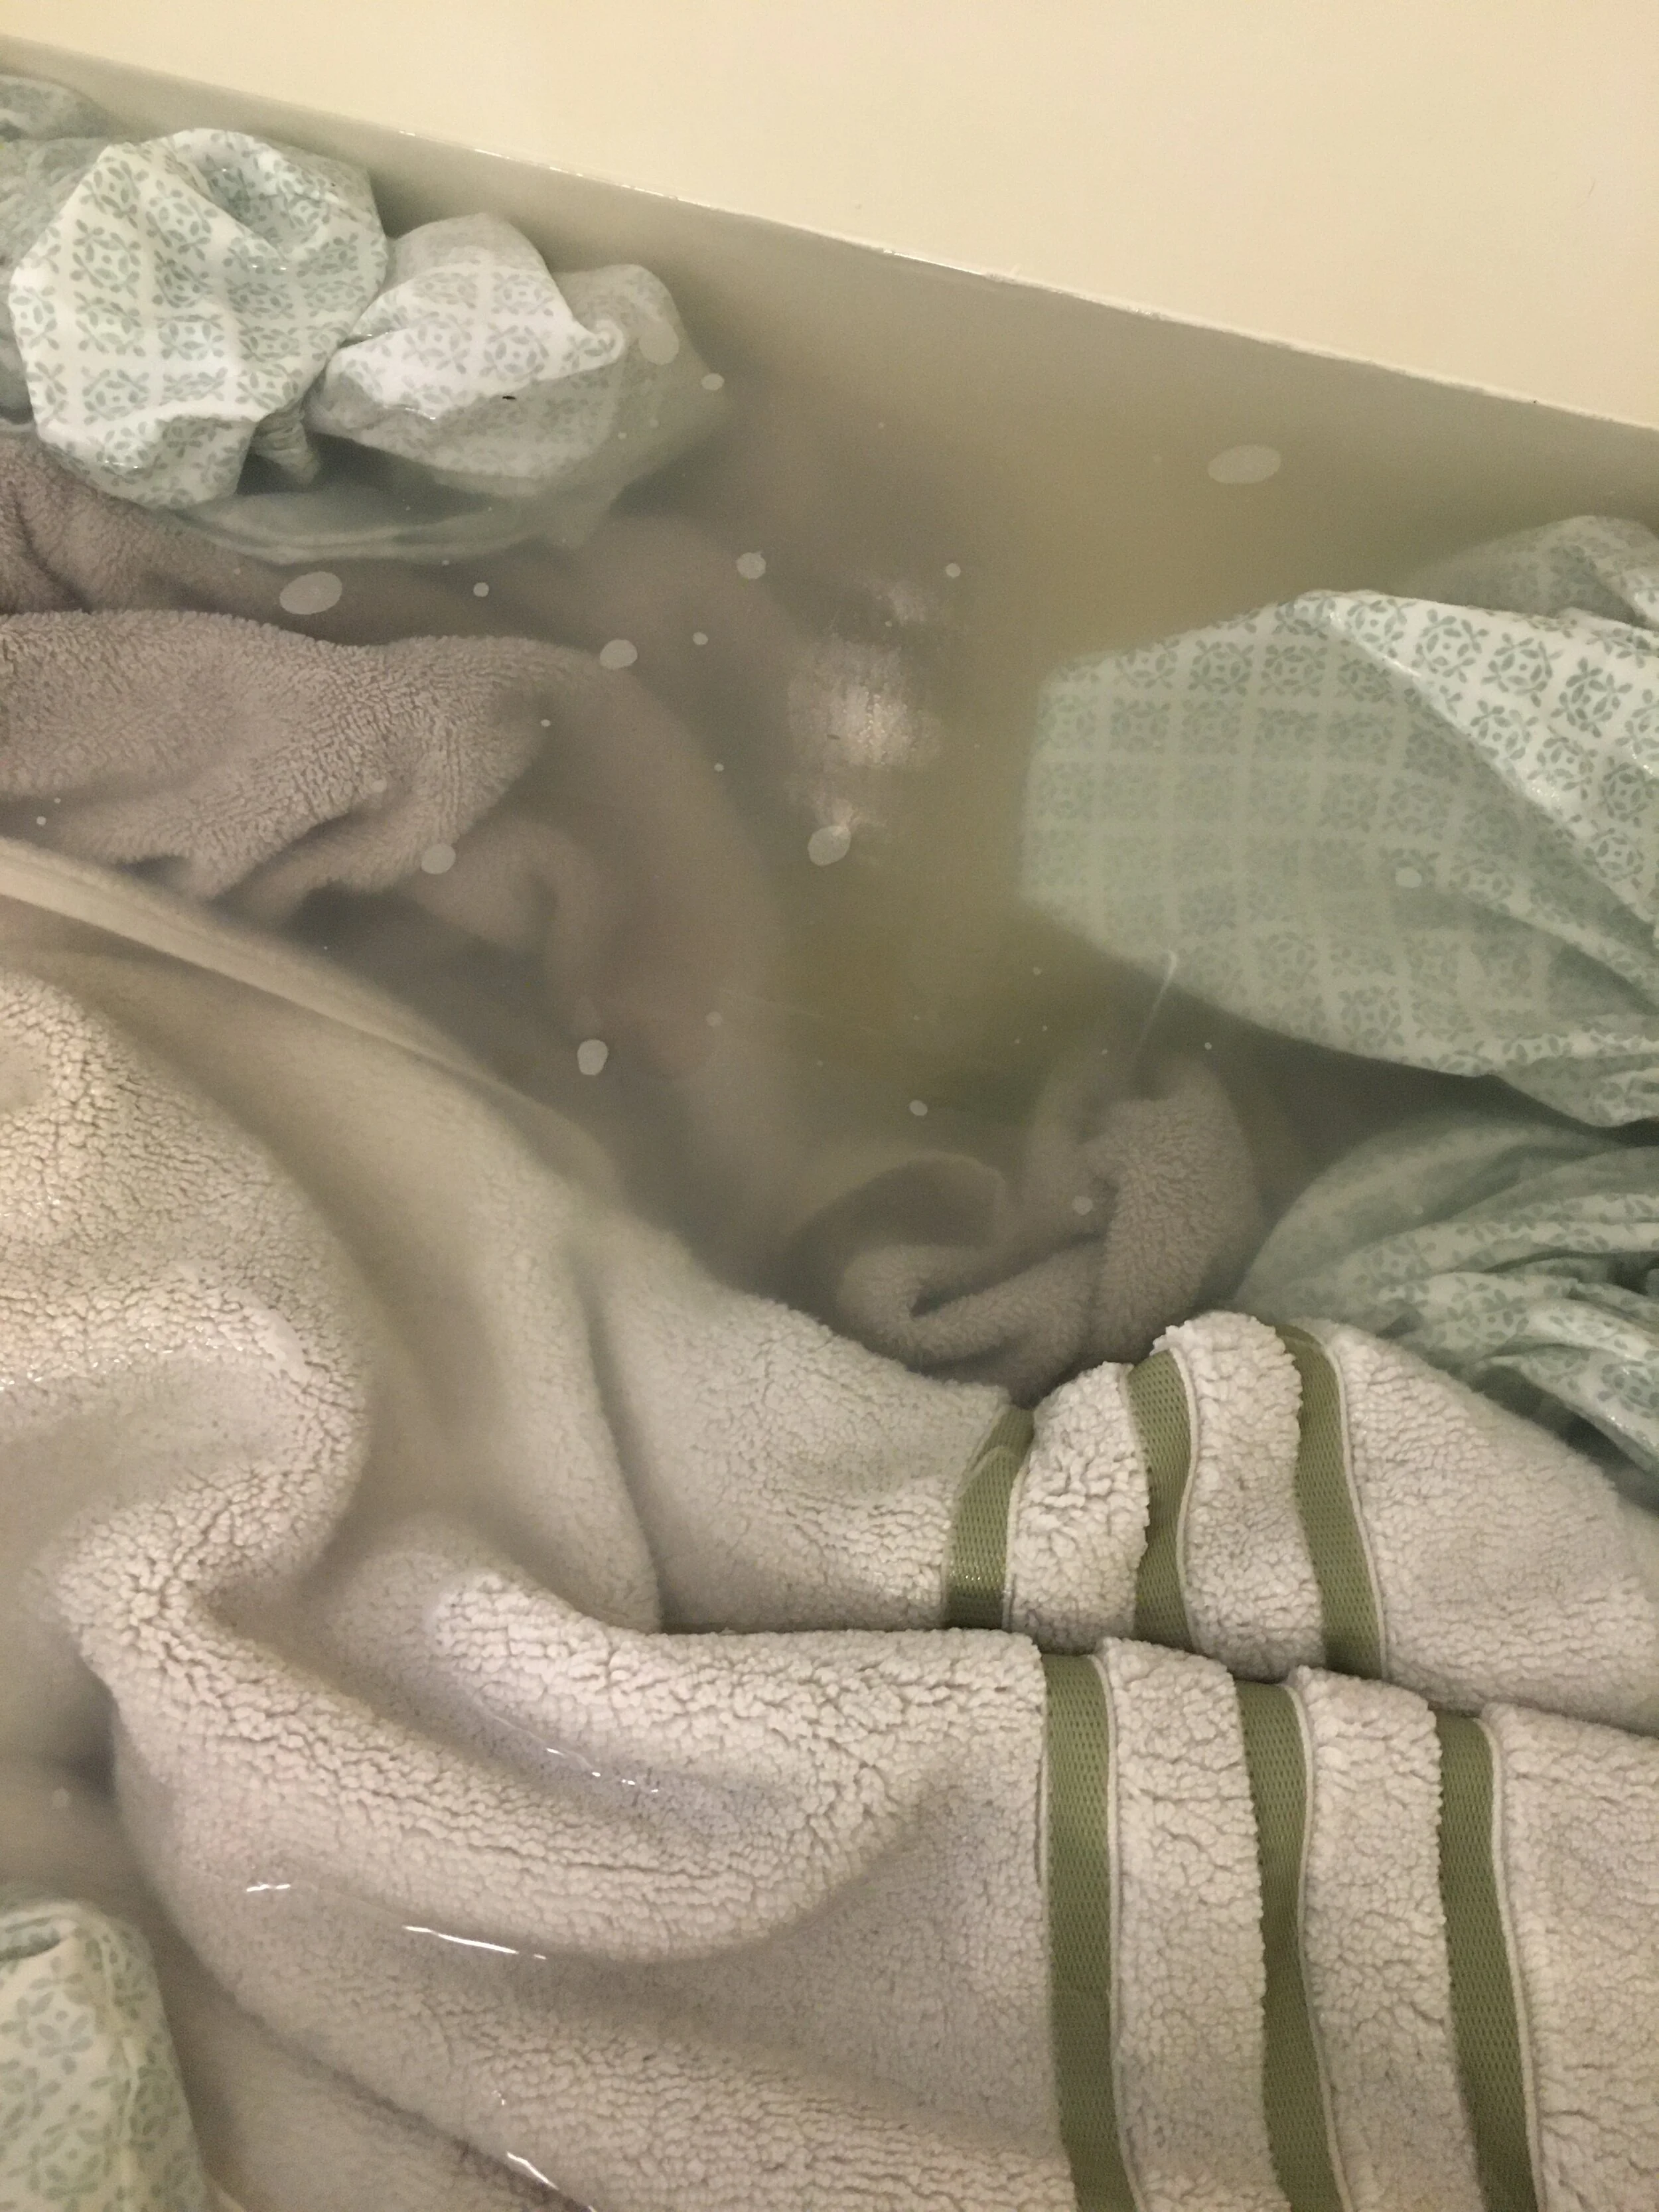
Then leave them to soak for the next four or so hours, stirring occasionally. You should see the water turn from clear to a gross yellowish-dirty color.

Once the water cools, drain the tub and squeeze the water from the linens, rinsing them with some fresh water. Then put in the washing machine (with no detergent - your items will already have absorbed detergent and Borax and you want to rinse everything out, not add more soap at this point), and run through the “wash” cycle to rinse everything out thoroughly.

After that you can put them in the dryer, or re-run the washing machine with detergent like you normally would to give them a fresh wash before drying.

Draining the dirty water after stripping. Ew.

Draining the dirty water after stripping. Ew.

Our Personal Results:

So it wasn’t the magical night-and-day change across the board that I was expecting, visually anyways - and some items definitely had better results than others. OVERALL - Our linens definitely felt cleaner, and looked a little brighter - however, our old white towels (which have turned very off-white over the years), did not magically turn luminous white again like I was hoping. But again, that’s probably too much to expect as they are 10+ years old and have had many years to get discolored in the regular laundry. Nevertheless, just SEEING the dirty water after we stripped the linens makes me feel a lot better about doing this process - visually not everything looks perfectly white again, but I KNOW it’s cleaner after removing all that invisible gunk and that makes me feel a lot better.

Okay, so the old white towels are still off-white, but I know they’re cleaner than before after seeing the dirty water after the stripping process.

Okay, so the old white towels are still off-white, but I know they’re cleaner than before after seeing the dirty water after the stripping process.

It’s my understanding that you can repeat this process as needed, and I can see myself doing this maybe up to 2-4x per year going forward to try to keep build-up at bay.

Disclaimer: Try at your own risk. In some cases this process may make colored fabrics run and may not be suitable for all fabrics.

Want to see another satisfyingly gross example…?

Here’s a photo my sister sent me after she did her sheets - wow!

Here’s a photo my sister sent me after she did her sheets - wow!


KEEP UP WITH BIRCH LANDING HOME
|  Etsy  |  Facebook  |  Instagram  |  Pinterest  |  Bloglovin'  |  Hometalk  |

Art Cart Solution for Kids' Craft Supplies

Our kids love arts and crafts, and at this age, they particularly love coloring and coloring books - however, the art supplies were totally taking over the house. In order to contain the chaos, I decided an “Art Cart” would be the perfect storage and organizational solution. | This post contains affiliate links |

Art Cart Organization

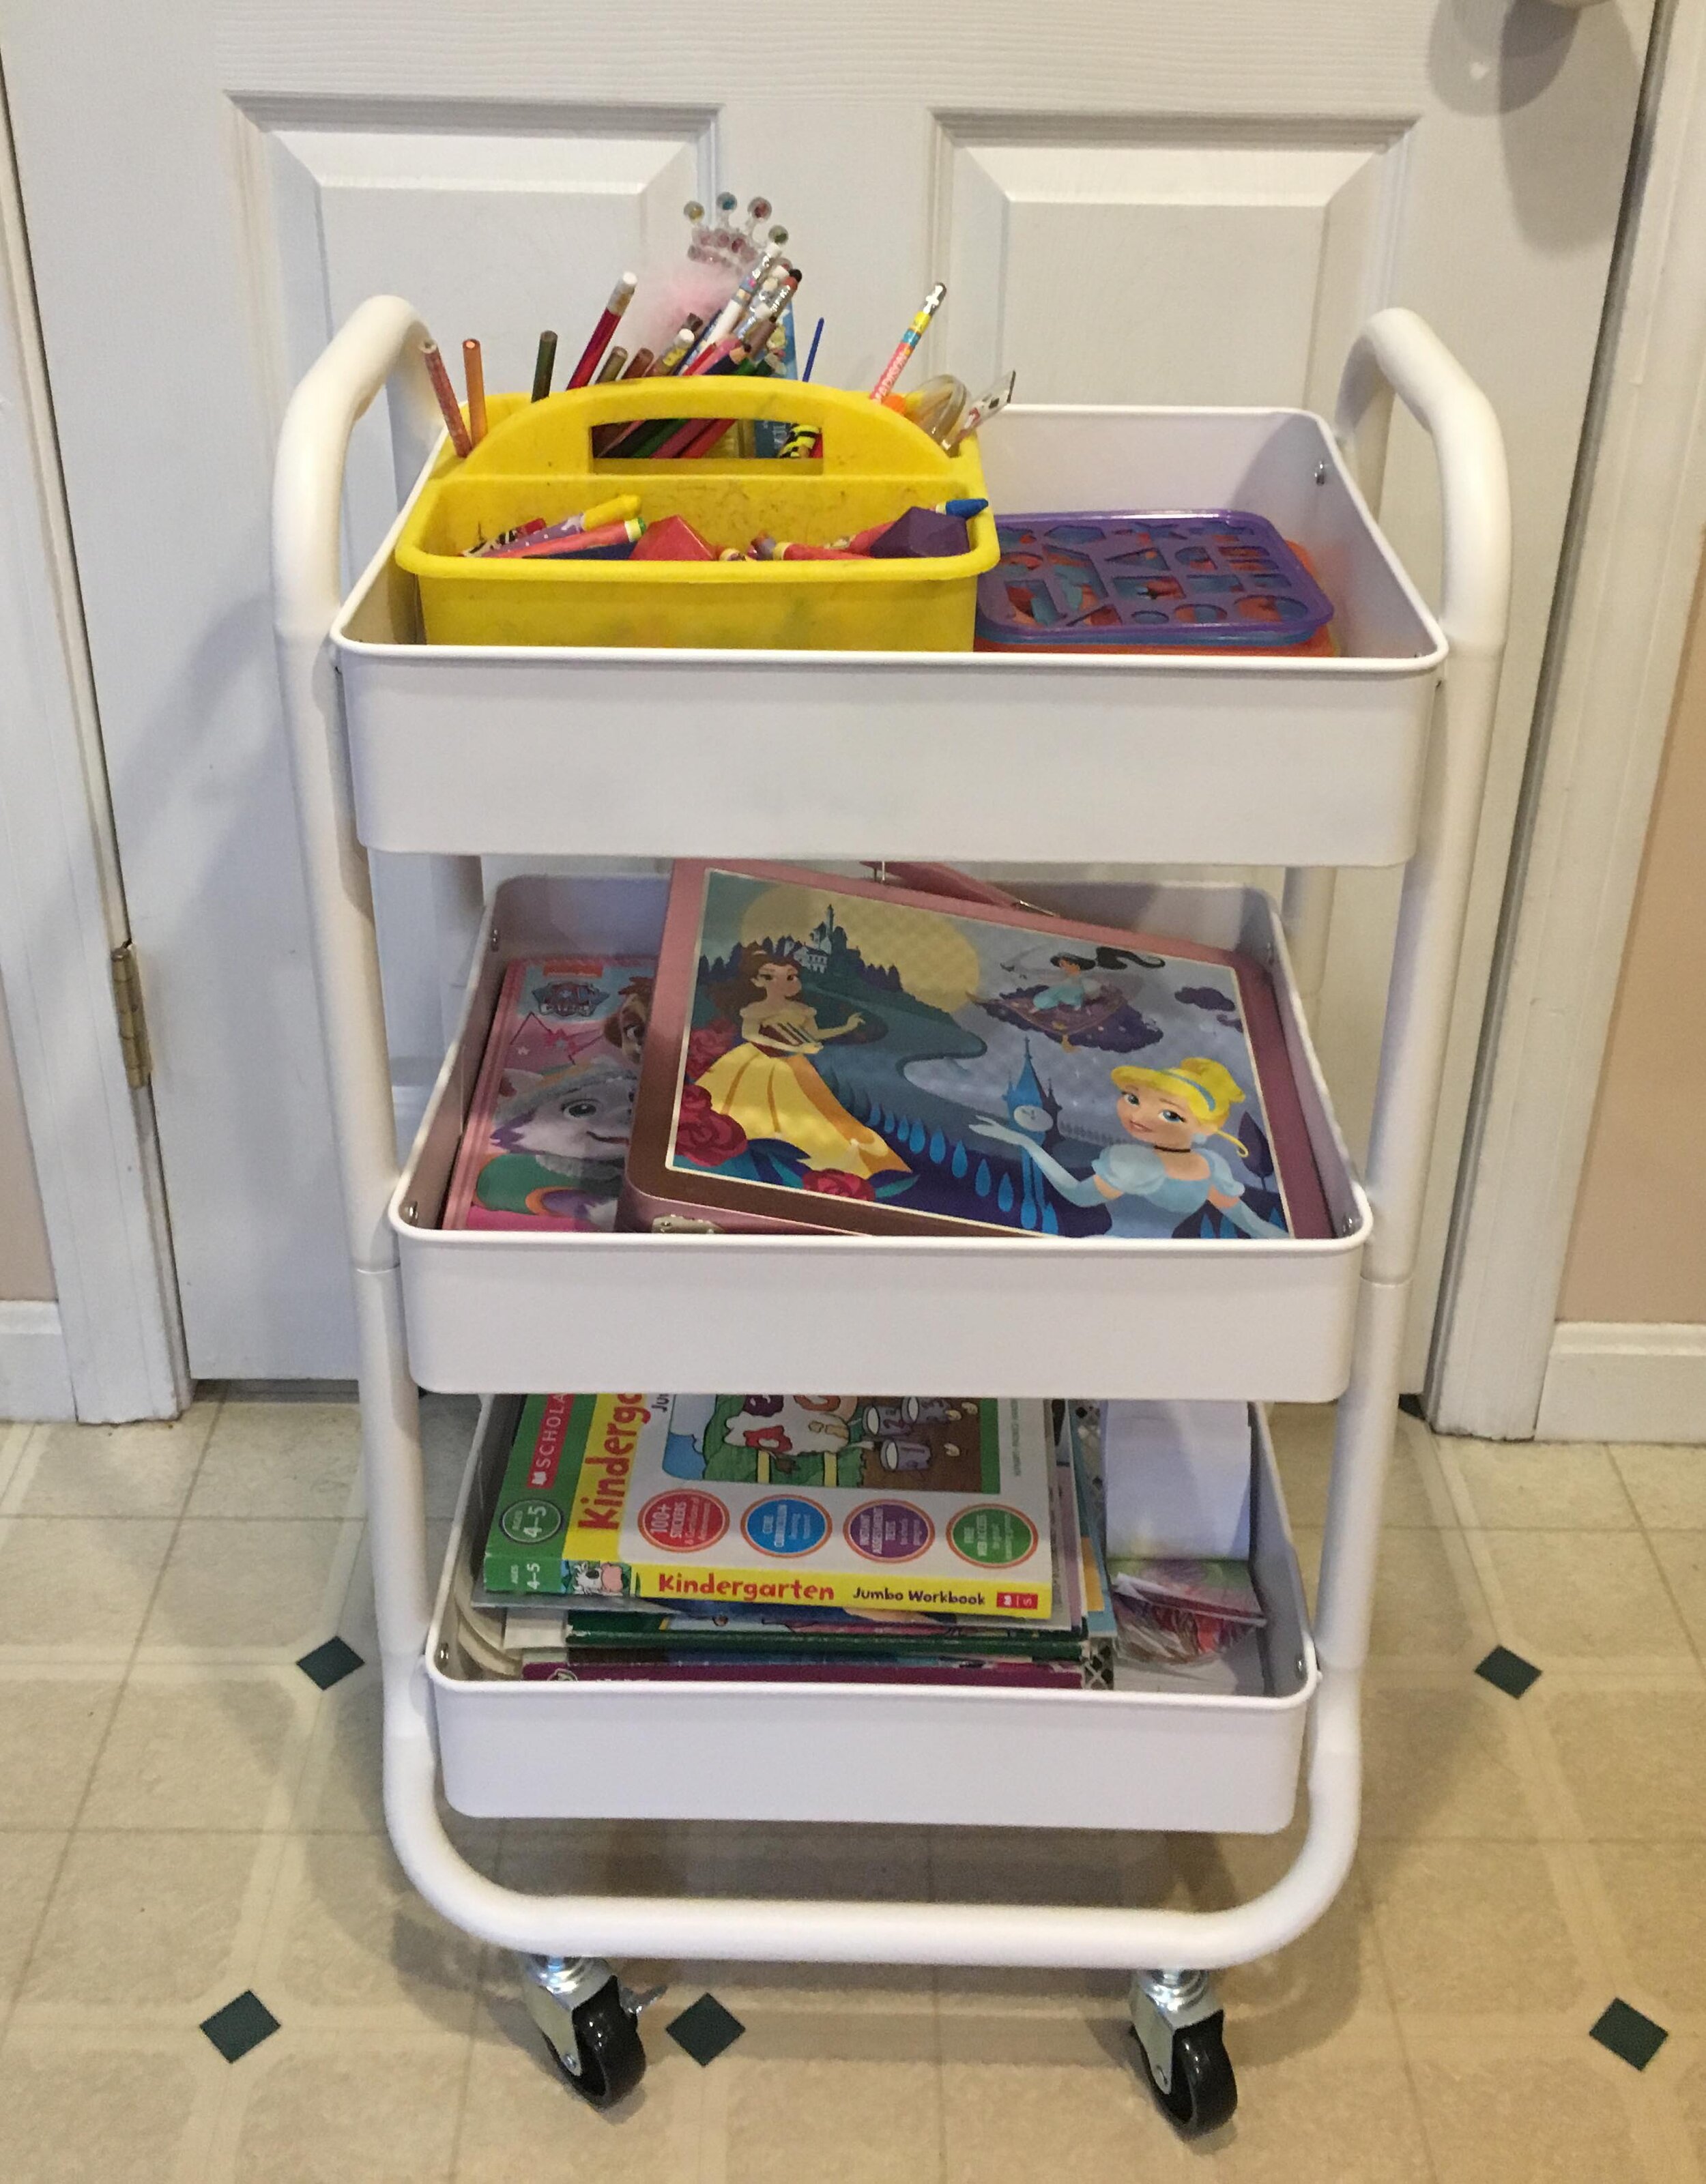
I picked up this cart at Target, but I've linked a very similar one here from Amazon. We decided to stash the coloring books on the bottom shelf, then the tins full of stickers and art kits on the second shelf, and finally the top shelf was reserved for our Art Supply Caddy full of crayons, colored pencils, stencils, etc.

Art Cart Caddy Organization

For the Art Supply Caddy, I used an inexpensive plastic caddy and made custom vinyl labels with my Cricut so that everything has a place.

Art Cart Storage Solution

Finally to store everything, the Art Cart tucks neatly into our pantry where it’s easily accessible but still out of the way. The kids can go in and help themselves to craft supplies whenever they like, and when we want to do a big project the whole thing can wheel out for even easier access. This storage hack has been a game changer in our home and I hope it does the same for you too :)

KEEP UP WITH BIRCH LANDING HOME
|  Etsy  |  Facebook  |  Instagram  |  Pinterest  |  Bloglovin'  |  Hometalk  |

Going “KonMari” on my Daughter’s Bureau

Our daughter’s bureau was a train wreck and I just couldn’t take it anymore. She’s been very much into picking out her own clothes lately and tends to dig around in her drawers until she finds what she wants, without putting anything back the way it was. Today I finally decided to tackle the disaster and emptied her bureau, folded everything in the “KonMari” style, and put it back with order.

BEFORE

BEFORE

What’s the KonMari style? Well, technically the first step is to only keep what you truly love or use, and purge the rest (I pulled out a few items that she was starting to outgrow, but most of her clothes stayed). Then you fold everything uniformly so it can stand up in the drawers and be “filed,” allowing you to see everything at once. This is a great way to fold your clothes as you can see everything all at once and keeps you from falling into the rut of constantly wearing just what’s on top.

AFTER

AFTER

As you can see I came up with a basic system for the drawer too - I grouped all her t-shirts together, then long-sleeve shirts, then sweatshirts and tank tops. (This folding technique also seems to be a lot more efficient as there’s even some empty space now!) I also tackled her other drawers too and tidied up her jeans, pants, and PJs. Overall I think it looks great and should help make getting ready for school in the morning a breeze.

How I organized it:

Going "KonMari" on my Daughter's Bureau:  AFTER

I already had my own drawers folded in the KonMari style and love it - it’s so nice being able to see all your options at once when you’re getting dressed in the morning. As for our daughter, I explained the new setup to her and she understands it (she was honestly really excited about her neat drawers when I first showed them to her) - but the reality is she’s five years old and there’s no way it’s going to stay this organized on it’s own. I also don’t think it’s worth nagging her over it to keep it this way, it’s really not a fair expectation for a five year old. So, we’ll see how long this lasts… I’ll do my best to tidy it up when I can and try to keep some semblance of order but it won’t always be picture-perfect and that’s okay. That’s life ;)

One Week Update: She actually kept the system perfectly! Just a few things had fallen over and one item was crumpled up and put back, but 95% of it was still perfect. I’m super impressed that an almost 5-year-old can keep the system that neat. But it goes to show, that if she can do it - so can you!

Related Post:

KEEP UP WITH BIRCH LANDING HOME
|  Etsy  |  Facebook  |  Instagram  |  Pinterest  |  Bloglovin'  |  Hometalk  |

Easy Flashcard Organization Hack

Our toddler loves flash cards... well, loves dumping them all over the living room mostly.  After getting tired of constantly picking them up I decided it was time to do something about it.  

Easy Flashcard Organization Hack!

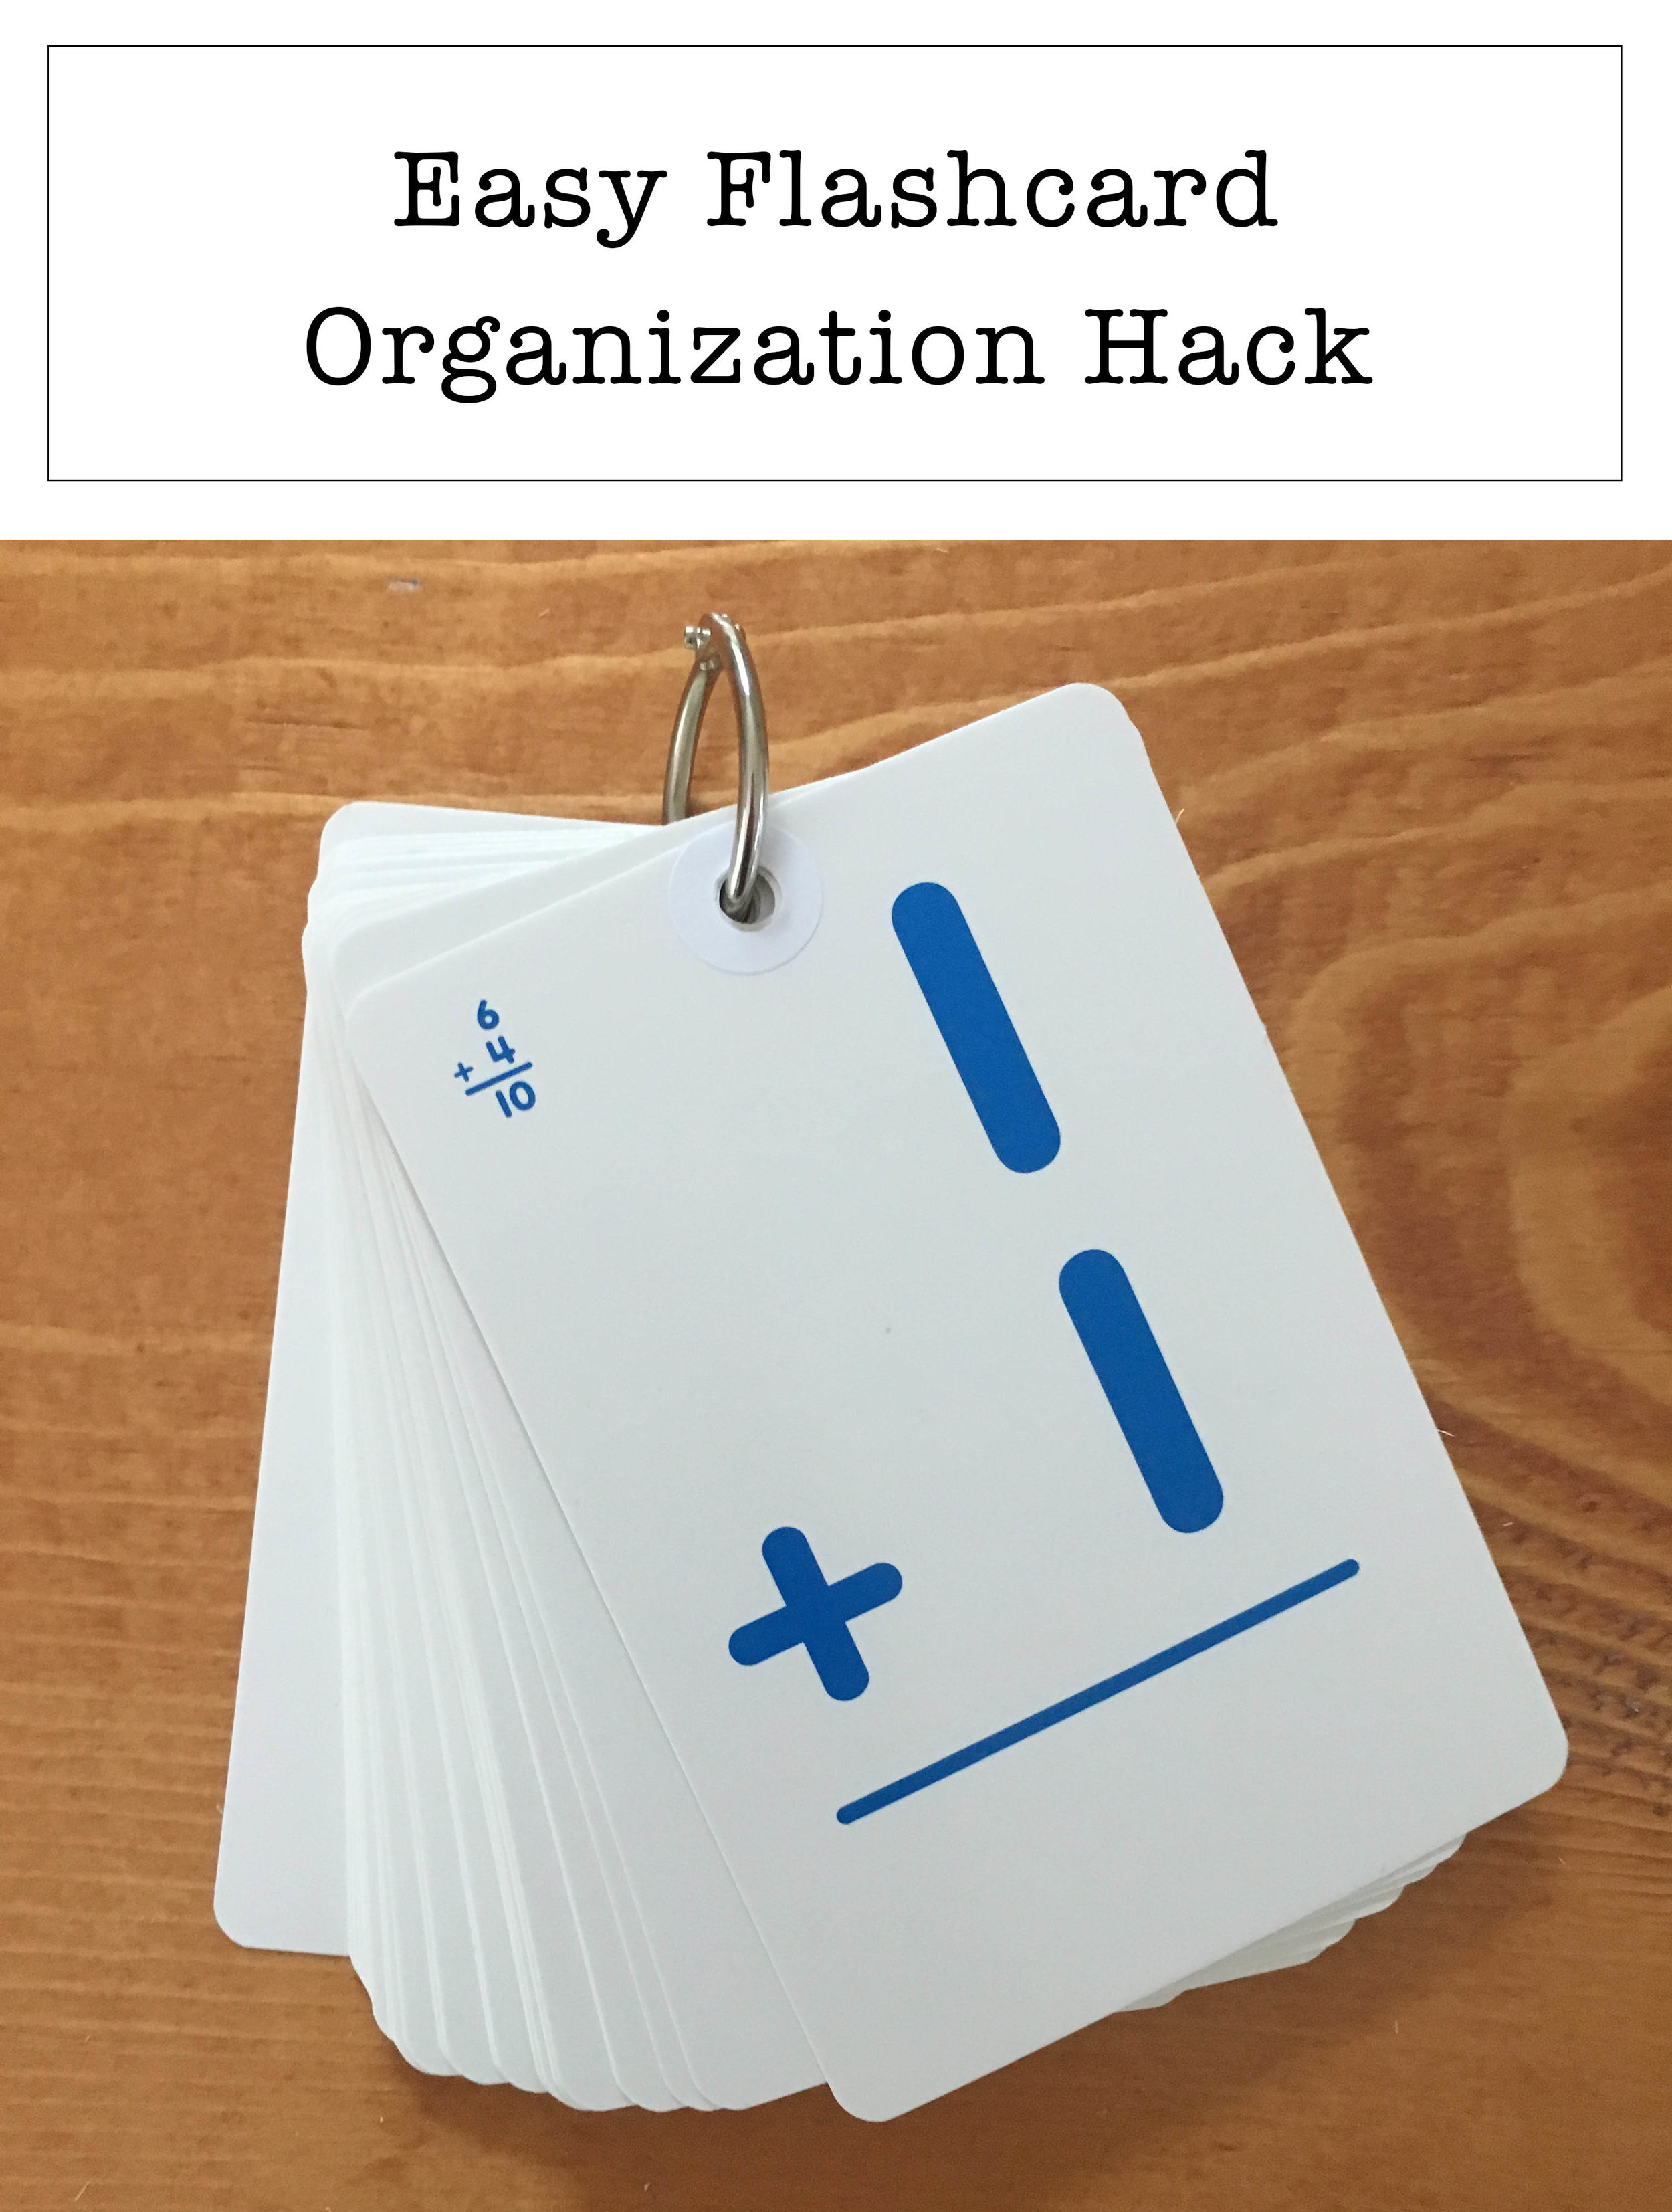
After buying some $1 packs of flashcards from Target Dollar Spot (love Dollar Spot!), I punched a hole in each one and reinforced them with hole reinforcement stickers before stringing them together with binder rings.  If you don't have binder rings, you could also use a piece of ribbon or string.  

Easy Flashcard Organization Hack

And that was it - easy-as-can-be!  Now I don't have a couple hundred flashcards thrown all over the living room, and they're super-easy to pack for car trips and travel!  

Easy Flashcard Organization Hack

KEEP UP WITH BIRCH LANDING HOME
|  Etsy  |  Facebook  |  Instagram  |  Pinterest  |  Bloglovin'  |  Hometalk  |

Easy DIY Book Rails

In our daughter's small bedroom, space is at a premium.  We try hard to make the most of the space and keep the floor as open as possible to help the room feel a little bigger and give her more area to play.  On one wall of her room, there is a very shallow nook I wasn't sure what to do with but wanted to make it an efficient use of space.  After some thought, I decided building some custom book storage would be the perfect solution.  

DIY Book Rails, Book Ledge, Storage.  Kids Room / Nursery

Materials:  

IMG_8626.JPG
  • 1x3 boards

  • 1x2 boards

  • screws

  • wood glue

  • spackle

  • level

  • painters tape

How-To:  

1.  Cut the wood the desired length of the rail shelf.  You will need two 1x3 boards and one 1x2 board for each rail.  

2.  Line up the boards as shown below (the wide ones on the bottom and back, and the narrow one at the front).  Pre-drill, then glue the edges, and secure with wood screws.  

IMG_8625.JPG
IMG_8641.JPG

3.  Once it's dried and secure, spackle the screw holes, let dry, and then apply 3 coats of paint (I used semi-gloss trim paint).  

IMG_8752.JPG

4.  Next mark the location of the studs and the approximate spacing of the book rails.  I could have easily put three rails in this space but I didn't want our toddler trying to climb it like a ladder, so I decided to only do two.  

IMG_8764.JPG

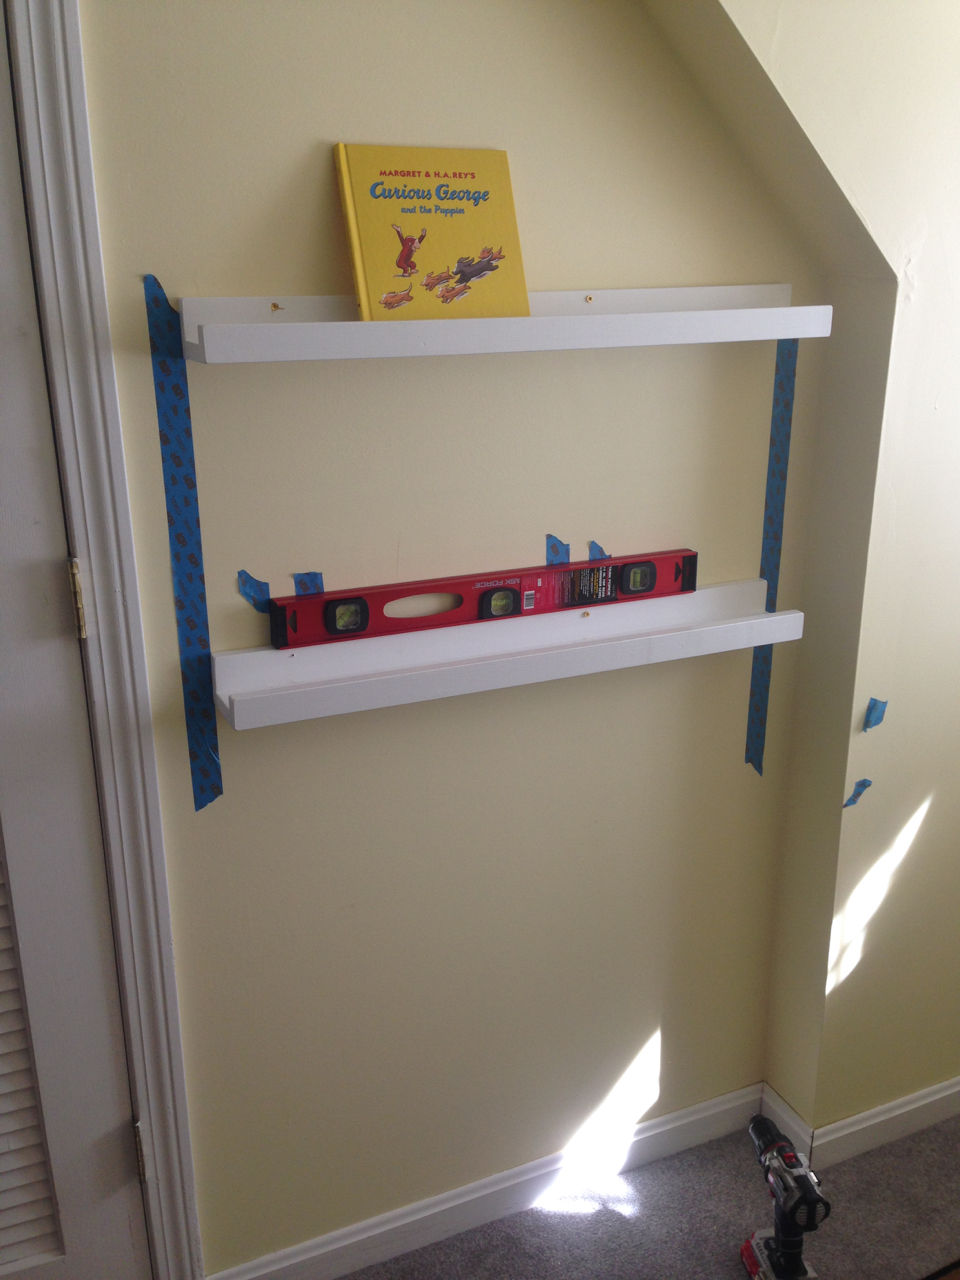
5.  Center the book rails in the space and use a level to hang the book rails, pre-drilling and screwing the book rails into the wall studs.  

Leveling the book rails for hanging.

6.  Decorate and add your books!  While these are pretty sturdy, I would recommend being mindful of the weight put on the rails - don't put too many books or large, heavy books on them, especially since your little one will be reaching up to pull books off and you don't want anything heavy to topple off.  

And finally I decided to build a simple, sturdy narrow crate to hold our daughter's bigger, heavier books.  


IMG_9328.JPG

KEEP UP WITH BIRCH LANDING HOME
|  Etsy  |  Facebook  |  Instagram  |  Pinterest  |  Bloglovin'  |  Hometalk  |

Spring has Sprung!

I've been very busy around the house lately, working on a lot of spring cleaning and garden projects.  
It seems like there isn't enough time to get it all done... raking, weeding, mulching, planting our veggie garden, cleaning out the closets and donating/consigning our unwanted warmer weather clothing... just a few of the things on my to-do list.  Whew.  

But you certainly can't beat lilac season!  These beauties are from our next door neighbor and a reminder to stop and smell the roses (or lilacs) no matter how much there is to get done.  

Love me some lilacs!  A perfect sign of spring.

Happy Spring from Birch Landing Home!  

KEEP UP WITH BIRCH LANDING HOME
|  Etsy  |  Facebook  |  Instagram  |  Pinterest  |  Bloglovin'  |  Hometalk  |

Cheers to 2016!

Every time the New Year comes around it really gets me motivated.  I want to overhaul everything in the house, with Birch Landing Home, and my fitness goals and this year is no different.  

Happy New Year!  Time to make resolutions.

I've decided to take most of January to focus on our home:  it's time to do our yearly closet purge, deep clean all the carpets, and reorganize the dumping ground that our basement has become.  While I haven't read the book myself yet, I have read a lot of articles on The Life-Changing Magic of Tidying Up, and I'd like to try to use these techniques to purge more unused items from our home.  Though I can't make too many promises on this front.. I can be pretty sentimental about little things so we'll see how far I get.

I have big goals for Birch Landing Home too and I want to grow my Etsy shop and blog in many ways.  I'm planning on expanding to more New England-inspired decor in the shop including signs, handmade boxes, and painted sap buckets (don't worry, we'll still have our signature hand-etched ornaments available).  I'd also like to get our products carried at more local retailers too.  
The blog will still be a mix of DIY projects, product reviews, and lessons learned as first-time parents but there will a be a stronger underlying New England vibe to it.  I'd like to blog more about our favorite places to visit in NE as a family as well as showcase more great local products and makers (by the way, if you're a New England-based maker and want to collaborate this year please send me a message).  

And then there's fitness goals.. every year I say I want to get back into running and while I did run a lot more this year than I have in a while, I still didn't get to where I want to be.  So this year I want to make the push to finally run a half-marathon!  For those of you who aren't familiar with my running backstory, I was training for a half-marathon about six years ago when I suffered a couple stress fractures, mostly due to a structural issue with my foot (which I now wear orthotics for).  
We're hoping to expand our family again within the next year or two and so I feel this year will be my last chance to try for a half marathon again before I'm too pregnant or busy with a newborn to seriously run for awhile.  

Start your New Year's Resolutions now!

Whew, so those are my top goals for 2016!  Wishing everyone lots of health, happiness, and success in the New Year - cheers!  

KEEP UP WITH BIRCH LANDING HOME
|  Etsy  |  Facebook  |  Instagram  |  Pinterest  |  Bloglovin'  |  Hometalk  |