I'm a wife, stay-at-home mom, crafter, and blogger living in rural New England. As seen in Martha Stewart Living, Food Network Magazine, and more! | Tutorials, DIY, crafts, parenting tips, recipes, money saving tips, product reviews, local product features, New England living, intentional living, and more! |
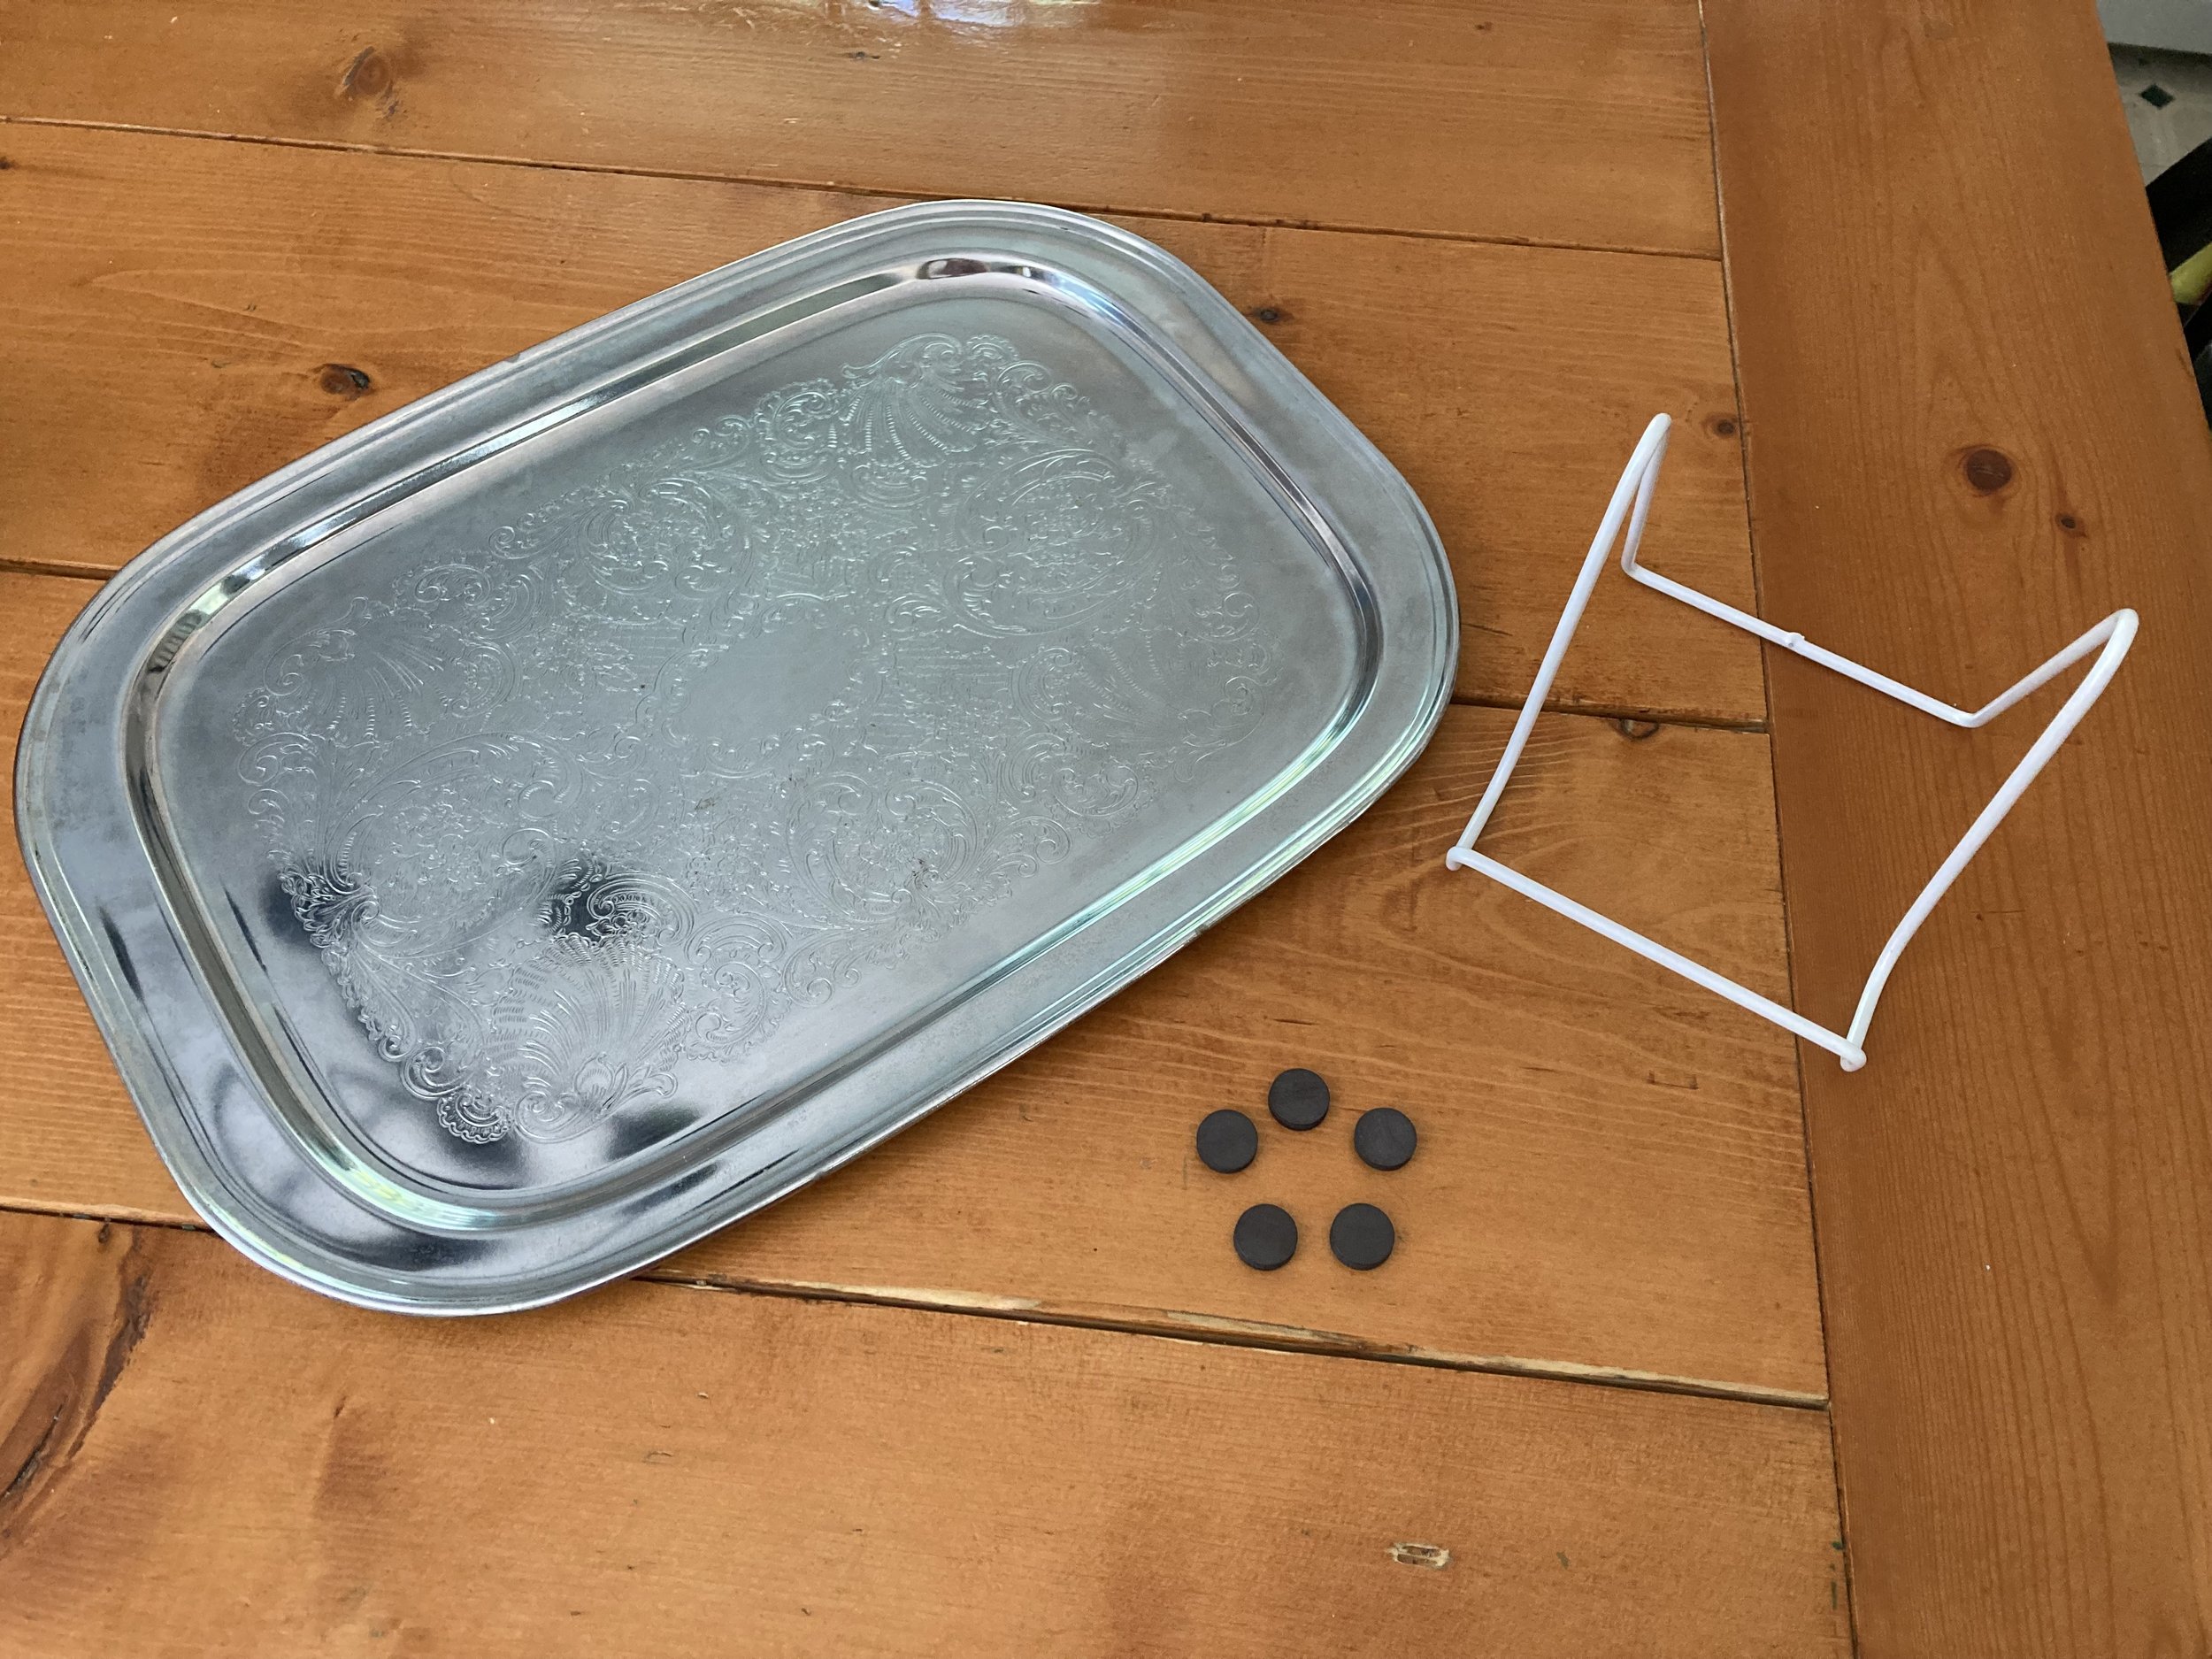
We’ve been slowly helping to clean out a family member’s attic and came across this old heavy “silver” (not actually silver) serving tray. Since not many people still use serving trays I thought it might be fun to repurpose it into something else - and since it seems to be made of some kind of steel (therefore magnetic), I thought it would make a fun magnetic memo board! | This post contains affiliate links |
Materials:
Vintage metal tray (check to make sure it's magnetic)
plate stand big enough to support the tray (similar size stand linked)
magnets
How To:
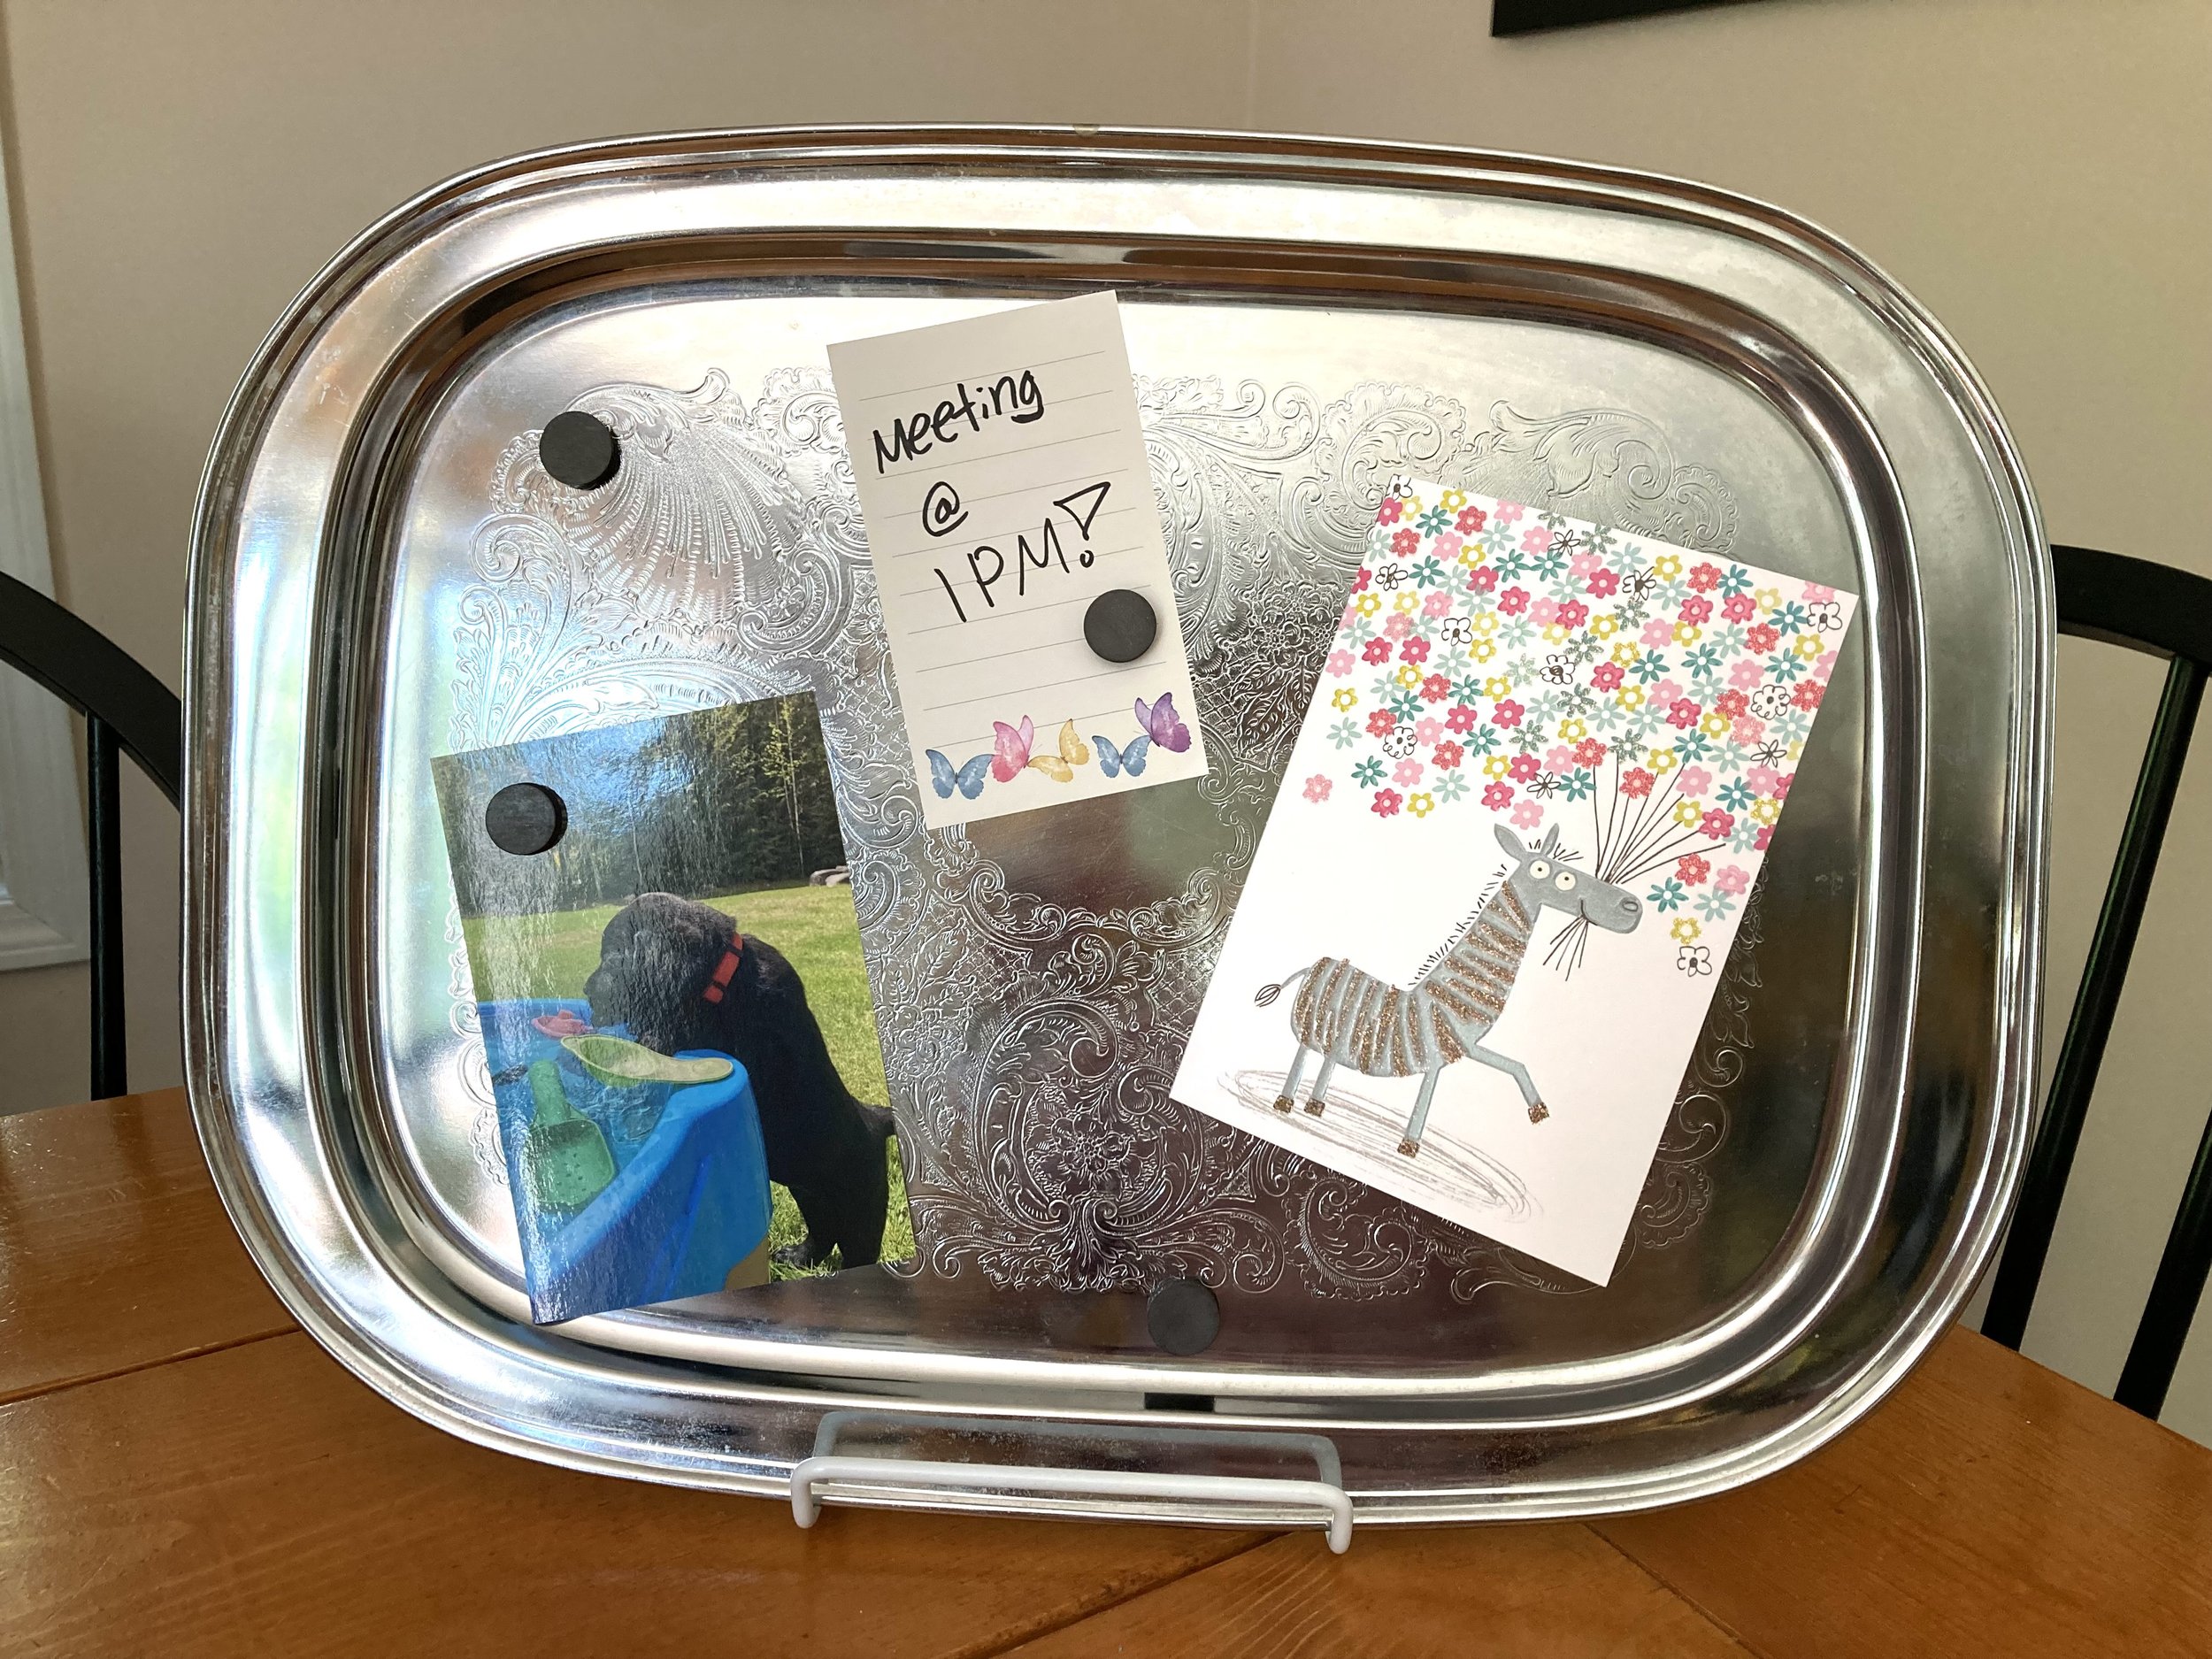
Really the how-to for this project could not be easier! Rest that serving tray on a plate stand that’s big enough/sturdy enough to support it, add some magnets, and BAM, you’re done! I think this project would look so cute on a dresser in a bedroom, a feminine office space, or on a desk nook in the kitchen. It can be used to hold reminders, photos, thank you notes, recipes, mementos, and more.
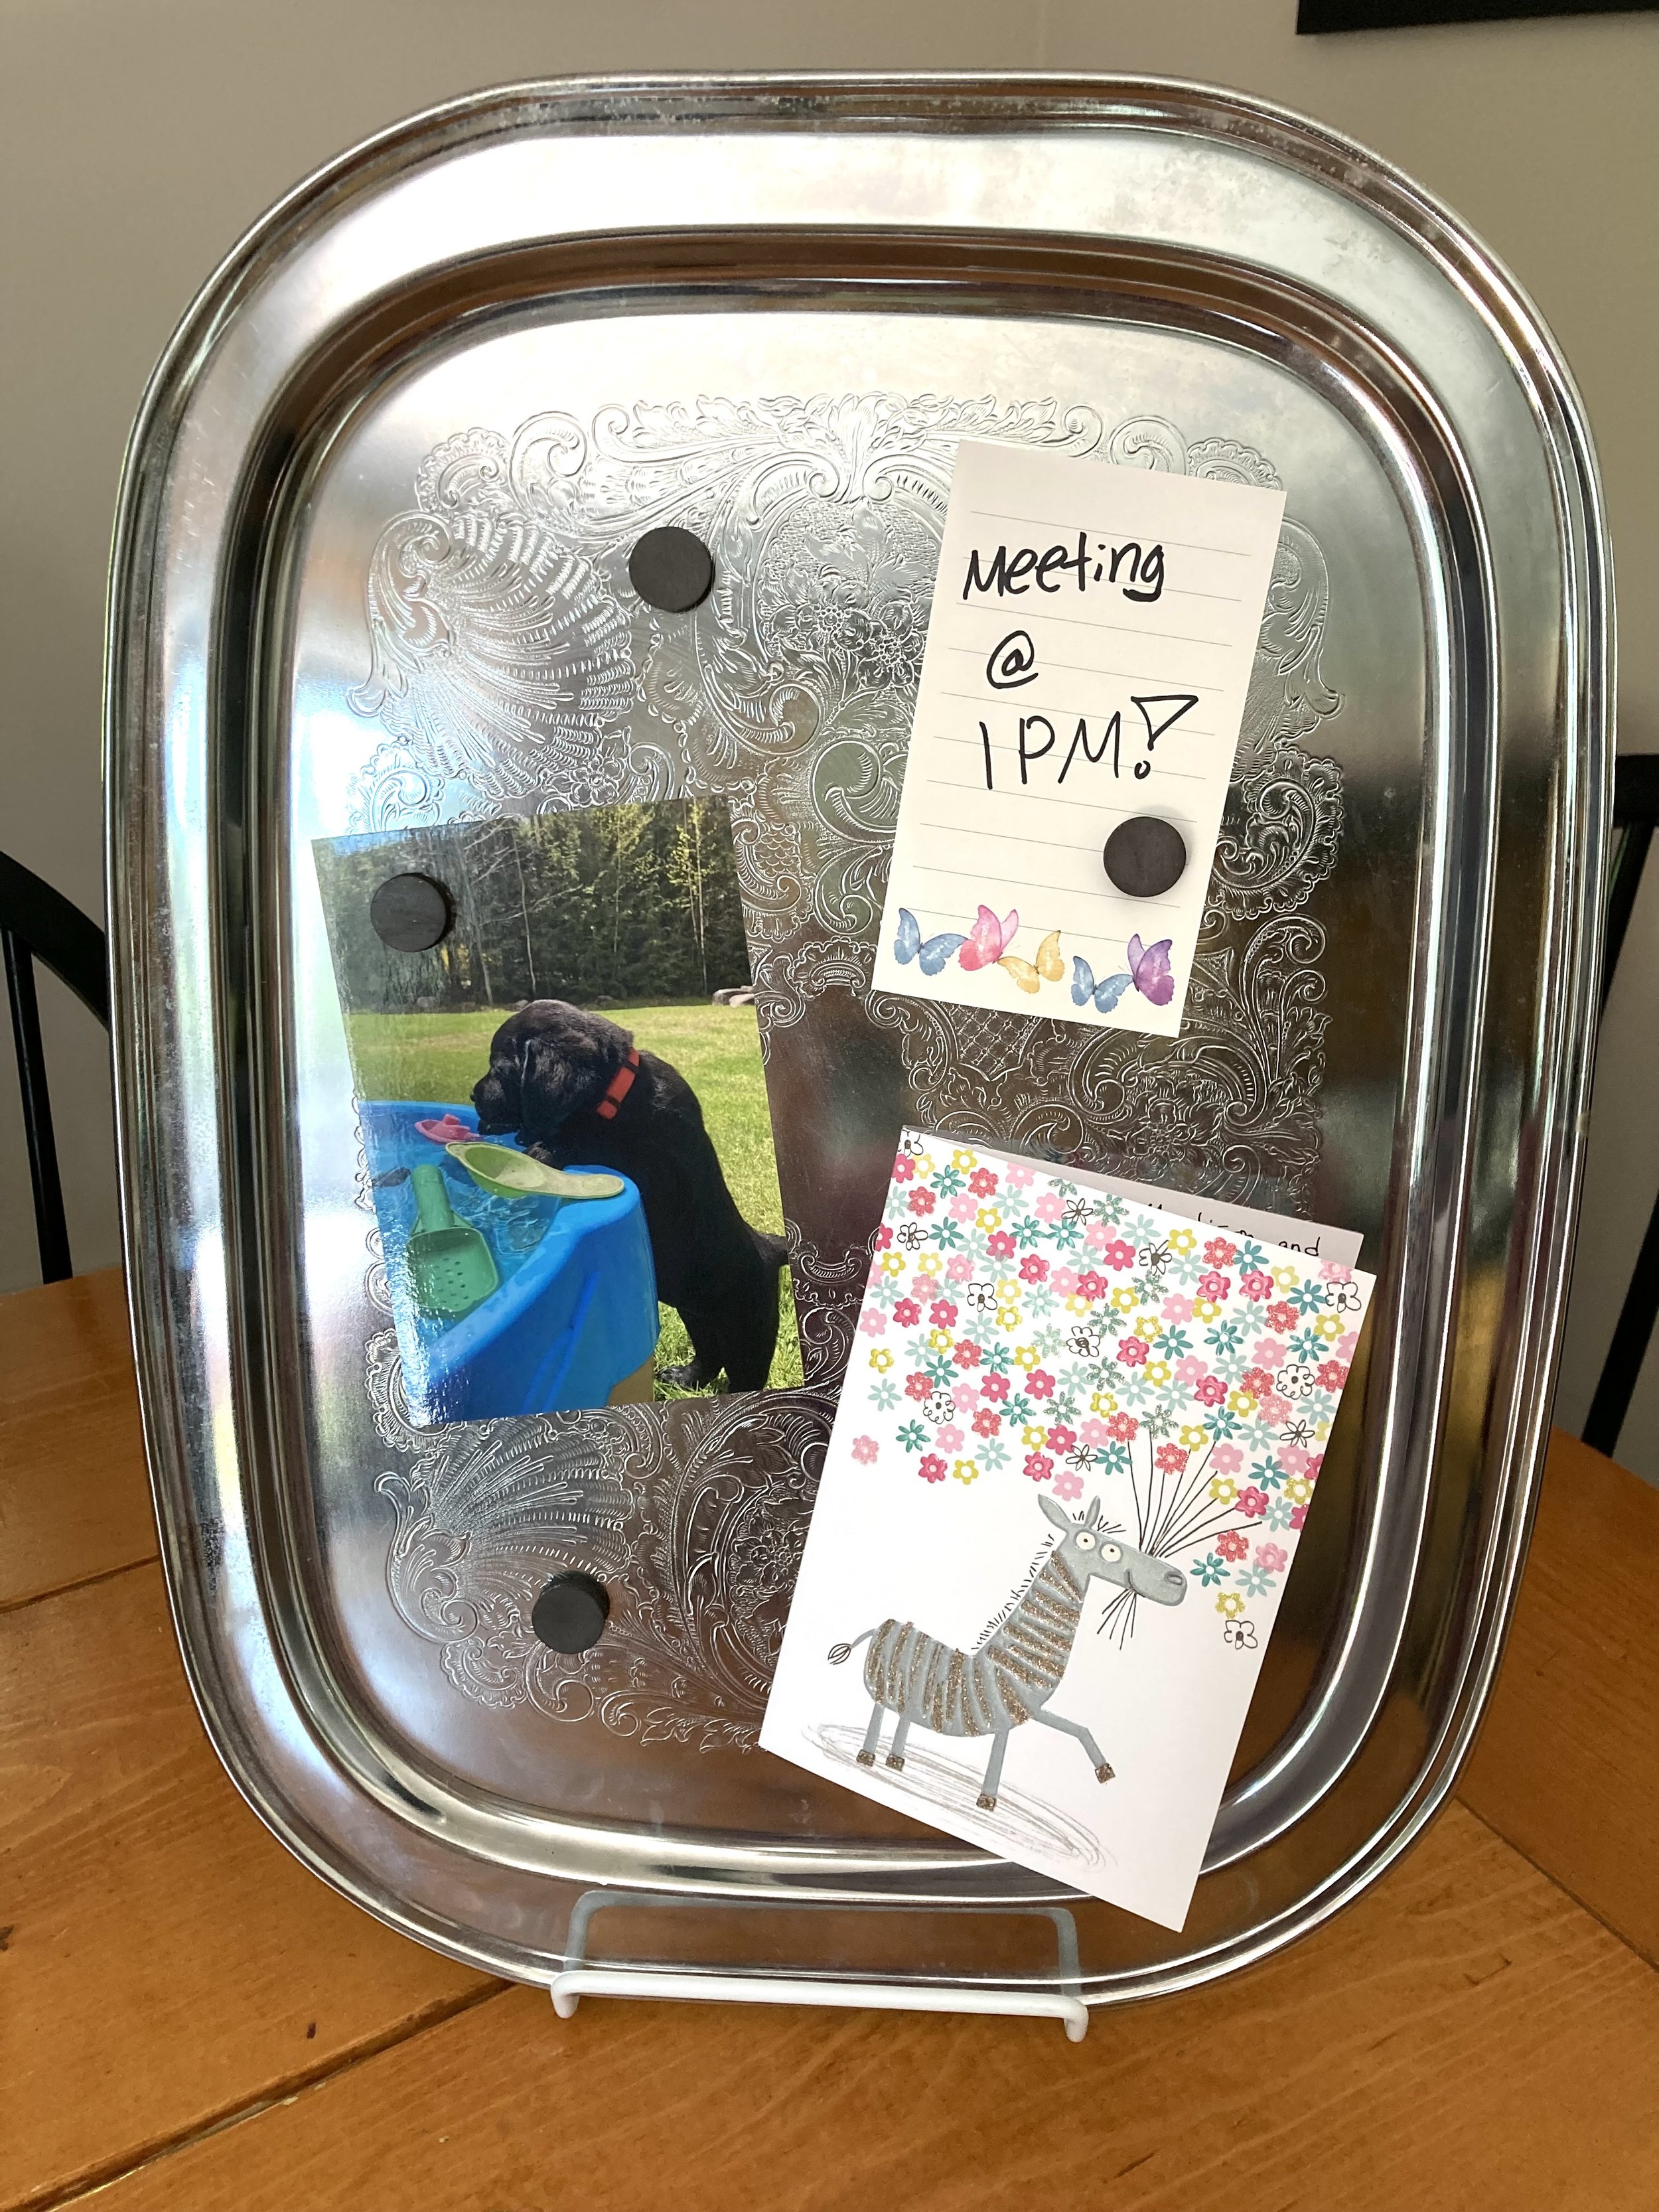
And if the horizontal orientation isn’t working for your space, just turn the tray and you instantly have a vertical memo board!
If you wanted to hang the tray on a wall instead, you could try using a tray hanger. Just make sure to buy the correct size hanger for your tray and make sure it's rated to support the weight of it.
PS - looking for vintage items like the serving tray in this post? Be sure to check out our Etsy Shop for some fun vintage finds! Our inventory is always changing so check back often :)
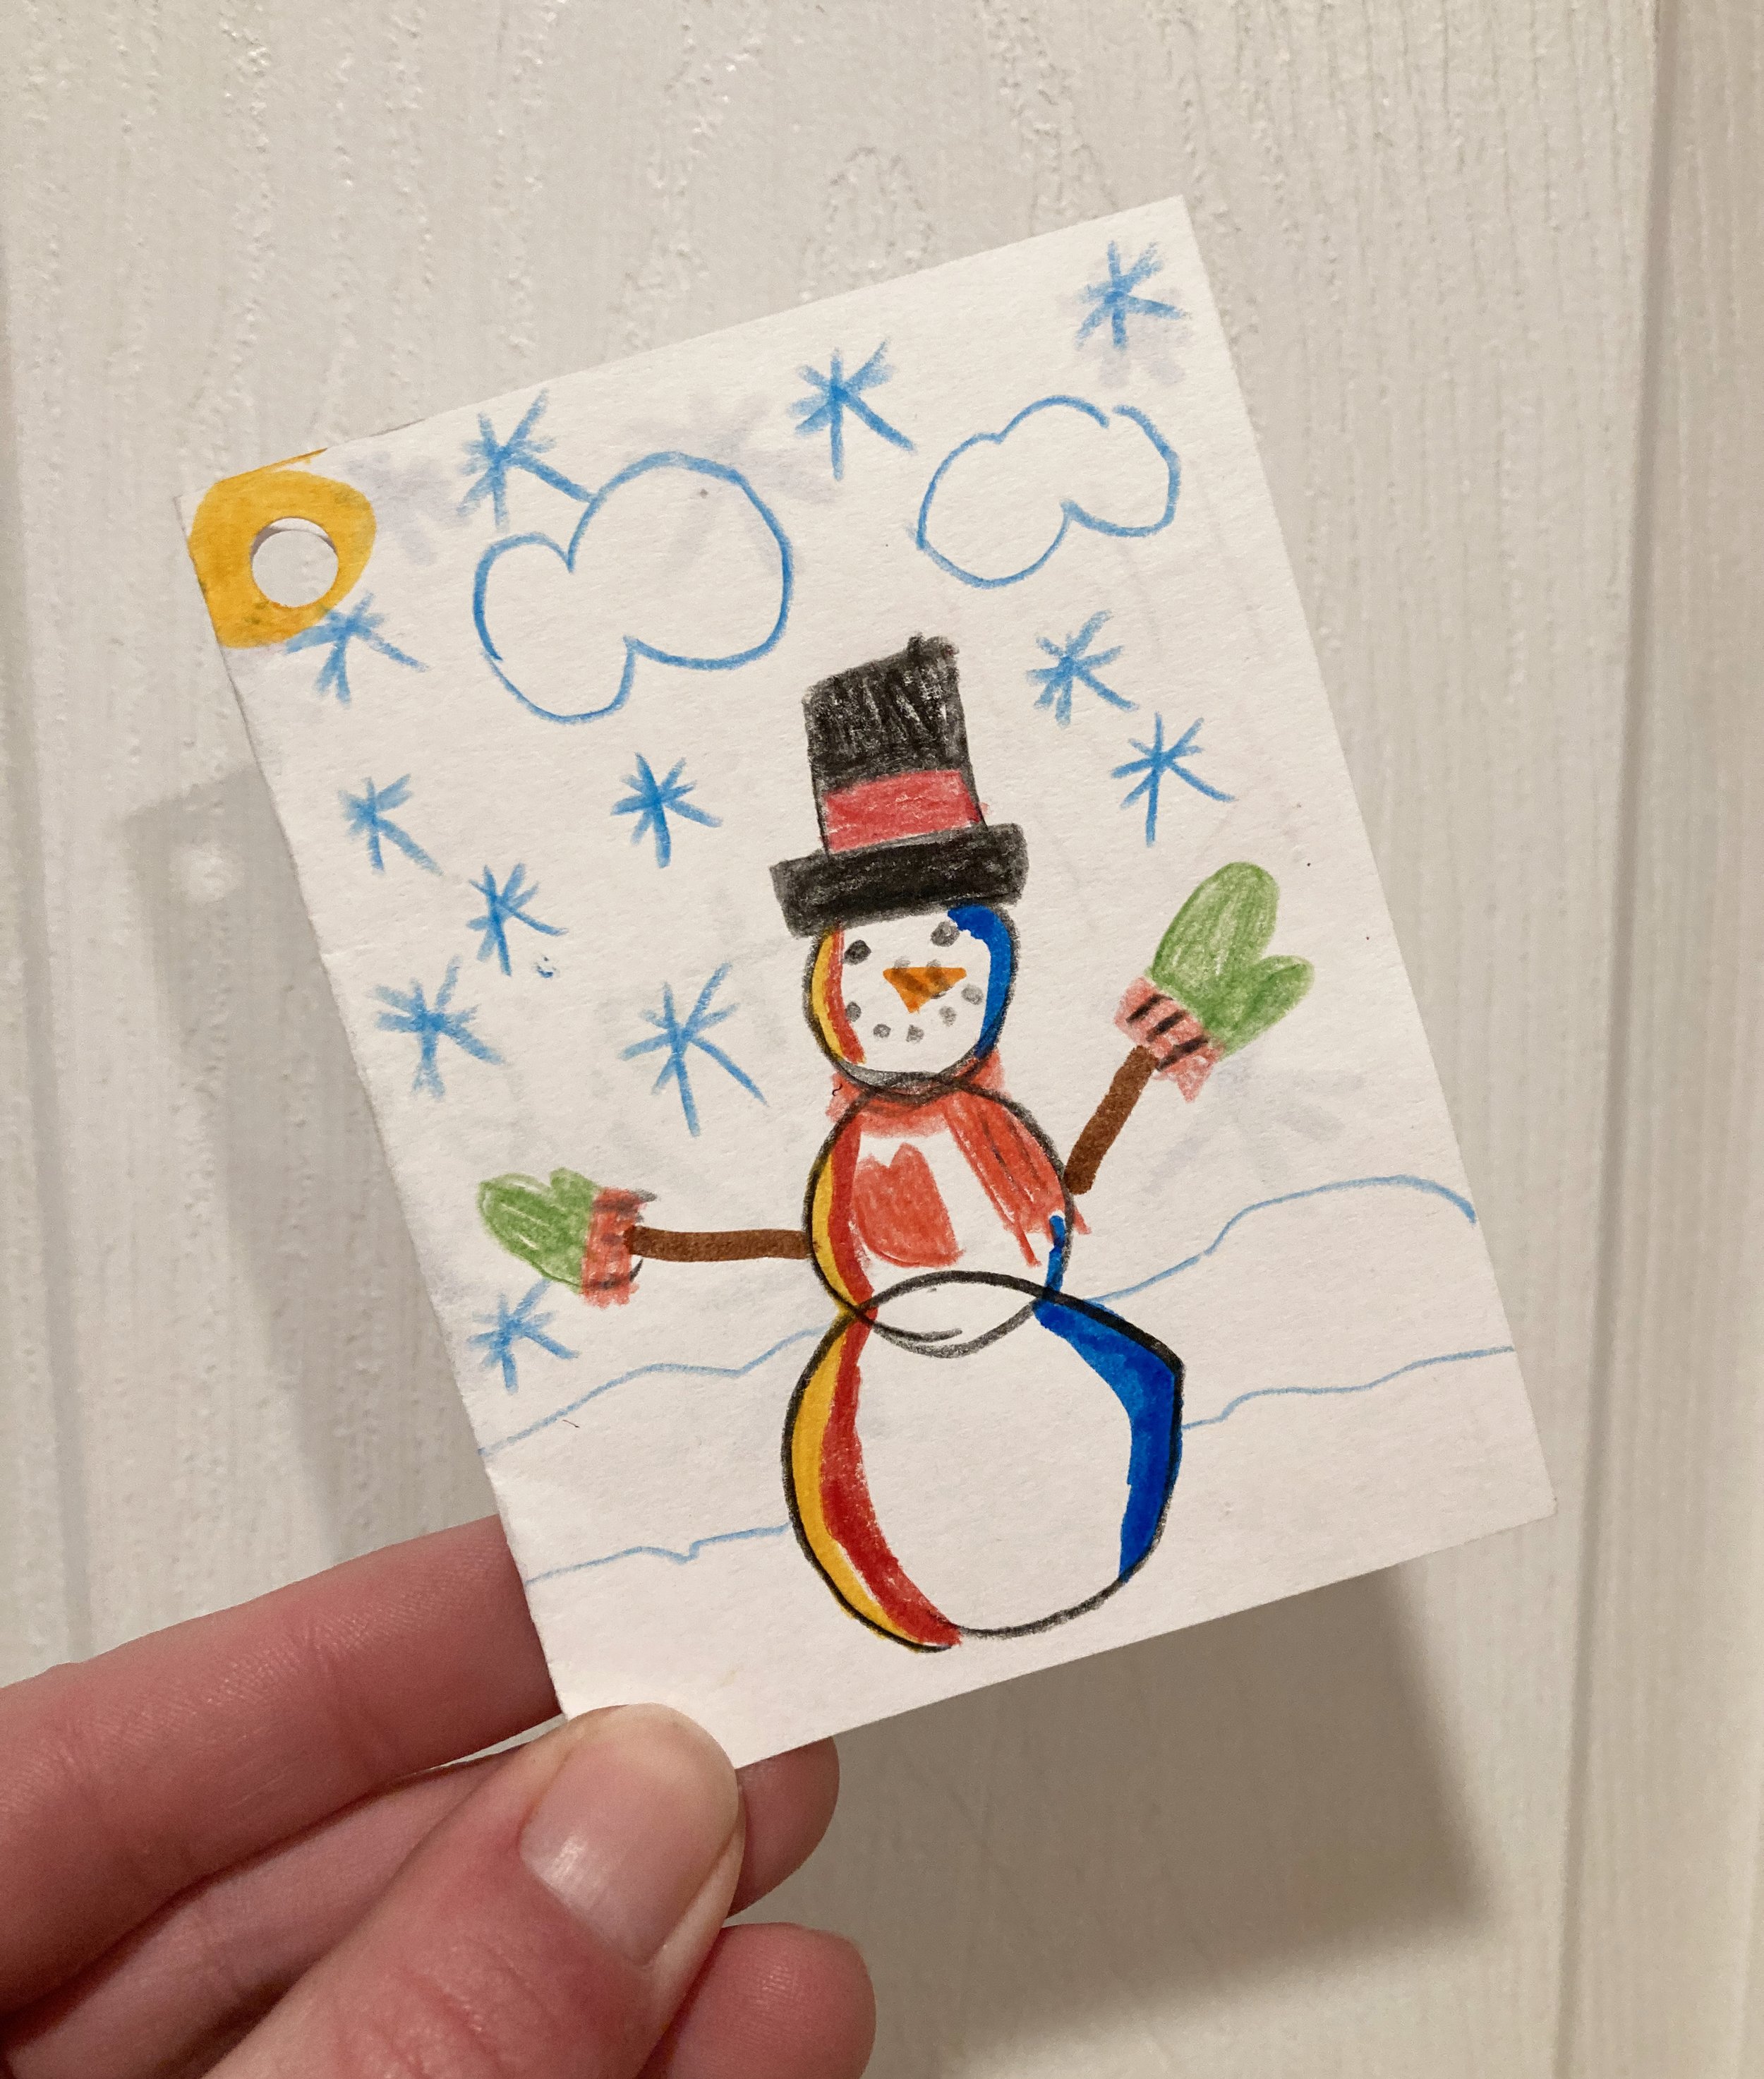
Just wanted to share this easy, cute homemade gift idea for anyone with small kids in a snowy climate - DIY Simple Snowman Kits! Since we aren’t able to get together with a lot of family and friends again this year (thanks Covid), we decided to make and send these little kits so our kids could “help” their friends make their own snowmen from afar. | This post contains affiliate links |
Really there isn’t too much to explain for this project — we gathered some basic materials, painted them, and then packaged them together before including a little note from the kids.
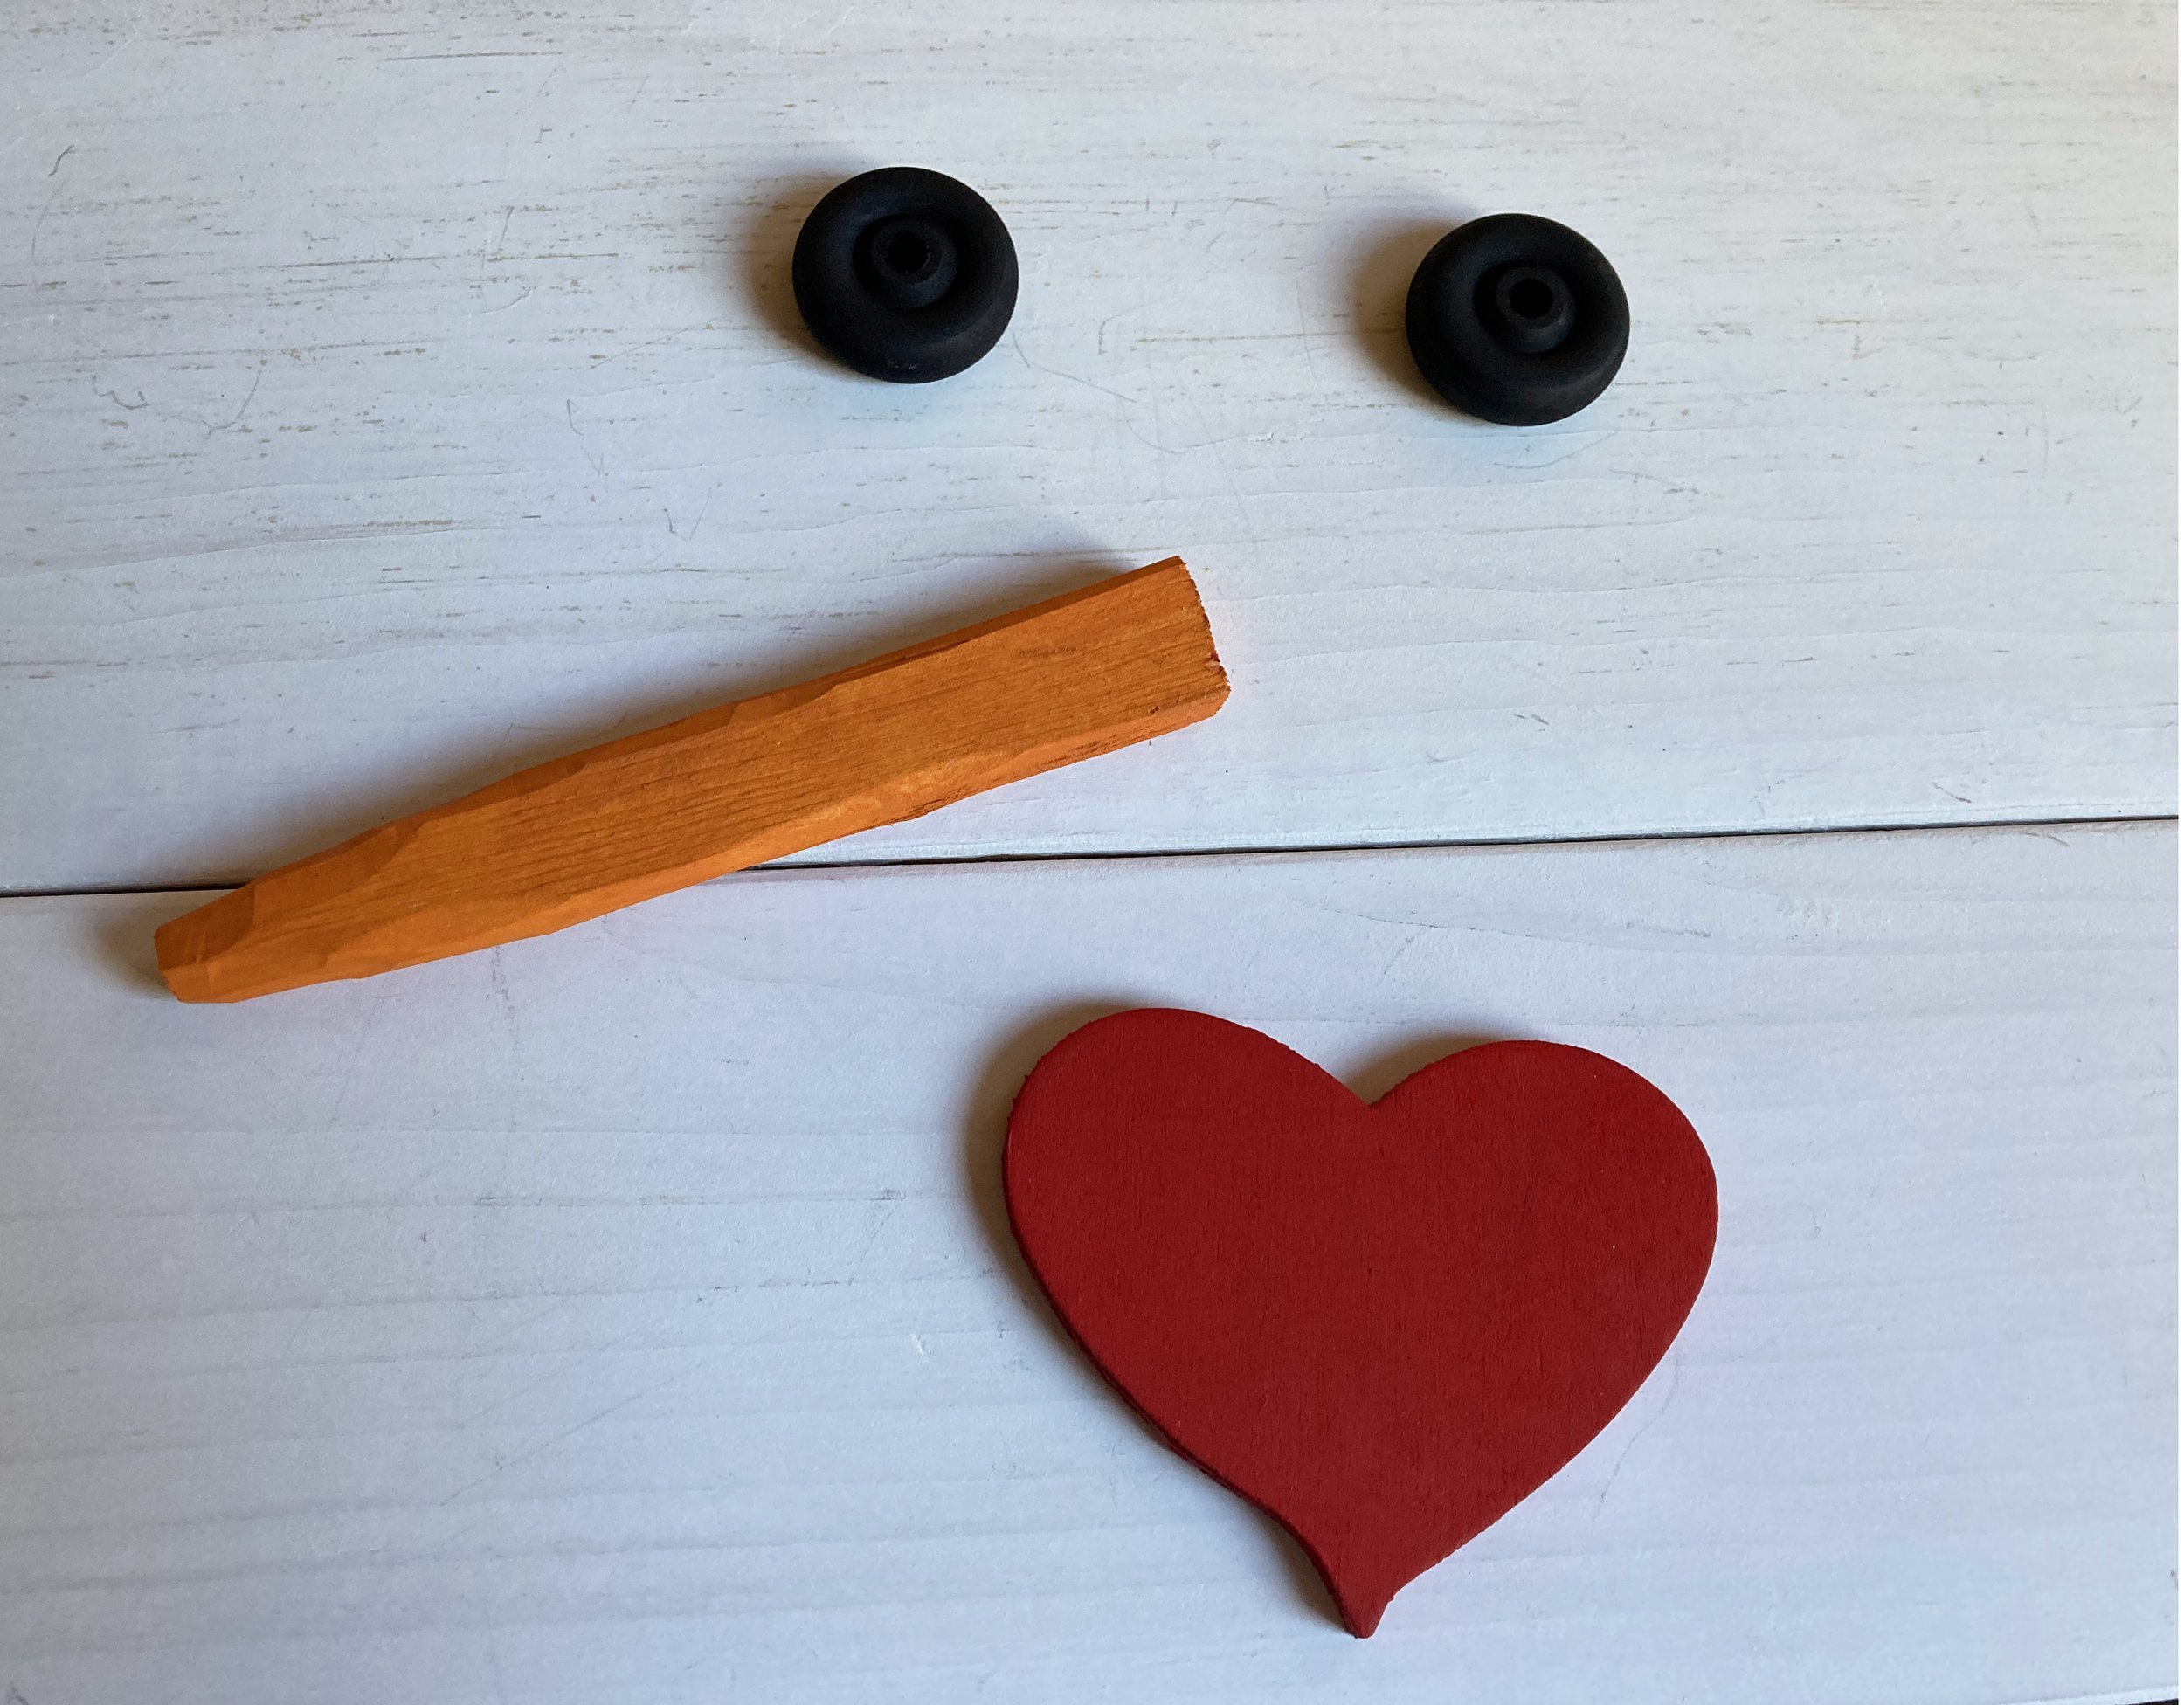
EYES: For the eyes we used wooden toy wheels from a craft store (similar ones linked) that we painted black - but you could use just about anything, including painted rocks or scrap wood. NOSE: For the nose I whittled down some pieces of scrap wood into a rough carrot shape, then painted them orange. HEART: For the hearts we glued together two layers of pre-cut balsa wood hearts we had picked up at a craft store (similiar ones linked), then painted them red. BUTTONS (OPTIONAL): We did not include buttons in our kits but you can include painted rocks, small pieces of scrap wood, or actual large buttons in your kits to be used as buttons. GIFT BAG: We packaged our kits up in some organza gift bags I had on hand (similar ones linked), but you could wrap them up in a number of ways including using a piece of fabric that could double as a scarf!
Then I had the kids make the gift tags and write notes to their friends - they loved coming up with special drawings and messages! Our friends really enjoyed getting these kits and I’m excited to see how their snowmen turn out. Hopefully these Snowmen supplies will be something they can reuse for future winters too! Just add snow… ;)
PS - I have a few kits left over listed for sale in my Etsy Shop if you would like to check them out. Just click the button below to shop:
Yesterday the kids finger-painted some big sheets of paper and today we cut hearts out to hang in all our windows as a way to say THANK YOU to all the heroes out there - especially medical personnel, but also mail/package carriers, truck drivers, and our neighbors and community that are staying home.
I hope everyone can find some small way to help spread some hope and gratitude in your neighborhoods too. Thank you all!
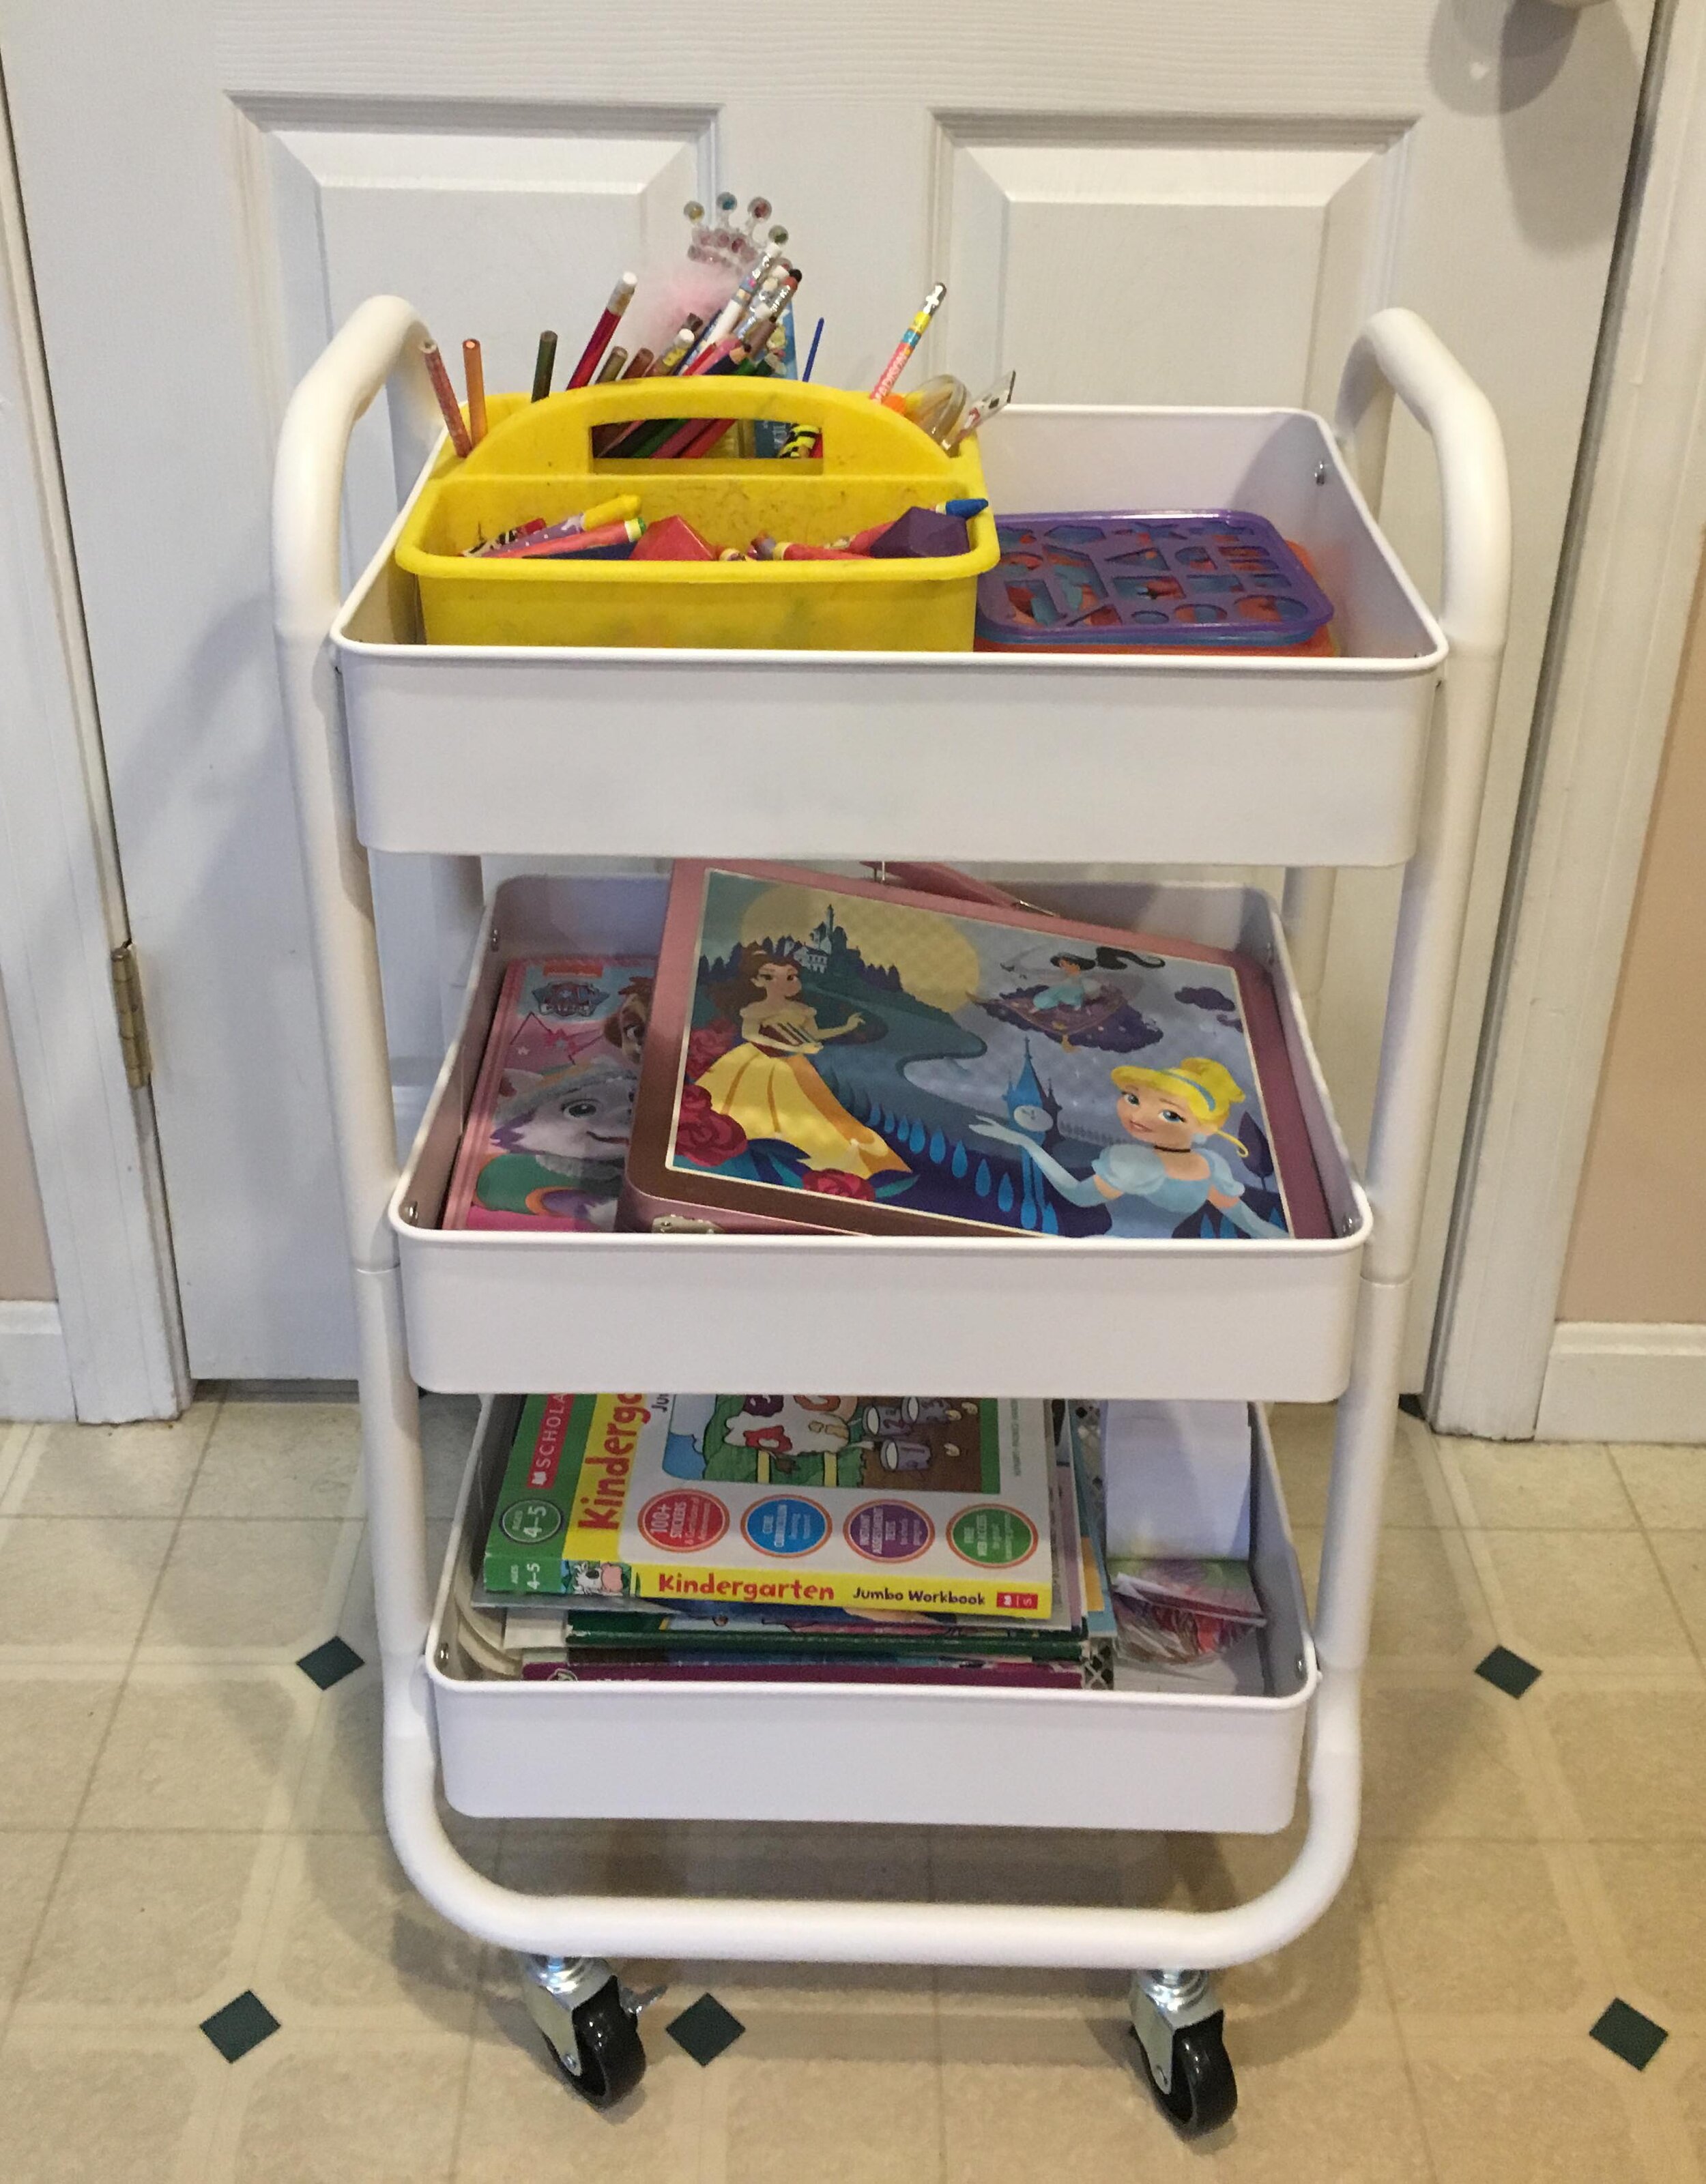
Our kids love arts and crafts, and at this age, they particularly love coloring and coloring books - however, the art supplies were totally taking over the house. In order to contain the chaos, I decided an “Art Cart” would be the perfect storage and organizational solution. | This post contains affiliate links |
I picked up this cart at Target, but I've linked a very similar one here from Amazon. We decided to stash the coloring books on the bottom shelf, then the tins full of stickers and art kits on the second shelf, and finally the top shelf was reserved for our Art Supply Caddy full of crayons, colored pencils, stencils, etc.
Finally to store everything, the Art Cart tucks neatly into our pantry where it’s easily accessible but still out of the way. The kids can go in and help themselves to craft supplies whenever they like, and when we want to do a big project the whole thing can wheel out for even easier access. This storage hack has been a game changer in our home and I hope it does the same for you too :)
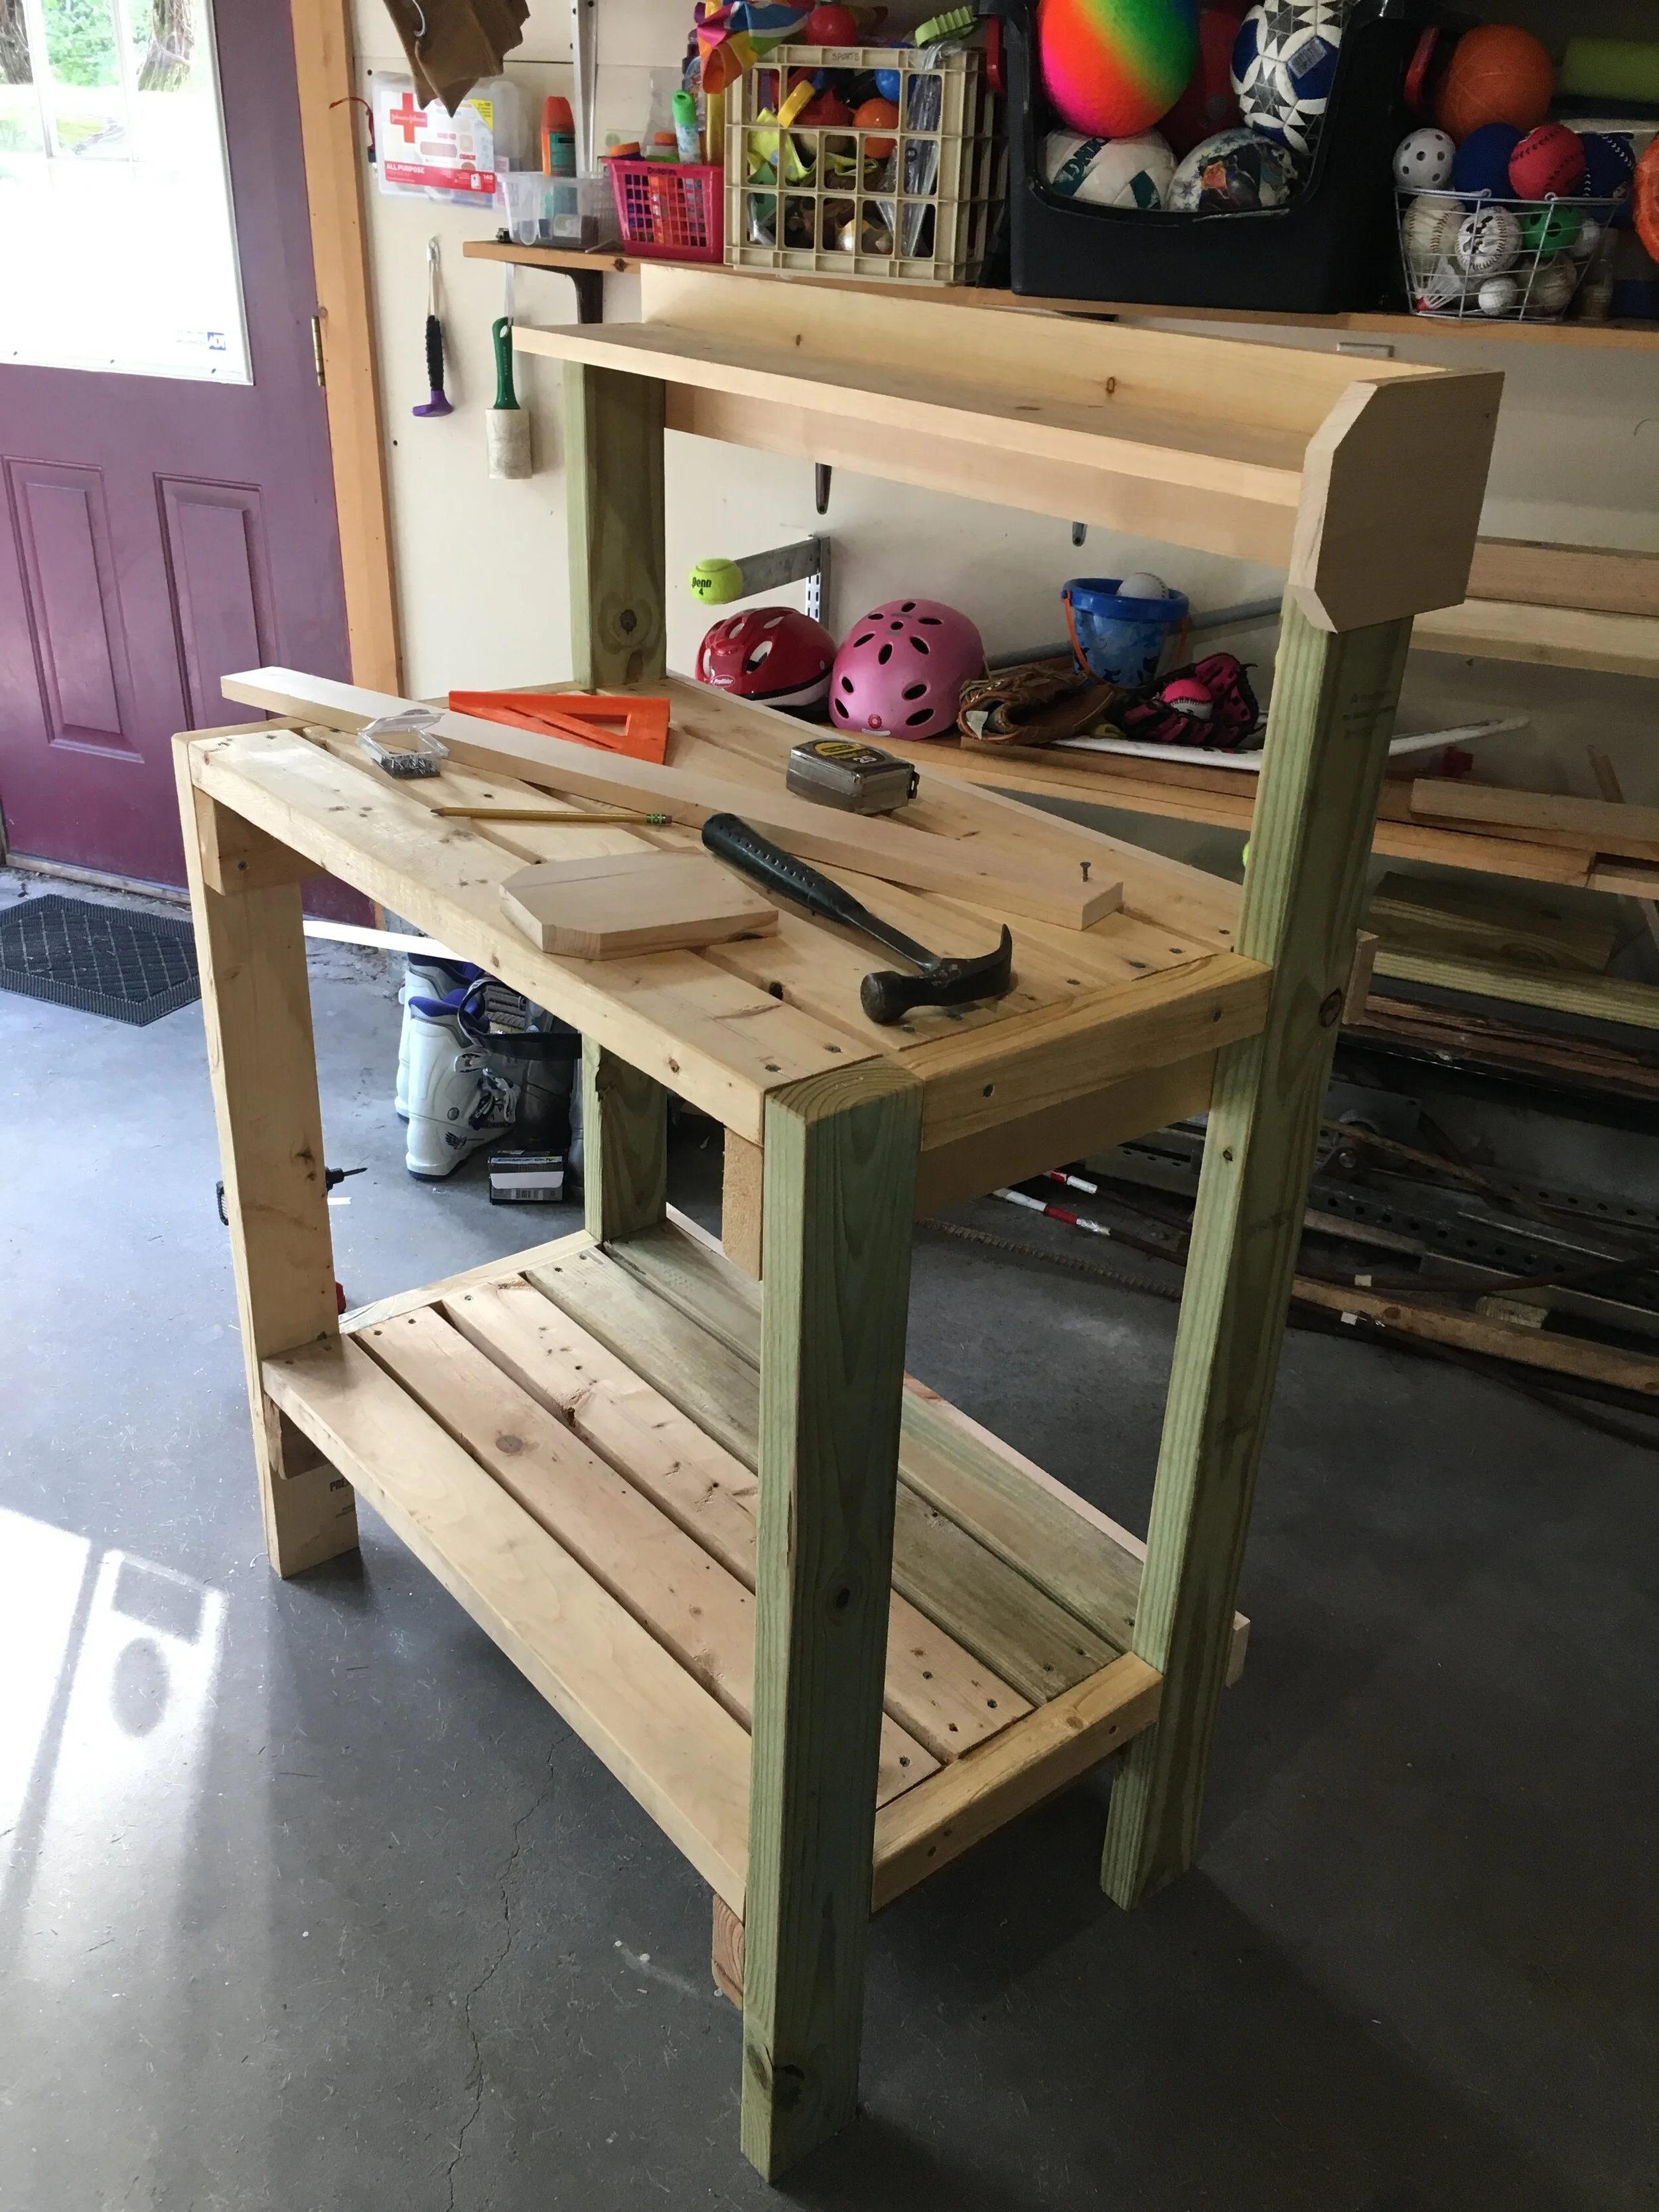
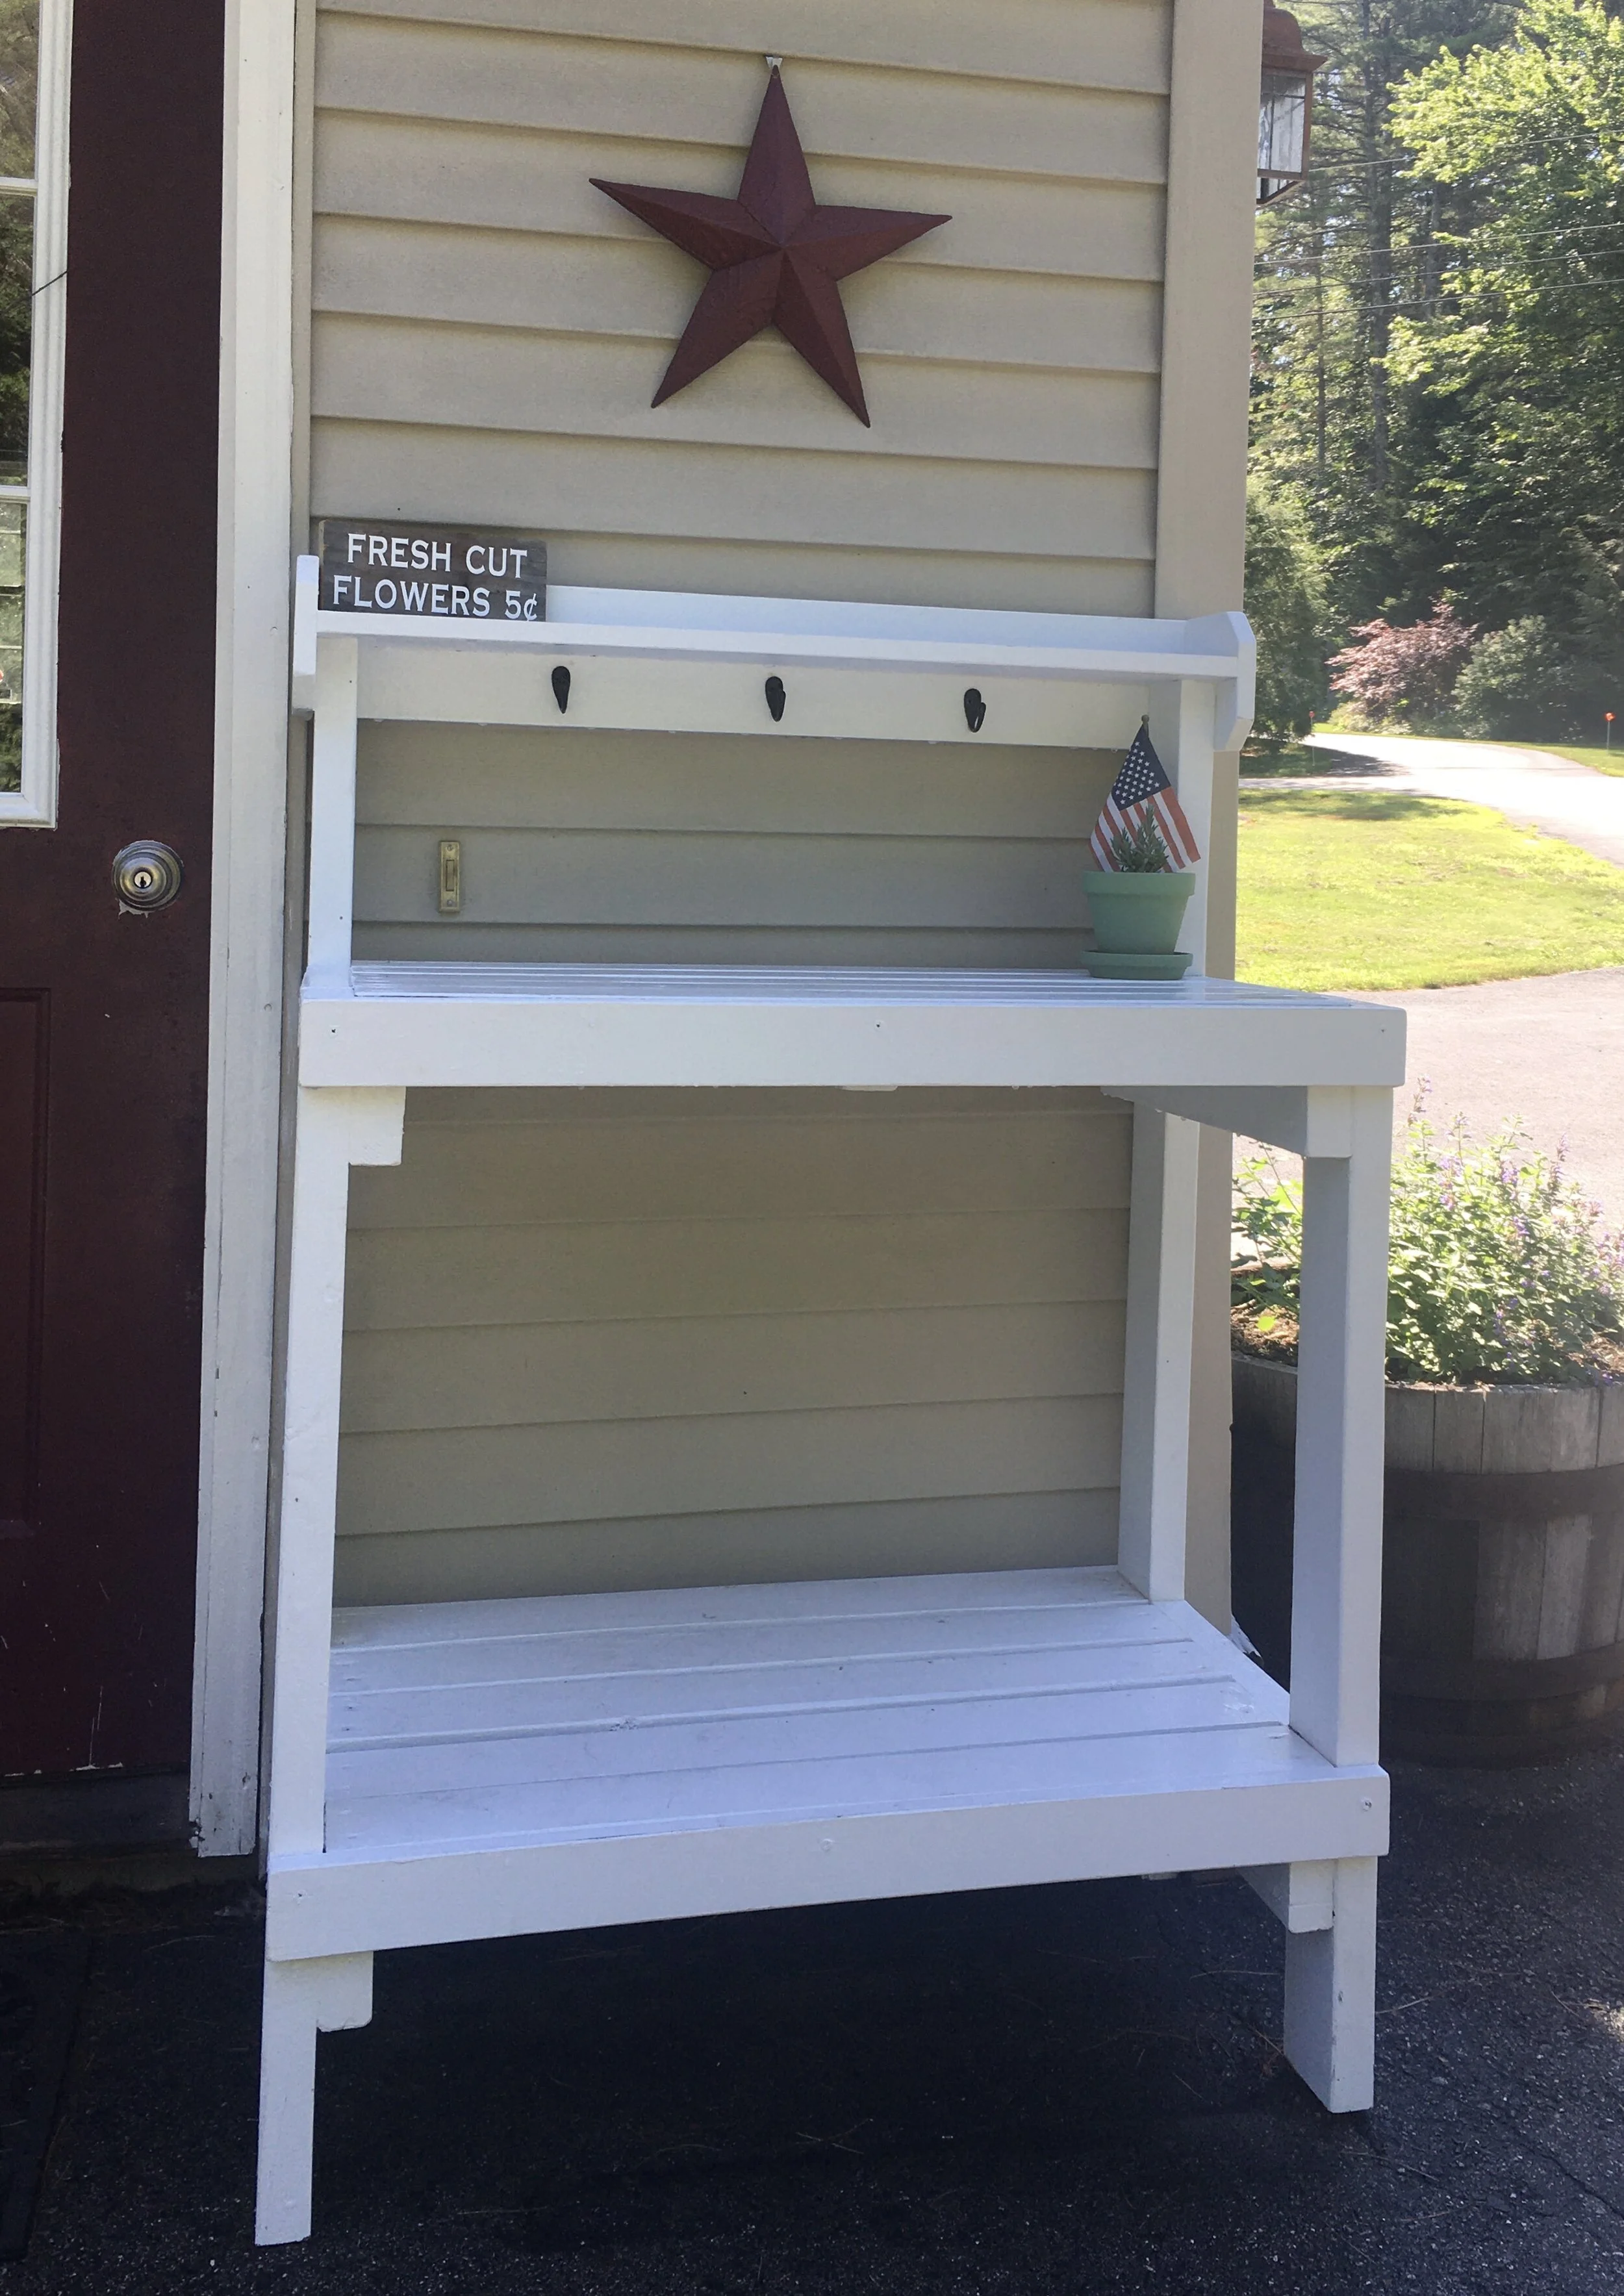
I’ve been wanting a potting bench for a while now - something by the back door to display some decor, use as an outdoor work station, and double as a place for UPS to leave packages. After looking around online and at local stores, I couldn’t find anything that I liked that fit the narrow space - so I did what any #woodworkingmom would do, I decided to build it myself. | This post is not sponsored but does contain affiliate links |
{ Note: The plans I worked from were from Ana White and can be found HERE }
I came across these Ana White plans for a Simple Potting Bench on Pinterest and thought it was perfect! It was exactly the simple, rugged style I was looking for and easy to tailor to our space too. Most of the wood needed were 2x4’s, which are sturdy and cheap - and thankfully between our garage and my father-in-law’s garage we had all the wood scraps I needed to piece together this project. Since I used leftover wood we already had, this project cost me nothing which was pretty amazing!
Since I only used what wood we had on hand, I had to make do - some of the wood was pressure-treated, some was not, some had knot holes or gashes, and not all of it was “true” (straight). But that was fine by me as this was to be a rustic piece for outside.
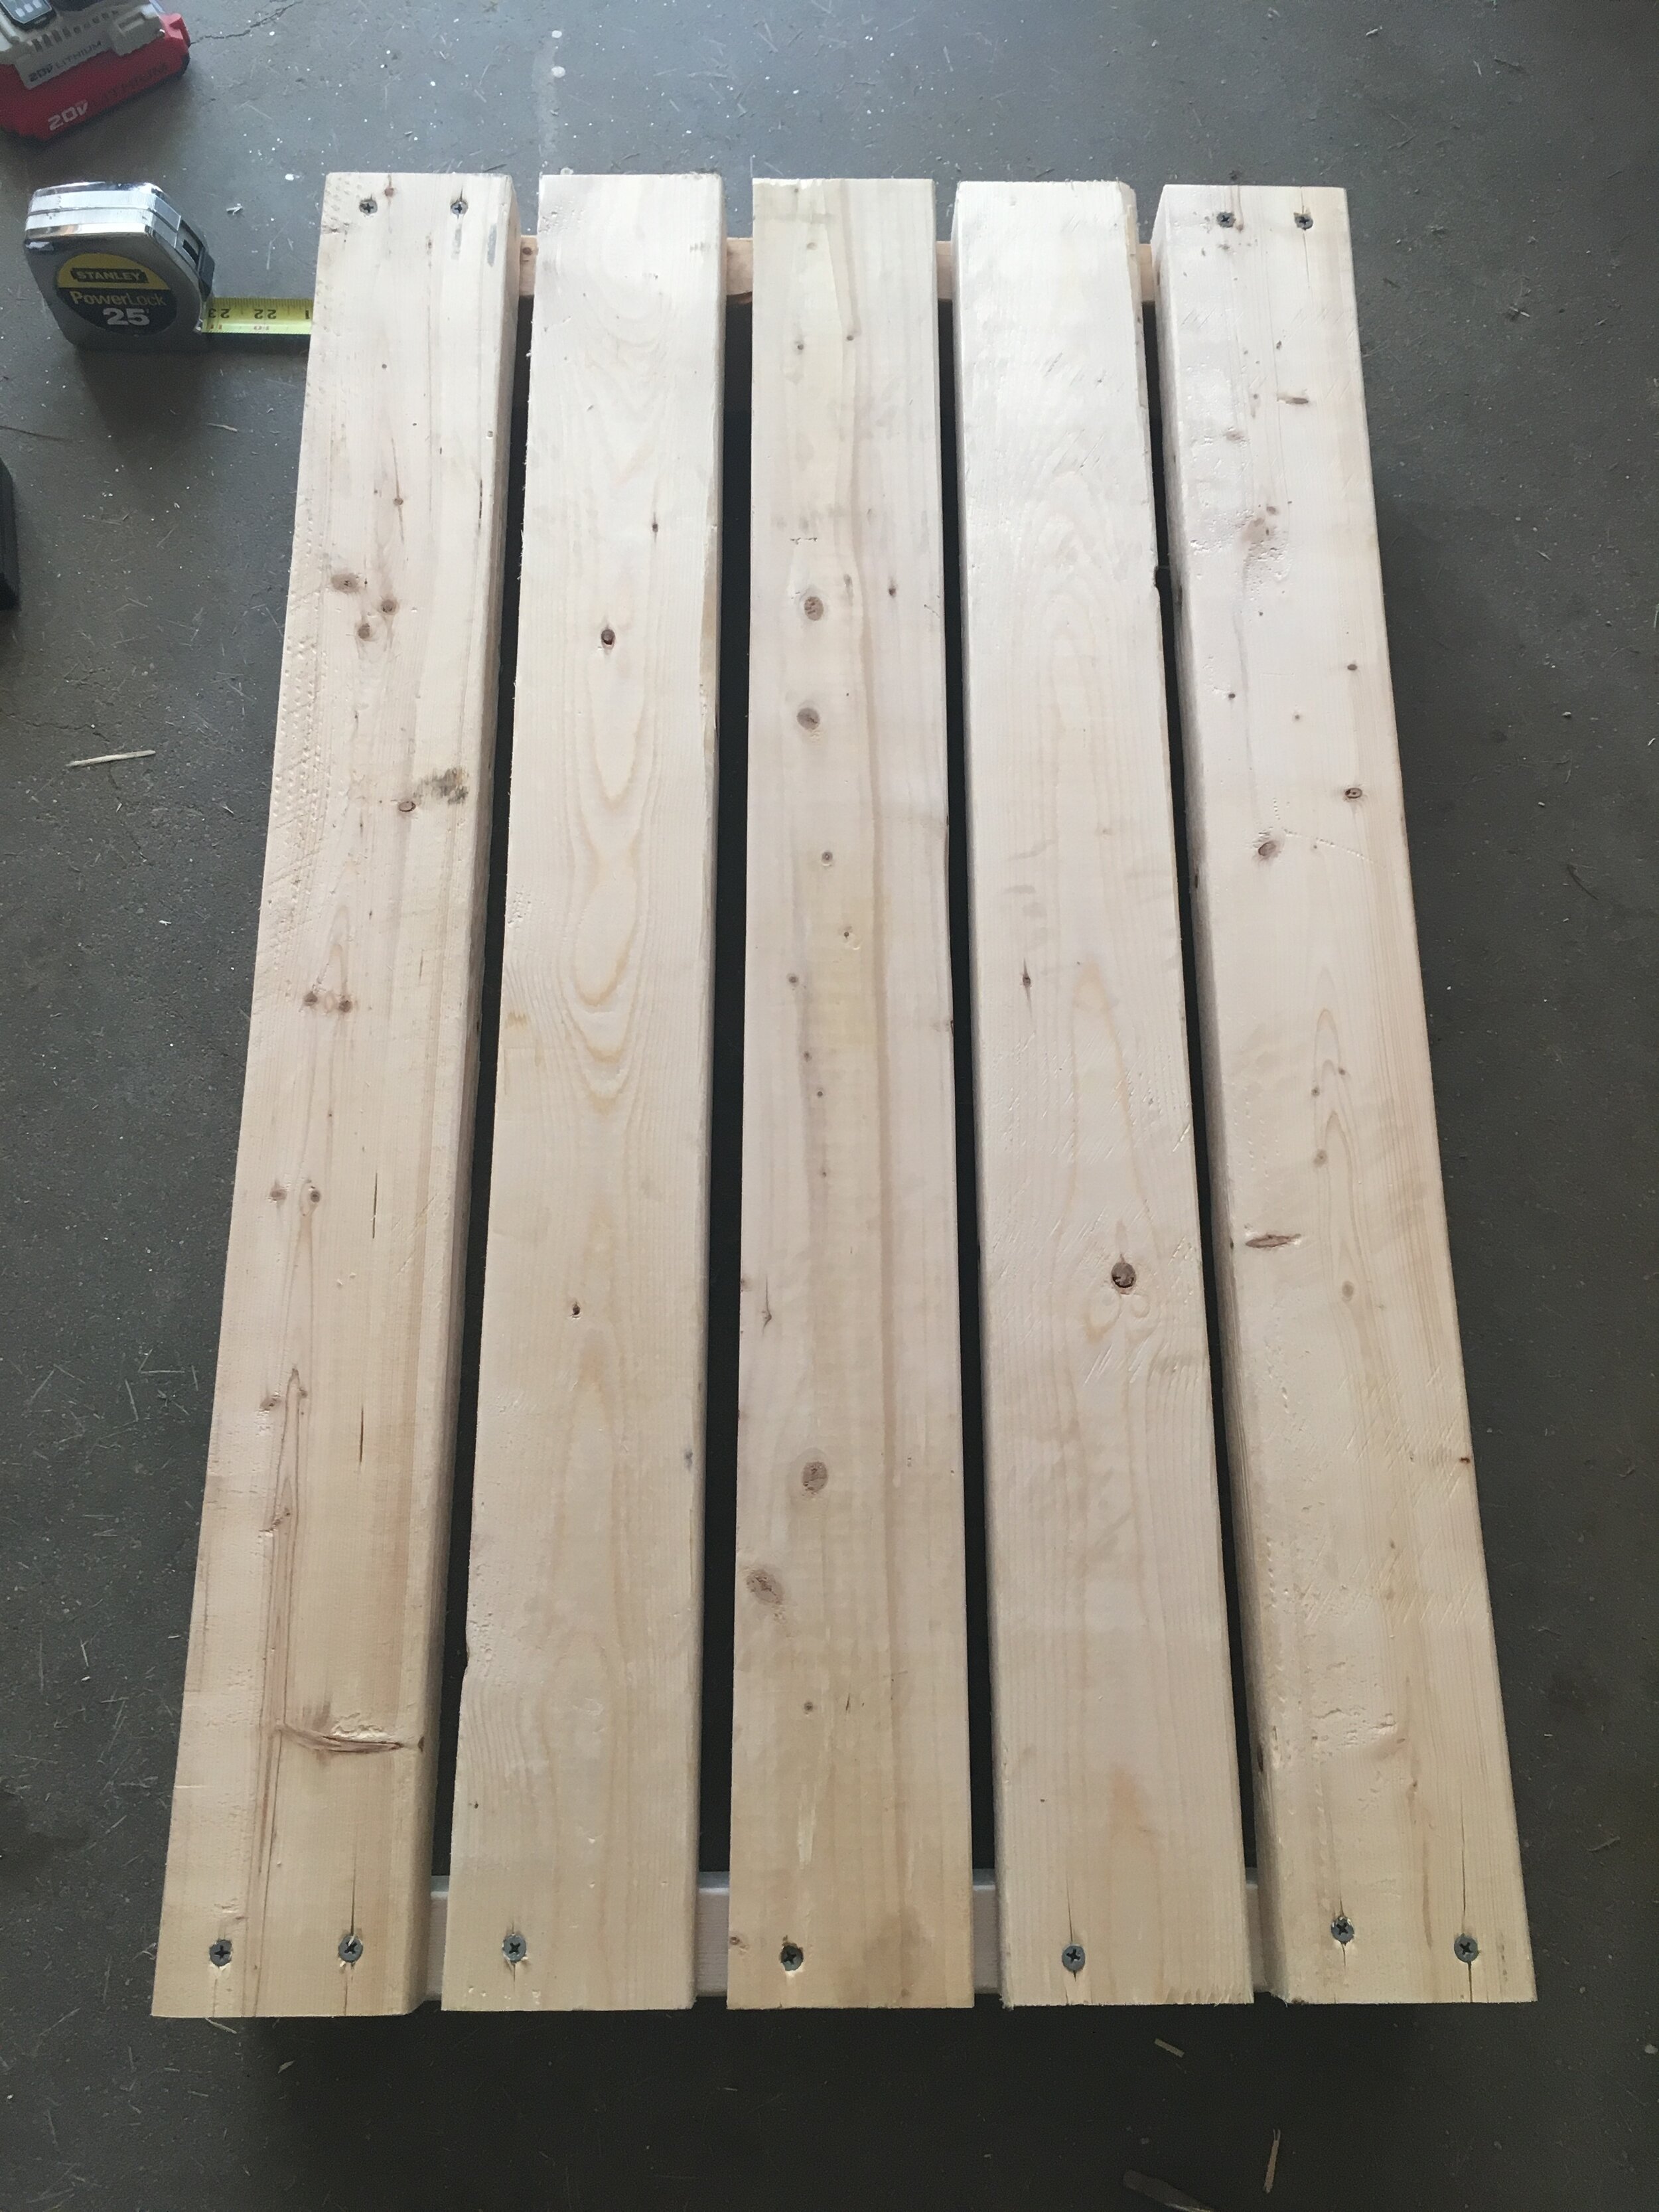
Before I started building, I followed Ana White’s “cut list,” cutting and making piles of all the wood in the dimensions I would need to build the project. I carefully chose the lumber for each section to minimize how the knot holes, gashes, or crooked pieces would be seen in the final piece. For our potting bench I made it 4 inches narrower so it would fit against the small wall next to our back door and because of this I had to adjust my cut list and refigure some of the overall dimensions.
The next step was constructing the shelves individually - attaching the outer planks first, checking for square, then spacing out the middle planks and attaching them. To build this whole project I used an Impact Driver, which made the entire project go much quicker and easier.
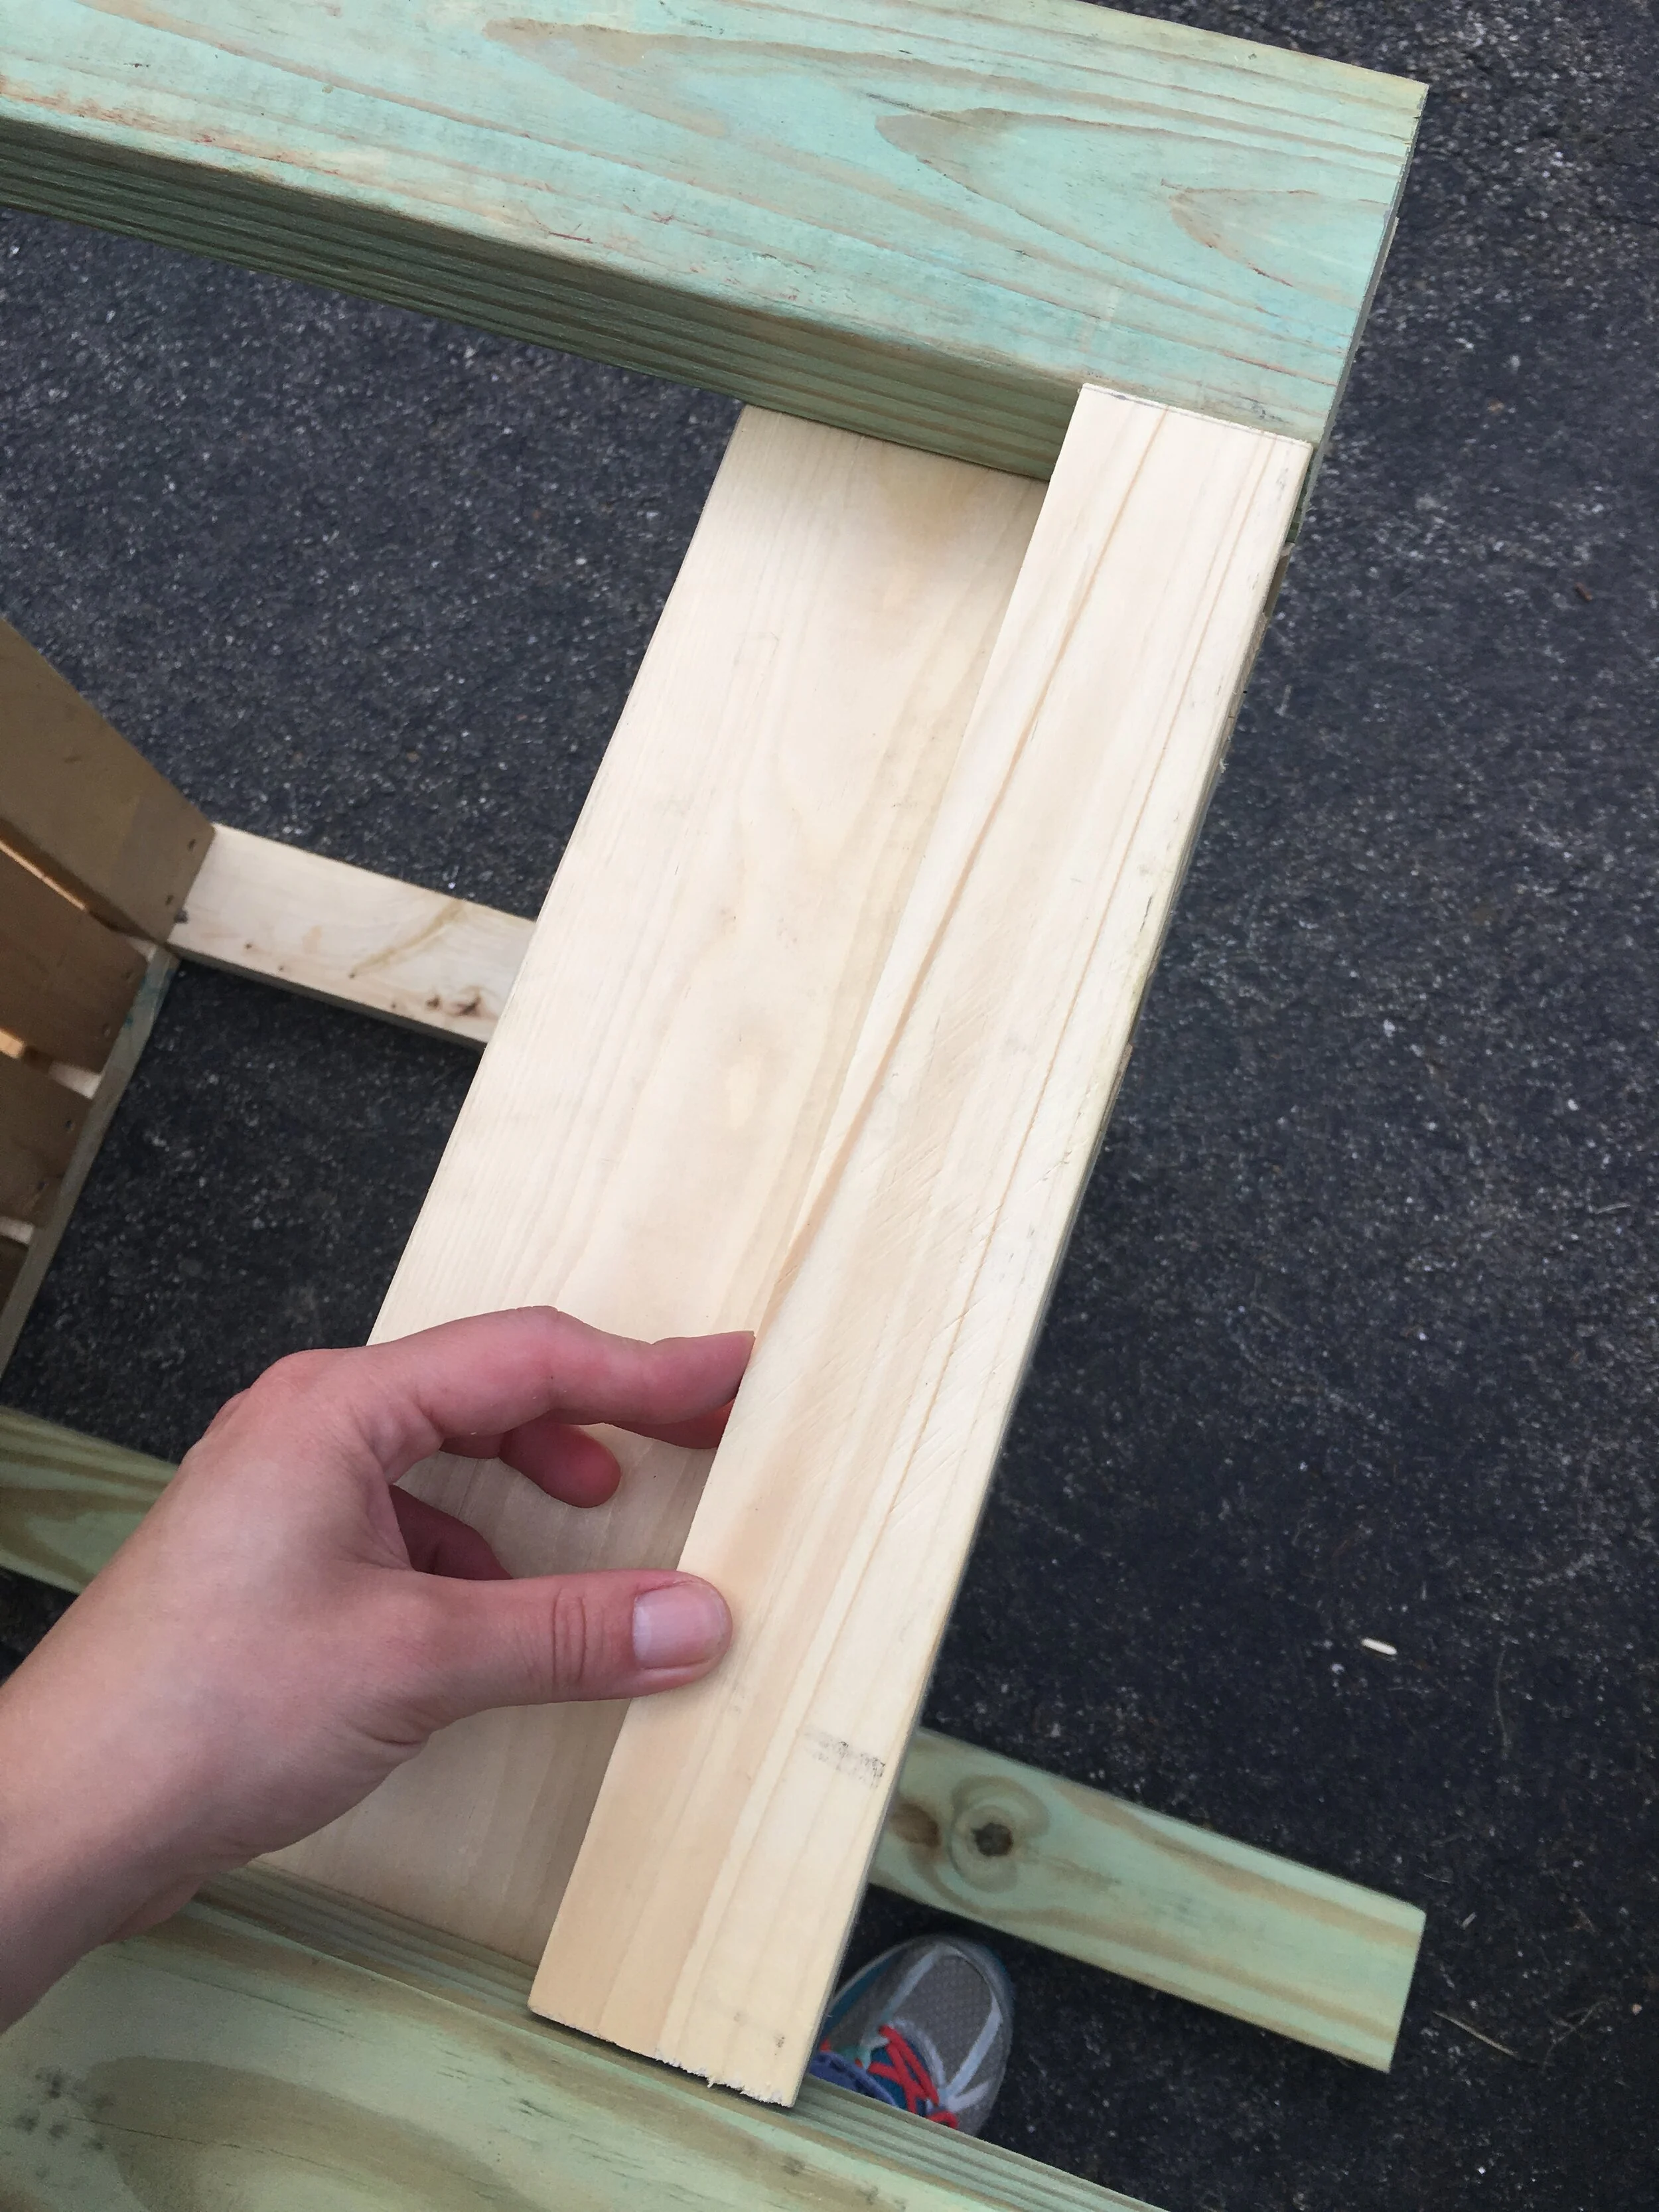
To attach the legs, I laid the project on it’s side and carefully measured the distances between the legs as well as up the legs before attaching the shelves to makes sure everything would be as level and as square as possible.
Finally to make the project look more “finished” I added some wood scraps to the sides of the project to conceal the butt ends of the shelves and make it look a little more polished.
I also decided to add some 1x3”s to the front of the shelves to make it look a little more polished from the front as well. (I did not counter-sink these screws, but I should have as they were more noticeable than I was expecting in the finished piece.)
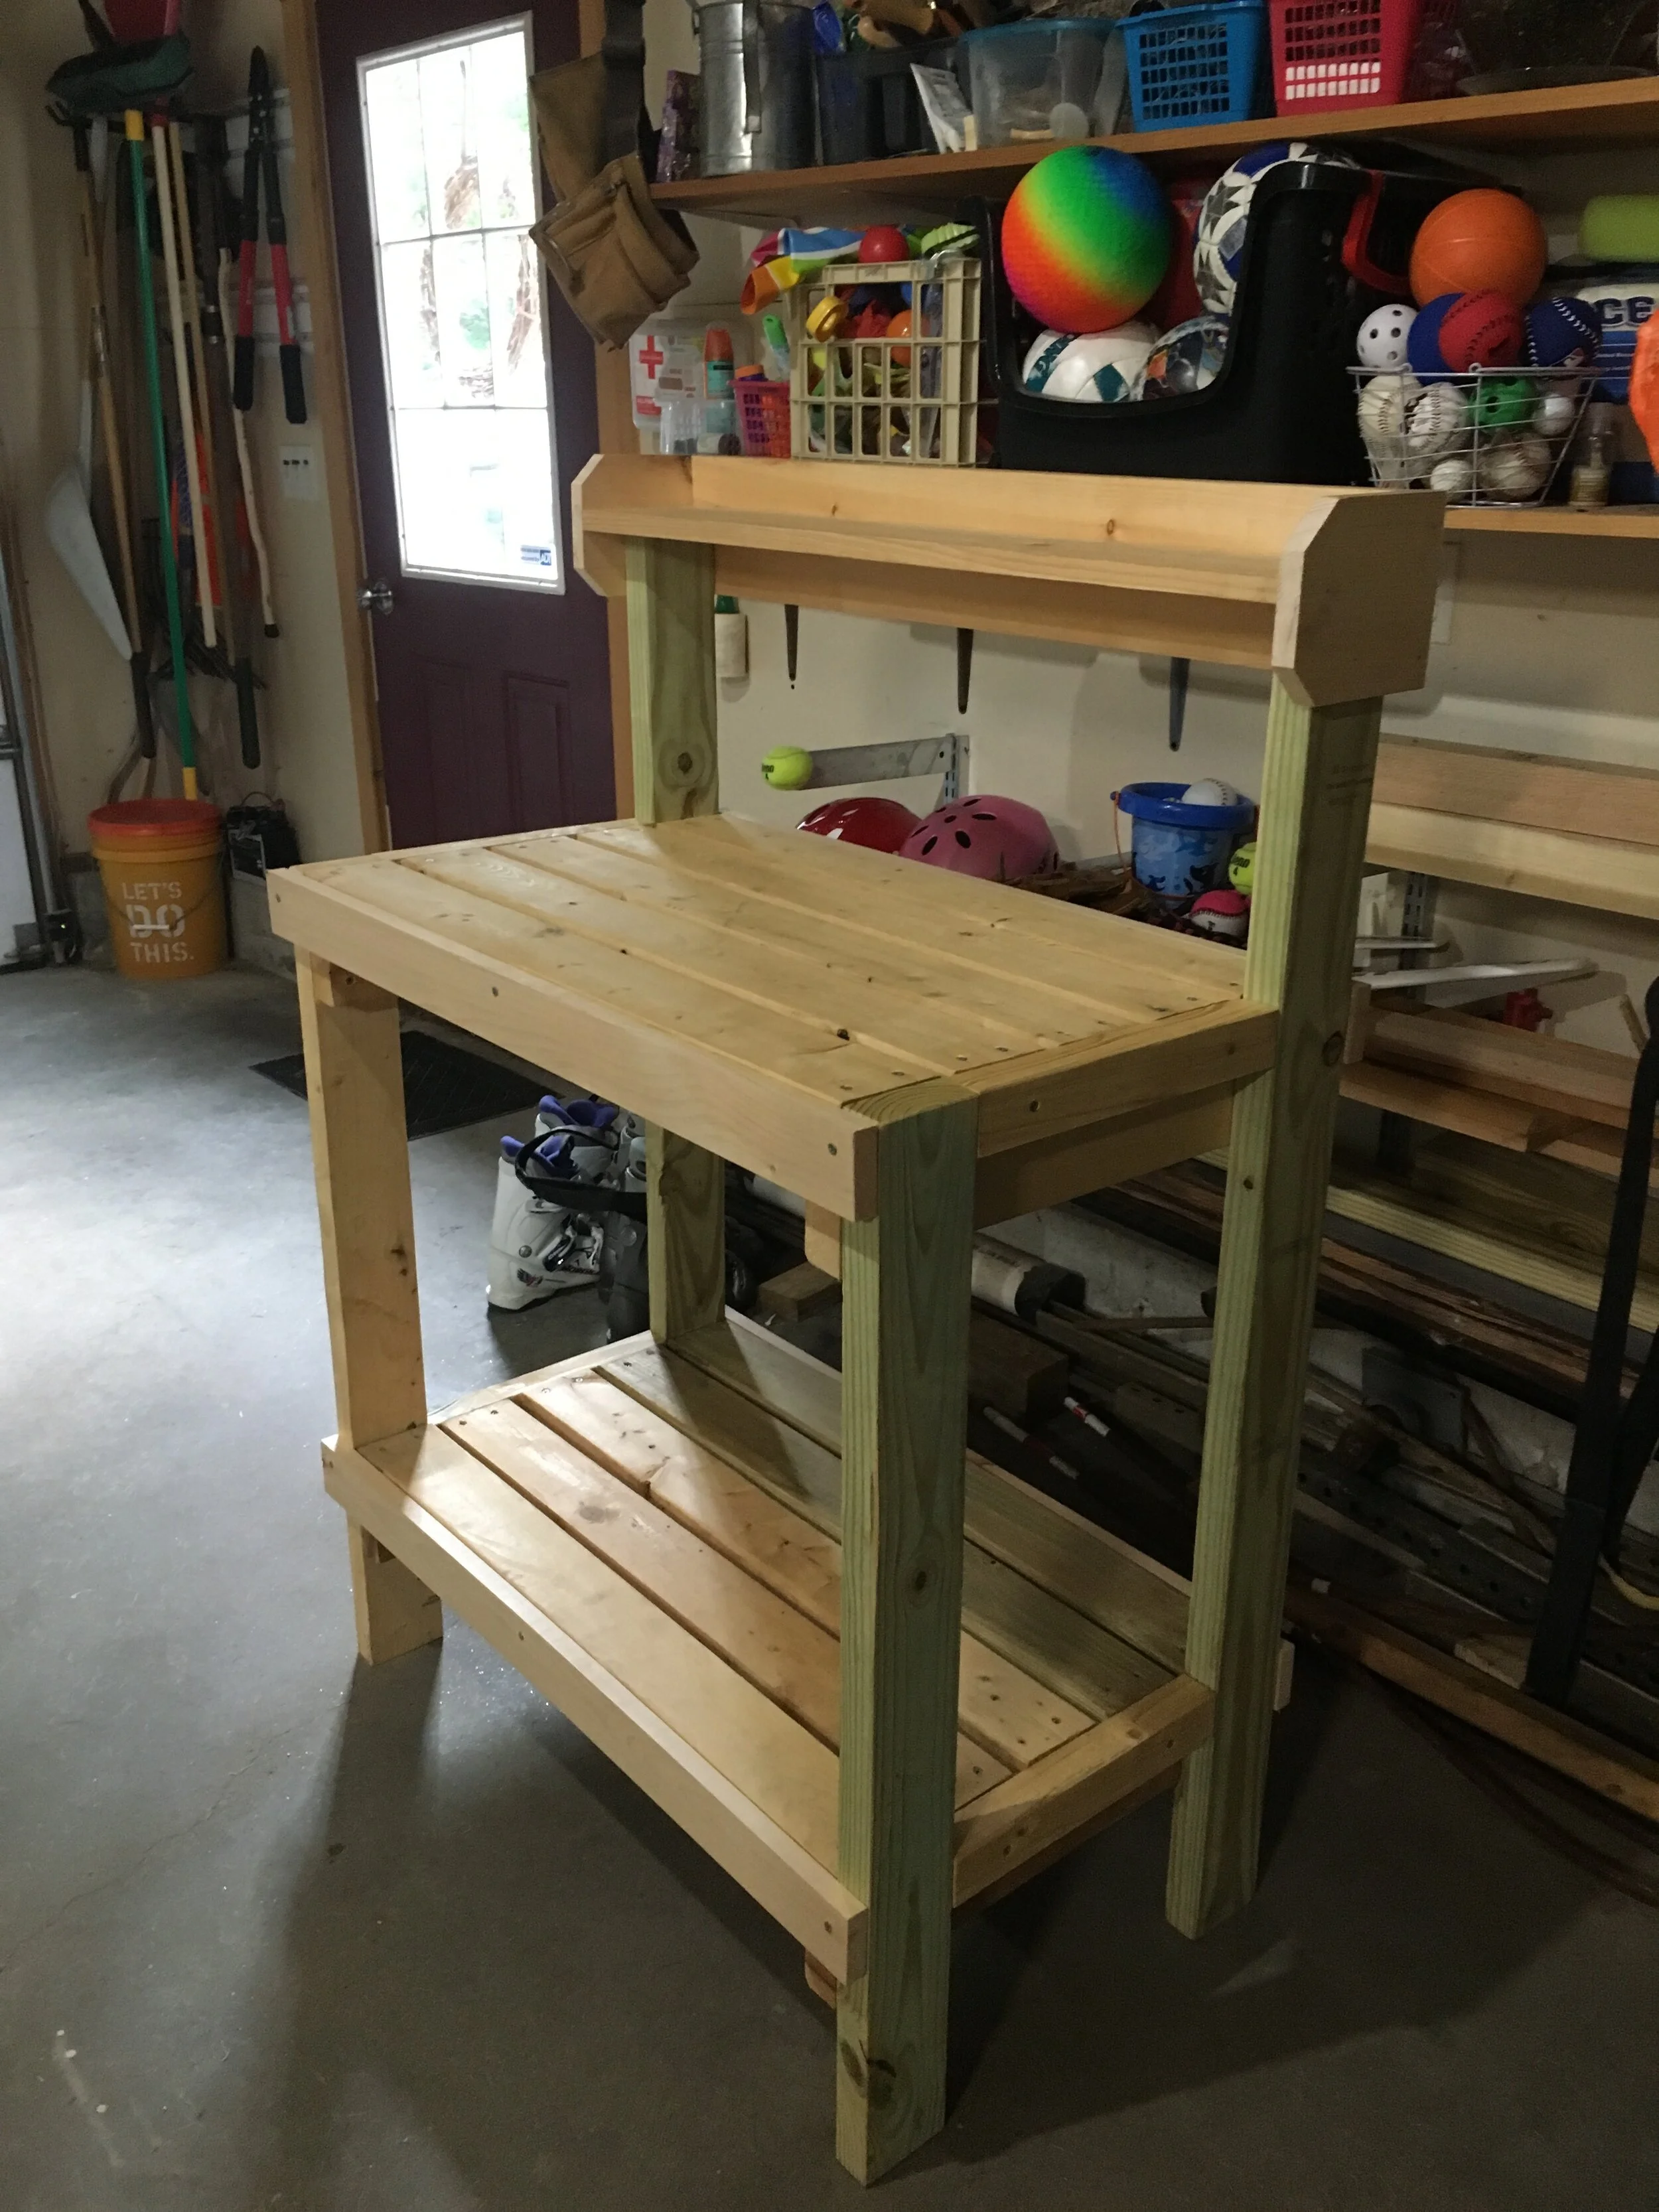
Then came time for painting - I chose to paint the whole potting bench in several coats of my favorite Valspar Stainblocking Bonding Primer/Sealer. This stuff has great coverage and really covers and seals well. My one regret was not giving all the wood pieces a single coat of paint before assembling - as once everything was assembled it was a huge pain to get in all the nooks and crannies.
Finally I finished the project by adding a few little hooks underneath the shelf (very similar hooks linked here), from which I can hang tools or decor. I’m really happy with how this came out and how quickly it came together. I can’t wait to decorate it with some plants come next spring!
PS - I’m thinking this potting bench would also be great for parties and BBQ’s! It would be perfect on a patio or deck as a makeshift buffet table.
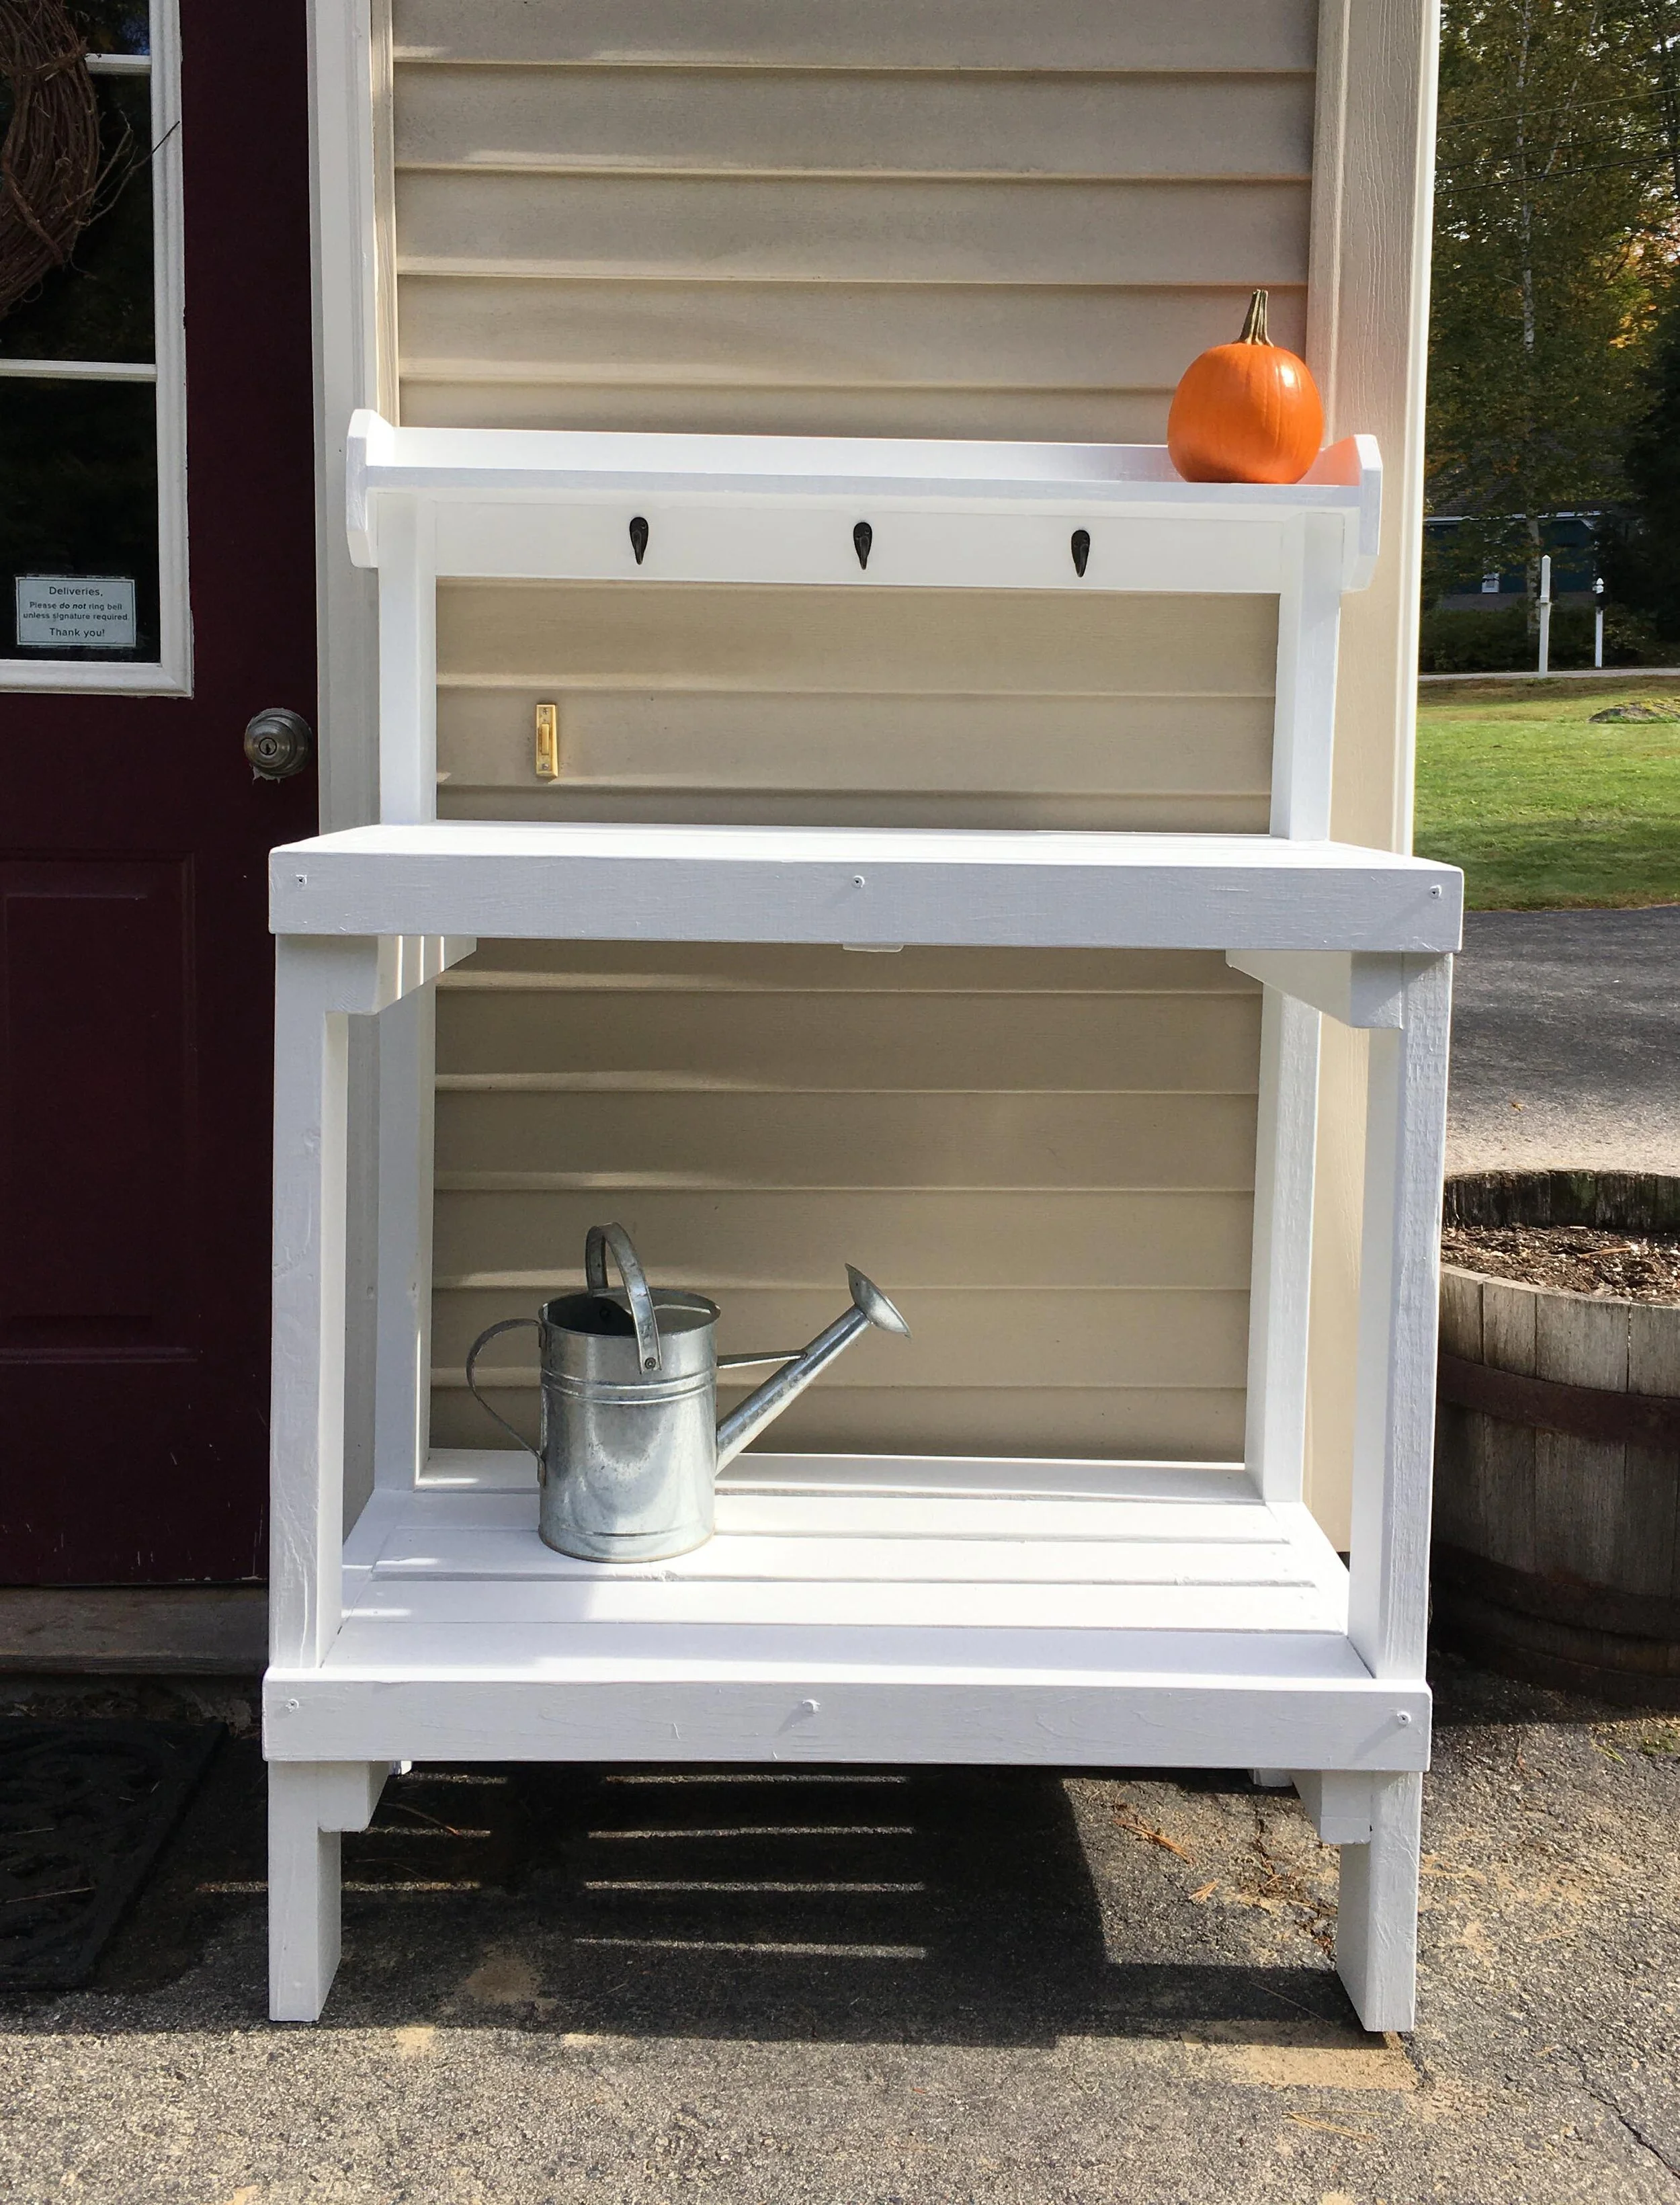
UPDATE: Spring, 2020
Just wanted to give a quick update after I made the potting bench last Fall: Over winter we decided to store it in our shed, just so we wouldn’t have to snow blow and shovel around it all winter, but as soon as the threat of snow passed in early Spring we brought it right back out. It’s been wonderful to have for planting and working on outside this spring, and due to the current Pandemic situation we’re getting more packages than ever so it’s great to have a designated spot for deliveries (and right in view of our security camera too).
For decor right now I'm keeping it very simple, especially since the potting bench is utilized daily for mail - there's just a garden rock, a metal barn star (hung from a special hook that doesn't damage vinyl siding), and a small potted lavender plant with an American flag - all items we already had around our house.
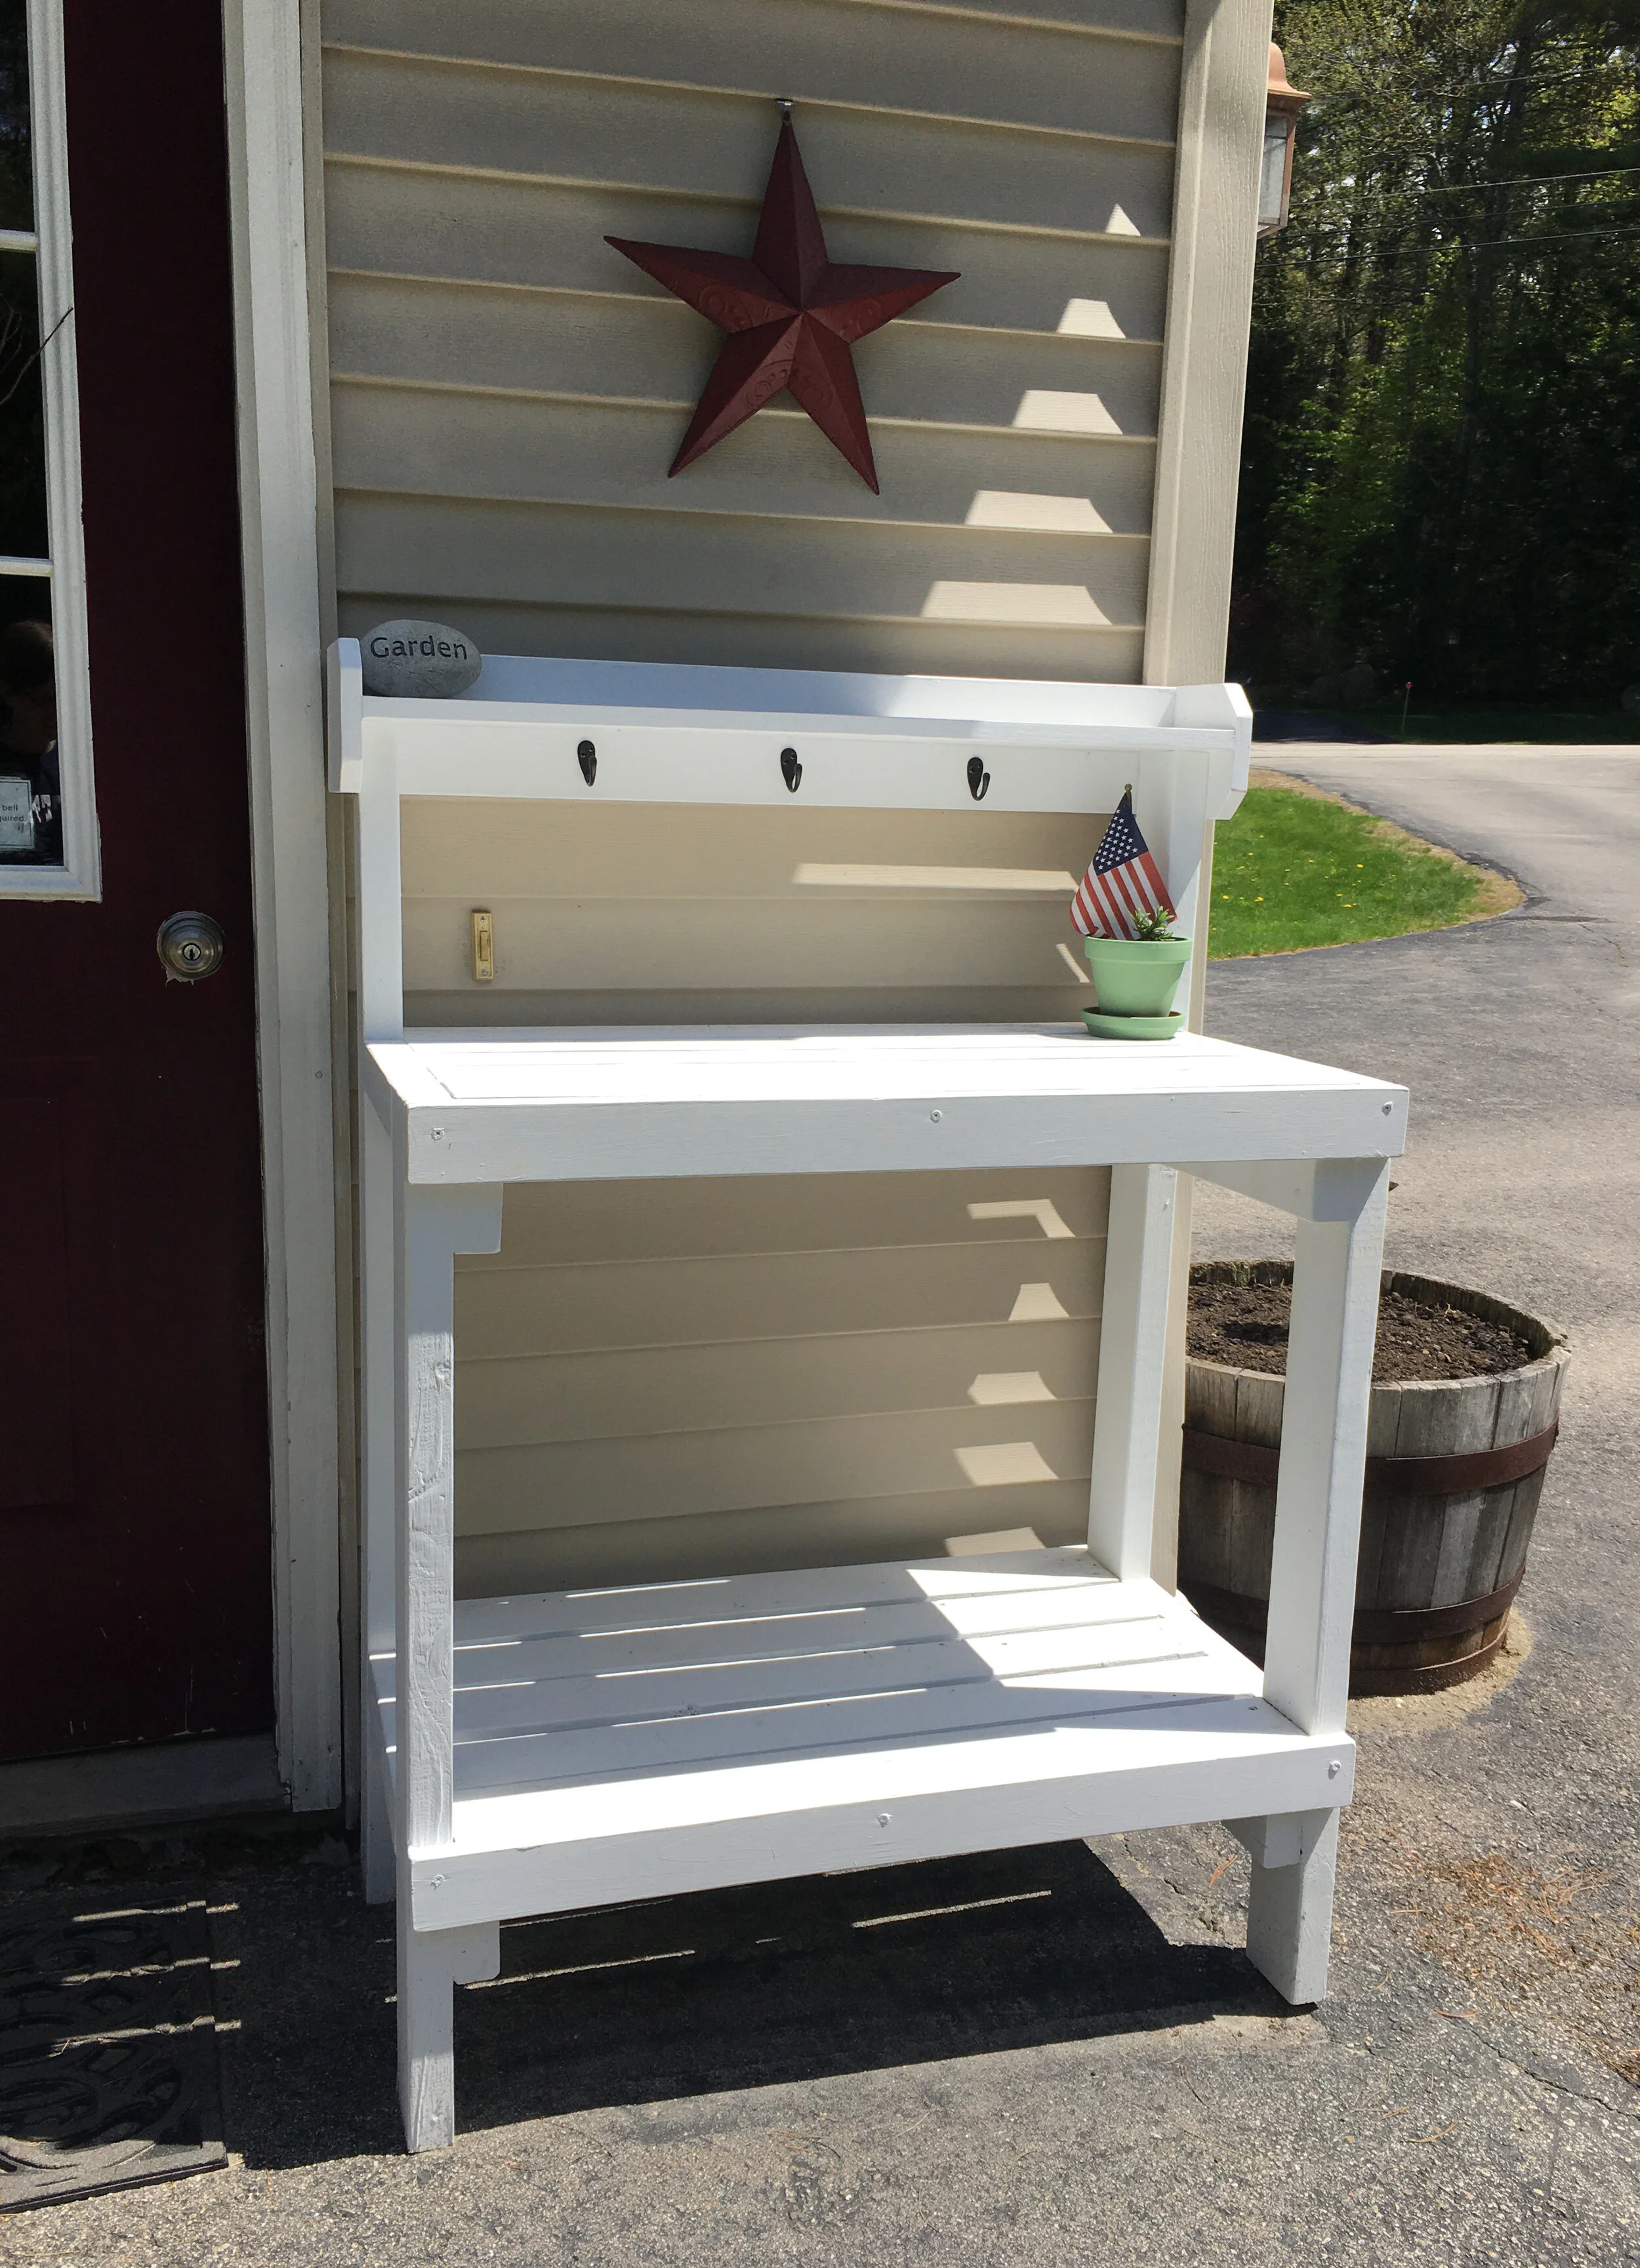
Summer, 2020 - sharing another little decor update for the potting bench:
I found this weathered piece of wood in our scrap bin and thought it would make a cute sign for the potting bench. I used my Cricut Machine to design and cut a stencil that said "Fresh Cut Flowers 5¢" and used it to paint the sign. I think it looks cute and it's a great finishing touch!
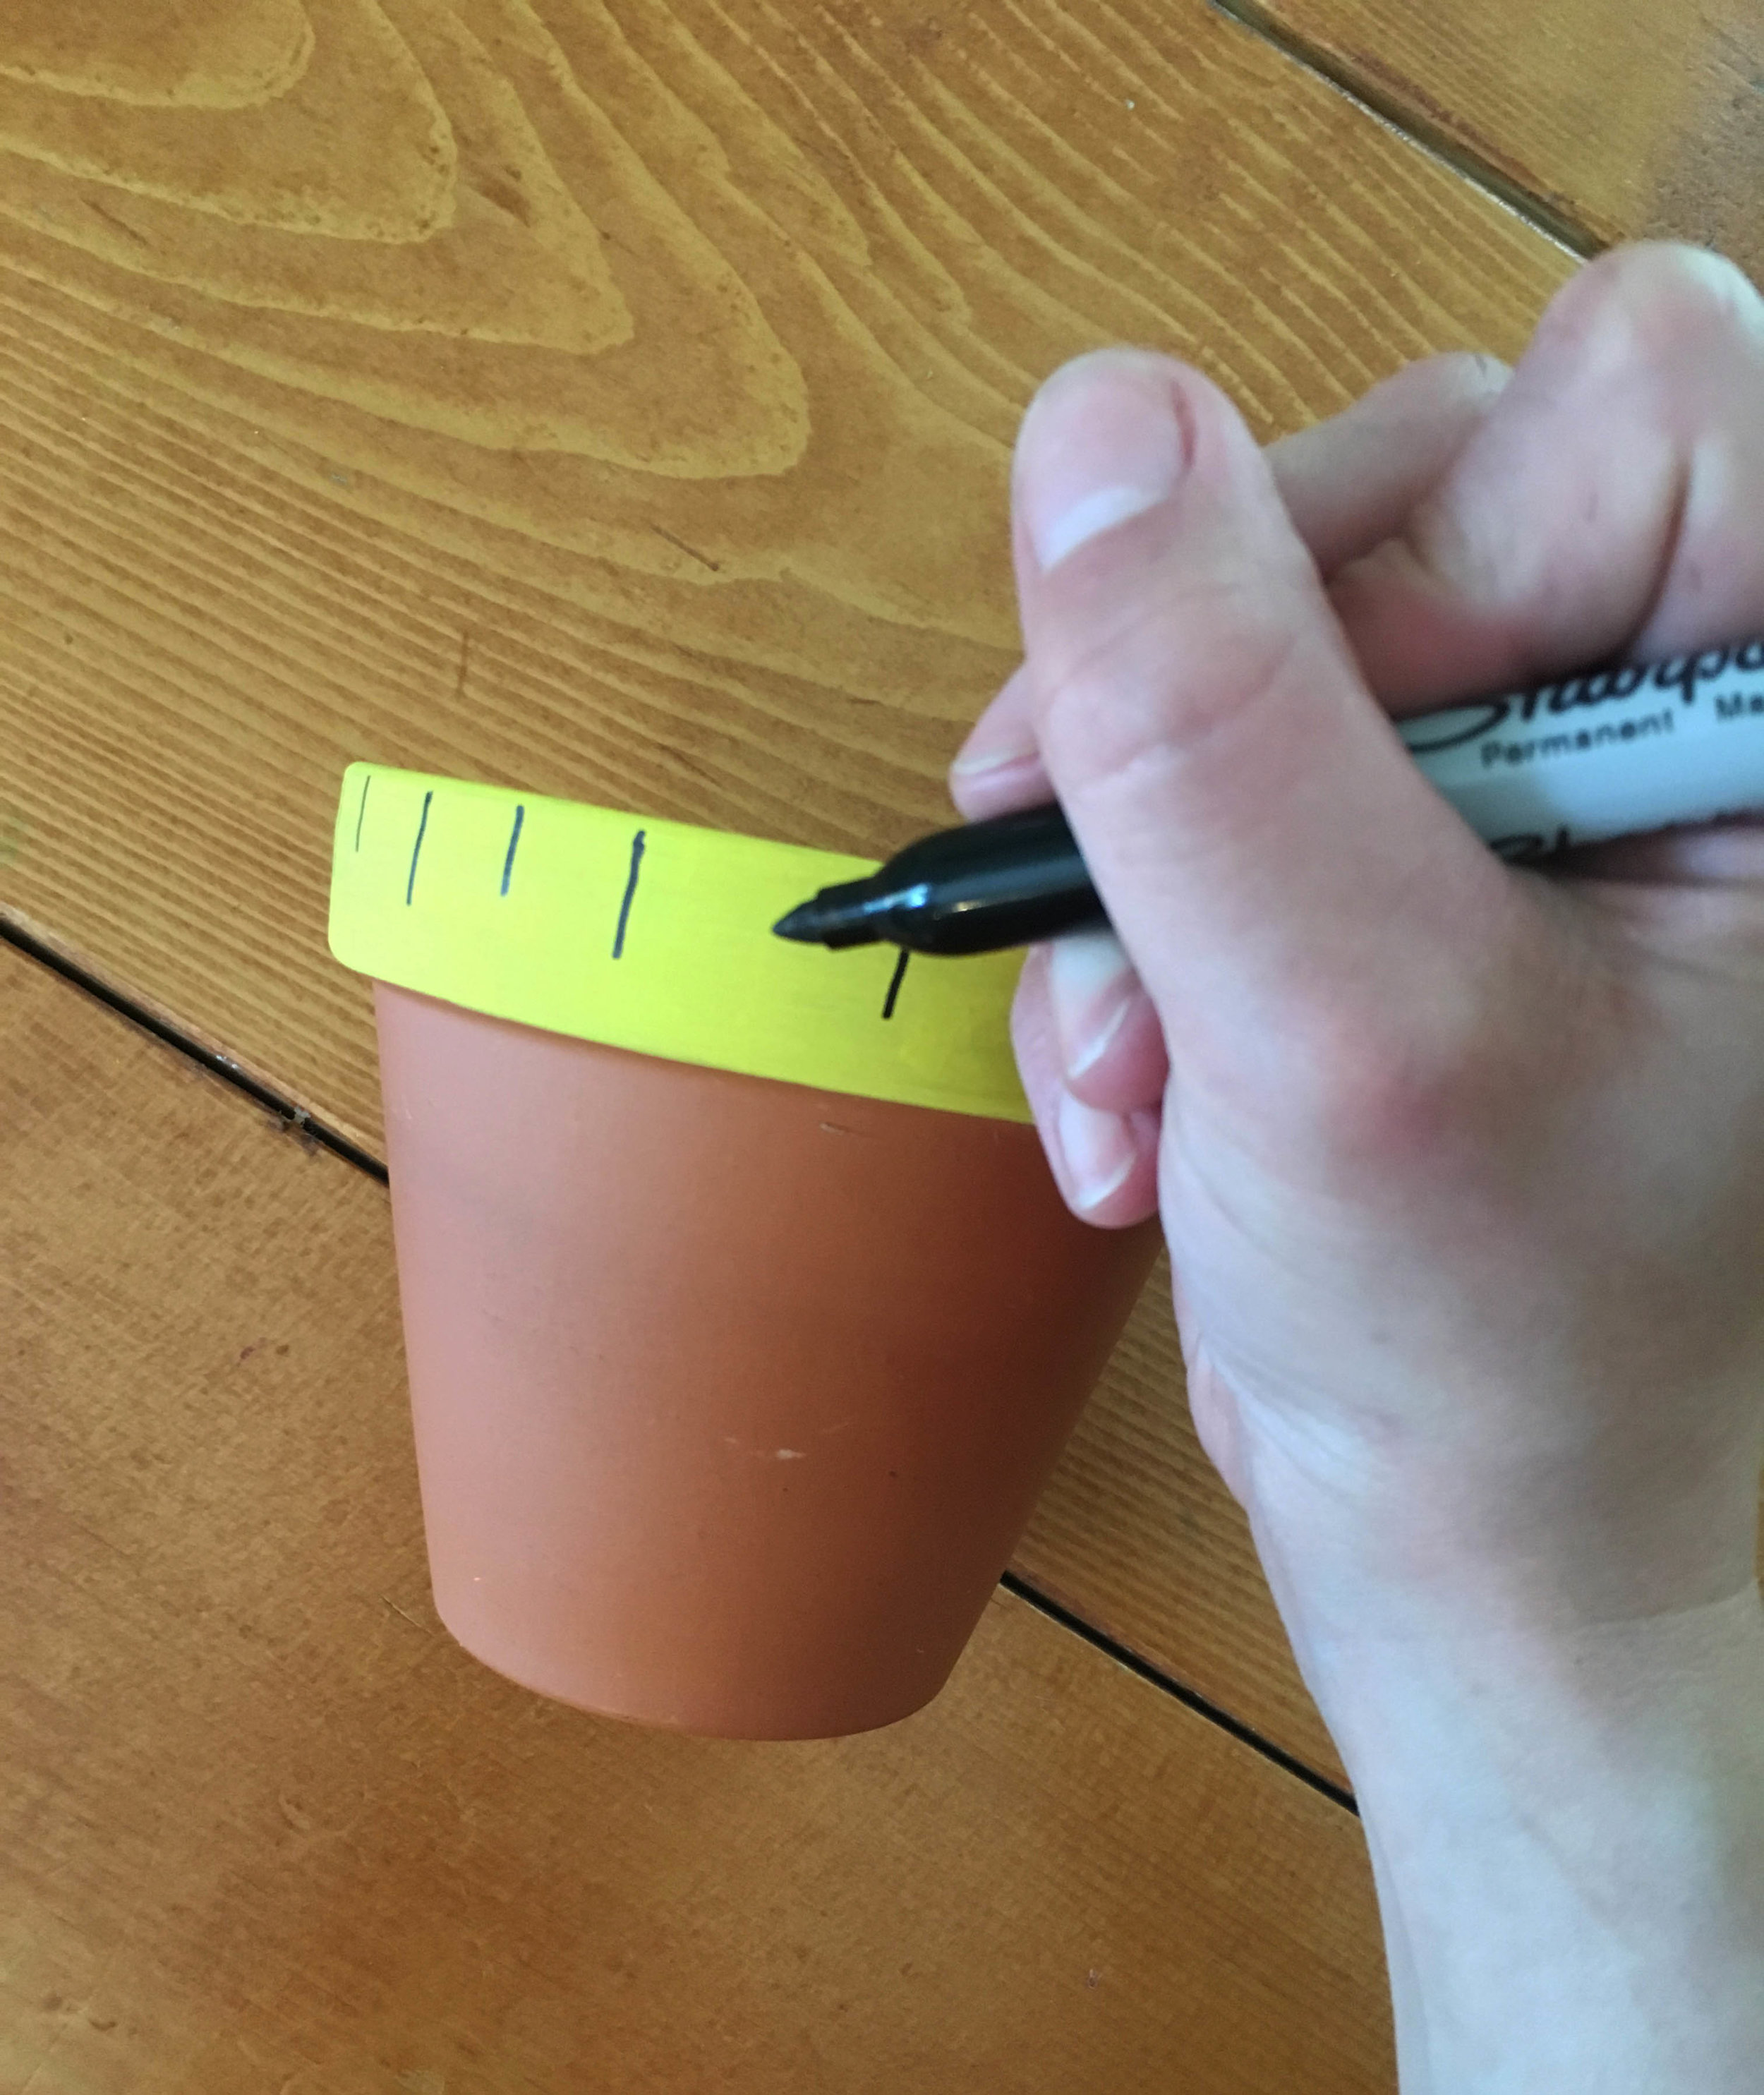
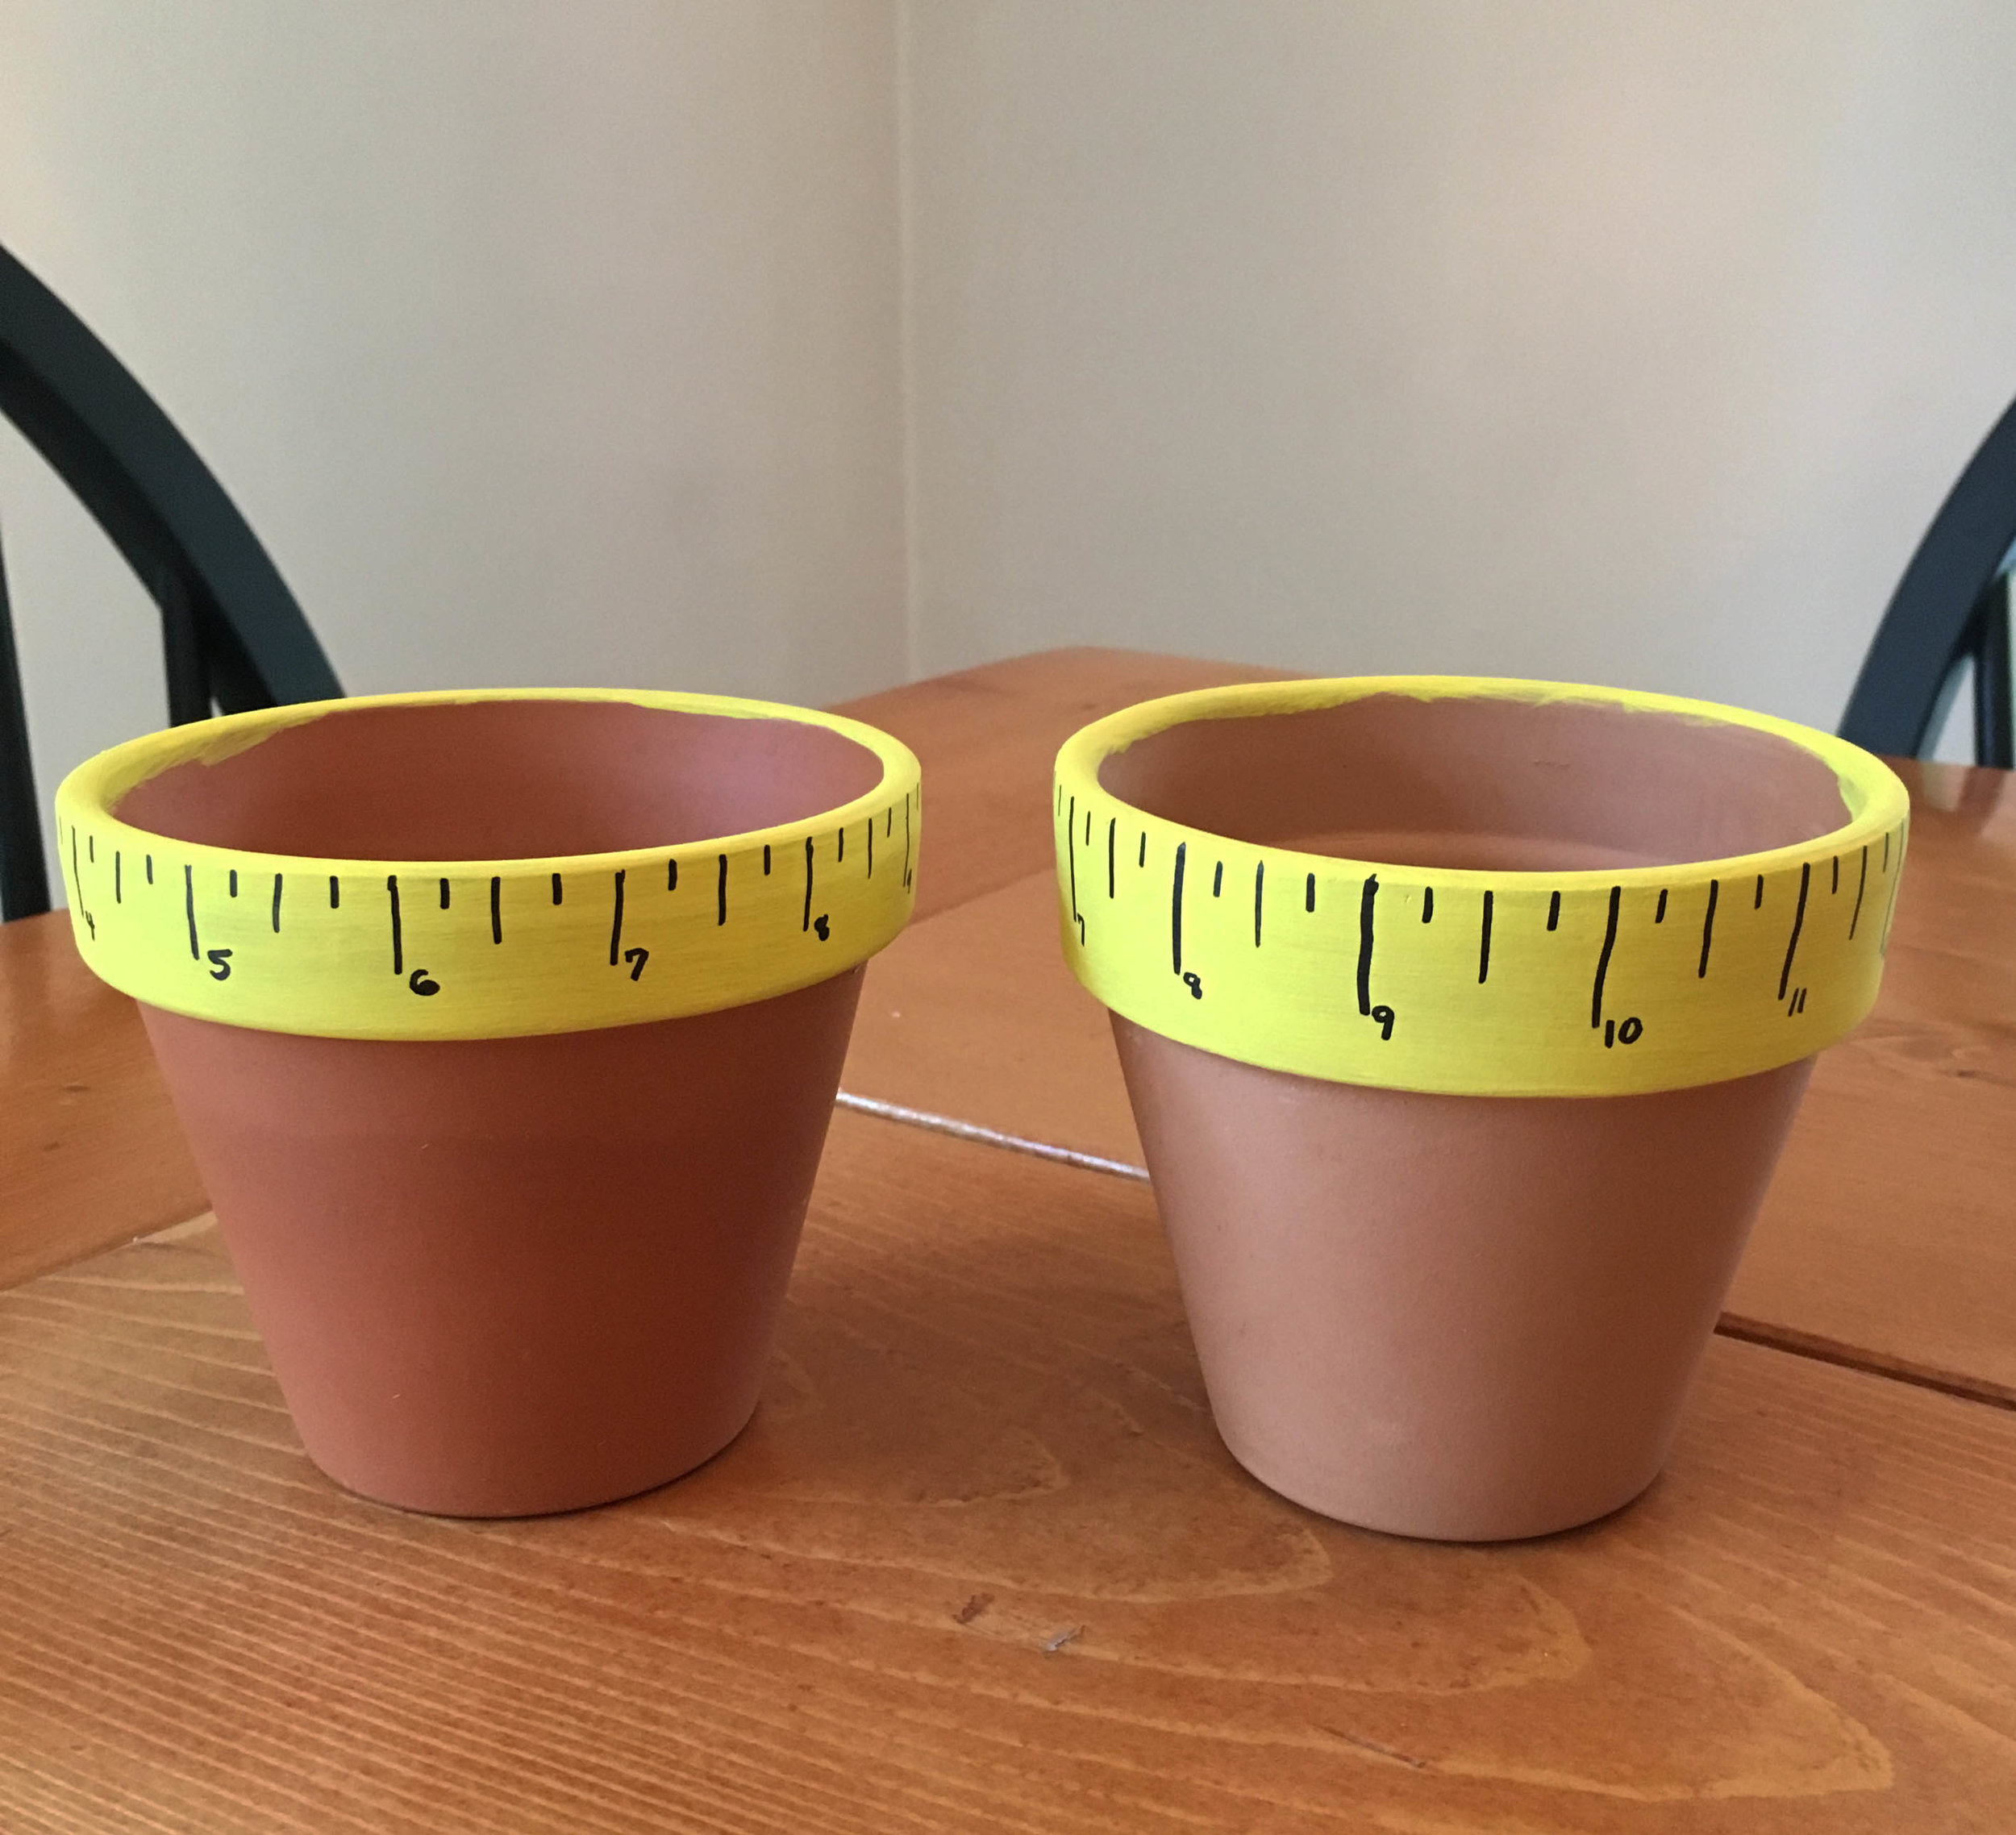
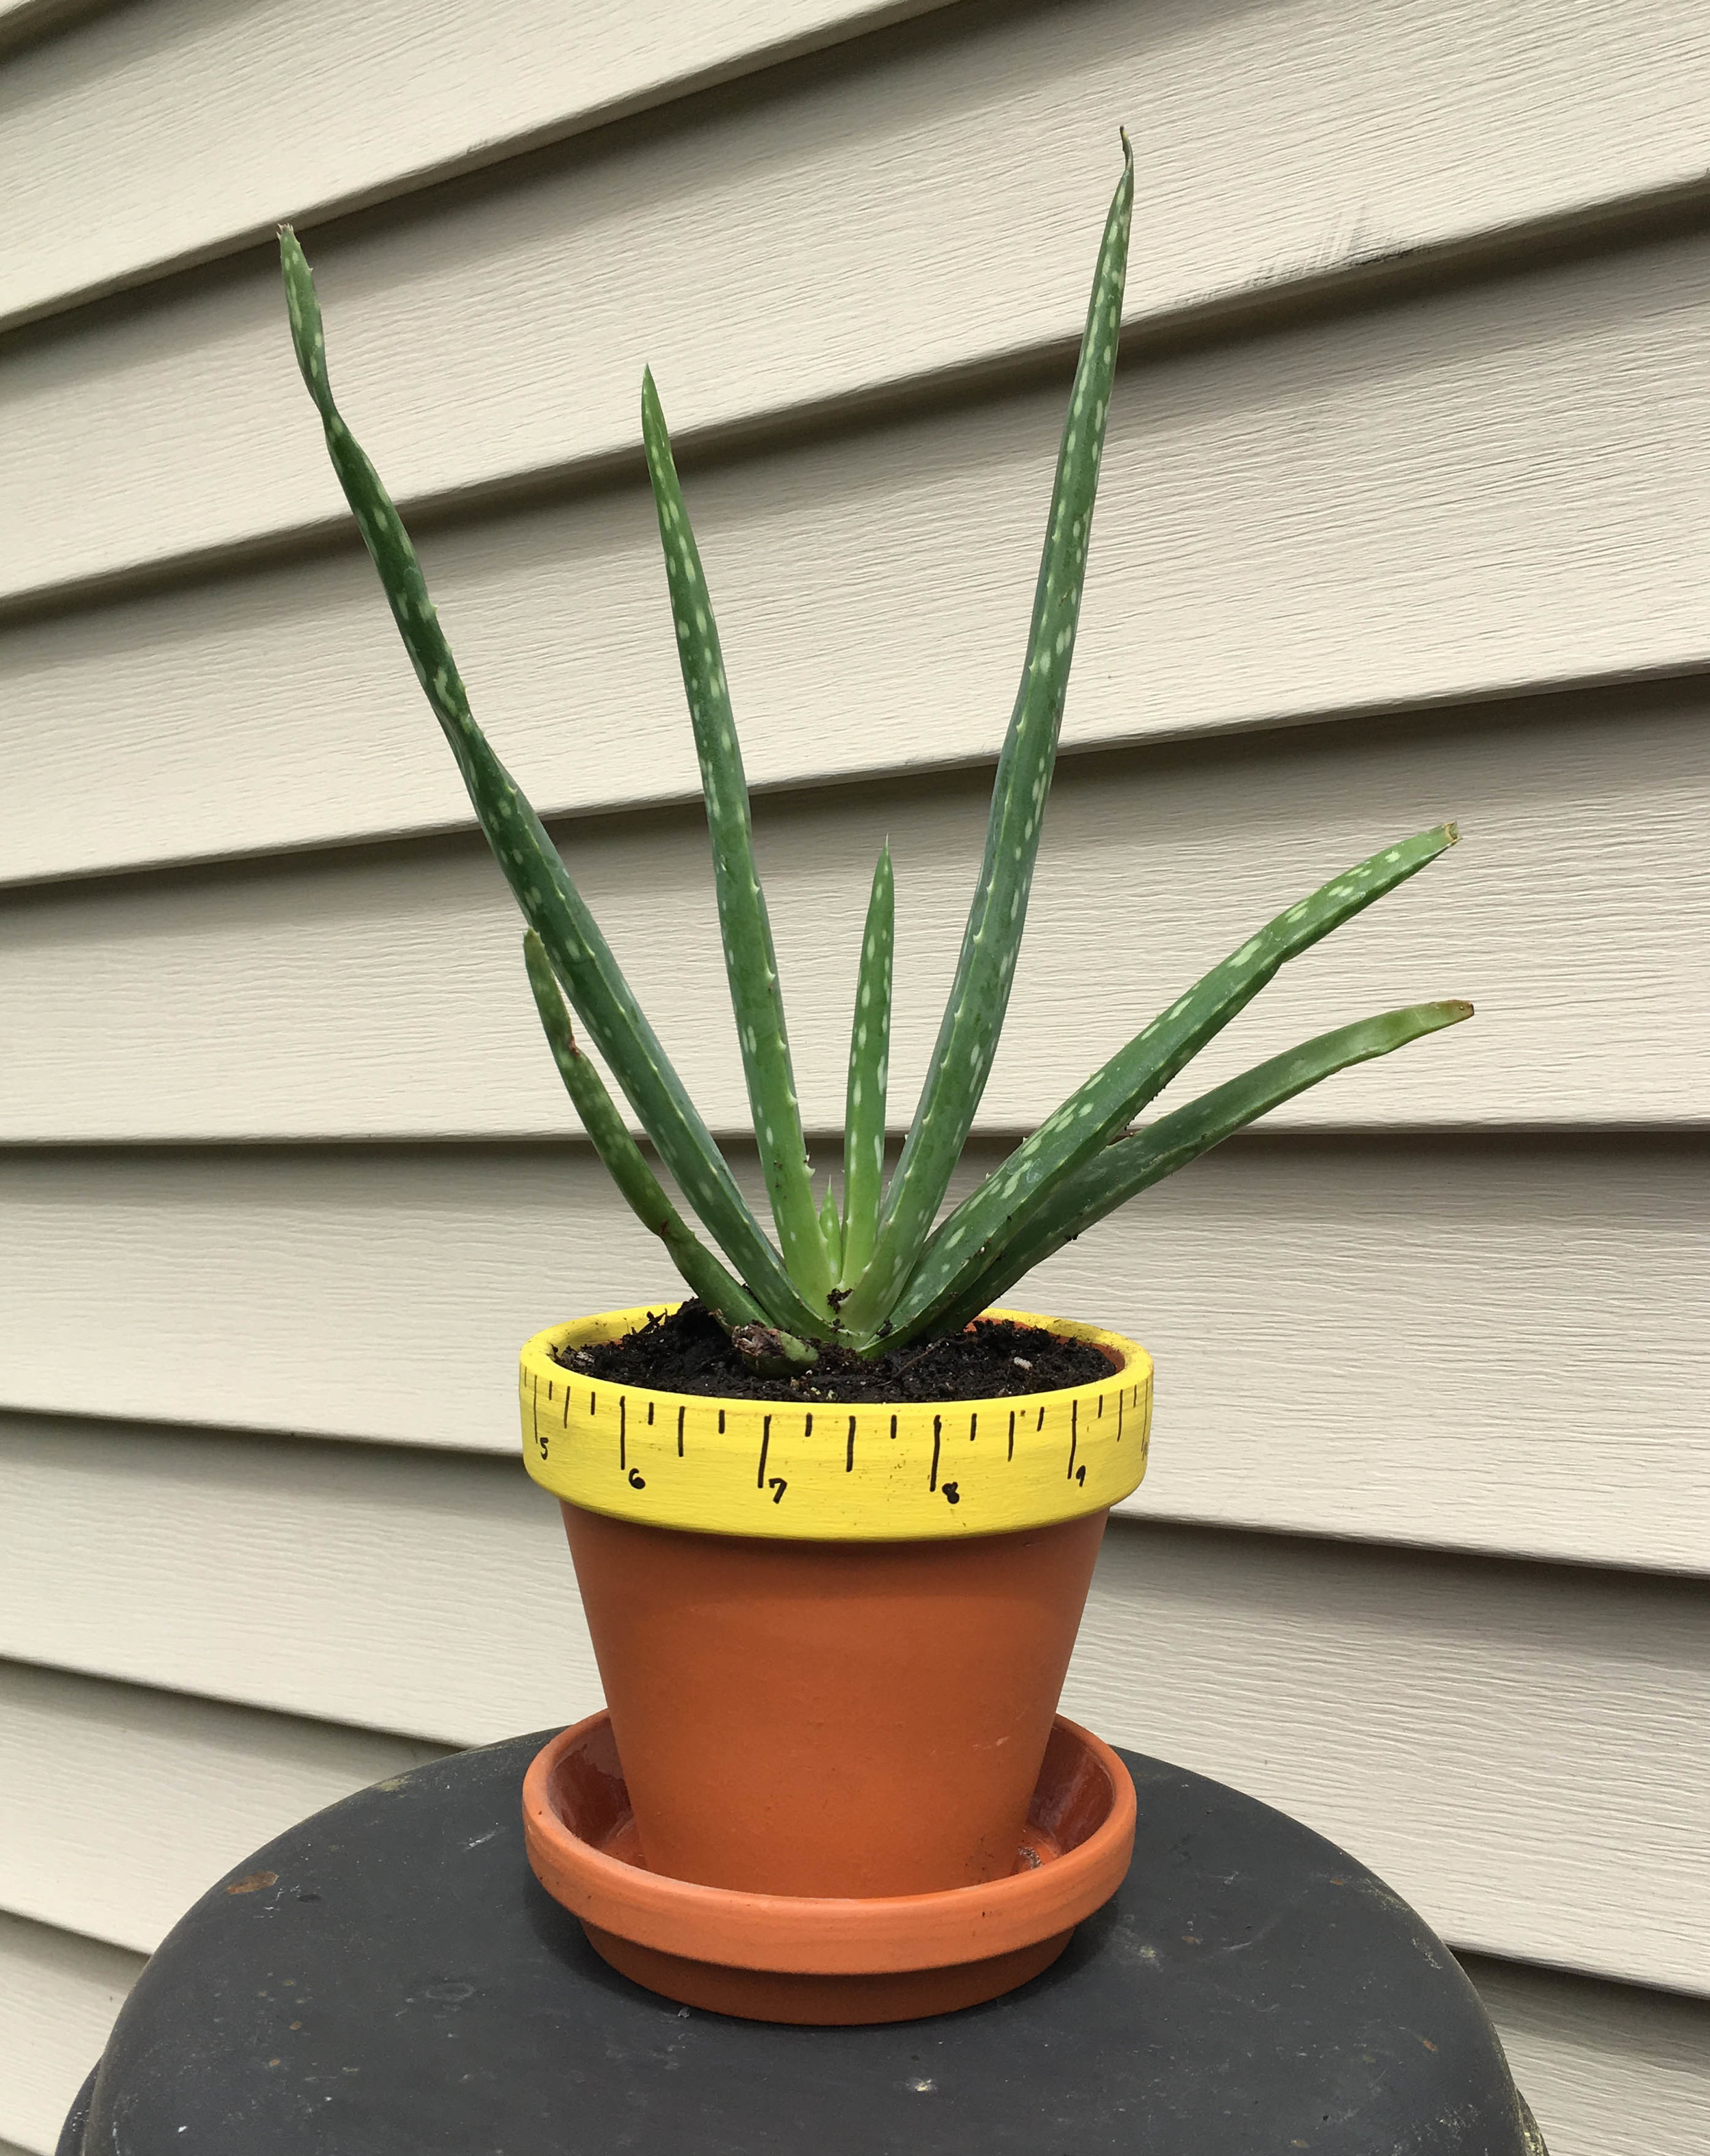
Teacher gift ideas are always tough… I always want to do something thoughtful, useful, but still affordable. This year we decided to make ruler painted flower pots to go with the “Thanks for helping me GROW” theme. In them we planted small aloe vera plants which will come in handy for soothing sunburns over summer vacation. | This post contains affiliate links |
First paint the lip of the pot with the yellow acrylic paint, you might need to do several coats to get good coverage.
Then mark inch lines evenly around the rim (I made a template with a piece of scrap paper). It may not come out evenly when they meet up so feel free to take artistic license with the spacing.
Then using a sharpie or black paint and a fine paintbrush, paint the lines of the ruler (whole, half, and quarter lines) as well as the numbers.
Once everything is dry, fill with soil and a plant of your choice. We decided on aloe vera since it’s a useful plant as well - the teachers will be able to use it to soothe any sunburns that may happen over summer vacation.
All that’s left is to add a card or a gift tag and a message of thanks!
Looking for a super easy way to dress up your budget Christmas cards? Emboss the envelopes! We bought this Embosser on Amazon years ago for our wedding and it’s definitely earned it’s keep.
This would make a great wedding or engagement gift too. We use ours yearly for Christmas cards and throughout the year dressing up otherwise boring stationery.
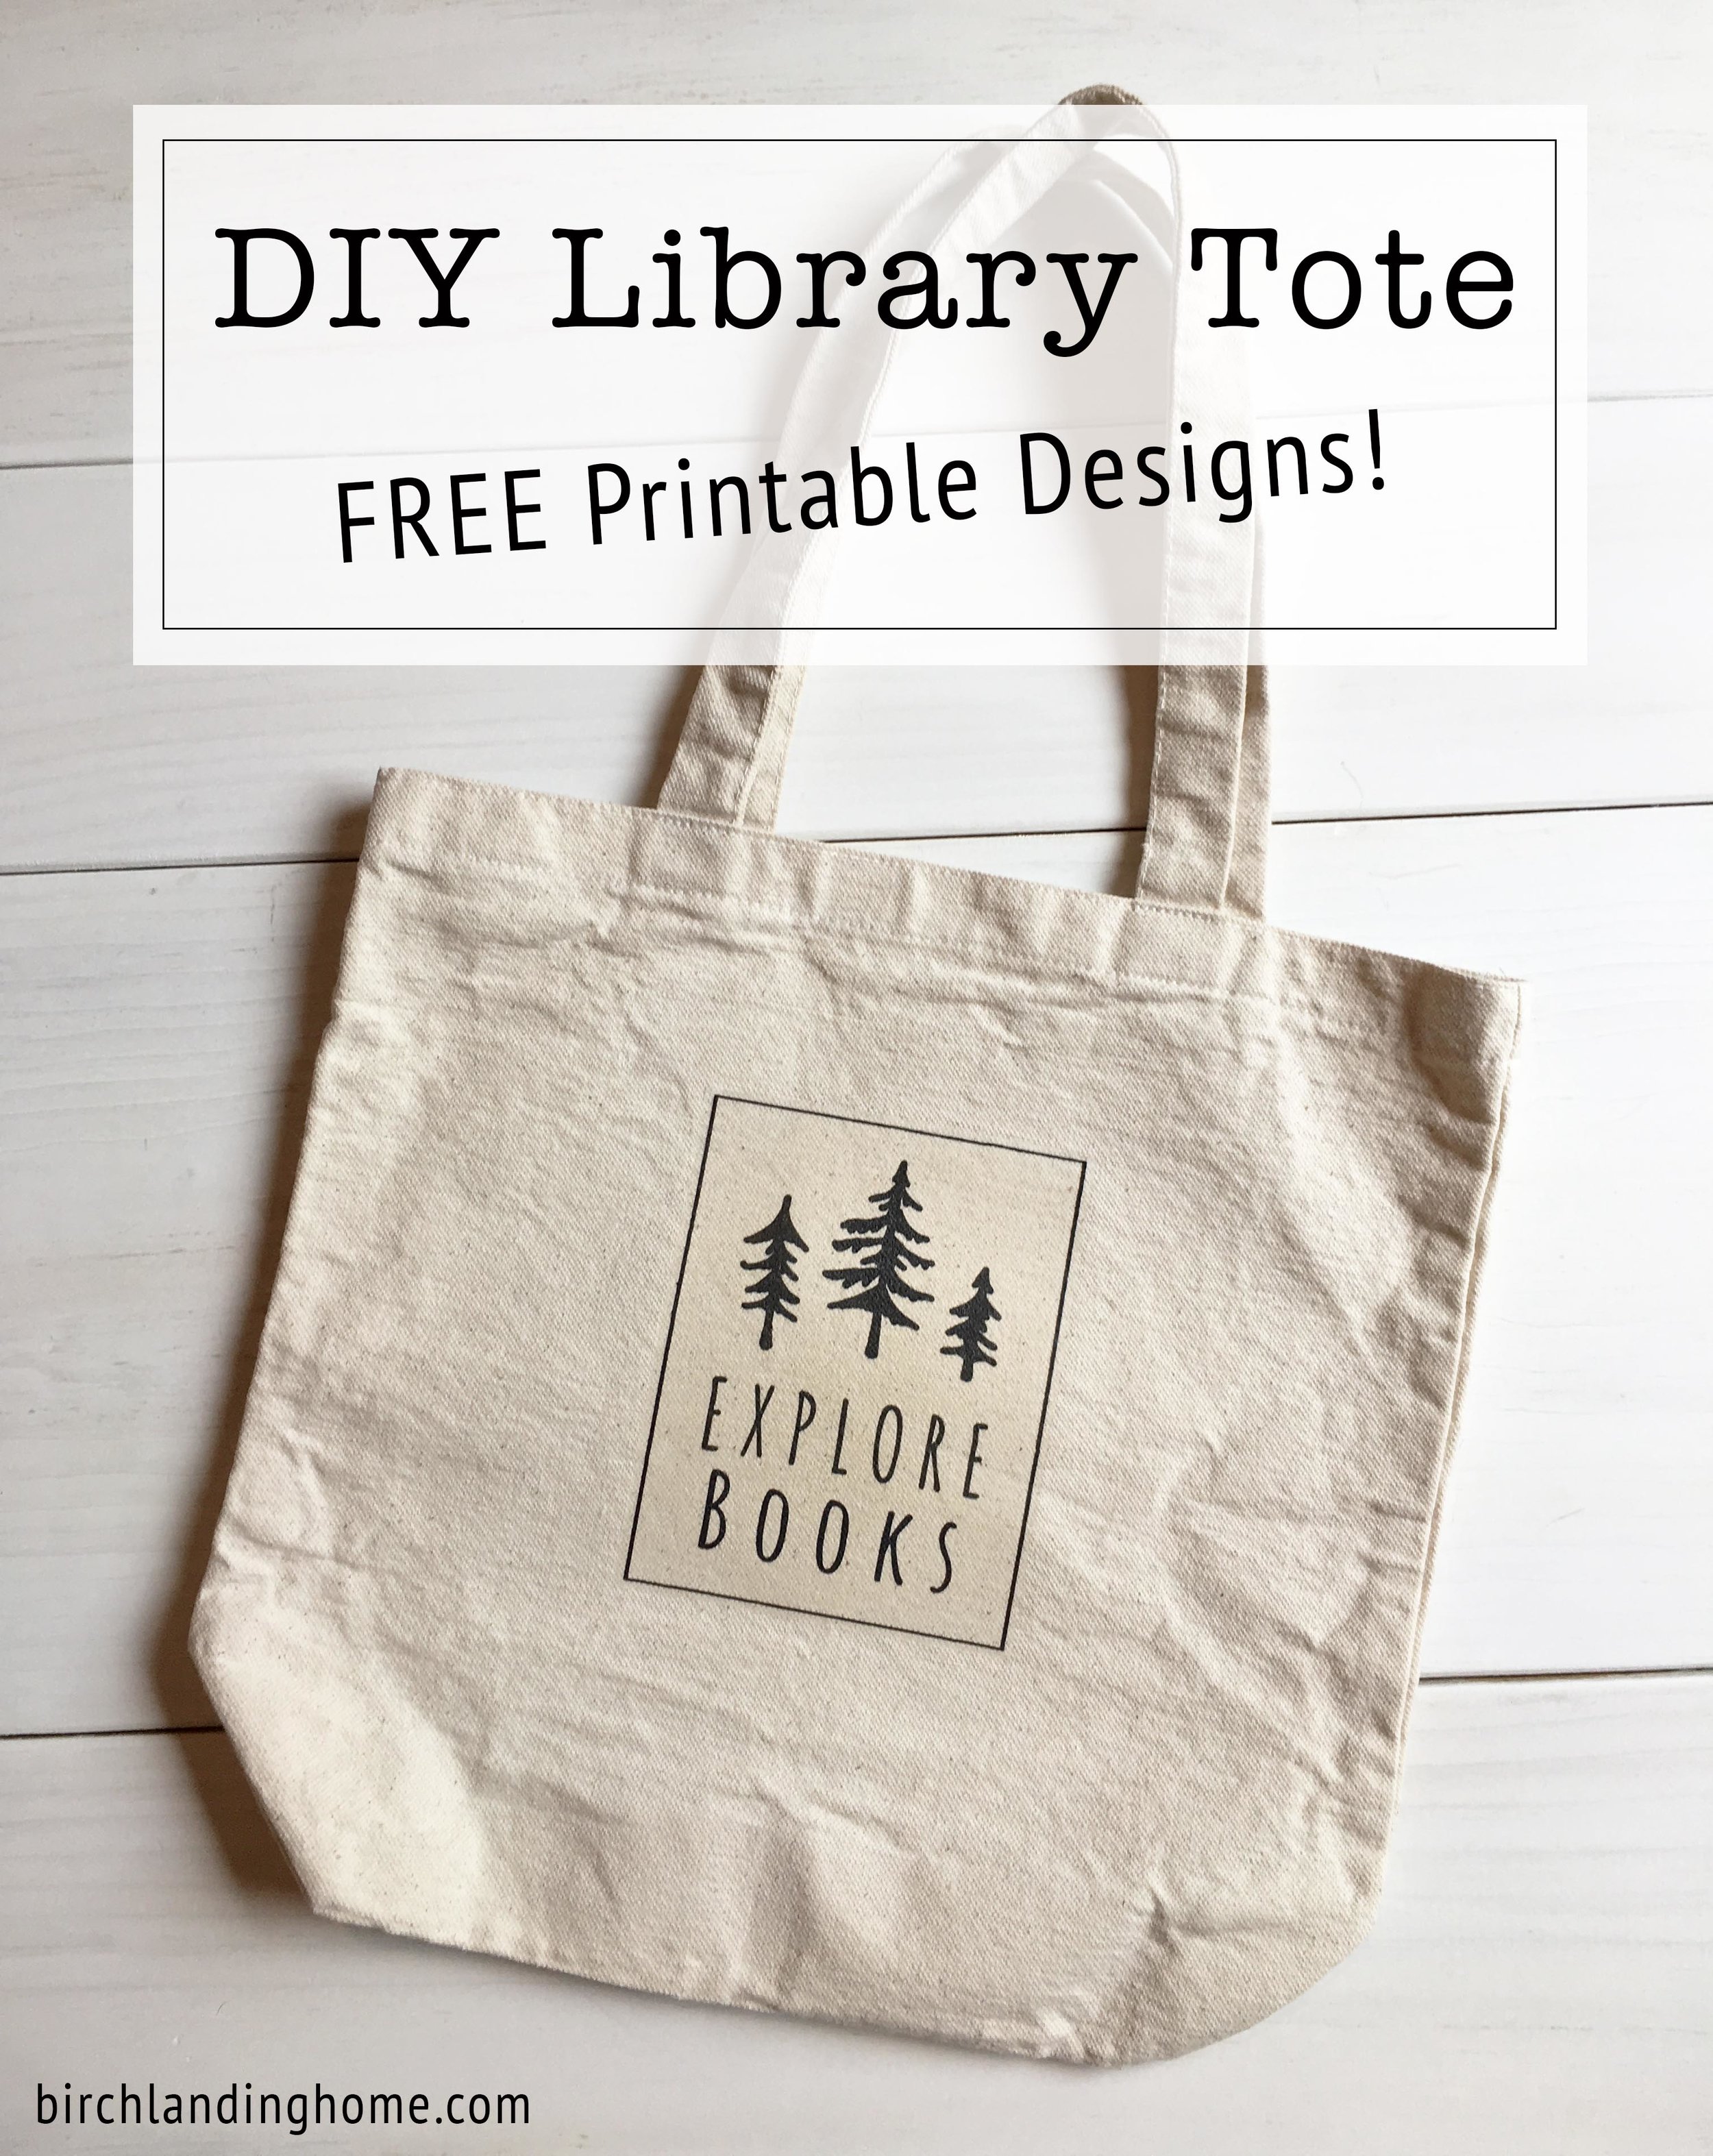
If you have kids you know how tricky it can be to keep track of library books in your home… you bring them home, read them on the couch, and then before you know it they’re mixed in with your own books and quickly forgotten… until you get that late notice from the library (ooops). The best way to keep track of them is to have a designated place to keep them - for us we made a special library tote that has served us well. We use it to bring home books from the library, and as we read them we make sure to return them to the tote so they’re never misplaced. I’ll show you exactly how I made ours, along with two free printables so you can make your own! | This post contains affiliate links |
1. First, run your canvas tote bag through the washer and dryer - you need to make sure it’s clean and there’s no more sizing on it from manufacturing which might keep the iron-on transfer from adhering well.
2. Print out your design on the transfer paper. (Please note that the designs I have available for download are ready-to-print PDFs for printing on iron-on transfers, therefore they are already in mirror image - aka backwards.) *You can find links to download our designs at the end of this post - there are two different designs to choose from!*
3. Cut out the iron-on transfer design, leaving a border around the edge of the design to help ensure the design will adhere well to the fabric and not lift at the edges.
4. Make sure to read the instructions for your particular brand of iron-on transfers as these next steps may vary slightly from brand to brand. For the transfers we used, the next step is to heat up the iron then pre-iron the bag to get rid of wrinkles and preheat the fabric for the transfer. Our directions recommend working on a hard surface with a piece of scrap fabric underneath.
5. Carefully place your design face down on the bag and iron it on using a LOT of pressure. I actually stand on a chair to put my full body weight down on it too. You want to iron over the whole design, paying particular attention to the edges to make sure it really adheres well.
6. After going over your design like a thousand times (an exaggeration, but make sure you go over it a lot to adhere it well). Let it cool completely before carefully pulling the paper backing off and you’re done. Time to go to the library!
Download FREE Printables for Iron-On Transfer Here:
Explore Books Logo (prints to approximately 4”x5”)
*Please note that the downloaded PDF files will have the logos in MIRROR IMAGE (aka backwards), since it needs to be printed in reverse on the iron-on transfers.
Want to make a Custom Design?
I made the designs for these library tote logos by using design files from my husband's Creative Market Shop. If you want to edit these designs or make your own, you can purchase the files from Creative Market and personalize them yourself!