I'm a wife, stay-at-home mom, crafter, and blogger living in rural New England. As seen in Martha Stewart Living, Food Network Magazine, and more! | Tutorials, DIY, crafts, parenting tips, recipes, money saving tips, product reviews, local product features, New England living, intentional living, and more! |
Introducing a bottle can be difficult at first, especially if your baby had been exclusively breastfed. Here are a few quick tips on ways to make bottle feeding easier. | This post contains affiliate links and an honest review on products provided by Nuby |
When our little one was about 3.5 months old we had no choice but to make the switch from exclusively breastfed to formula fed because she was unable to digest my breastmilk (if you'd like, you can read more about that HERE). Going cold turkey from breast to bottle was hard on everyone and I definitely learned some lessons along the way.
Bottle Feeding Tips
Use a "natural-shaped" bottle
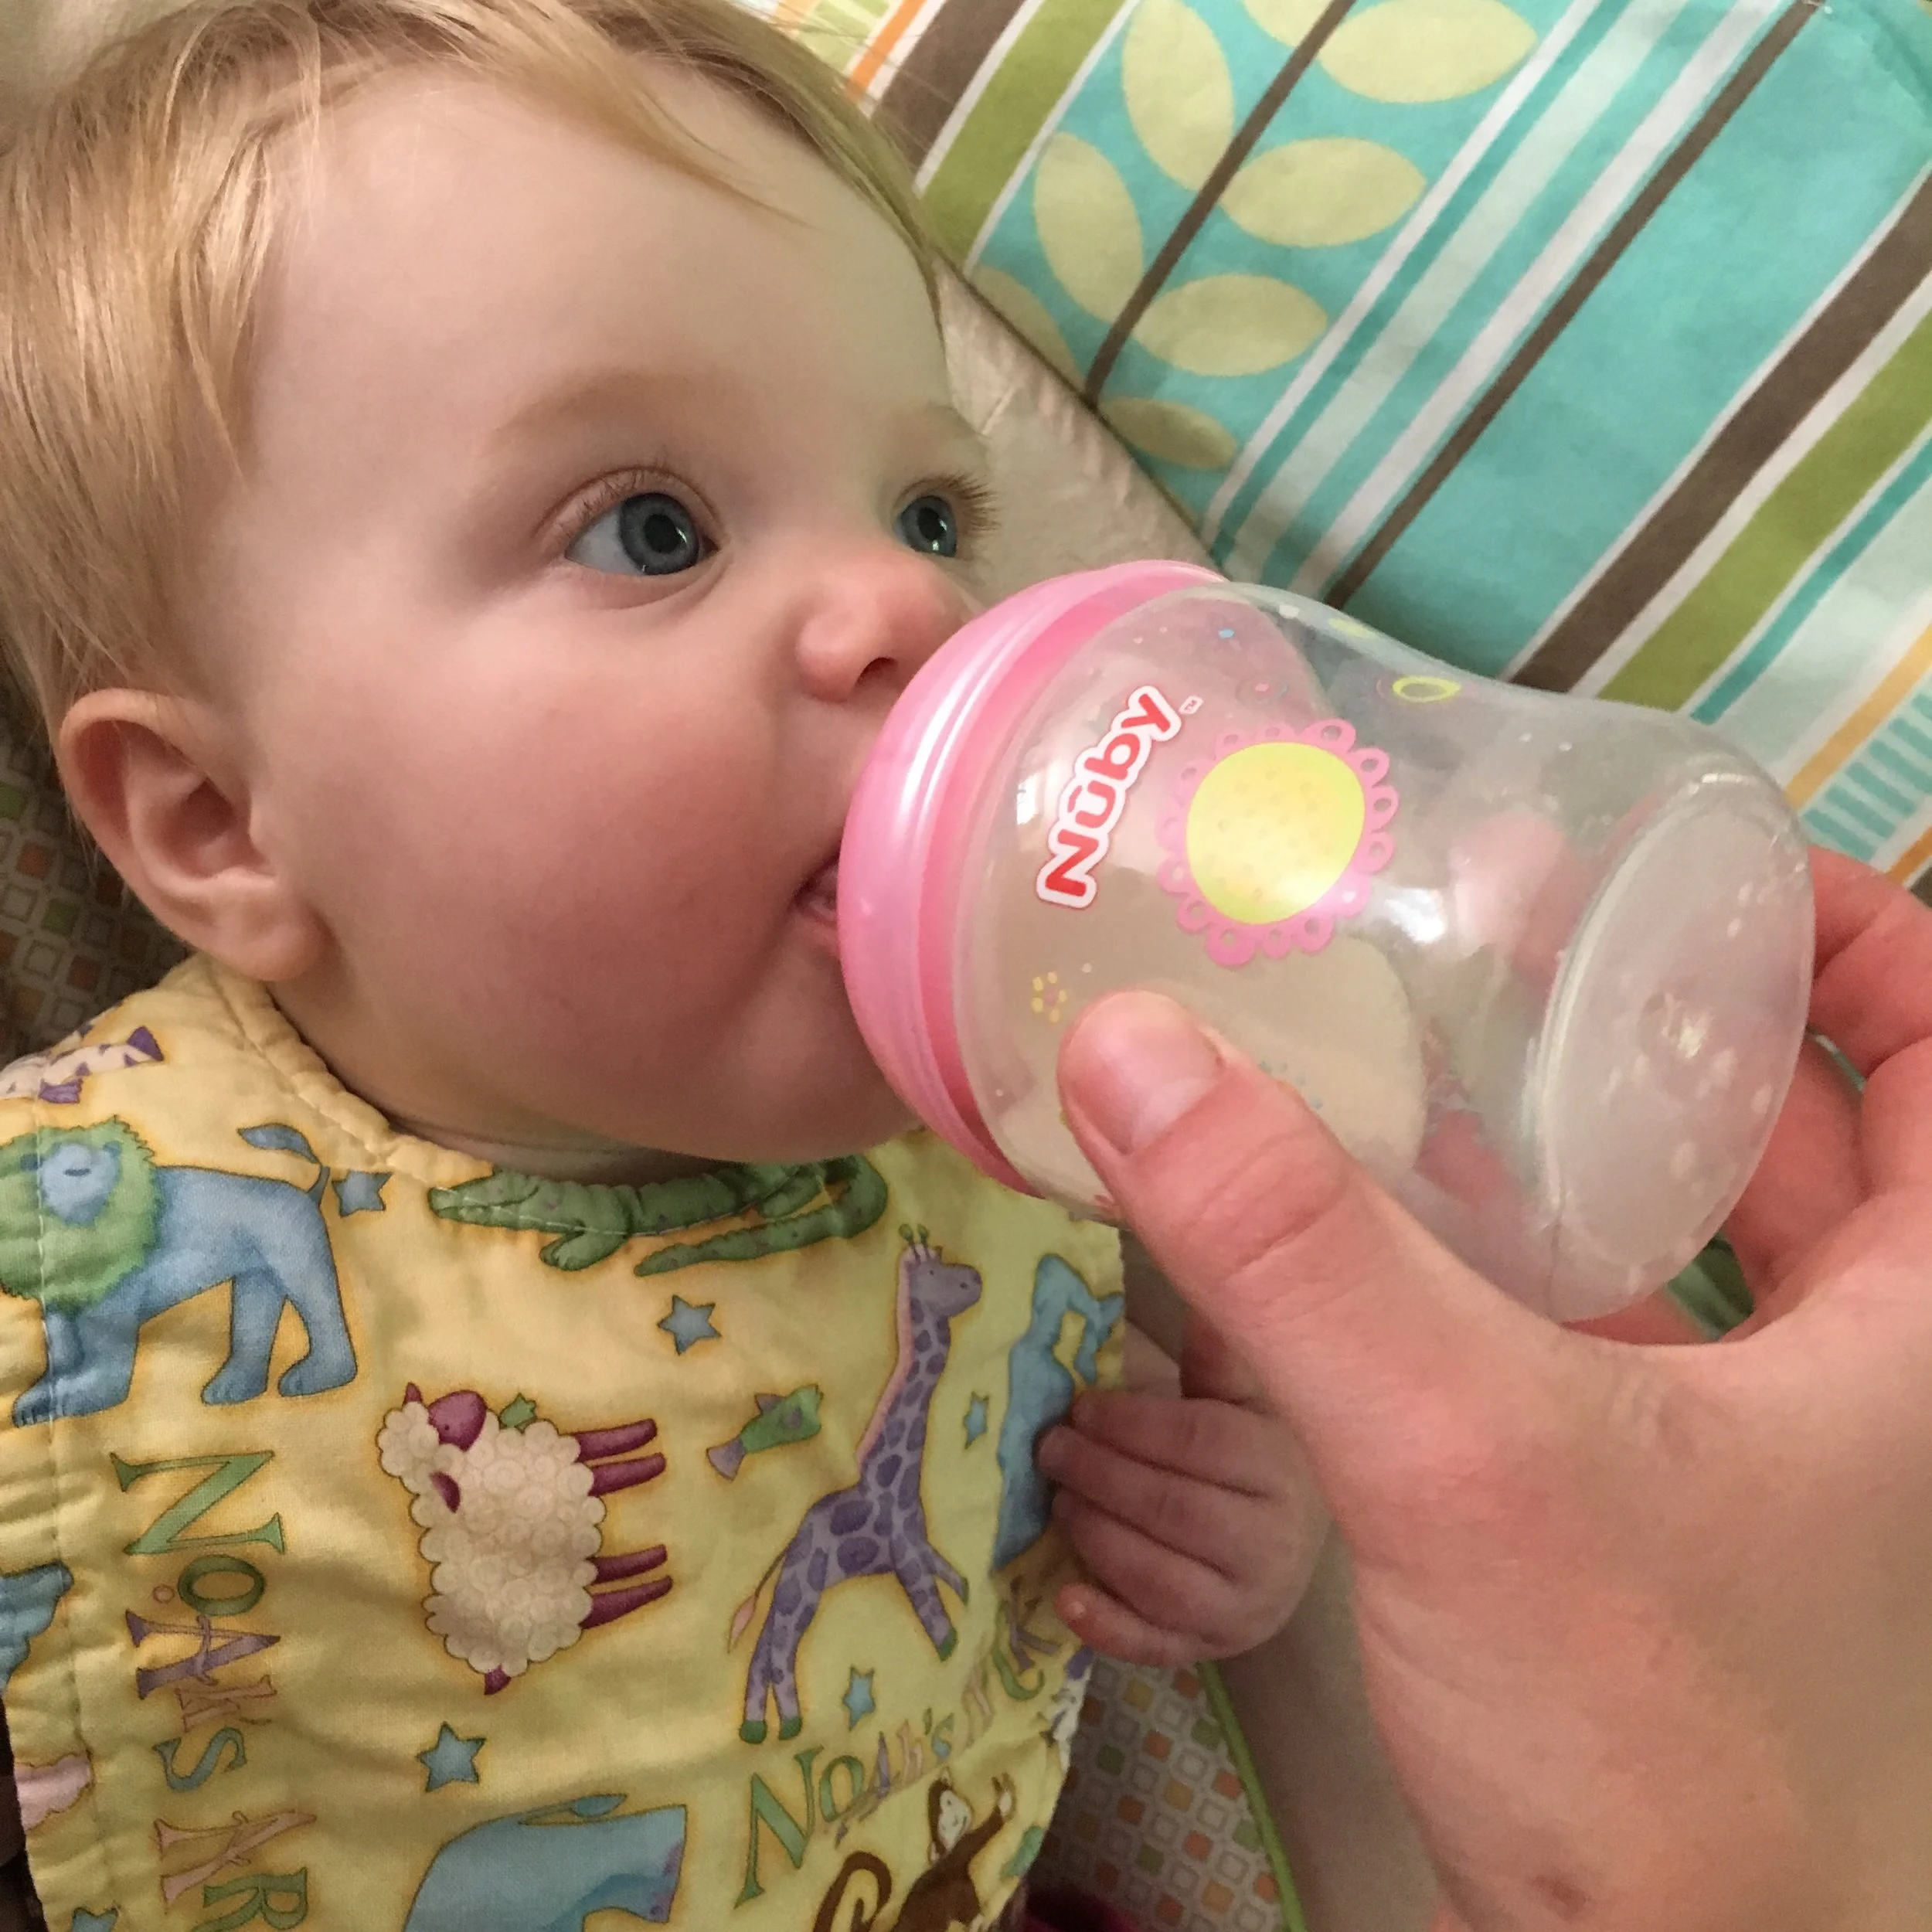
In the beginning we tried a lot of different kinds of bottles to see what our baby would take. It was a lot of trial-and-error at first but we quickly found that she took best to bottles in a natural shape that mimics the shape of a breast, like Nuby's Natural Touch Bottles - rather than the traditionally-shaped narrow bottles. For her, latching on to a natural bottle was easier and more instinctive.
Use bottles with fewer pieces to clean
One of the first bottles we had tried was a specialty bottle that literally had 7 pieces to it that had to be taken apart and cleaned every time you used it. It was such a daunting and tedious process and ain't nobody got time for that! Thankfully using a simpler bottle system (like Nuby's Natural Touch Bottles), was a lot easier since they only have three easy-to-clean pieces - the bottle, the nipple, and the collar.
Find a comfortable and consistent place to feed in the beginning
When we first introduced the bottle, our baby just wouldn't have it. I initially tried bottle feeding her in the rocking chair I always nursed in but it just made her so mad because she was reminded of nursing. I quickly realized that in our case she needed somewhere new and comfortable to be her new feeding spot so we switched to a little bouncy chair on the floor which really helped. She sits in the chair at a comfortable, somewhat upright angle that's perfect for her and I sit on the floor facing her to feed her.
Introduce the bottle when baby is well rested and not starving
When you first start introducing a bottle to your baby, it can be very overwhelming to them so it's best to set yourself up for the highest chance of success! Your baby will likely get easily frustrated because it's something new, so try not to push the matter when they're overtired or starving. A calm baby will be more likely to try to figure out the bottle rather than just melt down at the first sign of frustration.
Be Consistent
Consistency is key. Even if your baby hates bottle feeding, keep trying and keep offering it regularly until they get the hang of it. It can be so hard in the beginning but hang in there!
- I received this item for review from Nûby but all opinions expressed are my own. Please read our full Disclosure Policy for more information -
Nûby's Natural Touch Infant Bottle with Easy Latch Nipple can be found at Wal-Mart, Babies 'R Us, and Amazon.
Living in the Northeast, ticks have just been awful the last few years and it seems as though you can't enjoy the outdoors anymore without finding one. It's so important to protect yourself and family from getting a tick in the first place (if you want to read more on my tips to keep ticks at bay, check out my previous post "Safeguarding Against TICKS"). But in the event you unfortunately get one on you, you need to be prepared so you can remove that awful thing ASAP. By having a Tick Kit handy, you'll be able to remove the tick quickly and safely and hopefully lessen your chances of catching a tick-borne illness. | This post contains affiliate links and personal tips - Disclaimer: I am not a medical expert, always check with your doctor for advice |
I recommend putting together several tick removal kits and keeping them handy at all times - keep one at home, one in the car, and one in your hiking bag for outdoor trips or diaper bag for playground excursions. That way if you're out and about and find one on you or your family you can safely remove it and document it, ready for testing purposes.
If you unfortunately get a tick attached to you, safely remove it immediately to help reduce your exposure to tick borne illnesses. Use the alcohol wipes to cleanse the area where the tick was removed as well as wipe down the tick spoon after removal.
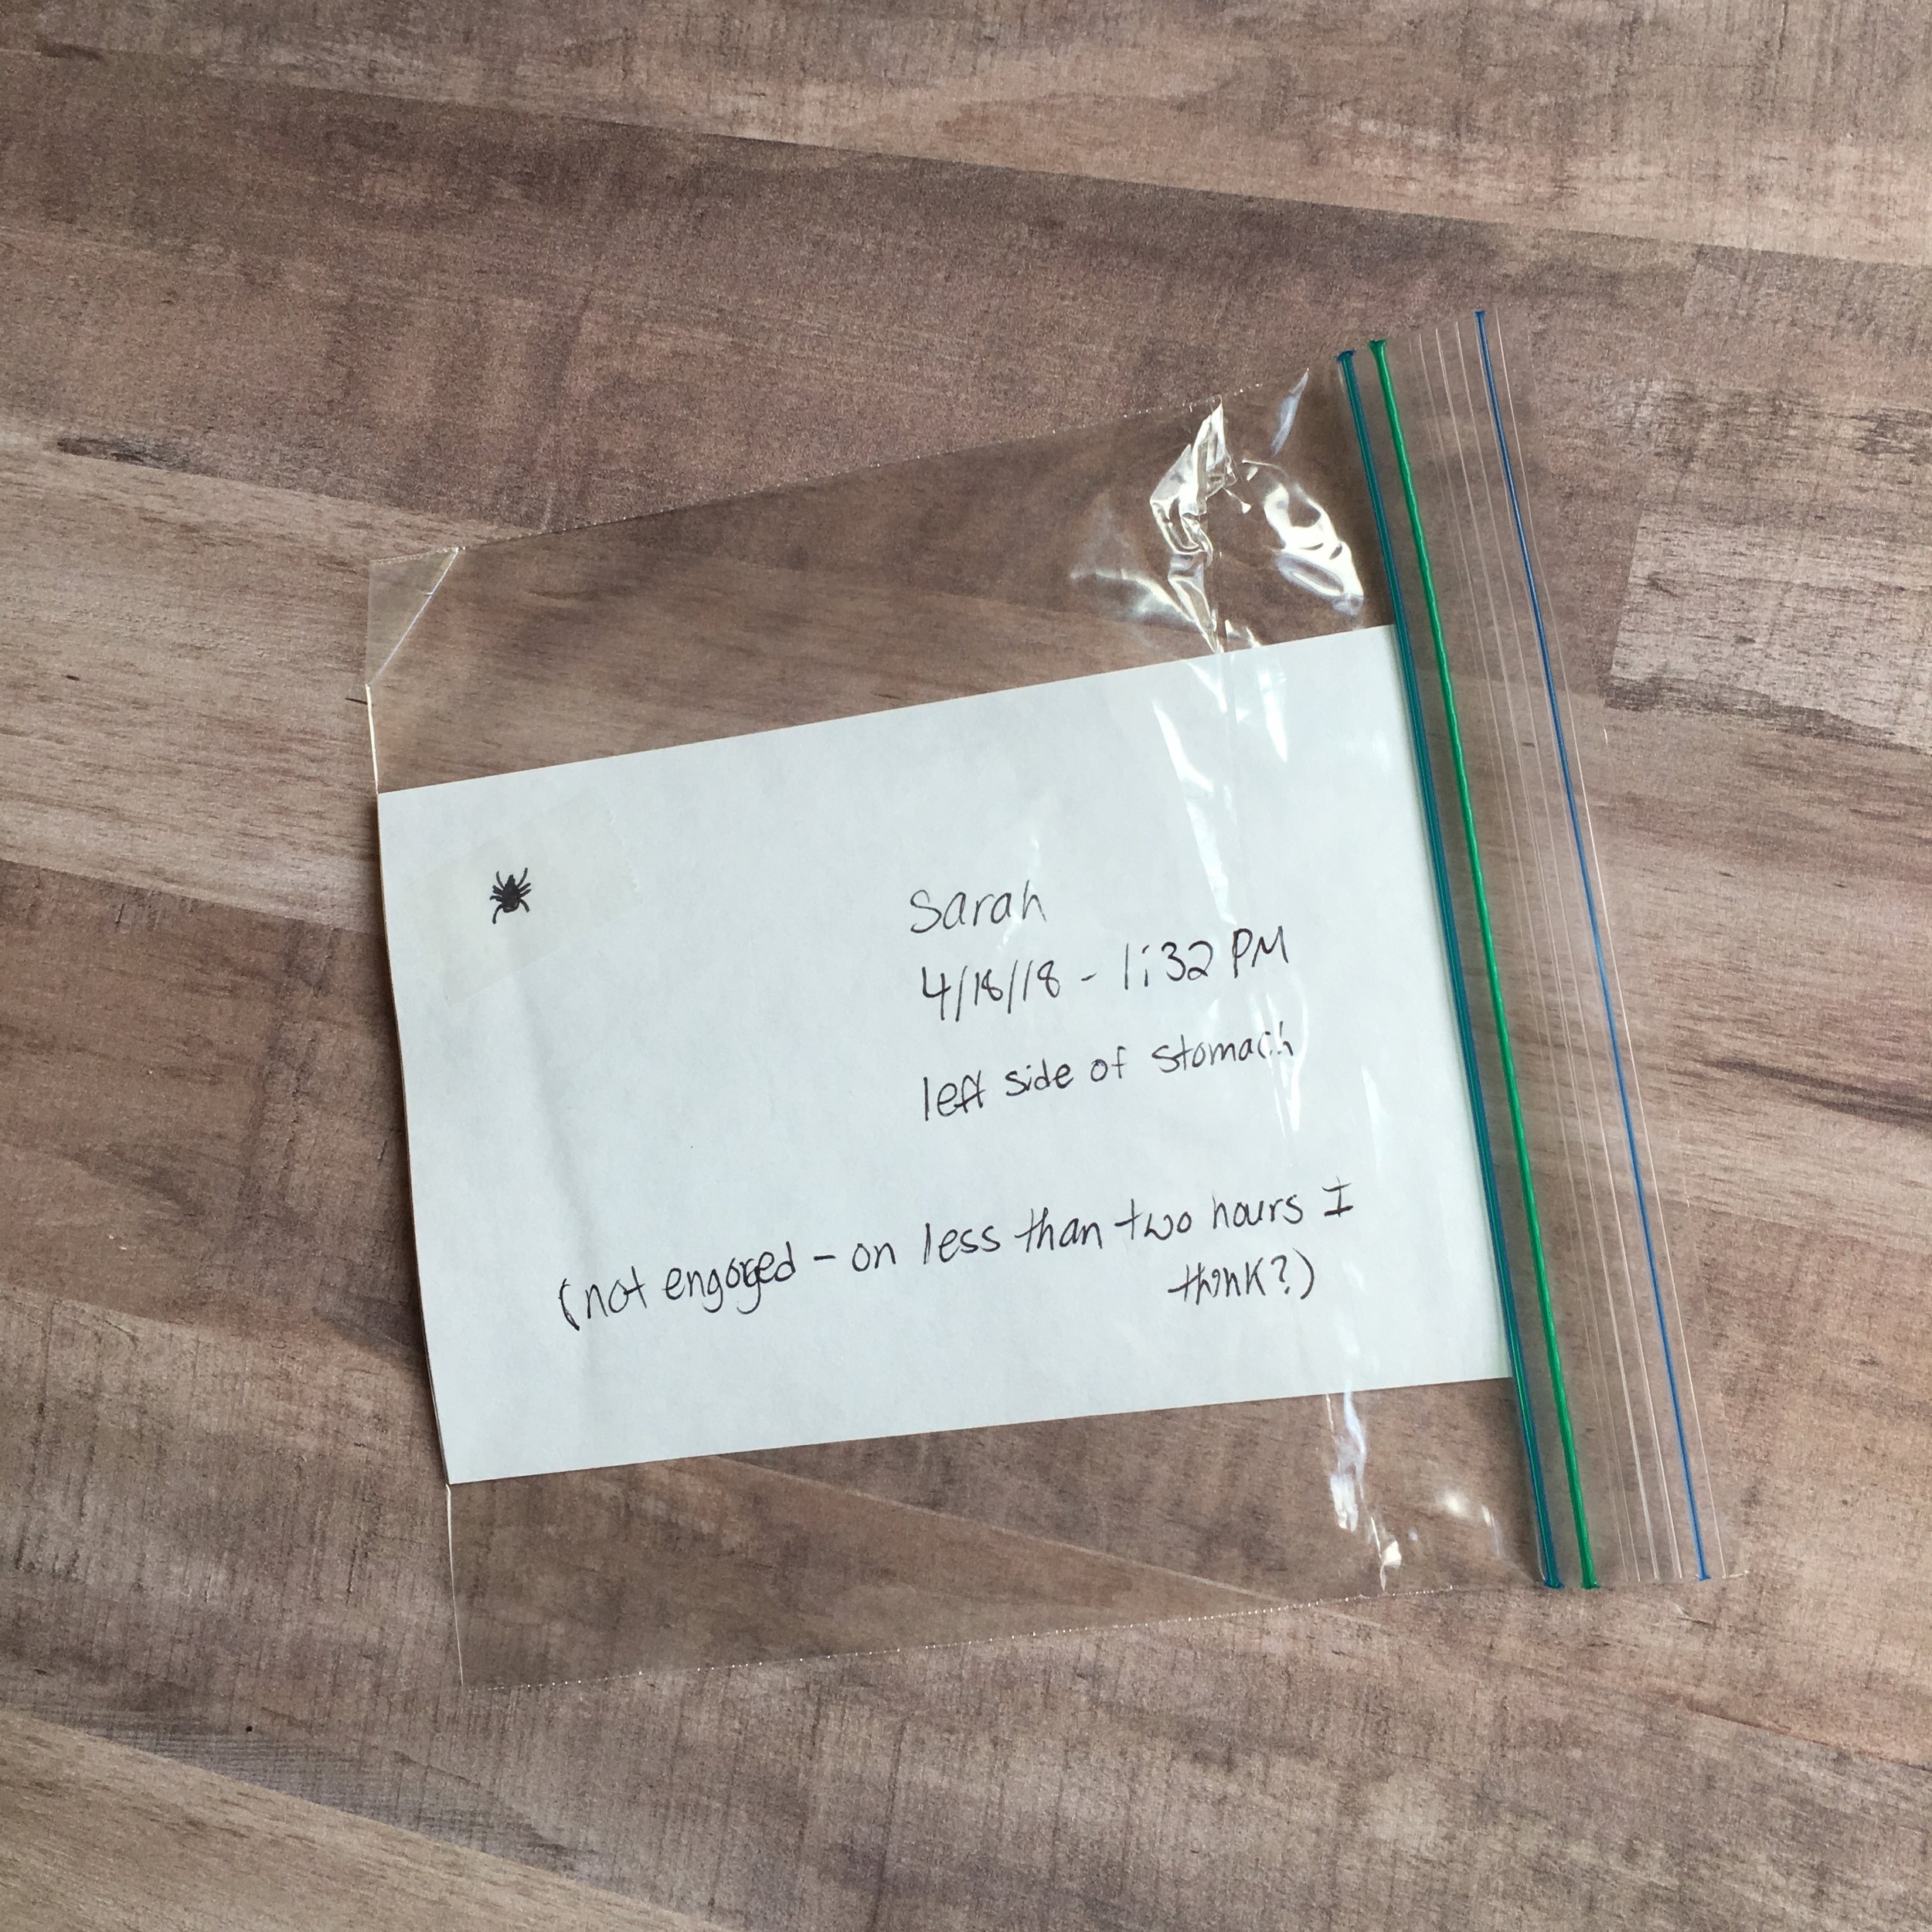
It's important to keep the tick itself - as well as note when and where it was located and any other information about the situation (if the tick was engorged, your best guess at how long it could have been attached, etc). Tape the tick to an index card and use your pen to record all of this information, then place in an empty ziplock bag - feel free to double bag it if you want. Then call your doctor right away for advice on any precautions you may need to take, or if he wants to order to get the tick tested.
Whether or not you get the tick tested (either by your doctor or privately), you can also report your tick bite to TickEncounters. TickEncounters is a program run by the University of Rhode Island, recording and monitoring trends and information regarding tick bites and your information helps aid in their research. They can also help advise you about how to get the tick tested for your peace of mind in the event your doctor's office doesn't do it.
DISCLAIMER: I am NOT an expert or medical professional. These are tips and information I've learned over the years living in a tick-prone area. Always check with your own doctor and local experts for the best prevention and treatment plans for yourself and your family. Discuss with your doctor ahead of time what to do in the event of a tick bite (and I hope you never need to use that information).
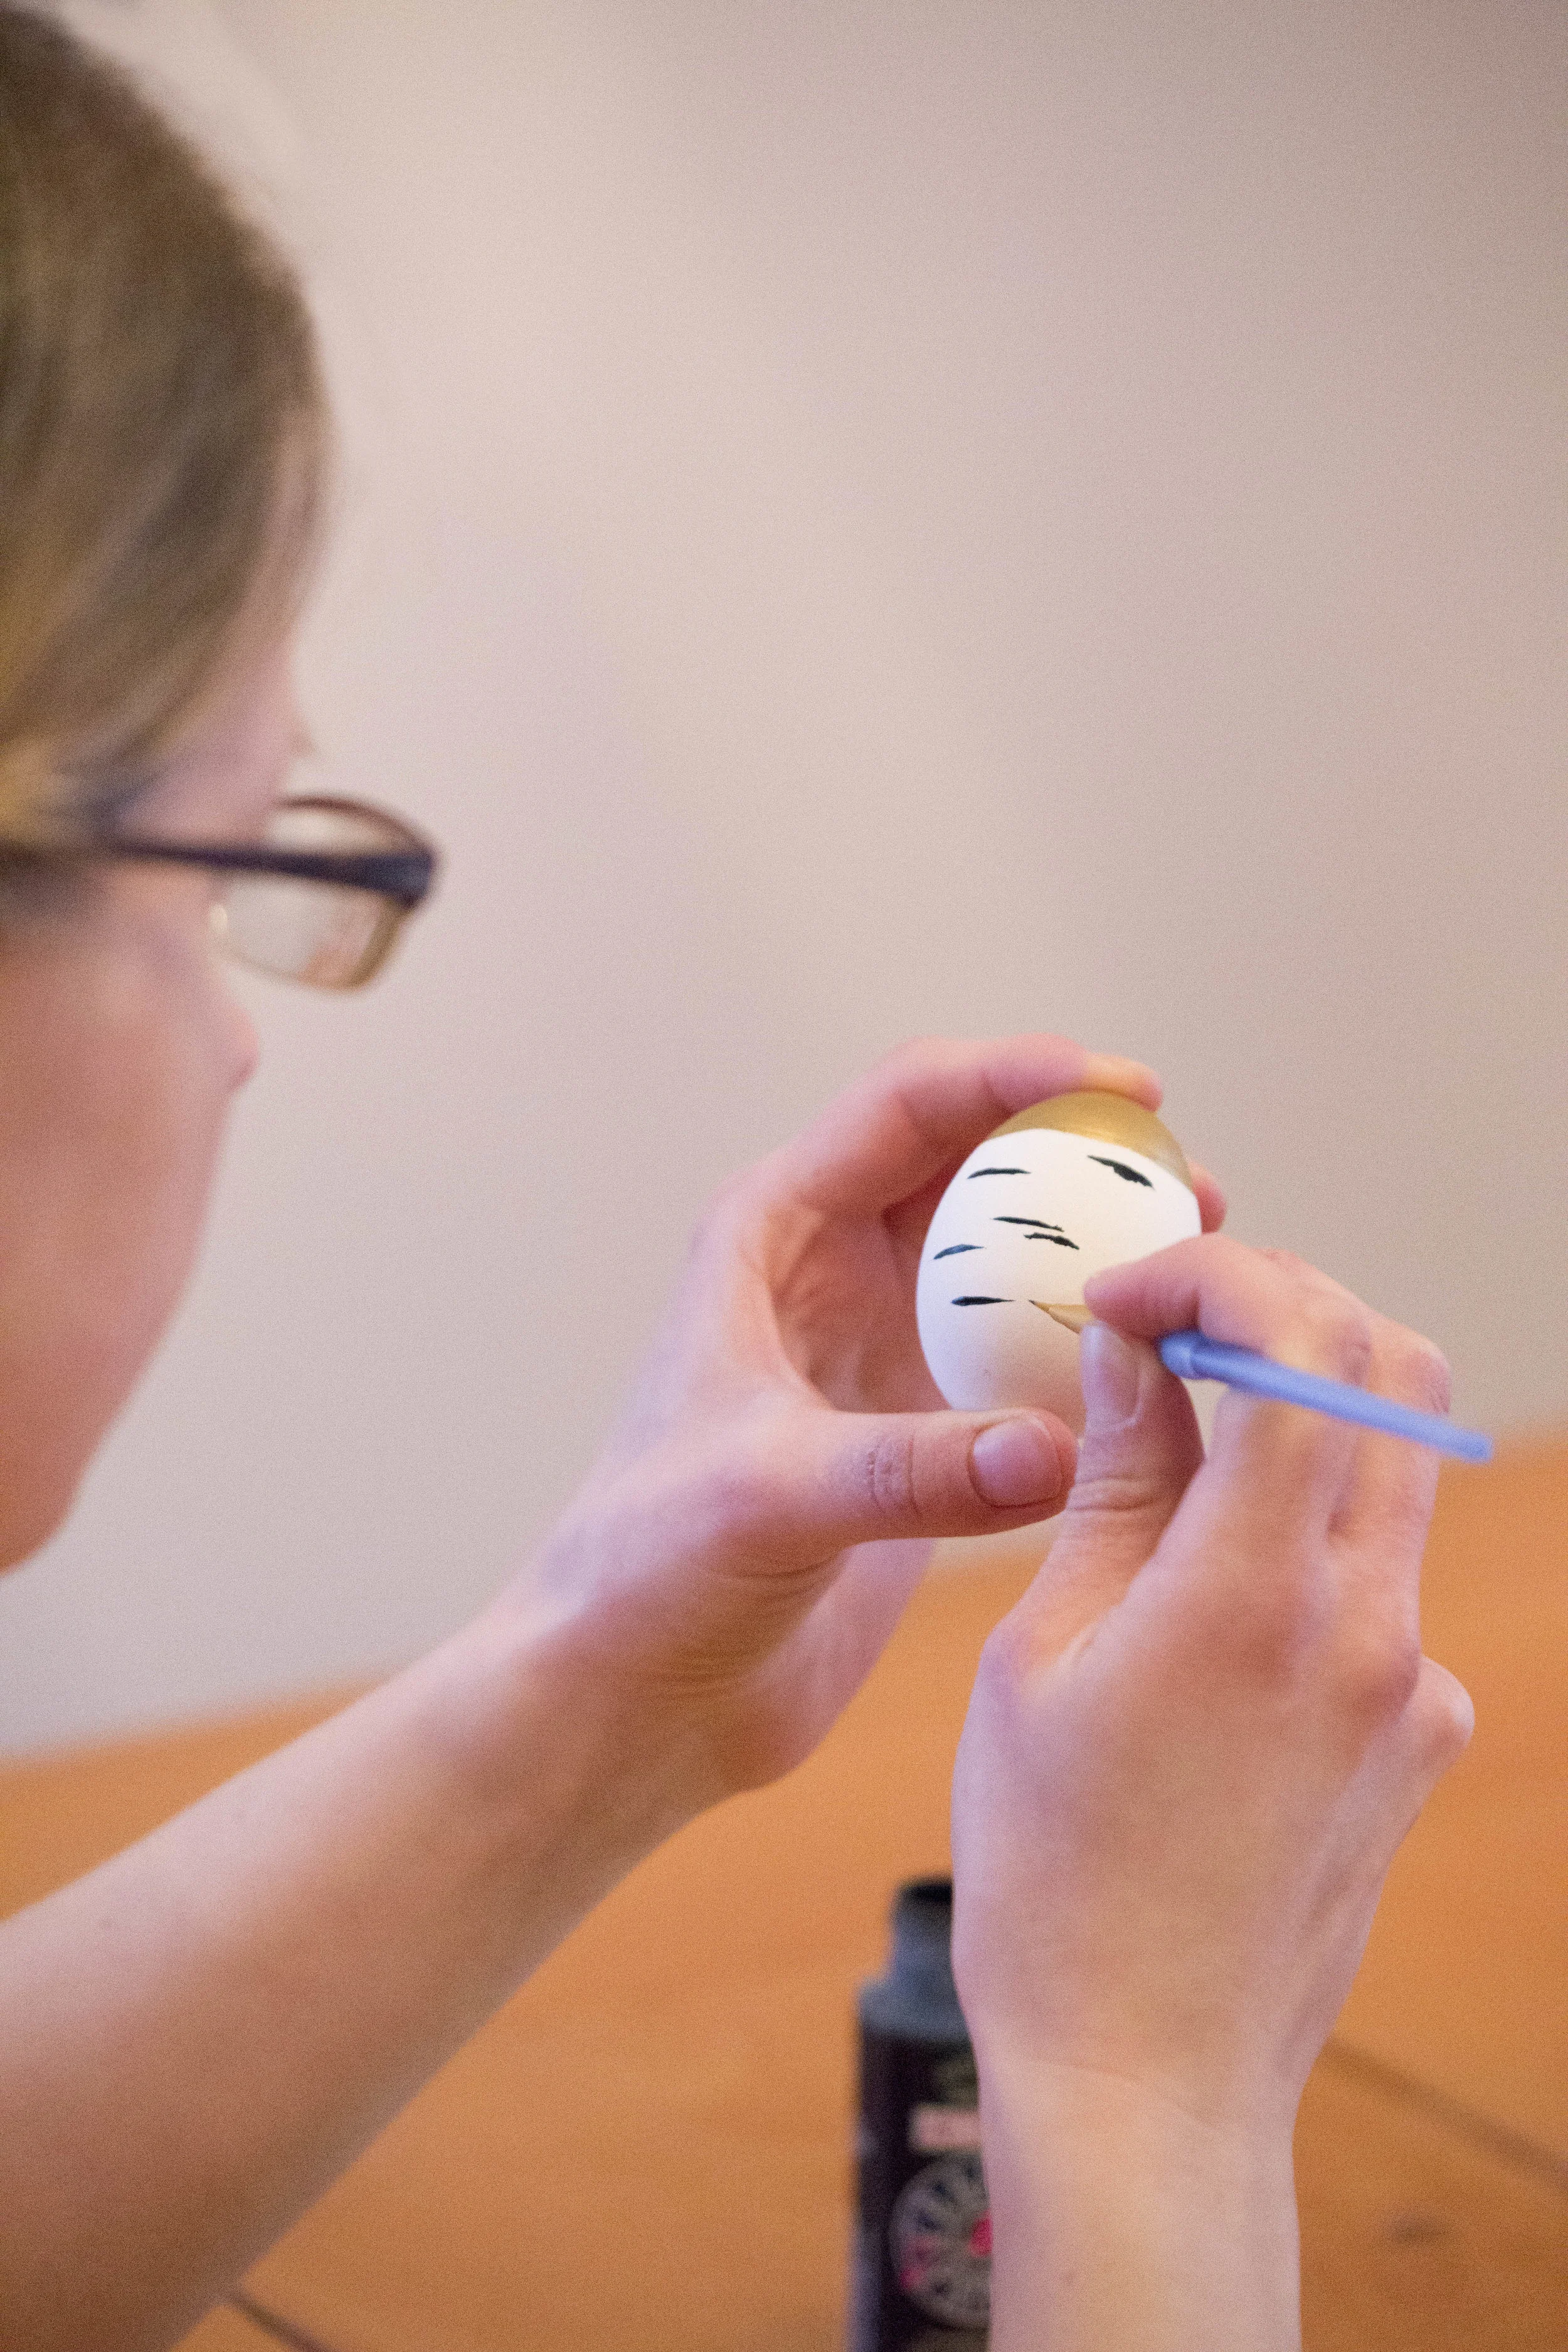
A few months ago, Food Network Magazine emailed me and asked if I'd be interested in designing a New Hampshire-themed egg for their Easter issue! I was completely blown away and honored for the opportunity. My New Hampshire egg design was a gold-dipped, faux birch bark egg - gold-dipped to represent our State House with it's golden dome, and the birch bark paint finish to represent our our state tree, the white birch. Fun Fact: My great-grandfather was a steeplejack and did the gold leaf on the New Hampshire capitol dome back in the 1920's! | This post contains affiliate links |
Creating one of these gold-dipped birch eggs for yourself is pretty simple! Here's the full how-to:
Materials:
faux egg (for the Food Network Magazine example and most of the photos in this how-to, I used an Eggnot, a fake ceramic egg - but you could also use a wooden egg. If you use real hardboiled eggs I would not recommend eating them after painting)
white acrylic paint (if your fake egg isn't already white to begin with)
paper cup
thin paintbrush
tinfoil to make a stand for the egg to dry on
How-to:
1. First, make a tinfoil ring to hold your egg while it dries between steps. Then if your egg isn't already white, paint white and allow to dry between coats. It may need several coats of paint.
2. Next shake the gold acrylic paint well and pour about half an inch of it into a small paper cup. Dip the top of the egg carefully into the cup. (I found it best to to do the gold-dip first, then paint the bark pattern after since sometimes the black lines were visible under the gold-dip.) Gold paint tends to be thick and you may have some swirling or thick drips after dipping. You can try to smooth these out a bit with a paintbrush but it usually looks cleaner if you just leave it as-is, even if you end up with a thick spot within the dip. After the gold dip, carefully place the egg in the tinfoil ring to dry.
3. Once the gold-dip is dry, use a thin paint brush to paint horizontal black lines on the egg, all the way around. Vary the placement and thickness of the lines a bit to mimic the look of birch bark. You may have to carefully hold the egg for a few minutes to let it air dry a bit before carefully setting it, gold top down, into the tinfoil ring to finish drying.
And that's it! While making them can be tedious with the drying time between steps, it's really quite easy. And in the event you don't feel like tackling this project yourself, I have a limited supply of painted Wooden Gold-Dipped Birch Eggs in my Etsy Shop!
It's been cold and snowy here in New England these last two weeks (like 3 Nor'easters in two weeks snowy!), so what better way to warm up than with a bowl of hearty and healthy chili! This recipe was done in our crockpot but could be made in less time in an Instapot. Don't have an Instapot? You're in luck - I've teamed up with several other bloggers to give one away! {Scroll down to enter the givewaway}
This chili is super easy to make and can be adjusted to your taste with whatever veggies you'd like to add. I often make chili as an excuse to use up all the extra veggies we have in the fridge - once all the flavors meld together you can hide just about any vegetable in there (perfect for picky toddlers or husbands). While not in this current batch, I've often added things like mushrooms, spinach, sweet potatoes, zucchini, tomatoes, carrots, squash, etc. As far as using canned beans and tomato sauce I always buy store-brand organic varieties when I can - they tend to have less additives and salt than non-organic and are cheaper than the name brand ones!
Ingredients
1 lb of lean ground turkey (can also use lean ground beef if you prefer)
2 cans of low sodium tomato sauce
1 can of red kidney beans
1 can of garbanzo beans
1 can of lentils (adds a lot of protein and you won't even notice them mixed in with the ground meat!)
2/3 cup of frozen corn (using frozen veggies is a great shortcut)
1/2 cup of frozen chopped peppers
2 tablespoons chili powder
1 teaspoon chopped jarred garlic
1 teaspoon turmeric (turmeric has great anti-inflammatory properties)
1 teaspoon Italian seasoning
salt and pepper to taste
shredded cheese and/or crackers to garnish
Directions
Brown ground meat in a skillet, pouring off excess fat.
Add meat and all remaining ingredients (except for garnishes) to crockpot.
Cook on low in crockpot for 8 hours or high for 4 hours, until veggies are soft and flavors have melded.
Garnish with shredded cheese and crackers, if desired.
Looking for a way to make this yummy recipe faster? Use an Instapot! I've teamed up with several other bloggers to give one away to a lucky follower. Enter below for a chance to win - good luck!
As a mom, I'm always looking for ways to make the everyday must-dos a little easier and more fun. So I was so excited when Nûby offered to let us try out some of their bath time staples - and give away a set to a lucky follower too! | This post contains affiliate links as well as an honest review of Nûby products |
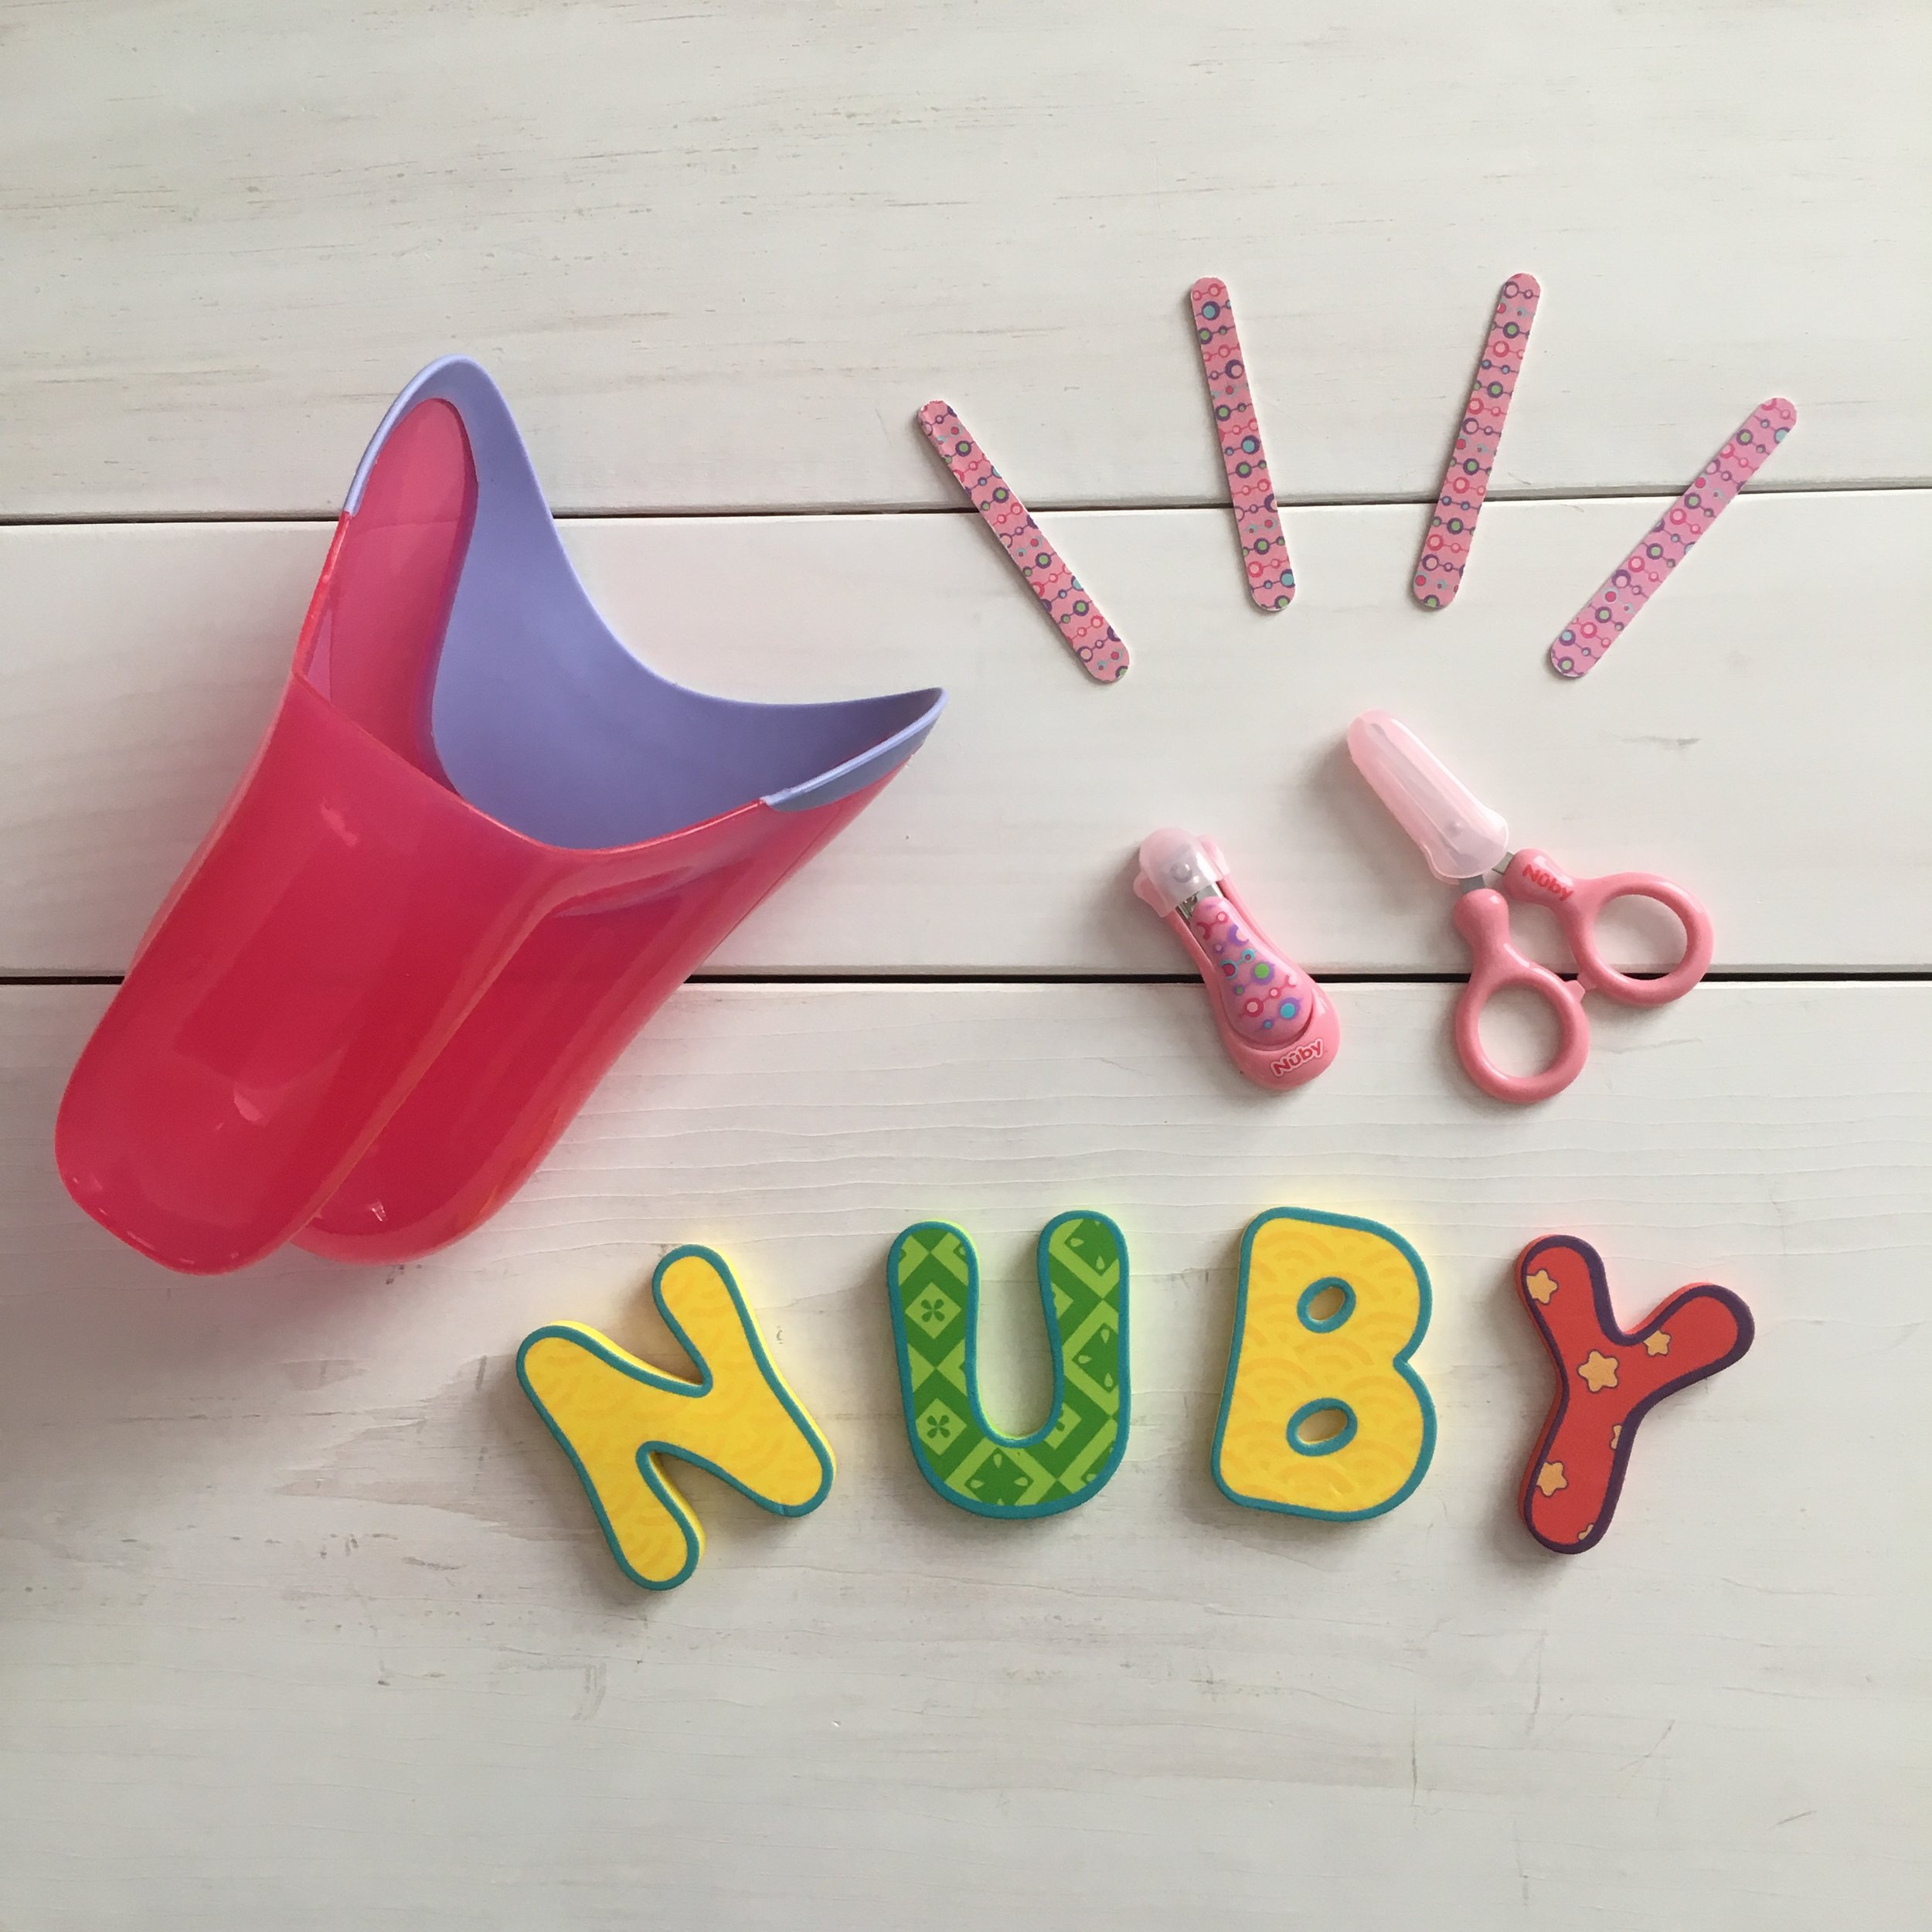
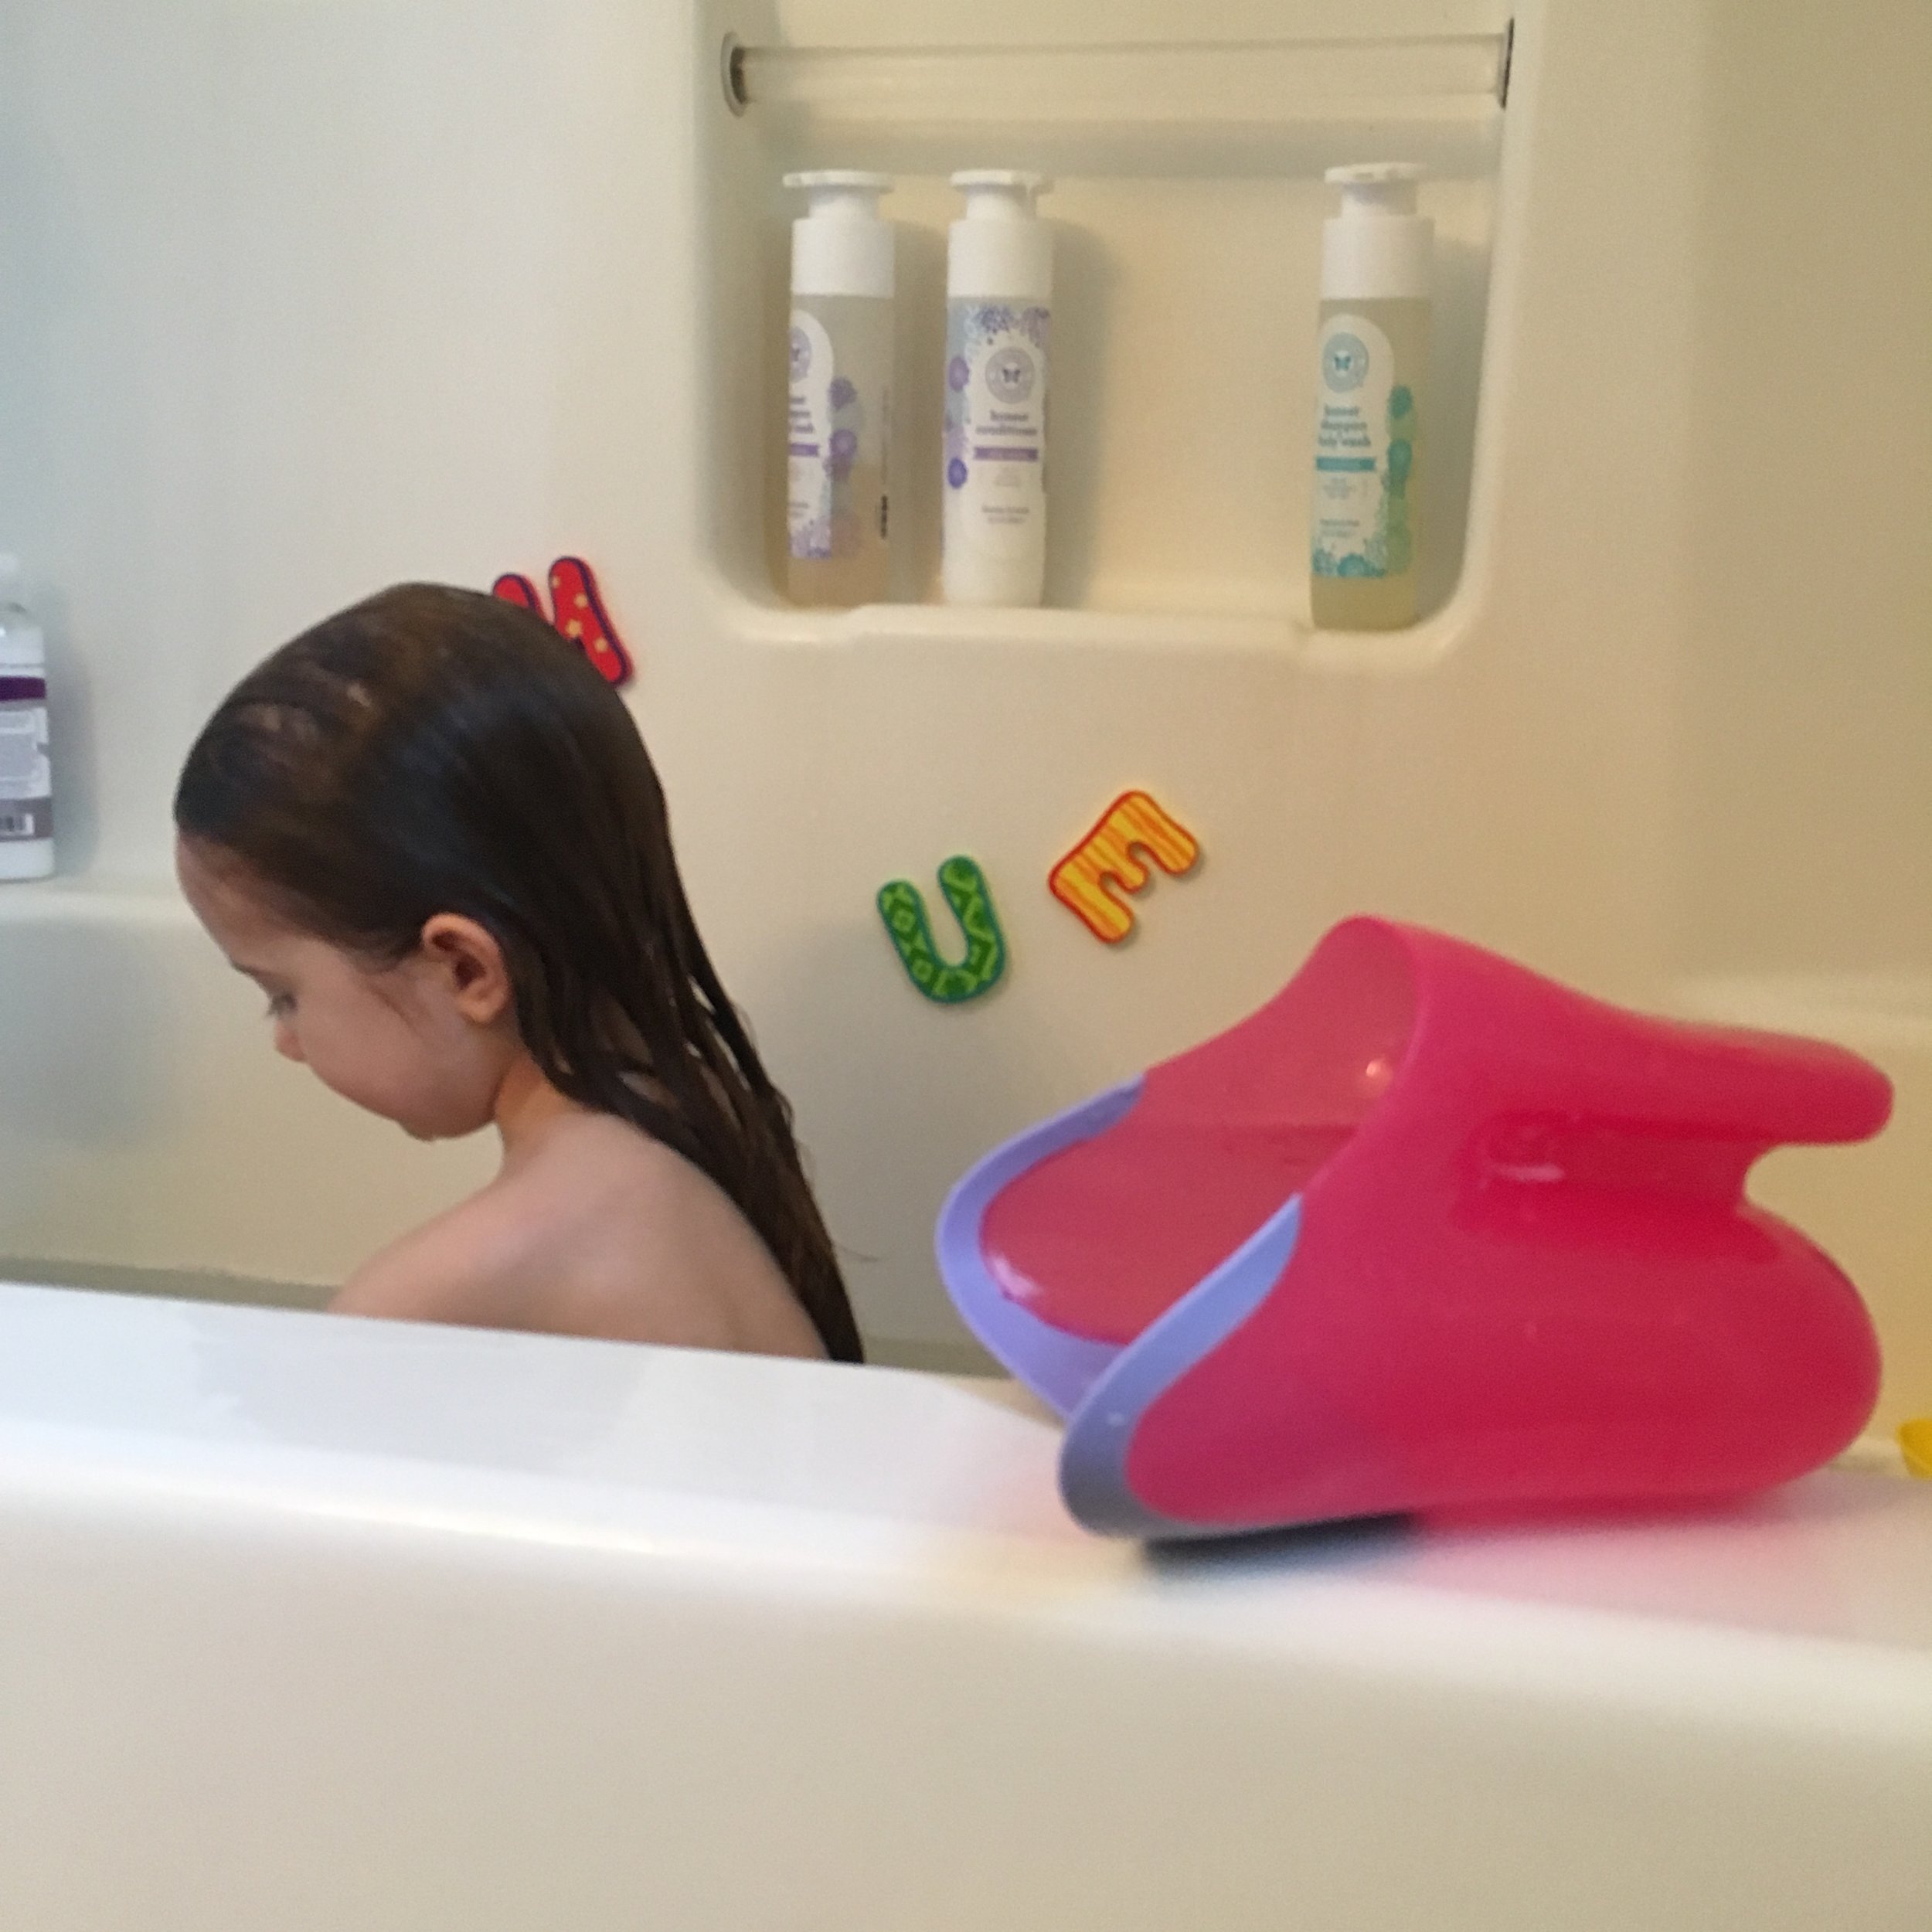
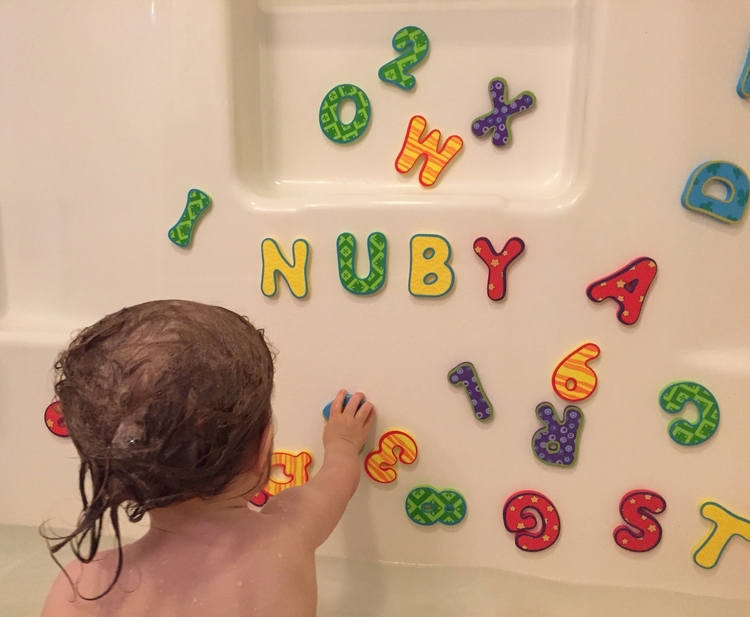
With both a toddler and a baby, I feel like we're constantly doing baths or trimming nails and any way we can make these chores easier is a huge help. Our toddler really loves Nûby's Foam Bath Letters and Numbers set - she's really into spelling and loves putting random letters together and asking "what does that spell?", even when it doesn't make a real word. She's really starting to get the hang of it though, and can spell several short words all on her own!
The Tear-Free Rinse Pail has also been a huge help at bath time, for both our toddler and our baby. No one likes getting soap or water in their eyes - especially little ones. So it's great that we can easily rinse the shampoo away without any tears. The rinse pail is BPA-free and features a soft rubber edge so you can comfortably fit it against your little one's forehead. It also holds a generous amount of water for quick rinsing!
Finally nail cutting... ugh. Probably one of the most nerve wracking tasks a parent has to do for their baby! Thankfully Nûby's 6-Piece Nail Care Set has everything you need including scissors, nail clippers, and four emery boards sized for taking care of baby and toddler nails. Their perfect size helps make taking care of your wiggly baby's nails a little less intimidating.
*Giveaway!*
Make sure to enter our Giveaway over on Instagram for the chance to win this great Bath Bundle from Nûby! The winner will receive Nûby’s Tear-Free Rinse Pail, Nail Care Set, and Foam Bath Letters and Numbers Set. Just look for this photo in my Instagram feed and follow the directions to enter! Good luck!
- I received this item for review from Nûby but all opinions expressed are my own. Please see our full Disclosure Policy for more information -
Nûby's Foam Bath Letters & Numbers, Nail Care Set, and Tear-Free Rinse Pail can be found at many retailers including Amazon, Buy Baby Direct, and Babies 'R Us.
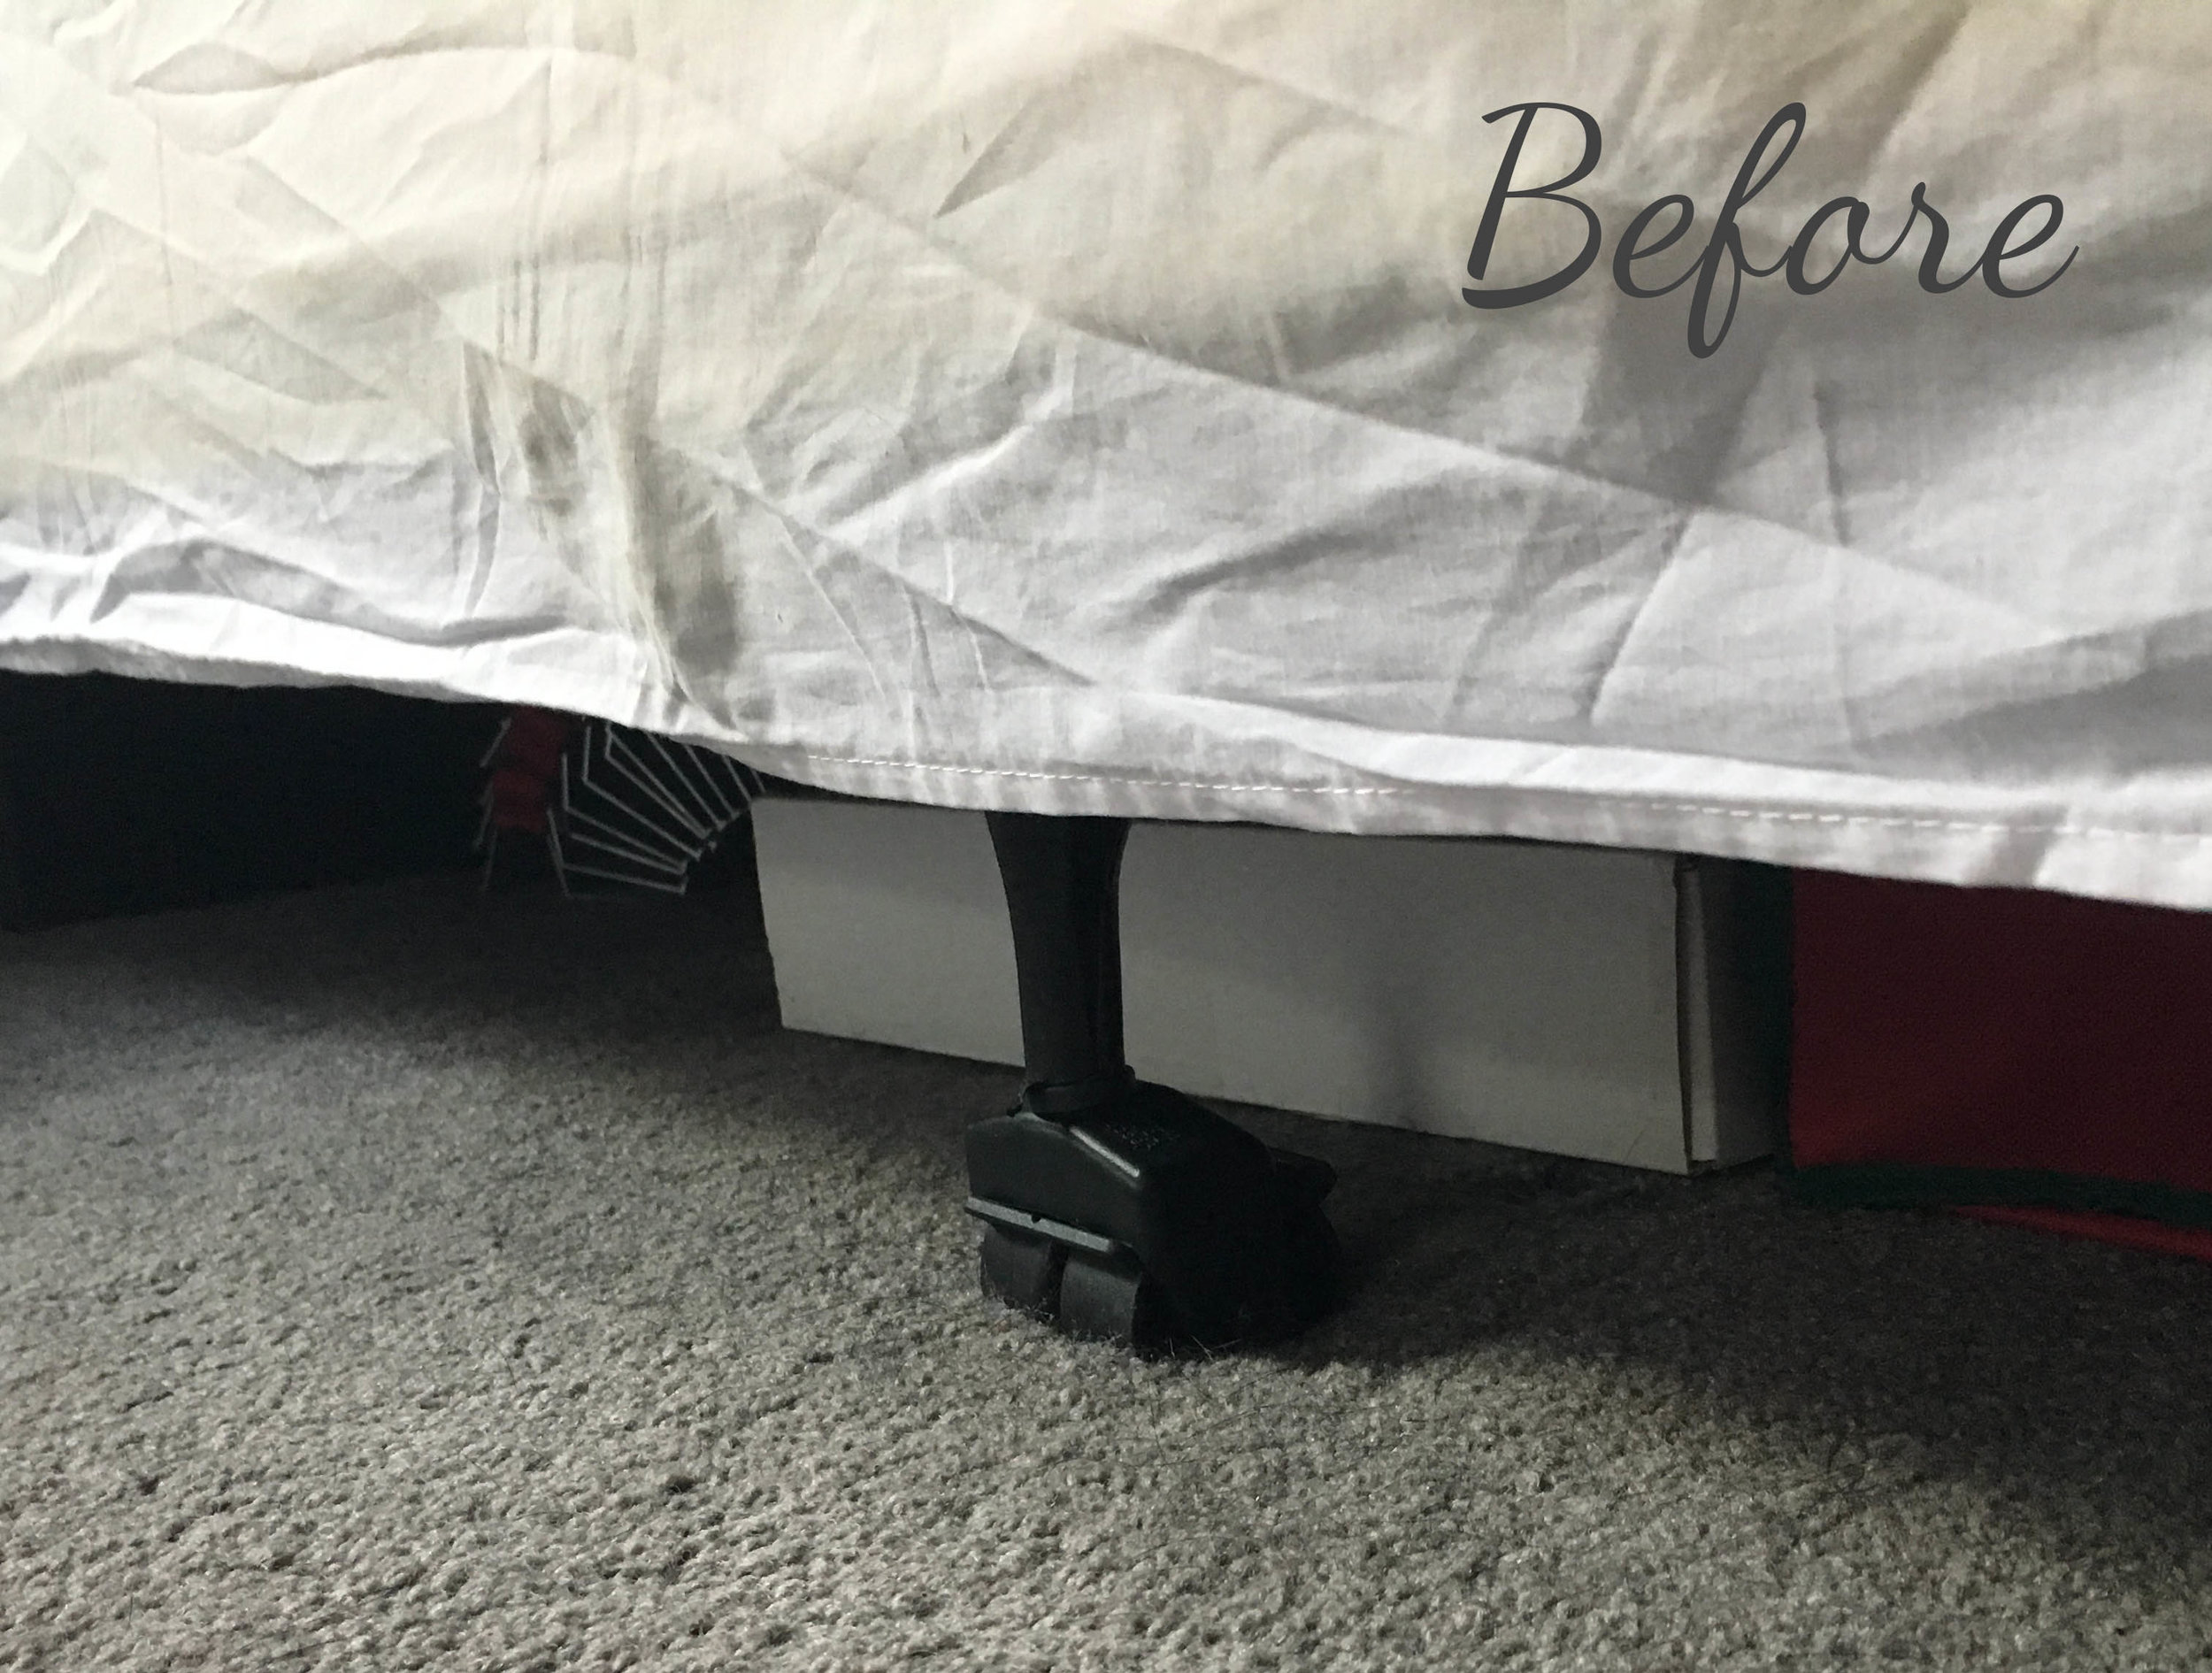
In our master bedroom our bed sits on a standard metal bed frame. Not only were the legs still visible under the bedskirt, but the bed was about an inch too low to fit underbed storage containers! Not being able to store much under the bed was a huge inconvenience and after tripping over these containers in our walk-in closet for far too long I decided to make my own bed risers and fix the issue once and for all. | This post contains affiliate links |
Now this isn't exactly a glamorous or high-end project, but I think you'll agree that the Before and Afters speak for themselves - it's a huge improvement over what was there and helps fit more under the bed for critical storage.
The wrinkly, too-short bedskirt shows the ugly metal legs and the limited storage underneath.
Materials:
ruler
chop saw or handsaw
2x4 lumber
1x5 lumber (or whatever size wood will cover the legs of your bed + the thickness of the 2x4)
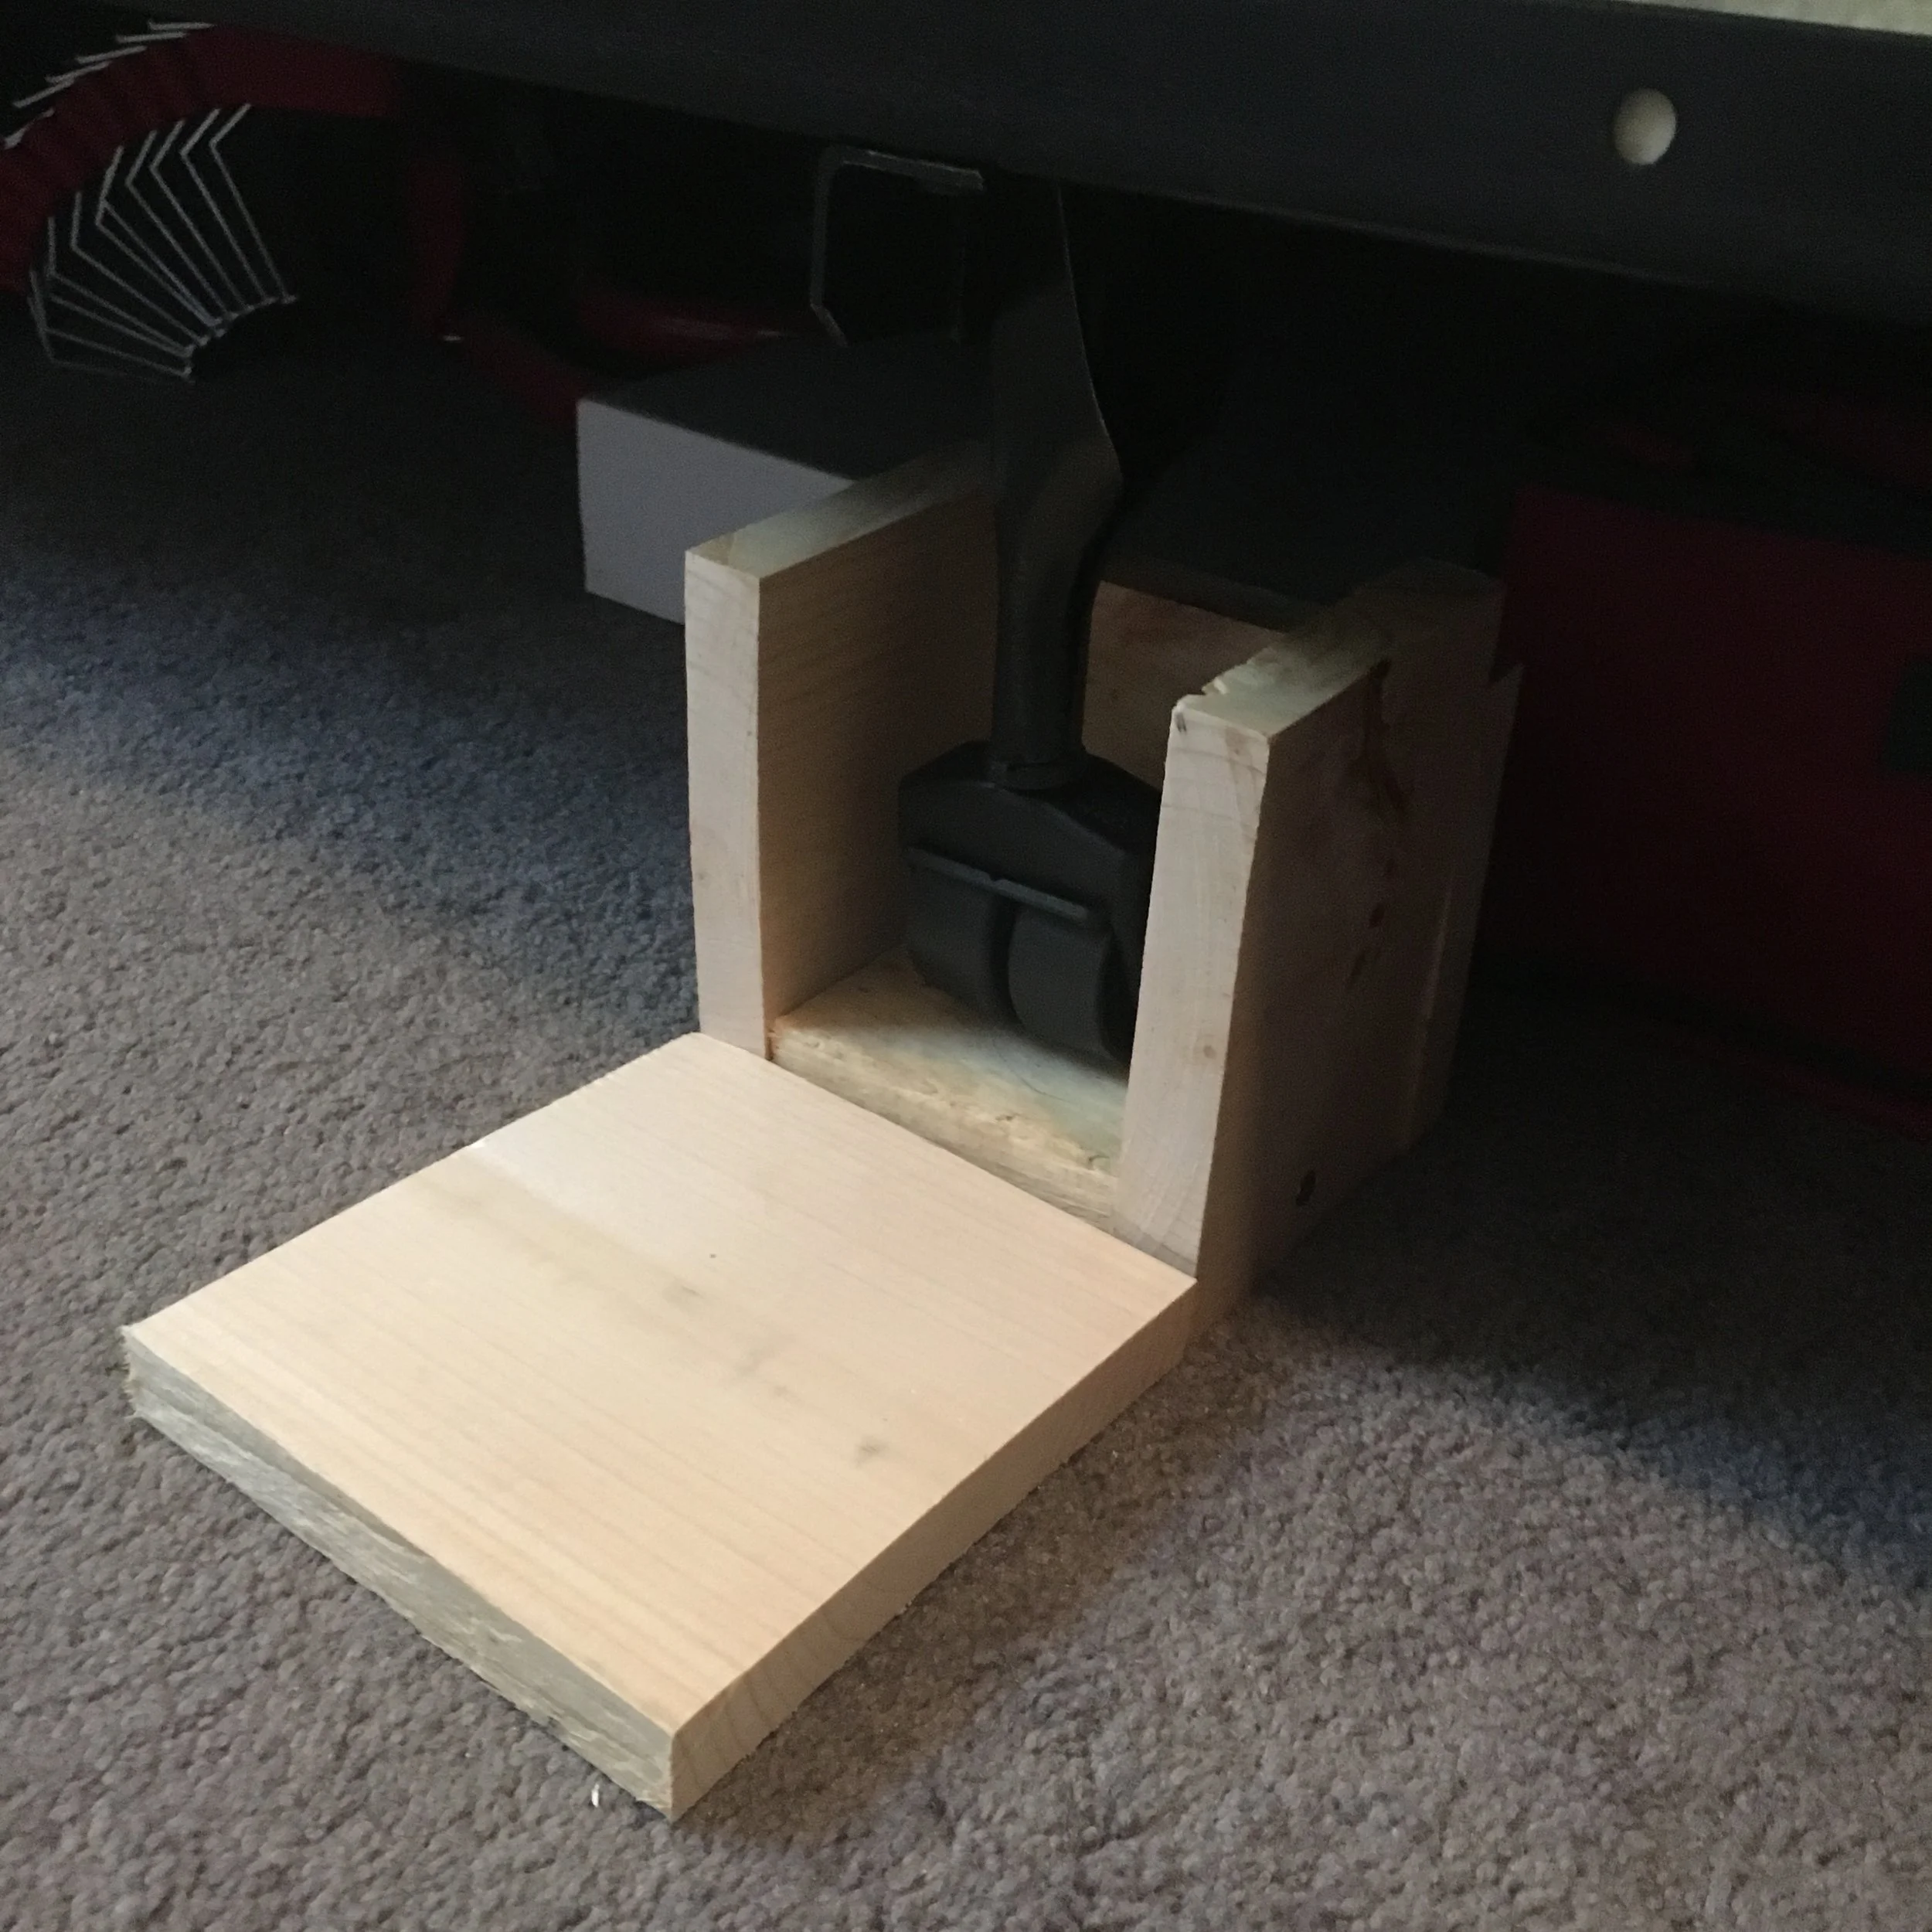
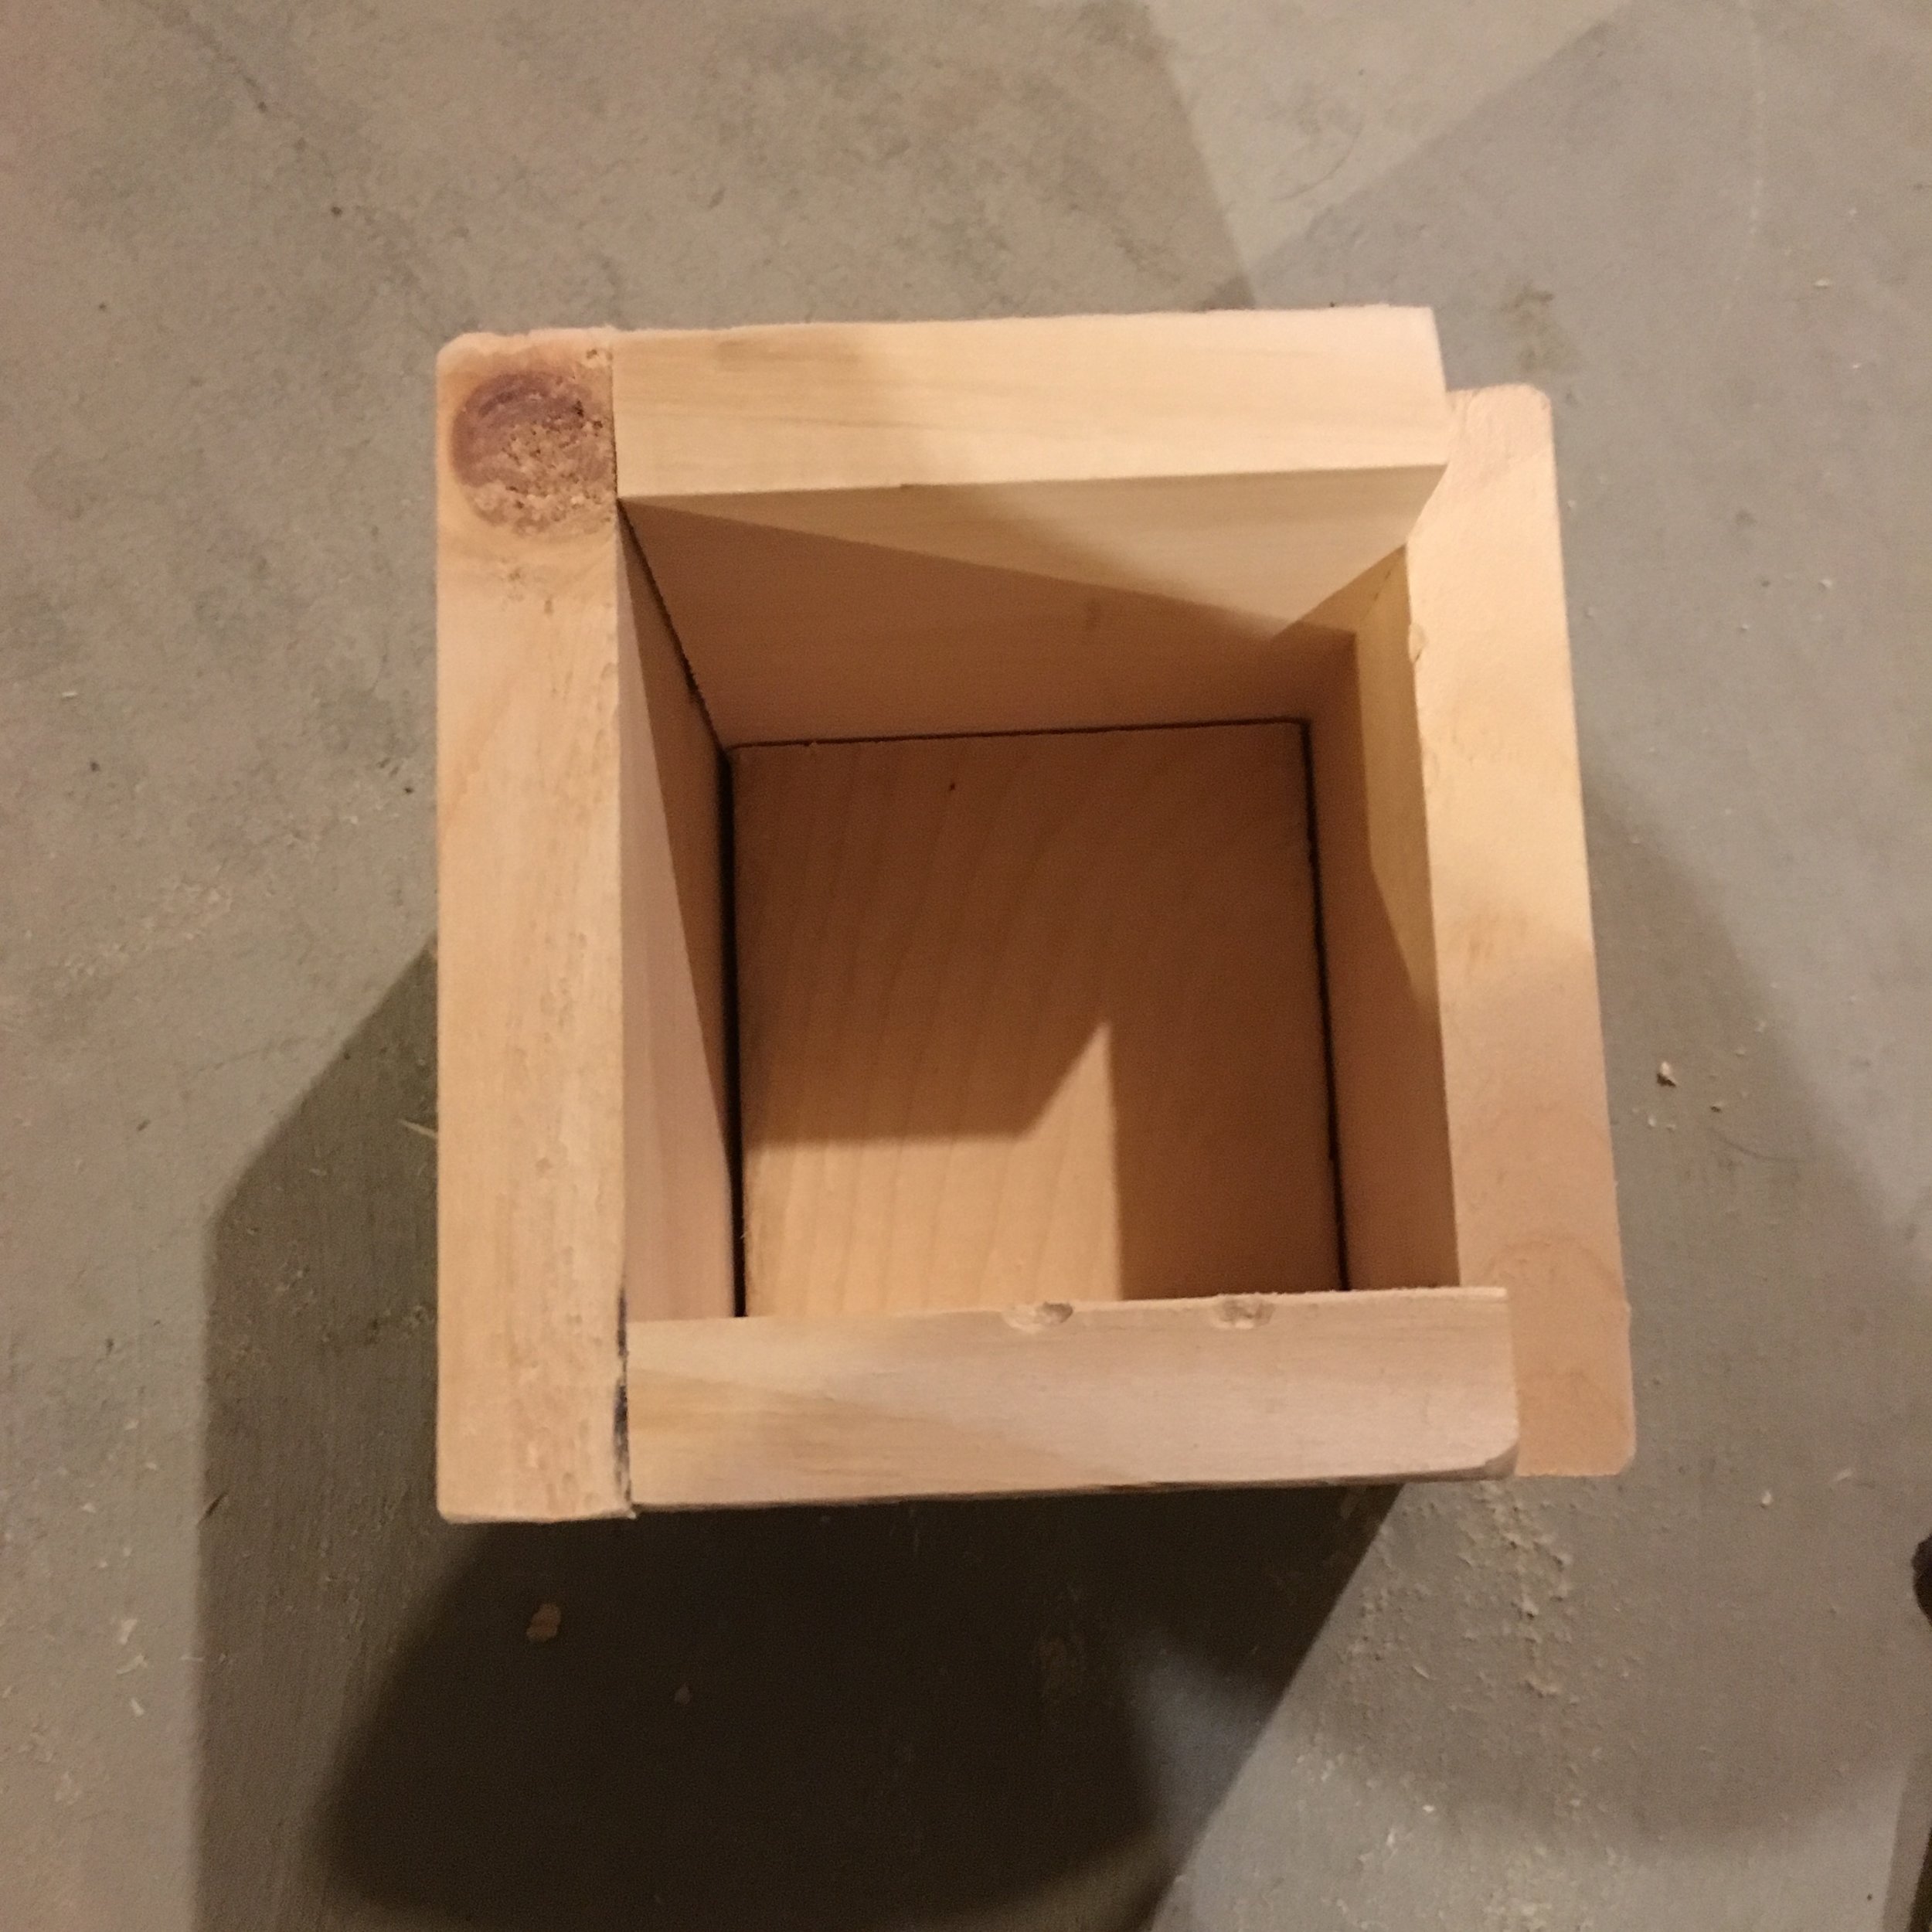
First measure the height of the legs of the bed (in our case the back side of the leg has a support bracket which is why you'll see the back side of our risers are slightly shorter) and add this height to 1.5 (the actual thickness of a 2x4). This is the height your side boards will be for the bed riser. For us it came to about 5 inches along the front three sides and 4 inches in the back.
Next cut your 2x4 to size to fit comfortably under the legs of your bed. Then cut all the side pieces to size, creating a box around the 2x4 base.
Before assembling, it's a good idea to lay it out under one of the legs of the bed to make sure everything fits properly (as you can see from the "cut-away" example I have below). Here you can see how the leg sits on the 2x4 base with all the side pieces around it.
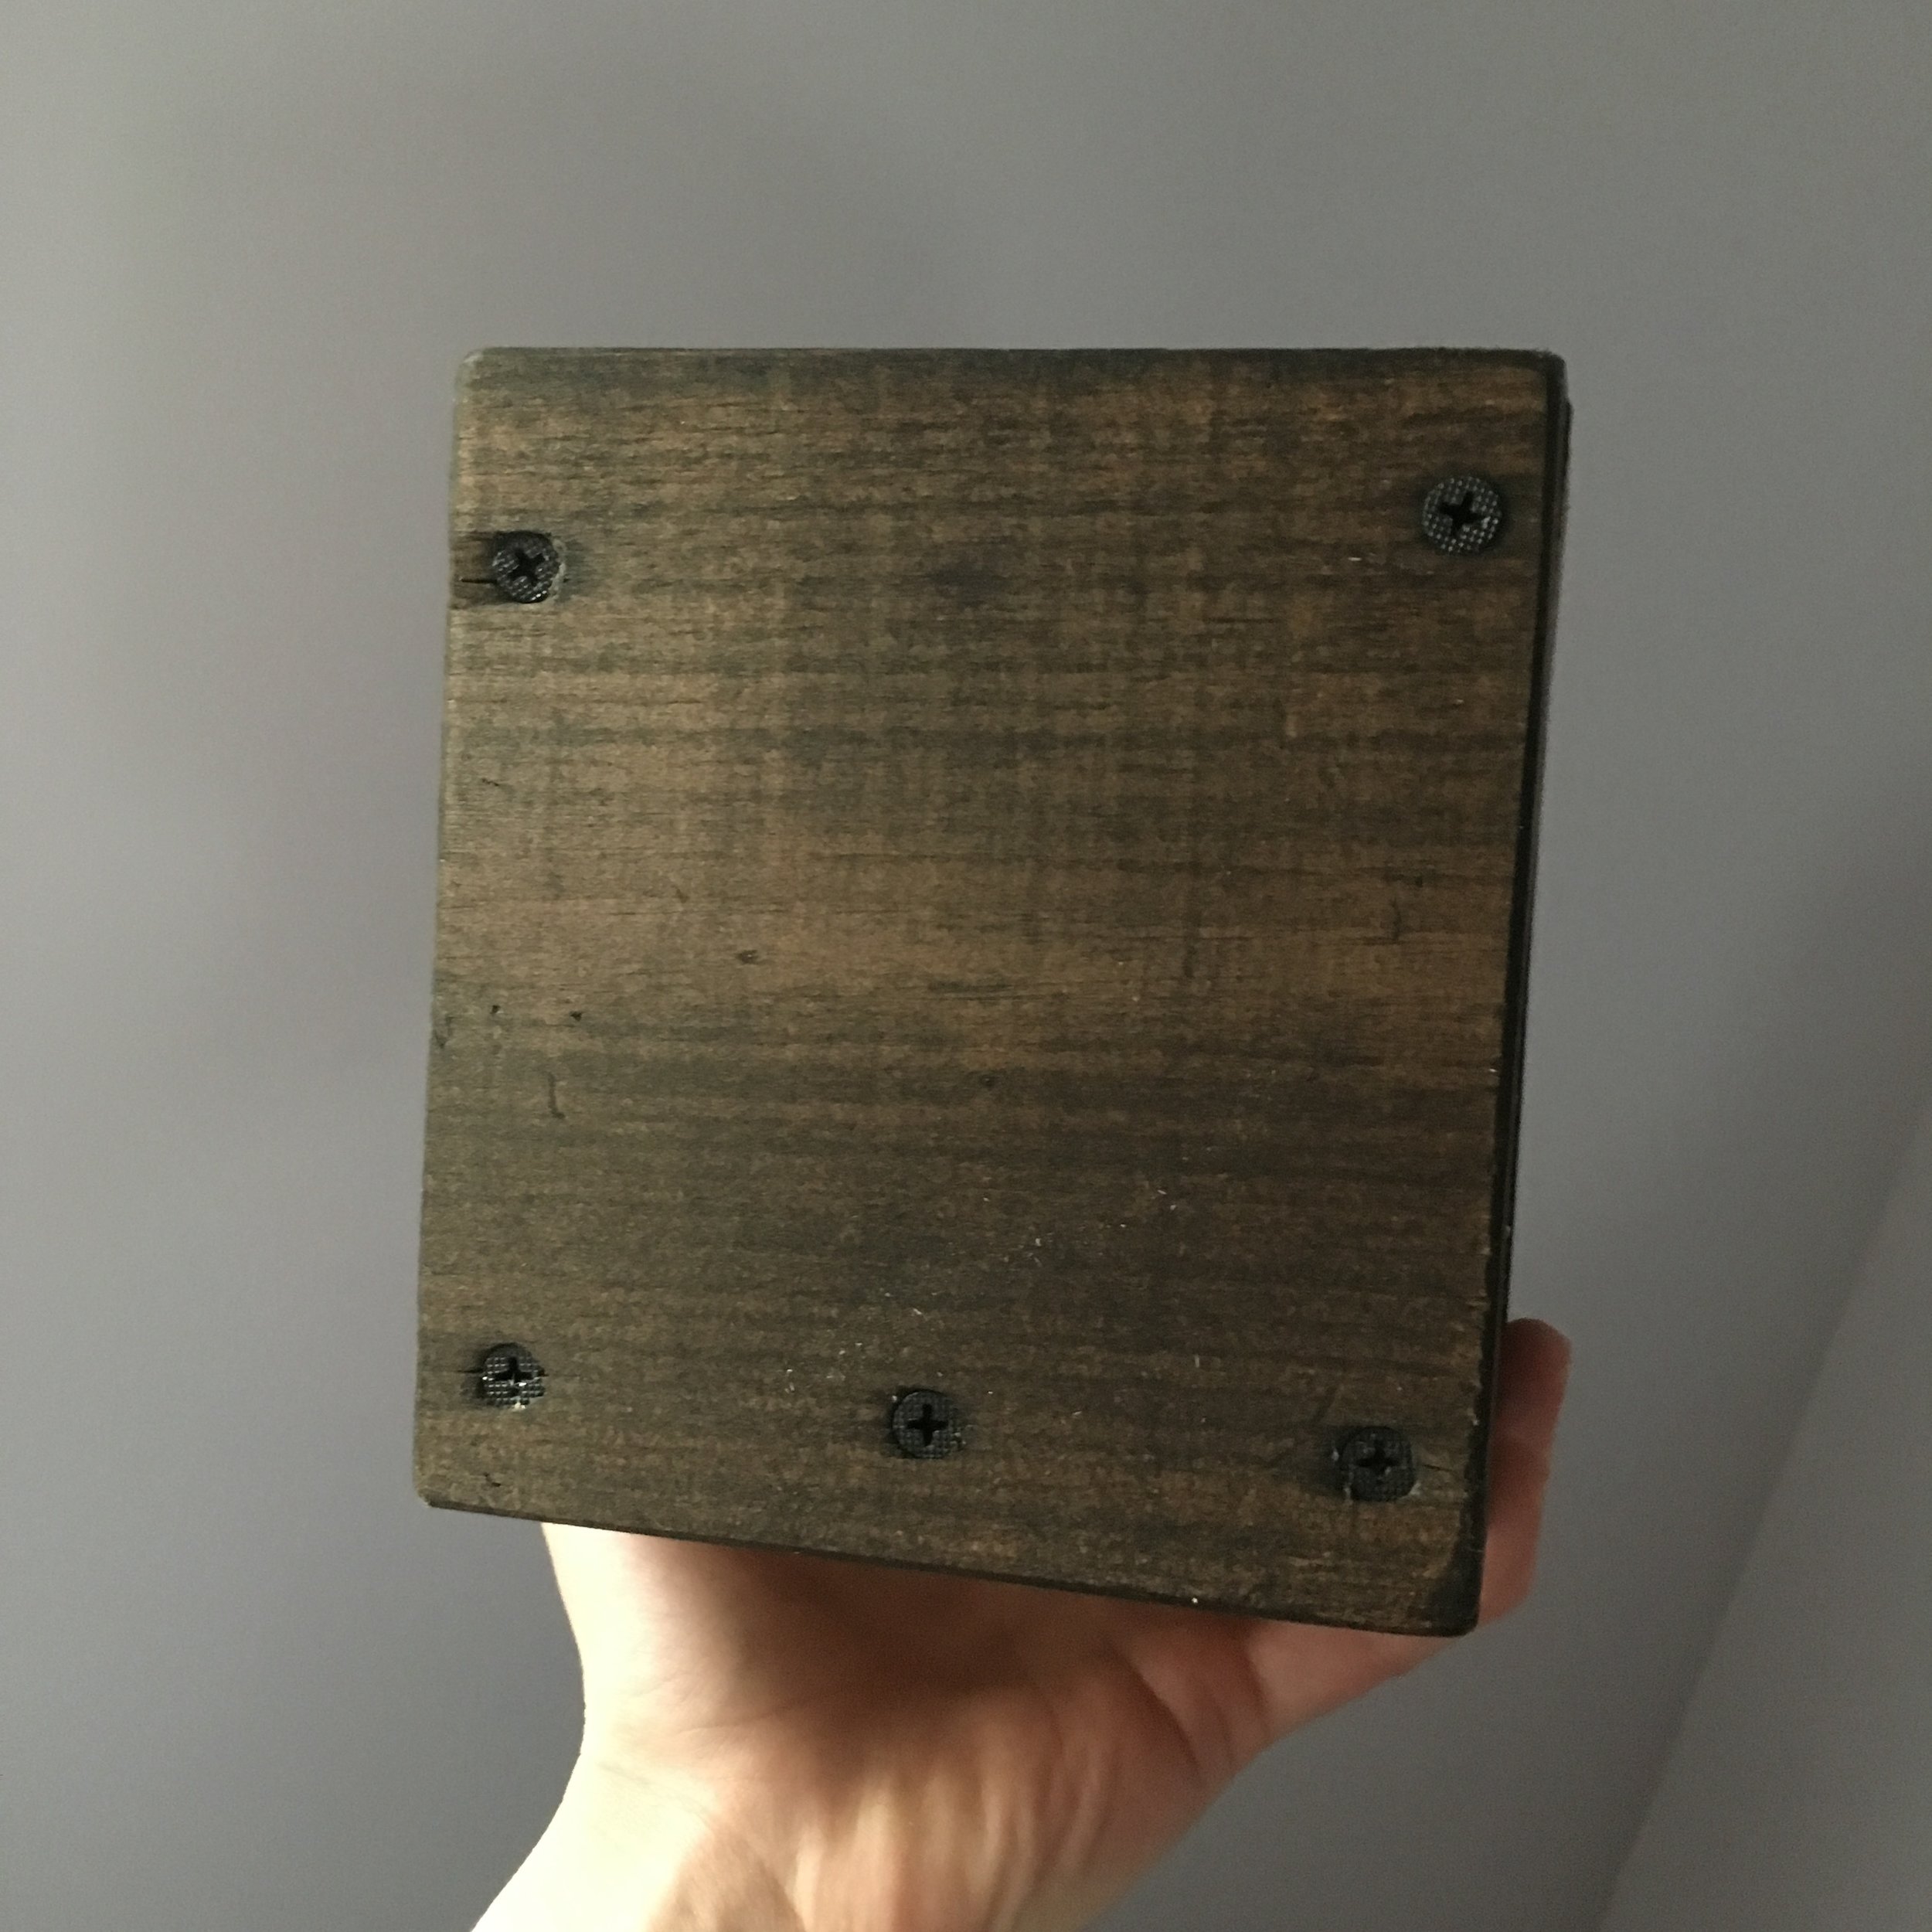
Once you have all your pieces cut to size, pre-drill, wood glue, and screw everything together. We used black screws so they would blend in better with the dark stain we chose. Make sure everything is attached sturdily then sand and stain/paint in the color of your choosing. We went with a dark stain since the rest of our bedroom set is a darker wood.
After everything was dry, I had my husband help me by picking up one corner of the bed at a time so I could place a riser under each leg. I also purchased a longer bedskirt that better fit the new height of the bed. These risers aren't the most beautiful DIY project but they're pretty un-noticeable with the longer bedskirt - and the best part? Now I can finally fit the storage totes under our bed!
Disclaimer: Always make sure the risers you build are appropriate for your bed and your situation. Make sure it's safe and sturdy! Use at your own risk.
Having a baby really changes your hair, and after having two babies my hair is nothing like it used to be. Hormones have totally changed the color and texture of my hair... in the past few years it's gone from bright blonde and wavy to ten shades darker and stick straight. After our second baby my hair definitely needed some recharging and I was excited to try something new. | This post shares an honest review of products provided by Maple Holistics |
Recharging Postpartum Hair
Give your Hormones a Chance to Settle Down
Those first two months after baby, your hormones are raging and just about anything goes. Don't be surprised if your hair suddenly gets super dry or super greasy, or starts shedding like crazy. As frustrating as those first two months can be (and for so many reasons - dealing with a new baby and a healing body isn't easy!), try to roll with these hair hiccups and know that a lot of it will improve or get more predictable once your hormones settle down.
Get a Haircut
Getting a new haircut or even just a trim can really help refresh your hair and give you a boost of confidence. Getting rid of those split ends will give you a fresh start to learn about your new post-baby hair.
Try a New Shampoo/Conditioner
With all the new things going on with your hair, your old shampoo routine just might not cut it anymore. Now's a great time to switch it up and try something new! My hair really needed some perking up so I was super excited when Maple Holistics reached out to me and asked if I wanted to try their Tea Tree Shampoo and Conditioner.
Maple Holistics uses all-natural ingredients, and is both chemical free and cruelty free, which I love. Using their tea tree shampoo gives you a cool, tingling sensation on your scalp that really helps you and your hair feel more refreshed and awake. Afterwards my hair felt clean and lighter - I loved that the conditioner didn't leave it feeling heavy!
If you want to try Maple Holitics' Tea Tree Shampoo or another one of their products, make sure to check out their Free Samples Program.
- I received this item for review from Maple Holistics but all opinions expressed are my own. Please read our full Disclosure Policy for more information -
We're huge Amazon fans in this house - living out in the boonies like we do means that a lot of home and grocery shopping is done online and you can't beat Amazon for their selection and Prime shipping! | This page contains affiliate links |
I've created a page on Amazon to showcase some of our favorite Amazon finds - everything from home, to beauty, to baby and kid items. Items with a "speech bubble" in the corner means I've added a note about that item, just give it a click to see what I have to say about it.
Feel free to check our Favorite Amazon Finds often since I'll be continuing to add more items as they come up.