Easy DIY Wooden Bed Risers
In our master bedroom our bed sits on a standard metal bed frame. Not only were the legs still visible under the bedskirt, but the bed was about an inch too low to fit underbed storage containers! Not being able to store much under the bed was a huge inconvenience and after tripping over these containers in our walk-in closet for far too long I decided to make my own bed risers and fix the issue once and for all.
| This post contains affiliate links |

Now this isn't exactly a glamorous or high-end project, but I think you'll agree that the Before and Afters speak for themselves - it's a huge improvement over what was there and helps fit more under the bed for critical storage.
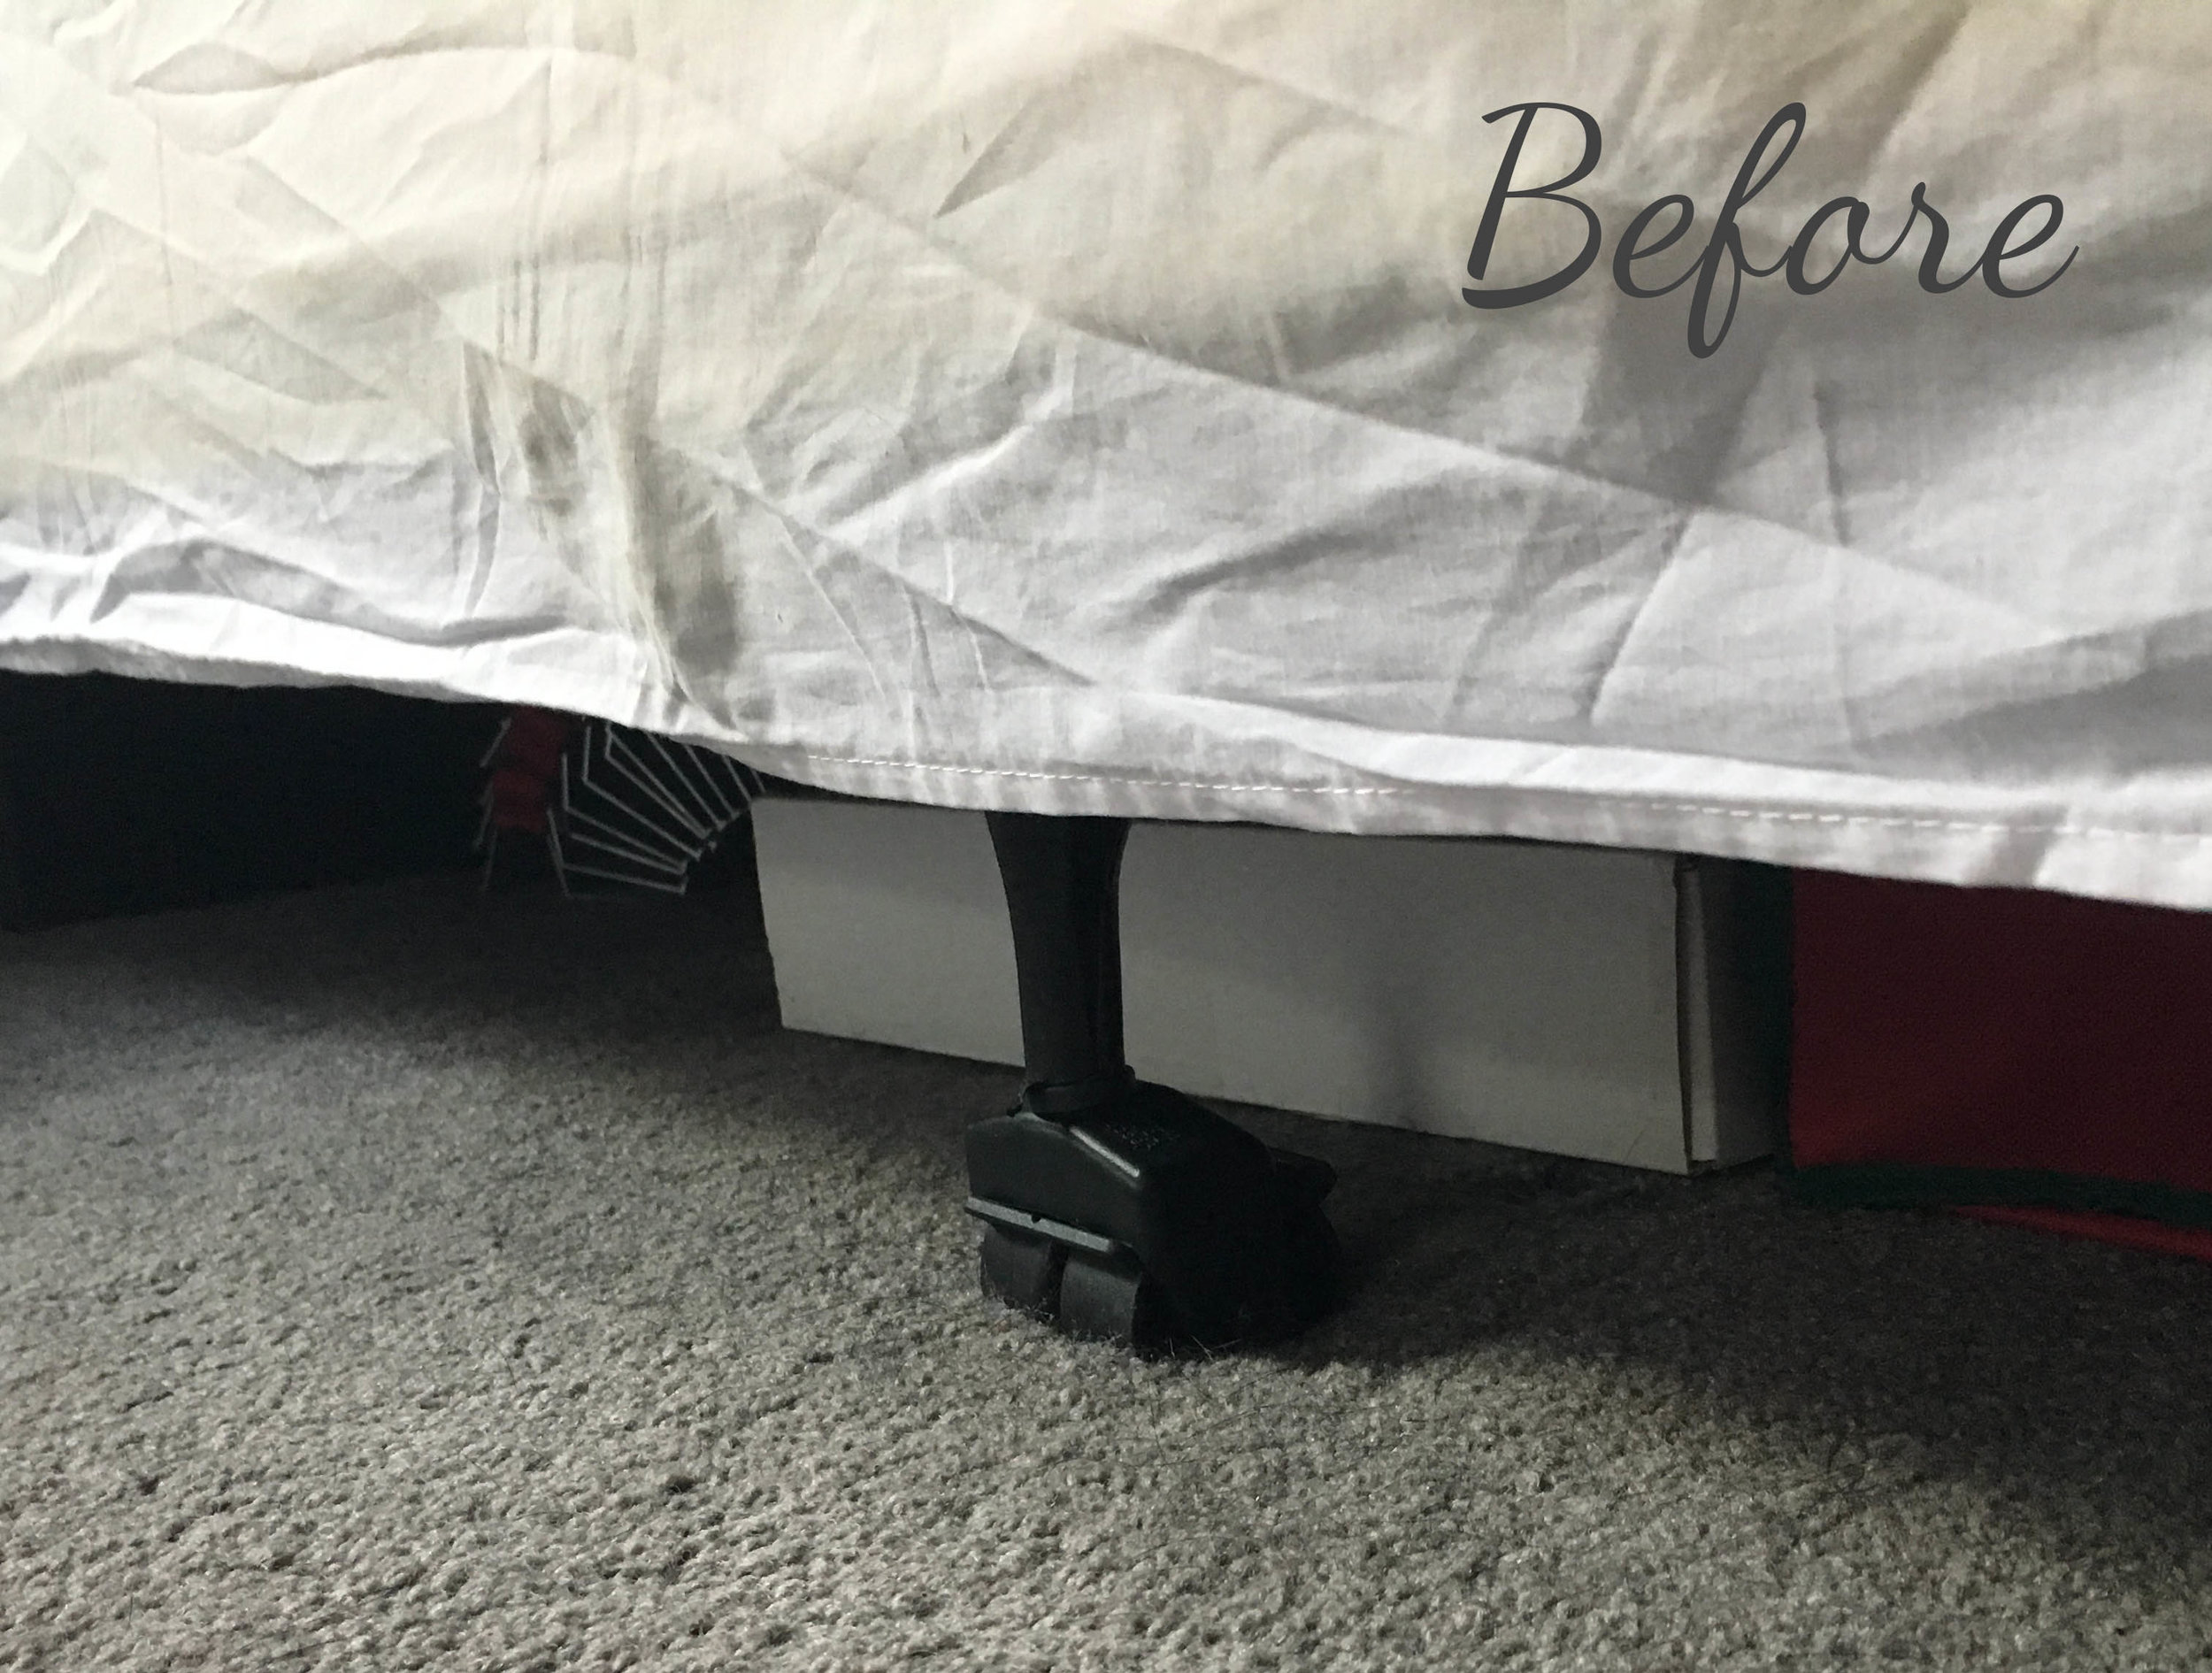
The wrinkly, too-short bedskirt shows the ugly metal legs and the limited storage underneath.
Materials:
- ruler
- chop saw or handsaw
- 2x4 lumber
- 1x5 lumber (or whatever size wood will cover the legs of your bed + the thickness of the 2x4)
- woodglue
- screws
- drill/screw gun
- sandpaper
- stain or paint
How-To:

First measure the height of the legs of the bed (in our case the back side of the leg has a support bracket which is why you'll see the back side of our risers are slightly shorter) and add this height to 1.5 (the actual thickness of a 2x4). This is the height your side boards will be for the bed riser. For us it came to about 5 inches along the front three sides and 4 inches in the back.
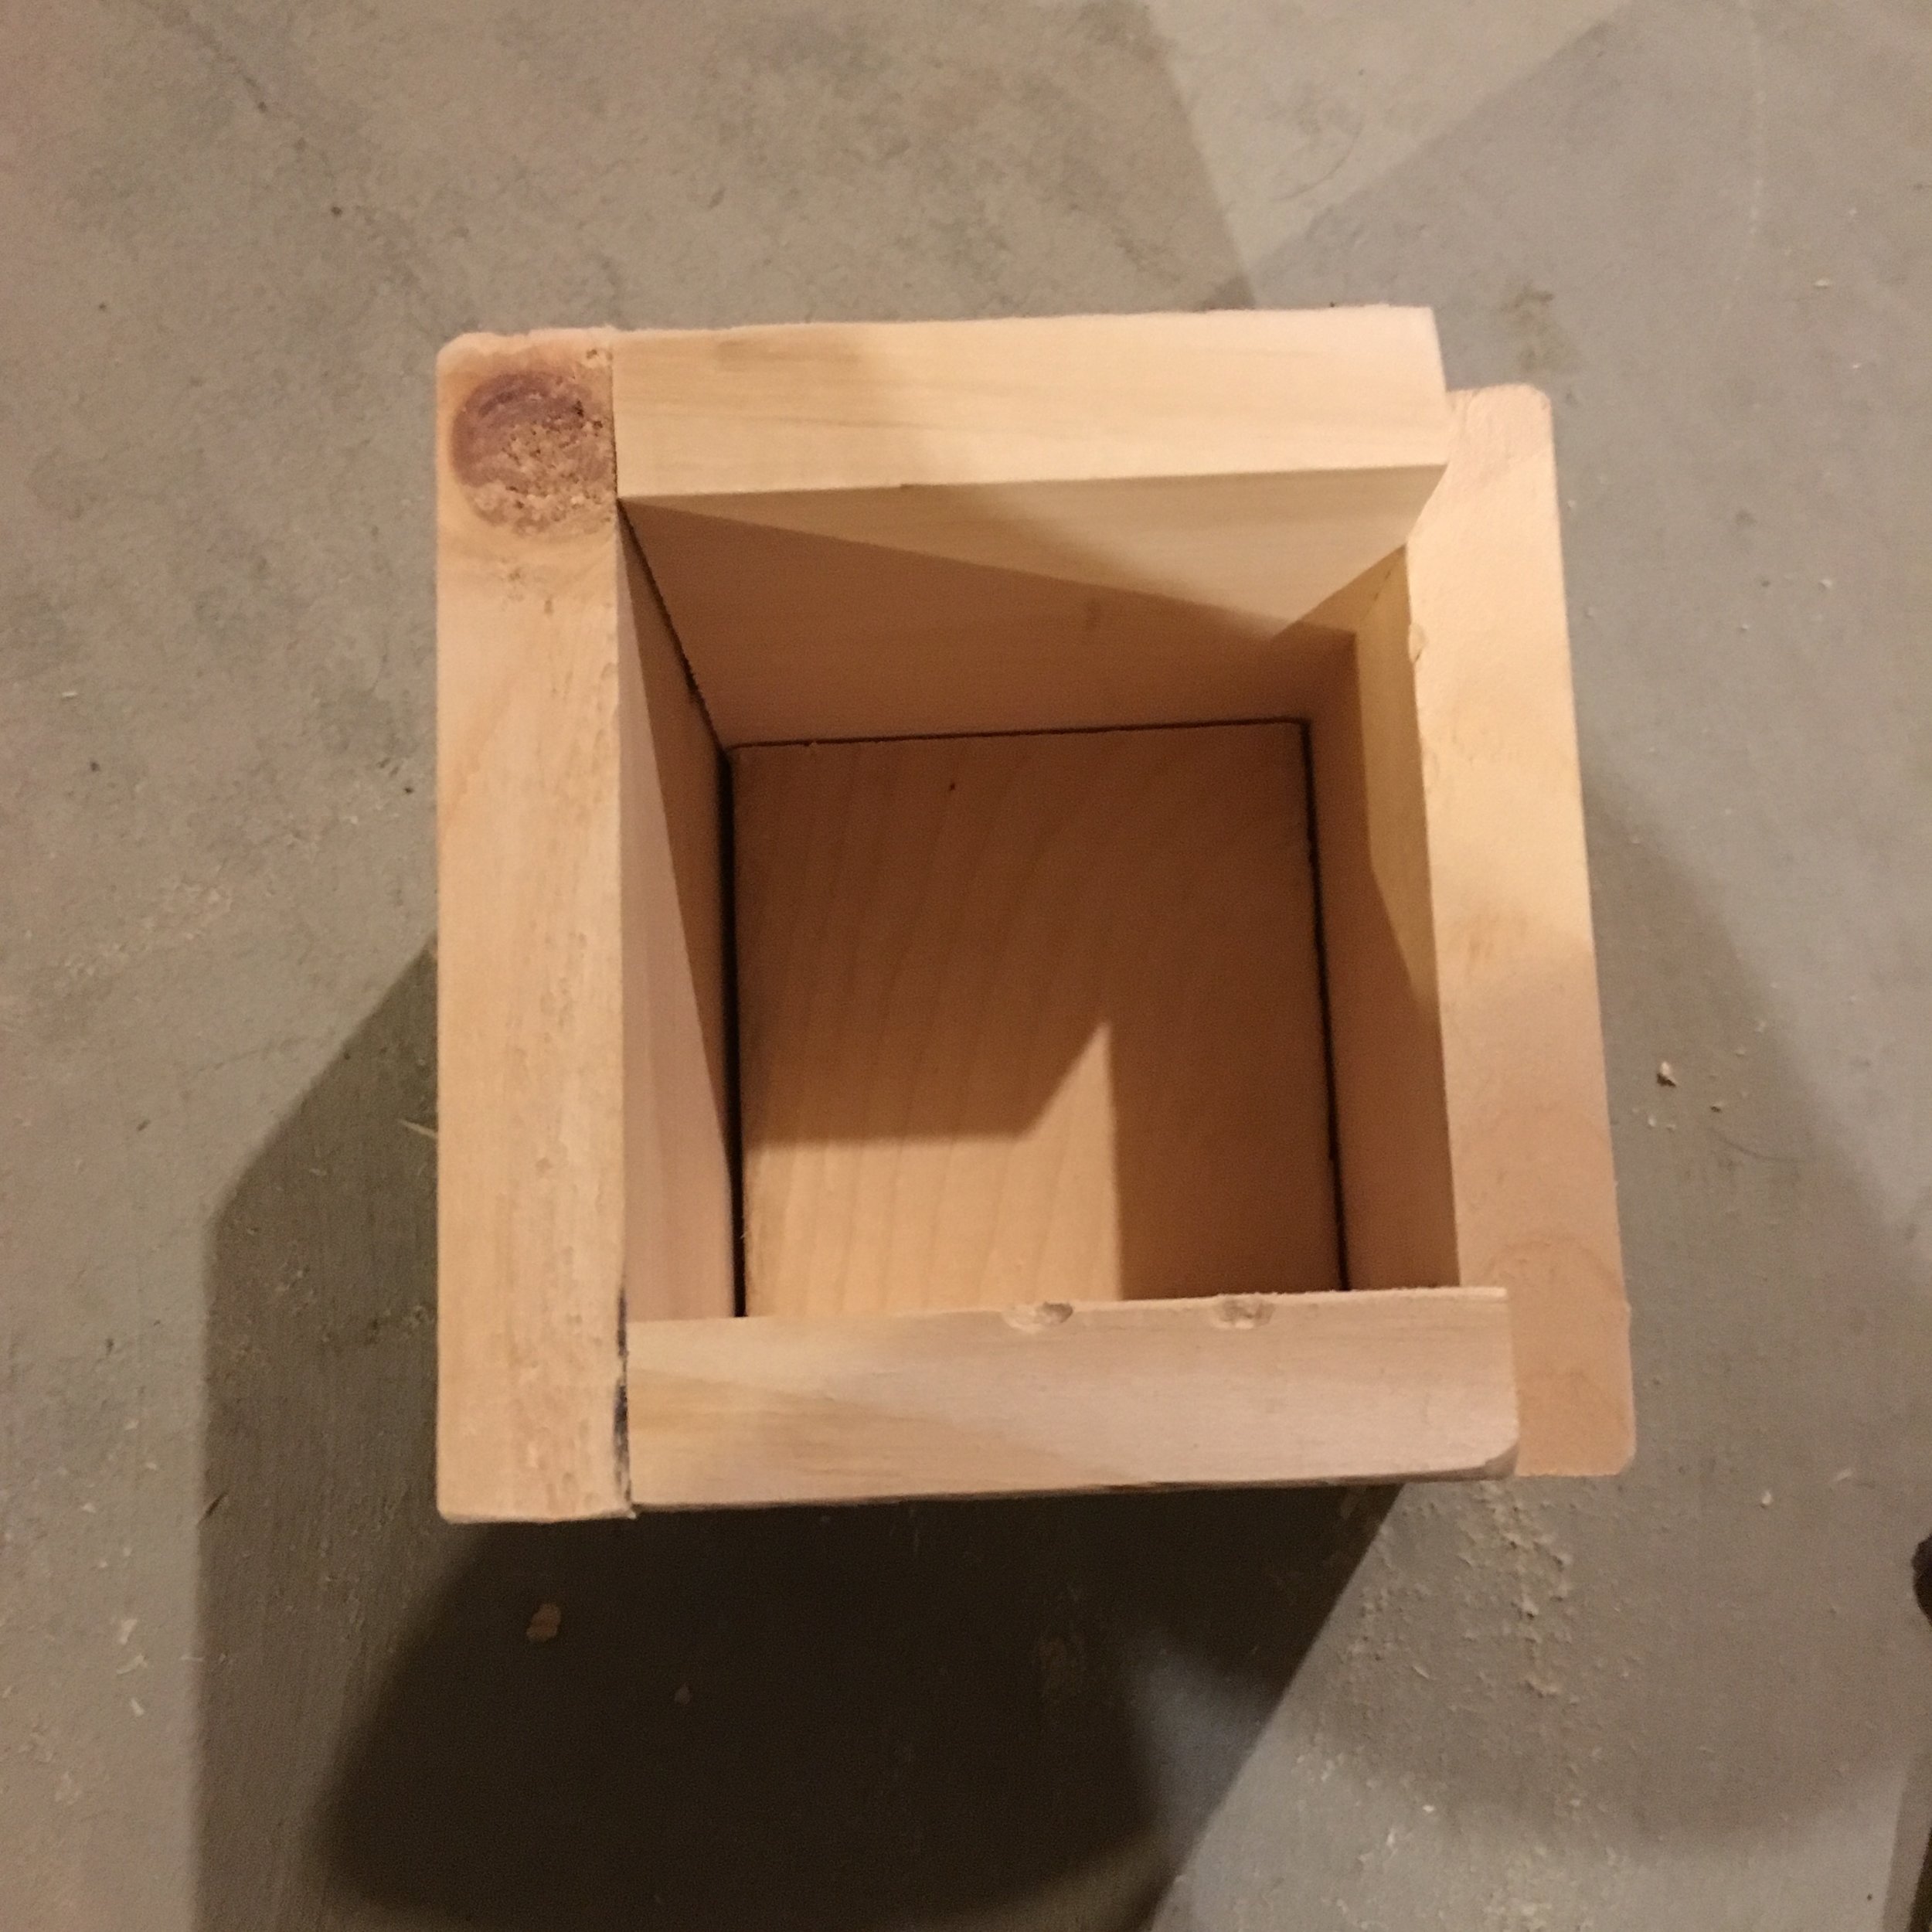
Next cut your 2x4 to size to fit comfortably under the legs of your bed. Then cut all the side pieces to size, creating a box around the 2x4 base.
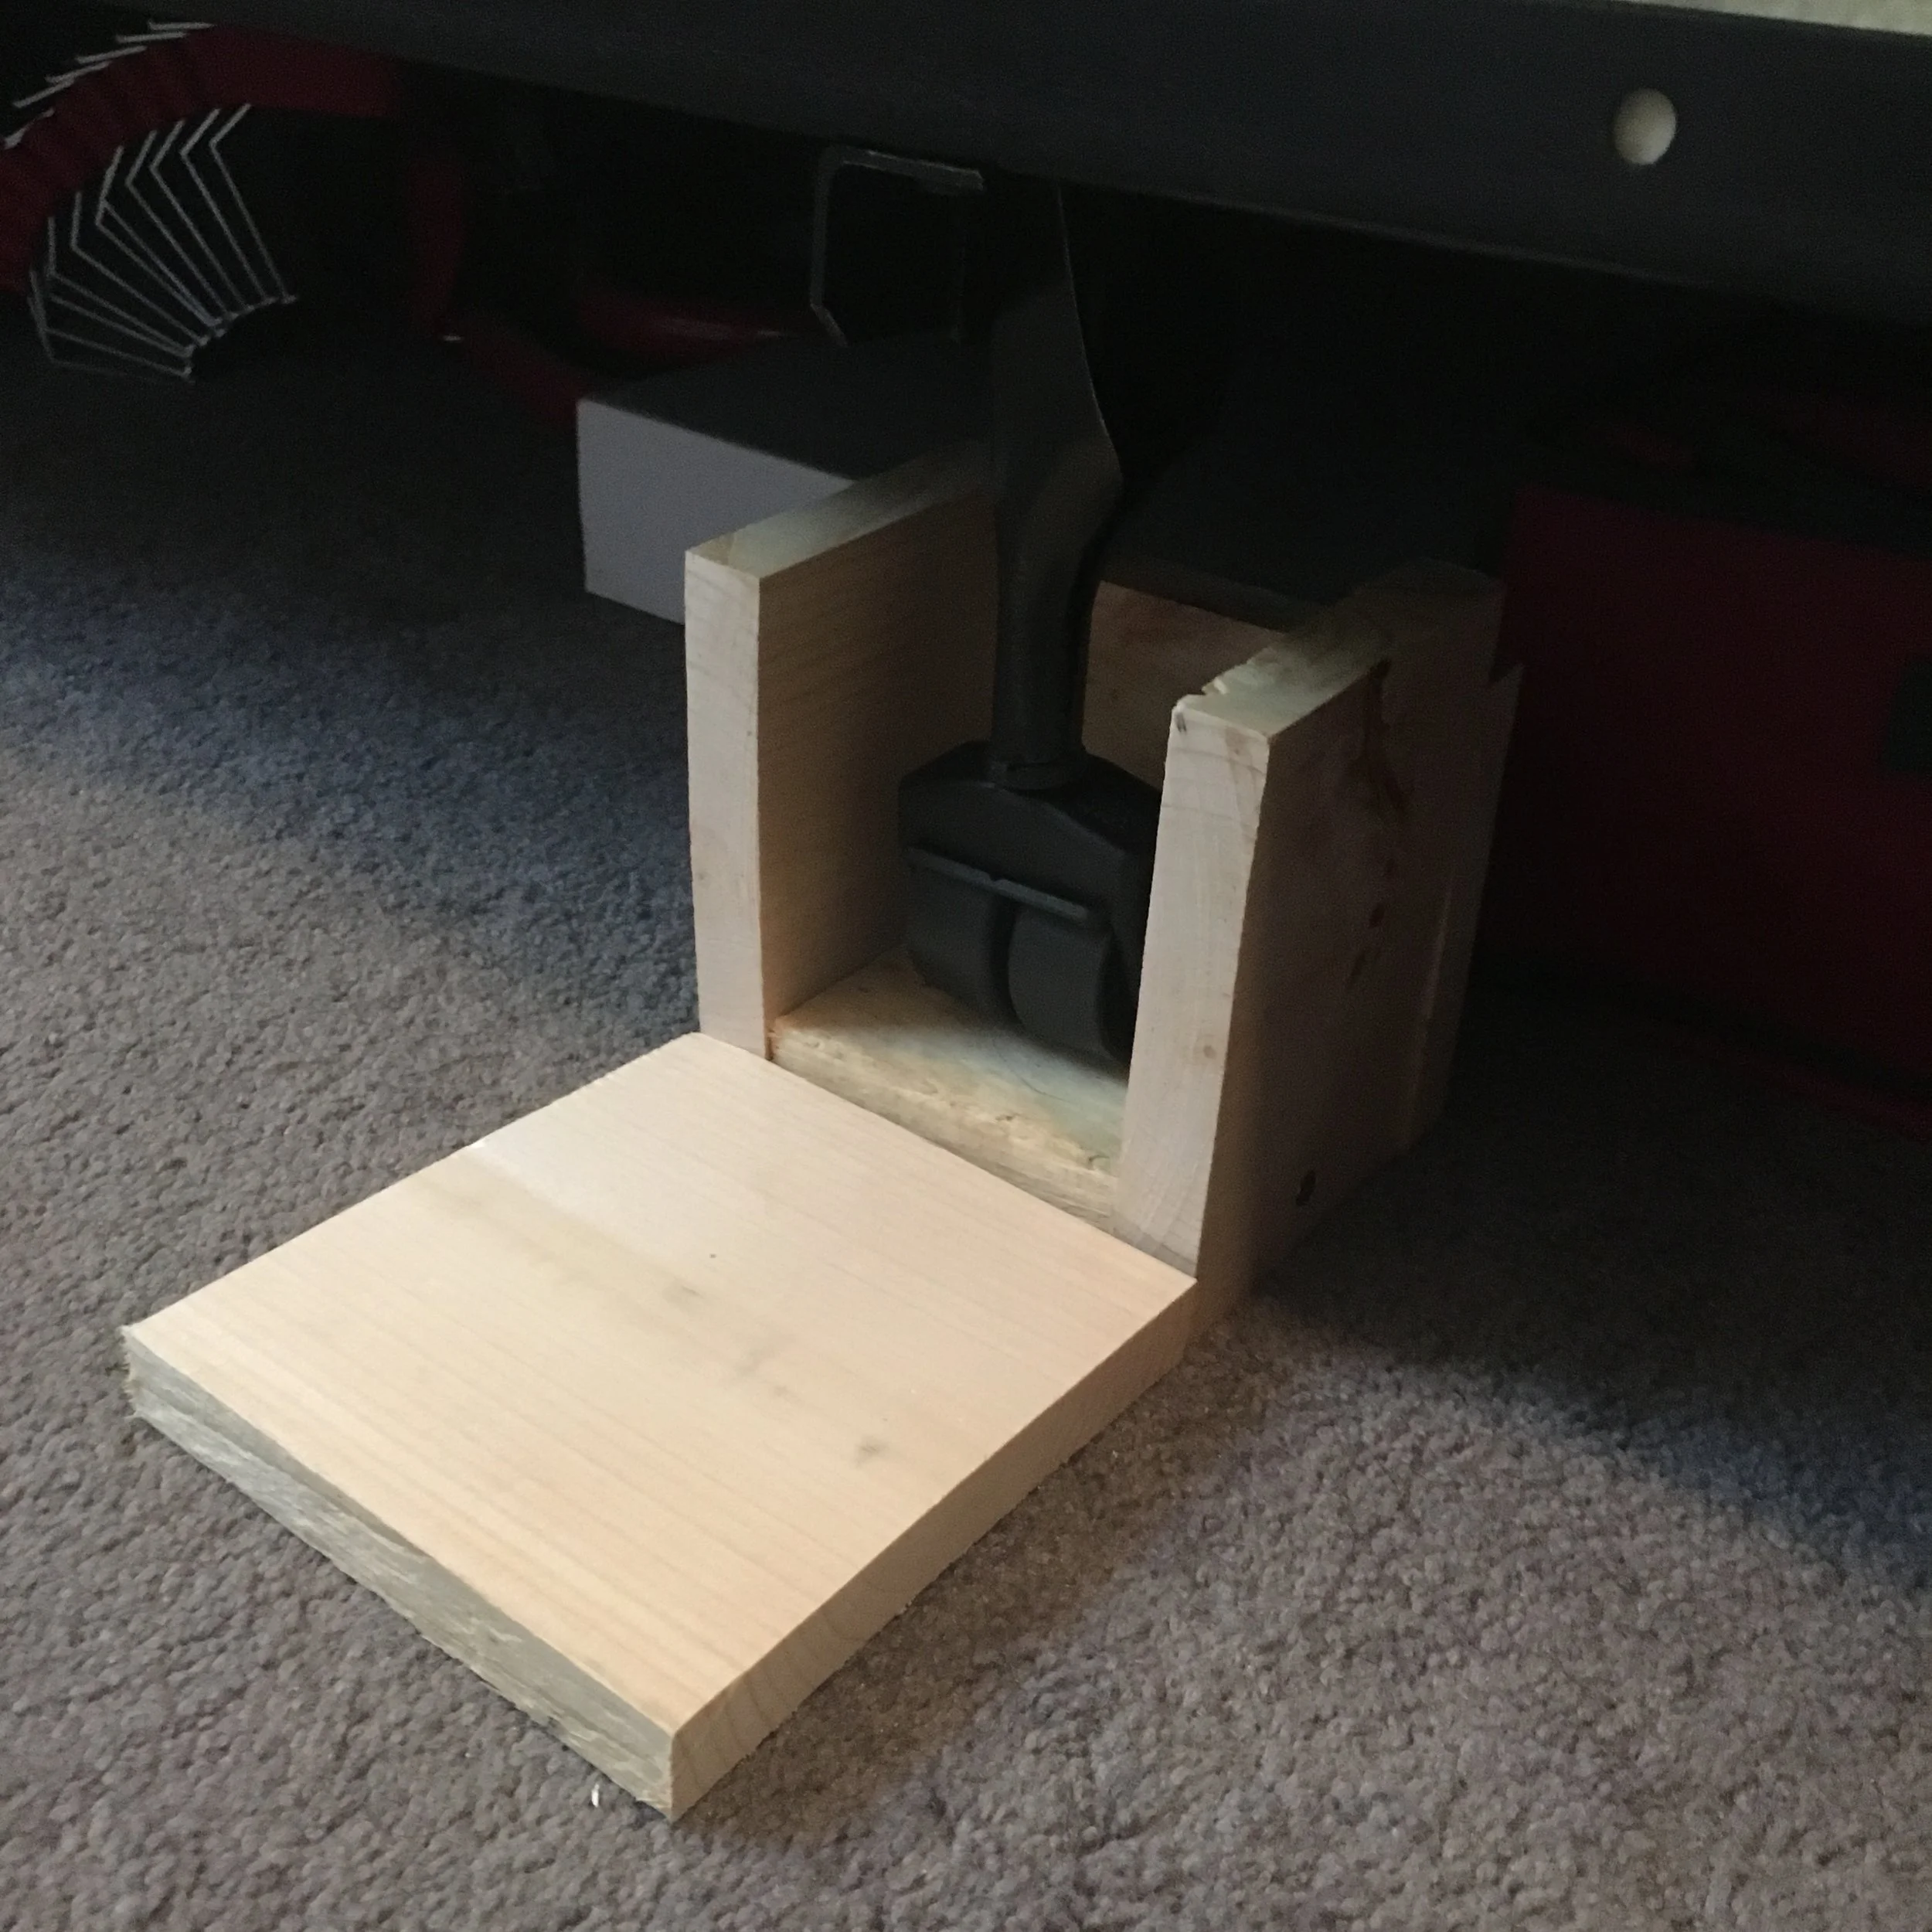
Before assembling, it's a good idea to lay it out under one of the legs of the bed to make sure everything fits properly (as you can see from the "cut-away" example I have below). Here you can see how the leg sits on the 2x4 base with all the side pieces around it.
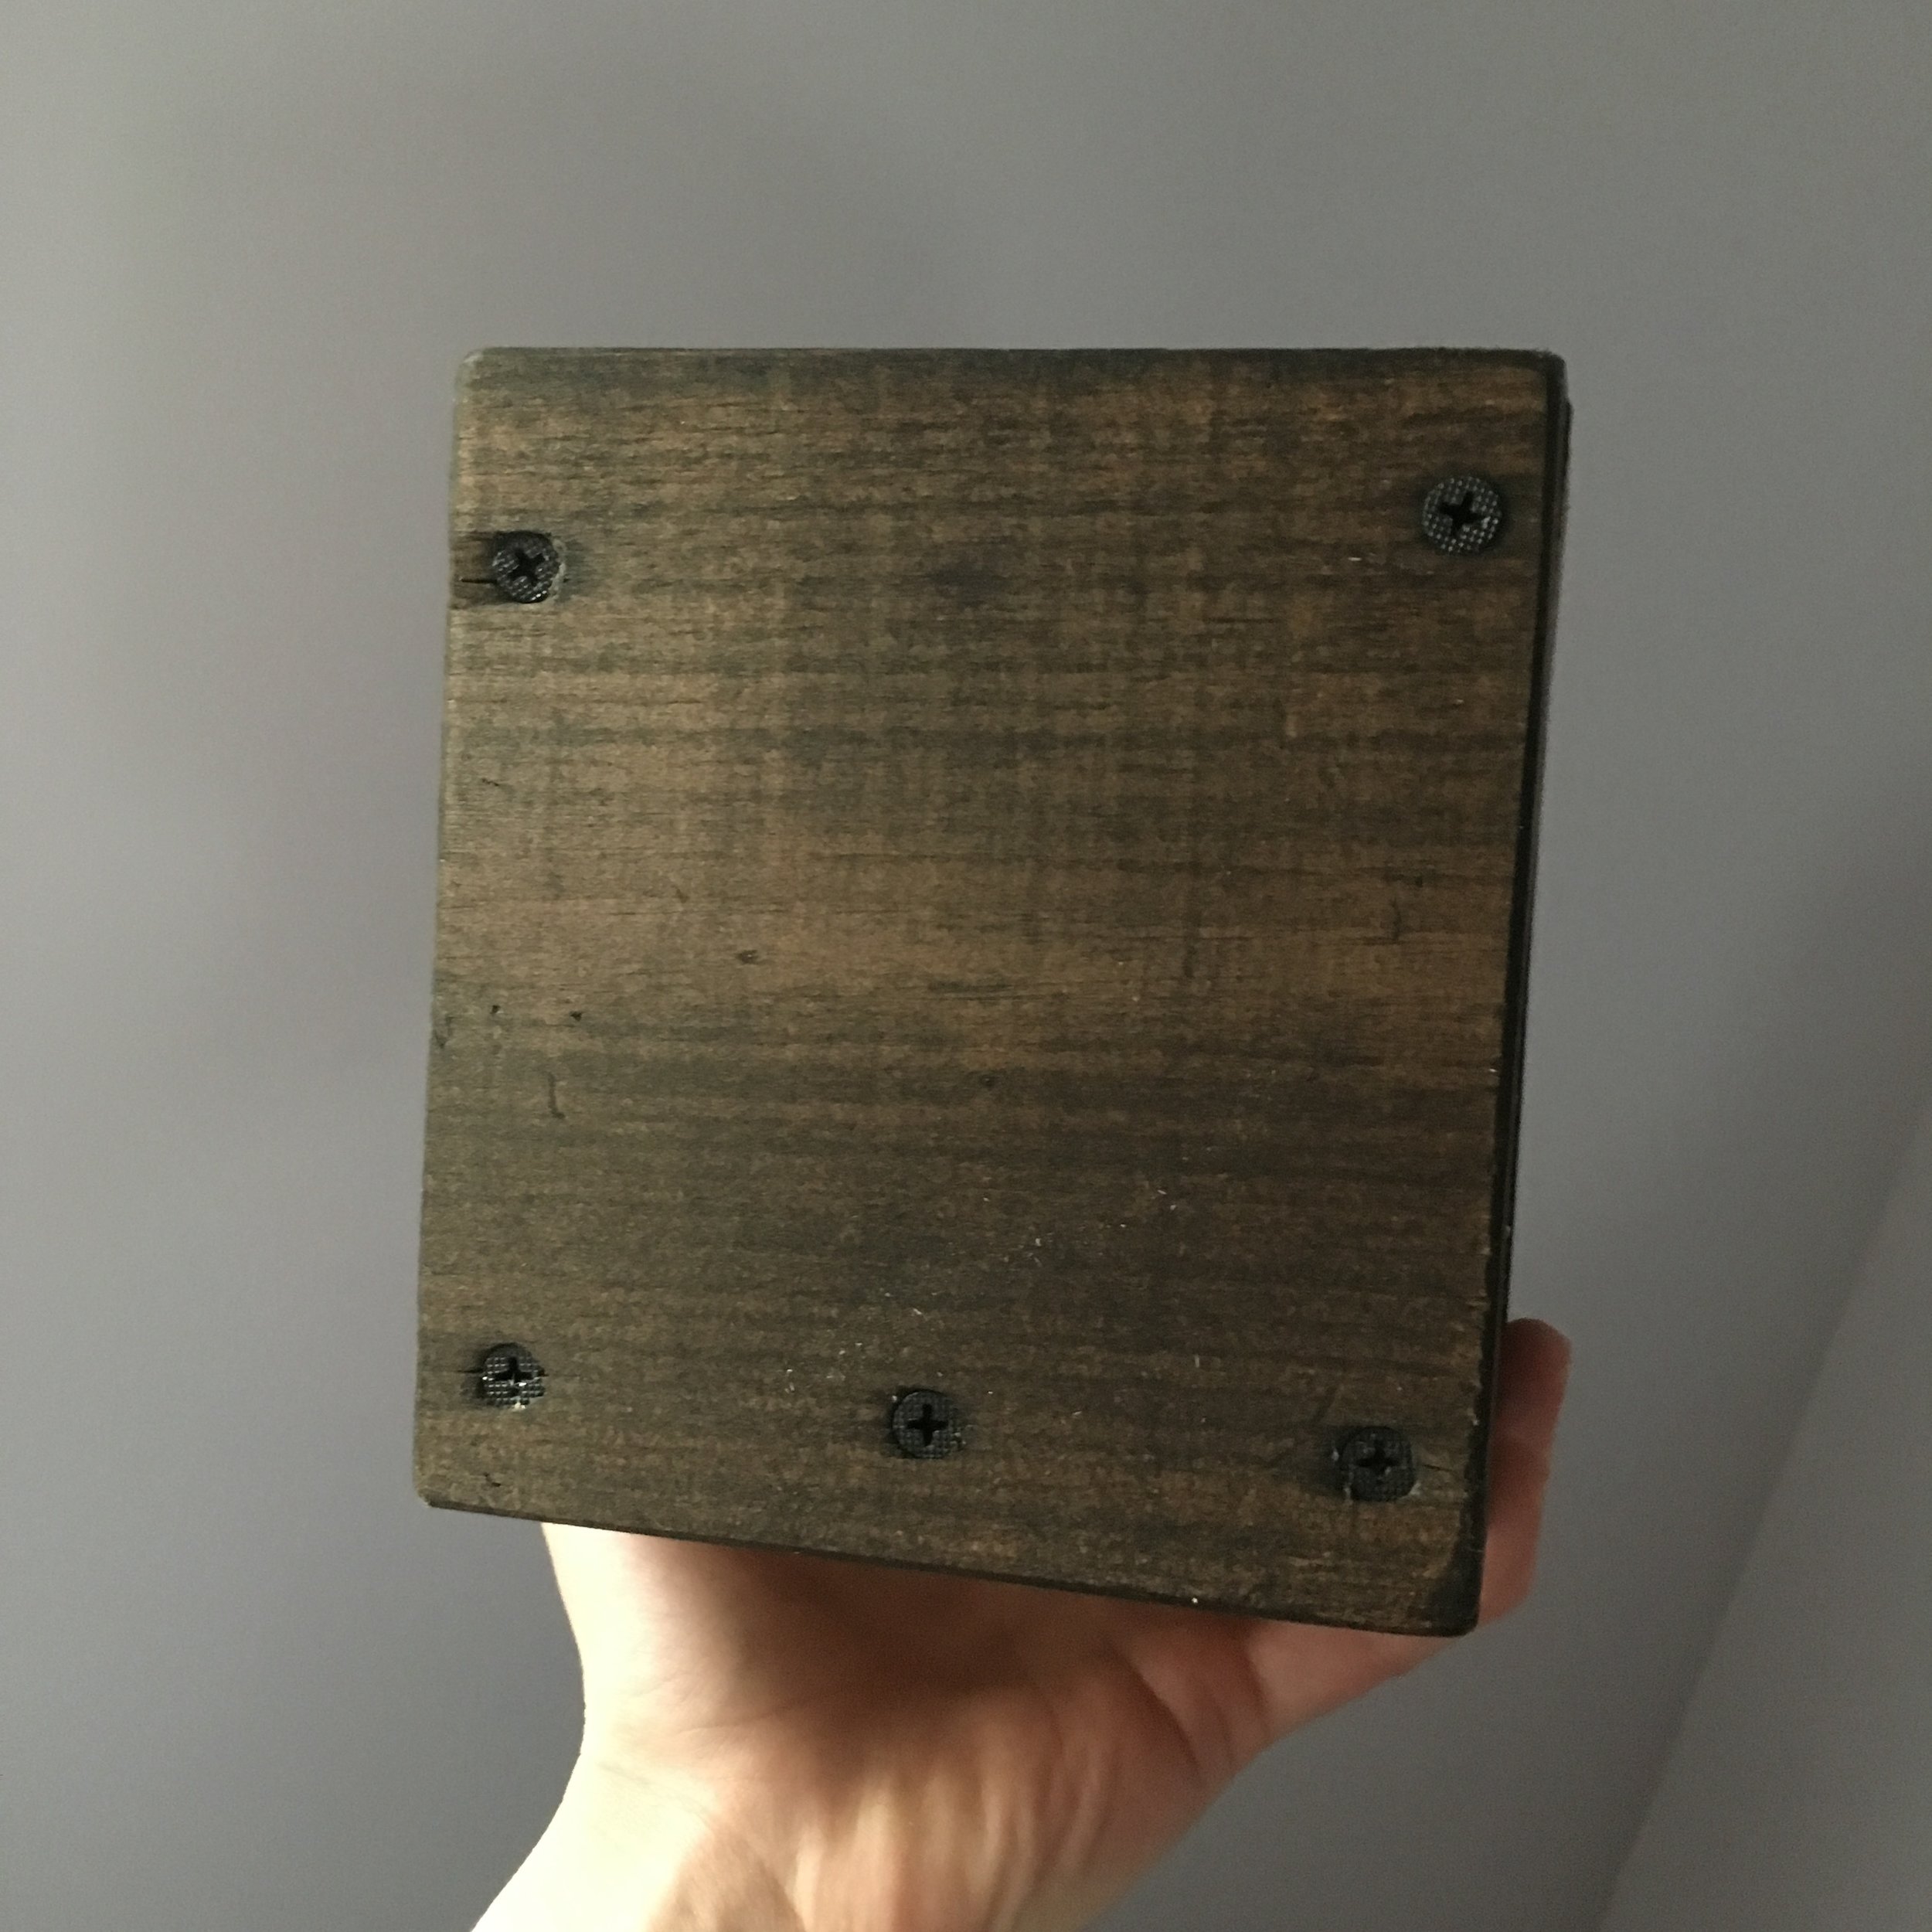
Once you have all your pieces cut to size, pre-drill, wood glue, and screw everything together. We used black screws so they would blend in better with the dark stain we chose. Make sure everything is attached sturdily then sand and stain/paint in the color of your choosing. We went with a dark stain since the rest of our bedroom set is a darker wood.
After everything was dry, I had my husband help me by picking up one corner of the bed at a time so I could place a riser under each leg. I also purchased a longer bedskirt that better fit the new height of the bed. These risers aren't the most beautiful DIY project but they're pretty un-noticeable with the longer bedskirt - and the best part? Now I can finally fit the storage totes under our bed!
Disclaimer: Always make sure the risers you build are appropriate for your bed and your situation. Make sure it's safe and sturdy! Use at your own risk.

Related Posts:


KEEP UP WITH BIRCH LANDING HOME
| Etsy | Facebook | Instagram | Pinterest | Bloglovin' | Hometalk |