How's this for a super-easy project? I love the idea of a monogram on the door of our little girl's room, but wanted to keep it simple and subtle and easy to take down if we decide to change things up.
This project really couldn't be easier. The letter I bought was a pre-painted small white one from Hobby Lobby because I wanted it to be subtle, but it could easily be repainted another color if you wanted it to stand out more.
To hang it, I used some light-weight Command strips so it can easily be removed later if we decide to do something different on the door.
Just love the finishing touch it adds!
KEEP UP WITH BIRCH LANDING HOME
| Etsy | Facebook | Instagram | Pinterest | Bloglovin' | Hometalk |
And don't forget, I'll be sharing an exclusive coupon code for my Etsy shop this week with my newsletter subscribers! So if you haven't already, please sign up for my newsletter by clicking on the button below. I promise I'll never send more than one email per week and will never share your information. Thanks so much!
KEEP UP WITH BIRCH LANDING HOME
| Etsy | Facebook | Instagram | Pinterest | Bloglovin' | Hometalk |
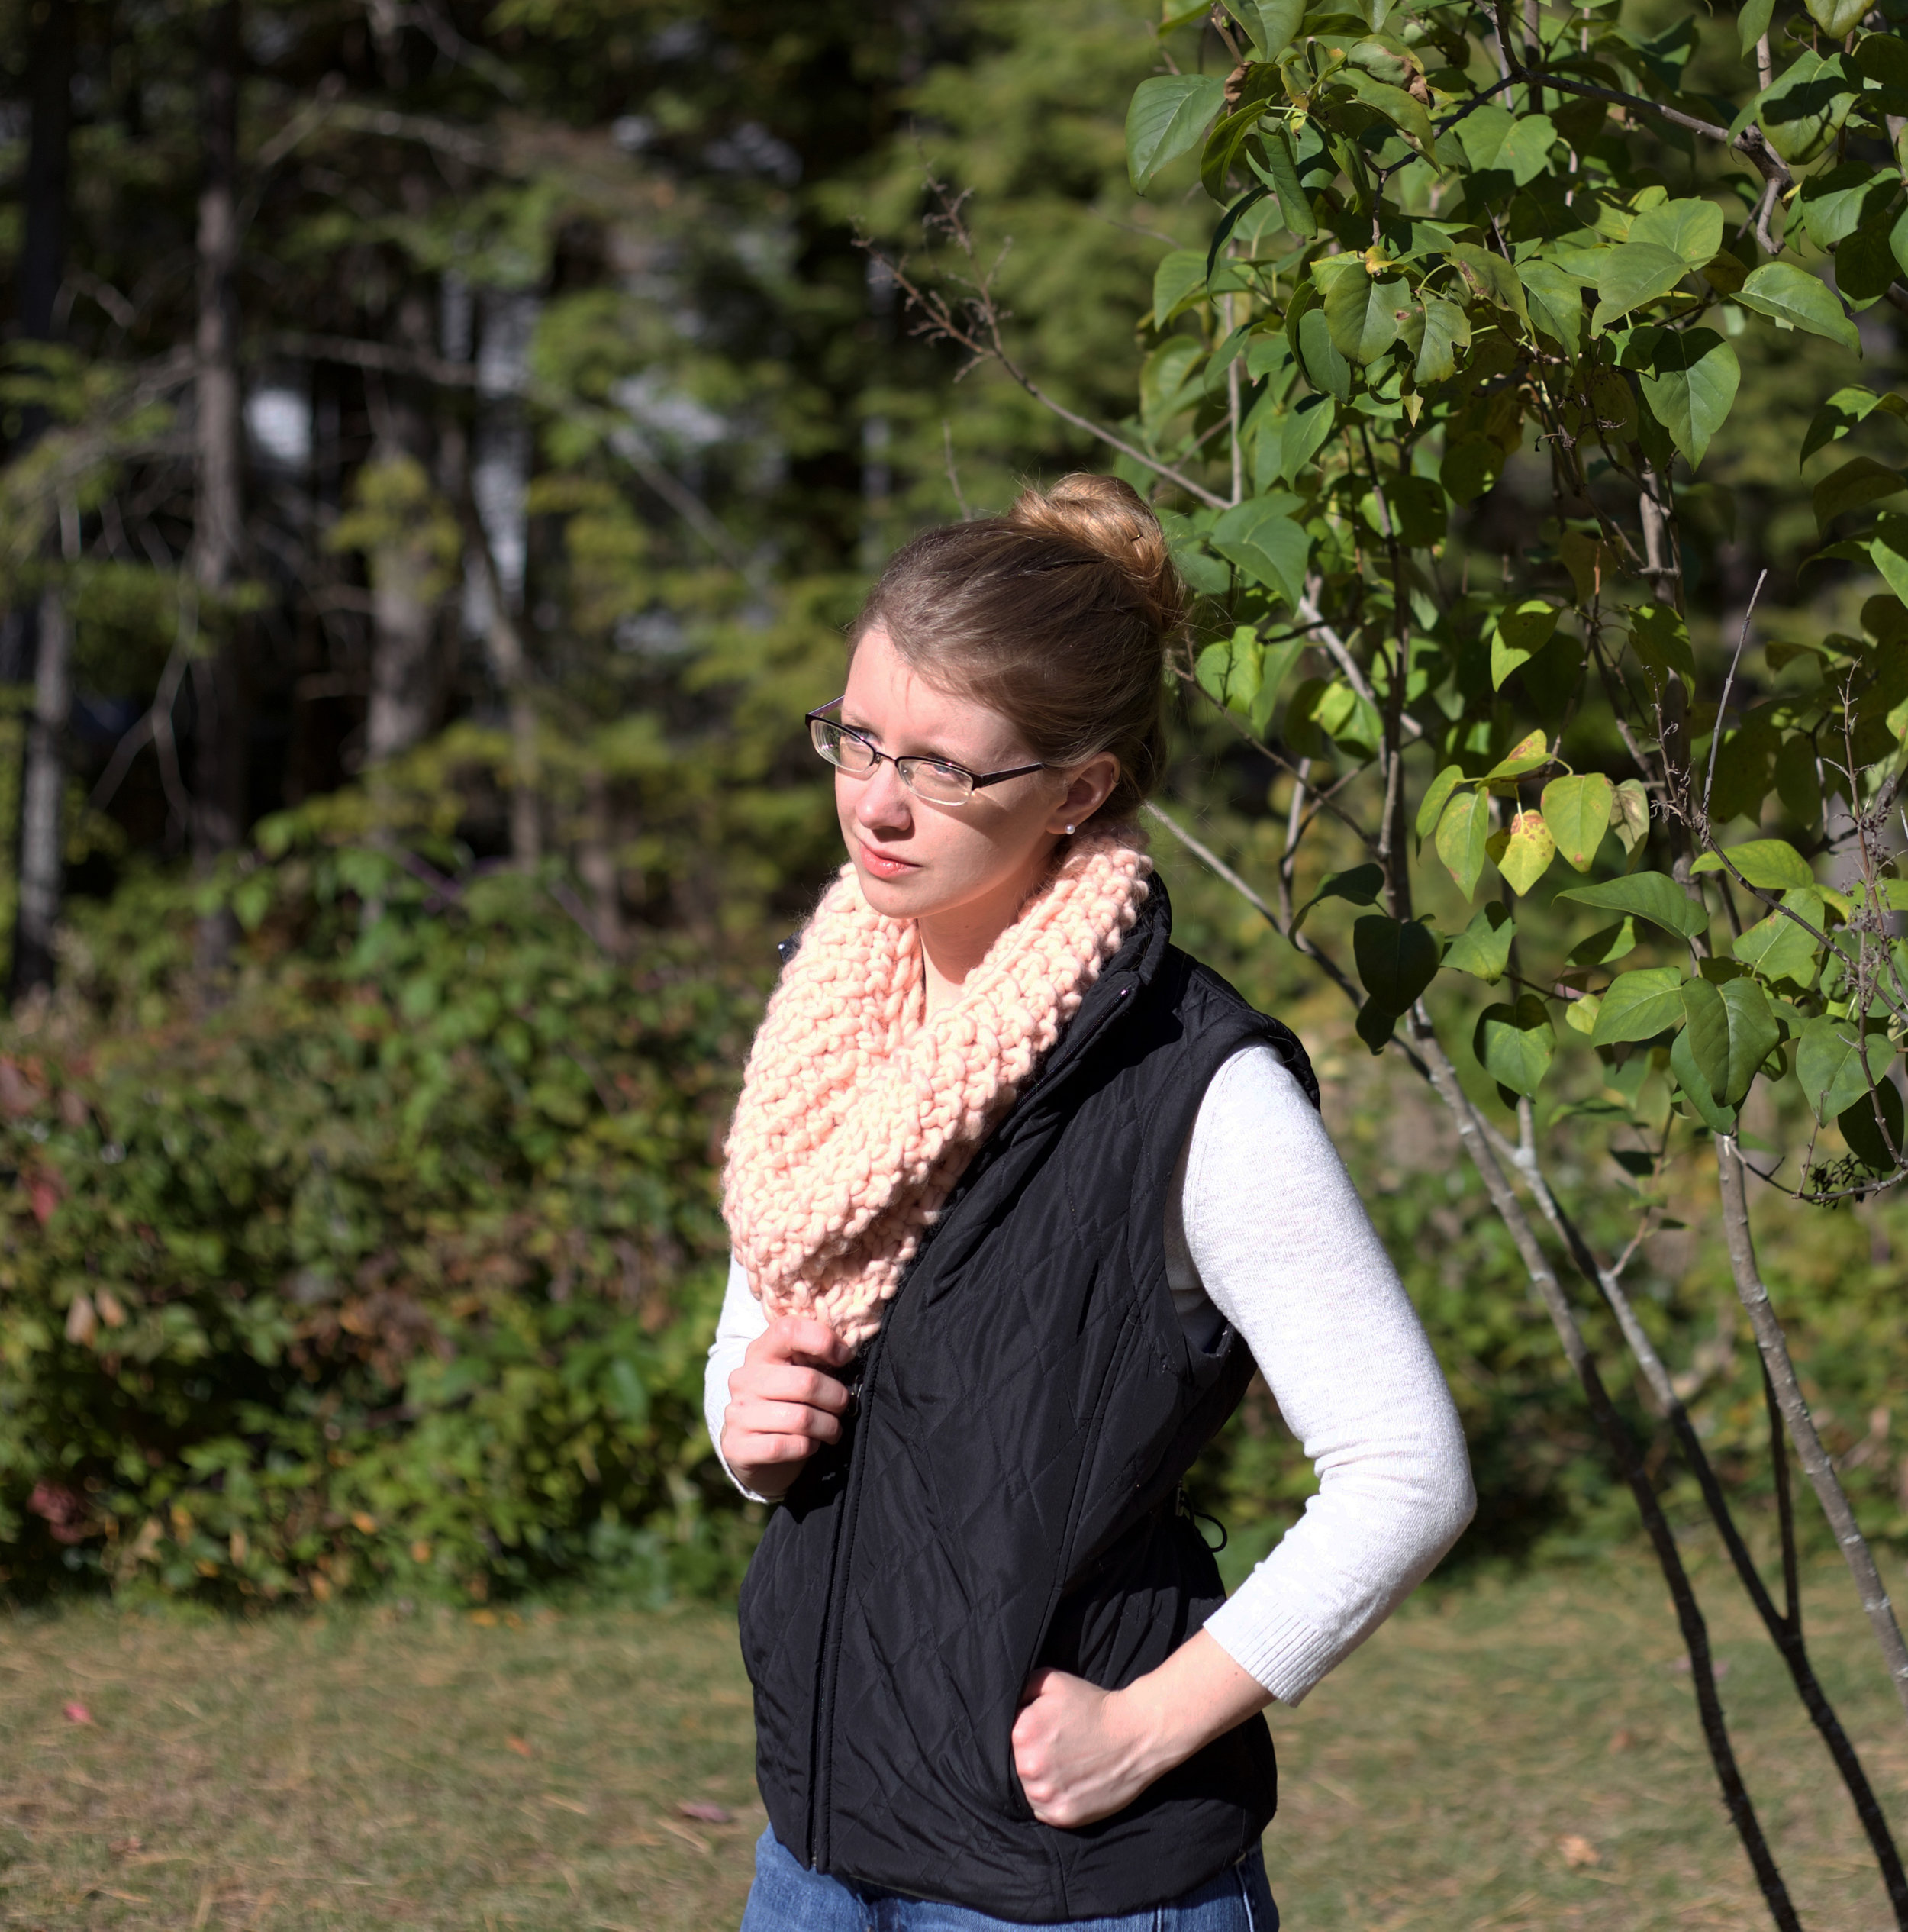
It's been a long, loooong time since I knit anything but when We Are Knitters contacted me to see if I wanted to try out one of their kits and give one away to a lucky follower I was excited to say yes. There's just something about curling up in a cozy chair and knitting that melts the stress away.
(Don't forget to look for our exclusive coupon code and enter the giveaway to win your own kit!)
We Are Knitters has tons of kits available to choose from - including scarves, hats, sweaters, blankets, and even dresses! But since it had been so long since I knit anything I decided to be safe and go with the
Downtown Snood kit from their beginner level selection of kits.
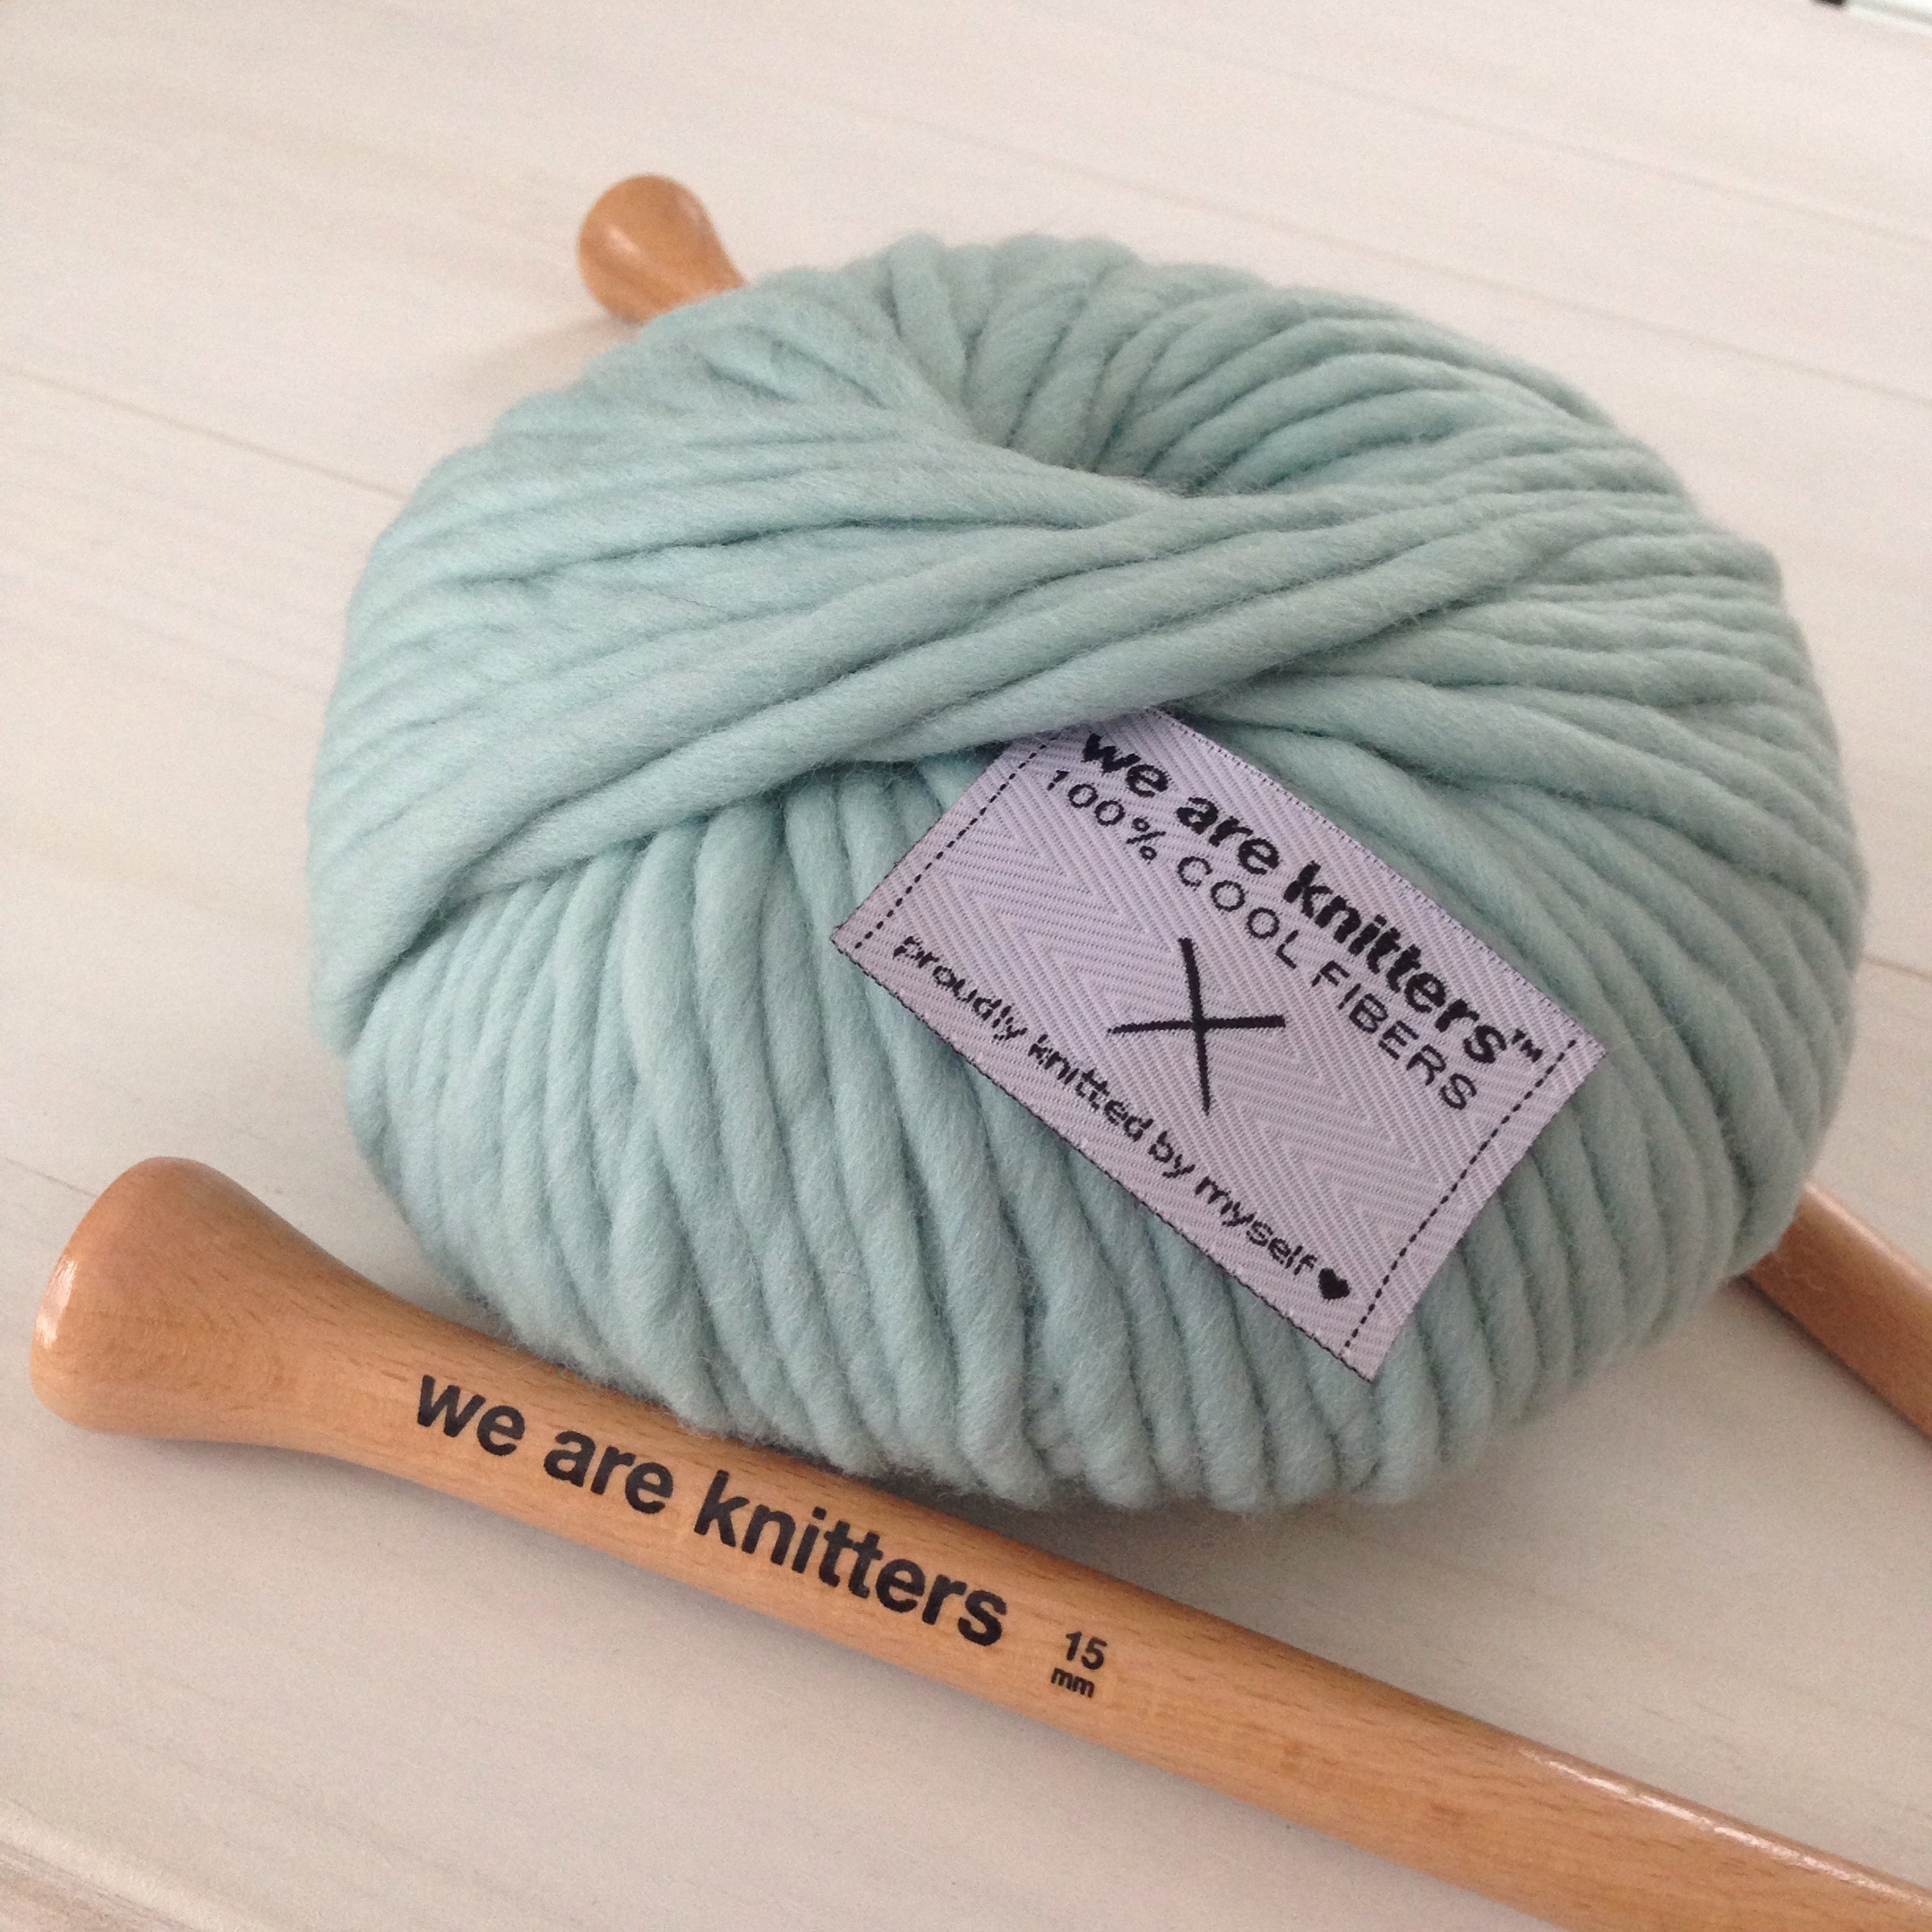
The wool for this kit is premium 100% natural Peruvian wool which is amazingly soft and thick with 35 colors to choose from. In fact, I loved it so much I got an extra skien so I could make the project twice. (You are also able to purchase wool skeins separately right from their website.)
In the kit you find your wool, wooden knitting needles, pattern, needle, and a label for your finished project. Embarrassingly, I do not know how to read a knitting pattern (ha) but it was written so simply even I could understand it. And what's even better, We Are Knitters (WAK) has great video tutorials available to you so you can study how to do the stitch and easily pause the video to practice step-by-step.
I definitely recommend watching the videos with your knitting needles and some scrap yarn in your hands so you're able to practice before you start on your nice yarn from WAK. But after some practice I was able to get it down and was kitting away a mile a minute in no time.
The project went quickly and now I have some gorgeous handmade scarves to wear now that the cold weather is setting in.
We Are Knitters was also kind enough to share an exclusive coupon code with my readers - just use the code BIRCHLANDINGWAK at checkout to receive 15% off your order!
GIVEAWAY
Would you like the chance to win your own Downtown Snood Kit in your choice of color? Just visit We Are Knitters
HERE and sign up for their free newsletter. Givewaway will end October 24th.
EDIT 10/26/16: Winner chosen and notified - Congratulations Kristin B!
- I received these materials for review from We Are Knitters but all opinions expressed are my own. Please see our Disclosure Policy for more information. -
KEEP UP WITH BIRCH LANDING HOME
| Etsy | Facebook | Instagram | Pinterest | Bloglovin' | Hometalk |
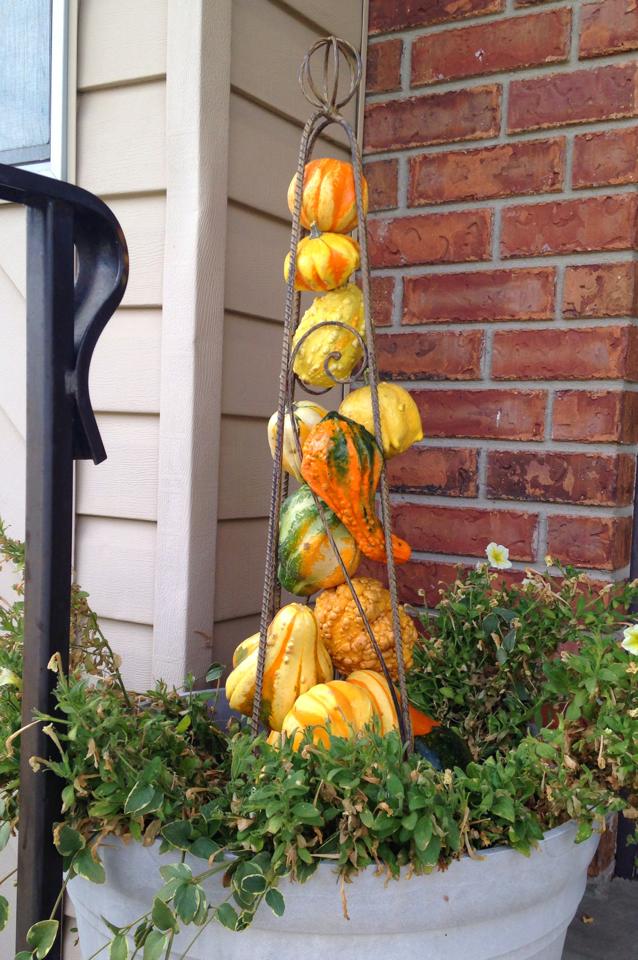
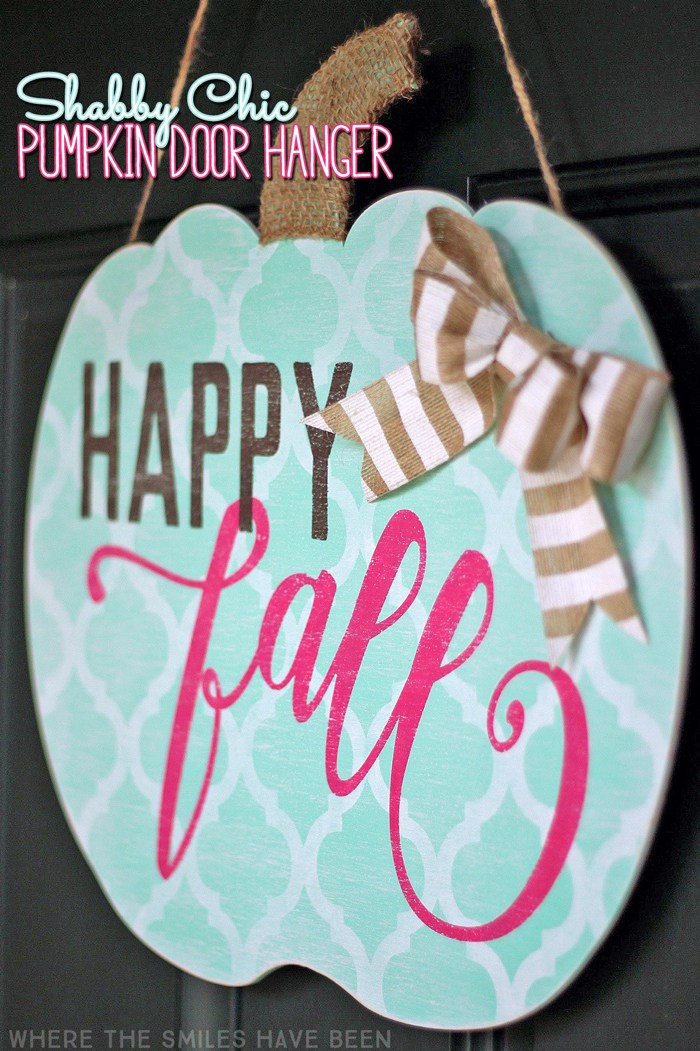
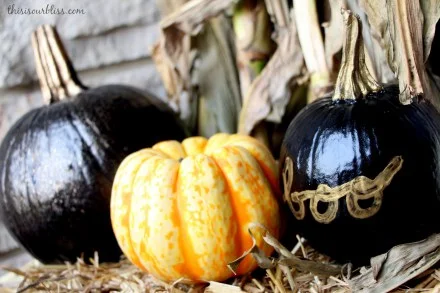
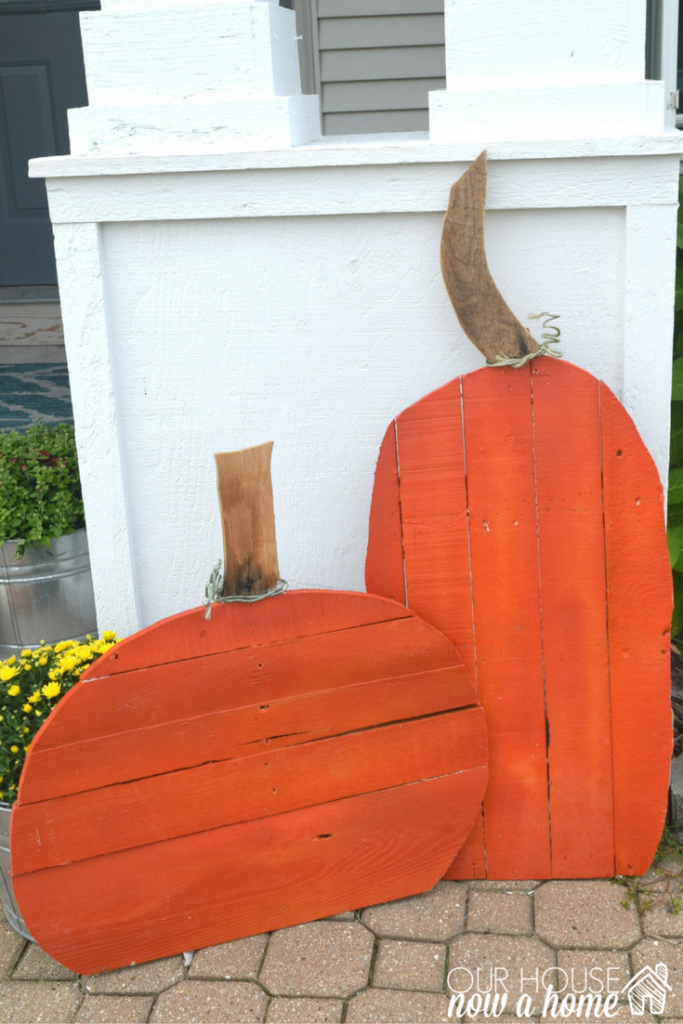
Fall is here and that means decorating up your front porch with, you guessed it - pumpkins! I've rounded up 15 very different pumpkin-themed decor ideas for you. Just click on the author's name to be brought to the original post for the how-to details. Enjoy!
Pumpkin Porch Decor Roundup
5 Minute Monogramed Pumpkin
Painted Pumpkins and DIY Stems
DIY White Pumpkin Fall Wreath
Pink Fall Decor for Breast Cancer Awareness Month
How to Build a Rustic Pumpkin Stand
DIY Pretty Porch Pumpkins
Fall Porch & Courtyard Home Decor
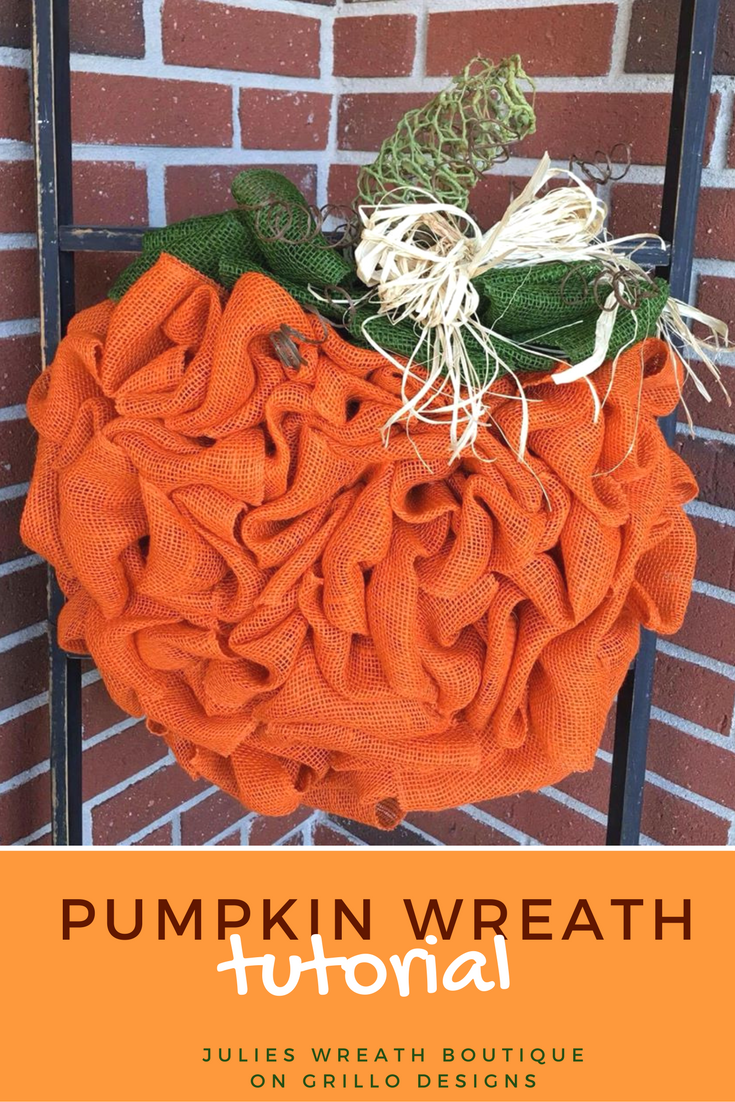
Pumpkin Wreath Tutorial with Burlap
All images and links are used with permission from the authors.
KEEP UP WITH BIRCH LANDING HOME
| Etsy | Facebook | Instagram | Pinterest | Bloglovin' | Hometalk |
I've been selling my hand-etched ornaments and other small crafts locally and from my Etsy shop for a little while now, and I've learned quite a bit during this time. In the beginning I was totally "winging it" and looking back now there are a few things that I really wished I had started right from the get-go. | This post contains affiliate links |
DISCLAIMER: Always consult a local tax and business professional for the best advice for your situation regarding finances and how to legally set up your business.
5 Things I Should Have Done from the Start with my Handmade Business
Keep All Receipts
In the beginning this all started out more as a hobby than anything else, and so I never kept my receipts from supplies bought, postage, etc. I really didn't know how much I was spending vs. how much I was making or if it was really profitable. If you're doing your handmade business on a very small scale strictly as a hobby all this might not matter as much, but once you start getting a decent amount of sales you need to keep track of how much you're spending for these things - this is especially important for taxes (whomp, whomp) since you can write off a lot of your expenses, but only if you have the receipts. You can use a receipt organizer to make it a little easier to file and organize everything for your records.
Supply & Materials Records
Knowing how much everything costs for your business (craft supplies, packaging materials, etc) as well as how much you use is important for planning ahead and having enough materials on-hand. In the beginning you can expect a learning curve where you'll run out of padded envelopes or ribbon from time-to-time. But figuring out your demand and flow of goods and materials can help make sure you always have enough supplies on-hand without having too much surplus (also not good).
Separate Bank Account
Keeping a separate bank account really helps keep track of expenses as well as makes sure you're only spending what you're making and not more. Open a new checking/debit account (and possibly a credit card) and use those methods of payment for all business related expenses - buying supplies at the store, shipping items, etc. When payments are deposited from Etsy or checks they should go into this checking account. By only using the money you're making to spend on expenses you won't go into debt. Also make sure to set some money aside to pay yearly or quarterly taxes if applicable (your accountant can help you figure that out).
Better Overall Financial Record Keeping
Keeping track of expenses vs. income can be hard and it's easy to forget infrequent or small expenses that can really add up (yearly website hosting, Etsy listing fees, advertising, items sent to bloggers for collabs, etc). You'll definitely want to create or purchase a spreadsheet template to keep close tabs on all of these expenses.
Rather than try to make one myself, several months ago I purchased the Etsy Seller Spreadsheet from Paper + Spark and was really impressed! Janet from Paper + Spark is a Certified Public Accountant, so she really knows her stuff. The spreadsheet template can input all the data (sales, Etsy selling fees, listing fees, etc) right from Etsy and populates them into the spreadsheet for you so you don't miss anything. There are also sections you can customize so you can put in expenses from website hosting, office supplies, etc or income from local craft shows or wholesale accounts. It can be hard to realize how much Etsy's cut is (they charge a listing fee, a transaction fee, and a percentage of the sale), so seeing just how much their take actually is has helped me adjust my pricing better. Recording all these details was so important to finally see what my bottom line actually is - I really wish I had kept better track of everything right from the beginning!
I had purchased Paper + Spark's original spreadsheet, but Janet's since come out with more detailed spreadsheets as well as “bundles” that include documents to help you with inventory, pricing, and selling on other platforms (Shopify, Square, etc) so you can decide what spreadsheet and package is best for you and your business. And the best part? Paper + Spark’s customer service is AMAZING! Janet will continue to make available the latest version of your purchases each year. That way if Etsy or another platform tweaks anything, you’ll know that your current spreadsheet will be up to date and working properly.
If you'd like to purchase one of Paper + Spark's spreadsheets or other business tools (check with your accountant regarding your situation, but you should be able to write it off as a business expense!), you can use the Coupon Code "BIRCH10" to receive 10% off her entire store.
Social Media + Collaborations
Never underestimate the power of social media! Social Media is the place to see and be seen - make sure you're always posting, commenting, and connecting with other handmade buisnesses, gift shops, bigger brands, and bloggers. Always use hashtags on Instagram, but hide them in your first comment so they don't clutter up your caption. In particular, Instagram is a great place to get exposure - in fact my photos have been reposted by brands like Nuby, Kohl's, and Yankee Magazine and one was even featured in print in Martha Stewart Living Magazine! I was also contacted by Food Network Magazine to be a contributor for one of their articles.
Another great way to gain exposure and a following is to reach out to bloggers for collaborations (collabs). Usually this entails you sending your product to them, free of charge, and they will style and feature your item on their blog and across their social media accounts. You could also team up with them to host a giveaway. Some larger bloggers may also charge you a fee to collab with them, but many bloggers will feature for free if your product fits their aesthetic. This is a great way to get your name and your products out there and increase your following. And don't write-off the power of smaller bloggers either - sometimes the smaller bloggers have the most active and devoted followings.
DISCLAIMER: Always consult a local tax and business professional for the best advice for your situation regarding finances and how to legally set up your business.
Looking for FREE Etsy listings to get started?
If you're thinking of opening a brand new Etsy shop, please feel free to use my referral link HERE - and we'll both earn some free listings on Etsy :)
- I purchased Paper + Spark's products myself and was so impressed that I chose to become an affiliate. All my opinions are my own and I honestly love her product. As an affiliate, if you purchase anything from her site using my links I may receive a small commission at no additional cost to you -
KEEP UP WITH BIRCH LANDING HOME
| Etsy | Facebook | Instagram | Pinterest | Bloglovin' | Hometalk |
Our little one made this Paper Pizza at story time at the public library the other day and I thought it was so cute I wanted to show you all. The story time lady read several pizza-related stories and then had the kids make their own paper pizzas to bring home. The kids really enjoyed this project and I think it would make a great activity for a pizza-themed kids' party.
They gave the kids paper plates and a brown crayon to color the "crust" (our daughter skipped this part), then a paper red circle "tomato sauce" to glue down, shredded yellow paper "cheese", as well as paper mushrooms, pepperonis, and meatballs. After the pizzas were done, the kids took them home in actual pizza boxes which was the perfect finishing touch to the project. These brand new boxes had been bought ahead of time at the local pizza shop for a few cents each.
I don't remember the actual books she read before the project, but I've linked some cute-looking pizza stories here (affiliate links):
KEEP UP WITH BIRCH LANDING HOME
| Etsy | Facebook | Instagram | Pinterest | Bloglovin' | Hometalk |
Just received my first We Are Knitters knit kit! I haven't knit anything in years and I'm so excited to do it again. I'll be sharing a full review of my project (I'll be making the Downtown Snood) as well as a giveaway for your own kit on the blog soon!
If you can't wait until then, use the code "BIRCHLANDINGWAK" to receive 15% off your order from We Are Knitters.
- I received this item for review from We Are Knitters but all opinions expressed are my own. Please see our Disclosure Policy for more information. -
KEEP UP WITH BIRCH LANDING HOME
| Etsy | Facebook | Instagram | Pinterest | Bloglovin' | Hometalk |
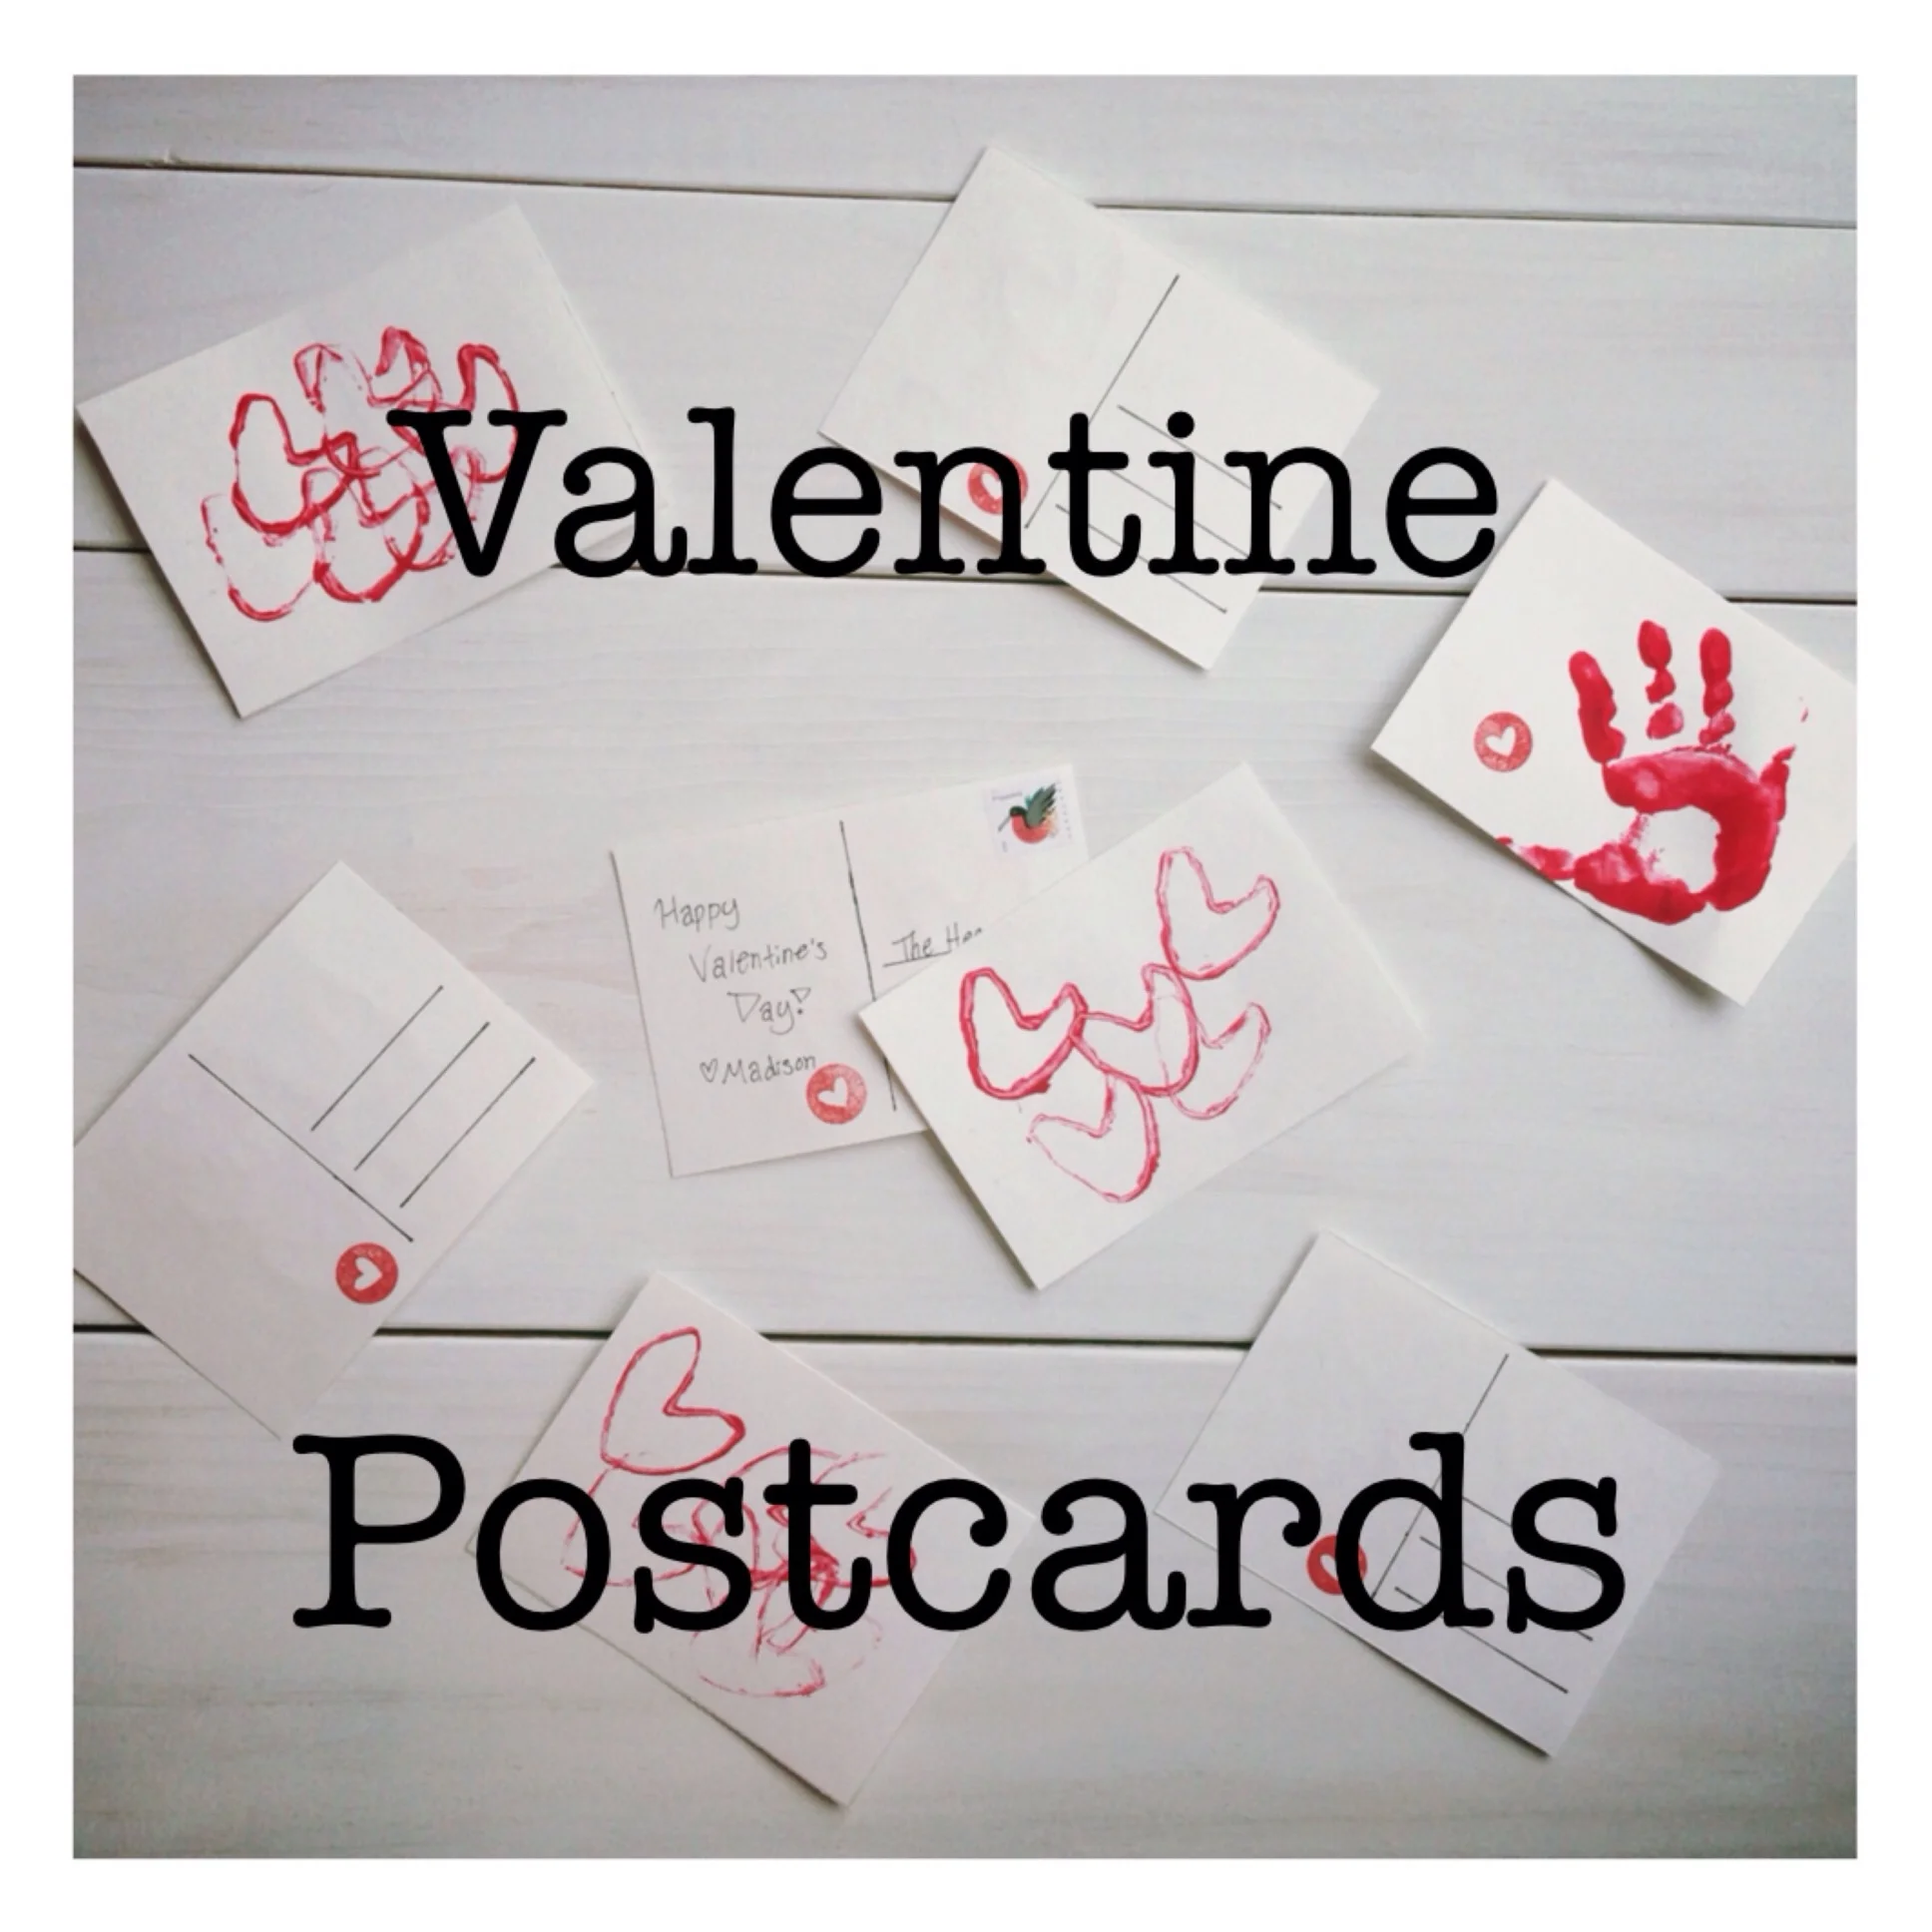
Last year I started the tradition of having our little one make Valentines for close family and friends. This year I wanted to continue the tradition but find a way to make them as inexpensive as possible, and so I settled on the idea of DIY Valentine Postcards.
| This post contains affiliate links |
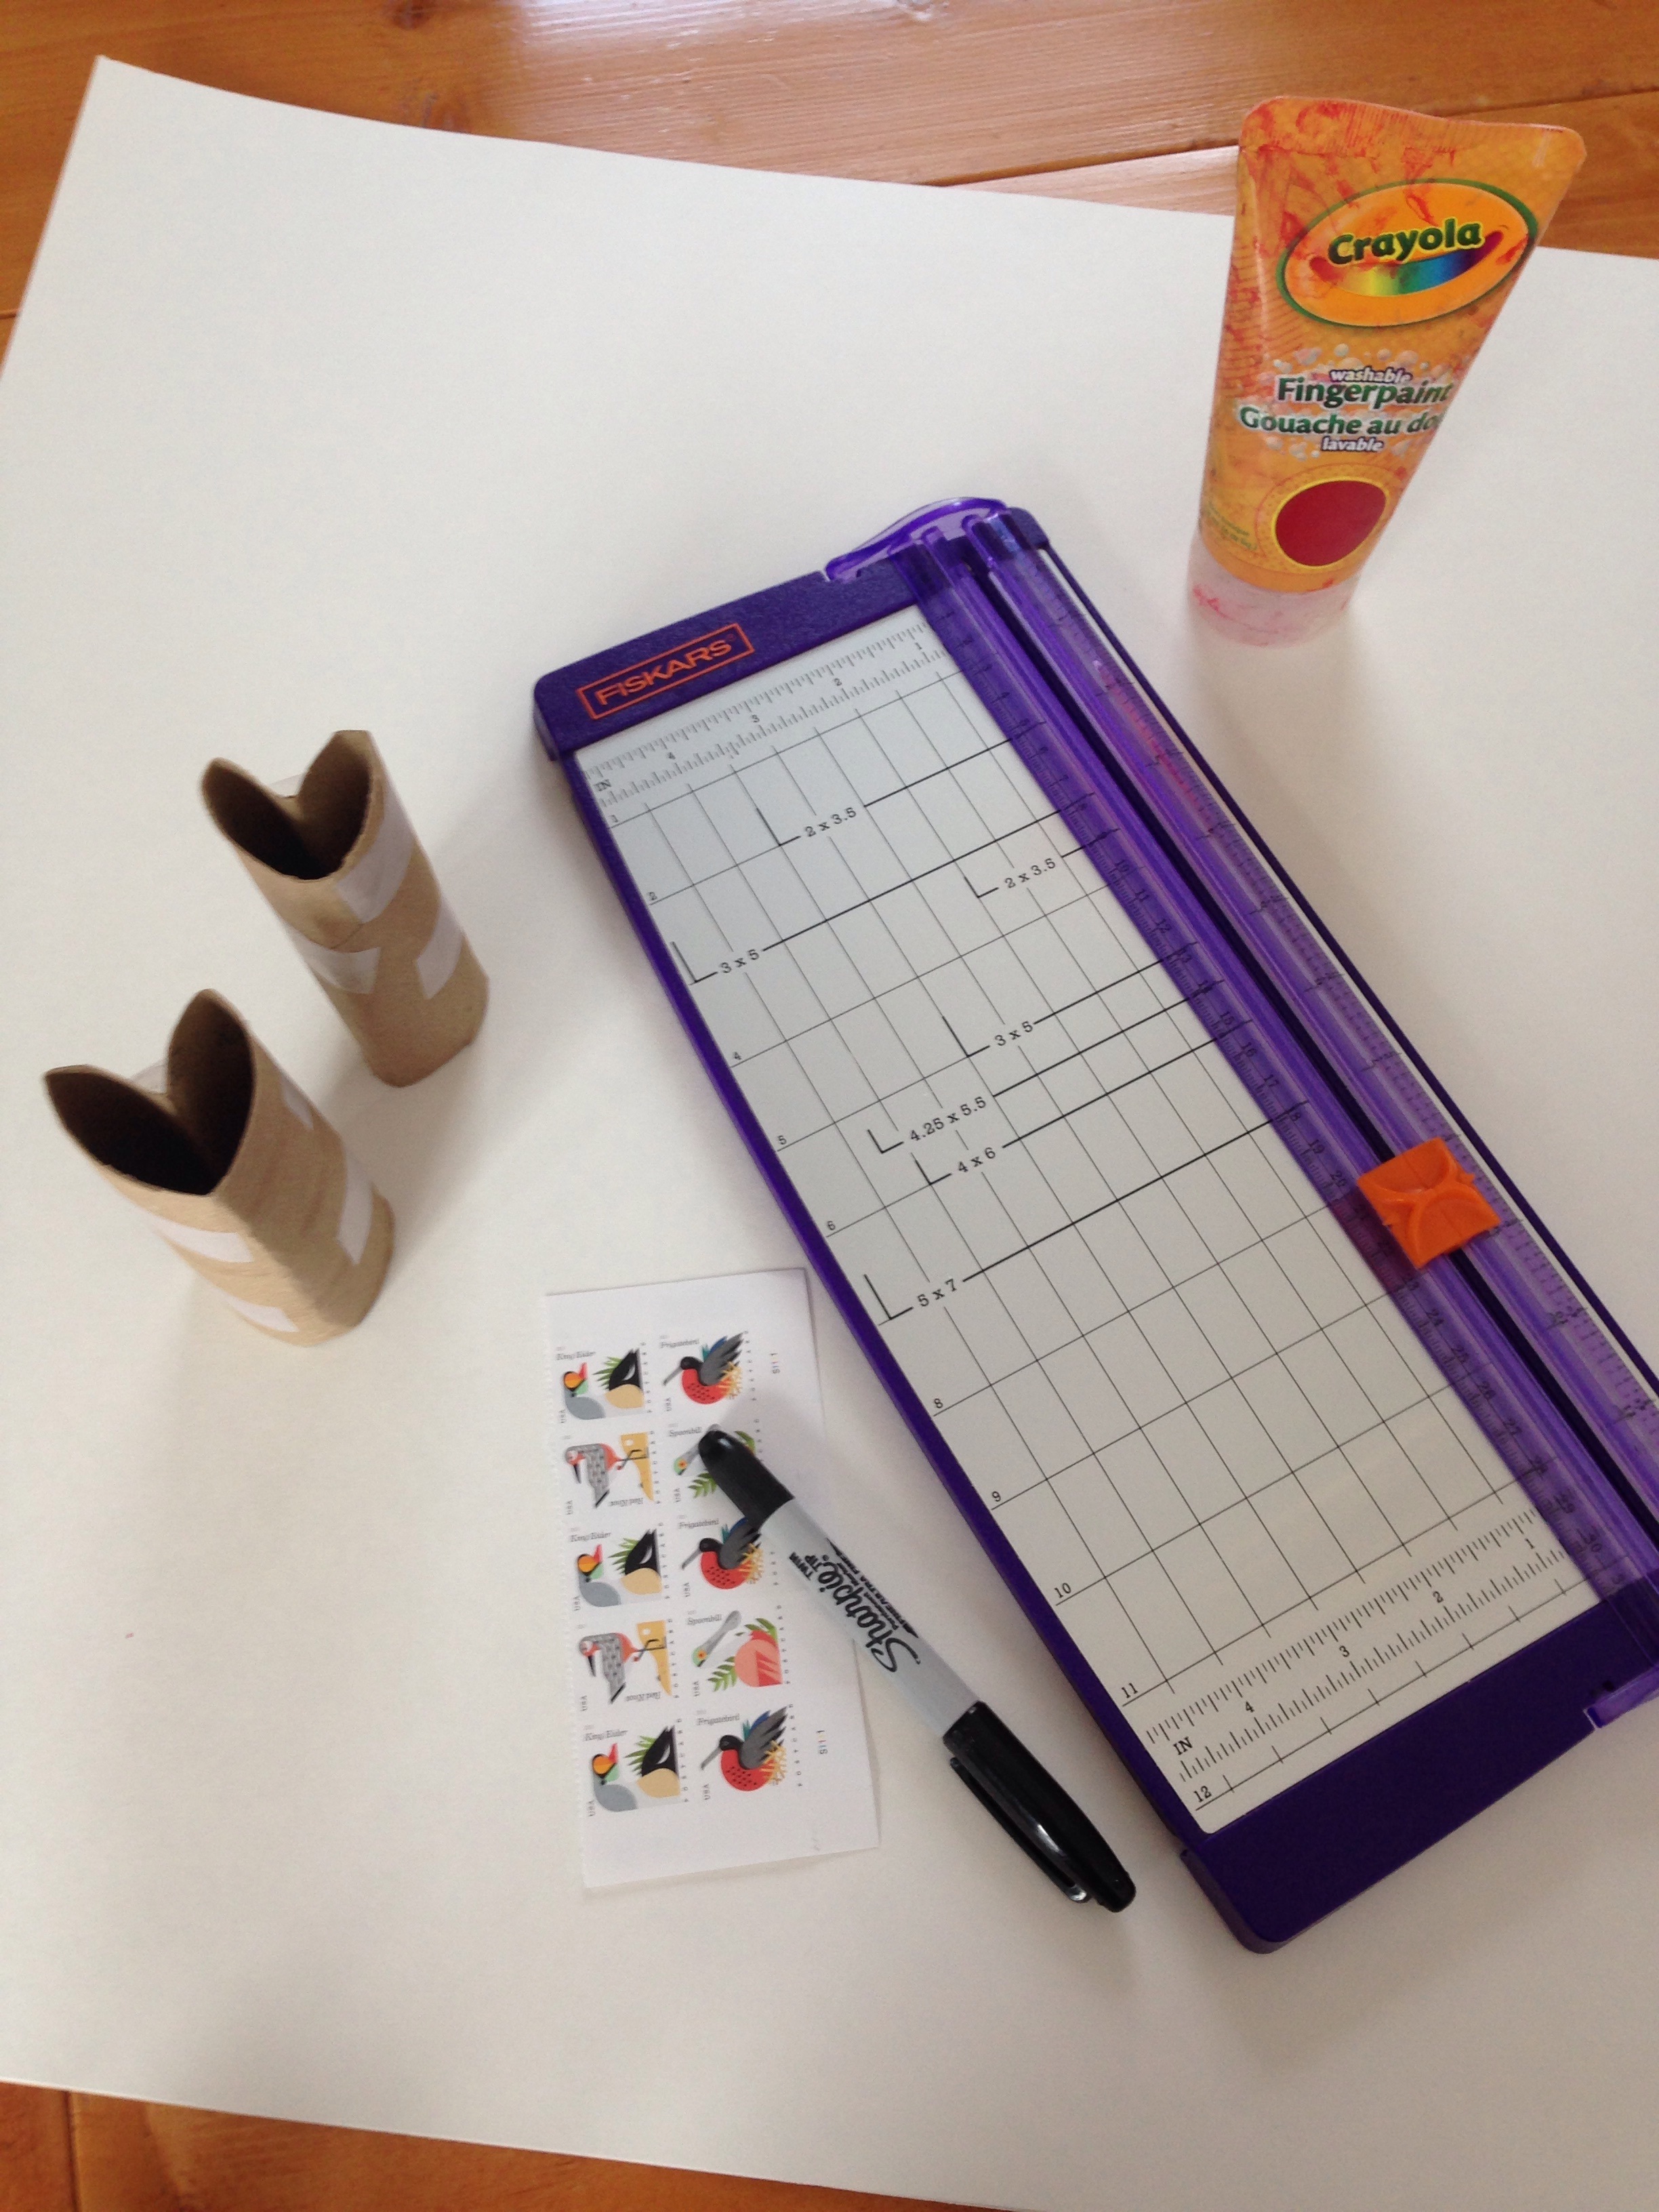
Materials:
How-to:
One of the reasons I decided to make postcards this year instead of traditional cards was, not only are postcards cuter, they cost almost 30% less to mail than a traditional card - these postage savings add up! As a result, this project cost next to nothing to do. I already had the paint, toilet paper rolls, rulers, etc. - I just had to run down to the local store and pick up a piece of poster board which cost a whopping 99 cents.
The how-to is pretty straight forward: use a ruler to measure and cut out your postcards (I made mine 4x5.5", but you can check here for more details on postcard requirements). If you have a paper cutter that can come in quite handy to make quick work of cutting them out.
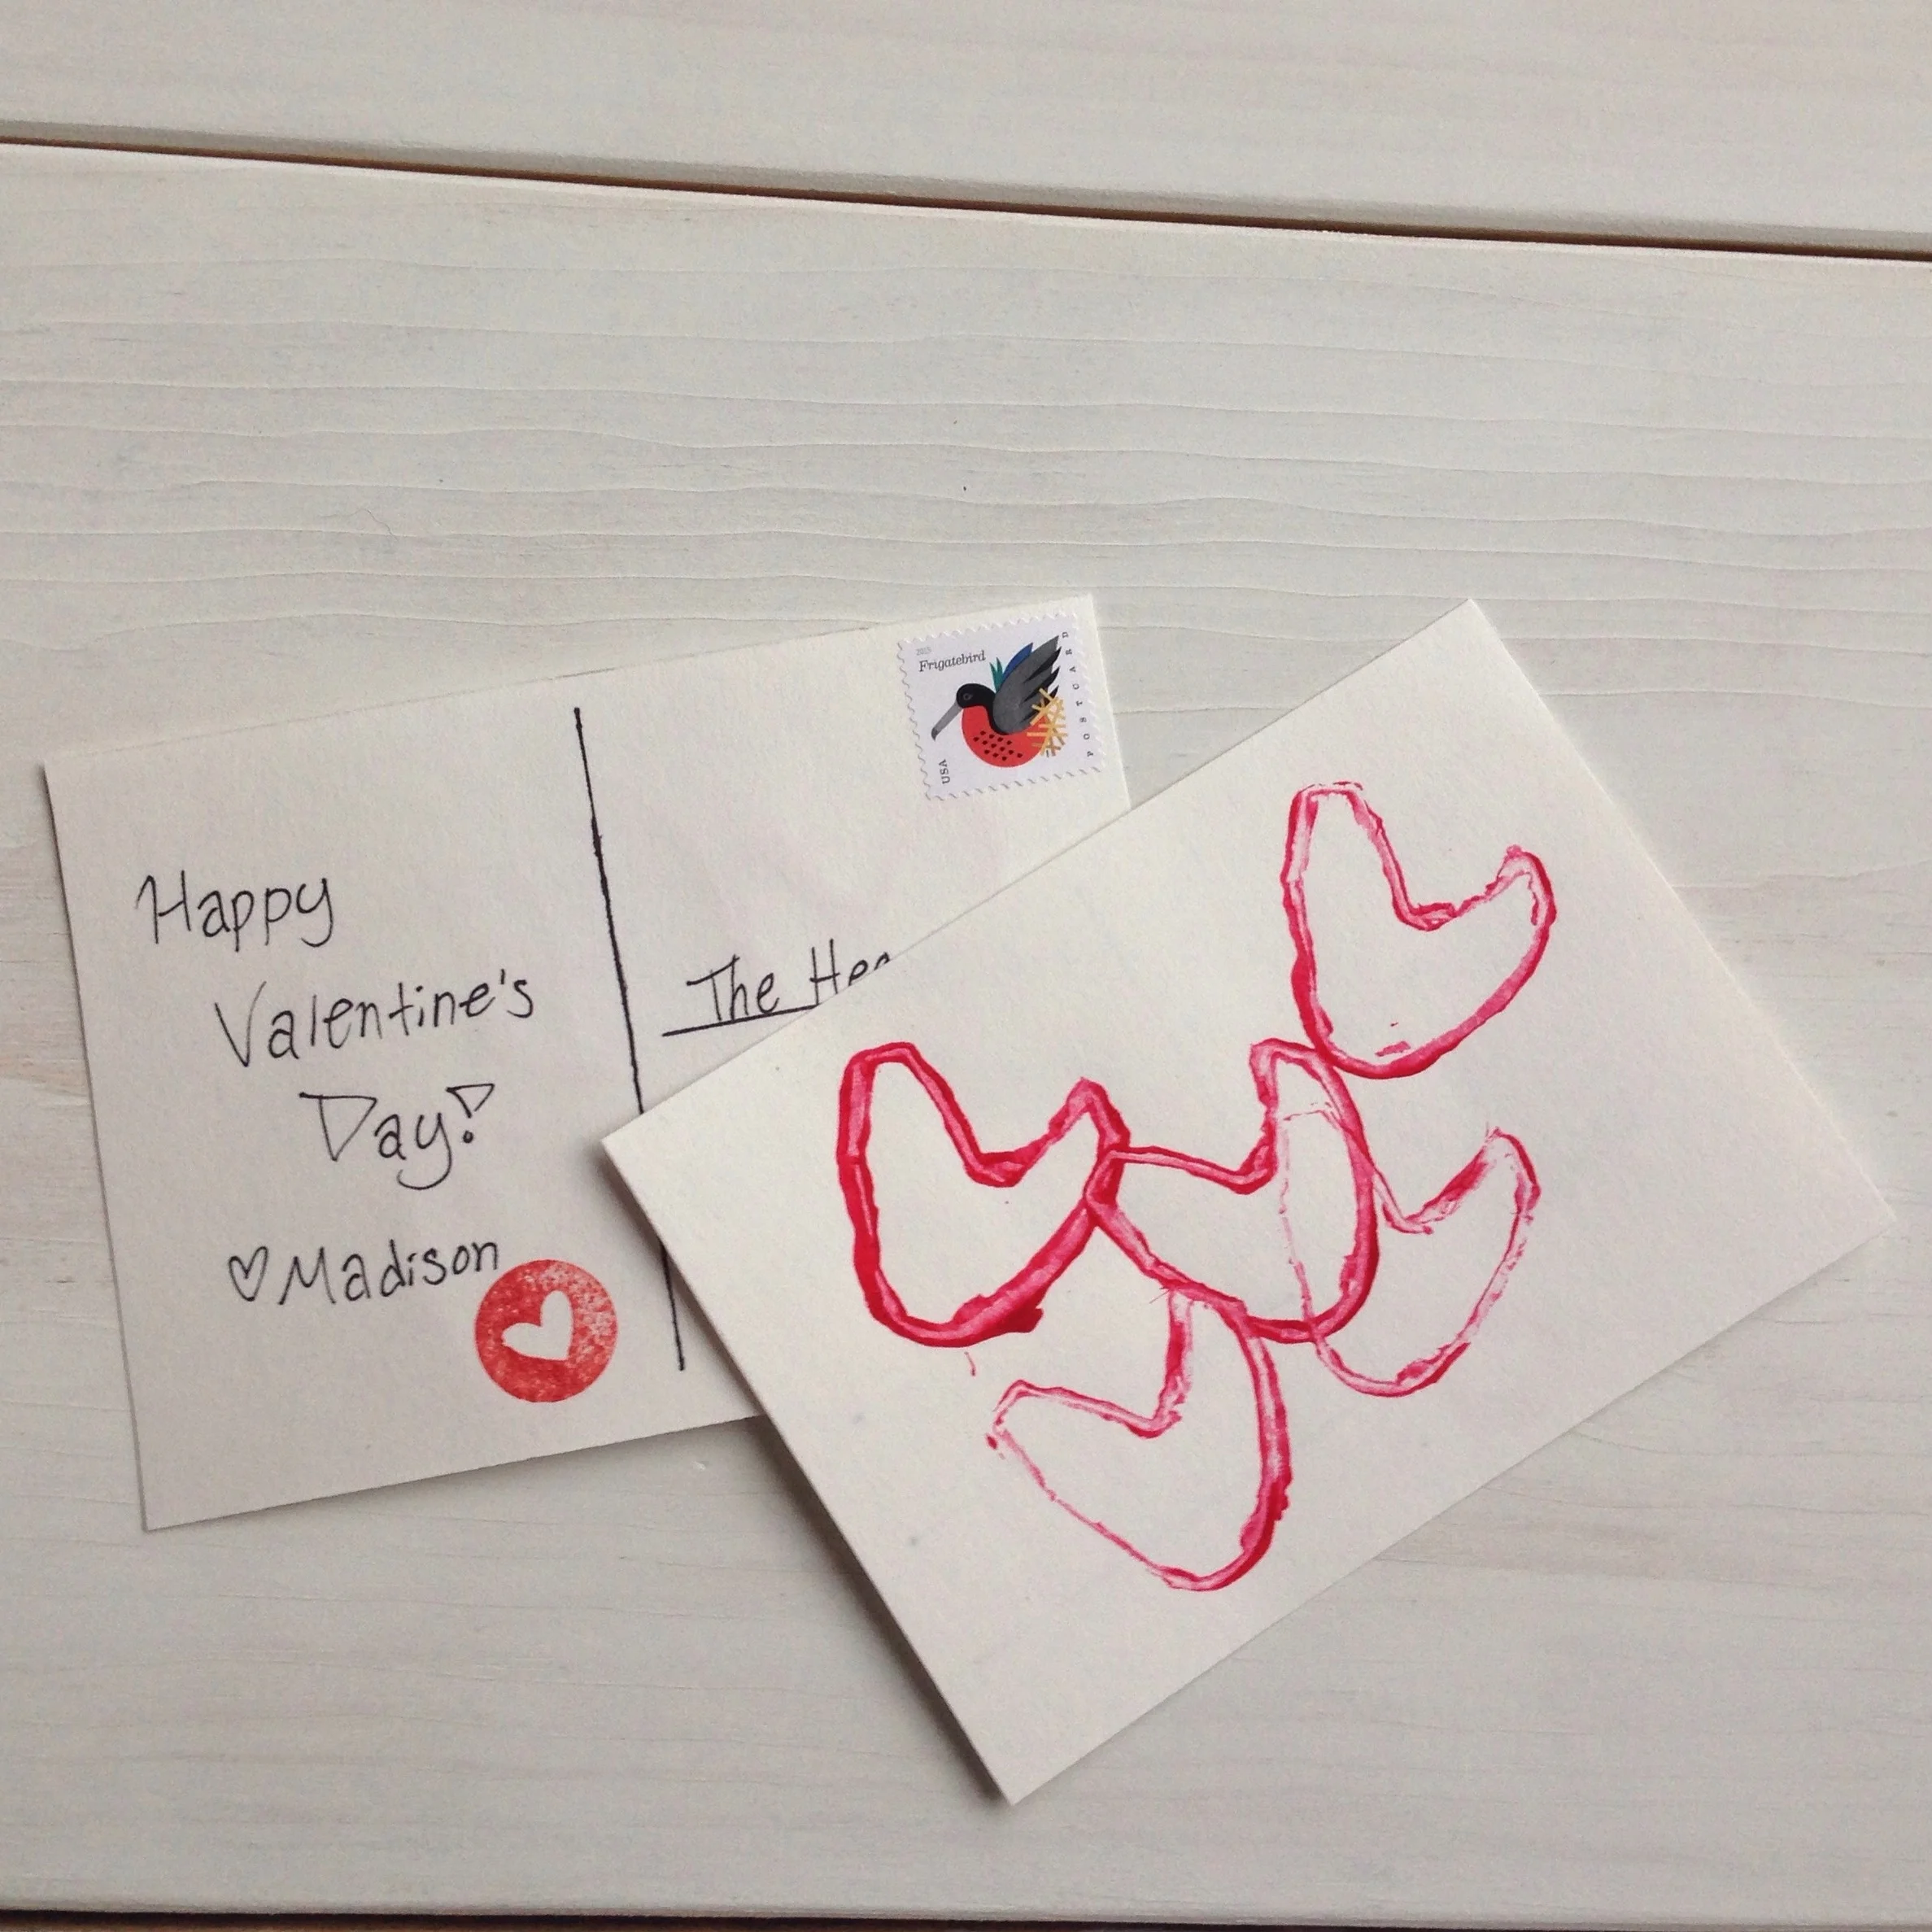
Next use a ruler and a sharpie to create the back of the postcard, one line down the middle and then three lines on the right hand side for the address.
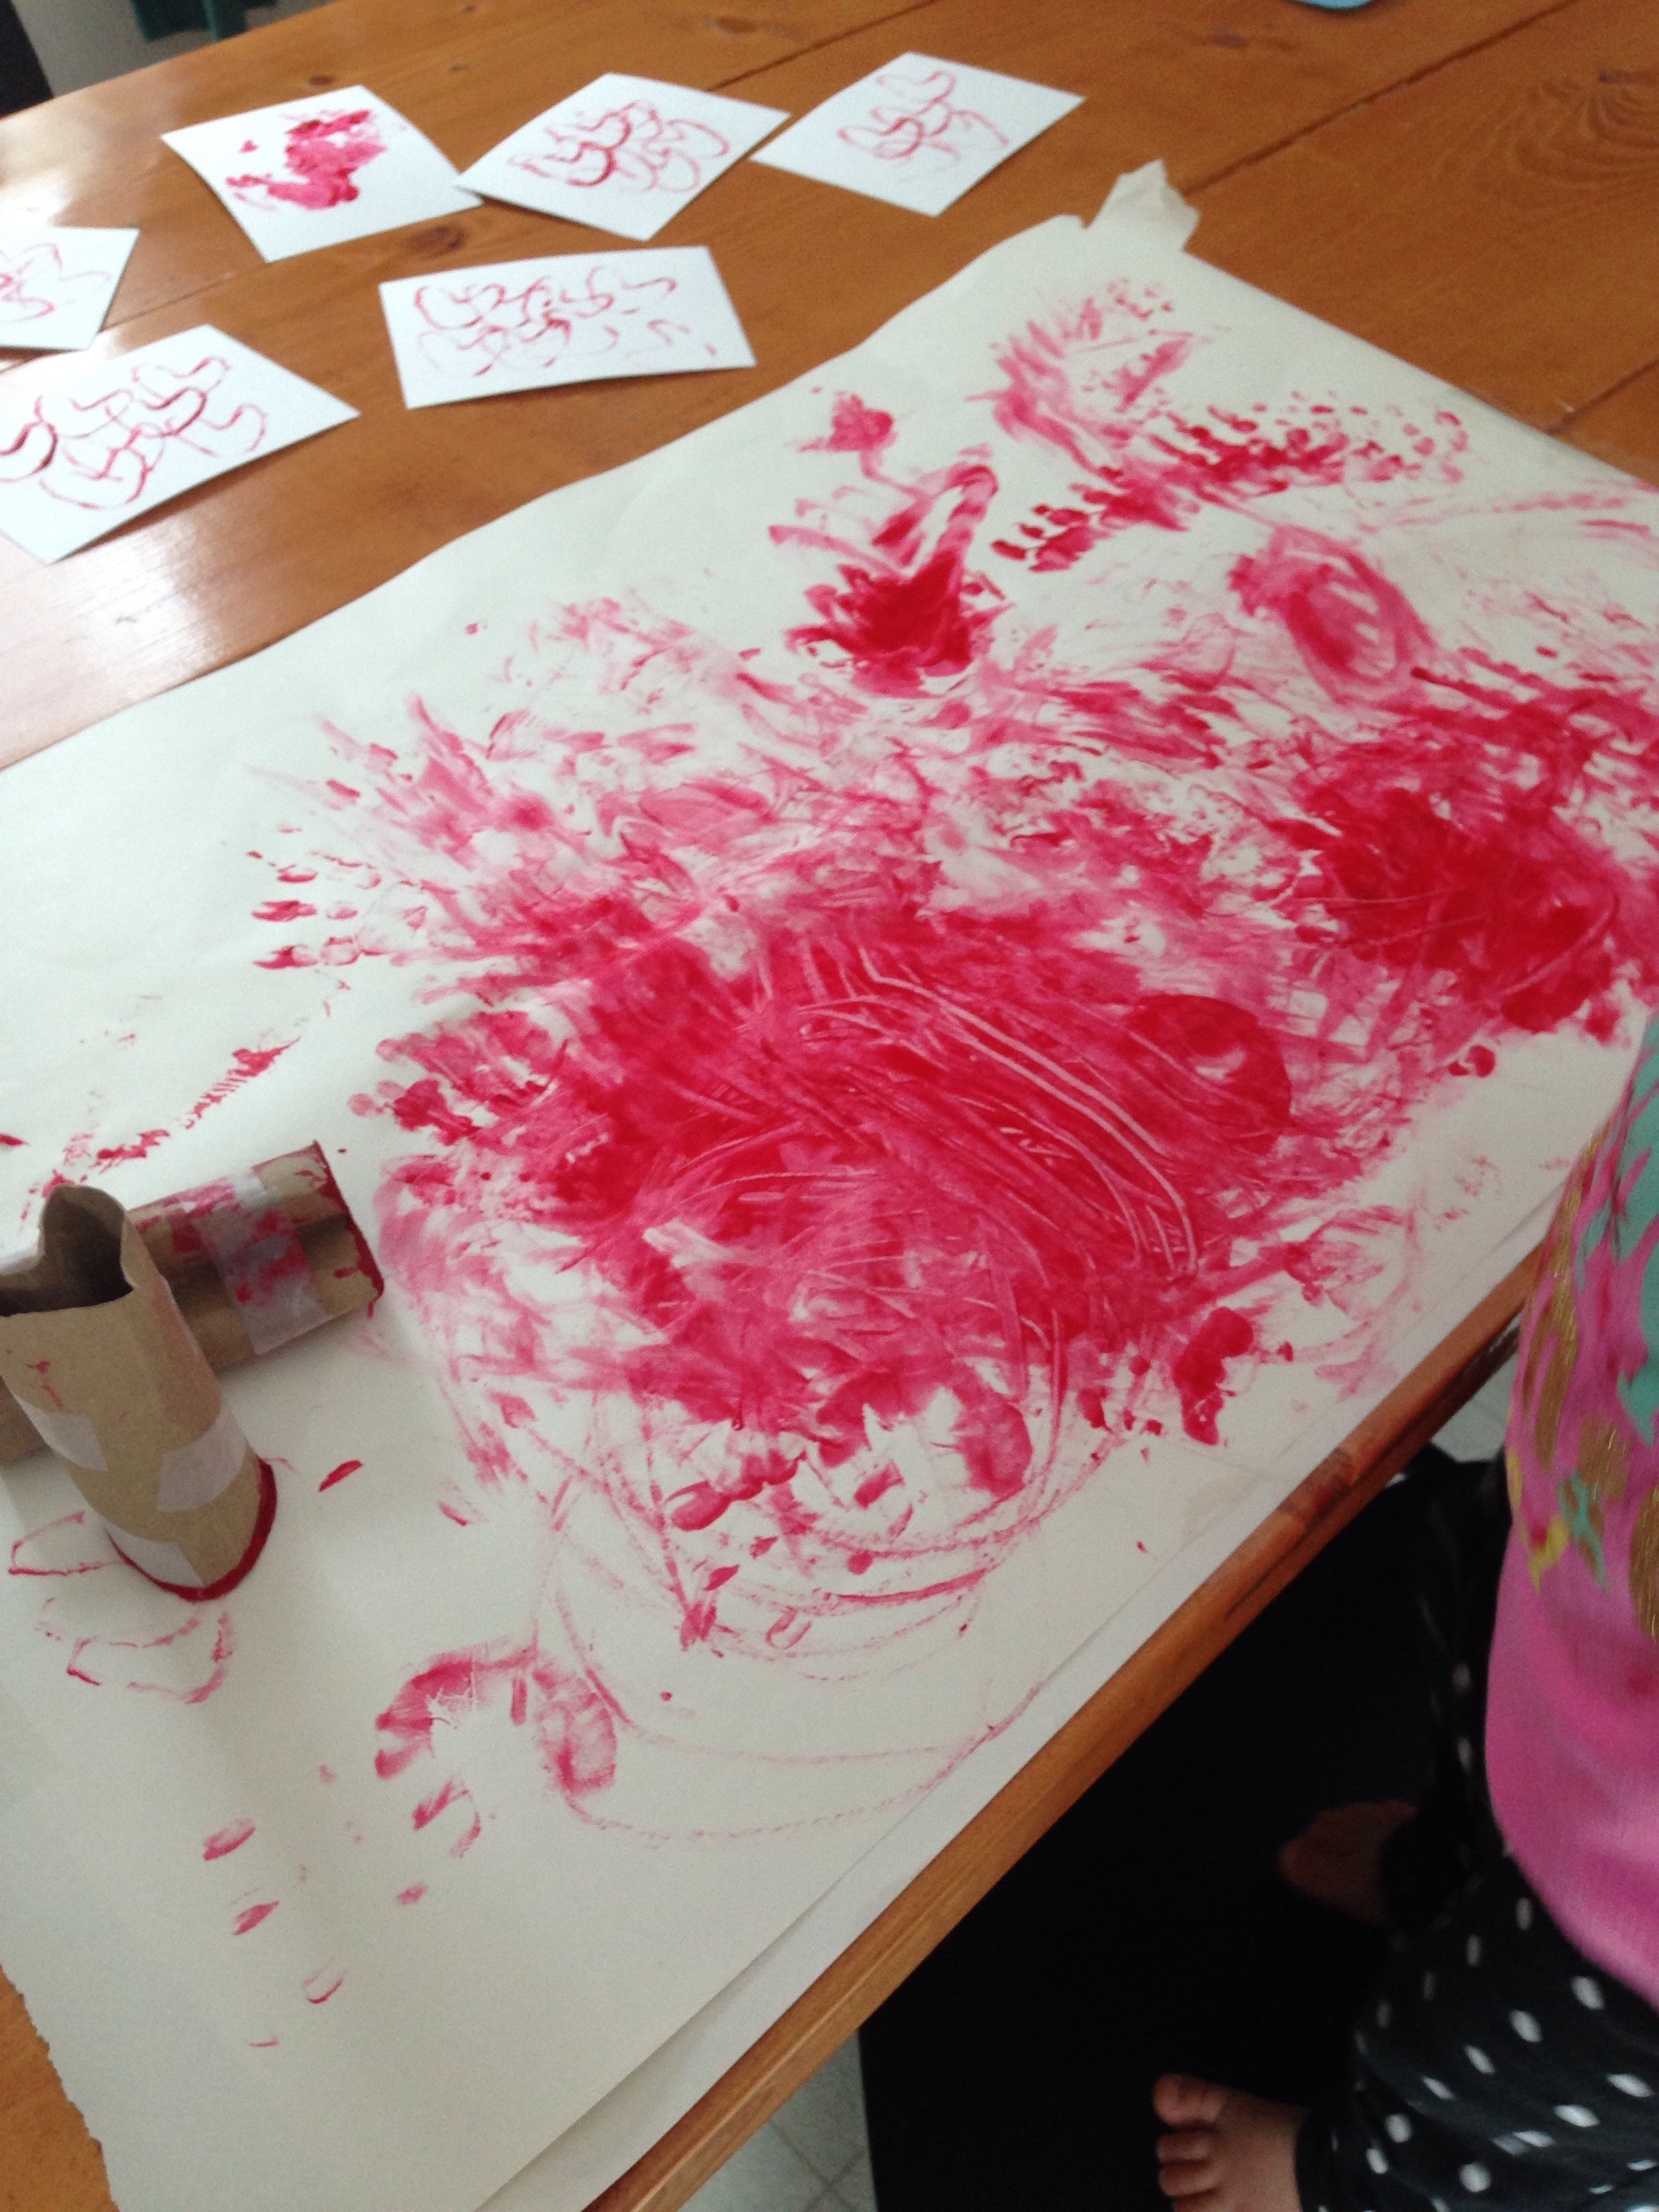
Next let your toddler go to town! I put down one card at a time to keep the backs clean from paint as well as to keep them from getting over-saturated. To make the heart "stamp" I used toilet paper tubes bent into a heart shape and held together with tape.
Once the cards were done I let our little one go crazy on the table covering.
The cards drying - they came out pretty great!!
I kept the backs very basic with a simple handwritten message and a little heart stamp.
I hope you enjoyed this little Valentine DIY! It was very quick and easy and the possibilities are endless when it comes to how you want to paint, color, or draw the front of the postcard.
Happy Valentine's Day!
Check out our other Valentine's Posts:
KEEP UP WITH BIRCH LANDING HOME
| Etsy | Facebook | Instagram | Pinterest | Bloglovin' | Hometalk |