I'm a wife, stay-at-home mom, crafter, and blogger living in rural New England. As seen in Martha Stewart Living, Food Network Magazine, and more! | Tutorials, DIY, crafts, parenting tips, recipes, money saving tips, product reviews, local product features, New England living, intentional living, and more! |
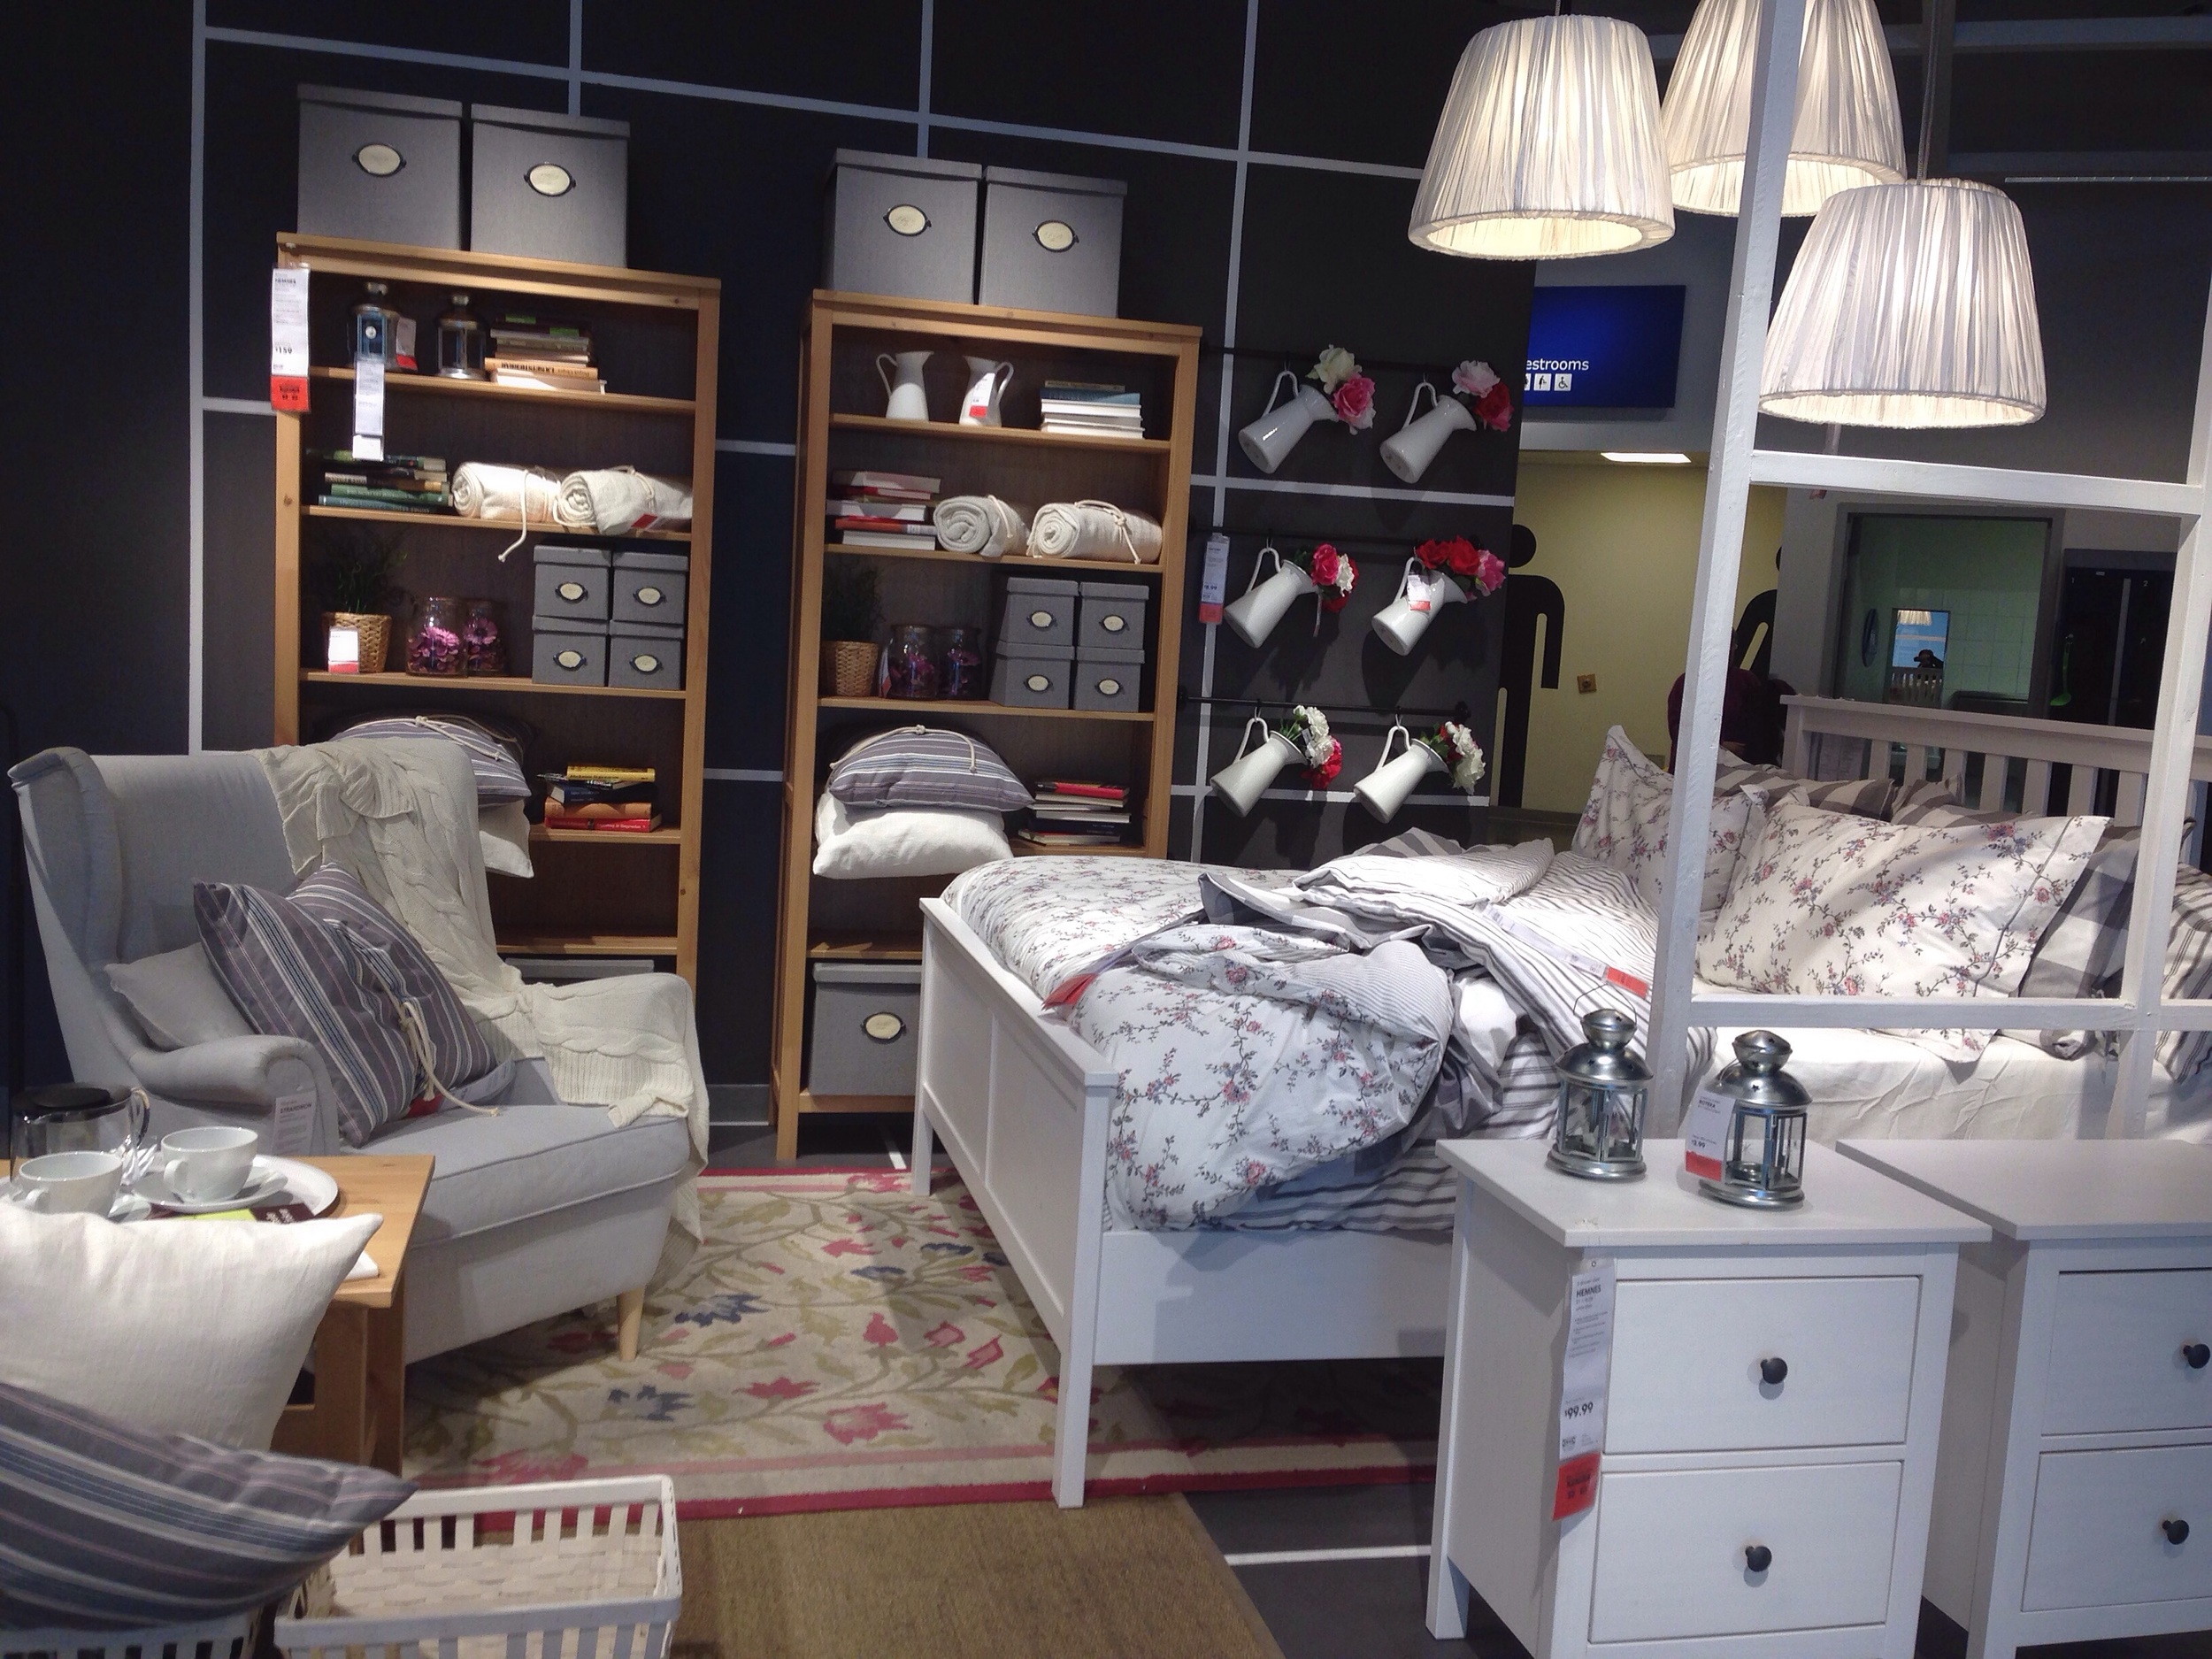
Today was my first time going to IKEA and let me tell you, it was ah-mazing!
We live about 3 hours away from the nearest IKEA, and that's probably a good thing because I liked way too many of the things they have there. What blew me away most was how beautiful, sturdy, and reasonably-priced the furniture was.
We left with "big girl" furniture for our daughter's new room since she'll be transitioning out of her crib soon (eek) and moving into what was my craft room. We got her the small Hemnes dresser and Hemnes twin bed (full review and room makeover will be on the blog soon). And since my craft room will become her room, we decided to bite the bullet and get the Hemnes sideboard to hold all my displaced craft supplies. I just loved the Hemnes line from IKEA, can't you tell? We also picked up a cute (and cheap!) wooden train set for her.
I was expecting IKEA to be a lot of modern furniture and accessories, but I was pleasantly surprised to see they had a lot of great "farmhouse-inspired" pieces that fit with our New England style.
I should have taken more pictures for the blog while we were there, but I was just too busy browsing and shopping! ;)
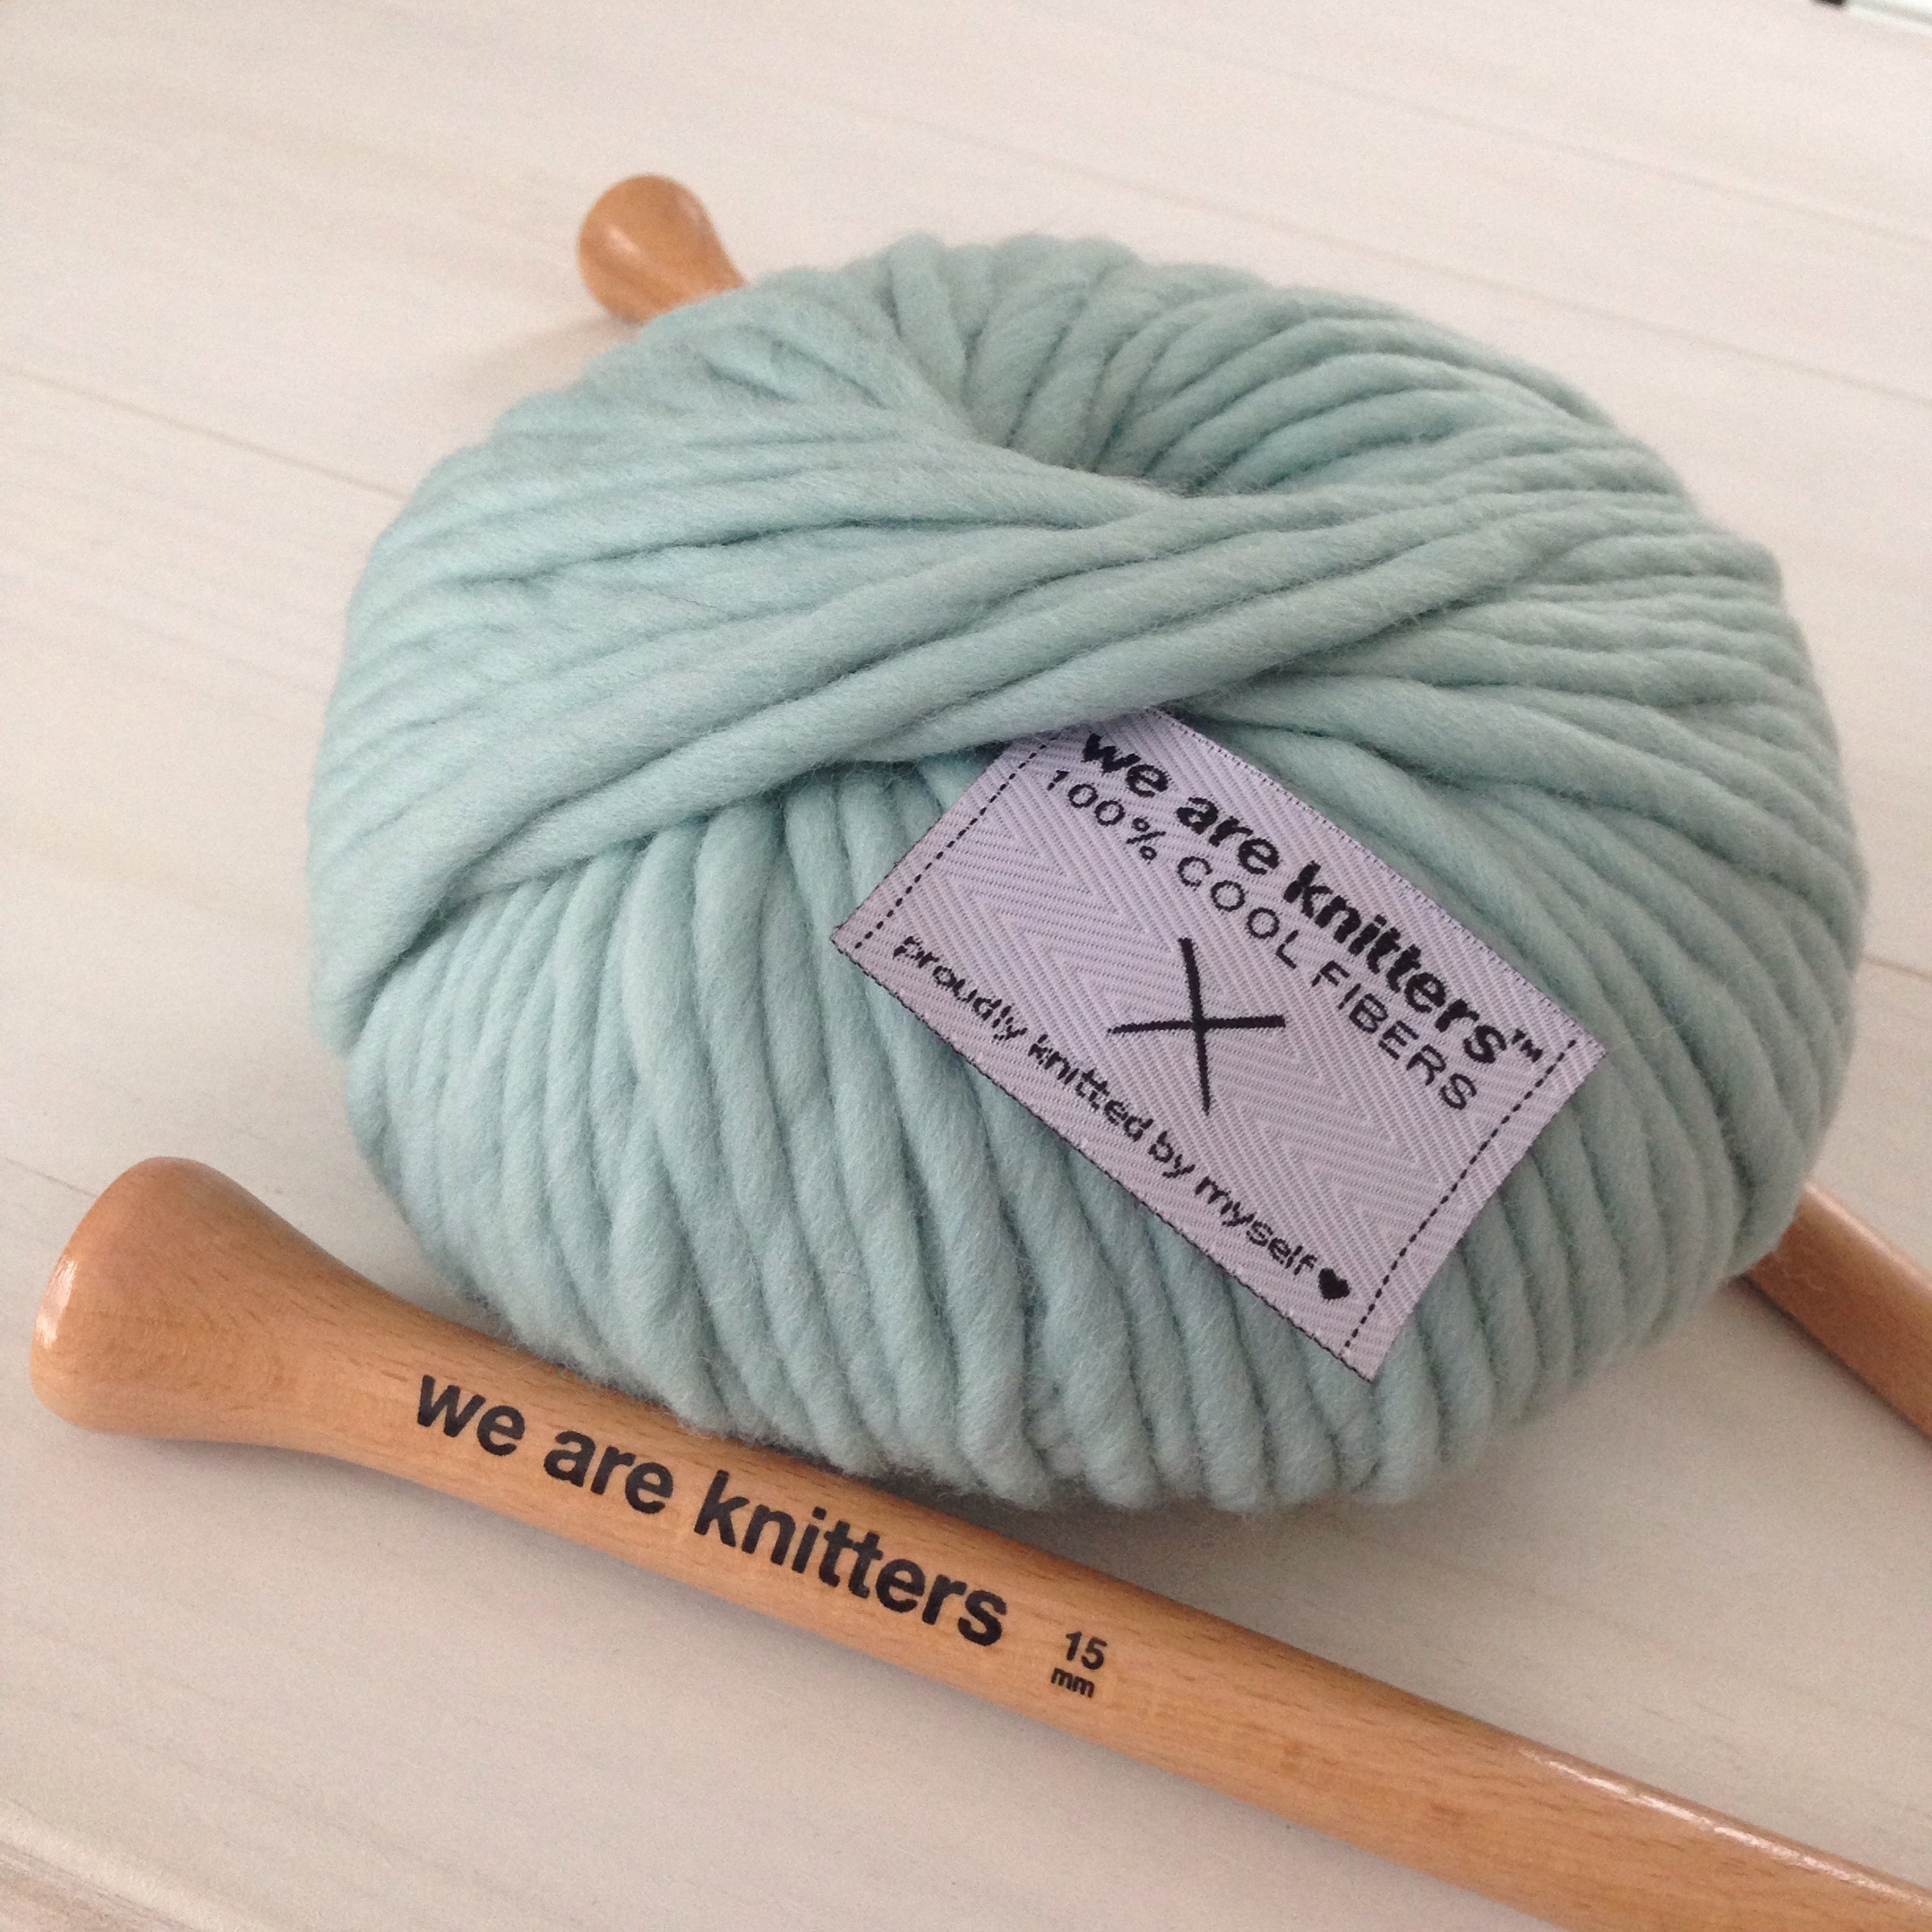
Just received my first We Are Knitters knit kit! I haven't knit anything in years and I'm so excited to do it again. I'll be sharing a full review of my project (I'll be making the Downtown Snood) as well as a giveaway for your own kit on the blog soon!
If you can't wait until then, use the code "BIRCHLANDINGWAK" to receive 15% off your order from We Are Knitters.
- I received this item for review from We Are Knitters but all opinions expressed are my own. Please see our Disclosure Policy for more information. -
It may not be Fall right now but that doesn't mean we can't still enjoy yummy apple baked goods! This recipe is for a soft-baked cookie - lightly spiced and not too sweet, just perfect. Besides, it's my Grandma's recipe so you know it has to be good.
Now I never actually met my Grandma Dot - she passed away before I was born. But from the stories I’ve heard she was a hard worker, very outspoken, and feisty. Whenever I make these cookies I think of her and am honored to carry on a piece of her. We make these cookies pretty regularly throughout the year, especially when we get together with family (they are my Dad’s favorite cookies).
Sift dry ingredients together and add to creamed mixture. Fold in 1 1/2 cups diced raw, unpeeled apples, coated with 1 tbsp brown sugar. (I usually chop my apples a little on the bigger side.) Dough will be crumbly. Drop by small teaspoons full and BAKE at 375 degrees for 8-10 minutes.
These cookies are best enjoyed the same day you make them; they tend to get soggy the longer they sit because of the moisture in the apples. Usually they're gobbled up fast though, so this generally isn't an issue.
Every so often someone will contact me and ask if they can order a completely custom ornament. I'm always game to give it a try and see if I can use my wood burner to translate what they want onto a little wooden disc.
Custom Methodist Cross ornament in the making.
Recently a very nice lady contacted me on Etsy to see about ordering a set of Methodist Cross ornaments for her Church. I loved the idea of having my ornaments hanging in a Church and I was excited to give it a try. I'm really happy with how they came out and I especially love the texture of the flame on them.
Even though it's not Christmas-time, if you have an idea for a completely custom ornament please don't hesitate to send me an e-mail or a custom order request on Etsy. I'm always happy to see what I can do for you.
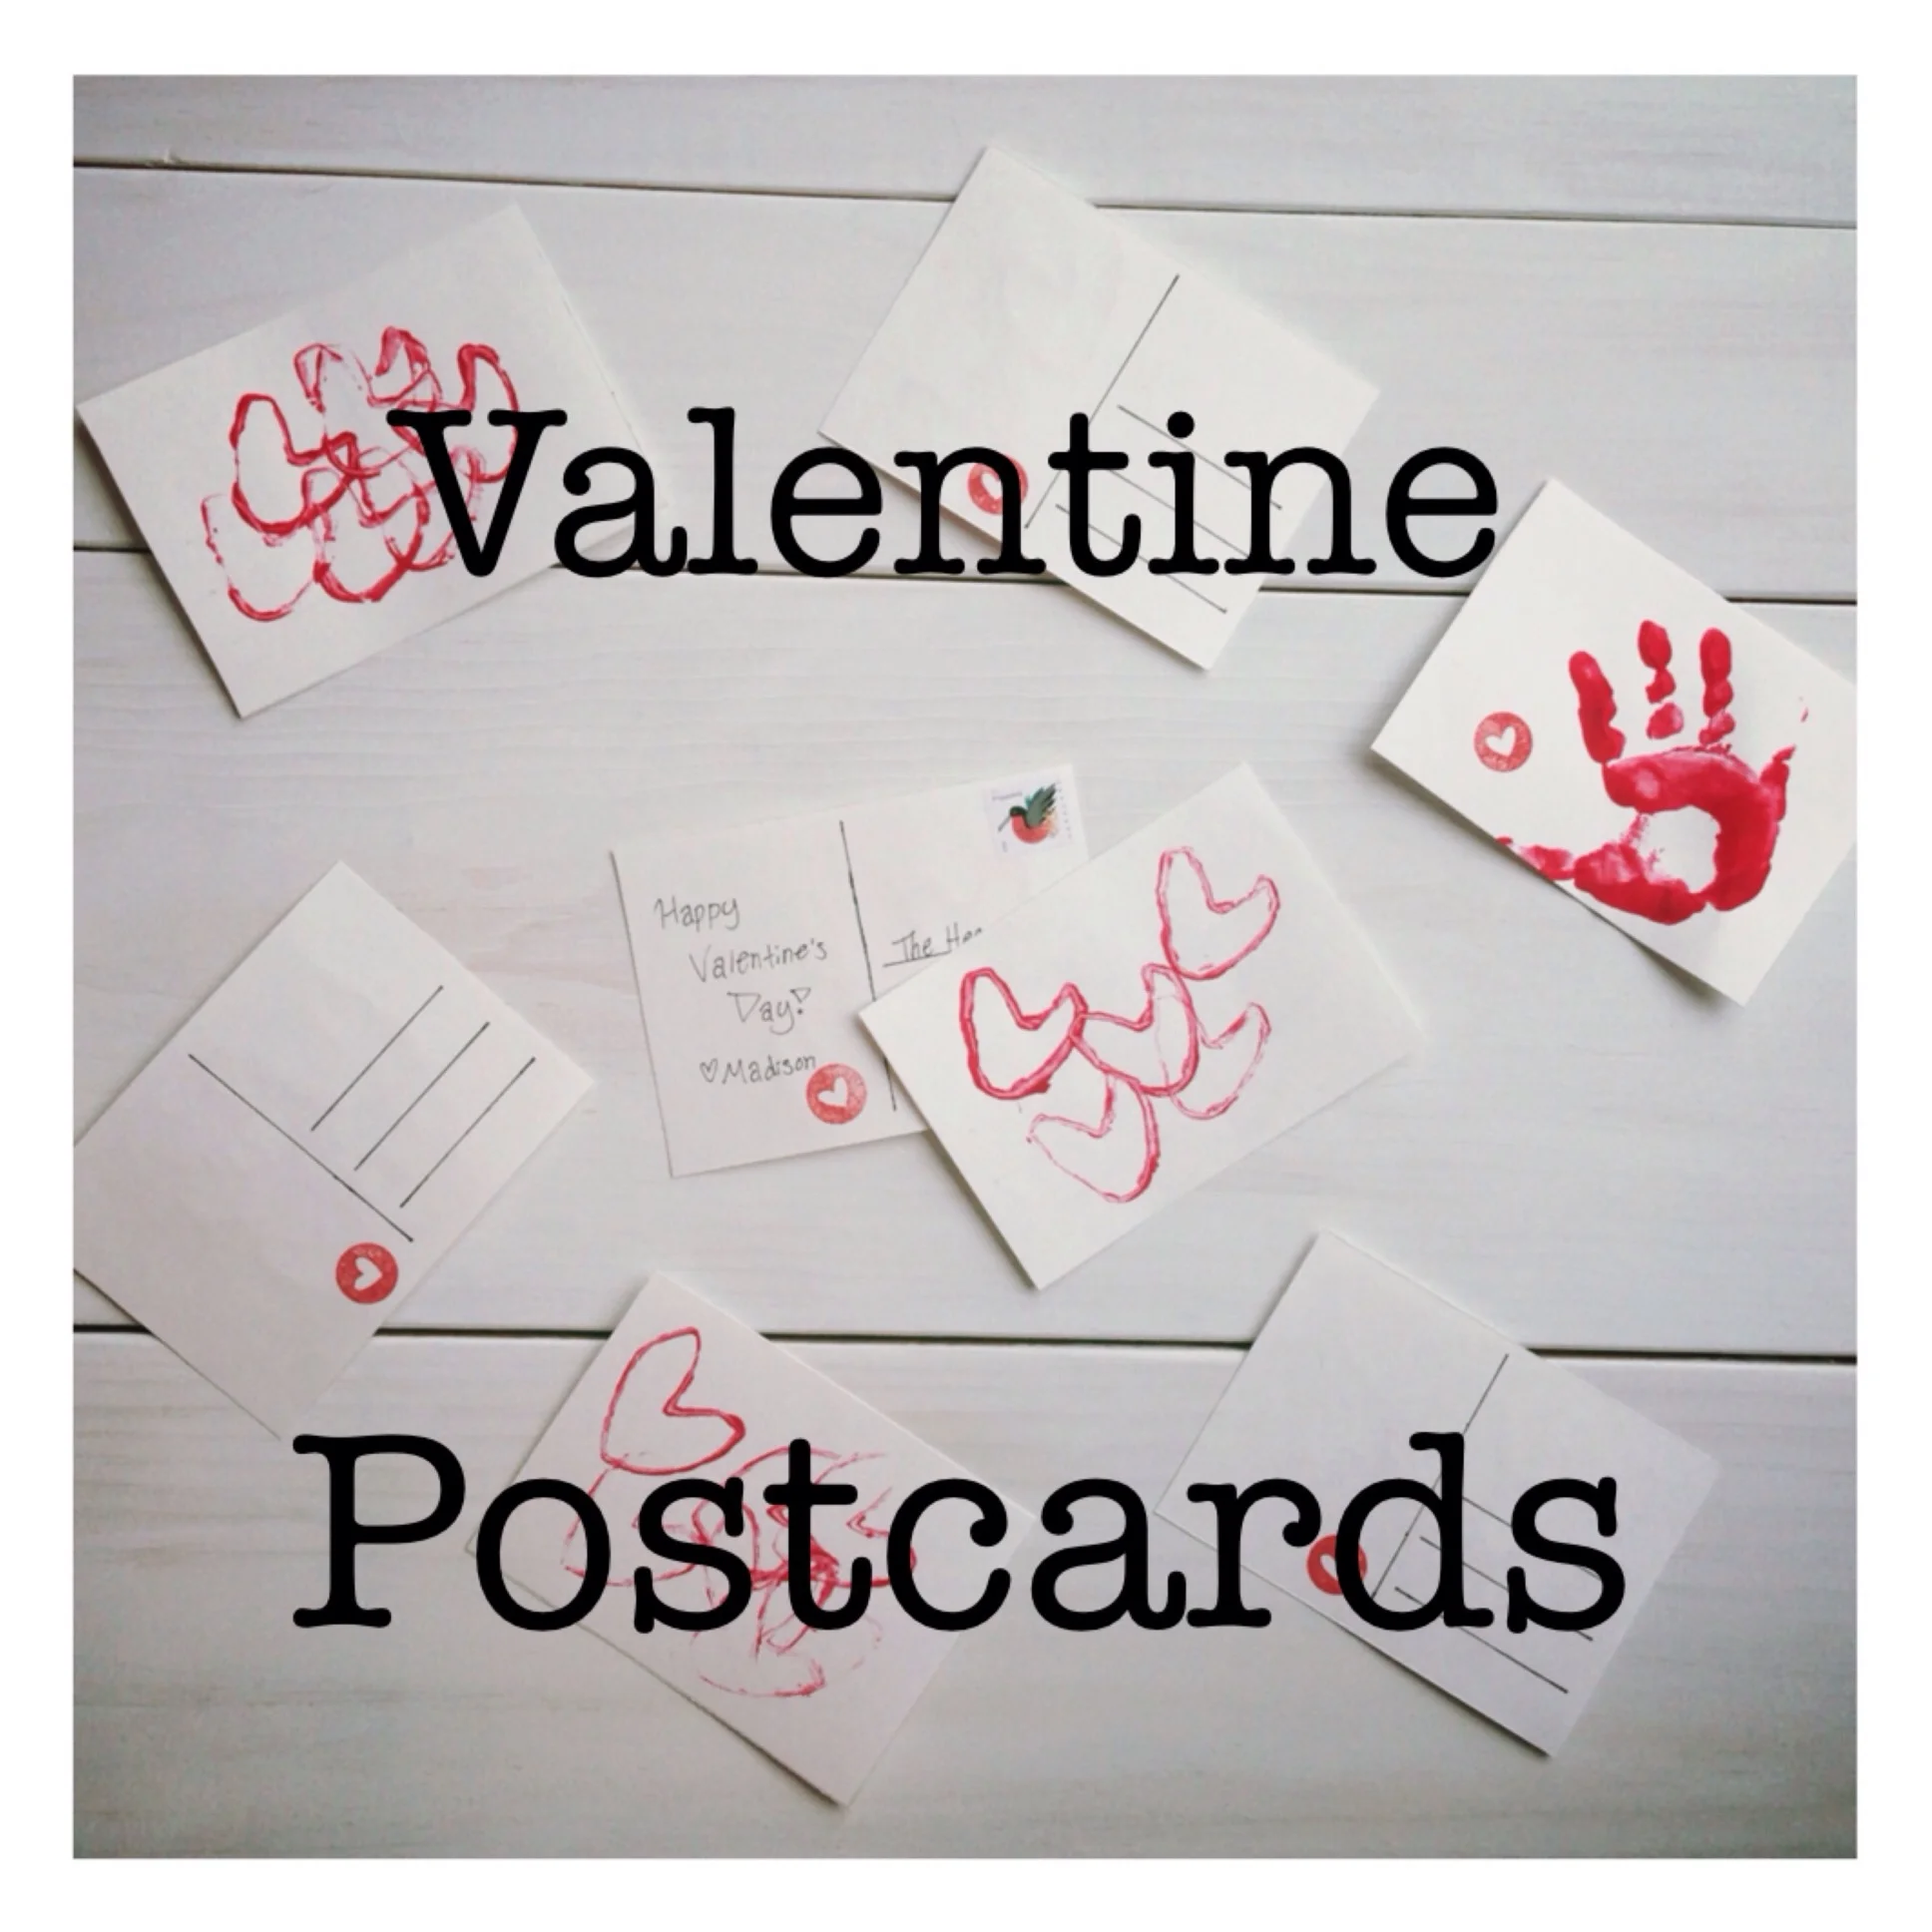
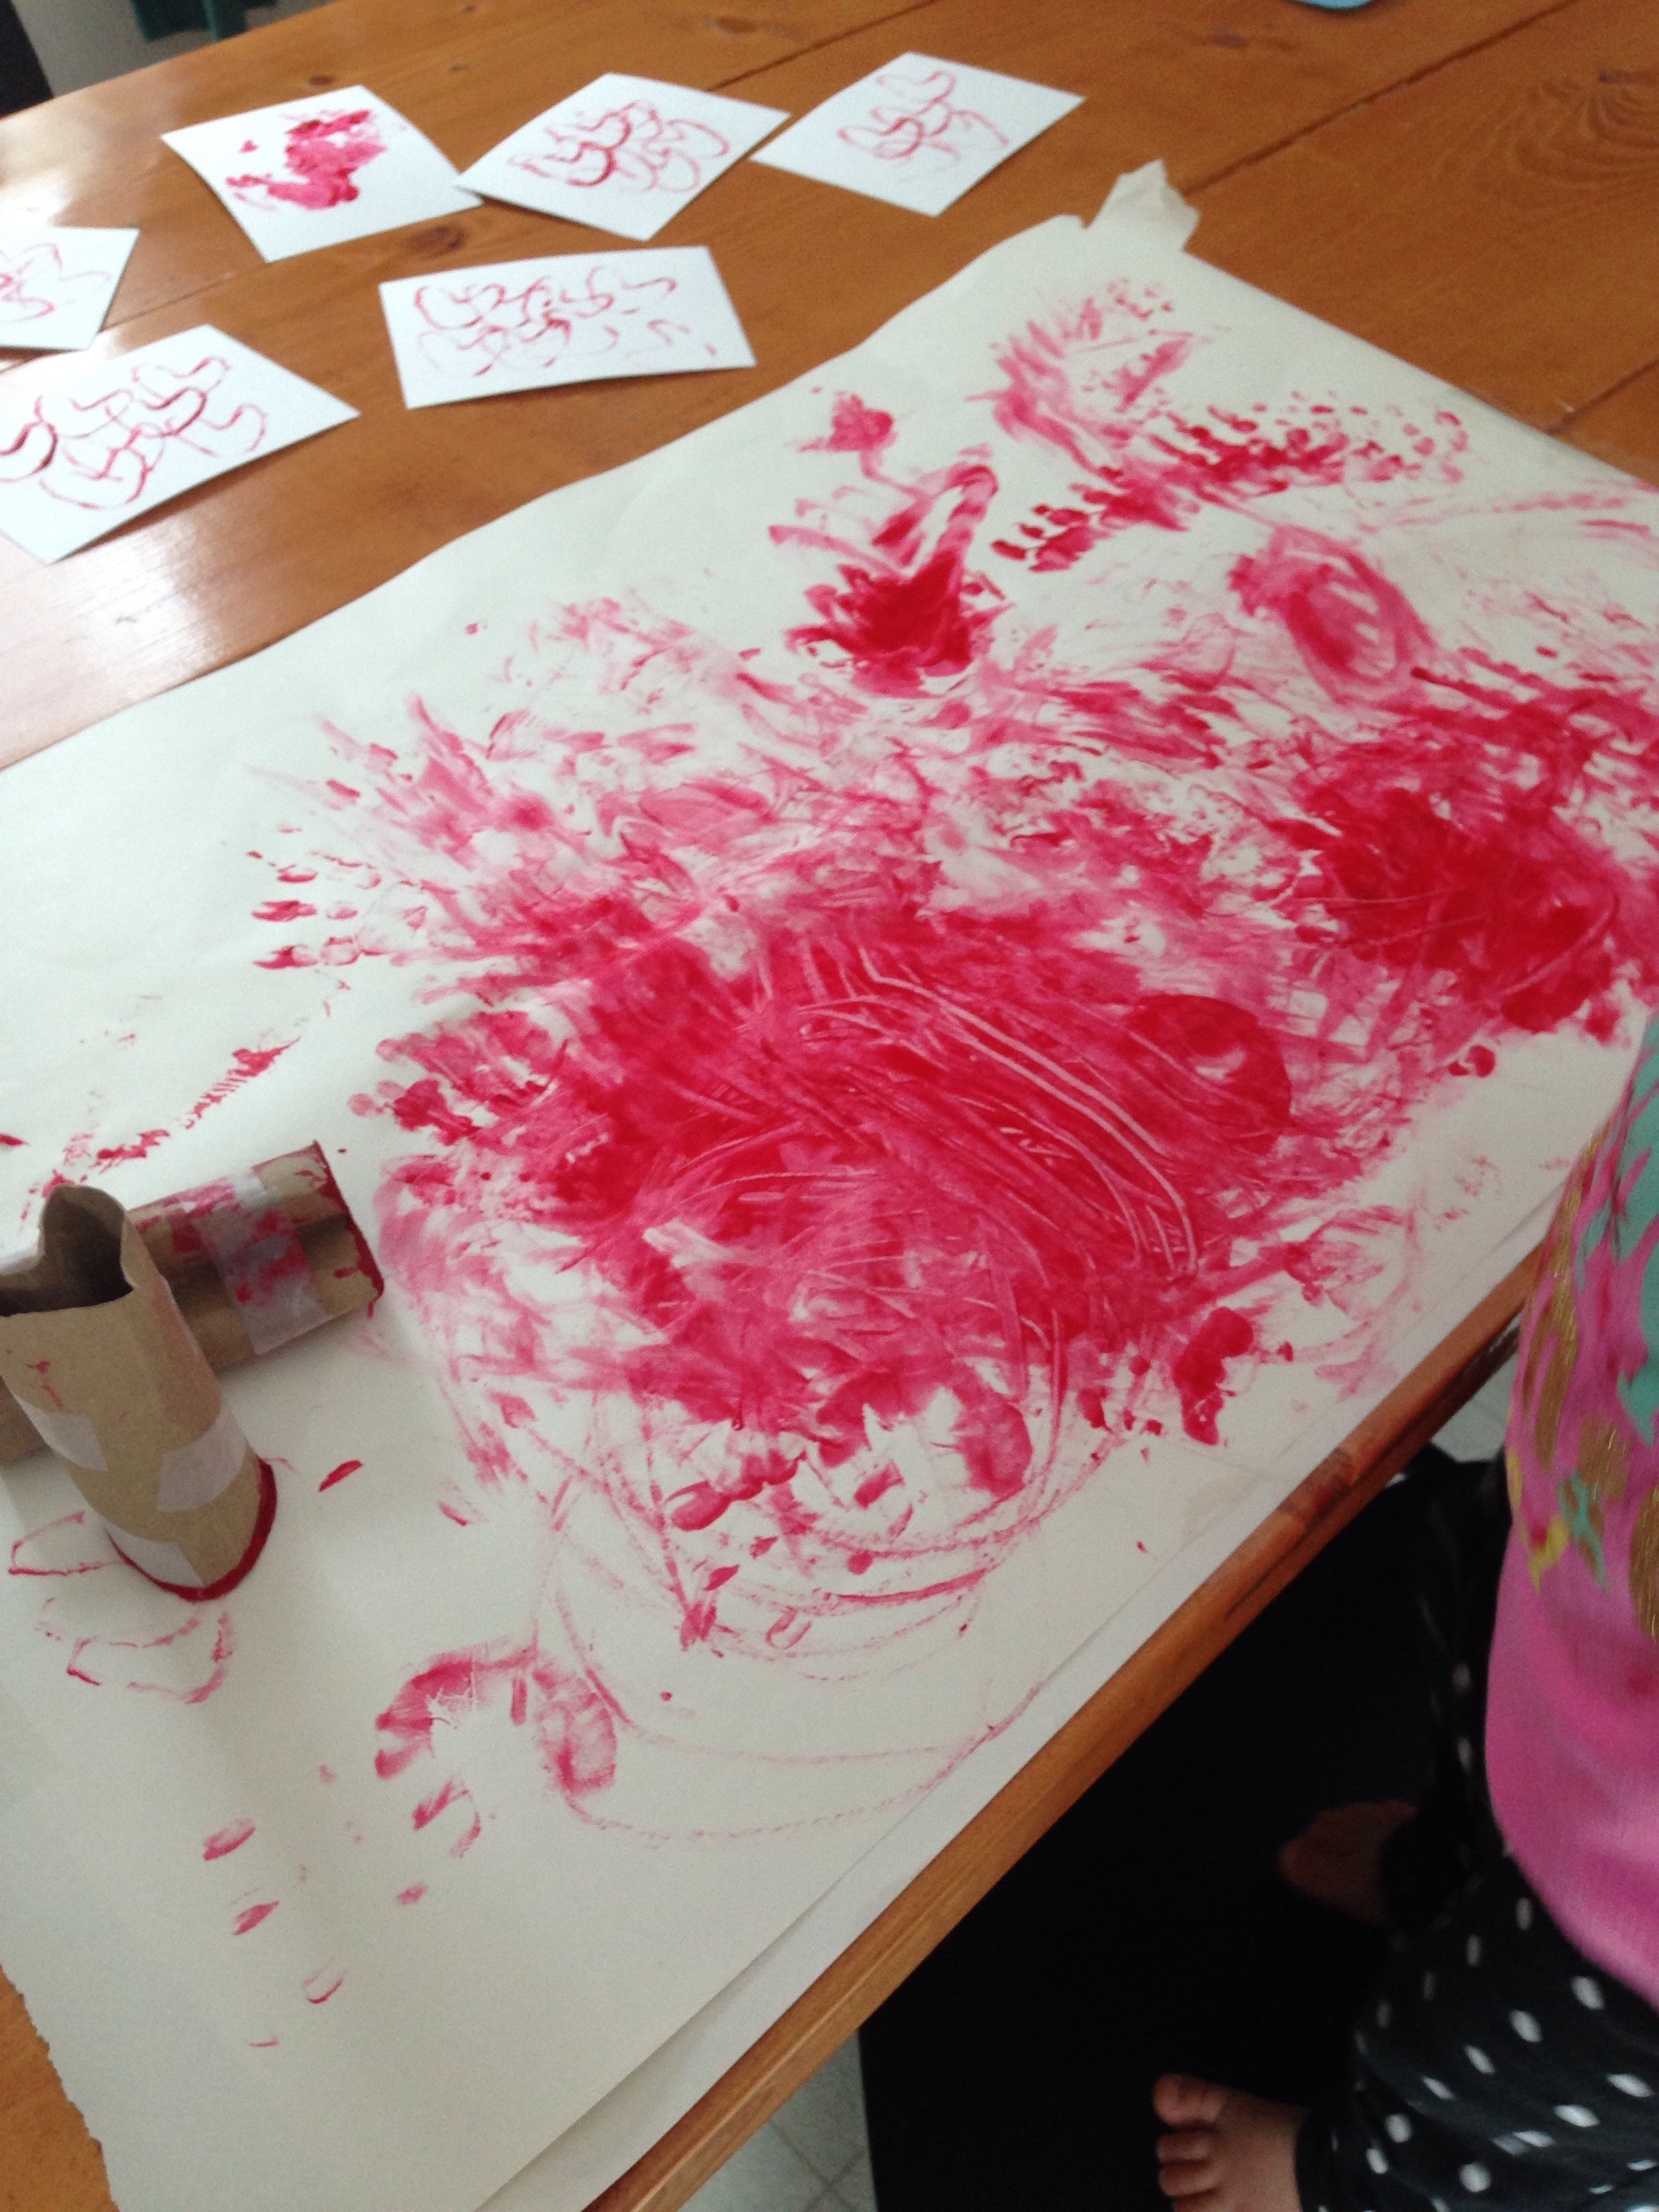
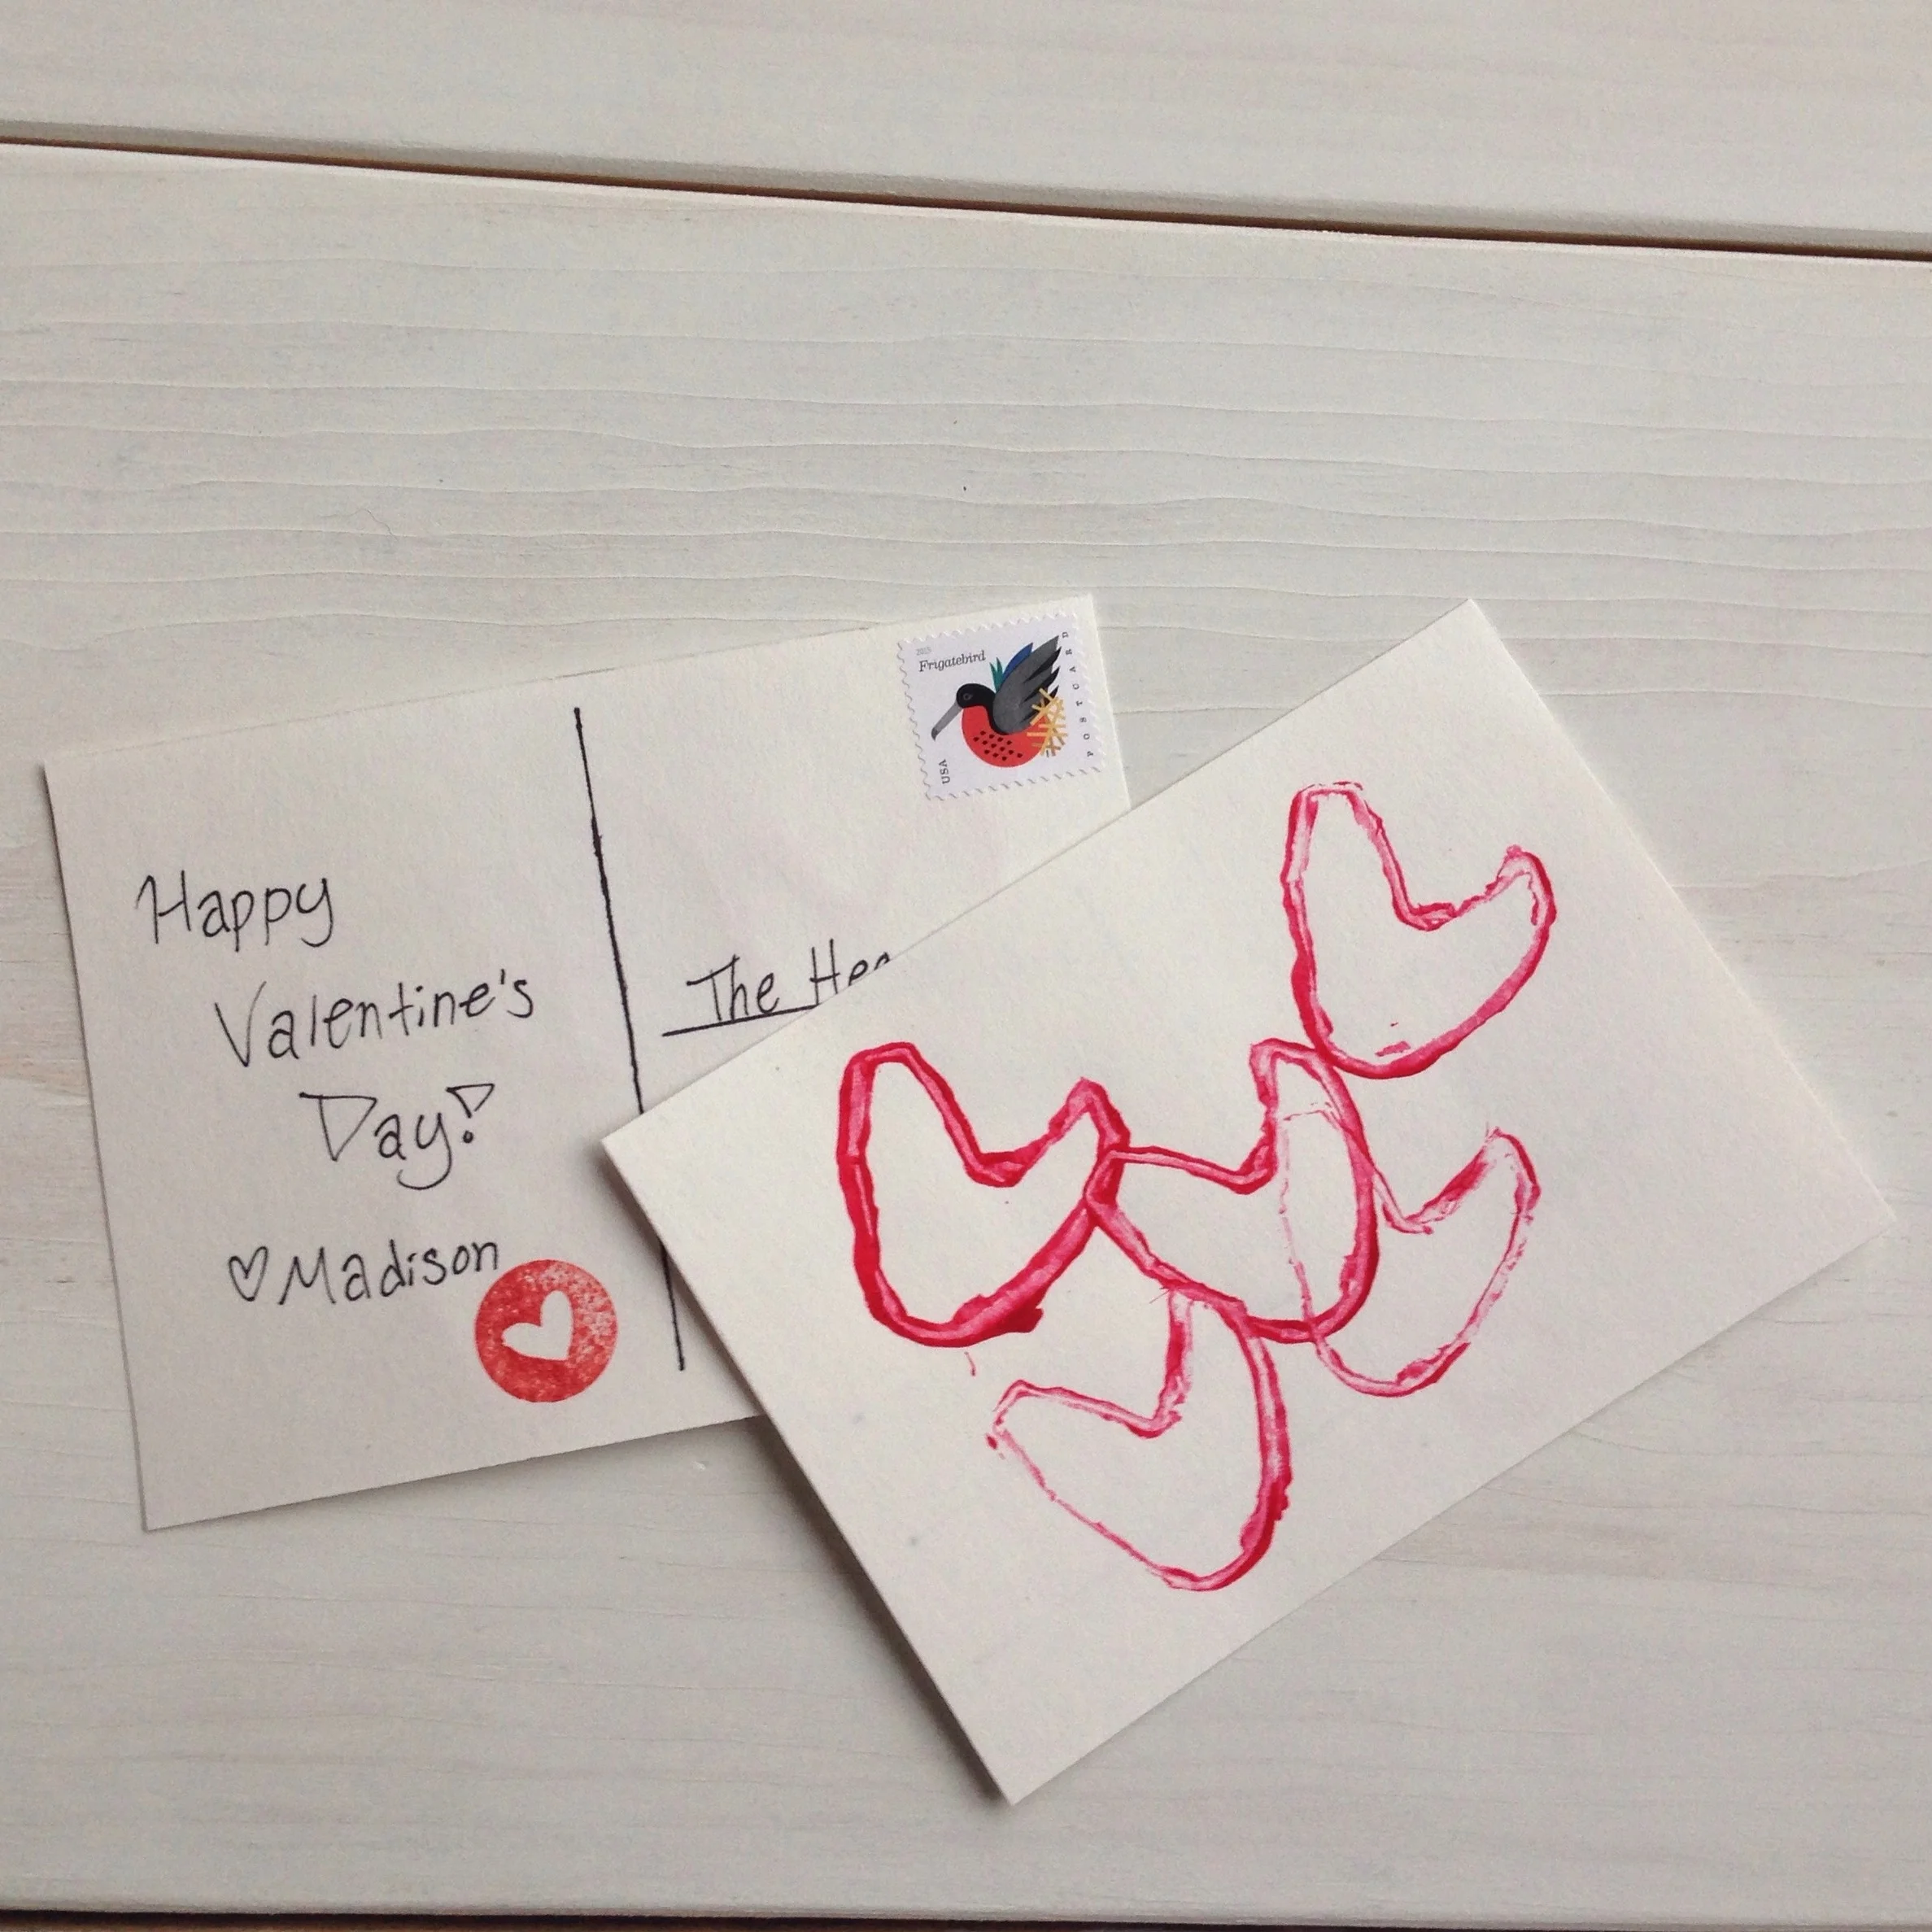
Last year I started the tradition of having our little one make Valentines for close family and friends. This year I wanted to continue the tradition but find a way to make them as inexpensive as possible, and so I settled on the idea of DIY Valentine Postcards. | This post contains affiliate links |
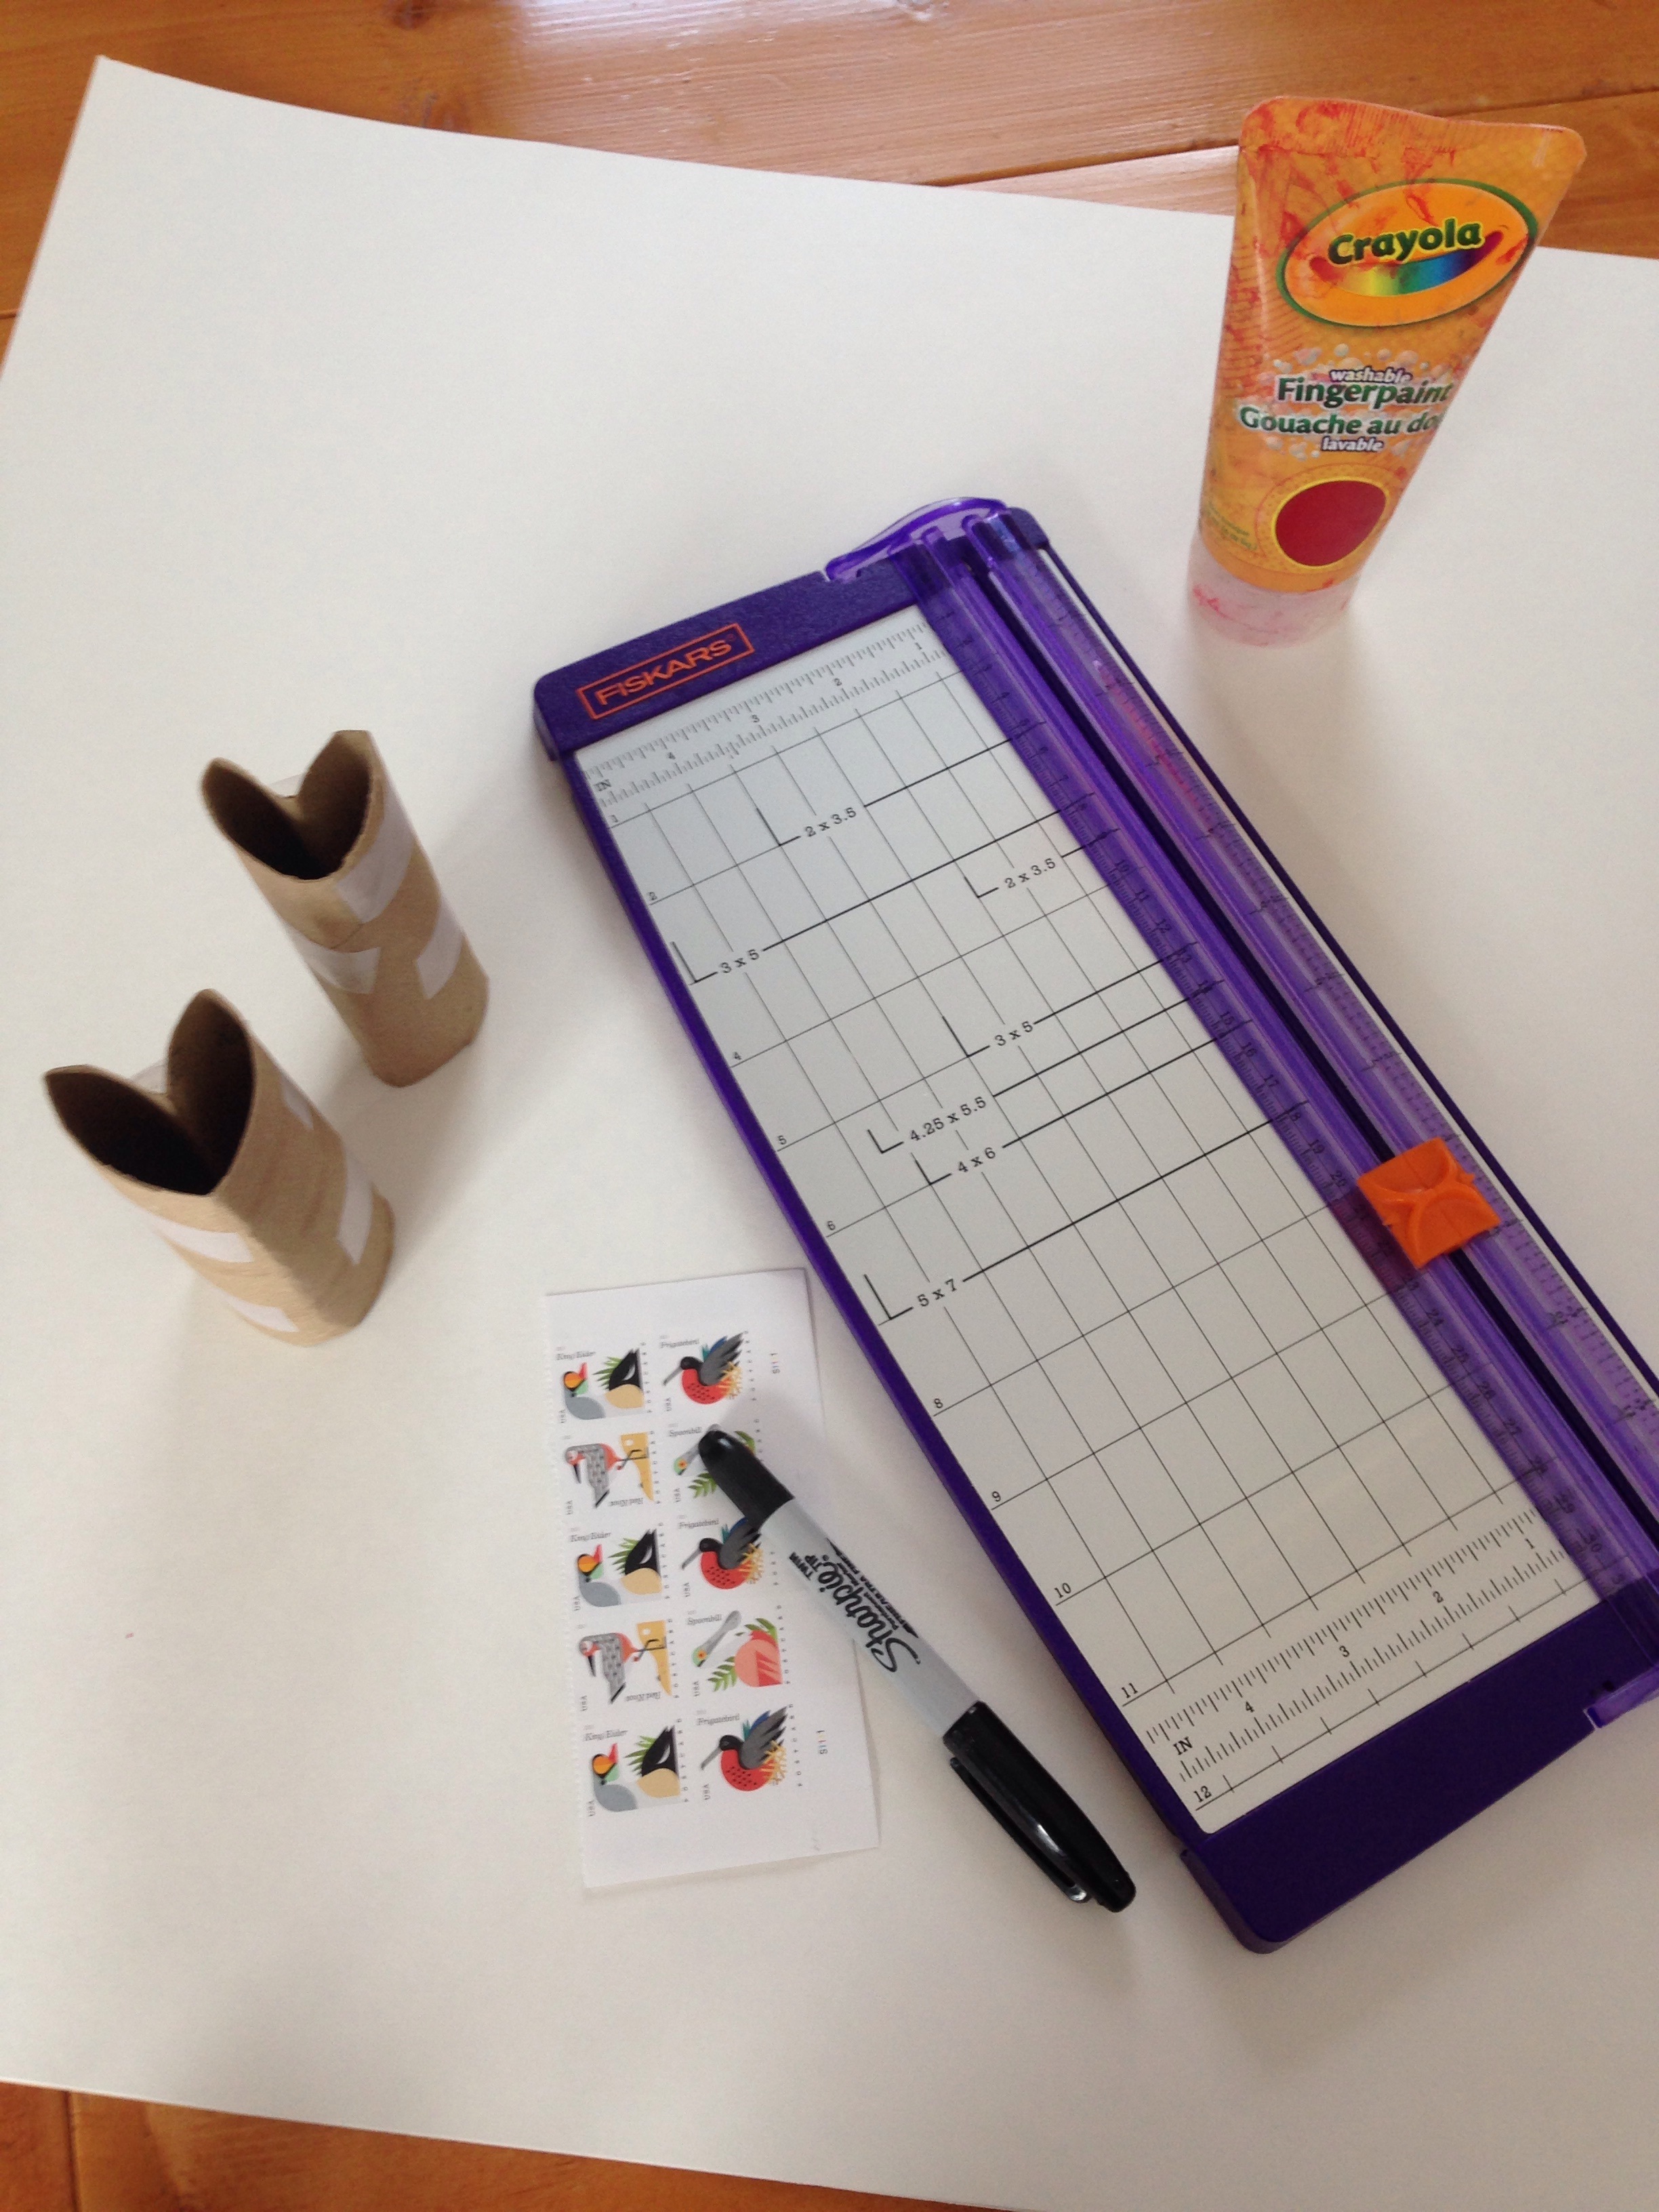
One of the reasons I decided to make postcards this year instead of traditional cards was, not only are postcards cuter, they cost almost 30% less to mail than a traditional card - these postage savings add up! As a result, this project cost next to nothing to do. I already had the paint, toilet paper rolls, rulers, etc. - I just had to run down to the local store and pick up a piece of poster board which cost a whopping 99 cents.
The simple supplies
The how-to is pretty straight forward: use a ruler to measure and cut out your postcards (I made mine 4x5.5", but you can check here for more details on postcard requirements). If you have a paper cutter that can come in quite handy to make quick work of cutting them out.
Next use a ruler and a sharpie to create the back of the postcard, one line down the middle and then three lines on the right hand side for the address.
Next let your toddler go to town! I put down one card at a time to keep the backs clean from paint as well as to keep them from getting over-saturated. To make the heart "stamp" I used toilet paper tubes bent into a heart shape and held together with tape.
Once the cards were done I let our little one go crazy on the table covering.
The cards drying - they came out pretty great!!
I kept the backs very basic with a simple handwritten message and a little heart stamp.
I hope you enjoyed this little Valentine DIY! It was very quick and easy and the possibilities are endless when it comes to how you want to paint, color, or draw the front of the postcard.
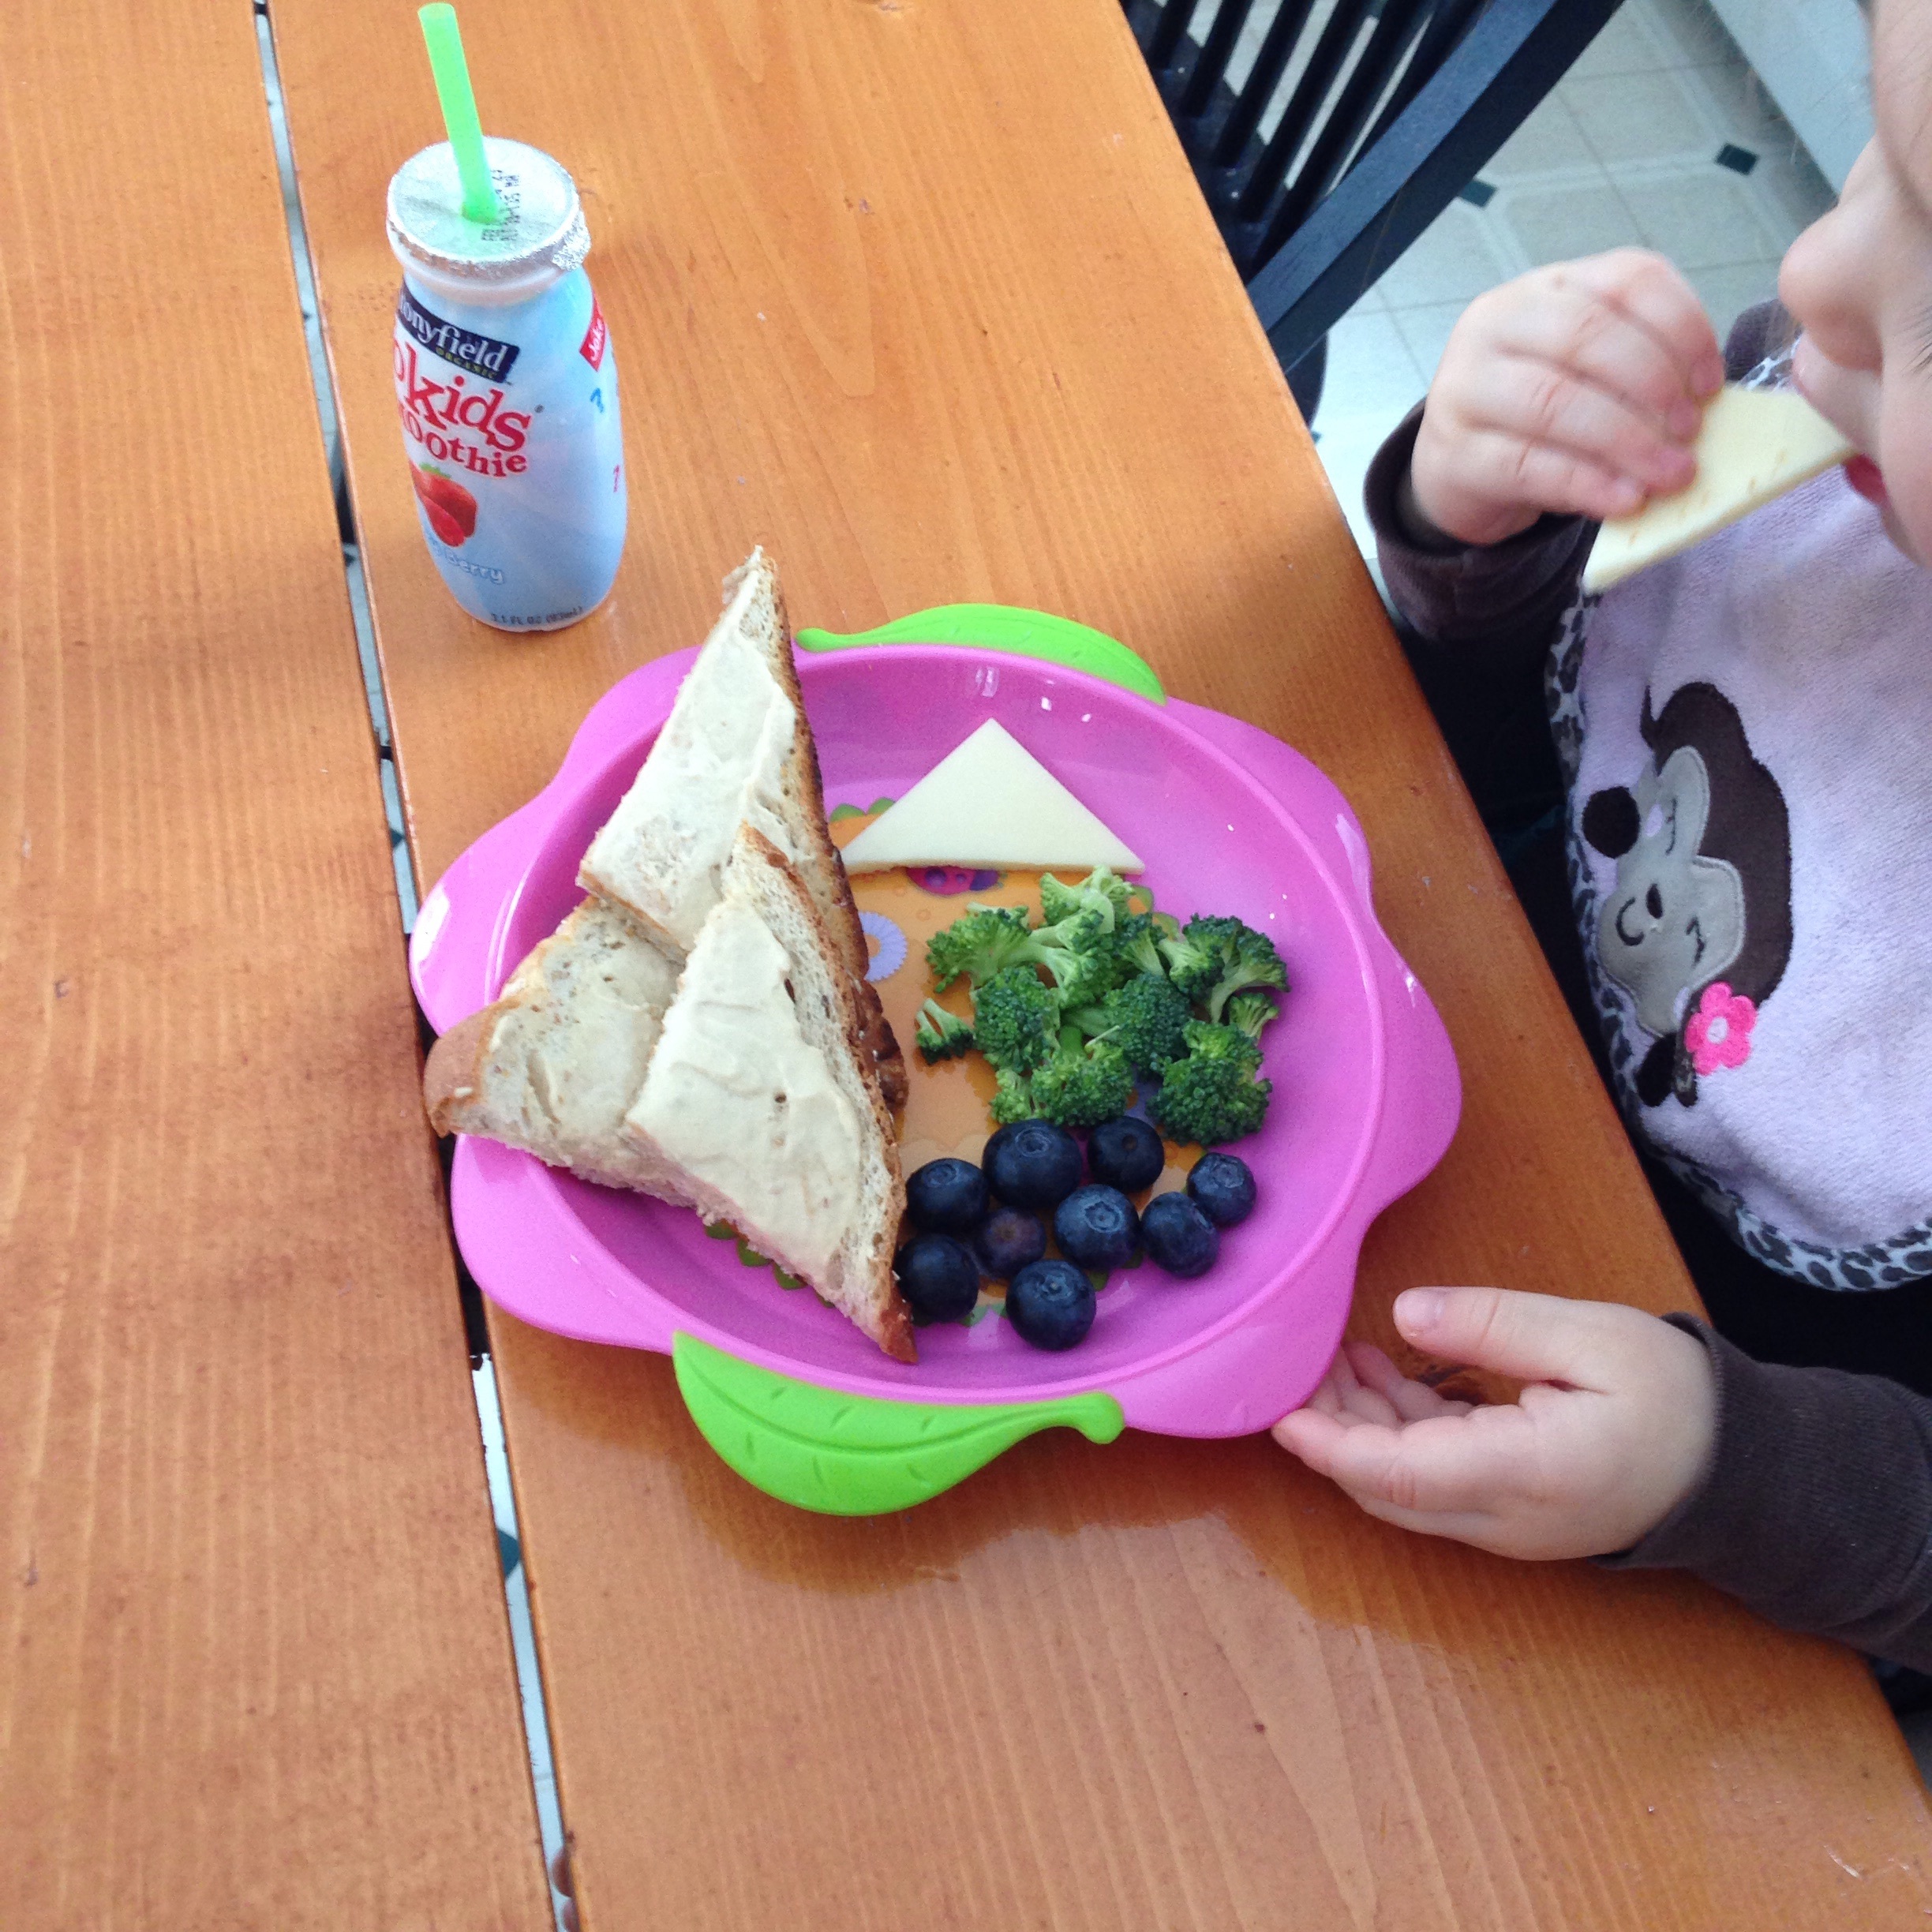
Lunchtime is often kind of hectic around here. Mornings tend to be when we do errands, groceries, story time, swim lessons, etc. and we always seem to be rolling back into the house right at lunchtime. This means I often only have a few minutes to get lunch on the table before a hunger-induced meltdown occurs. Having a no-prep, no-cook lunch is key to keeping everyone happy. | This post contains affiliate links and an honest review of a Nûby product |
This little lunch isn't anything fancy but that's what's so great about it. It's essentially a collection of healthy snacks that, when put together, make a great toddler-friendly meal. This meal hits all the main food groups (dairy, protein, grains, fruit, and veggies) and best of all our little one loves it.
Our little one's meal includes a Stonyfield Yogurt drink, hummus on whole grain toast, blueberries, broccoli florets, and some cheese all served on this cute Nûby Flower Child Toddler Plate.
We love this fun plate from Nûby. It's BPA-free and has a great no-skid bottom which is really helpful when your little one is eating. Our daughter especially loves the fun shape, easy grip handles, and the pictures (lady bugs and daisies) printed on the bottom of the plate. This adorable plate has quickly become her favorite for mealtimes.
Toddler Meal Ideas
If you're looking for more meal ideas, mix and match these other great no-cook or quick-cook foods to make your own healthy toddler meal:
smoothies
puree pouches
fruit cups (make sure to get ones packed in juice, not syrup. It's also still a good idea to drain and rinse the fruit to reduce the sugar content a bit)
any fresh fruit (cut to appropriate-sized pieces if needed)
any fresh or previously cooked vegetables (cut to appropriate-sized pieces if needed)
yogurt
cottage cheese
cheese
toast with mashed avocado spread on it
hummus with crackers
hummus with unsalted pretzels
crackers with peanut, almond, or sun butter spread thinly on it (only use nut butters if your child does not have nut allergies)
instant oatmeal
cereal with milk
cereal bar
Always use use your best judgement when it comes to safe foods and safe serving sizes to give to your little one, and always supervise them while eating.
- I received this item for review from Nûby but all opinions expressed are my own. Please see our Disclosure Policy for more information. -
Nûby's Flower Child Toddler Plate can be found at various retailers including Amazon.
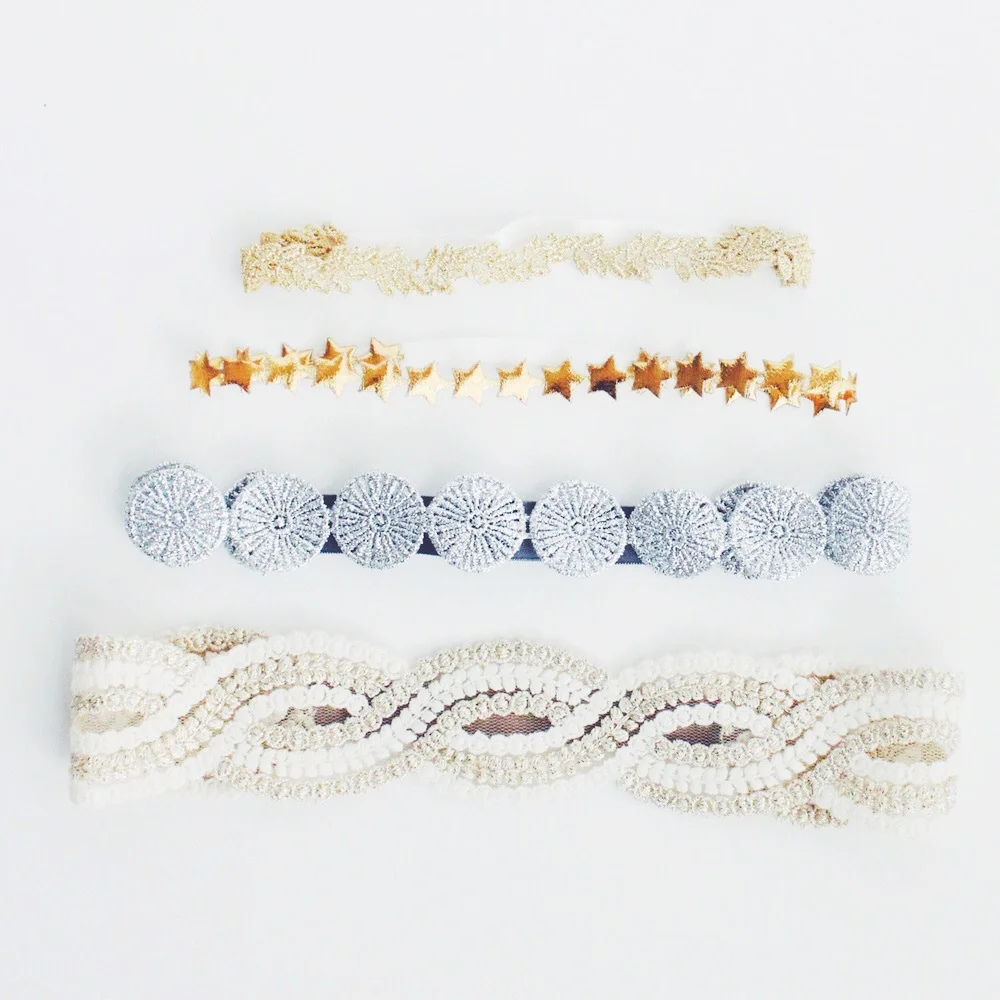
Willow Crowns has probably been my favorite mama-made business I've watched grow over the last few years. I started following Willow Crowns around the same time I launched my own Etsy shop and blog and Megan's hard work and resulting meteoric success has been such an inspiration! Megan was kind enough to answer a few questions for me about how she got started, how she handles the work-mama balance, and where she hopes to take Willow Crowns in the future.
BIRCH LANDING HOME: Tell me a little about yourself and your business.
WILLOW CROWNS (MEGAN): I'm a lifelong New Englander living in Texas with my husband and three year old daughter, trying to keep it all balanced! I love coffee (French press is my new addiction), hair and beauty products, and I honestly never thought I'd be an entrepreneur! Willow Crowns in my second baby and over the past 2.5 years has grown into what I like to think is the premier destination for stylish, timeless hair accessories for ladies of all ages.
Megan, the mama behind Willow Crowns.
BLH: How did you start Willow Crowns? Did you always make headbands and accessories or was this a new leap for you?
WC: When my daughter was ten months old we were newly relocated to Houston and I was struggling to find my groove. Being alone in a new city with a little baby was stressful and I was looking for something to help me decompress and fill my time, something that could me "mine." I was already (occasionally) making her some headbands and thought I'd give opening an Etsy shop a try! I ended up enjoying it so much and found it so fulfilling that I kept trying to grow, improve, and ultimately make it a full-time business.
BLH: What does a typical day look like for you? Do you set aside specific time for work and for family? How do you handle the dreaded nap strike? (okay.. that last question is mostly for me)
WC: There's really no "typical" day around here, but I try to dedicate my mornings as much as possible to Olivia. I'll schedule playdates, etc during that time. During nap time (or "quiet rest time" with the iPad during nap strikes), I handle the bulk of my administrative work, which means replying to e-mails, preparing social media content, and getting orders filled. Late afternoon is ideally earmarked as family time, prepping meals, folding laundry, etc. and I handle the rest (mostly production) after she goes to bed.
I have a part-time production assistant who comes to the studio once a week and she helps keep our inventory stocked, and I'll do the rest while my daughter is at a Mother's Day Out program two days a week. All this keeps my days pretty busy, but I wouldn't have it another way! I love knowing that there's lots to be done and I find it really gratifying to check it all off my list as the day goes on.
BLH: What is your favorite part about owning your own company? And least favorite part?
WC: This is a tough one, and they're kind of the same! The flexibility of being able to work from home and set my own hours is huge. My family is my top priority and being able to adapt to changes in our life/schedule/whatever is going on has really helped me maintain a balance. On the flip side, since I work from home, I'm never off the clock. My mind is always racing with ideas, to-do's, and the studio sometimes calls to me late at night when I know there's work to be done. Finally, I have to add in the personal satisfaction as another favorite. When a collection does well, our customers are happy, and we continue to grow, it feels enormously satisfying to have my name attached to that!
BLH: What has been the most exciting moment for Willow Crowns since you started?
WC: So many to choose from! The most recent one is the one I'd have to award "most exciting moment" to, though! Over the holidays West Elm reached out and asked us to do a pop-up shop in one of their Houston stores. I love West Elm and the idea to work with such an established and respected brand was a huge of highlight of WC's short life.
BLH: What advice do you have for people just starting out?
WC: I usually give two separate pieces of advice, the first of which is photography is critical. If you have a great product, great service, and poor photography, your product just won't move. Investing in a photographer or working a trade with a local photographer can put you at a huge advantage when marketing your product. I've spent the two years working on my own photography skills so that I can combine my work with the photographer's we hire and have social media accounts and a website that always look top notch and the better our products look, the more they sell!
Secondly, hang in there! Growing a business can take time (lots of time sometimes depending on your market) and it's important not to compare yourself to others. Staying focused on your product, your brand, your shop, and working persistently even when times are slow will serve you well. Strike up friendships with other local creatives, be consistent on social media, be true to your aesthetic, and things will come together!
BLH: What is your long-term goal? Where do you see yourself in 5 years?
WC: I'm so excited to watch WC grow over the next few years! A move into retail establishments is very much on my mind for the near future and I'd also like to grow our family in the next five years. Hopefully five years from now I can follow up and have another baby, a few more employees, and lots more ladies wearing Willow Crowns!