I'm a wife, stay-at-home mom, crafter, and blogger living in rural New England. As seen in Martha Stewart Living, Food Network Magazine, and more! | Tutorials, DIY, crafts, parenting tips, recipes, money saving tips, product reviews, local product features, New England living, intentional living, and more! |
Since we moved into our home several years ago we’ve been trying to establish more pollinator-friendly areas in our yard. We planted perennial flower beds wrapping around our house which are now well established, and we also have a veggie garden we plant every summer. One item that we’ve been wanting to add has been a solitary bee house to help make our space even more bee-friendly. Thankfully Kind Bee Farms was kind enough to send me one of their all-inclusive bee kits to try! | This post contains an honest review of product provided by Kind Bee Farms |
Kind Bee Farms is unique in that it's an all-inclusive bee experience - you don't just get the solitary bee house, but you get baby leafcutter bee cocoons to hatch too!
The whole kit is well packaged and thought out and comes with everything you need to get started. Since our kids will be home this year remote learning/homeschooling, we thought this would be a great project for science enrichment too.
Once you open your kit, you have the choice whether to let your cocoons start the hatching process inside or outside. We opted for inside so our kids could get to see them come out their cocoons - and don’t worry, letting these bees hatch inside your house isn’t as scary as it sounds! The cocoon box comes with a breathable window so you can see the process and keep them contained. Once 1-5 bees have hatched it’s time to bring the box outside, take the lid off, and put it in the loft of your bee house.
Once our bees started to hatch, we moved the cocoon box out to the bee house. We loved how the bee house looked on our potting bench but realized the afternoon sun was too intense here so we ultimately decided to hang it on our garden fence. This worked out well so our kids could keep a good eye on the bees too. These bees are non-aggressive so I’m personally not worried about our kids watching them up close.
Hello little bee friend!
We’ve had a few bees hatch over the last few days and I’m excited to see the rest of them hatch, move in, and pollinate our fall flowers and veggie garden!
End of Season Update: Ultimately we only had a few bees hatch and then they stopped… I was worried maybe a brief cool spell we experienced had done them in but after hearing back from Kind Bee Farms I found out that they unfortunately had some warehouse and processing delays due to COVID restrictions which affected their cocoon timing. They were kind enough to offer those who didn’t have a great hatching experience free cocoons next year which I thought was great customer service. I’m really looking forward to trying again next year and am sure we will have great results next time!
- I received this item for review from Kind Bee Farms but all opinions expressed are my own. Please see our full Disclosure Policy for more information -
So our garden isn’t magazine-worthy (and it definitely could use a good weeding - the spot by the gate gets so over-run with crab grass I can never seem to keep up) - but it’s been doing really well this year and I thought I would give a quick tour and share some things we’ve been doing in our Victory Garden. New England, Zone 4-5. | This post contains affiliate links |
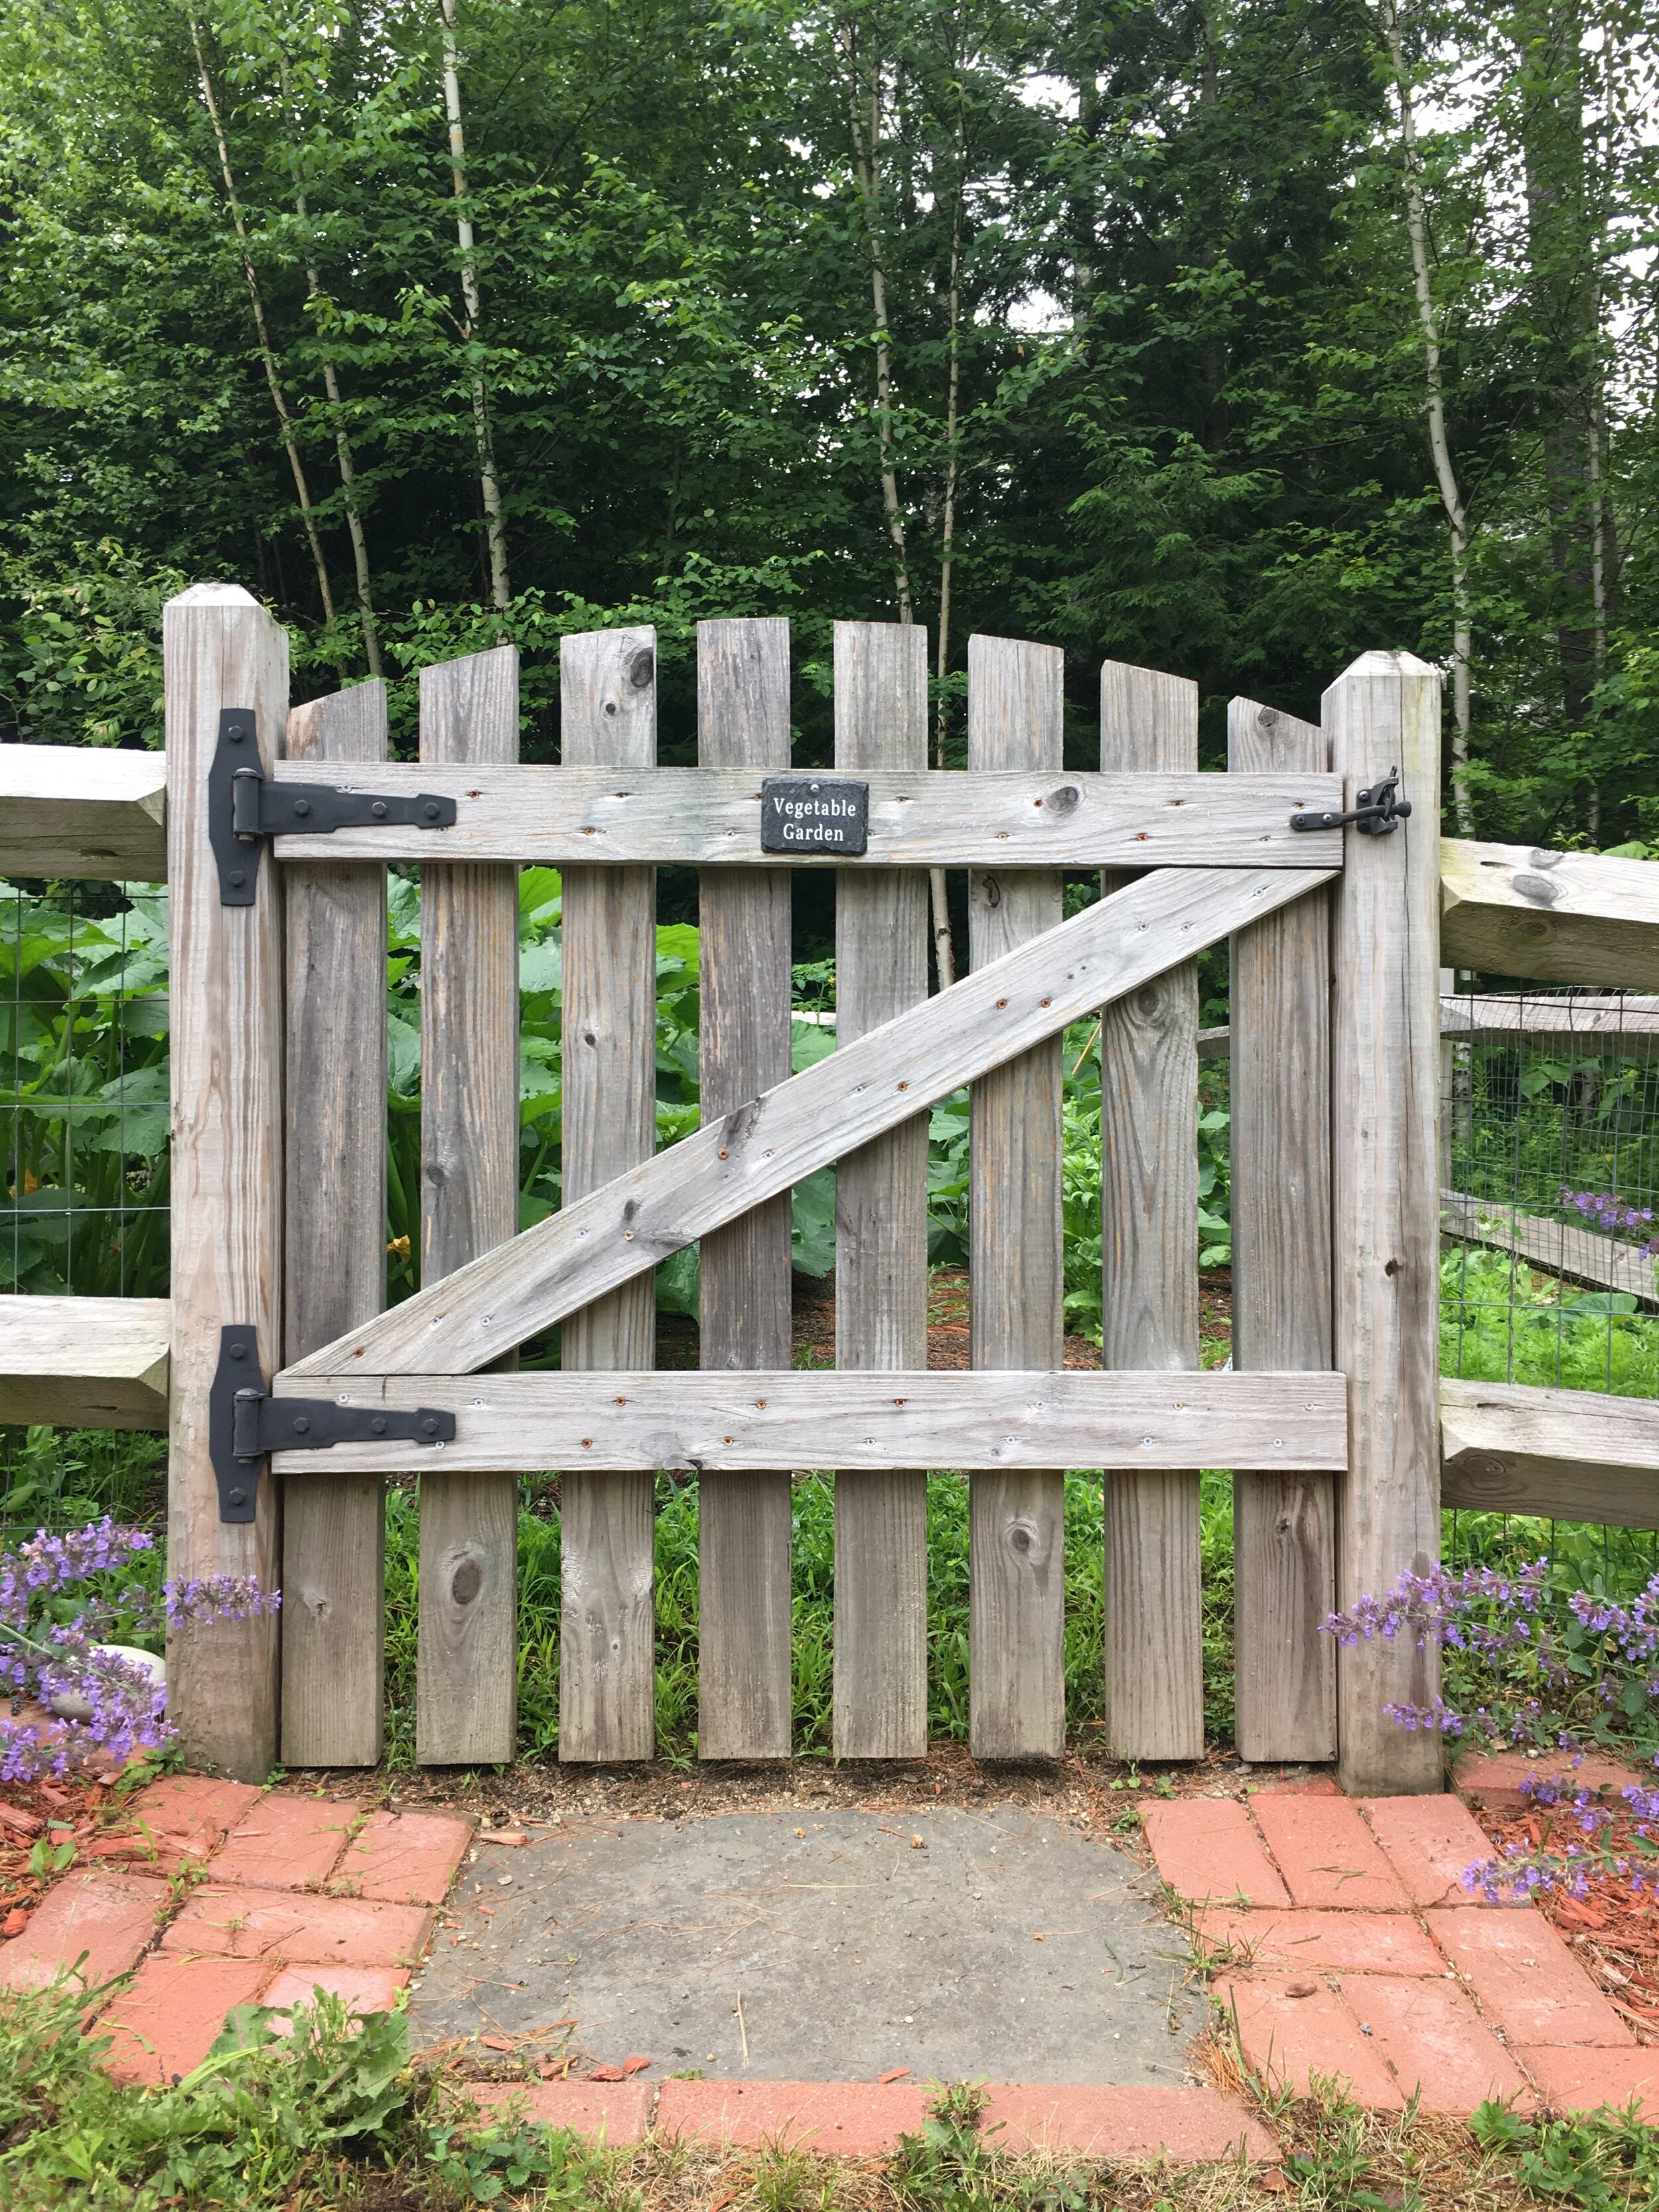
Our garden is approximately 12x24 feet. My husband built the enclosure seven years ago with split-rail fence lined with garden wire fencing (to help keep critters out) and then designed and built the gate himself - the gate is absolutely my favorite part! At the front of the garden I inlayed bricks and pavers (all of which we had on our property left over from the previous owner years ago) to create a little stepping stone walkway leading up to the entrance of the garden and a small flower bed on each side.
Inside the garden everything was planted from seed and directly sown into the ground mid-May with the exception of the Rhubarb plant (it’s a perennial) and the Tomato plants (I purchased them as seedlings from a local garden center).
For fertilizer we put a few bags of composted cow manure in before rototilling in the spring, and then after planting the seeds I sprinkled a small amount of 10-10-10 Fertilizer across the garden.
In each of the front flower beds I planted Catmint which is a perennial and a great pollinator plant! The blooms attract lots of bees and butterflies and help encourage pollination in the vegetable garden. I also just love how wild and cottage-y they look. They’re also very drought tolerant and hardy - a great no-care plant once they’re established.
Soon I would like to also get some type of Mason Bee House to add to the garden to further ecourage pollinators to come to the garden.
Just inside the garden, along either side of the front, I planted Snap Peas against the fence so they would have something to climb. I also planted Carrots along this front area on each side as well.
When I directly sow the seeds into the ground, I usually stake the empty seed packet with a twig (seen above for the Snap Peas), to mark where I’m planting and so I can reference when the seeds should start to sprout, mature, etc as they grow. Now that my plants are mature I could take all these out but I haven’t just yet.
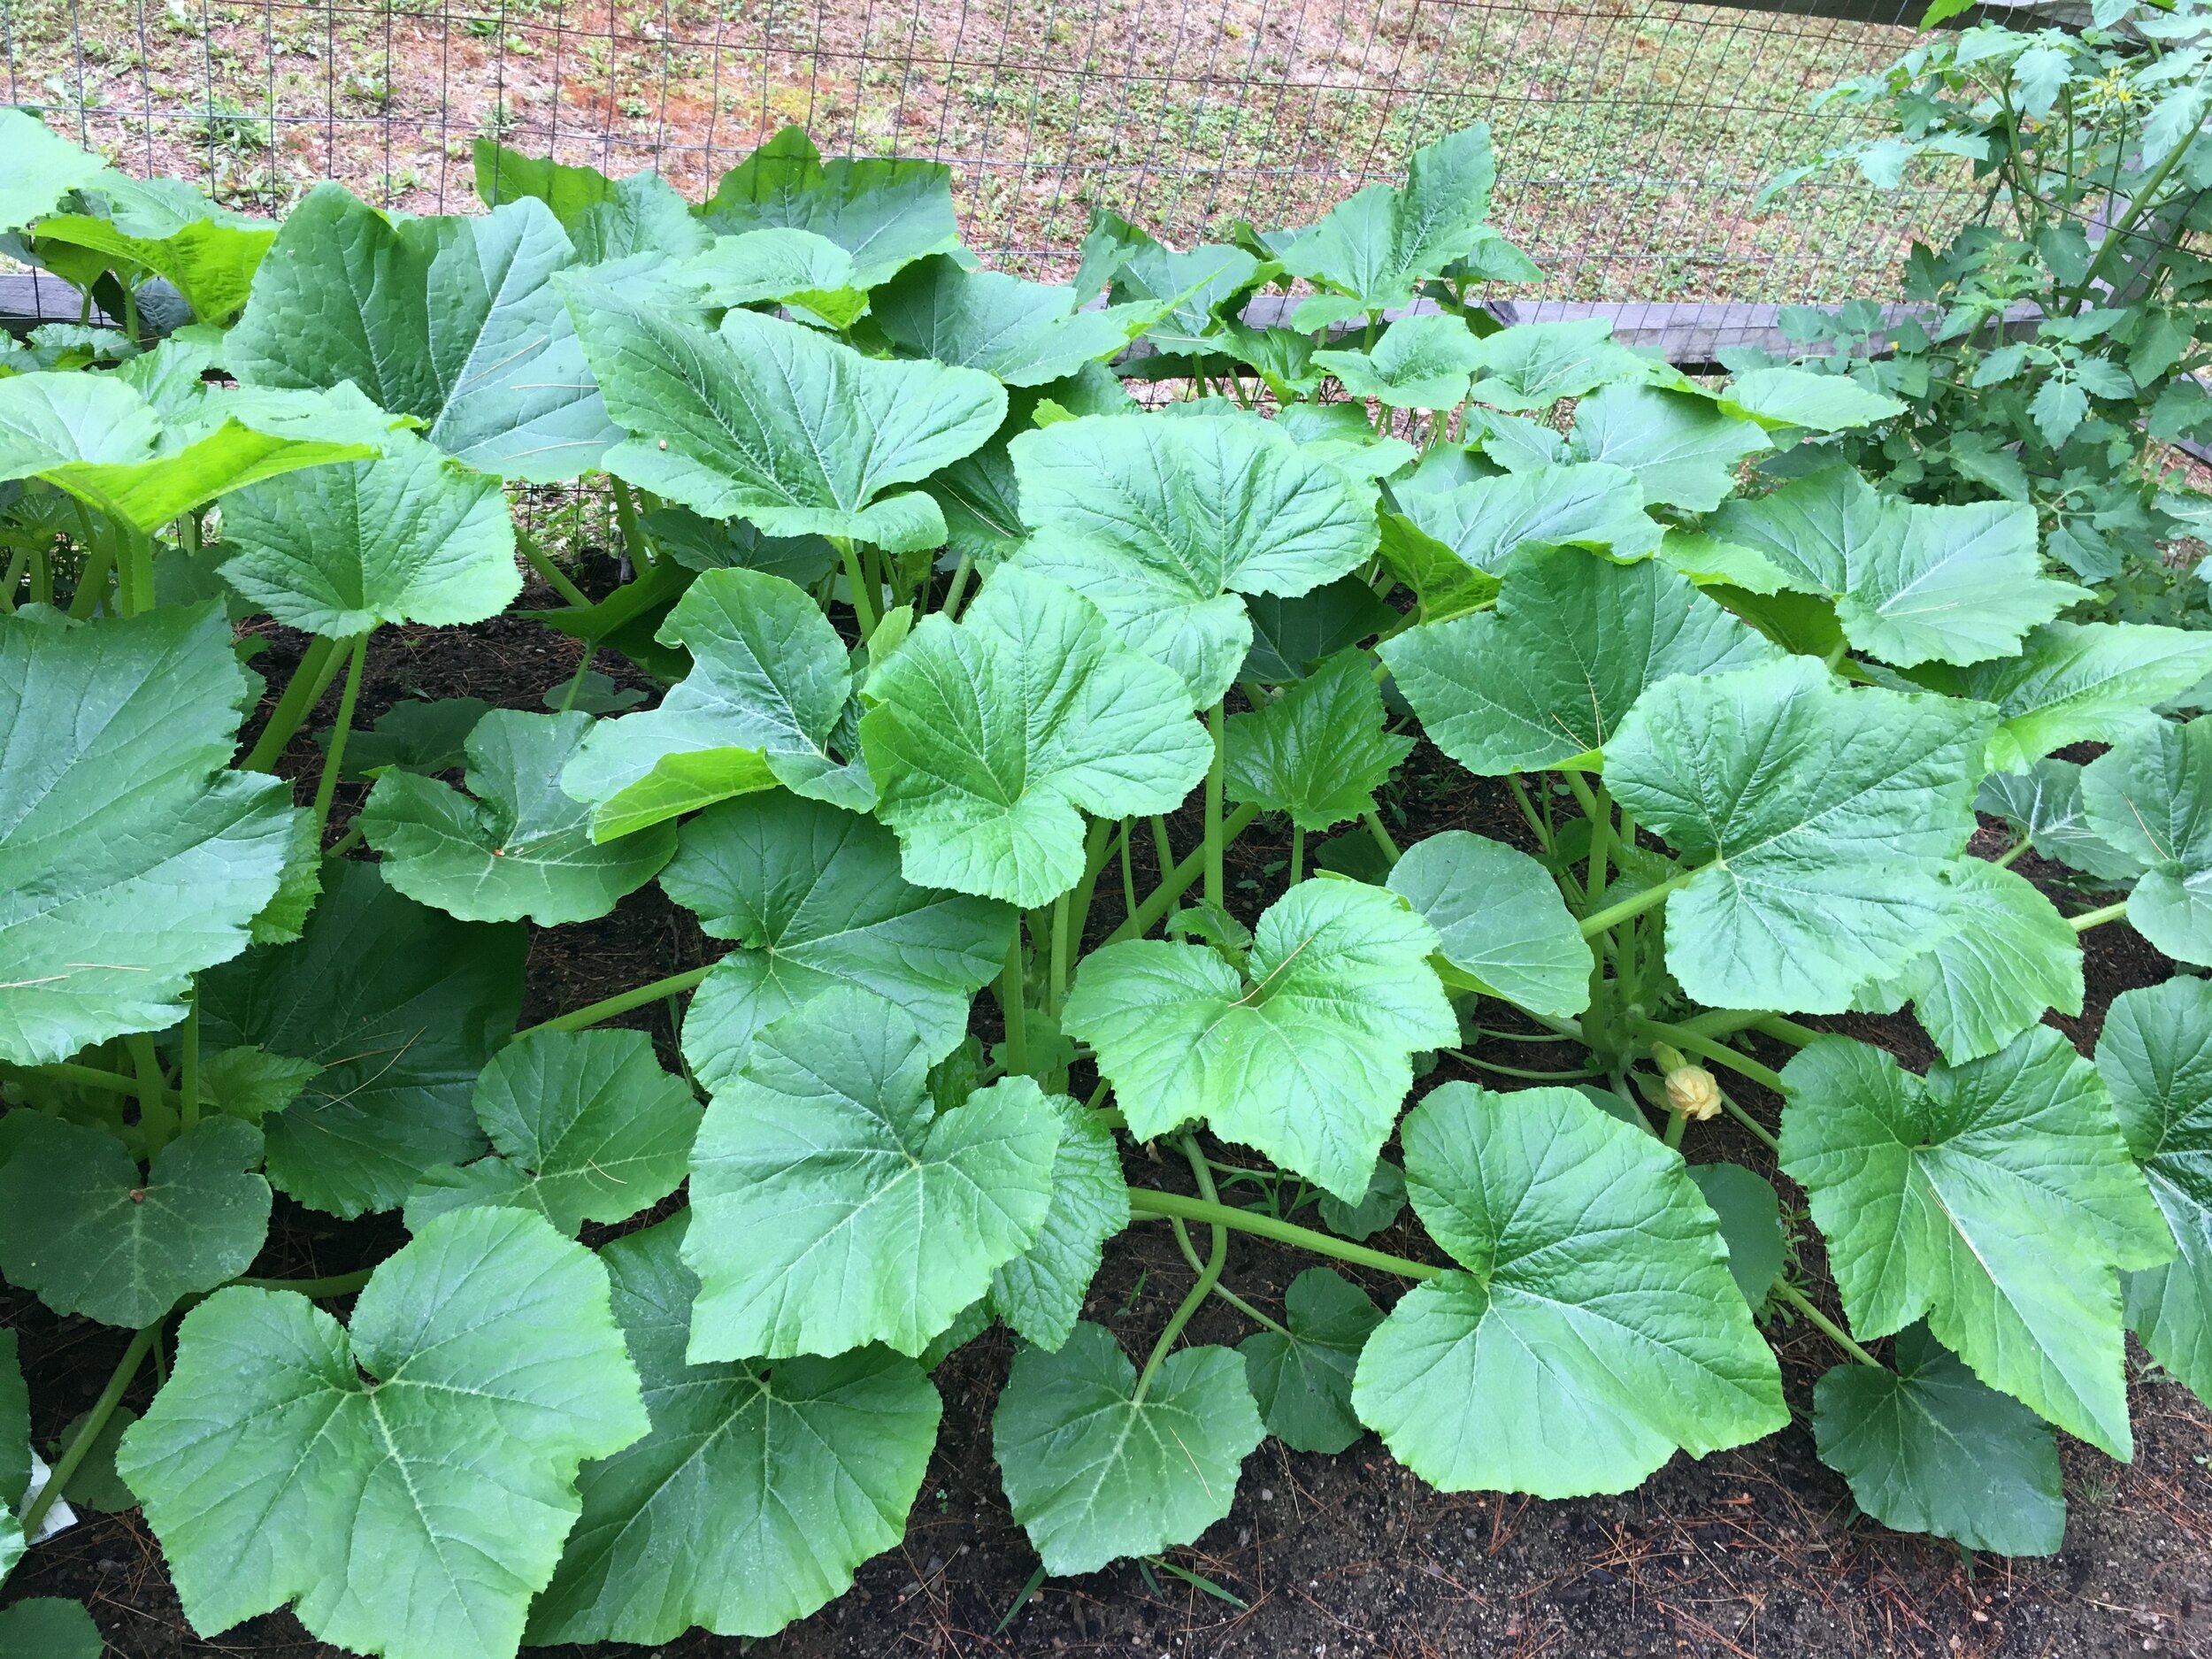
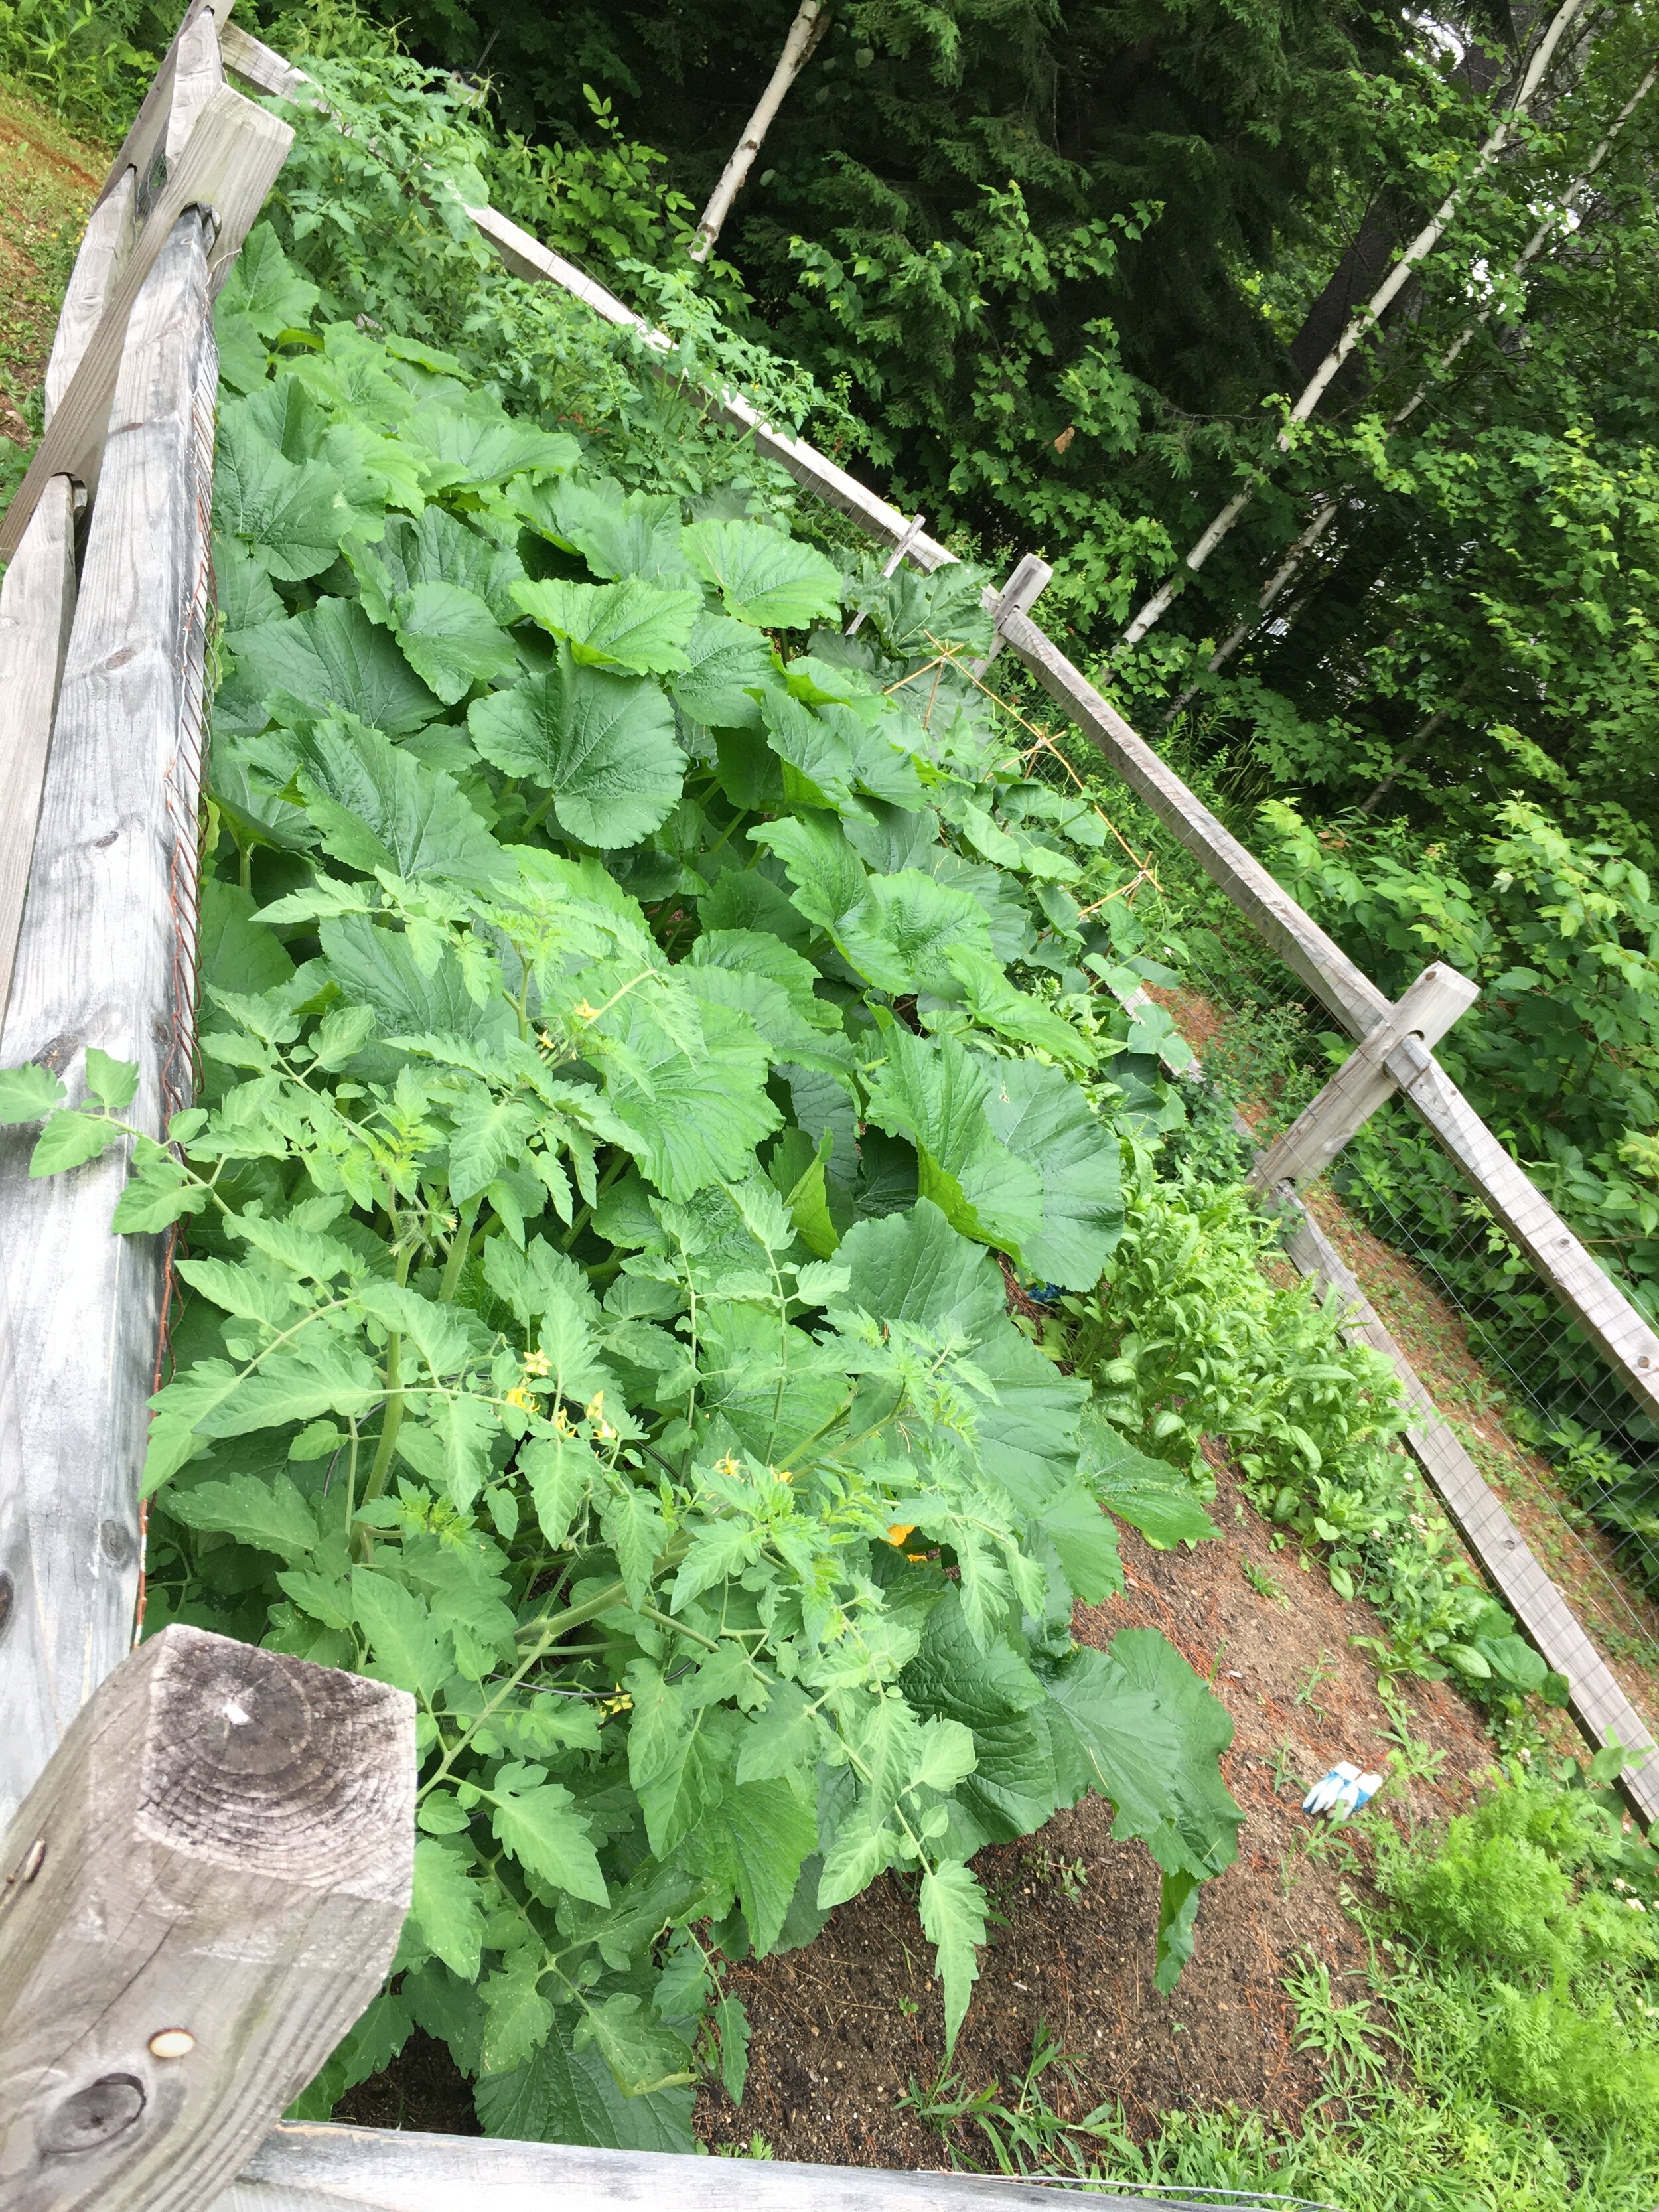
The Zucchini plants are huge this year! Right up to the top of the fence… though I do need to thin out some of the lower leaves on the ground soon for better air flow and access for pollinators (it also can help keep your plants from getting disease/mildew from the ground too).
Here are my Summer Squash plants, which are a bit smaller than the Zucchini ones but doing really well overall. I also need to thin out some of the lower leaves on these as well.
Spinach are cold weather plants and these ones pictured above are sadly done (I actually pulled them out after I took these photos). Once it starts getting hot they tend to “bolt” or grow upwards really fast and flower. Once they do that the leaves are bitter and don’t taste good. This spinach crop is done for now - though I will try to plant more Spinach late summer/early fall to get another harvest in the Fall.
Cucumbers are doing well too. It's a bit hard to see in this photo but I made a small trellis out of Bamboo Stakes and twine for them to grow on. The trellis may look flimsy, but bamboo is actaully really strong (and eco-friendly) so it's great to use in the garden to help support plants.
Along the back I have several Tomato plants growing, both cherry tomato and slicing tomato varieties; behind these along the fence I also have some Sunflowers growing too.
Now for the “showstopper” of the garden - our Rhubarb plant! This is definitely the plant that gets the most interest and questions about in our garden because it’s so big. Rhubarb is a perennial and will come back each year - so make sure to plant it somewhere out of the way where it will have room to grow. We planted this one in the back corner of our garden and marked the area with a stake so we don’t rototill over it in the spring.
While I’m honestly not a huge fan of Rhubarb myself (it’s very sour), growing it is a tradition in our family… when I was growing up we had a very large garden with at least 16 Rhubarb plants. We had so much Rhubarb that we would pick literally garbage bags full of it to give to neighbors and people at Church.
I transplanted this Rhubarb plant from my parents’ garden so I’m not sure on the variety… though from reading around online I’m guessing it’s some type of Canadian or Siberian variety. It can get very large with thick stalks and leaves over two feet across. If you decide to grow Rhubarb, make sure to read up on how to harvest it - you don’t want to over-pick the plant and the leaves are inedible (they’re actually somewhat toxic), it’s just the stalks that can be used.
Across the yard we also have some wine barrels that we’re using for an herb garden. Some of the more hardy herbs (Chives, Garlic Chives, Peppermint, Oregano) come back yearly, despite the fact the wine barrels freeze solid in the winter. I bought the blank slate garden markers on Amazon (and here is the how-to post on how I made them).
This year we also added two blueberry bushes to our landscaping since we didn’t have any fruit trees or bushes yet. It’s recommended to have two different varieties of blueberry bushes to encourage cross-pollinating and better fruit production, so we planted two different kinds near each other. We are already getting a few large berries from them which is very exciting! Here’s hoping they continue to do well in the years to come.
And that’s our little garden tour - thanks so much for following along! I’m no expert by any means, but if you have any questions please let me know.
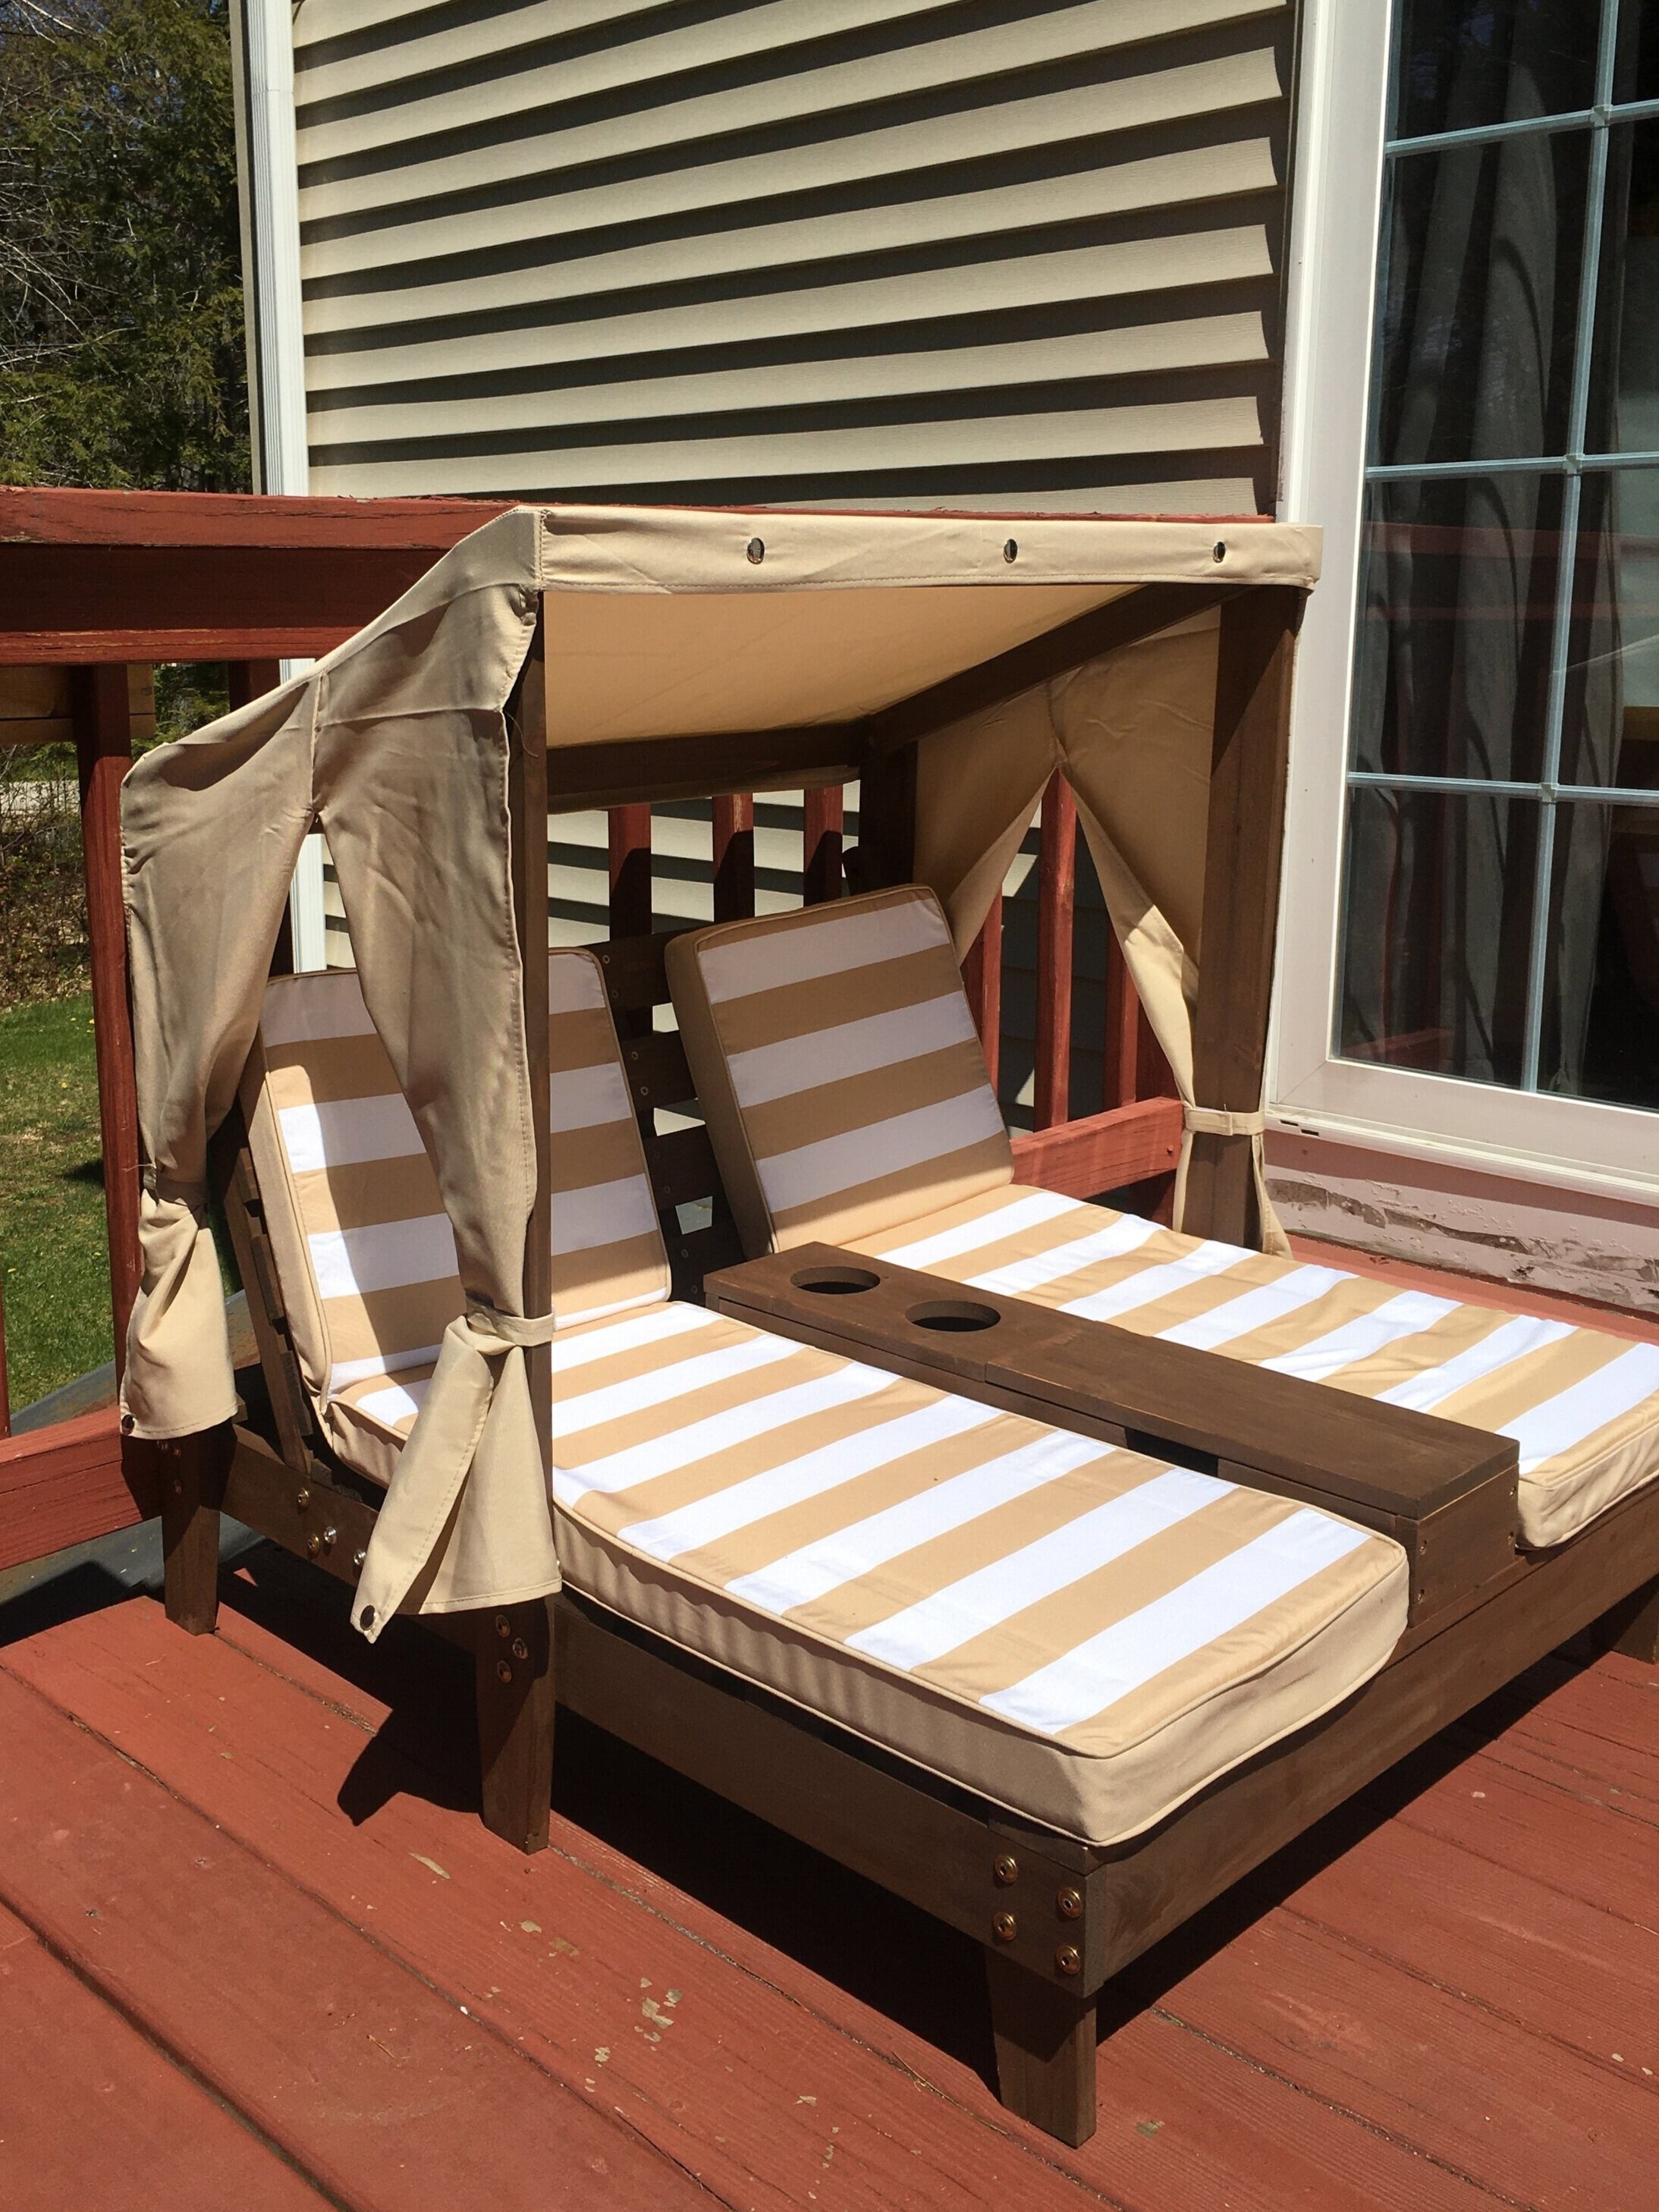
Just wanted to hop on here and share this ADORABLE KidKraft Cabana my sister bought for our kids as a fun, very thoughtful gift. We’ve been trying to turn our home into an oasis of sorts for the kids since we’re home 24/7 now. Mostly just rearranging their current toys and books to create zones and make things more efficient for play, remote learning, and relaxing - but this Cabana takes the cake! It’s absolutely adorable and perfect for relaxing outside for snack, reading a book, or taking a rest after they get out of the kiddie pool. We might not be able to go on vacation this year, but they can certainly pretend they’re at a beach resort now - though I must confess, I’m totally jealous and wish I had one in my size too!
The Cabana also has cupholders and a little storage cubby which the kids absolutely love! It’s definitely been a huge hit and now I know where the kids will be hanging out all summer long.
Thanks again Auntie Suz for such an awesome gift for the kids! :)
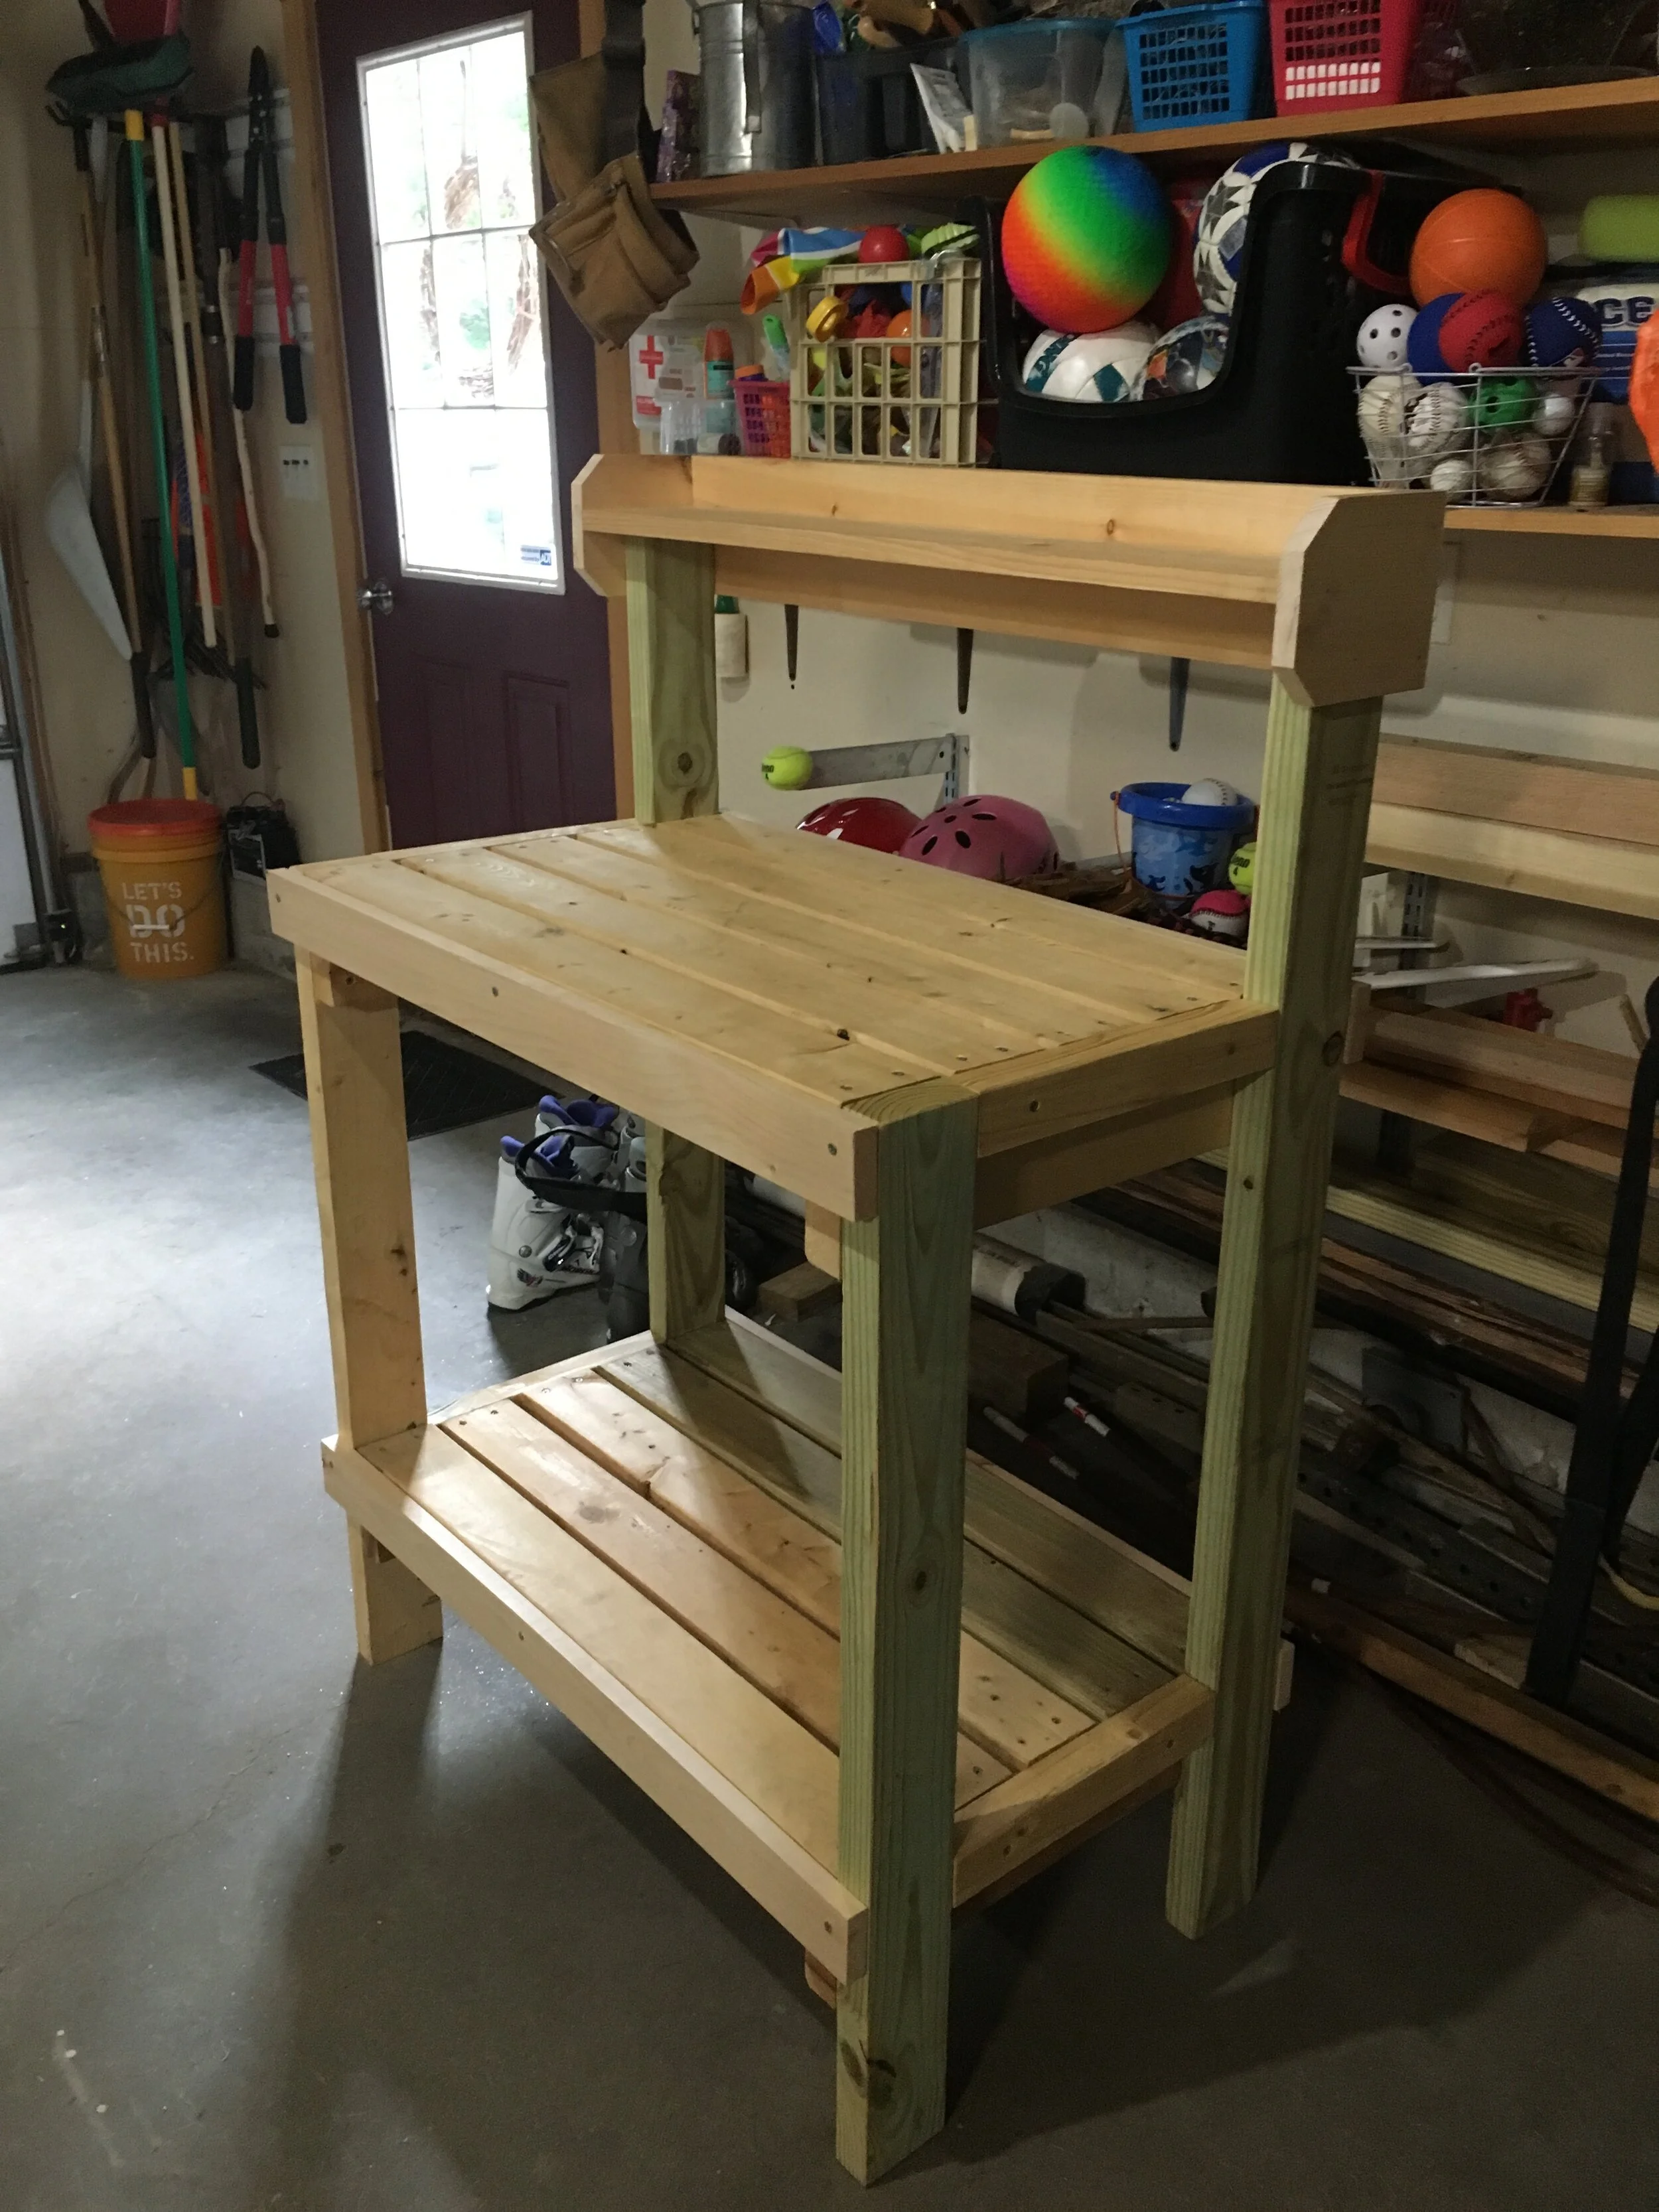
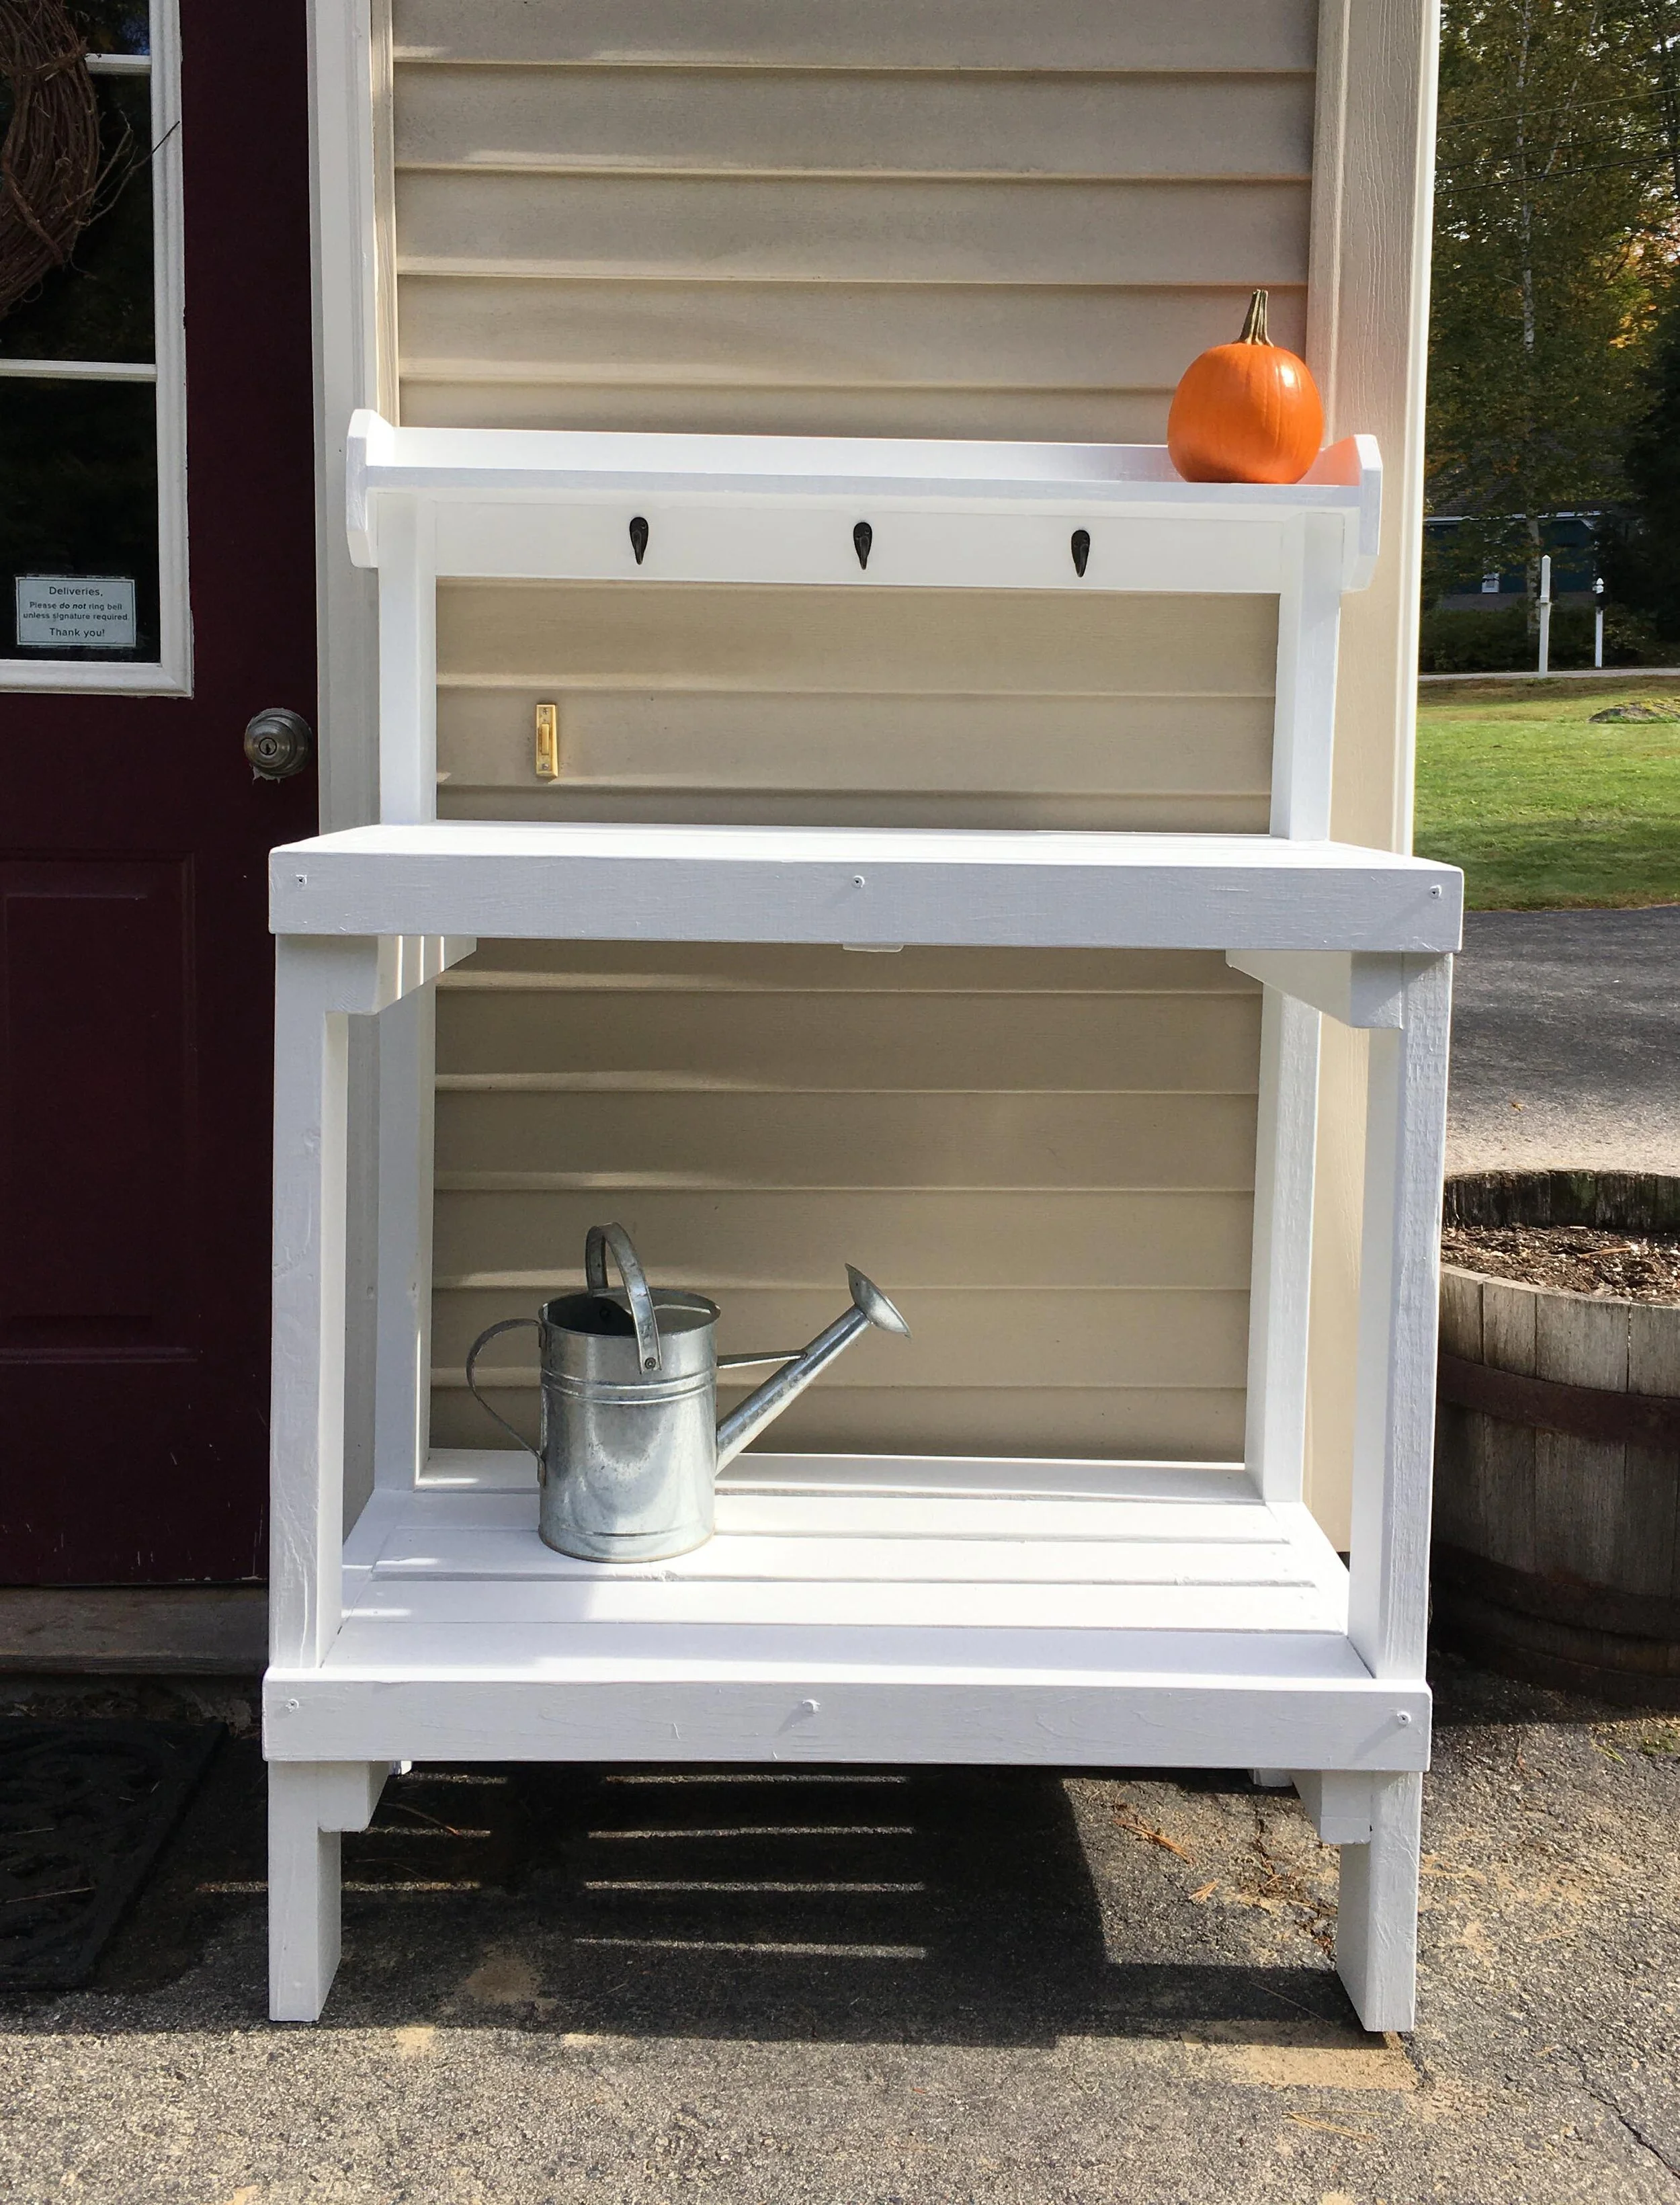
I’ve been wanting a potting bench for a while now - something by the back door to display some decor, use as an outdoor work station, and double as a place for UPS to leave packages. After looking around online and at local stores, I couldn’t find anything that I liked that fit the narrow space - so I did what any #woodworkingmom would do, I decided to build it myself. | This post is not sponsored but does contain affiliate links |
{ Note: The plans I worked from were from Ana White and can be found HERE }
I came across these Ana White plans for a Simple Potting Bench on Pinterest and thought it was perfect! It was exactly the simple, rugged style I was looking for and easy to tailor to our space too. Most of the wood needed were 2x4’s, which are sturdy and cheap - and thankfully between our garage and my father-in-law’s garage we had all the wood scraps I needed to piece together this project. Since I used leftover wood we already had, this project cost me nothing which was pretty amazing!
Since I only used what wood we had on hand, I had to make do - some of the wood was pressure-treated, some was not, some had knot holes or gashes, and not all of it was “true” (straight). But that was fine by me as this was to be a rustic piece for outside.
Before I started building, I followed Ana White’s “cut list,” cutting and making piles of all the wood in the dimensions I would need to build the project. I carefully chose the lumber for each section to minimize how the knot holes, gashes, or crooked pieces would be seen in the final piece. For our potting bench I made it 4 inches narrower so it would fit against the small wall next to our back door and because of this I had to adjust my cut list and refigure some of the overall dimensions.
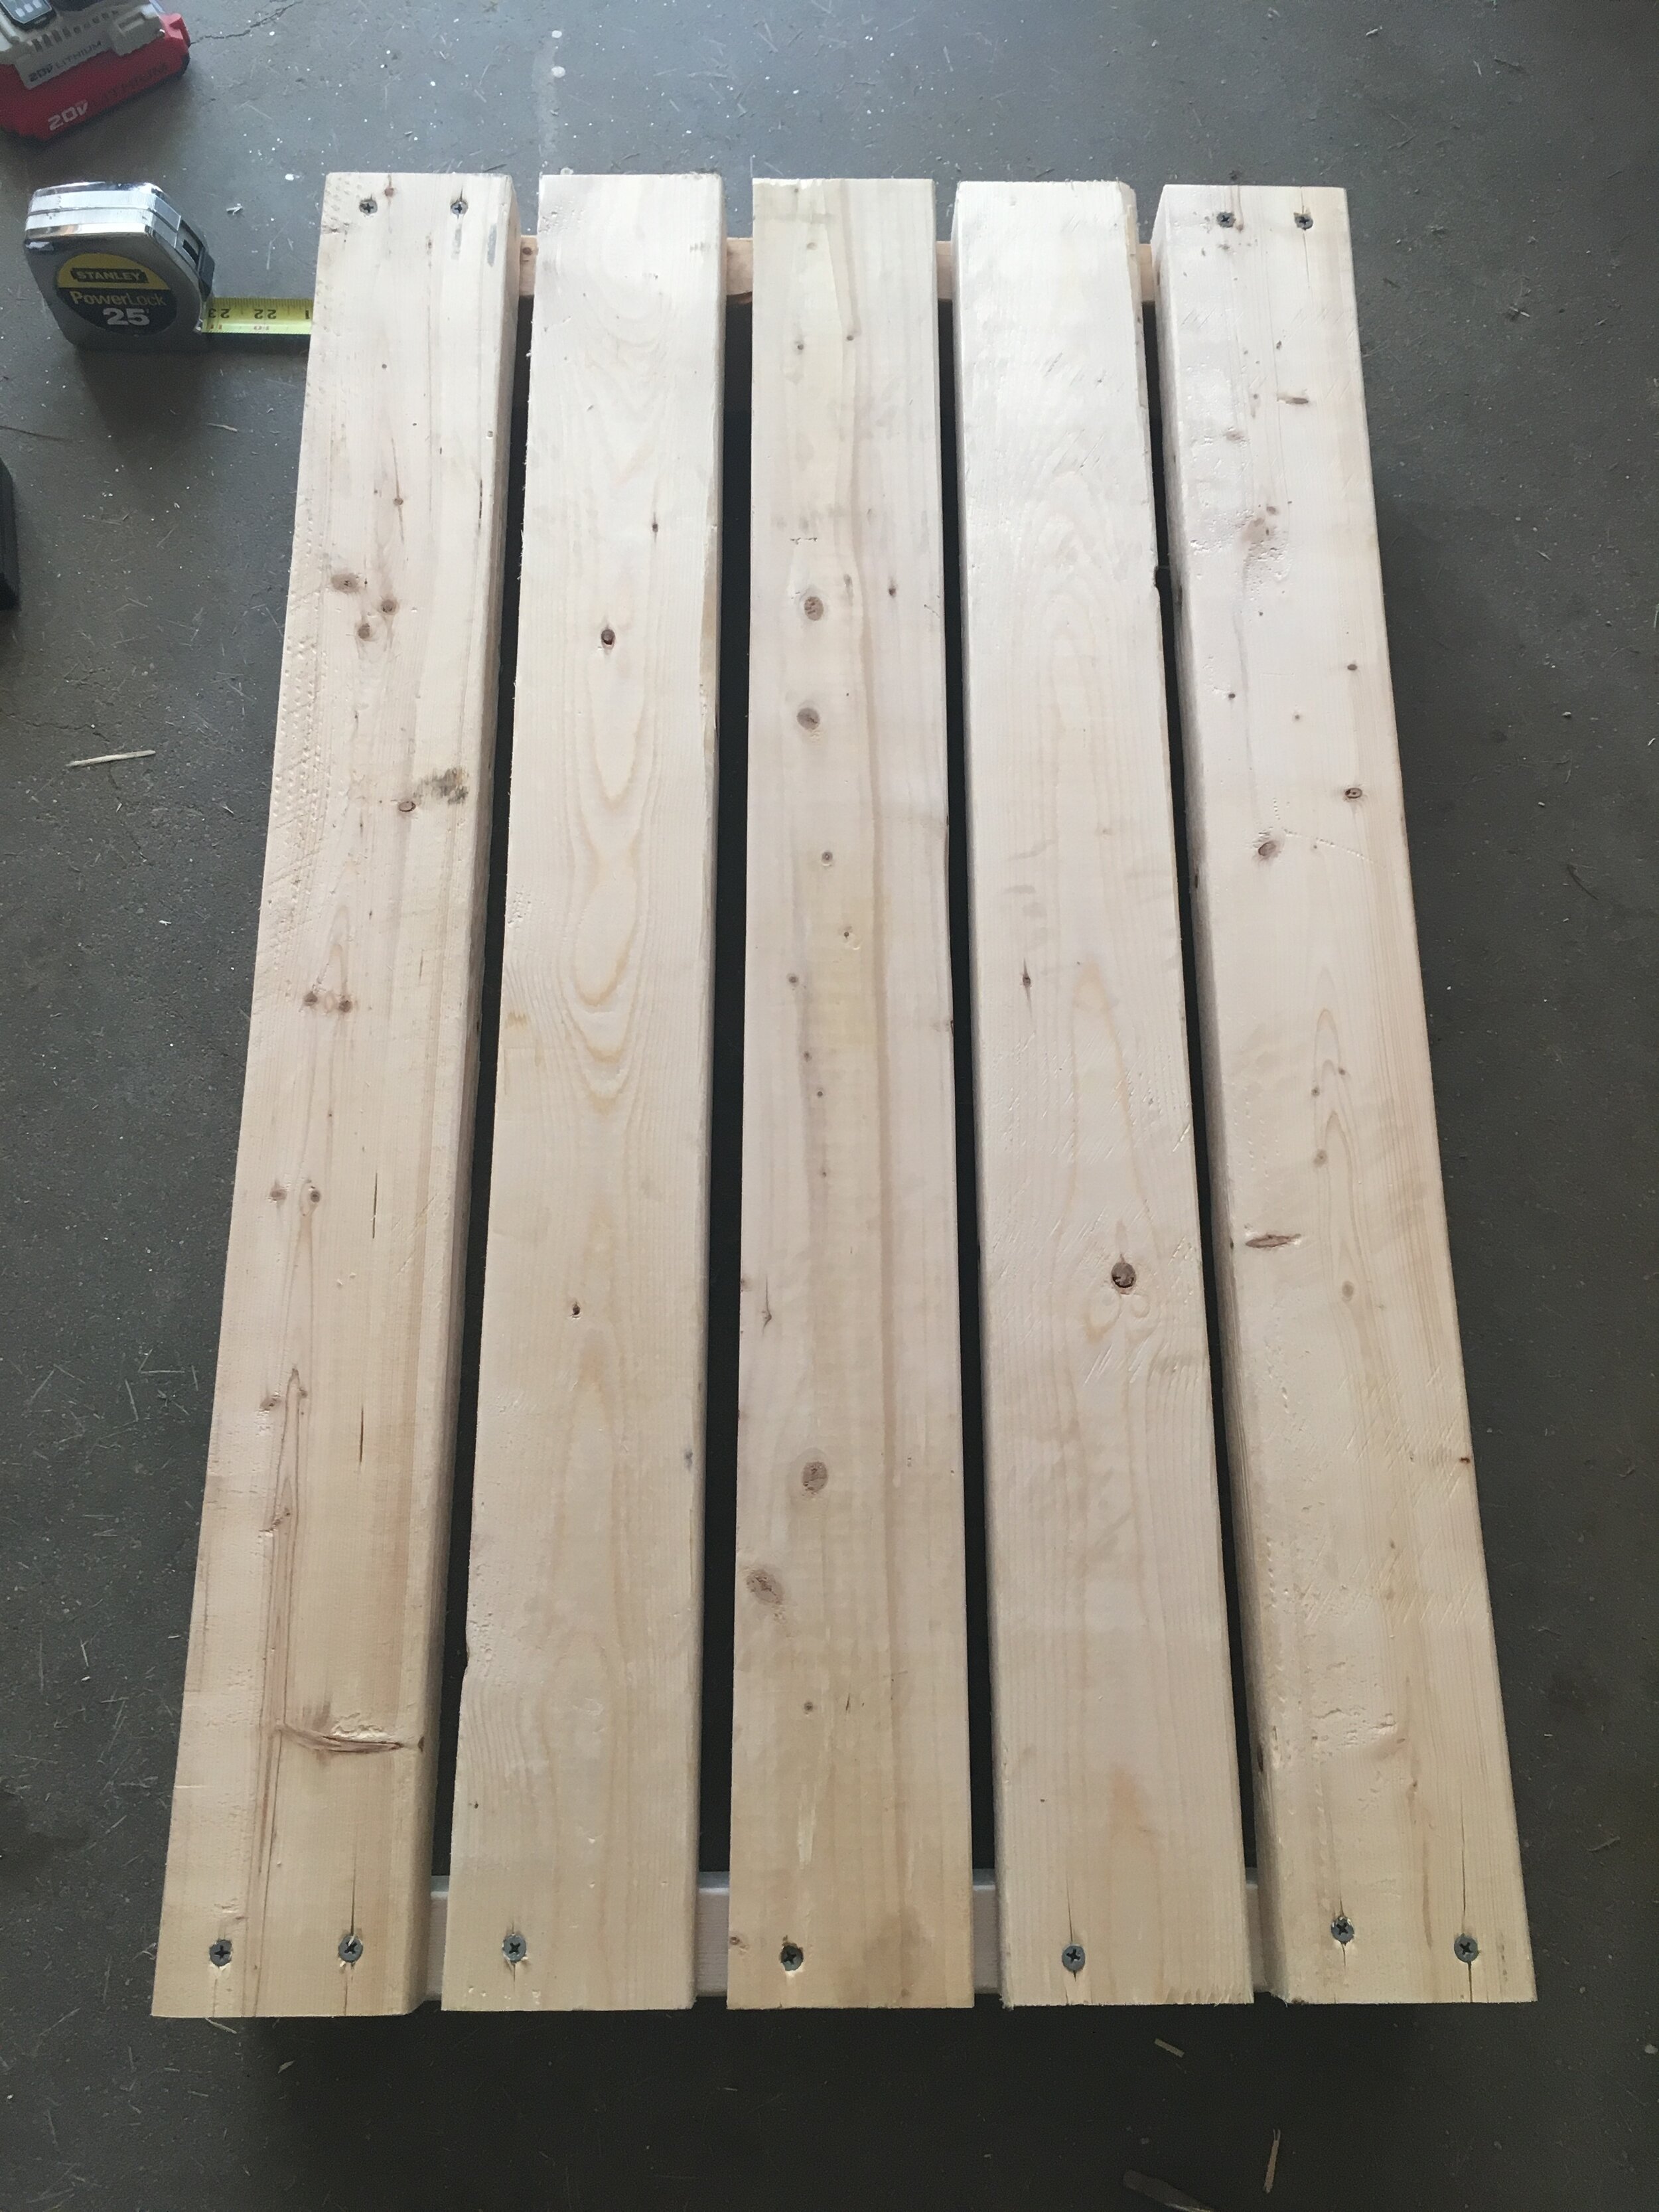
The next step was constructing the shelves individually - attaching the outer planks first, checking for square, then spacing out the middle planks and attaching them. To build this whole project I used an Impact Driver, which made the entire project go much quicker and easier.
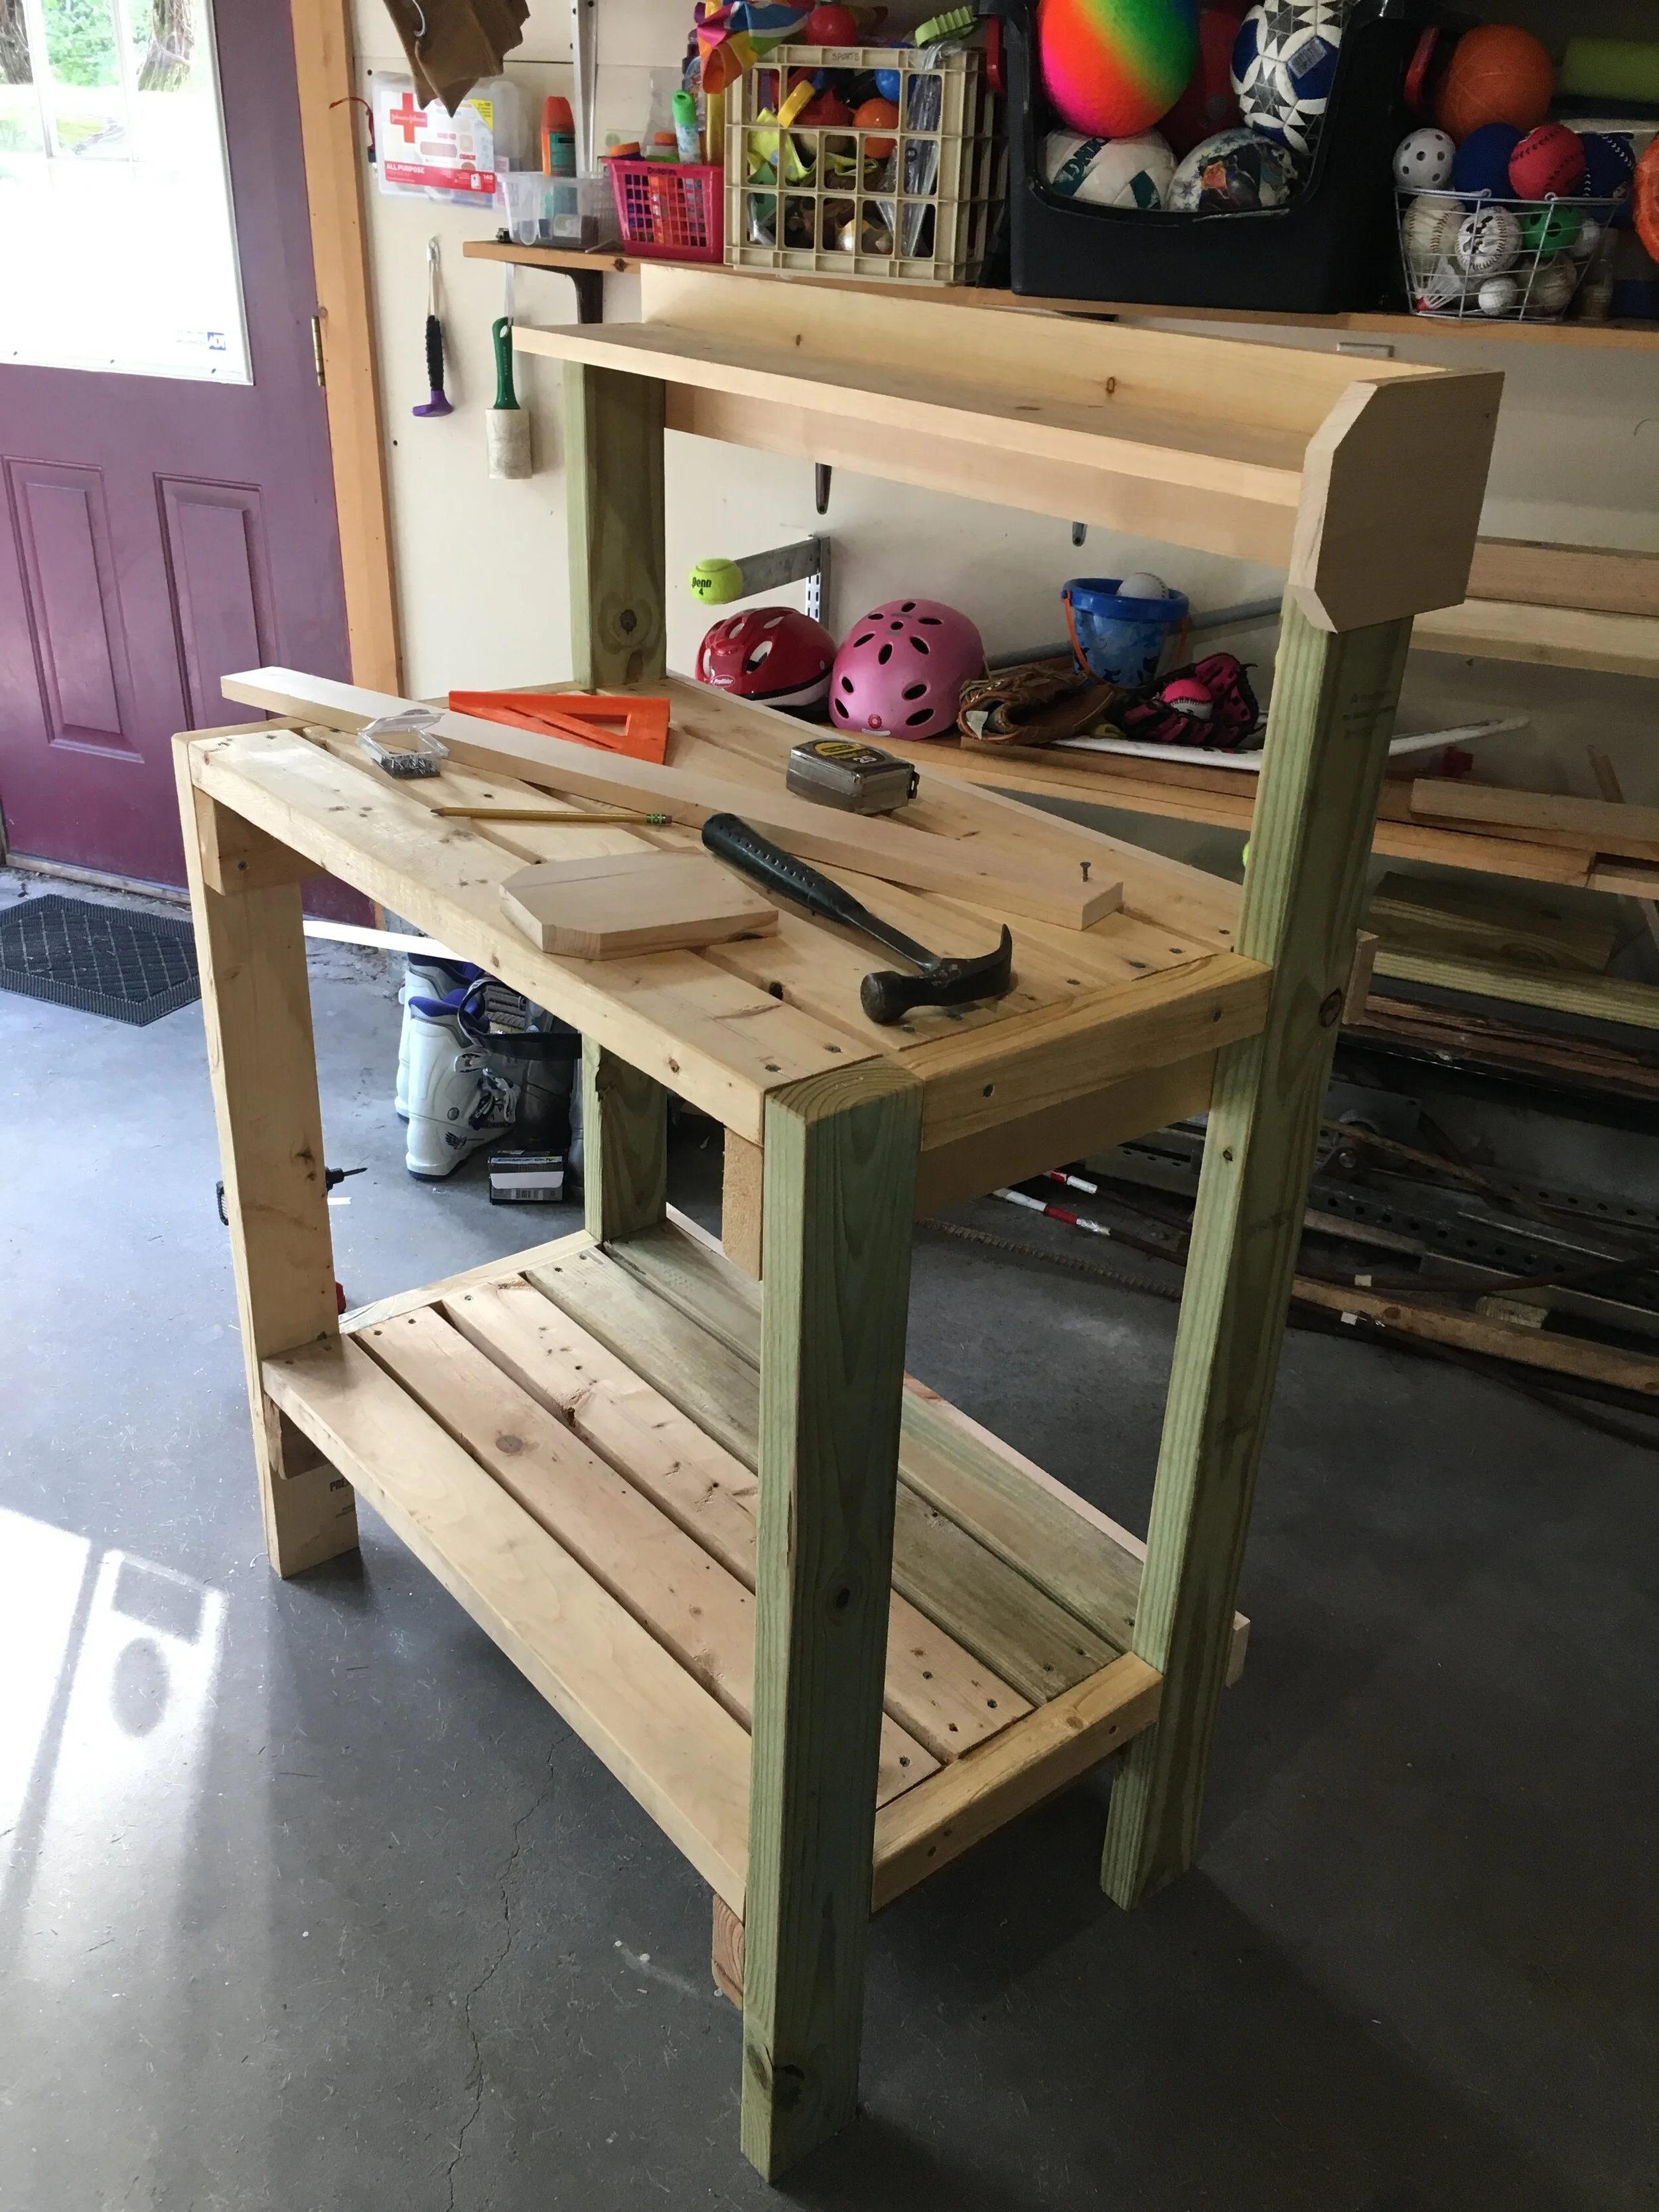
To attach the legs, I laid the project on it’s side and carefully measured the distances between the legs as well as up the legs before attaching the shelves to makes sure everything would be as level and as square as possible.
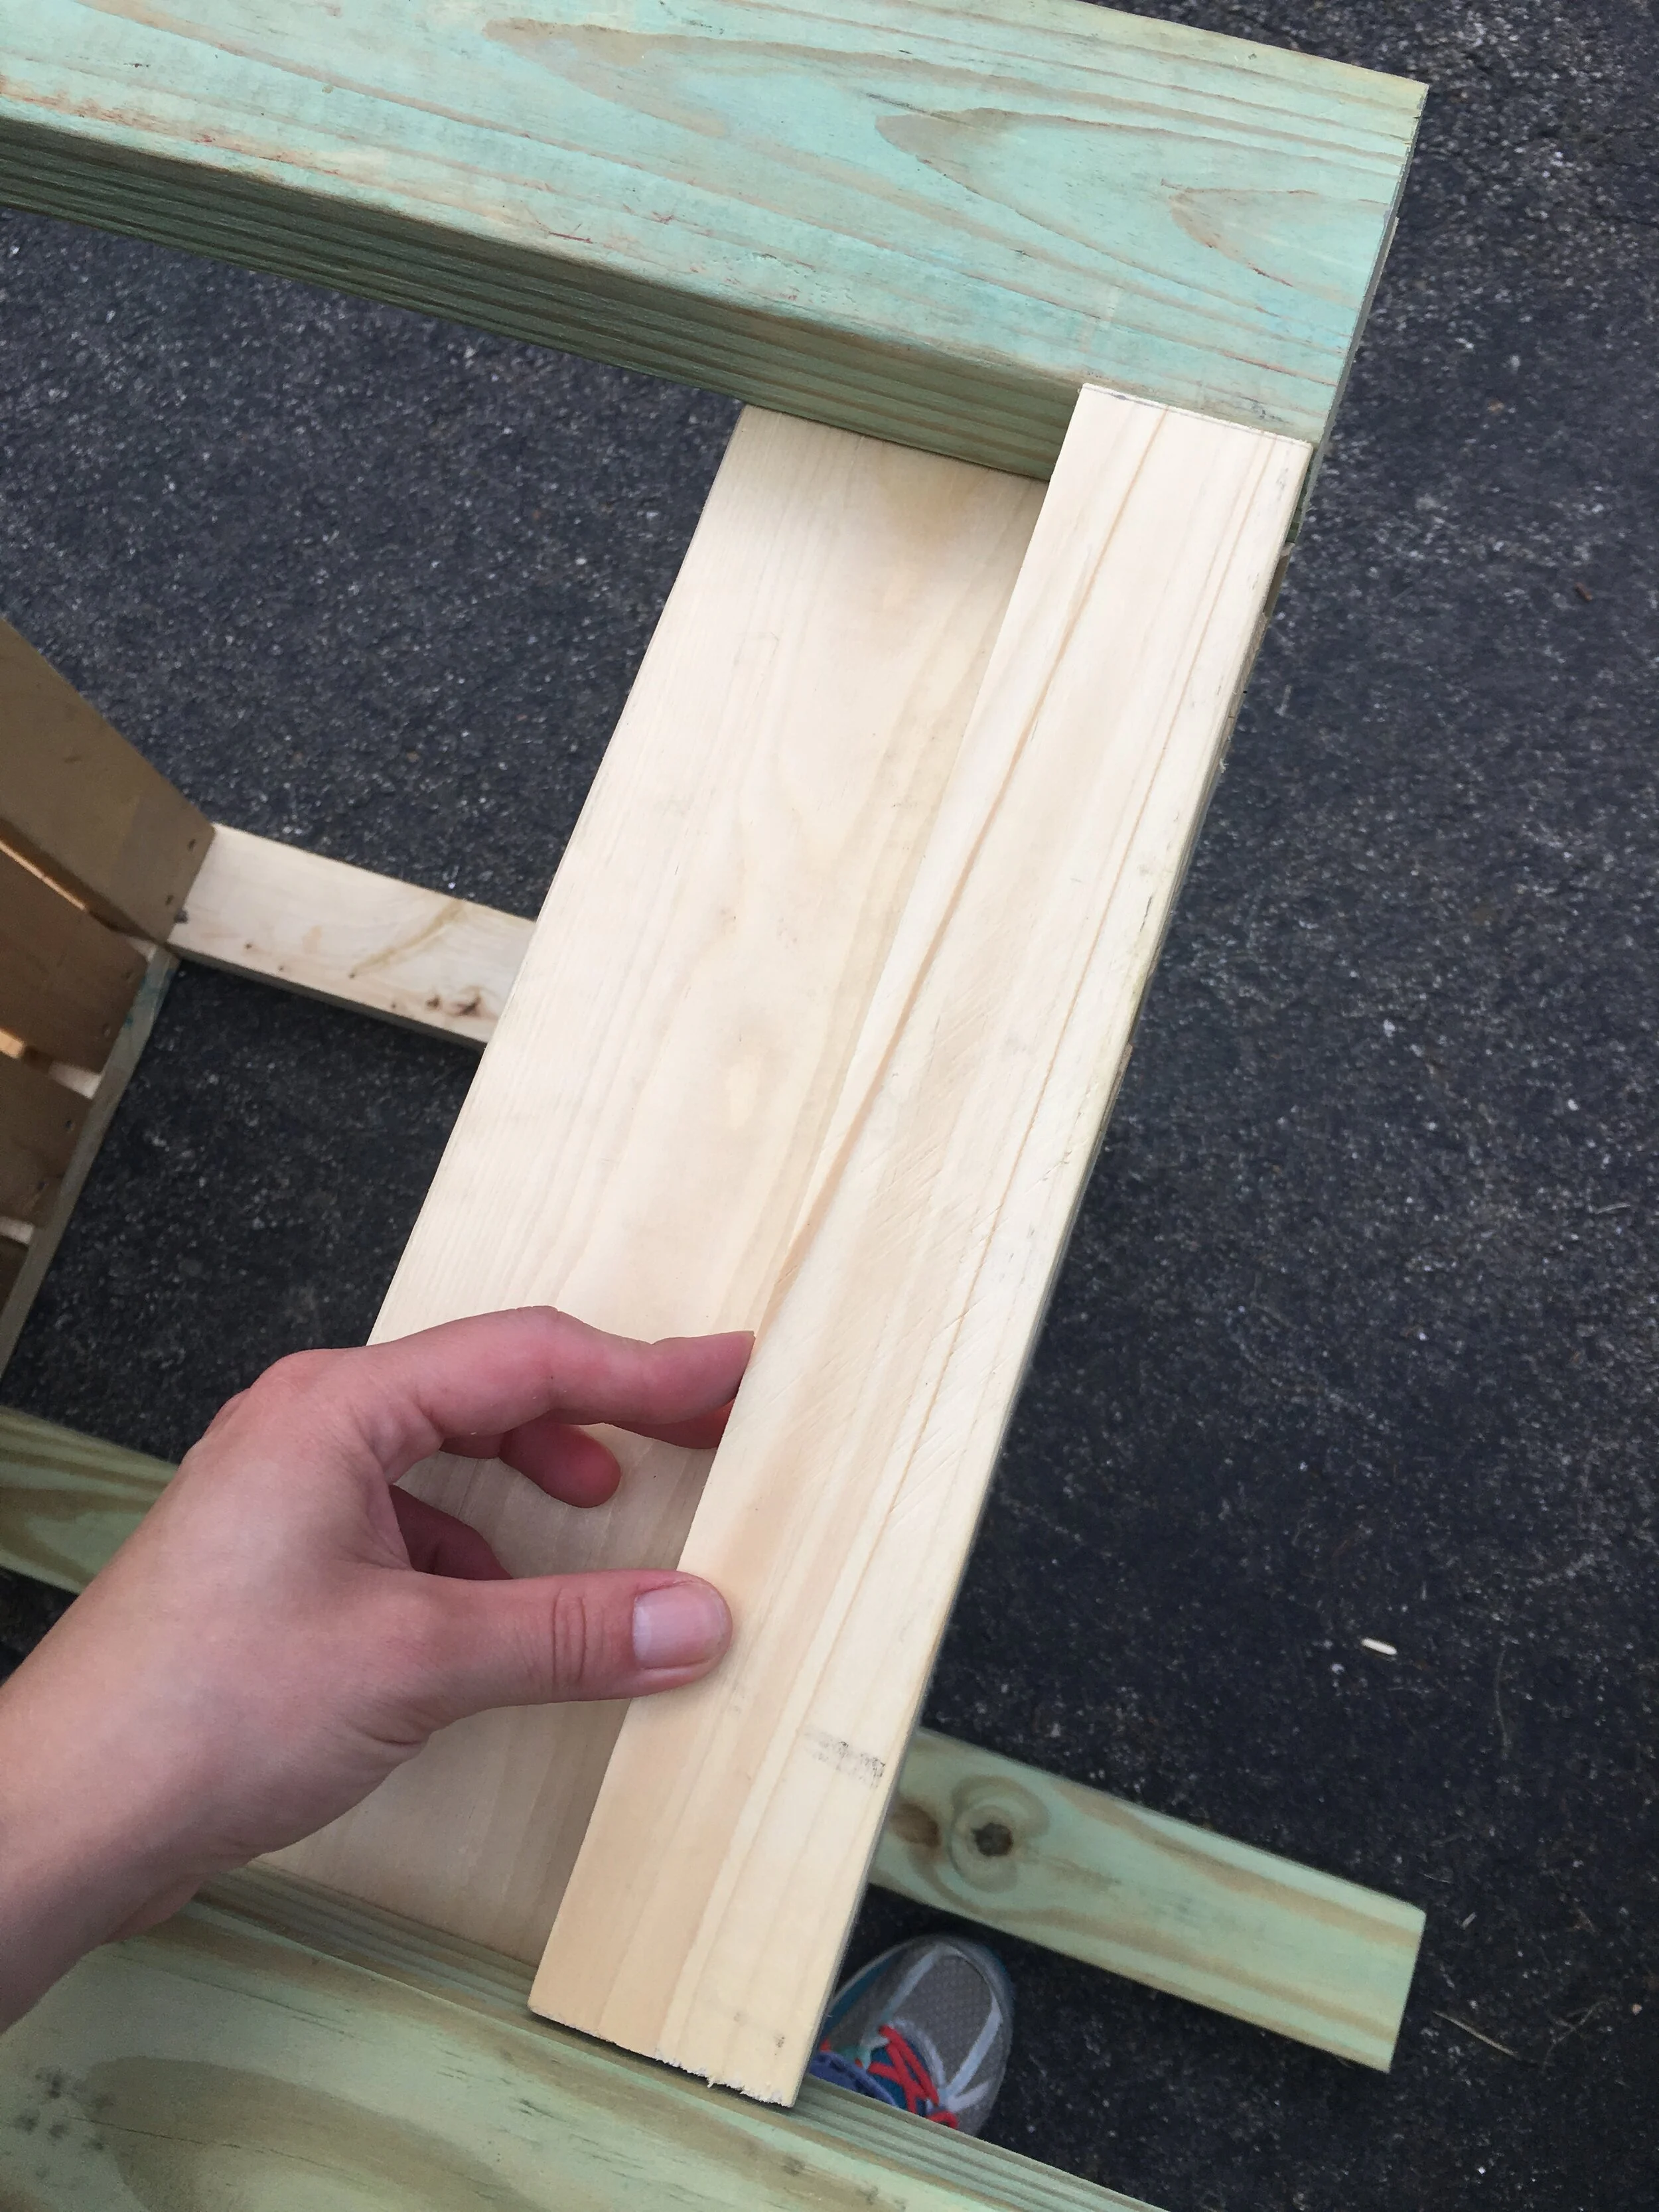
Finally to make the project look more “finished” I added some wood scraps to the sides of the project to conceal the butt ends of the shelves and make it look a little more polished.
I also decided to add some 1x3”s to the front of the shelves to make it look a little more polished from the front as well. (I did not counter-sink these screws, but I should have as they were more noticeable than I was expecting in the finished piece.)
Then came time for painting - I chose to paint the whole potting bench in several coats of my favorite Valspar Stainblocking Bonding Primer/Sealer. This stuff has great coverage and really covers and seals well. My one regret was not giving all the wood pieces a single coat of paint before assembling - as once everything was assembled it was a huge pain to get in all the nooks and crannies.
Finally I finished the project by adding a few little hooks underneath the shelf (very similar hooks linked here), from which I can hang tools or decor. I’m really happy with how this came out and how quickly it came together. I can’t wait to decorate it with some plants come next spring!
PS - I’m thinking this potting bench would also be great for parties and BBQ’s! It would be perfect on a patio or deck as a makeshift buffet table.
UPDATE: Spring, 2020
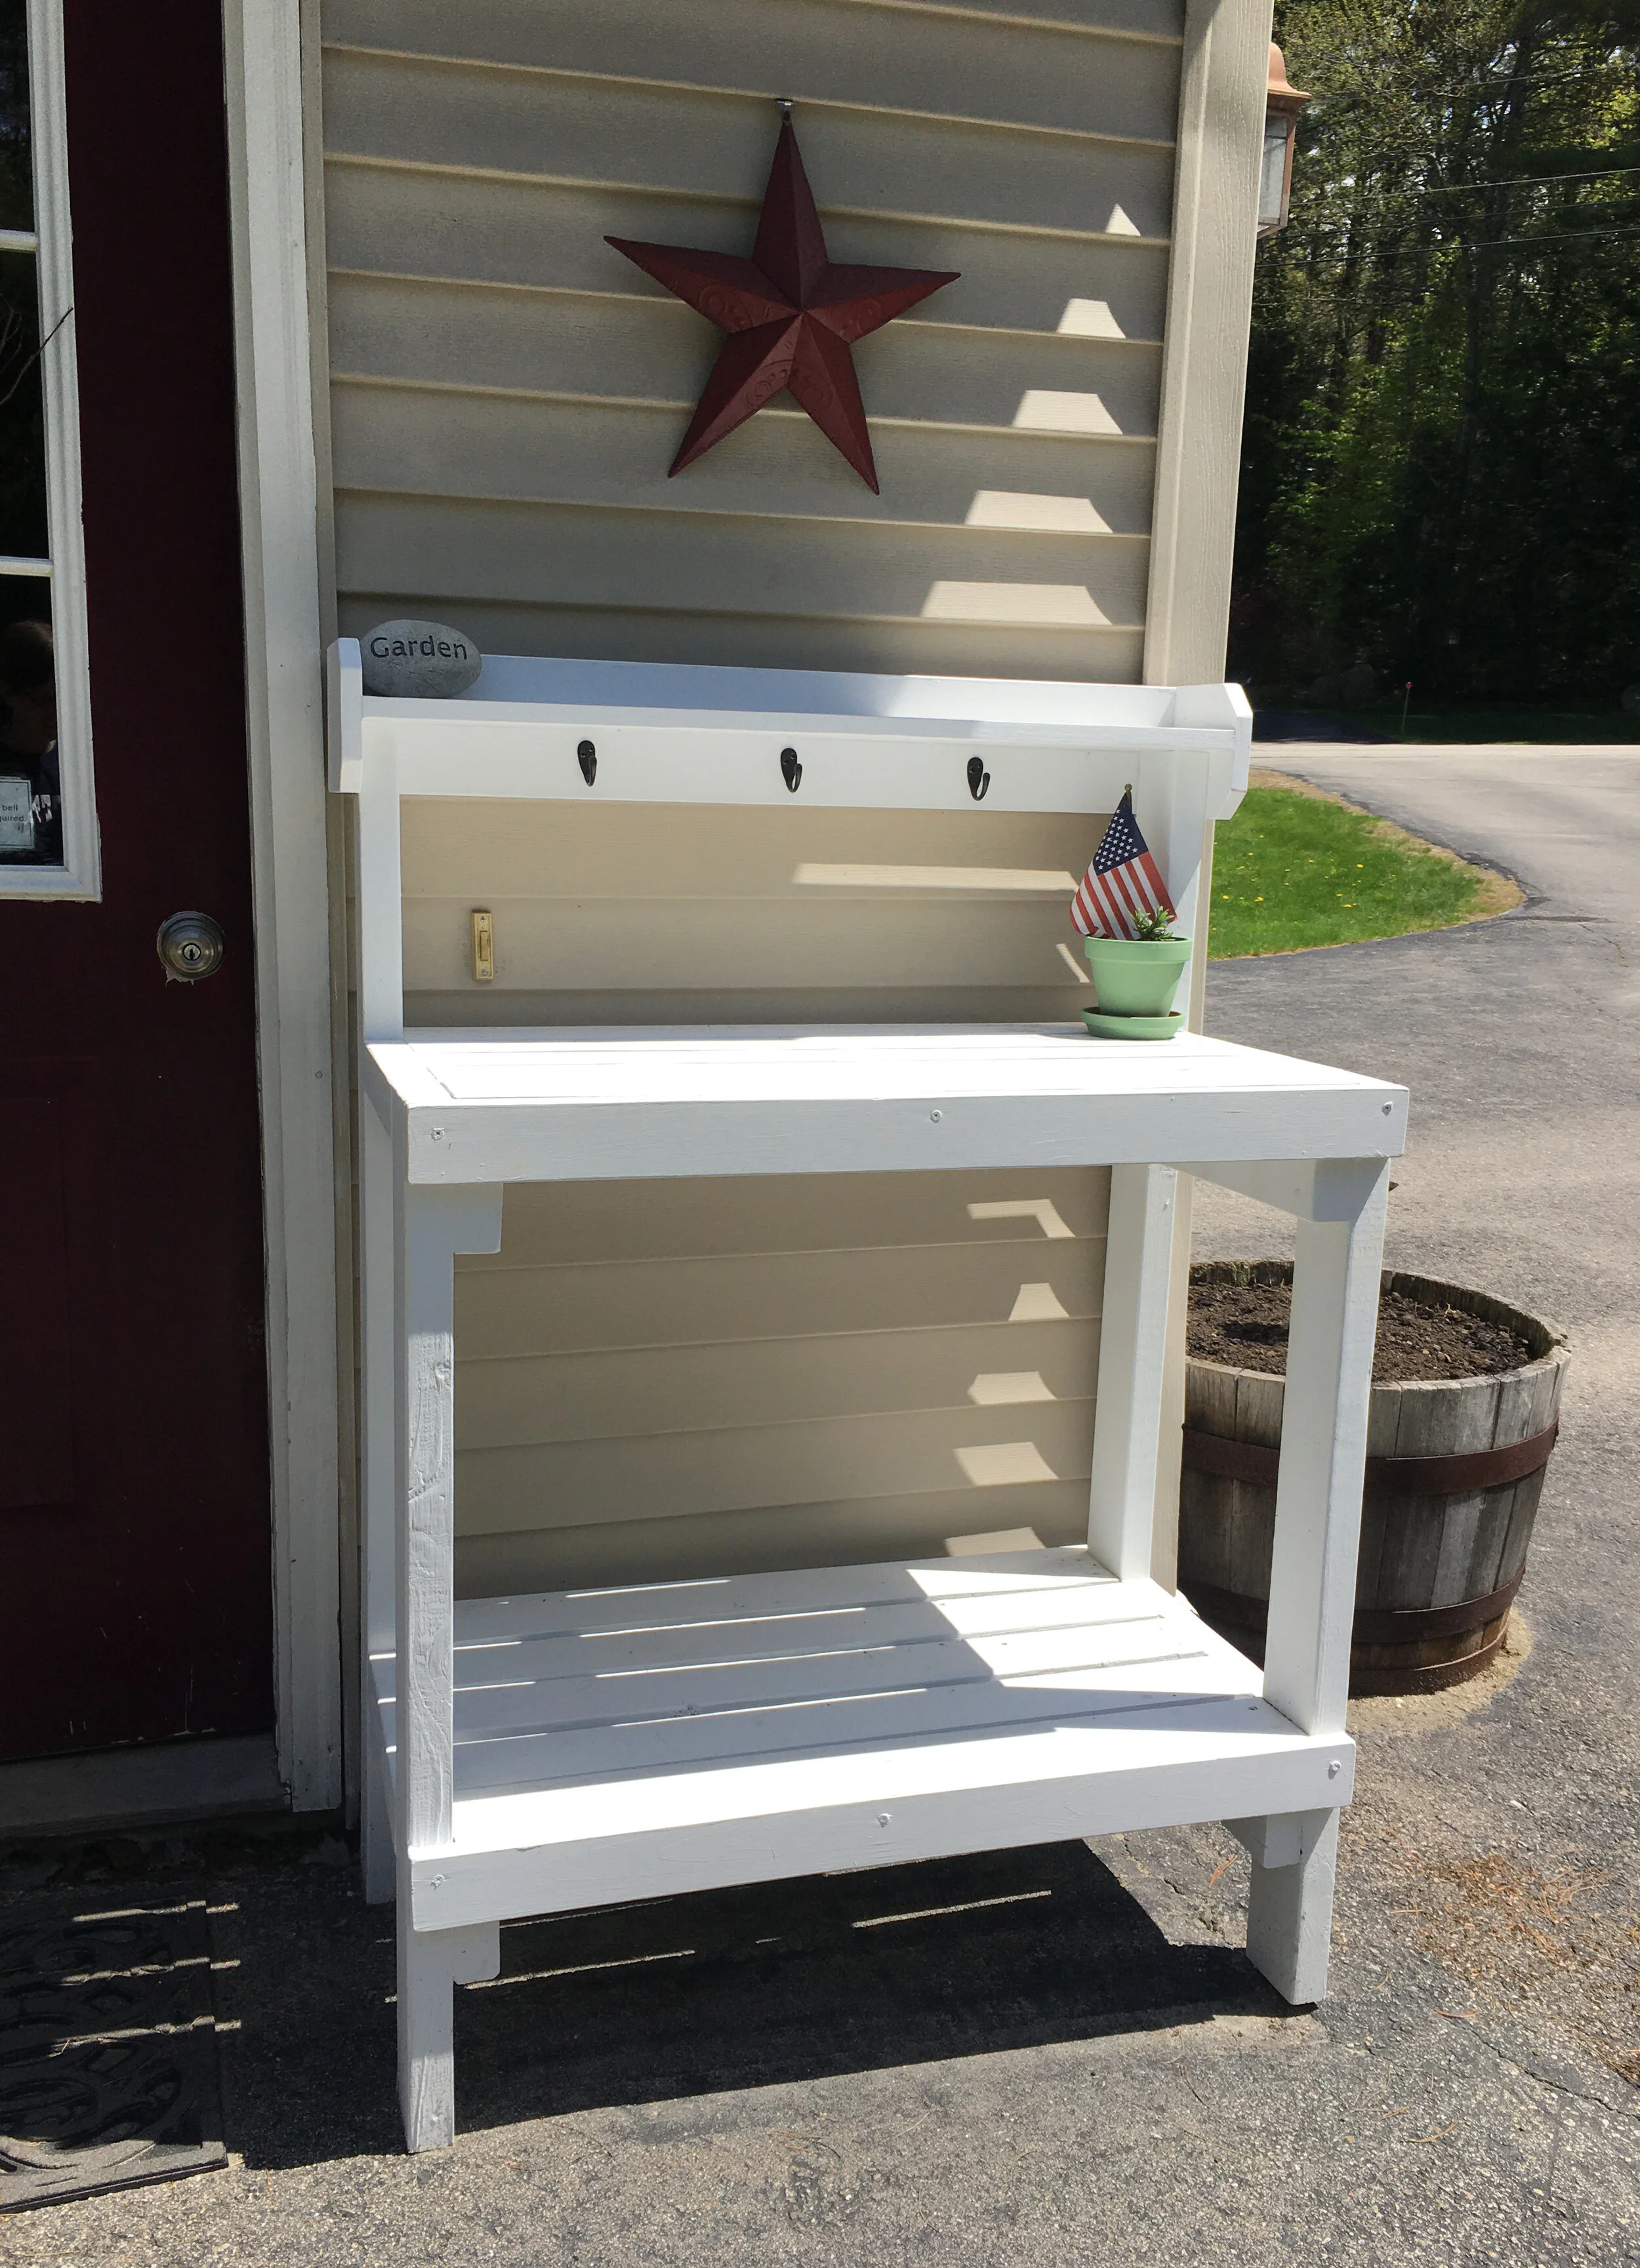
Just wanted to give a quick update after I made the potting bench last Fall: Over winter we decided to store it in our shed, just so we wouldn’t have to snow blow and shovel around it all winter, but as soon as the threat of snow passed in early Spring we brought it right back out. It’s been wonderful to have for planting and working on outside this spring, and due to the current Pandemic situation we’re getting more packages than ever so it’s great to have a designated spot for deliveries (and right in view of our security camera too).
For decor right now I'm keeping it very simple, especially since the potting bench is utilized daily for mail - there's just a garden rock, a metal barn star (hung from a special hook that doesn't damage vinyl siding), and a small potted lavender plant with an American flag - all items we already had around our house.
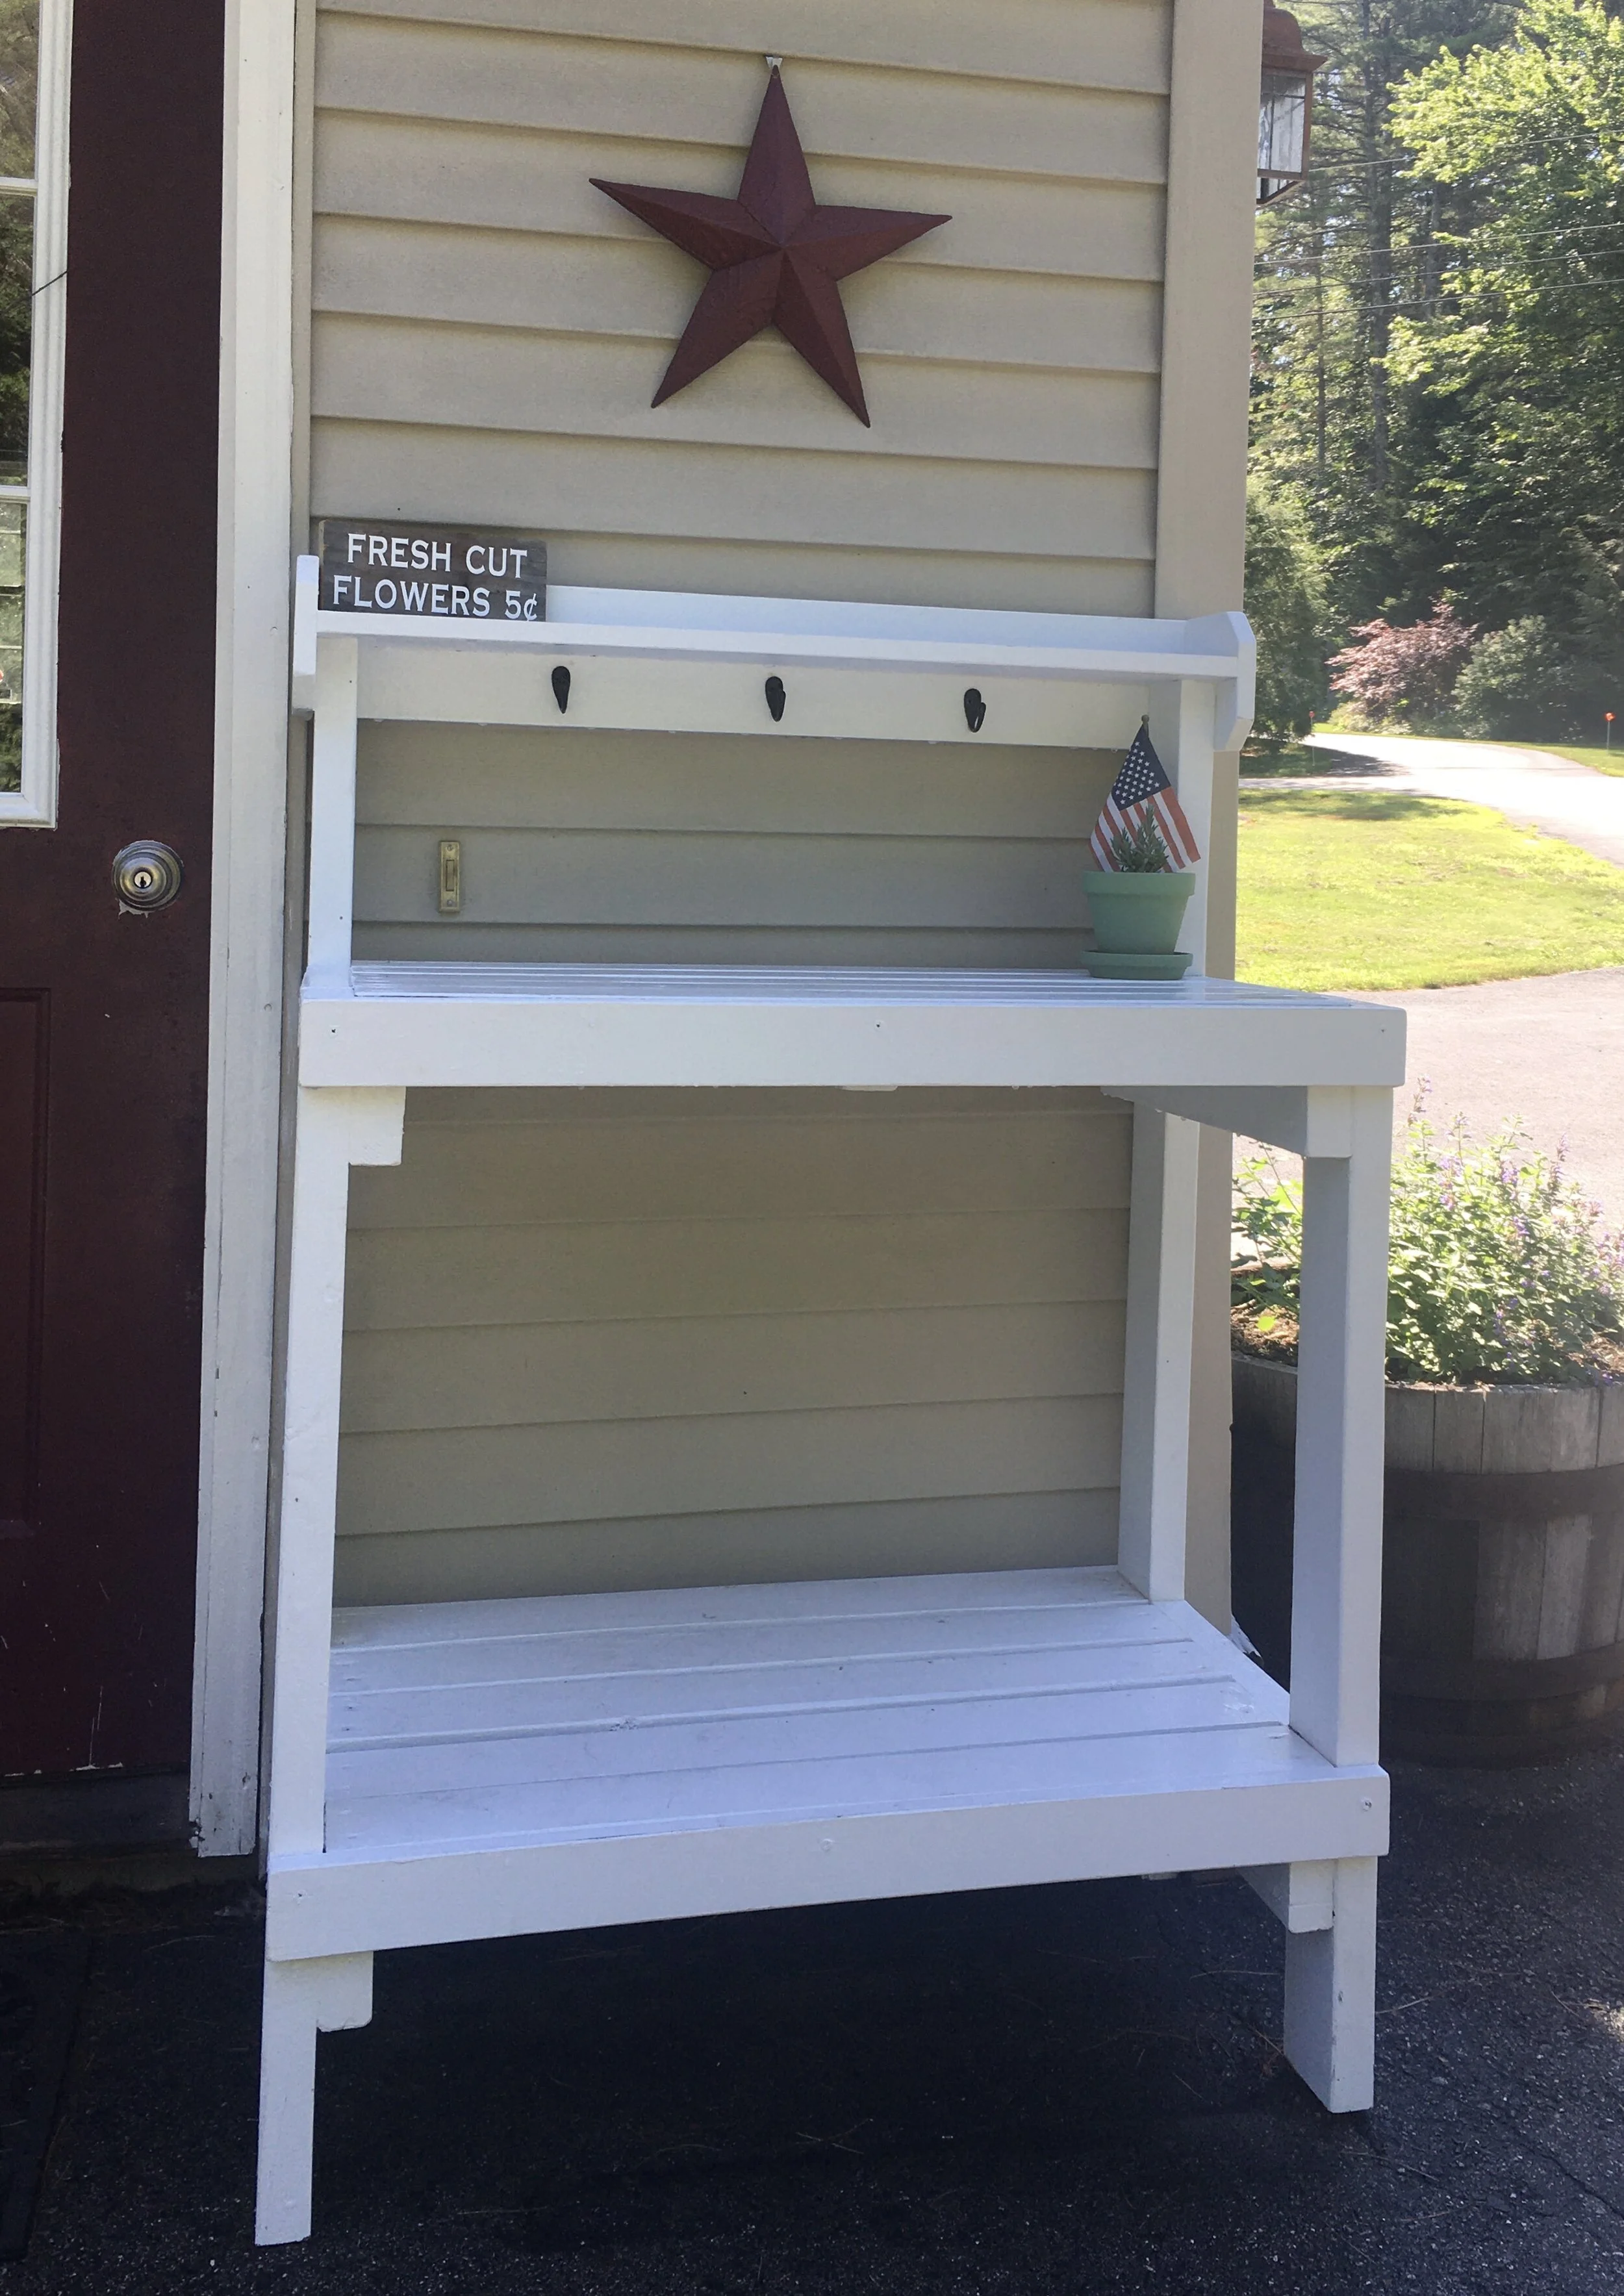
Summer, 2020 - sharing another little decor update for the potting bench:
I found this weathered piece of wood in our scrap bin and thought it would make a cute sign for the potting bench. I used my Cricut Machine to design and cut a stencil that said "Fresh Cut Flowers 5¢" and used it to paint the sign. I think it looks cute and it's a great finishing touch!
Whew, where is the summer going? It seems like just last week school got out - but here we are with just a few precious weeks of summer vacation left. We’re trying to squeeze in what fun we can with family hikes, day trips, visiting friends, - and of course enjoying some of our favorite summertime foods. One of my favorites is this Easy Chopped Greek Salad which can make a perfect dinner on a hot night or a side dish to bring to the neighborhood BBQ. | This post contains affiliate links |
Ingredients:
2 cucumbers
2 large tomatoes (or a bunch of cherry tomatoes)
half a red onion (I love red onions and tend to put in a lot... feel free to adjust the amount of red onion to your taste)
This recipe is a great way to use up tomatoes, cucumbers, and herbs from your garden too!
How-to:
Chop cucumbers and tomatoes into bite sized chunks (remove seeds from tomatoes if they’re too “sloppy”).
Dice up to half a red onion (adjust amount of onion to taste).
In a separate bowl, make the dressing: juice one lemon, and add a splash of olive oil. Add about a tsp of dried oregano, and salt and pepper. Whisk together and add more olive oil or herbs/spices to taste.
Combine veggies, black olives, and dressing in bowl and mix well.
Add feta cheese and chives to garnish before serving.
Enjoy!
I make this salad just by “winging it” each time and don’t have exact amounts for olive oil or spices - really it’s up to you and your personal taste. Just experiment and see what tastes good to you.
Drilled wellheads are a common eyesore in yards these days. Often installed in a convenient location for maintenance, but definitely not appealing. Take our wellhead for example - it's smack dab in the middle of our front lawn and sticks out like a sore thumb. Thankfully with the help of a Dekorra Rock Enclosure from the Home Depot, I was able to easily and quickly hide this eyesore in just one afternon! You can check out the full how-to on "How to Hide a Drilled Wellhead" on The Home Depot Blog.
BEFORE
I acknowledge that The Home Depot is partnering with me to participate in the program described above (the “Program”). As a part of the Program, I am receiving compensation in the form of products and services, for the purpose of promoting The Home Depot. All expressed opinions and experiences are my own words. My post complies with the Word of Mouth Marketing Association (WOMMA) Ethics Code and applicable Federal Trade Commission guidelines.
Here in New England we seemed to have a very late start to spring this year… after all the snow didn’t even melt from our yard until May 2nd! The rest of May has been generally cool and rainy and didn’t give us a chance to rototill and prep our garden until now. I finally planted the garden with our older daughter today and fingers crossed it does well this year! Last year our garden was a bust… we inadvertently overdid it with adding woodash the year before and nothing grew. But thanks to soil testing with UNH we have since re-set the pH and other imbalances and things should be off to a better start this year!
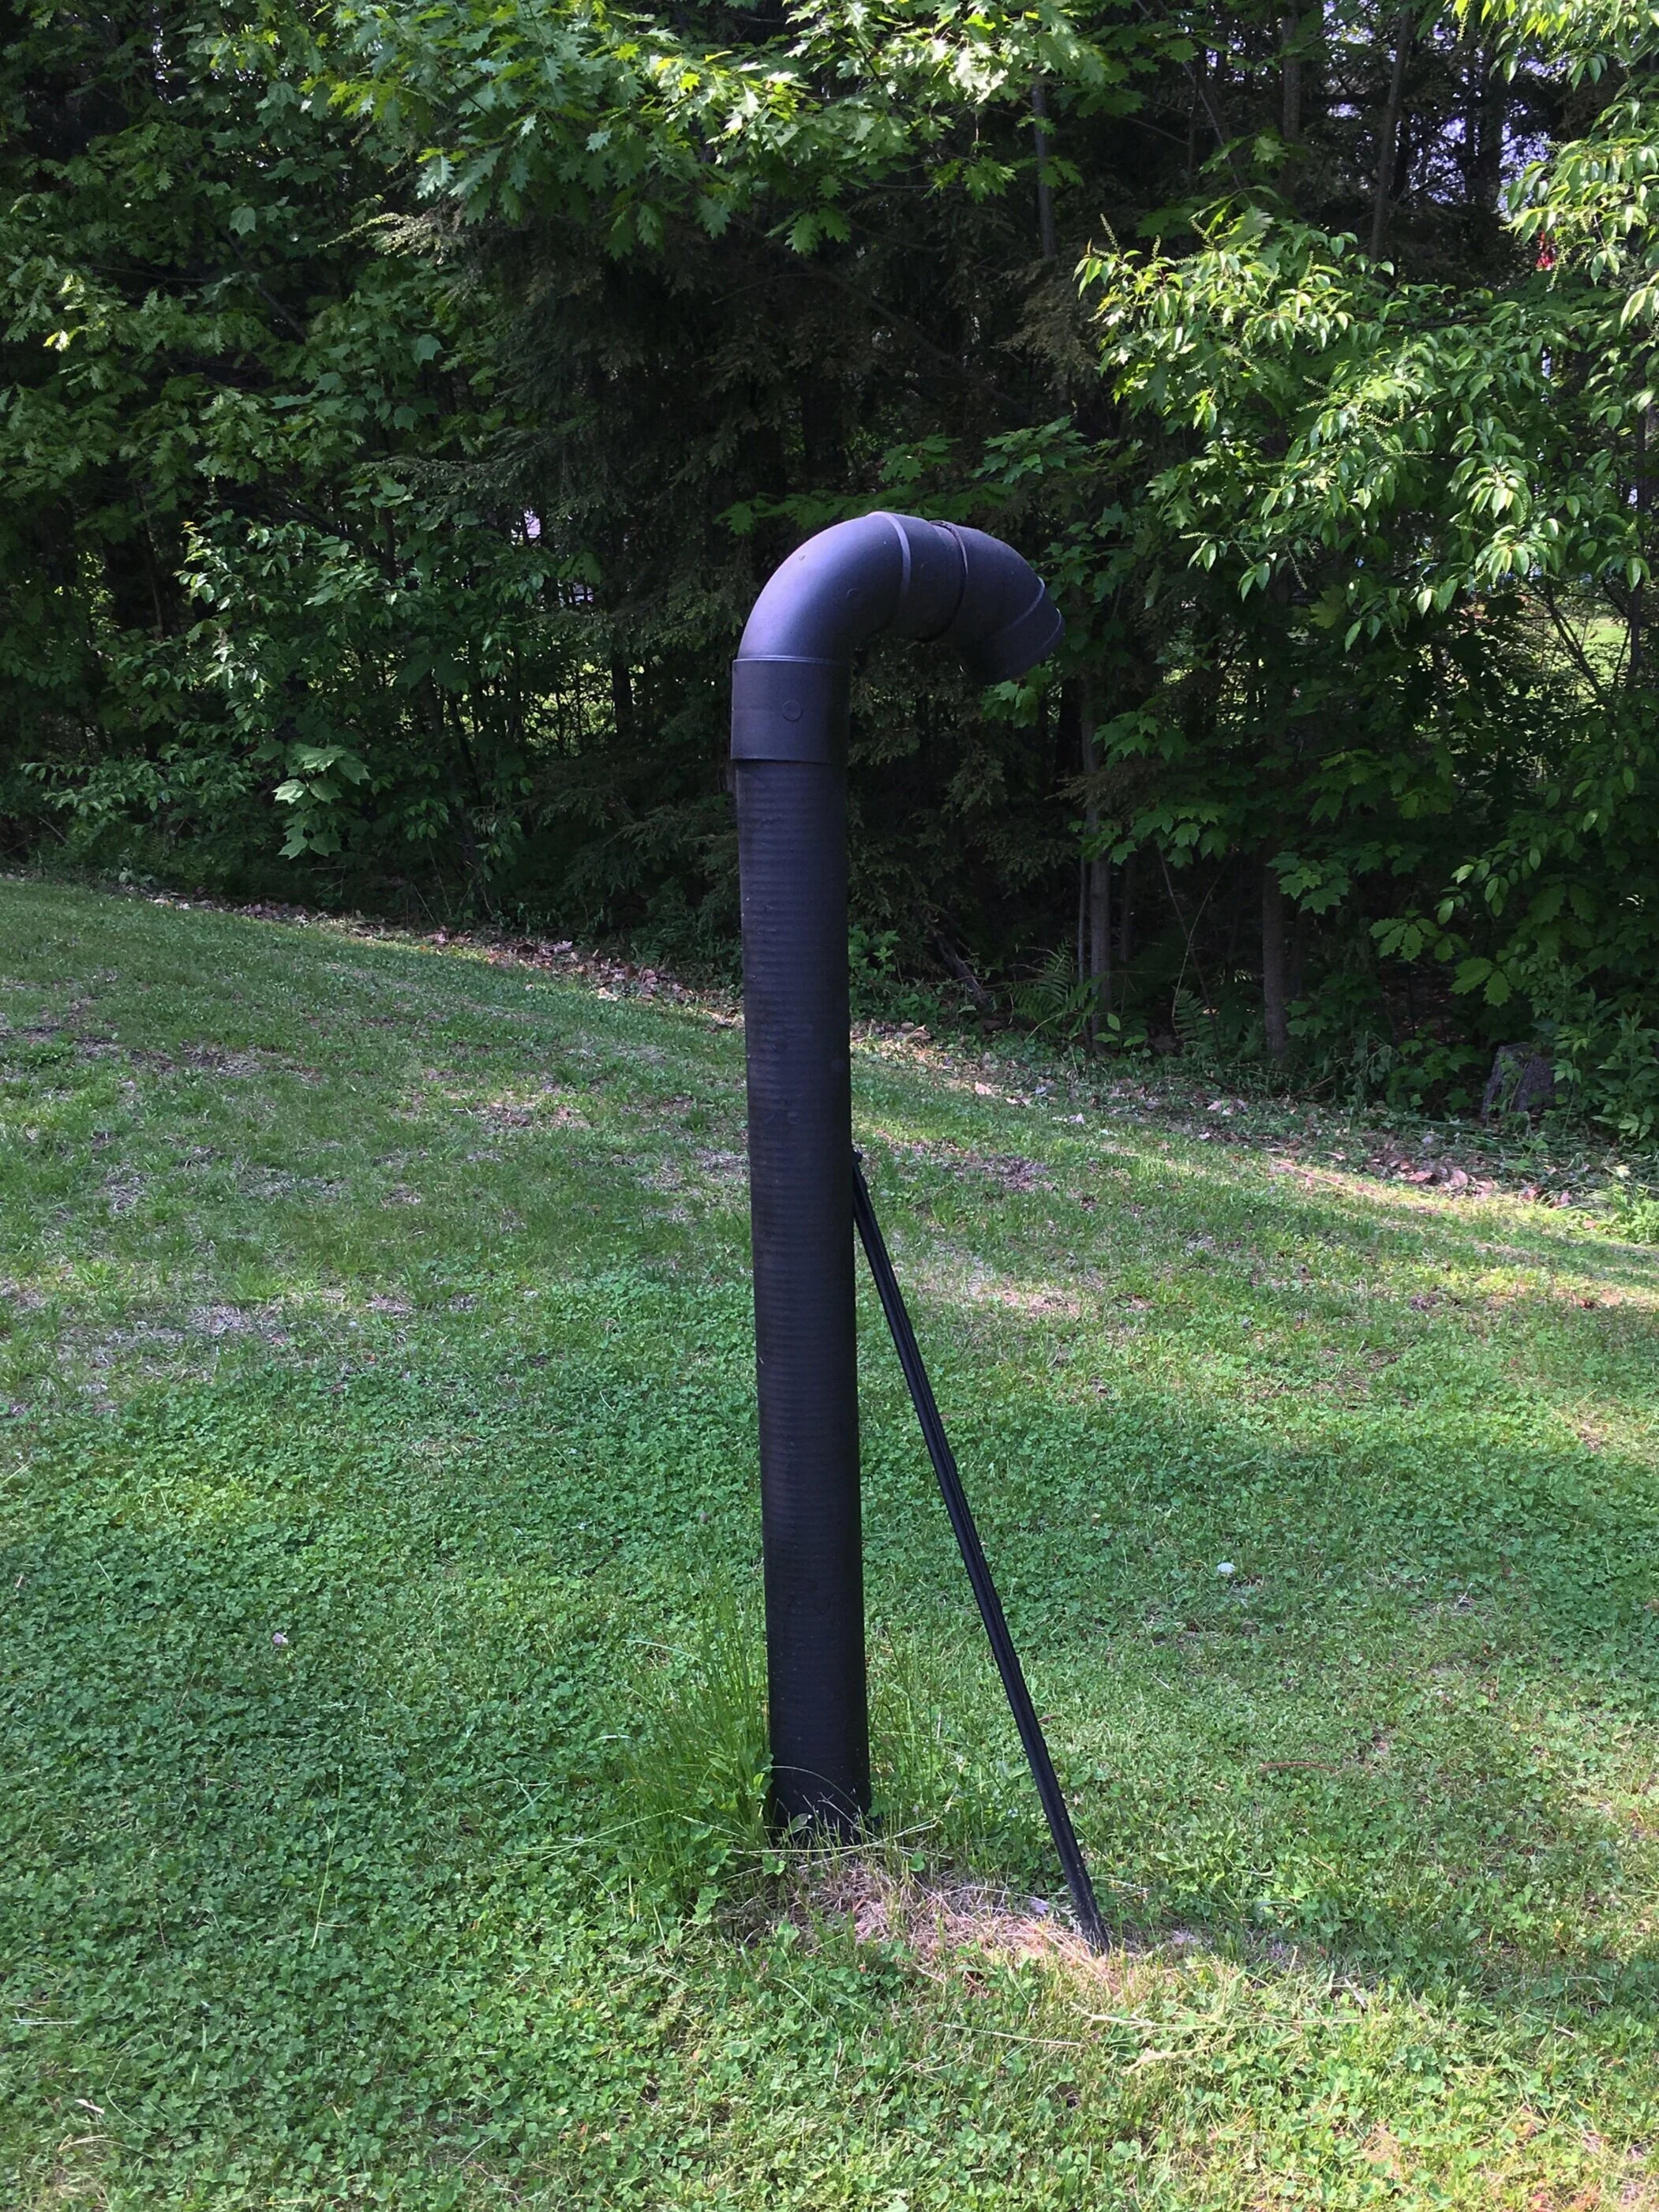
Okay, so I don’t know if “makeover” is the right word here because it’s not a huge change but it certainly helps! So in our area, most homes have septic tanks/leach fields with terribly ugly white or sea foam green PVC vent pipes that stick out like a sore thumb in their lawn. They can be tricky to hide because you don’t want to plant or build anything too heavy or substantial around them and risk damaging the leach field underground or diminish their venting capabilities… so we were limited on options on how to “make it over.”
In any case, I decided to pick up some outdoor rated matte black spray paint from our local hardware store and give our vent pipe a quick coat of black paint and it’s made a huge difference! The black definitely makes the pipe look more industrial and blends in with the grass and trees better than a bright white pipe. Like I said before, it’s certainly not a huge change but it’s a small one that’s made a big difference in my opinion.
AFTER: I forgot to take a “Before” photo but this is the After! The black definitely helps the pipe blend in with the trees and background much better than a white pipe.