An Appeal to Save Childhood Summers

Recently I looked at our family calendar and realized every single day in July was booked with 95% of it being kids' activities or lessons. It felt crazy, and unhealthy. I went through our calendar and cancelled several things and now we have some downtime again - I feel like I can breathe.
| This post contains affiliate links |

"An Appeal to Save Childhood Summers"; image of kids walking outside

Some of my fondest memories growing up were those lazy summer days where we spent every moment outside with no plans and completely lost track of time, no idea what day of the week it even was. That's what kids' summers should be, not pressure to get ahead or keep up. Every day shouldn’t be booked with tennis lessons, or tutoring, or private training. There's plenty of time to over-schedule yourself once you're an adult - for now it’s so important to be a kid.

I recently read a few articles and books that talked about the importance of letting kids have downtime for their mental health and the opportunity to grow and make more decisions on their own. I highly reccomend reading "How to Raise an Adult" - while I definitley don't agree with all of the points or suggestions in the book, it's a great reminder that your kids are capable of much more than you think and you need to give them some space to figure it out on their own (and not overschedule their life). Also the article "Summer Sanity" is a short read from the University of Florida that also touches on the issues of over-scheduling.

I wish you all a safe, relaxing - and not over-scheduled - summer :)

KEEP UP WITH BIRCH LANDING HOME
|  Etsy  |  Facebook  |  Instagram  |  Pinterest  |  Bloglovin'  |  Hometalk  |
"Anything But a Backpack" Day Ideas

Having worked at a middle/high school for a few years now I’ve experienced a few “Anything But a Backpack” Days for Spirit Week and they can be pretty hilarious. …What does that mean? you might wonder - well, it pretty much means what it says - leave your backpack at home that day and come up with a creative way to carry your things around school for the day. I thought I’d share a list of some of the favorites I’ve seen or have heard about form others - some are quite creative and ridiculous. | This post contains affiliate links |
Disclaimer: always make sure you check with your school for any parameters or rules for this event as every school will have different expectations as to what’s acceptable or not.

“Anything But a Backpack” Day Ideas

  • laundry basket
  • hamper
  • stroller
  • car seat
  • remote control car
  • PowerWheels
  • wagon
  • toy shopping cart
  • real shopping cart
  • Easter basket
  • pizza box
  • toolbox
  • bucket
  • a really ugly/tacky purse or bag (can be found cheap at a local thrift shop!)
  • tool chest
  • mini fridge
  • microwave (that has to be heavy!)
  • a car bumper (very tricky to put your stuff in - and yes, I have seen this one myself!)
  • a kayak
  • Cozy Coupe
  • a canoe (very awkward to get up the stairs)
  • golfbag
  • milk crate
  • horse saddle bag
  • office chair
  • cooking pot
  • cat carrier
  • birdcage
  • wheelbarrow
  • guitar case
  • suitcase (the ones with the wheels are handy!)
  • fishing net
  • traffic cone
  • stuffed animal that has a zippered pocket
  • trick-or-treat bag or container
  • trash bag or trash can (just make sure your stuff doesn’t get thrown out by accident!)
  • a younger sibling (I have seen this at another school - the student and their family got permission and everyone was okay with it. The younger sibling had fun carrying their older sibling's Chromebook and tagging along for the day. This is one where you DEFINITELY would need to check with school administration beforehand)

I will add to this list as I see more ideas every year. What have you done for “Anything But a Backpack” Day?

Check out our Spirit Week Theme Day Ideas blog post for other theme day ideas!

Disclaimer: Always make sure you check with your school for any parameters or rules for this event as every school will have different expectations as to what’s acceptable or not. This list is for ideas/entertainment purposes only.


Teaching Curated Picks:

Scroll sideways to see more —>


KEEP UP WITH BIRCH LANDING HOME
|  Etsy  |  Facebook  |  Instagram  |  Pinterest  |  Bloglovin'  |  Hometalk  |

The Three Questions I Ask My Kids Every Night

Keeping an open dialogue is so important with kids, and it’s essential to start that trust early. A few years ago I started a tradition where I ask each kid three questions before they go to bed to give them an opportunity to easily share about their day and anything that may have been trouble for them.
| This post contains affiliate links |

We typically do our bedtime routine together - brush teeth, say prayers, read a story, etc. but then I spend a few minutes solo with each child when I tuck them in and turn out the lights and say goodnight. I use this solo time to ask each kid their 3 Questions. They know they can be honest and say whatever they want.

The 3 Questions:

  • What was your favorite part of the day?

  • What was your least favorite (worst) part of the day?

  • What are you looking forward to tomorrow?

Now to explain the reasoning behind the questions…

What was your favorite part of the day?

This gives them an opportunity to start easy, an ice breaker. They can share something good about their day and it can be anything. It could be that their favorite part was they did good on a math test, or that they had ice cream after dinner, or that they did their locker combination on their first try. It not only gives them an ice breaker to start the conversation, it gives you a chance to celebrate their favorite “win” of the day with them - no matter how big or how small.

What was your least favorite (worst) part of the day?

This one is the loaded question… the one where you hope your kid will share what’s really bothering them. Some days they will, and some days they won’t.. but at least asking this question daily gives them an easy opportunity to bring something up. Sometimes their answer could be something simple like the worst part was having to eat brussell sprouts at dinner. Or maybe they tripped in the hallway and felt embarrassed. Or maybe that they’re being bullied or there was an incident at school. These are important things to be aware of as a parent that your child isn’t always willing to share… by giving them the opportunity to share you can have a conversation with them to talk through what’s troubling them and hopefully help them figure out how to resolve it on their own or if you need to make someone else (school administration, etc) aware of the situation.
- Though typically we don’t dwell on whatever they say in the moment, especially if it’s obvious they don’t want to talk about right then. It’s more of a chance to just get it off their chest. If there’s something big going on I usually think it over that night and work towards addressing it the next day, if needed.

What are you looking forward to tomorrow?

This is where we end on a high note, a positive… something to look forward to tomorrow before they fall asleep. Sometimes the next day has big things to look forward to (an amusement park trip, a birthday party, skiing, etc), but often there’s nothing “big” the next day and that’s okay! This gives kids the opportunity to look for the positives in the every-day, as there’s always something to look forward to. It could be something simple like it’s pizza day at school, the weather is supposed to be nice, they have art class, etc.

Growing with this Practice

We started this 3 Questions tradition when our kids were small, in preschool. The oldest is now in late elementary school and starting to navigate cliques and social pressures… I hope that continuing this practice will help keep our dialogue open through Middle and High School as things get trickier with school and her social circle. I’m sure as she gets older this practice may evolve but for now I think it’s a great start!

Another useful thing to get converstations going is to always eat dinner together as a family at the dinner table. I admit this can be tricky to do every night especially during those busy weeks, but it's so helpful to get that undistracted face-to-face time with your family and kids. If you're struggling to get the conversation going you can try Table Topics which are fun conversation starters. We use these occasionally during dinner as a game.

KEEP UP WITH BIRCH LANDING HOME
|  Etsy  |  Facebook  |  Instagram  |  Pinterest  |  Bloglovin'  |  Hometalk  |

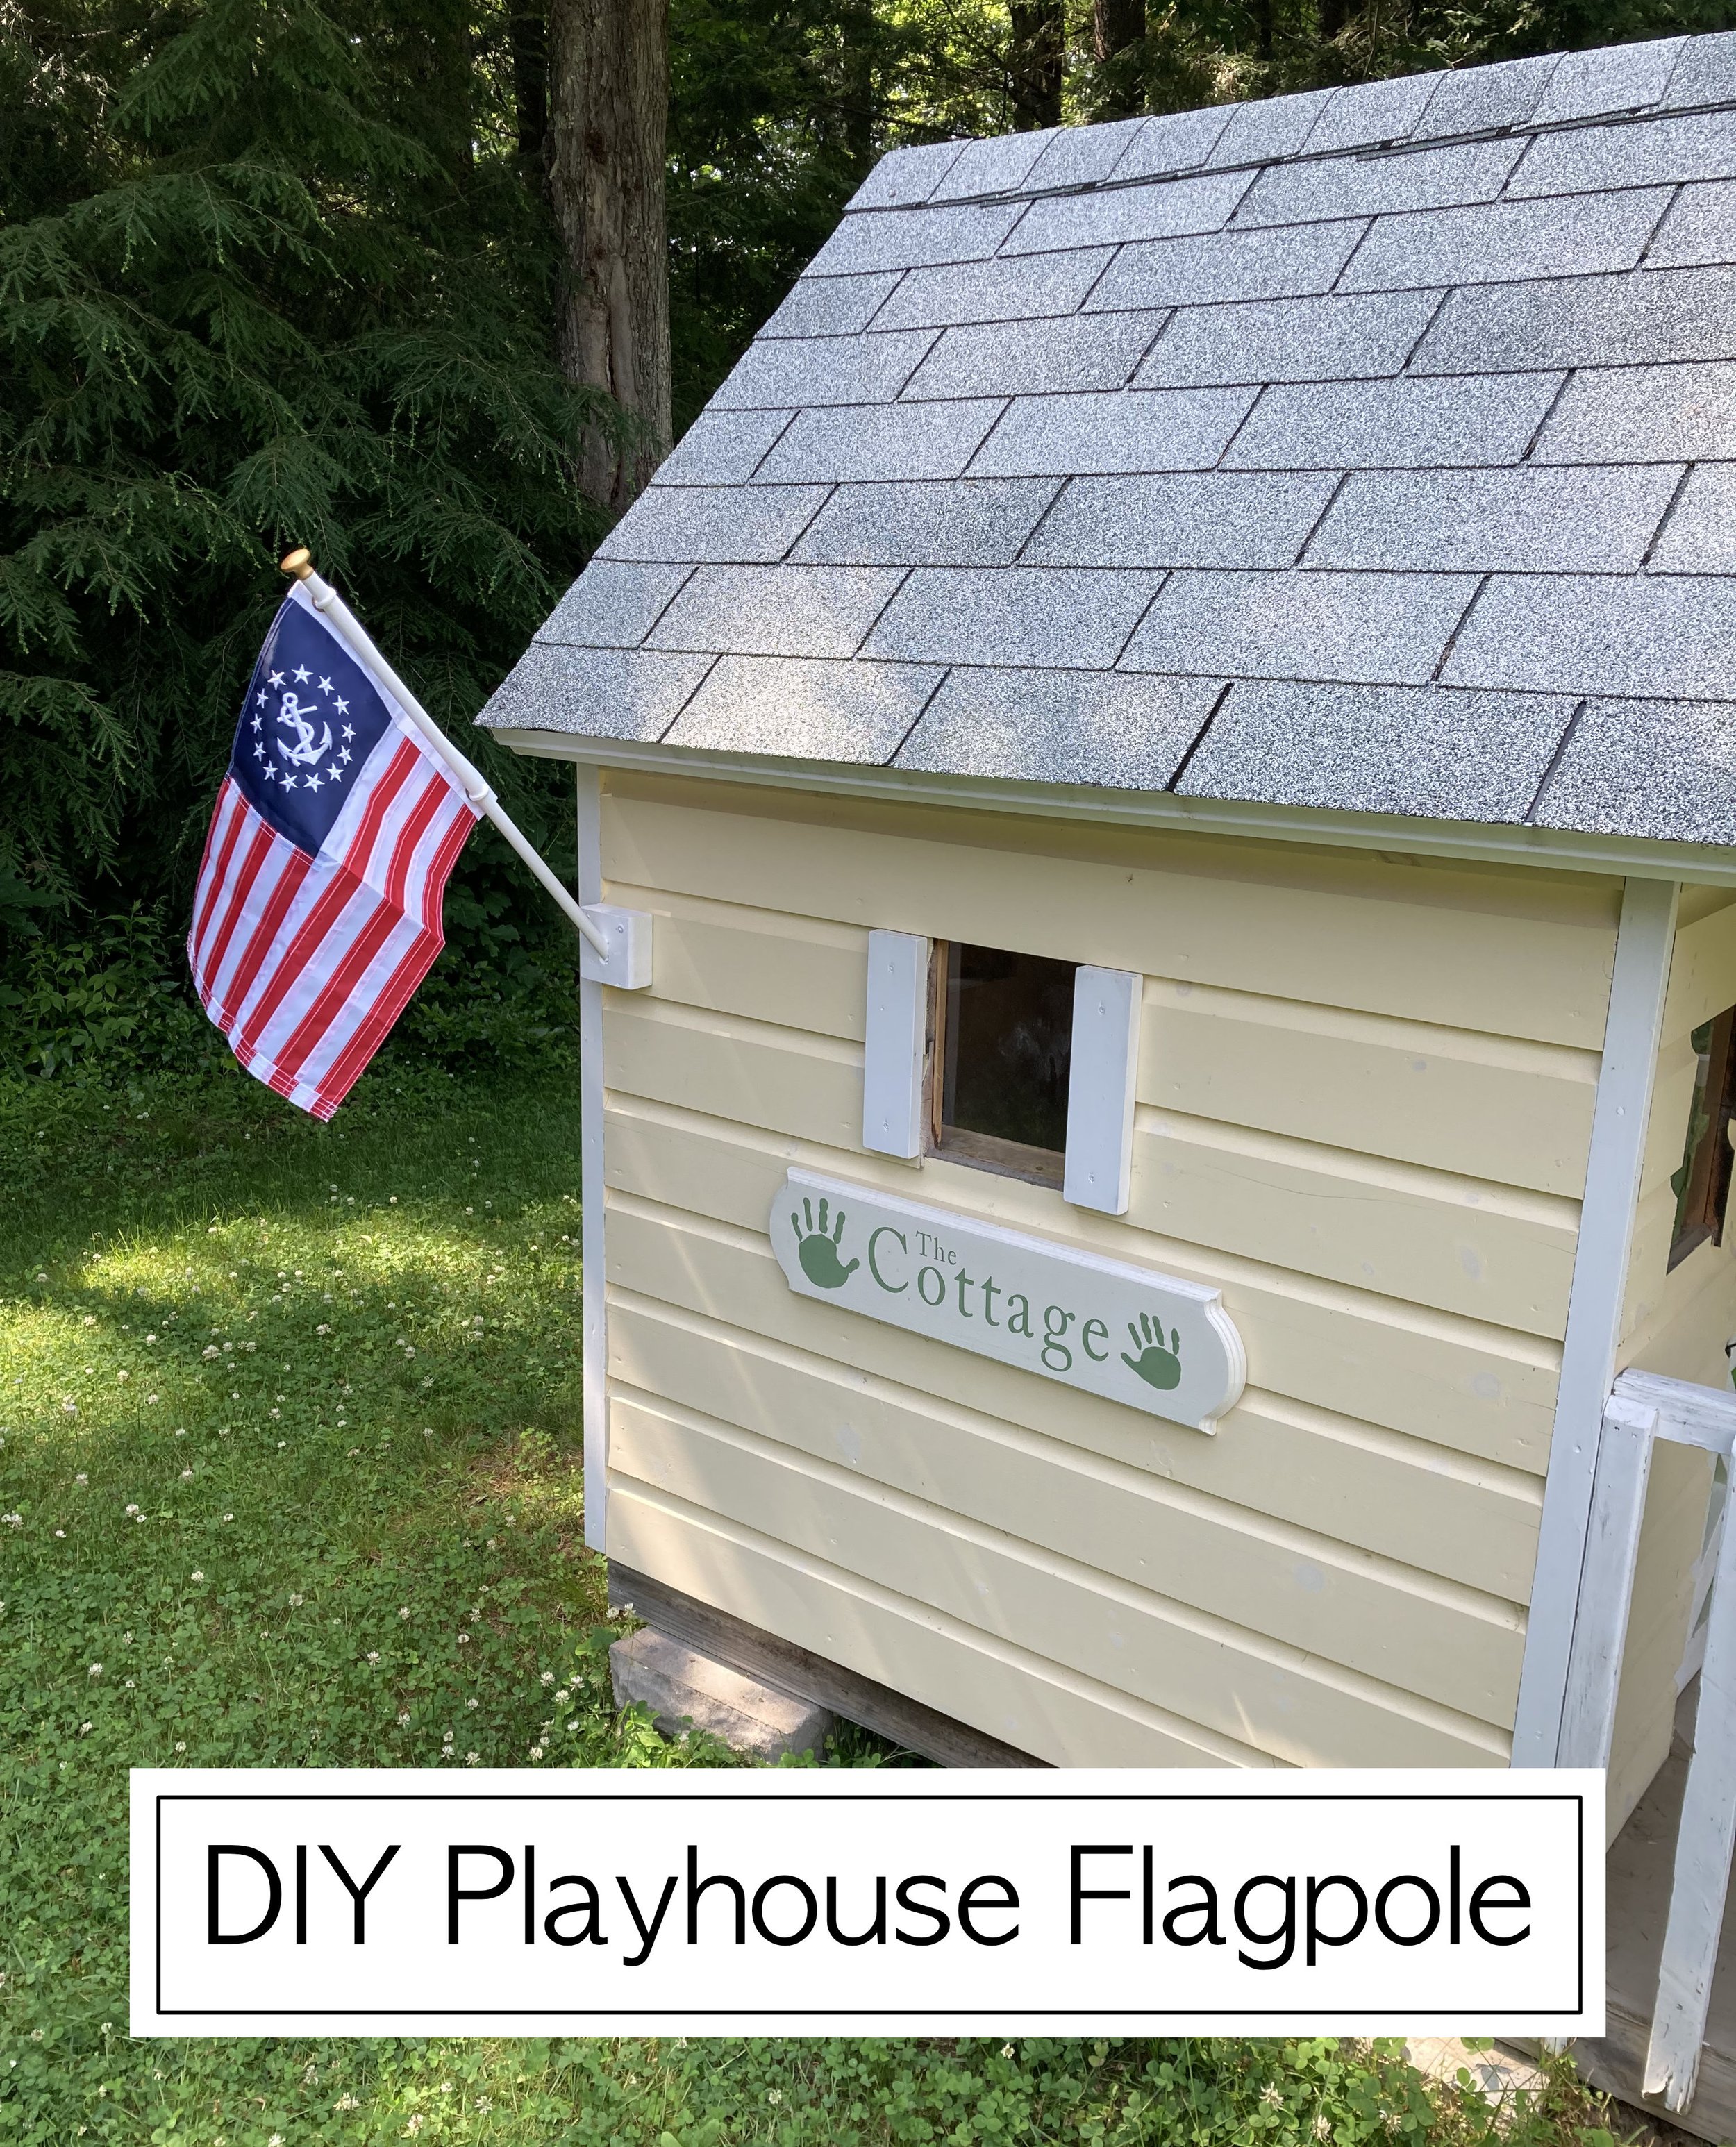
DIY Playhouse Flagpole

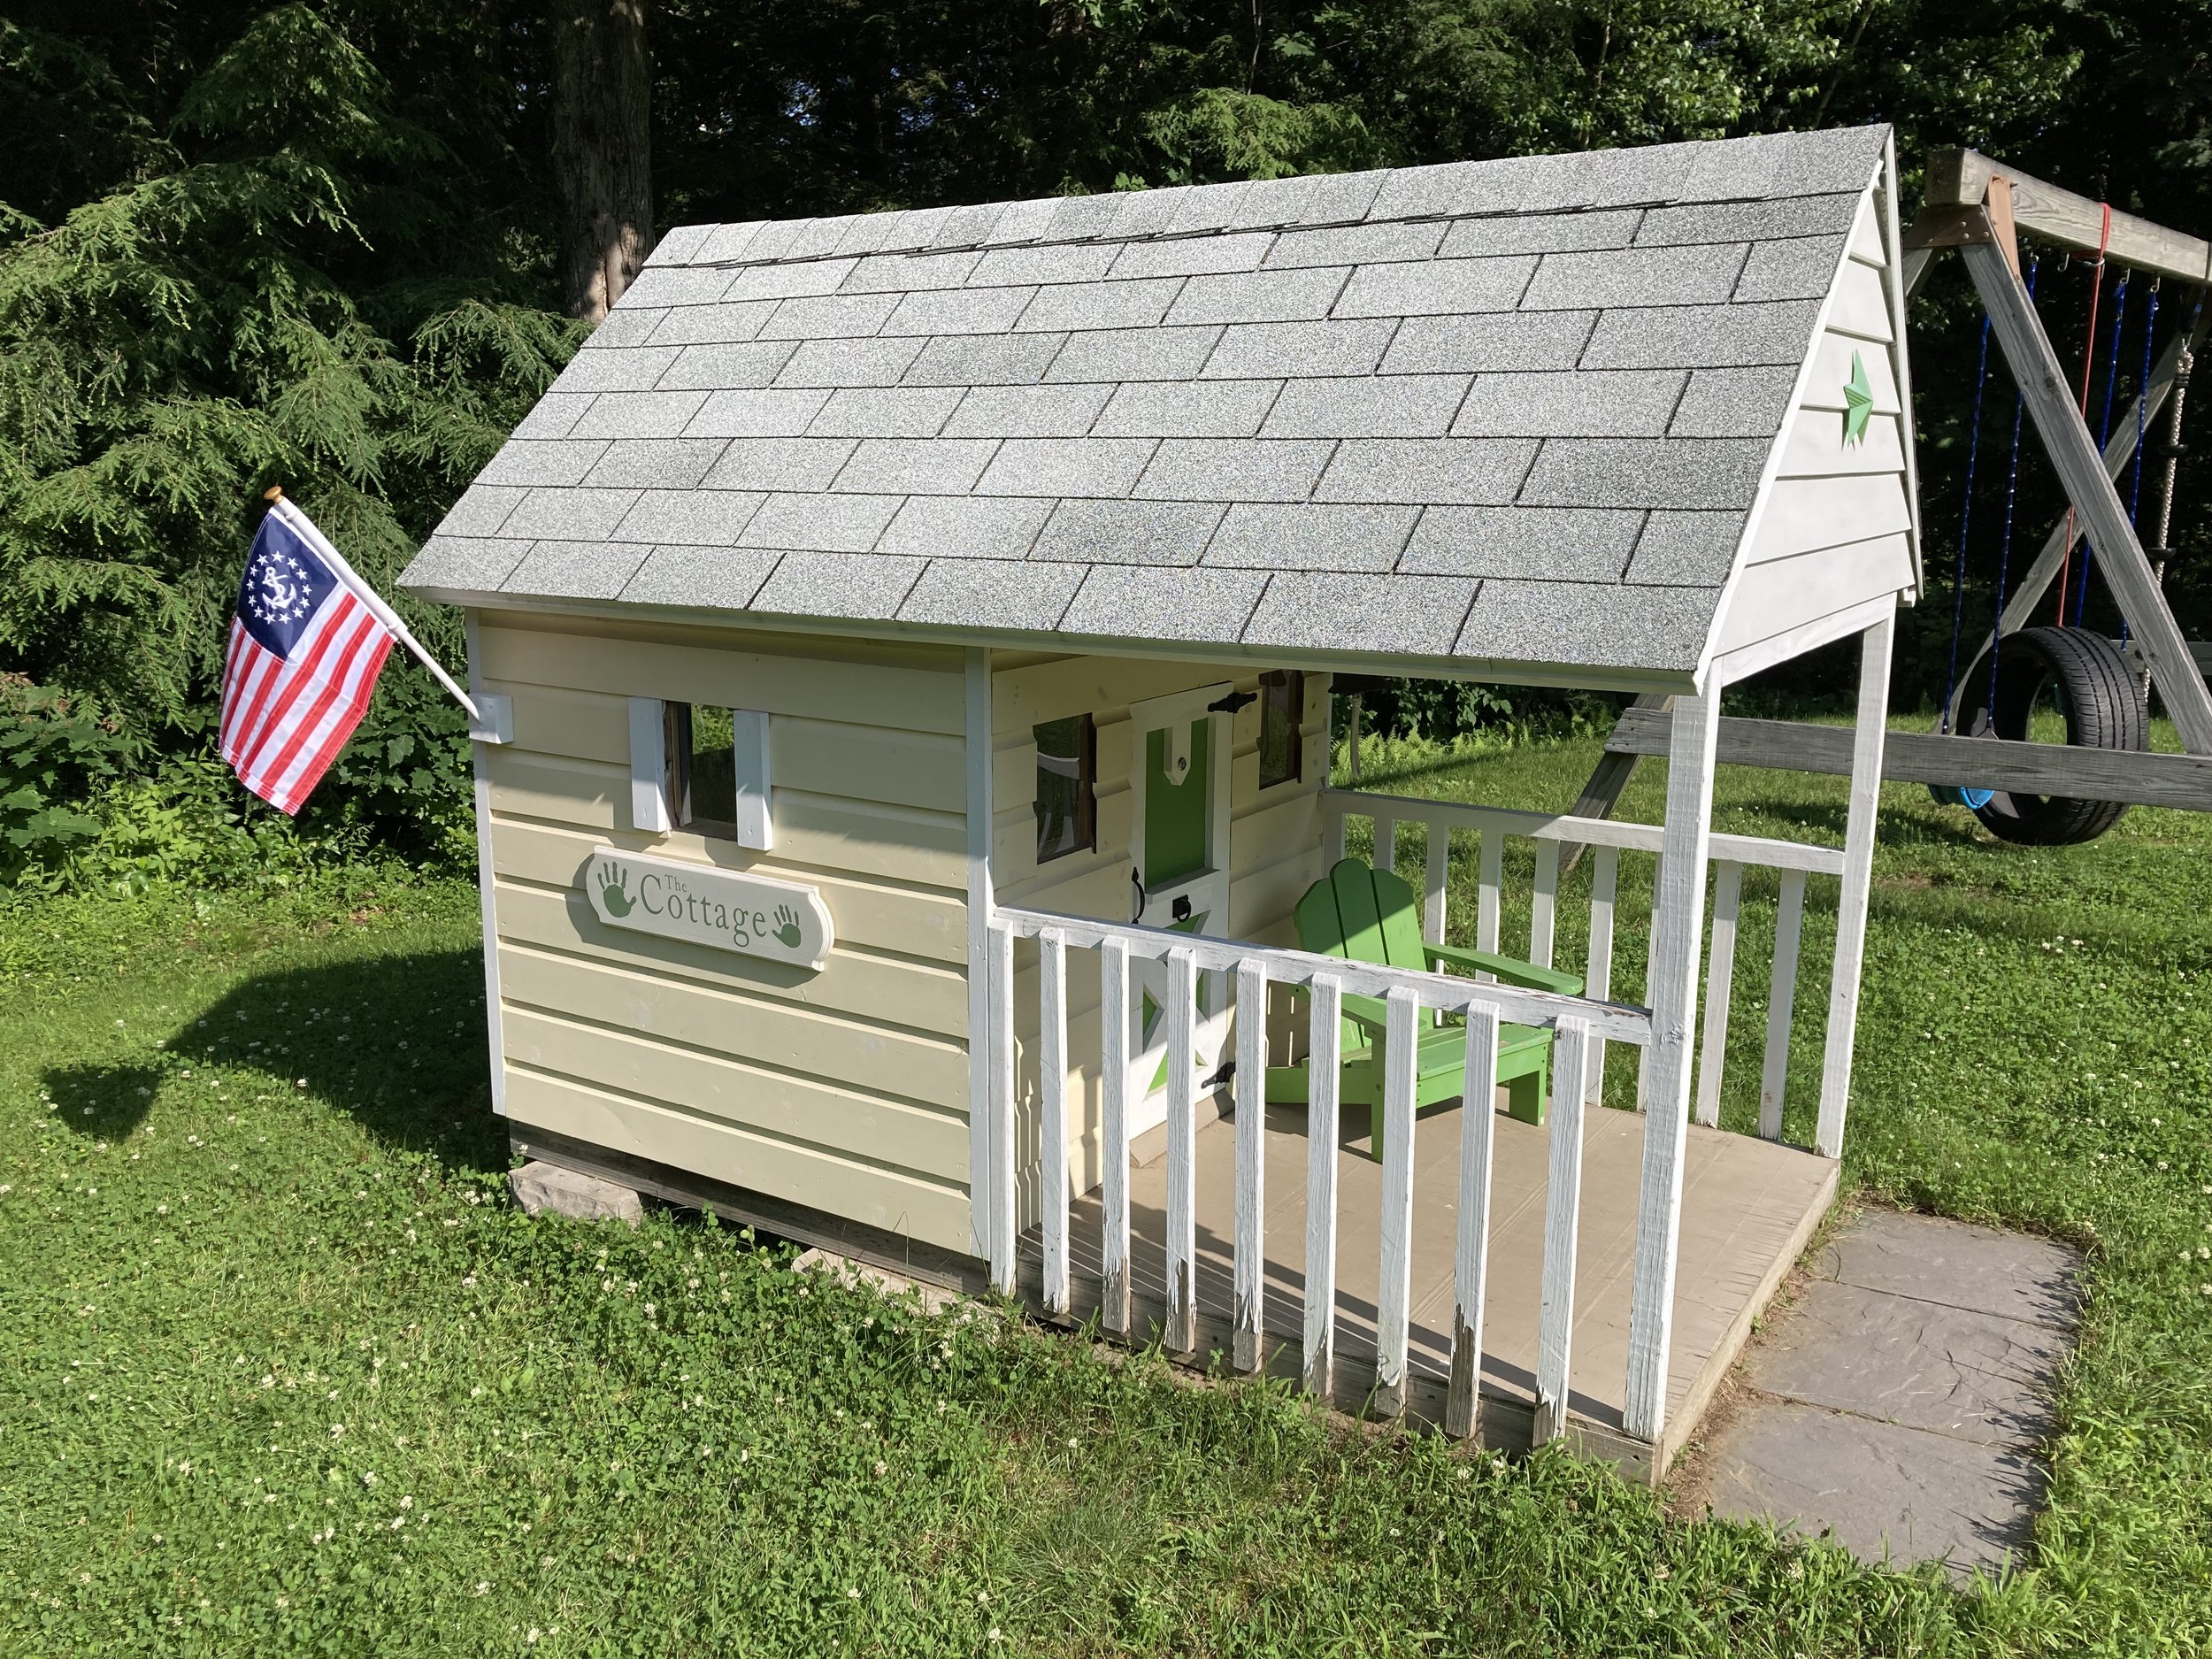
Our kids’ playhouse is pretty special - it was built for them by their Grandfather and the door was built by their Dad. It’s a special spot that has gotten a lot of use over the years and is always a hit when they have friends over. For awhile now I’ve wanted to add a little flagpole but wasn’t able to find an affordable boat flagpole in the dimensions I needed so I decided to make one myself. | This post contains affiliate links |

Materials:

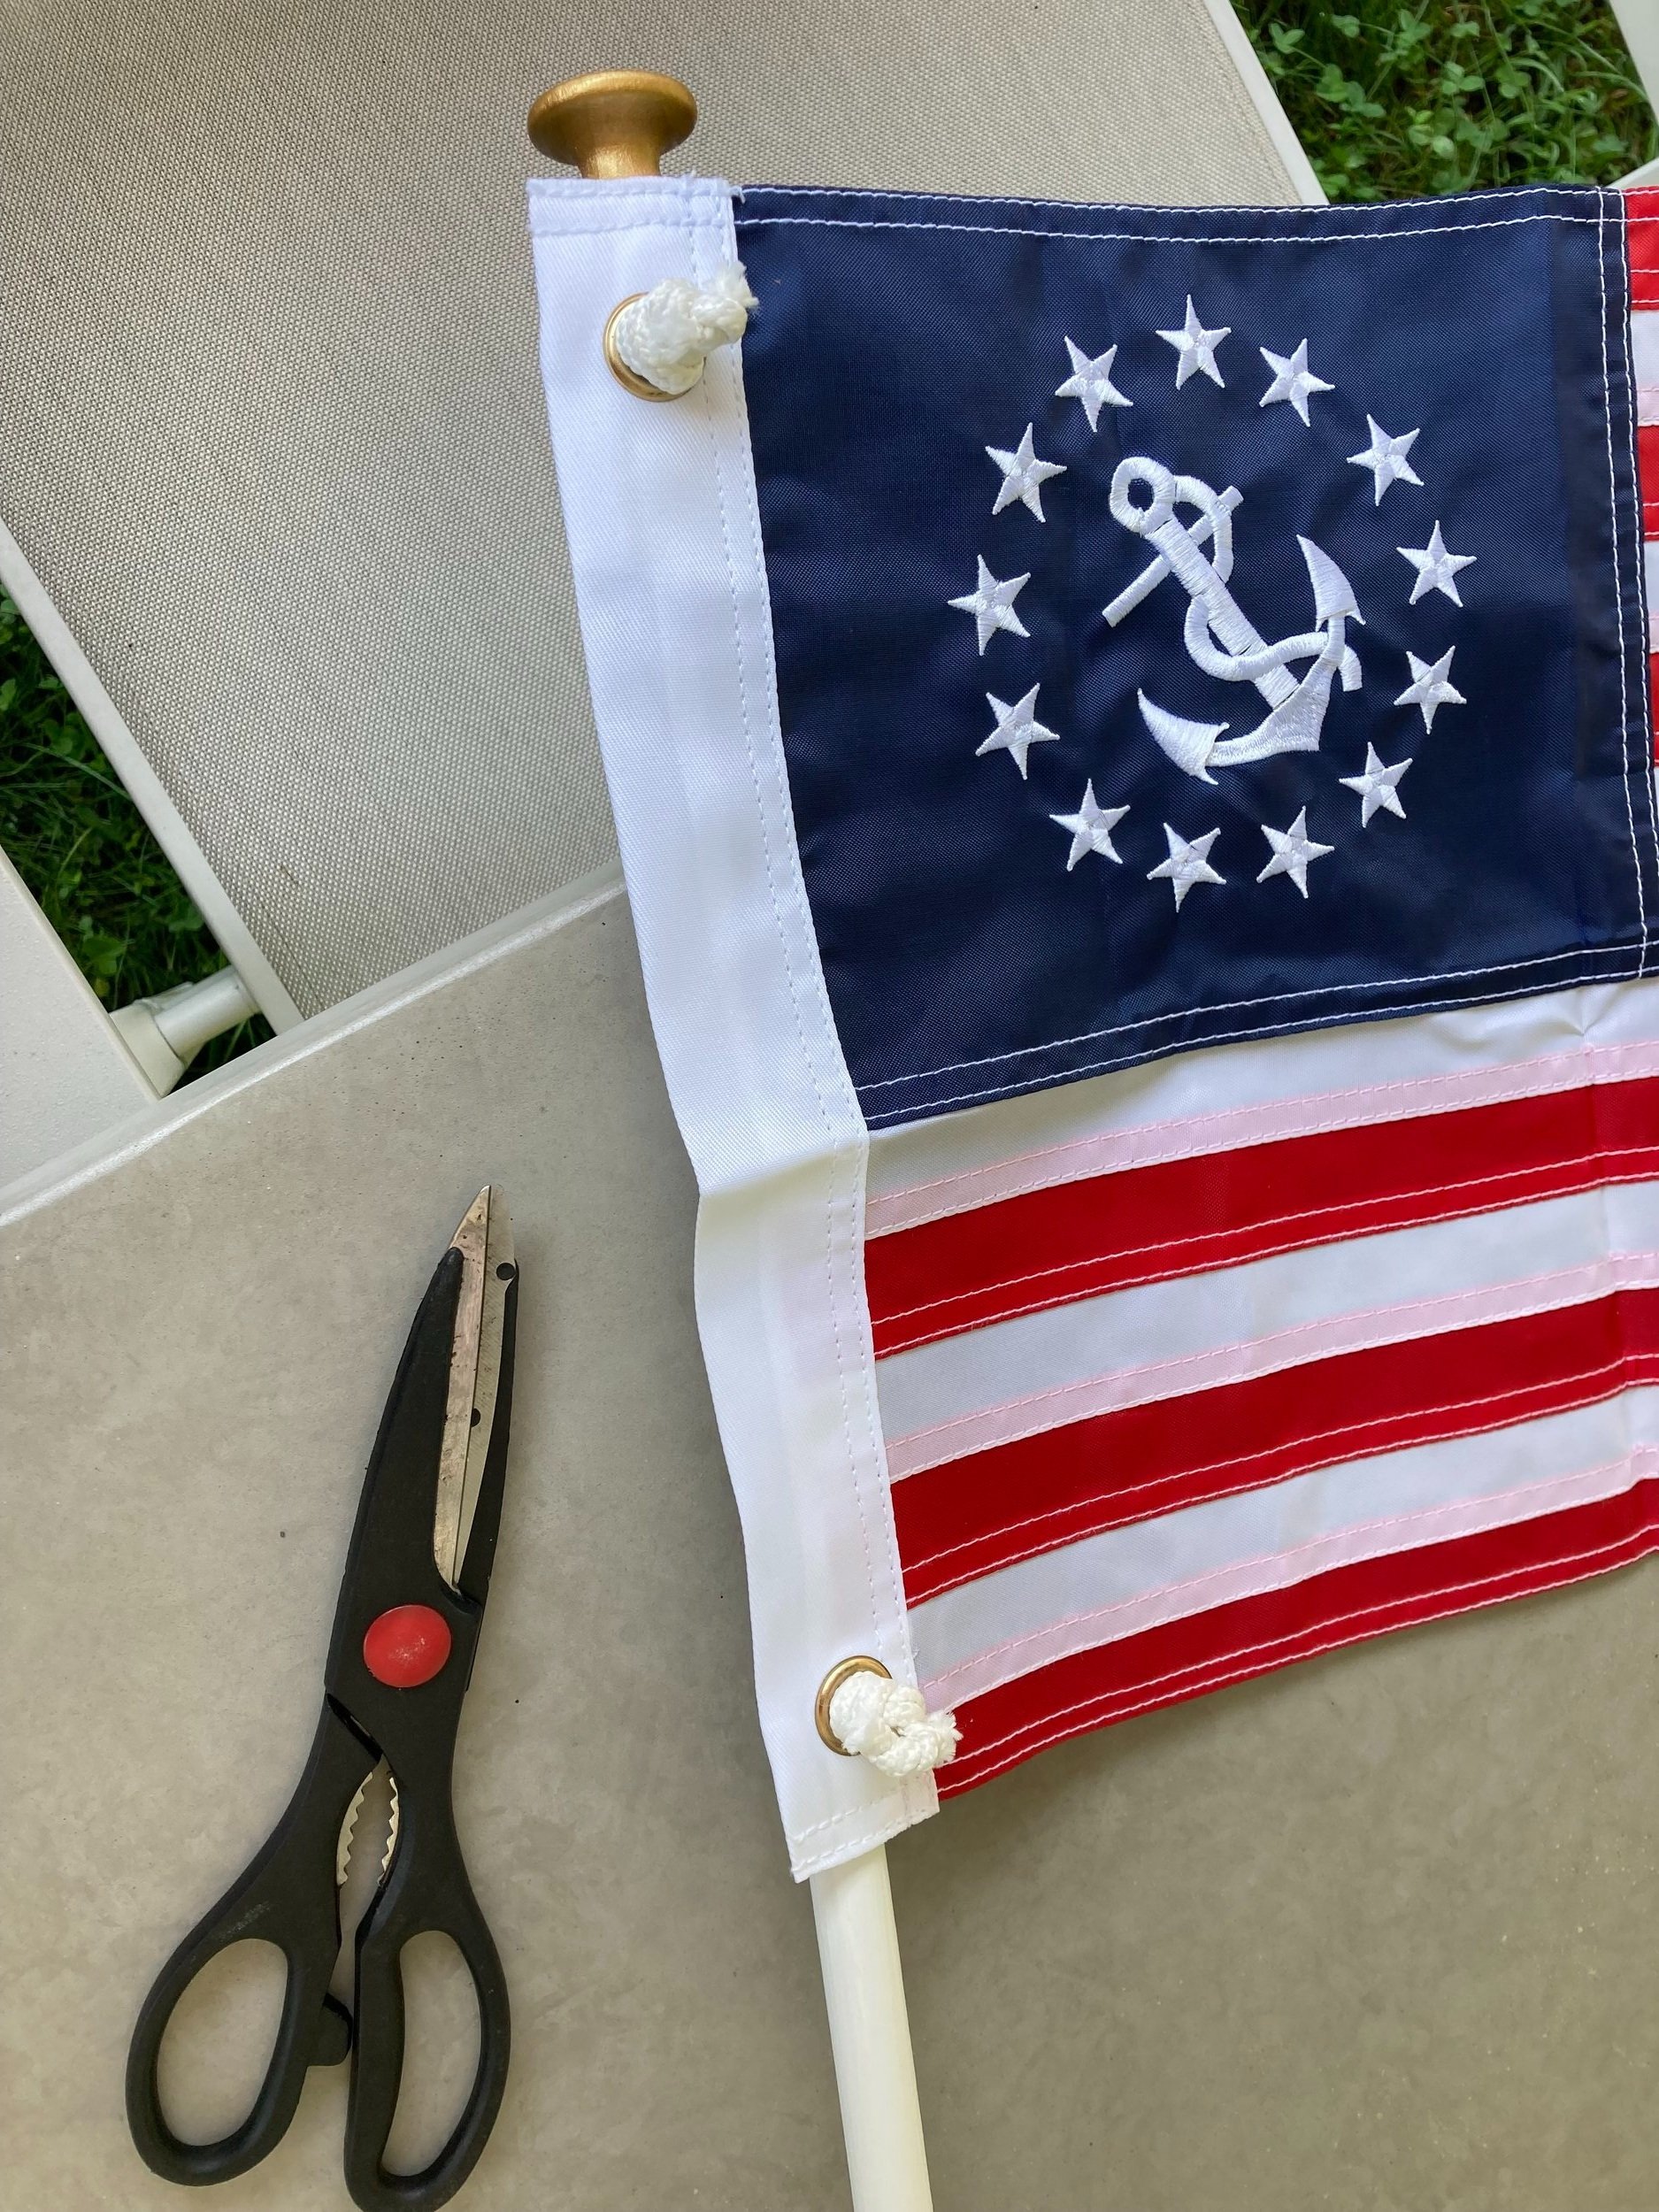
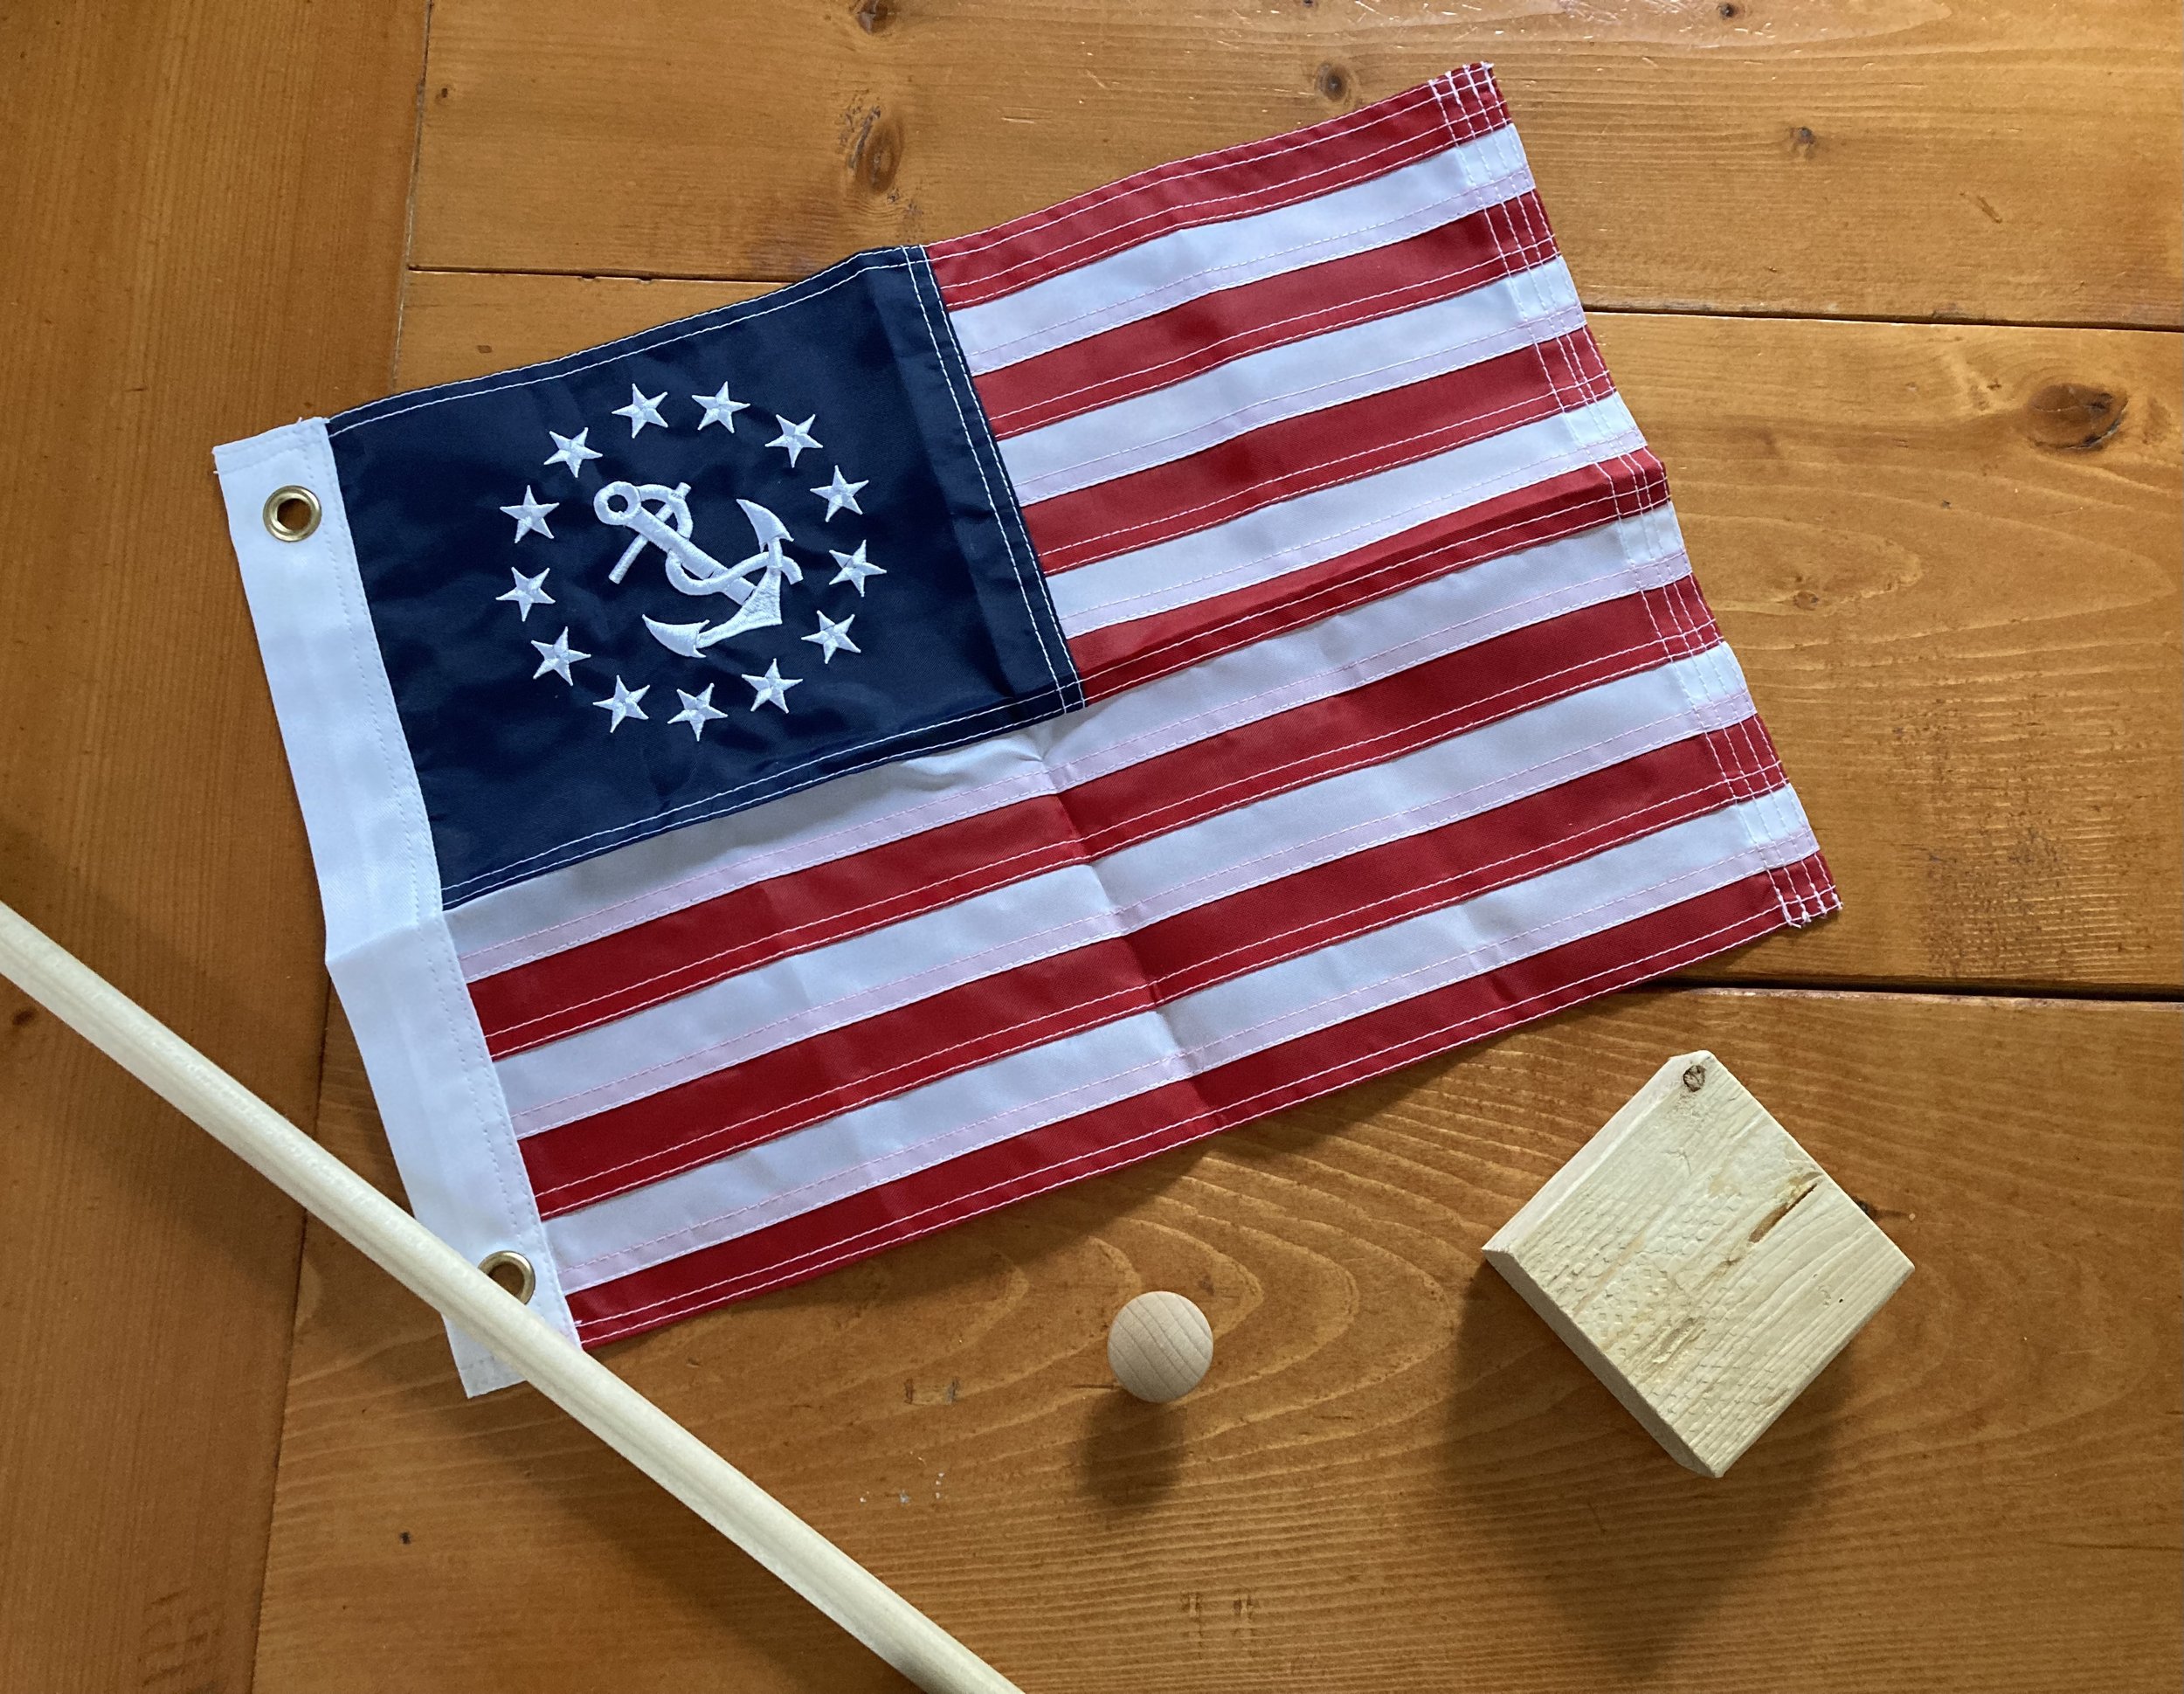
  • 12"x 18" boat flag (I used a nautical-inspired one but you could get a traditional American flag too)
  • dowel (I used 3/4")
  • small piece of 2x4
  • drill and screws
  • wooden knob that fits on end of dowel
  • paint (white and gold)
  • wood glue
  • clothes line rope
  • optional: you could use a boat flagpole and bracket kit if you wanted to make this quick and easy, but I was trying to make this project as inexpensively as possible and opted to make it myself with scrap wood we already had - I also wanted more control over the length of the pole and the angle which is another reason why I decided to make it myself.
DIY Playhouse Flagpole

How-To:

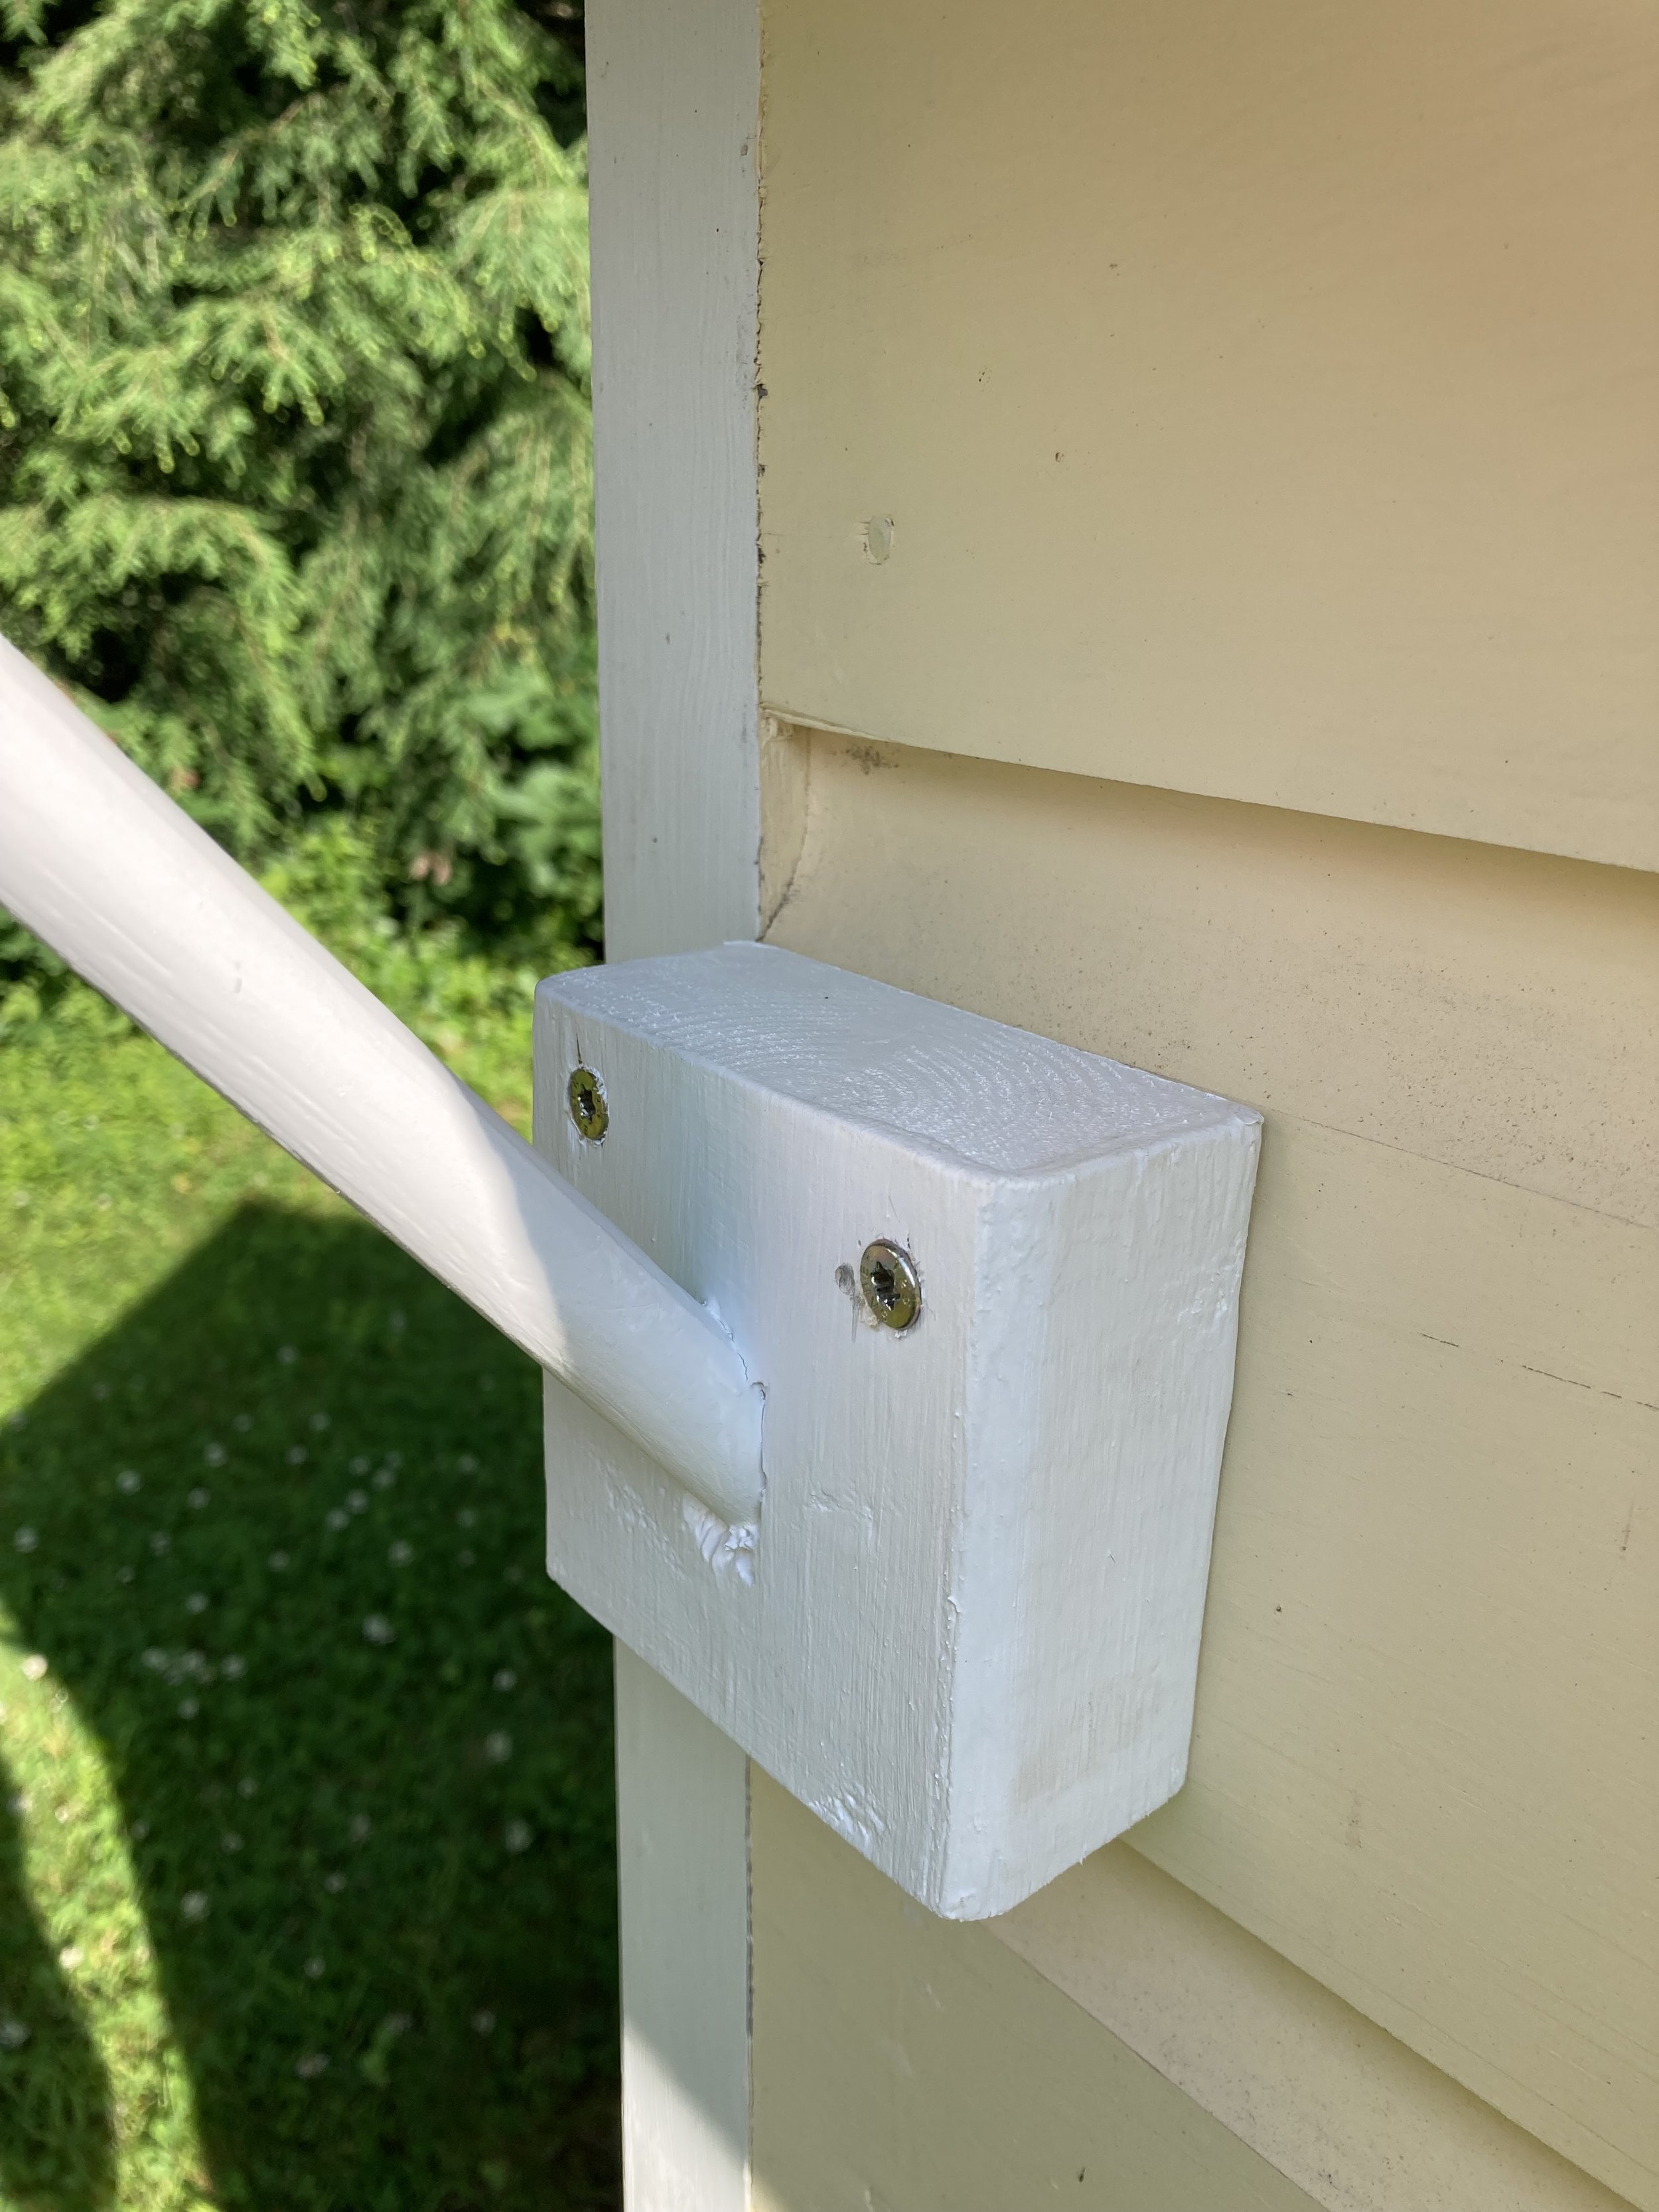
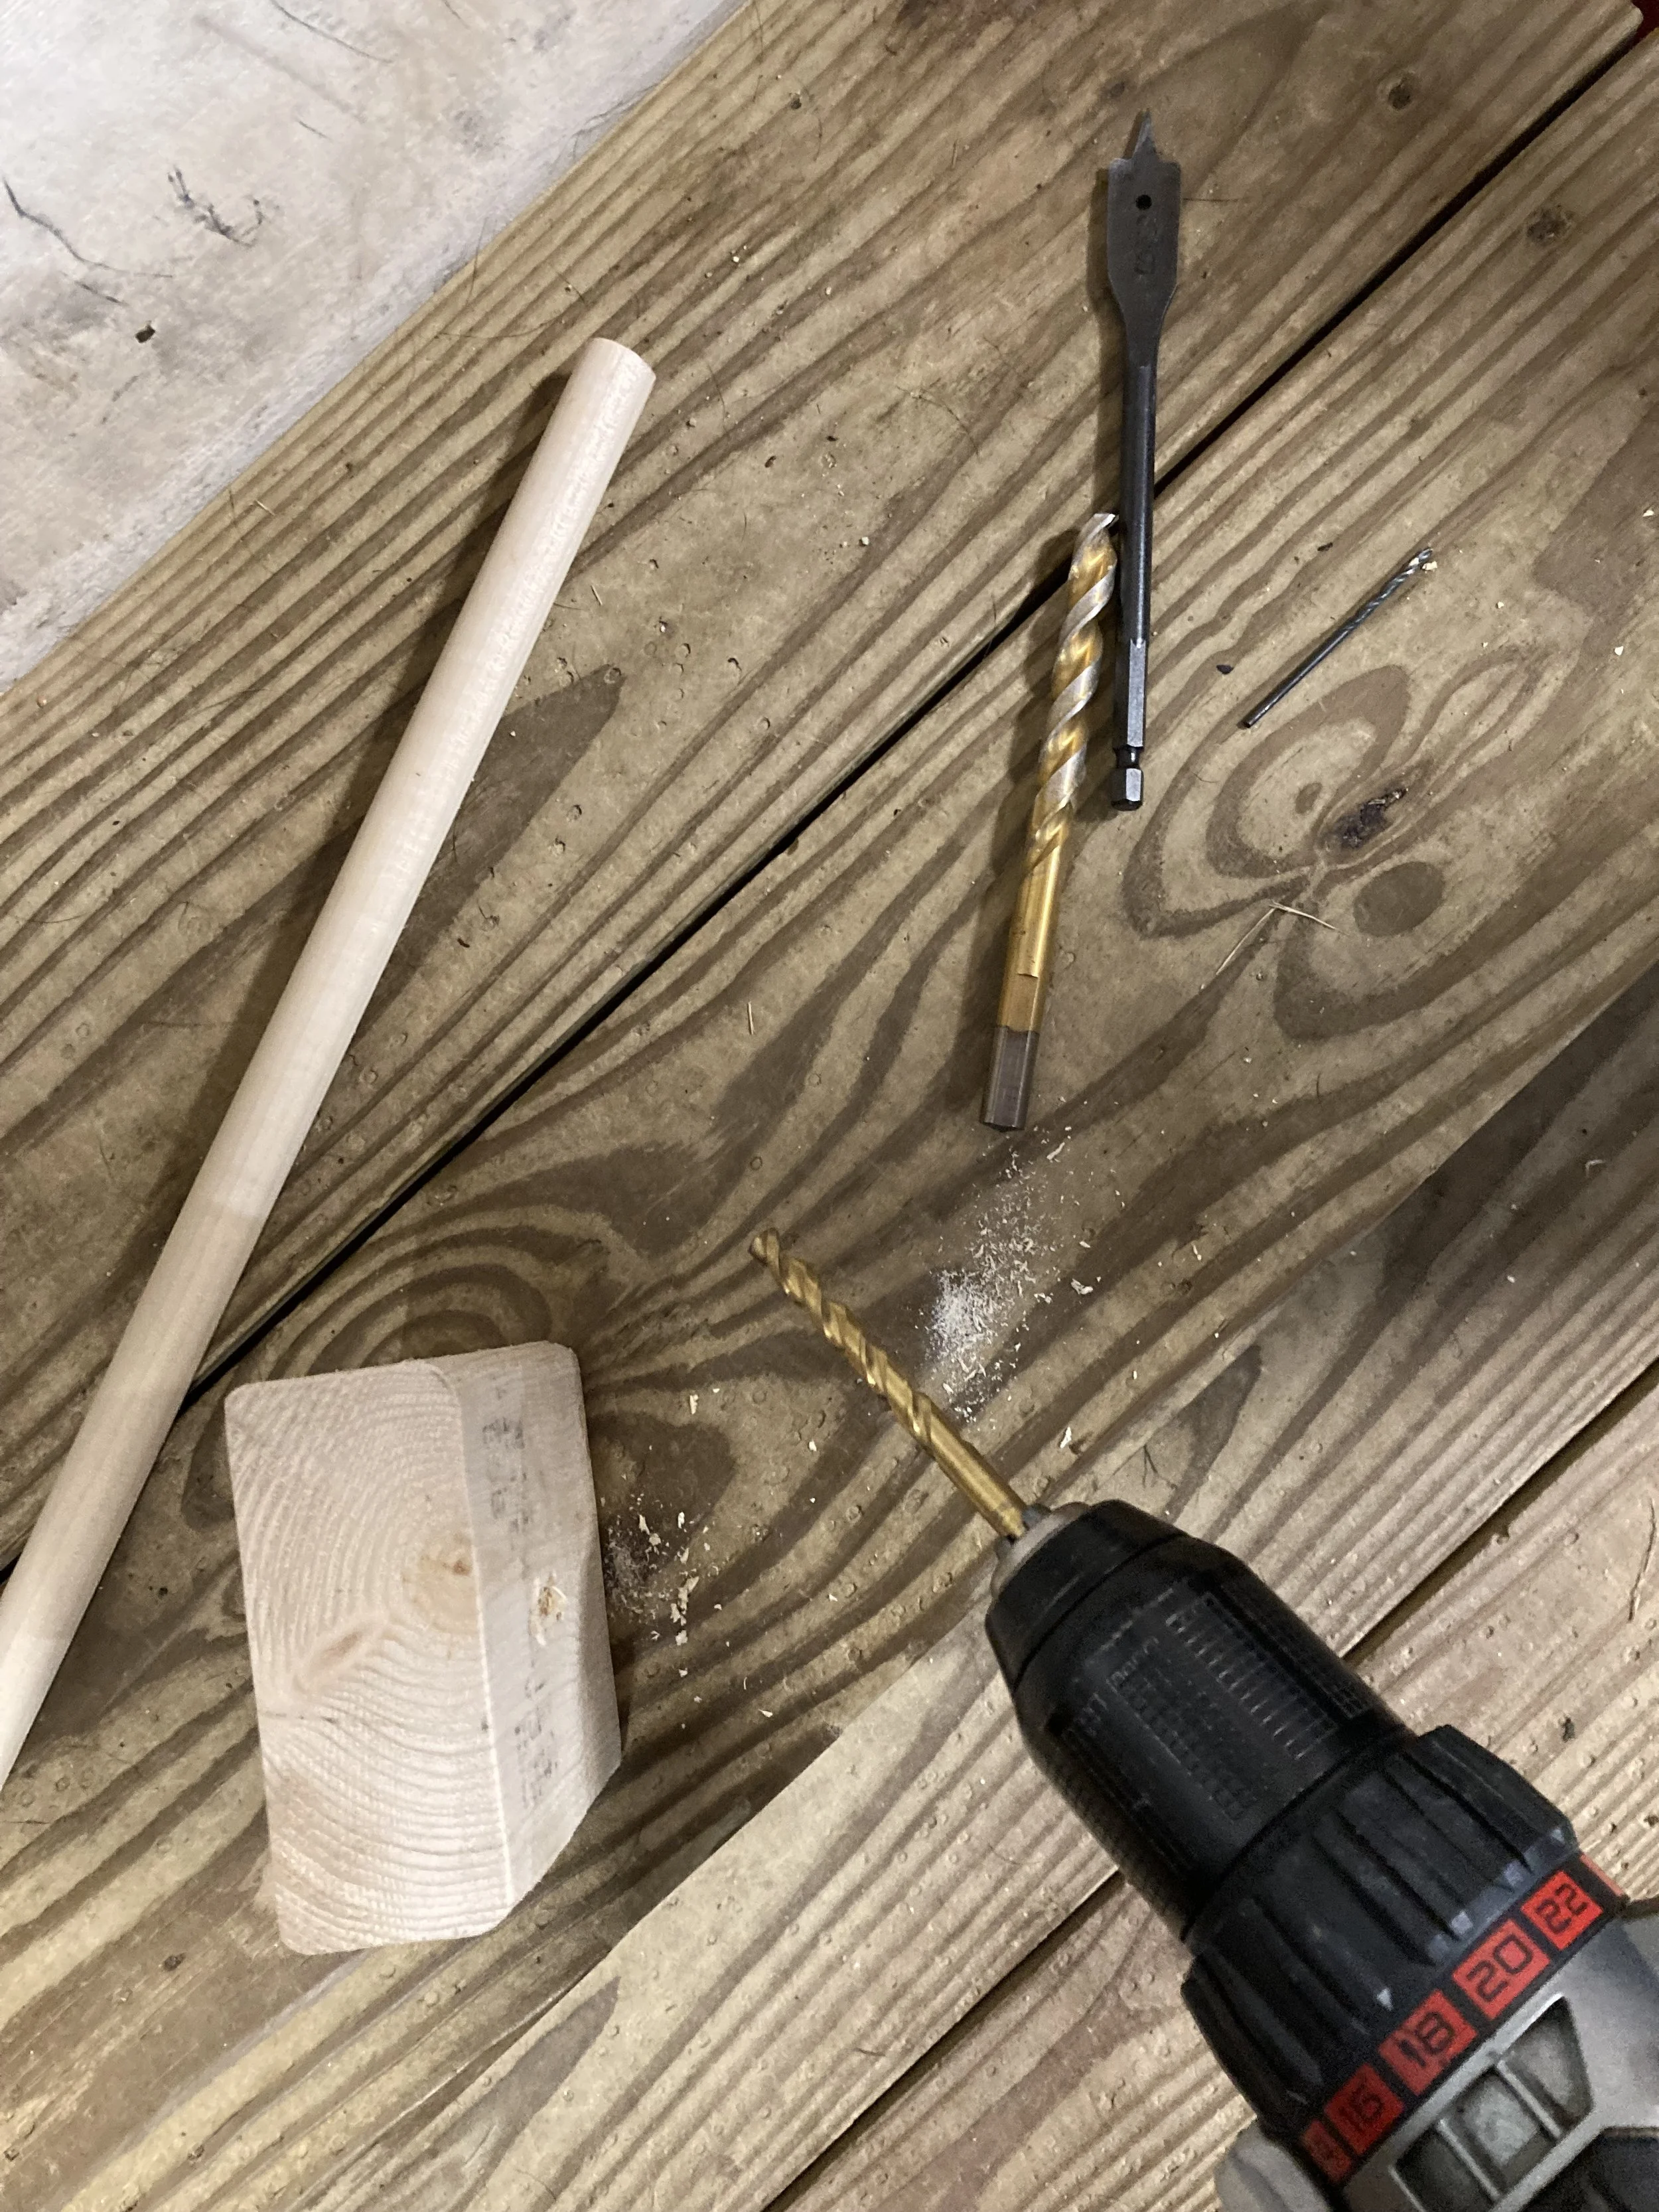
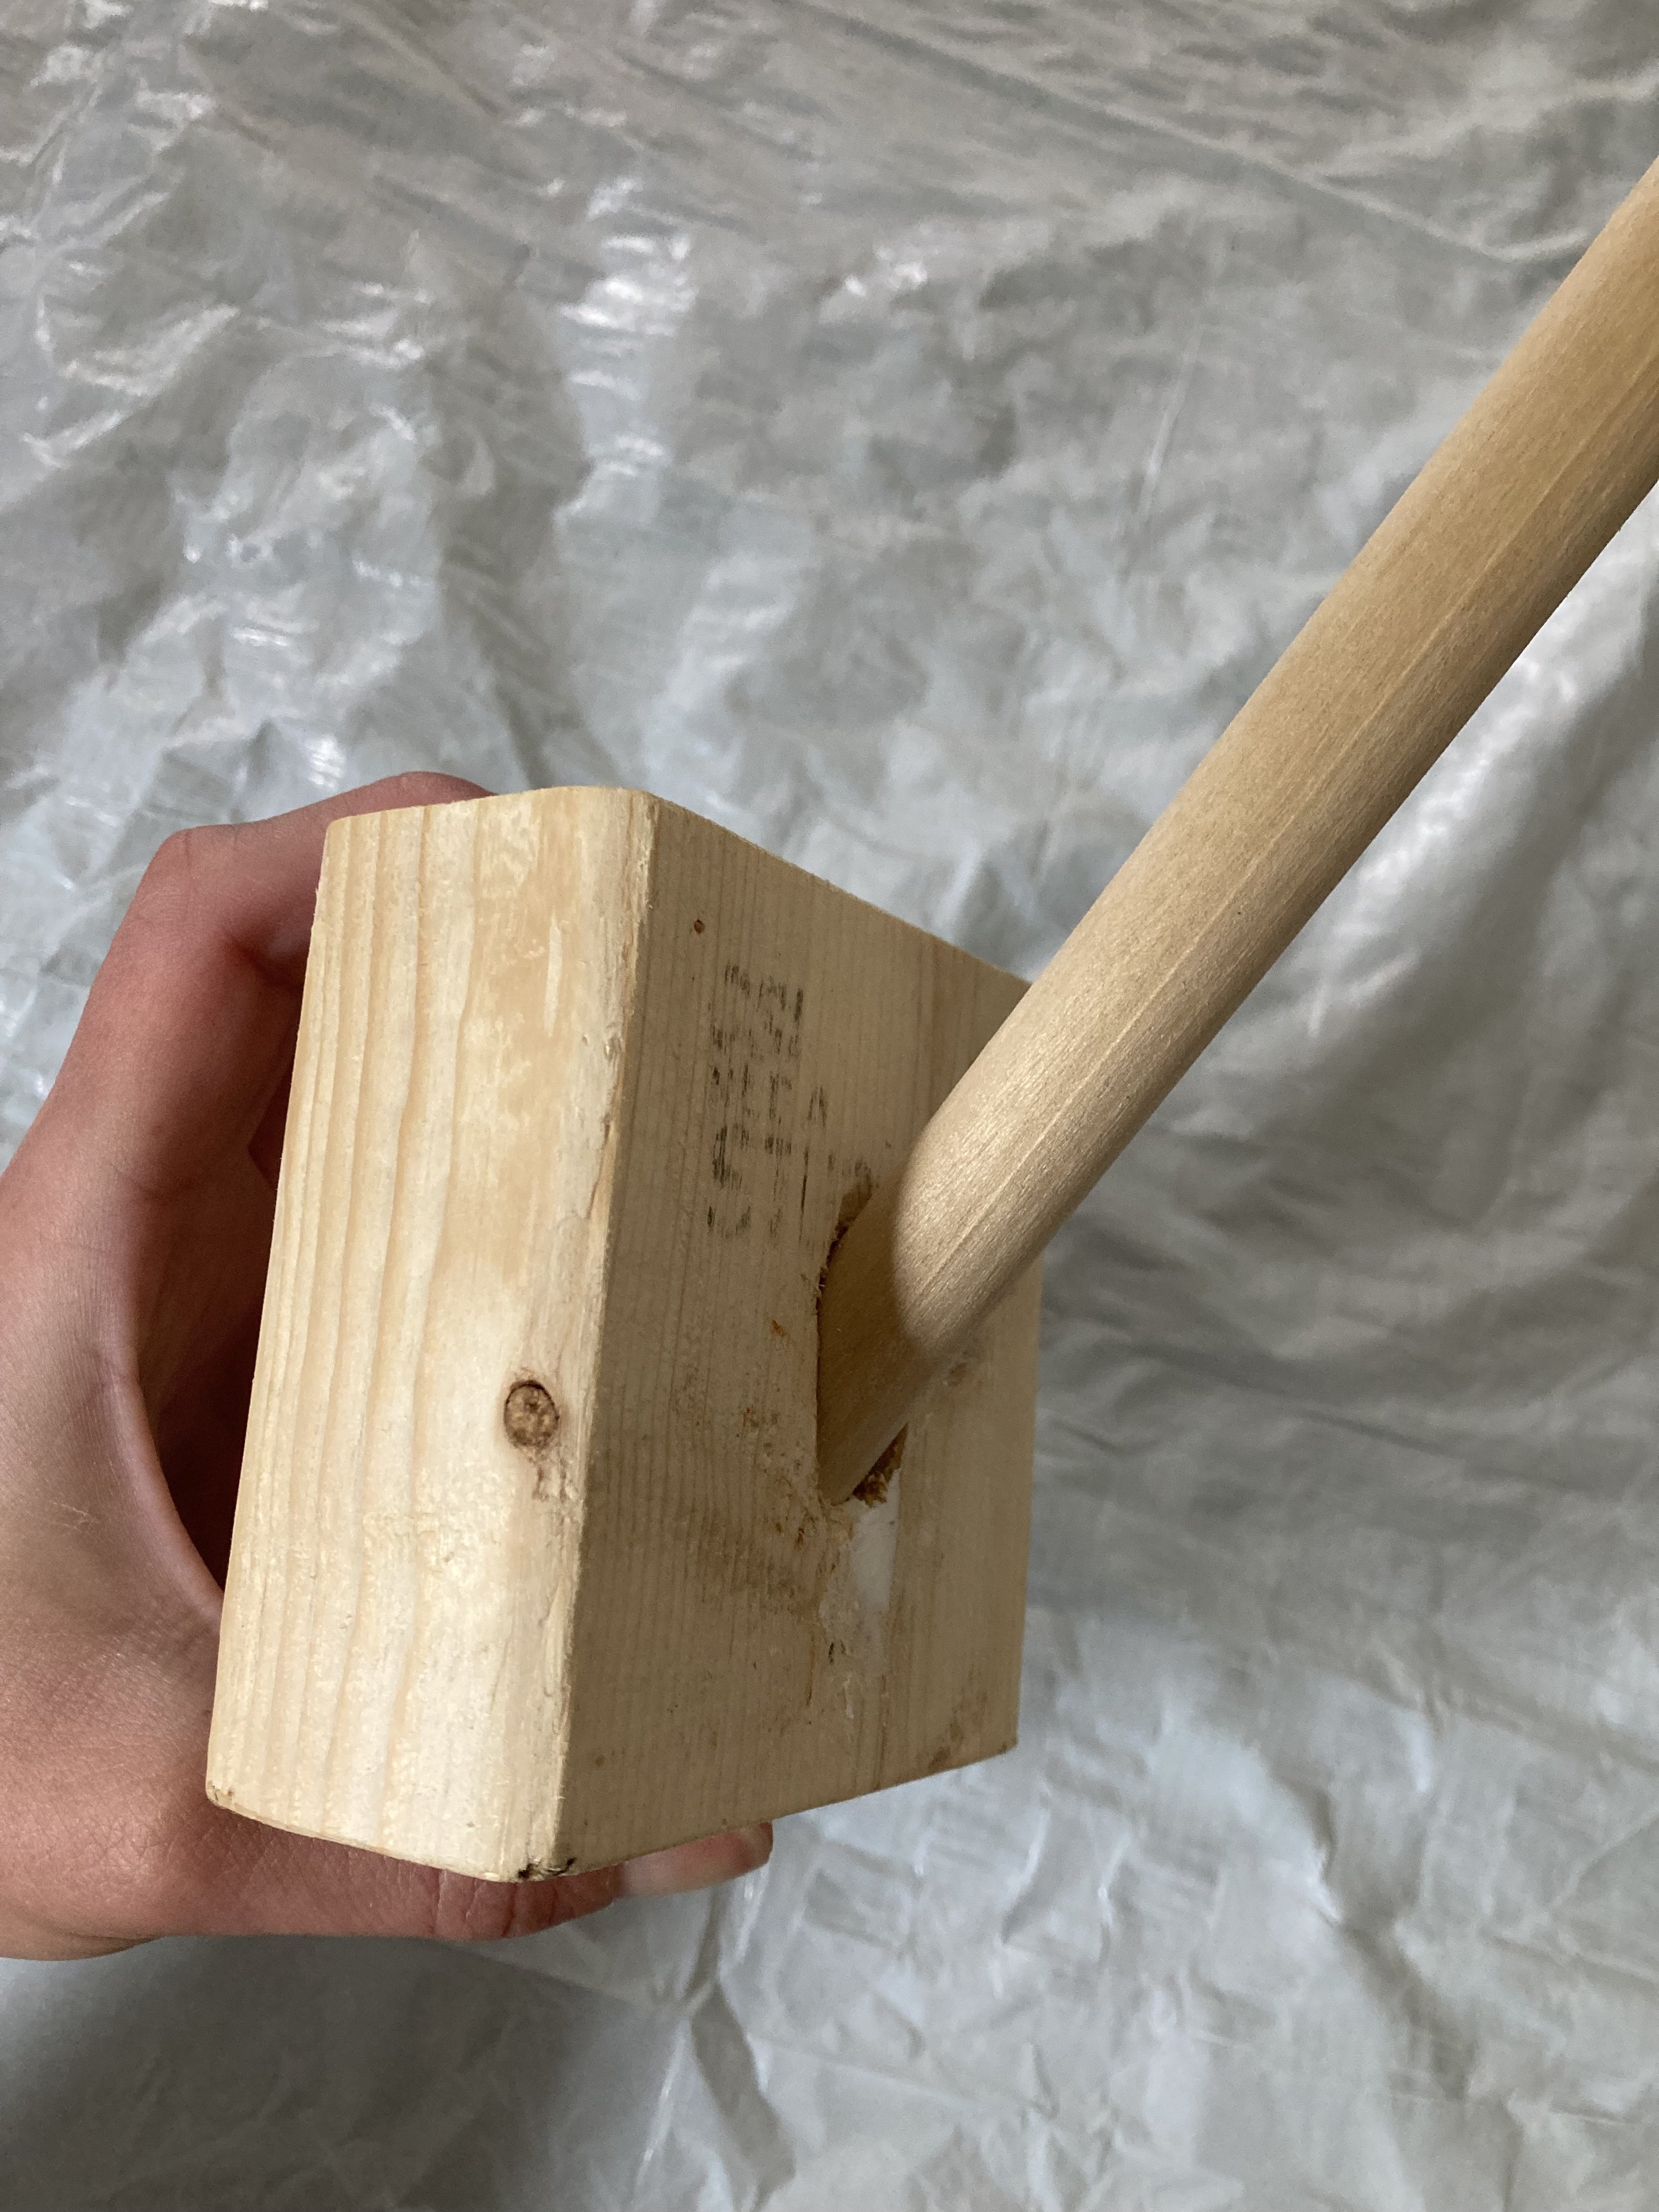
First, I decided on the angle of the dowel into the scrap piece of 2x4 and made a pilot hole at that angle with a small drill. Then I kept going up in drill sizes to make the hole the correct diameter. (Note: I do not recommend using a spade bit.. I tried that and it was terrible going in at an angle. We ended up borrowing a drill bit in correct final size to finish the hole.)

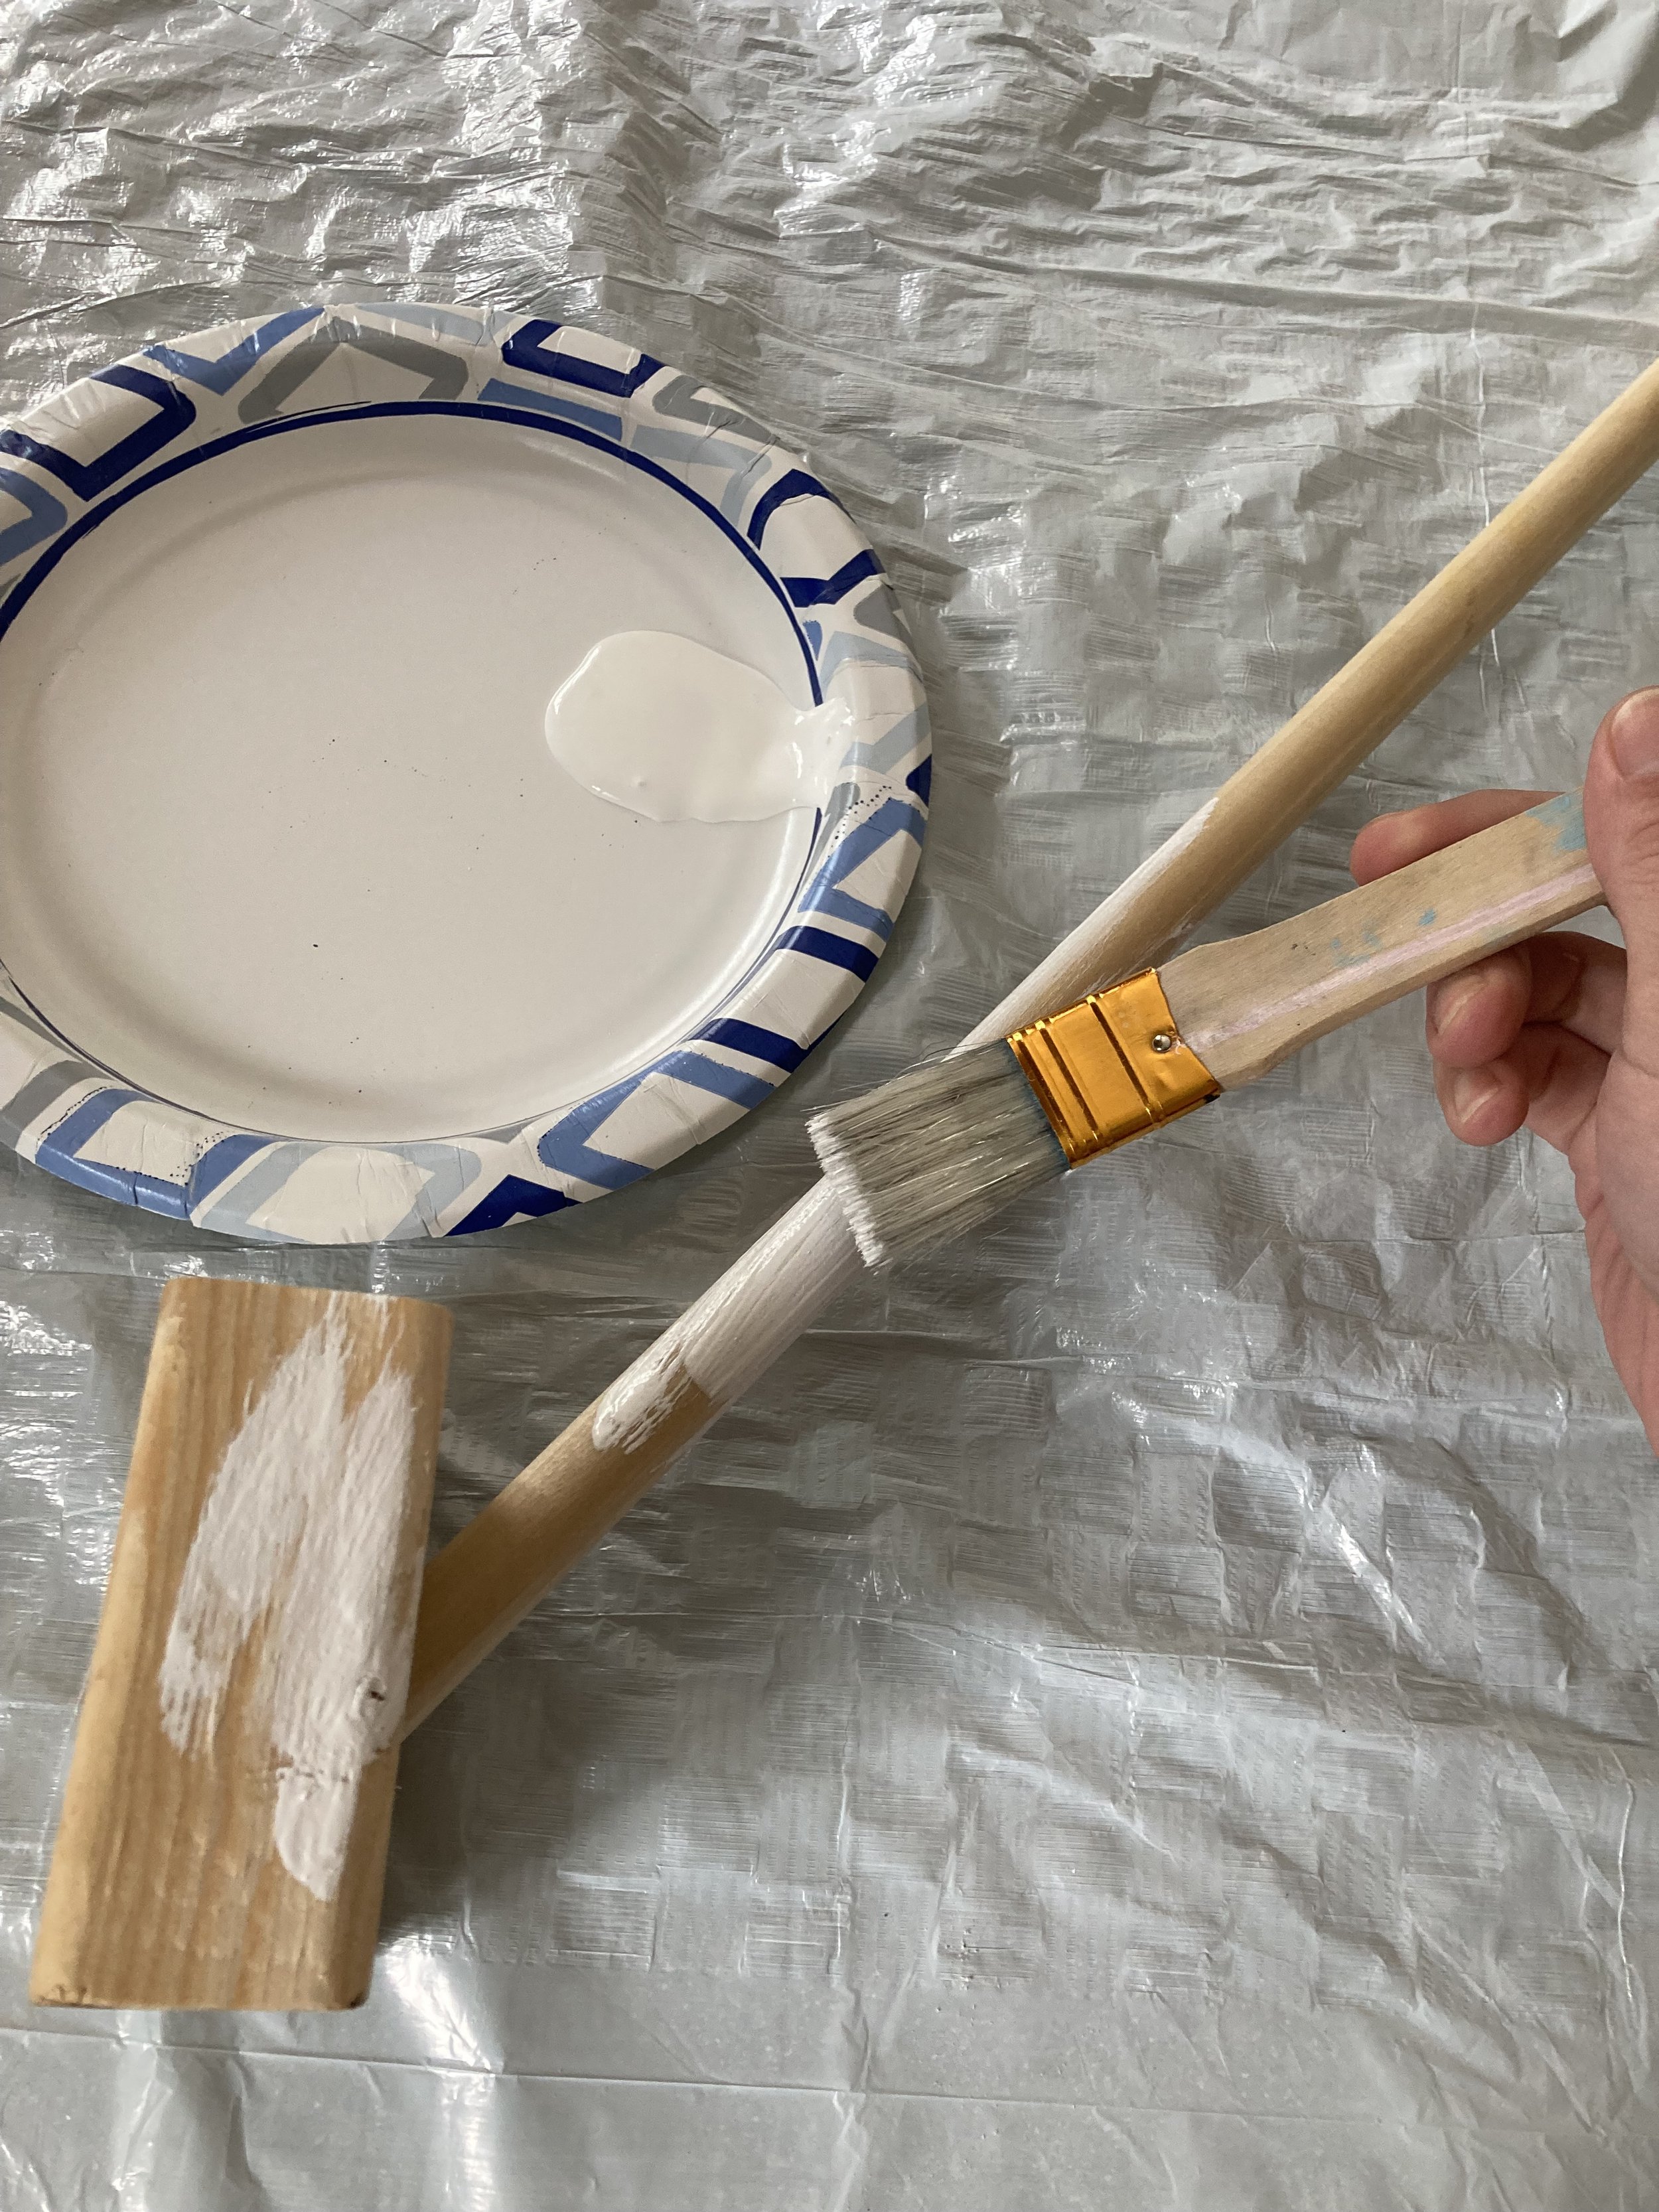
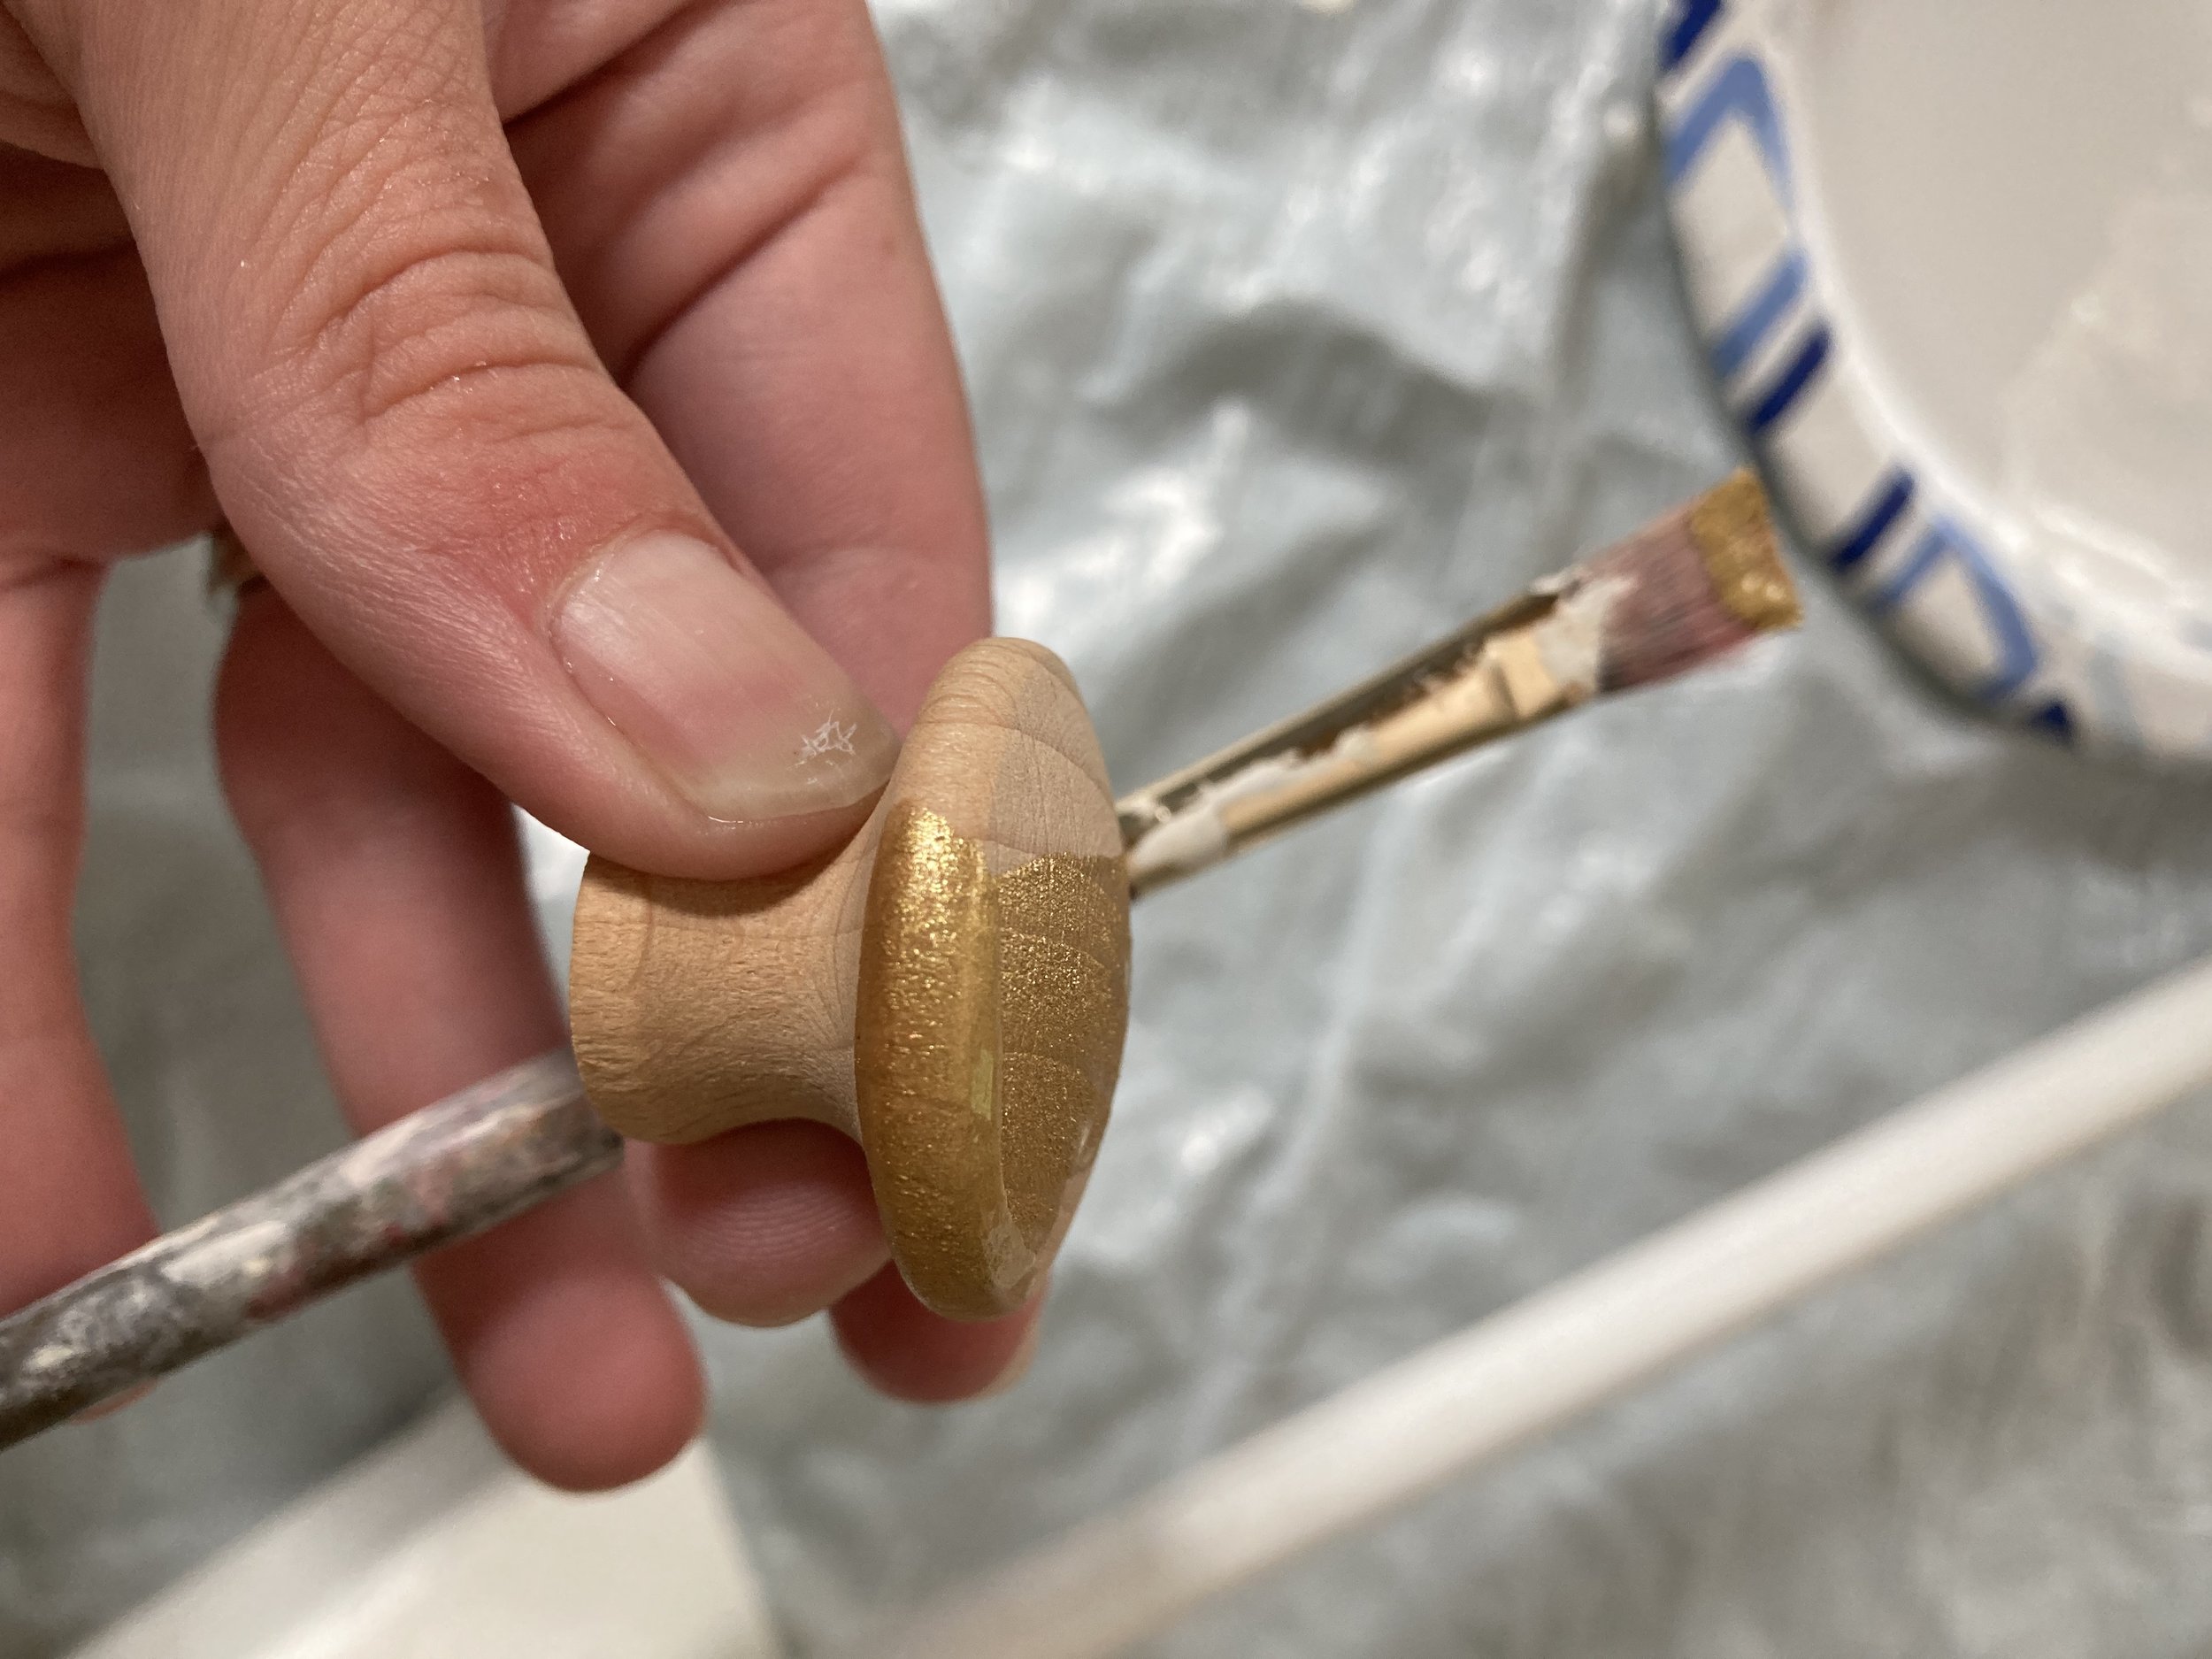
Once the hole was made I glued the dowel into it with some wood glue then painted it white with several coats of paint. While I was waiting for that to dry I moved on to painting the wooden knob with several coats of gold paint and then let that dry too.

Next I drilled a small hole into the end of the top of the flag pole and cut some toothpicks down to fit inside the hole but stick out far enough to also fit into the hole in the wooden knob. Then I added wood glue and put the knob onto the end of the flagpole. (Note: Using toothpicks to reinforce this joining is key - if just wood glue was used it would be at more risk to break off, but the toothpick reinforcement going through really helps!)

Adding the knob to the end of the flagpole.

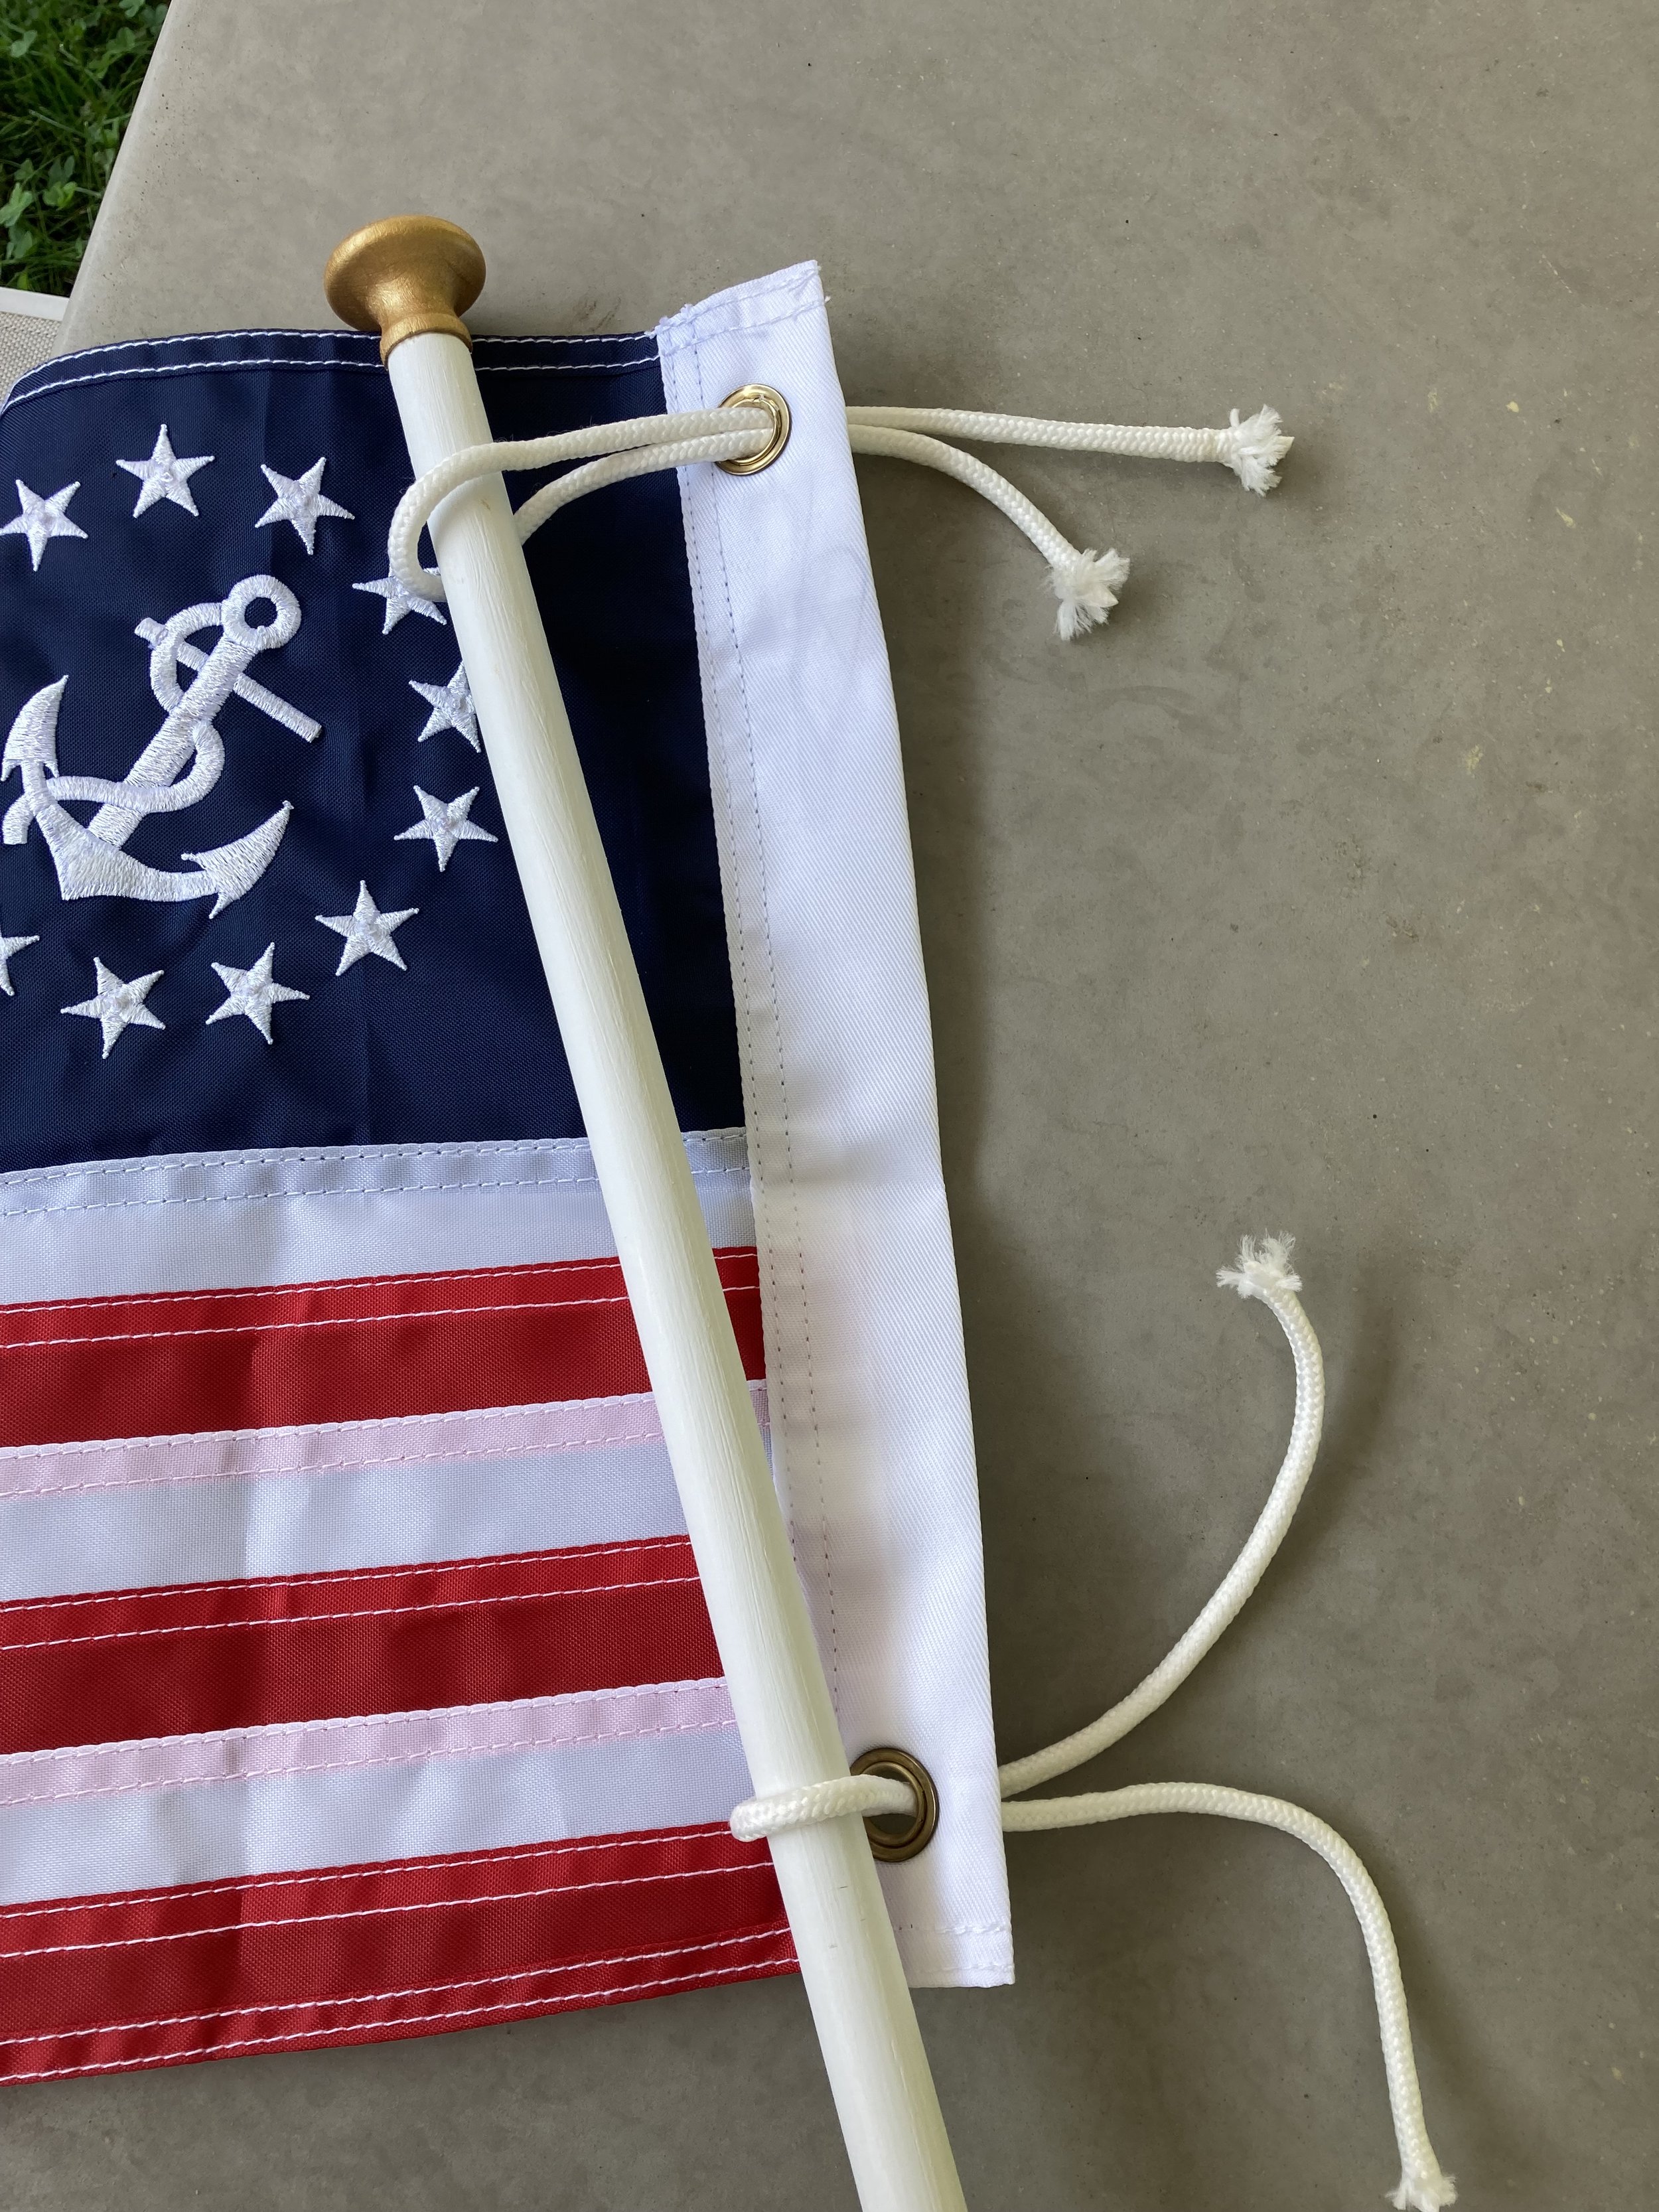
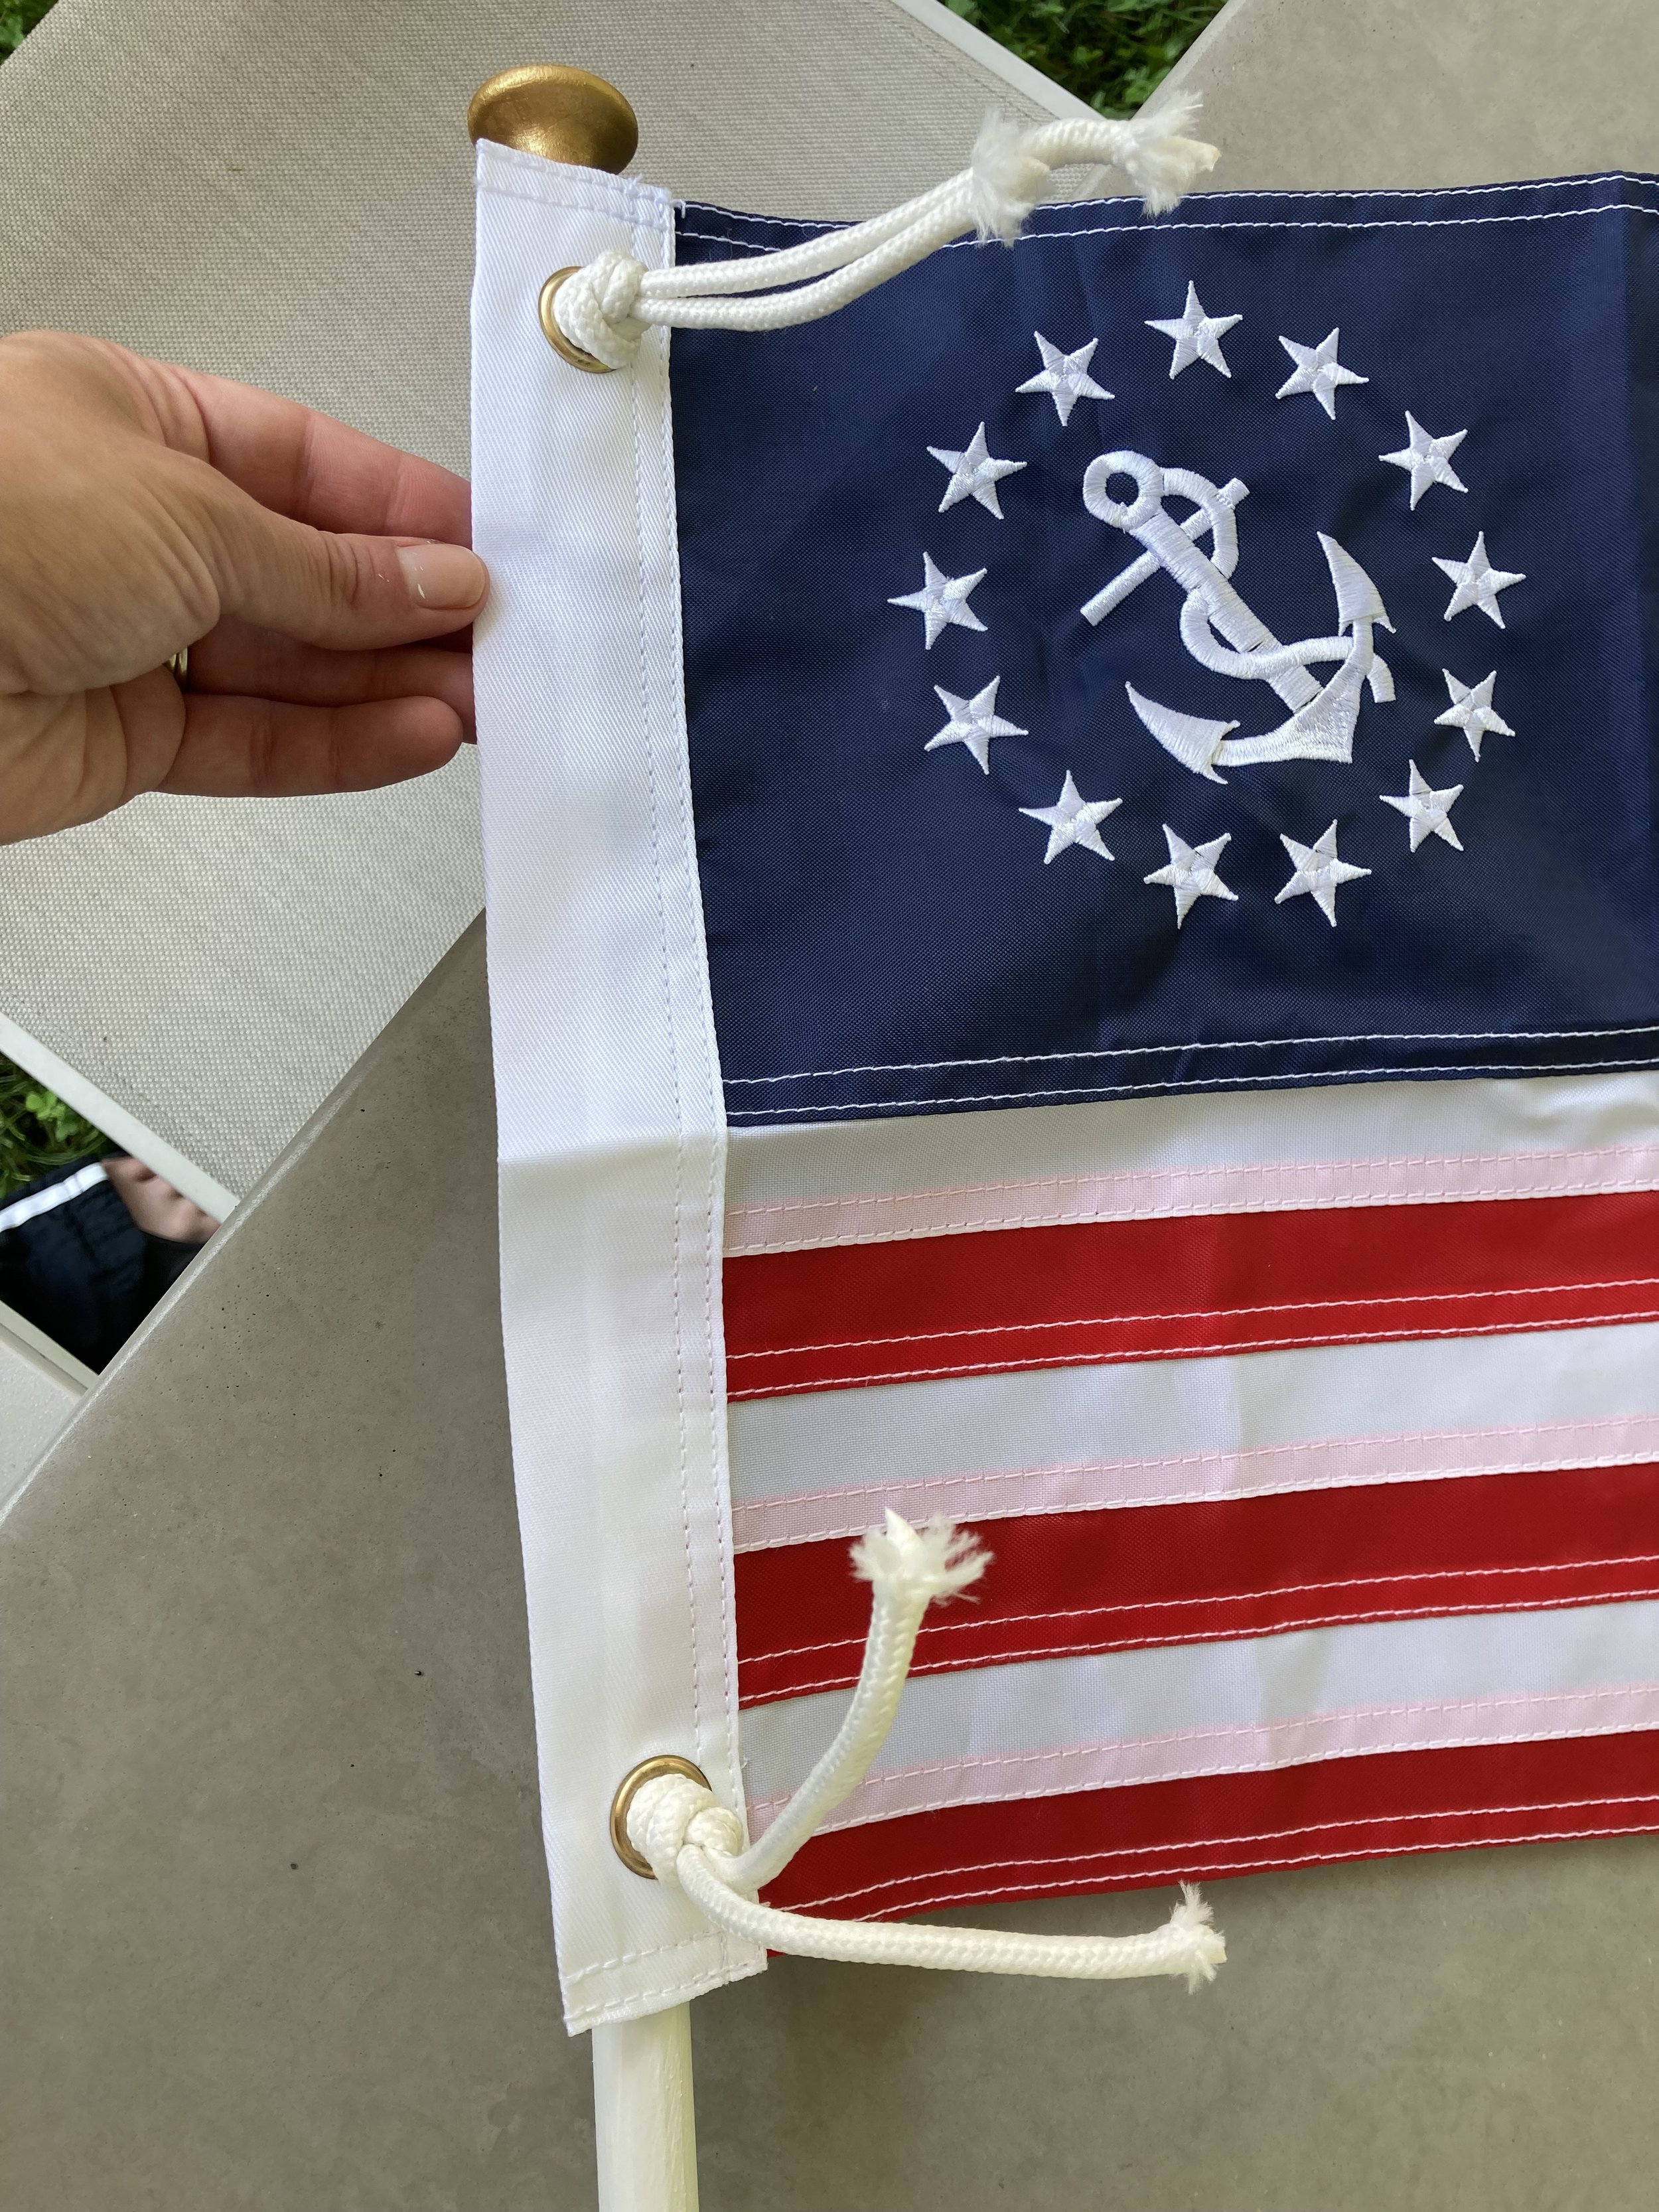
And now we can attach the flag! I just used some cotton clothes line rope to tie the flag to the flagpole. The wooden flagpole has enough grip and the flag is so small that we don’t have any issue with the flag sliding down or moving.

Now that your flag is assembled you just have to mount it. I screwed the base into the side of the playhouse then touched up the screw heads with white paint to help them blend in.

Attaching the flagpole

The finished product!

I will probably take the flag down come winter, as our harsh New England winters with heavy snow and ice would likely damage the pole but then I plan to put it right back up in the spring.

DIY Playhouse Flagpole

| "The Cottage" Sign - I made this a few years ago by making a stencil for the words using my Cricut and having the kids dip their hands in paint for the handprints. |

A few other Playhouse details…

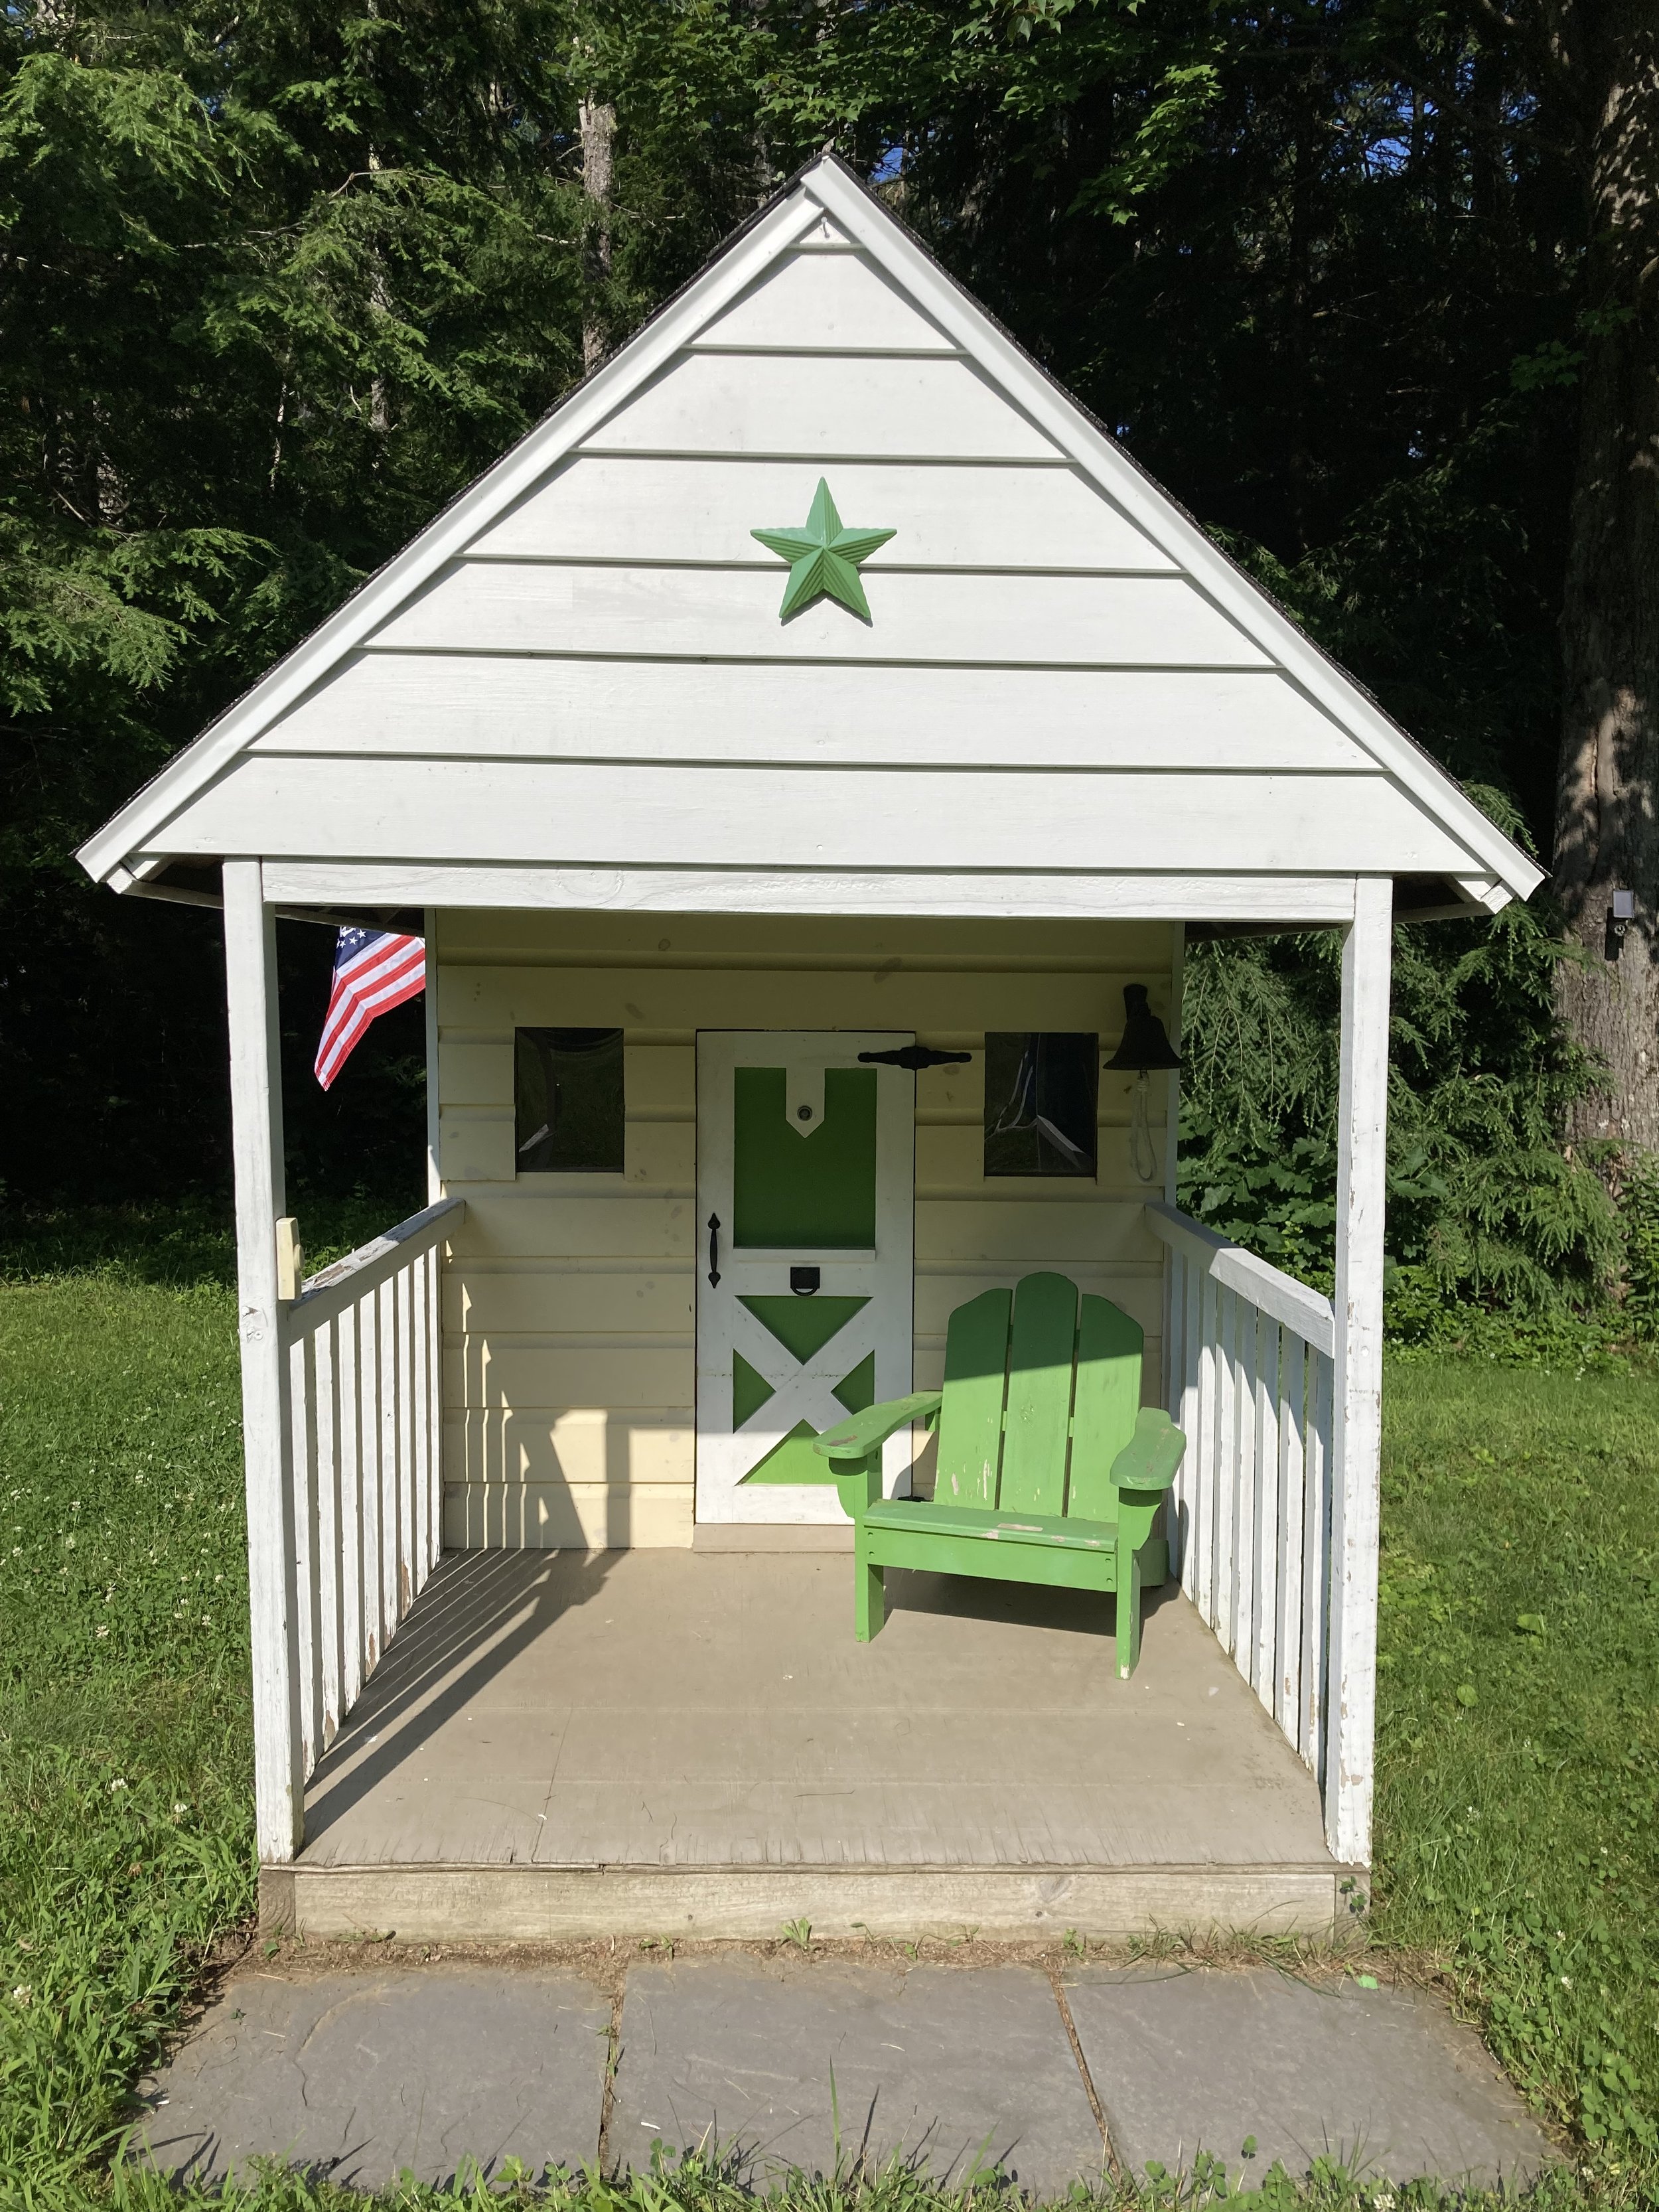
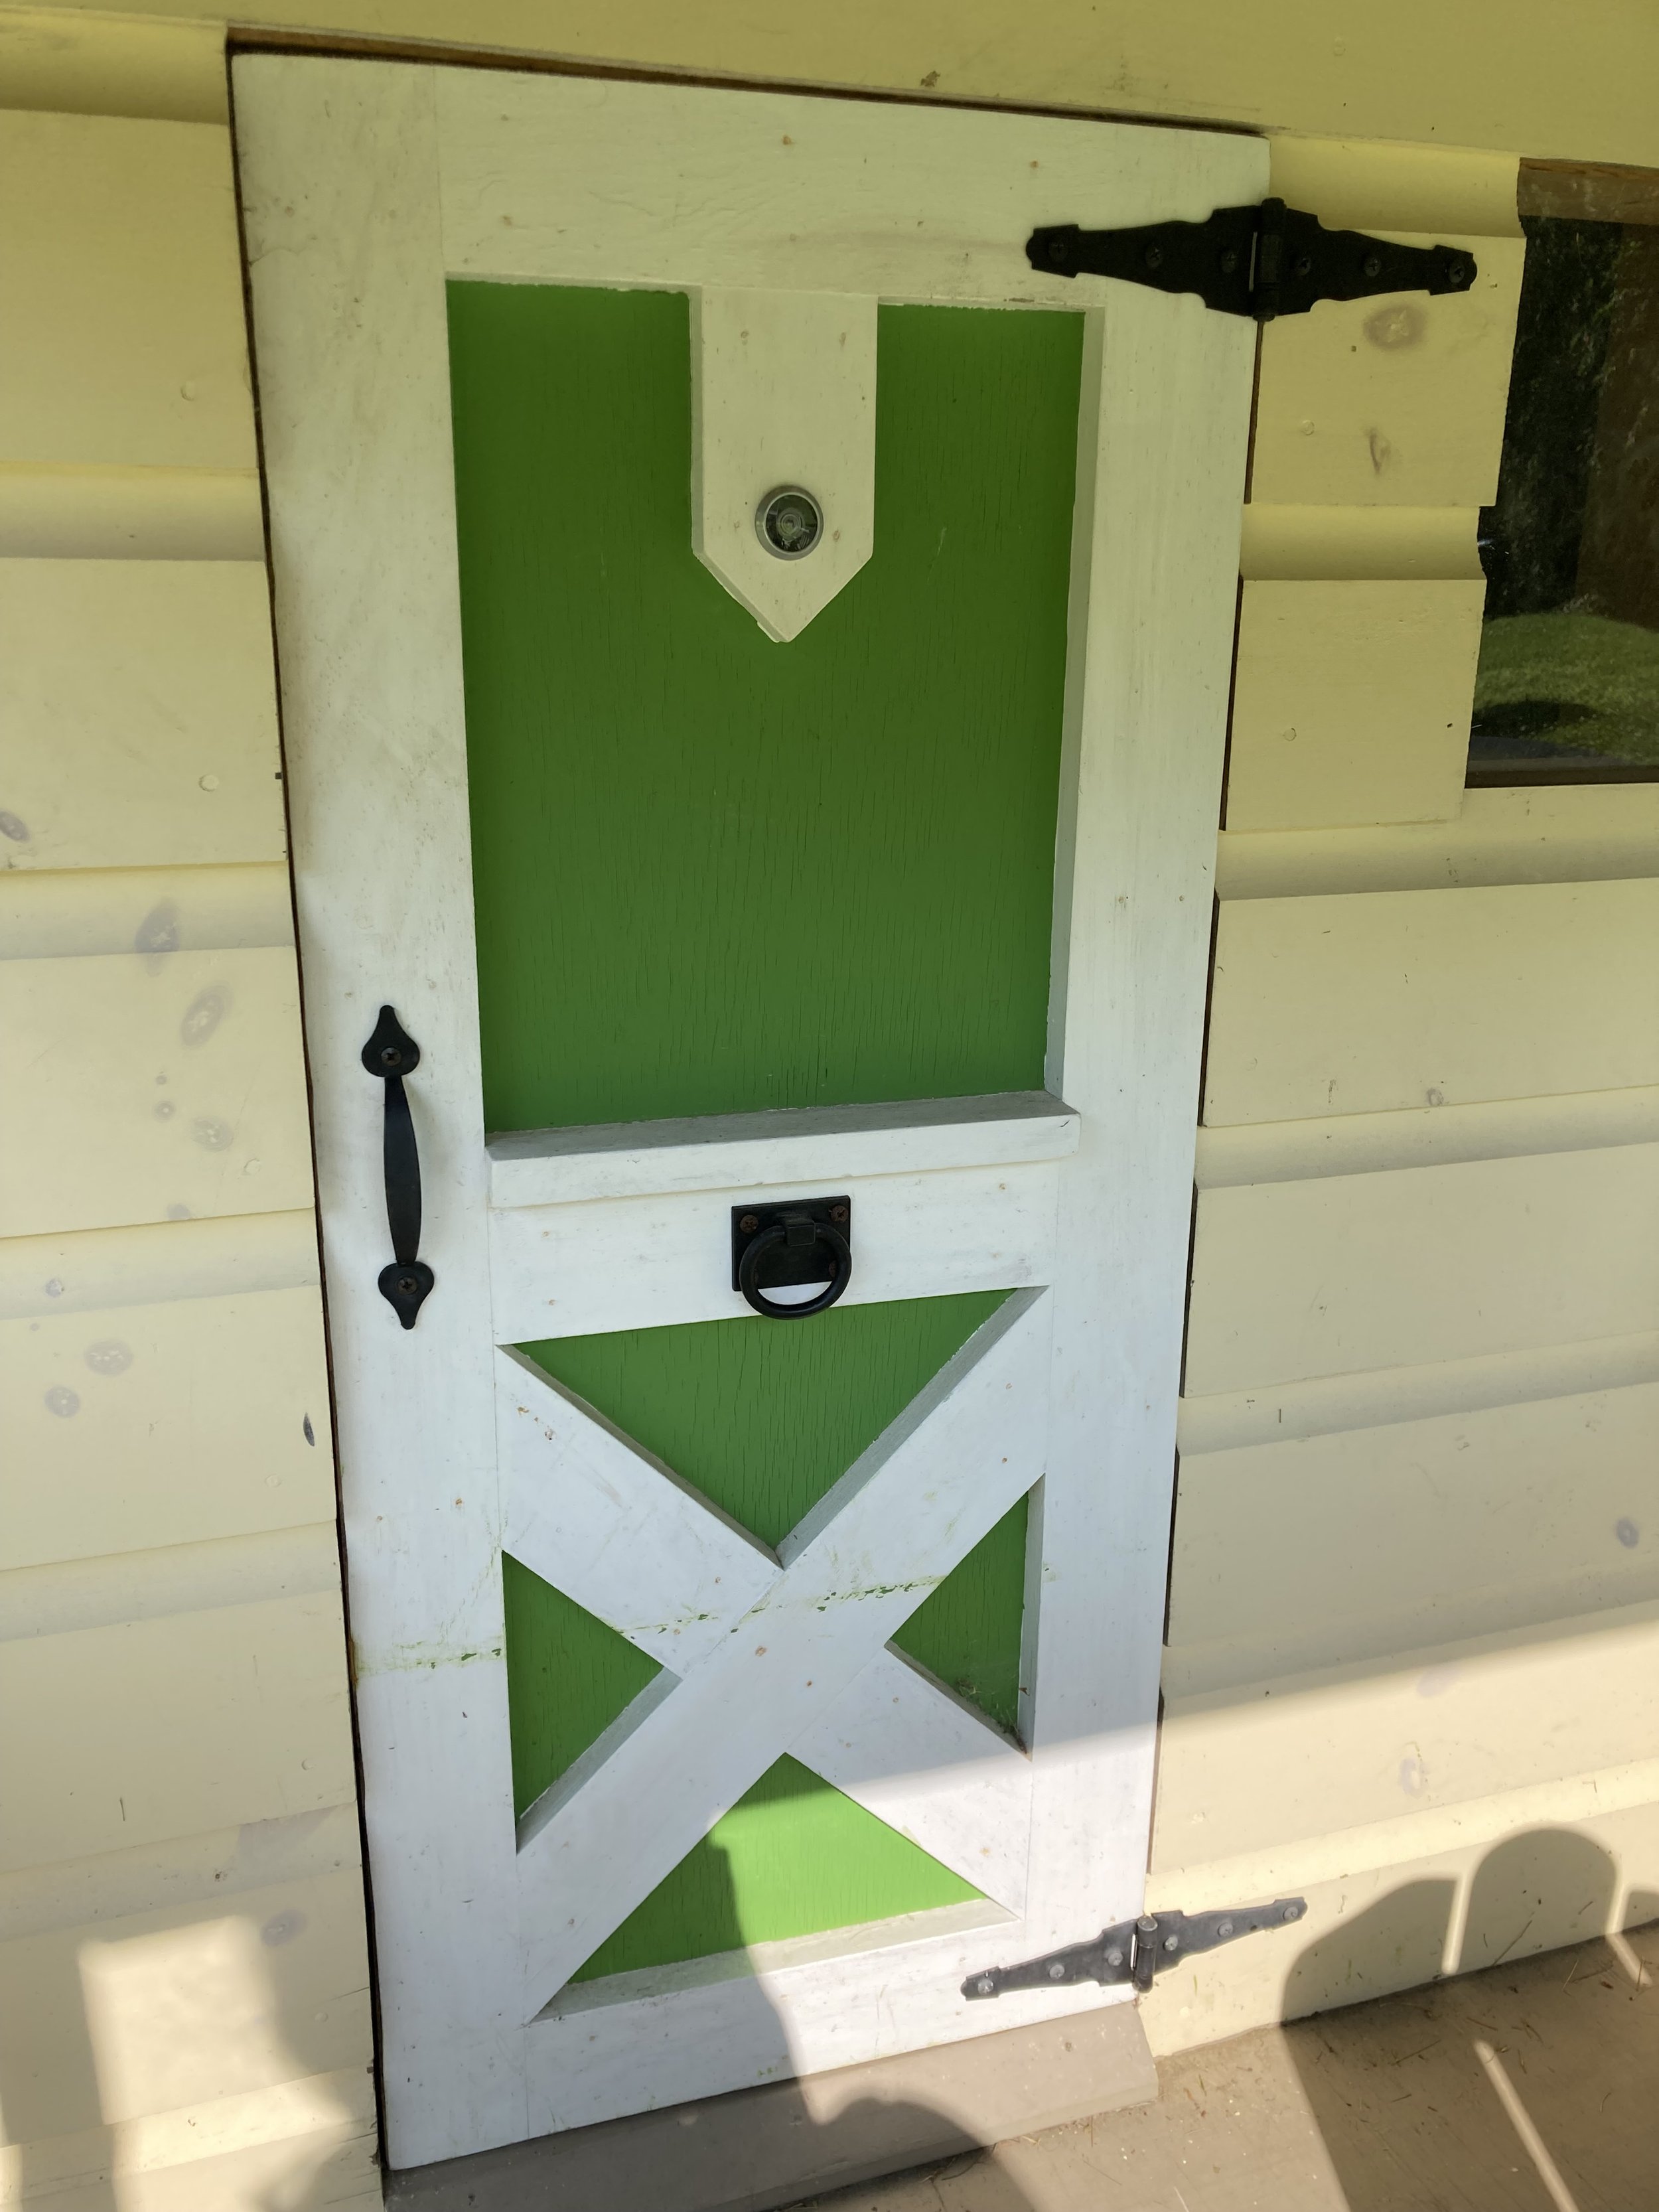
I just love the simple details of our little playhouse - my favorite being the amazing custom farm-style door my husband made for the playhouse.

Kids Playhouse Details

| Similar Wireless Doorbell - we put the button on the porch post and hung the box inside the playhouse so the kids can ring the doorbell to be let in. | Similar Kid-Sized Adirondack Chair - we got a kid-sized adirondack chair at a yardsale and painted it the same bright green that we painted the door (the original chair was yellow!). |

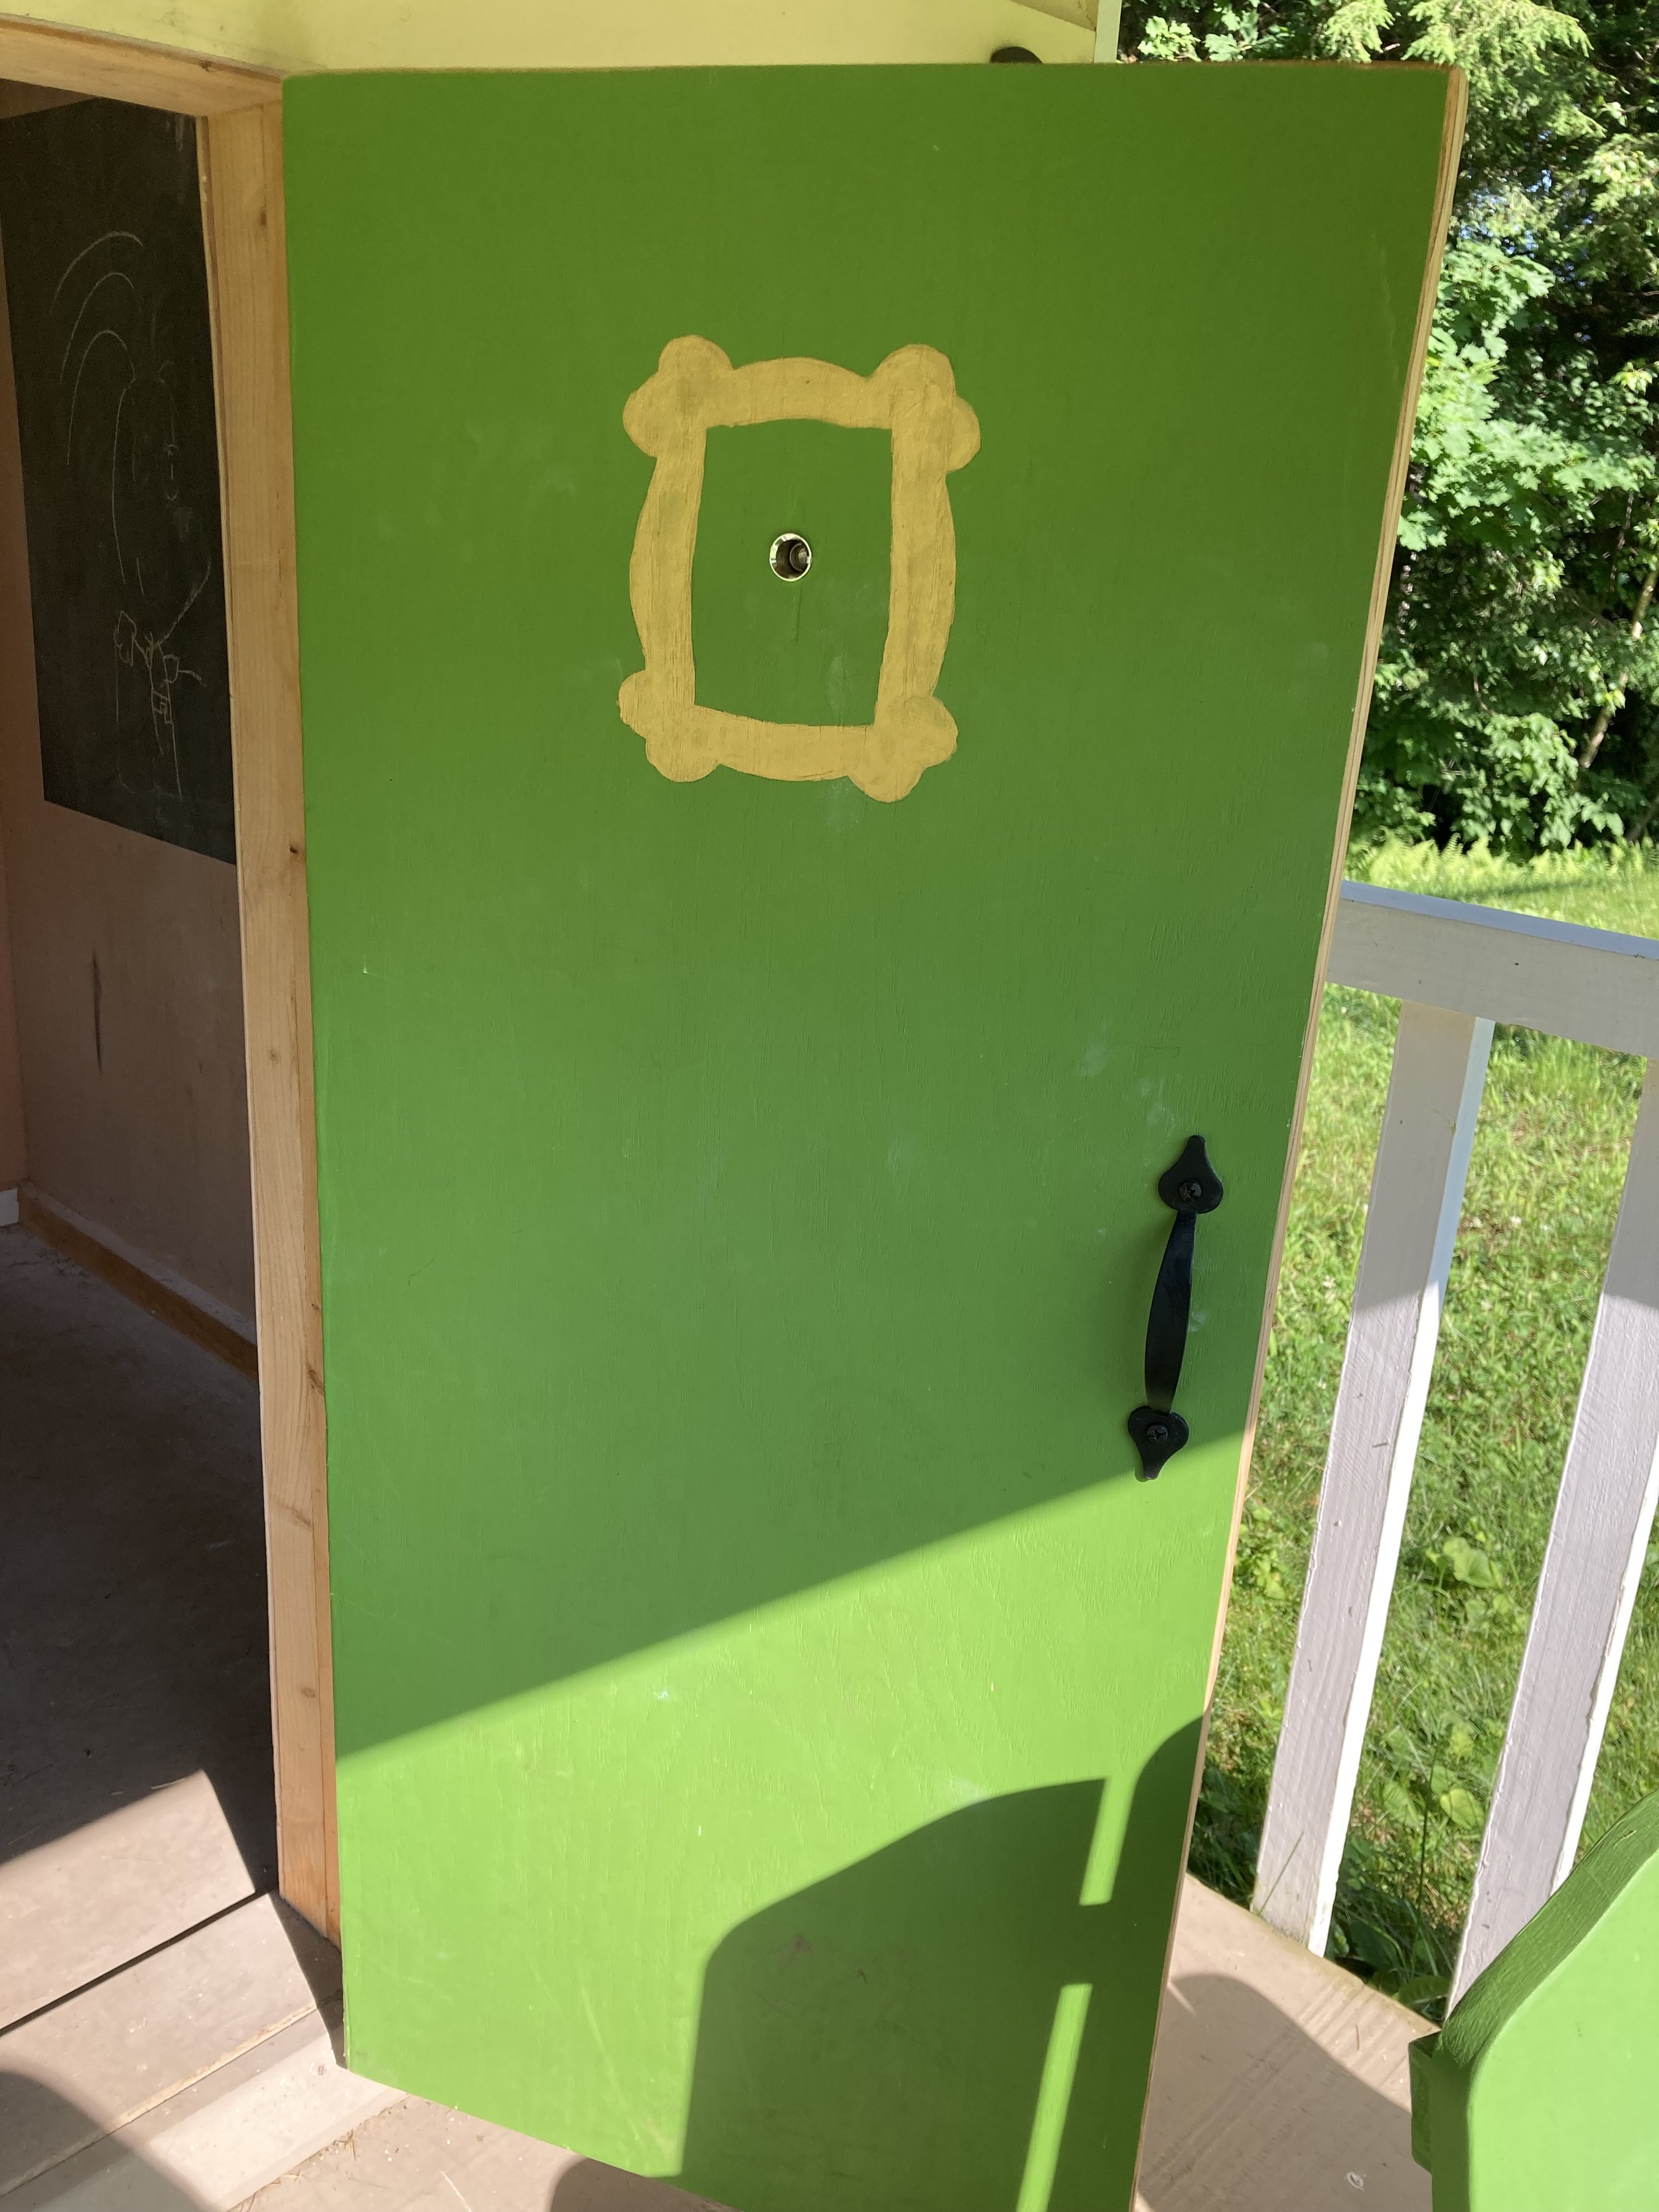
| Peep Hole - We added a peep hole to the playhouse door too. The kids love looking through it to see who's ringing the doorbell. | "Friends" Reference - I just had to paint a gold frame on the back of the door around the peep hole, just like on the TV show "Friends." |

Bell detail

| Porch Bell - the kids always get a kick out of ringing it to call their friends in from around the yard. |

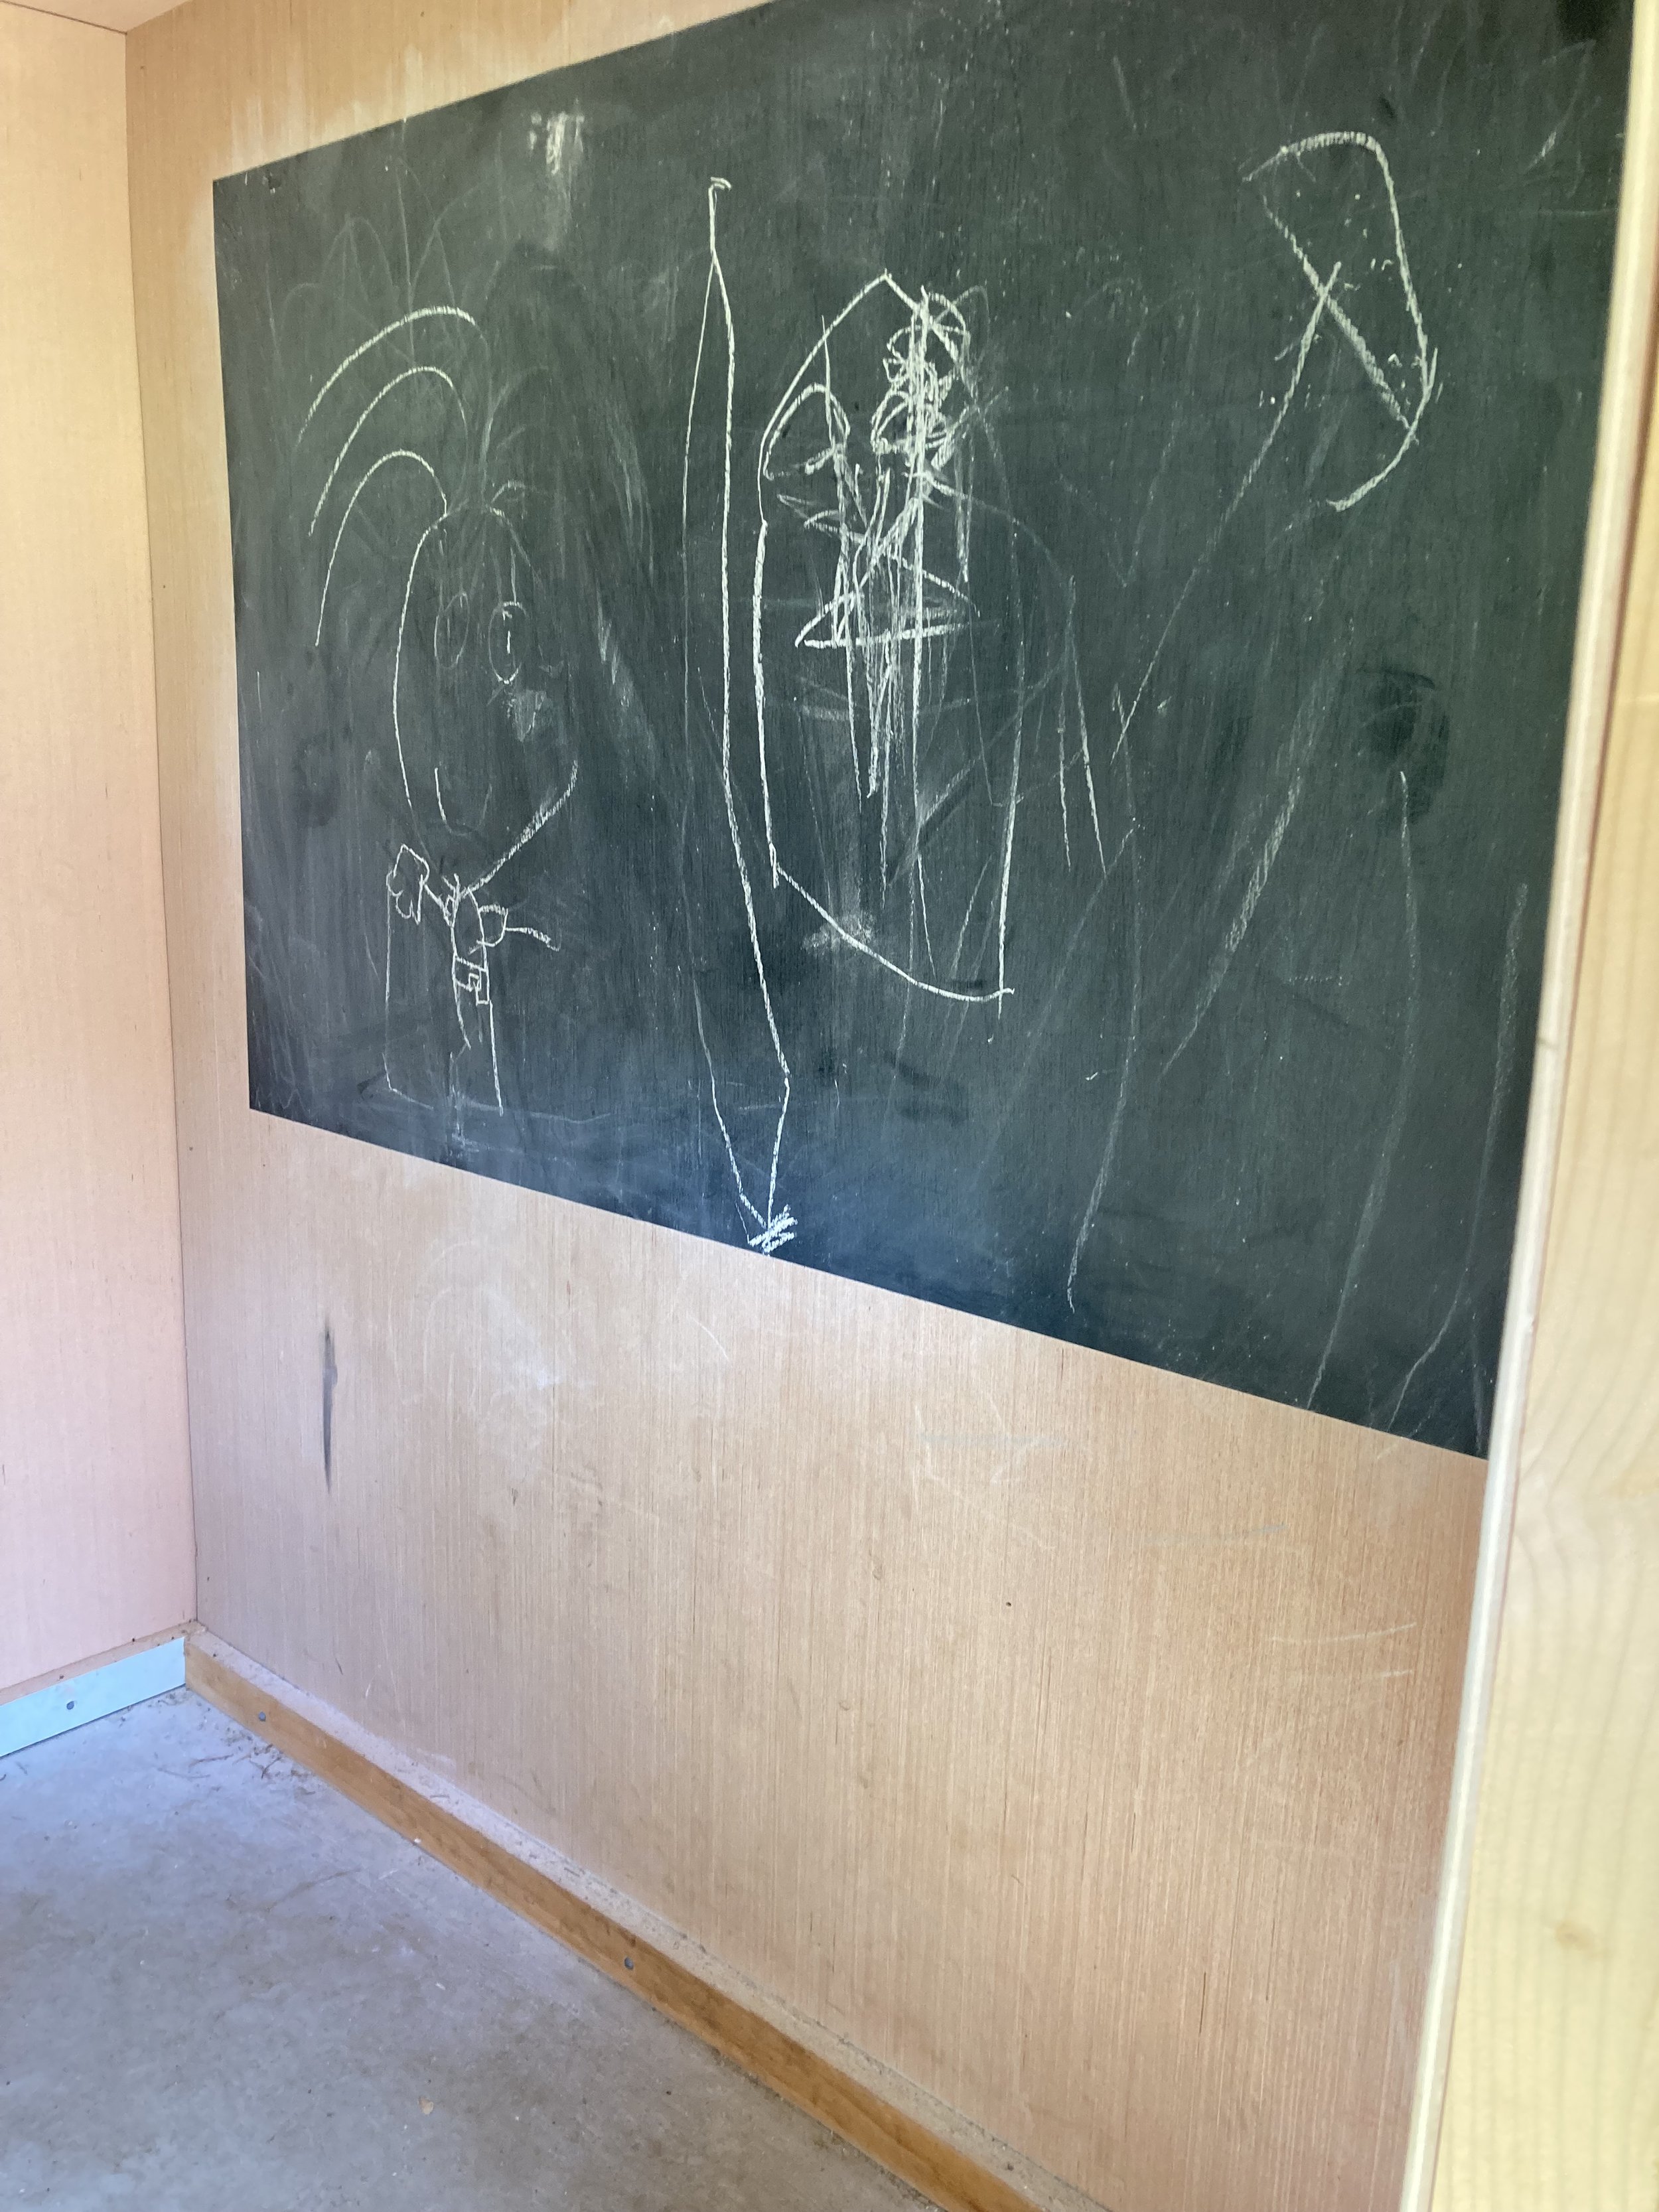
Chalkboard inside the playhouse

| Chalkboard - Inside the playhouse I painted one wall in chalkboard paint so the kids have a space to draw. We just keep the chalk and eraser on one of the windowsills inside the playhouse. |

PS - At Christmas we even decorate the playhouse with solar Christmas lights and a wreath!

KEEP UP WITH BIRCH LANDING HOME
|  Etsy  |  Facebook  |  Instagram  |  Pinterest  |  Bloglovin'  |  Hometalk  |
Preparing Your Daughter For Her First Period

At our last well-child visit, our pediatrician gave us the heads up to start preparing our daughter for her first period. “Already?! She’s only in elementary school!”, I thought. But he warned that elementary school is the time to get ready so they’re prepared, as girls are starting earlier than ever on average - and some girls start as early as 3rd or 4th grade. In order to help prepare her, we picked up a few items to start getting ready. | This post contains personal opinion as well as affiliate links |

Preparing Your Daughter for her First Period

Disclaimer: This post contains personal opinion based on our experiences - please discuss with your child’s pediatrician for the best advice as it pertains to them.

This will not be an in-depth post about how and when to get into details of all of this with your kids - that is up to you. Also, if your daughter is in public school Health Class is a great resource that covers a lot and explains it well in an age-appropriate manner. But if you’re looking for tips on how to introduce the topic at home and start to prepare your daughter, here are two things I would suggest:

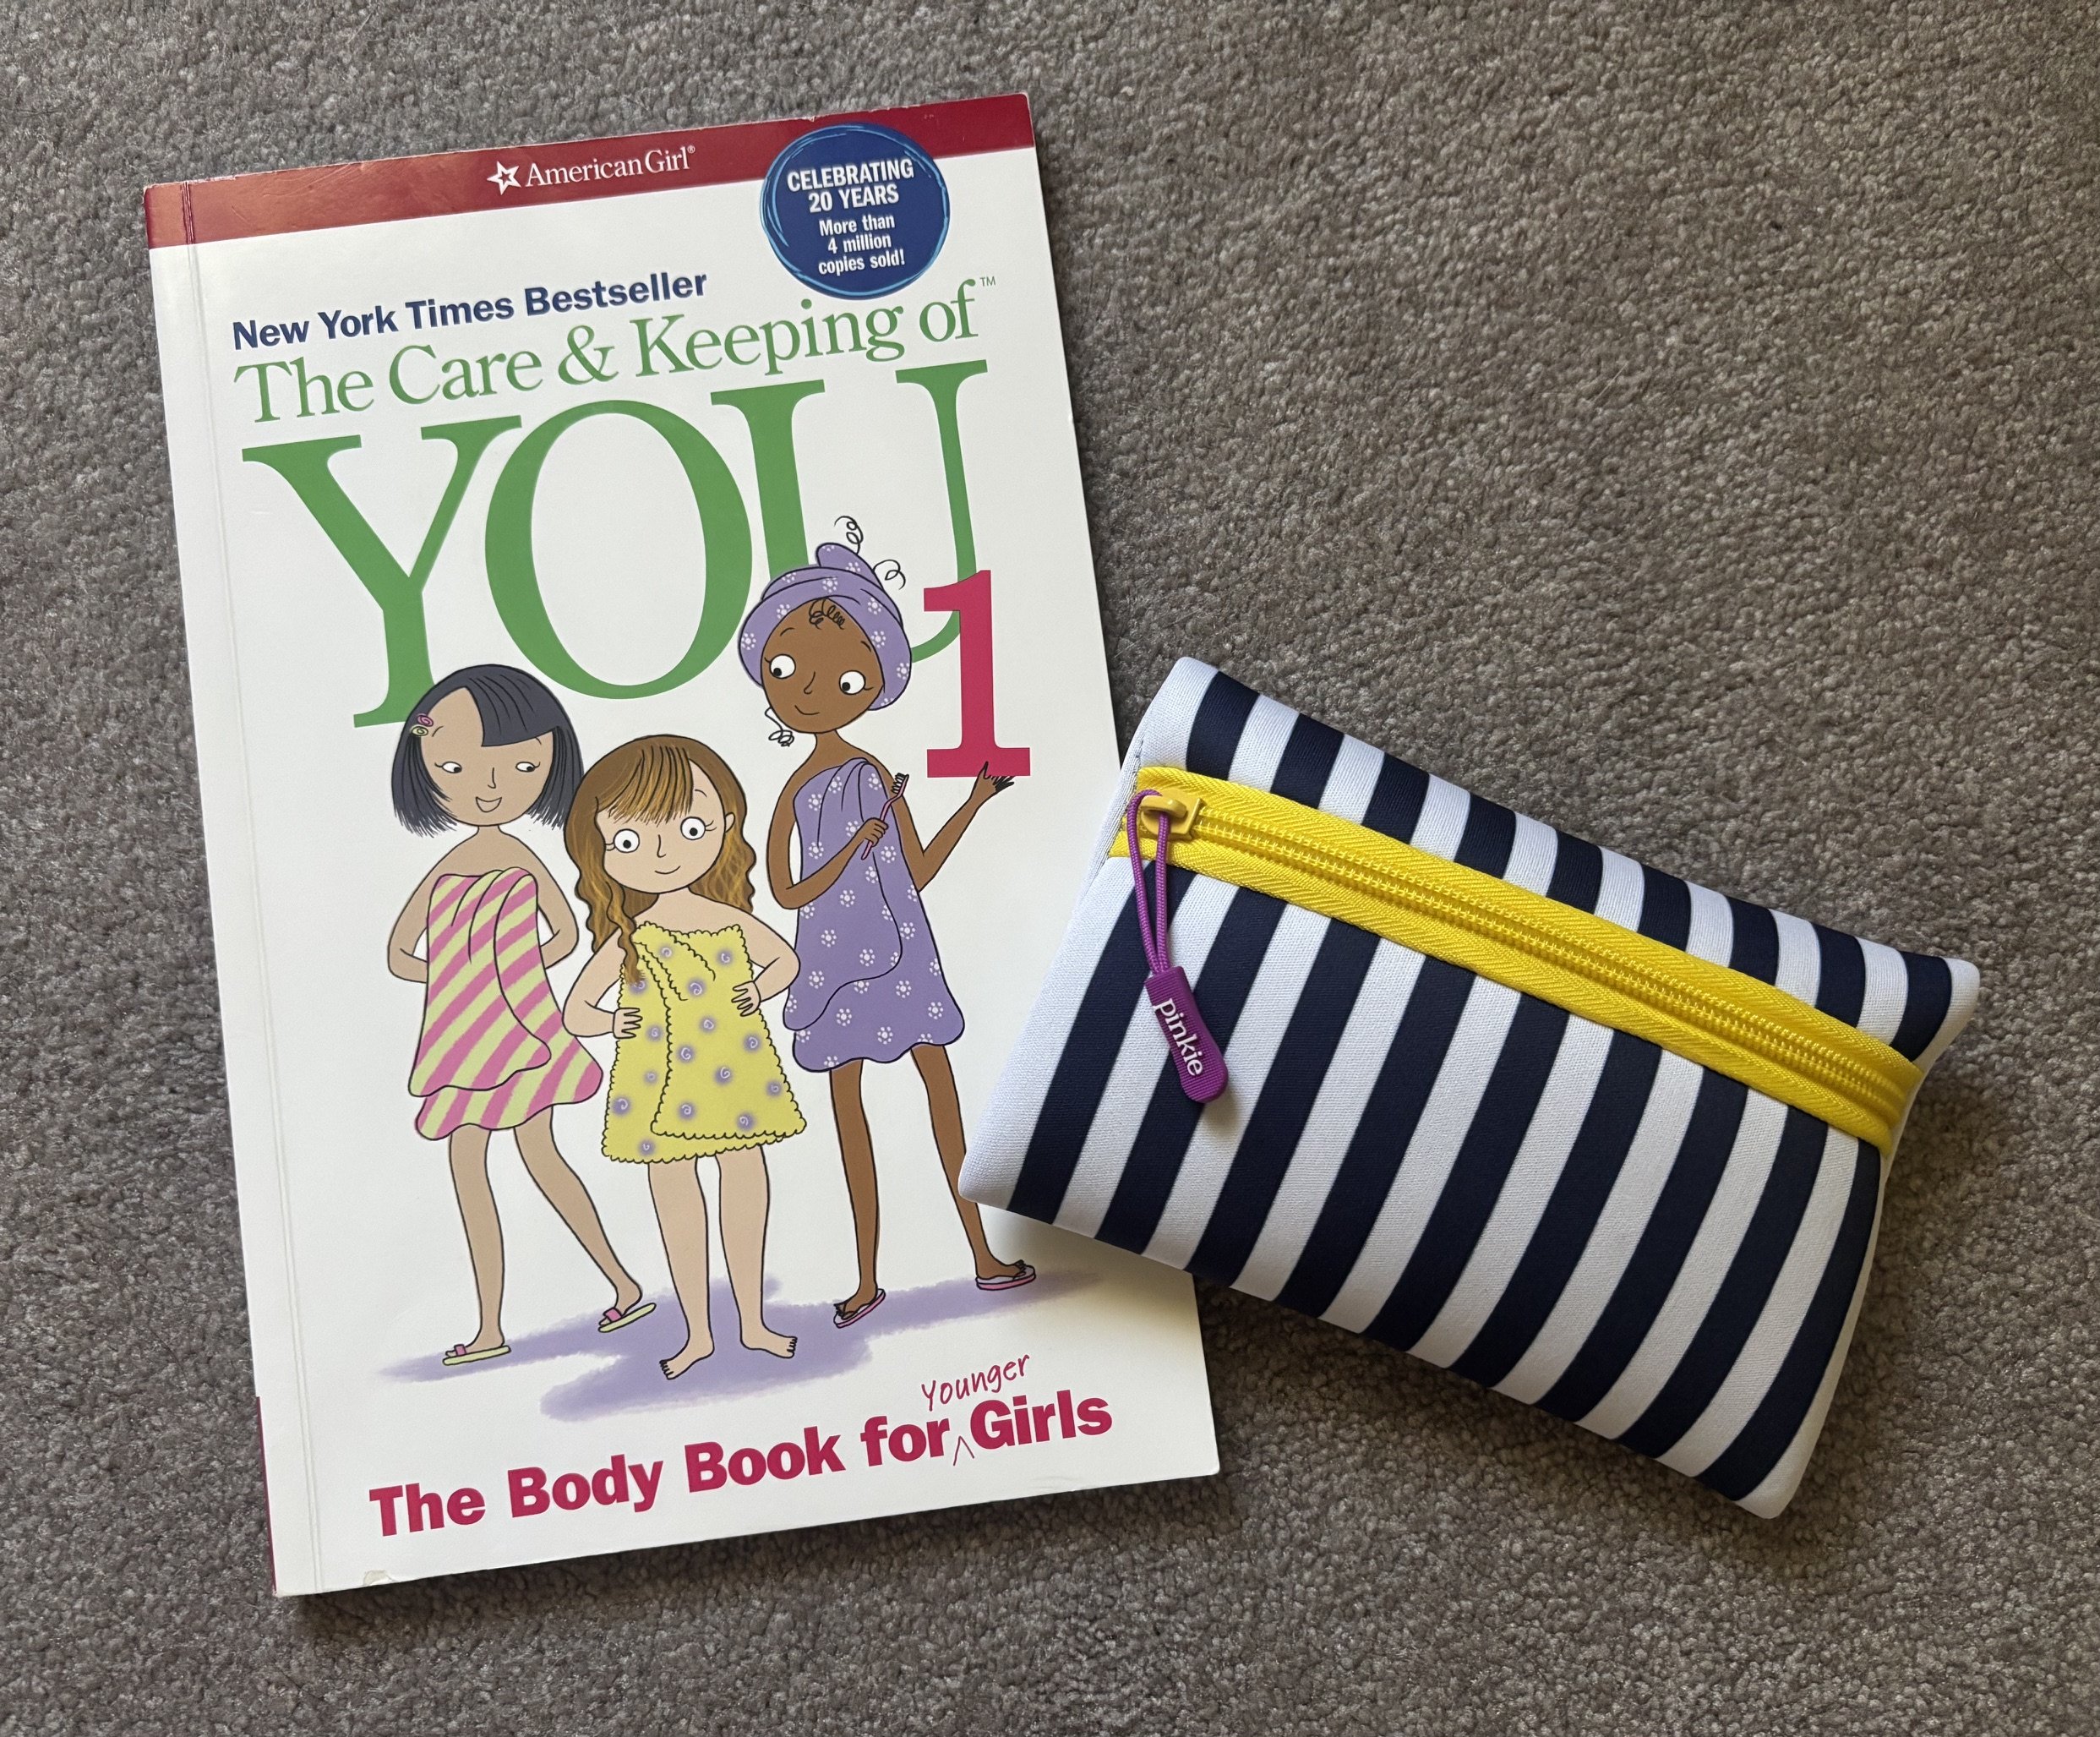
The Care and Keeping of YOU, Volume 1 -this book is a great, age-appropriate way to start to introduce some of the topics of puberty and periods. It covers a lot of matters including personal hygiene, body growth, friends, nutrition, periods, etc. It’s a great way for your daughter to get some basic knowledge on the subjects and start a conversation with her. (Once she’s a little older, there is also The Care and Keeping of YOU, Volume 2 which goes a little more in-depth.)

Period Kit - Pick up a cute pouch with some tween-sized pads and stash in their backpack for school, just in case. We really like this Pinkie First Period Prep Pouch in particular because it has all-natural pads (this is important to avoid exposure to synthetic chemicals and reduce skin irritation) in a variety of sizes. Knowing they have this on hand helps them feel a little more in-control and prepared.

And finally, make sure they know that there’s nothing to be embarrassed about and have a game plan of who they can ask for help when the time comes. Letting them know that they can come to you for help if they’re home, or to the nurse if they’re at school is a good idea. This is something that every woman goes through, and as scary as it can seem in the beginning we are all capable of handling it.

KEEP UP WITH BIRCH LANDING HOME
|  Etsy  |  Facebook  |  Instagram  |  Pinterest  |  Bloglovin'  |  Hometalk  |
Teaching Our 4-Year-Old How to Read

Just wanted to hop on here real quick and share about this book we have been loving for teaching our 4-year-old how to read! | This post isn’t sponsored but does contain affiliate links |

Teaching our 4 year old how to read

Our 4-year-old has been asking us to learn to read for a little bit now. She sees her older sibling reading and wants to join in too… after researching around I decided to try this book "Teach Your Child to Read in 100 Easy Lessons", which came highly rated.

The book and its format took a little getting used to at first, but we quickly caught on and our little one is EXCELLING at it. The program starts small, and builds on letter sounds one-by-one. They start with the predictable sounds and add annotations to help differentiate different letter sounds and minimize letters that are silent. Your little one builds confidence and knowledge and slowly starts to decipher how words, sentences, and paragraphs are made. Our 4-year-old is now sounding out and reading small paragraphs all on her own, and we’re only a little more than 1/3 through the book! Her comprehension/recall still isn’t quite there (she often needs to be reminded about what the beginning of the paragraph was about by the end of the paragraph), but she is honestly enjoying being able to decipher words all on her own. She’s even starting to read and recognize words and sentences in other books that don’t have the sounds broken down like this book does.

I think this is a great jumpstart to reading if your child is ready and willing. I know it will definitely give our child more confidence and a jumpstart on learning to read before starting Kindergarten. We’ve been taking our time doing the lessons (we only do them 2-3x a week), but I’m really looking forward to see how well she reads by the end!

Teaching our 4 year old how to read

KEEP UP WITH BIRCH LANDING HOME
|  Etsy  |  Facebook  |  Instagram  |  Pinterest  |  Bloglovin'  |  Hometalk  |
Stacked Snowmen Presents - Fun Idea for Christmas Morning

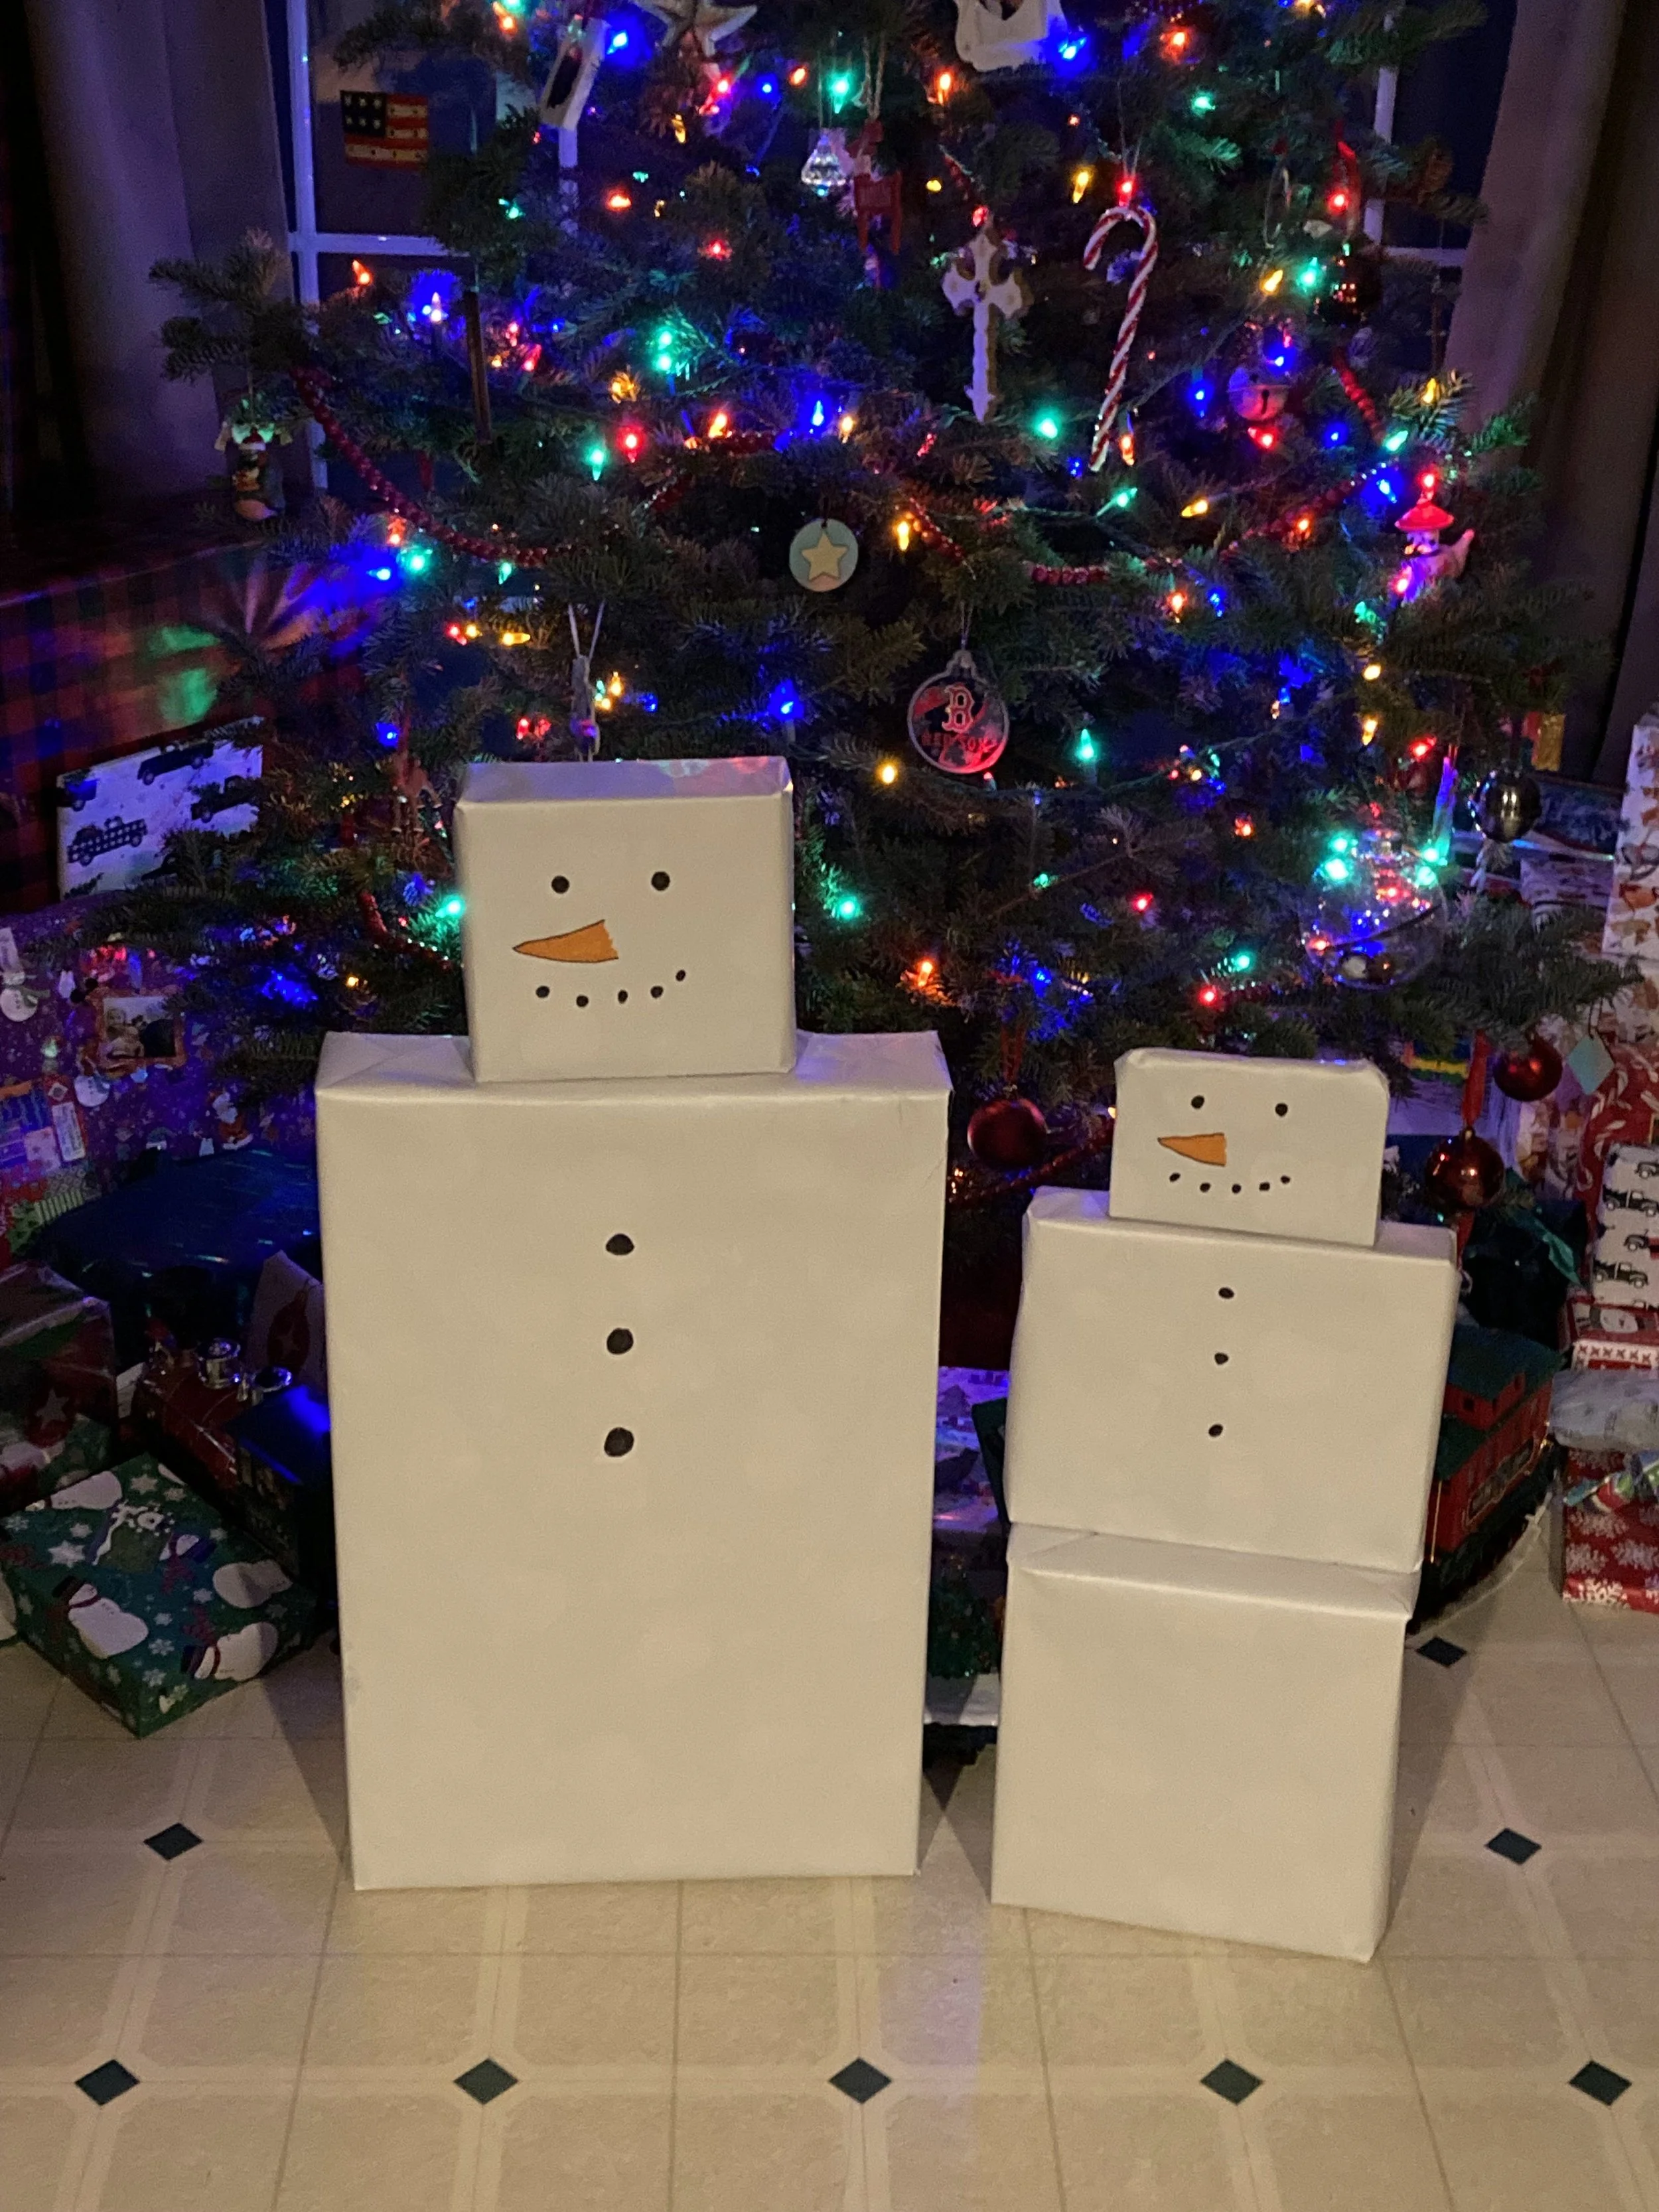
This year I was inspired by an old friend from high school - every year she makes themed “stacked characters” out of her family’s gifts. One year it was all Santas, another year all penguins, etc - complete with accessories! I thought it was such a cute idea and wanted to give it a try myself this year, but on a much simpler and smaller scale. So I opted to make each kid their own “present snowman” and they loved it! I think this has just become a yearly tradition in our family as well. | This post contains affiliate links |

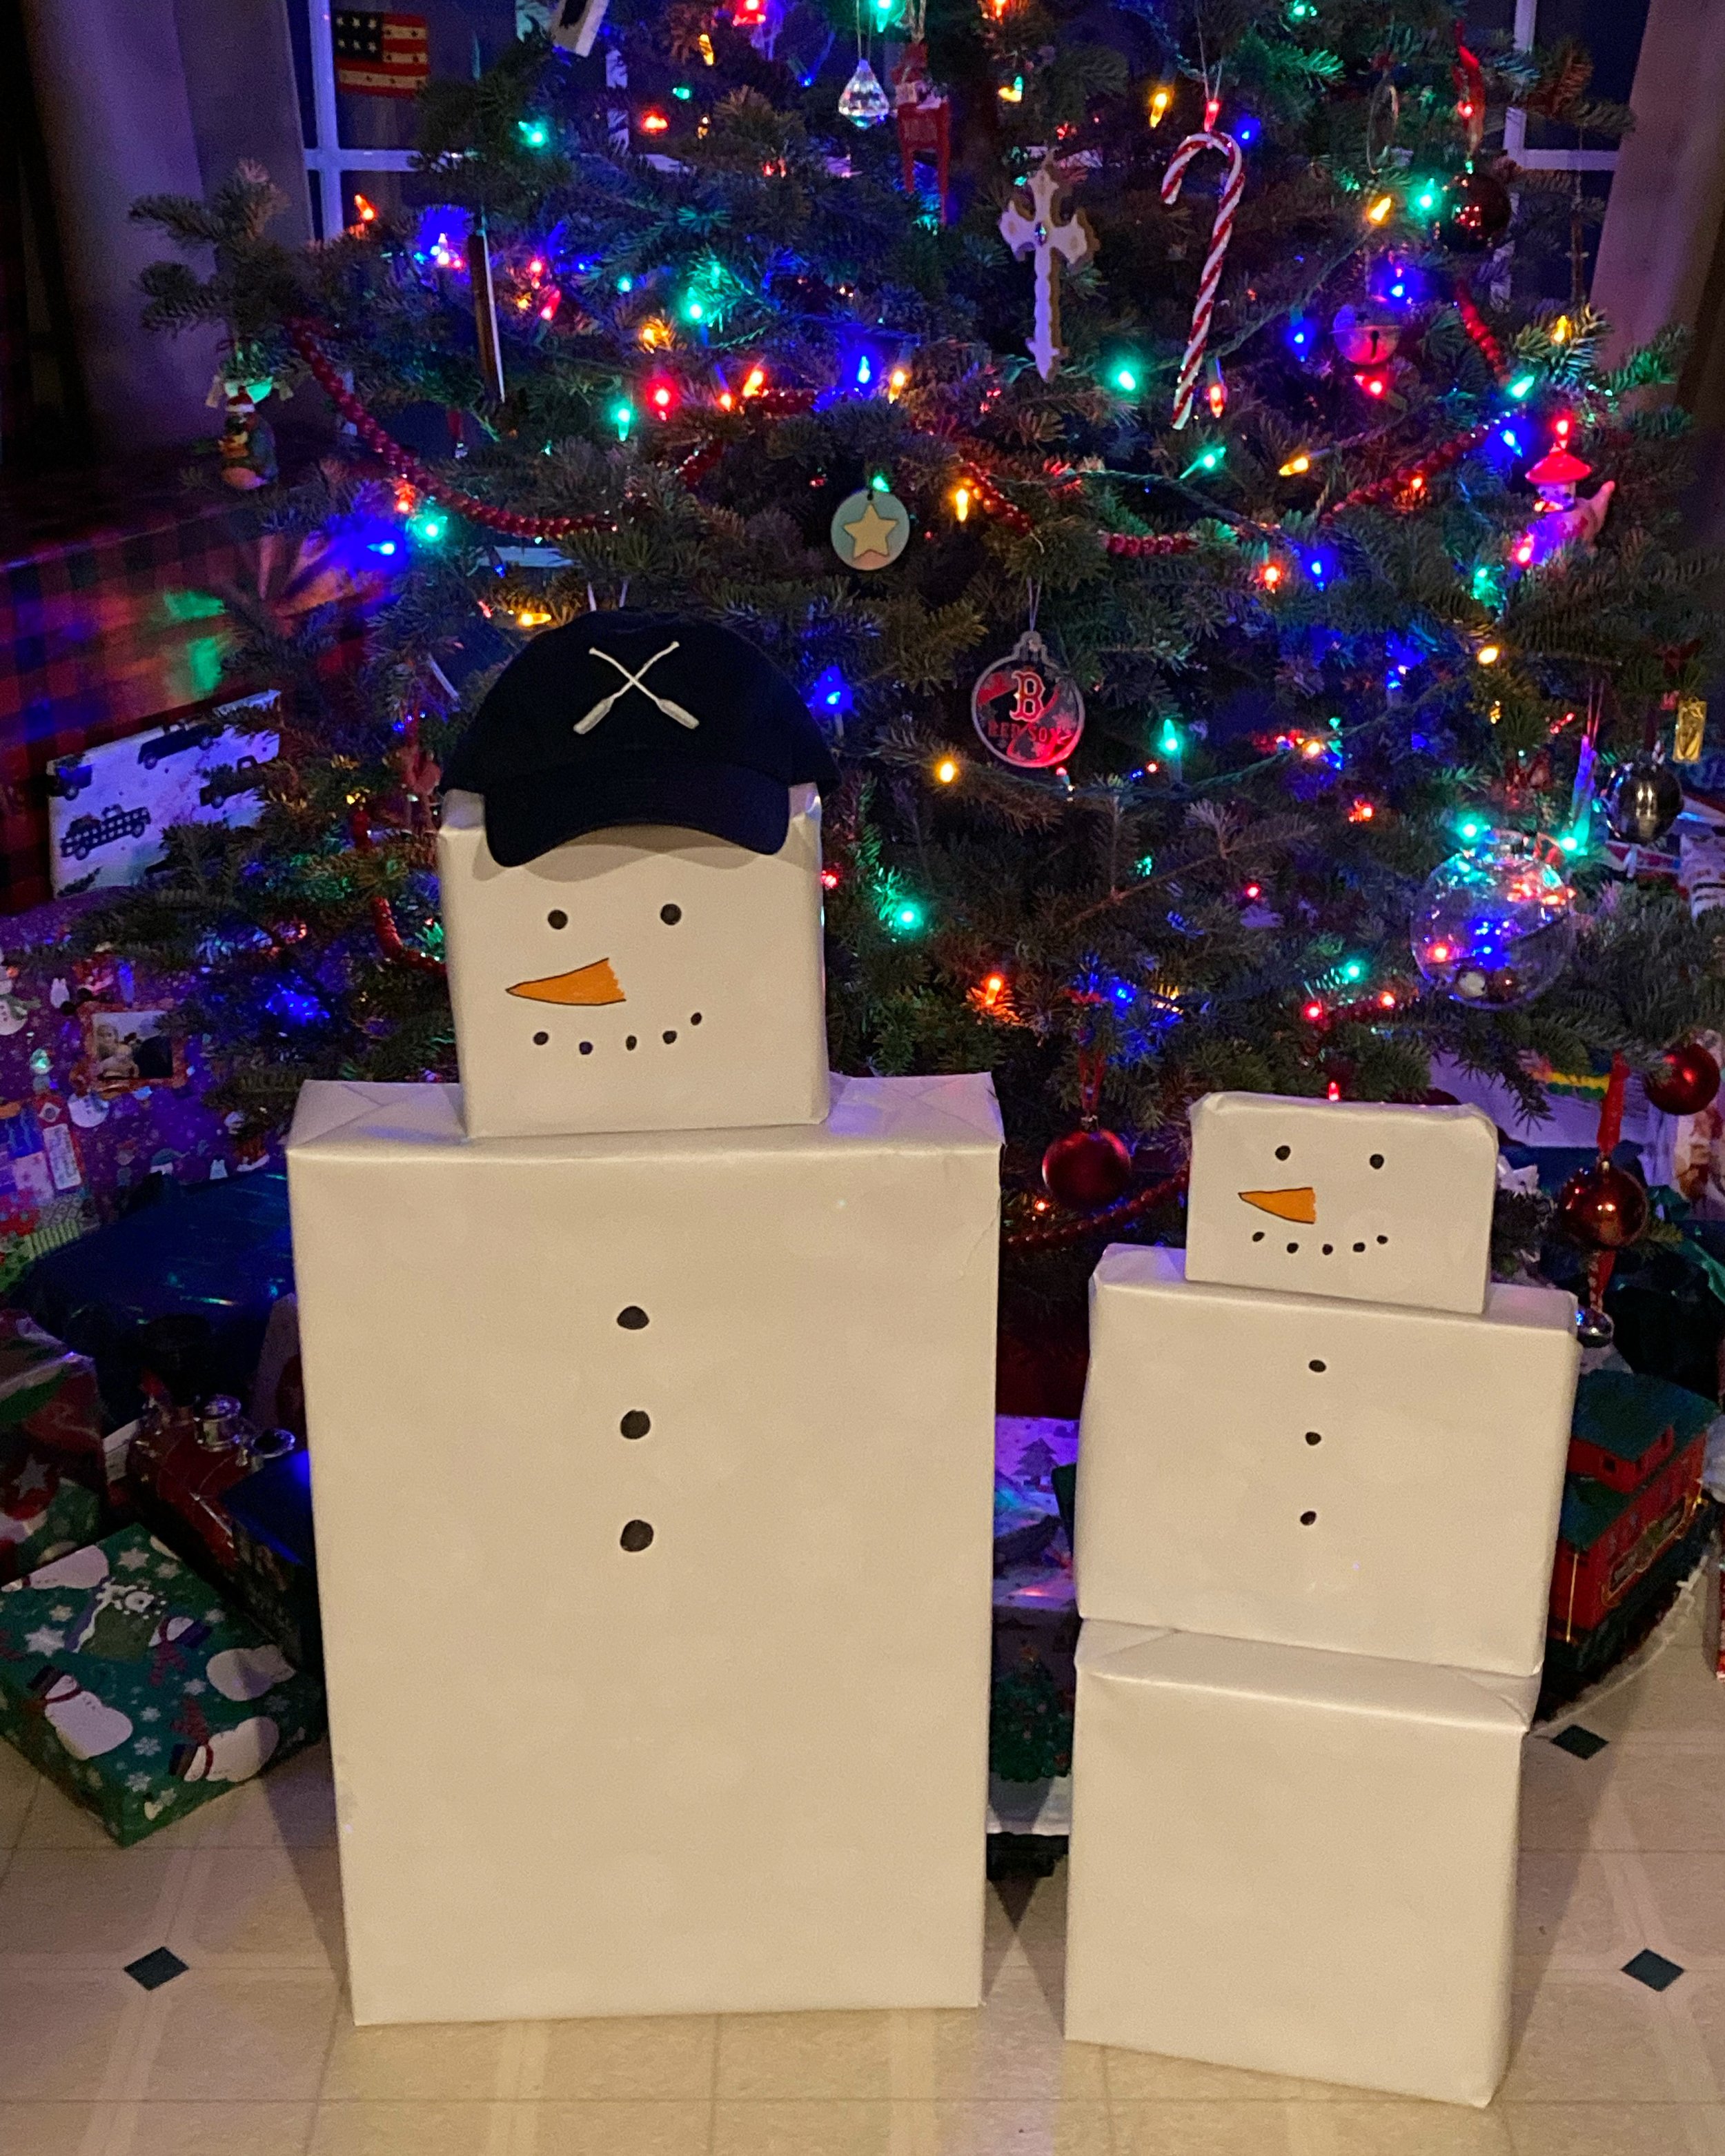
To make the snowmen you don’t need to buy anything special - in fact I just used regular Christmas wrapping paper but wrapped the gifts inside-out so the plain white back of the wrapping paper was facing out! I chose 2-3 gifts for each child that stacked well on top of each other and wrapped them, white side facing out. Then I used a sharpie marker and orange colored marker to draw the face and buttons.

Our oldest daughter recently asked for one of our New England Lakeside Baseball Caps of her own so obviously we had to give her one for Christmas! The hat made the perfect finish for her Snowman and she got a huge kick out of it on Christmas morning.

This was such an easy and fun surprise and I hope you’ll give it a try too and make Christmas morning just a little more magical.

KEEP UP WITH BIRCH LANDING HOME
|  Etsy  |  Facebook  |  Instagram  |  Pinterest  |  Bloglovin'  |  Hometalk  |
DIY Simple Snowman Kit

Just wanted to share this easy, cute homemade gift idea for anyone with small kids in a snowy climate - DIY Simple Snowman Kits! Since we aren’t able to get together with a lot of family and friends again this year (thanks Covid), we decided to make and send these little kits so our kids could “help” their friends make their own snowmen from afar. | This post contains affiliate links |

Really there isn’t too much to explain for this project — we gathered some basic materials, painted them, and then packaged them together before including a little note from the kids.

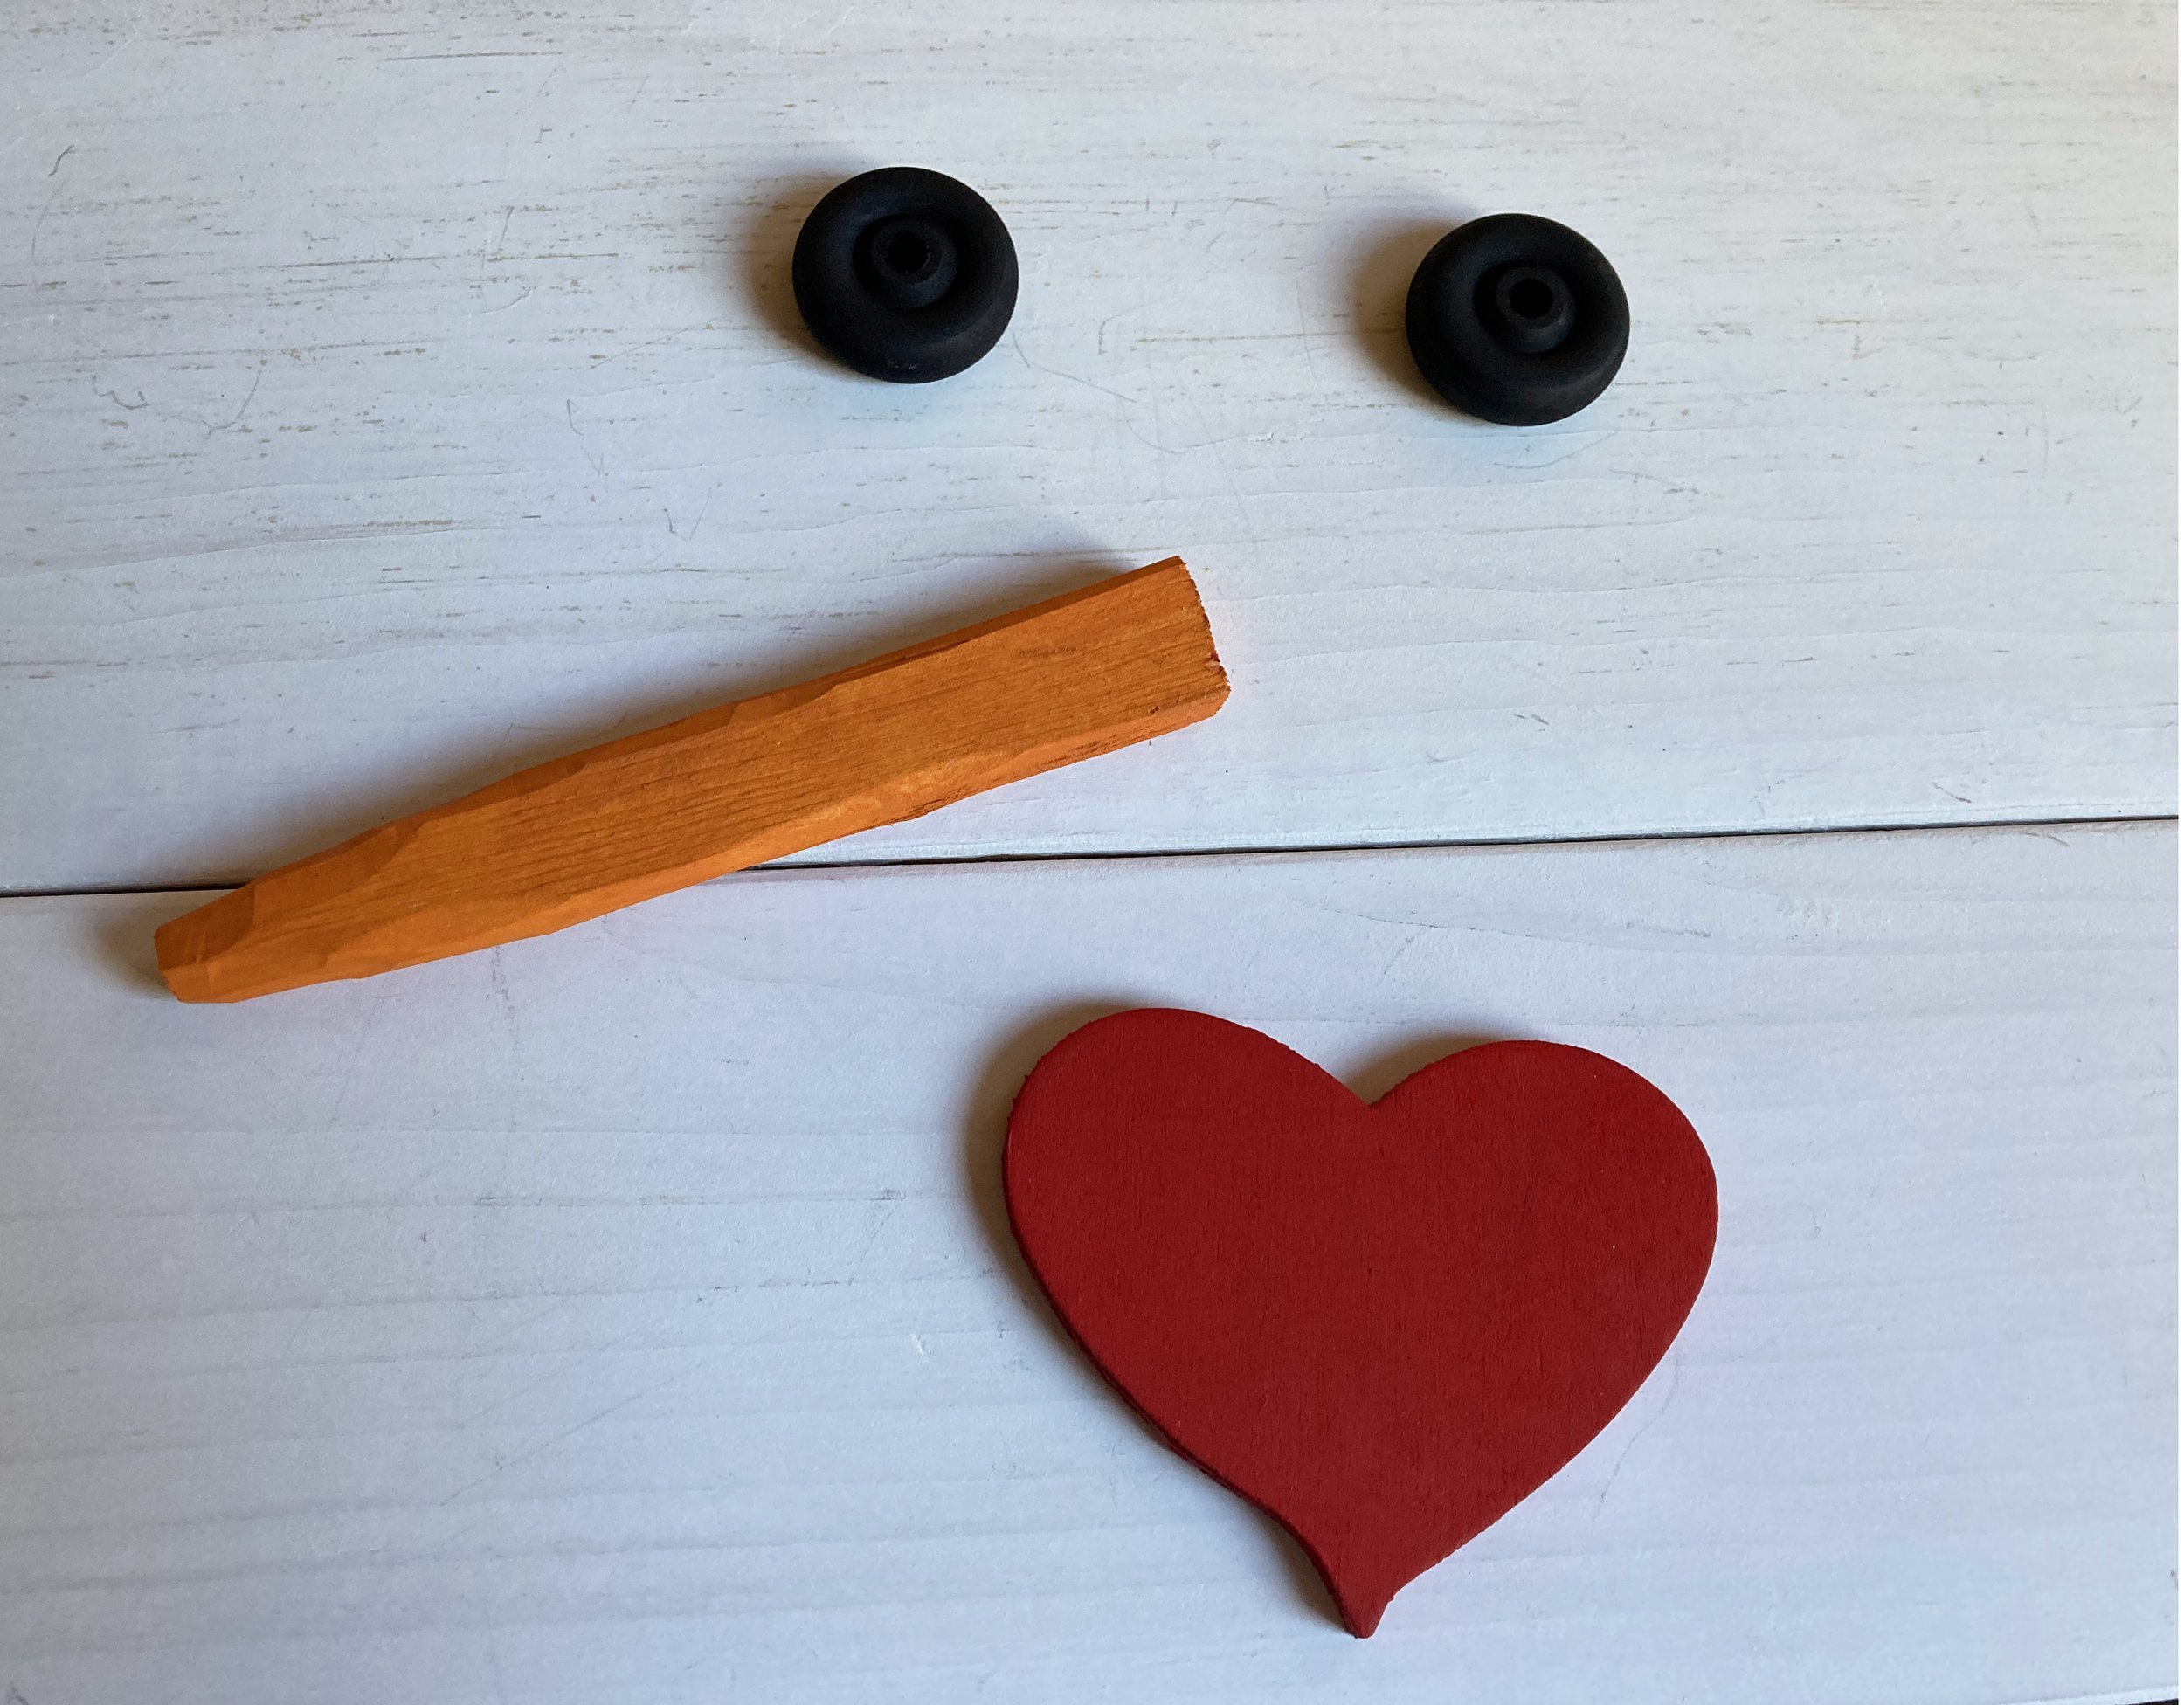
EYES: For the eyes we used wooden toy wheels from a craft store (similar ones linked) that we painted black - but you could use just about anything, including painted rocks or scrap wood.
NOSE: For the nose I whittled down some pieces of scrap wood into a rough carrot shape, then painted them orange.
HEART: For the hearts we glued together two layers of pre-cut balsa wood hearts we had picked up at a craft store (similiar ones linked), then painted them red.
BUTTONS (OPTIONAL): We did not include buttons in our kits but you can include painted rocks, small pieces of scrap wood, or actual large buttons in your kits to be used as buttons.
GIFT BAG: We packaged our kits up in some organza gift bags I had on hand (similar ones linked), but you could wrap them up in a number of ways including using a piece of fabric that could double as a scarf!

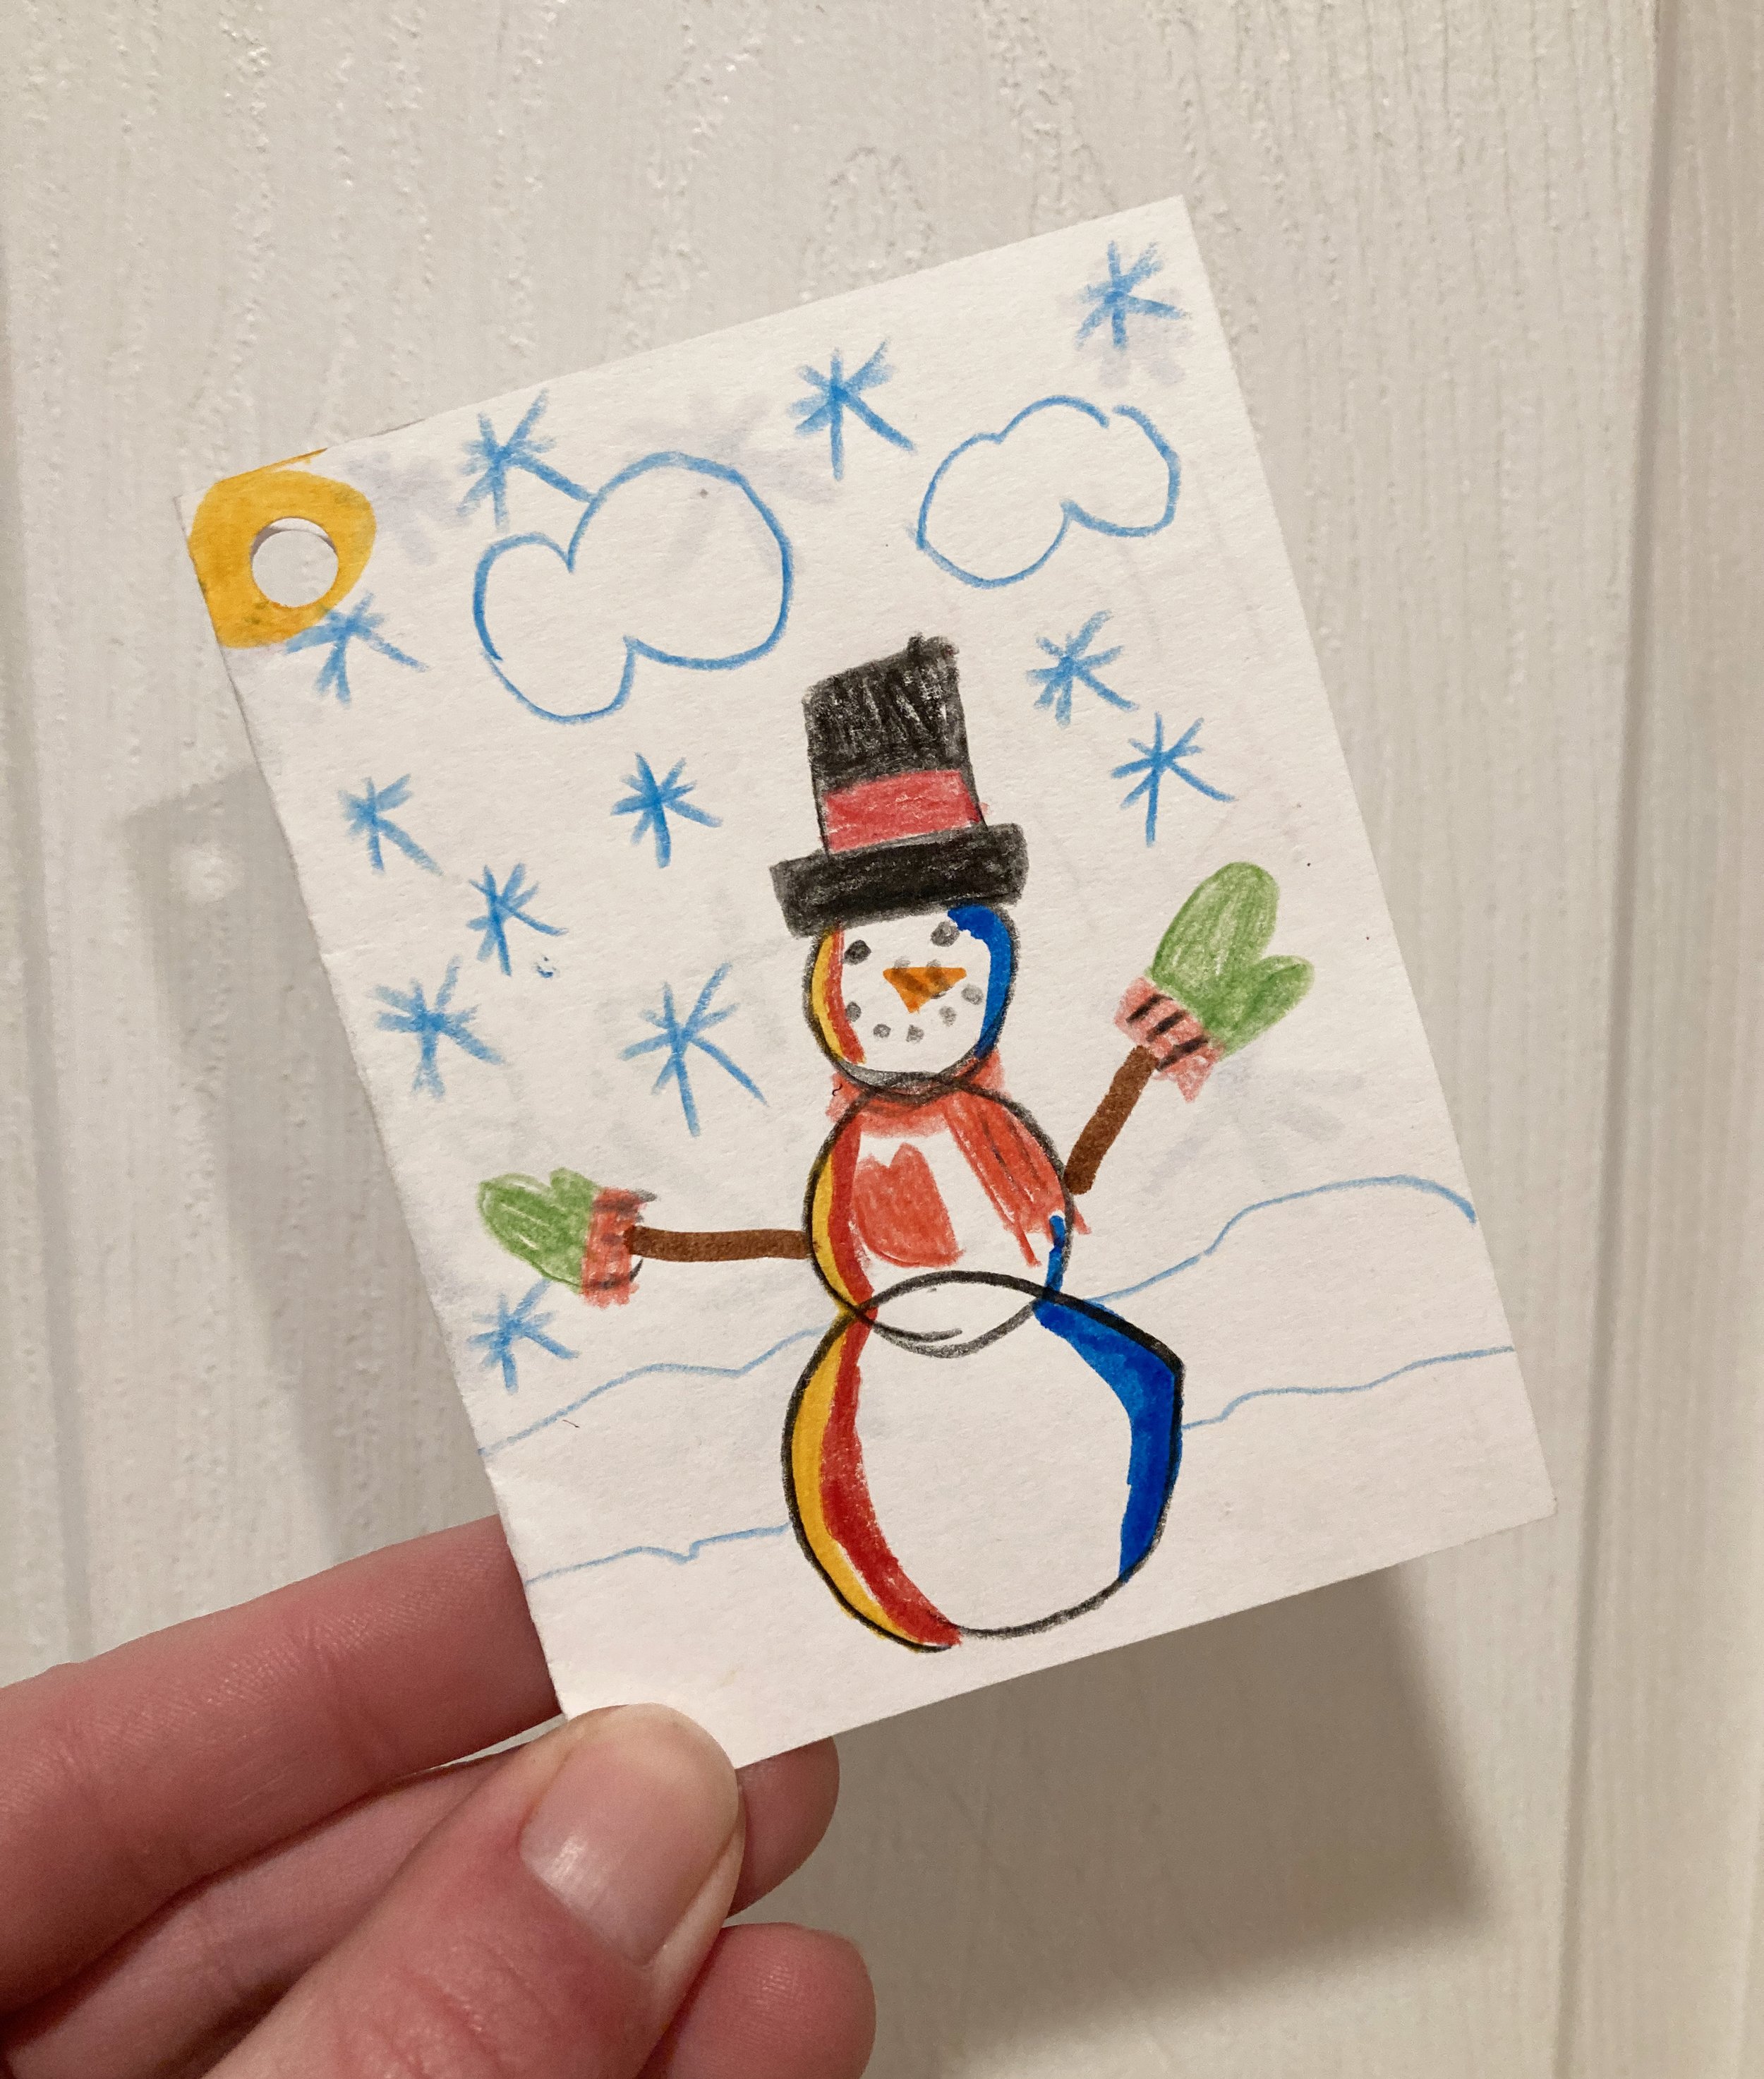
Then I had the kids make the gift tags and write notes to their friends - they loved coming up with special drawings and messages! Our friends really enjoyed getting these kits and I’m excited to see how their snowmen turn out. Hopefully these Snowmen supplies will be something they can reuse for future winters too! Just add snow… ;)

PS - I have a few kits left over listed for sale in my Etsy Shop if you would like to check them out. Just click the button below to shop:

KEEP UP WITH BIRCH LANDING HOME
|  Etsy  |  Facebook  |  Instagram  |  Pinterest  |  Bloglovin'  |  Hometalk  |