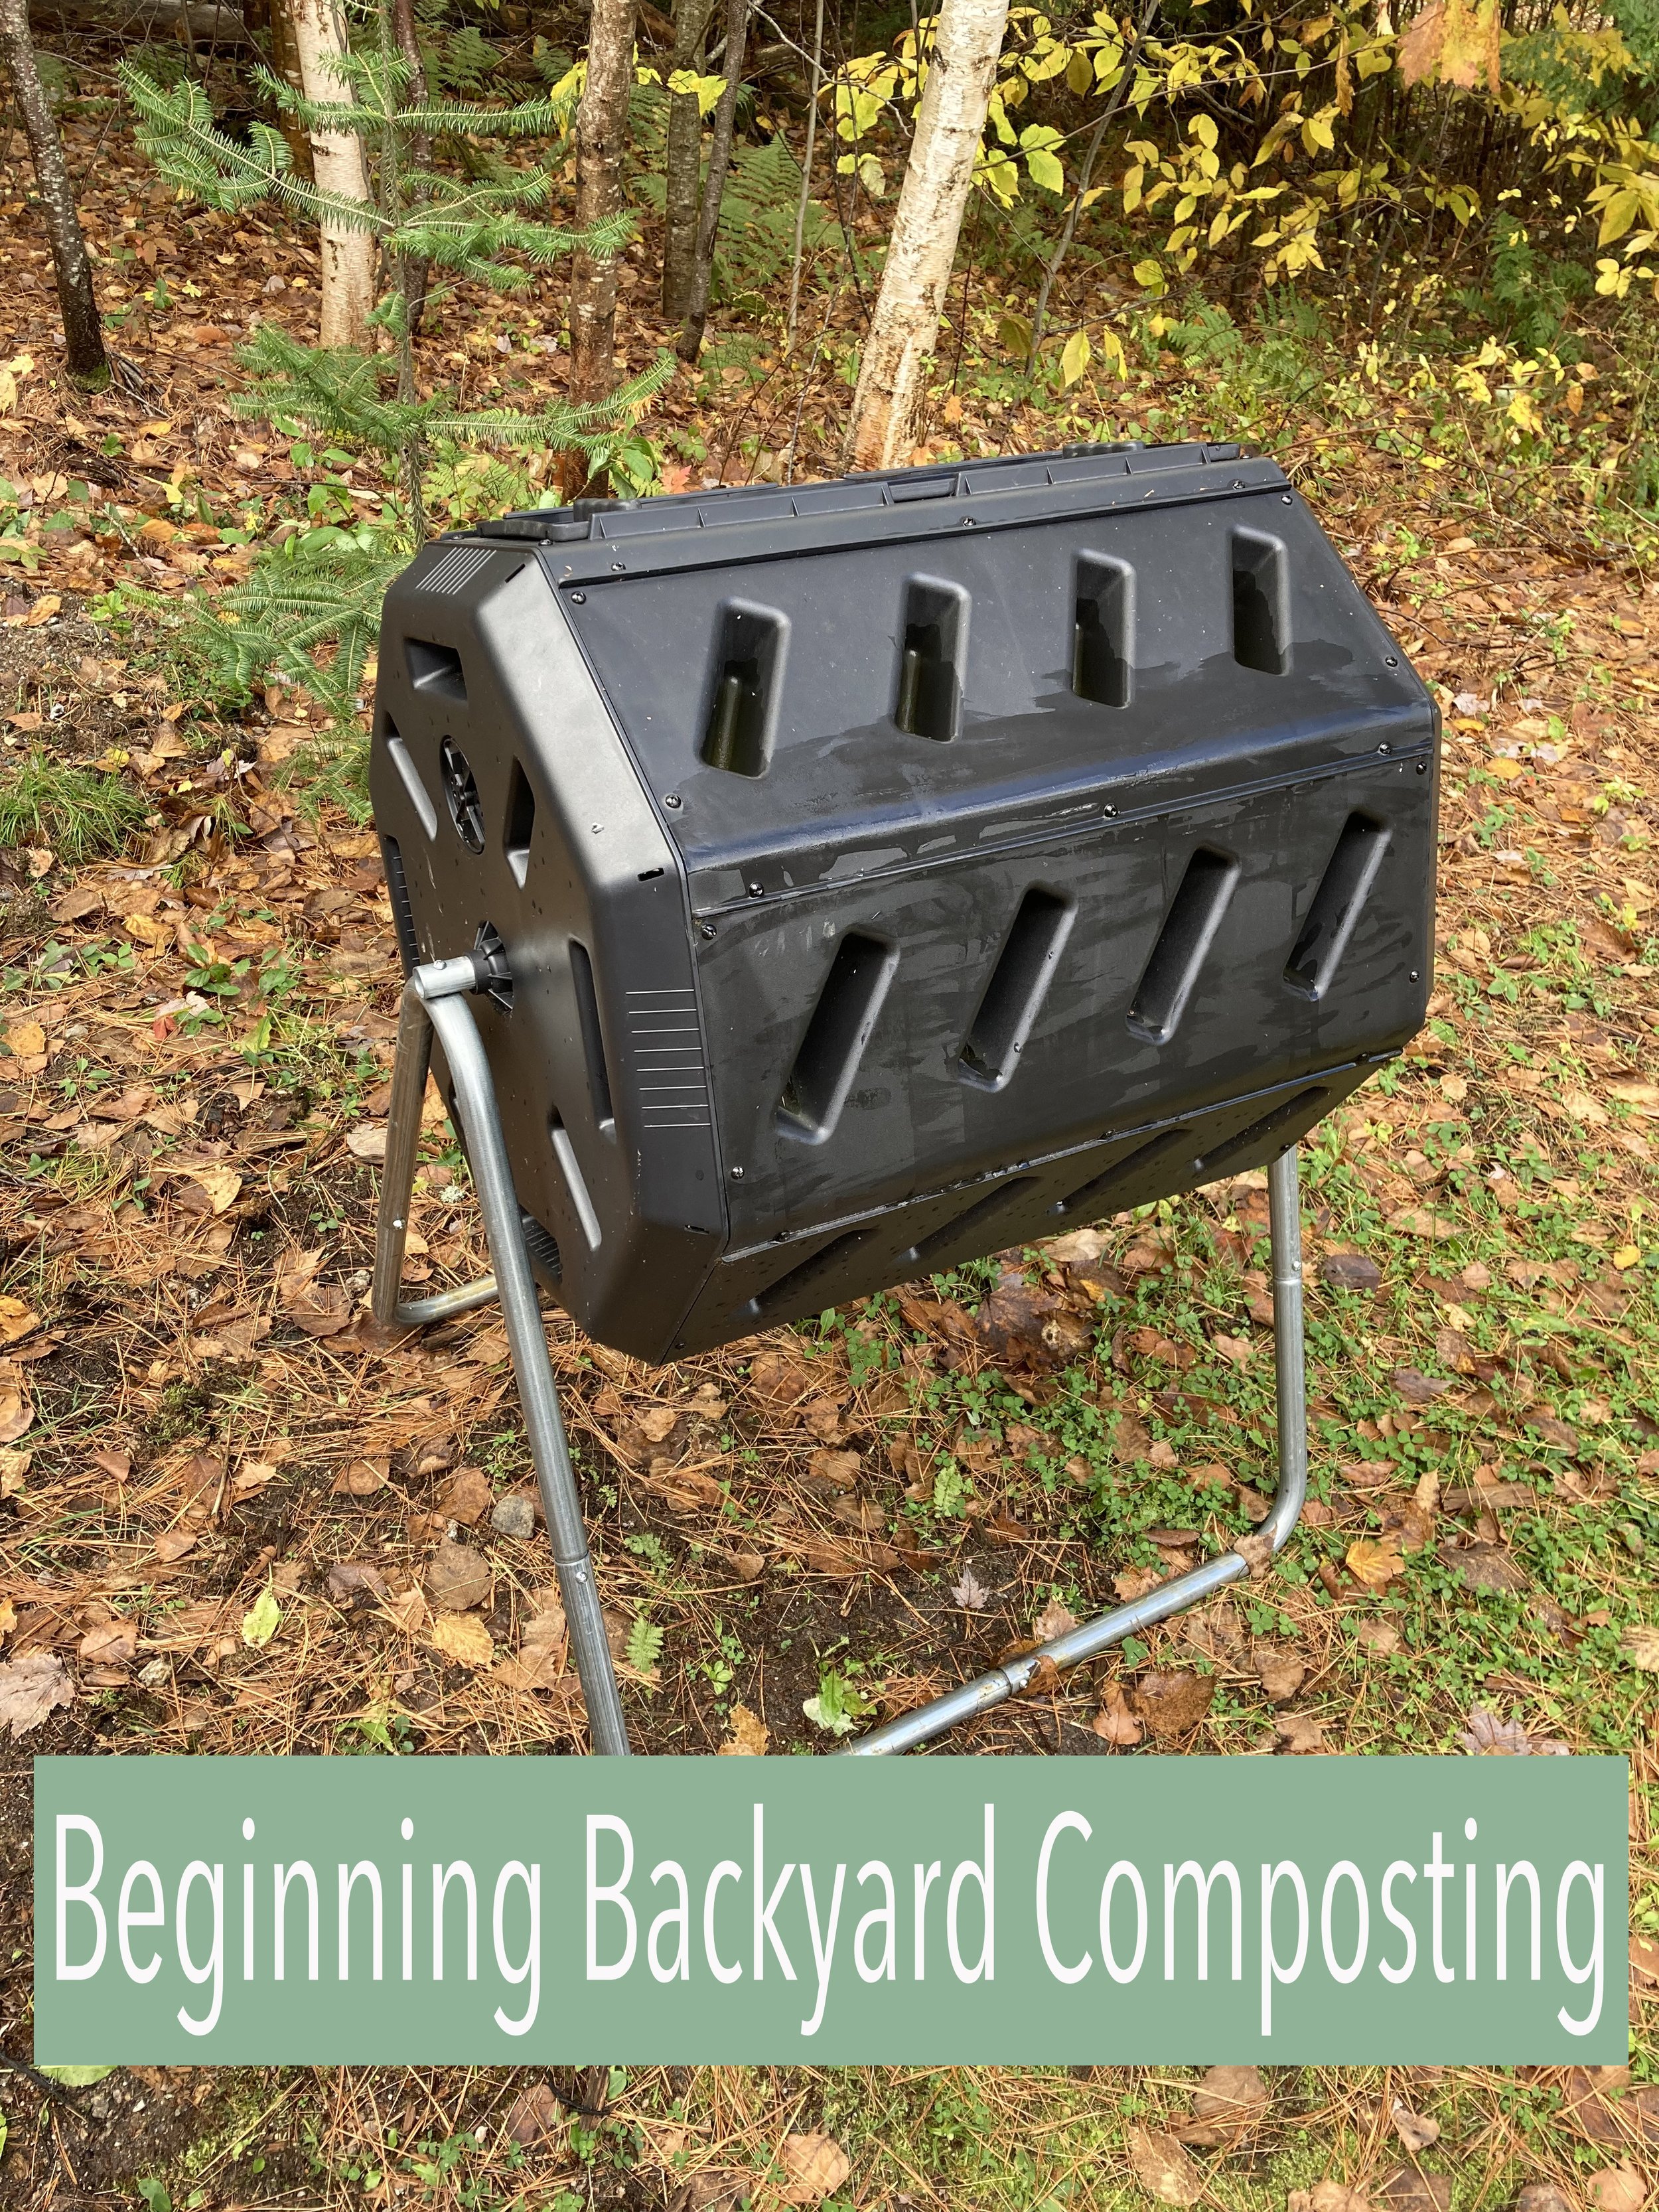
Beginning Backyard Composting

This year we finally jumped on the backyard composting bandwagon. We’ve been wanting to make more eco-friendly choices around our home and decided a big step we could make would be trying to eliminate as much food waste going into our household trash as possible. | This post contains affiliate links |

Composting has a lot of benefits. Some of which include reducing the amount of decomposing matter filling our landfills as well as producing nutrient-rich garden soil to benefit your own yard and garden.

Getting Set Up

When it comes to composting, you could just make a pile in the corner of your yard or make your own bin with some scrap wood or fence. However, we decided to opt for a tumbler-style bin since we were looking for something compact, self-contained, and efficient.

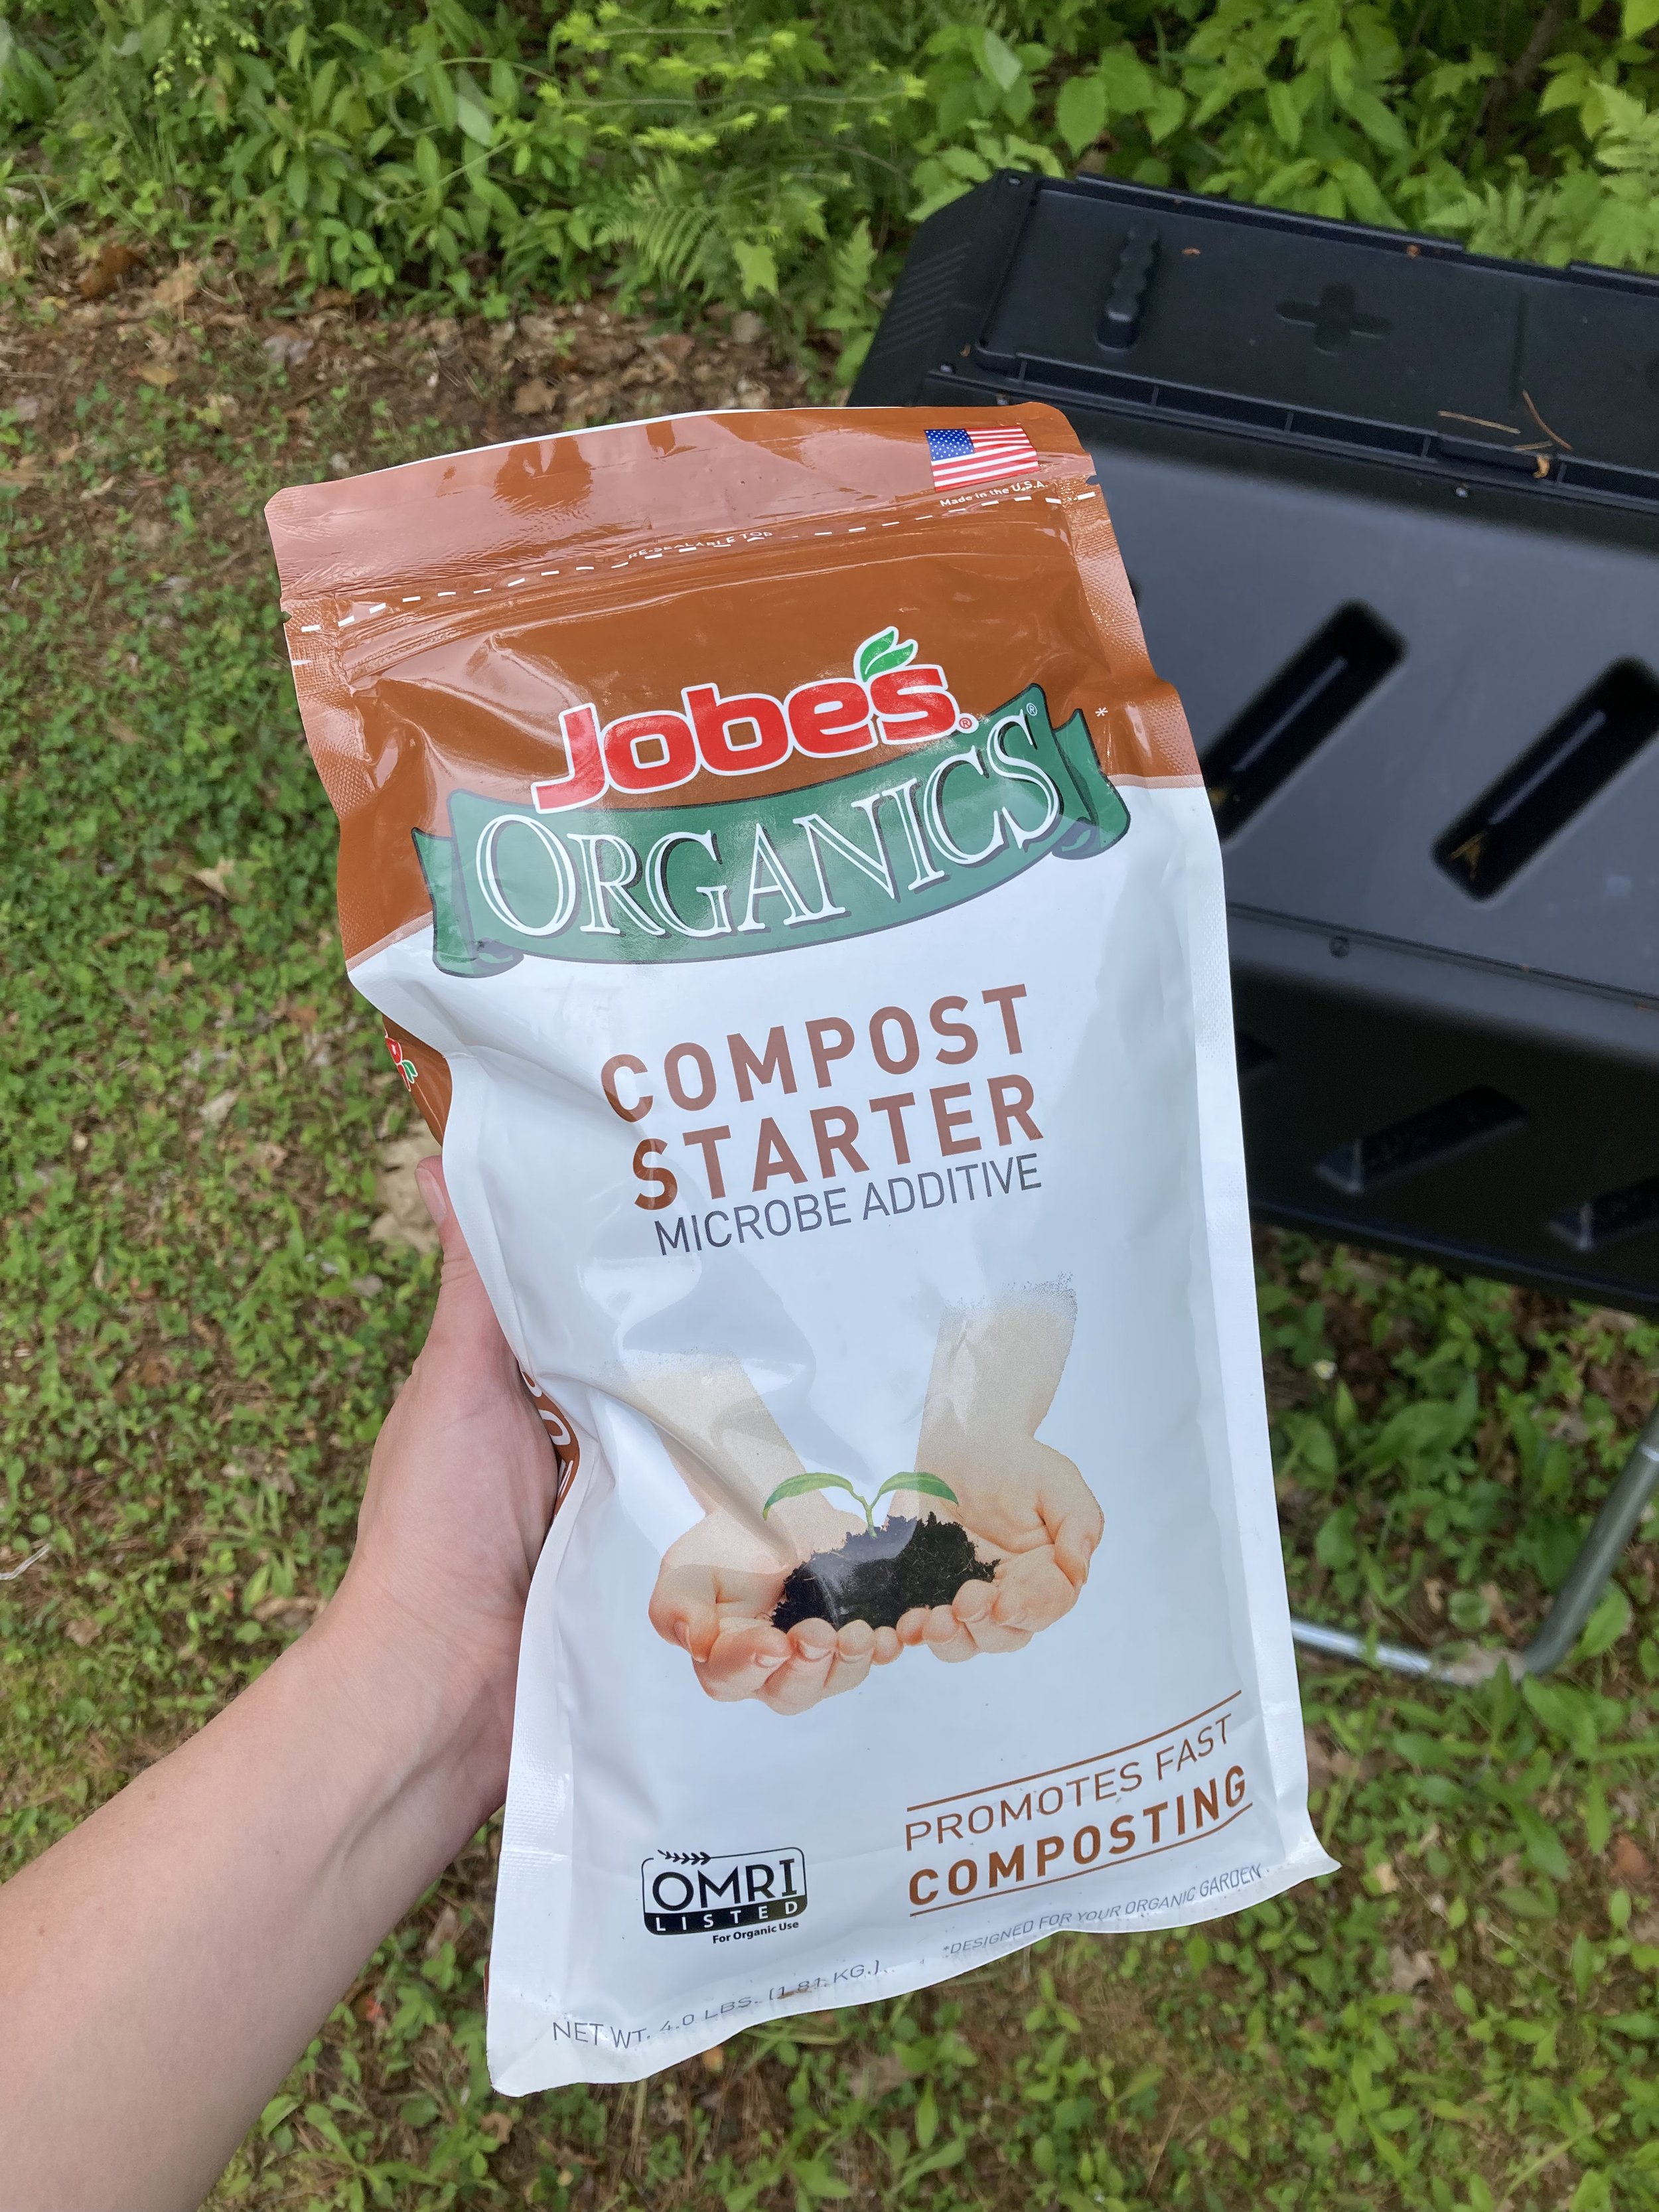
Once you decide on your compost set-up it's important to add some good microbes to "get the party started" and create a good environment for breaking down your food and yard waste. To do this you can add a shovel-full of garden dirt from your own garden to introduce some microbes, or you can buy some specialty compost starter to add to your composter (just follow the package directions).

Composting

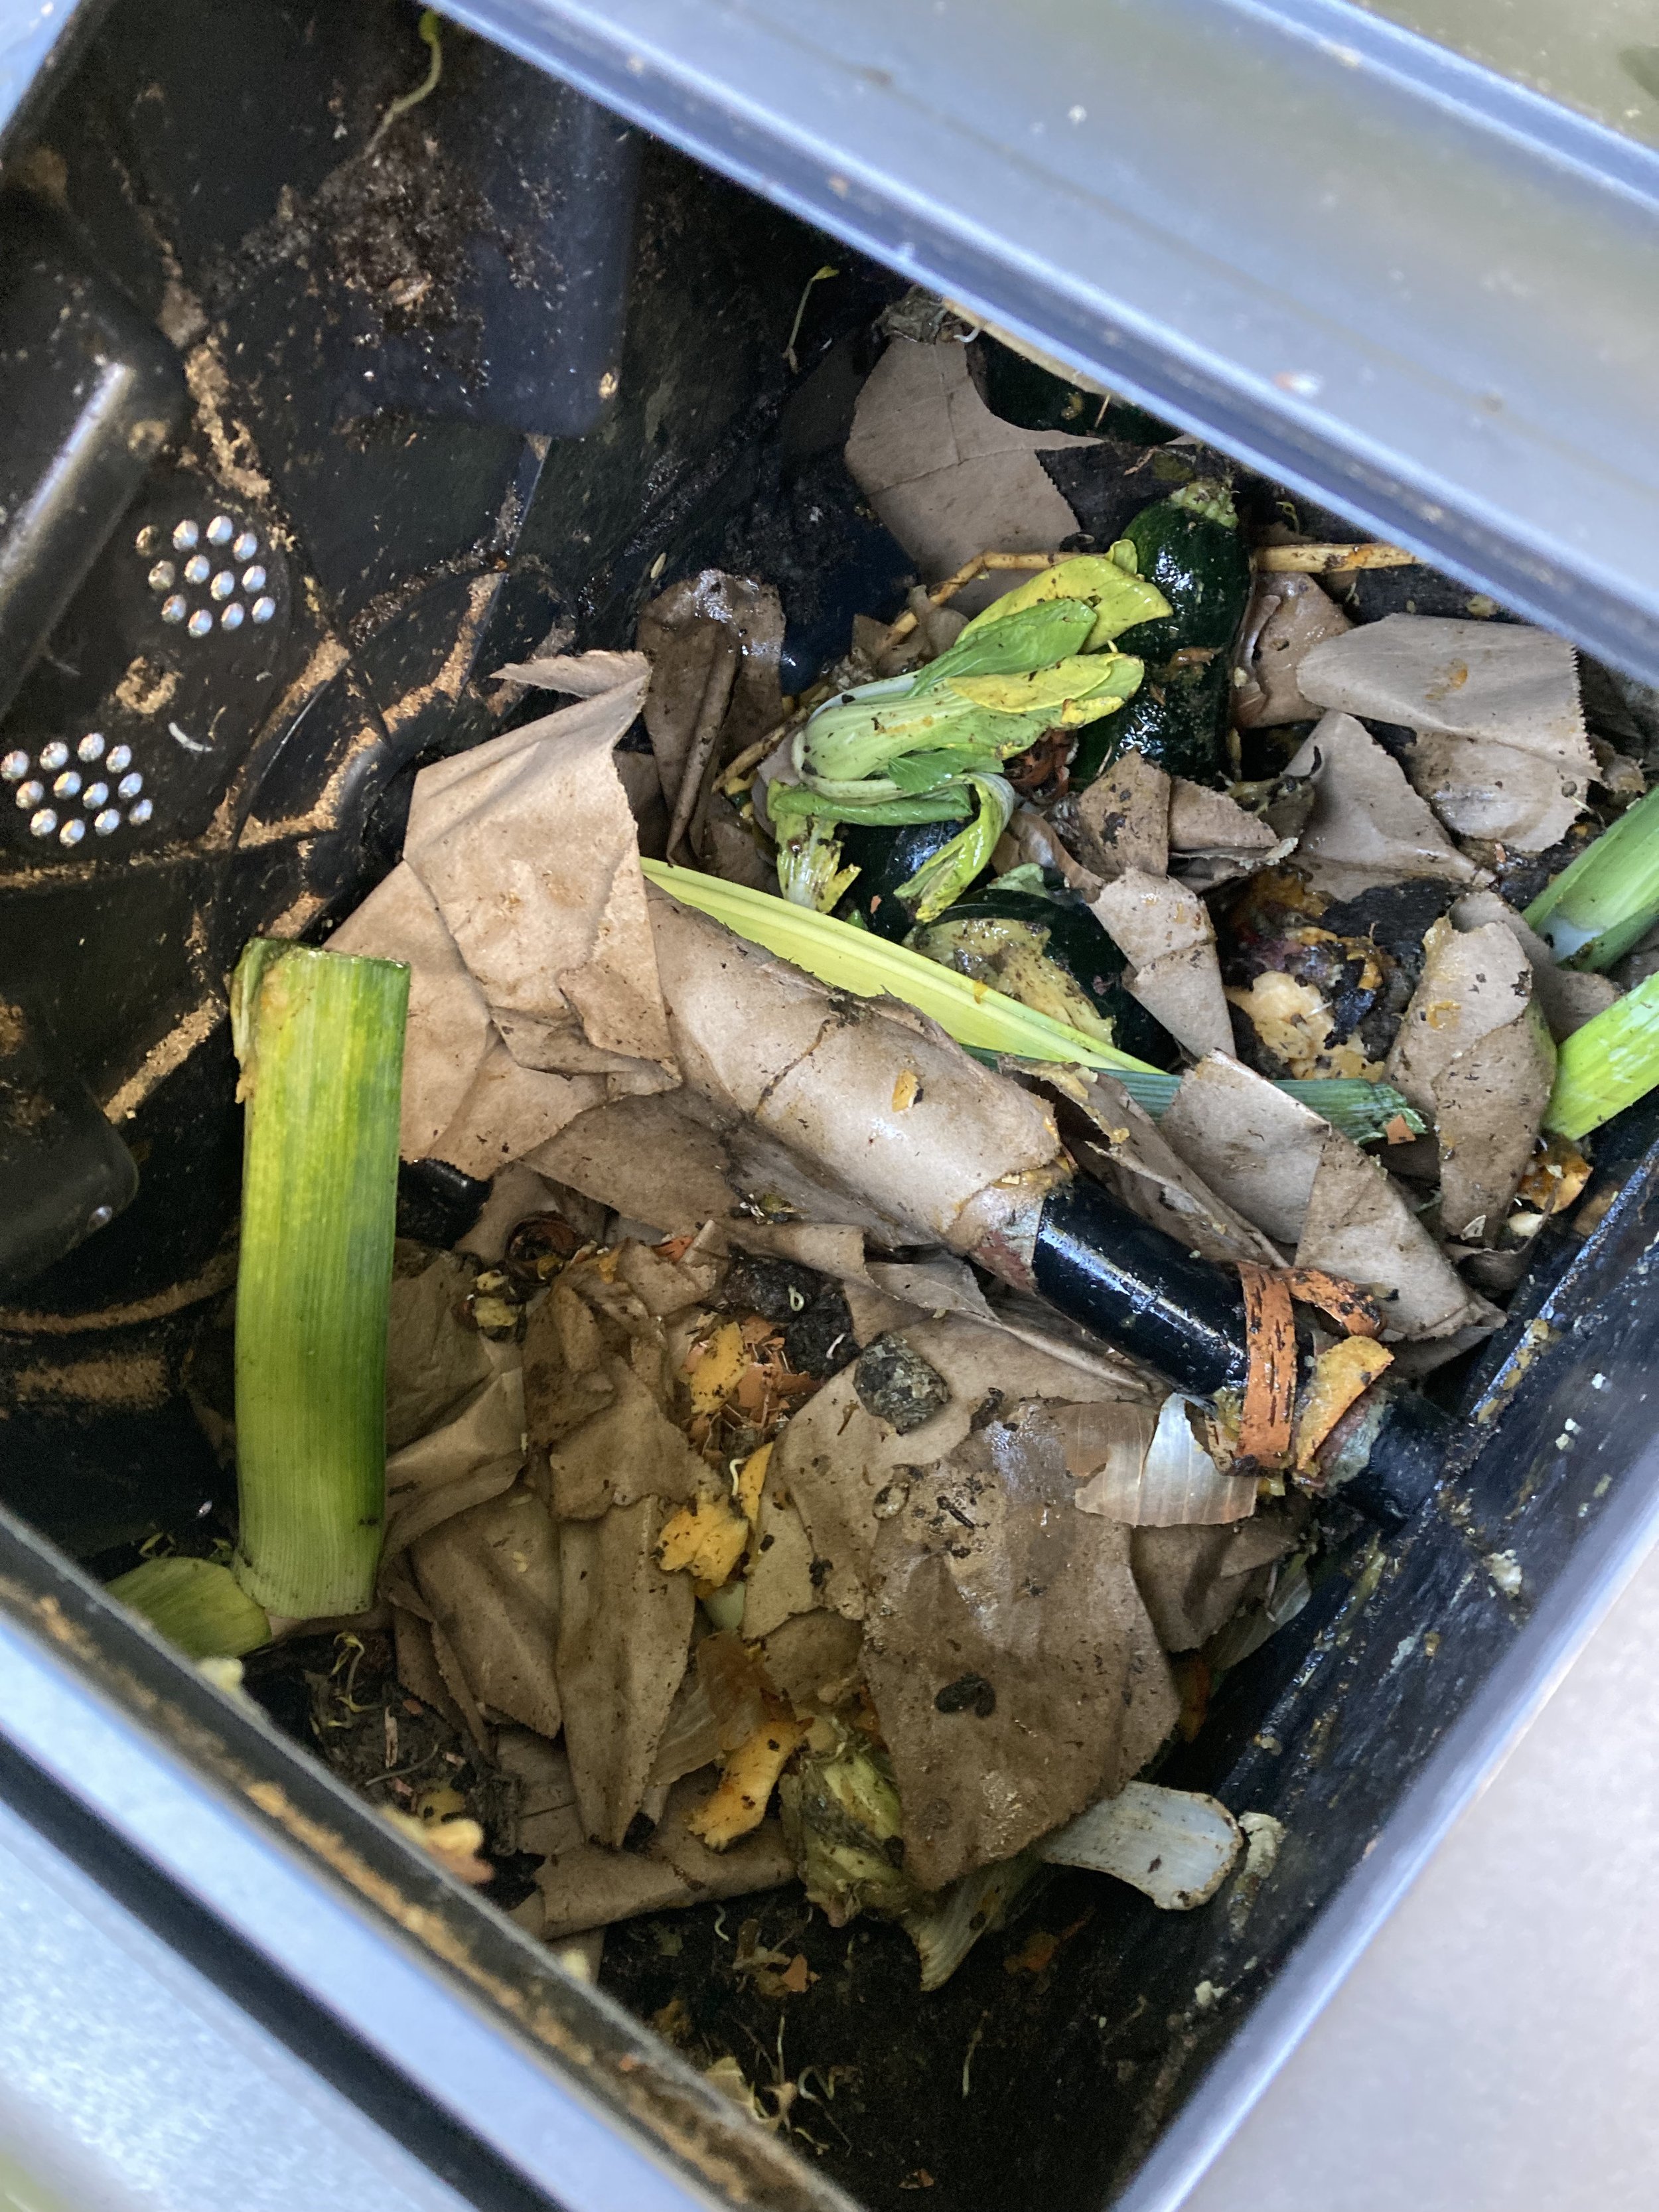
Once you have it set up, just keep on adding food/yard waste and periodically turn your compost over (by hand if yours is a pile or by spinning the drum if it’s a tumbler-style). The trickiest part for me is keeping the ratios right - ideally your compost pile should be about 1 part “greens” (these would be fruit/veggie scraps, coffee grounds, etc… I like to think of them as wet items) and 2 parts “browns” (leaves, newspaper, brown paper bags, etc… I like to think of them as dry items). We personally tend to teeter from too dry to too wet in our compost bin but it seems to average out eventually.

I typically toss our kitchen scraps in a bowl on the counter as I'm cooking and promptly empty it into the compost bin outside. This has worked well for us so far since the weather has been mild. Once it turns winter here I will probably invest in a kitchen countertop compost container so I don't need to walk outside across the icy/snowy yard several times a day, and instead can just empty the kitchen container into the outside compost bin periodically as it fills up.

What to Compost

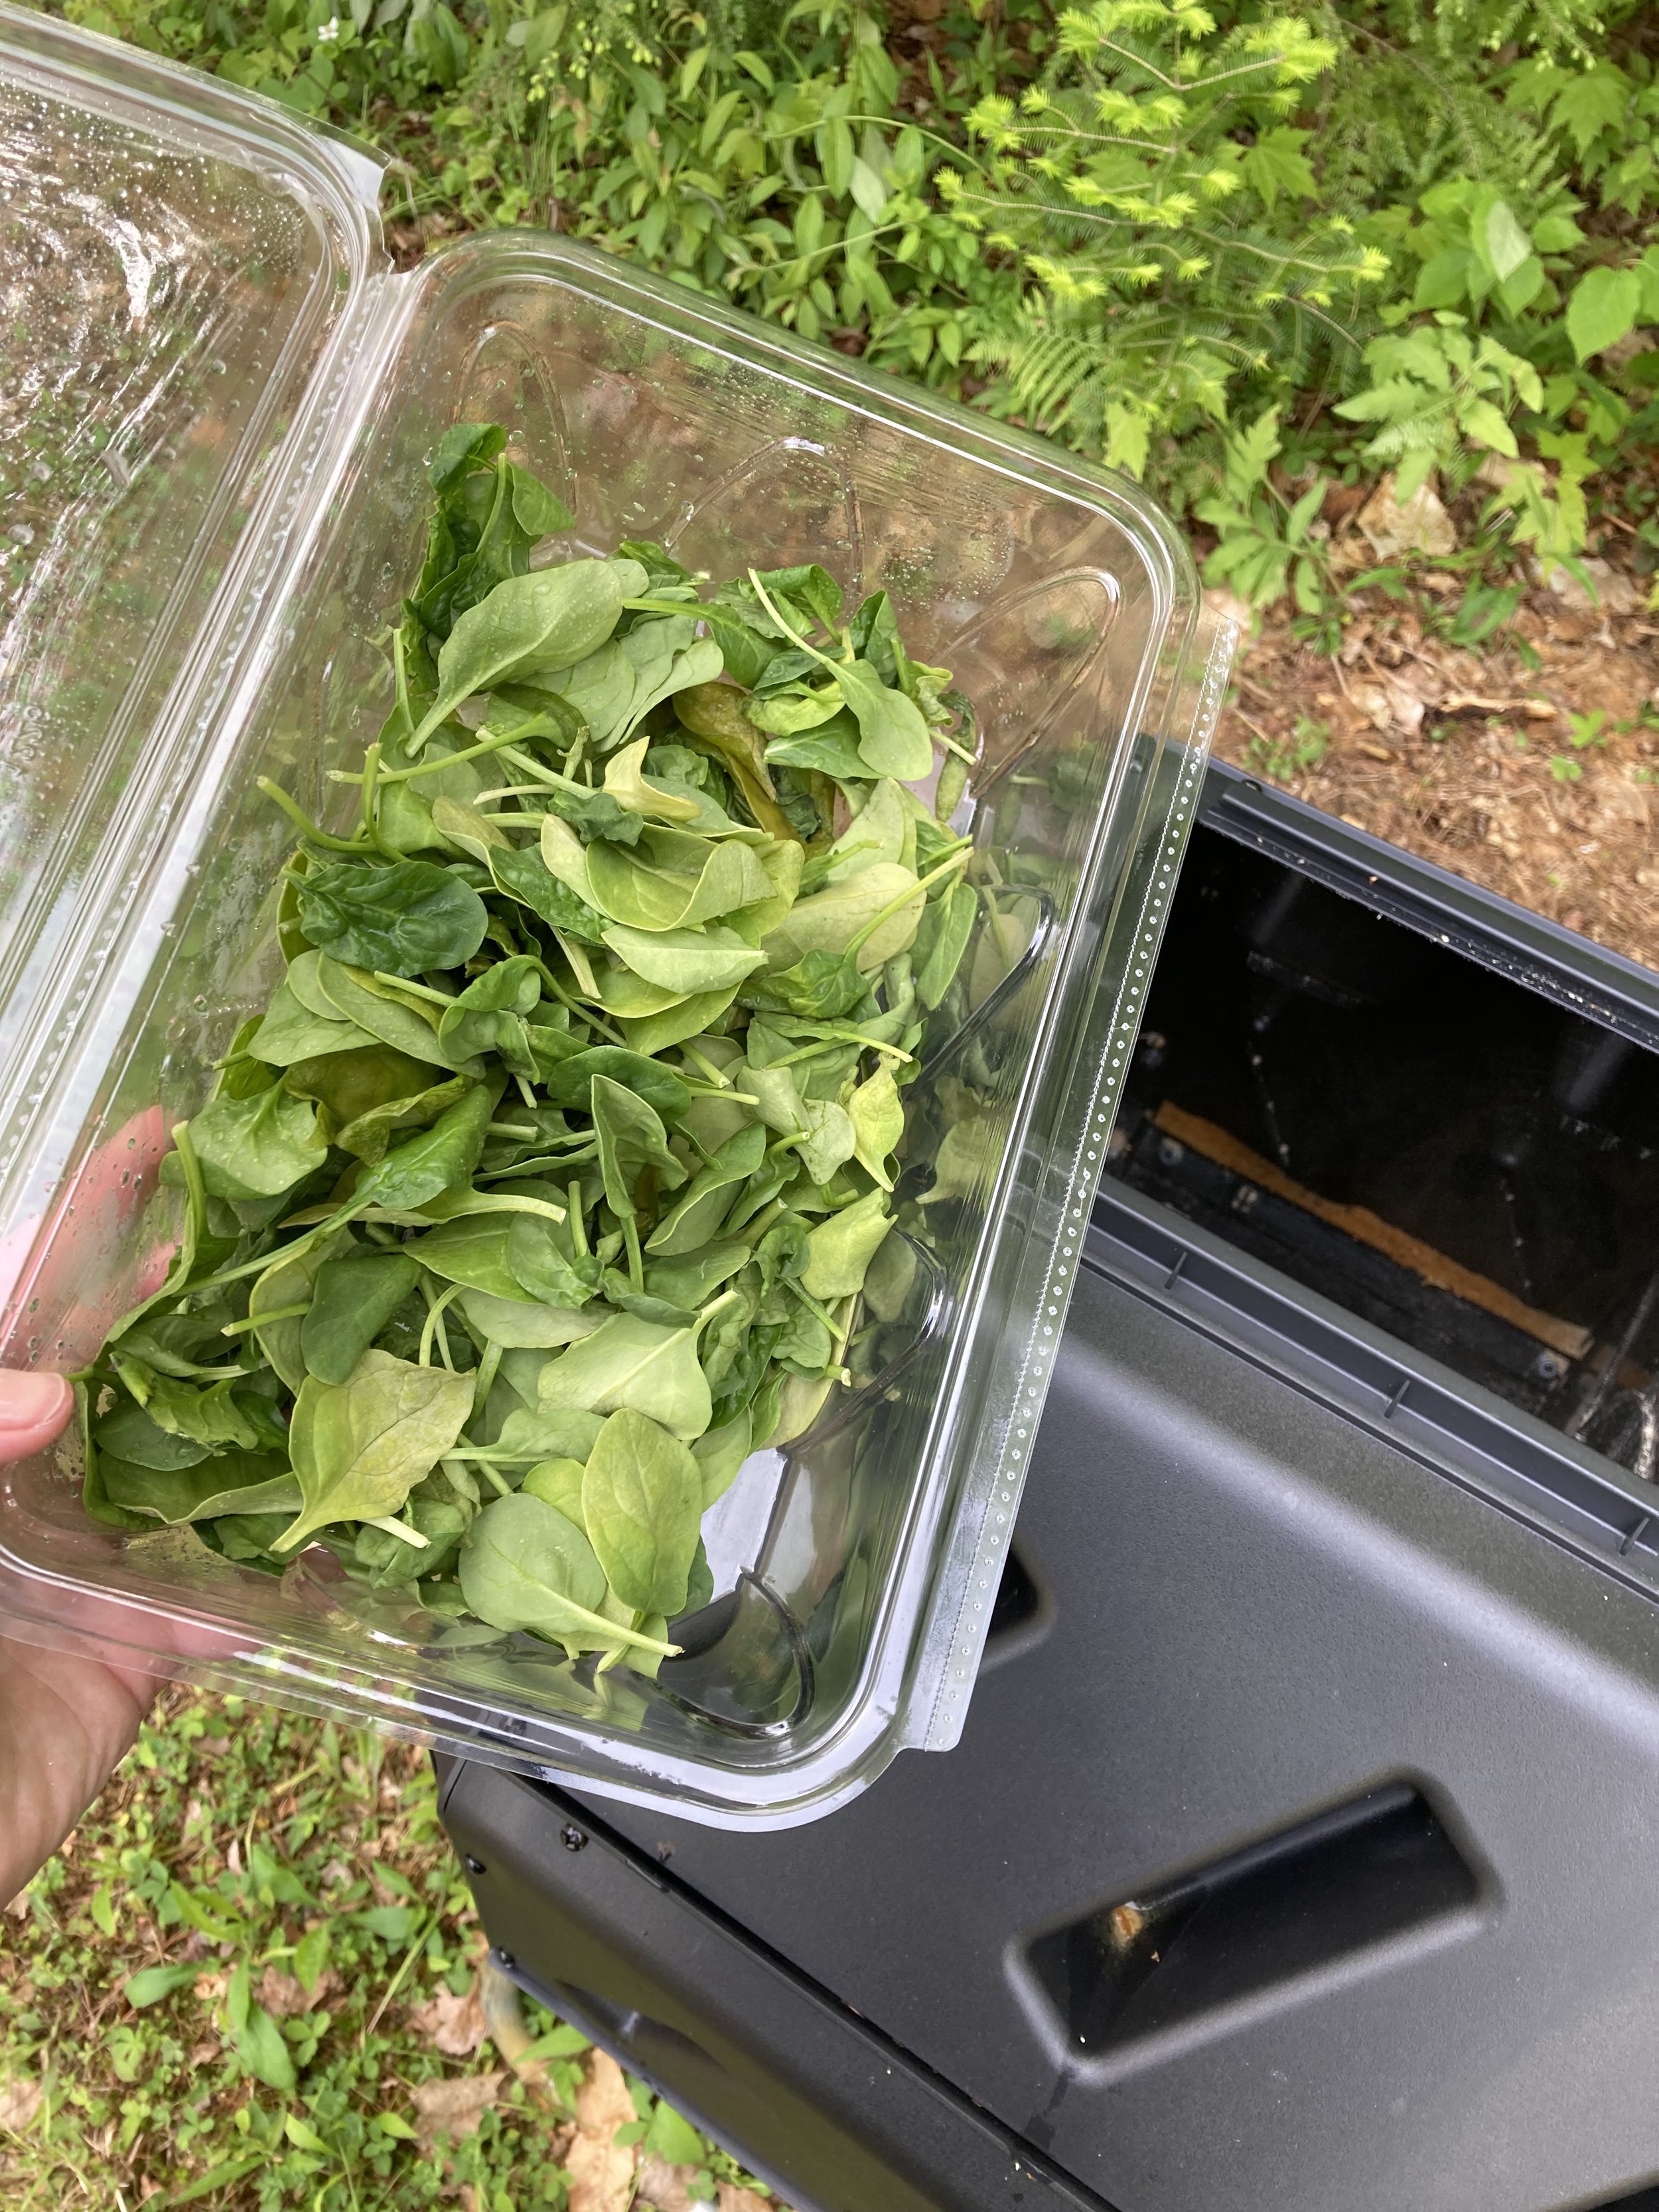
Slimy spinach in your fridge? Toss it in the composter and then recycle the container!

Here’s a short list of things you can potentially compost:

  • fruit

  • vegetables

  • inedible portions of fruit/veggies (i.e. - rinds/cores)

  • coffee grounds

  • egg shells

  • disease-free, non-invasive plants

  • shredded newspaper

  • shredded brown paper bags

  • shredded paper (non-glossy)

  • untreated sawdust (I make a lot of ornaments for my Etsy shop and compost the sawdust)

  • toilet paper rolls

  • leaves, grass clippings

  • small sticks

The smaller you make the items in your compost bin (cut them up or shred them), the quicker they should decompose and compost.

What NOT to Compost

Do NOT Compost:

x plastic or household trash
x meat
x dairy
x cooked food
x glass or metal
x animal waste or used animal bedding/shavings
x invasive or diseased plant materials
- compost very strong smelling fruit/veggies with caution (i.e. citrus/bananas) if you live in an area with bears or raccoons that are an issue

Good luck in your composting adventure! I hope you enjoy the process and be proud in your efforts to be a little more eco-friendly in your home.

Disclaimer: I am sharing my experiences with what we’ve learned in the composting process so far. If you’d like expert or more detailed and specific information, I’d recommend contacting your local garden center or university cooperative for more information. Your local town or city may have composting programs to join or guidelines to follow too.

KEEP UP WITH BIRCH LANDING HOME
|  Etsy  |  Facebook  |  Instagram  |  Pinterest  |  Bloglovin'  |  Hometalk  |

DIY Cattle Panel Trellis Arch

Last summer Pinterest blew up with DIY Cattle Panel Trellises and I decided I was going to jump on this bandwagon next season… And so here we are - it’s spring and I’m excited to get this set up and document my garden’s progress this year. | This post contains affiliate links |

- This post will show how we built our Cattle Panel Arch and I will also add progress photos to this post as our garden grows -

To make a Cattle Panel Trellis, you really only need a few things. We picked up most of our materials at a local Tractor Supply store but you could find these materials at other farm/garden centers too or order online. The trickiest part was getting everything home since the cattle panel is fairly large. Thankfully my father-in-law has a pickup truck and was able to pick up the items for us.

Materials:

How To:

First, figure out where you want your arch to go. For us we put it just inside our garden gate to frame the entrance. It’s also on the north side of our garden so it won’t shade the other veggies too much.

Once you have it laid out and square, drive the t-posts in with a hammer or post driver until they’re deep and sturdy. This was easier-said-than-done with our rocky soil here in NH, so one post couldn’t go in quite as deep as the others but it was sturdy enough still.

Next gently bend the cattle panel into a “rainbow” and set it inside the square you made. (Next year we might move our t-posts out a little wider to get a more gentle and less-tall arch, but this worked fine for us too as-is.)

Once you get it in place, secure it with hose clamps, heavy duty wire, or some rope so it stays in place.

Now you can plant! We planted ours with vining cucumbers, but you could plant just about any vining plant on these - including peas, squash, ornamental gourds, flowers, etc.

The vines do a great job climbing the arch on their own, but it’s a good idea to check them daily and gently guide the vines where you want them. There’s always a rogue vine that will try to go the other way! They will especially need some help being trained to follow along the top of the arch since their natural inclination will be to continue growing straight up rather than bending around the curve at the top.

And that’s it! Overall it was a very easy project and one we will definitely continue with in the future. I also noticed a huge benefit for our pollinators too - the bees were able to reach the flowers easily and we had a bumper crop of cucumbers this year. They were also very easy to pick hanging down from the arch.

Good luck on your cattle panel trellis adventure!

From earlier in the season, before the vines reached the top.

KEEP UP WITH BIRCH LANDING HOME
|  Etsy  |  Facebook  |  Instagram  |  Pinterest  |  Bloglovin'  |  Hometalk  |

Preparing to Homeschool

We are still waiting to hear the final plans for our local school district (whether that’s in-person learning only, remote learning only, or a choice/combination between the two) - but whatever our school district decides, we’ve already made our decision. Because of the unknowns regarding COVID and how things will play out this fall and winter, we have decided to keep our kids home either way. | This post contains affiliate links |

Preparing to Homeschool

We are waiting to hear what our district offers before we purchase a curriculum… if they offer remote learning then we will likely do that and supplement on our own with what we feel our kids need more help with or are interested in learning more about. But if they don’t offer remote learning then we will choose a curriculum and officially homeschool.

I recommend looking into what your state requires regarding homeschooling as every state is different. In New Hampshire we have a lot of flexibility and pretty basic requirements… I find this to be a blessing and curse - it’s great because it’s very open-ended… but it also makes it very difficult to choose what to do because, well - it’s very open-ended. Right now I’m in the process of looking into different curriculums (in fact I’m attending an “e-open house” online tomorrow for our 1st grader). A family member also offered to loan us some of their homeschool books from a few years ago which is very helpful. But since our kids are only going to be entering 1st grade and preschool I’m not too stressed about choosing the right curriculum for them… what they need to learn is very basic and could be taught on our own if needed without following a specific curriculum (which could be okay in our situation). Regardless, I have more homework to do in the coming weeks to decide how we’re going to handle everything.

Preparing to Homeschool

In the meantime though, I thought it would be a good idea to start setting up our homeschool area in our home. Ideally I would love to get our 1st grader her own desk and designated school space but we just don’t have the room. Instead we worked with what we had and decided to dedicate one corner of our dining room to be our homeschool area.

Preparing to Homeschool

We already had a chalkboard easel (similar one linked here), and decided to repurpose a small metal utility cart we already had as a shelving unit for our homeschool supplies. You could also use a 3-tier rolling cart for the same purpose.

Preparing to Homeschool

The cart will hold most of our supplies for homeschooling. On the top shelf we have play money, sight word cards, and some basic art supplies.
On the middle shelf we have a collection of workbooks for both kids as well as their Kids Kindle Fires. We love the Kindles for playing age-appropriate educational games for each kid, and reading books for our first grader.
On the bottom shelf we have a small collection of reference books for kids, some early reader books, and a small globe. I lined the bottom of this shelf with a wooden board so the books would stand up easier.

Preparing to Homeschool

We absolutely love the "First Big Book of.." series from National Geographic (Space is linked here). They have many in the series and our kids could spend all day looking through them.

Preparing to Homeschool

FIRST GRADER | Again, we still haven't picked a curriculum yet - but here are some supplemental workbooks we've gotten for our 1st grader so far: Cursive Handwriting (this isn't something that is typcially taught in first grade here but our daughter has expressed an interest in learning, so this is more of a fun bonus activity we plan on working on if she feels like it), Brain Quest Workbook: Grade 1 (we love this series of workbooks for fun, educational worksheets that cover a variety of subjects), Logic Puzzles for Clever Kids (age-appropriate logic puzzles are great for everyone to practice thinking and problem solving skills), and Human Body Activity Book for Kids (we chose this to cover some science and health basics).

Preparing to Homeschool

For our First Grader we also ordered this set of play money. Getting kids familiar with money is so important on many levels - not only will they need to learn our currency and what everything is called and what it's worth, money is also great for teaching math concepts of addition, subtraction, and equivalences.

Preparing to Homeschool

PRESCHOOL | For our preschooler, we're keeping it VERY basic. At this age I think it's best to mostly learn through playing, but we're going to work on reinforcing and learning some very basic things like letters, numbers, colors, and how to write her name. For her I purchased "My First School Book" from Learning Without Tears, which came very highly recommended to me. I also got a Melissa & Doug Water Wow ABC Book as a fun reusable resource to reinforce her ABCs.

Preparing to Homeschool

A computer is also SUPER important in most remote learning/homeschooling situations these days... I upgraded my Macbook last year so our daughter has been using my old Macbook for school but a basic Chromebook is a great option for most. It's also a very good idea to have a printer available to print out worksheets and activities that can't be done online.

You also may want to consider some "school decor" to help set the stage for them to help it feel more like school. A calendar center might be a good idea for younger grades, or some laminated maps. I picked up some maps for us that I will hang up soon - our daughter has been really interested in maps and learning about the world and I personally think it's important to teach them about the bigger world out there, especially since we're so closed off at home these coming months.

Not pictured is our Art Cart which we keep in our pantry - it's well stocked with art supplies, pencils, crayons, glue, rulers, coloring books, paper, and just about anything they might need for hands-on activities or creativity.

We still have a lot to figure out but now that we have our classroom space starting to shape up I feel like we're heading in the right direction. Whatever you decide for the coming school year, know you’re not alone - it’s definitely a difficult and stressful decision no matter what you choose. Best of luck and stay healthy!


KEEP UP WITH BIRCH LANDING HOME
|  Etsy  |  Facebook  |  Instagram  |  Pinterest  |  Bloglovin'  |  Hometalk  |

Backyard Camping Tradition During Quarantine

We’re still social-distancing very seriously but all our favorite outdoor spaces (hiking trails, lakes, beaches, camping areas, etc) have been totally overrun lately with people looking for a change of scenery. This unfortunately makes it impossible to social-distance safely, so we tend to just stay home. | This post contains affiliate links |

In order to make our weekends more special we started a weekend tradition early on during Quarantine to “camp at home” every weekend. During the colder months and bad weather, this meant camping in our living room every Saturday night with sleeping bags and staying up late watching a family-friendly movie. Sunday mornings we make a special breakfast, usually of pancakes or egg sandwiches.

Backyard Camping

Now that the weather is warmer, we’re doing more backyard camping. Our large tent is nice and roomy for all of us to spread out - and the extra large screen areas on the top mean we can leave the rainflap off in nice weather so we can see the stars and watch the fireflies (which is what we typically do). It feels really magical and the kids love it!
When we set up the tent we typically try to camp for at least two nights in a row to get more out of it.

(Pro-tip: Put a doormat outside your tent to help keep grass and sand from getting tracked in - We purchased our mat from one of our favorite companies, Maine Rope Mats.)

Backyard Camping

We may be stuck at home, but that doesn’t mean we still can’t make special memories. I hope you can find a fun tradition to start at home during this time too - stay well!


KEEP UP WITH BIRCH LANDING HOME
|  Etsy  |  Facebook  |  Instagram  |  Pinterest  |  Bloglovin'  |  Hometalk  |

Cloth Face Mask Organization and Storage

We’re definitely living in different times right now… and it’s becoming clearer that it looks as though we will have to co-exist with the COVID-19 virus for the foreseeable future. Because of that anything we can do that might mitigate the risk of virus transmission, like always wearing face masks or face coverings when outside our homes, have become a part of our “new normal.” Since mask-wearing should be part of your new routine whenever you leave your house, it’s a good idea to have a system in place to make sure you always have clean masks at the ready and you never leave home without one. | This post contains affiliate links |

Cloth Face Mask Organization and Storage

Disclaimer: I am not giving medical advice. Make sure to always consult the CDC and local health officials for up-to-date recommendations on mask wearing, storage, and care. Cloth masks are not considered medical grade and should be washed in between each use… check with individual mask makers/companies on the best way to store/wash/care for your masks.

Mask Storage at Home

Cloth Face Mask Organization and Storage

It’s a good idea to keep your clean masks in a designated area of your home, preferably in a place where you’ll be sure to grab one on your way out the door to do errands, go to work, etc. At first glance it might look like we have a lot of masks, but we really don't considering we're a household of four and it's essential to have enough masks to get through between laundry loads. We're still staying home and social-distancing very seriously, but whenever we have to do an essential errand/appointment or just go for a drive to get out of the house, we always make sure to have a clean mask for everyone that’s leaving the house.

In our home, we've designated a special basket that sits up high on our mudroom shelf, full of clean masks. We put the adult masks towards the back, and then kids masks in the front. I was unable to find a basket the same size on Amazon to link to, but I did find this sleek bamboo box that looks to be the perfect size. If you don't have shelf space for a basket, you could alternatively use wall-mounted baskets for storage.
Our masks are a mix of ones made with love for us by family members, as well as ones purchased from Old Navy and Miss Harlow VT (one of the local makers I featured in my "Masks by New England Makers" blog post).

If you don't like the idea of using a basket like we do and would rather hang your masks by the door, another option would be using a small set of hooks such as a set of compact coat hooks or key rack - or even just simple Command Hooks.

Mask Storage On-The-Go

Cloth Face Mask Organization and Storage

We have found a slim wipes container is the perfect size for holding several face masks on-the-go! In fact, we always make sure to leave our case packed with an extra mask for each family member in the car. That way we're always covered if we forget one or need to change masks while we're out of the house.
I think this would be a great way to carry extra face masks in your bag for work, or your child's backpack whenever they return to school. It would probably be a good idea to also keep a ziplock bag or separate sealed container in your bag in case you have a dirty/used mask that needs to be brought home to wash.

th Face Mask Organization and Storage

And if you wanted to take it a step further and have an organzied mask system on-the-go to put in your work bag or child's backpack, you might want to consider having two cases - one for clean masks and one for dirty masks. I ordered these clear mask cases from Amazon and cut labels for them on my Cricut. We'll be packing one with extra clean masks, and the other will be empty for dirty masks to come home in. Since we recently invested in some better quality masks I wanted to make sure they stay in cases when not in use to keep them in good shape.

Cloth Face Mask Organization and Storage

Alternatively, if you don't have any slim wipes containers hanging around you could also use Small Craft Storage Cases , which come in clear and a variety of colors. This might be more cost effective too if you needed multiple cases - especially if you needed one or more cases for each family member, or if you were a teacher and wanted to make a case for each student in your class.

You can also easily label any of these cases with a label maker.

Cloth Face Mask Organization and Storage

We always make sure to keep the car stocked with our plastic case of extra face masks, hand sanitizer, and disinfectant wipes to help protect ourselves when we’re out doing errands.

Mask Care

Cloth Face Mask Organization and Storage

Always refer to individual mask makers/companies on the best way to care for each of your masks (hand wash only vs machine wash, line-dry vs dryer, etc.) But in general, all masks should be washed and allowed to thoroughly dry in between each use.

Since all of our masks are machine washable, we've found using a mesh lingerie laundry bag is perfect for keeping the masks from getting lost in the wash or caught on other items.

Quick Adjustment Tips

Quick Face Mask Adjustment Tip

If you feel like your face mask is a little large or isn’t fitting as closely to your face as you would like, you can typically adjust it very easily by making a small knot in the ear loop elastics (as shown above) to make it smaller.

There are also lots of options for "ear saver" or "mask adjustment" straps available out there, though we have not personally tried any ourselves yet.

Cloth Face Mask Organization and Storage:  Mask Lanyard

One mask accessory that we've found super helpful lately are Mask Lanyards. We personally use them most often when we're out hiking or going for a long walk, that way the time we're out alone we can keep our masks down, however in the event we see someone coming up we can easily put them on if we need to pass others on the trail. We made a point to choose lanyards that have a breakaway safety feature, but use at your own discretion/risk.

Disclaimer: I am not giving medical advice. Make sure to always consult the CDC and local health officials for up-to-date recommendations on mask wearing, storage, and care. Cloth masks are not considered medical grade and should be washed in between each use… check with individual mask makers/companies on the best way to store/wash/care for your masks.


Vaccination Card Protector

Vaccinated? You may want to consider getting a Vaccination Card Protector for your vaccine card to help keep them protected and clean at home or while you're traveling. These are nice because you can remove your vaccine card to record updates/boosters if needed.


Related posts:


Face Mask Storage Idea for School and Work

KEEP UP WITH BIRCH LANDING HOME
|  Etsy  |  Facebook  |  Instagram  |  Pinterest  |  Bloglovin'  |  Hometalk  |

Easy Bike Helmet Storage DIY

After getting sick of our family’s bike helmets constantly tumbling around the garage I thought it was high time we figure out a solution to keeping them corralled and within easy reach. The best part? It cost me nothing since I already had the hardware and scrap wood kicking around. | This post contains affiliate links |

This is the before…. the helmets usually got strewn about on our lumber rack because the shelves were too high for the kids to reach and it was a convenient spot by the back door. I could have made a low coat hook type rack for the helmets to hang from, but since the shelves and the wood rack are in the way all the available studs were blocked/used and I didn’t have anything to anchor into. So - I had to get creative. I decided to cut down some 1x3 scrap wood and anchor them from the bottom of the shelves to act as the back piece to the rack.

After cutting down the scraps and pre-drilling through the top of the wooden shelves, I simply screwed the back boards right into shelf from the top down.

After that, it was a simple matter of screwing in small hooks from which to hang the helmets from. I had a bunch of these small coat hooks left over from previous projects and they were perfect for this job. (I love these coat hooks because they're cheap and come in a big pack - great for adding random hooks around the house for keys, accessories, etc.)

The helmet rack has been working wonderfully and is a great, practical addition to our garage!

| Reflective Stickers we added to our helmets - these are also great for adding additional visibility to backpacks, jackets, bikes, gear, etc. |

KEEP UP WITH BIRCH LANDING HOME
|  Etsy  |  Facebook  |  Instagram  |  Pinterest  |  Bloglovin'  |  Hometalk  |

Sheet and Towel Stripping How-To

While home for Quarantine, I’ve seen a lot of people posting about “stripping” their towels and bedsheets and showing disgusting After photos of dirty water - I was intrigued! Stripping the linens is supposed to get rid of any kind of build-up on them (whether that’s laundry detergent, body oil/sweat, hard water mineral deposits, etc). So I decided to give it a try myself and share the easy process - and let me tell you, it was a disgusting and oddly satisfying Quarantine Project. | This post contains affiliate links |

Sheet and Towel Stripping How-To

Apparently one should consider stripping their linens when they aren’t as absorbent as they used to be, they look or feel dingy, or they start to smell musty.

Supplies:

Everyone seems to be using more or less the same supplies, which are:

  • 1/4 cup Borax Powder
  • 1/4 cup washing soda (or 1/4 cup baking soda if you're in a pinch and don't have washing soda.. I used baking soda)
  • 1/2 cup laundry detergent

How-To:

Fill a bath tub with hot water and dissolve the Borax, washing soda or baking soda, and laundry detergent in it. Next add your towels and sheets (make sure to only do similar colors together… in some cases it can cause some colors to run. We only have done our white and light colored linens so far.)

Then leave them to soak for the next four or so hours, stirring occasionally. You should see the water turn from clear to a gross yellowish-dirty color.

Once the water cools, drain the tub and squeeze the water from the linens, rinsing them with some fresh water. Then put in the washing machine (with no detergent - your items will already have absorbed detergent and Borax and you want to rinse everything out, not add more soap at this point), and run through the “wash” cycle to rinse everything out thoroughly.

After that you can put them in the dryer, or re-run the washing machine with detergent like you normally would to give them a fresh wash before drying.

Draining the dirty water after stripping. Ew.

Draining the dirty water after stripping. Ew.

Our Personal Results:

So it wasn’t the magical night-and-day change across the board that I was expecting, visually anyways - and some items definitely had better results than others. OVERALL - Our linens definitely felt cleaner, and looked a little brighter - however, our old white towels (which have turned very off-white over the years), did not magically turn luminous white again like I was hoping. But again, that’s probably too much to expect as they are 10+ years old and have had many years to get discolored in the regular laundry. Nevertheless, just SEEING the dirty water after we stripped the linens makes me feel a lot better about doing this process - visually not everything looks perfectly white again, but I KNOW it’s cleaner after removing all that invisible gunk and that makes me feel a lot better.

Okay, so the old white towels are still off-white, but I know they’re cleaner than before after seeing the dirty water after the stripping process.

Okay, so the old white towels are still off-white, but I know they’re cleaner than before after seeing the dirty water after the stripping process.

It’s my understanding that you can repeat this process as needed, and I can see myself doing this maybe up to 2-4x per year going forward to try to keep build-up at bay.

Disclaimer: Try at your own risk. In some cases this process may make colored fabrics run and may not be suitable for all fabrics.

Want to see another satisfyingly gross example…?

Here’s a photo my sister sent me after she did her sheets - wow!

Here’s a photo my sister sent me after she did her sheets - wow!


KEEP UP WITH BIRCH LANDING HOME
|  Etsy  |  Facebook  |  Instagram  |  Pinterest  |  Bloglovin'  |  Hometalk  |

DIY Ribbon and Trophy Display

It seems kind of weird and petty to write about fun DIY projects during a Pandemic, but maybe fun projects to work on at home is just what we need right now :) I did this project about two months ago when I was looking for a nice way to display our oldest’s growing collection of award ribbons and medals but couldn’t find a display setup that I liked or was remotely affordable.
The whole project was super easy and done start-to-finish within two days. Here’s hoping for things to go back to normal someday soon so she can continue to add to her award collection. | This post contains affiliate links |

DIY Ribbon and Trophy Display

Materials:

DIY Ribbon and Trophy Display

How-To:

First decide how long you want the overall shelf to be (in our case I decided on making it 3ft wide). Then cut your shelf top to that length.

(Nothing is screwed in yet here… just laying everything out to make sure it will fit like I want it to.)

(Nothing is screwed in yet here… just laying everything out to make sure it will fit like I want it to.)

Next decide how wide you want the shelf back to be - remember that the self back plus the brackets should fall within your overall shelf top length. Ultimately how long you cut the shelf back is your preference though. But visually I think that the shelf back and the brackets look best if they fall within about 2 inches of the shelf top on each side.

(Side note: If you have a router you can cut a dovetail channel along the back of the shelf back now to make for easier hanging… I do not have one of those handy so I skipped this step and will hang our shelf another way.)

Once you have everything laid out, cut your dowel to about 1/8” less than your shelf back length so it will fit comfortably within that space.

DIY Ribbon and Trophy Display

After everything is cut, I recommend sanding everything first before you assemble. I love using our orbital sander - it makes for quick work and does a nice job.

DIY Ribbon and Trophy Display

Next start assembling. Screw the shelf supports to the backing first, making sure everything is lined up and flush.

DIY Ribbon and Trophy Display

Next carefully center the shelf top, making sure it’s flush with the back and screw in.

DIY Ribbon and Trophy Display

Now for the fun part - paint! I did one coat of primer and then three coats of semi-gloss white paint, though you could choose any color you wish. I like semi-gloss paint since it has a slight sheen to it and is easier to dust and keep clean.

DIY Ribbon and Trophy Display

For hanging - first I measured this wall side-to-side to figure out where the shelf should fall within that space to be centered. Then I marked the studs with a stud finder.

To be honest I usually use two different kinds of stud finders when I have to hang something - I use a magnetic stud finder first to identify exactly where the stud is and then a digital one to find the edges of the stud. I’ve found that sometimes the digital ones can be finicky so it’s nice to know where the studs are first rather than get a false stud reading when it could be something else (a pipe, a thick area of plaster on the wall, etc).

Then using a level to make sure the shelf was level, I screwed directly into the wall studs through the shelf back making sure to place the screws where they would be hidden by the dowel once I installed it.

DIY Ribbon and Trophy Display

Next I hung the dowel by centering it and adding a simple hook to support it on each side, as shown above (this also hides the screws I used to hang it). And now the project is finished and ready to display ribbons, medals, and trophies!

DIY Ribbon and Trophy Display

To hang the ribbons and medals you can easily lift the dowel up and string them on, or loop them around the dowel like I did here.

I hope you liked the project and we look forward to when this Pandemic is over and there will be sport and fair ribbon awards again - stay well!

DIY Ribbon and Trophy Display

UPDATE:

Years later our kids are still using the DIY Ribbon and Trophy Displays but they’re getting a little full. In order to spread things out a bit I bought these simple medal holders (similar one linked), so they could hang their medals on these and keep the DIY Display just for their ribbons/trophies. It’s working great!


Similar Posts:


KEEP UP WITH BIRCH LANDING HOME
|  Etsy  |  Facebook  |  Instagram  |  Pinterest  |  Bloglovin'  |  Hometalk  |