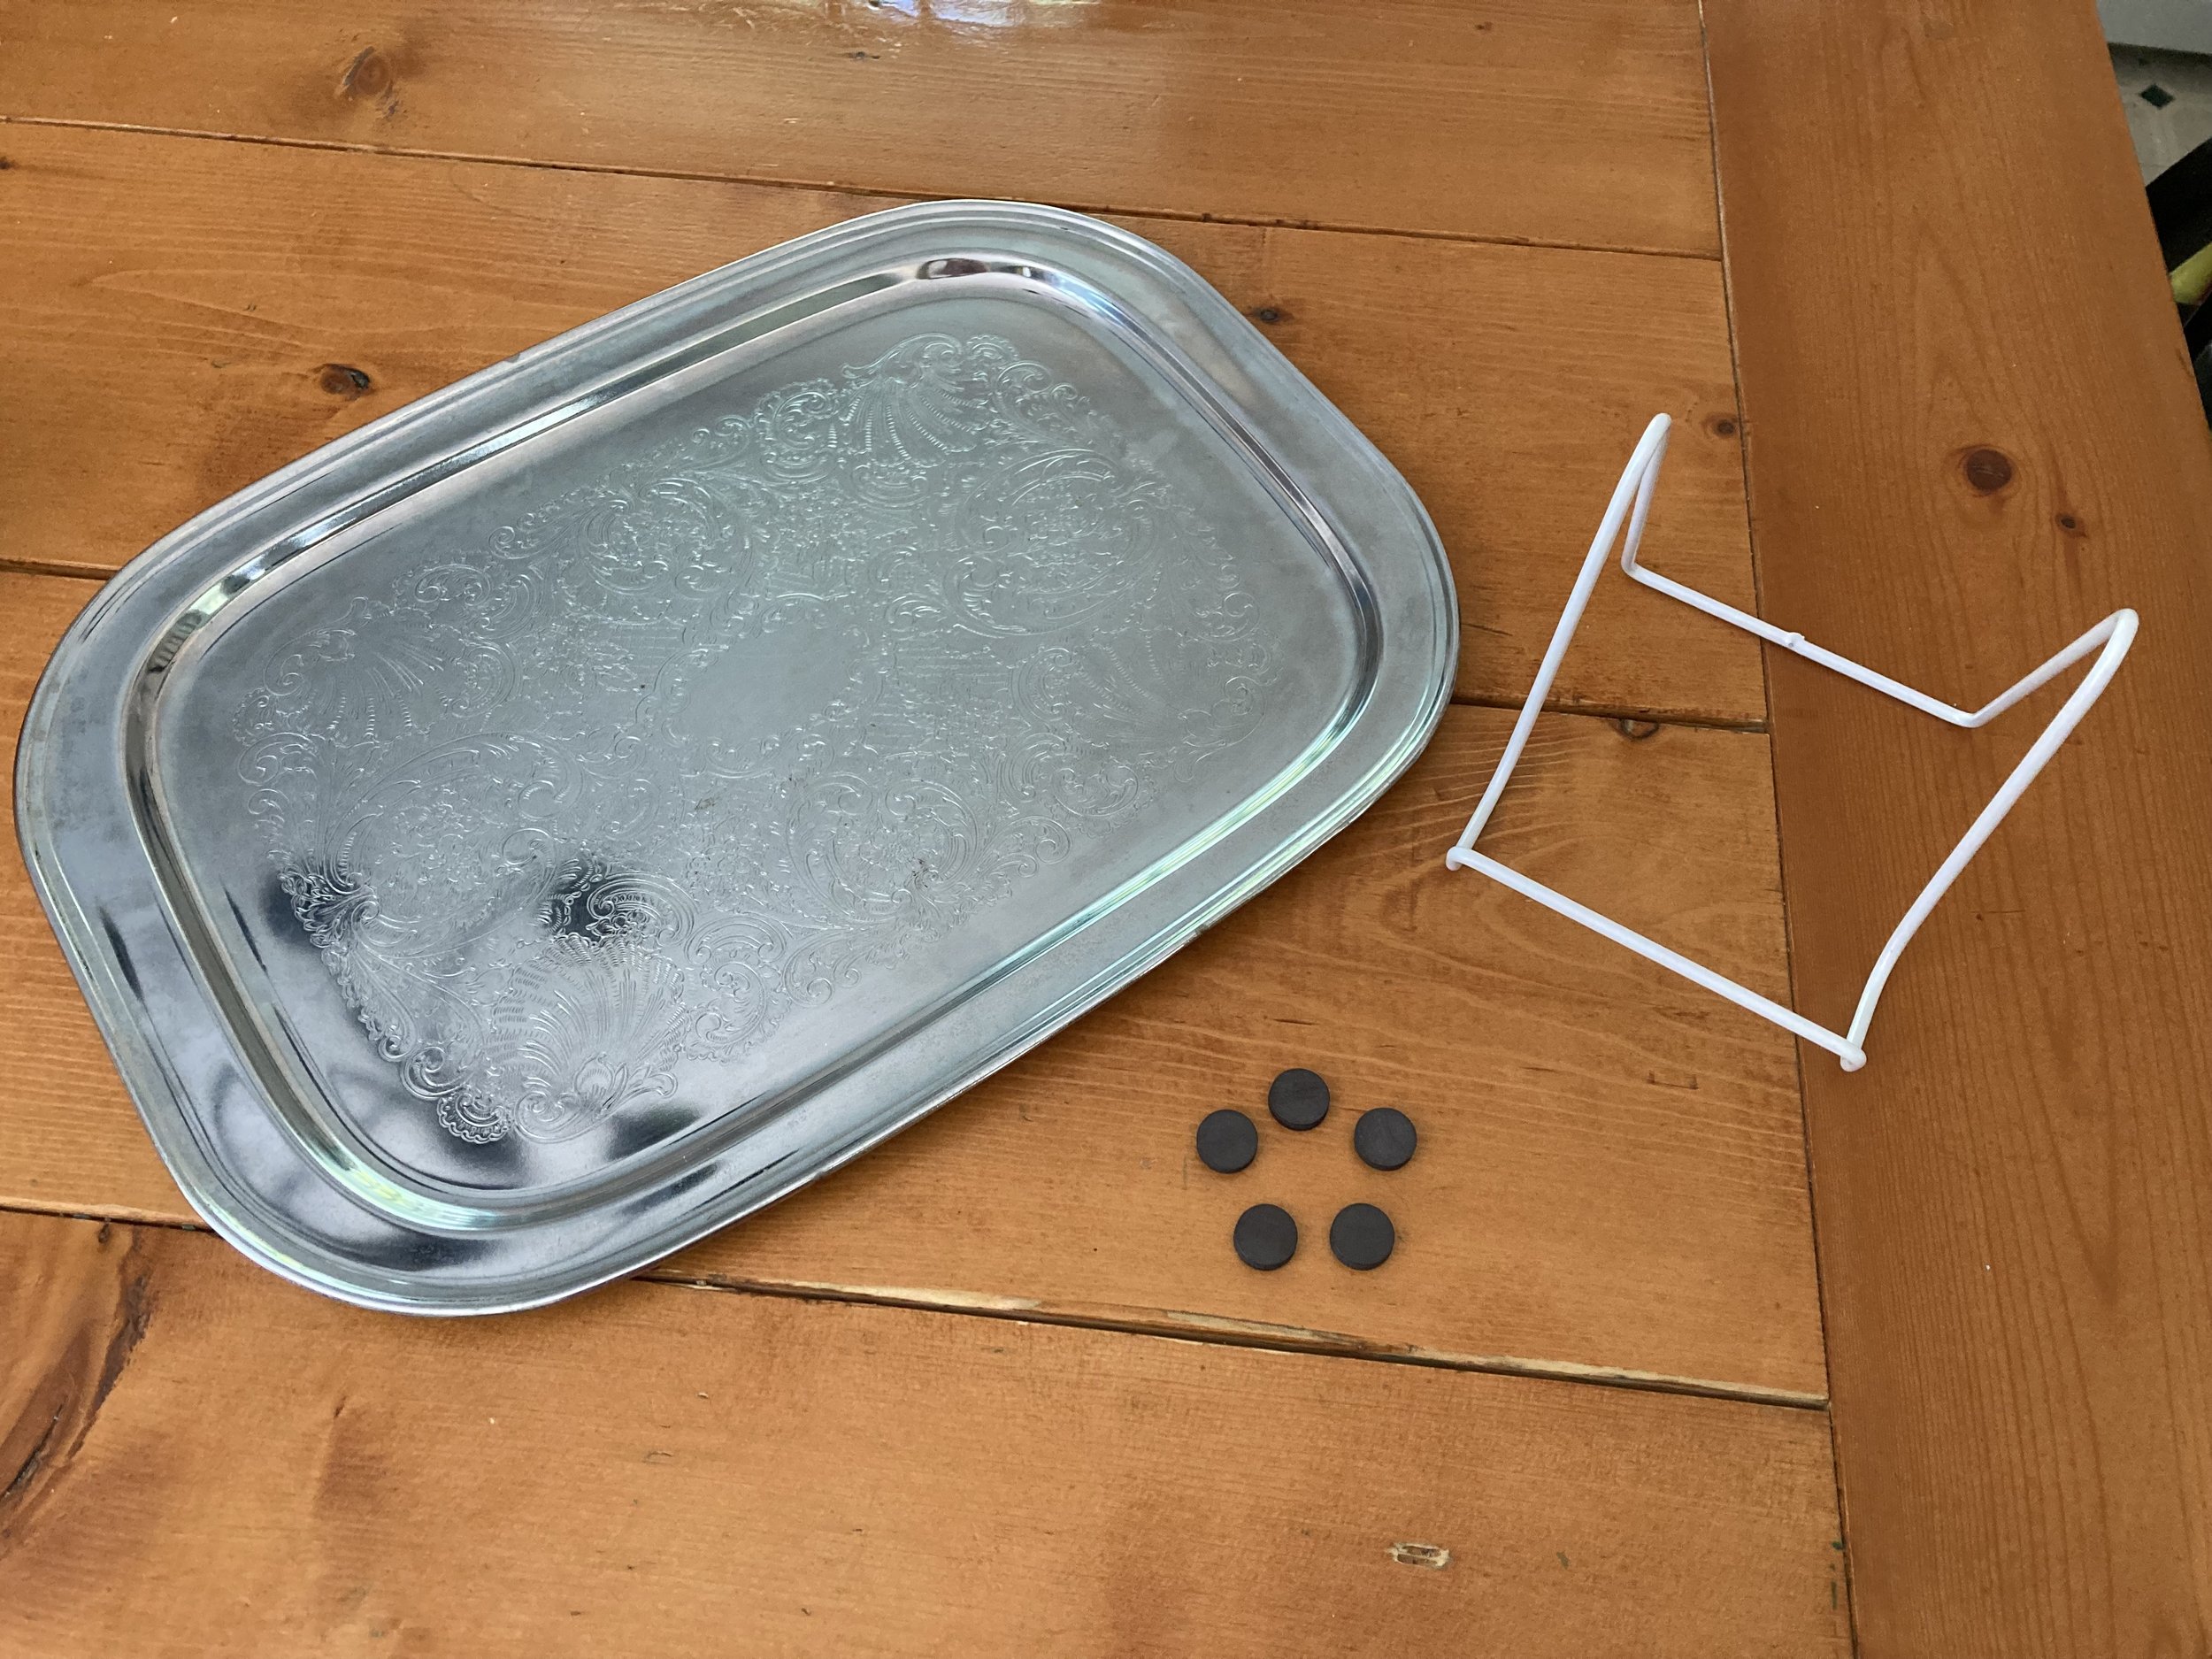
We’ve been slowly helping to clean out a family member’s attic and came across this old heavy “silver” (not actually silver) serving tray. Since not many people still use serving trays I thought it might be fun to repurpose it into something else - and since it seems to be made of some kind of steel (therefore magnetic), I thought it would make a fun magnetic memo board! | This post contains affiliate links |
- Vintage metal tray (check to make sure it's magnetic)
- plate stand big enough to support the tray (similar size stand linked)
- magnets
How To:
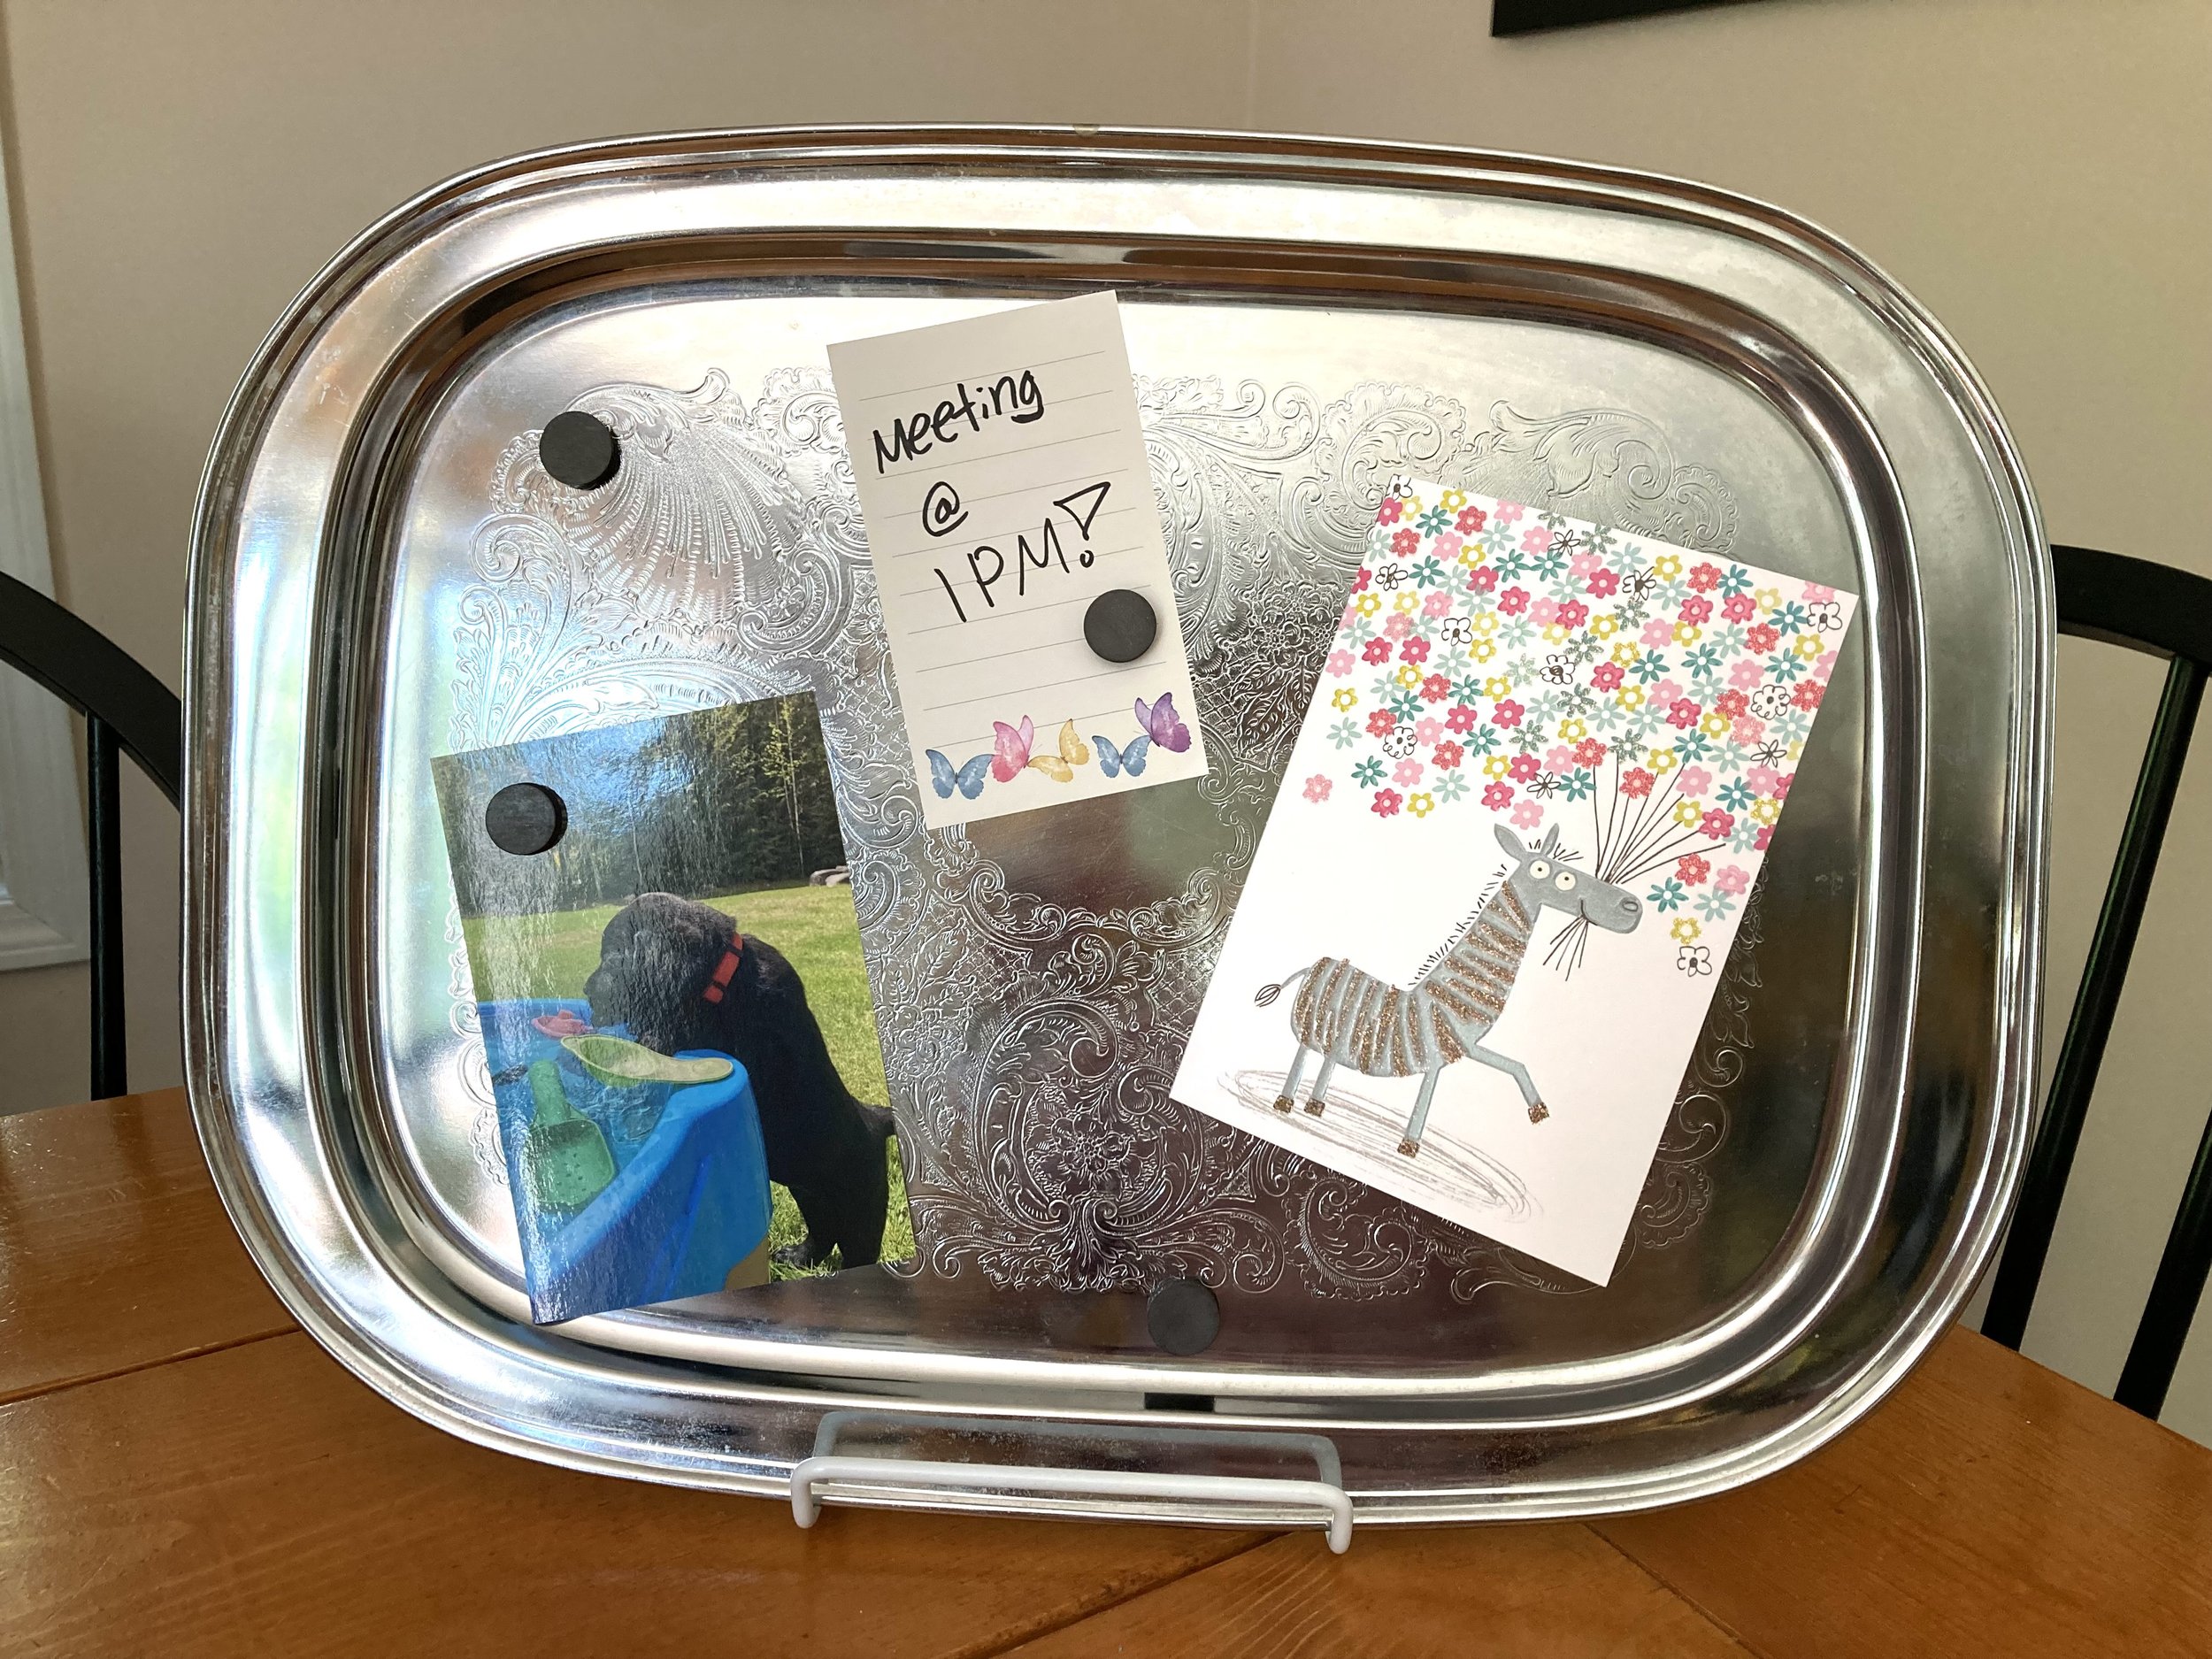
Really the how-to for this project could not be easier! Rest that serving tray on a plate stand that’s big enough/sturdy enough to support it, add some magnets, and BAM, you’re done! I think this project would look so cute on a dresser in a bedroom, a feminine office space, or on a desk nook in the kitchen. It can be used to hold reminders, photos, thank you notes, recipes, mementos, and more.
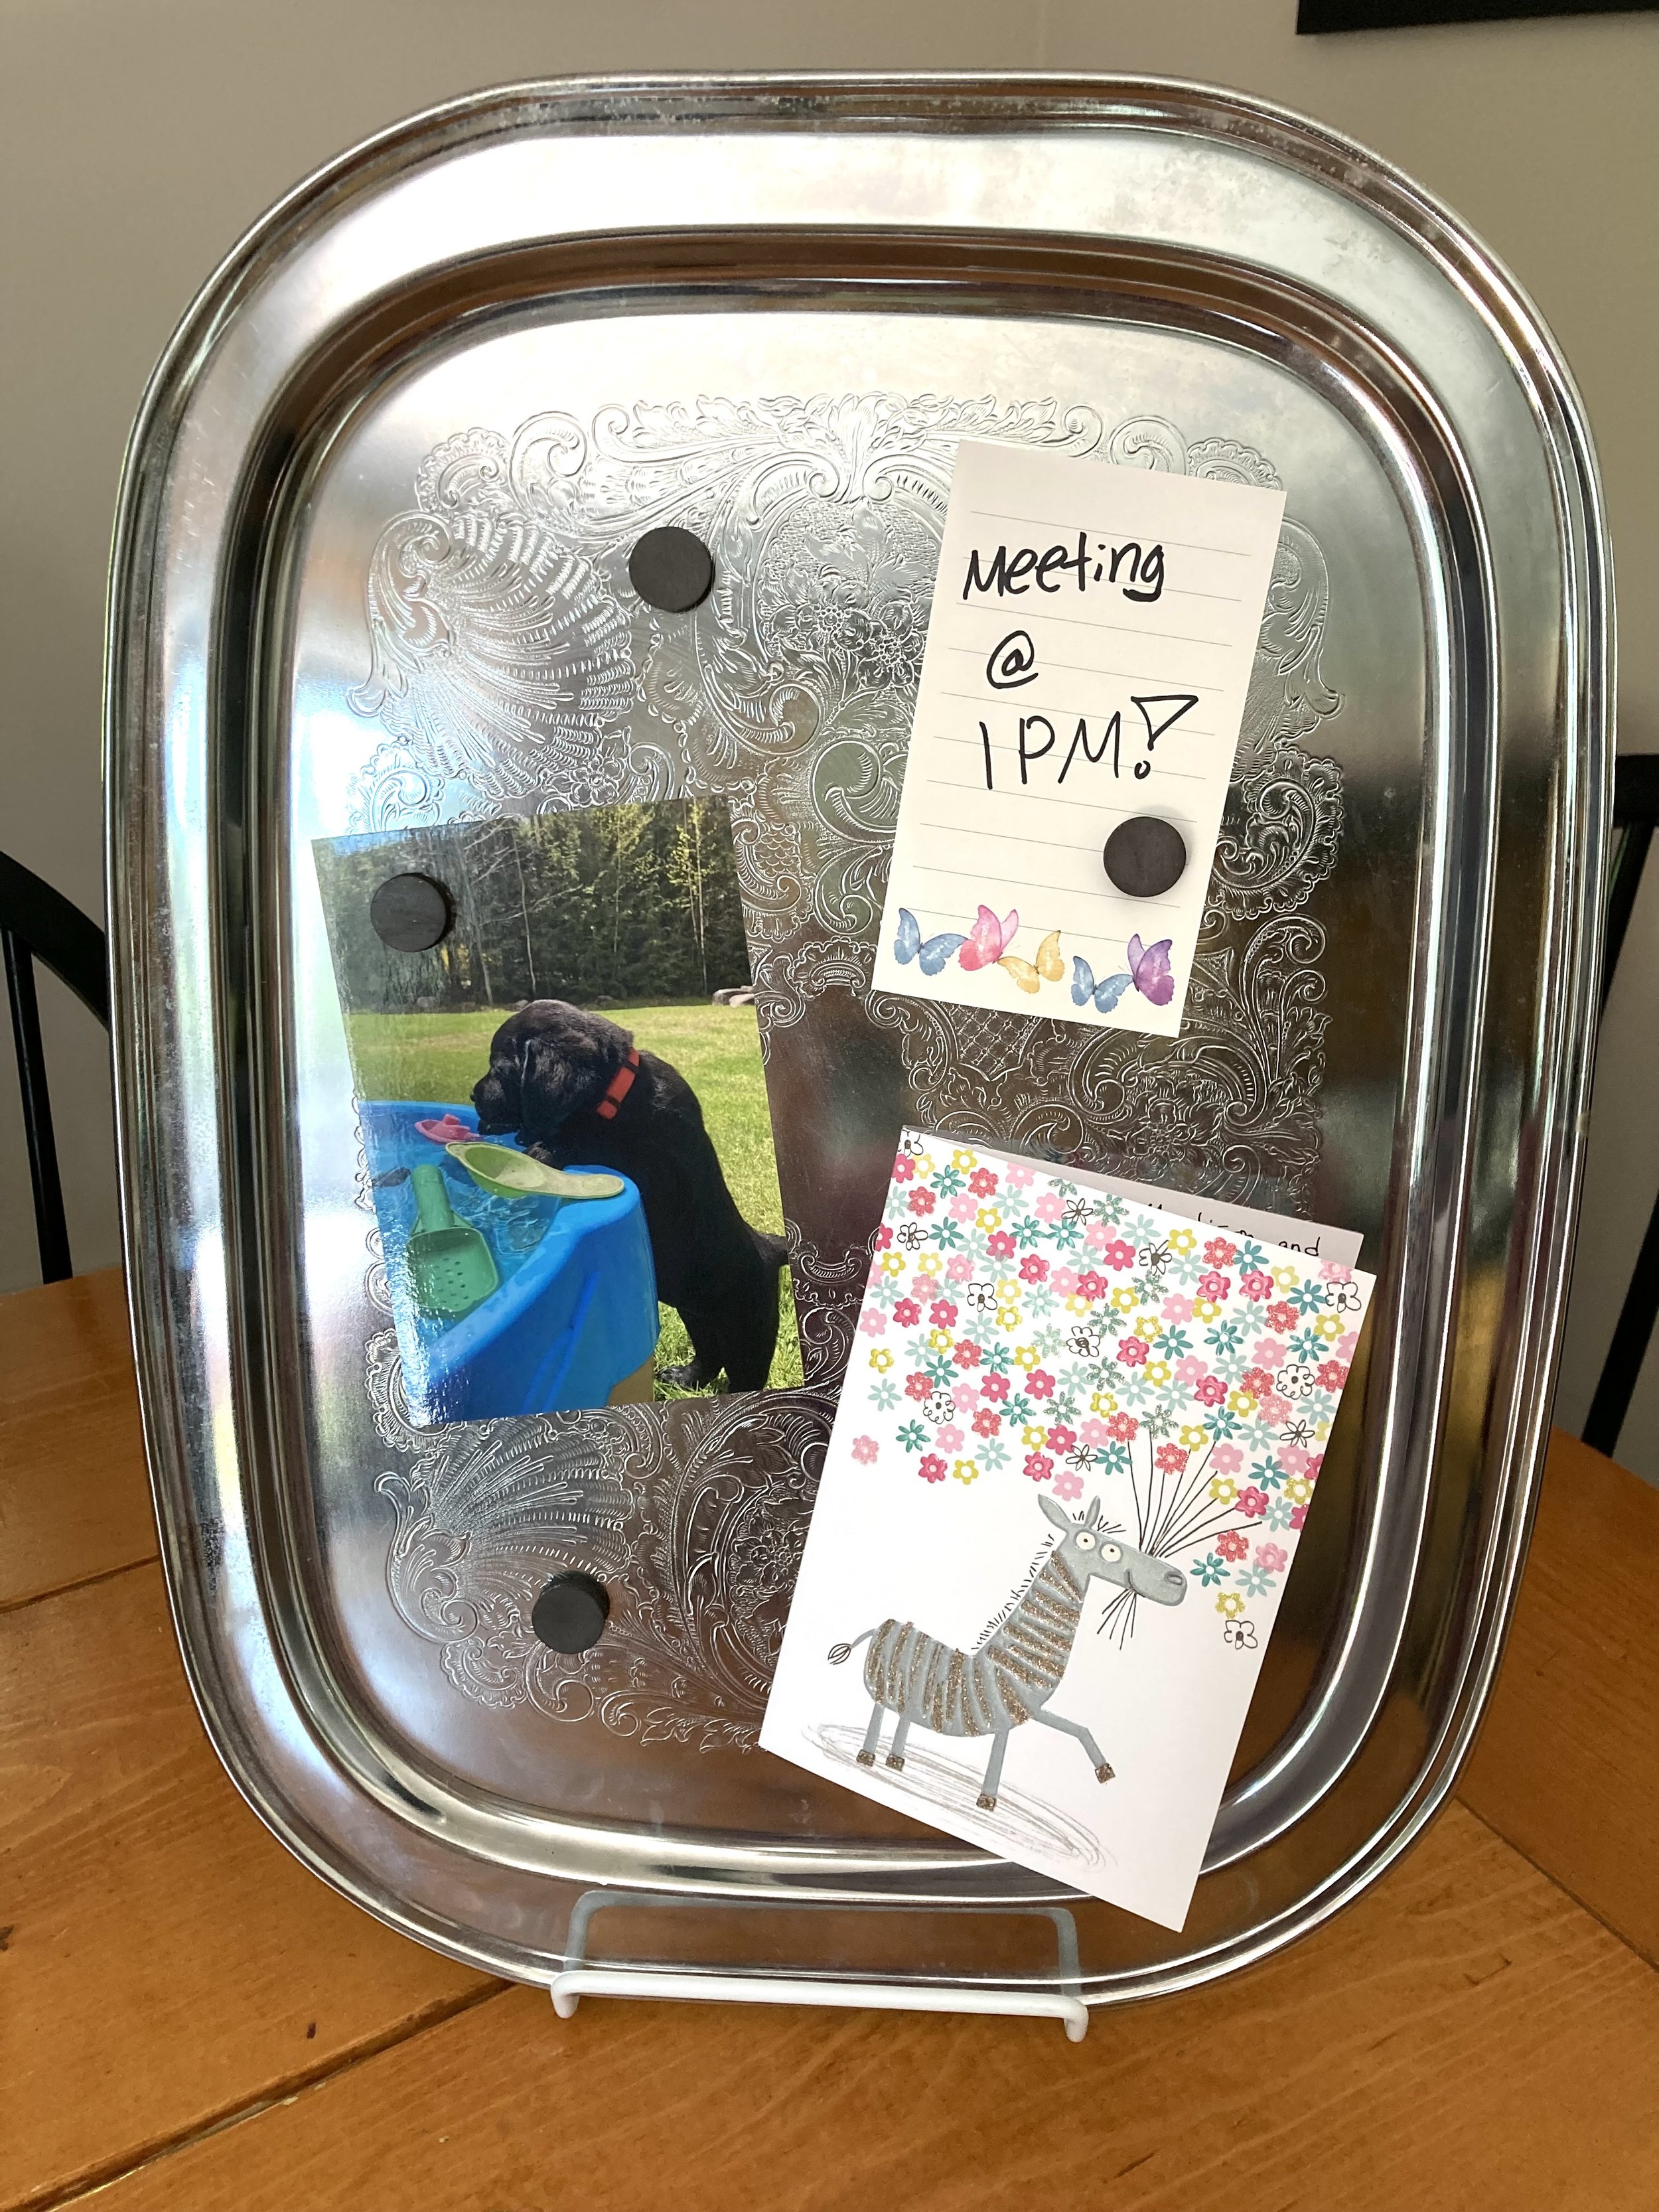
And if the horizontal orientation isn’t working for your space, just turn the tray and you instantly have a vertical memo board!
If you wanted to hang the tray on a wall instead, you could try using a tray hanger. Just make sure to buy the correct size hanger for your tray and make sure it's rated to support the weight of it.
PS - looking for vintage items like the serving tray in this post? Be sure to check out our Etsy Shop for some fun vintage finds! Our inventory is always changing so check back often :)
KEEP UP WITH BIRCH LANDING HOME
| Etsy | Facebook | Instagram | Pinterest | Bloglovin' | Hometalk |
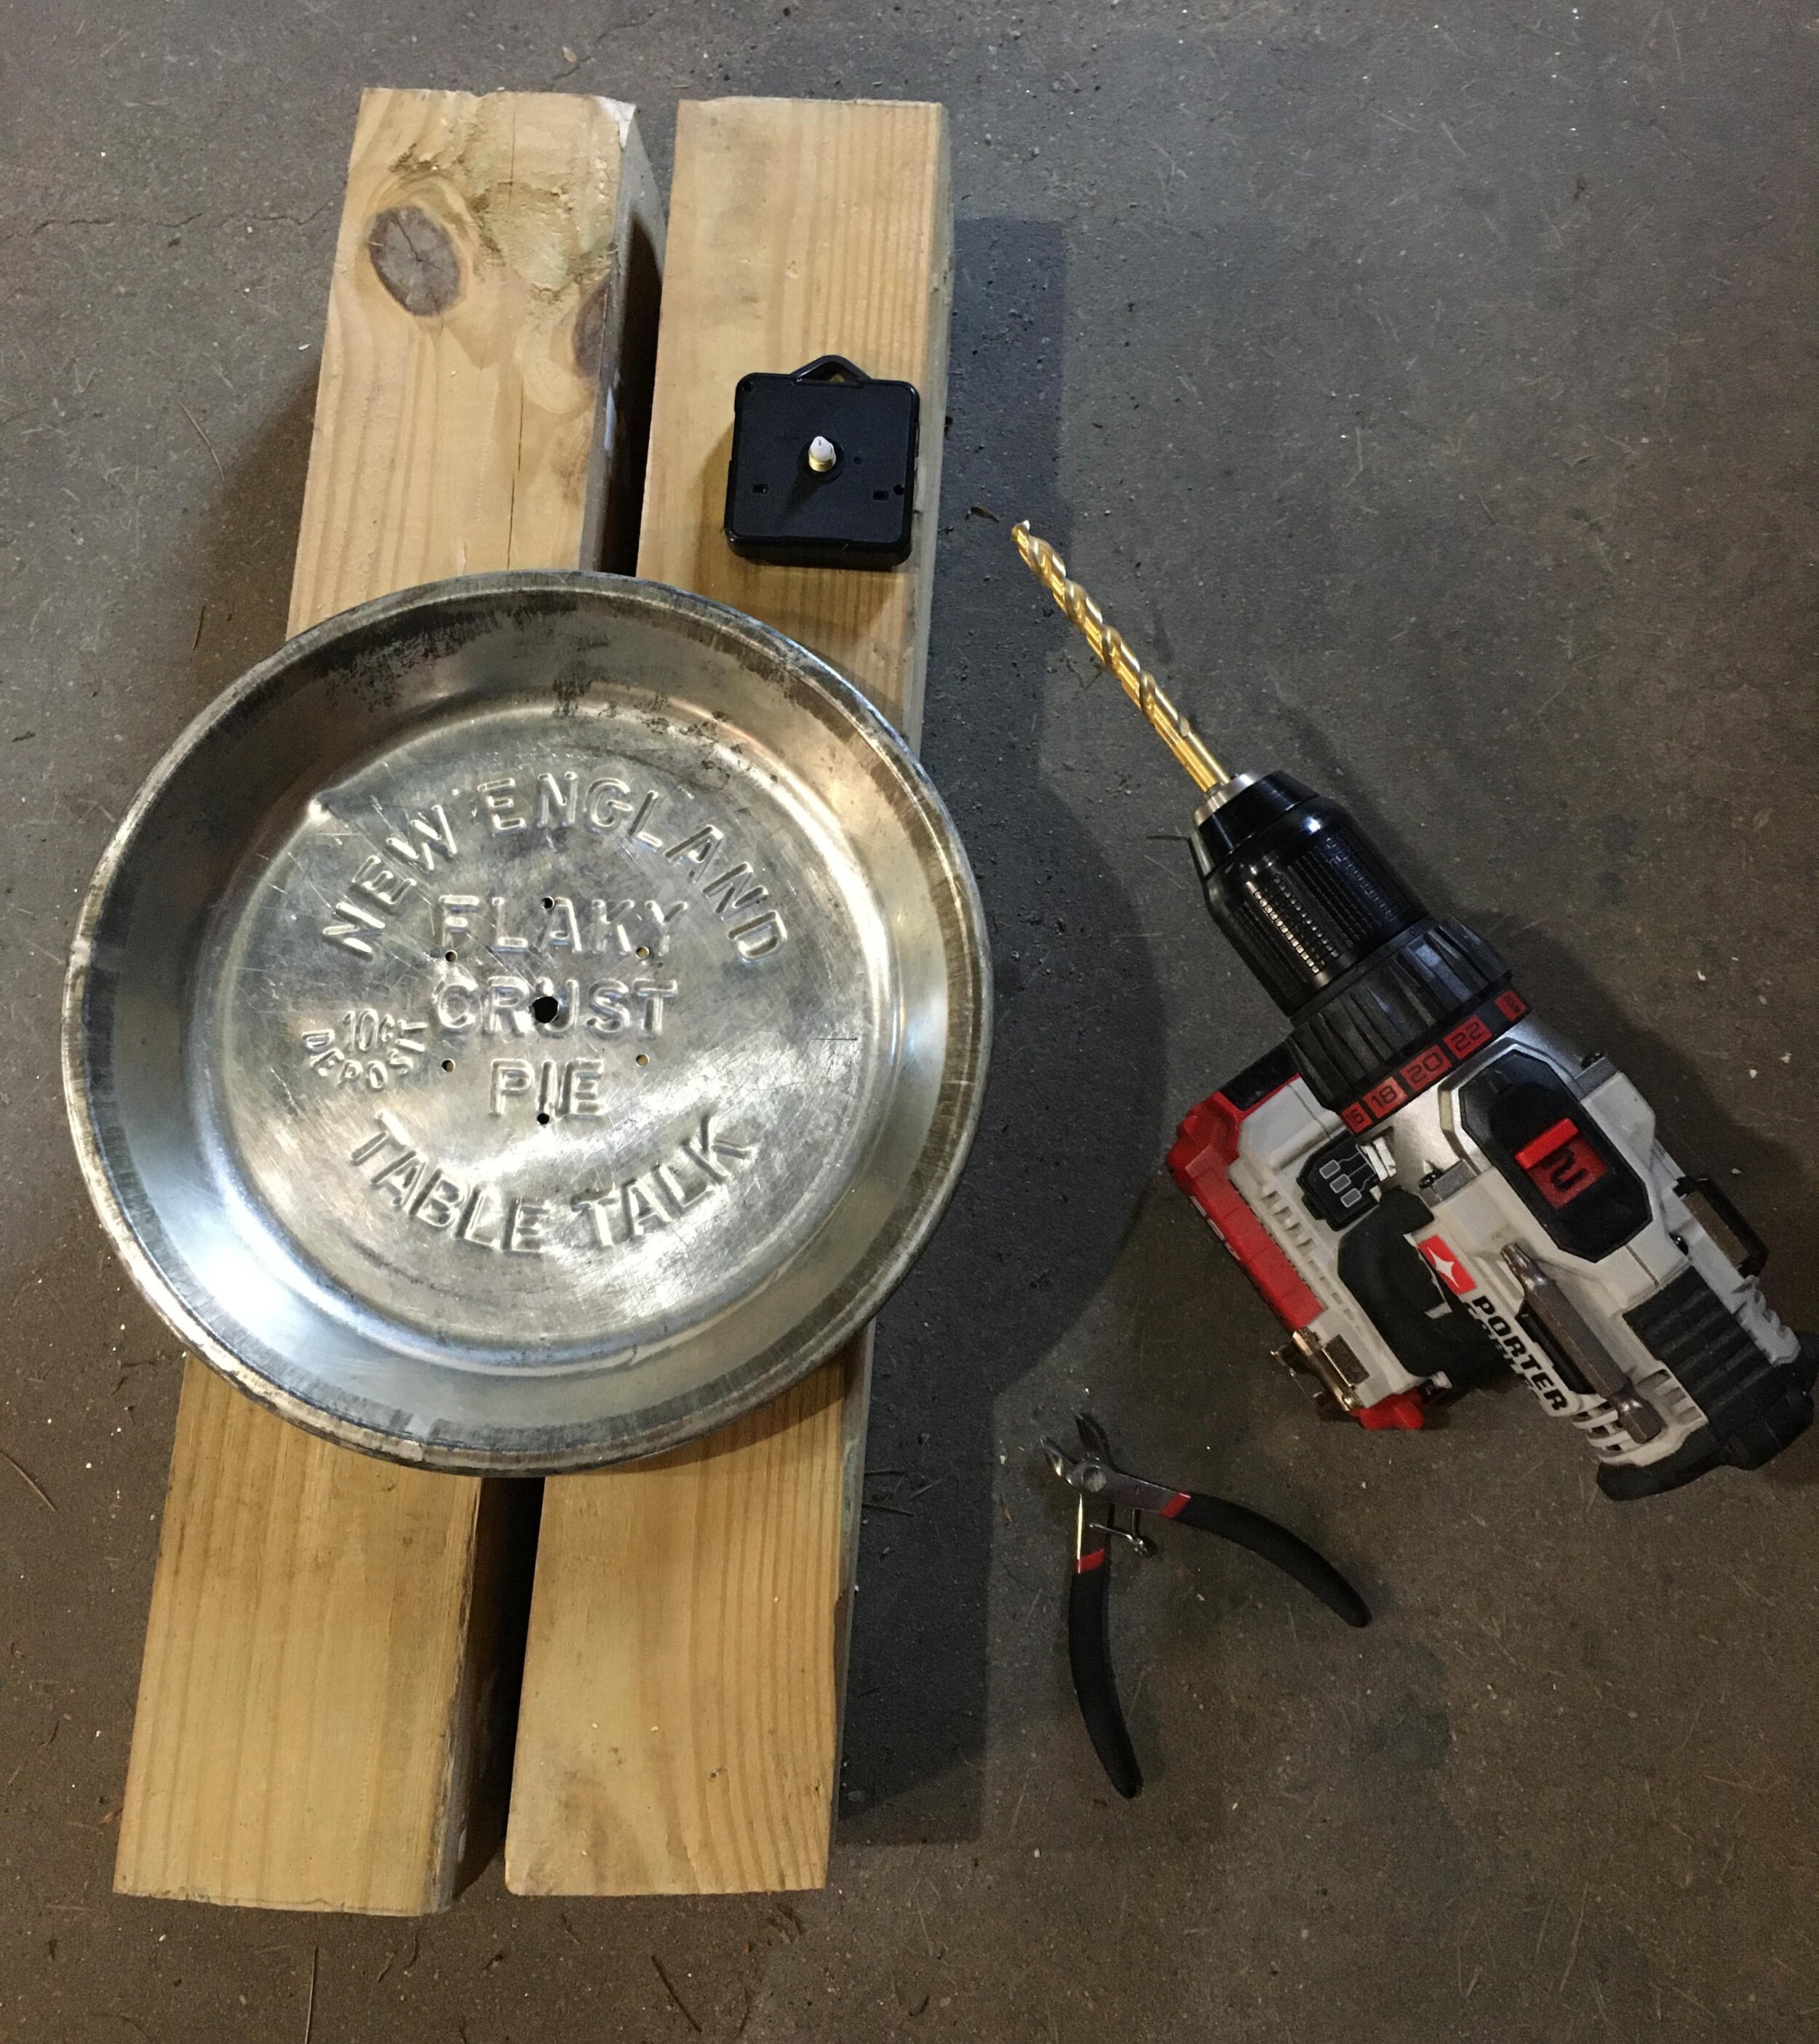
Rummaging around in my parents basement a few weeks ago, I stumbled across a stack of Vintage Table Talk Pie Tins that had been my Grandmother’s. Back in the day (approximately the 1930’s-1950’s), people would buy these store-bought pies with an extra 10 cent deposit that would be reimbursed if you returned the clean pie tin back to the store… but apparently my Grandmother chose not to, haha. These pie tins were a fun vintage find, and sentimental because they had once belonged to her. Since we didn’t have a kitchen clock I figured turning one of these tins into a clock would be a fun idea - and here’s how I did it. | This post contains affiliate links |
The first step to creating your clock is to purchase a clock kit that has the right diameter hands for your pie tin, so when they are mounted in the center of the tin they can move freely all around the face without touching the sides (very important).
After some measuring and browsing around on Amazon, I settled on this Mudder Clock Kit - I liked the style of the hands and they would fit perfectly in my particular pie tin.
Next, carefully measure to find the center of the pie tin and poke a pilot hole through with a small nail and hammer. After that, make sure your pie tin is well supported and on a safe area for drilling (I used some scrap 4x4 posts as a work station). Then carefully drill out your hole, starting with your smallest drill bit.
In order not to “rip” the tin, it’s very important to start small and work your way up in drill bit size. I started with the smallest drill bit and then worked my way up, using every-other-drill bit in the set going up in size order.
If you get a large burr, carefully cut it off with a pair of small wire cutters before you move up to your next drill bit size.
Please note: Keep in mind that these pieces of tin are SHARP so use care and be mindful of the metal shavings you may drop while drilling. Make sure to clean up the shavings well after your project is done.
Periodically check to see if the threaded clock mechanism can pass through your hole yet. For this clock kit, I needed to jump up to a larger drill set in order to finally work my way up to the size hole I needed (in this case it was a 5/16” drill bit).
Once the hole is the correct size, use a round file to clean up any little burrs around the edge.
Now it’s time to assemble your clock - follow the manufacturer’s directions on the best way to assemble the clock hands for your particular kit. Keep in mind that clock kits and especially the hands are VERY delicate so take care assembling them.
Once your clock is assembled, install the battery and set the time - now you can enjoy your new Vintage Pie Tin Clock!
Are you interested in making your own Vintage Pie Tin Clock but need a pie tin?
I’m selling some extra pie tins* in my Etsy shop, click the button below to shop:
*Please note the tins I have listed for sale may vary slightly in size and style from the one I made my Pie Tin Clock with.
Other posts you might enjoy from Birch Landing Home:
KEEP UP WITH BIRCH LANDING HOME
| Etsy | Facebook | Instagram | Pinterest | Bloglovin' | Hometalk |
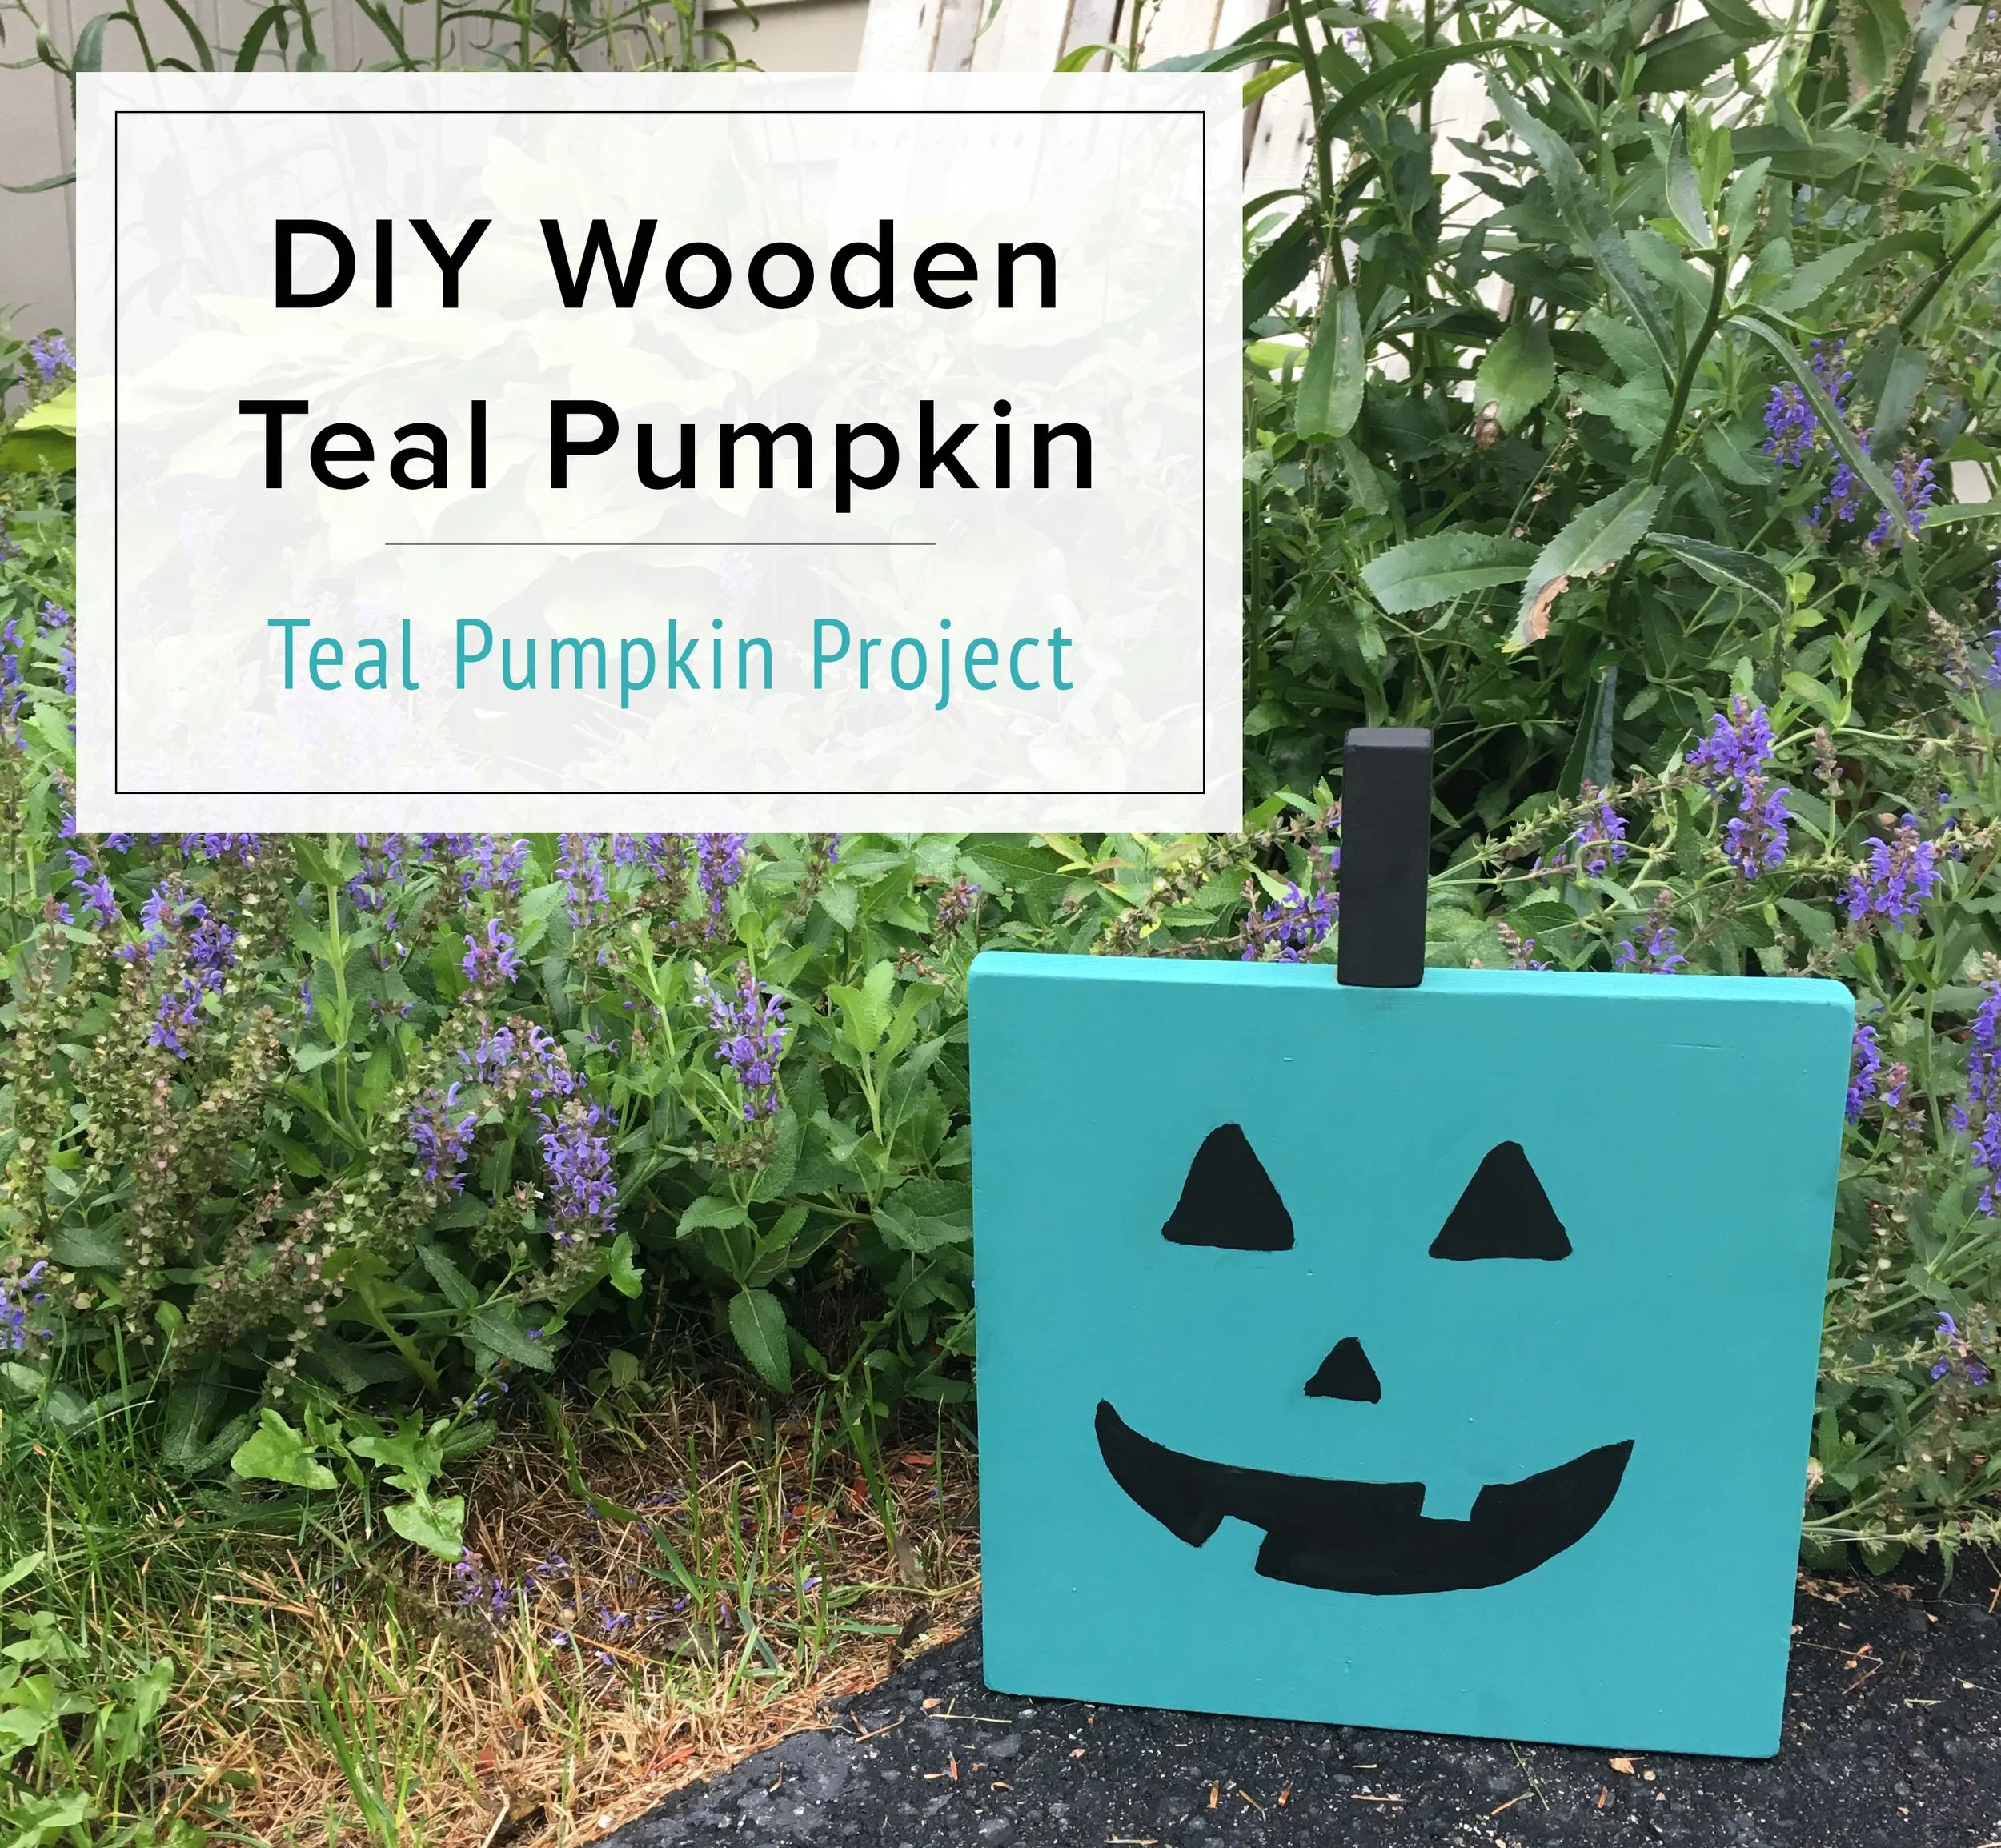
Every Halloween we participate in the Teal Pumpkin Project to promote awareness and inclusion of all trick-or-treaters, no matter their dietary restrictions. Unfortunately a lot of kids have food allergies, ranging from mild to potentially very dangerous. These allergies can include dairy, chocolate, nuts, soy, gluten, artificial dyes, and more. These kids either can't participate in trick-or-treat or have to throw out most of what they get - and when you're a kid that's really rough.
| This post contains affiliate links |
By having a teal pumpkin out, you're letting kids and their parents know that your house is a safe place to trick-or-treat and you have non-food items available. These can be things like novelty pencils, erasers, stickers, bubbles, crayons, small toys, etc. You can still give out the usual candy, but it's a good idea to keep the non-food items separate. This is a great project to allow all kids a chance to feel included in trick-or-treat on Halloween.
We usually paint a real pumpkin teal each year, but this year the squirrels and chipmunks have been eating all the decorations we put out on our porch (*shakes fist*). So yesterday afternoon during nap time I whipped up a Wooden Teal Pumpkin that can be used for many years to come. And the best part? It cost me NOTHING! I made it all with scraps from our wood bin and paint we already had.
Materials:
How to:
1. Cut your wood scraps down to size if necessary. You need one larger piece for the face, one small piece for the stem, and a piece for the support at the back (the support piece does not have to be triangular, that’s what I happened to have though).
2. Next attach the support piece of wood to the back of the large piece with a screw or nail.
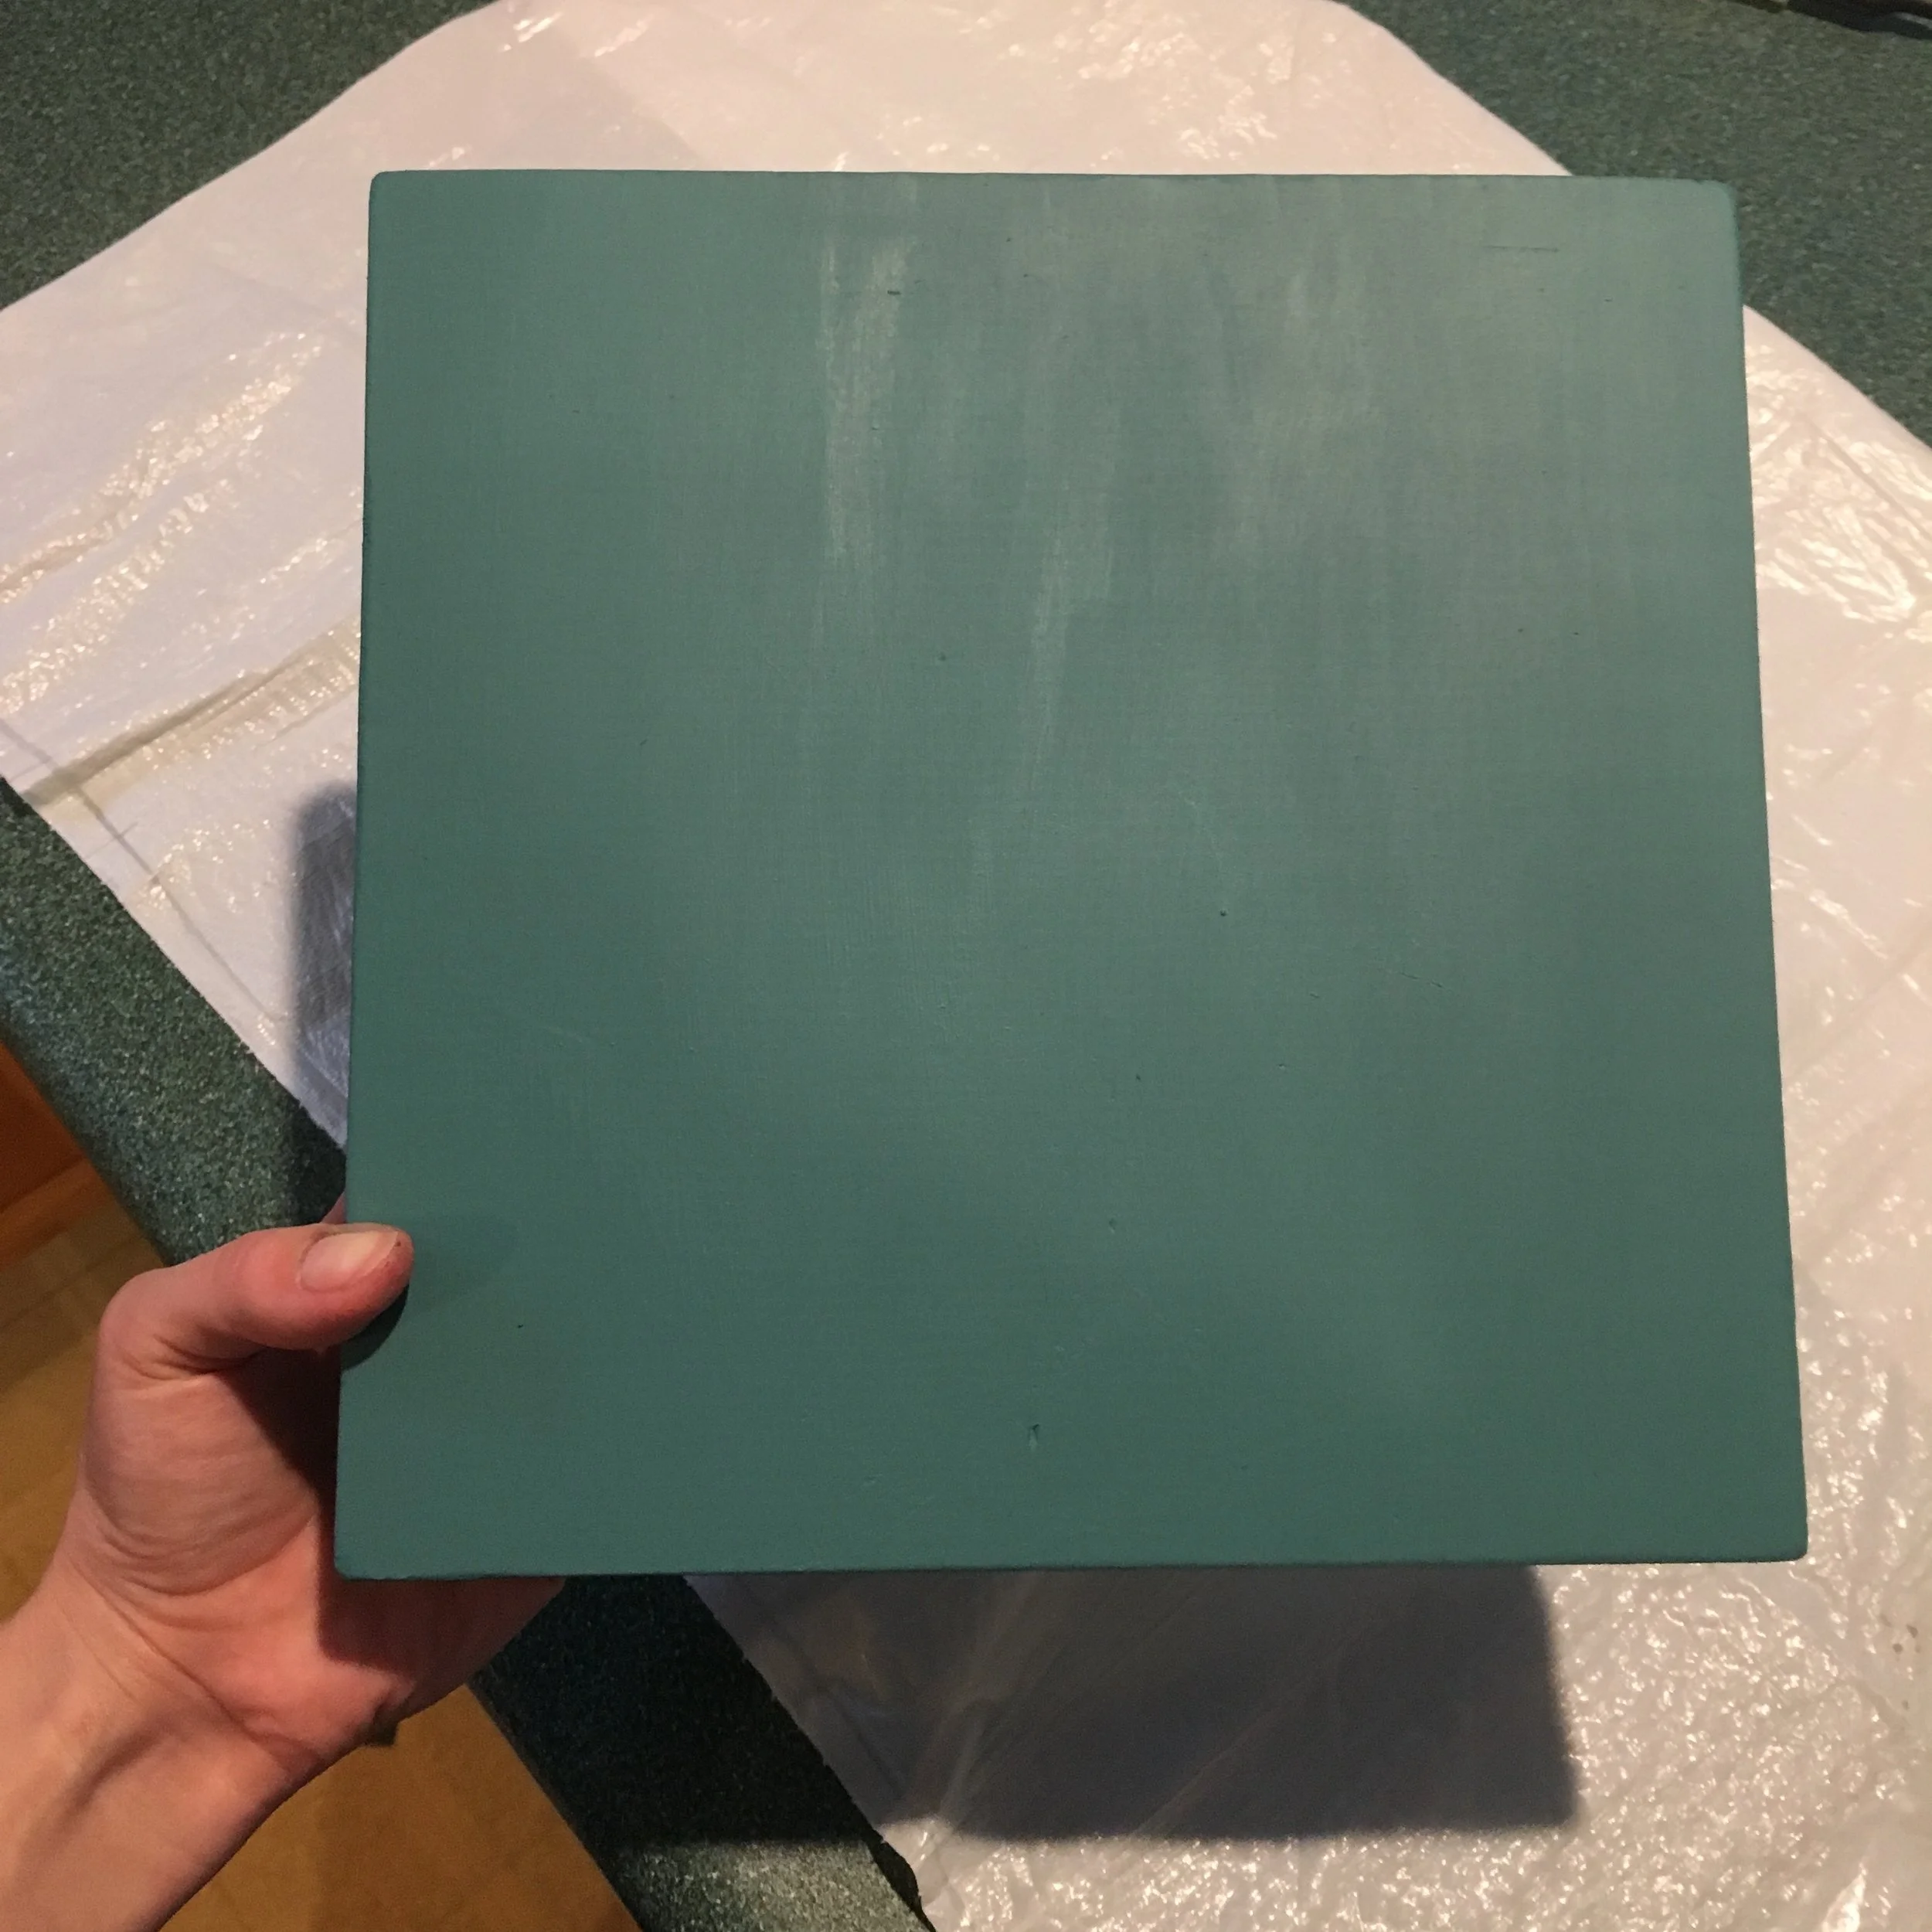
3. After that, give it at least two coats of teal paint. Paint it all over, including the sides and back.
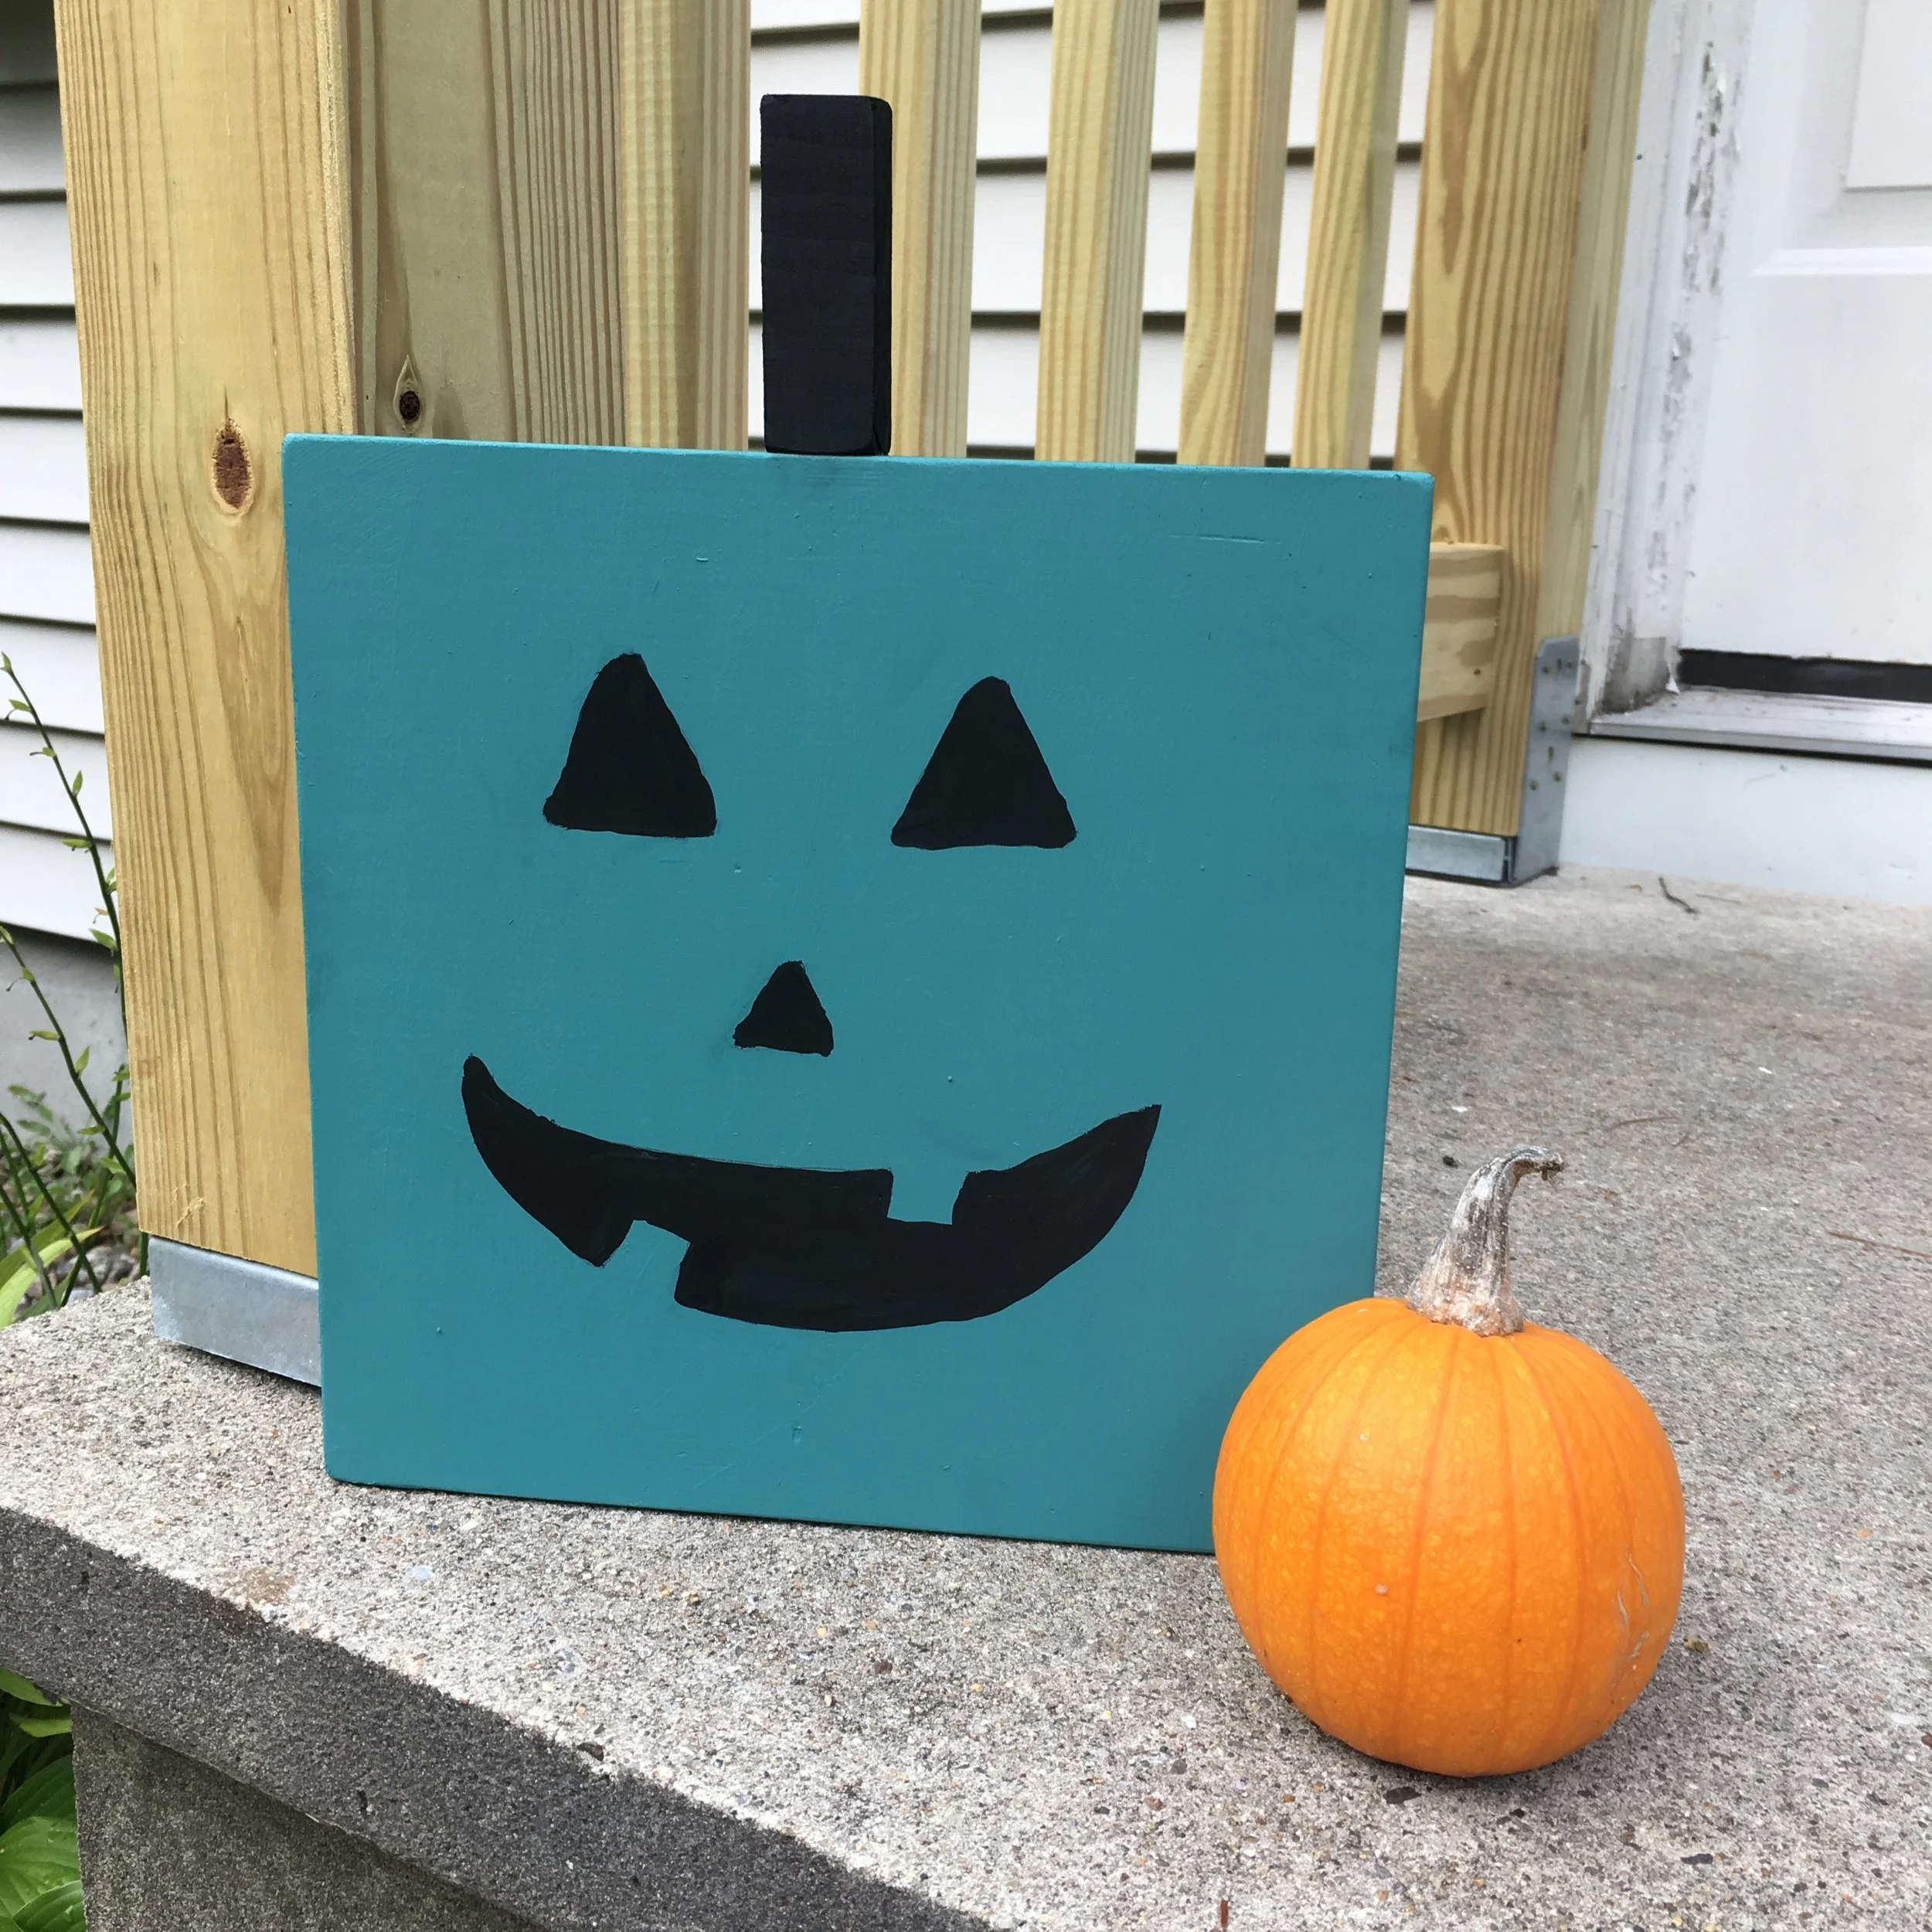
4. Once that’s dry, use black paint to paint a jack-o-lantern face on it and paint the stem piece black as well.
5. Once everything is dry use wood glue to attach the stem to the top of the pumpkin and give a good spray of clear sealer if you’ll be putting it out not under the cover of a porch, etc.
And that’s it! Now you’re ready to put your teal pumpkin out to welcome all kids for Halloween. Happy Halloween!
FARE (Food Allergy Research & Education) has some wonderful resources on their website - including crowdsourcing maps to identify participating houses, printables you can use to proudly show your support and educate others, and fundraising opportunities to help fund food allergy research and awareness.
KEEP UP WITH BIRCH LANDING HOME
| Etsy | Facebook | Instagram | Pinterest | Bloglovin' | Hometalk |
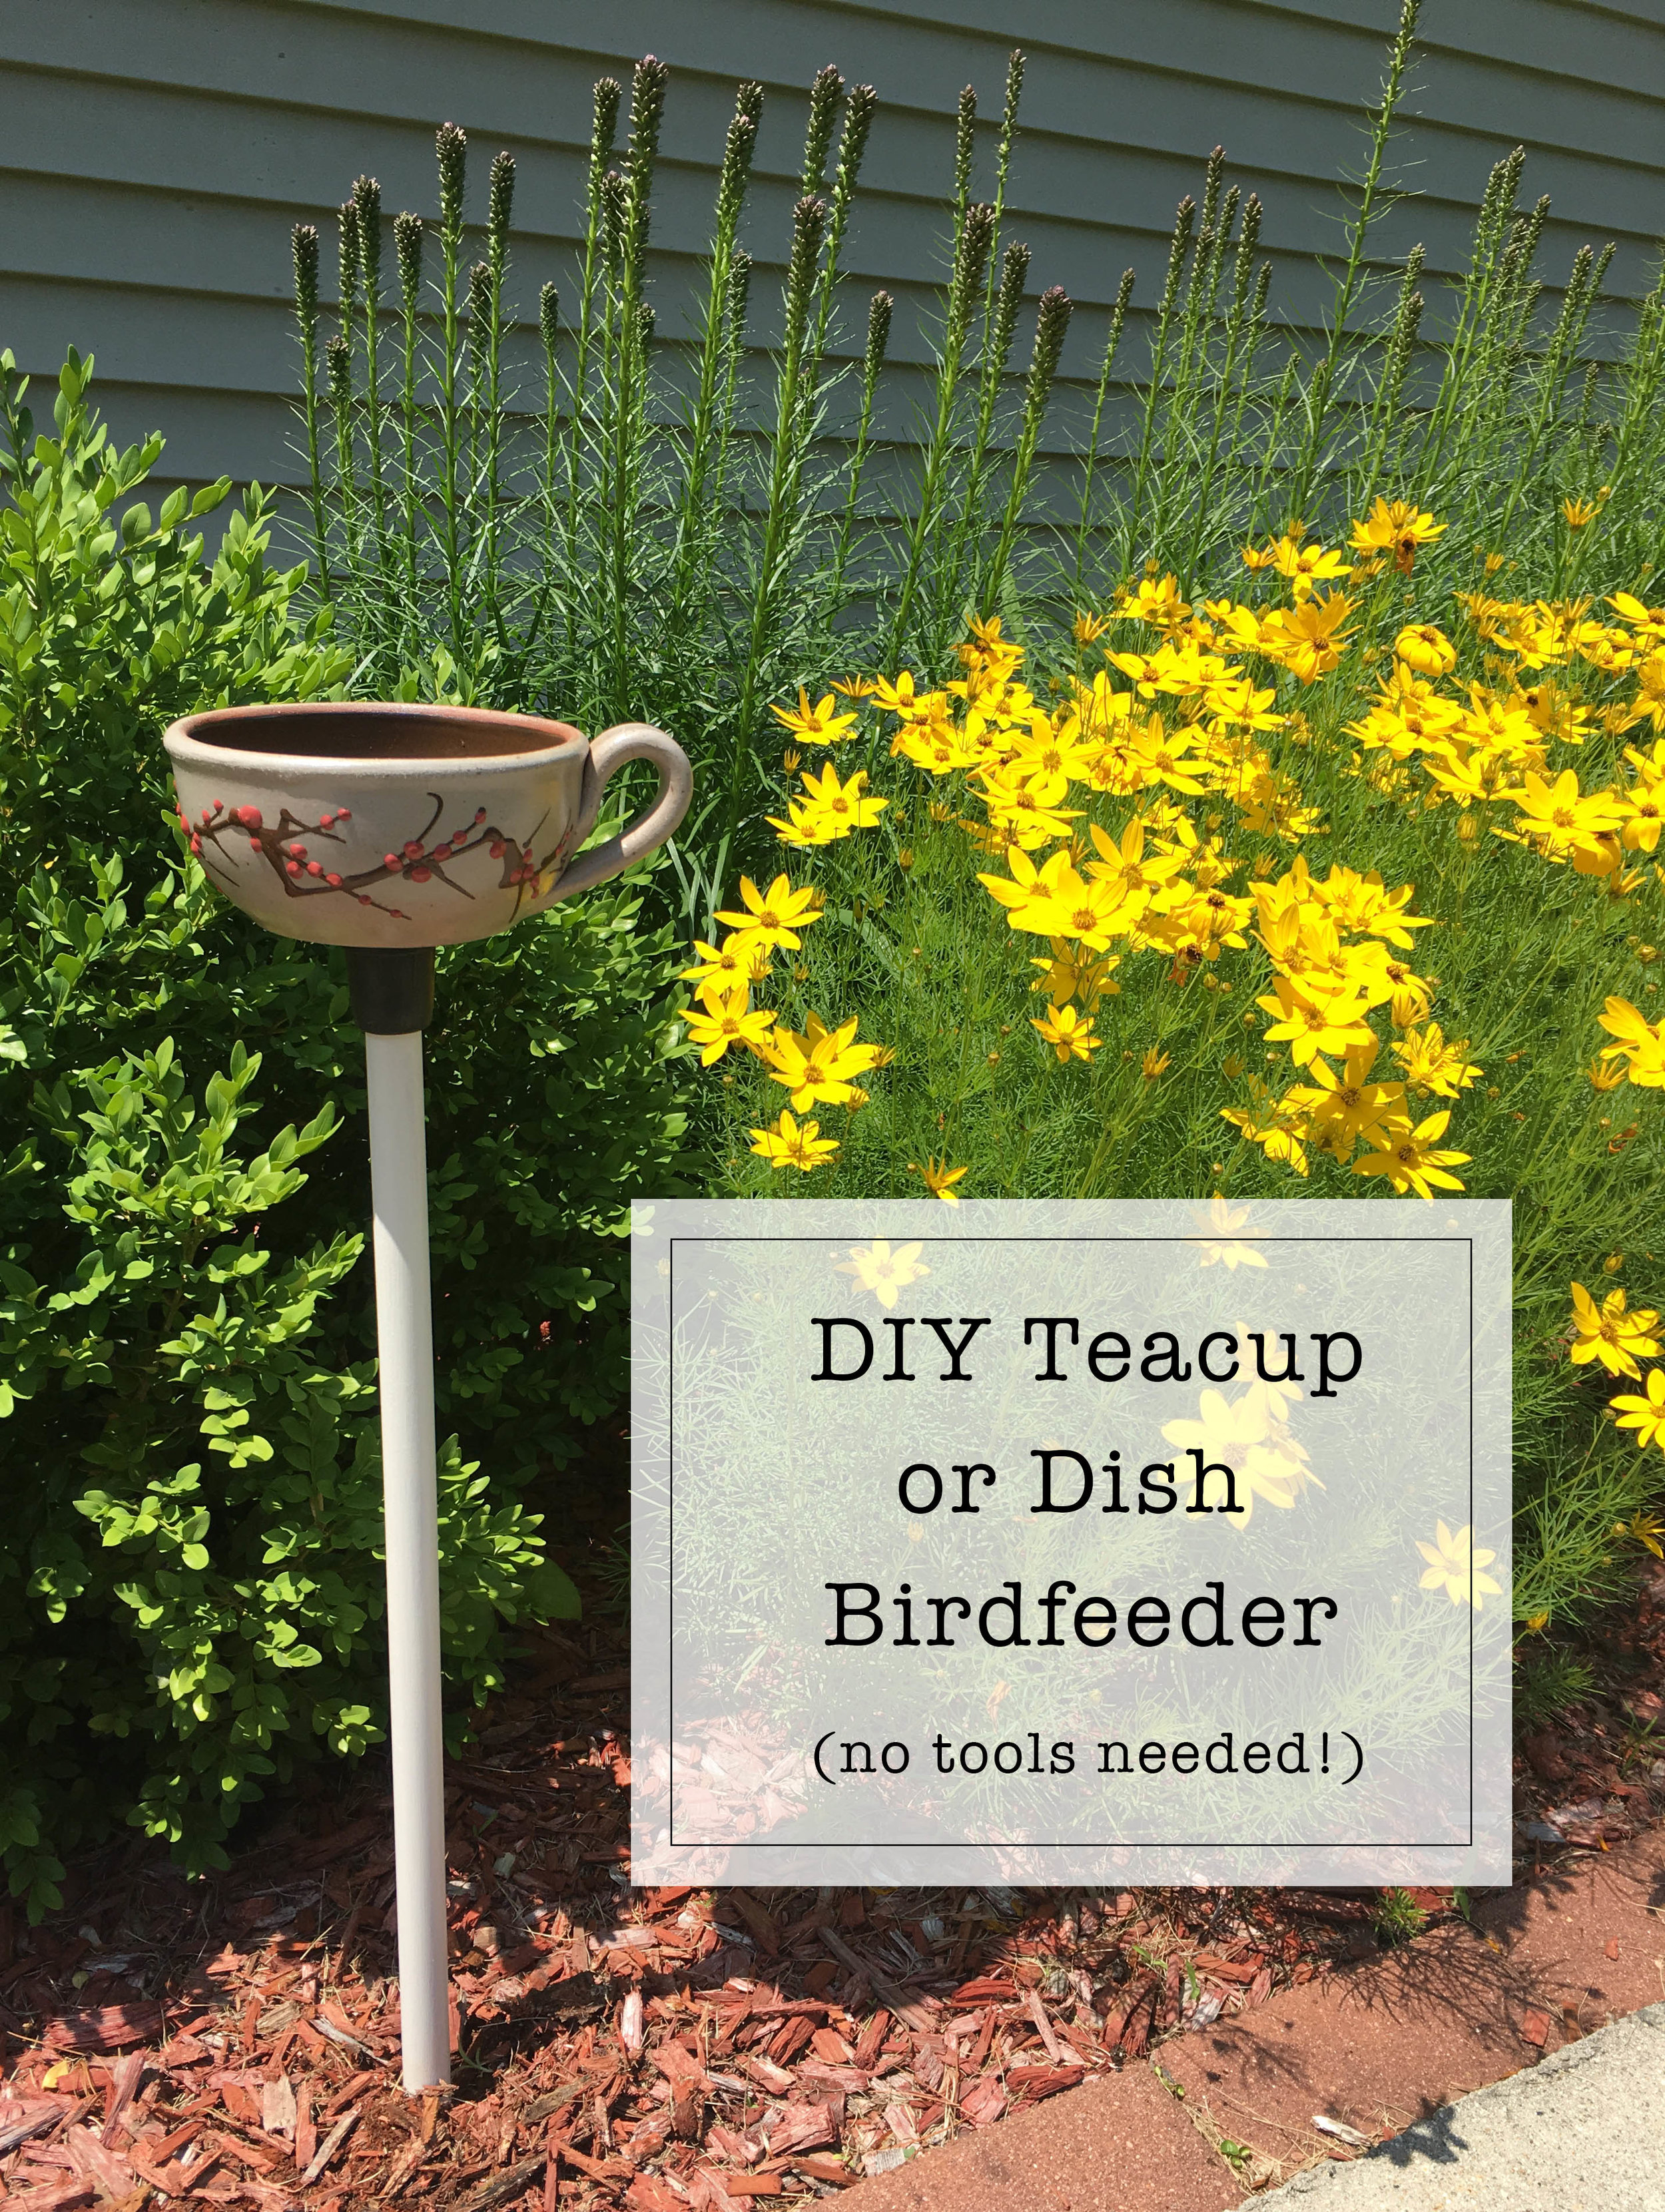
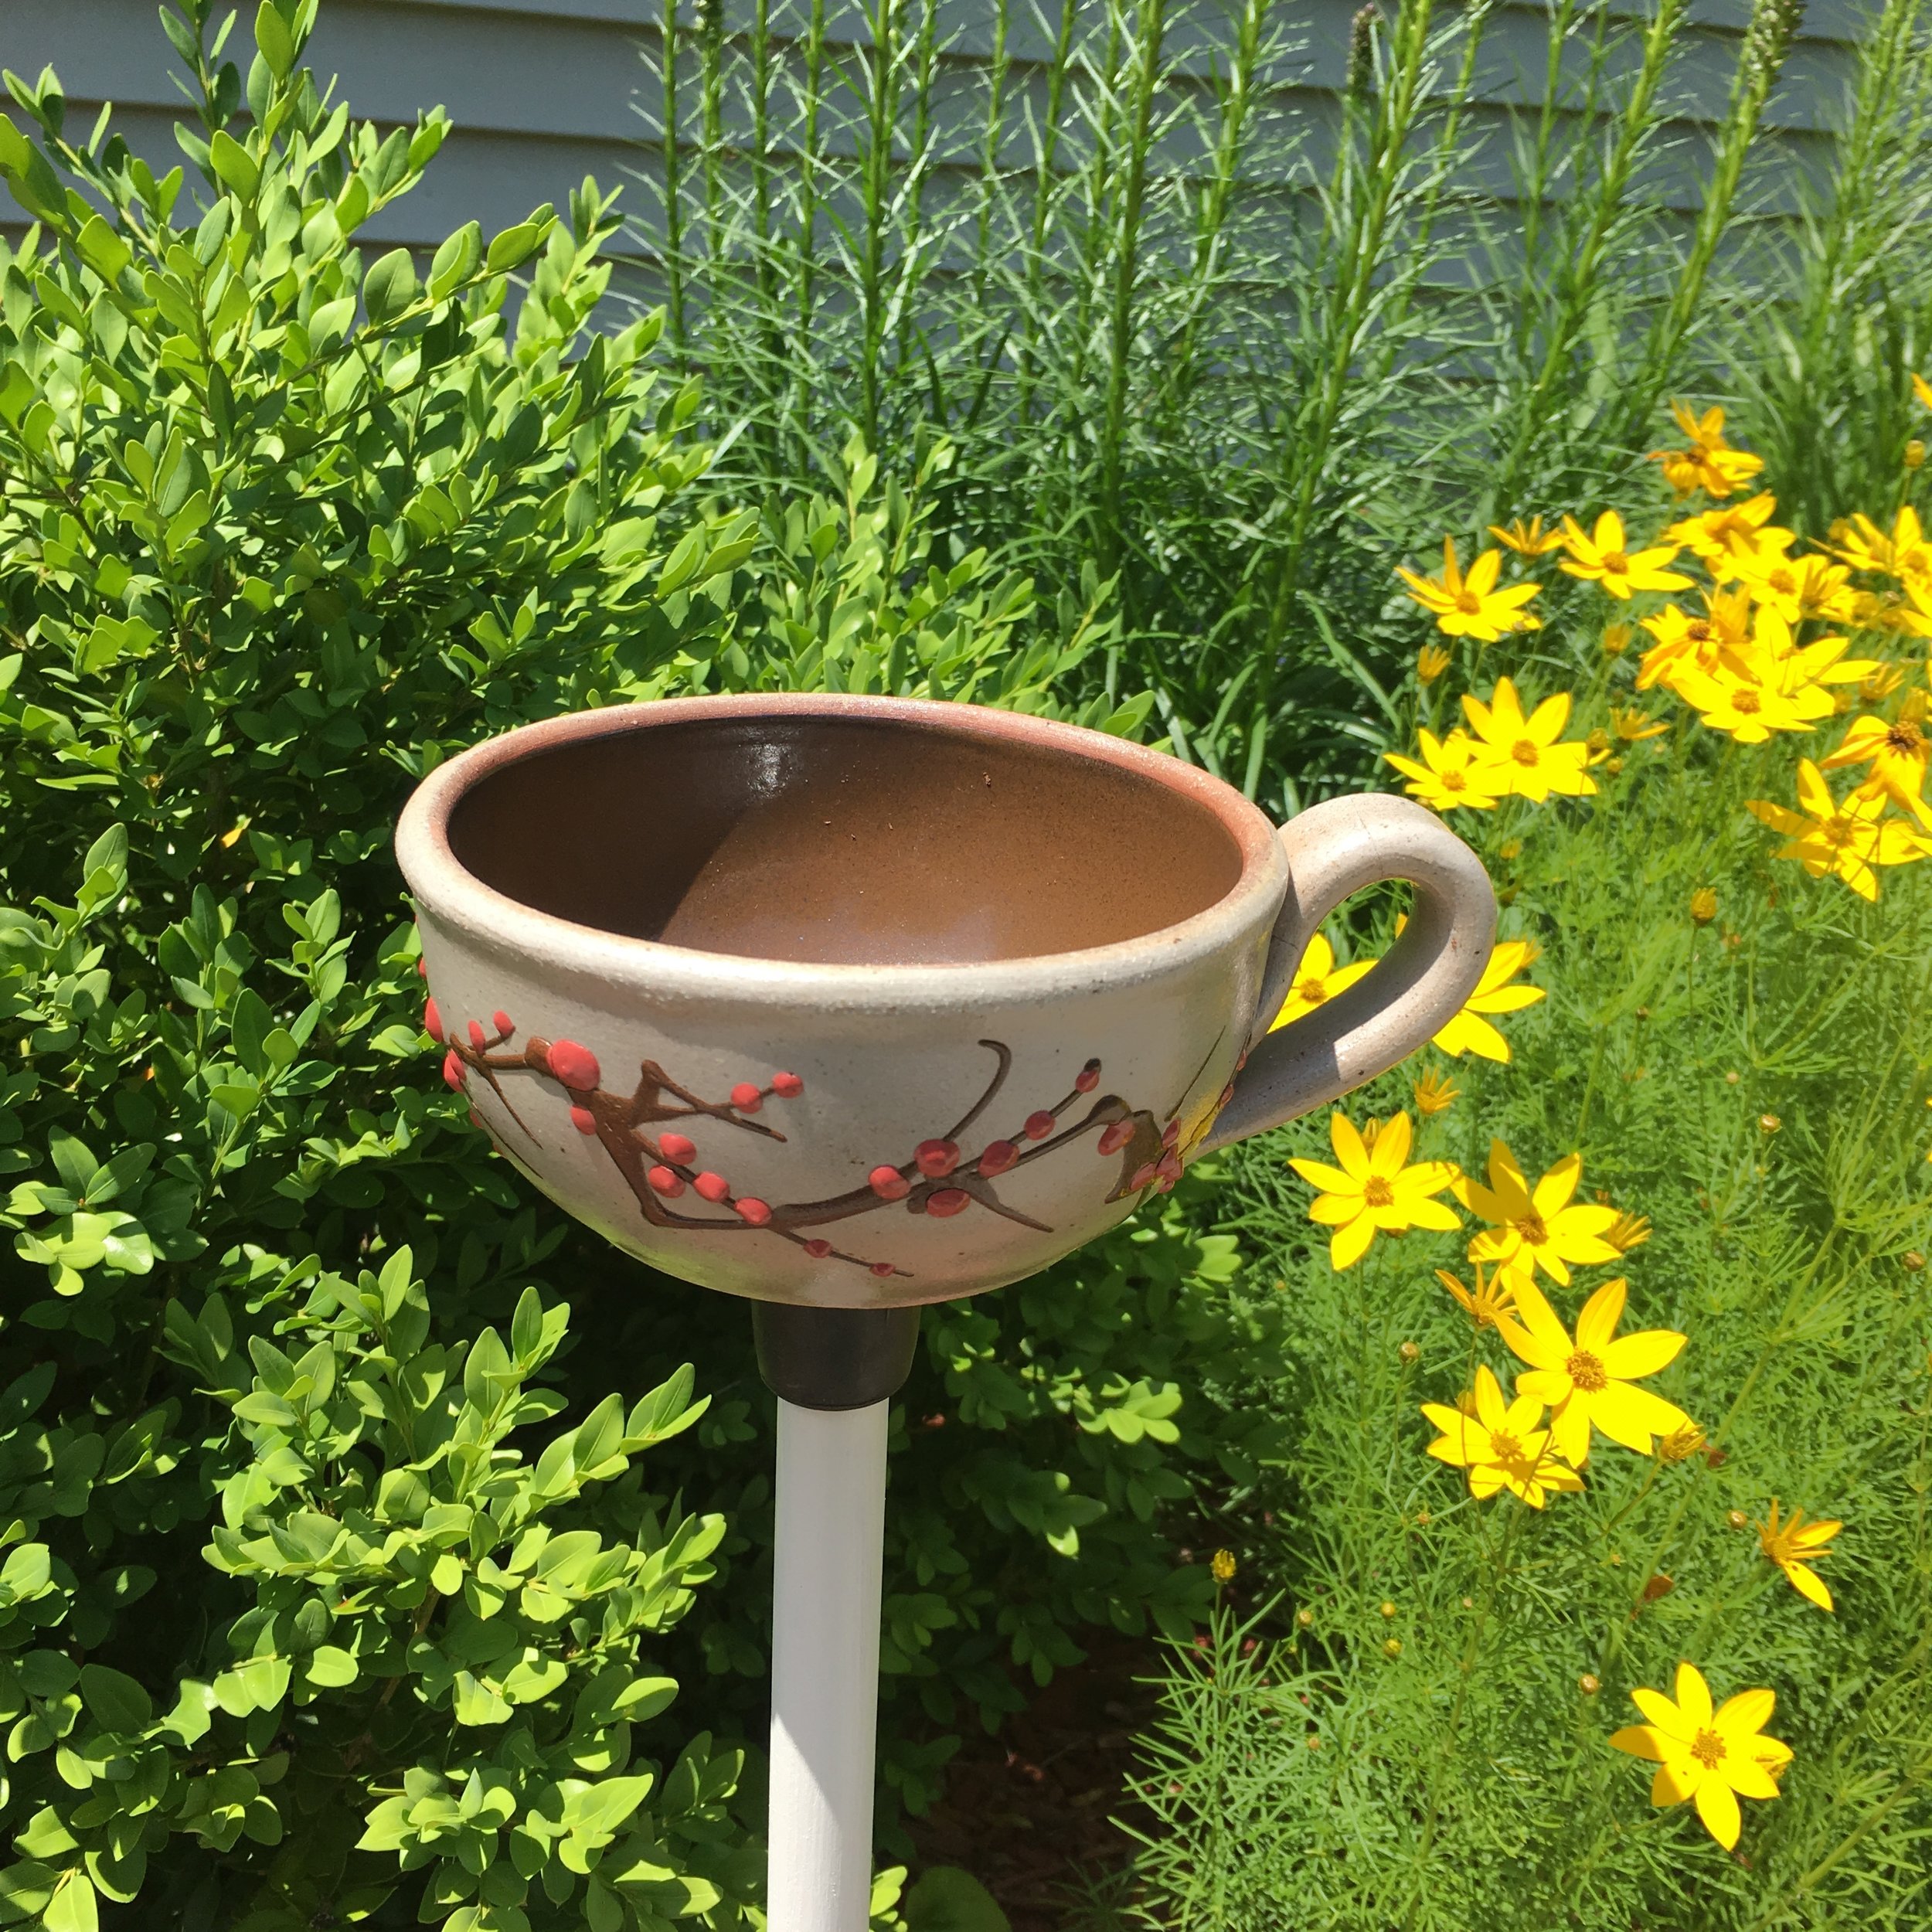
You might remember a previous post where I reused a repaired coffee mug as an herb planter in the kitchen. Well this year I decided to transform that mug one more time into a little bird feeder for a focal point in the flower garden.
Supplies & How-to:
The supply list really couldn't be more simple - all you need is a mug, bowl, or plate, a wooden dowel, a rubber cap, and some super glue! That's it!
I had my husband paint the wooden dowel with a couple coats of white outdoor paint first (normally I would have painted it, but the outdoor paint isn't recommended to be used by pregnant women). I wanted it painted to give a bit more of a finished look and to help make sure the dowel lasts longer outdoors.
Then with a little bit of Super Glue, I attached the rubber cap to the bottom of the ceramic mug.
By having the mug be removable from the dowel, you can easily pound the dowel sturdily into the ground with a small mallet or hammer then add the feeder once the dowel is in place. It also makes it easy to clean out the feeder regularly.
Since we've had bears frequent our neighborhood lately, I will just be filling the mug with water for now for birds and butterflies to drink from. Once the bears go into hibernation again I will be able to safely fill it with bird seed for our feathered friends.
Overall I'm happy with how this simple project came out - it adds the perfect touch to our flower bed!
KEEP UP WITH BIRCH LANDING HOME
| Etsy | Facebook | Instagram | Pinterest | Bloglovin' | Hometalk |
Fall is here and that means decorating up your front porch with, you guessed it - pumpkins! I've rounded up 15 very different pumpkin-themed decor ideas for you. Just click on the author's name to be brought to the original post for the how-to details. Enjoy!
Pumpkin Porch Decor Roundup
5 Minute Monogramed Pumpkin
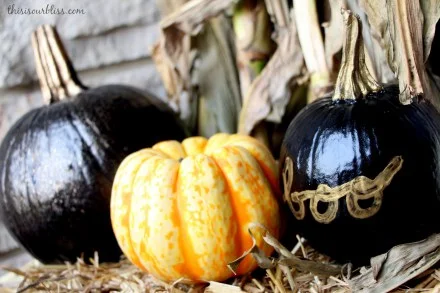
Painted Pumpkins and DIY Stems
DIY White Pumpkin Fall Wreath
Pink Fall Decor for Breast Cancer Awareness Month
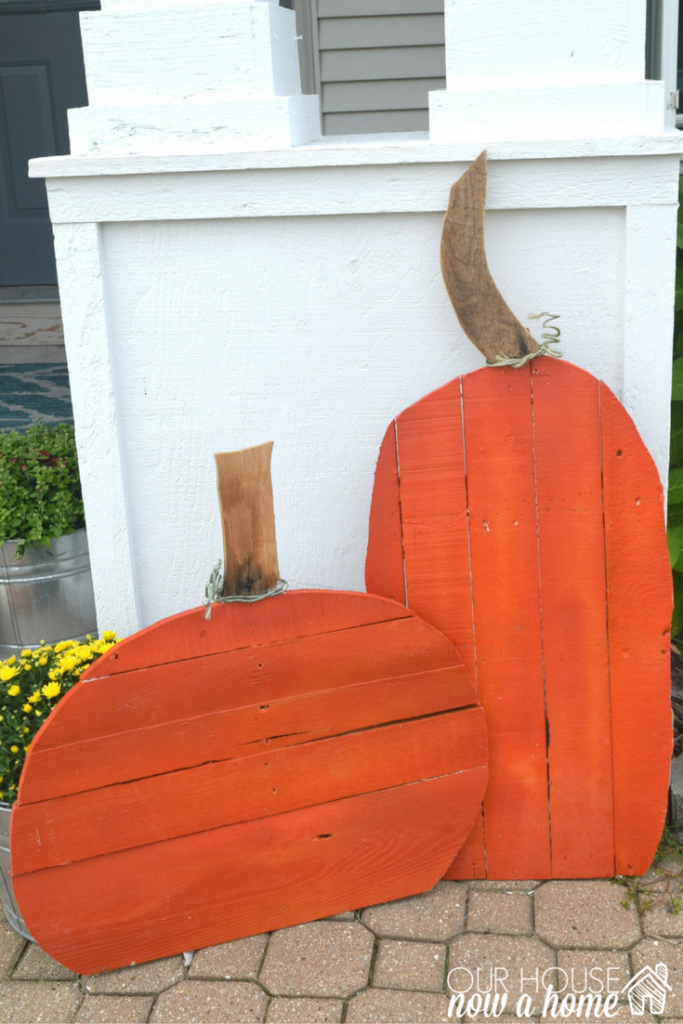
How to Build a Rustic Pumpkin Stand
DIY Pretty Porch Pumpkins
Fall Porch & Courtyard Home Decor
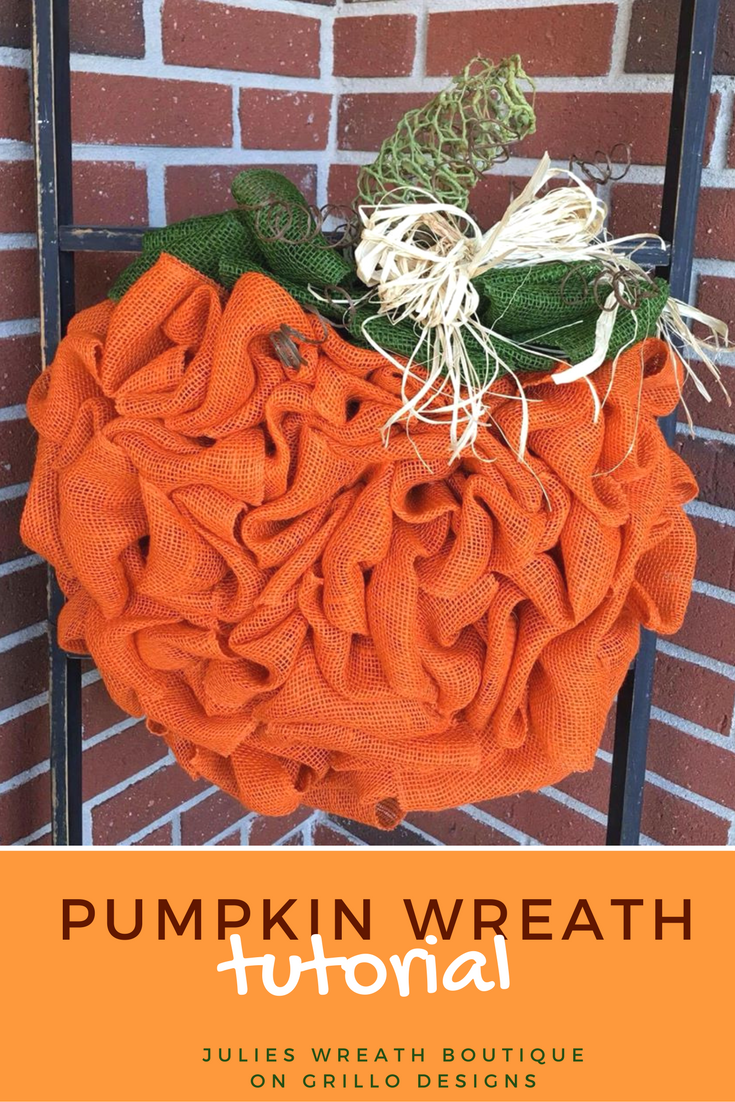
Pumpkin Wreath Tutorial with Burlap
All images and links are used with permission from the authors.
KEEP UP WITH BIRCH LANDING HOME
| Etsy | Facebook | Instagram | Pinterest | Bloglovin' | Hometalk |
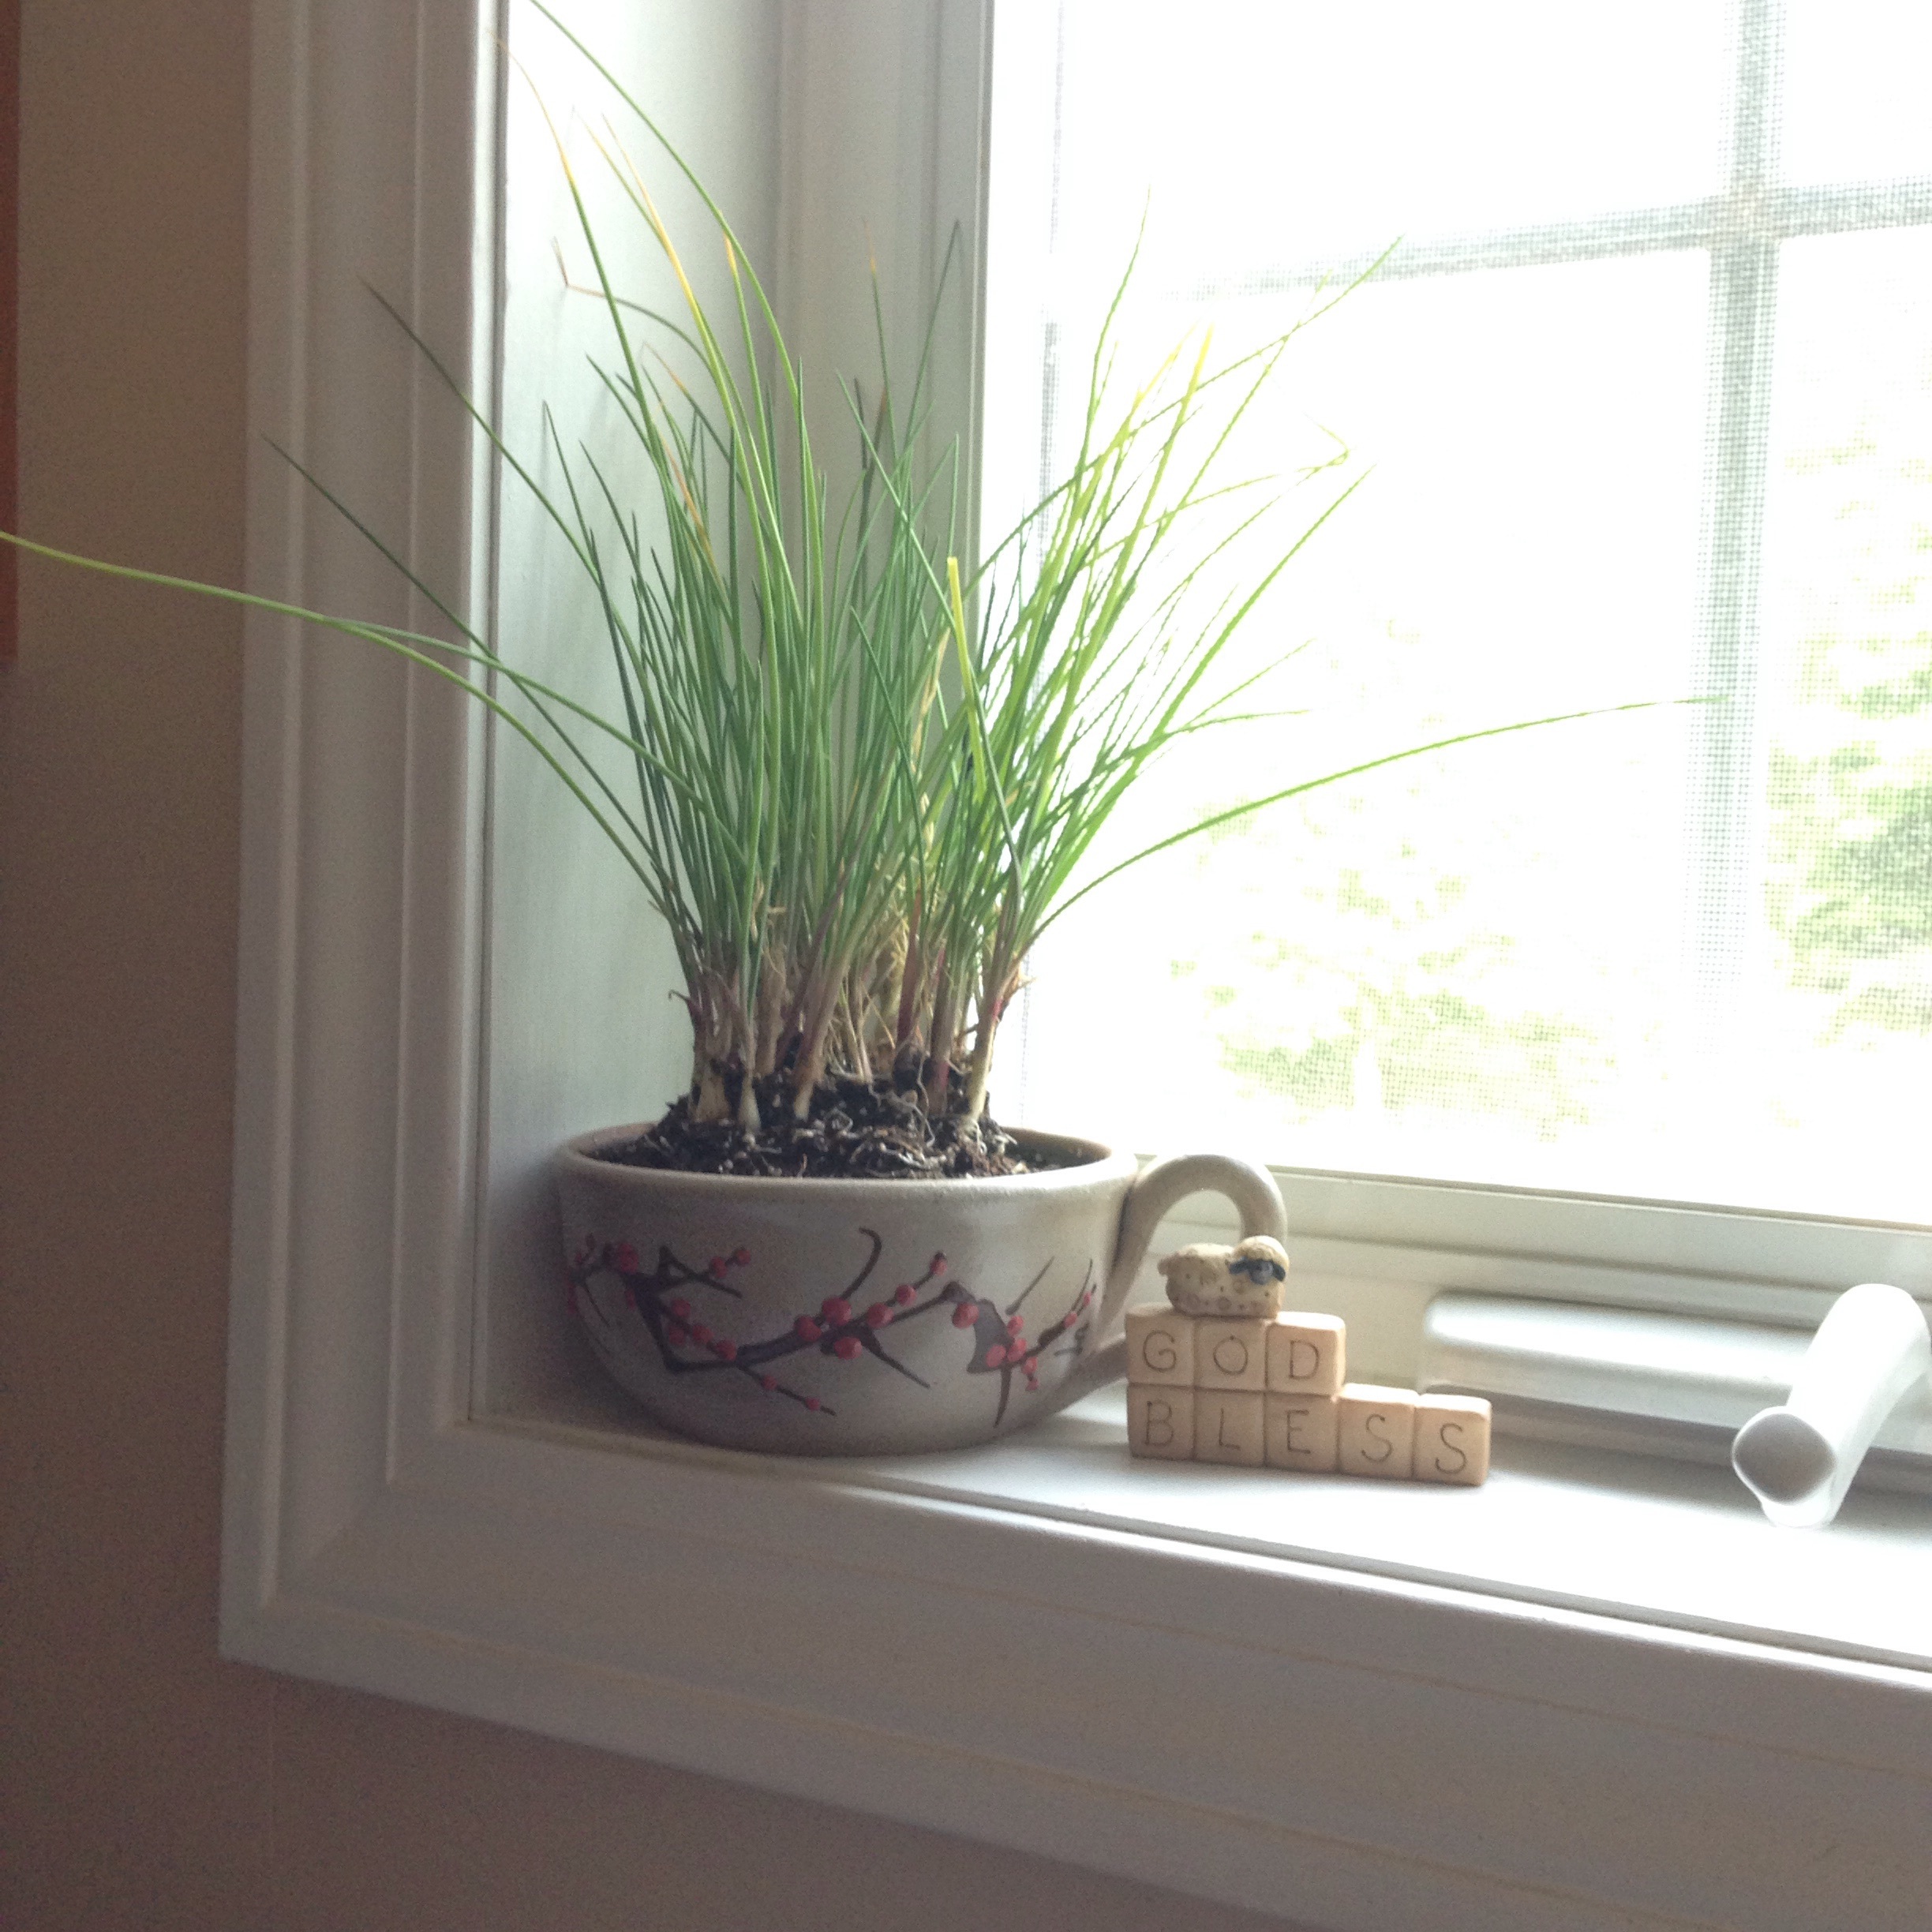
Ever have a favorite mug but the handle broke? :( Well that very thing happened to this great Salmon Falls Chowder Mug I have. I superglued it back together and while the repair looked pretty good I didn't dare trust it to hold a piping hot cup of soup or coffee over my lap anymore. I was thinking of tossing it but decided to repurpose it into a little herb planter for the kitchen instead.
The first step was to fill the bottom with some gravel so my herbs won't sit directly in water. Alternatively, you could drill a hole in the bottom for drainage and put a saucer underneath, but since I don't have anything to put under the mug that matches I decided to use it as-is.
Then I filled it with dirt and added an Italian Chive plant I picked up at the local garden center and it was done! (Pretty easy, right?) Depending on the size of your mug and your plants, you could add more than one type of herb in it. You could also grow your herbs from seed.
Now I just need to keep it on a sunny windowsill and water it very carefully as needed. Keep in mind since there's no drainage hole at the bottom and it's a small container, it would be very easy to over-water a plant like this.
KEEP UP WITH BIRCH LANDING HOME
| Etsy | Facebook | Instagram | Pinterest | Bloglovin' | Hometalk |
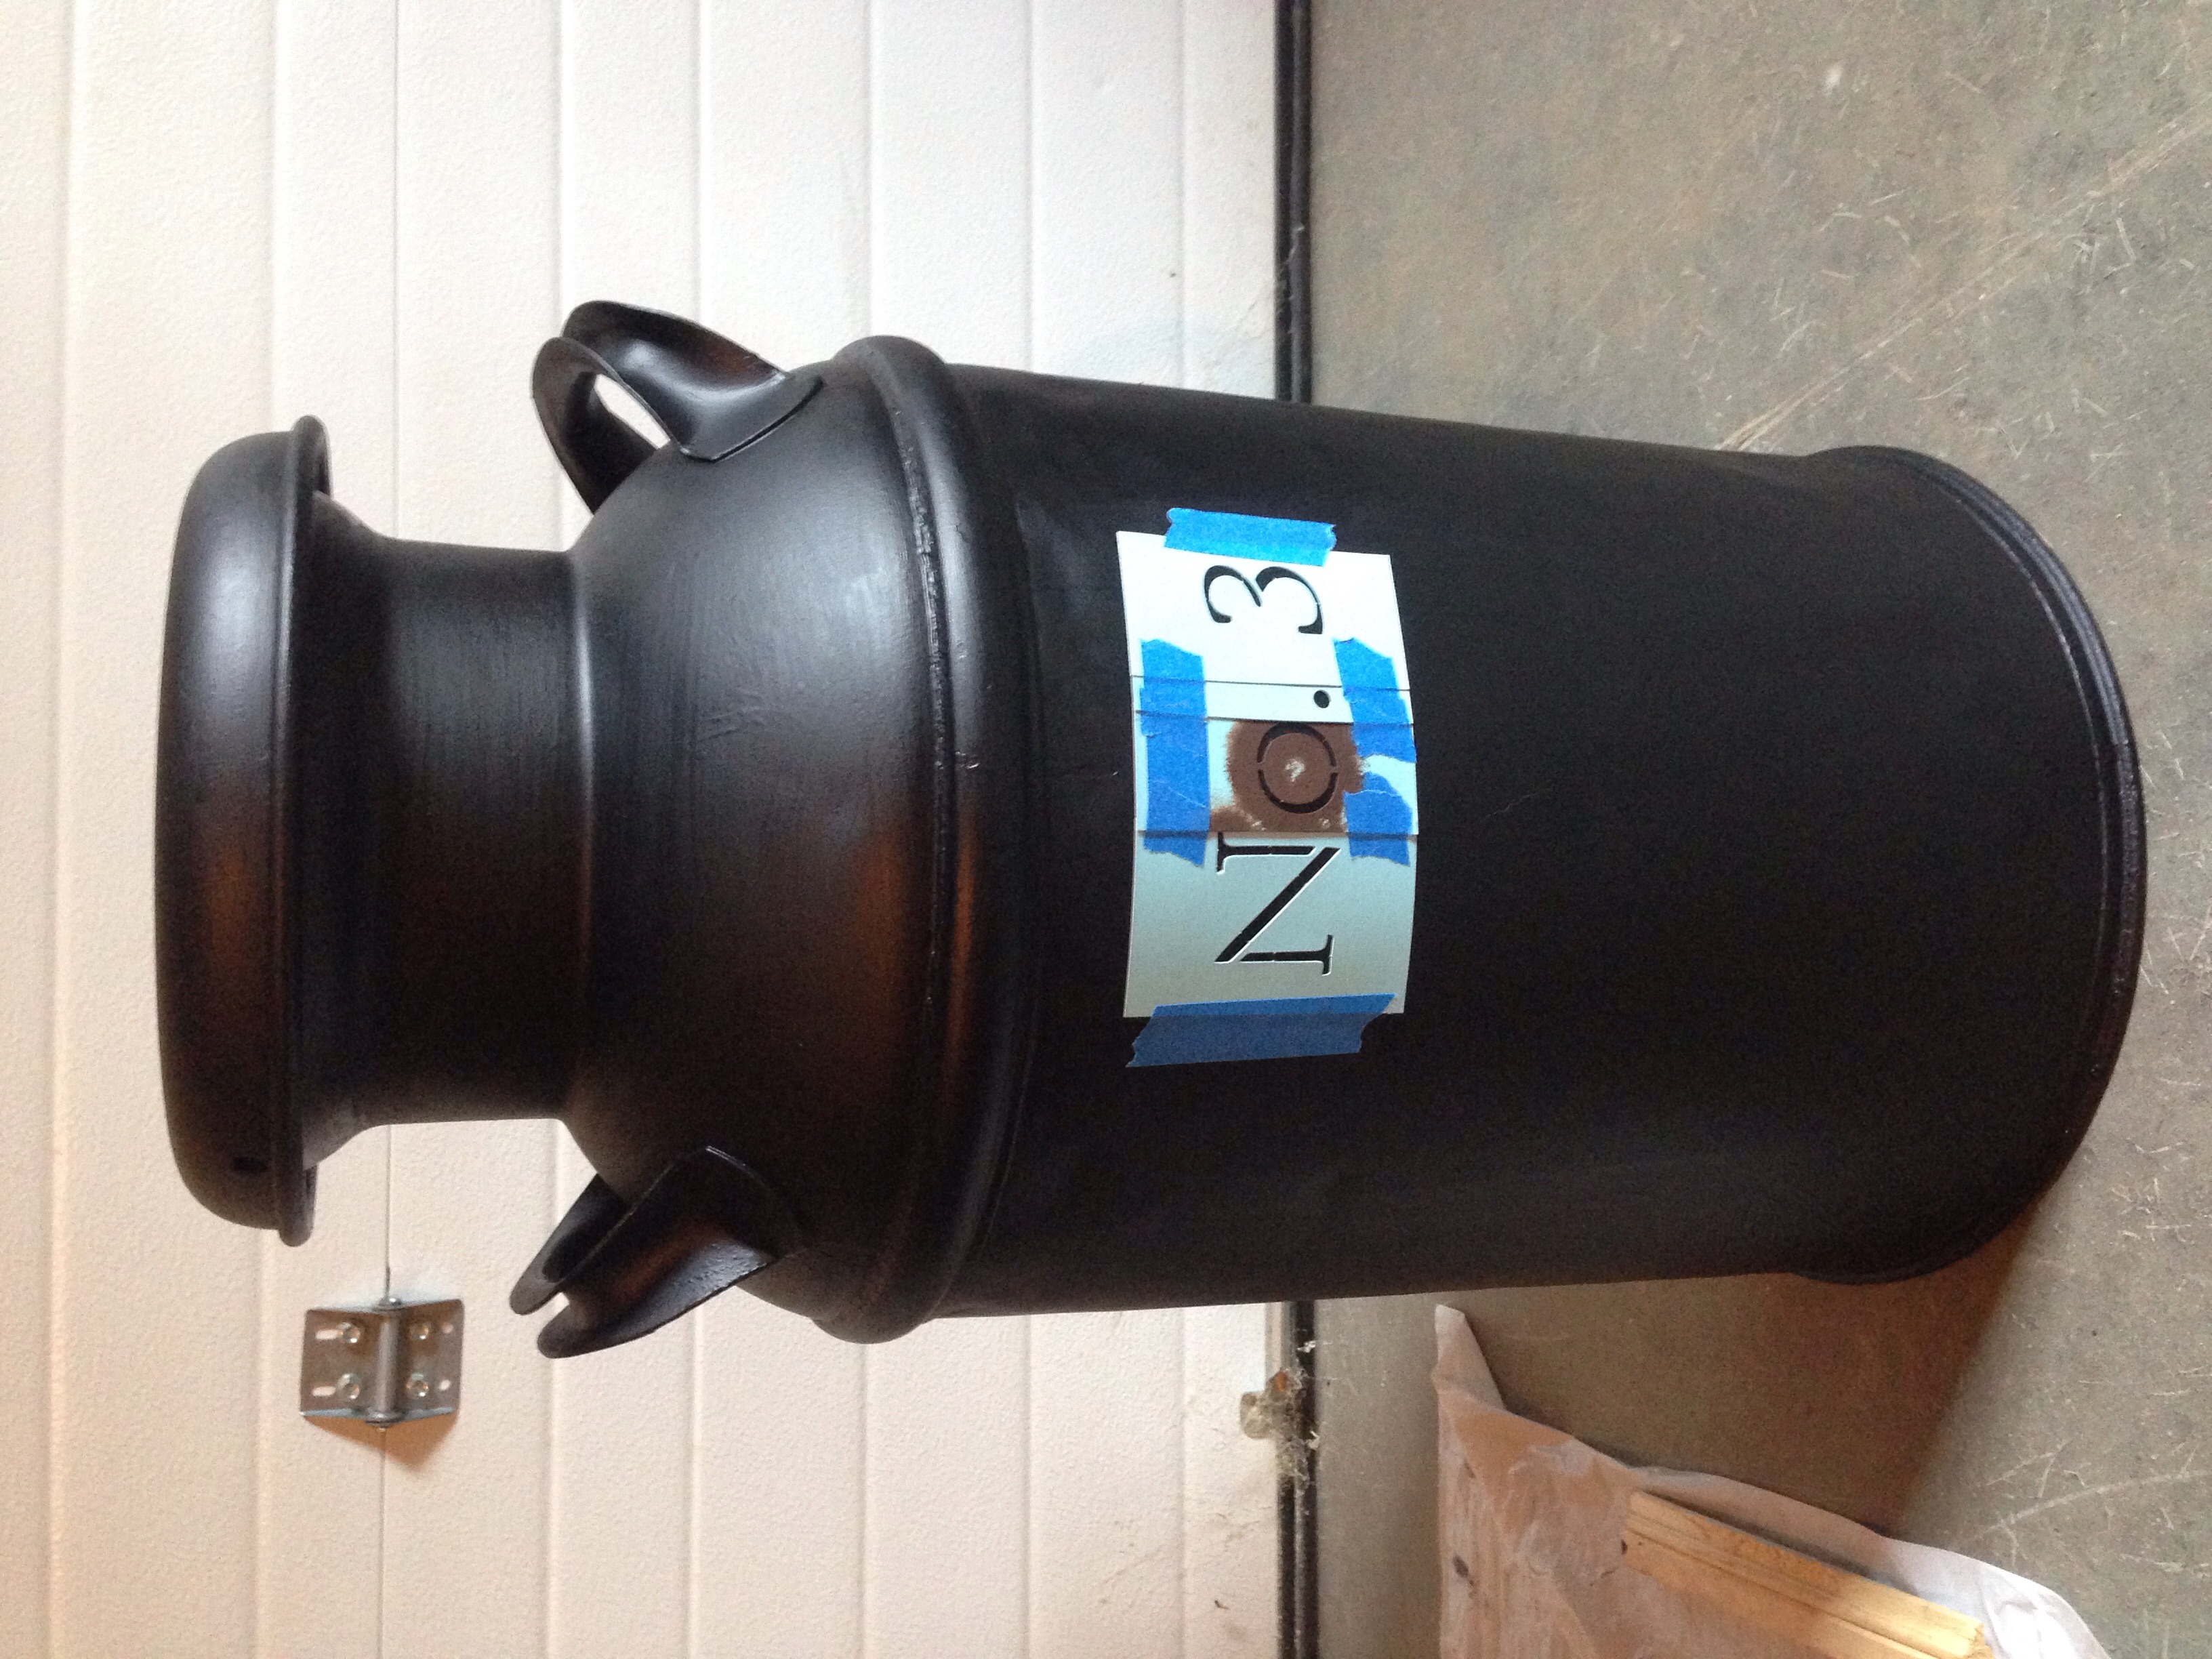
My parents-in-law gave us an awesome old milk can and it took me a little while to decide what I could do with it. After some thought I decided to use it as a country-inspired house number display. | This post contains affiliate links |
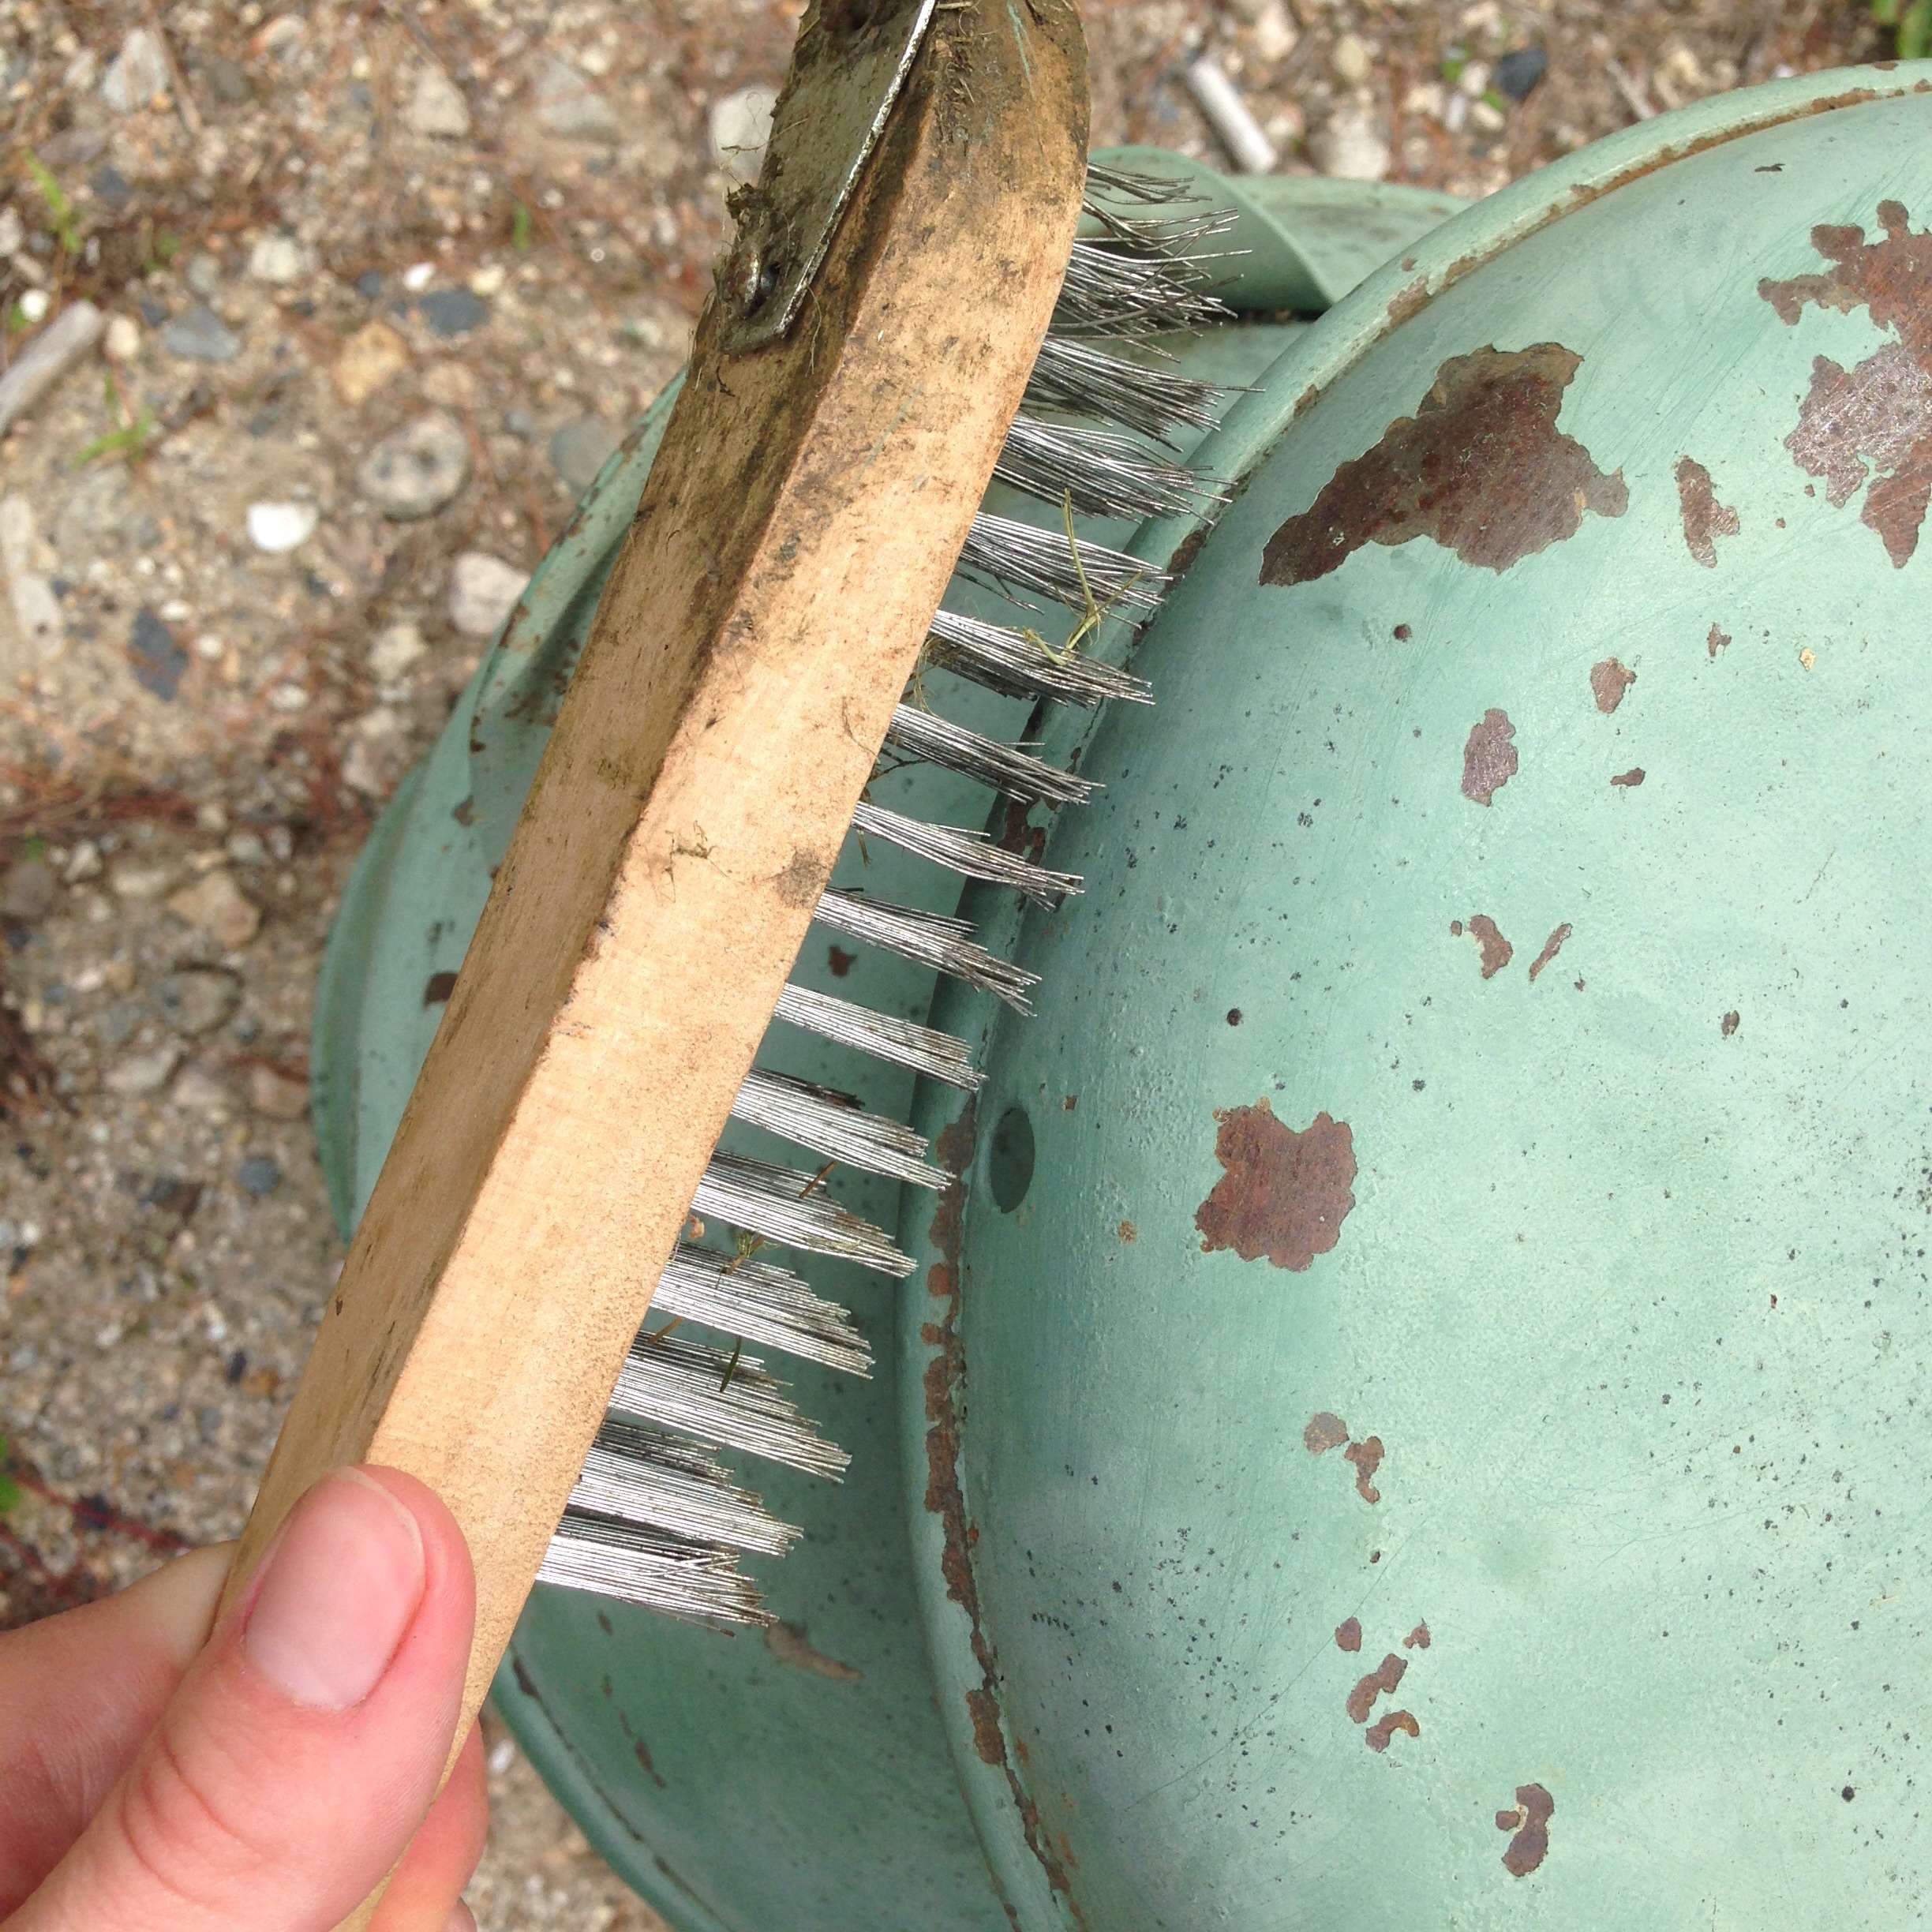
The milk can had already been re-painted at one point and while the green paint and the rust spots definitely gave it a nice patina, I decided to clean it up and repaint it to make it a little cleaner and kid-friendly.
First step was to clean up all the loose paint. I used a wire brush, metal scraper, and rough-grit sandpaper to clean it up and make a good base for the new paint.
Once it was ready I used Rust-Oleum Professional High Performance Protective Enamel in matte black and gave it two coats, letting dry about 24 hours between coats. For the stencil I made a point to choose a font and size that looked like it belonged there - that maybe the farmer numbered all his milk cans and this was just one in the lineup. The stencils I used were from the Martha Stewart Monogram Serif Stencil Set, trimming the letters down and taping them together with painters tape. I had used the "o" previously for another project.. hence why it's brown.
I used white acrylic paint to stencil it and filled the gaps in the stencil with a small brush after. I think the milk can came out pretty cute and adds the perfect country touch!
KEEP UP WITH BIRCH LANDING HOME
| Etsy | Facebook | Instagram | Pinterest | Bloglovin' | Hometalk |
A few weeks ago my mom picked up this Longaberger silverware caddy for me from a yard sale for $1. I couldn't find the exact item on their website, but a different style of silverware caddy is listed on there for $65. Gotta love yard sales.
I didn't really see myself using it as a silverware caddy though so I decided to ditch the fabric insert and use it as an art caddy on my little craft desk and I absolutely love it. It's great for corralling brushes, markers, pens, and scissors - not to mention it looks really nice against the yellow walls. I have to say, I'm pretty happy with this re-purpose!
KEEP UP WITH BIRCH LANDING HOME
| Etsy | Facebook | Instagram | Pinterest | Bloglovin' | Hometalk |