Garage Locker Power Tool Organizer - Fits Between Garage Doors!

Lately our garage has been kind of a mess - my husband has been rebuilding our rotting deck and the power tools he has have multiplied with no good place to store them. I was getting tired of tripping over sanders and planers so I thought I’d come up with a way to get all the small power tools easily accessible and organized for his project. In my search I came across the perfect locker solution! | This post contains affiliate links |

Garage Locker Tool Organizer - Fits Between Garage Doors!

I realized the space between our garage doors was vastly underutilized. It’s a skinny spot but tall - with a lot of potential for easily-accessible storage. I thought about building shelves there but then it would be open and kind of messy. I tried finding a cabinet that would fit but they were all too wide. Then I realized a locker would fit!

Use a Locker as a Garage Tool Organizer - Fits Between Garage Doors!

I searched for single-width lockers and found many options and considered doing a single tall locker or a double locker. But then I came across this amazing single-width locker with six doors/tiers! It was perfect for my needs - it fit right in between the garage doors and each tool could have it’s own cubby. This locker fit perfectly in our garage but make sure to measure your space first as you may have a narrower (or wider) space to work with. There was assembly required for the locker but it went together easily and then it was ready to use!

Use a Locker as a Garage Tool Organizer - Fits Between Garage Doors!

One important thing to consider before you put a locker in your garage is how you will contend with wet floors. We live in New England and in the winters especially our garage floors get quite wet when the snow melts off our cars… in order to protect the bottom of your locker from rusting you probably want to raise it up off the floor. For us we used a thick paving stone that fit well under the locker - though we did have to level it some with composite shims (similar ones linked) because our garage floors are slightly uneven. (Just slide the shim under the paver and break off when it's the right height - so easy!) You may also want to consider attaching your locker to the wall in some way if you’re concerned about it tipping.

Use a Locker as a Garage Tool Organizer - Fits Between Garage Doors!

Once we had our locker level and secured I labeled each cubby with what it contained (“Drills & Bits”, “Orbital Sander”, etc). To make the labels I just typed them up on my computer, printed them out on a sheet of cardstock, and cut them out.

This was an awesome and very easy project to do in our garage. We love how organized and accessible the tools are while still keeping them out of sight.

KEEP UP WITH BIRCH LANDING HOME
|  Etsy  |  Facebook  |  Instagram  |  Pinterest  |  Bloglovin'  |  Hometalk  |

Tips for Selling on Facebook Marketplace

Lately I’ve been on a huge decluttering kick. I really want to pare down what we have in our home so we only have stuff we love, use, or is sentimental/important to us. Everything else can go. I’ve been taking my time with this process but it’s been really freeing to open up some space in our home. I try to throw away as little as possible and have been either donating items locally or selling them on Facebook Marketplace. Read on for my tips on how to sell your unwanted items on Facebook.
| Disclaimer: These are suggestions. Sell/buy on Facebook at your own risk. |

| Disclaimer: These are suggestions. Sell/buy on Facebook at your own risk. |

Tips for Selling on Facebook Marketplace

Clean Your Items Before Taking Photograpshs

Oh my gosh - this is the most obvious one that I feel like so many people neglect to do. They will post a picture of a table for example, still covered with magazines and cups - or the table will be filthy with dust. Kids’ shoes is another big example - make sure to take a little time and clean kids’ shoes. Get any stains/dirt you can off up the uppers and take an old toothbrush and clean the mud out of the treads. No one is interested in your dirty items - clean them up!

Consider the Backdrop of Your Photos

Don’t take photos somewhere messy or that looks unclean (like a basement or garage - unless you’re selling something that really belongs there like sports equipment or tools). For example, if you’re selling a nice piece of furniture, dress, kids’ toys, etc make sure the backdrop is somewhere clean and nice inside your home - don’t take a sketchy looking photo in a dirty/damp-looking basement because that implies the items weren’t well-cared for.

Price Your Items Well

Keep in mind this is a “yard sale.” And while things are typically priced a little higher than they would be at an actual yard sale, don’t be unreasonable. I usually price my items at the higher-end of reasonable, and then decrease my price periodically. If it doesn’t sell in a few weeks, it typically gets donated.

Be Safe

Be really wary with selling/buying on Facebook. Always check out the profile of who’s interested in the item to make sure it looks like it’s a real account with some history (it wasn’t just made in the last few months). Also never give out your phone number.. a lot of scammers will send you a message that says something like “I’m working, what’s your phone number so I can text you about this item? -or- Here’s my number, please text me.” Always decline to give out your number and say you only do correspondence through Facebook Messenger. It’s also a good idea to never accept electronic payments (Venmo, PayPal, etc) - stick to cash-only. (And if you’re a buyer never send an electronic payment as a “deposit to hold an item” - that’s a very common scam and a big red flag.)

And the biggest one - ALWAYS MEET IN A PUBLIC PLACE THAT ISN’T YOUR HOUSE. I strictly will only meet at local Police Department parking lots. Our surrounding town police departments all have designated parking spots under video surveillance that are meant for online sale exchanges. Several times someone has messaged me asking to meet for an item but instantly declined once they found out I only meet at the Police Station - that’s a huge red flag if they won’t meet at the Police Station and you want nothing to do with that person.. block them and move on.

Send a Reminder Message about an Hour Before the Meet

No-shows are the worst, and unfortunately fairly common. To help reduce no-shows, send a one-line reminder message about an hour before you’re supposed to meet the person.. something like “See you at XXX Police Department at 3PM.” Most of the time if they forgot or weren’t going to show up they will message you back and say “whoops, I won’t be there” and you’ll save yourself the trip. I also try really hard to line up my yard sale meets with other errands so I’m in that area anyways and it’s not as much of an inconvenience if I get stood up.

What Generally Sells Really Well:

  • Kids’ toys

  • Kids’ shoes & clothing (clothing typically sells better in big lots by size)

  • Sporting equipment

  • Tools

  • Furniture

  • Garden Items

I’ve found that some items in particular (like books and women’s clothing) do not generally sell well. Also make sure to try to sell items seasonally - don’t list snow pants for sale in April, they probably won’t sell. List them for sale in Fall when people are looking for them.

And always - make sure to follow Facebook guidelines on what is allowed for sale or not.

Good luck with your decluttering journey!

KEEP UP WITH BIRCH LANDING HOME
|  Etsy  |  Facebook  |  Instagram  |  Pinterest  |  Bloglovin'  |  Hometalk  |

Getting Ready for Back to School 2021

We’re getting ready to send our oldest back to school in person for the first time in about 18 months and I don’t know who’s more nervous - me or her. Nevertheless, we’re trying hard to be positive and prepare her as best we can for the return to school. I thought I would share some of the things we’re packing in the event it helps other parents think of things to pack too. | This post contains affiliate links |

Getting Ready for Back to School 2021

Disclaimer: I am not giving medical advice… please consult the CDC, your doctor, etc for what supplies your child should need for themselves and their school situation.

Some Ideas for Back to School Supplies 2021

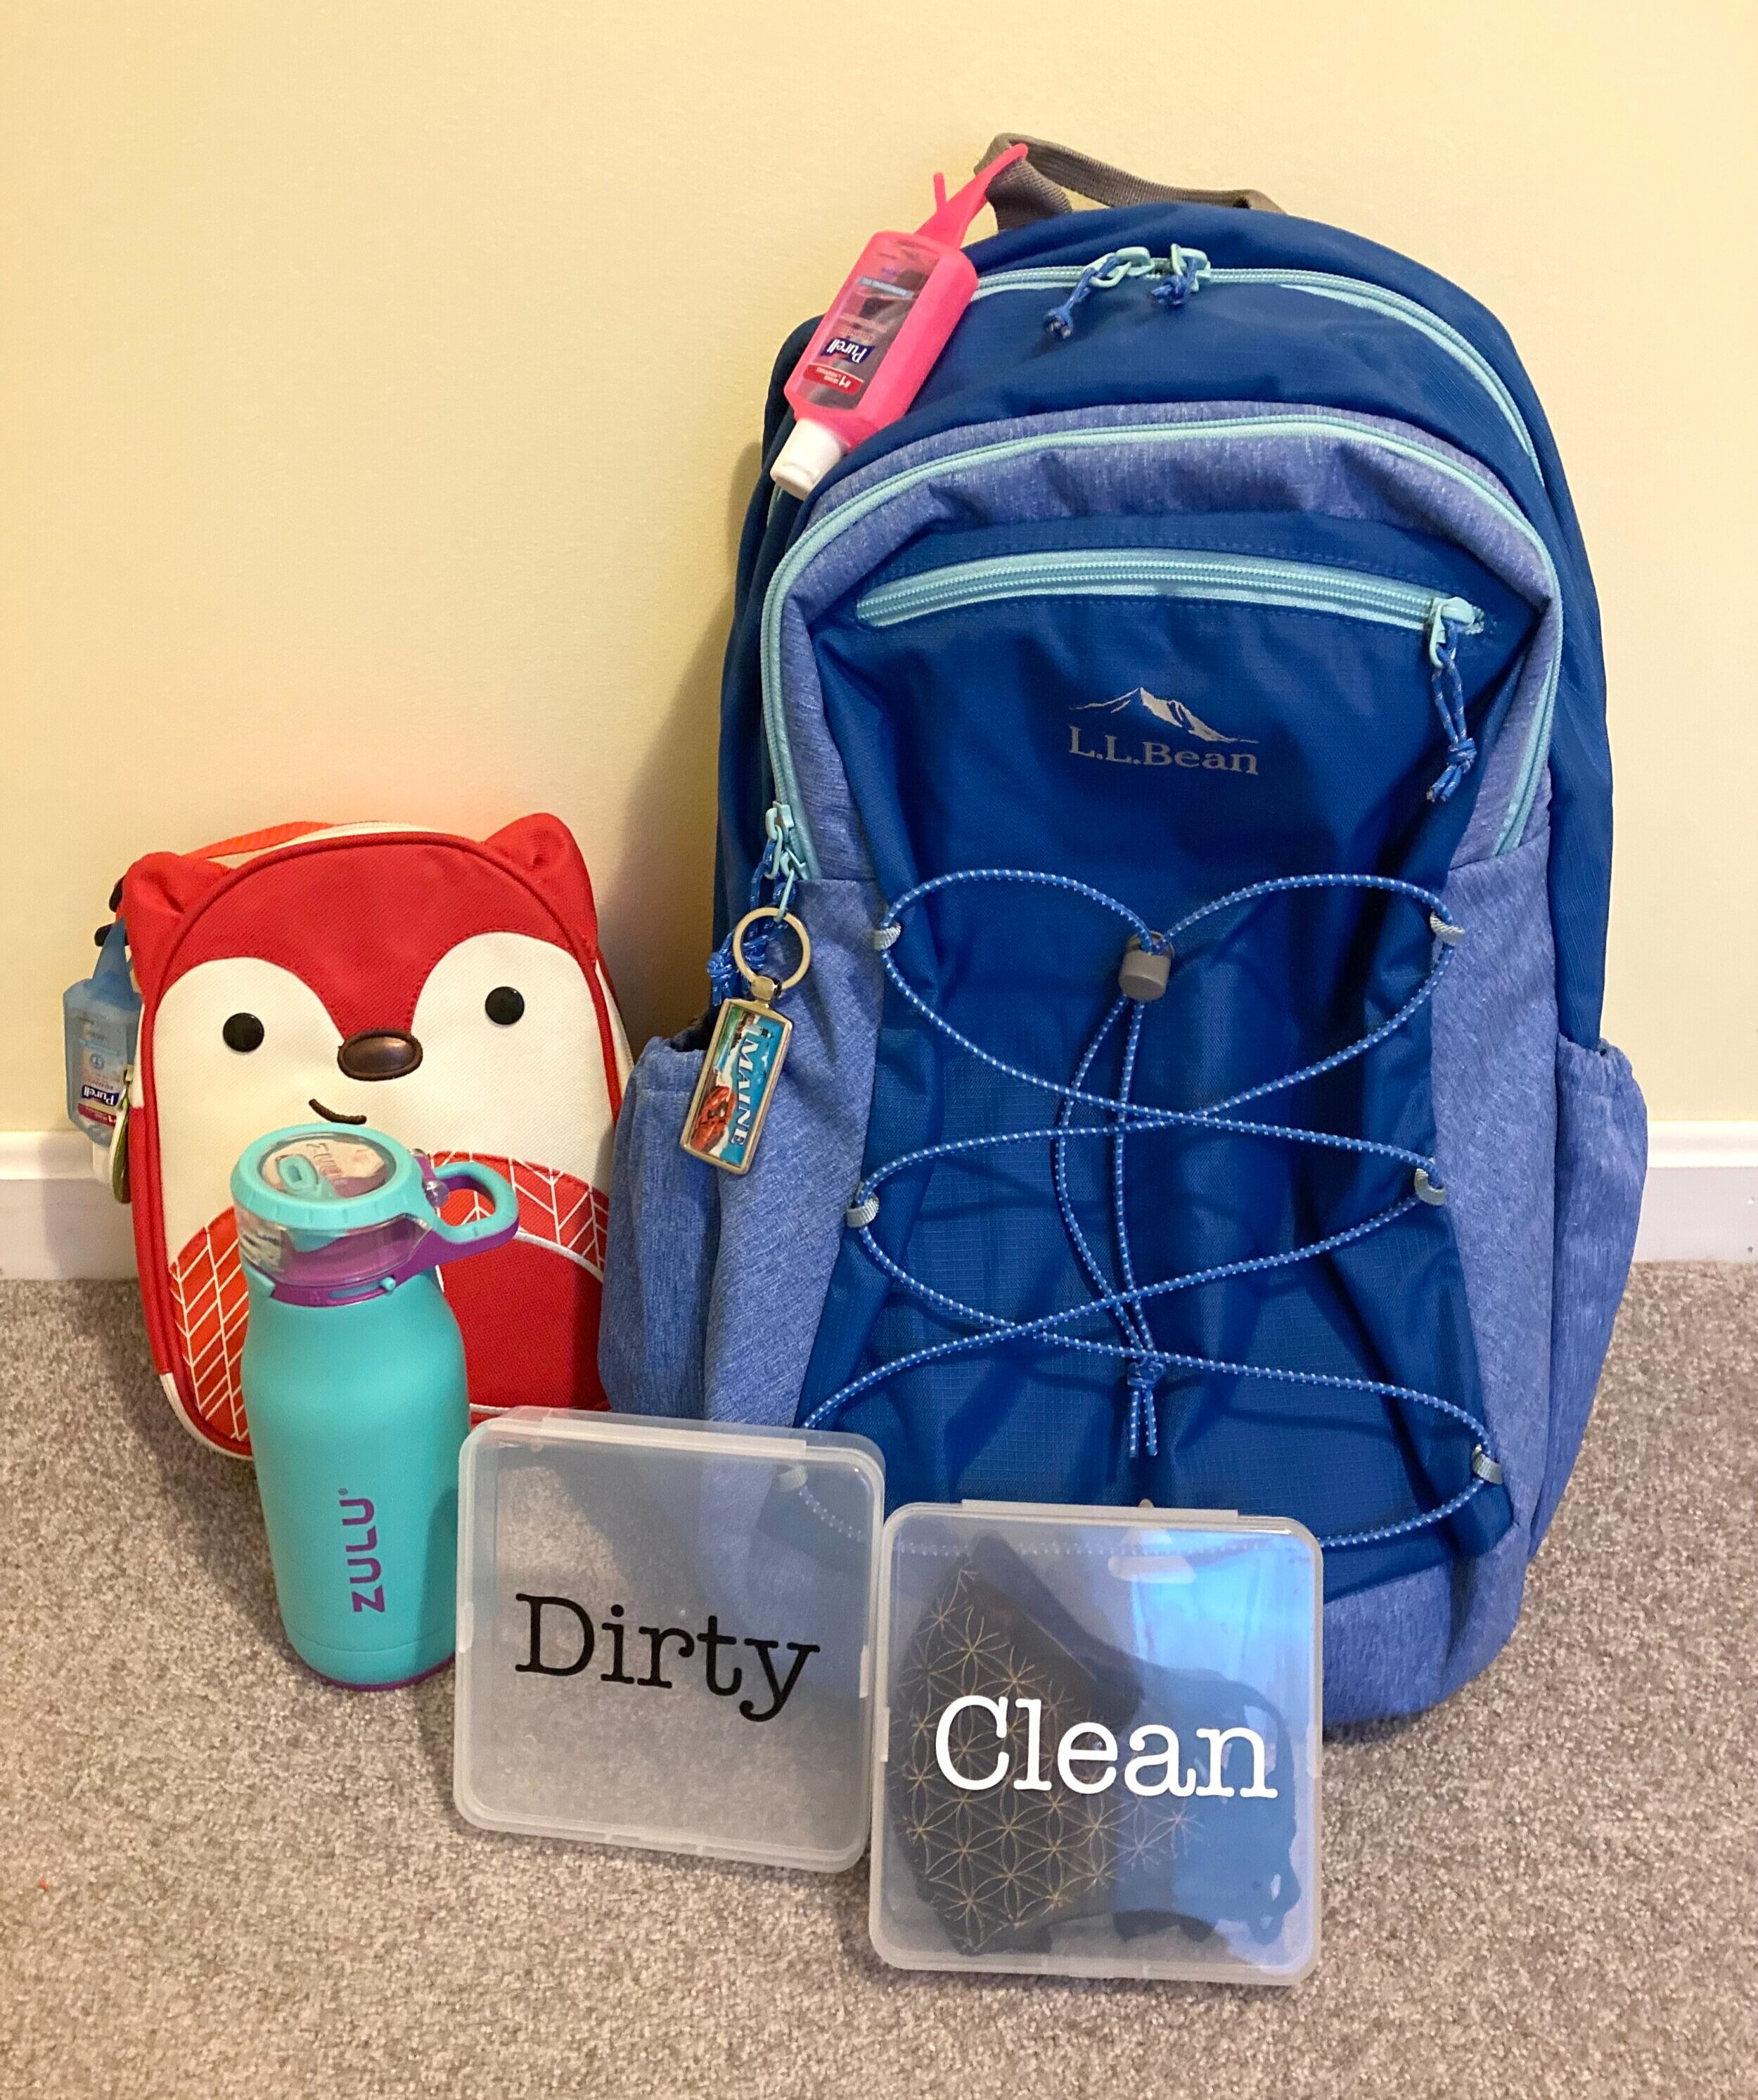
  • Sturdy Backpack - We're huge fans of L.L. Bean backpacks. They're built to last so we buy a size bigger than our kids need in order to last them many years to come. Since our school does a lot with computers we made sure to pick a backpack that also has a built-in laptop sleeve. (Side note: We always add some added visibility to our kids' gear with Gear Aid Reflective Patches.)
  • Hand Sanitizer - We got some small "key chain" hand sanitizer dispensers to attach to both her backpack and her lunch box so cleaning her hands whenever she needs to will be easy, especially important before adjusting or taking off masks and before eating/drinking.
  • Covered Water Bottle - This was a small upgrade we thought might be useful this year. In the past our daughter always used reusable water bottles with an exposed spout, however we thought it might be a better idea to have one that keeps the spout covered when not in use to help keep it cleaner.
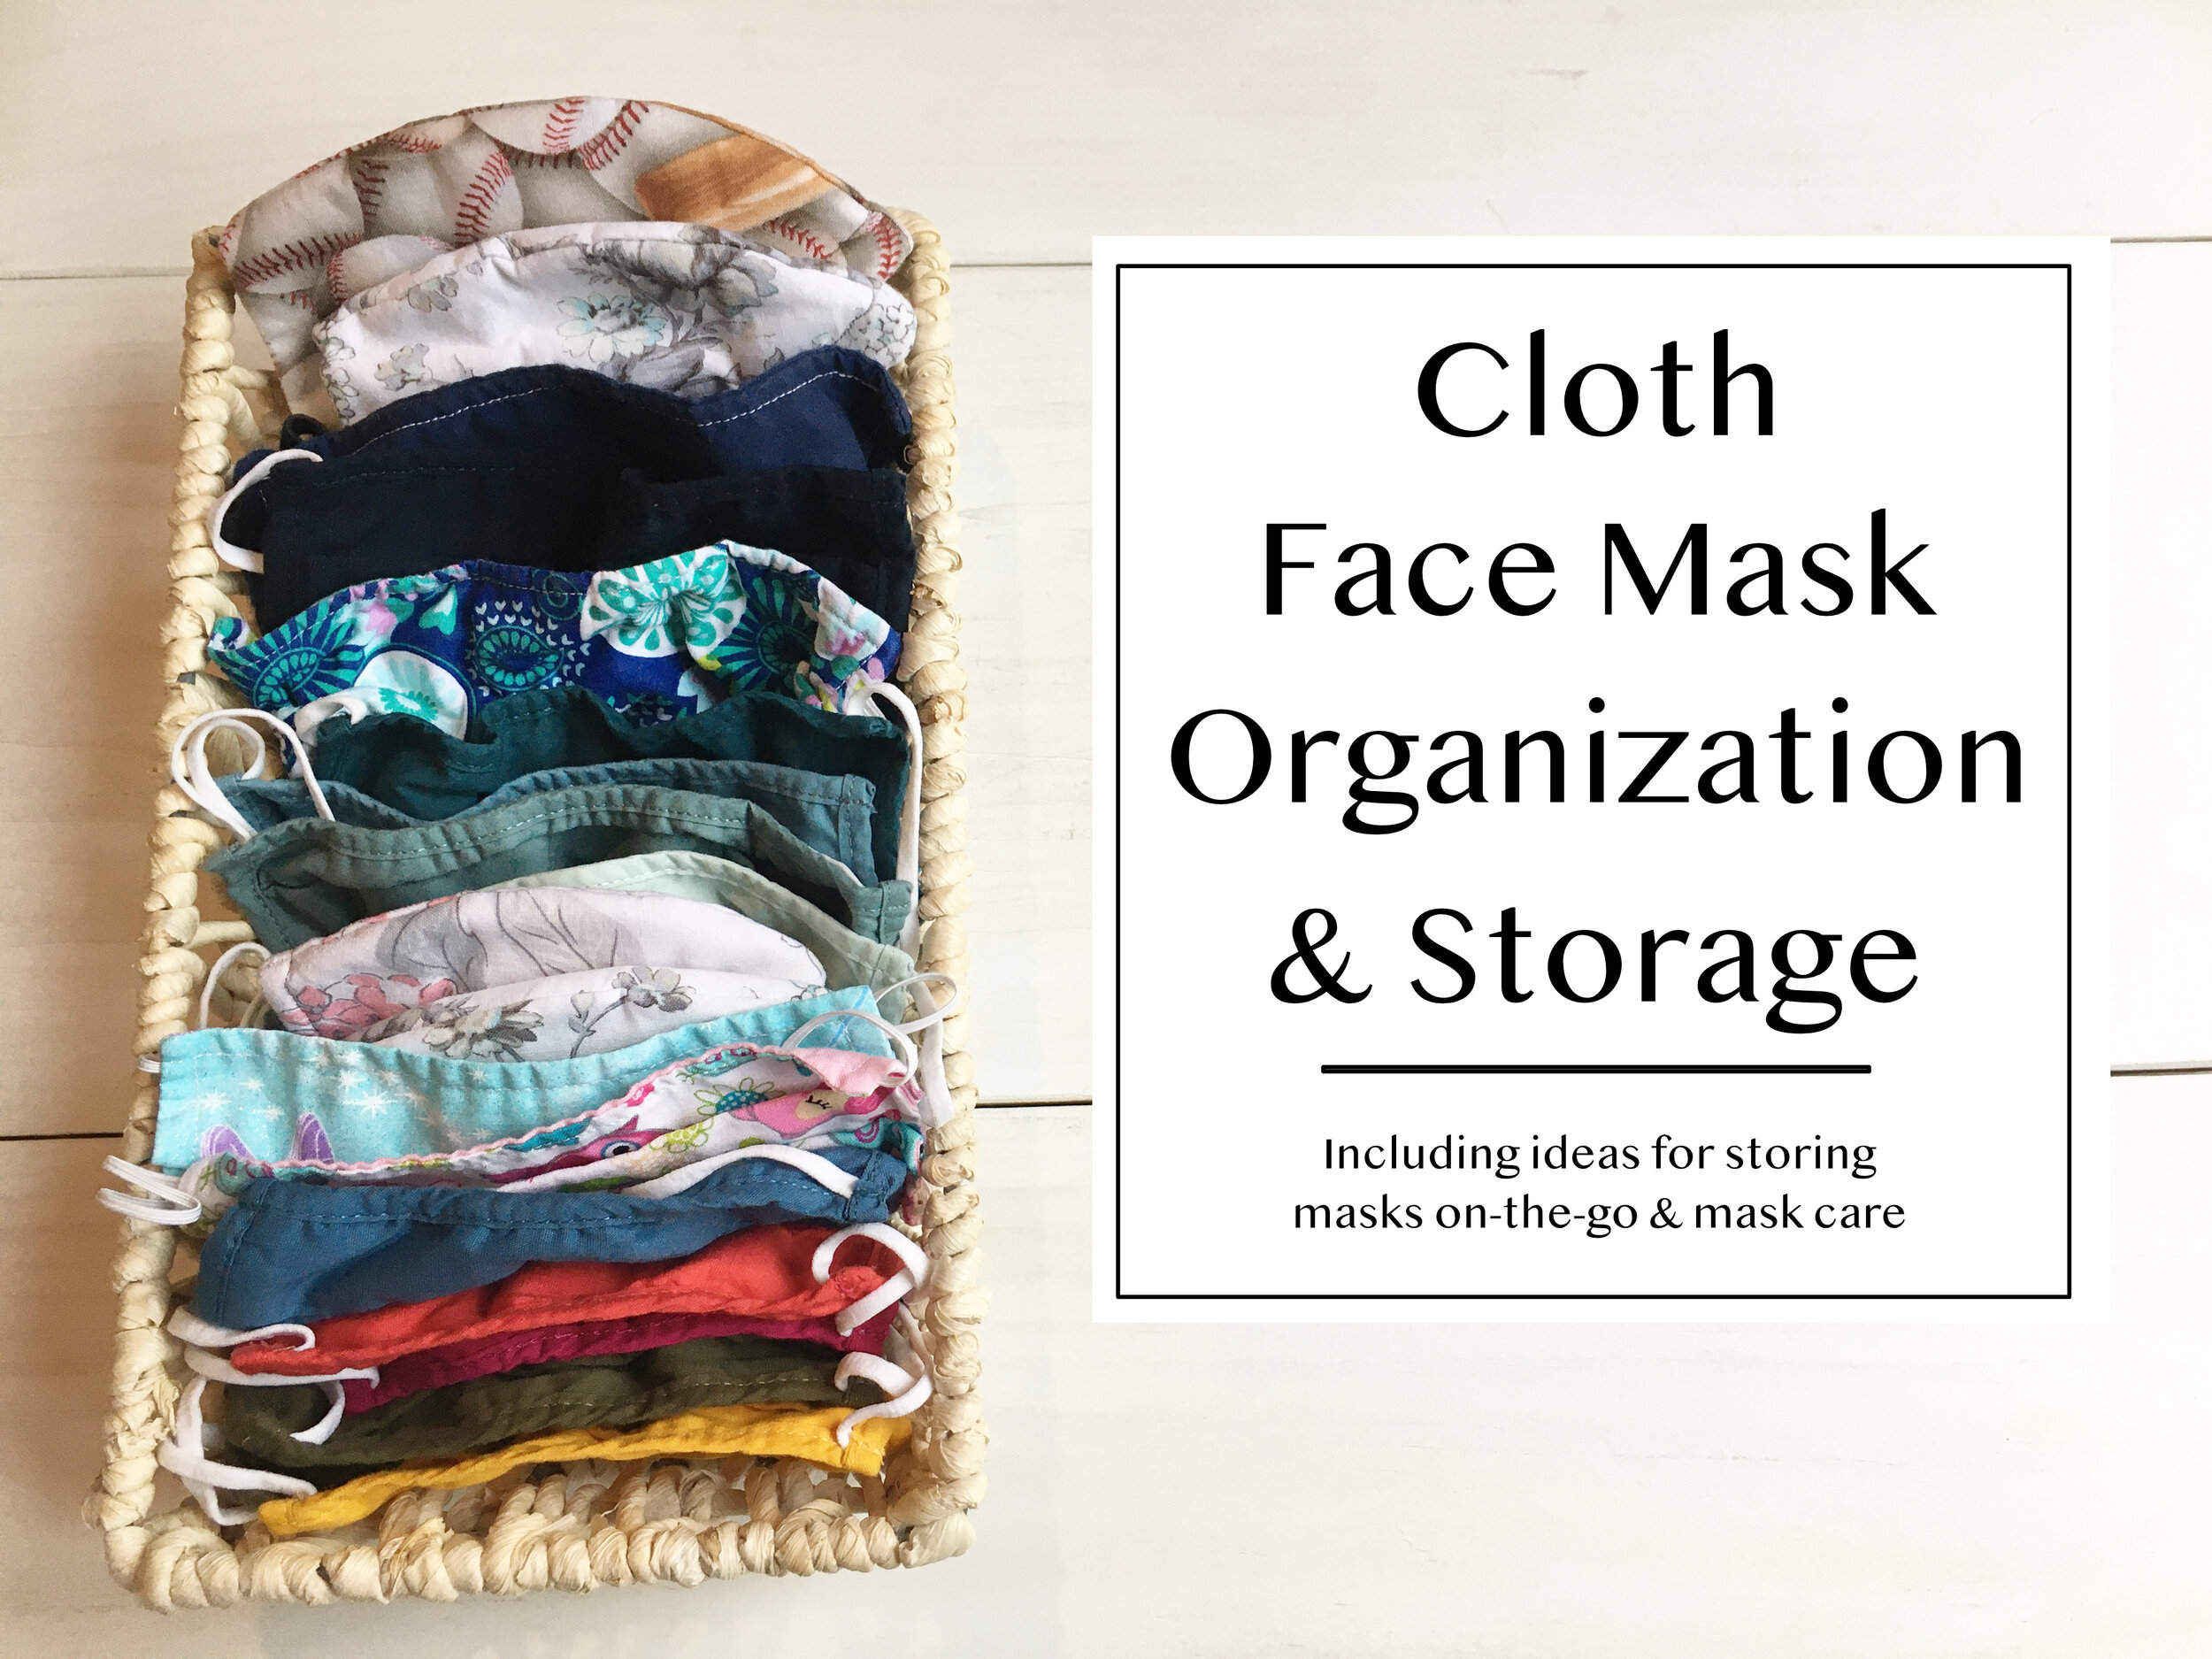
  • Good Masks - We did our best to try to find better masks for this year that are supposed to have better filtration. We have some child-sized "M95" ones as well as some cloth masks that have special filters that go inside of them.
  • Mask Cases/System - I have no idea if this system will be practical, but we're going to give it a try! I ordered these clear mask cases from Amazon and cut labels for them on my Cricut. We'll be packing one with extra clean masks, and the other will be empty for dirty masks to come home in. Since we invested in some better quality masks I wanted to make sure they stay in cases when not in use to keep them in good shape.
  • Breakaway Mask Lanyard - These can be handy during times when masks come down (lunch/snack, mask breaks outside, etc).
  • Label Everything - Pandemic or not, it's important to label all the things when kids go to school. We love this label maker for making quick and easy labels for water bottles, cases, sports gear, etc.

I hope that gave you some ideas of things you may want to pack for your children too, I hope you all have a safe, happy, and healthy school year!


Related Posts:


KEEP UP WITH BIRCH LANDING HOME
|  Etsy  |  Facebook  |  Instagram  |  Pinterest  |  Bloglovin'  |  Hometalk  |

Sheet and Towel Stripping How-To

While home for Quarantine, I’ve seen a lot of people posting about “stripping” their towels and bedsheets and showing disgusting After photos of dirty water - I was intrigued! Stripping the linens is supposed to get rid of any kind of build-up on them (whether that’s laundry detergent, body oil/sweat, hard water mineral deposits, etc). So I decided to give it a try myself and share the easy process - and let me tell you, it was a disgusting and oddly satisfying Quarantine Project. | This post contains affiliate links |

Sheet and Towel Stripping How-To

Apparently one should consider stripping their linens when they aren’t as absorbent as they used to be, they look or feel dingy, or they start to smell musty.

Supplies:

Everyone seems to be using more or less the same supplies, which are:

  • 1/4 cup Borax Powder
  • 1/4 cup washing soda (or 1/4 cup baking soda if you're in a pinch and don't have washing soda.. I used baking soda)
  • 1/2 cup laundry detergent

How-To:

Fill a bath tub with hot water and dissolve the Borax, washing soda or baking soda, and laundry detergent in it. Next add your towels and sheets (make sure to only do similar colors together… in some cases it can cause some colors to run. We only have done our white and light colored linens so far.)

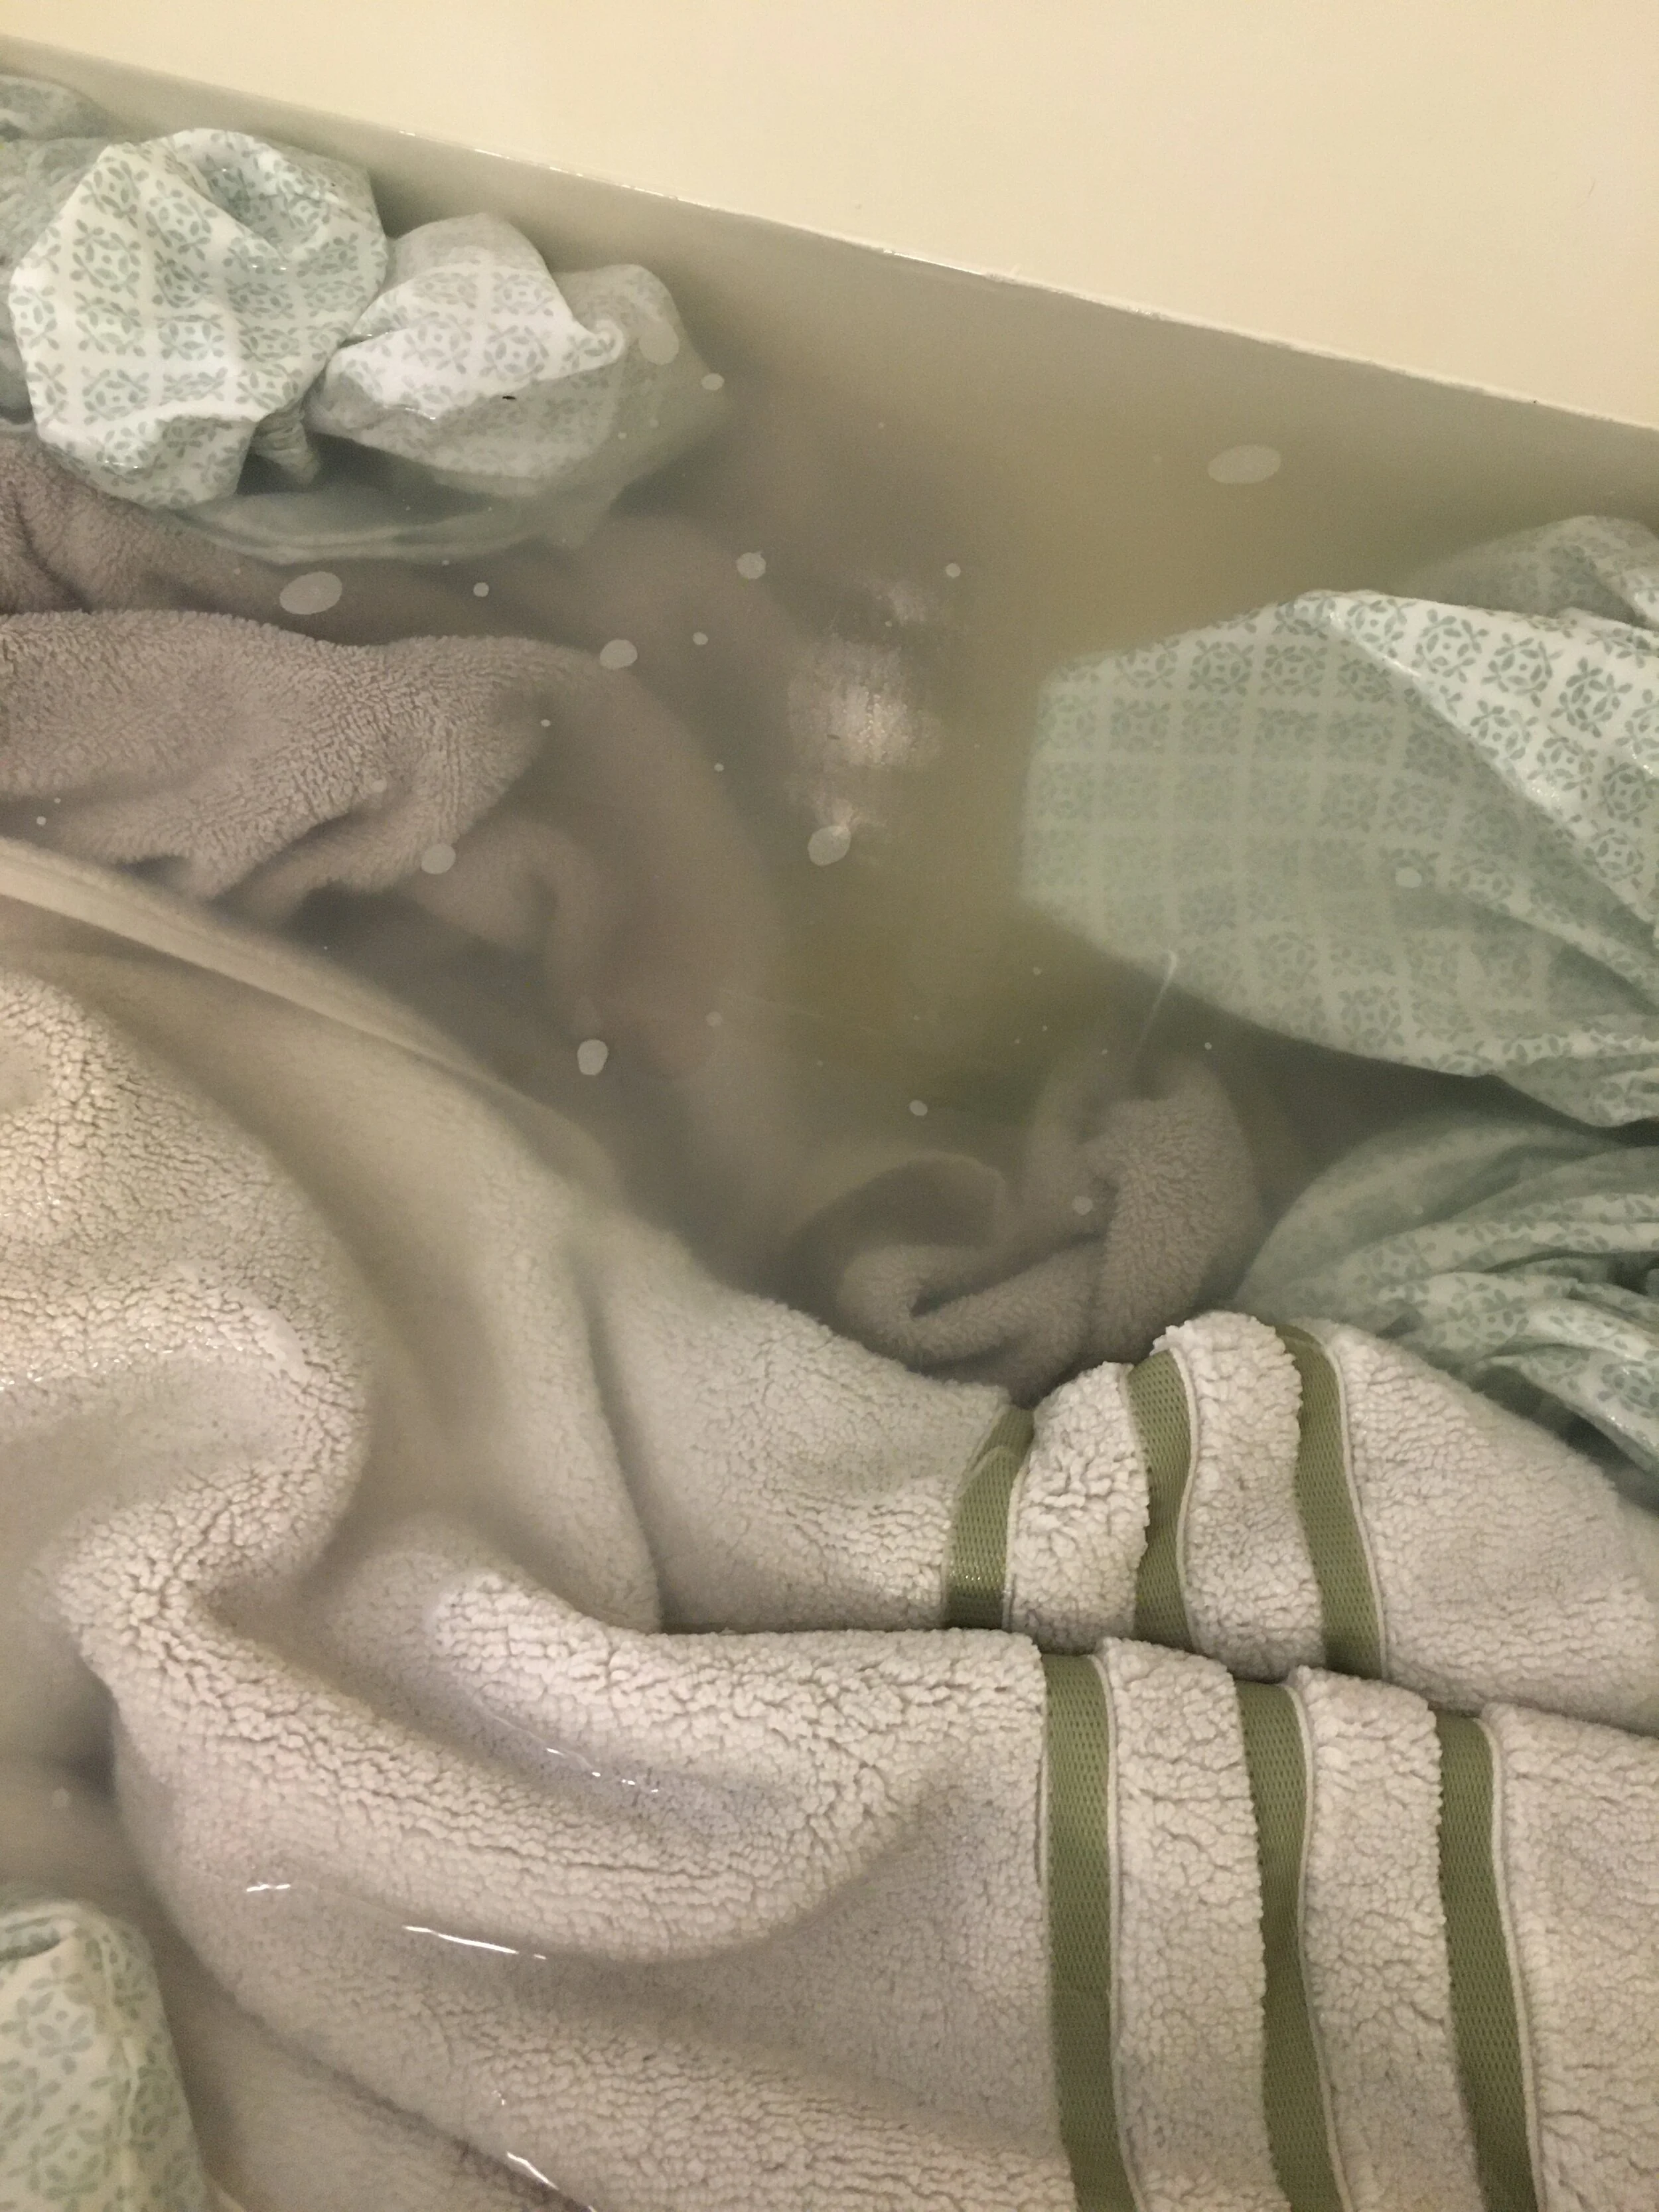
Then leave them to soak for the next four or so hours, stirring occasionally. You should see the water turn from clear to a gross yellowish-dirty color.

Once the water cools, drain the tub and squeeze the water from the linens, rinsing them with some fresh water. Then put in the washing machine (with no detergent - your items will already have absorbed detergent and Borax and you want to rinse everything out, not add more soap at this point), and run through the “wash” cycle to rinse everything out thoroughly.

After that you can put them in the dryer, or re-run the washing machine with detergent like you normally would to give them a fresh wash before drying.

Draining the dirty water after stripping. Ew.

Draining the dirty water after stripping. Ew.

Our Personal Results:

So it wasn’t the magical night-and-day change across the board that I was expecting, visually anyways - and some items definitely had better results than others. OVERALL - Our linens definitely felt cleaner, and looked a little brighter - however, our old white towels (which have turned very off-white over the years), did not magically turn luminous white again like I was hoping. But again, that’s probably too much to expect as they are 10+ years old and have had many years to get discolored in the regular laundry. Nevertheless, just SEEING the dirty water after we stripped the linens makes me feel a lot better about doing this process - visually not everything looks perfectly white again, but I KNOW it’s cleaner after removing all that invisible gunk and that makes me feel a lot better.

Okay, so the old white towels are still off-white, but I know they’re cleaner than before after seeing the dirty water after the stripping process.

Okay, so the old white towels are still off-white, but I know they’re cleaner than before after seeing the dirty water after the stripping process.

It’s my understanding that you can repeat this process as needed, and I can see myself doing this maybe up to 2-4x per year going forward to try to keep build-up at bay.

Disclaimer: Try at your own risk. In some cases this process may make colored fabrics run and may not be suitable for all fabrics.

Want to see another satisfyingly gross example…?

Here’s a photo my sister sent me after she did her sheets - wow!

Here’s a photo my sister sent me after she did her sheets - wow!


KEEP UP WITH BIRCH LANDING HOME
|  Etsy  |  Facebook  |  Instagram  |  Pinterest  |  Bloglovin'  |  Hometalk  |

Going “KonMari” on my Daughter’s Bureau

Our daughter’s bureau was a train wreck and I just couldn’t take it anymore. She’s been very much into picking out her own clothes lately and tends to dig around in her drawers until she finds what she wants, without putting anything back the way it was. Today I finally decided to tackle the disaster and emptied her bureau, folded everything in the “KonMari” style, and put it back with order.

BEFORE

BEFORE

What’s the KonMari style? Well, technically the first step is to only keep what you truly love or use, and purge the rest (I pulled out a few items that she was starting to outgrow, but most of her clothes stayed). Then you fold everything uniformly so it can stand up in the drawers and be “filed,” allowing you to see everything at once. This is a great way to fold your clothes as you can see everything all at once and keeps you from falling into the rut of constantly wearing just what’s on top.

AFTER

AFTER

As you can see I came up with a basic system for the drawer too - I grouped all her t-shirts together, then long-sleeve shirts, then sweatshirts and tank tops. (This folding technique also seems to be a lot more efficient as there’s even some empty space now!) I also tackled her other drawers too and tidied up her jeans, pants, and PJs. Overall I think it looks great and should help make getting ready for school in the morning a breeze.

How I organized it:

Going "KonMari" on my Daughter's Bureau:  AFTER

I already had my own drawers folded in the KonMari style and love it - it’s so nice being able to see all your options at once when you’re getting dressed in the morning. As for our daughter, I explained the new setup to her and she understands it (she was honestly really excited about her neat drawers when I first showed them to her) - but the reality is she’s five years old and there’s no way it’s going to stay this organized on it’s own. I also don’t think it’s worth nagging her over it to keep it this way, it’s really not a fair expectation for a five year old. So, we’ll see how long this lasts… I’ll do my best to tidy it up when I can and try to keep some semblance of order but it won’t always be picture-perfect and that’s okay. That’s life ;)

One Week Update: She actually kept the system perfectly! Just a few things had fallen over and one item was crumpled up and put back, but 95% of it was still perfect. I’m super impressed that an almost 5-year-old can keep the system that neat. But it goes to show, that if she can do it - so can you!

Related Post:

KEEP UP WITH BIRCH LANDING HOME
|  Etsy  |  Facebook  |  Instagram  |  Pinterest  |  Bloglovin'  |  Hometalk  |

How "Clean Kitchen at Night" Changed my Life

Okay, okay - so saying a hashtag "changed my life" is a bit dramatic, but let me explain...

As a Mom, you spend your entire day cleaning up after others... toys, food, diapers, everything - and at the end of the day the last thing you want to do is clean up more. Before kids I used to be good about keeping an empty sink and clean counters, but these days once the kids were in bed I just wanted to be done and the kitchen was left in disarray almost every night. However after seeing An Organized Life's Instagram hashtag #cleankitchenatnight, I was inspired and had to try it!
| This post contains affiliate links |

How Clean Kitchen at Night Changed my Life

The whole point of "clean kitchen at night" is that it's a great motivator.  Having a clean kitchen and clean slate to wake up to in the morning helps set a less-stressful and more motivated tone for the rest of your day, in all aspects of your life. It's so refreshing to see clean counters and an empty sink.  Making meals throughout the day is so much easier too when all of the dishes, pans, and silverware are ready to go!  I don't know how many times before I would go to make a meal, only to realize a specific pan, measuring cup, or casserole dish I needed was still dirty from the day before. Now meal prep is so much easier and quicker, simply because everything is already clean.

How Clean Kitchen at Night Changed my Life

Now, we don’t have an “Instagram-worthy” kitchen… it still has the honey-colored maple cabinets and green (yes, green) builder-grade laminate counters. But trust me in that you don’t need a picture-perfect kitchen to feel the sense of accomplishment and motivation in leaving everything in a clean and organized state each and every night.

As cheesy as it sounds, having a clean kitchen really does reduce stress and brings some peace to normally chaotic mornings. And I’ve found this motivation snowballs into all other areas of my life too - I feel so much more productive in work and efficient in accomplishing my to-do list every day. There's a saying that goes something like "cluttered house, cluttered mind" - and it's true... if you surround yourself with messes and clutter you feel it. If you have a sense of control over your house, even if it's just the kitchen, it makes you feel like you have life together (even if you don't, haha).

Don’t believe me that “Clean Kitchen at Night” really makes a difference?

I challenge you to give it a try! For the next week, I challenge you to make a point to clear out the sink, clean the clutter off the countertops, and wipe down your whole kitchen every night. It can be hard work at first, but once you get in the rhythm it goes quick - especially when you’re only picking up that day’s mess and not messes from previous days too. Try it for a week and let me know if you feel less stressed and more motivated across all aspects of your life - I hope you do!

#cleankitchenatnight #resetyourspace #progressnotperfection

Related Posts:

How Clean Kitchen at Night Changed my Life

KEEP UP WITH BIRCH LANDING HOME
|  Etsy  |  Facebook  |  Instagram  |  Pinterest  |  Bloglovin'  |  Hometalk  |

Easy Flashcard Organization Hack

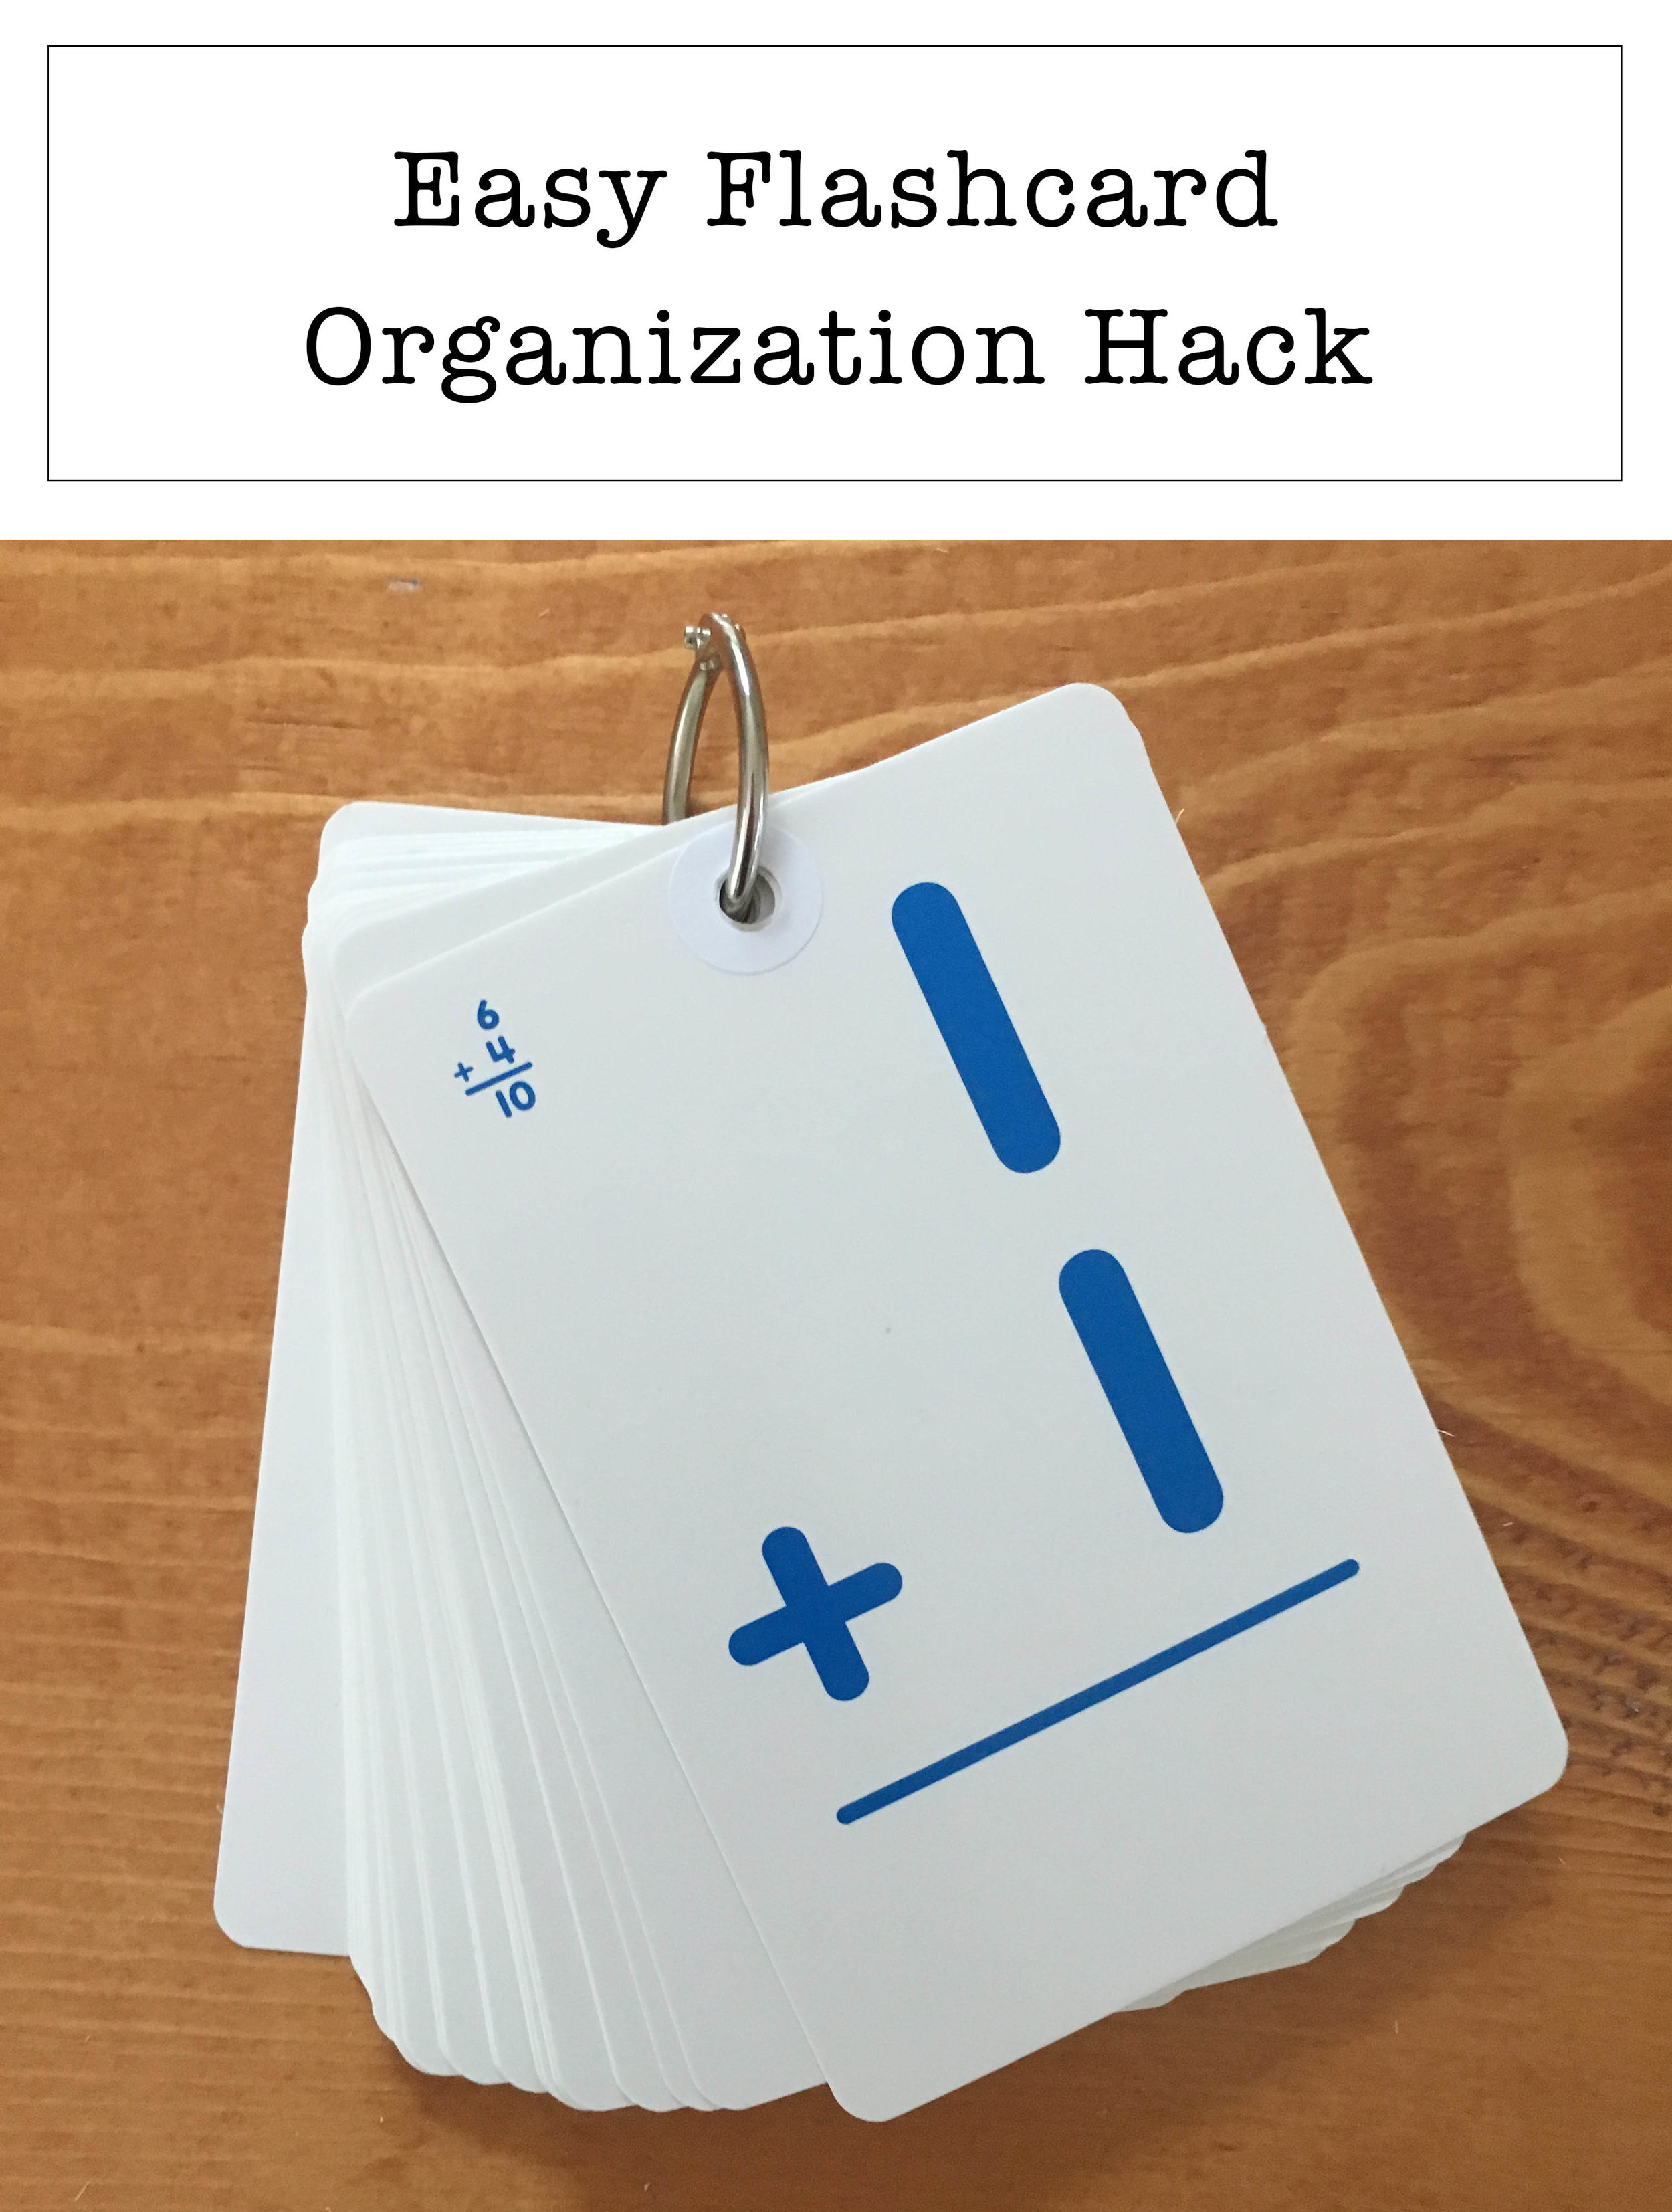
Our toddler loves flash cards... well, loves dumping them all over the living room mostly.  After getting tired of constantly picking them up I decided it was time to do something about it.  

Easy Flashcard Organization Hack!

After buying some $1 packs of flashcards from Target Dollar Spot (love Dollar Spot!), I punched a hole in each one and reinforced them with hole reinforcement stickers before stringing them together with binder rings.  If you don't have binder rings, you could also use a piece of ribbon or string.  

Easy Flashcard Organization Hack

And that was it - easy-as-can-be!  Now I don't have a couple hundred flashcards thrown all over the living room, and they're super-easy to pack for car trips and travel!  

Easy Flashcard Organization Hack

KEEP UP WITH BIRCH LANDING HOME
|  Etsy  |  Facebook  |  Instagram  |  Pinterest  |  Bloglovin'  |  Hometalk  |

Spring has Sprung!

I've been very busy around the house lately, working on a lot of spring cleaning and garden projects.  
It seems like there isn't enough time to get it all done... raking, weeding, mulching, planting our veggie garden, cleaning out the closets and donating/consigning our unwanted warmer weather clothing... just a few of the things on my to-do list.  Whew.  

But you certainly can't beat lilac season!  These beauties are from our next door neighbor and a reminder to stop and smell the roses (or lilacs) no matter how much there is to get done.  

Love me some lilacs!  A perfect sign of spring.

Happy Spring from Birch Landing Home!  

KEEP UP WITH BIRCH LANDING HOME
|  Etsy  |  Facebook  |  Instagram  |  Pinterest  |  Bloglovin'  |  Hometalk  |