I'm a wife, stay-at-home mom, crafter, and blogger living in rural New England. As seen in Martha Stewart Living, Food Network Magazine, and more! | Tutorials, DIY, crafts, parenting tips, recipes, money saving tips, product reviews, local product features, New England living, intentional living, and more! |
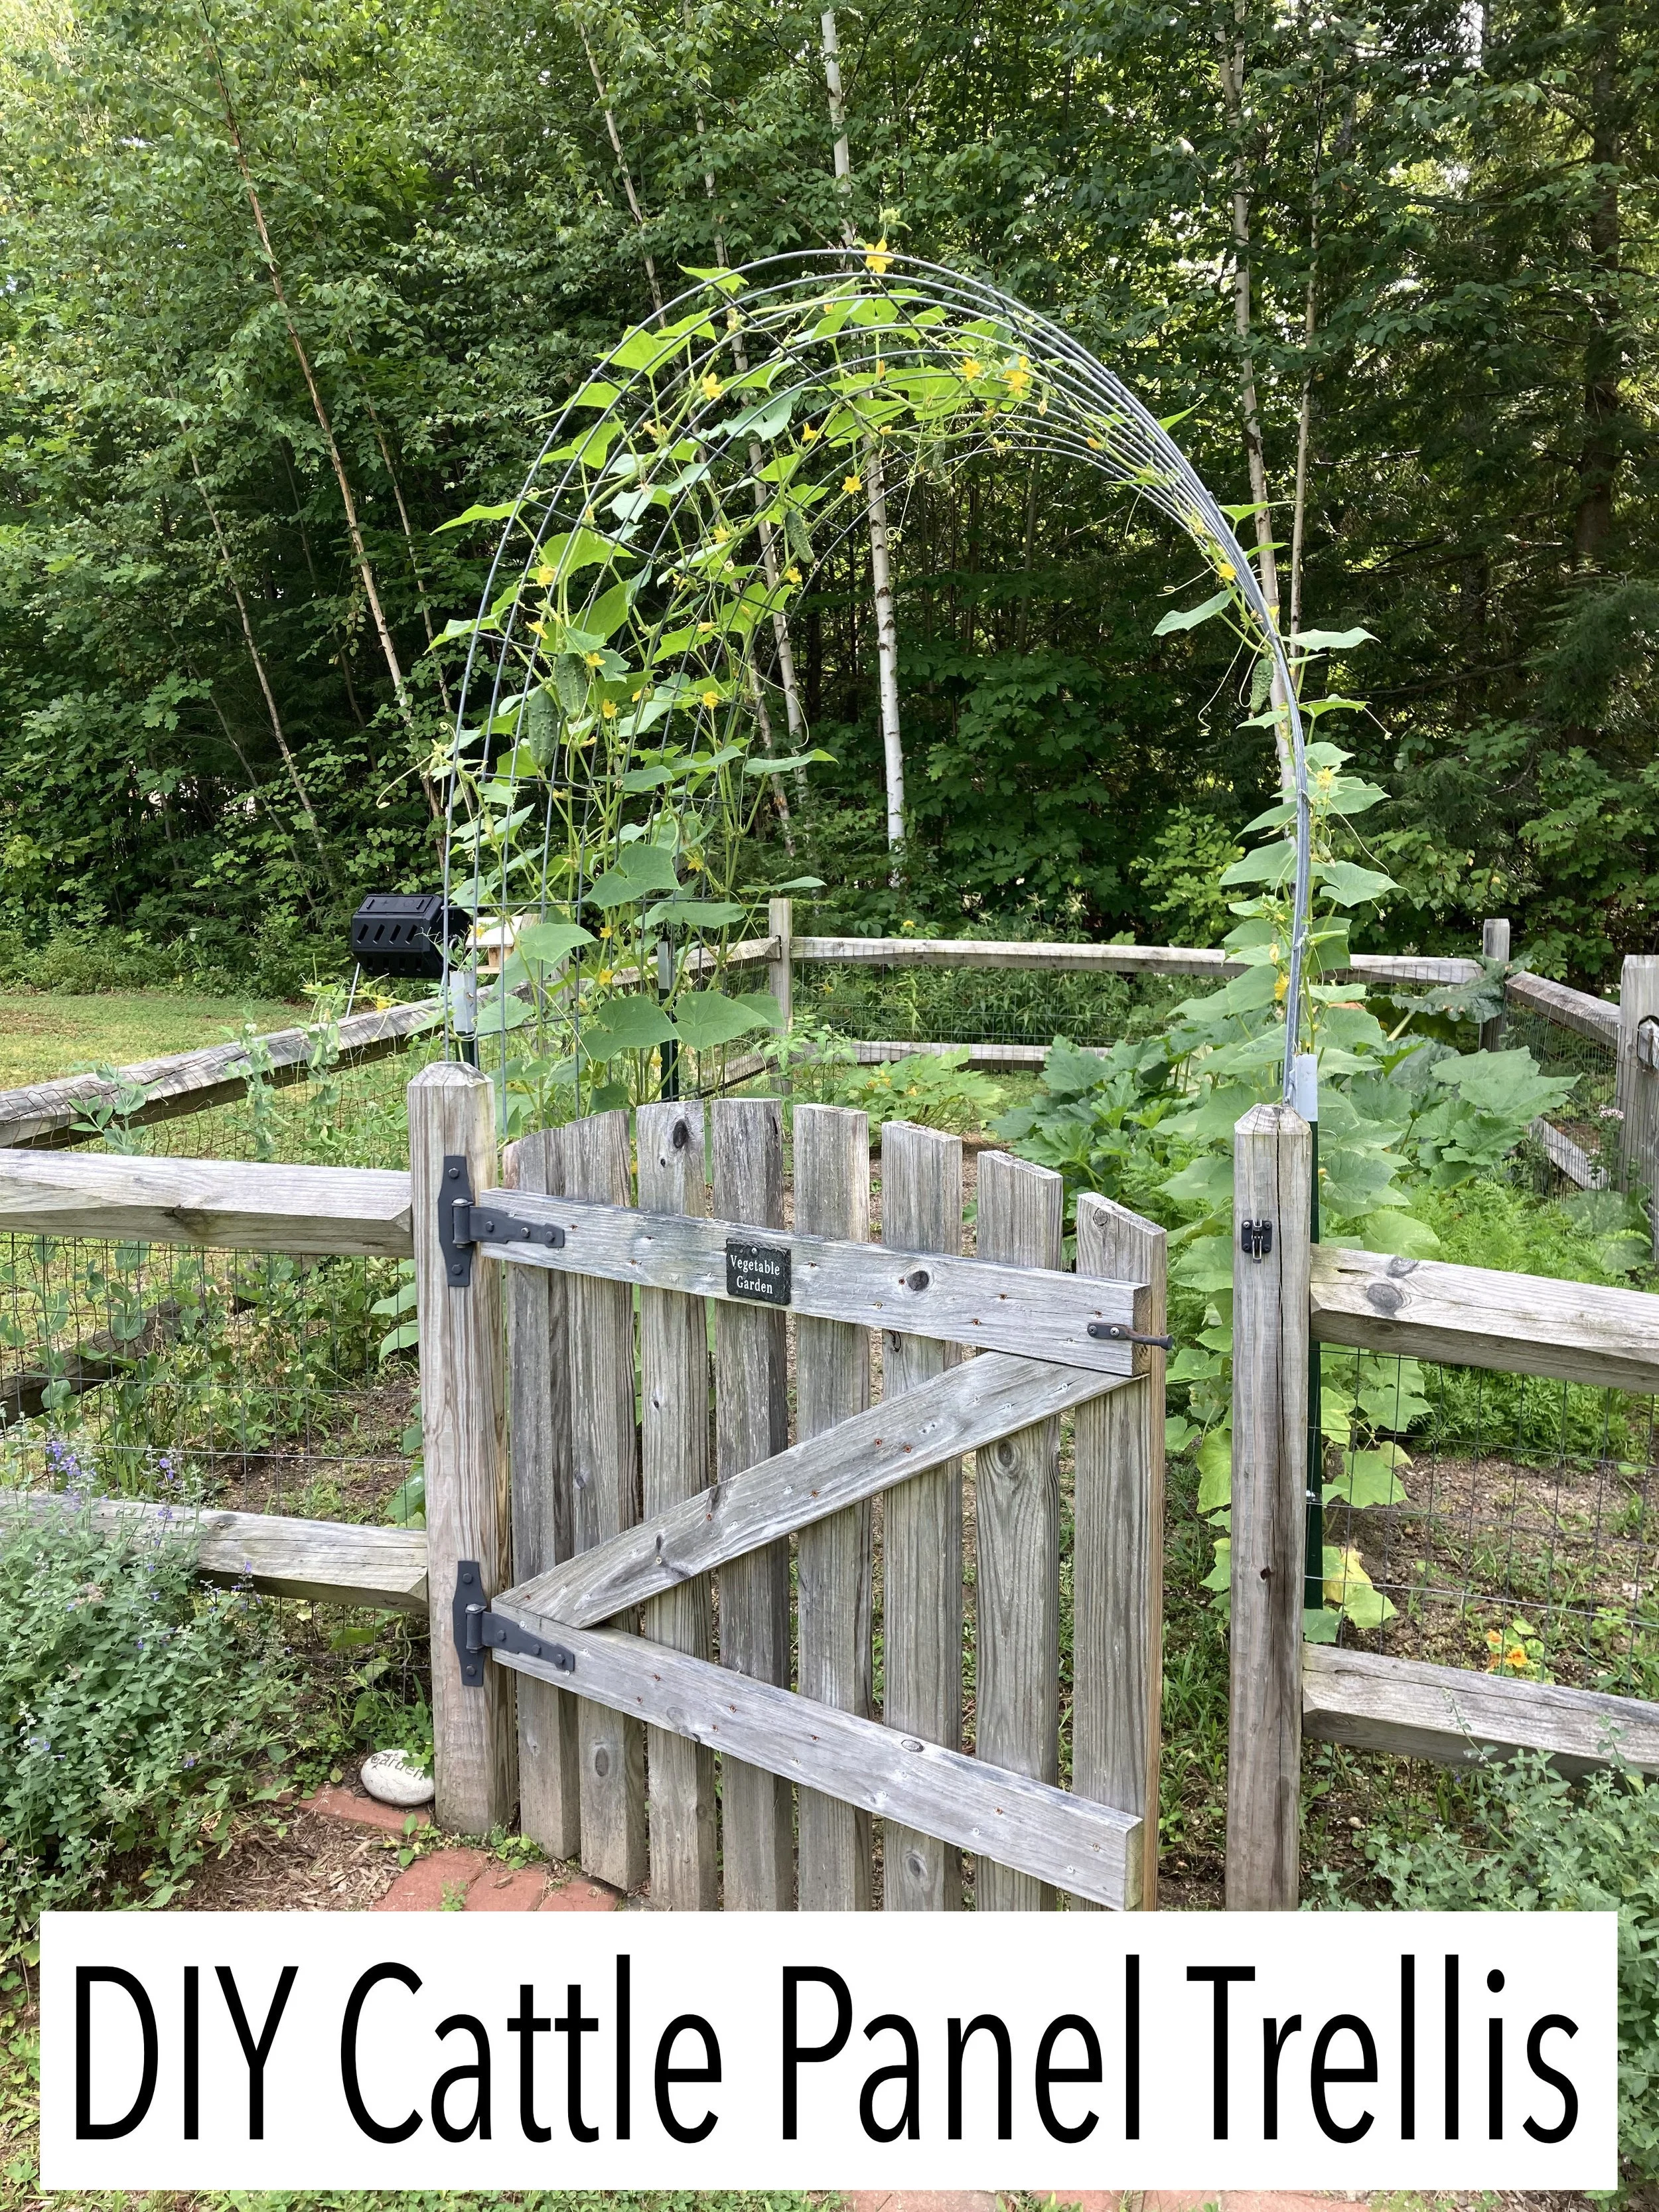
Last summer Pinterest blew up with DIY Cattle Panel Trellises and I decided I was going to jump on this bandwagon next season… And so here we are - it’s spring and I’m excited to get this set up and document my garden’s progress this year. | This post contains affiliate links |
- This post will show how we built our Cattle Panel Arch and I will also add progress photos to this post as our garden grows -
To make a Cattle Panel Trellis, you really only need a few things. We picked up most of our materials at a local Tractor Supply store but you could find these materials at other farm/garden centers too or order online. The trickiest part was getting everything home since the cattle panel is fairly large. Thankfully my father-in-law has a pickup truck and was able to pick up the items for us.
Materials:
Cattle Panel (we ordered online and picked it up at our local store)
T-posts (you can buy them individually in store too)
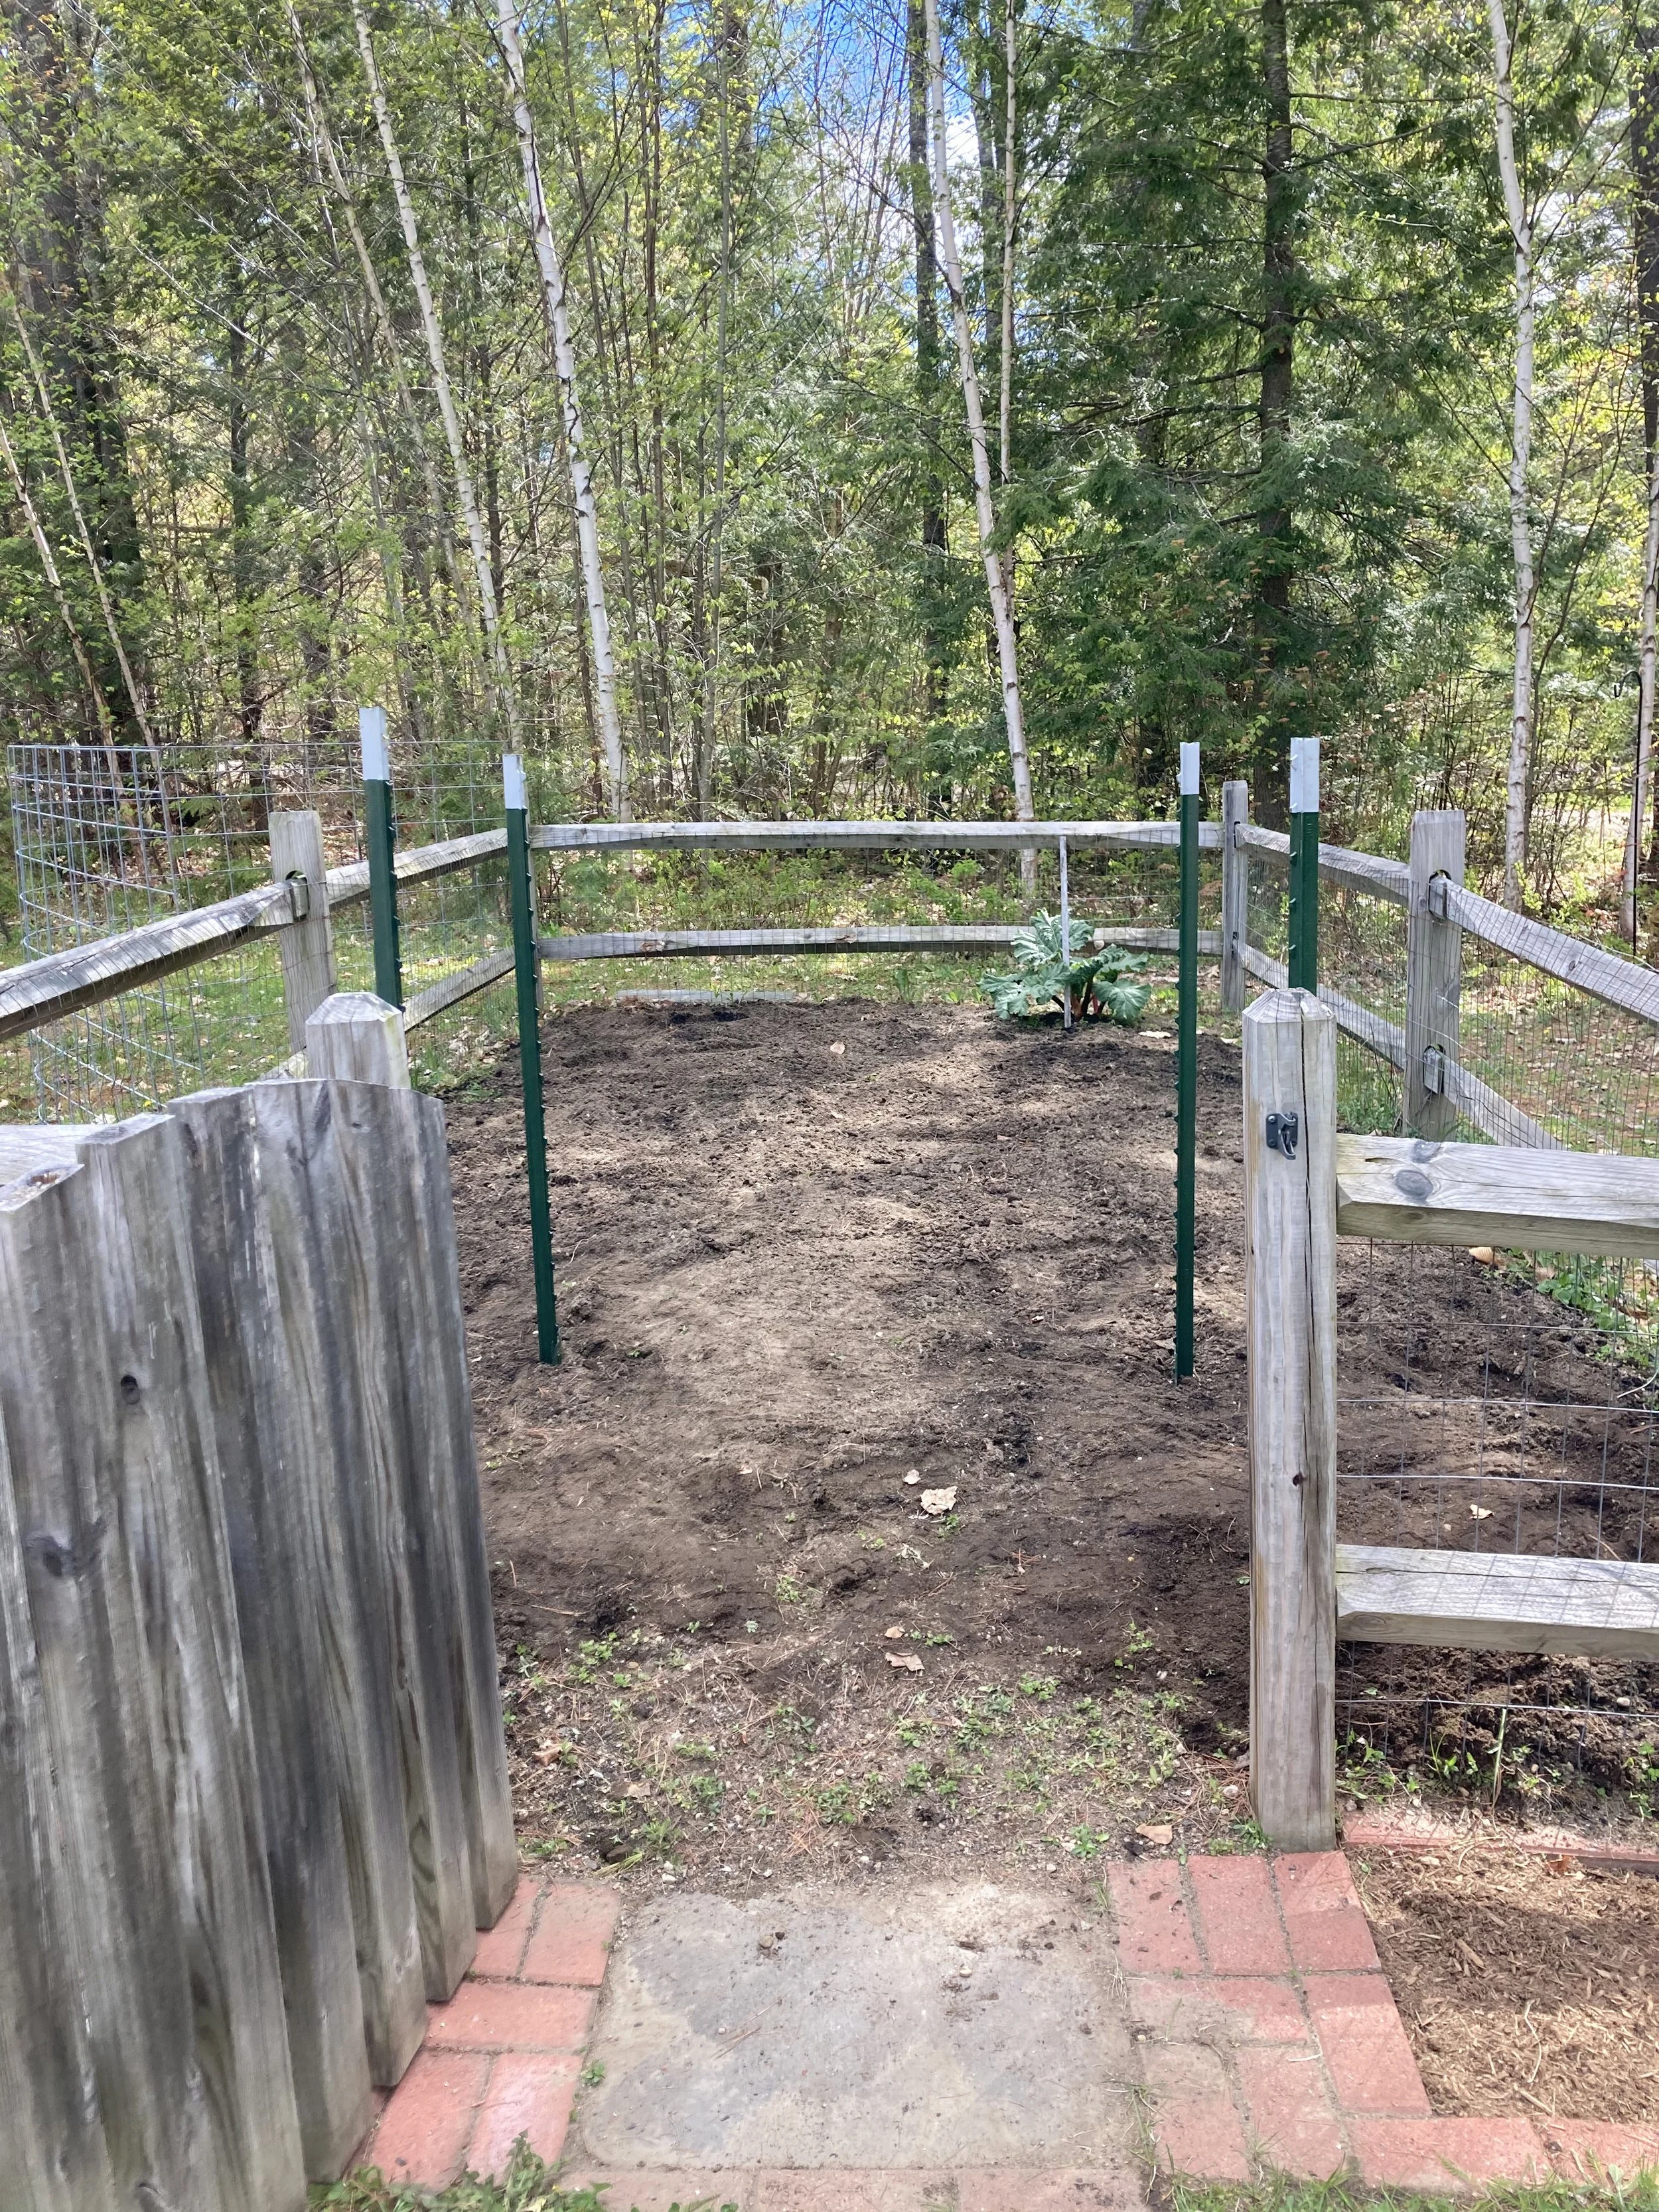
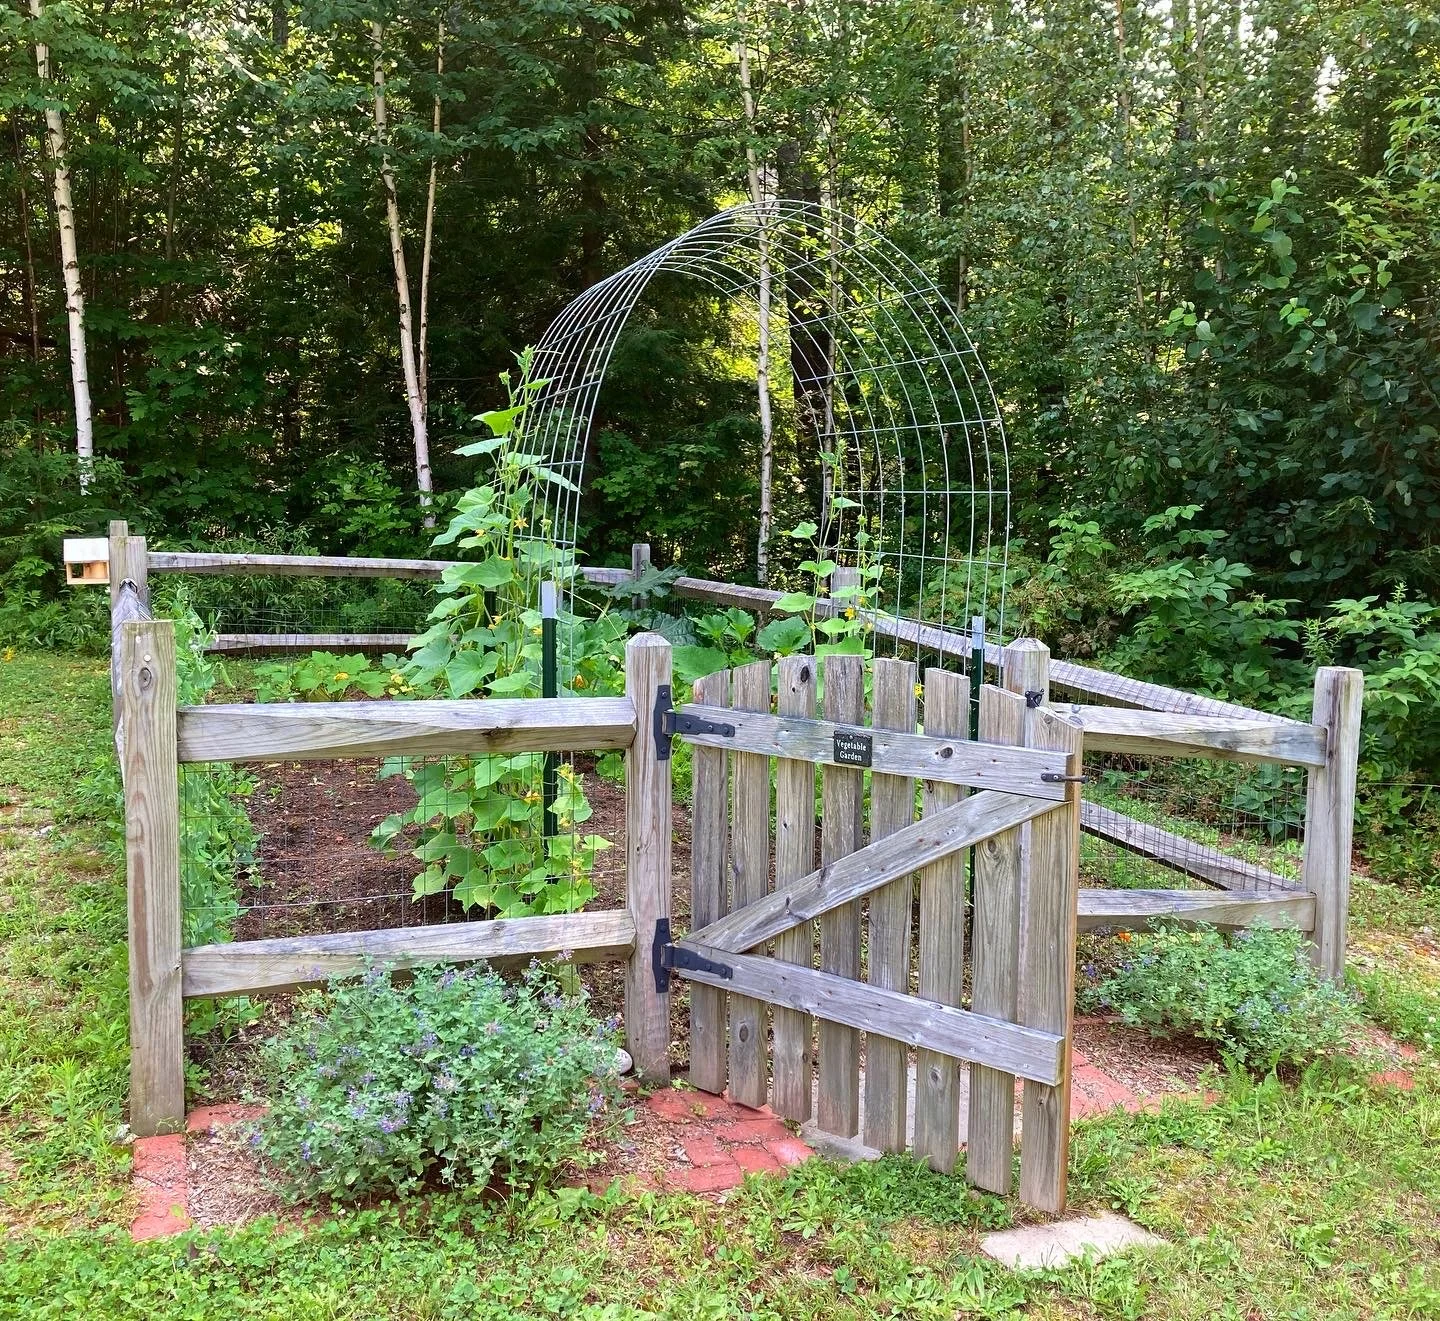
First, figure out where you want your arch to go. For us we put it just inside our garden gate to frame the entrance. It’s also on the north side of our garden so it won’t shade the other veggies too much.
Once you have it laid out and square, drive the t-posts in with a hammer or post driver until they’re deep and sturdy. This was easier-said-than-done with our rocky soil here in NH, so one post couldn’t go in quite as deep as the others but it was sturdy enough still.
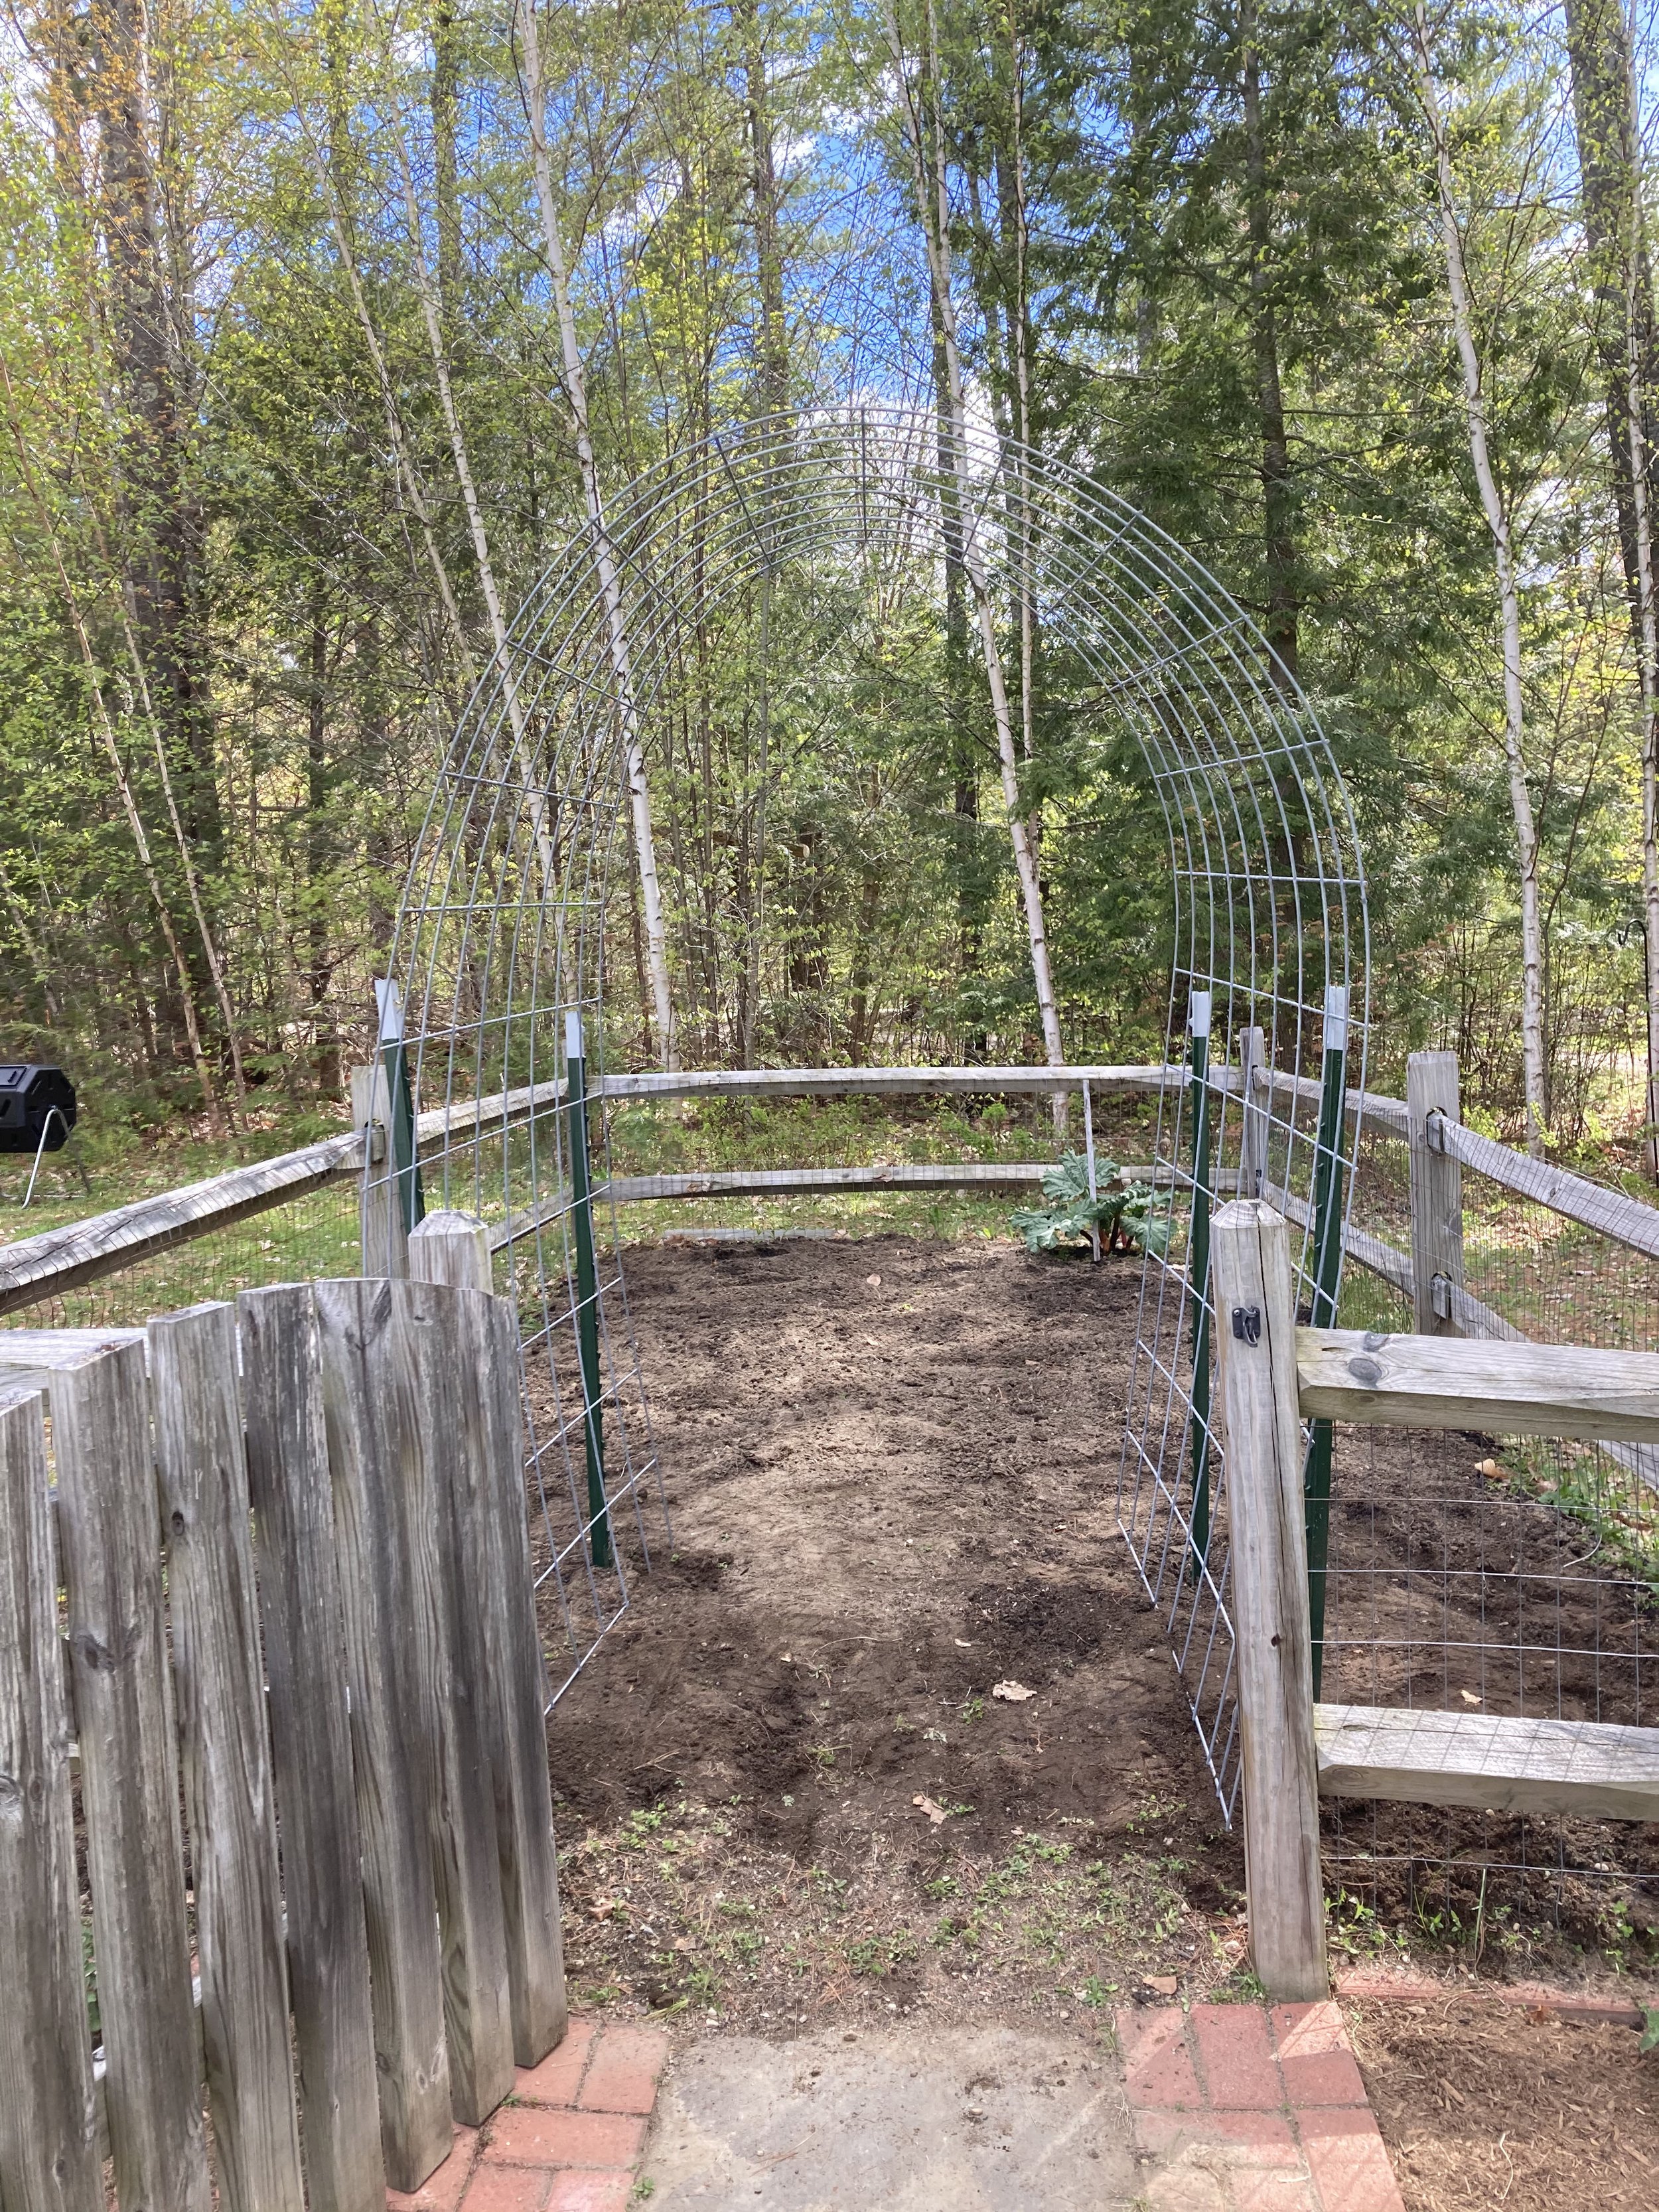
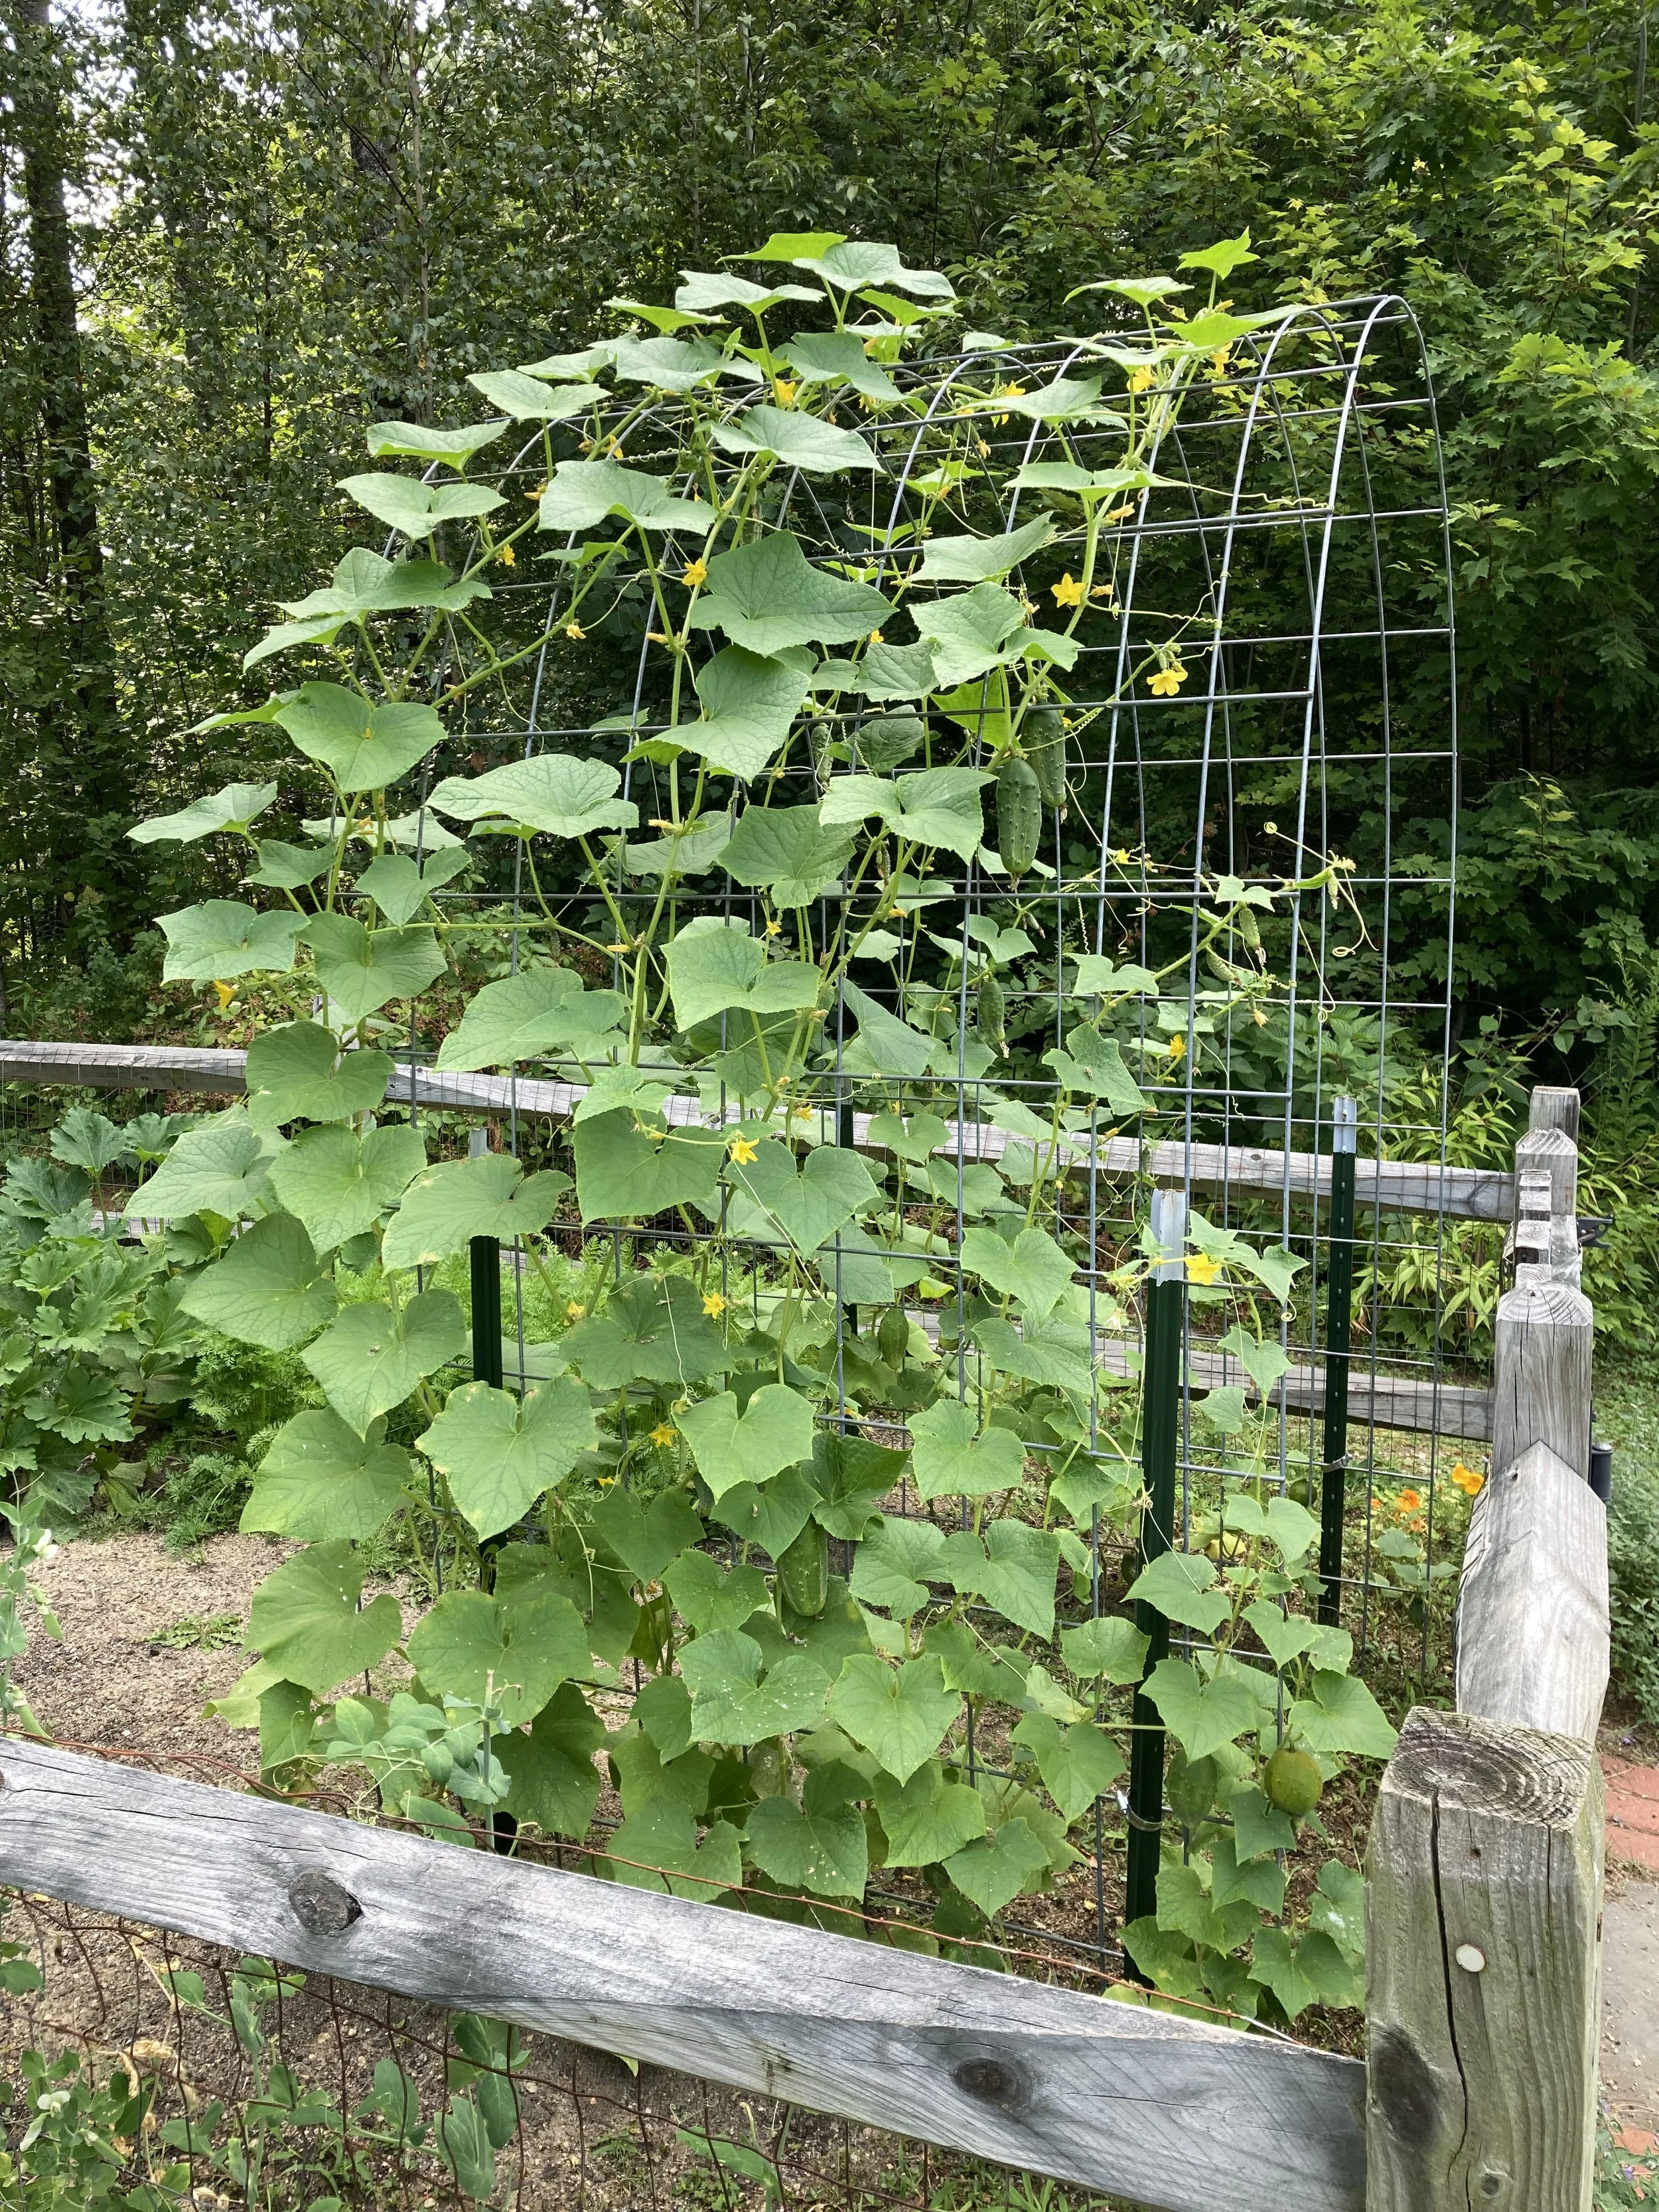
Next gently bend the cattle panel into a “rainbow” and set it inside the square you made. (Next year we might move our t-posts out a little wider to get a more gentle and less-tall arch, but this worked fine for us too as-is.)
Once you get it in place, secure it with hose clamps, heavy duty wire, or some rope so it stays in place.
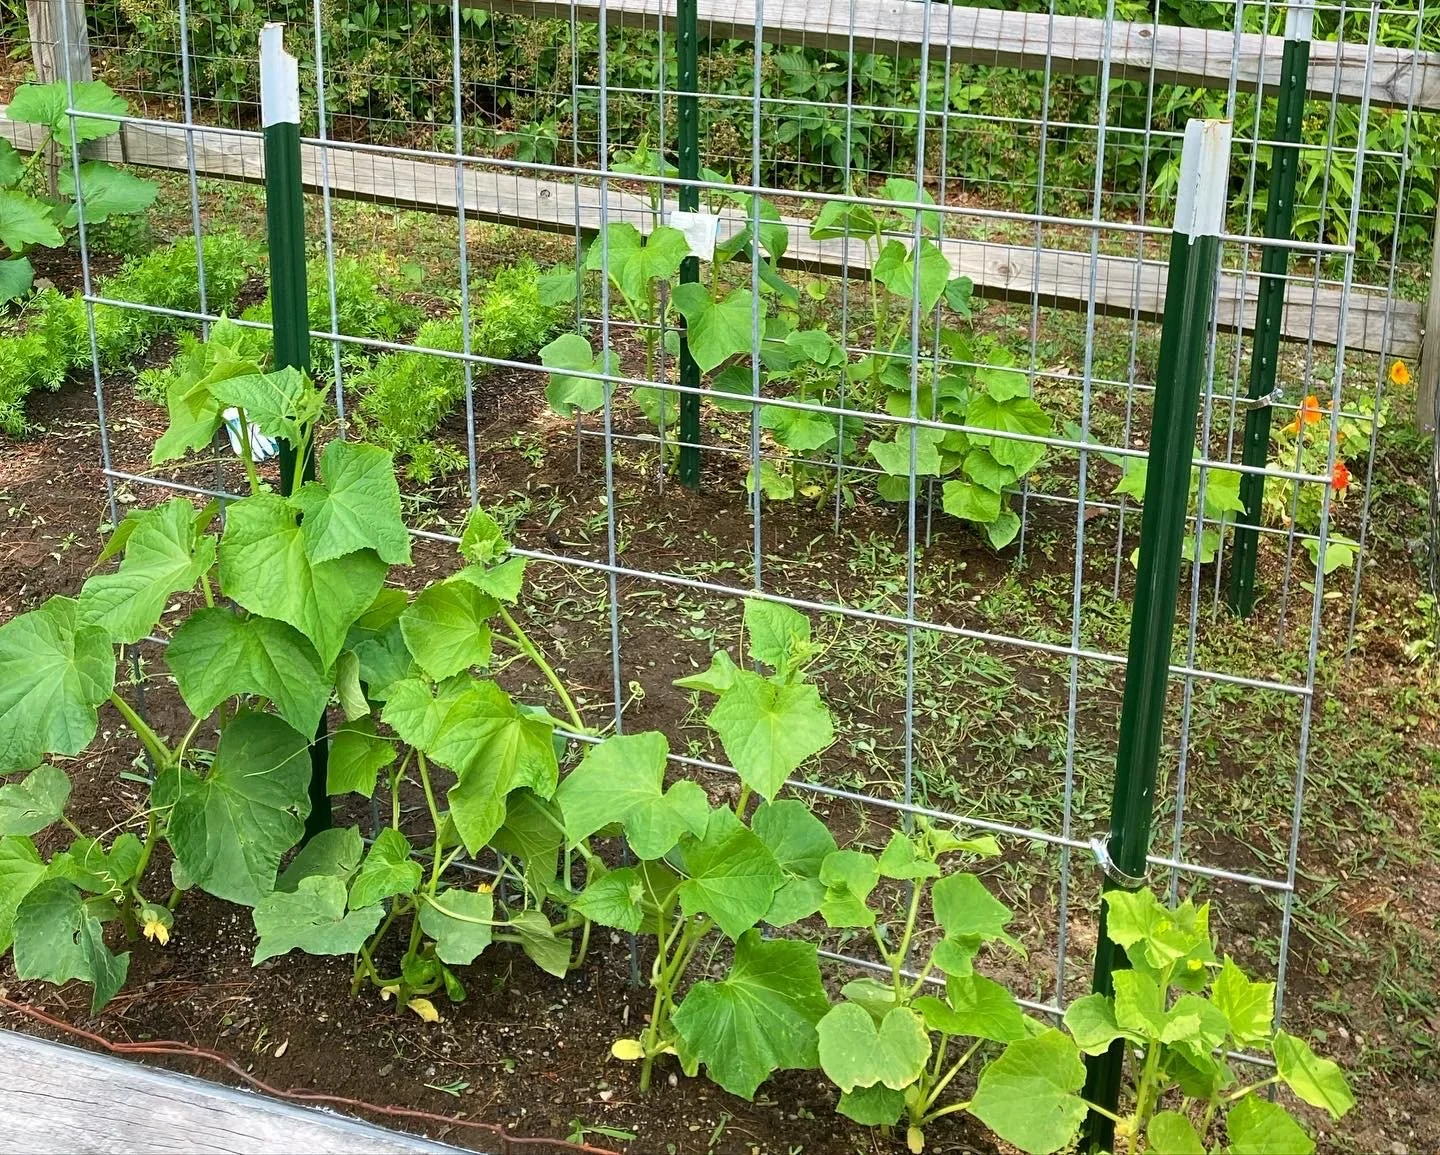
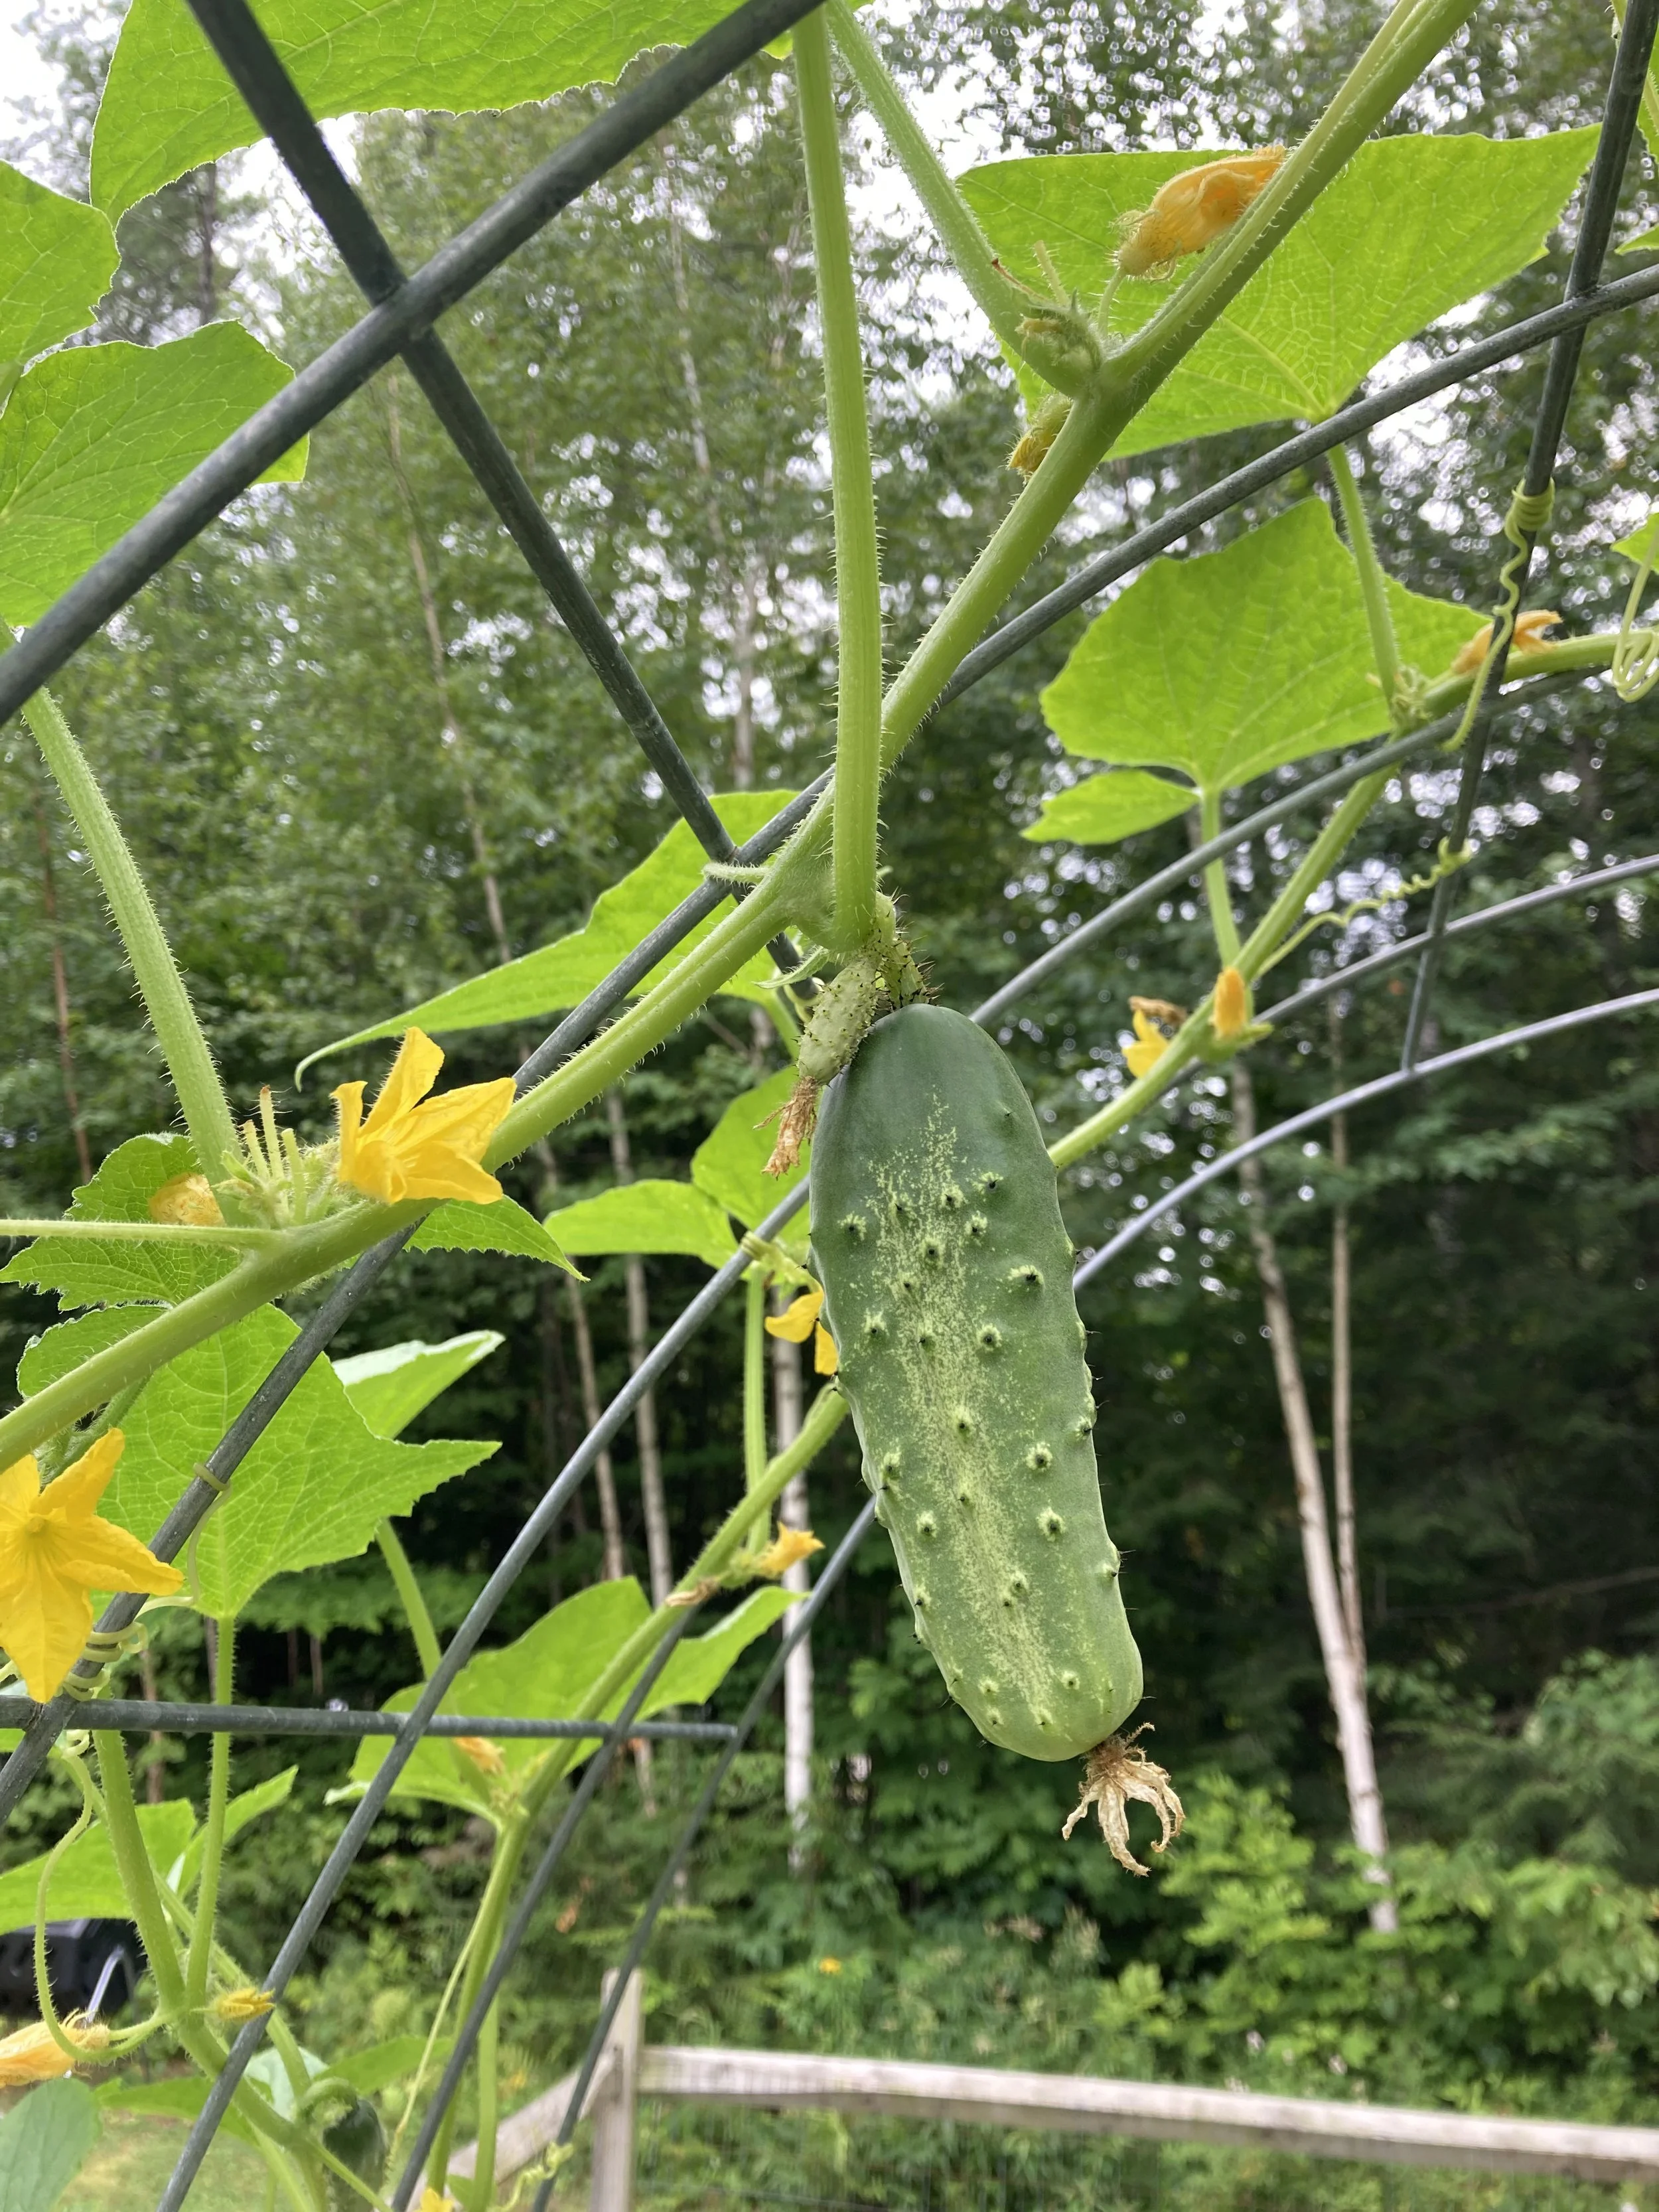
Now you can plant! We planted ours with vining cucumbers, but you could plant just about any vining plant on these - including peas, squash, ornamental gourds, flowers, etc.
The vines do a great job climbing the arch on their own, but it’s a good idea to check them daily and gently guide the vines where you want them. There’s always a rogue vine that will try to go the other way! They will especially need some help being trained to follow along the top of the arch since their natural inclination will be to continue growing straight up rather than bending around the curve at the top.
And that’s it! Overall it was a very easy project and one we will definitely continue with in the future. I also noticed a huge benefit for our pollinators too - the bees were able to reach the flowers easily and we had a bumper crop of cucumbers this year. They were also very easy to pick hanging down from the arch.
Good luck on your cattle panel trellis adventure!
From earlier in the season, before the vines reached the top.
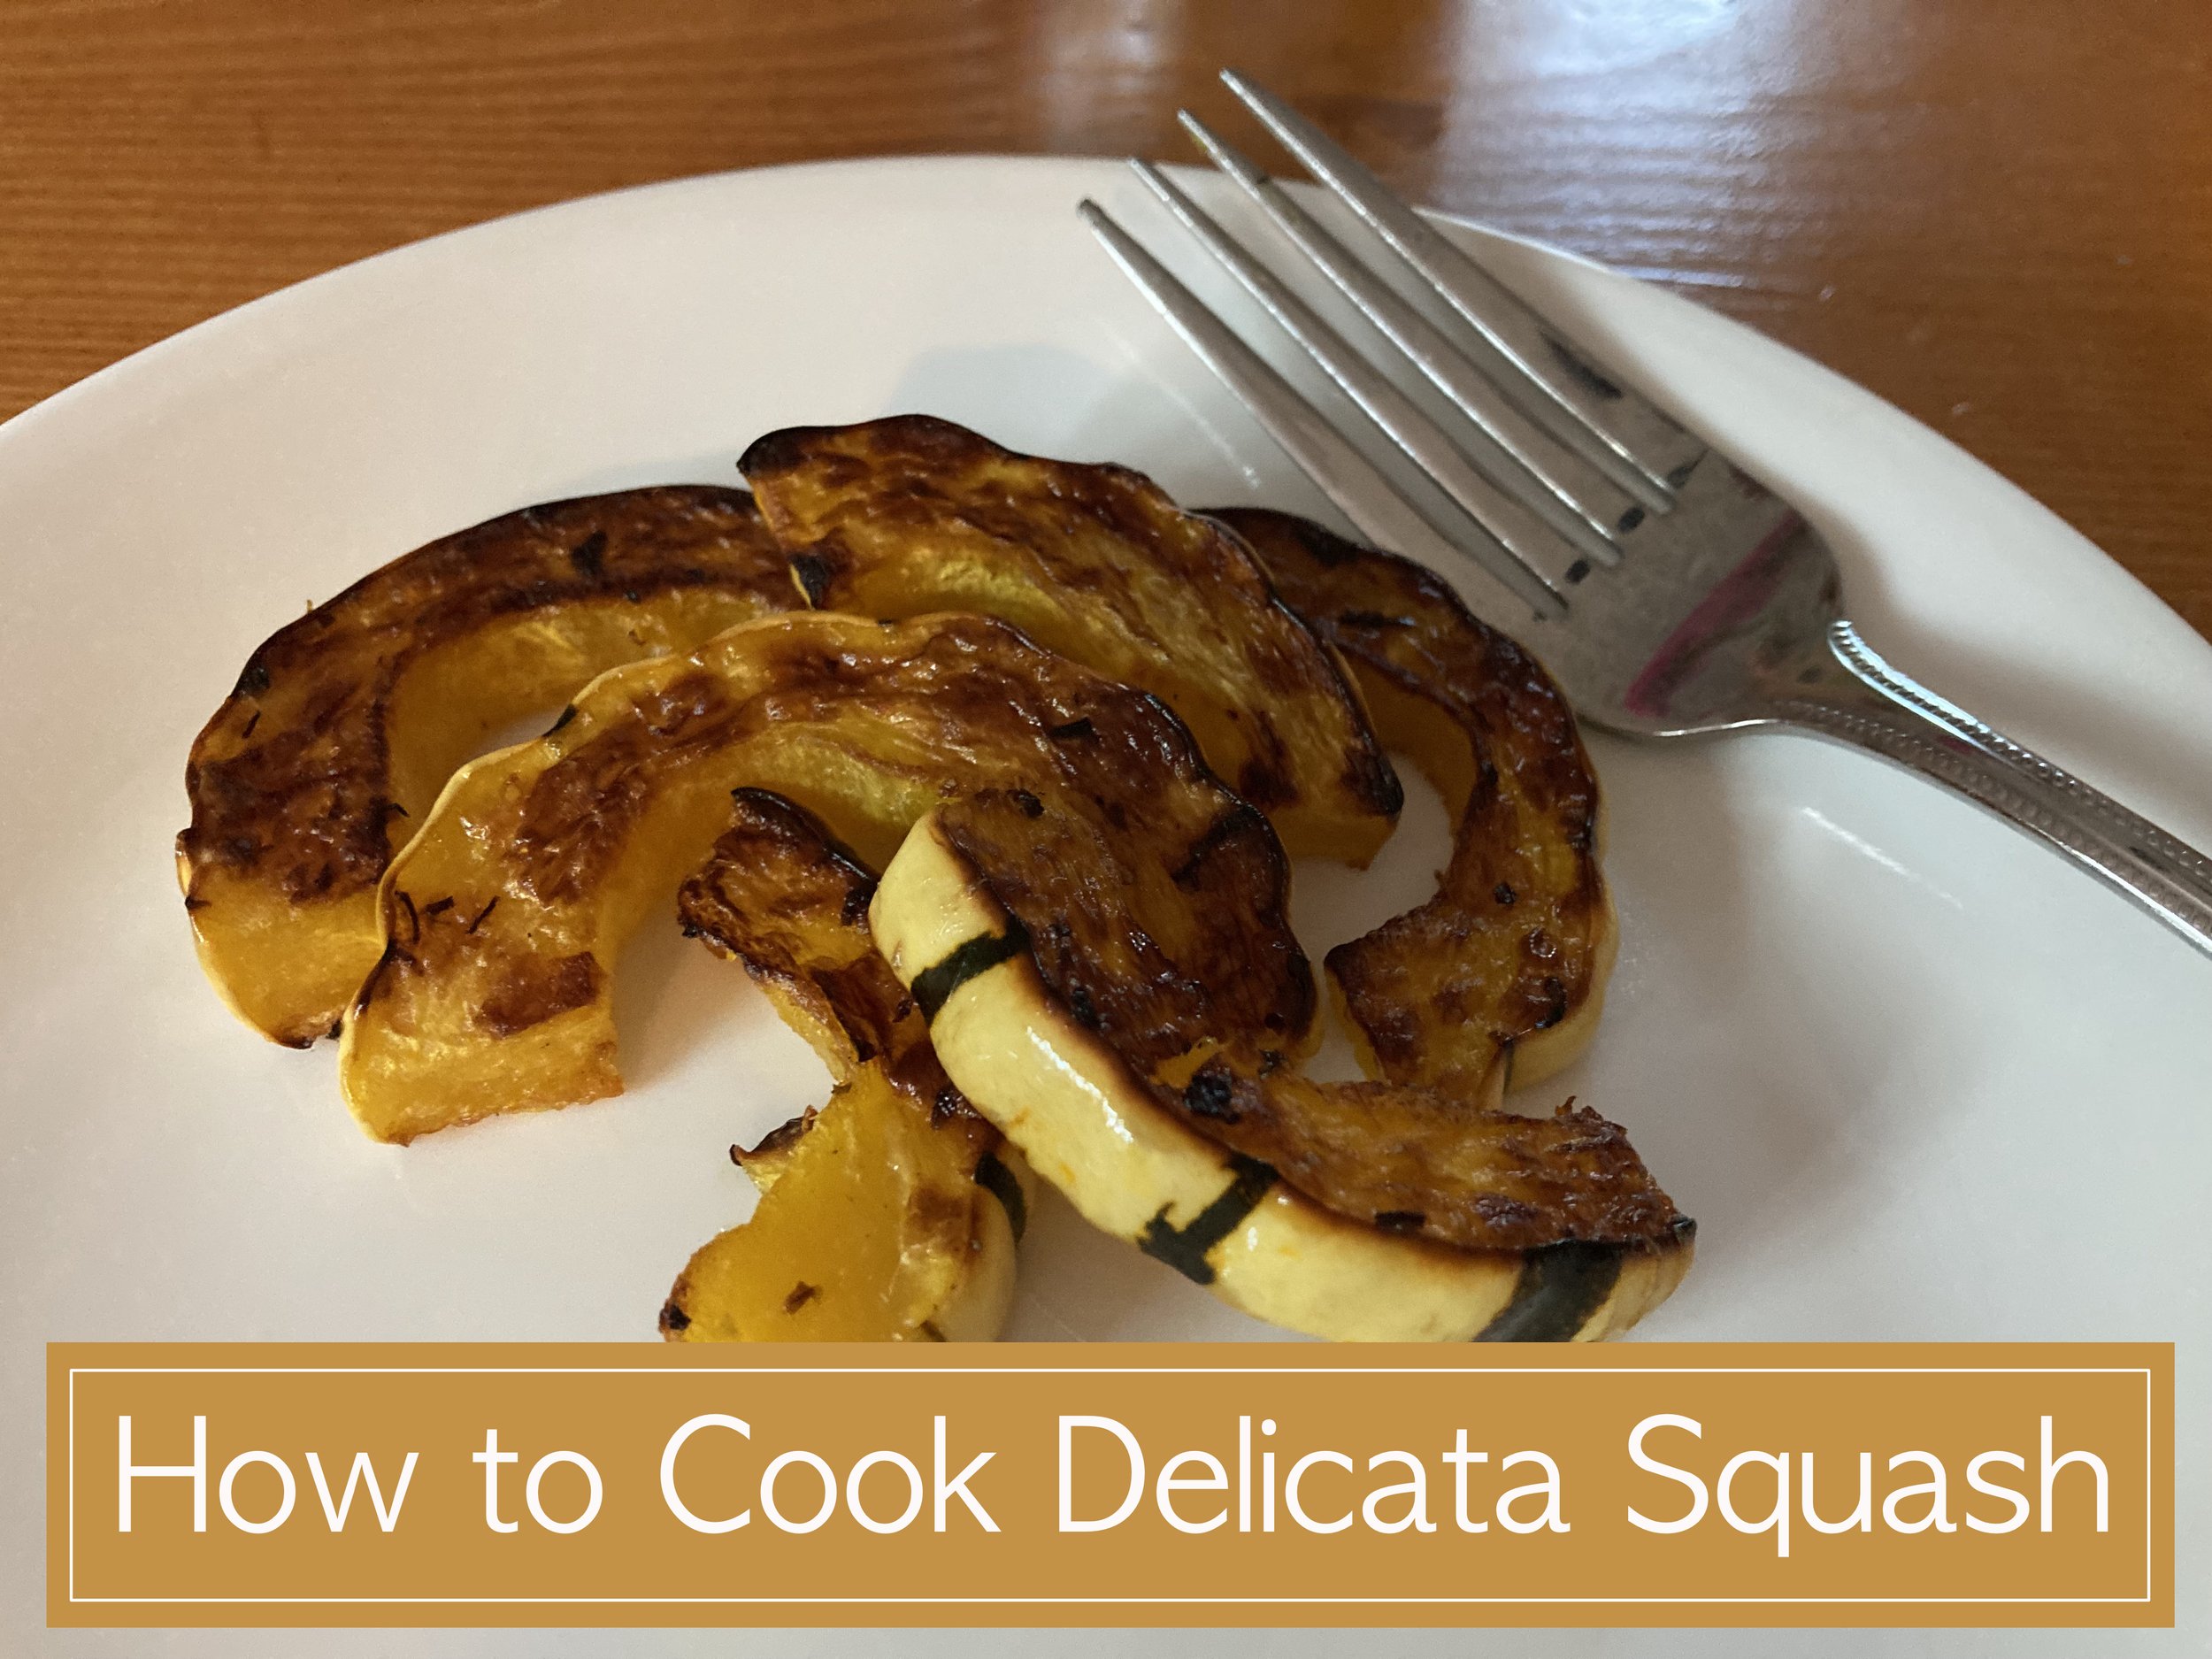
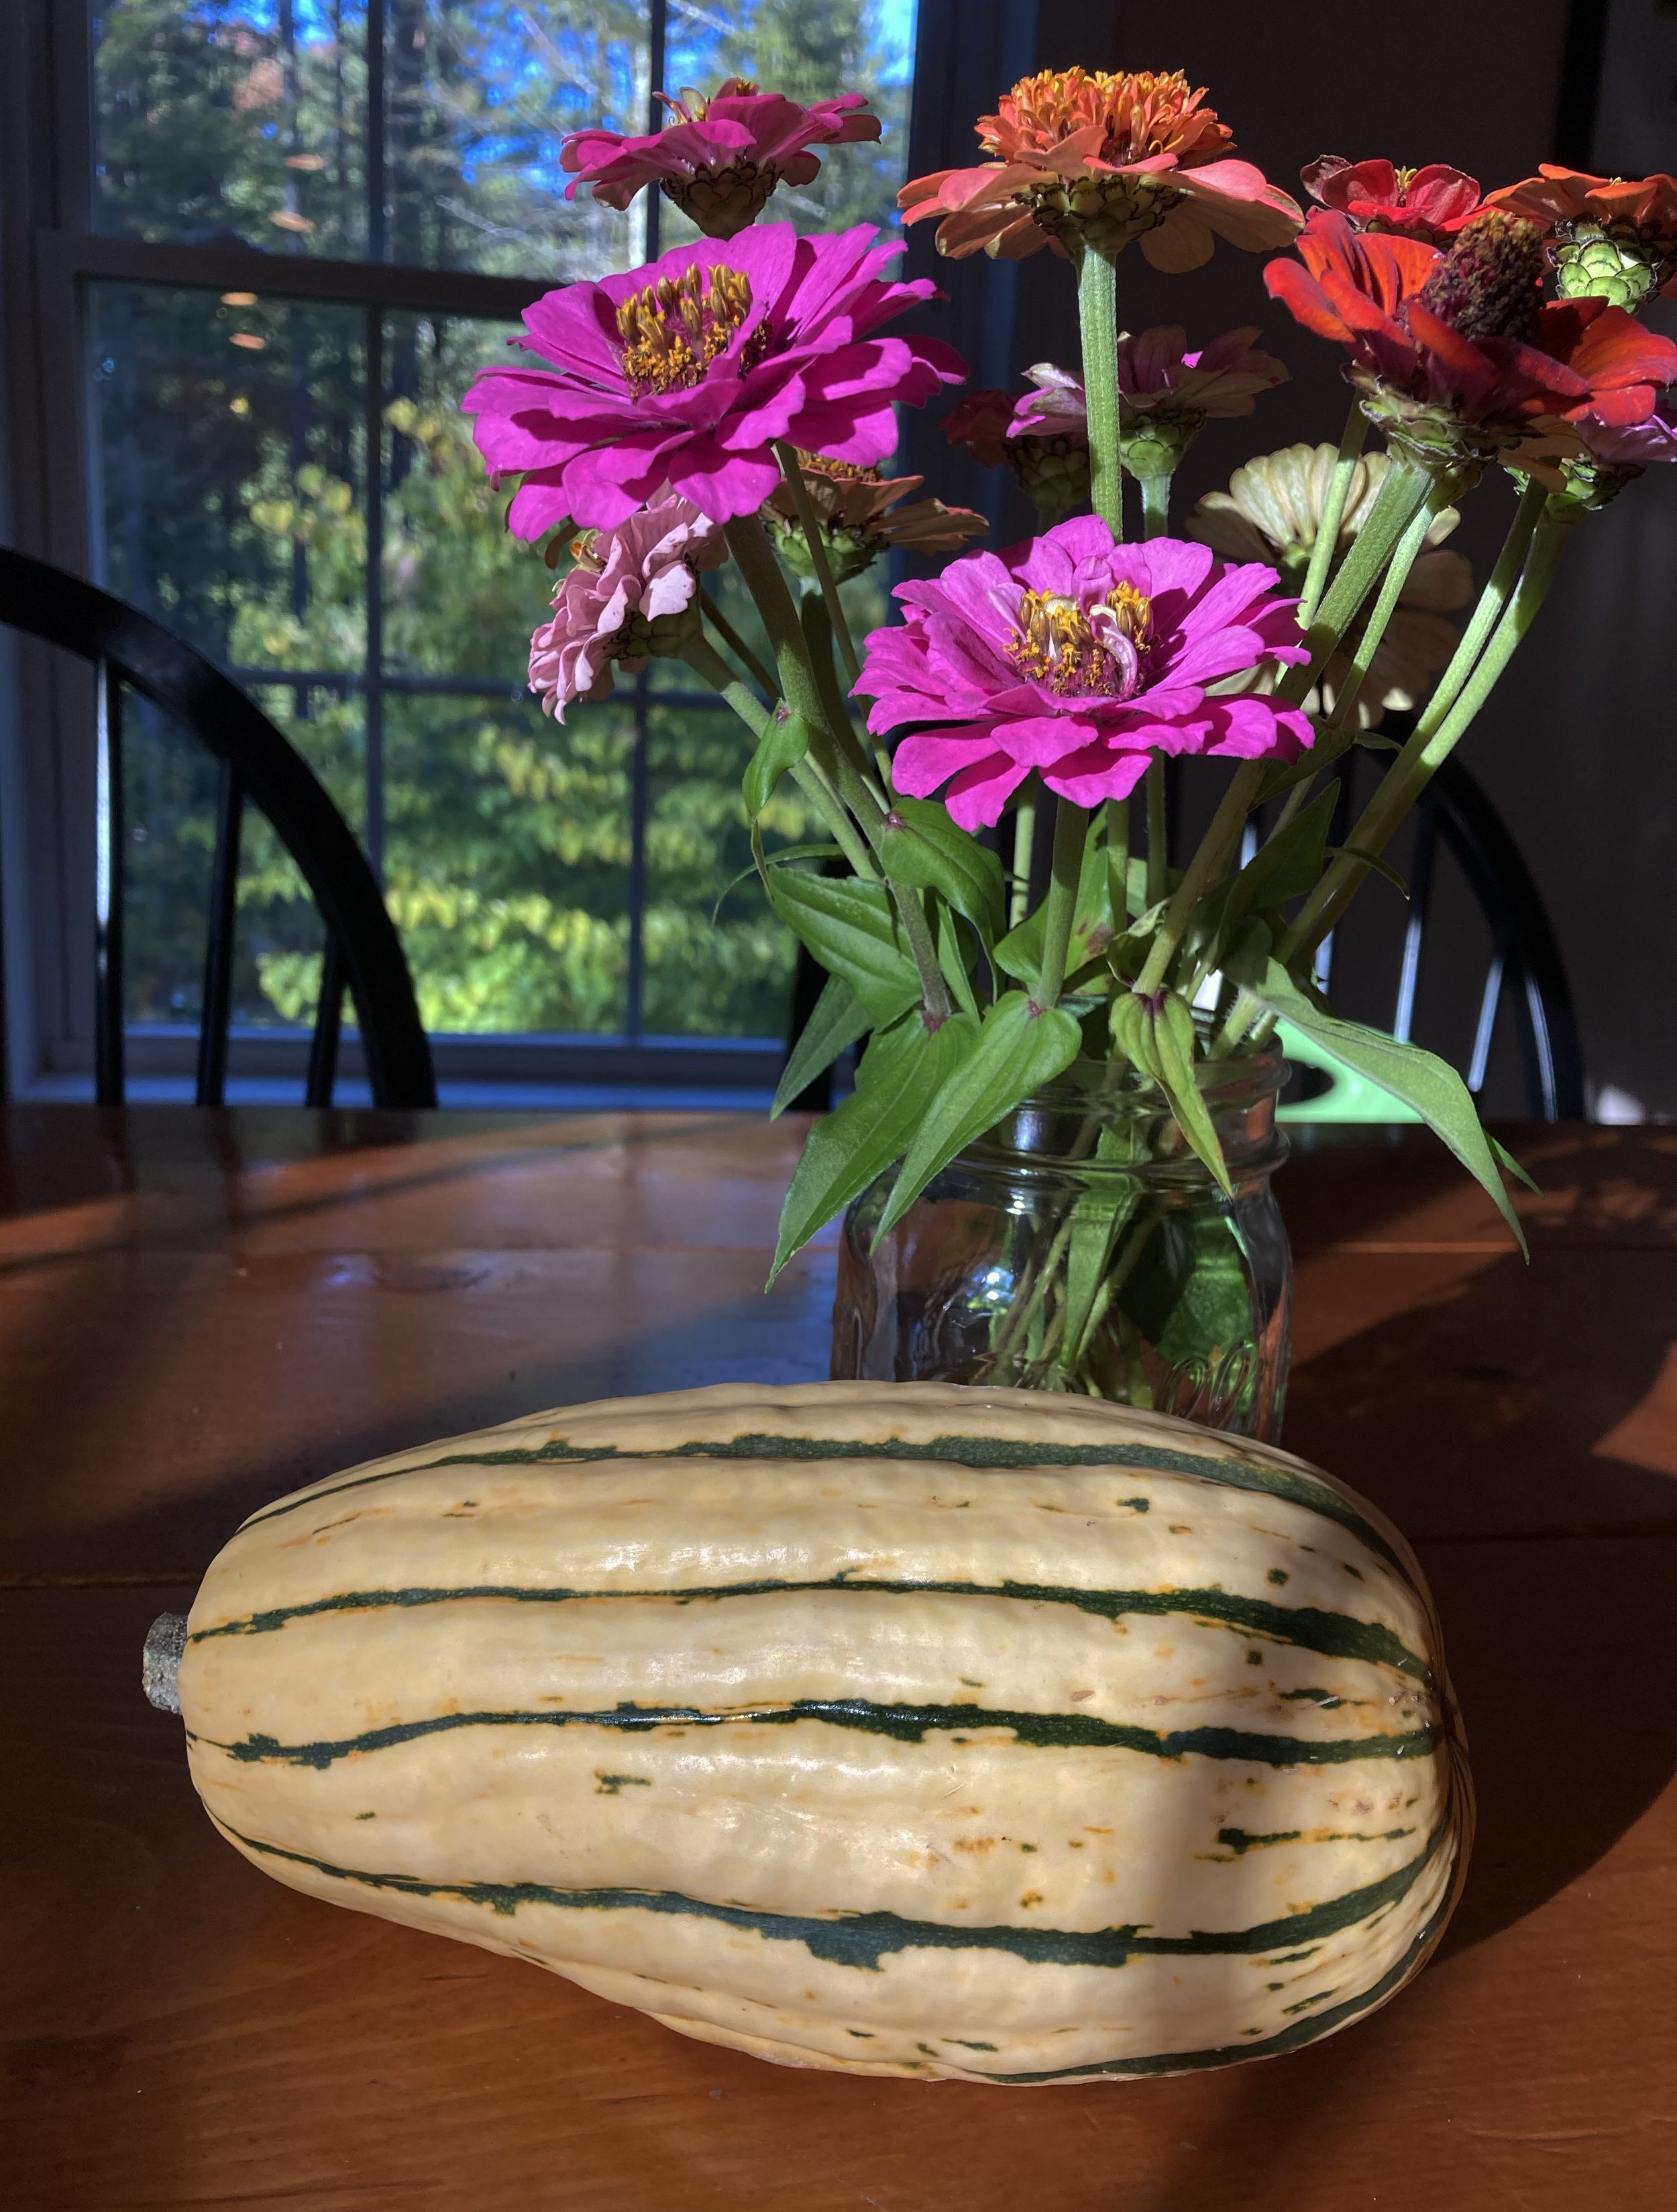
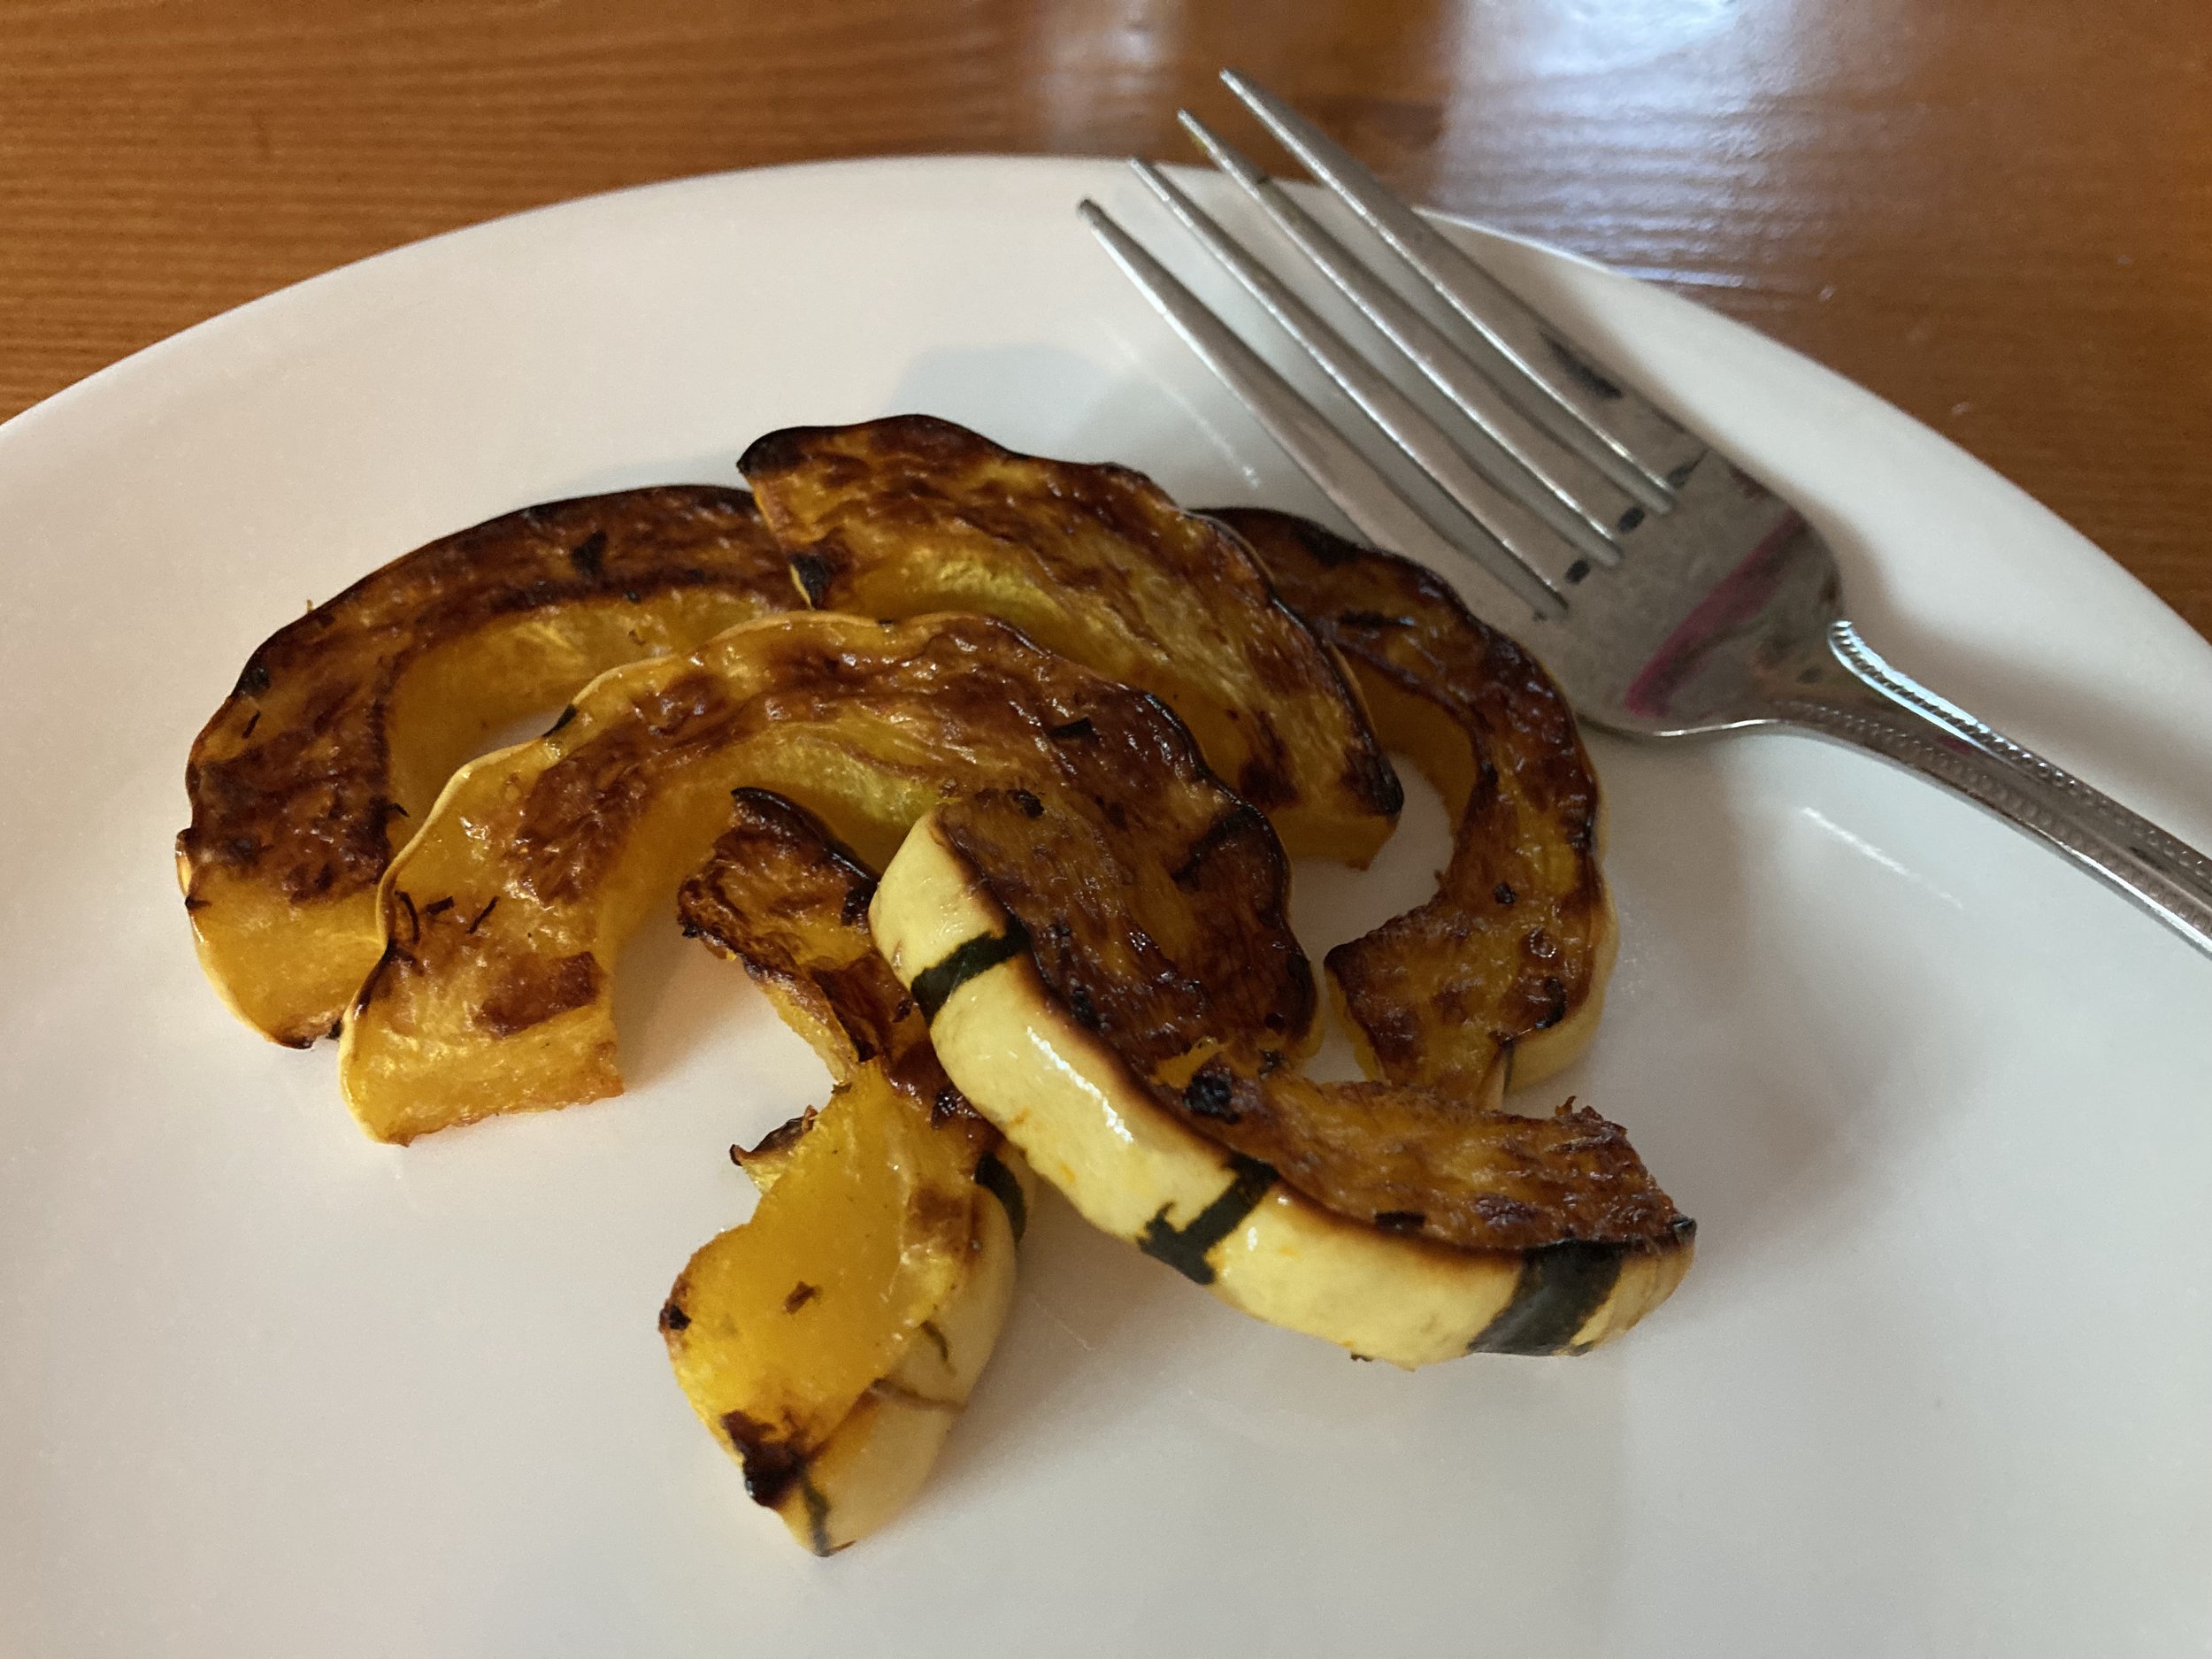
After trying Delicata Squash for the first time it quickly became a favorite - super easy to cook, no peeling (that’s a huge plus!), and a delicious maple-y taste without adding any sweetener. This squash is still an unknown to many people so I thought I would share the easy how-to of roasting them. | This post contains affiliate links |
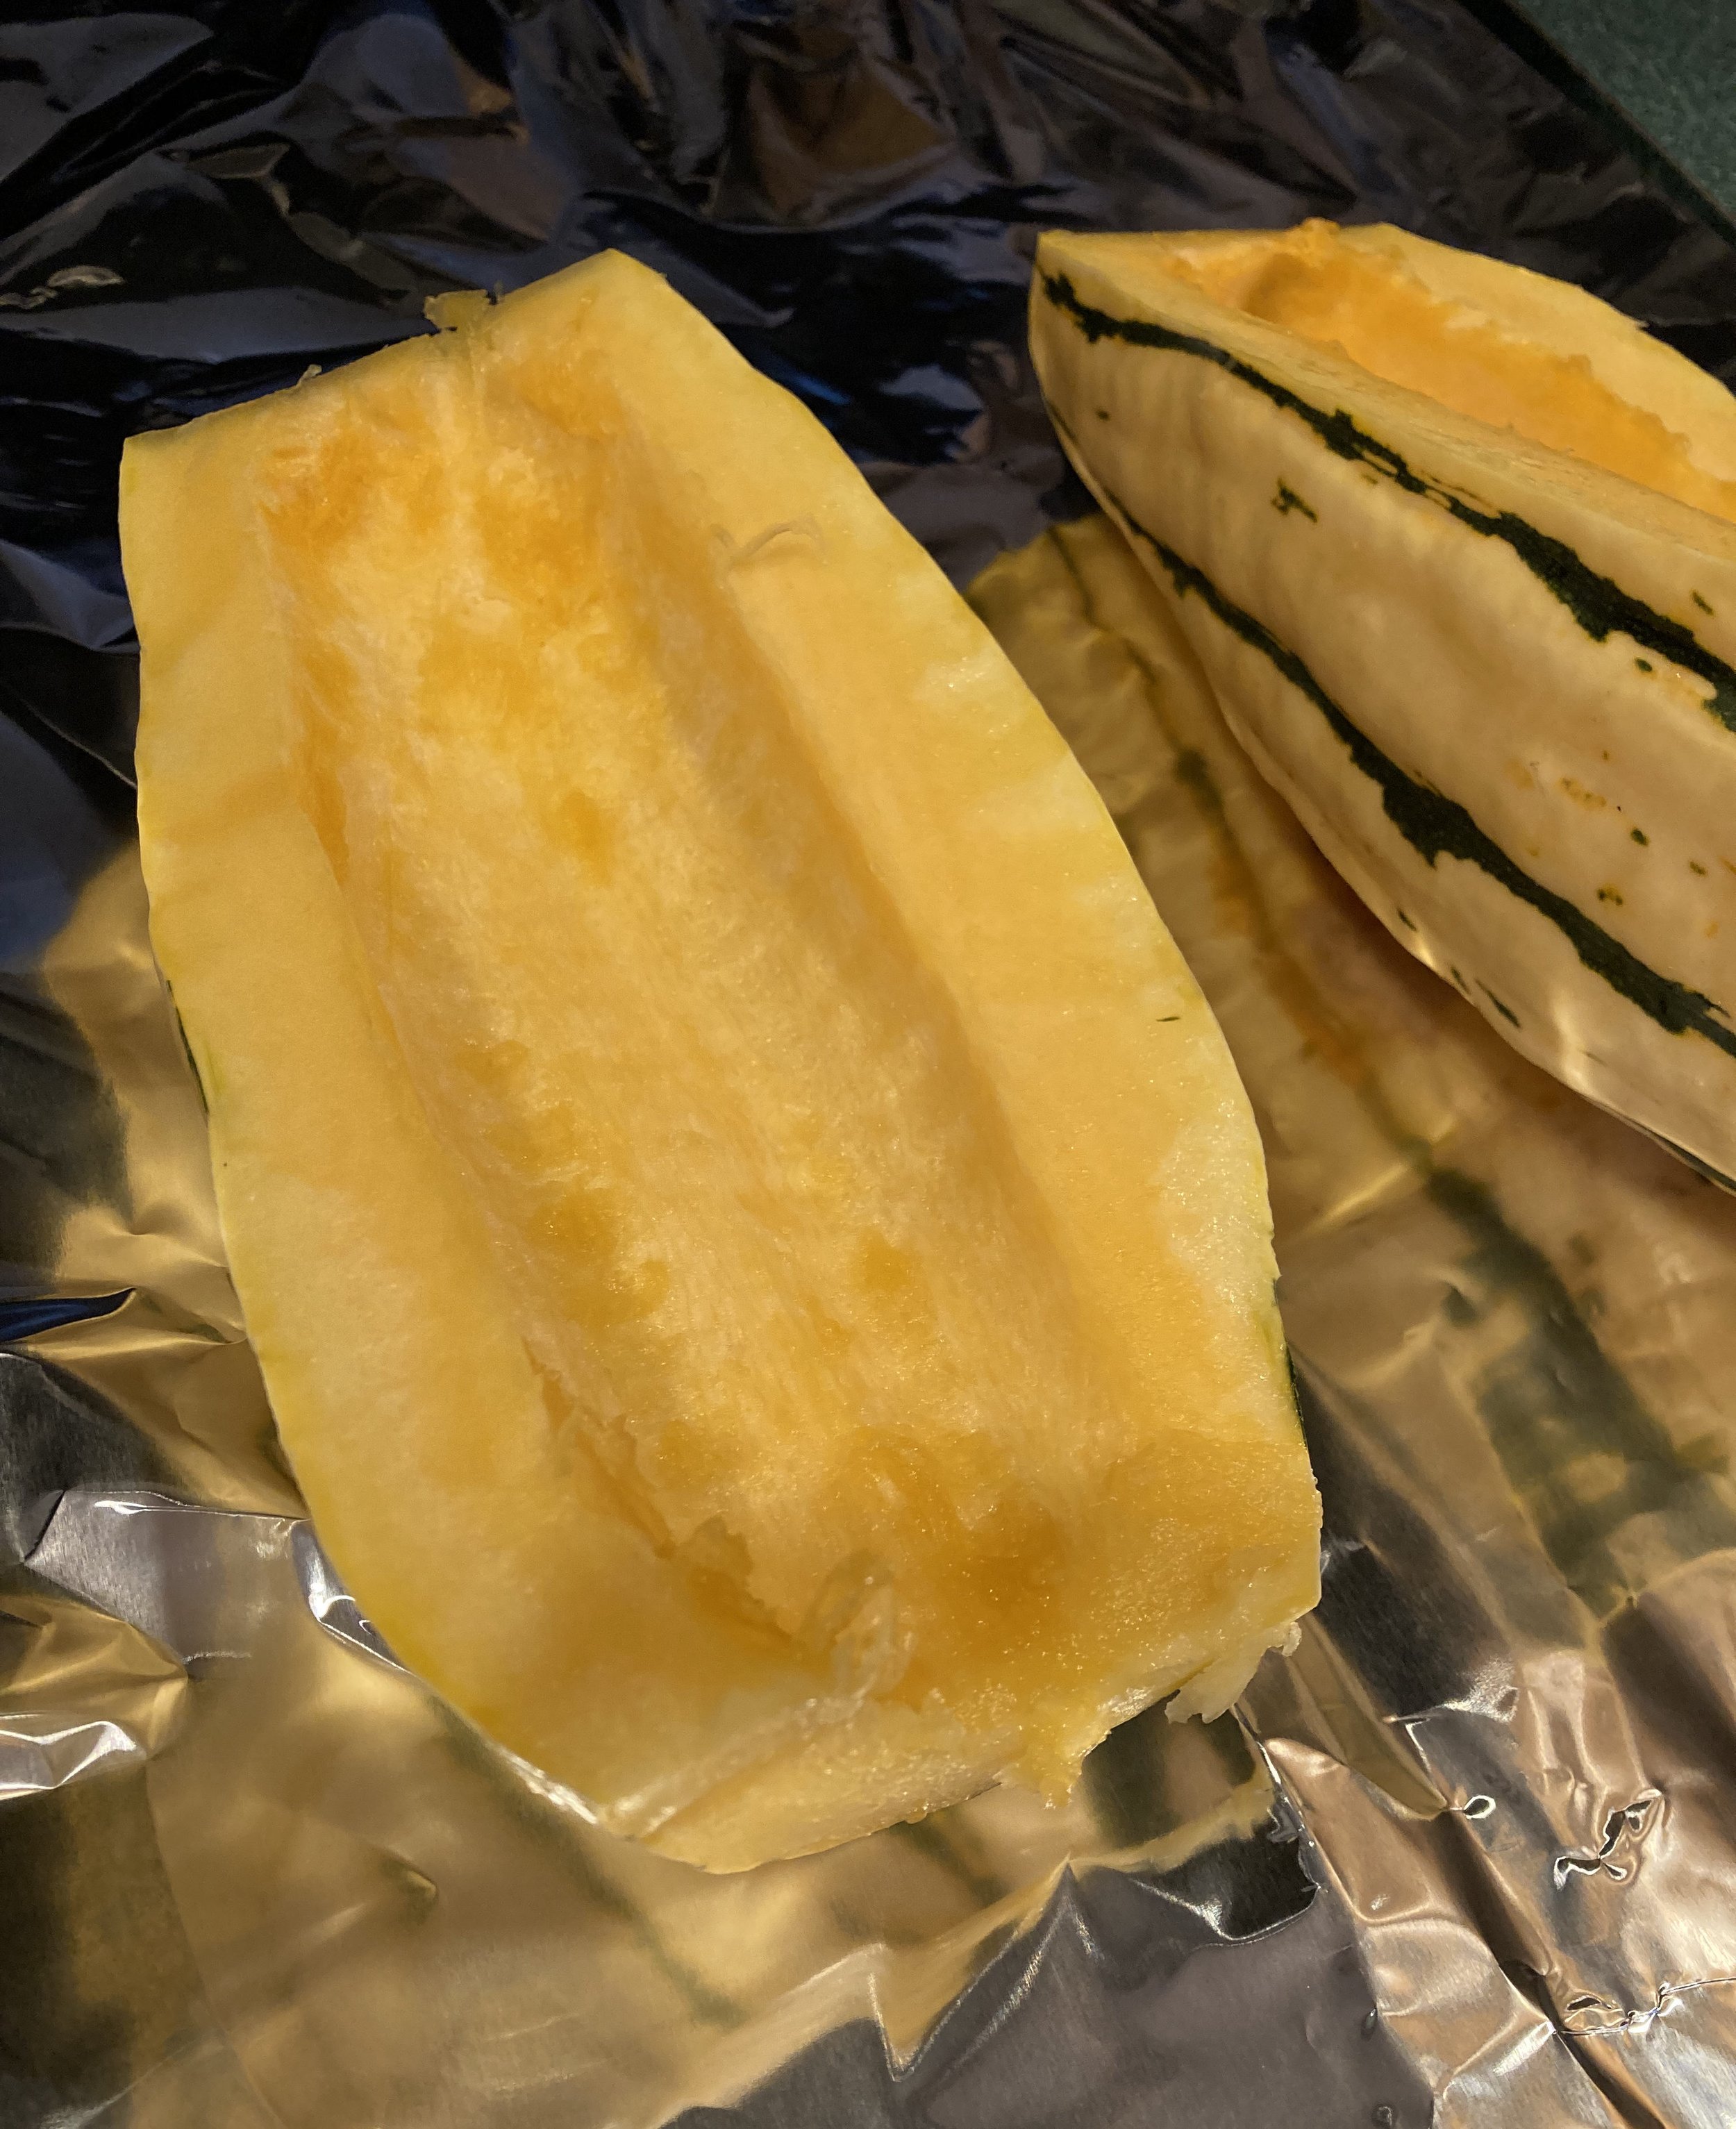
First make sure to wash and scrub the delicata squash thoroughly since you’ll be roasting and eating the skin as well - you don’t want any gritty dirty from the field left on!
Once it’s clean, chop each end off and cut open the long way. Next scoop out all the seeds and strings with a spoon until it’s nice and clean (like the photo on the right).
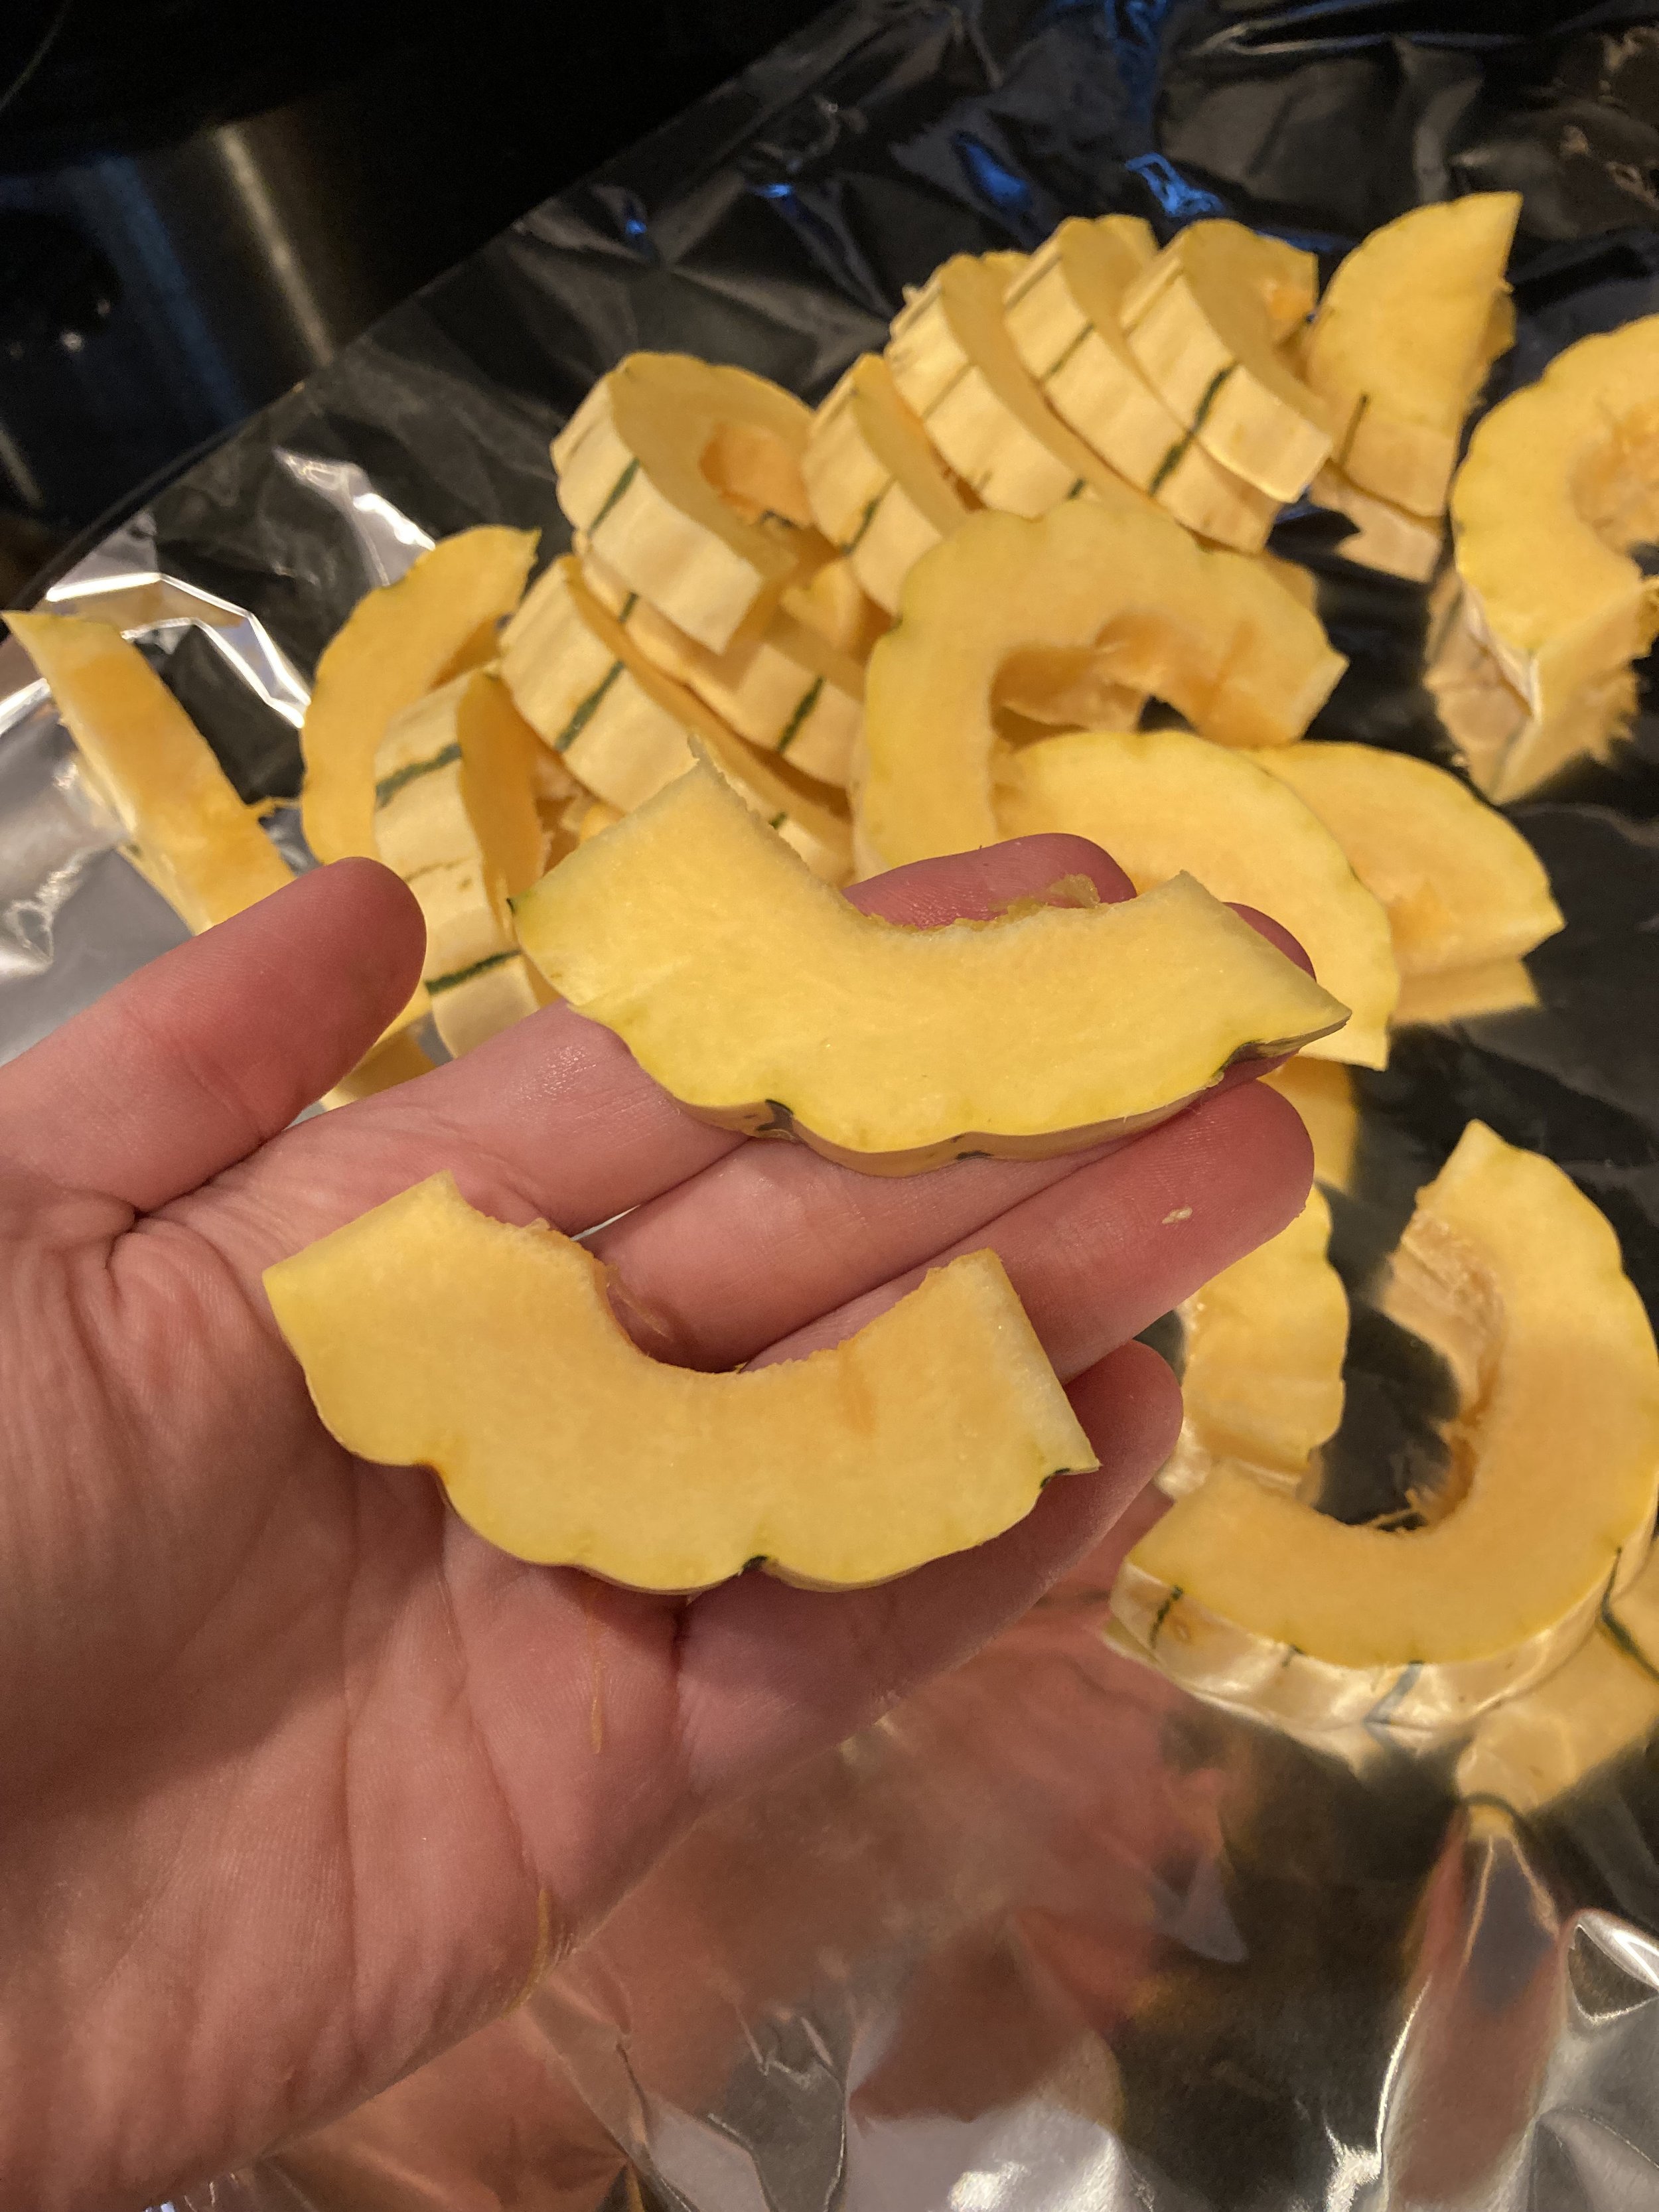
Next chop up the squash into whatever size pieces you prefer. We like cutting them into “quarter smiles” about half an inch thick.
Toss with some olive oil to coat and then sprinkle with salt and pepper to taste. We also love sprinkling on dehydrated kale flakes too - it adds a super subtle flavor and a tiny extra veggie boost too. (We add these kale flakes to most of our meals - love them!)
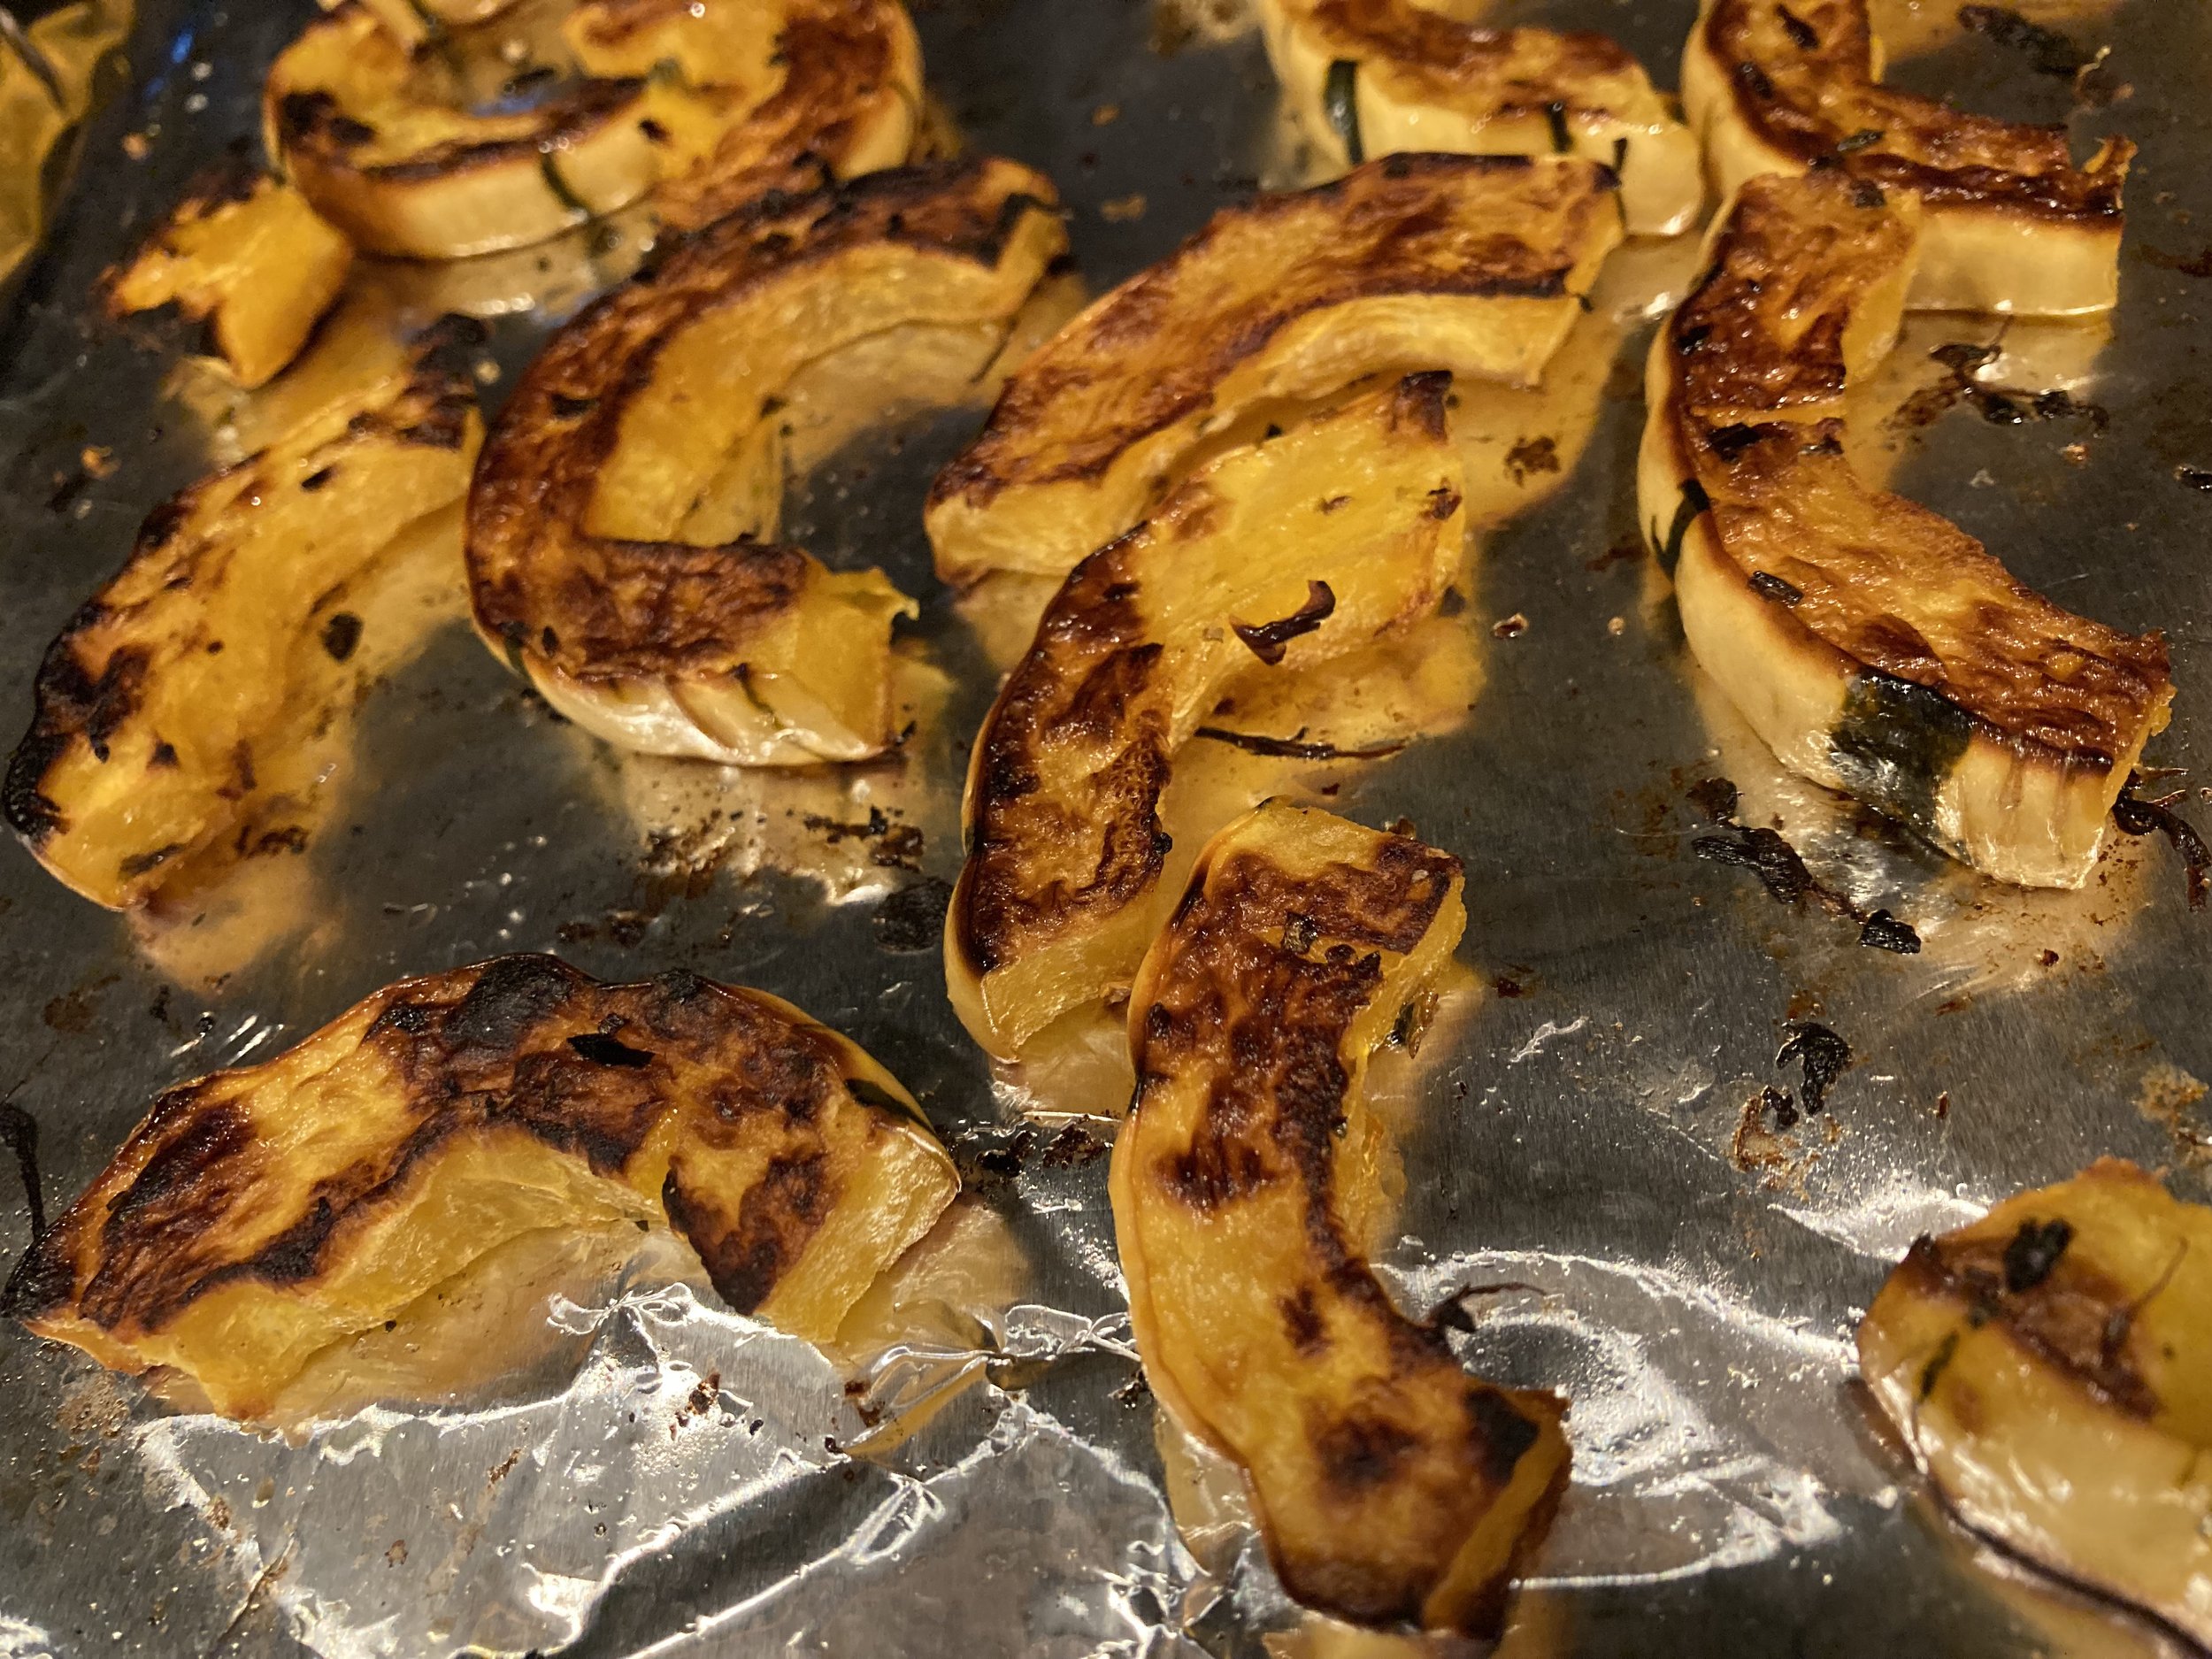
Now that it’s ready to cook, roast at 425 degrees in a preheated oven for approximately 20-30 mins, flipping halfway through. Cook until it’s soft and starts to caramelize and look burnt. Enjoy!
This squash has become a favorite in our house and I’m looking forward to trying to grow some in our garden next year.
So our garden isn’t magazine-worthy (and it definitely could use a good weeding - the spot by the gate gets so over-run with crab grass I can never seem to keep up) - but it’s been doing really well this year and I thought I would give a quick tour and share some things we’ve been doing in our Victory Garden. New England, Zone 4-5. | This post contains affiliate links |
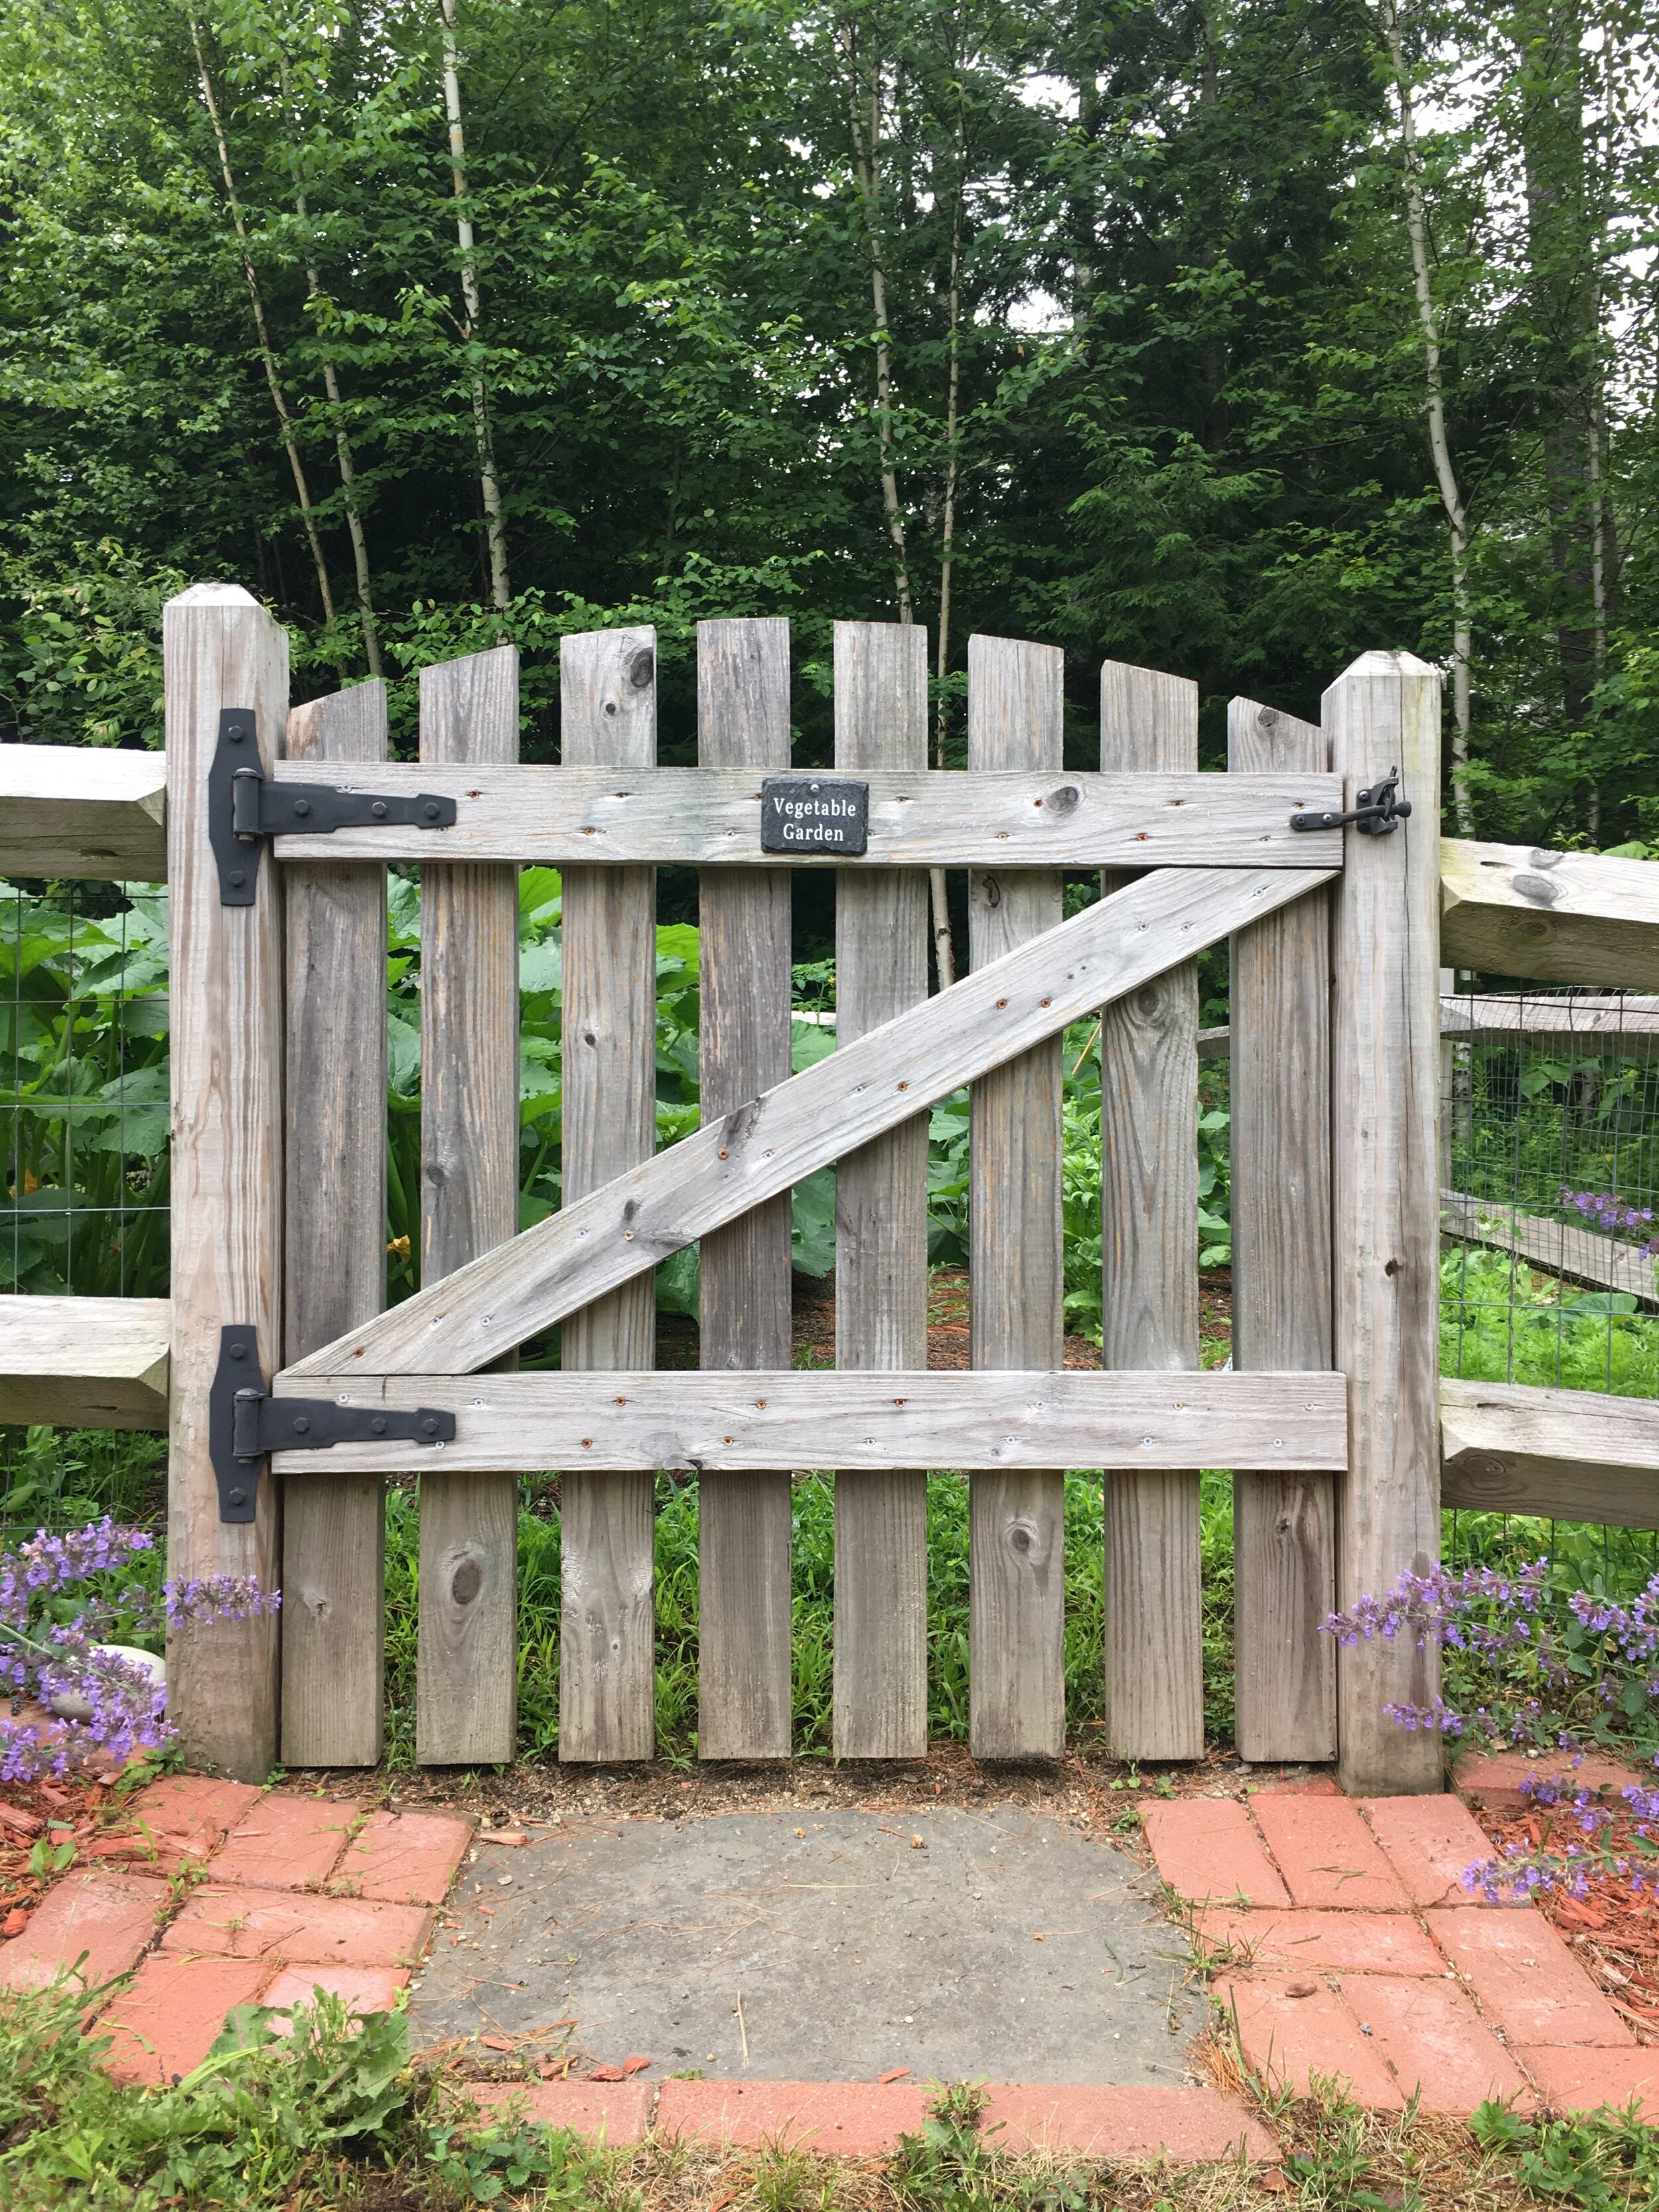
Our garden is approximately 12x24 feet. My husband built the enclosure seven years ago with split-rail fence lined with garden wire fencing (to help keep critters out) and then designed and built the gate himself - the gate is absolutely my favorite part! At the front of the garden I inlayed bricks and pavers (all of which we had on our property left over from the previous owner years ago) to create a little stepping stone walkway leading up to the entrance of the garden and a small flower bed on each side.
Inside the garden everything was planted from seed and directly sown into the ground mid-May with the exception of the Rhubarb plant (it’s a perennial) and the Tomato plants (I purchased them as seedlings from a local garden center).
For fertilizer we put a few bags of composted cow manure in before rototilling in the spring, and then after planting the seeds I sprinkled a small amount of 10-10-10 Fertilizer across the garden.
In each of the front flower beds I planted Catmint which is a perennial and a great pollinator plant! The blooms attract lots of bees and butterflies and help encourage pollination in the vegetable garden. I also just love how wild and cottage-y they look. They’re also very drought tolerant and hardy - a great no-care plant once they’re established.
Soon I would like to also get some type of Mason Bee House to add to the garden to further ecourage pollinators to come to the garden.
Just inside the garden, along either side of the front, I planted Snap Peas against the fence so they would have something to climb. I also planted Carrots along this front area on each side as well.
When I directly sow the seeds into the ground, I usually stake the empty seed packet with a twig (seen above for the Snap Peas), to mark where I’m planting and so I can reference when the seeds should start to sprout, mature, etc as they grow. Now that my plants are mature I could take all these out but I haven’t just yet.
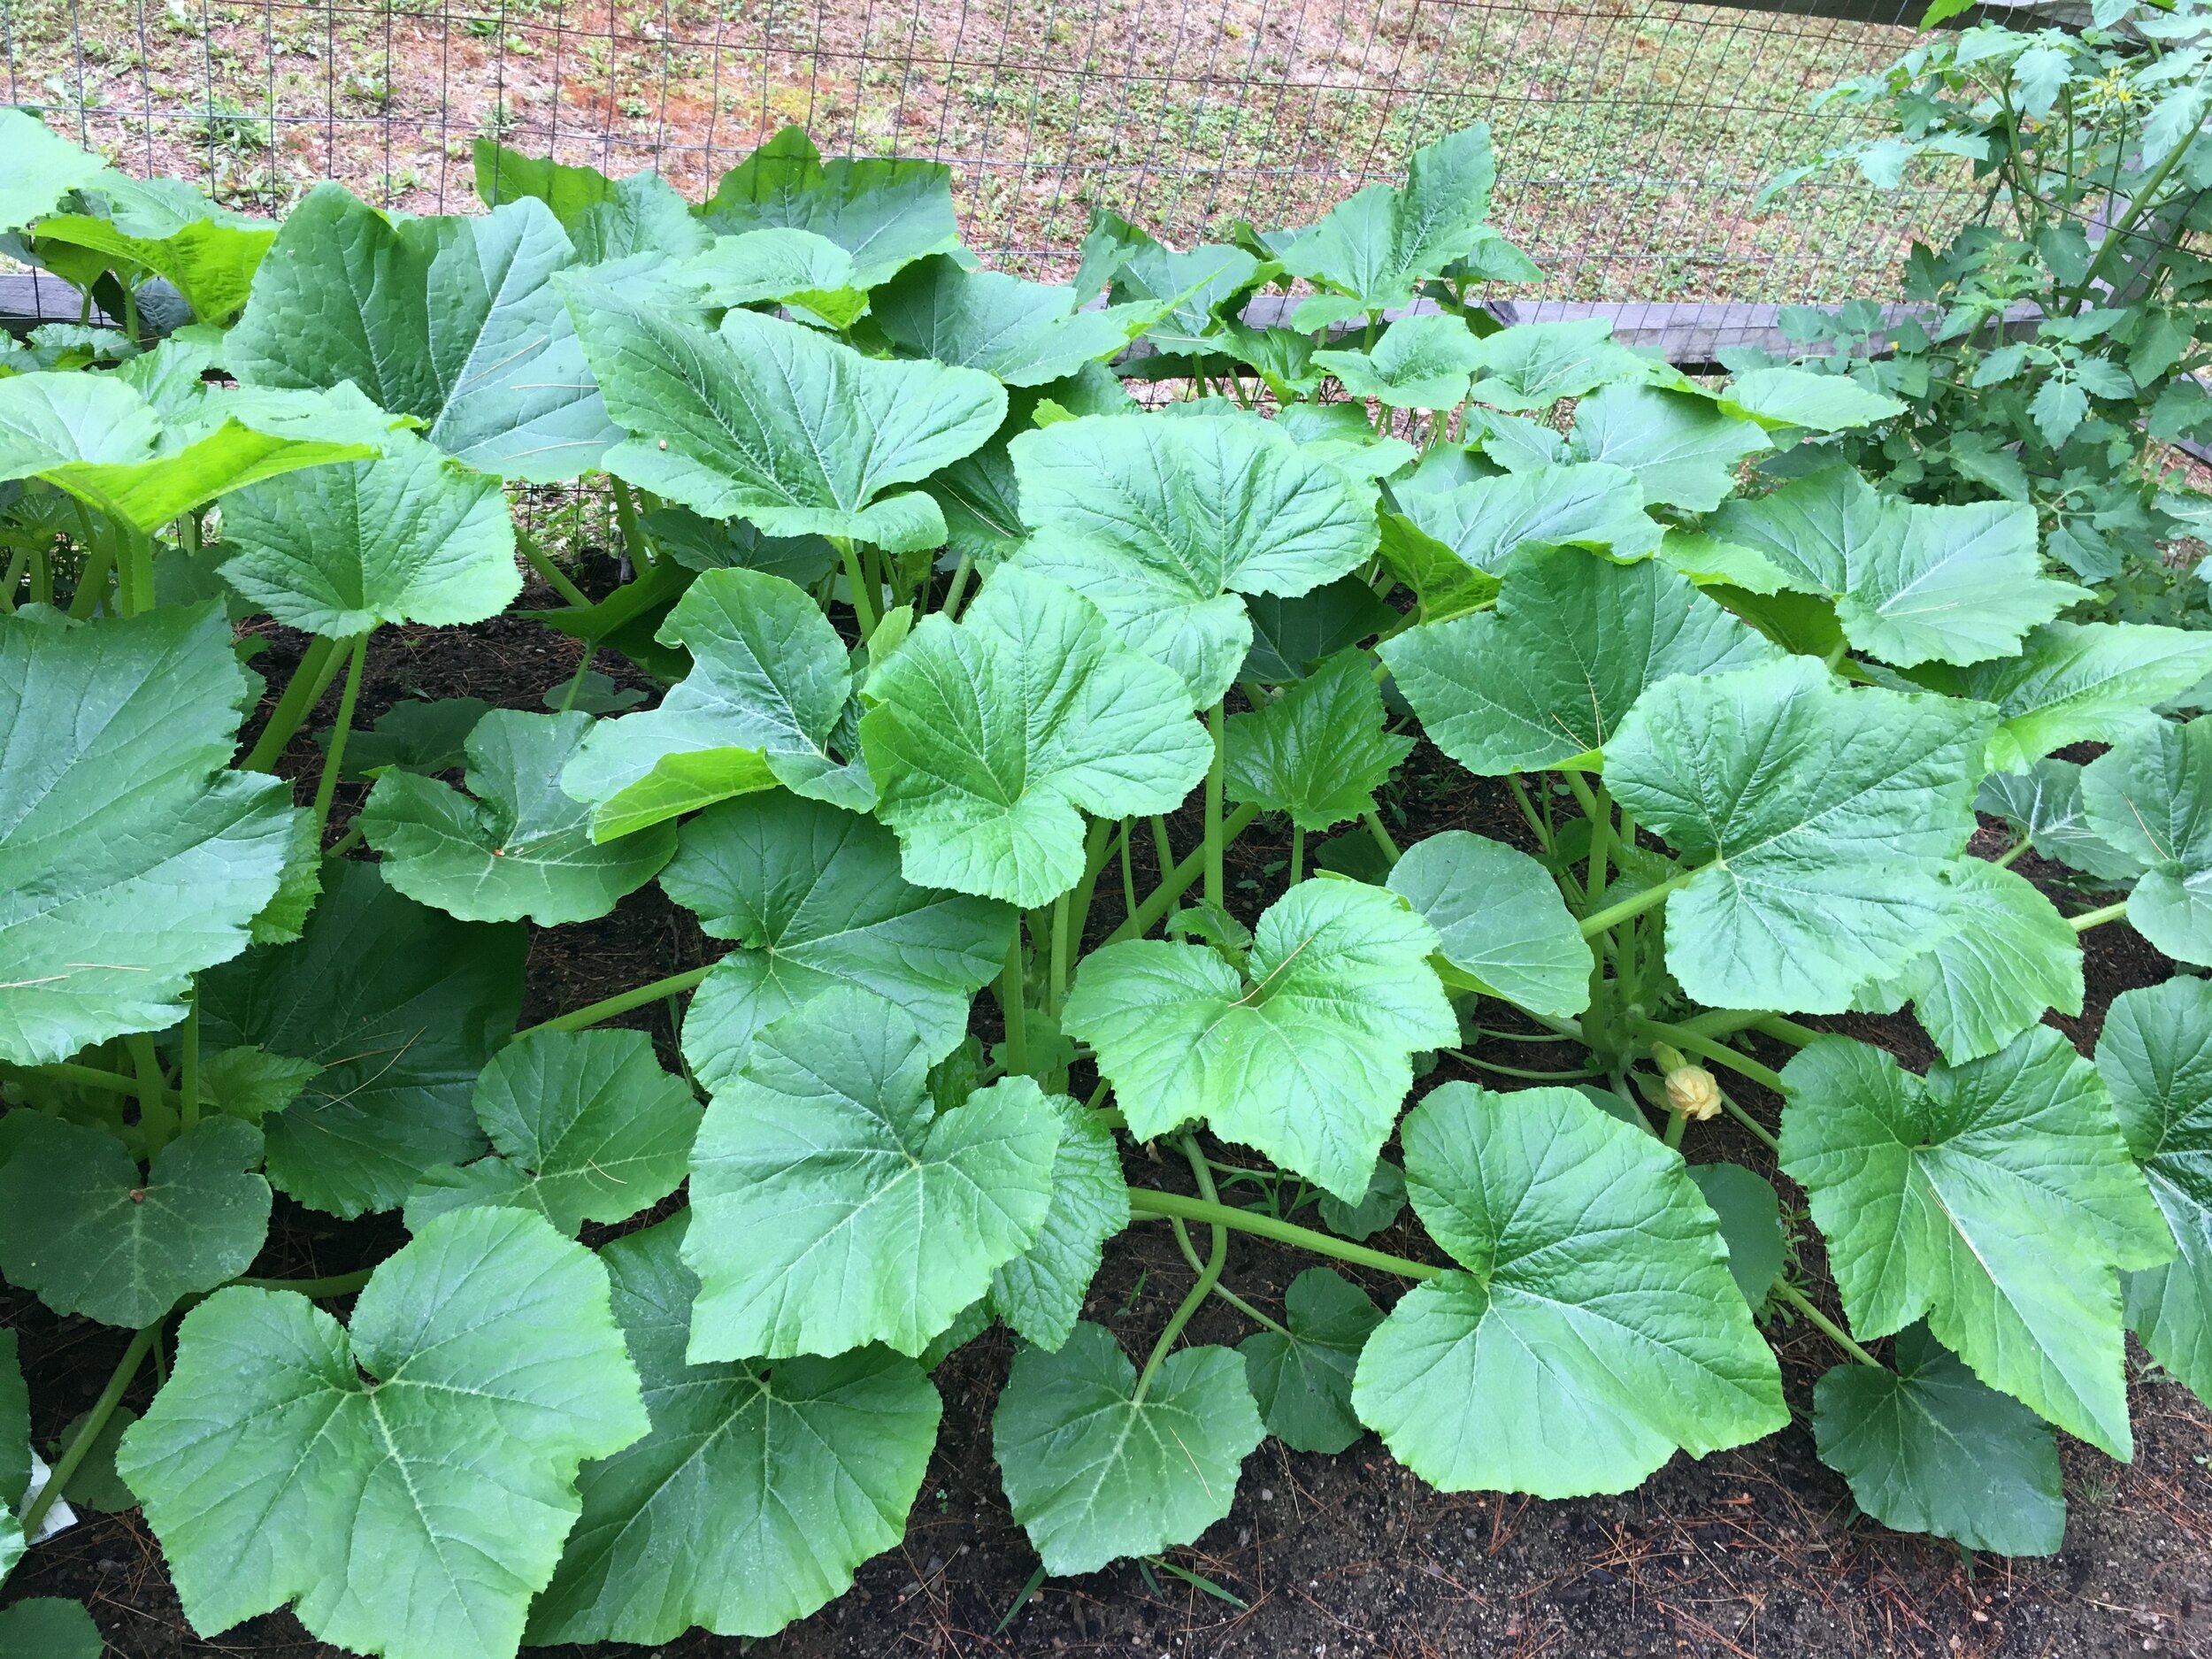
The Zucchini plants are huge this year! Right up to the top of the fence… though I do need to thin out some of the lower leaves on the ground soon for better air flow and access for pollinators (it also can help keep your plants from getting disease/mildew from the ground too).
Here are my Summer Squash plants, which are a bit smaller than the Zucchini ones but doing really well overall. I also need to thin out some of the lower leaves on these as well.
Spinach are cold weather plants and these ones pictured above are sadly done (I actually pulled them out after I took these photos). Once it starts getting hot they tend to “bolt” or grow upwards really fast and flower. Once they do that the leaves are bitter and don’t taste good. This spinach crop is done for now - though I will try to plant more Spinach late summer/early fall to get another harvest in the Fall.
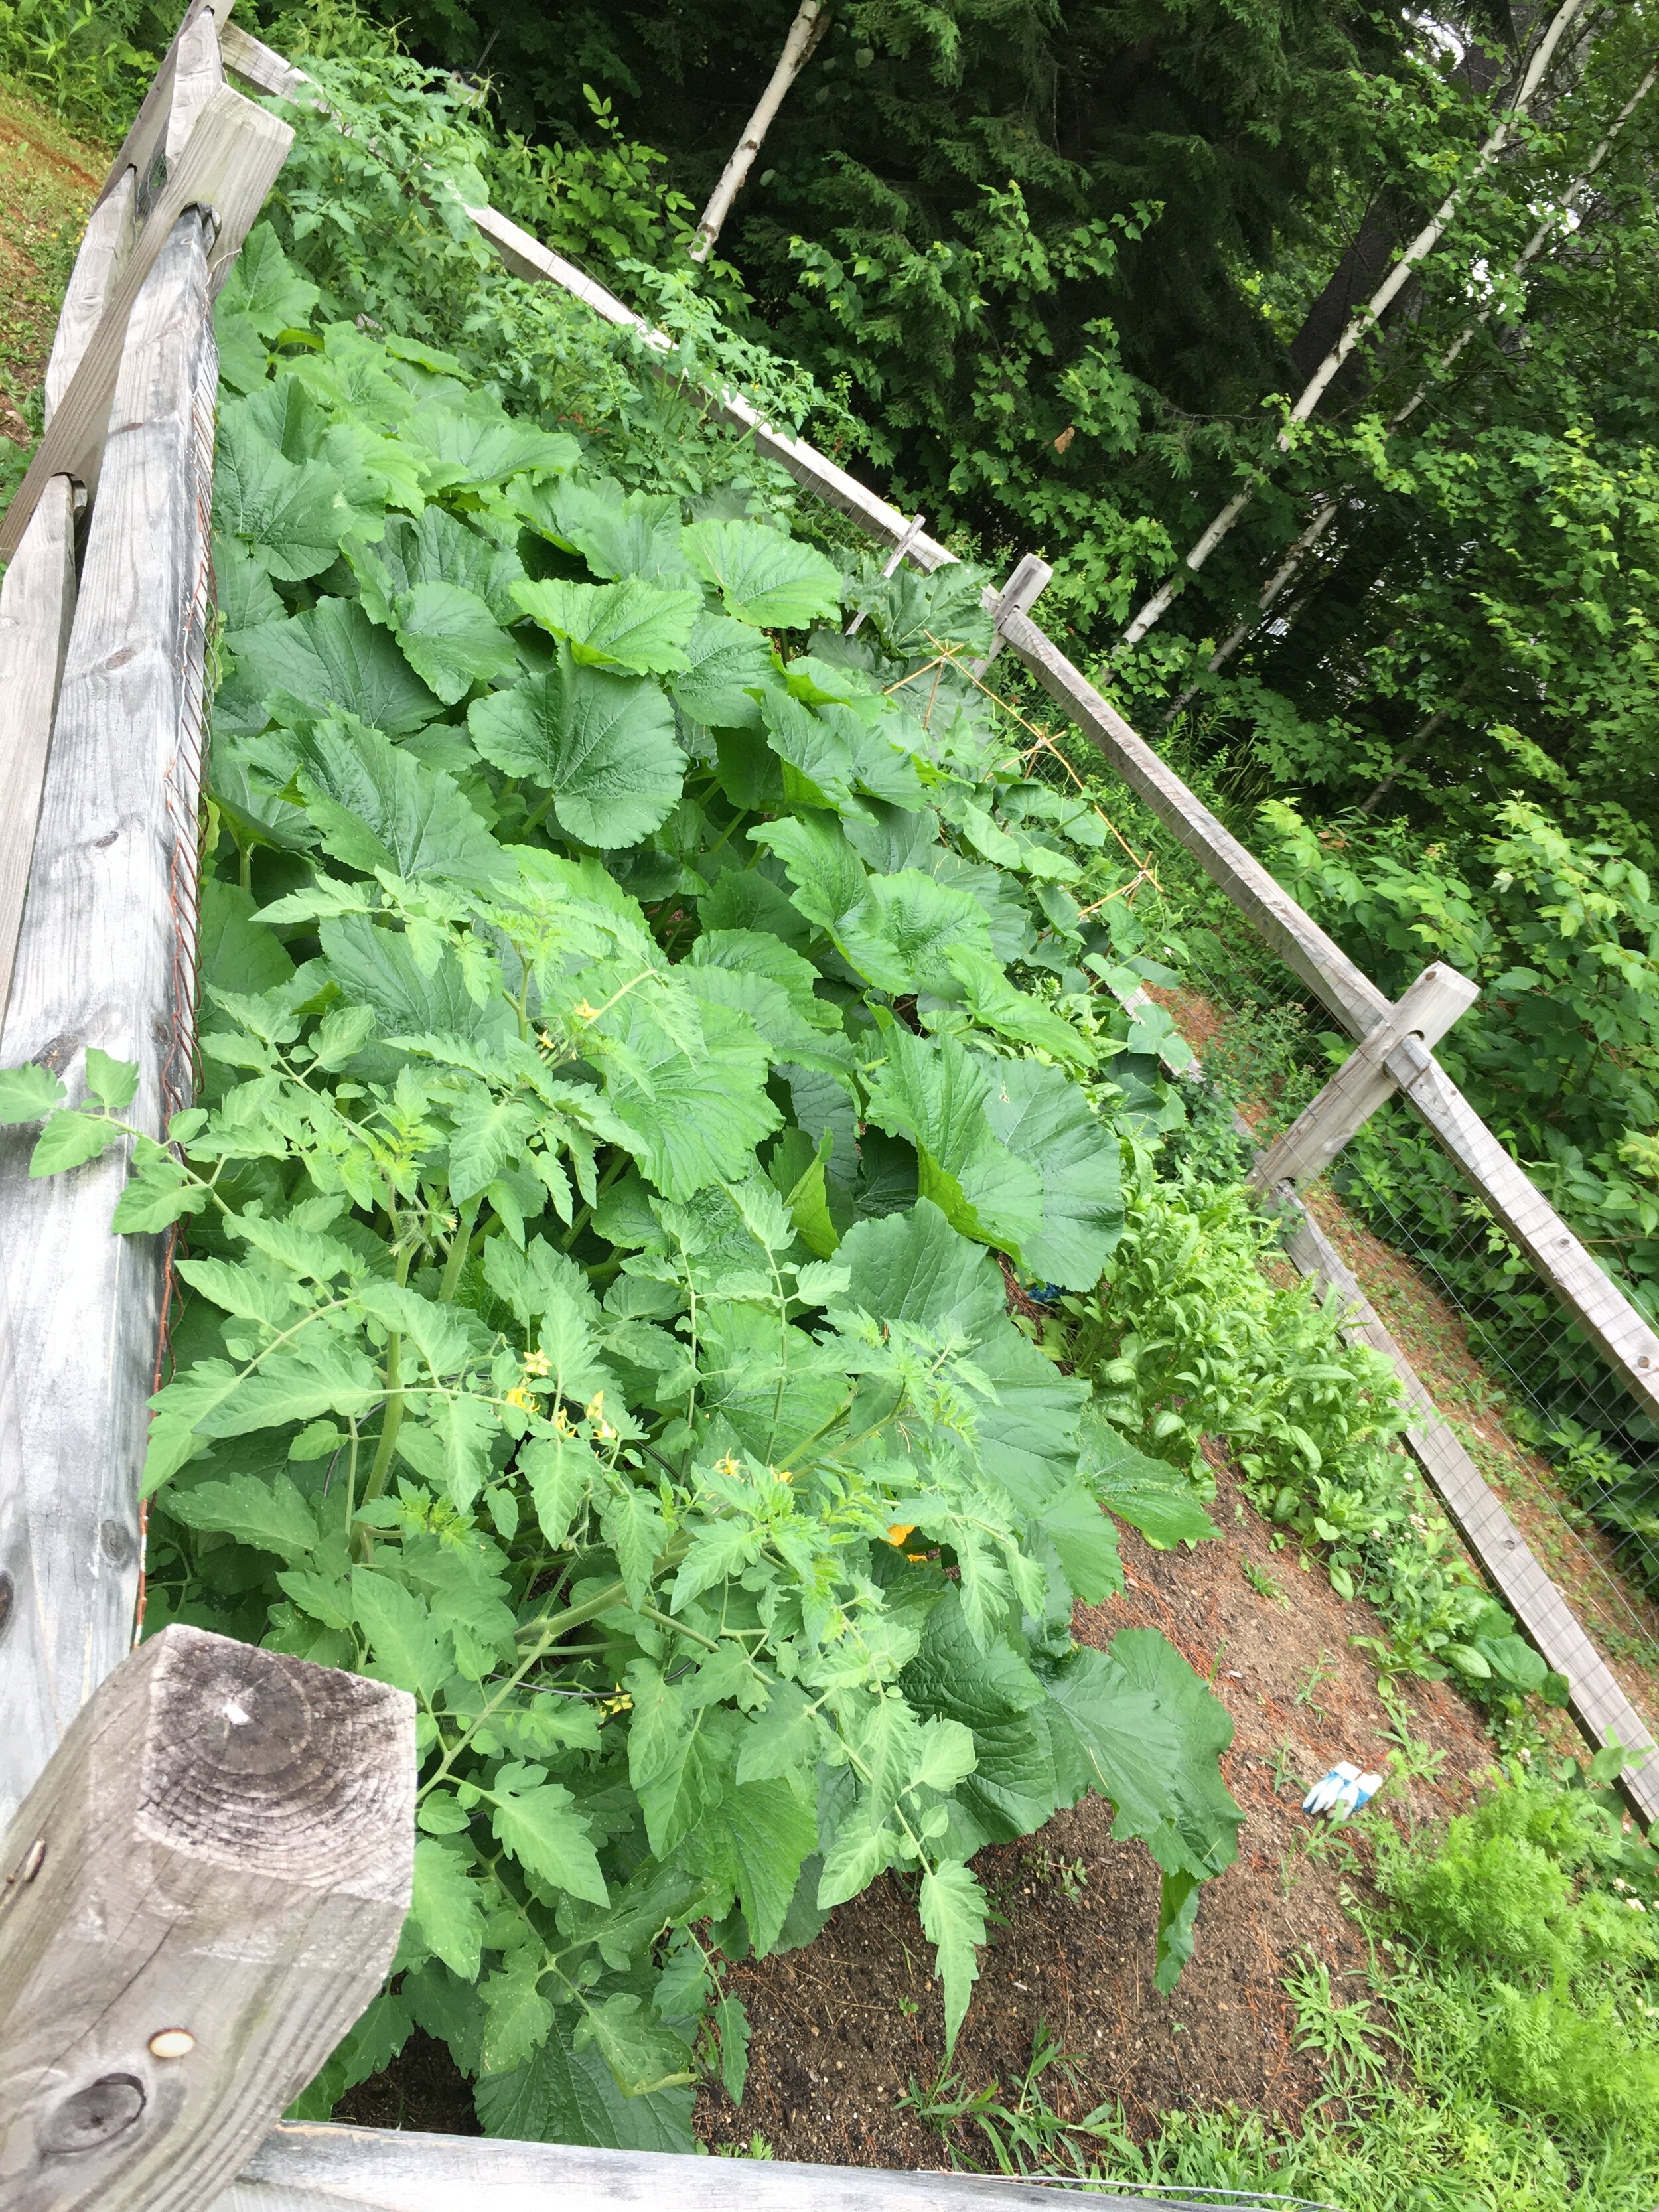
Cucumbers are doing well too. It's a bit hard to see in this photo but I made a small trellis out of Bamboo Stakes and twine for them to grow on. The trellis may look flimsy, but bamboo is actaully really strong (and eco-friendly) so it's great to use in the garden to help support plants.
Along the back I have several Tomato plants growing, both cherry tomato and slicing tomato varieties; behind these along the fence I also have some Sunflowers growing too.
Now for the “showstopper” of the garden - our Rhubarb plant! This is definitely the plant that gets the most interest and questions about in our garden because it’s so big. Rhubarb is a perennial and will come back each year - so make sure to plant it somewhere out of the way where it will have room to grow. We planted this one in the back corner of our garden and marked the area with a stake so we don’t rototill over it in the spring.
While I’m honestly not a huge fan of Rhubarb myself (it’s very sour), growing it is a tradition in our family… when I was growing up we had a very large garden with at least 16 Rhubarb plants. We had so much Rhubarb that we would pick literally garbage bags full of it to give to neighbors and people at Church.
I transplanted this Rhubarb plant from my parents’ garden so I’m not sure on the variety… though from reading around online I’m guessing it’s some type of Canadian or Siberian variety. It can get very large with thick stalks and leaves over two feet across. If you decide to grow Rhubarb, make sure to read up on how to harvest it - you don’t want to over-pick the plant and the leaves are inedible (they’re actually somewhat toxic), it’s just the stalks that can be used.
Across the yard we also have some wine barrels that we’re using for an herb garden. Some of the more hardy herbs (Chives, Garlic Chives, Peppermint, Oregano) come back yearly, despite the fact the wine barrels freeze solid in the winter. I bought the blank slate garden markers on Amazon (and here is the how-to post on how I made them).
This year we also added two blueberry bushes to our landscaping since we didn’t have any fruit trees or bushes yet. It’s recommended to have two different varieties of blueberry bushes to encourage cross-pollinating and better fruit production, so we planted two different kinds near each other. We are already getting a few large berries from them which is very exciting! Here’s hoping they continue to do well in the years to come.
And that’s our little garden tour - thanks so much for following along! I’m no expert by any means, but if you have any questions please let me know.
This simple, hearty meal is basically a variation of traditional Pork Pie. The recipe isn't exact and doesn't have to be.. I generally don't make anything the same way twice and always go by what looks good. You can follow along the recipe for a general idea but feel free to incorporate substitutions and make it your own.
Our family got a total of three deer this year and so venison has been on heavy rotation. We've been finding ways to sneak it into lots of different meals and this Venison Pie has been a favorite!
Venison Pie
Prep time 50 mins | Cook time 30 mins | Serves up to 8
Ingredients
1 lb of ground venison
1 small onion, chopped (or about 1/3 cup chopped frozen onions)
1/2 tsp of Bell's Seasoning
1/2 cup frozen corn
3 medium potatoes, cooked and mashed
pie crust mix (I use classic boxed Jiffy Pie Crust Mix)
salt and pepper to taste
Directions
Start a pot of water boiling on a back burner. Meanwhile brown ground venison, onion, and Bell's Seasoning in a skillet, adding salt and pepper to taste.
Once browned add frozen corn, cover and simmer for about 30 mins. While that's simmering peel, chop, boil, and mash your potatoes.
Mix mashed potatoes and browned meat mixture together and fill prepared pie crust.
Bake at 450 degrees for about 30 mins. This meal goes great with baked beans or ployes.
Feel free to add more veggies or tweak the recipe however you like, sometimes I add mushrooms or shredded carrots to the mix.