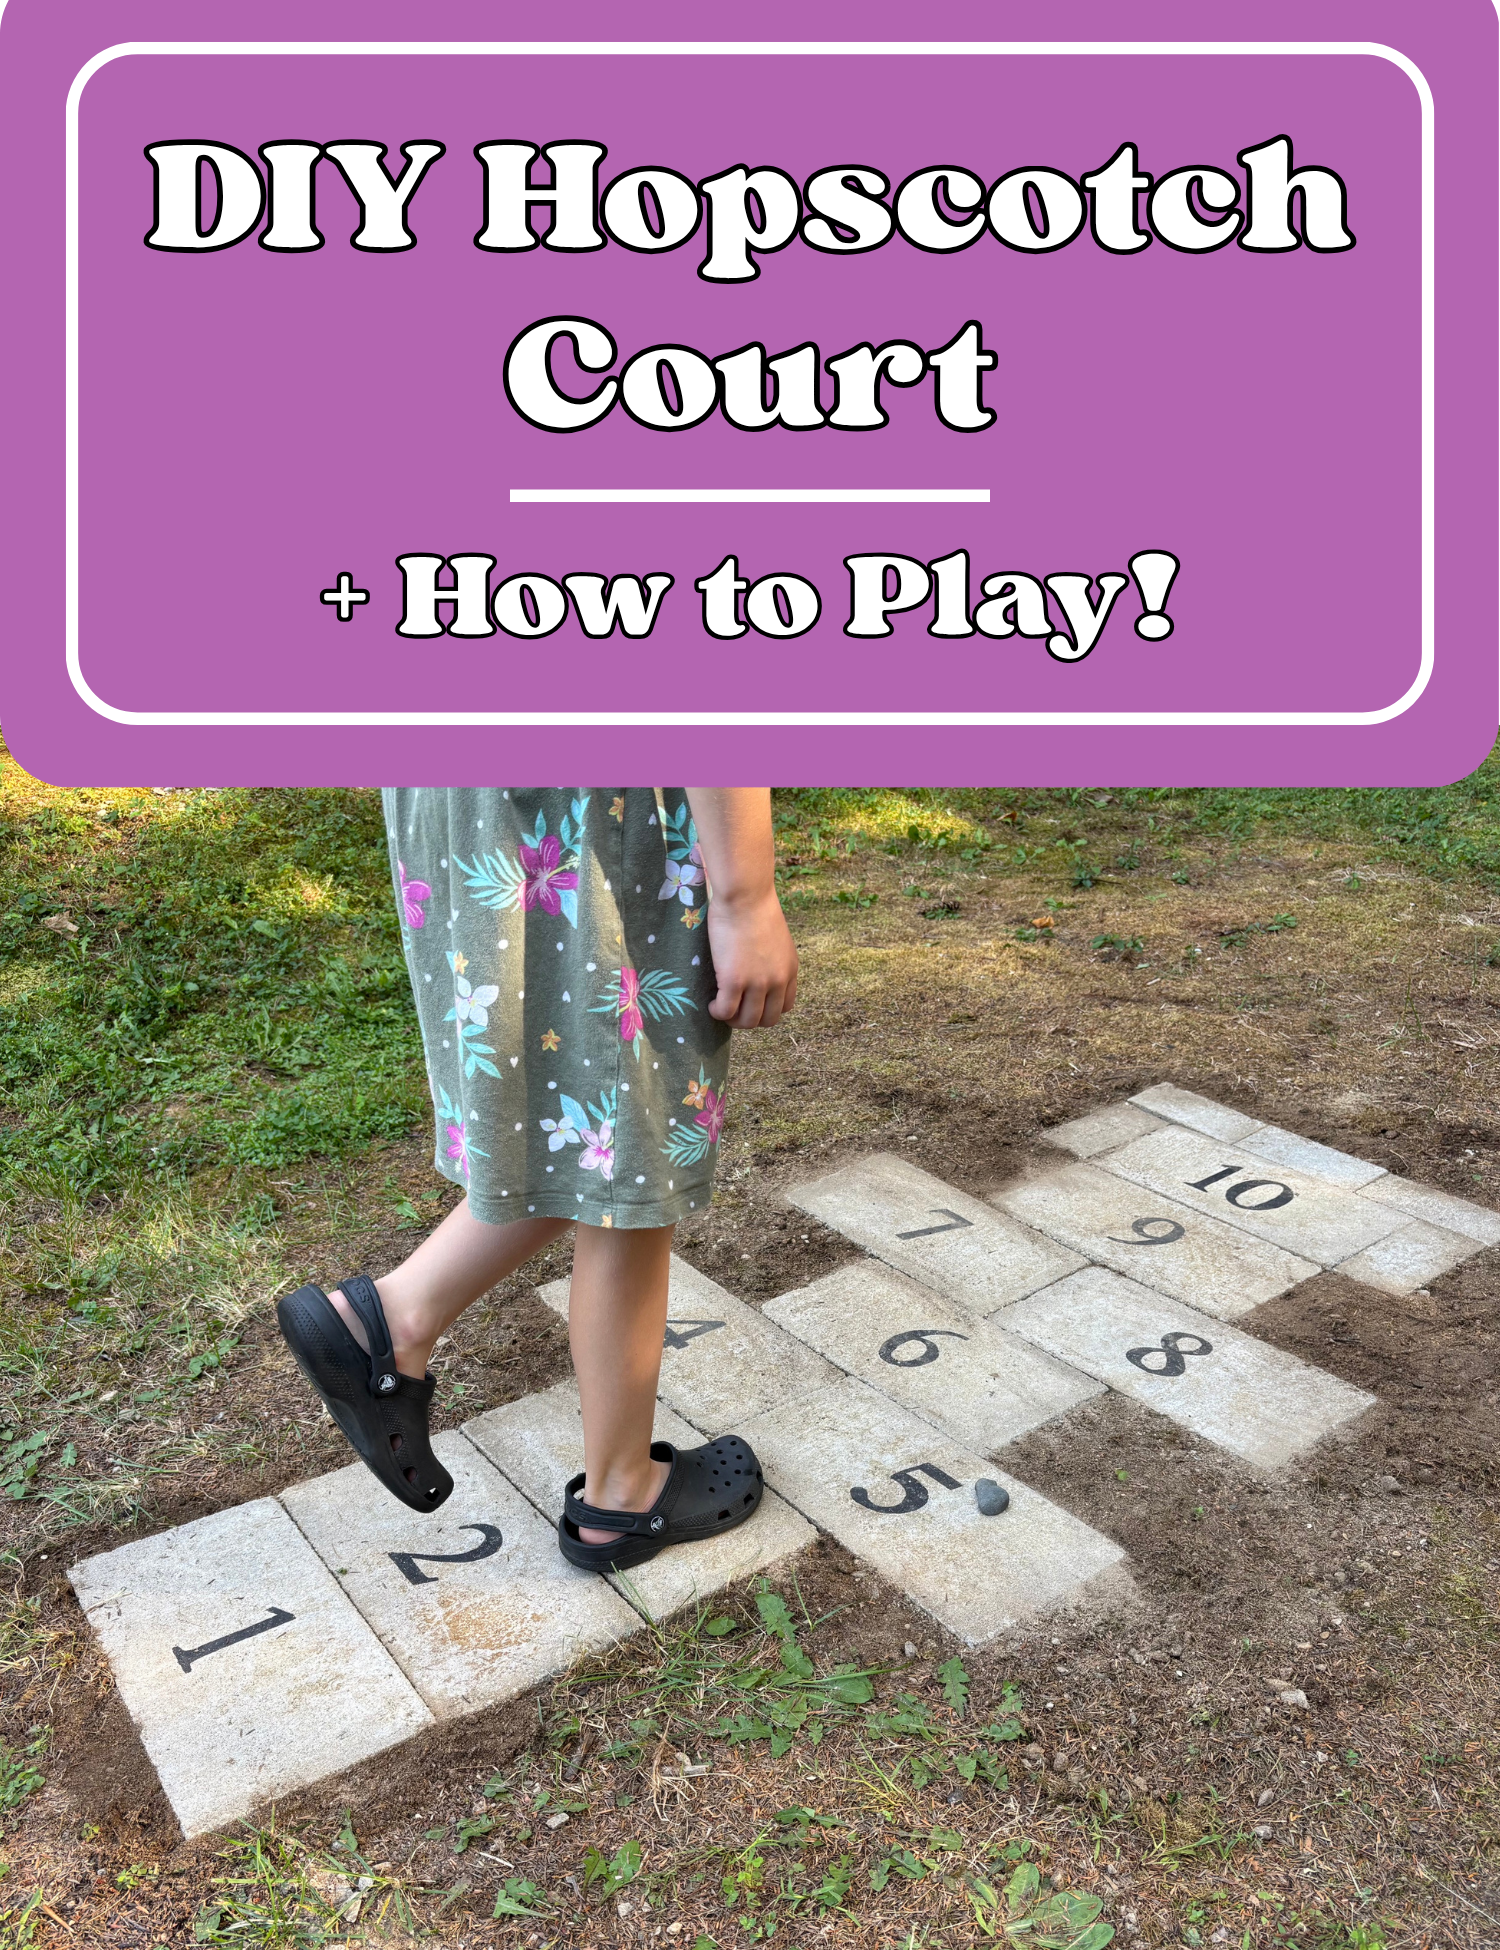
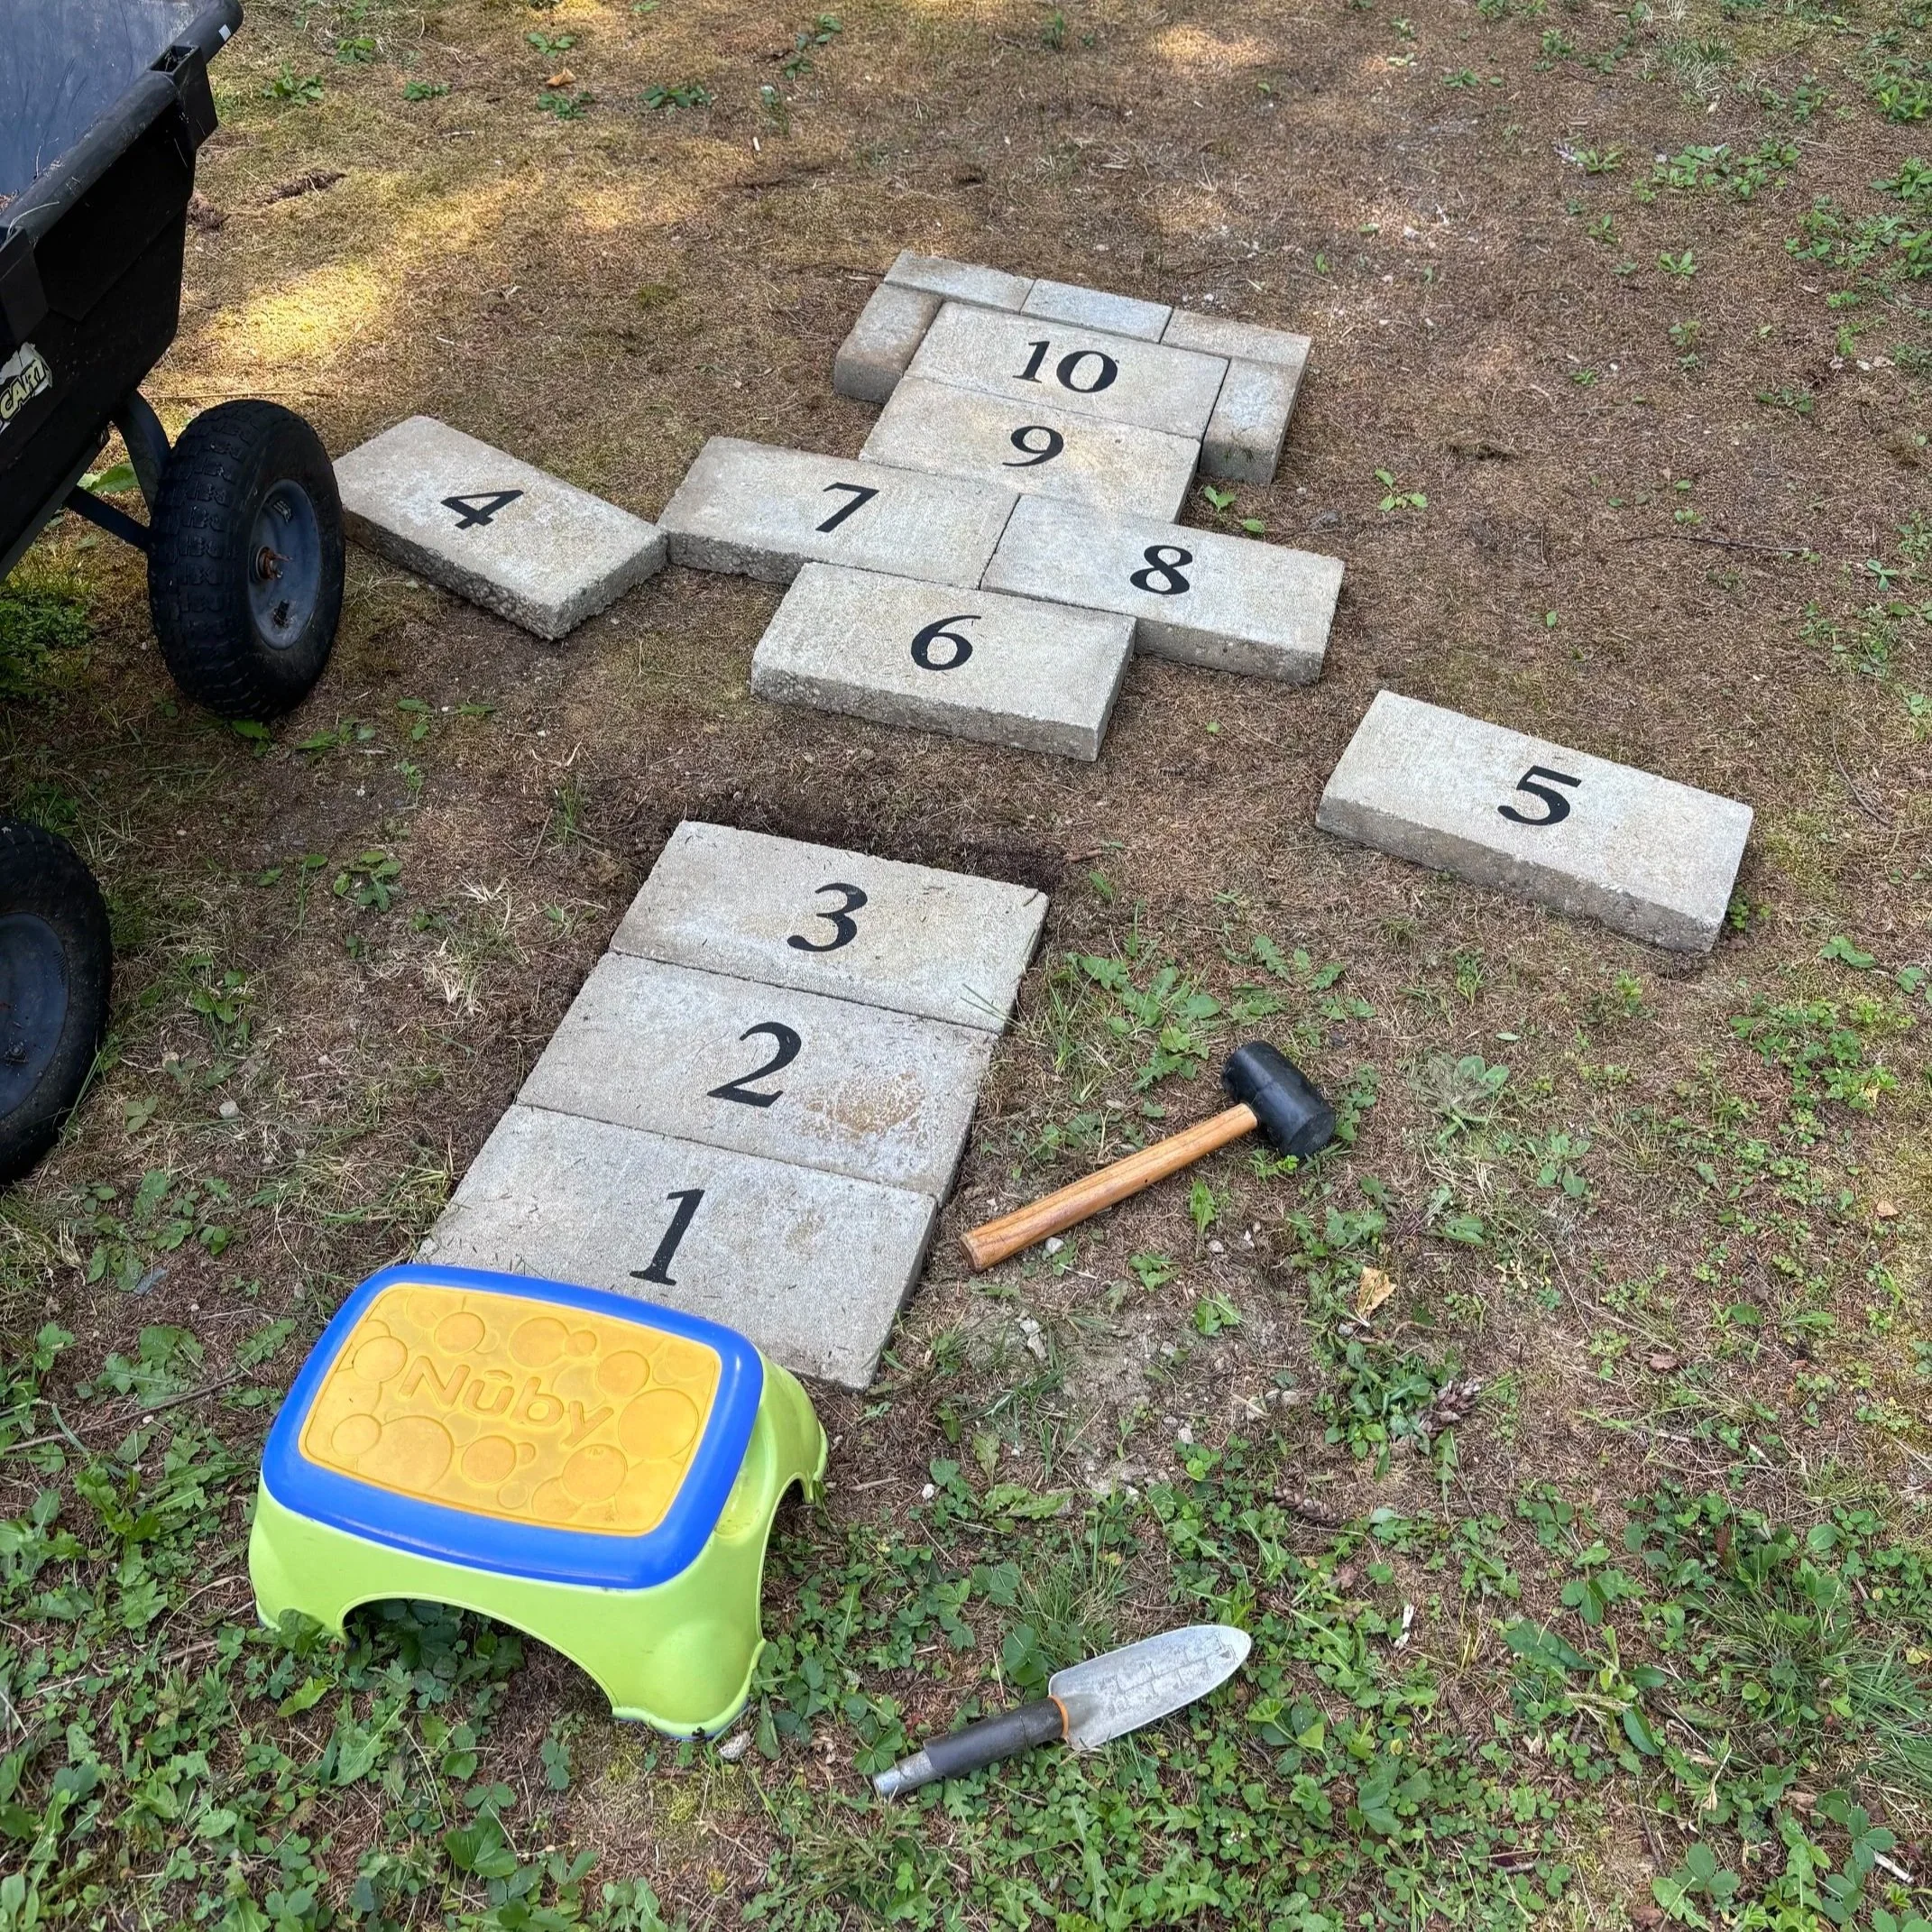
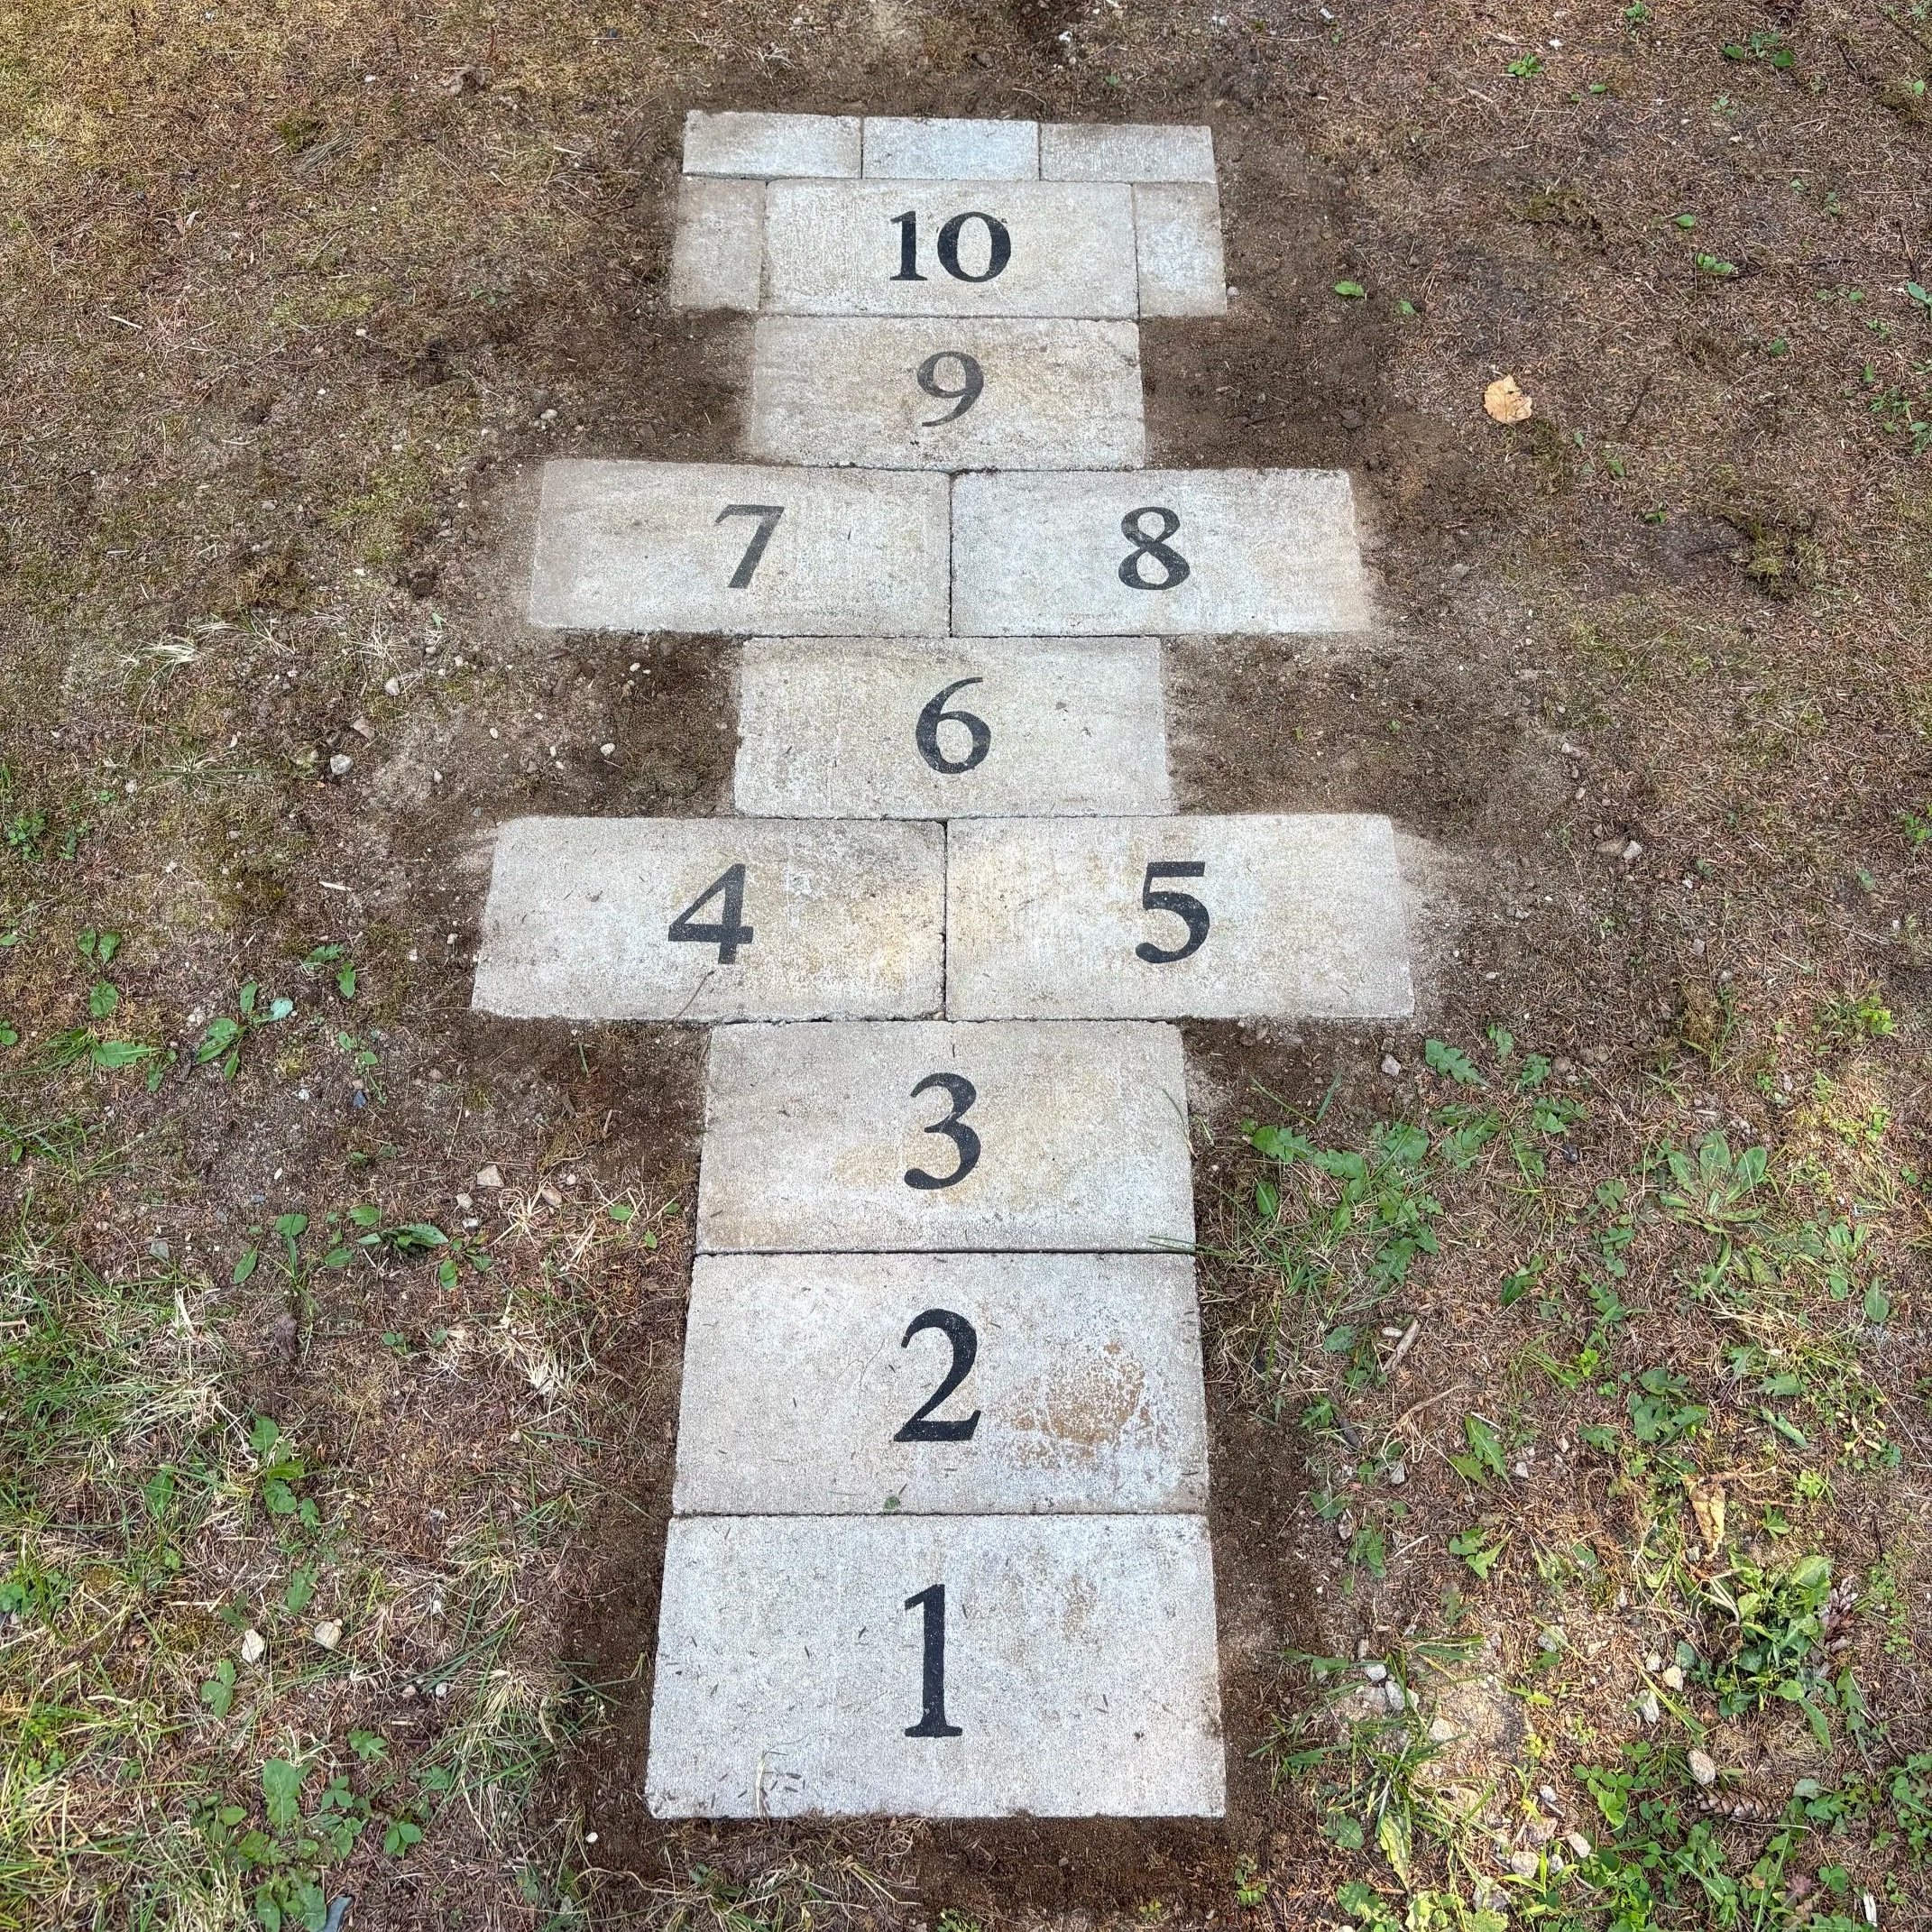
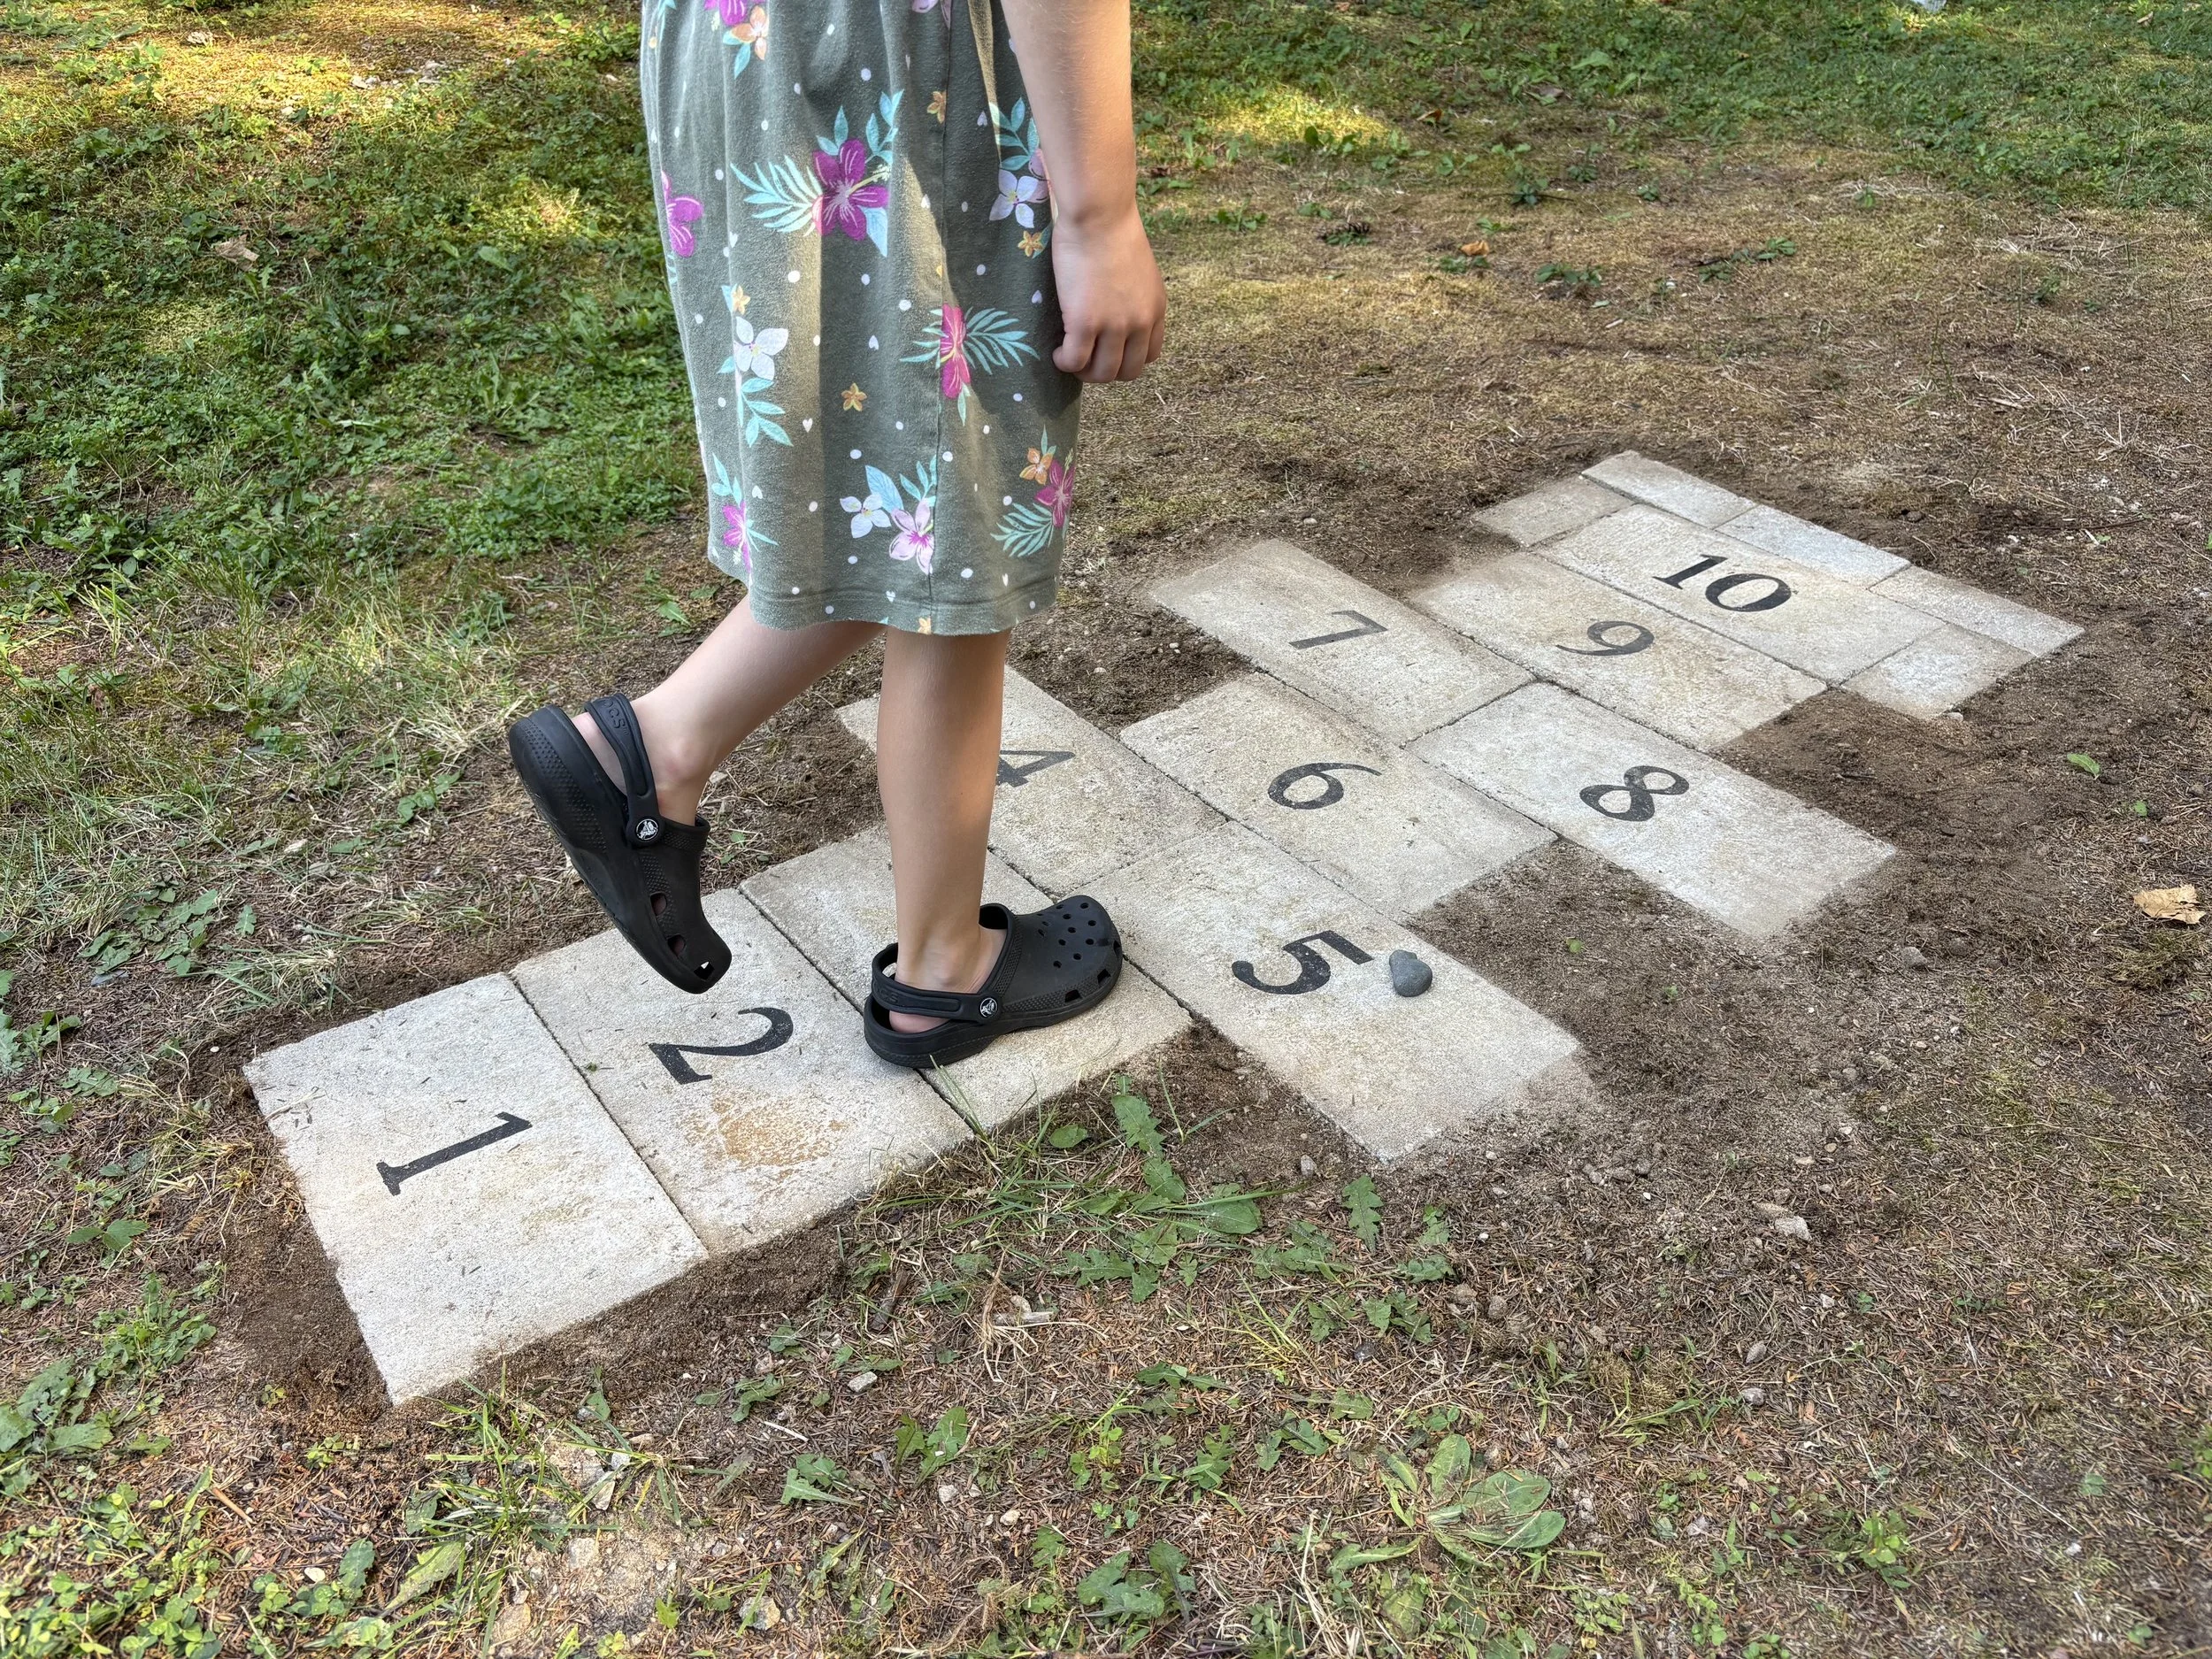
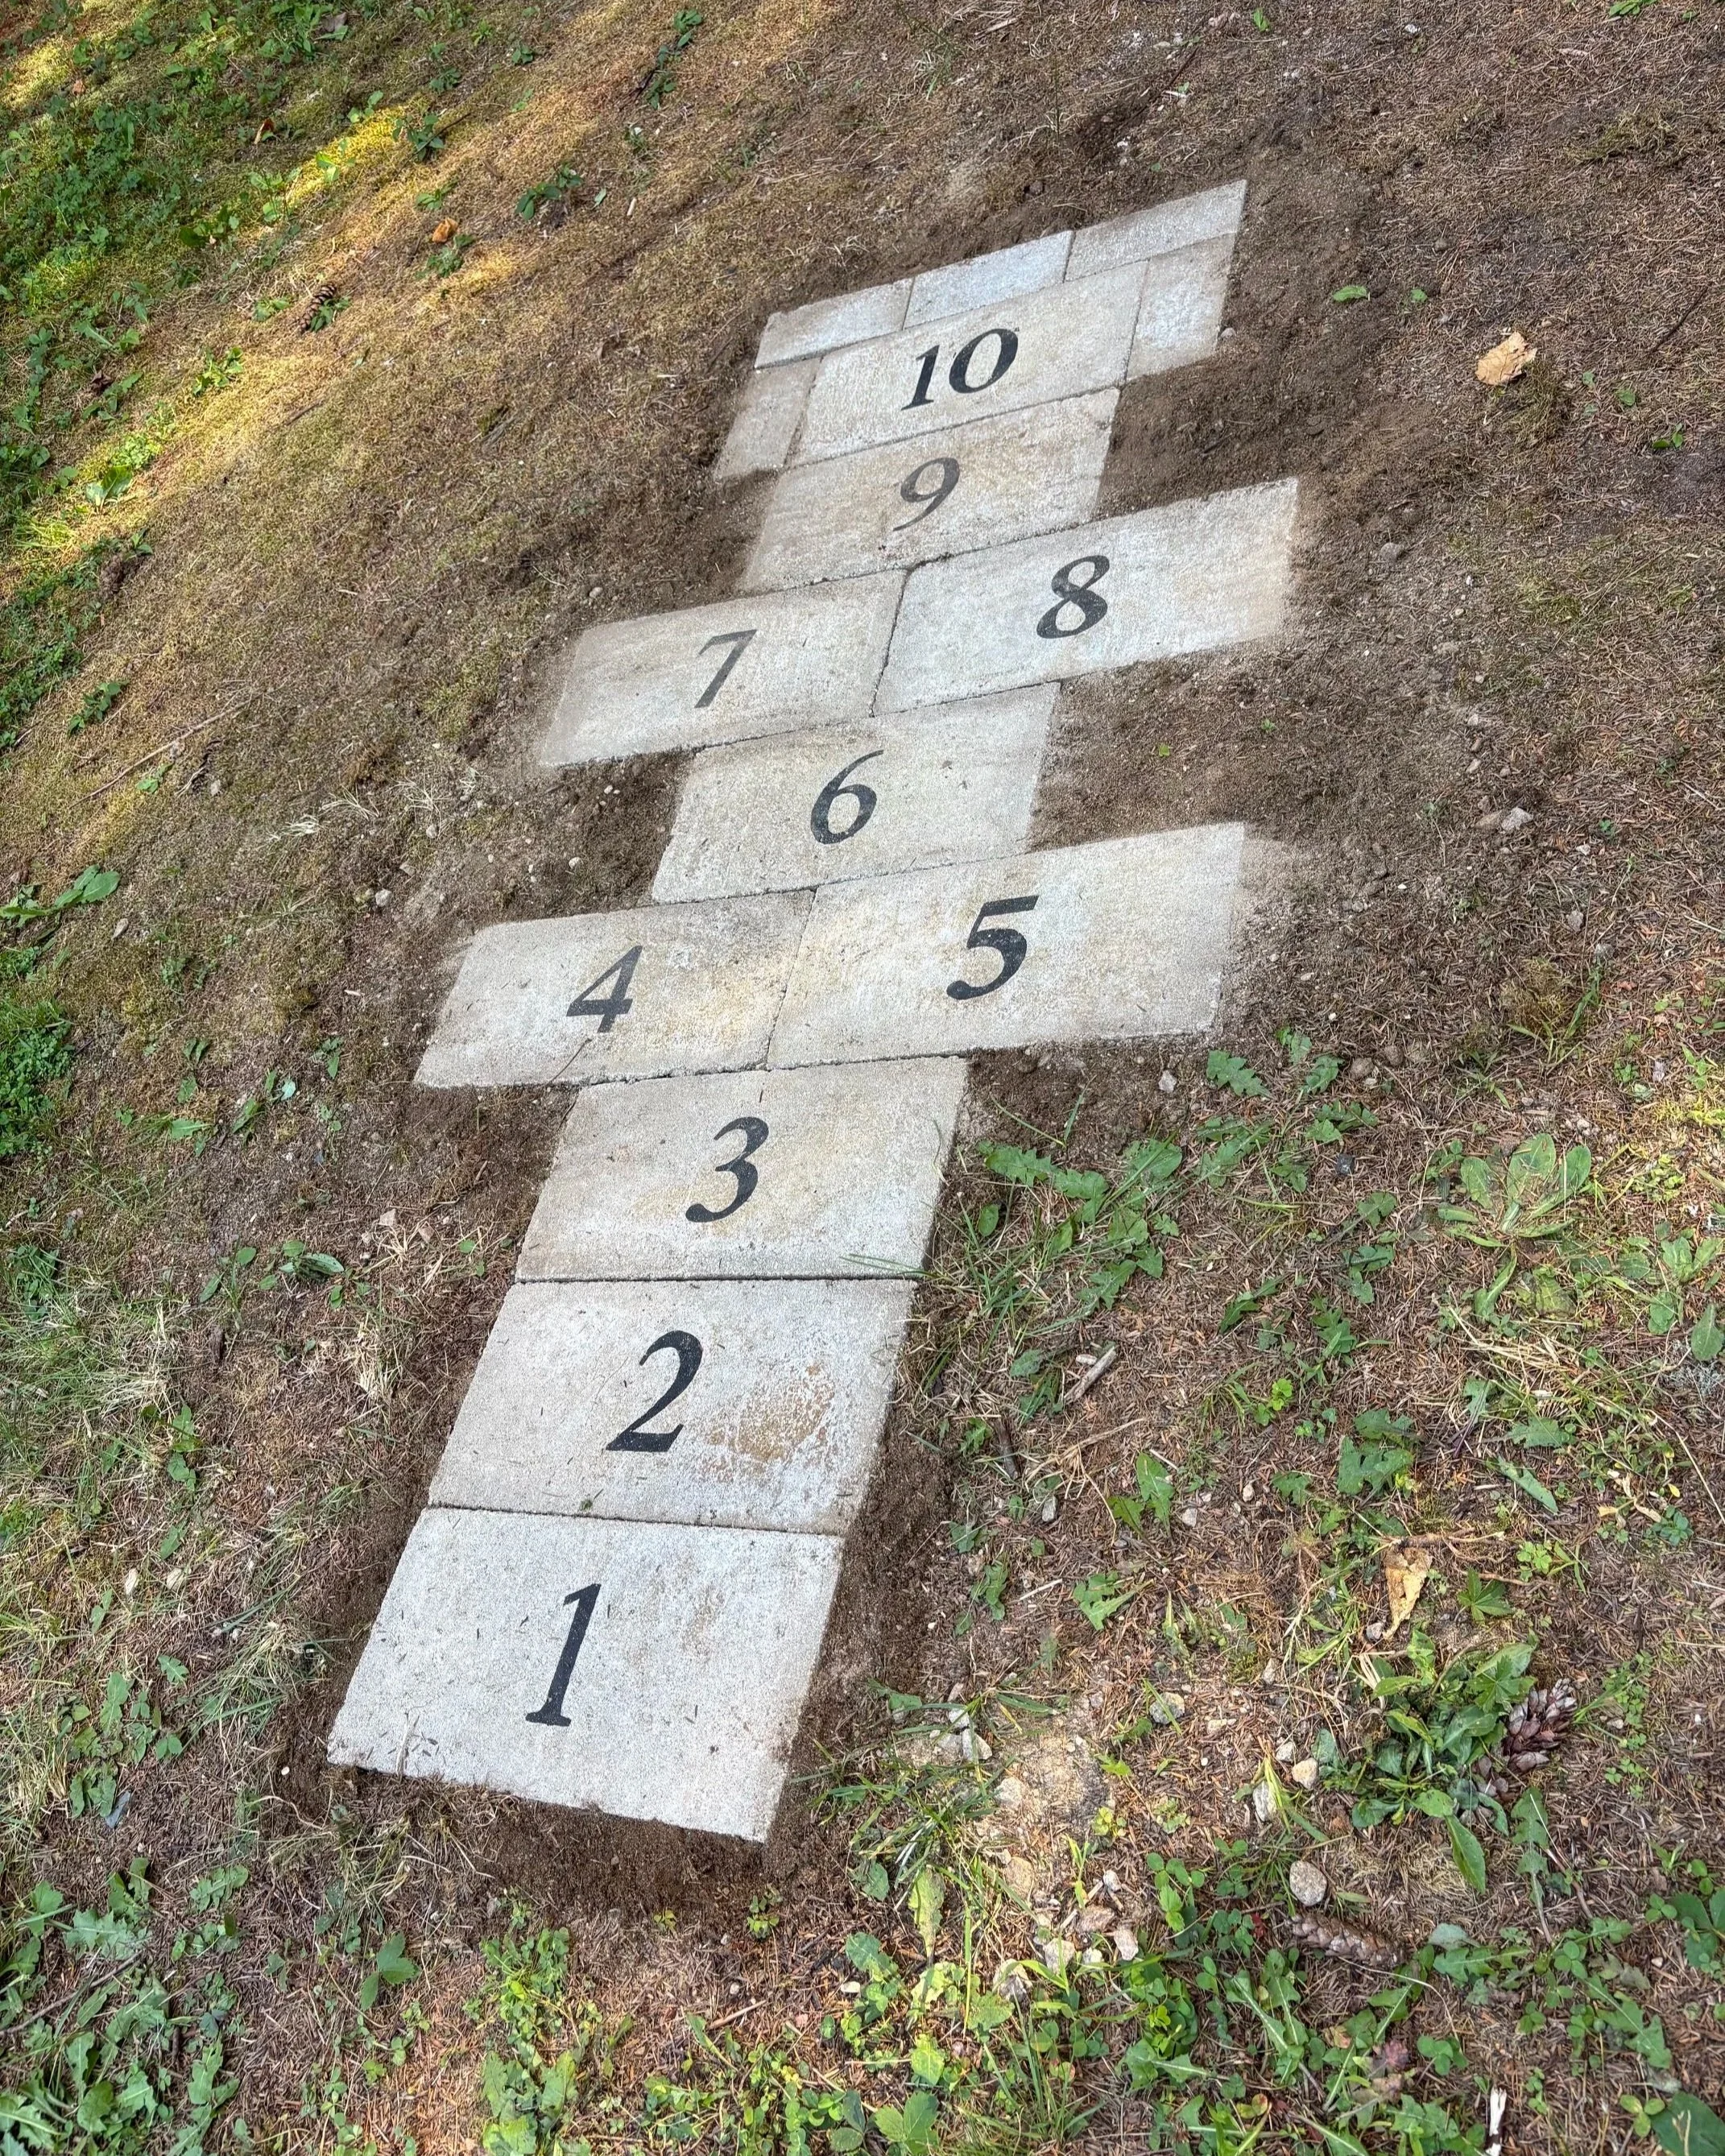
For years I’ve had the idea of making a permanent hopscotch court in our lawn using pavers but never got around to making it. Our kids are getting older, and I figured it’s now or never! We had some extra pavers and bricks from an old project laying around so I decided to go for it and finally make our hopscotch court and teach our kids this classic recess game. | This post contains affiliate links |
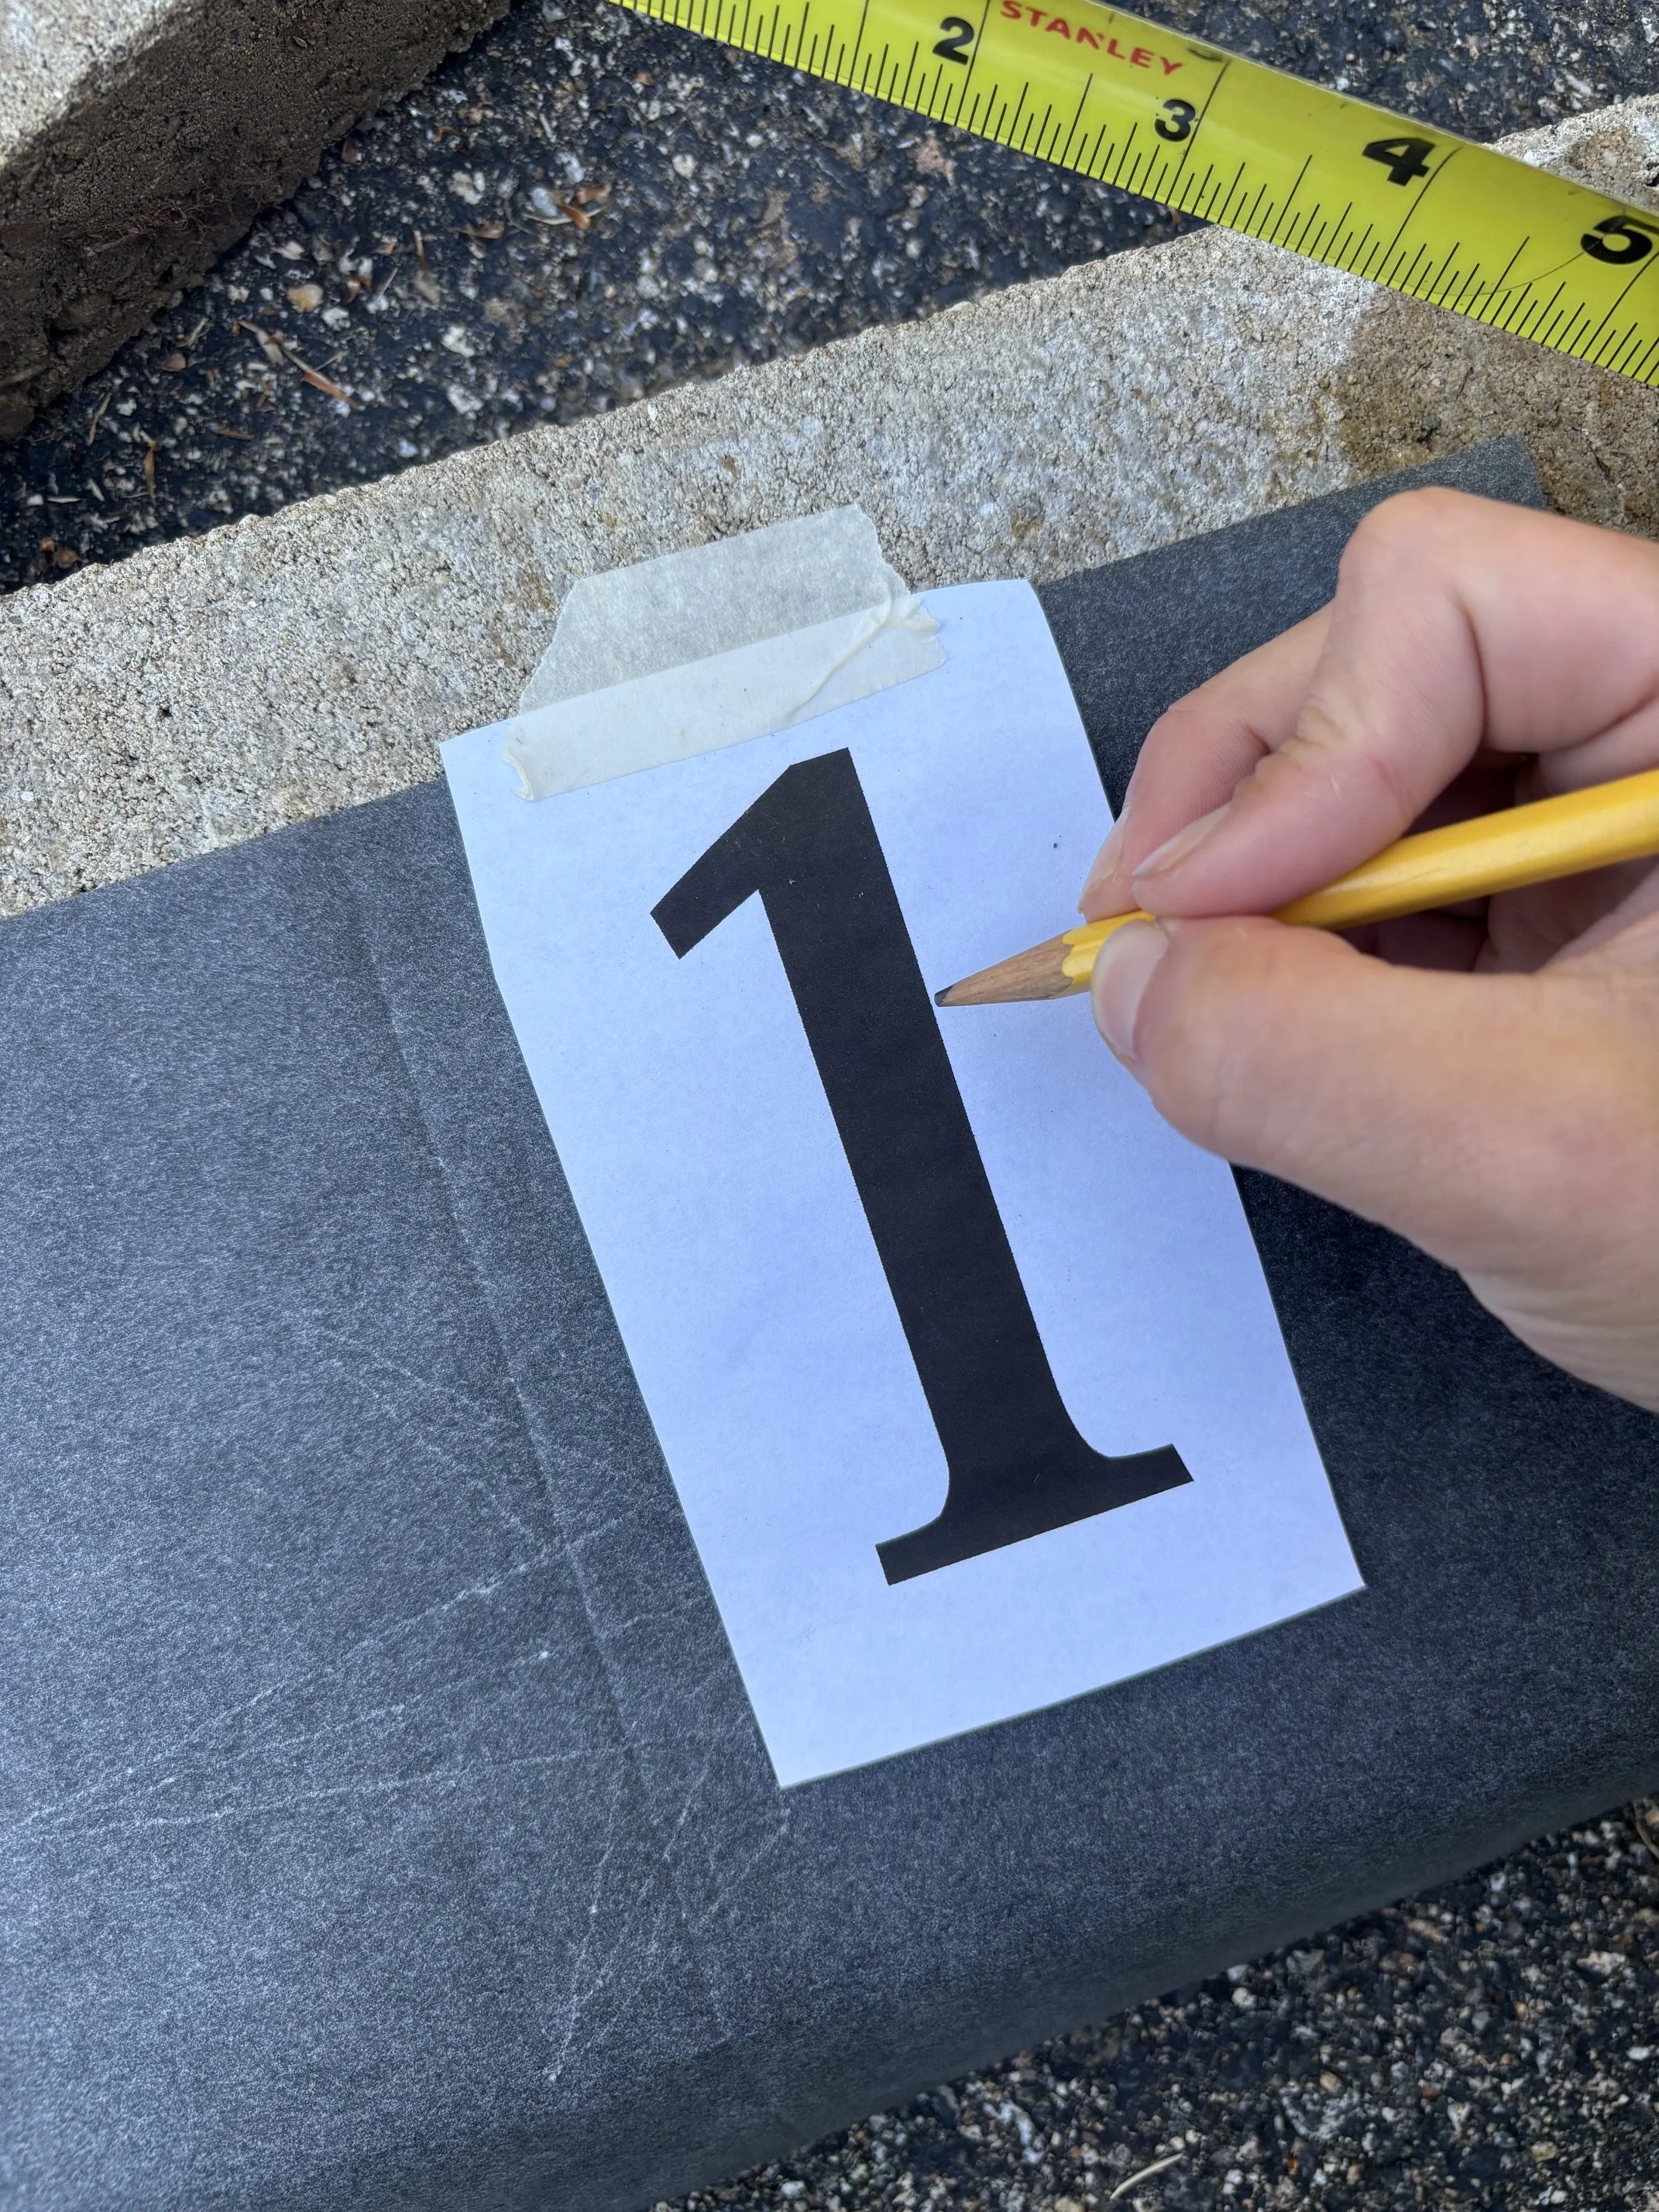
Print out numbers 1-10 on computer paper at the size you want your numbers to be - I used Canva, but you could use Word or Pages too. (Alternatively, you could buy stencils or freehand it.)
Center the numbers on the bricks and tape in place.
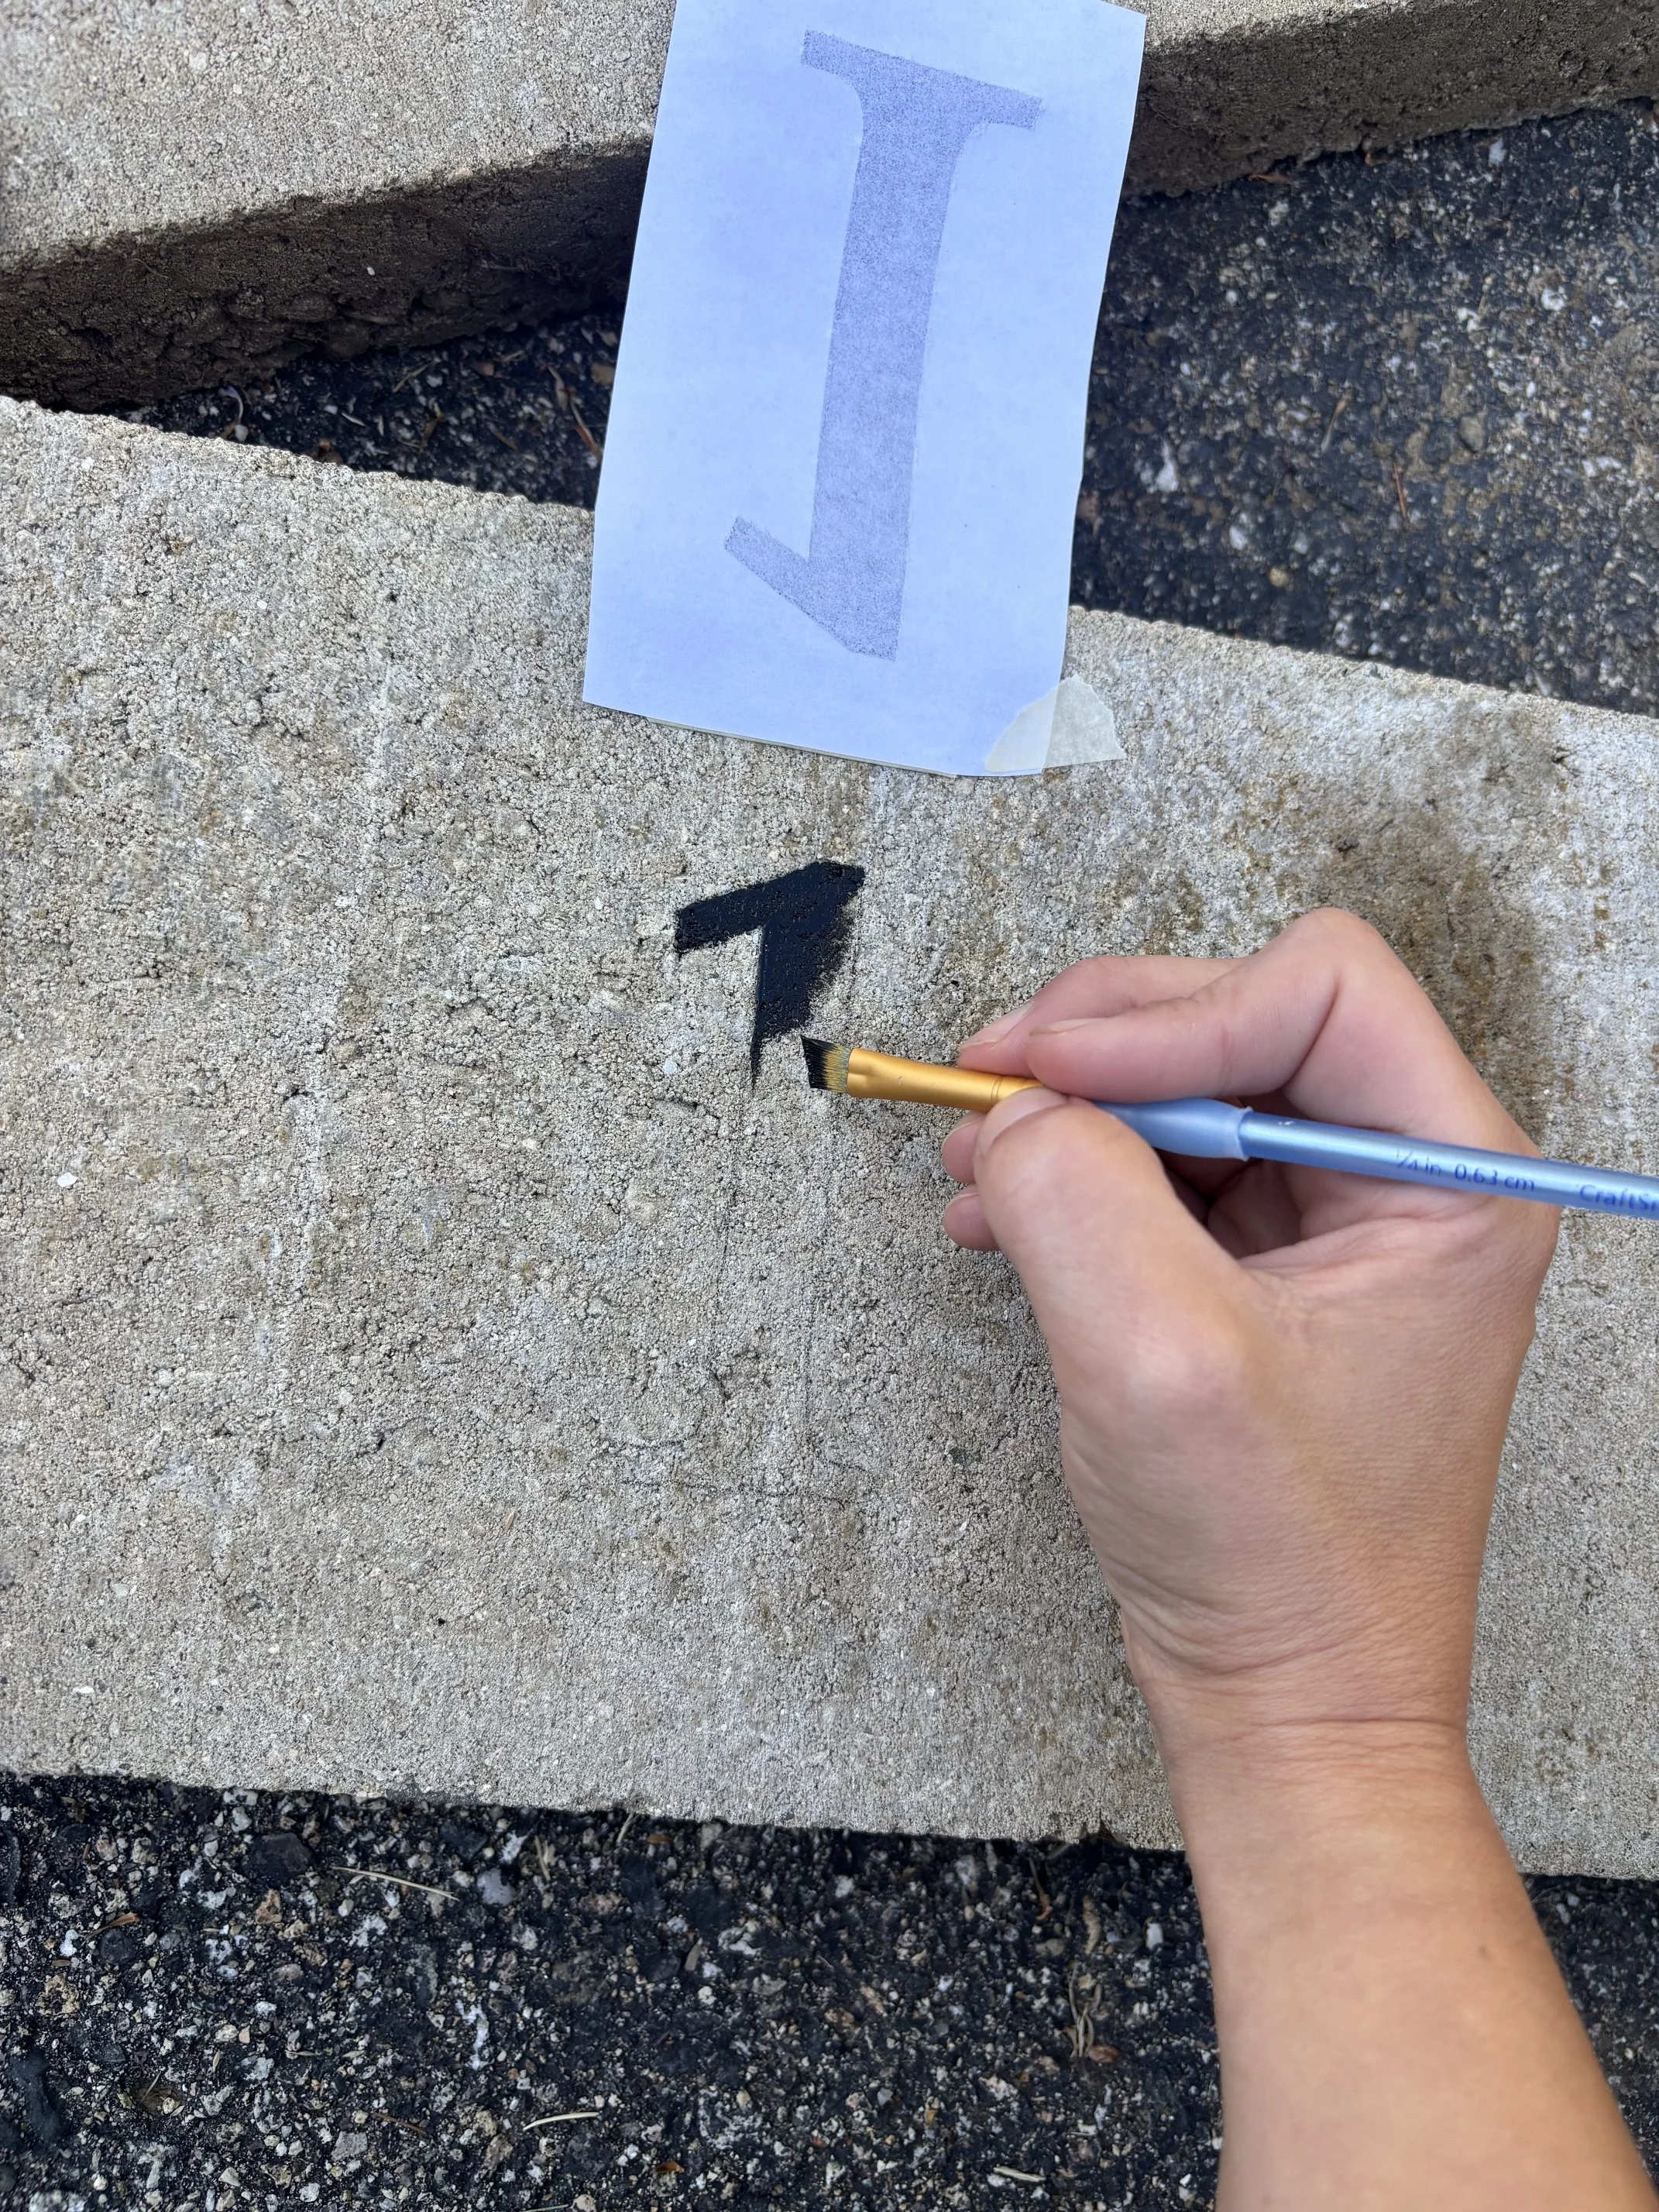
If using printed out numbers, put the carbon paper face down between the printed number and the paver and trace with a pencil.
Hand paint the numbers within the outline and allow to dry.
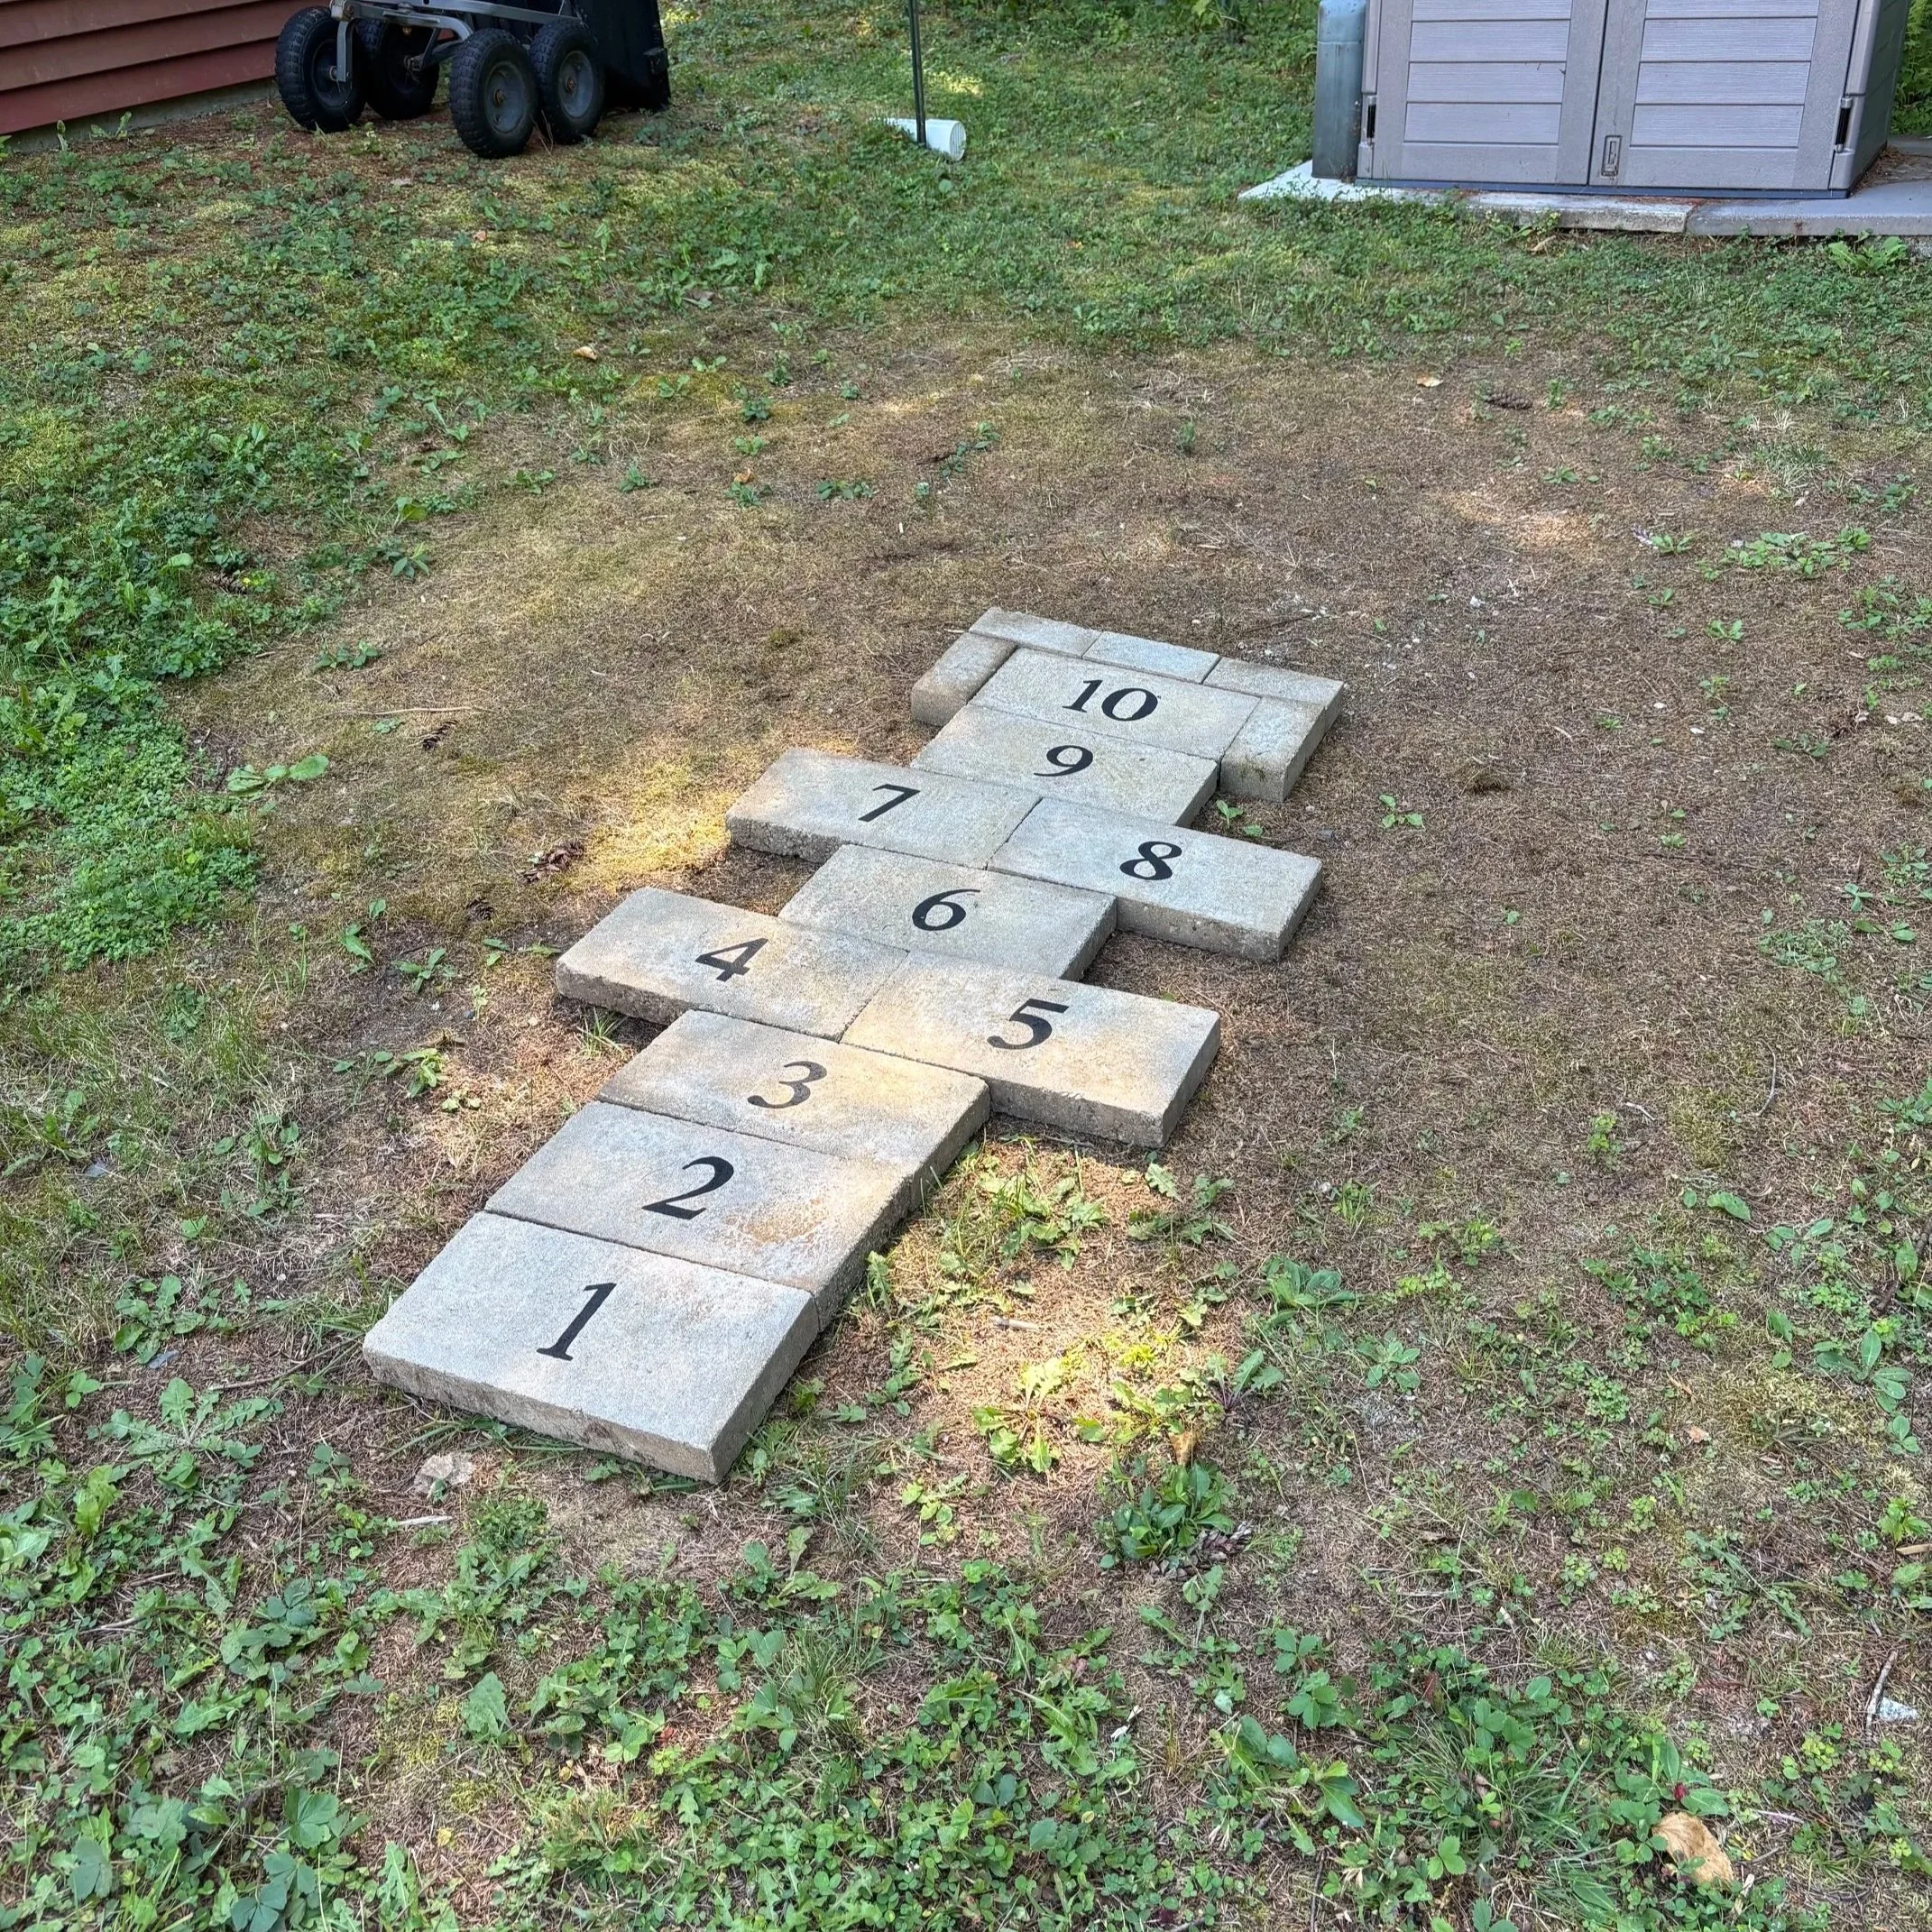
5. Lay out how you want the Hopscotch Court to be. There are several different ways you can layout the spaces, but I went with what is probably the most traditional layout. (Optional: Use extra pavers to outline the 10 space to make it larger, or use a larger paver for the 10 space.)
- Now that you have it laid out, dig out the soil to the depth of the pavers. I find it easier to to lay one paver at a time and level it with the surrounding ground. (Optional: You can use the rubber mallet to help set the pavers into place.)
Pro Tip: Use a little stool to sit on to save your back!
How to Play Hopscotch
There are some variations on how to play Hopscotch, but I’ll share how I learned growing up - and all you need is a Hopscotch Court and a small rock! Yes, a rock!
Start facing spot #1 and toss the small rock onto the court. Hop on one foot towards the rock. If there are two number squares next to each other you can land with both feet, one in each square.
When you get to the spot with the rock, skip that spot and continue to the end of the court.
When you get to the #10 spot, turn around and repeat the process heading back towards #1, but pick up the rock on your way back.
Once you get back to the beginning it’s the next person’s turn. If you fall, or land where you’re not supposed to, you’re out.
Don't want to commit to building a permanent Hopscotch Court in your yard? Just draw a temporary one on your driveway or sidewalk with chalk!
KEEP UP WITH BIRCH LANDING HOME
| Etsy | Facebook | Instagram | Pinterest | Bloglovin' | Hometalk |
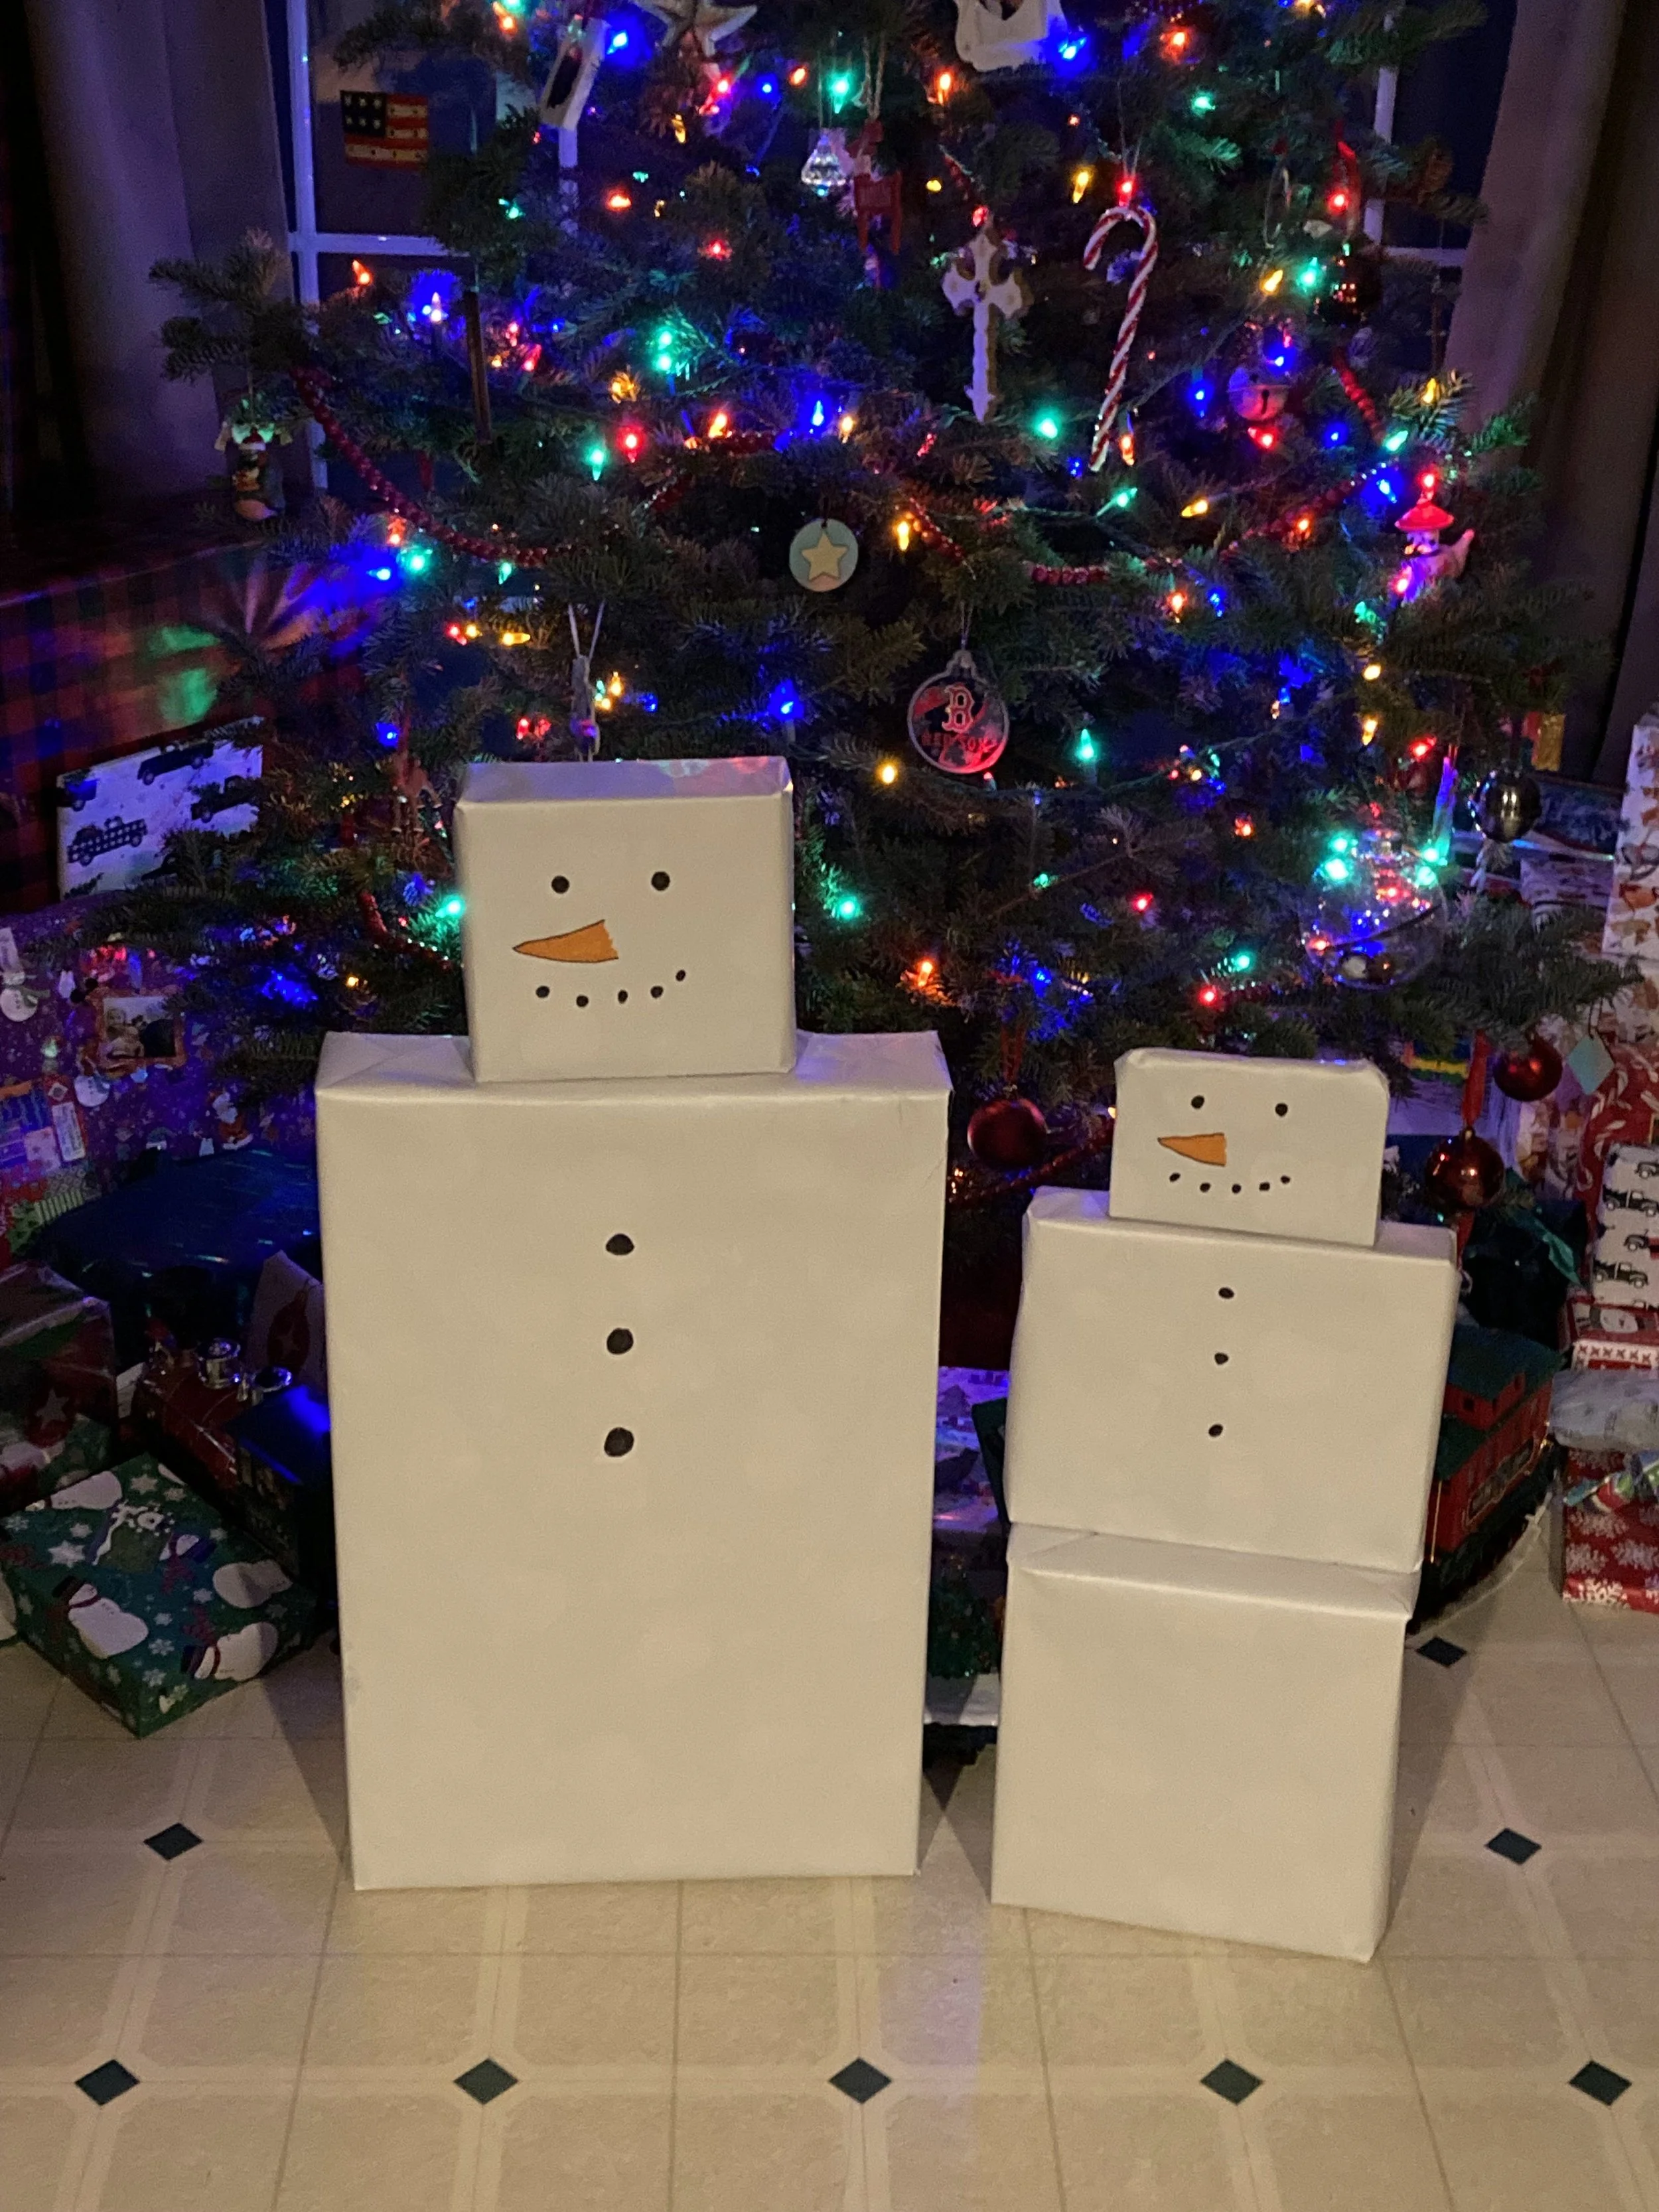
This year I was inspired by an old friend from high school - every year she makes themed “stacked characters” out of her family’s gifts. One year it was all Santas, another year all penguins, etc - complete with accessories! I thought it was such a cute idea and wanted to give it a try myself this year, but on a much simpler and smaller scale. So I opted to make each kid their own “present snowman” and they loved it! I think this has just become a yearly tradition in our family as well. | This post contains affiliate links |
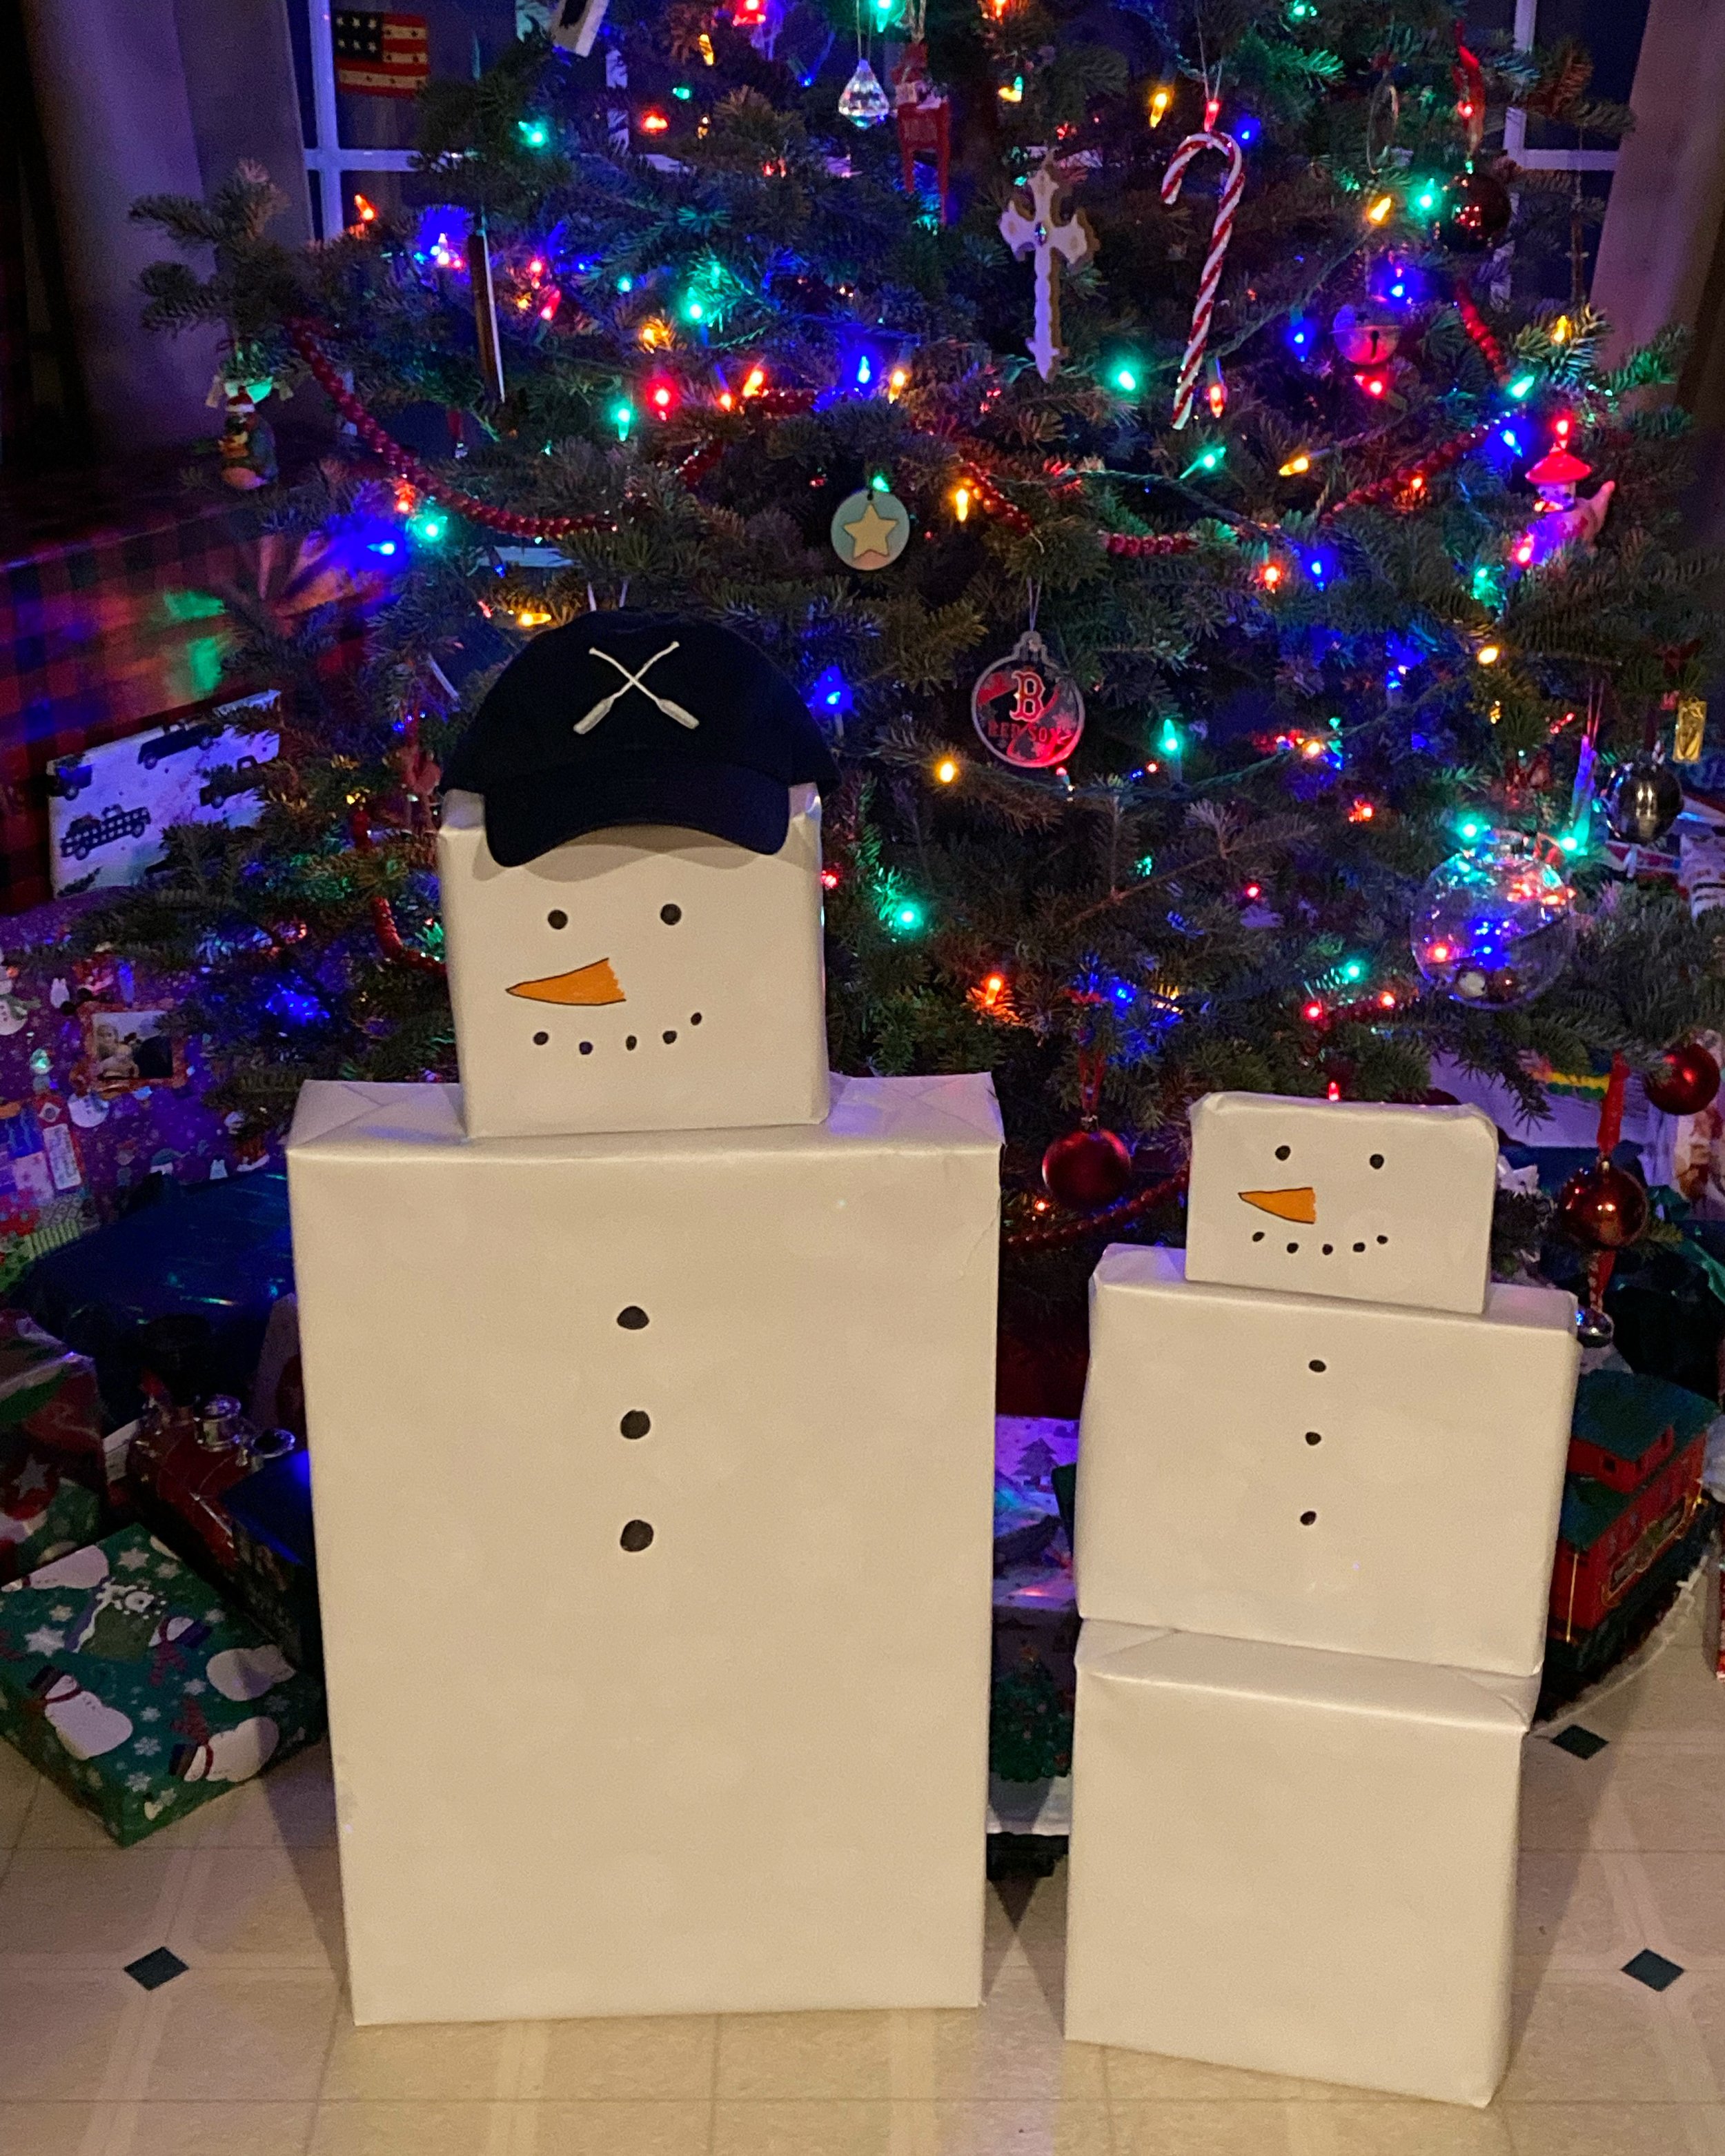
To make the snowmen you don’t need to buy anything special - in fact I just used regular Christmas wrapping paper but wrapped the gifts inside-out so the plain white back of the wrapping paper was facing out! I chose 2-3 gifts for each child that stacked well on top of each other and wrapped them, white side facing out. Then I used a sharpie marker and orange colored marker to draw the face and buttons.
Our oldest daughter recently asked for one of our New England Lakeside Baseball Caps of her own so obviously we had to give her one for Christmas! The hat made the perfect finish for her Snowman and she got a huge kick out of it on Christmas morning.
This was such an easy and fun surprise and I hope you’ll give it a try too and make Christmas morning just a little more magical.
KEEP UP WITH BIRCH LANDING HOME
| Etsy | Facebook | Instagram | Pinterest | Bloglovin' | Hometalk |
Just wanted to share this easy, cute homemade gift idea for anyone with small kids in a snowy climate - DIY Simple Snowman Kits! Since we aren’t able to get together with a lot of family and friends again this year (thanks Covid), we decided to make and send these little kits so our kids could “help” their friends make their own snowmen from afar. | This post contains affiliate links |
Really there isn’t too much to explain for this project — we gathered some basic materials, painted them, and then packaged them together before including a little note from the kids.
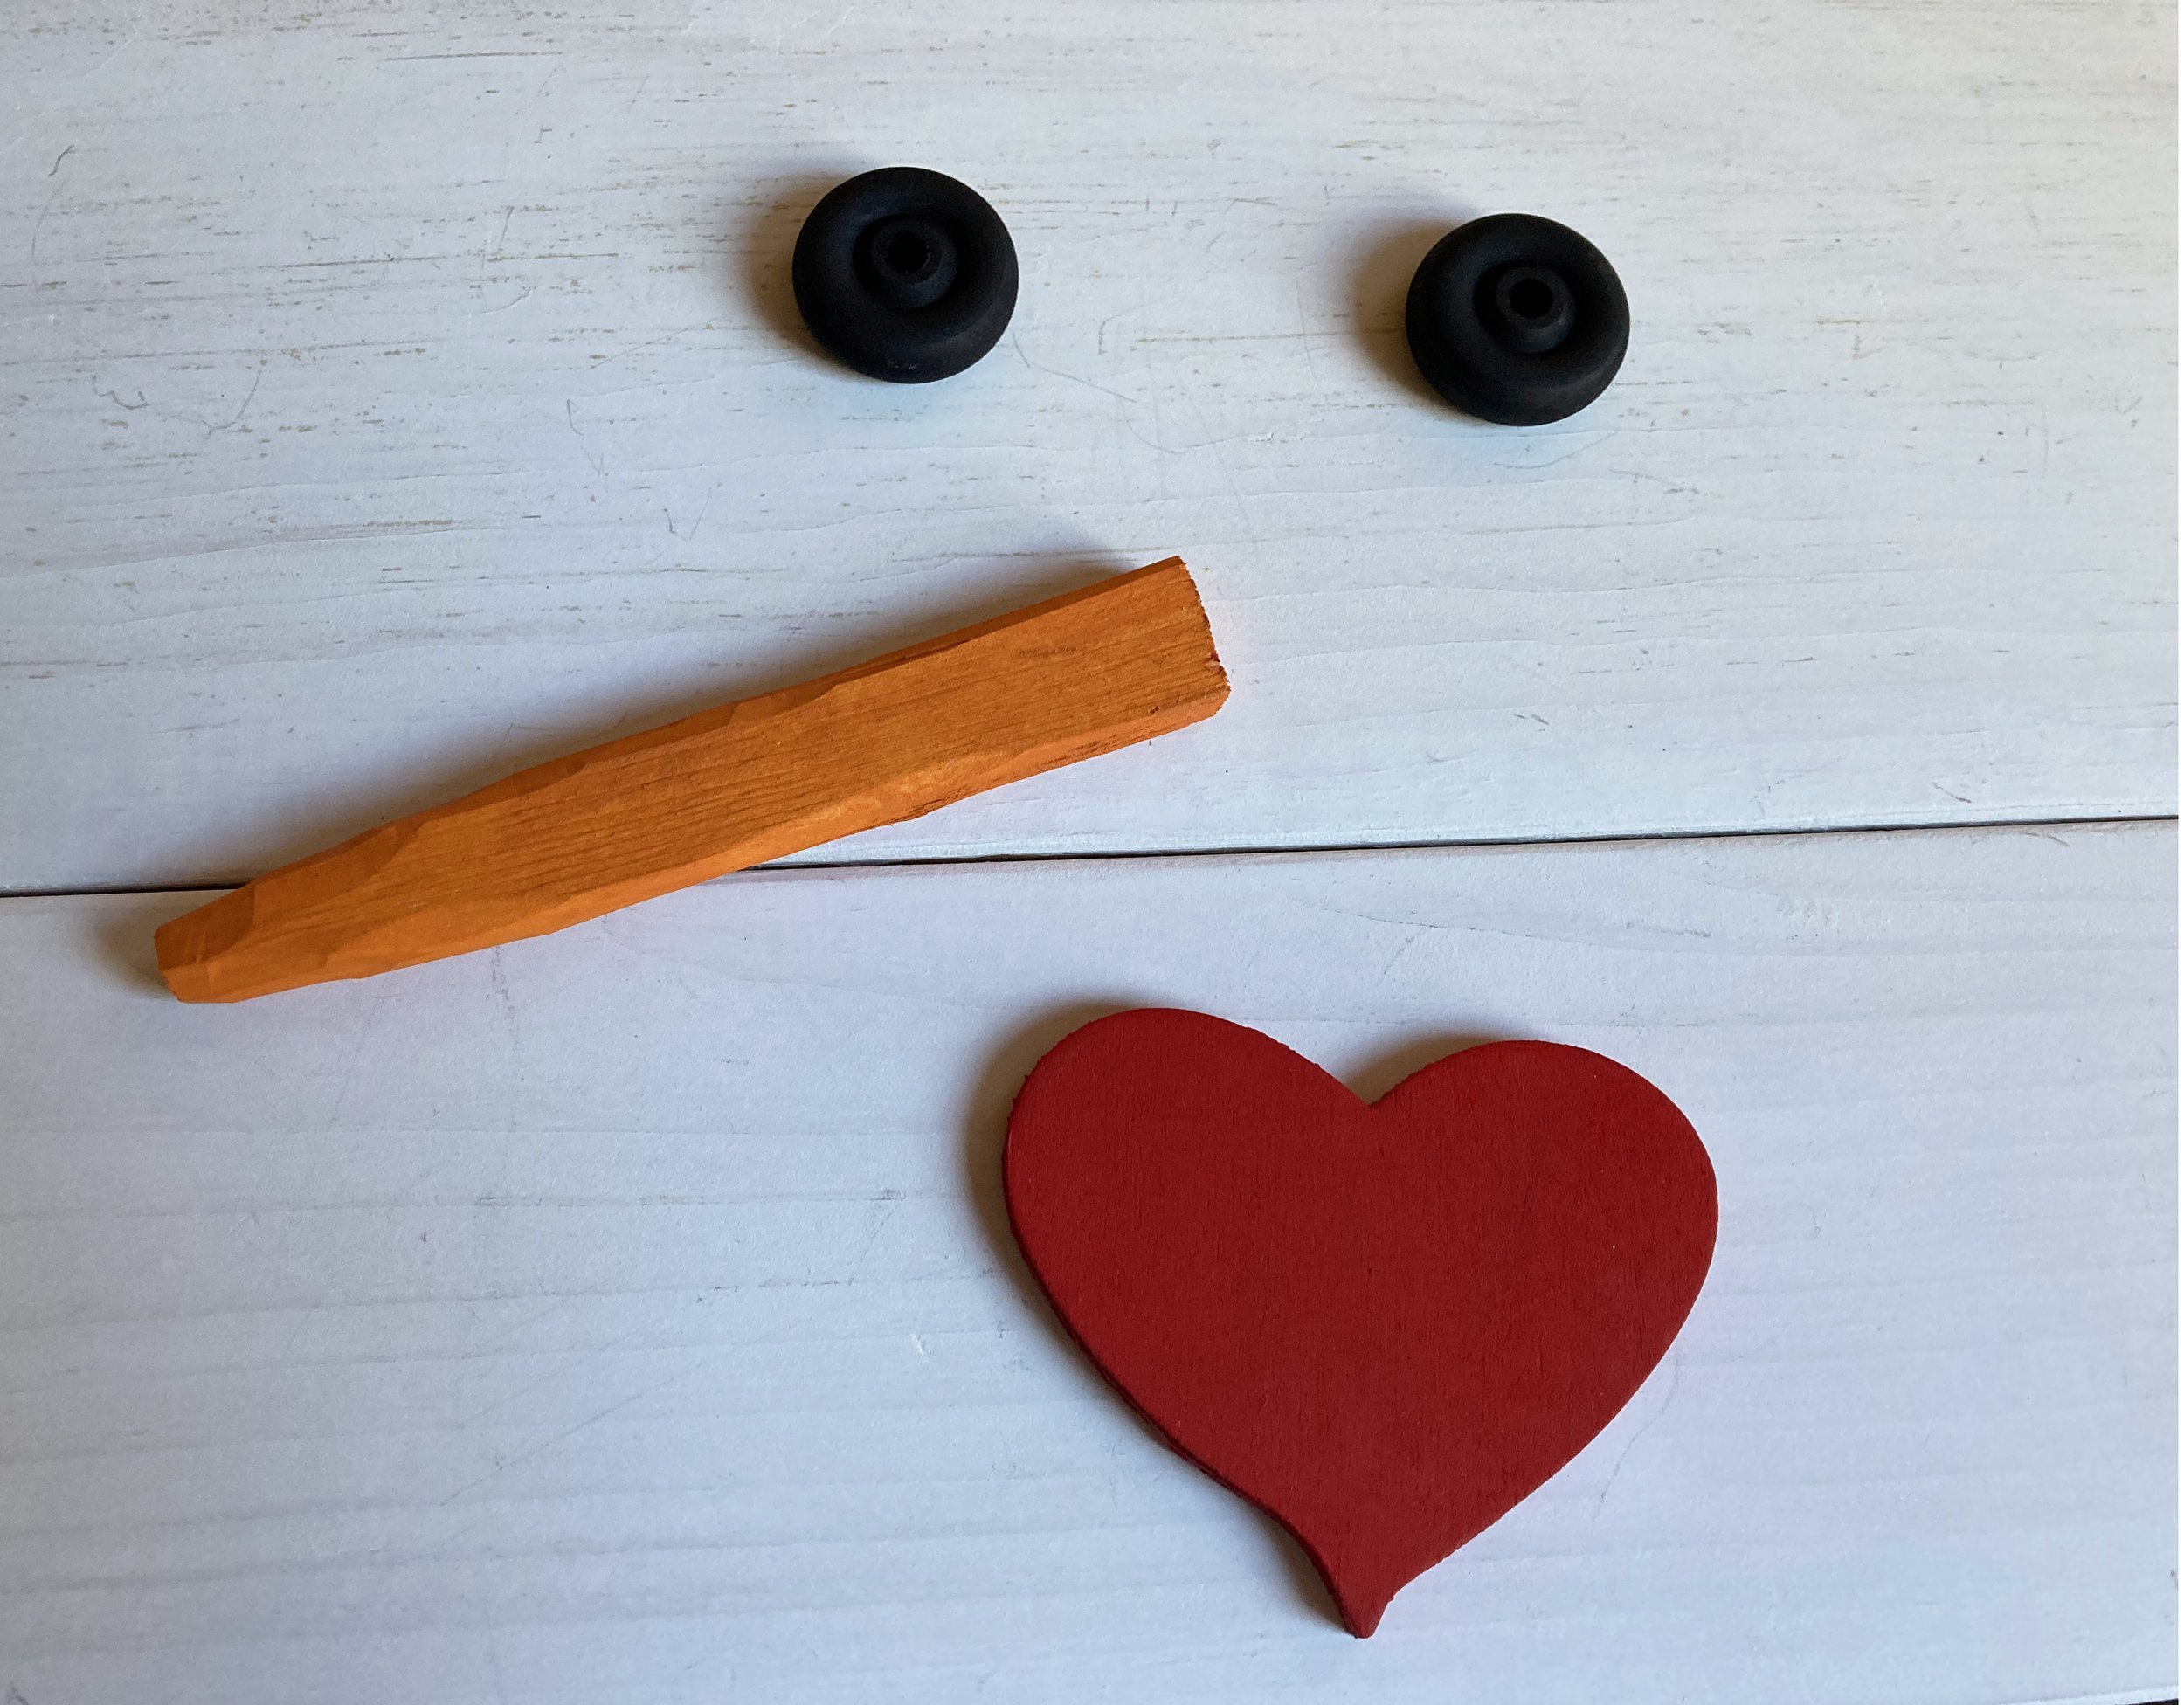
EYES: For the eyes we used wooden toy wheels from a craft store (similar ones linked) that we painted black - but you could use just about anything, including painted rocks or scrap wood.
NOSE: For the nose I whittled down some pieces of scrap wood into a rough carrot shape, then painted them orange.
HEART: For the hearts we glued together two layers of pre-cut balsa wood hearts we had picked up at a craft store (similiar ones linked), then painted them red.
BUTTONS (OPTIONAL): We did not include buttons in our kits but you can include painted rocks, small pieces of scrap wood, or actual large buttons in your kits to be used as buttons.
GIFT BAG: We packaged our kits up in some organza gift bags I had on hand (similar ones linked), but you could wrap them up in a number of ways including using a piece of fabric that could double as a scarf!
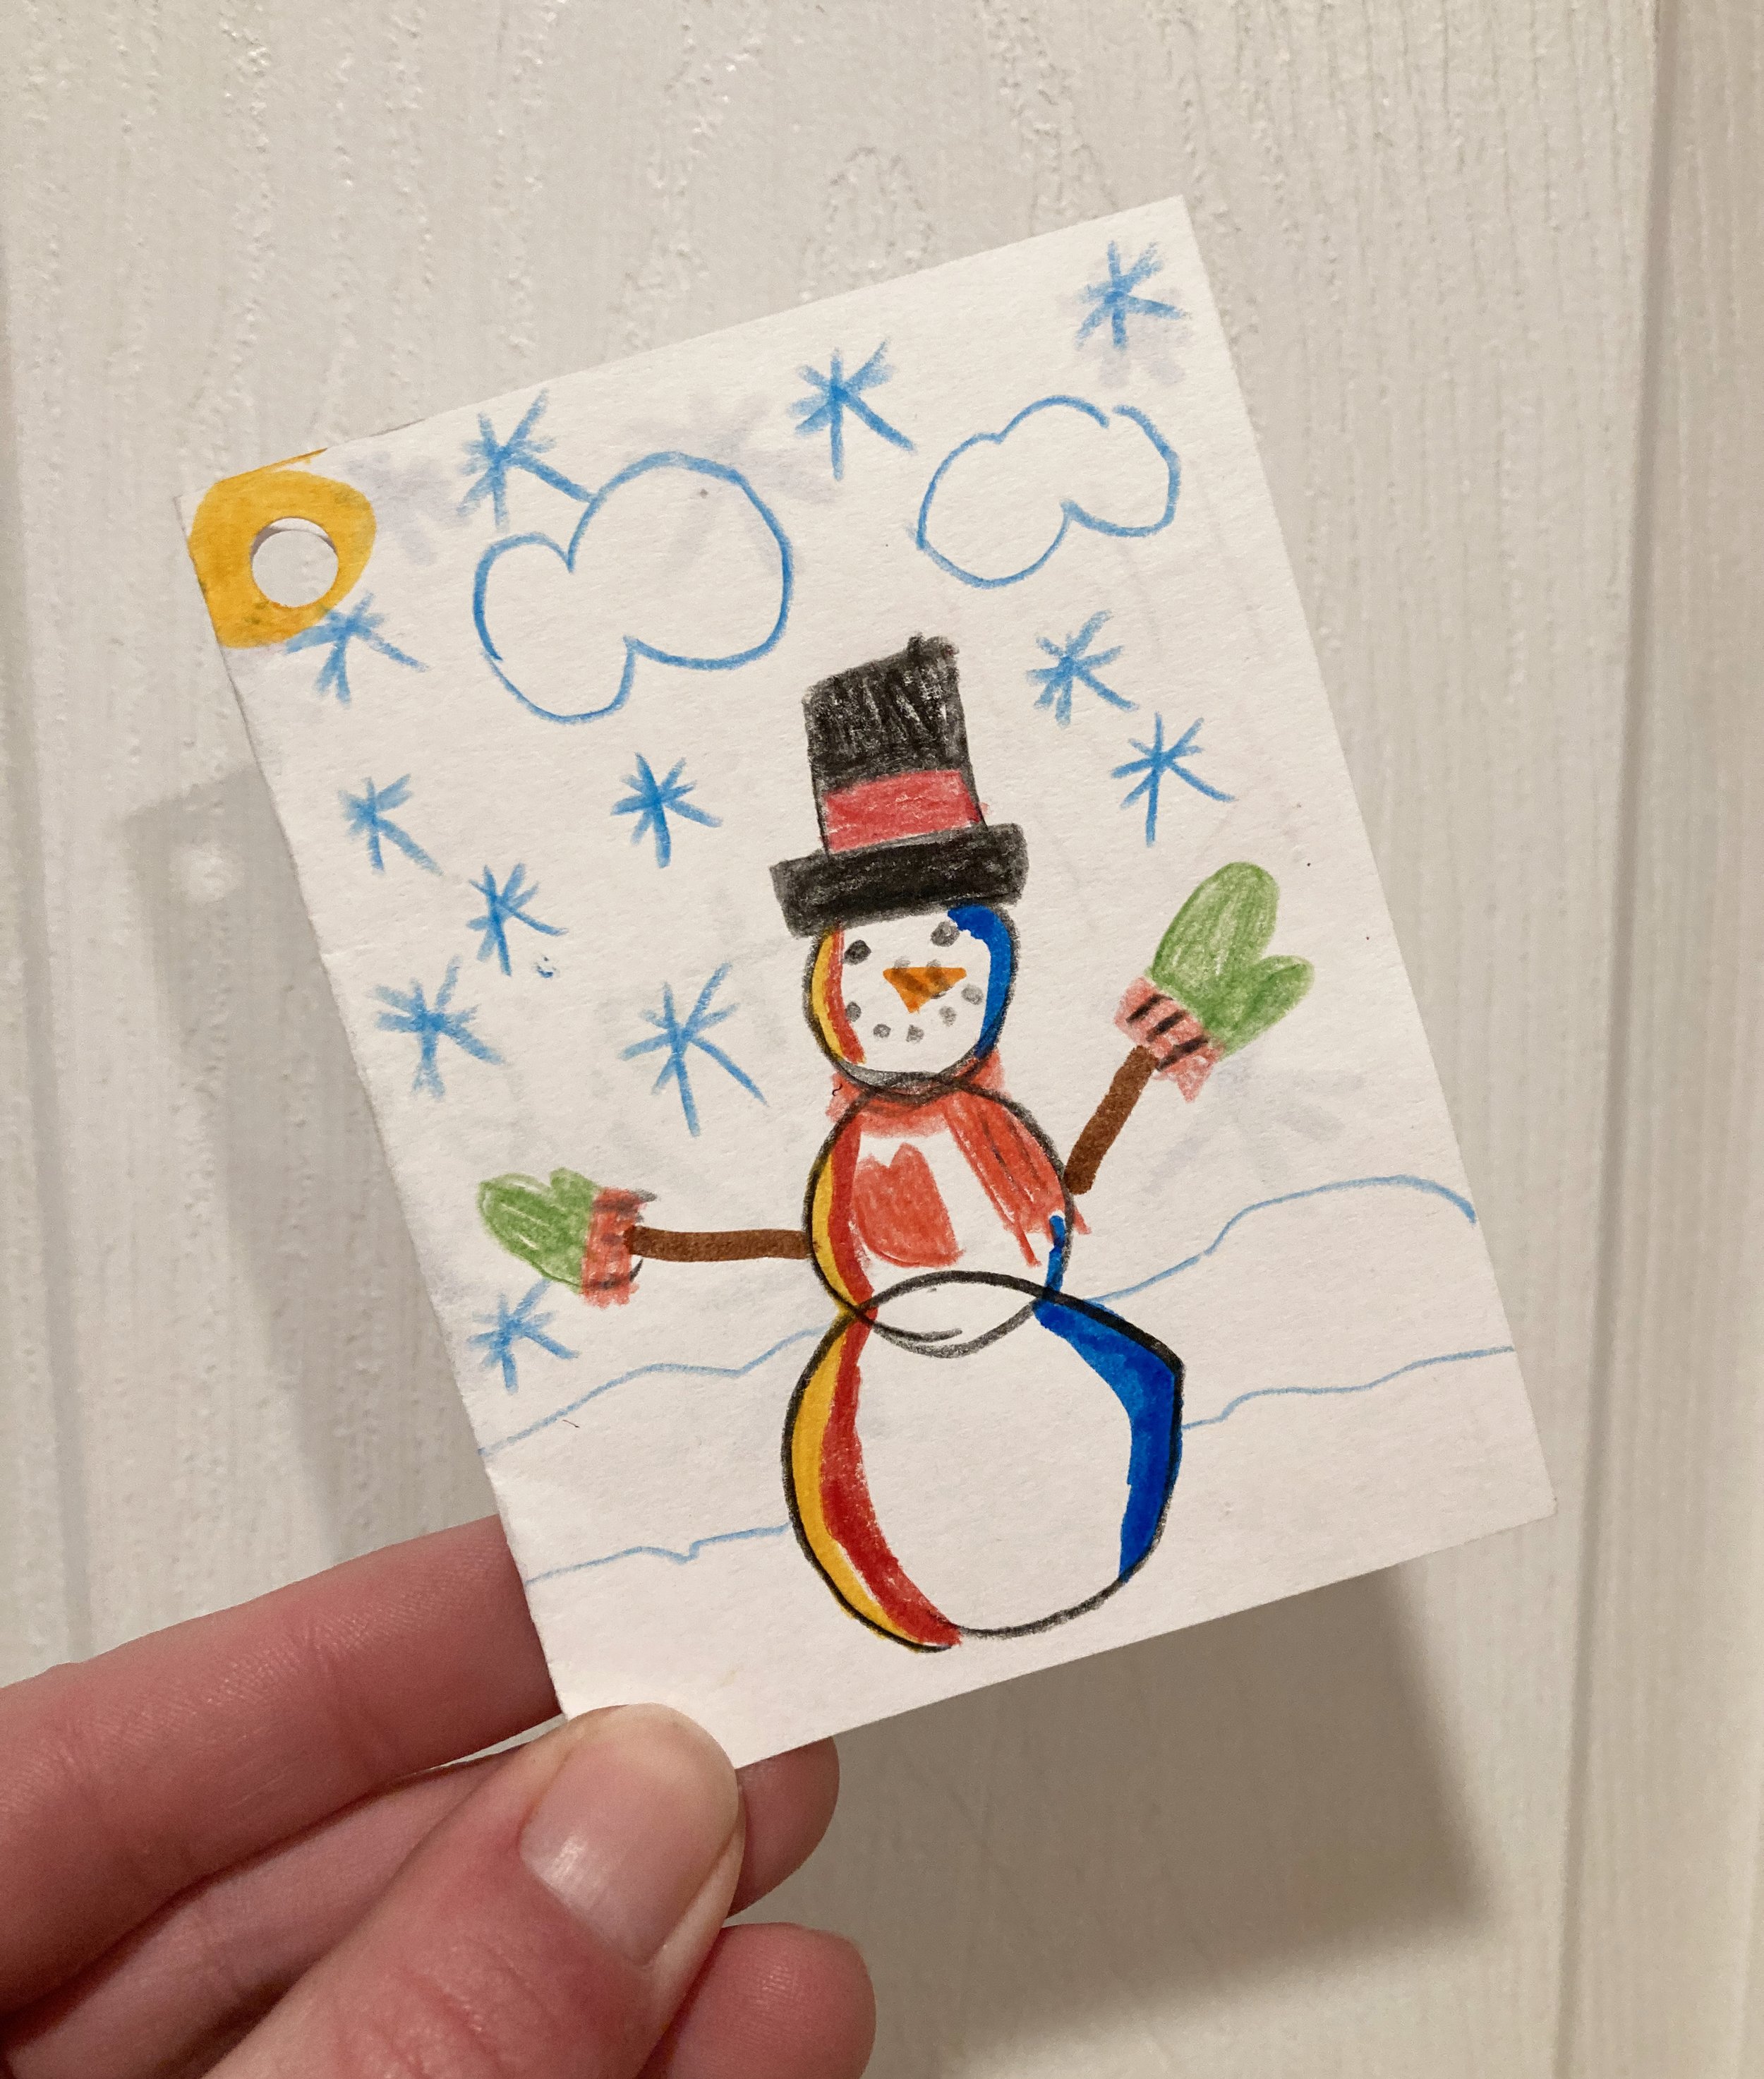
Then I had the kids make the gift tags and write notes to their friends - they loved coming up with special drawings and messages! Our friends really enjoyed getting these kits and I’m excited to see how their snowmen turn out. Hopefully these Snowmen supplies will be something they can reuse for future winters too! Just add snow… ;)
PS - I have a few kits left over listed for sale in my Etsy Shop if you would like to check them out. Just click the button below to shop:
KEEP UP WITH BIRCH LANDING HOME
| Etsy | Facebook | Instagram | Pinterest | Bloglovin' | Hometalk |
We’re still social-distancing very seriously but all our favorite outdoor spaces (hiking trails, lakes, beaches, camping areas, etc) have been totally overrun lately with people looking for a change of scenery. This unfortunately makes it impossible to social-distance safely, so we tend to just stay home. | This post contains affiliate links |
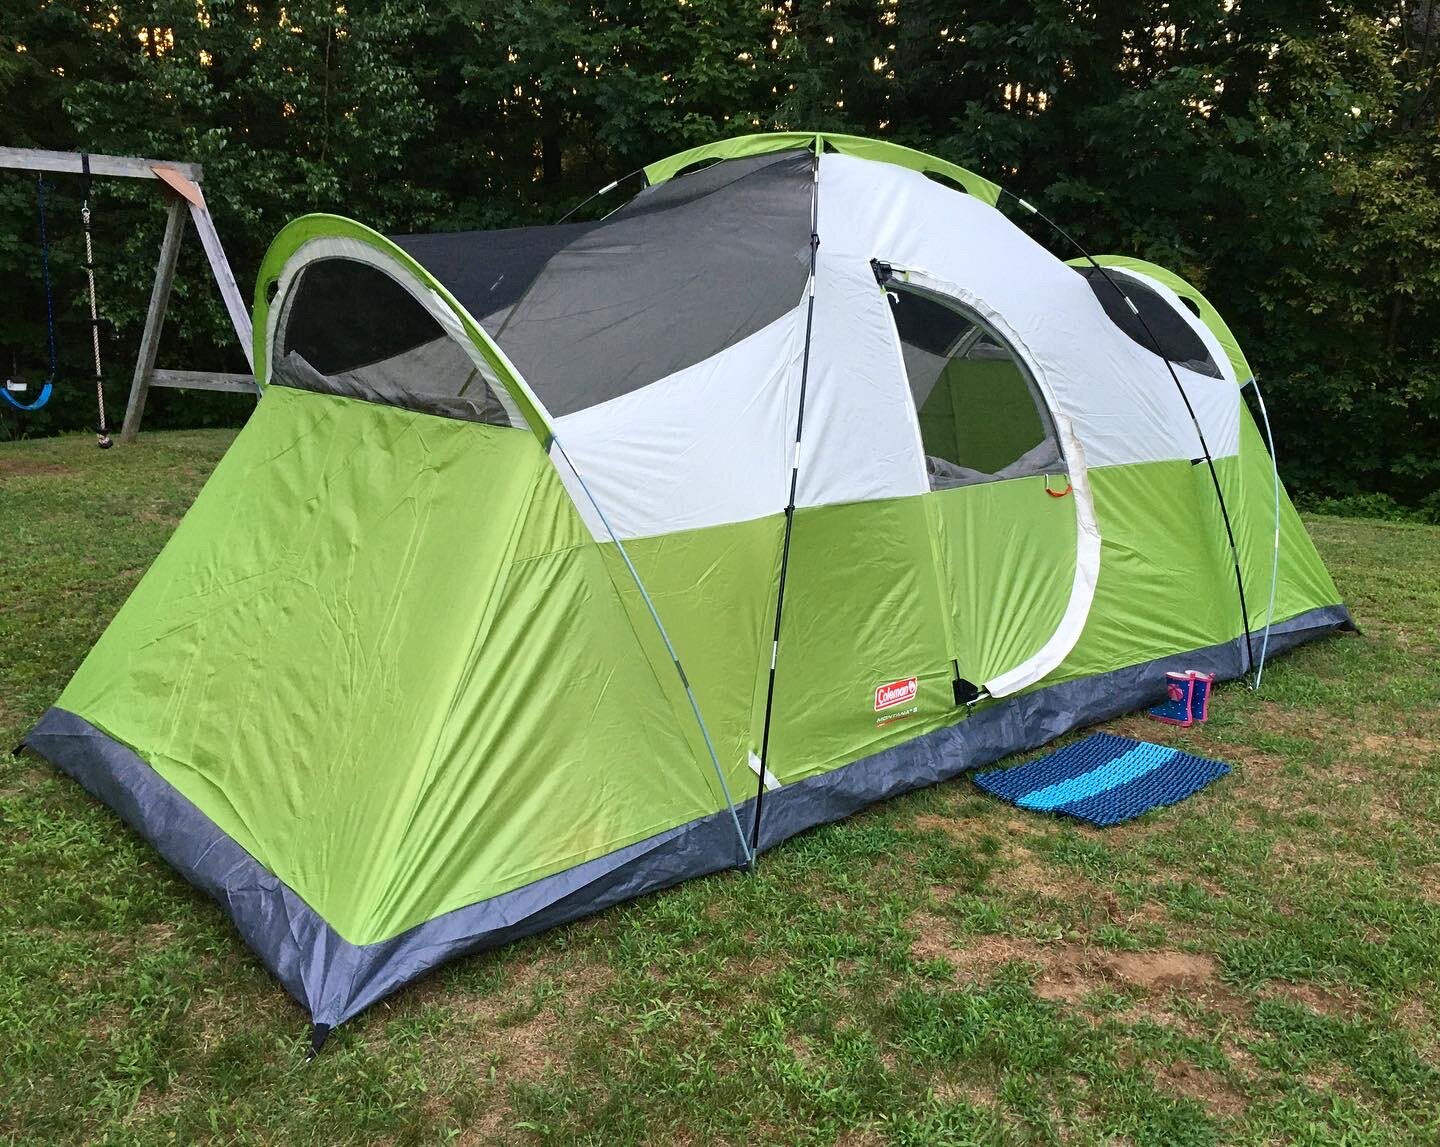
In order to make our weekends more special we started a weekend tradition early on during Quarantine to “camp at home” every weekend. During the colder months and bad weather, this meant camping in our living room every Saturday night with sleeping bags and staying up late watching a family-friendly movie. Sunday mornings we make a special breakfast, usually of pancakes or egg sandwiches.
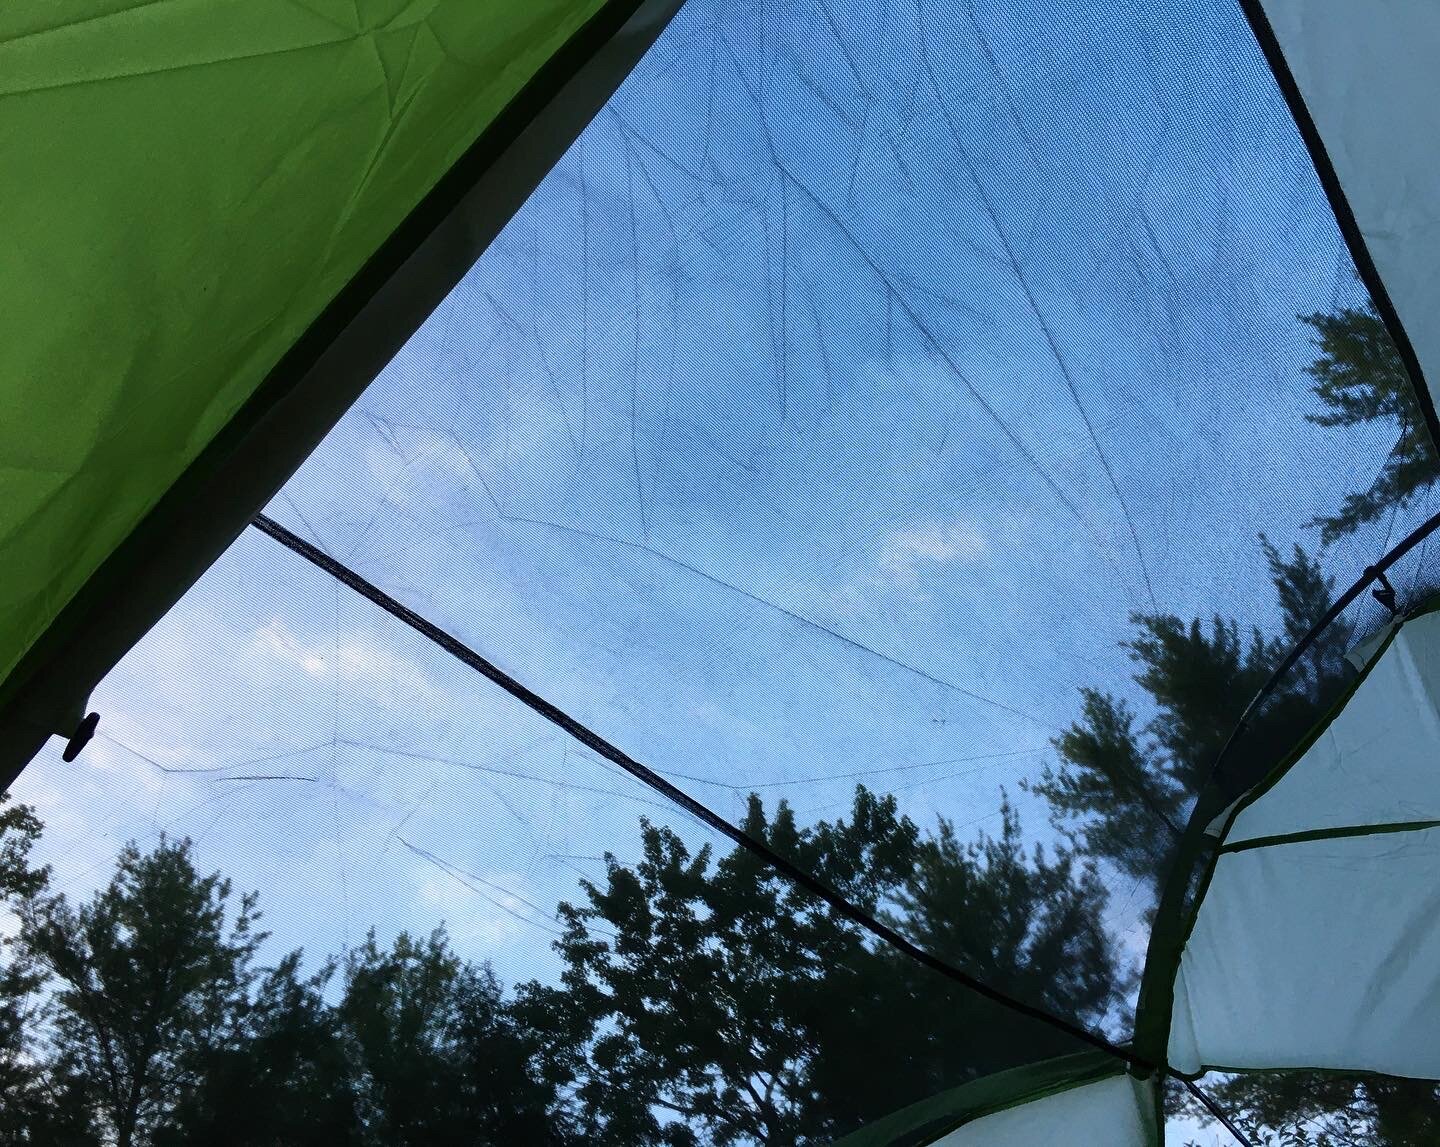
Now that the weather is warmer, we’re doing more backyard camping. Our large tent is nice and roomy for all of us to spread out - and the extra large screen areas on the top mean we can leave the rainflap off in nice weather so we can see the stars and watch the fireflies (which is what we typically do). It feels really magical and the kids love it!
When we set up the tent we typically try to camp for at least two nights in a row to get more out of it.
(Pro-tip: Put a doormat outside your tent to help keep grass and sand from getting tracked in - We purchased our mat from one of our favorite companies, Maine Rope Mats.)
We may be stuck at home, but that doesn’t mean we still can’t make special memories. I hope you can find a fun tradition to start at home during this time too - stay well!
KEEP UP WITH BIRCH LANDING HOME
| Etsy | Facebook | Instagram | Pinterest | Bloglovin' | Hometalk |
It’s so important that kids and chaperones can be seen by motorists to help avoid any accidents, so to remind everyone of this basic Halloween safety tip - make sure you can be seen and seen well while out Trick-or-Treating. | This post contains affiliate links |
Some Ways to Increase Visibility While Trick-or-Treating:
- Carry a Flashlight. Make sure everyone in your group has a flashlight so that everyone can see where they're going and others can see you better too. (It's also a good idea to remind your kids not to shine them in others eyes as you come across other trick-or-treaters.)
- LED Bracelets/Wearables. These bright, colorful, often flashing lights can really help you be seen at night - and kids think they're really fun.
- Glow Sticks. Glow Sticks and glow jewelry can be useful to help be seen at night, and kids generally love them and will wear them without a fight.
- Reflective Stickers/Patches. We put reflective stickers on our Halloween buckets (pictured above) to help make them more noticable at night. It's hard to capture it on camera, but these stickers reflect really well in low-light conditions and are super durable, even on fabrics. (For what it's worth, we put these on everything year-round - helmets, bikes, backpacks, hiking gear, coats, etc. We love them!)
- Stay Together. Having everyone in your party stay together in a group is a great way to increase visibility. When kids scatter and dart around it can be very disorientating for drivers and hard to see where everyone is. Make sure your group stays together and walks on the sidewalks or off the shoulder of the road. Also make eye contact with stopped drivers before you cross the road to ensure that they do see you.
For specific ideas about what’s recommended in your area for safe Trick-or-Treating, contact your local public safety or Police department for more ideas. Stay safe and Happy Halloween!
KEEP UP WITH BIRCH LANDING HOME
| Etsy | Facebook | Instagram | Pinterest | Bloglovin' | Hometalk |
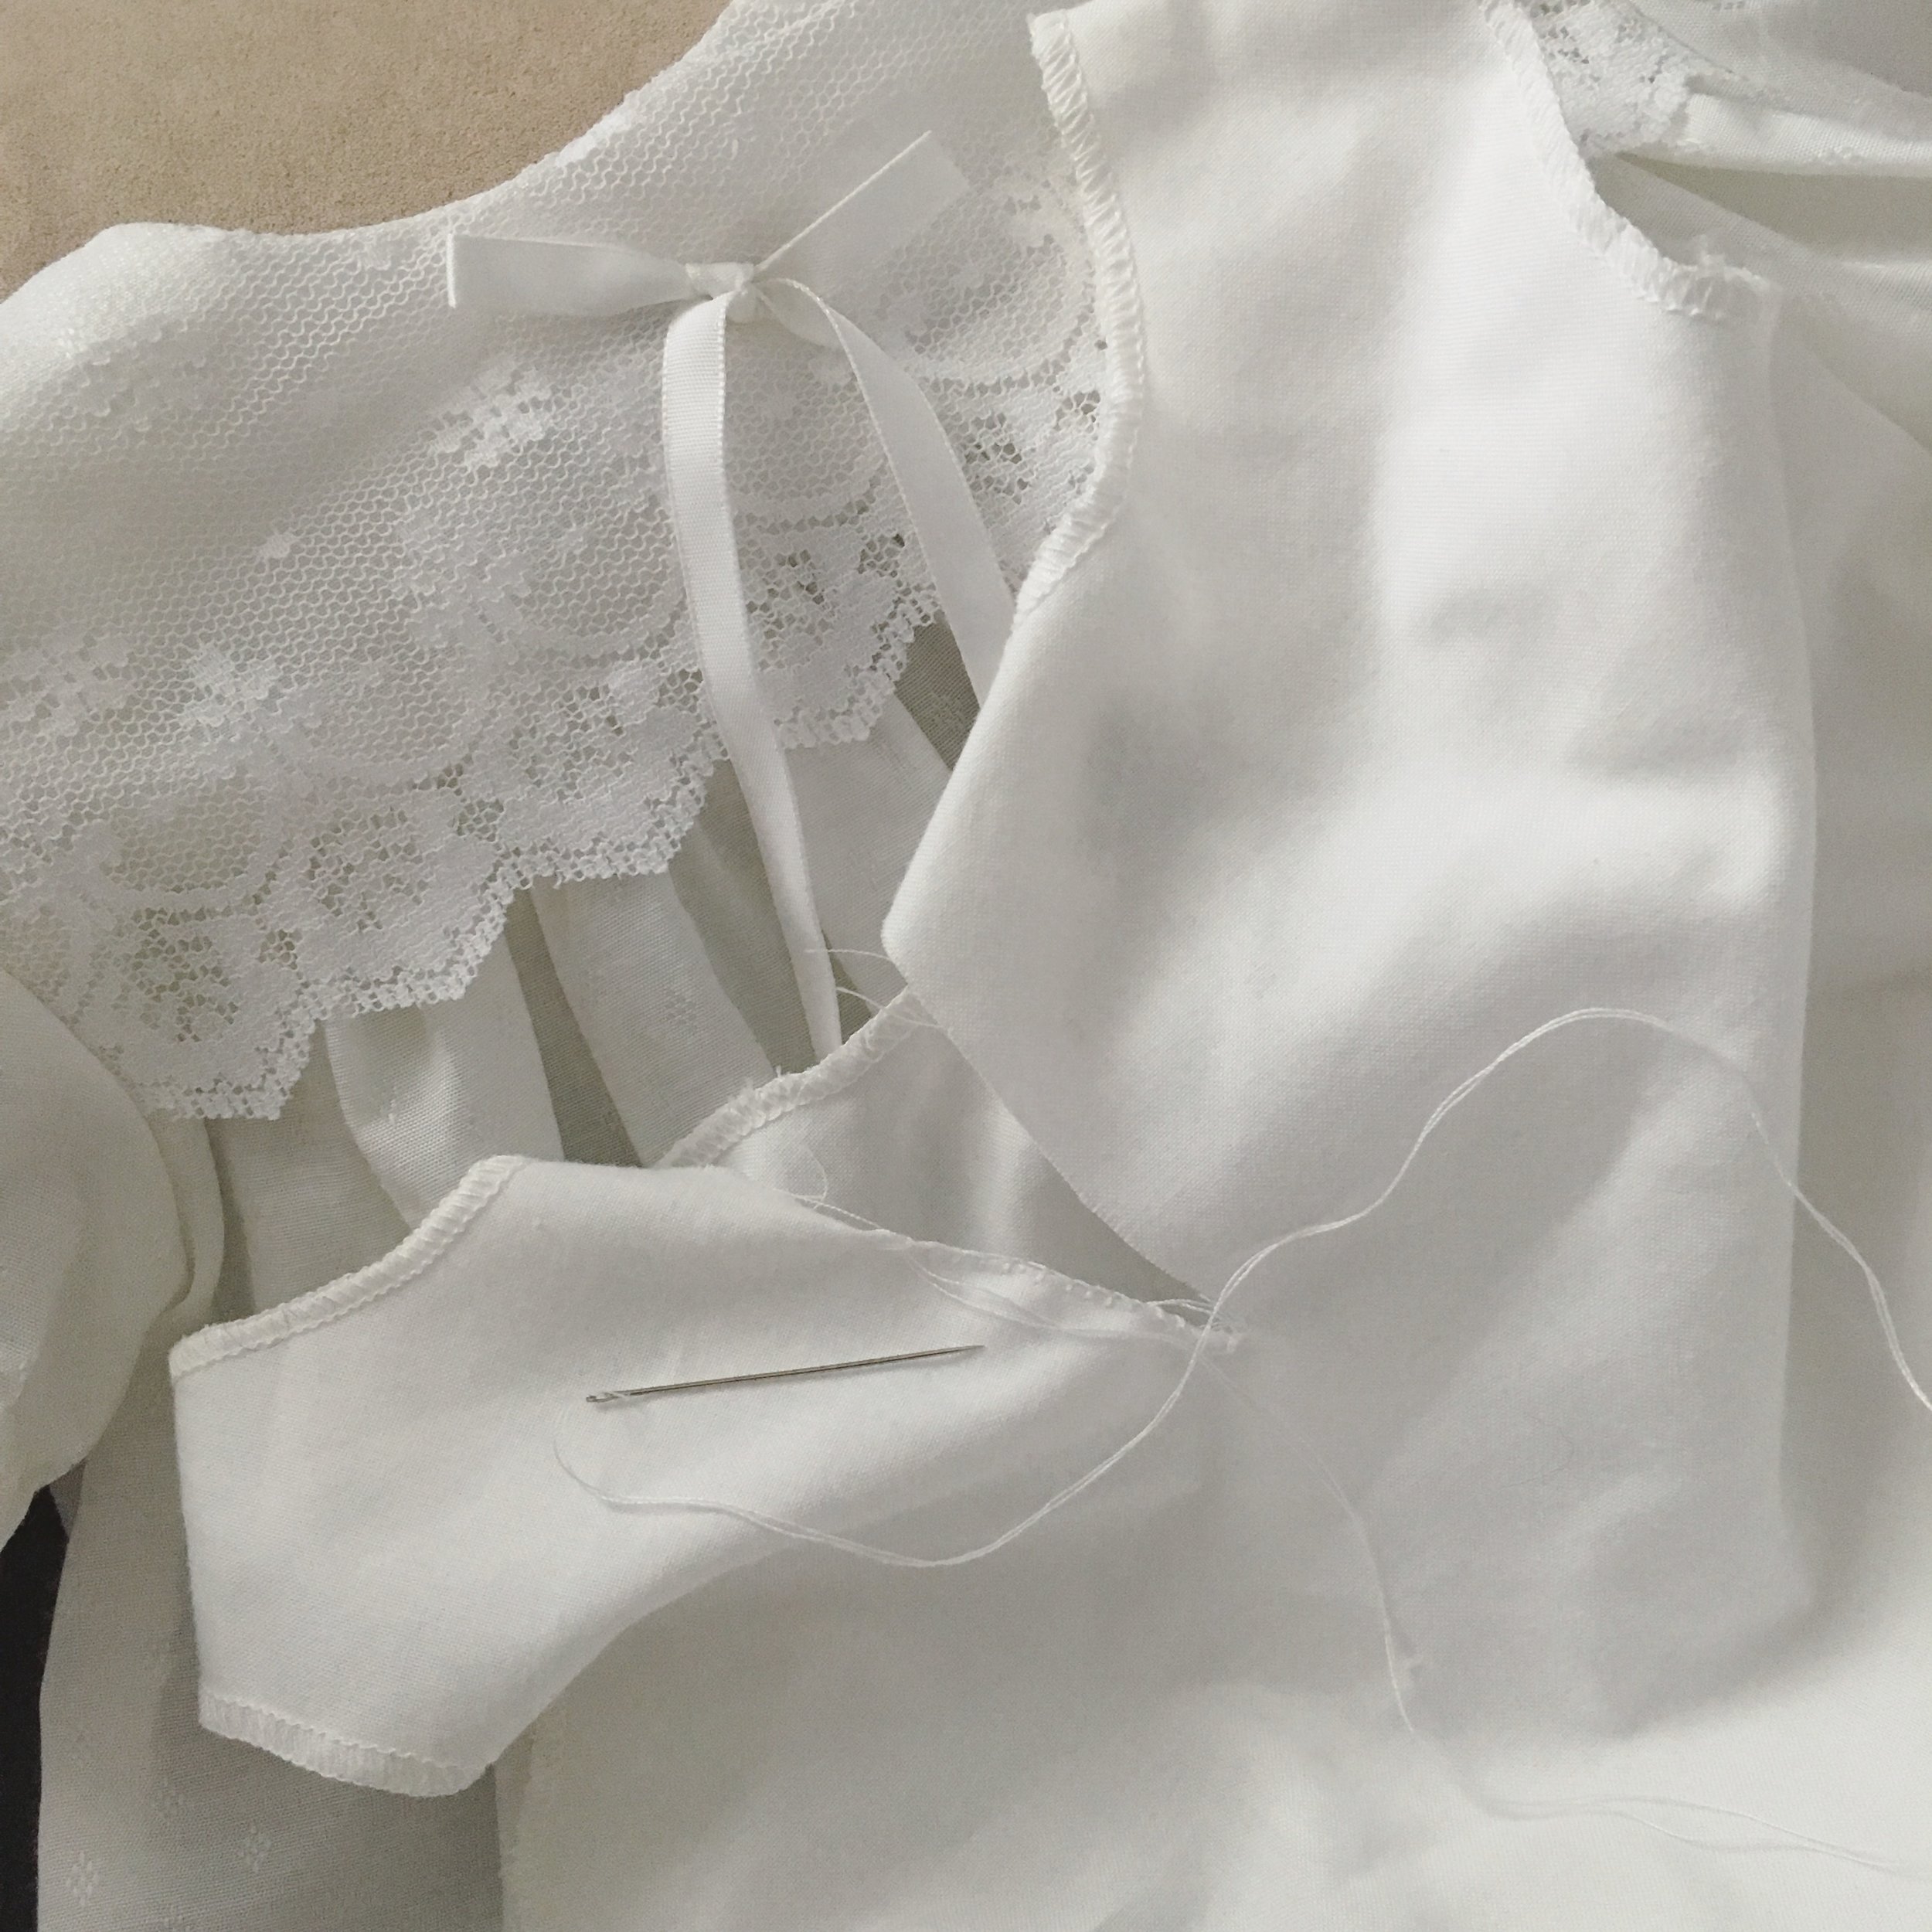
A week ago our youngest got Baptized. She wore the same Baptism Dress I did and big sister did, which is so special! ...However I did have to cut a slit in the slip to get it over her head that morning (she's a big baby!). So now I’m hemming that, and the dress will be cleaned and put away for their own kids someday.
Do you have any heirloom clothing in your family? We also have my Grandmother's wedding veil/crown from the 1940's that both my sister and I wore for our First Communions - so very special.
KEEP UP WITH BIRCH LANDING HOME
| Etsy | Facebook | Instagram | Pinterest | Bloglovin' | Hometalk |
Creating our family's Christmas card each year is a tradition I greatly look forward to. I especially love looking back at past years to see how much everyone has grown. I used to tuck these old cards away in a drawer but I've found it much more accessible and enjoyable to put them within reach, displayed in a special photo album. | This post contains affiliate links |
Luckily, we've always done 5x7 inch photo cards which fit perfectly inside a
festive perfectly-sized photo album I found on Amazon. If you've done different sized or odd-sized cards through the years, it might make the most sense to use a
big scrapbook to chronicle them. Just make sure to order an extra card to add to the album each year and cherish the memories!
KEEP UP WITH BIRCH LANDING HOME
| Etsy | Facebook | Instagram | Pinterest | Bloglovin' | Hometalk |
When I was growing up my Grandpa always threw his extra pennies in a big jar on the kitchen counter for me. And every time we visited I always checked to see how high the pennies had creeped up. Waiting for the jar to fill seemed to take forever (and for us it did take years for the jar to fill each time), but it taught patience and was something special to look forward to. This simple tradition is one I'd love to bring back for our own kids.
**Make sure to scroll to the end to enter the $200 Target Gift Card Giveaway!**
Once the jar was finally filled to the brim it was mine to take home! Guessing how much money was inside was always the most exciting part. Since there were only pennies it came to around $14-15 each time but that seemed like huge money as a 7-year old. Growing up my Dad always instilled on us that gifted money (received for birthdays, Christmas, and even the penny jar) needed to go to our college savings account so that's where it went. I didn't mind though, as a kid it was exciting just bringing it to the bank and hearing the coins run through the counting machine. Though I didn't realize it at the time, looking back that was such a sweet and important lesson -- that Grandpa thought of me every time he put a penny in the jar and that even small savings can add up over time.
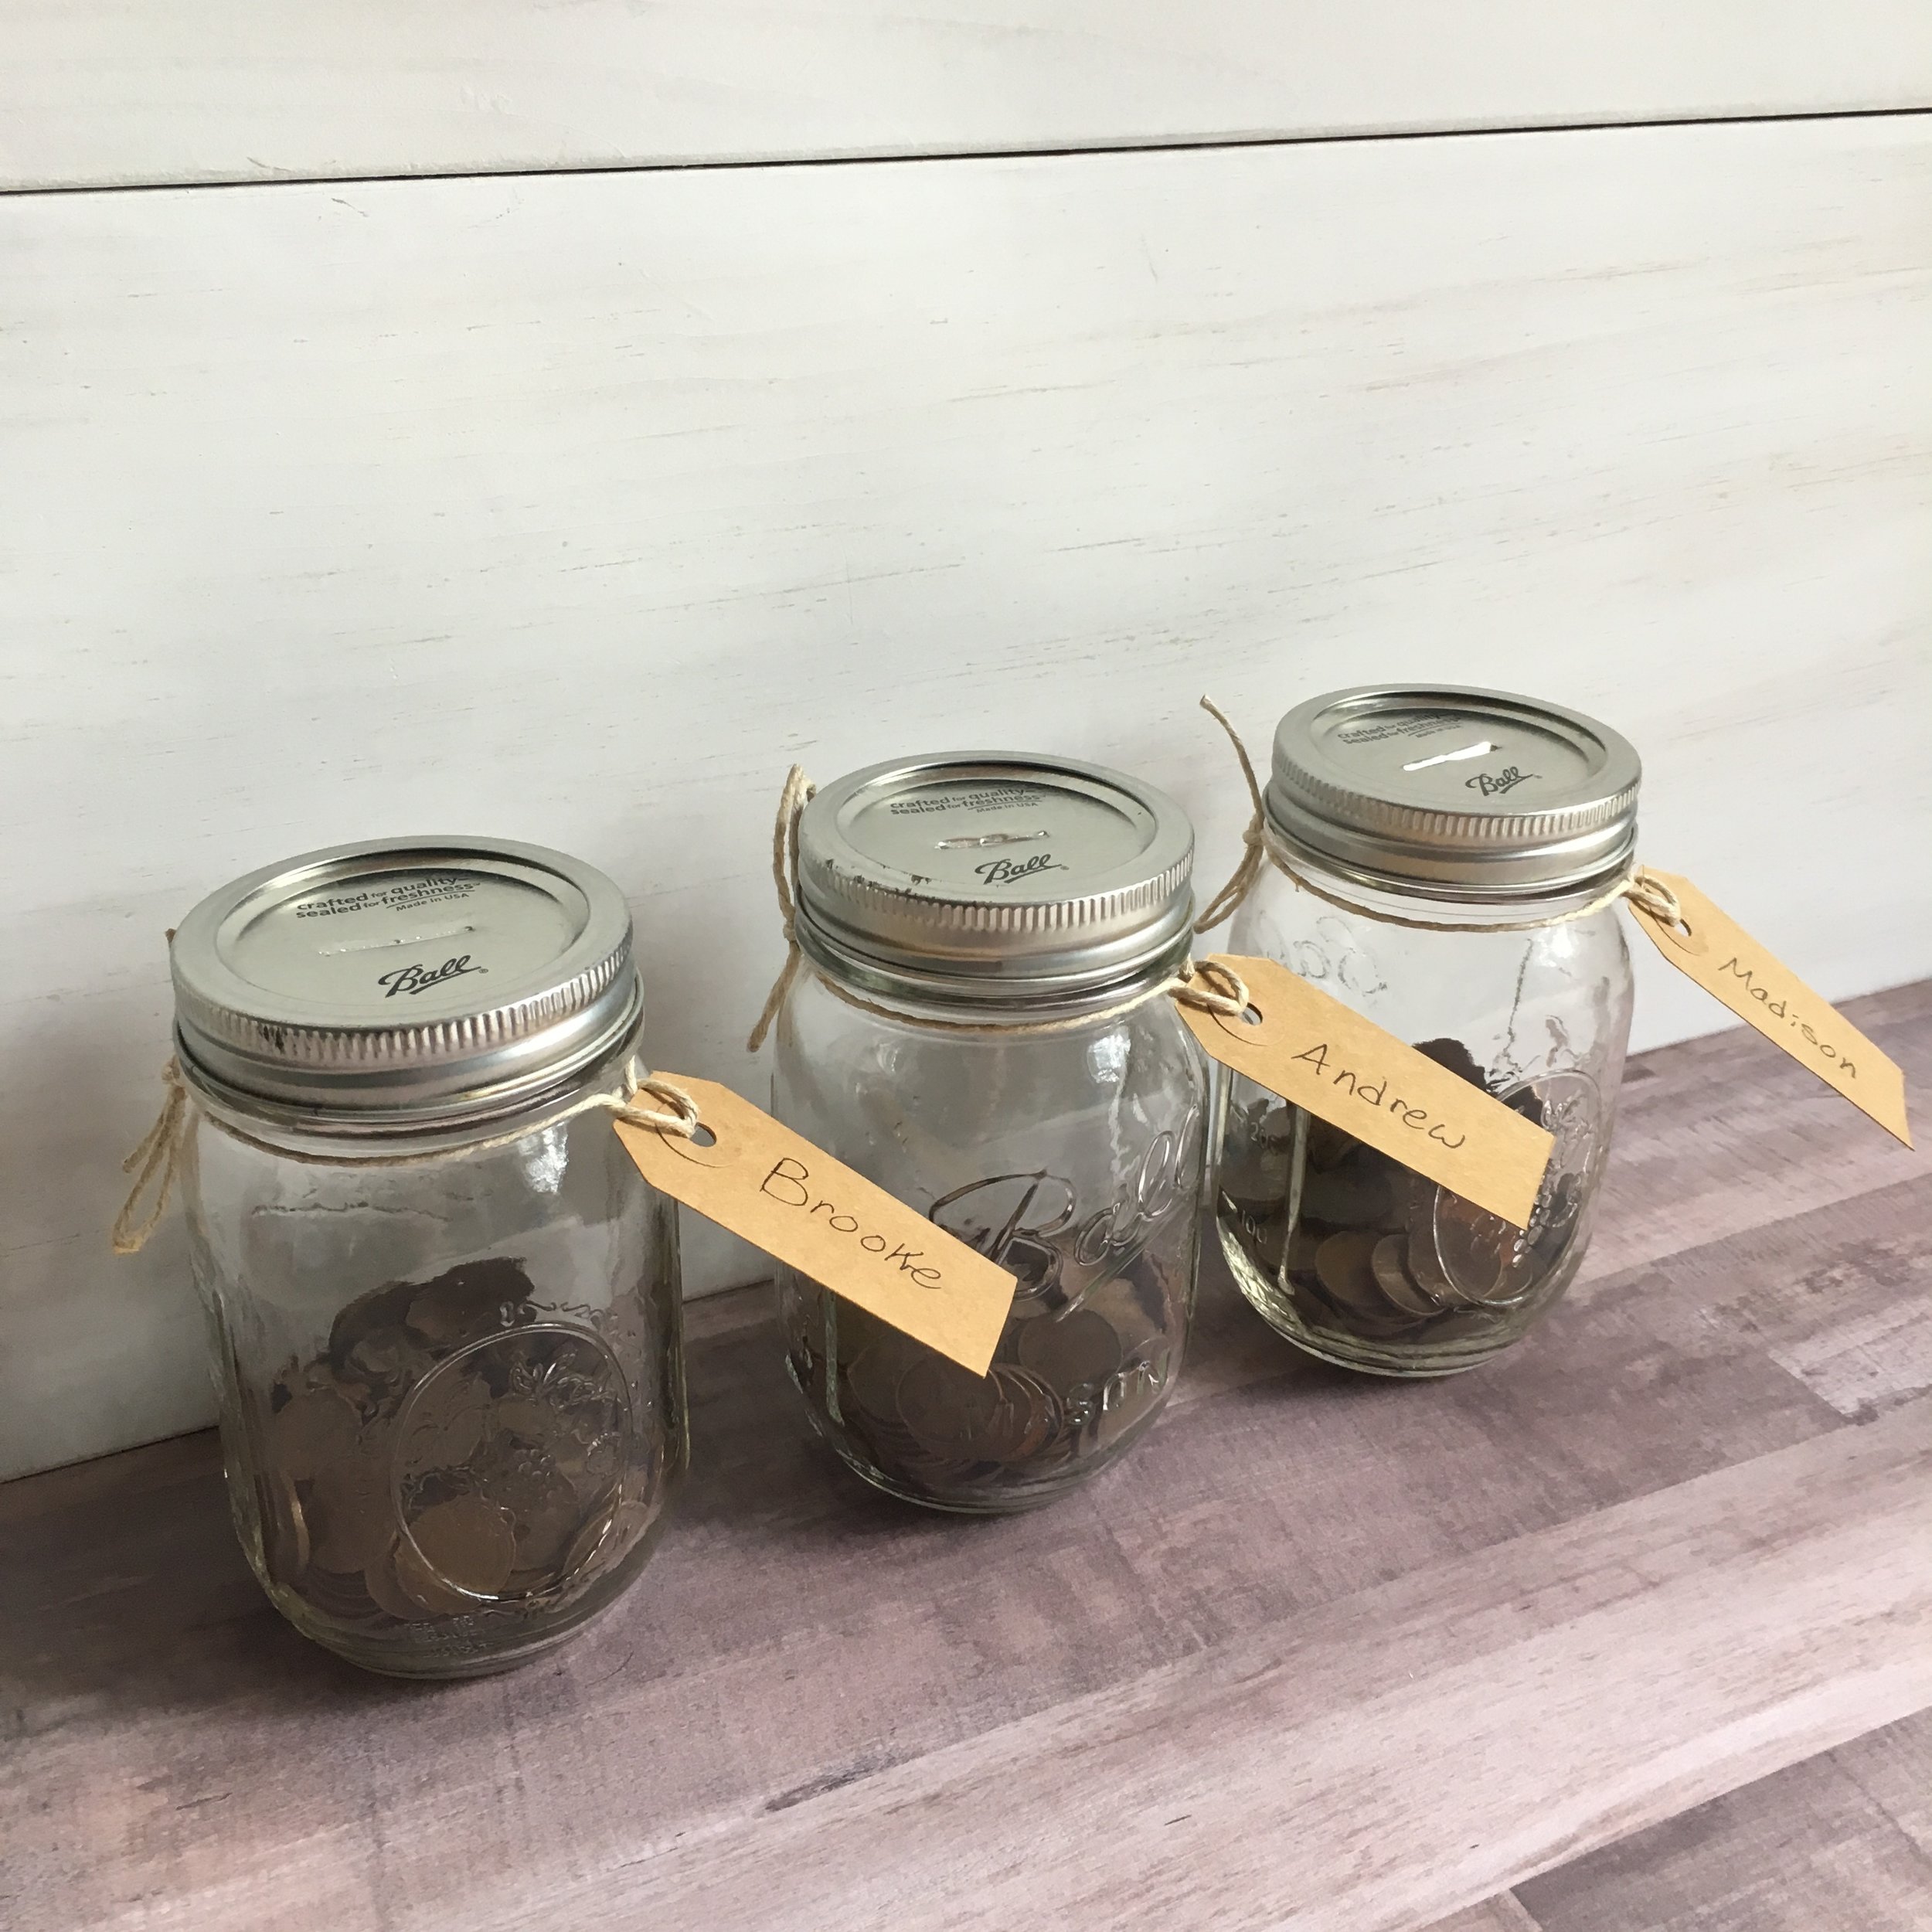
Now that we have little one (and another on the way), I want to continue this tradition still. So with just some simple Ball Jars, I punched slits in the top for change and labeled each grandkid's name on tags - these jars are going to my parents' so they can continue my Grandpa's simple legacy for all their grandkids.
I have such fond memories of this tradition and want my daughter and future baby to have a simple custom like this to look forward to when visiting their Grandparents.
Giveaway
I've teamed up with a couple other great bloggers to give you a chance to win a $200 Target Gift Card! Just think how many Ball Jars - or anything else you'd like - that you could buy ;)
Summer $200 Target Giveaway
Enter for your chance to win our fabulous Summer $200 Target Giveaway!
 Giveaway Brought to you By:
Juggling Act Mama
Giveaway Brought to you By:
Juggling Act Mama,
Doodlecraft,
Bree Cooley,
Birch Landing Home,
Walking on Sunshine, and
The Redhead Baker.
Summer $200 Target Giveaway
Giveaway is for $200.00 USD. Open to US residents 18+ only. One (1) winner will be chosen. Prize must be claimed within 48 hours of announcement or a new winner will be drawn. Prize delivered via email. All entries will be verified. This giveaway is in no way associated with Facebook, Pinterest, Twitter, Instagram, Target, Rafflecopter, or any other entity unless otherwise specified. Blogger not responsible for delivery of prize.
a Rafflecopter giveaway
KEEP UP WITH BIRCH LANDING HOME
| Etsy | Facebook | Instagram | Pinterest | Bloglovin' | Hometalk |