I'm a wife, stay-at-home mom, crafter, and blogger living in rural New England. As seen in Martha Stewart Living, Food Network Magazine, and more! | Tutorials, DIY, crafts, parenting tips, recipes, money saving tips, product reviews, local product features, New England living, intentional living, and more! |
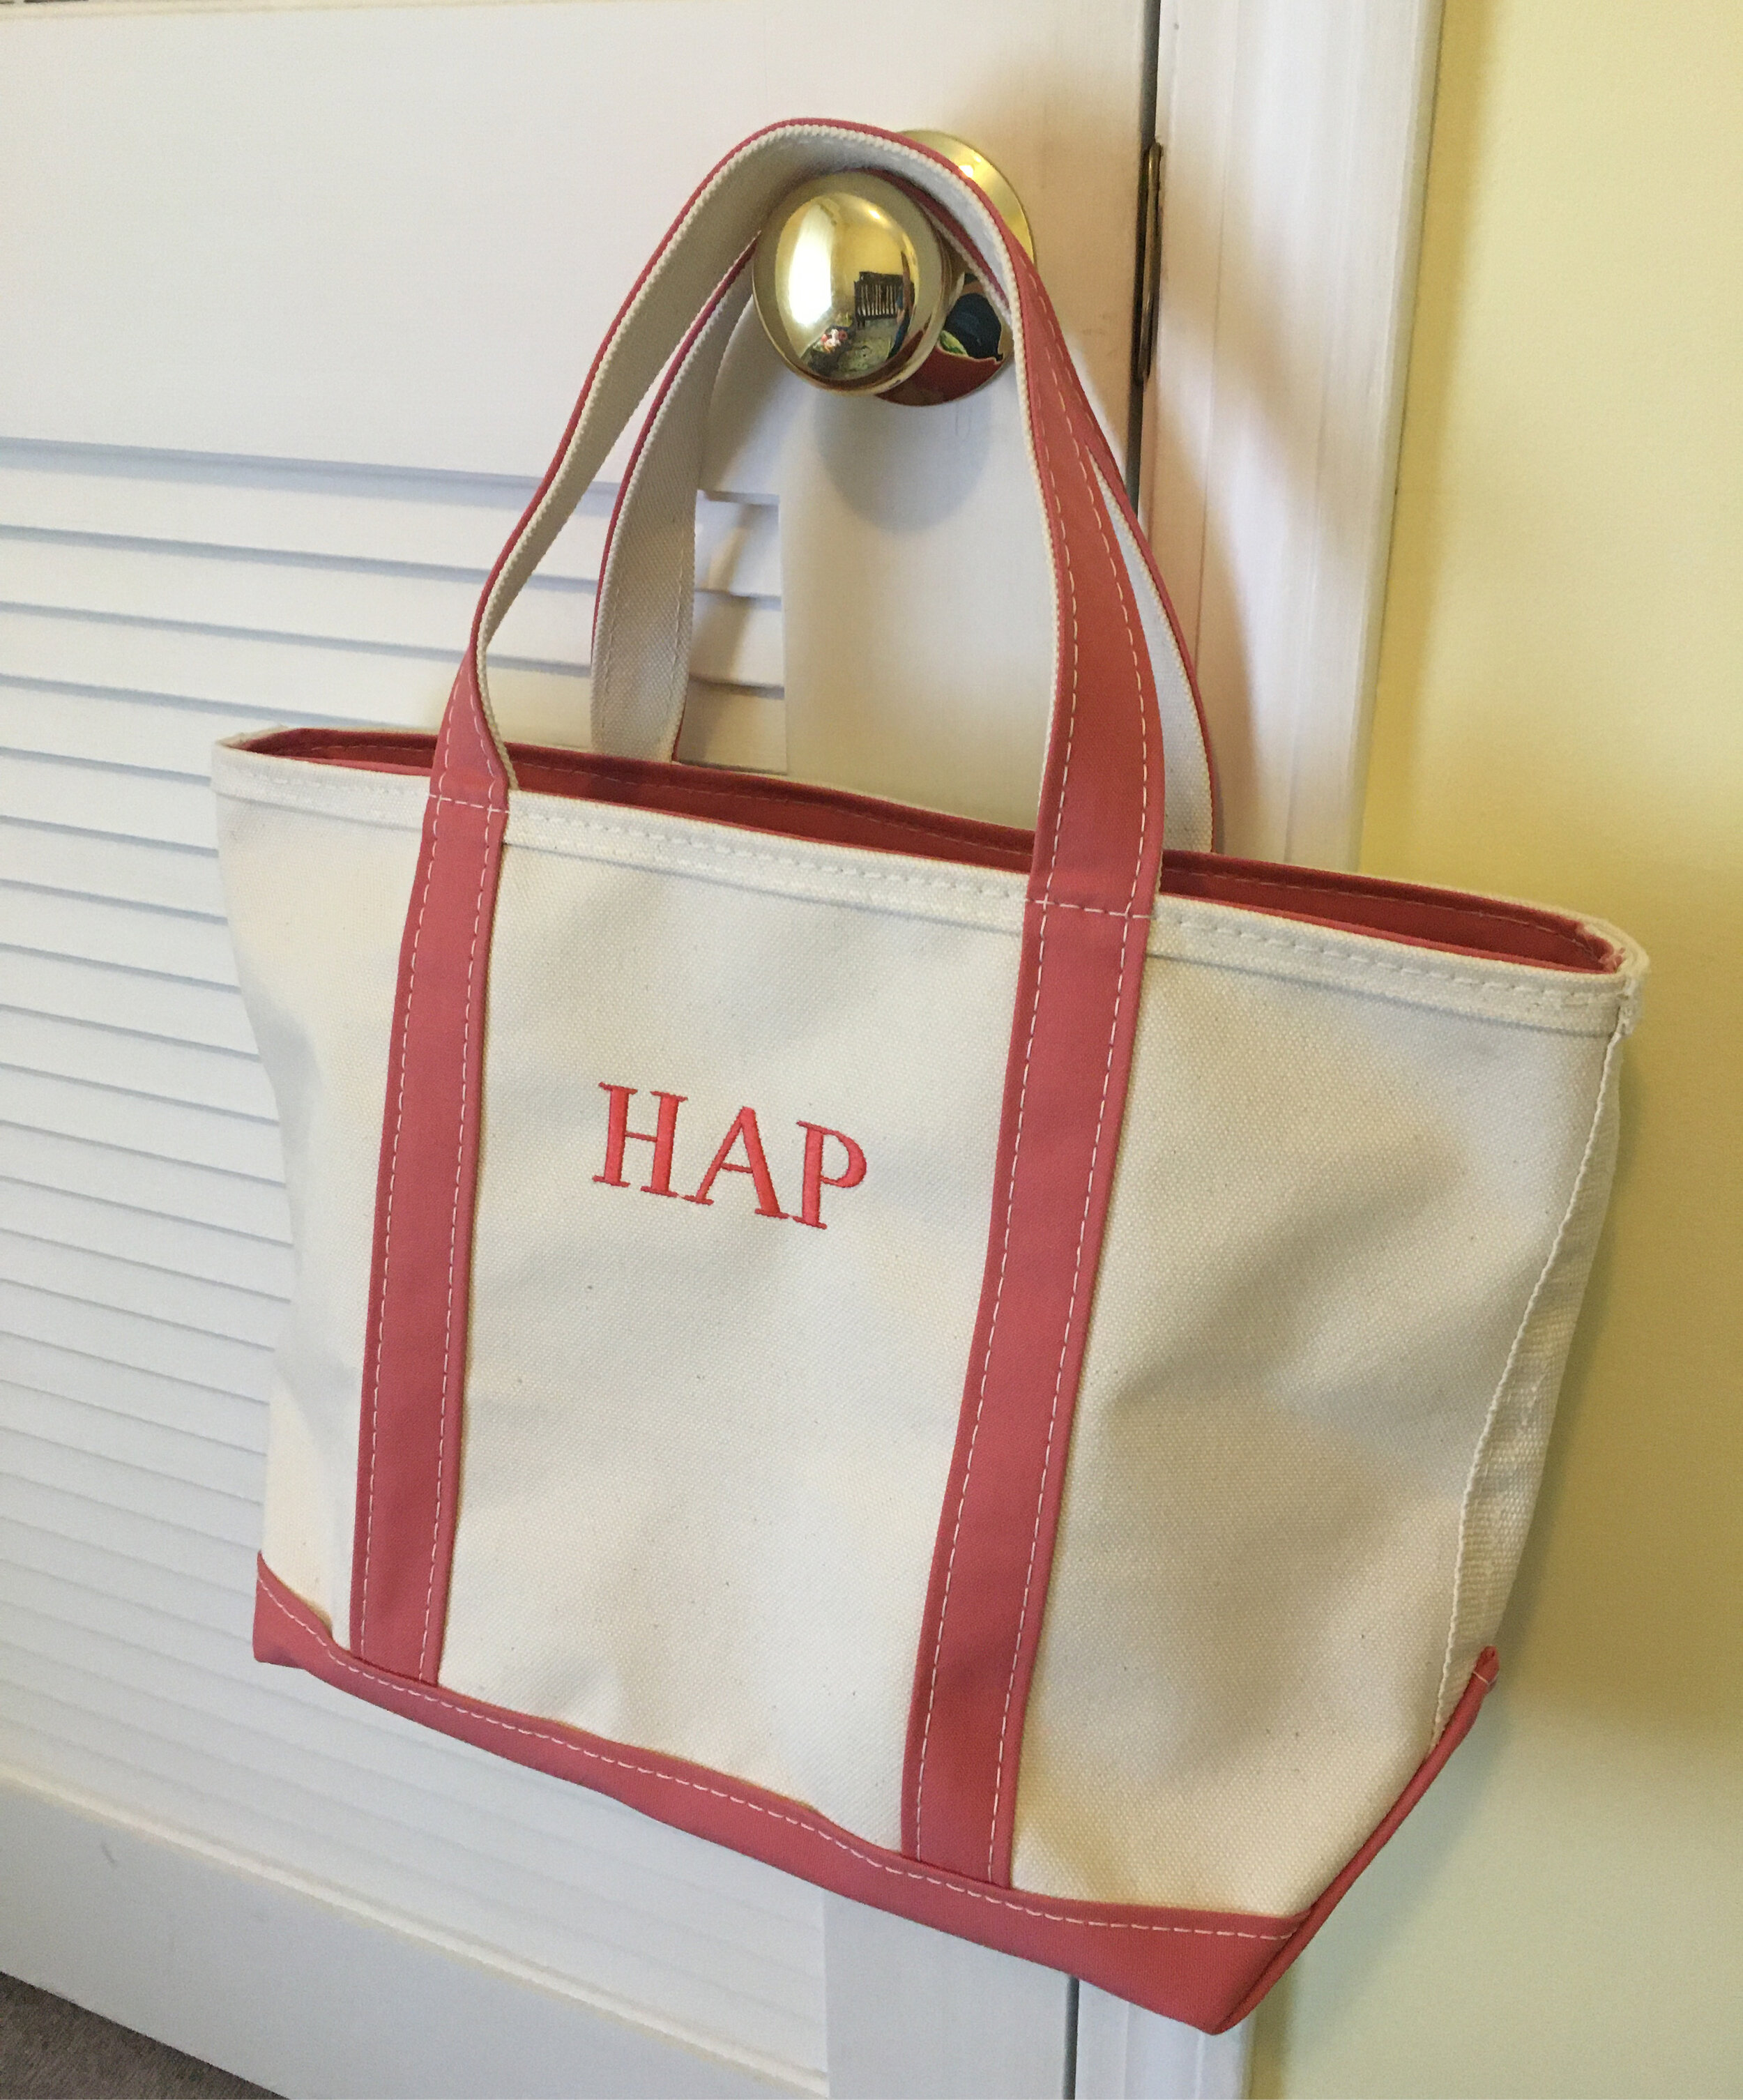
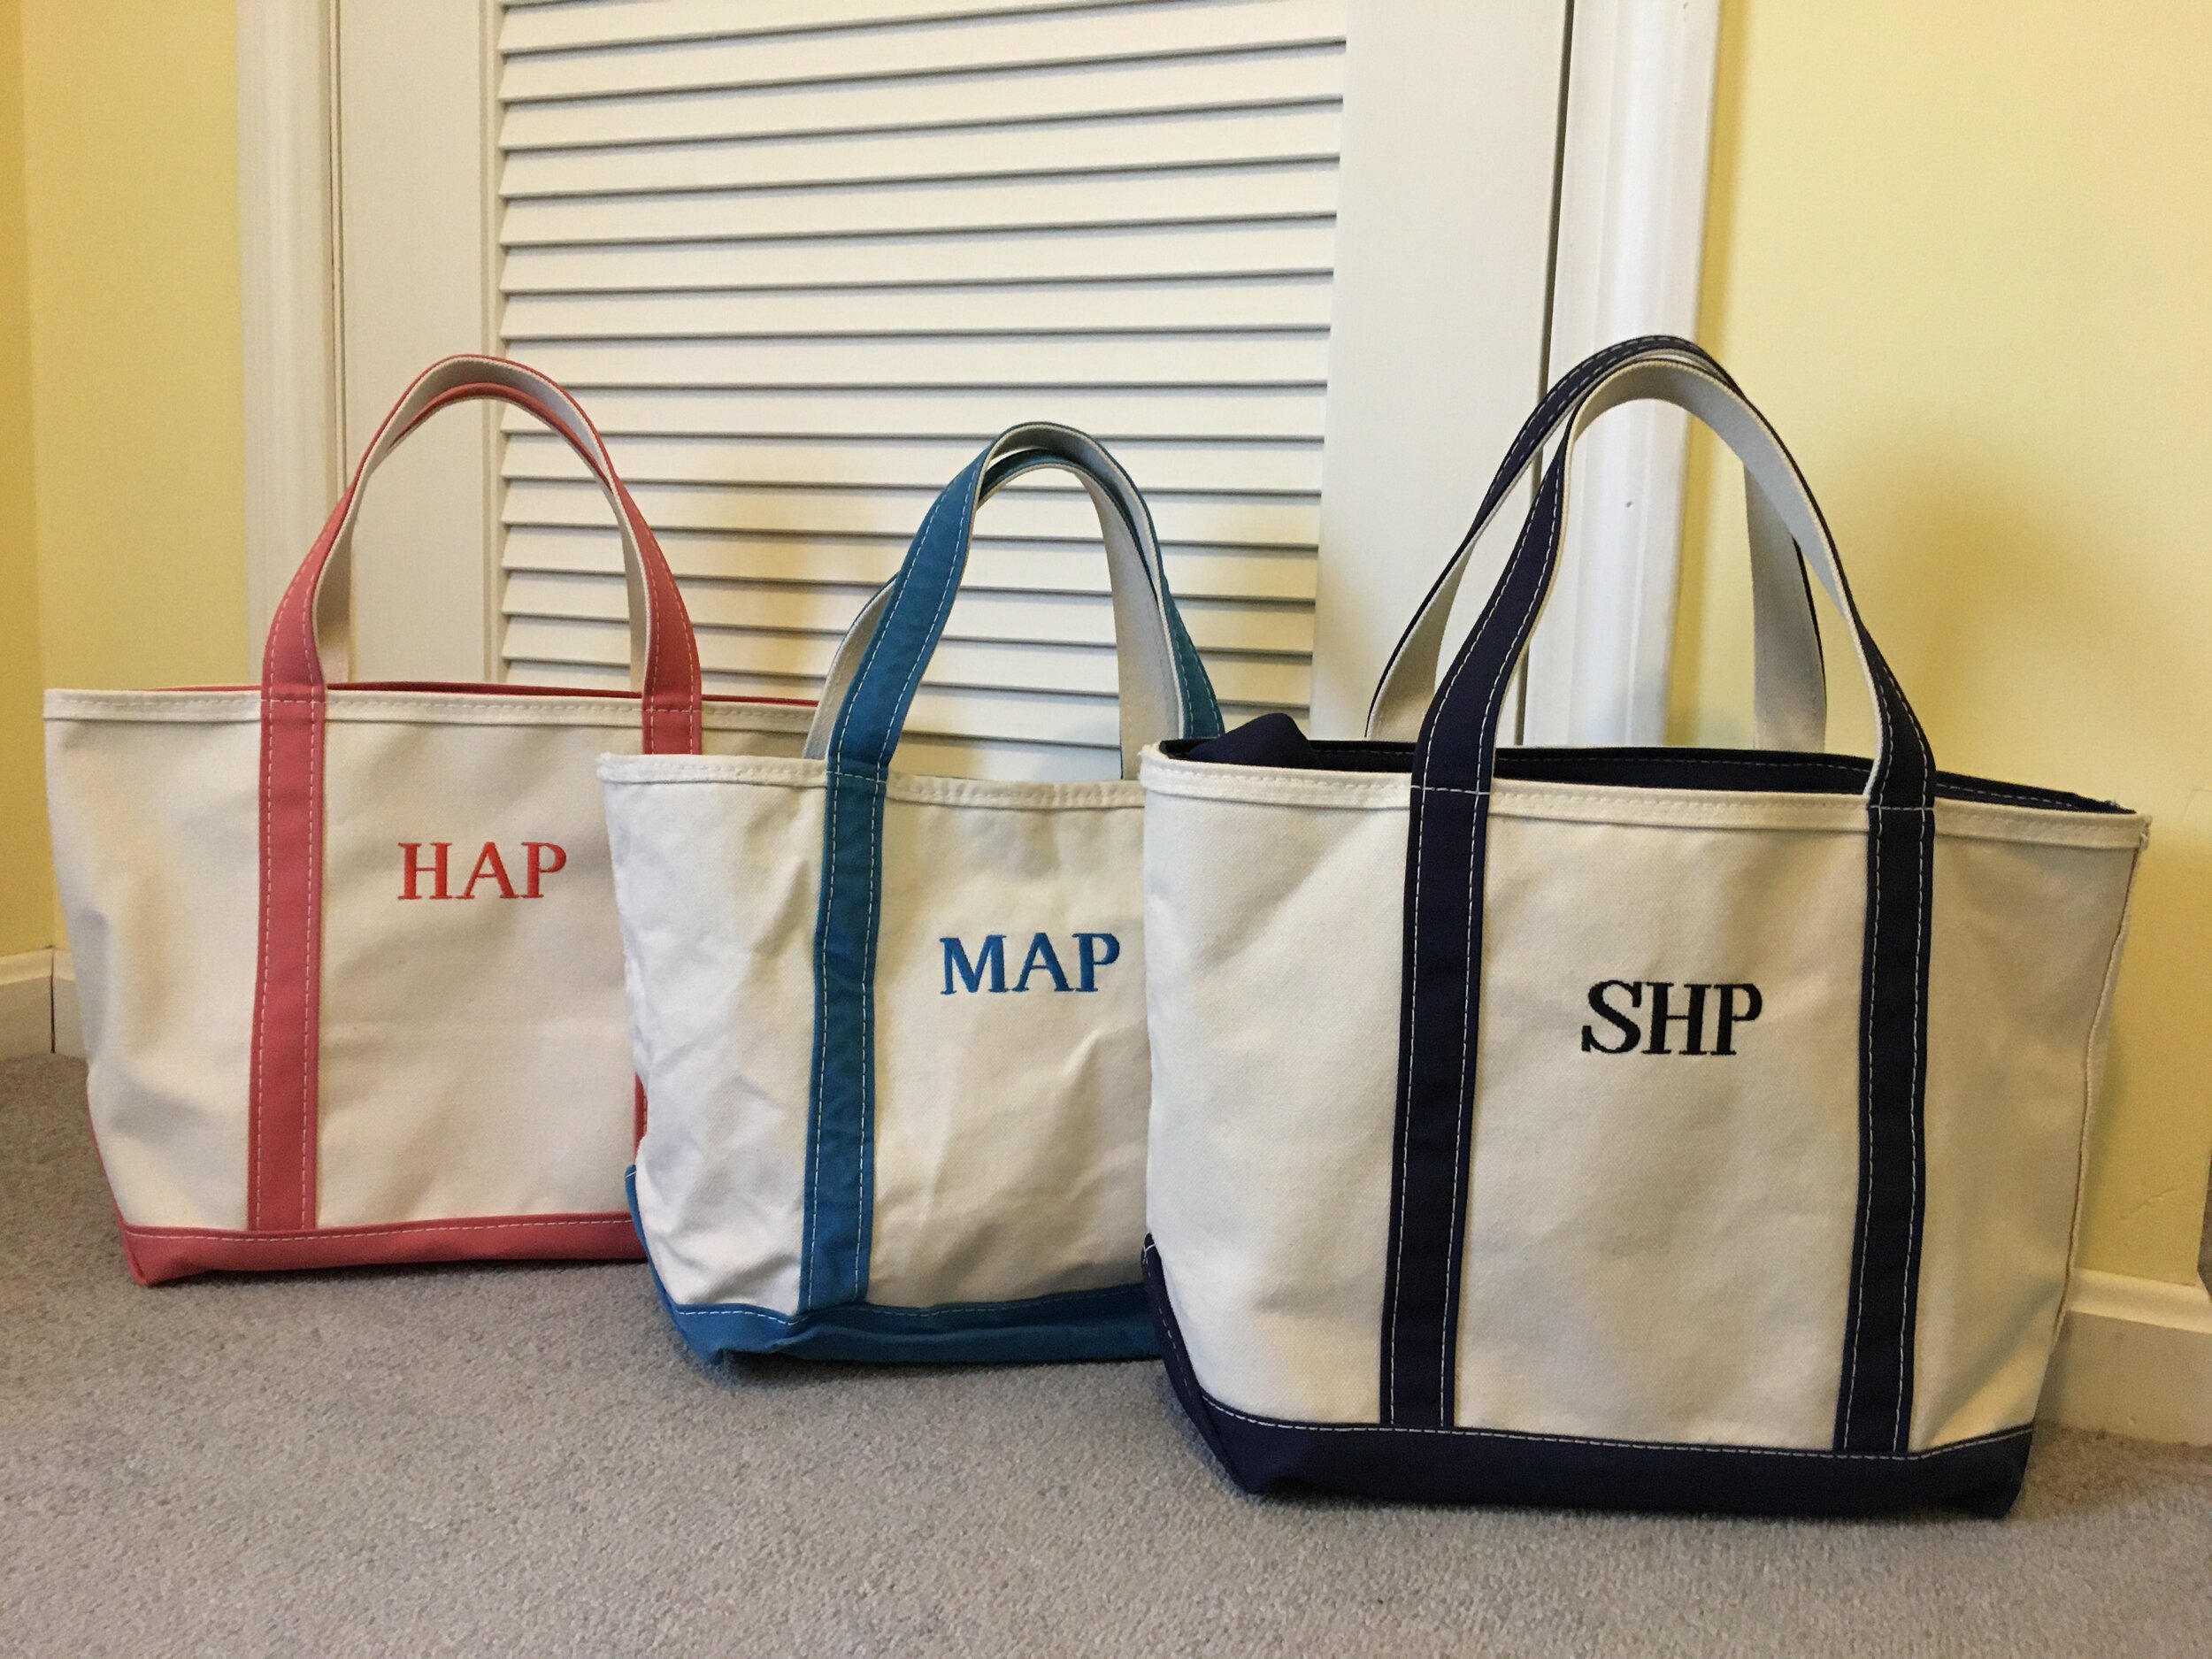
Because someday the kids will go back to school… (Right..? Right! fingers crossed) I ordered our youngest her own pink monogrammed L.L. Bean Boat and Tote to match Mama and big sis for when she hopefully starts school in the Fall. I love that each will have her own tote for school to stay organized and carry snow gear and sports things, and that these bags are something that will grow with them and be used for many years to come.
A bag for each of us and each of us has our own color to keep us organized. Our oldest’s bag has been through the wash many times and is a bit softer and more broken in :) These bags get better with use!
L.L. Bean Fashion
| This particular post is not sponsored by L.L. Bean but contains affiliate links and my personal opinions |
As a mom of two little ones, I’m always on the hunt for a stylish way to haul our gear when we’re out and about - which is where Town and Country Tote comes in! They are the perfect solution for your diaper or work bag. | This post contains an honest review of product provided by Town and Country Tote |
Town and Country Tote is a small business that offers quality, Made in USA classic tote bags with a twist - these tote bags come in a variety of colors and patterns as well as a really handy durable canvas insert that organizes all your gear perfectly! I just love the variety of compartments in the organizer, and how it’s set up like it’s own little filing system with everything at your fingertips!
These classic tote bags are super versatile and would make the perfect diaper, work, or gym bag for both women and men. They also offer great personalization options which can machine embroider, hand embroider, or hand paint your monogram and/or coordinating stripes on the tote bag. These special details really set the bag apart from others and make it unique and beautiful as well as practical!
Want to win a Custom Tote Bag for yourself?
Go over to my Instagram (@birchlandinghome), like our Town and Country Tote post, follow both accounts, and tag a friend! Winner will get to choose a Classic Tote Bag with the personalization option of their choice - up to a $160 value!
- This post contains an honest review of product provided by Town and Country Tote, LLC but all opinions expressed are my own. Please see our full Disclosure Policy for more information -
If you have kids you know how tricky it can be to keep track of library books in your home… you bring them home, read them on the couch, and then before you know it they’re mixed in with your own books and quickly forgotten… until you get that late notice from the library (ooops). The best way to keep track of them is to have a designated place to keep them - for us we made a special library tote that has served us well. We use it to bring home books from the library, and as we read them we make sure to return them to the tote so they’re never misplaced. I’ll show you exactly how I made ours, along with two free printables so you can make your own! | This post contains affiliate links |
1. First, run your canvas tote bag through the washer and dryer - you need to make sure it’s clean and there’s no more sizing on it from manufacturing which might keep the iron-on transfer from adhering well.
2. Print out your design on the transfer paper. (Please note that the designs I have available for download are ready-to-print PDFs for printing on iron-on transfers, therefore they are already in mirror image - aka backwards.) *You can find links to download our designs at the end of this post - there are two different designs to choose from!*
3. Cut out the iron-on transfer design, leaving a border around the edge of the design to help ensure the design will adhere well to the fabric and not lift at the edges.
4. Make sure to read the instructions for your particular brand of iron-on transfers as these next steps may vary slightly from brand to brand. For the transfers we used, the next step is to heat up the iron then pre-iron the bag to get rid of wrinkles and preheat the fabric for the transfer. Our directions recommend working on a hard surface with a piece of scrap fabric underneath.
5. Carefully place your design face down on the bag and iron it on using a LOT of pressure. I actually stand on a chair to put my full body weight down on it too. You want to iron over the whole design, paying particular attention to the edges to make sure it really adheres well.
6. After going over your design like a thousand times (an exaggeration, but make sure you go over it a lot to adhere it well). Let it cool completely before carefully pulling the paper backing off and you’re done. Time to go to the library!
Download FREE Printables for Iron-On Transfer Here:
Explore Books Logo (prints to approximately 4”x5”)
*Please note that the downloaded PDF files will have the logos in MIRROR IMAGE (aka backwards), since it needs to be printed in reverse on the iron-on transfers.
Want to make a Custom Design?
I made the designs for these library tote logos by using design files from my husband's Creative Market Shop. If you want to edit these designs or make your own, you can purchase the files from Creative Market and personalize them yourself!