Sheet and Towel Stripping How-To
While home for Quarantine, I’ve seen a lot of people posting about “stripping” their towels and bedsheets and showing disgusting After photos of dirty water - I was intrigued! Stripping the linens is supposed to get rid of any kind of build-up on them (whether that’s laundry detergent, body oil/sweat, hard water mineral deposits, etc). So I decided to give it a try myself and share the easy process - and let me tell you, it was a disgusting and oddly satisfying Quarantine Project. | This post contains affiliate links |
Apparently one should consider stripping their linens when they aren’t as absorbent as they used to be, they look or feel dingy, or they start to smell musty.
Supplies:
Everyone seems to be using more or less the same supplies, which are:
- 1/4 cup Borax Powder
- 1/4 cup washing soda (or 1/4 cup baking soda if you're in a pinch and don't have washing soda.. I used baking soda)
- 1/2 cup laundry detergent
How-To:
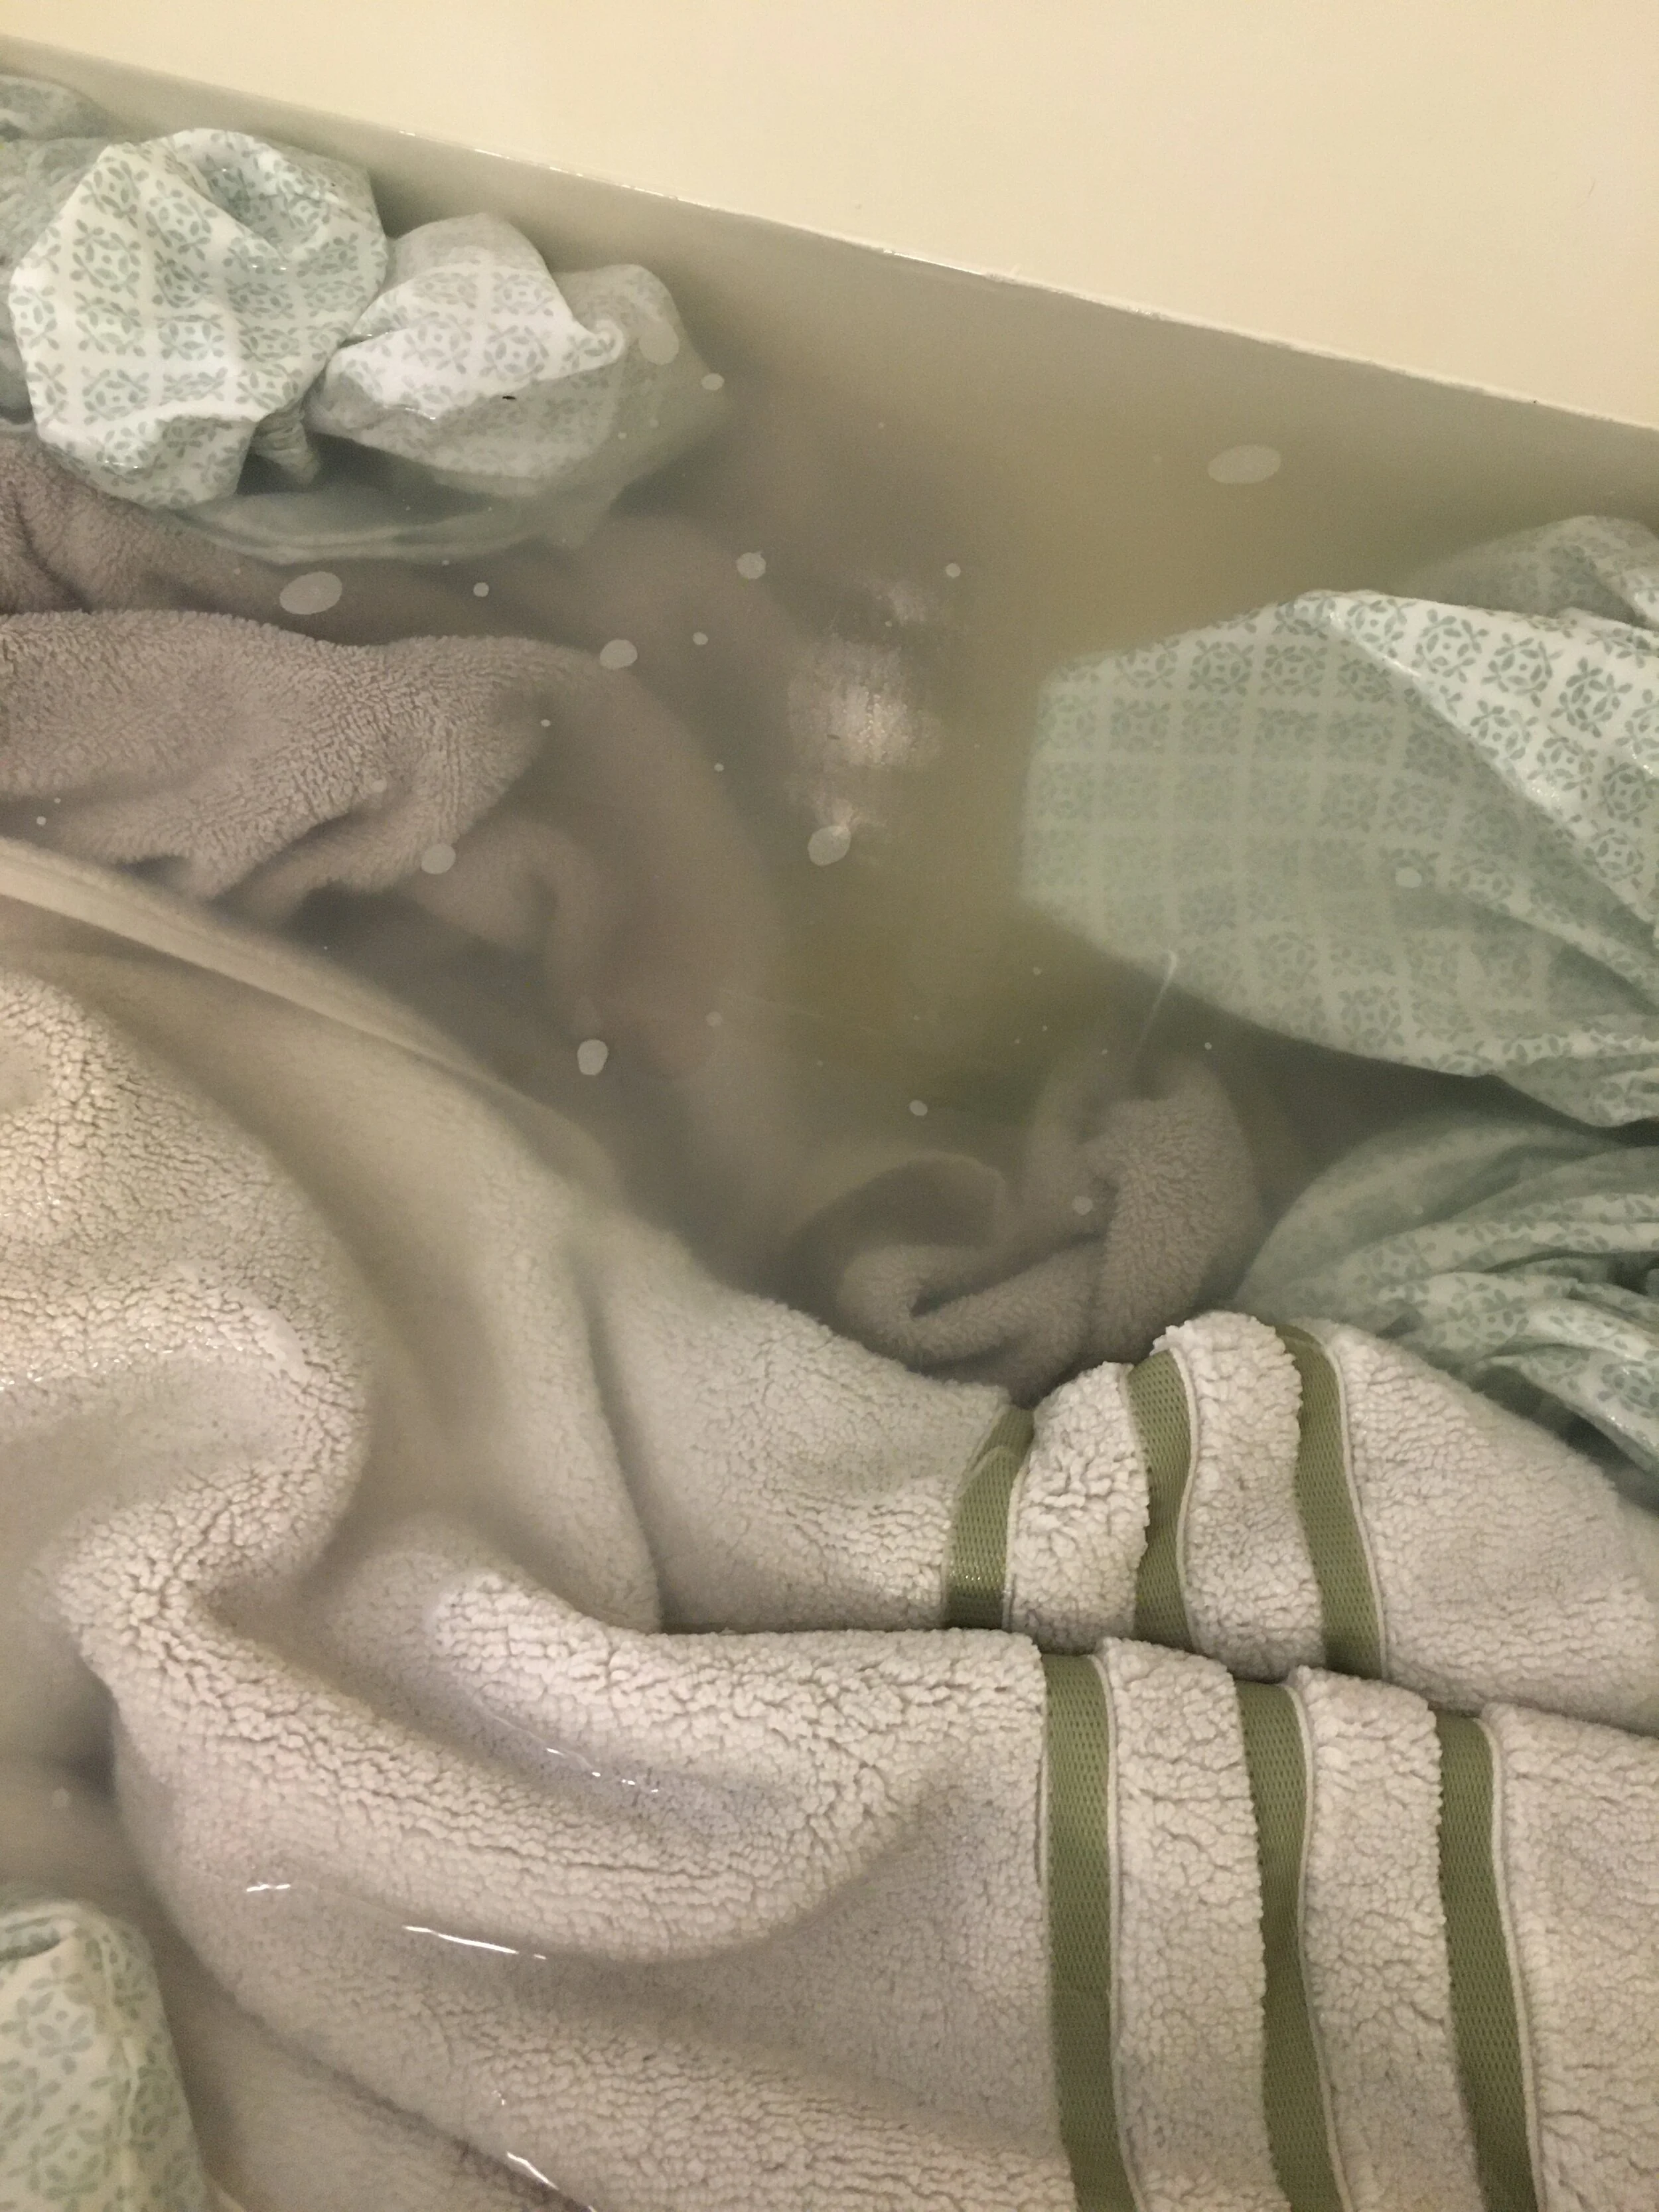
Fill a bath tub with hot water and dissolve the Borax, washing soda or baking soda, and laundry detergent in it. Next add your towels and sheets (make sure to only do similar colors together… in some cases it can cause some colors to run. We only have done our white and light colored linens so far.)
Then leave them to soak for the next four or so hours, stirring occasionally. You should see the water turn from clear to a gross yellowish-dirty color.
Once the water cools, drain the tub and squeeze the water from the linens, rinsing them with some fresh water. Then put in the washing machine (with no detergent - your items will already have absorbed detergent and Borax and you want to rinse everything out, not add more soap at this point), and run through the “wash” cycle to rinse everything out thoroughly.
After that you can put them in the dryer, or re-run the washing machine with detergent like you normally would to give them a fresh wash before drying.

Draining the dirty water after stripping. Ew.
Our Personal Results:
So it wasn’t the magical night-and-day change across the board that I was expecting, visually anyways - and some items definitely had better results than others. OVERALL - Our linens definitely felt cleaner, and looked a little brighter - however, our old white towels (which have turned very off-white over the years), did not magically turn luminous white again like I was hoping. But again, that’s probably too much to expect as they are 10+ years old and have had many years to get discolored in the regular laundry. Nevertheless, just SEEING the dirty water after we stripped the linens makes me feel a lot better about doing this process - visually not everything looks perfectly white again, but I know it’s cleaner after removing all that invisible gunk and that makes me feel a lot better.
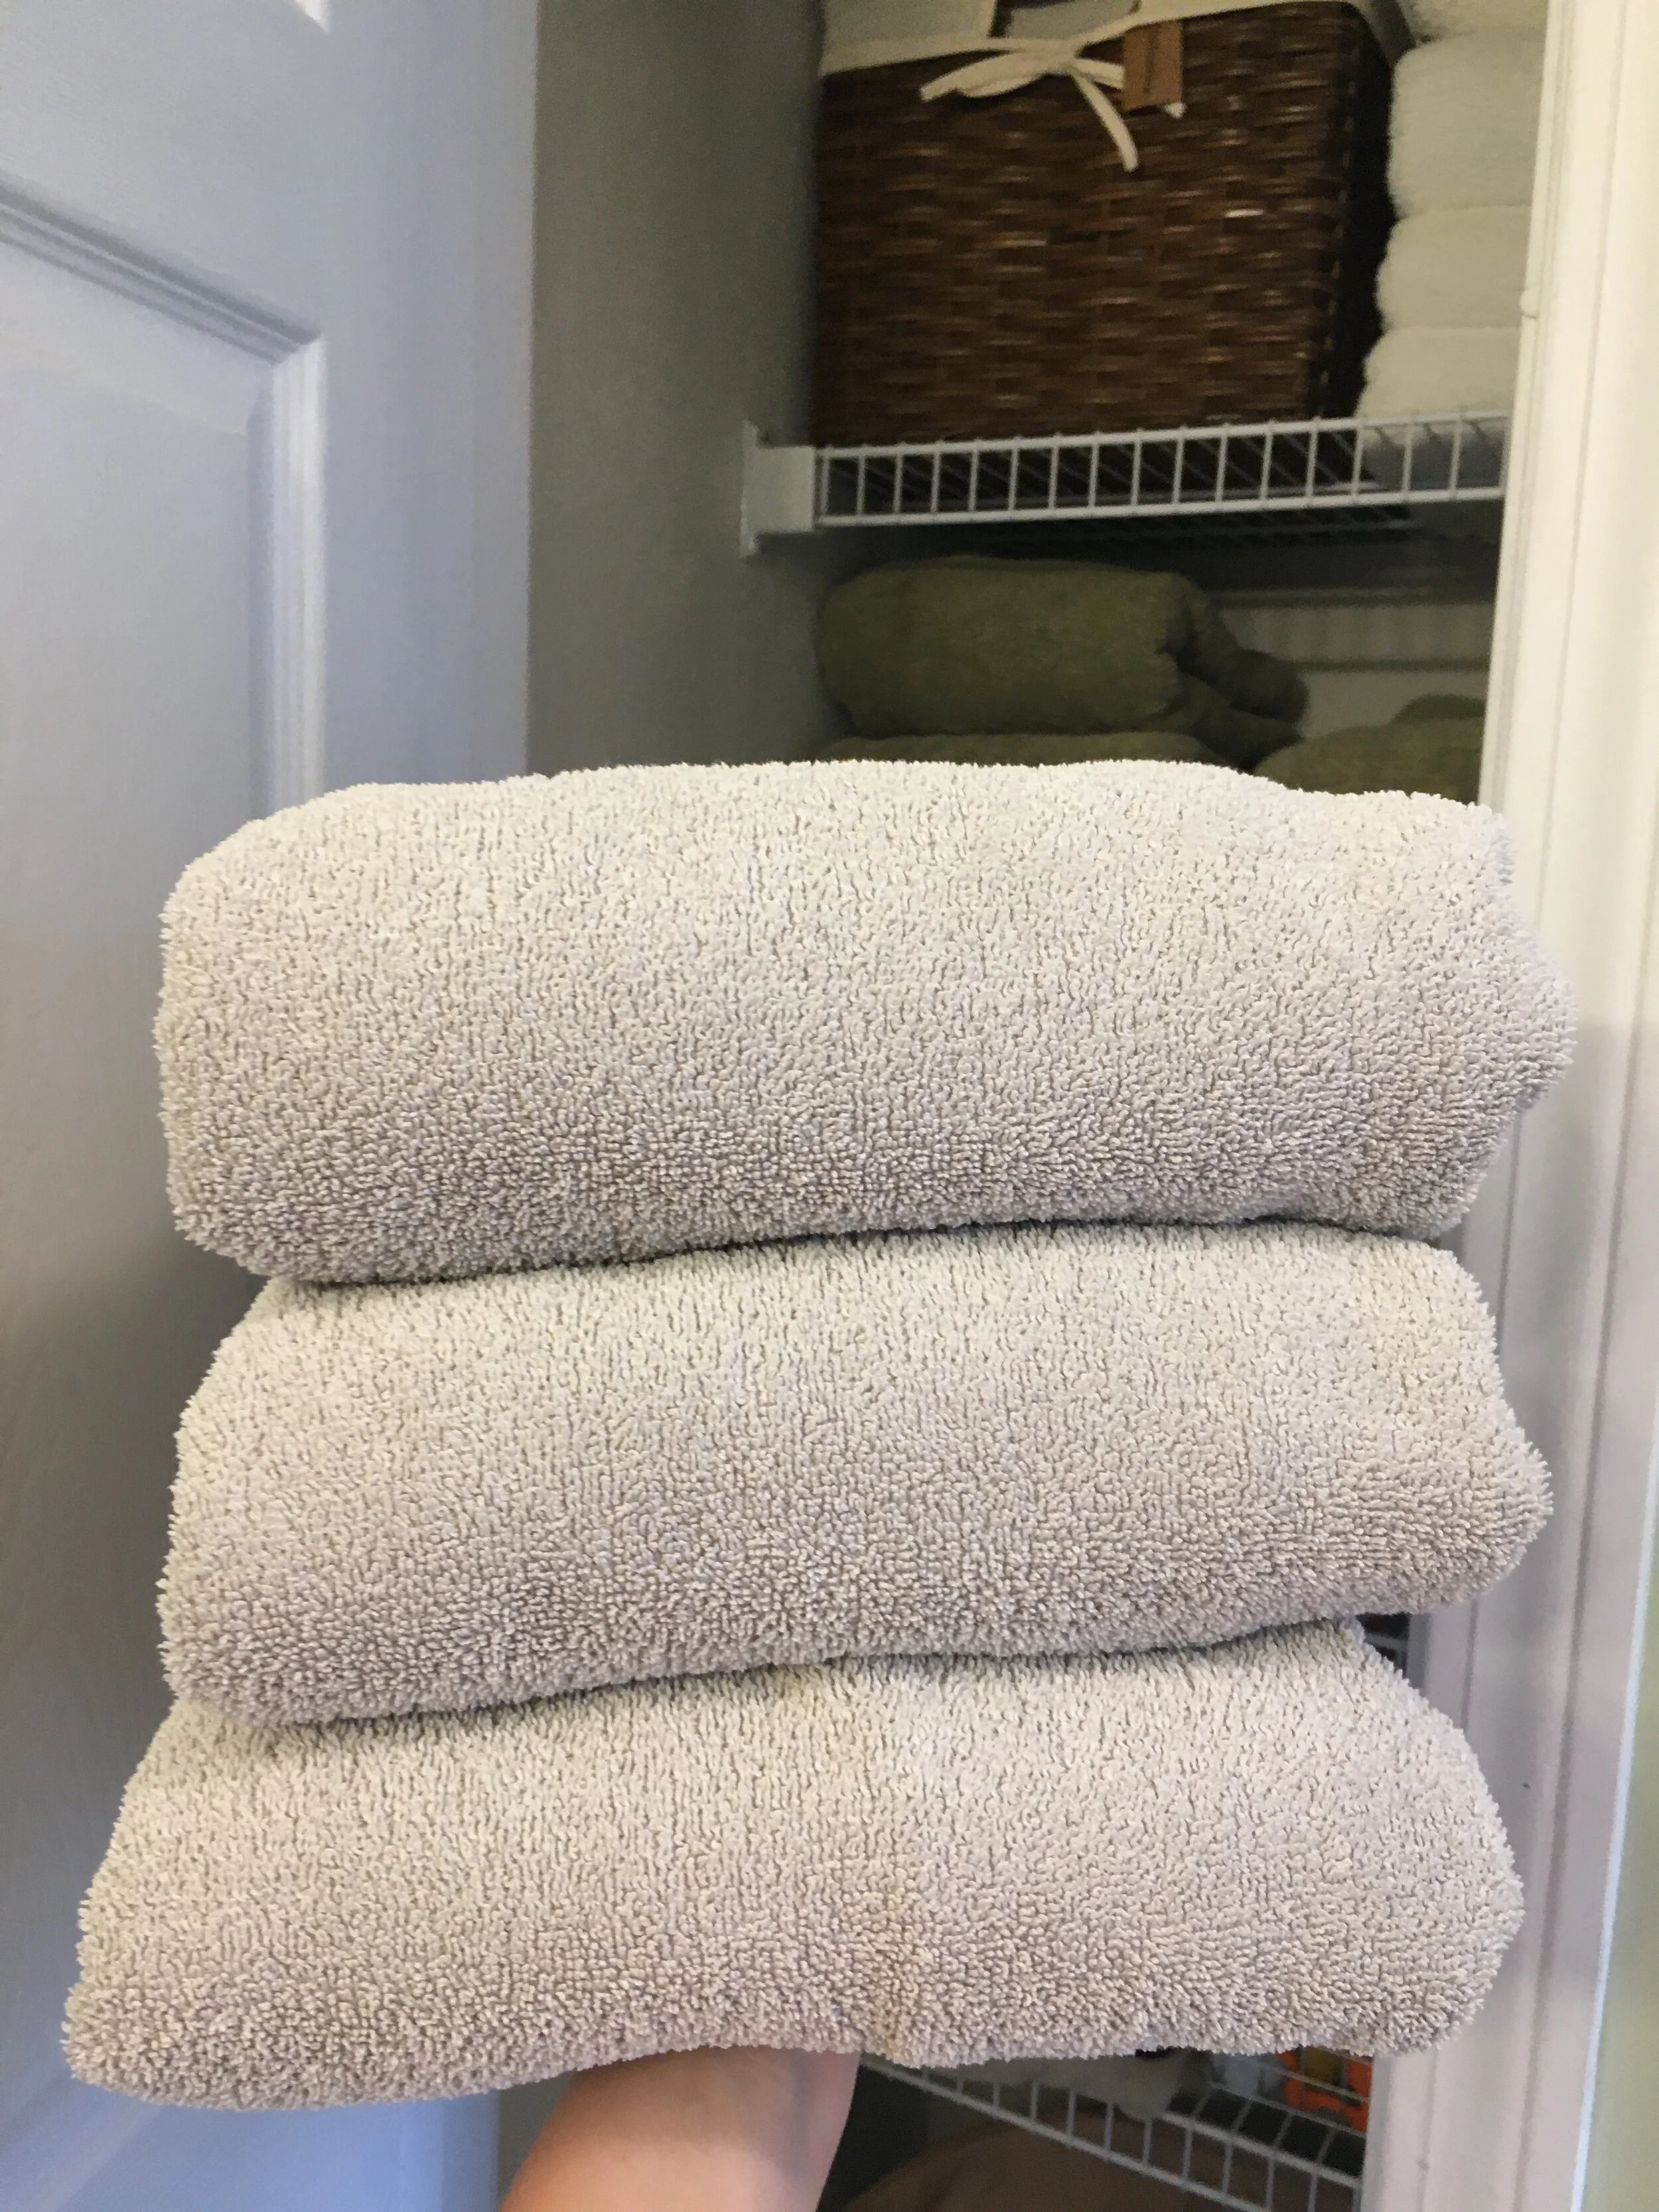
Okay, so the old white towels are still off-white, but I know they’re cleaner than before after seeing the dirty water after the stripping process.
It’s my understanding that you can repeat this process as needed, and I can see myself doing this maybe up to 2-4x per year going forward to try to keep build-up at bay.
Disclaimer: Try at your own risk. In some cases this process may make colored fabrics run and may not be suitable for all fabrics.
Want to see another satisfyingly gross example…?

Here’s a photo my sister sent me after she did her sheets - wow!
Shop some of our Organization + Cleaning Picks:
Scroll sideways to see more —>
KEEP UP WITH BIRCH LANDING HOME
| Etsy | Facebook | Instagram | Pinterest | Bloglovin' | Hometalk |