I'm a wife, stay-at-home mom, crafter, and blogger living in rural New England. As seen in Martha Stewart Living, Food Network Magazine, and more! | Tutorials, DIY, crafts, parenting tips, recipes, money saving tips, product reviews, local product features, New England living, intentional living, and more! |
Lately our garage has been kind of a mess - my husband has been rebuilding our rotting deck and the power tools he has have multiplied with no good place to store them. I was getting tired of tripping over sanders and planers so I thought I’d come up with a way to get all the small power tools easily accessible and organized for his project. In my search I came across the perfect locker solution! | This post contains affiliate links |
I realized the space between our garage doors was vastly underutilized. It’s a skinny spot but tall - with a lot of potential for easily-accessible storage. I thought about building shelves there but then it would be open and kind of messy. I tried finding a cabinet that would fit but they were all too wide. Then I realized a locker would fit!
I searched for single-width lockers and found many options and considered doing a single tall locker or a double locker. But then I came across this amazing single-width locker with six doors/tiers! It was perfect for my needs - it fit right in between the garage doors and each tool could have it’s own cubby. This locker fit perfectly in our garage but make sure to measure your space first as you may have a narrower (or wider) space to work with. There was assembly required for the locker but it went together easily and then it was ready to use!
One important thing to consider before you put a locker in your garage is how you will contend with wet floors. We live in New England and in the winters especially our garage floors get quite wet when the snow melts off our cars… in order to protect the bottom of your locker from rusting you probably want to raise it up off the floor. For us we used a thick paving stone that fit well under the locker - though we did have to level it some with
composite shims (similar ones linked)
because our garage floors are slightly uneven. (Just slide the shim under the paver and break off when it's the right height - so easy!) You may also want to consider attaching your locker to the wall in some way if you’re concerned about it tipping.
Once we had our locker level and secured I labeled each cubby with what it contained (“Drills & Bits”, “Orbital Sander”, etc). To make the labels I just typed them up on my computer, printed them out on a sheet of cardstock, and cut them out.
This was an awesome and very easy project to do in our garage. We love how organized and accessible the tools are while still keeping them out of sight.
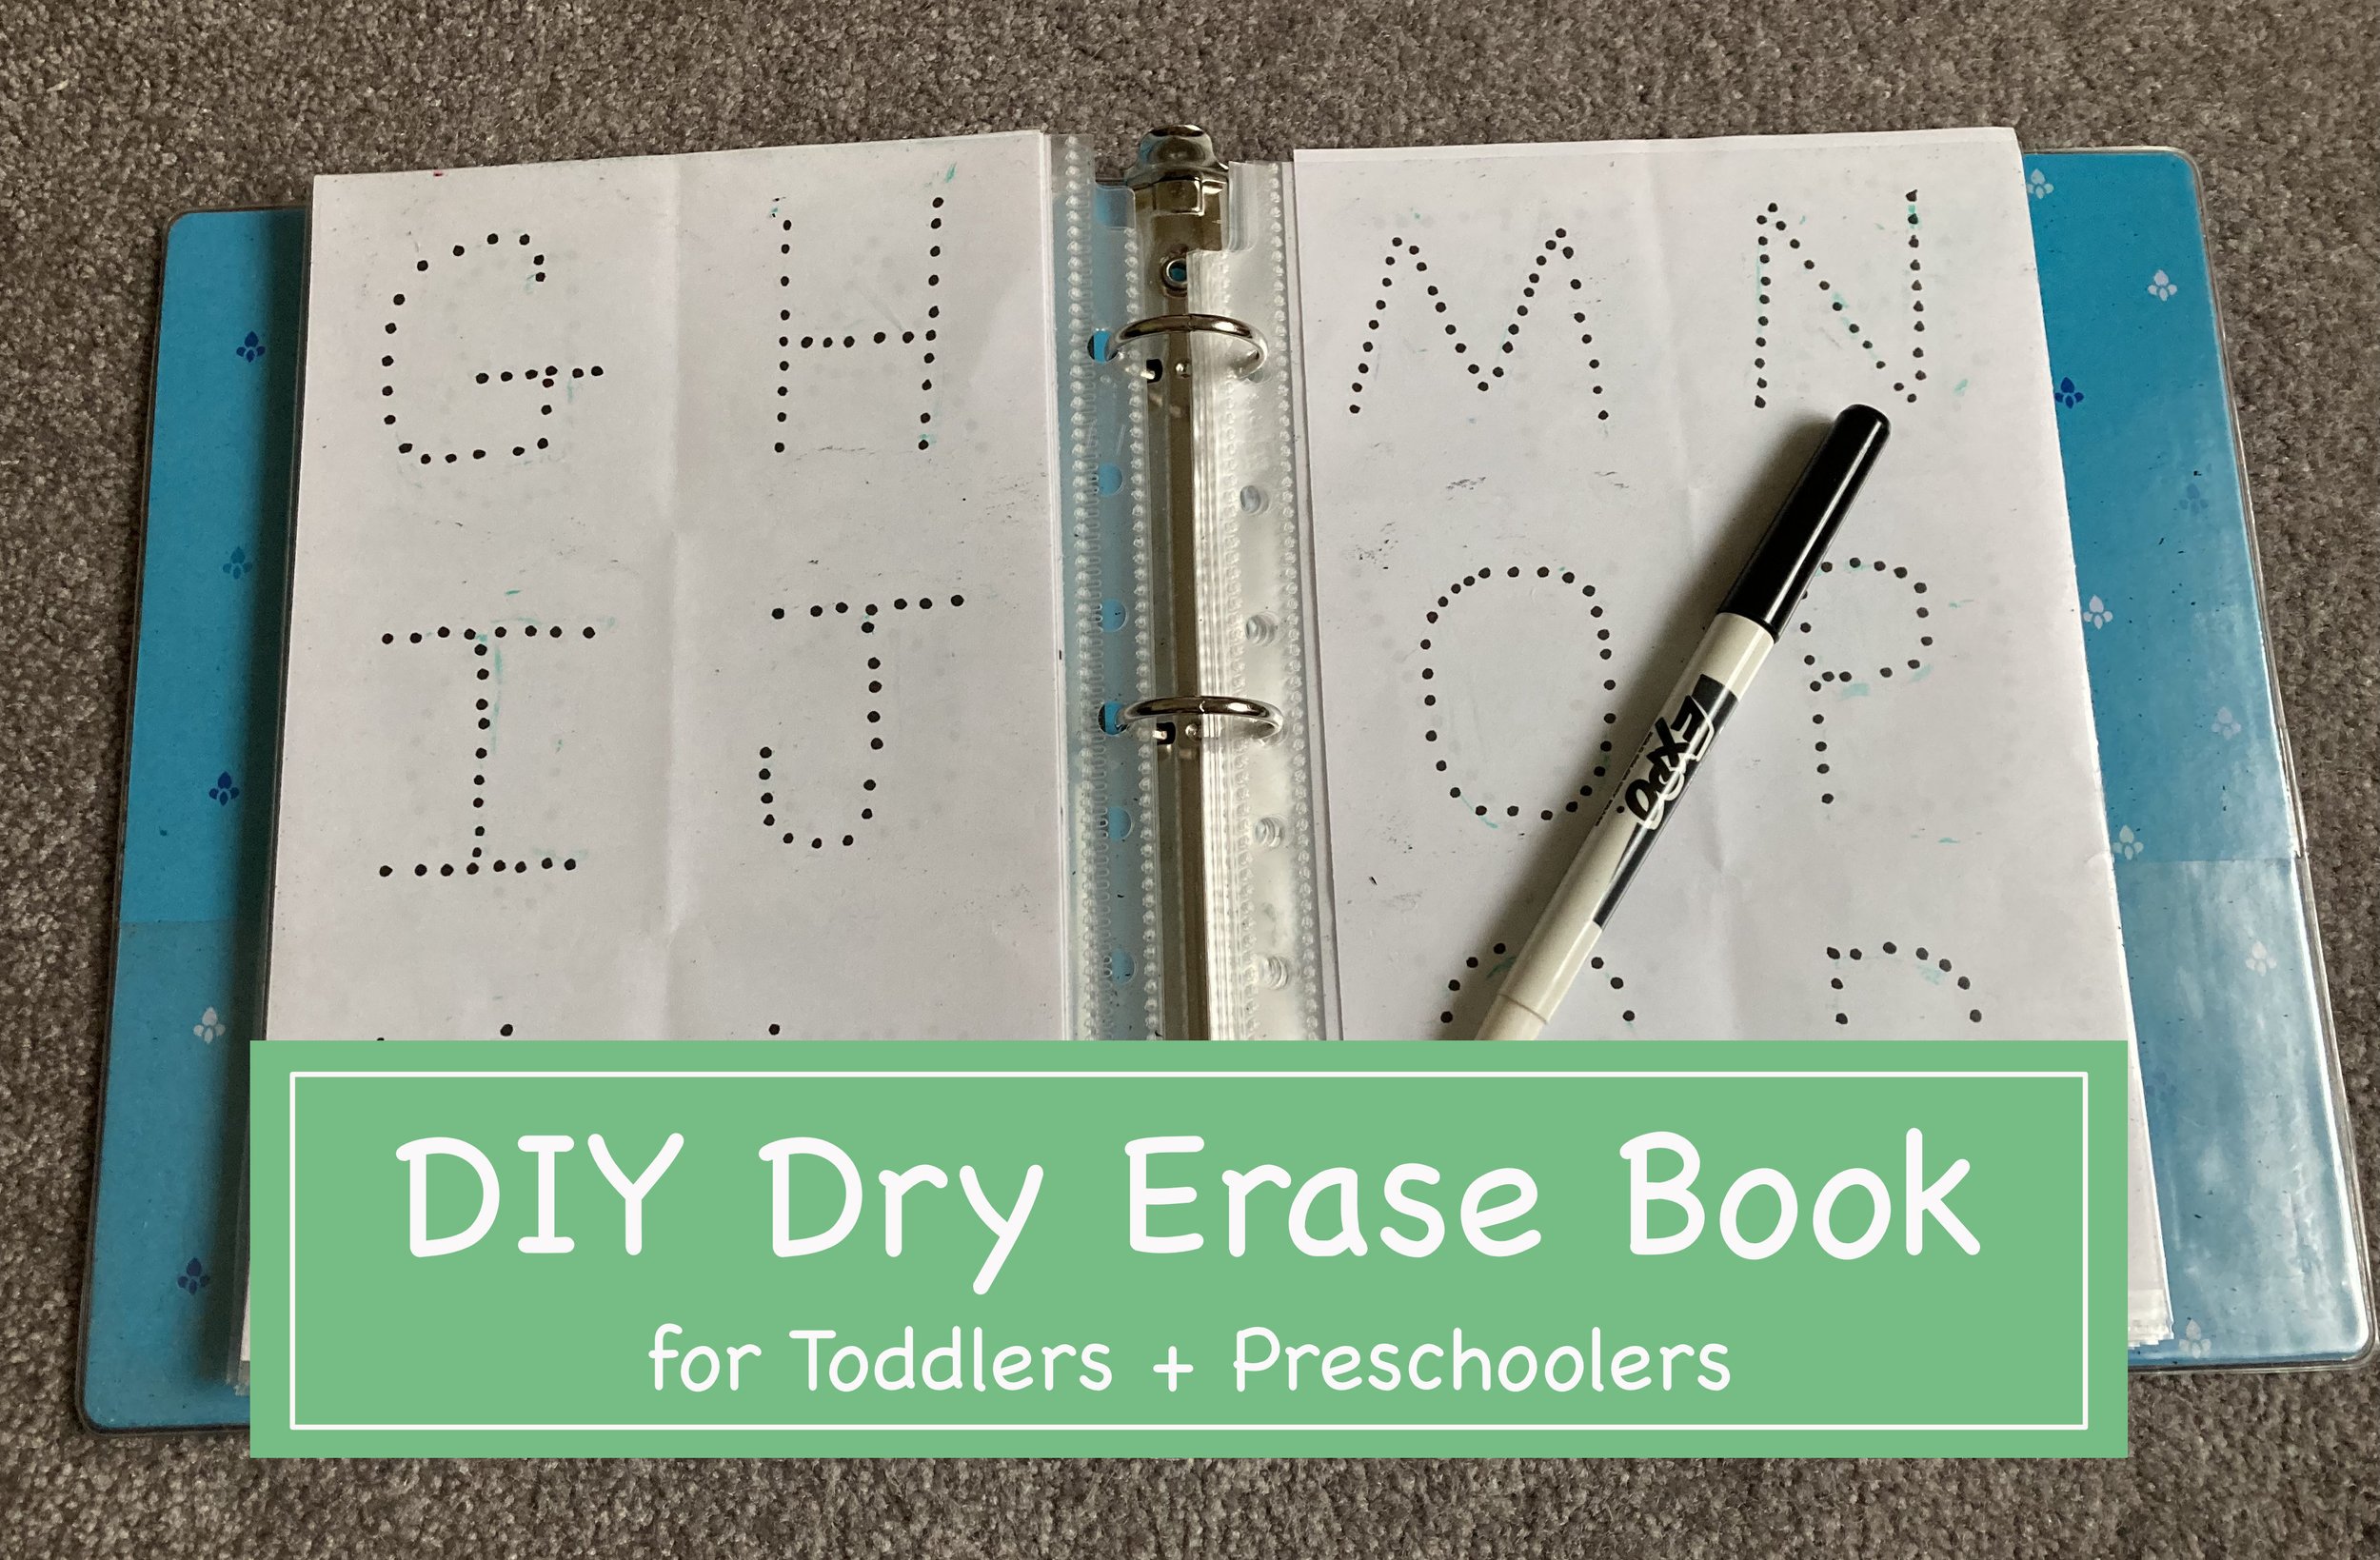
I was just refreshing the little books and toys we keep in our car, when I realized I had never shared about this Dry Erase Activity Book I made for our first kid years ago (and now our youngest uses it). It was incredibly easy to make and tailor to each child with what stage they were at/needed to work on. Here’s the super easy how-to, hopefully it will inspire you to make one yourself! | This post contains affiliate links |
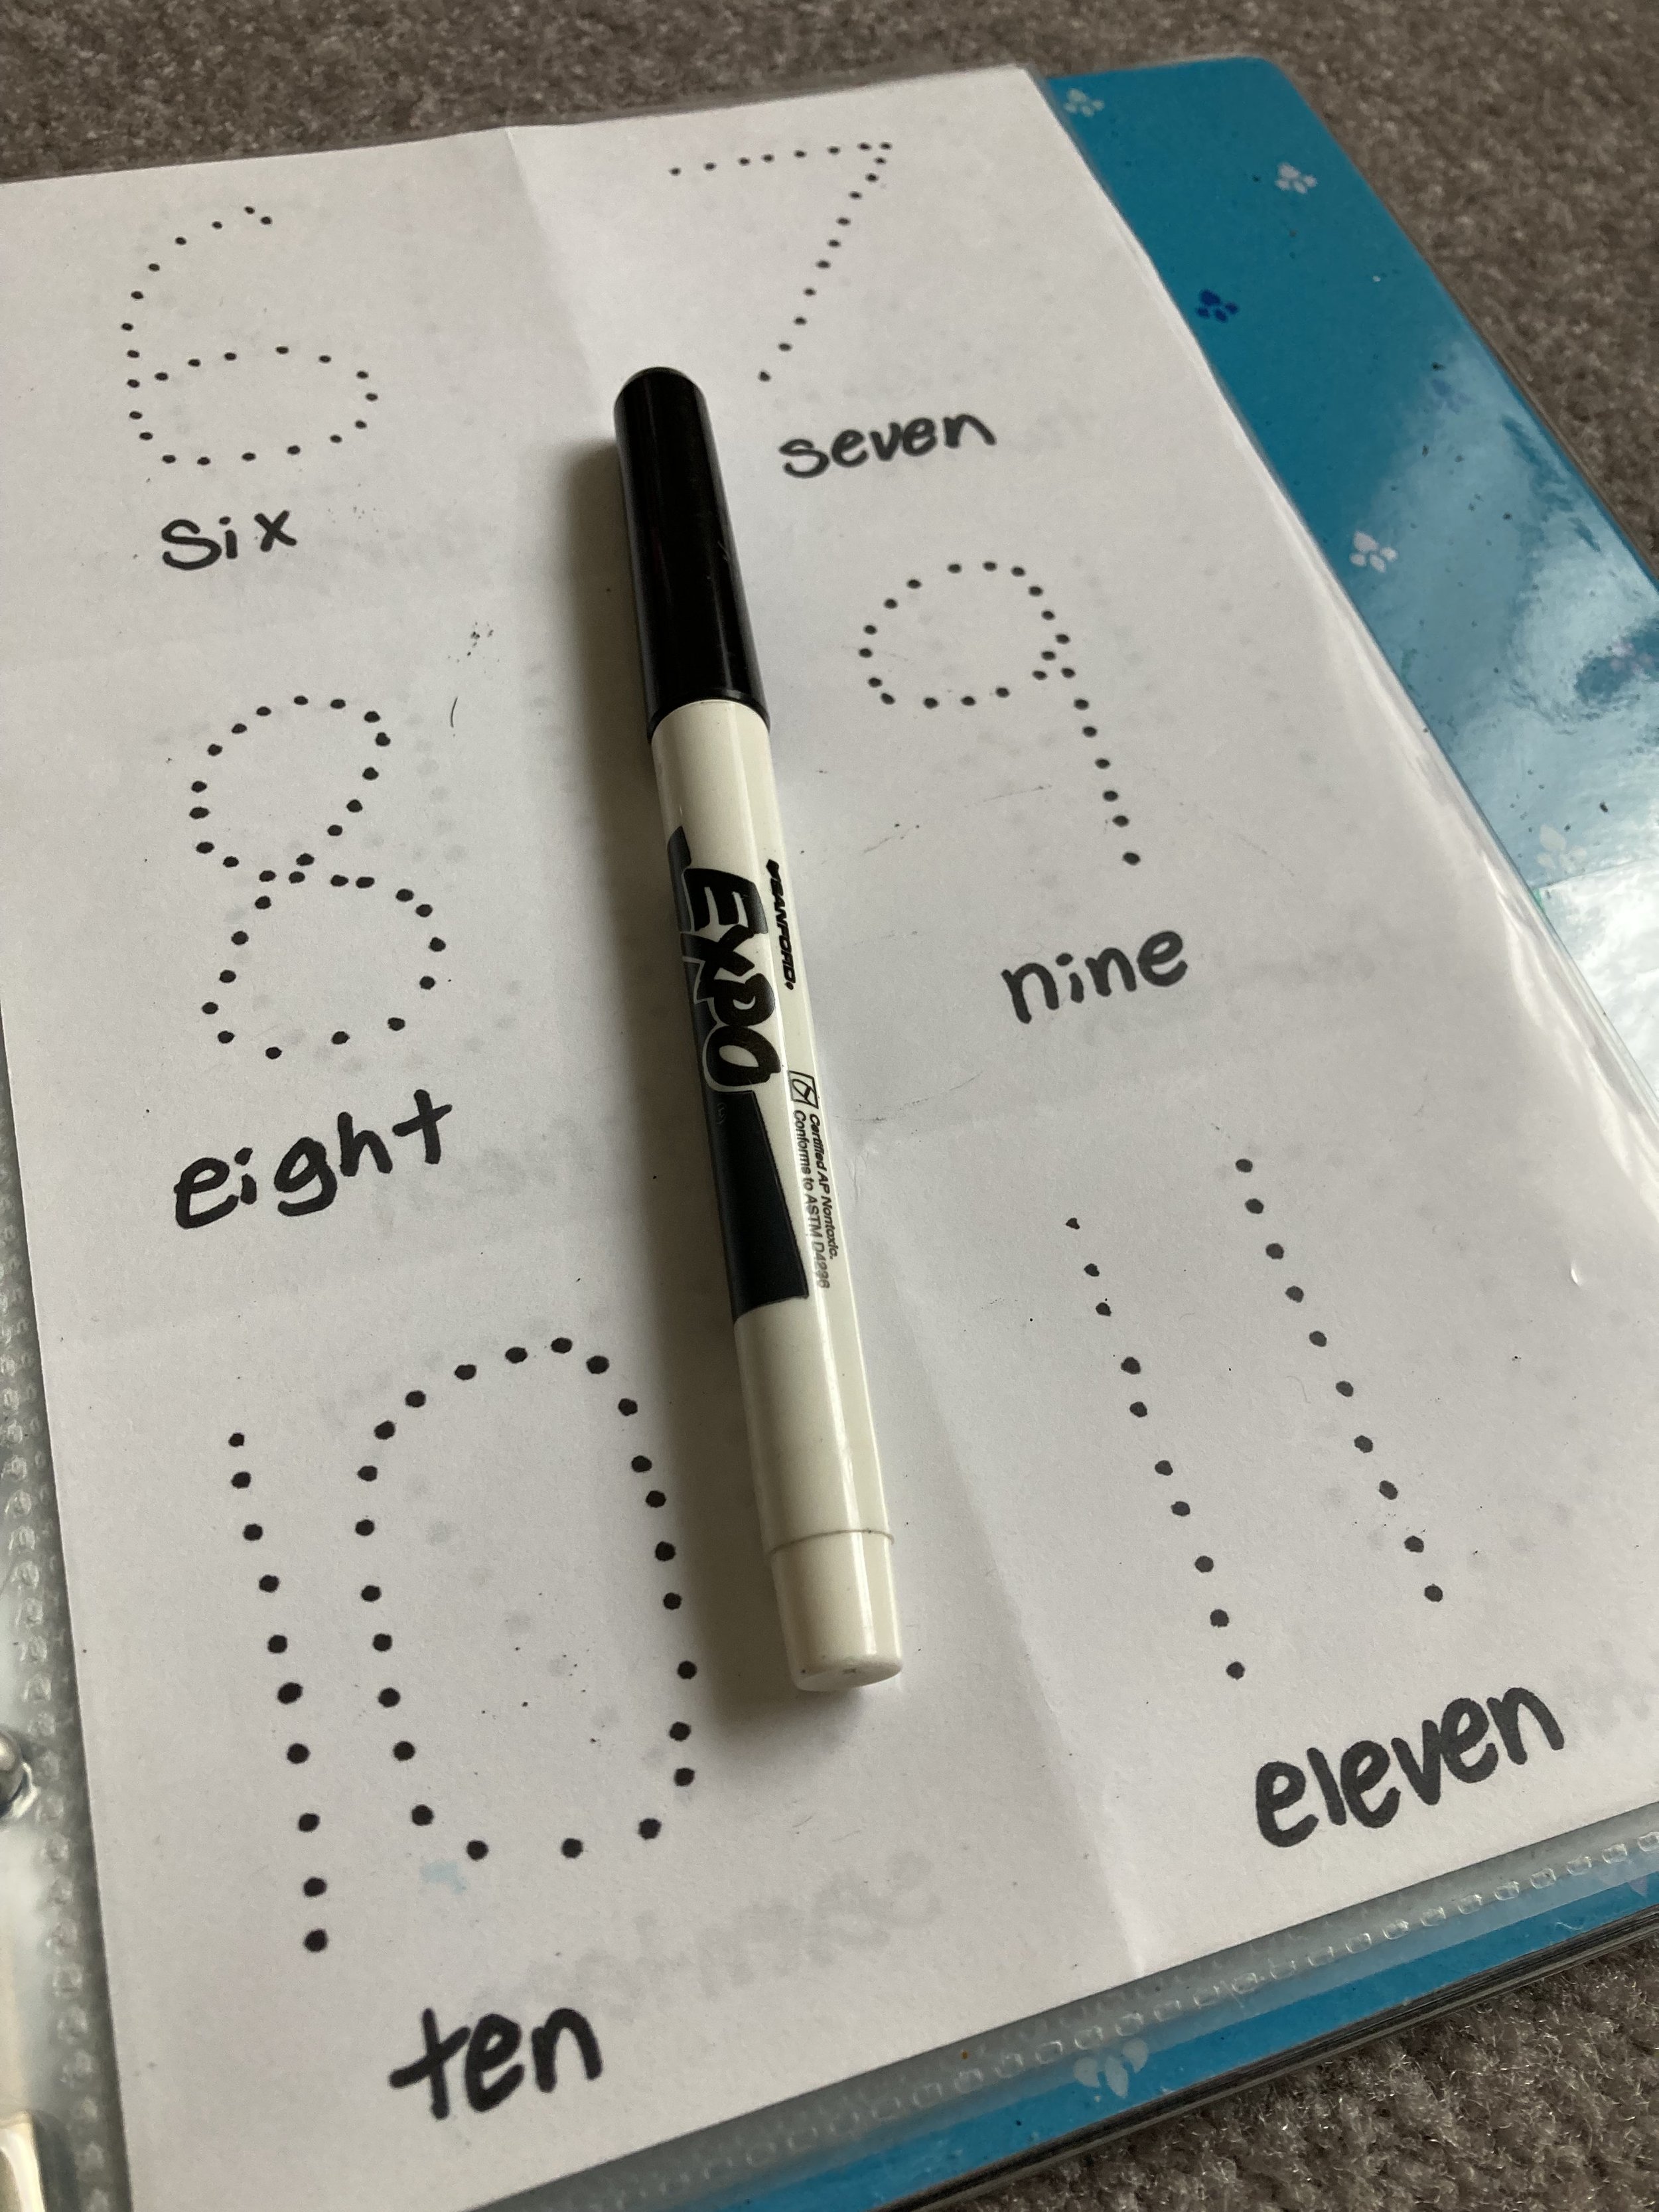
Really the how-to could not be easier! All you have to do is cut the computer paper in half to make it the correct size to fit in the sheet protectors, and then create your worksheets however you would like. I used dots for the kids to trace as well as made some free-draw pages and pages for them to practice writing out their whole names. In the pocket we keep a dry erase marker and some folded up paper towels to wipe the pages when they’re done.
We love this as a car toy and activity to do while the oldest is doing soccer practice, etc. And as your child grows you can update the pages with anything - math problems, maps to label, spelling practice, etc. Have fun tailoring it your kids and their age groups - we love that this can grow with our kids.
Page Ideas (for both young kids and older kids):
tracing shapes
tracing letters (uppercase and lowercase)
tracing numbers
writing name (all uppercase as well as with lowercase)
free draw pages
matching
math problems
spelling practice
labeling maps
labeling planets
draw features (eyes, hair, etc) on a blank face
draw details on a landscape photo
come up with your own - the possibilities are endless!
This Car Seat Organizer where our DIY Dry Erase Activity Book lives (along with other various car toys/books).
When you have kids, the chaos of their stuff seems to follow you everywhere - including into your car. I accept that our cars will never be pristine (dirt, crumbs, and dog hair will always be present), but I make sure that despite that we have a simple system to keep our things organized and to make sure we always have our essentials at hand. | This post contains affiliate links |
Disclaimer: Use organizers and other items at own risk. Make sure they are properly installed and compatible with your vehicle.
Keeping Toys in Check
I got tired of loose books and small toys spilling all over the back seat and the floor, so I got a backseat organizer to corral the kids’ items and keep them within easy reach for long car rides. In the organizer we always have some small books, an electronic kids toy, and some puzzles like a Rubik's Cube, as well as sunglasses for each kid in the small pockets in the front. I like this organizer because it fits between the car seats and can also buckle in so it doesn't slide around. (Side note: Where's Waldo has become a favorite car read and keeps the kids entertained for a long time.)
Trunk Organizer
With young kids we always carry supplies like a first aid kit, full change of clothing for each child, trash bags for wet/dirty clothes, extra towel and blanket, etc. For awhile all those items lived in a diaper bag in the trunk, but we are past the diaper stage now and it was time to retire the diaper bag and upgrade to something sleeker and space-saving. I am really loving this sturdy SUV trunk organizer for keeping everything hidden but still within reach.
The Infamous Car Potty
If you know, you know… With small kids traveling with a potty is a must, even for awhile once they’re past potty training age. You never know when an urgent bathroom request will happen, and these days with the pandemic it’s great to have a clean personal potty for your kid to use, rather than a dirty rest stop bathroom. Pro tip: We line our car potty with an open diaper to absorb liquid and waste and reduce the risk of a spill (makes for easier clean up too!).
Registration/Insurance Holder
It’s a good idea to keep all your car paperwork handy and organized in the glove box, because if you need it you don’t want to have to go digging for it - especially if it’s of an urgent nature (if you got pulled over, fender bender, etc). I personally like the little portfolios that keep everything ready and easy to find.
Roadside Kit / First Aid Kit
Always keep a roadside emergency kit and first aid kit in your car in the event you break down or have an accident. You may be able to find a kit that covers all your bases, but often you may have to purchase these separately or at least supplement with some additional tools or first aid items. Our trunk area has a hidden compartment underneath where we store all our roadside and first aid gear.
Extra Masks
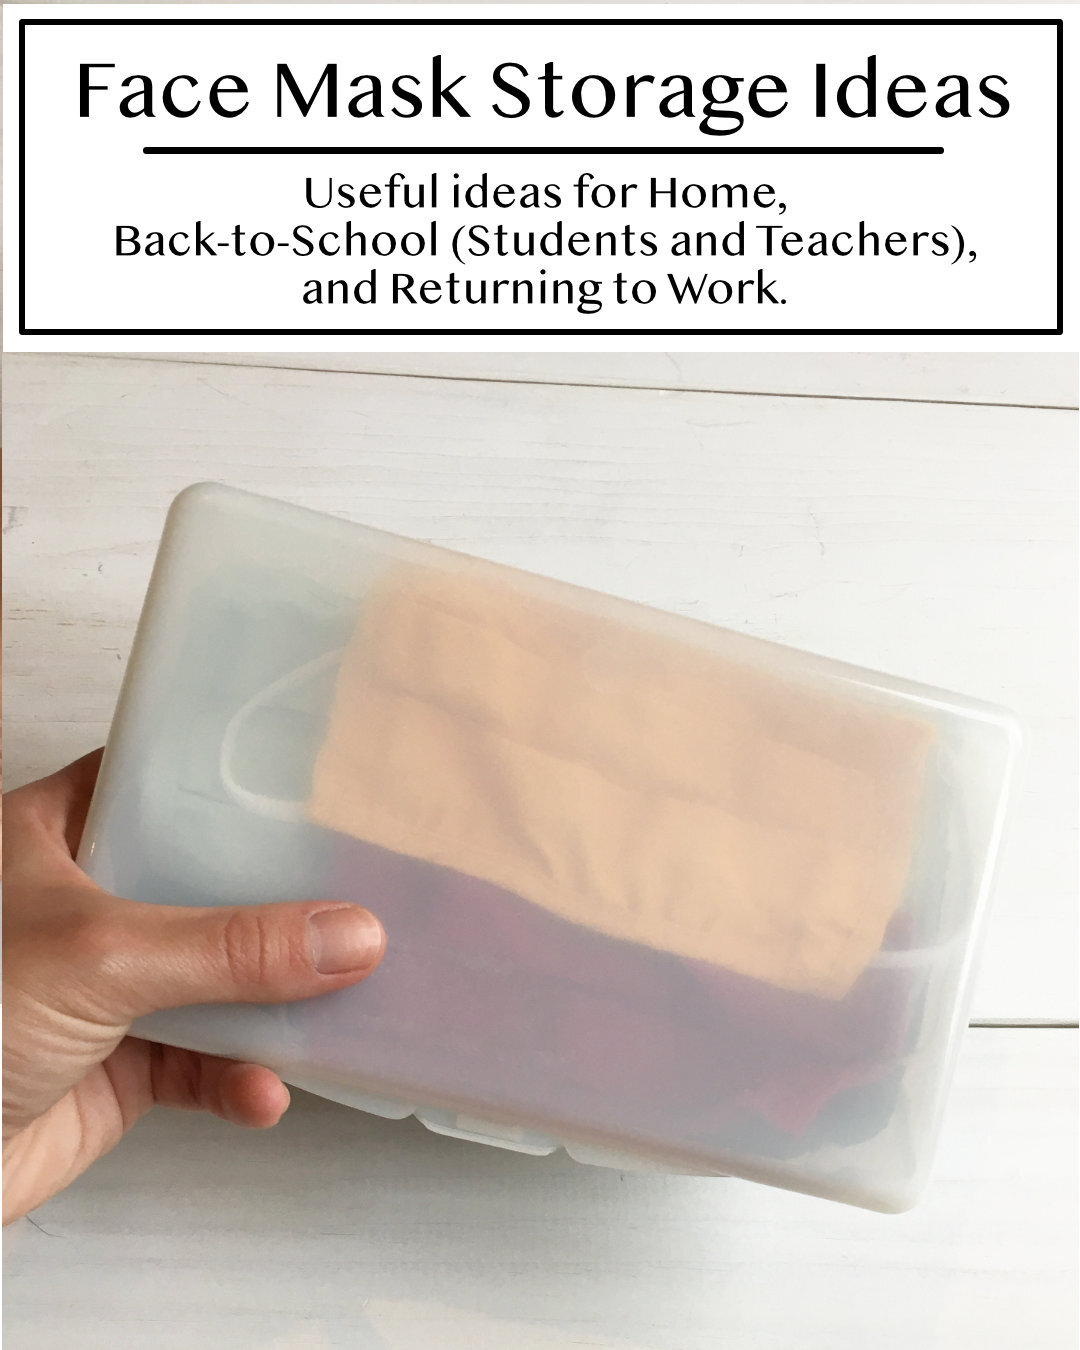
It’s a sign of the times… make sure you always keep a spare set of extra masks in your car for the whole family. That way you’re never caught without one if you need it. We made our mask case using a slim wipes container (similar container linked here).
Disclaimer: Use organizers and other items at own risk. Make sure they are properly installed and compatible with your vehicle.
We’re definitely living in different times right now… and it’s becoming clearer that it looks as though we will have to co-exist with the COVID-19 virus for the foreseeable future. Because of that anything we can do that might mitigate the risk of virus transmission, like always wearing face masks or face coverings when outside our homes, have become a part of our “new normal.” Since mask-wearing should be part of your new routine whenever you leave your house, it’s a good idea to have a system in place to make sure you always have clean masks at the ready and you never leave home without one. | This post contains affiliate links |
Disclaimer: I am not giving medical advice. Make sure to always consult the CDC and local health officials for up-to-date recommendations on mask wearing, storage, and care. Cloth masks are not considered medical grade and should be washed in between each use… check with individual mask makers/companies on the best way to store/wash/care for your masks.
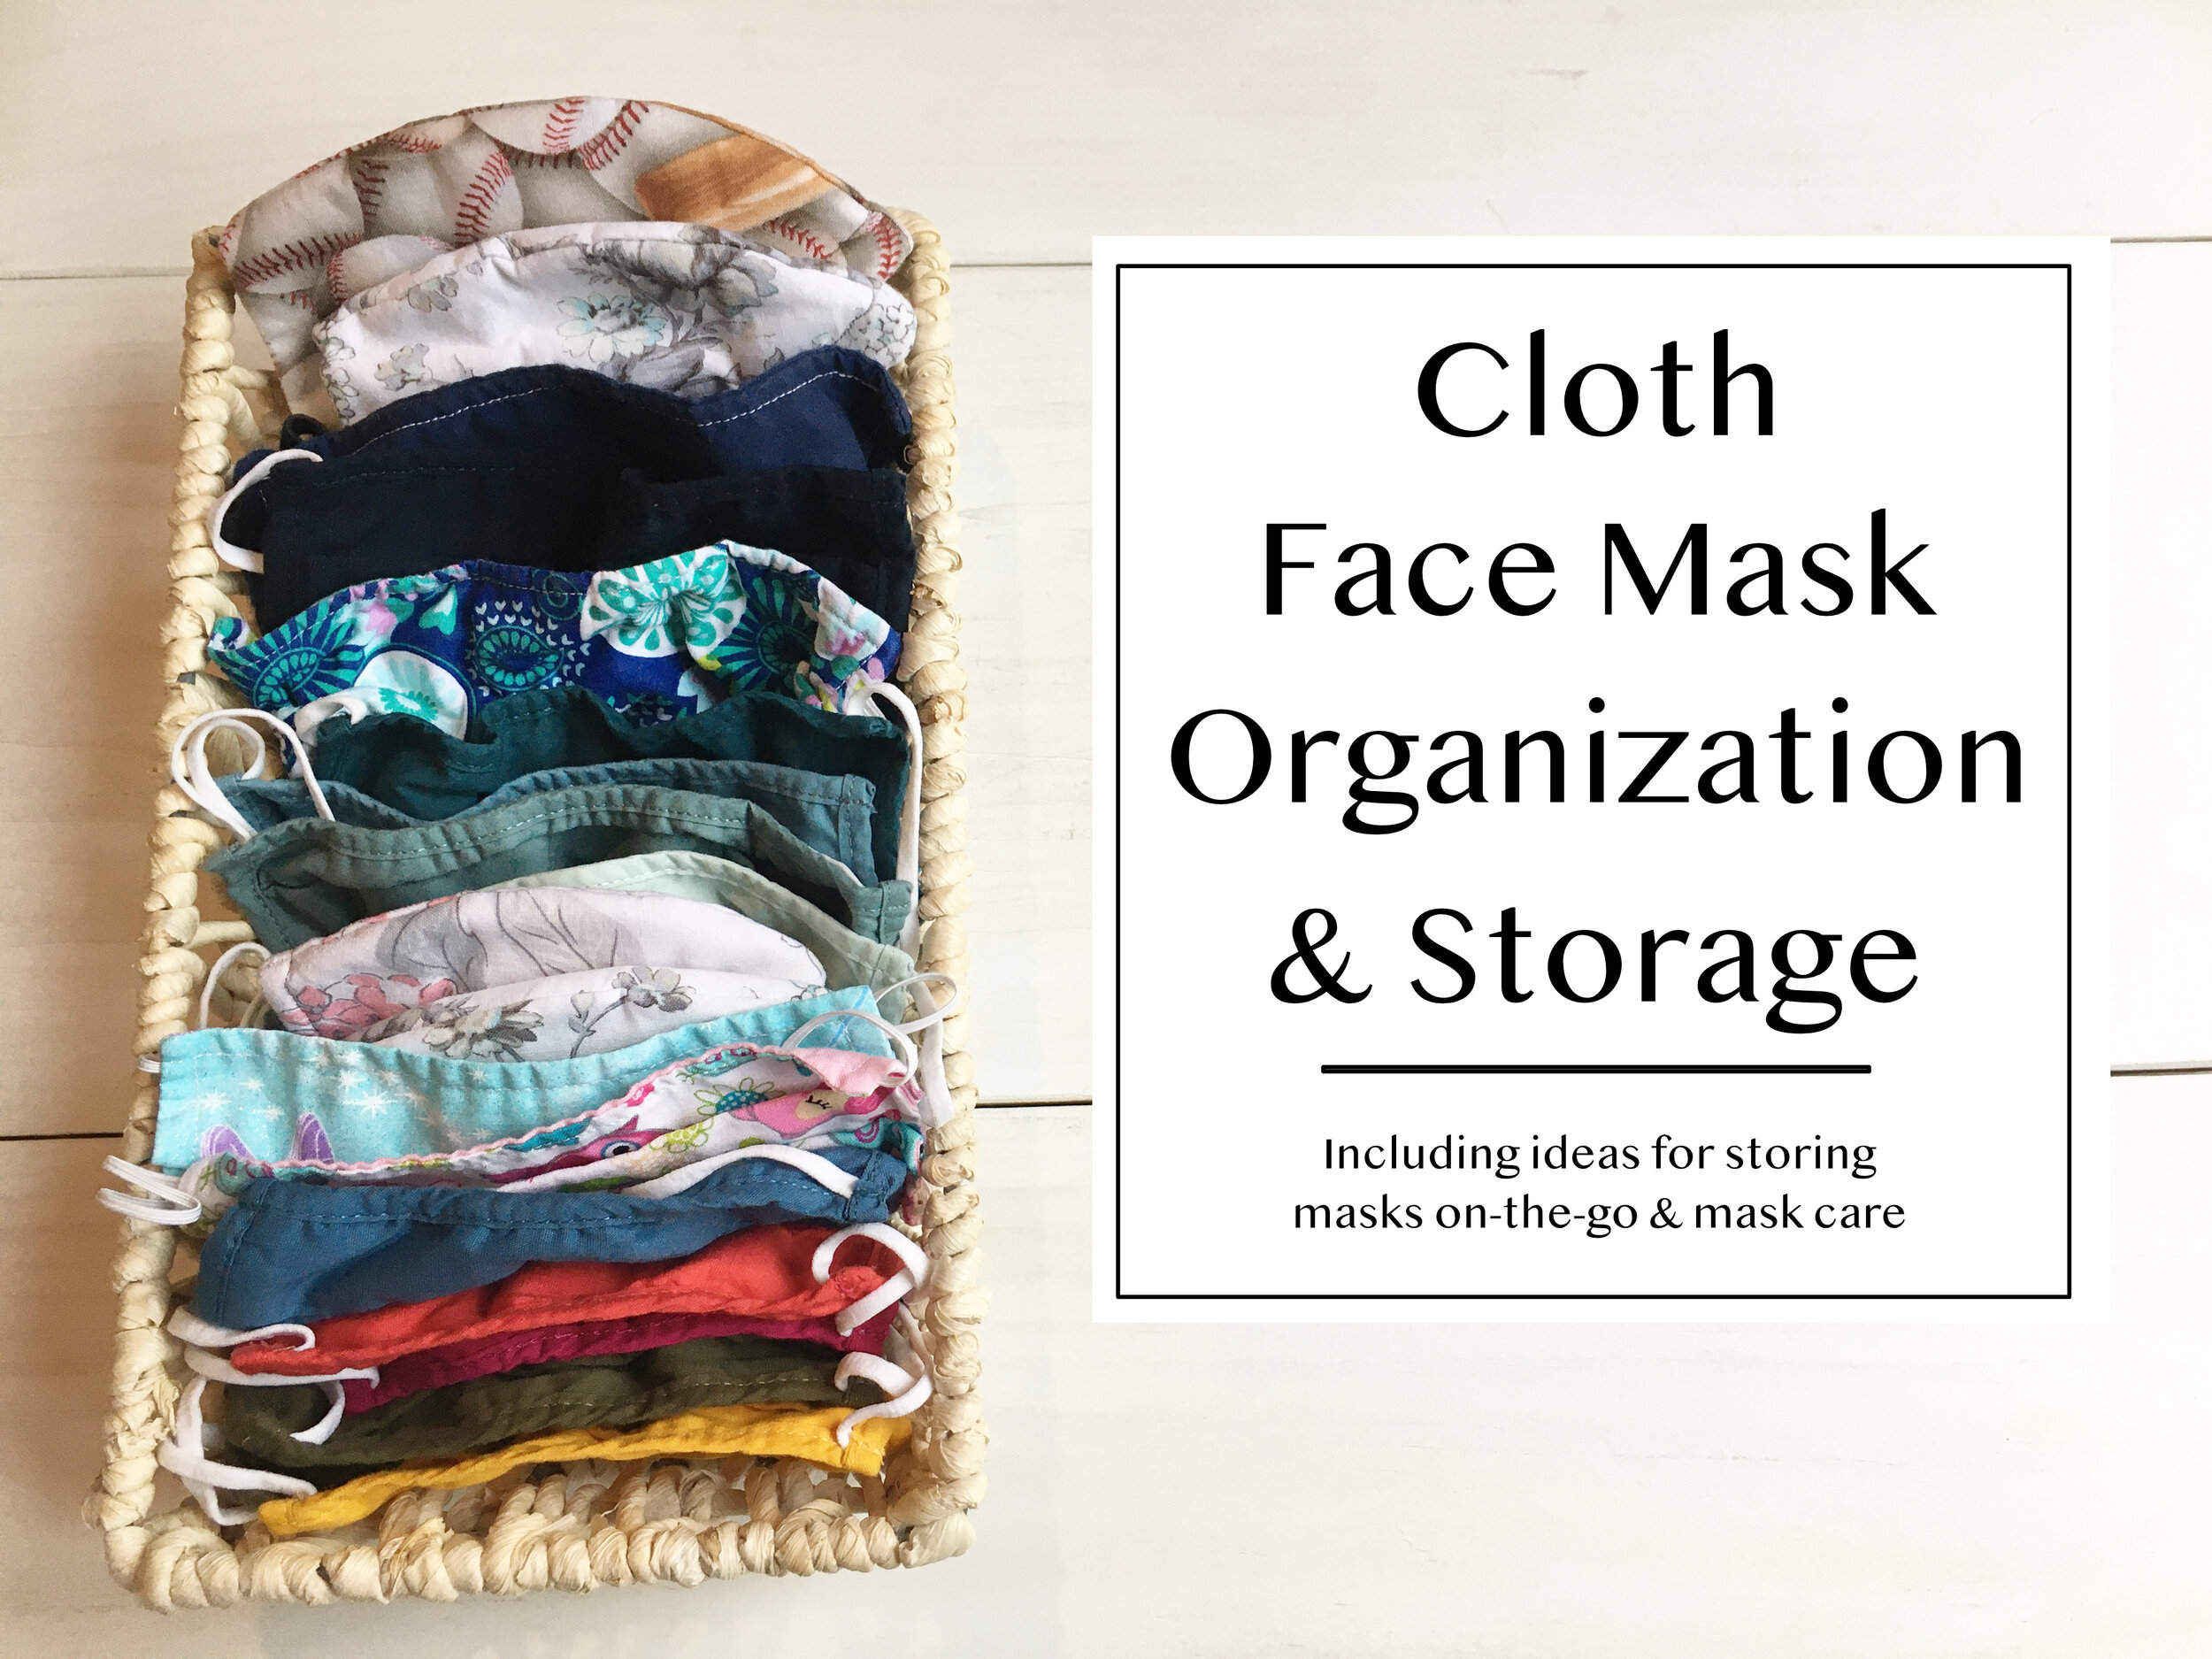
Mask Storage at Home
It’s a good idea to keep your clean masks in a designated area of your home, preferably in a place where you’ll be sure to grab one on your way out the door to do errands, go to work, etc. At first glance it might look like we have a lot of masks, but we really don't considering we're a household of four and it's essential to have enough masks to get through between laundry loads. We're still staying home and social-distancing very seriously, but whenever we have to do an essential errand/appointment or just go for a drive to get out of the house, we always make sure to have a clean mask for everyone that’s leaving the house.
In our home, we've designated a special basket that sits up high on our mudroom shelf, full of clean masks. We put the adult masks towards the back, and then kids masks in the front. I was unable to find a basket the same size on Amazon to link to, but I did find this
sleek bamboo box that looks to be the perfect size. If you don't have shelf space for a basket, you could alternatively use wall-mounted baskets for storage. Our masks are a mix of ones made with love for us by family members, as well as ones purchased from
Old Navy
and
Miss Harlow VT
(one of the local makers I featured in my "Masks by New England Makers" blog post).
If you don't like the idea of using a basket like we do and would rather hang your masks by the door, another option would be using
a small set of hooks
such as a set of compact coat hooks or key rack - or even just simple
Command Hooks.
Mask Storage On-The-Go
We have found a
slim wipes container
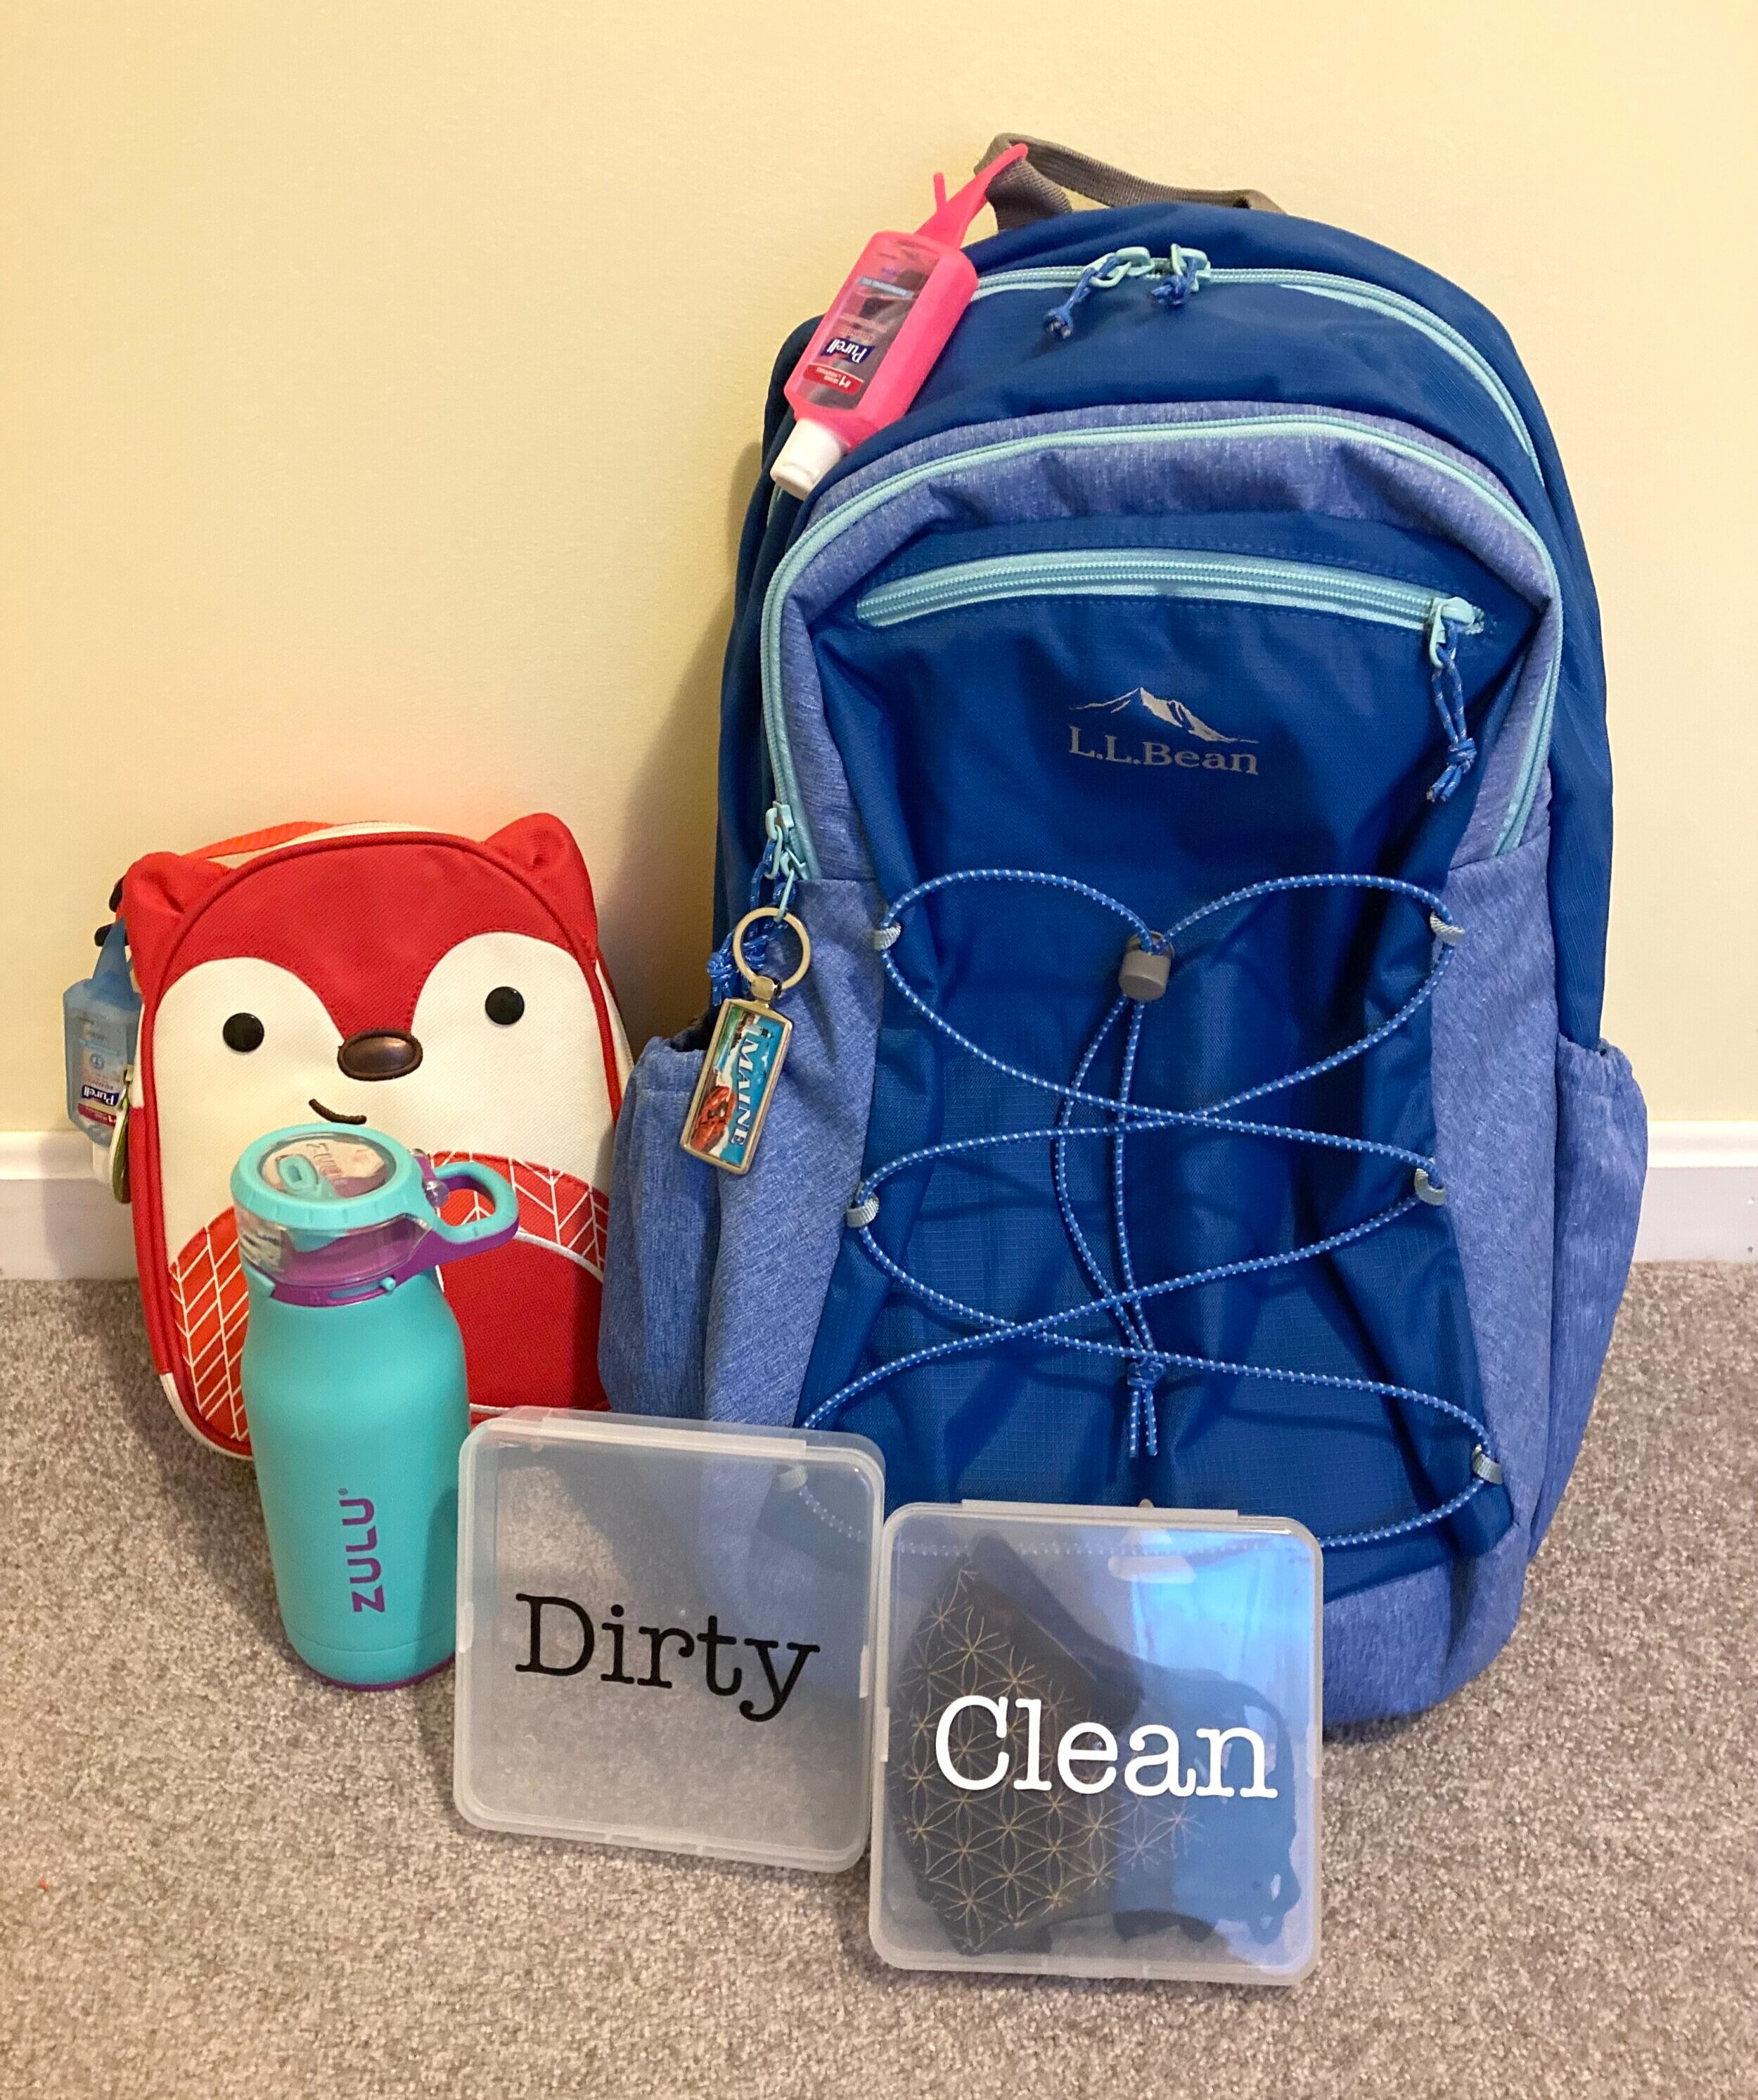
is the perfect size for holding several face masks on-the-go! In fact, we always make sure to leave our case packed with an extra mask for each family member in the car. That way we're always covered if we forget one or need to change masks while we're out of the house. I think this would be a great way to carry extra face masks in your bag for work, or your child's backpack whenever they return to school. It would probably be a good idea to also keep a ziplock bag or separate sealed container in your bag in case you have a dirty/used mask that needs to be brought home to wash.
And if you wanted to take it a step further and have an organzied mask system on-the-go to put in your work bag or child's backpack, you might want to consider having two cases - one for clean masks and one for dirty masks. I ordered these clear mask cases from Amazon and cut labels for them on my Cricut. We'll be packing one with extra clean masks, and the other will be empty for dirty masks to come home in. Since we recently invested in some better quality masks I wanted to make sure they stay in cases when not in use to keep them in good shape.
Alternatively, if you don't have any slim wipes containers hanging around you could also use
Small Craft Storage Cases
, which come in clear and a variety of colors. This might be more cost effective too if you needed multiple cases - especially if you needed one or more cases for each family member, or if you were a teacher and wanted to make a case for each student in your class.
You can also easily label any of these cases with a
label maker.
We always make sure to keep the car stocked with our plastic case of extra face masks, hand sanitizer, and disinfectant wipes to help protect ourselves when we’re out doing errands.
Mask Care
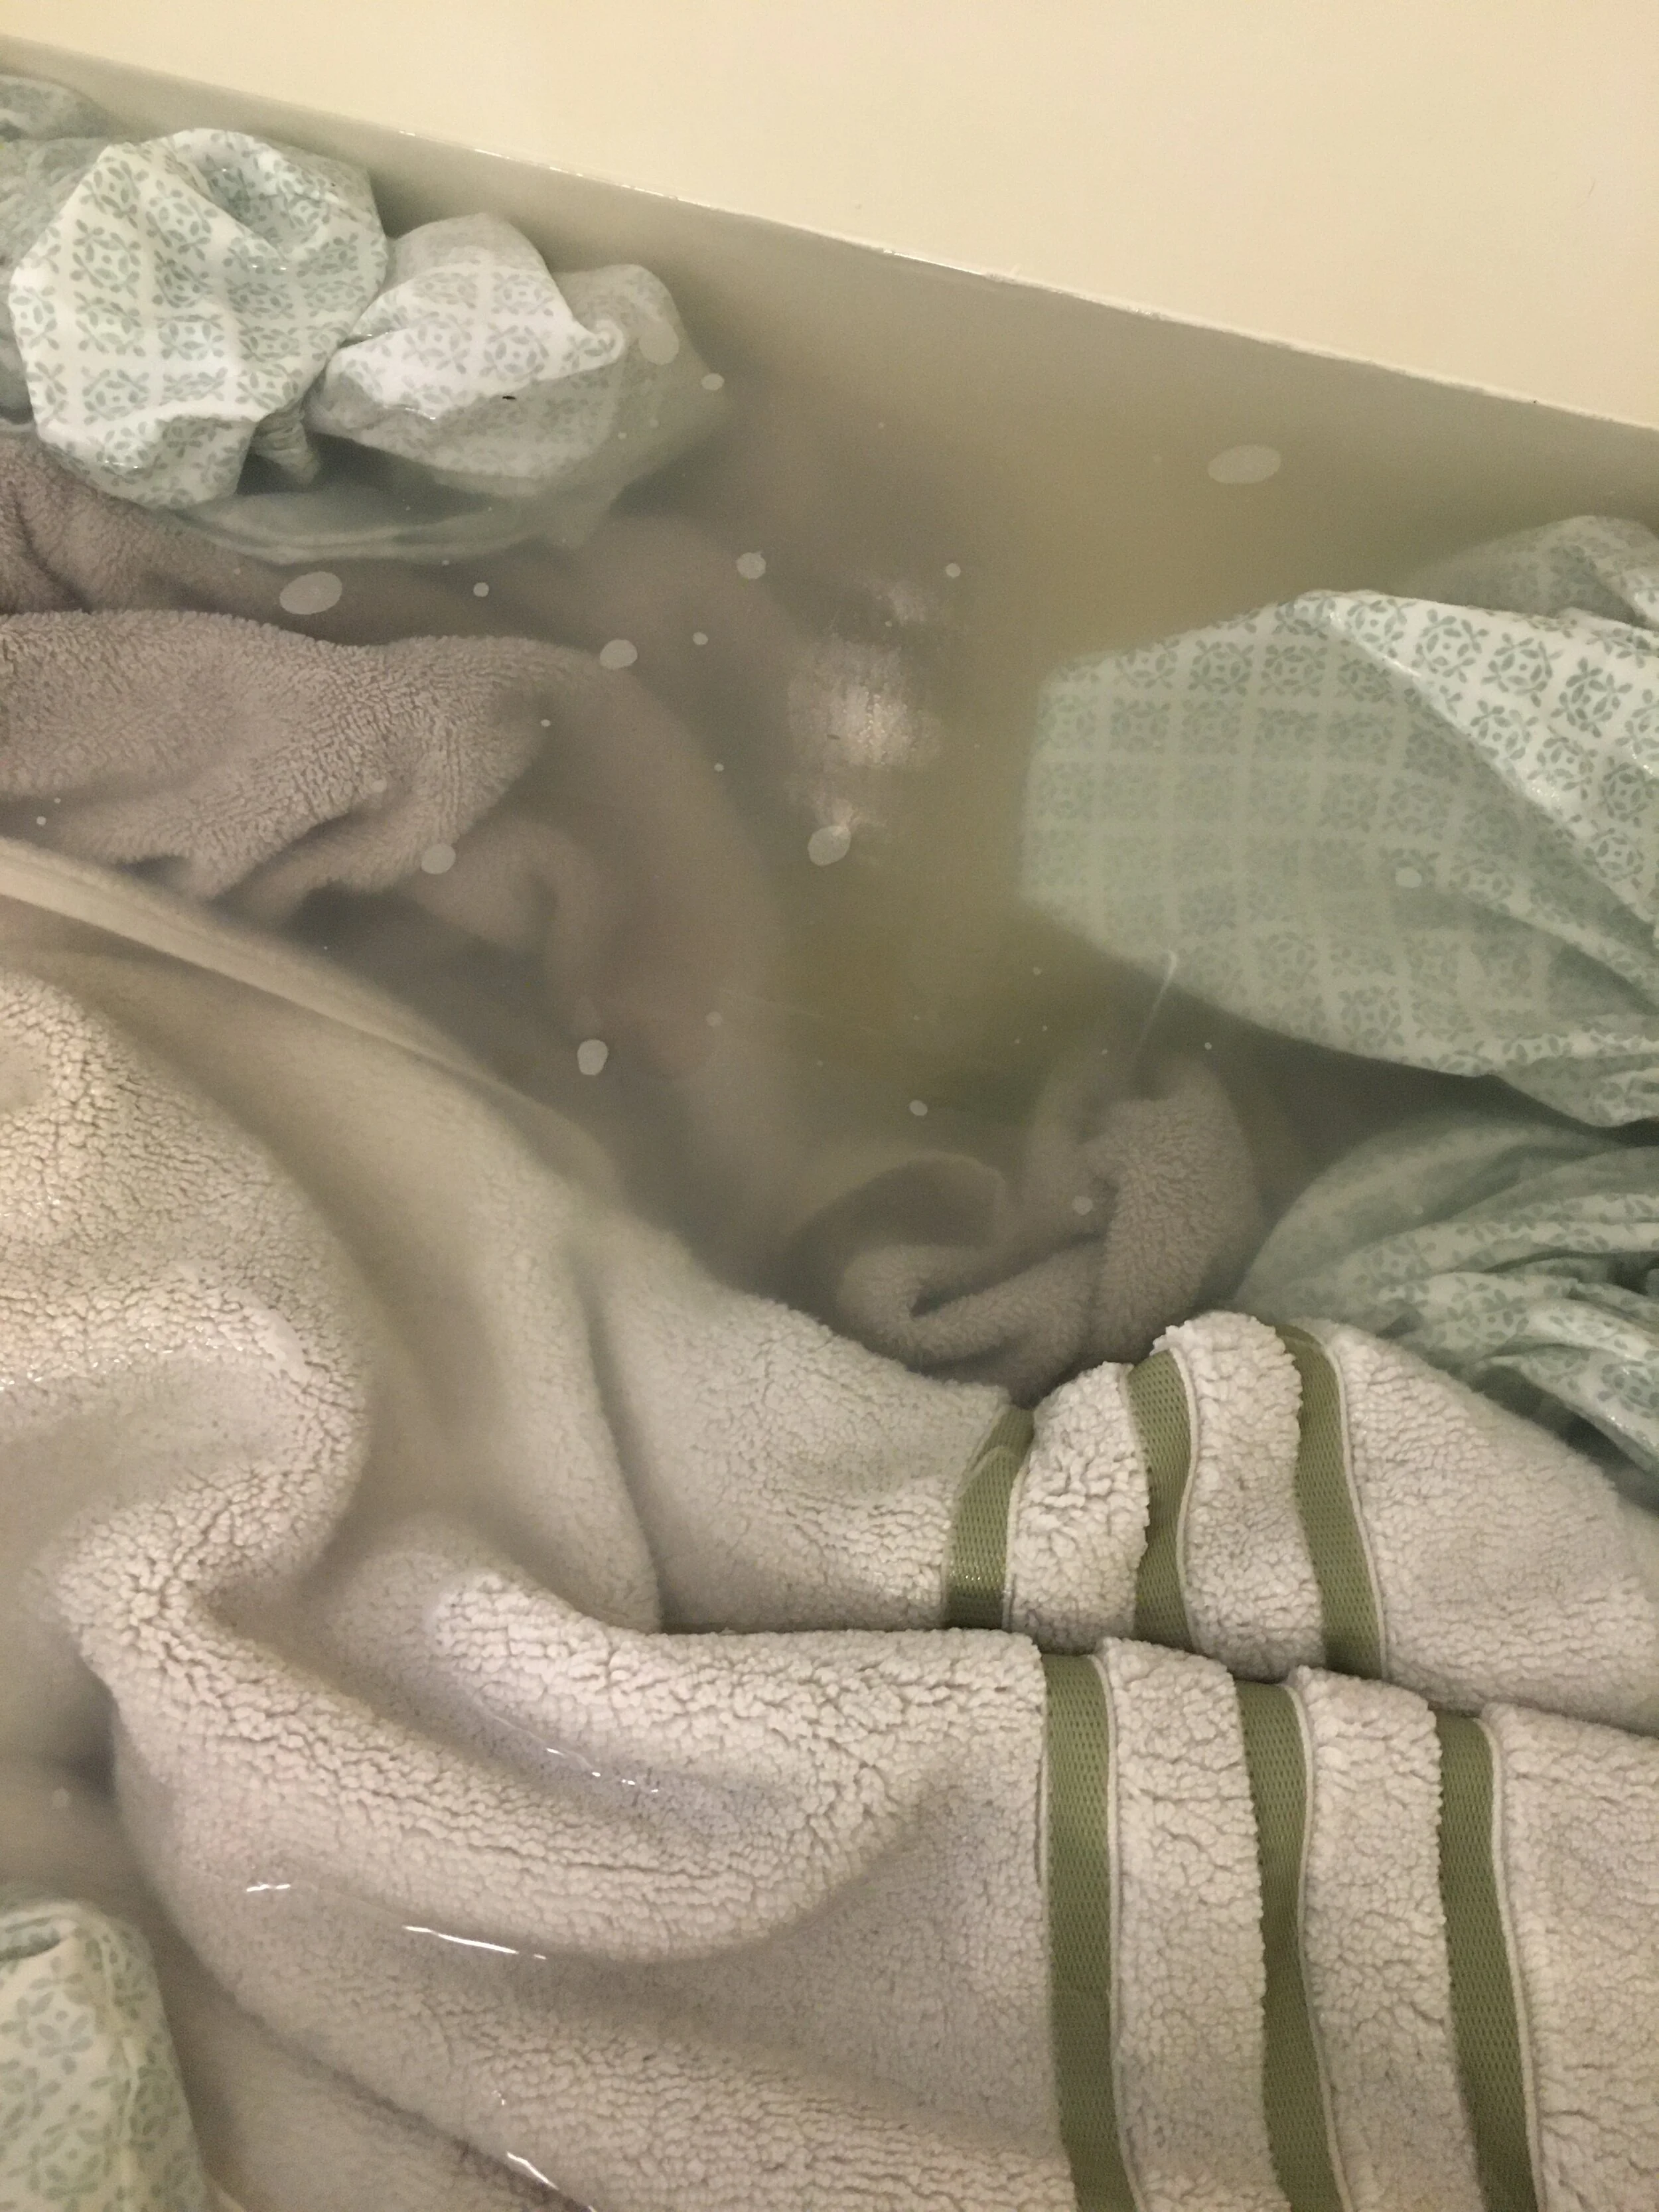
Always refer to individual mask makers/companies on the best way to care for each of your masks (hand wash only vs machine wash, line-dry vs dryer, etc.) But in general, all masks should be washed and allowed to thoroughly dry in between each use.
Since all of our masks are machine washable, we've found using a mesh lingerie laundry bag is perfect for keeping the masks from getting lost in the wash or caught on other items.
Quick Adjustment Tips
If you feel like your face mask is a little large or isn’t fitting as closely to your face as you would like, you can typically adjust it very easily by making a small knot in the ear loop elastics (as shown above) to make it smaller.
One mask accessory that we've found super helpful lately are
Mask Lanyards. We personally use them most often when we're out hiking or going for a long walk, that way the time we're out alone we can keep our masks down, however in the event we see someone coming up we can easily put them on if we need to pass others on the trail. We made a point to choose lanyards that have a breakaway safety feature, but use at your own discretion/risk.
Disclaimer: I am not giving medical advice. Make sure to always consult the CDC and local health officials for up-to-date recommendations on mask wearing, storage, and care. Cloth masks are not considered medical grade and should be washed in between each use… check with individual mask makers/companies on the best way to store/wash/care for your masks.
Vaccination Card Protector
Vaccinated? You may want to consider getting a Vaccination Card Protector for your vaccine card to help keep them protected and clean at home or while you're traveling. These are nice because you can remove your vaccine card to record updates/boosters if needed.
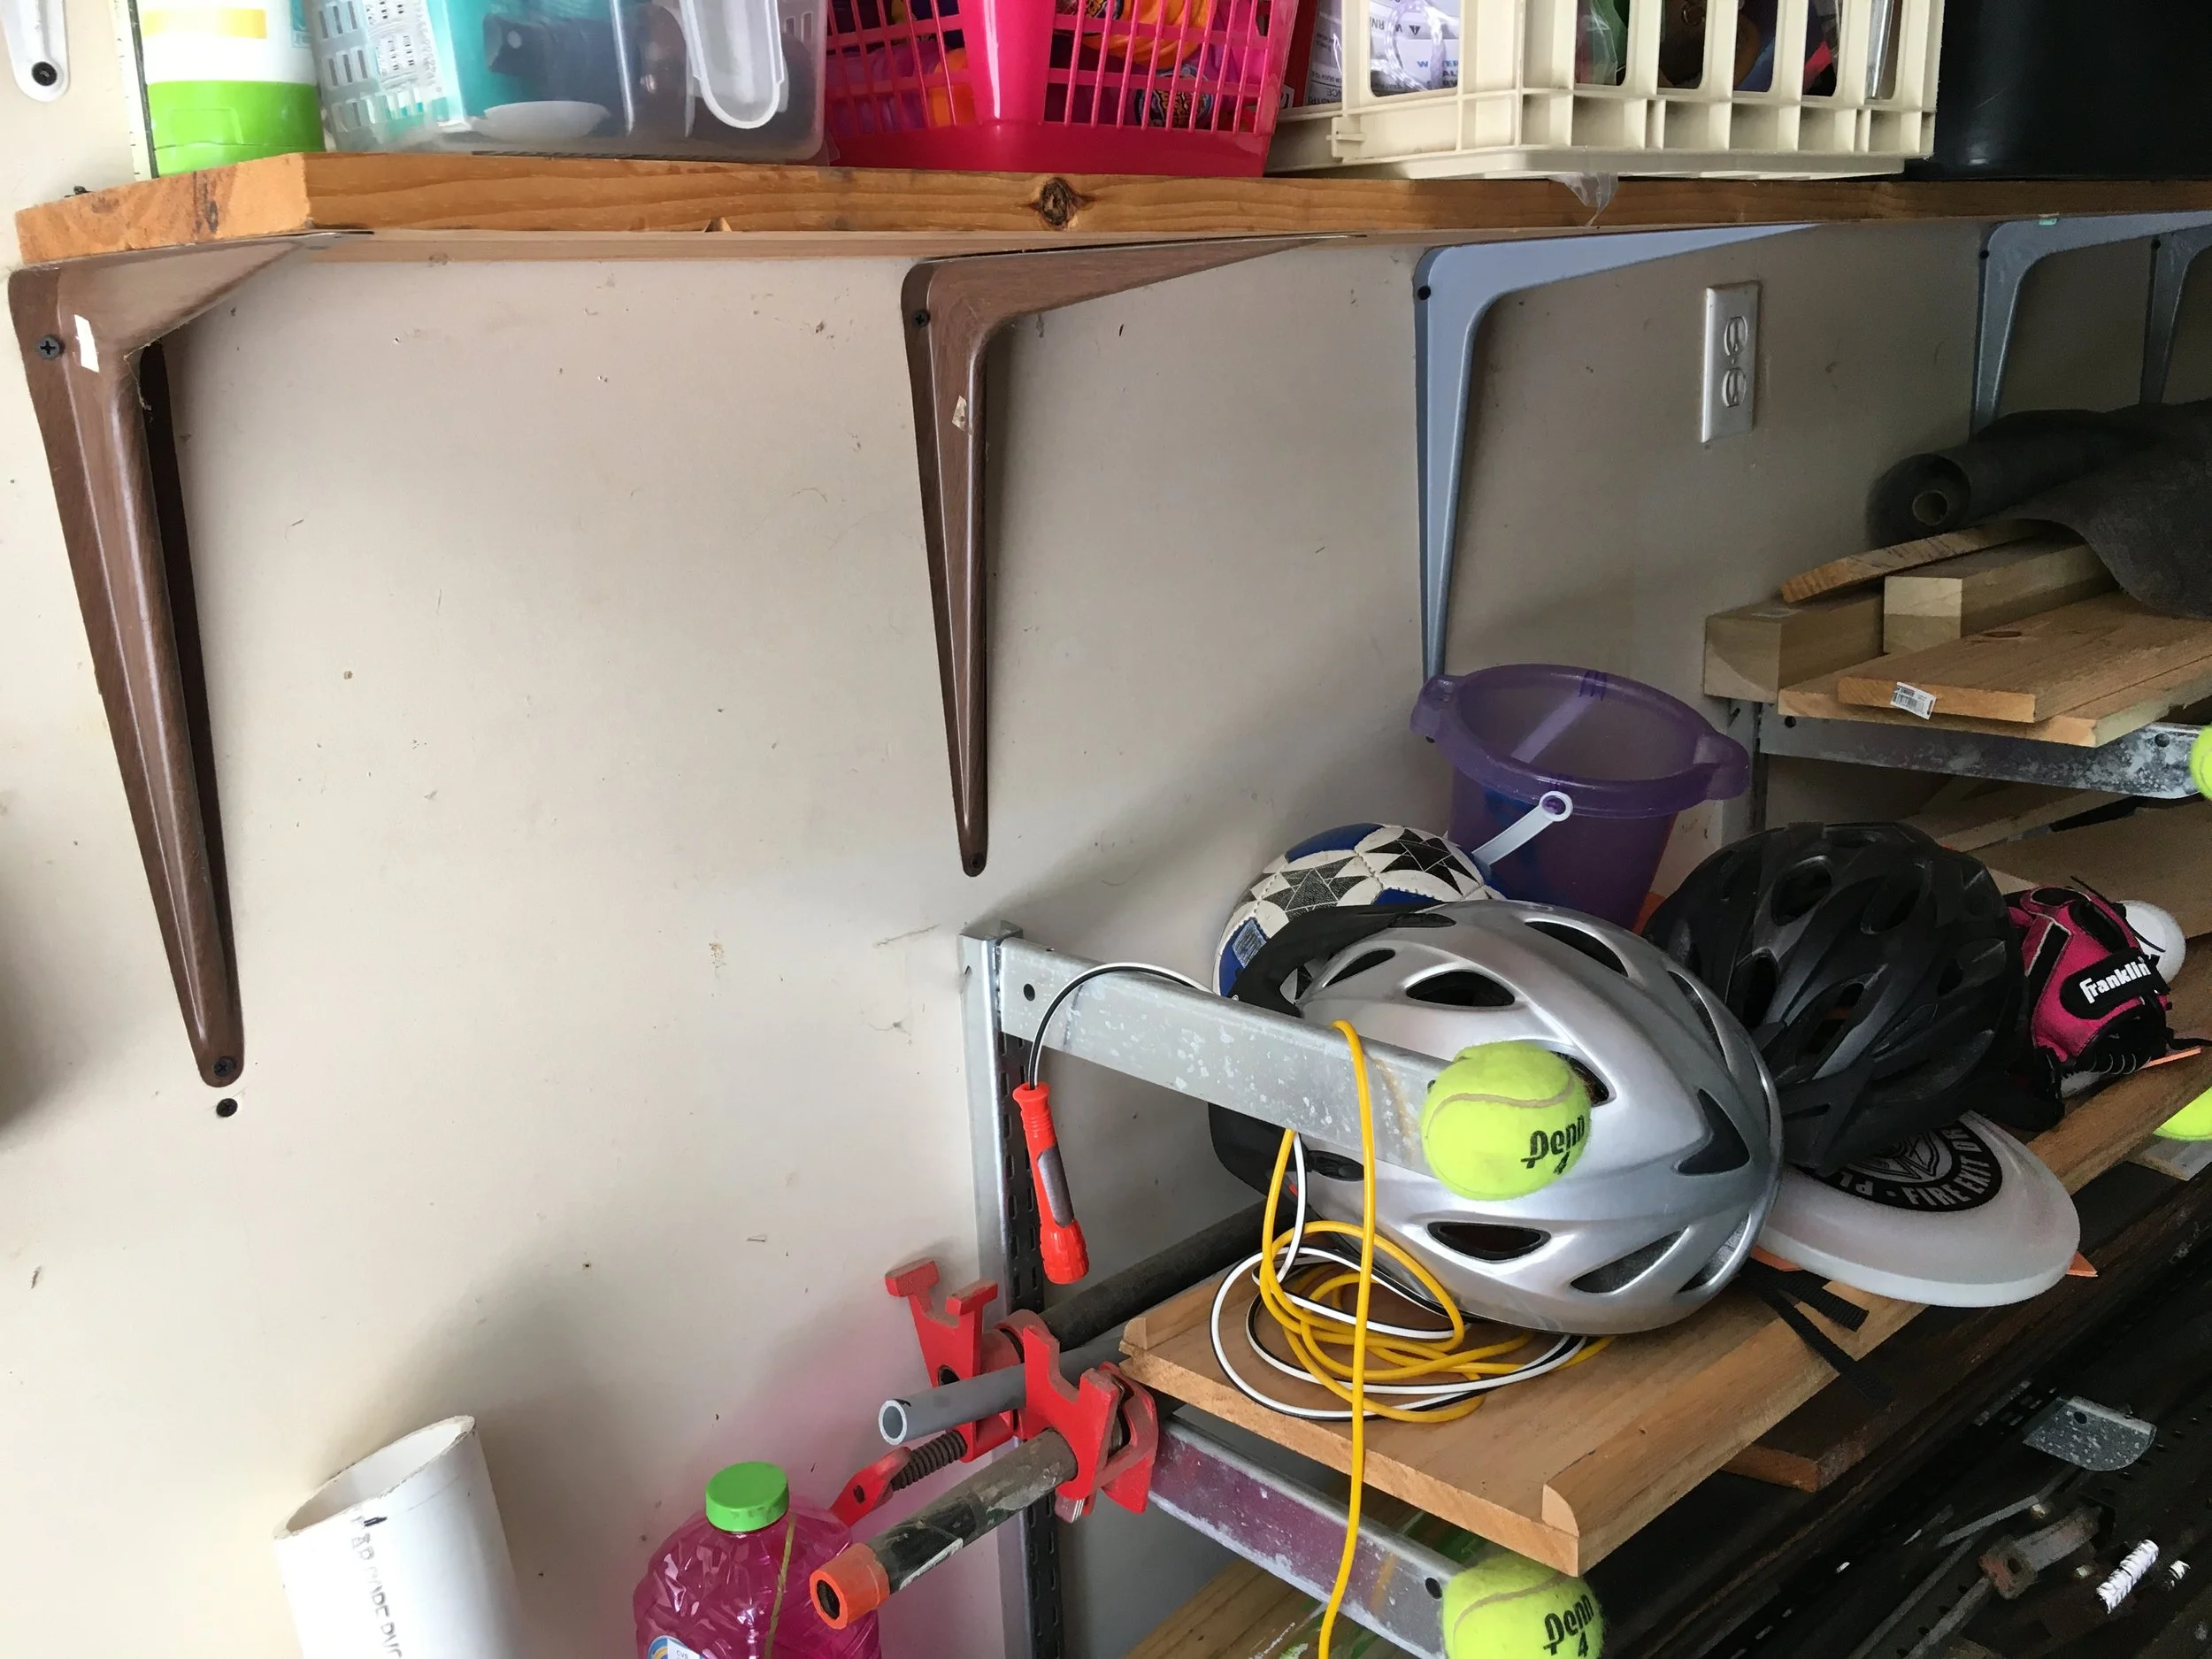
After getting sick of our family’s bike helmets constantly tumbling around the garage I thought it was high time we figure out a solution to keeping them corralled and within easy reach. The best part? It cost me nothing since I already had the hardware and scrap wood kicking around. | This post contains affiliate links |
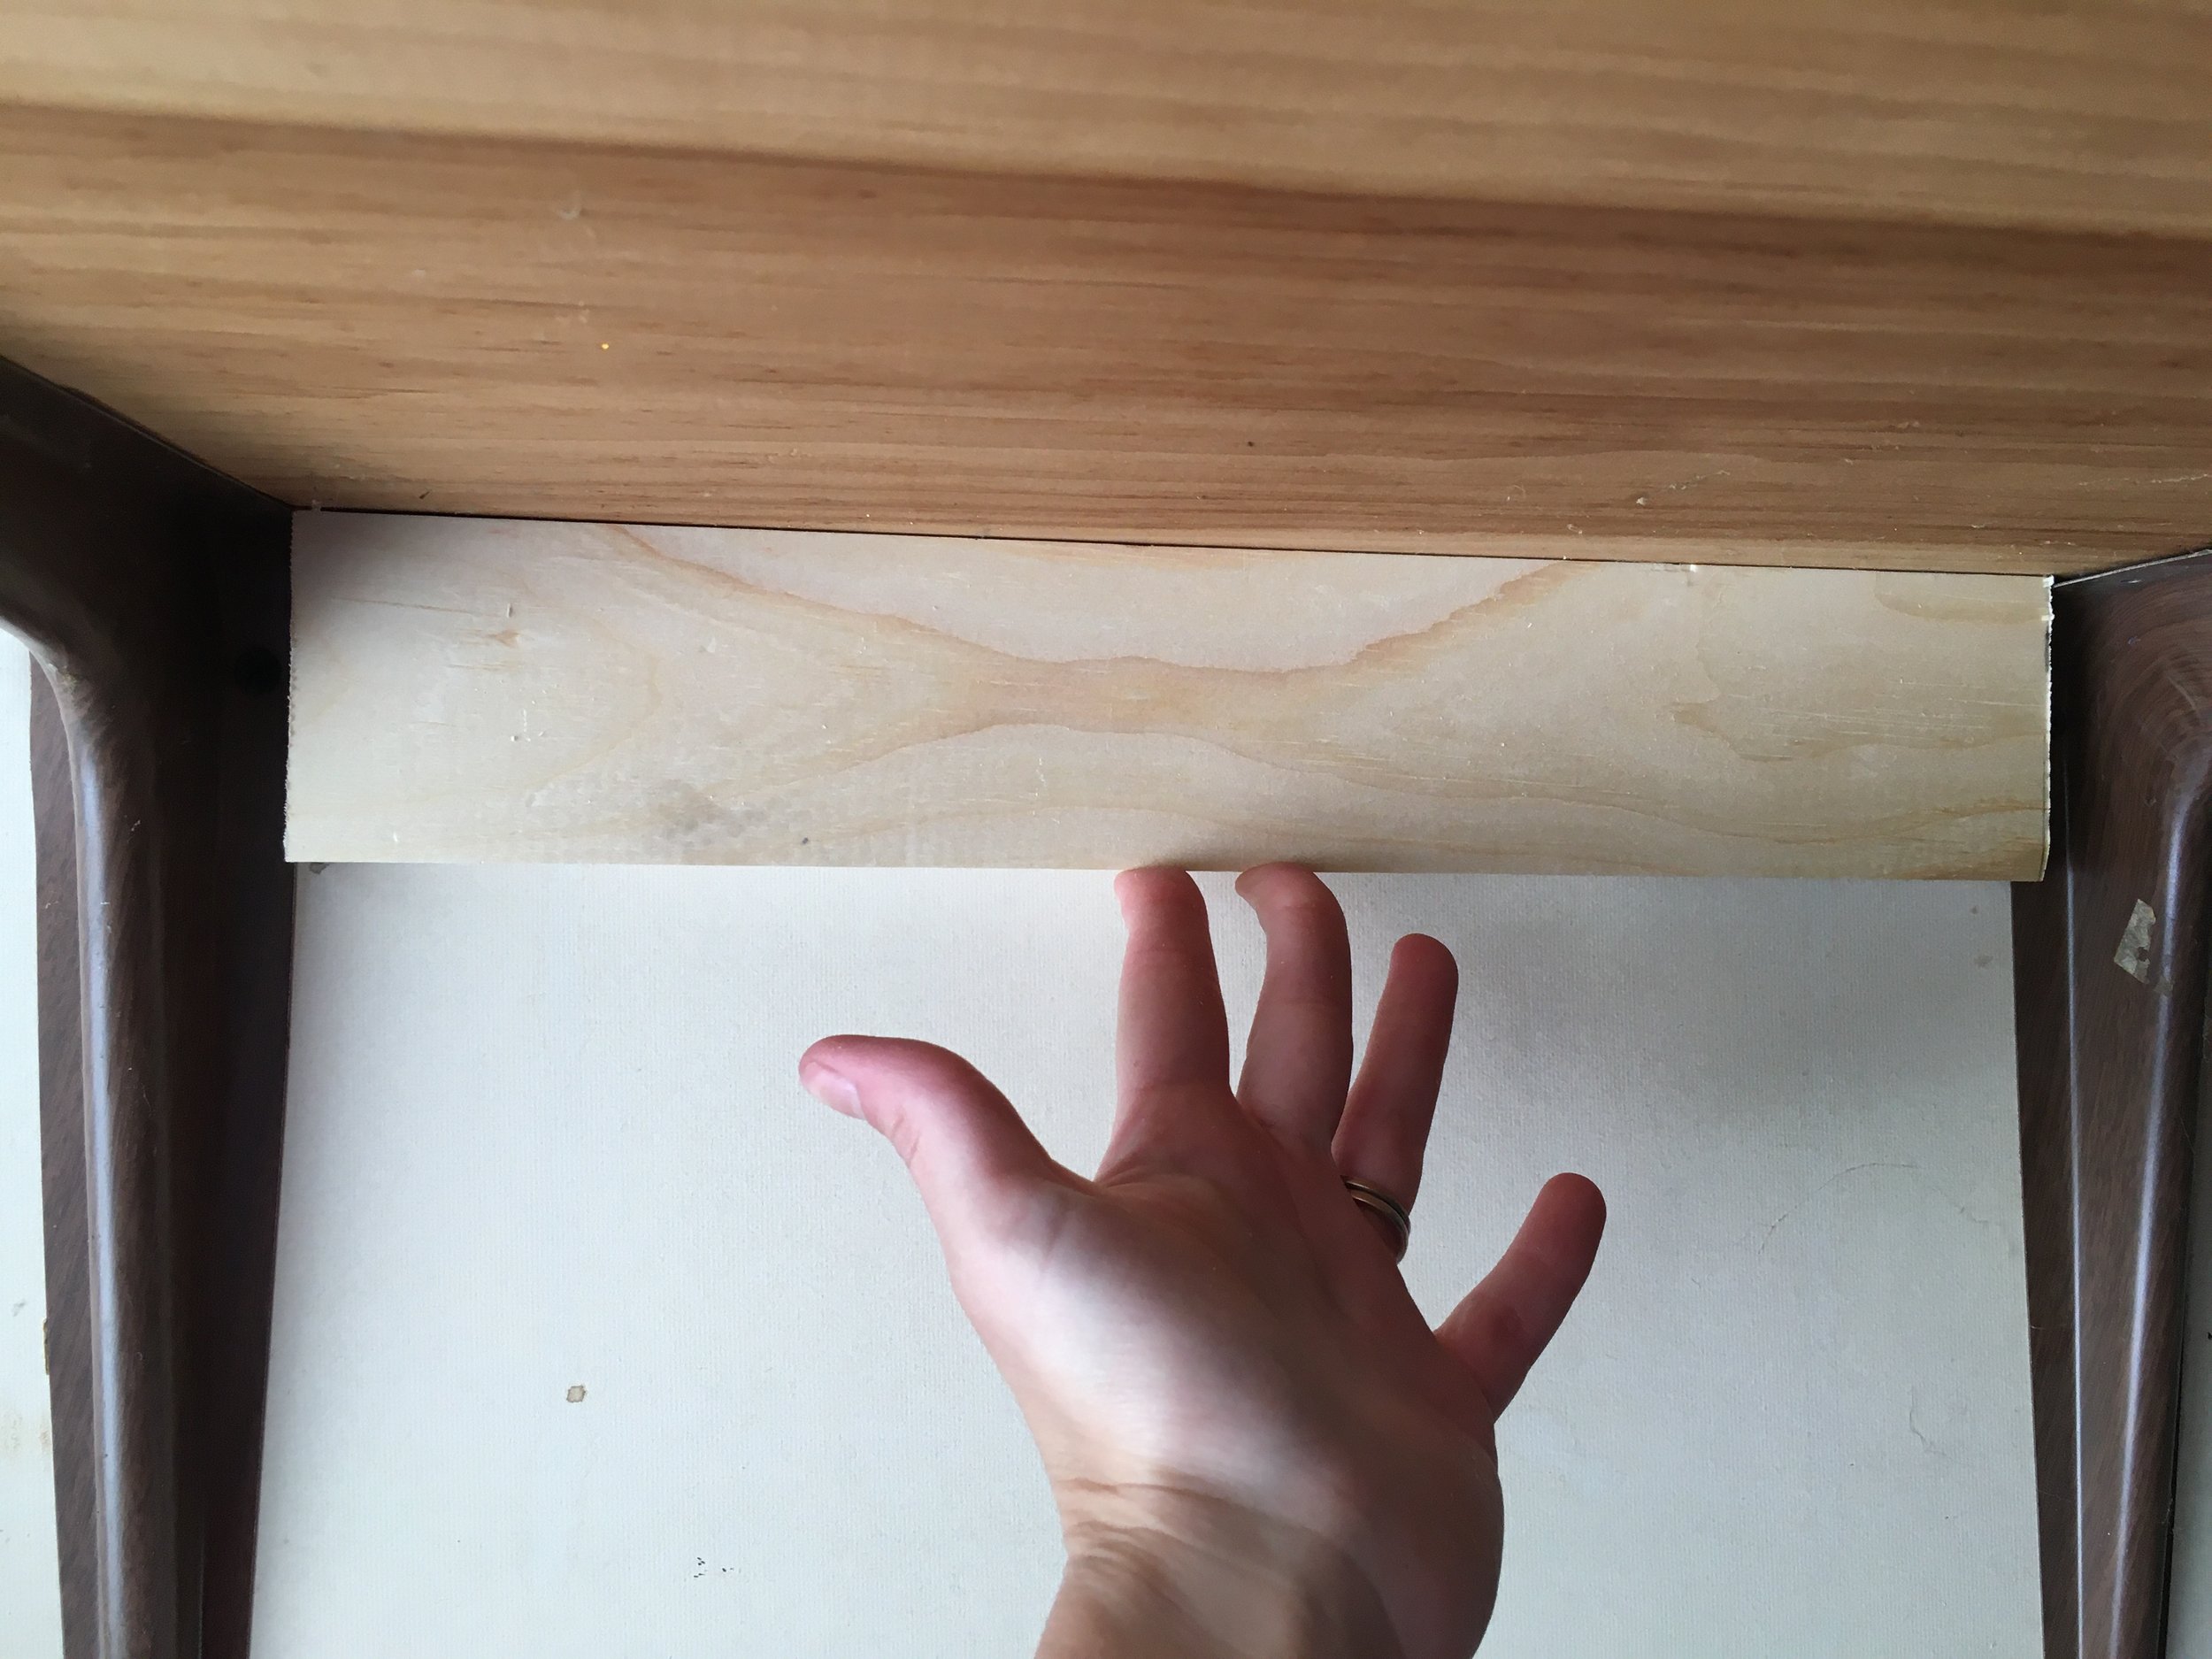
This is the before…. the helmets usually got strewn about on our lumber rack because the shelves were too high for the kids to reach and it was a convenient spot by the back door. I could have made a low coat hook type rack for the helmets to hang from, but since the shelves and the wood rack are in the way all the available studs were blocked/used and I didn’t have anything to anchor into. So - I had to get creative. I decided to cut down some 1x3 scrap wood and anchor them from the bottom of the shelves to act as the back piece to the rack.
After cutting down the scraps and pre-drilling through the top of the wooden shelves, I simply screwed the back boards right into shelf from the top down.
After that, it was a simple matter of screwing in small hooks from which to hang the helmets from. I had a bunch of these small coat hooks left over from previous projects and they were perfect for this job. (I love these coat hooks because they're cheap and come in a big pack - great for adding random hooks around the house for keys, accessories, etc.)
The helmet rack has been working wonderfully and is a great, practical addition to our garage!
With the Covid-19 Pandemic still persisting and school in our state cancelled for the rest of the school year (and maybe longer), average parents have been thrown into the role of becoming teachers too and most of us weren’t prepared at all. While I have a degree in Art Education, I went a different career route after graduation and my teaching/classroom management skills are now quite rusty. So I pulled from my own classroom and remote teaching experiences - as well as polling many teacher friends, homeschooling parents, and regular now-remote-teaching-parents for ideas on what’s working for them and what supplies have been lifesavers as they navigate this new remote learning world. | This post contains affiliate links |
Give Yourself Grace
This is probably the biggest takeaway from everyone I’ve talked to…. remote learning during a Pandemic is definitely uncharted territory and everyone is trying to figure things out - readjusting roles, schedules, expectations, everything. Most of us weren’t cut out to be teachers, and it can be incredibly hard to motivate and focus your own kids as well as their teachers are able to. Ultimately, it’s a matter of doing the best that you can in the circumstance you’re currently in… and don’t beat yourself up if everything isn’t perfect.
Communicate with Teachers and Administrators
If you have a lot going on at home (working from home yourself, several kids schedules to juggle, other personal hurdles to deal with, etc) or if the teacher’s expectations for remote learning are just unrealistic, definitely reach out to them to voice your concerns and come up with a plan. Maybe deadlines can be extended, or the workload can be reduced to the essential assignments. Maybe the big group Zoom meetings are too overwhelming and frustrating for your young child and they need a one-on-one meeting instead. Maybe the schedule the teacher came up with won’t work for your family with your own work and other school schedules. The point is - if you or your kids are feeling overwhelmed and stressed about about the whole remote learning process, it’s worth discussing with their teachers and administrators so that you can come up with something that works for everyone and still meets all the learning requirements.
Come up With a Schedule that Works for Your Family
This will take some trial-and-error. And if you have older students with a heavier workload, their home school day might just look very similar to a regular school day schedule-wise and time-wise - especially if they can work pretty independently. But for us with younger kids, mom or dad needs to be there to walk them through each assignment, activity, and online meeting.
If you’re also working from home or juggling other kids schedules too this can be particularly challenging and exhausting... if you need something to buy periods of occupation from your kids (maybe so you can do an uninterupted confrence call, or you can concentrate helping one child with an assignment while keeping the other kids busy), consider giving them something they will enjoy doing and keep them safely occupied (but always under some parent supervision of course). Maybe it's educational games on the Kindle, or perhaps low-mess craft projects, or an hour of TV time, or reading a book series on their own that they enjoy, etc. Or maybe you find school work or office work done in fragments at unusual times is what works best for your family.
For us personally with younger kids, we’ve fallen into a good rhythm and schedule over the last two months of remote learning. For our family we’ve found it best to buckle down in the mornings and get the work done first thing when attention spans are at their best and everyone is well rested. So our daughter works through her assignments one-by-one every morning with breaks for snack and classroom meetings. Our goal is to have all her work completed for the day by lunchtime, and while some days that doesn’t happen and things need to be finished after lunch, most of the time she’s done by noon which leaves the afternoons for “free choice fun.” Typically, spending the whole afternoon outside if the weather is nice or inside playing legos or watching a movie if it’s raining (and while the kids are playing I can chip away at whatever work I need to get done too). Our days have consistent expectations and a nice rhythm to them now which helps a lot.
Set Snack and Meal Times
As anyone with kids home 24/7 can tell you, they can and WILL eat you out of house and home if you let them. By having set snack and mealtimes it will help your pantry and wallet by not blowing through all your quarantine snacks in 2 days flat. I’ve seen some parents even pack their kids lunch box every morning, just like they would for school, so the kids have a finite amount of snacks and lunch food for the day.
Designate a School Space and Stay Organized
Having a designated “school space” that has all the supplies your kids will need to complete their assignments at their fingertips can be crucial to success. Ideally having a desk or separate workspace would be ideal, but any designated space can work. For us, we set up one end of our kitchen island - it has a laptop where our daughter completes most of her assignments online and a small basket where we store paper, workbooks, flashcards, and a few ziplock bags containing different supplies that she uses often (markers, counting chips, etc). By having everything ready to go each day, there's no excuse when it's time to get to work.
I polled many friends, both teachers and regular parents who are now remote teaching, and compiled a list of things they have needed or found to be extremely helpful during this time. Younger kids definitely tend to need more learning aides so the list has many items geared to younger students but there are also some items that can be useful for older grade levels listed too. Click the button below to browse our picks, which I will be periodically adding to as I get more suggestions:
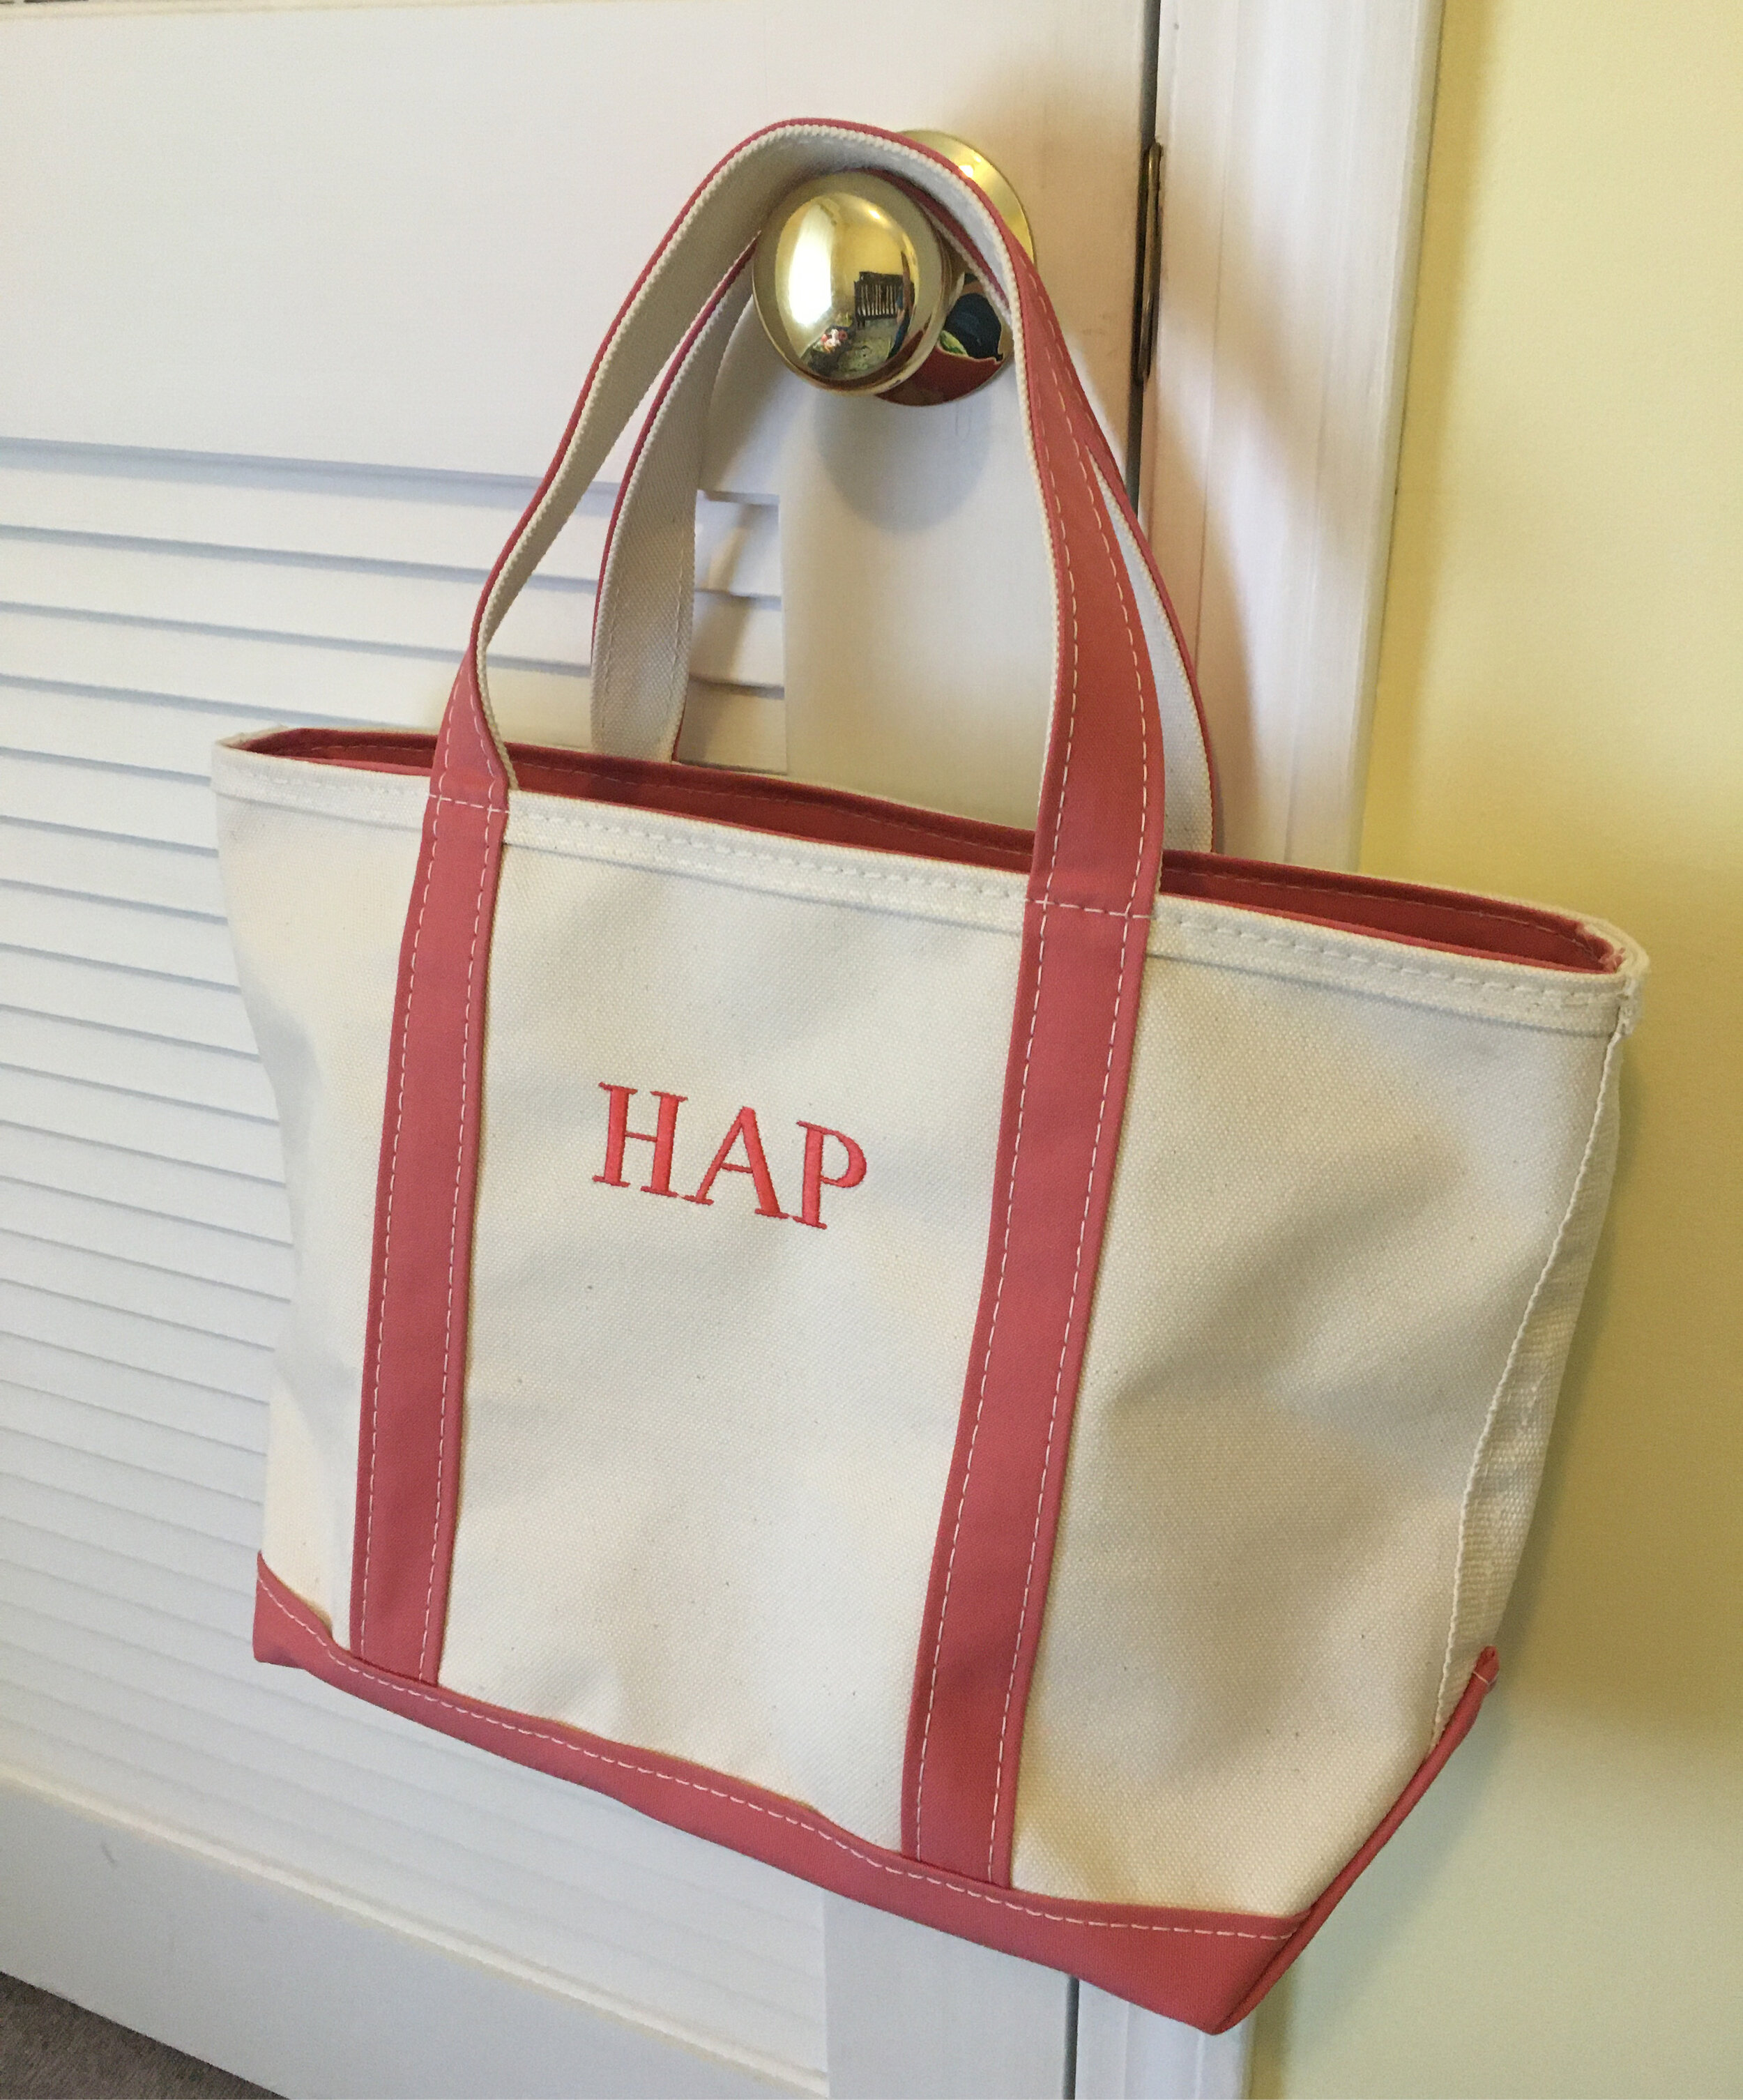
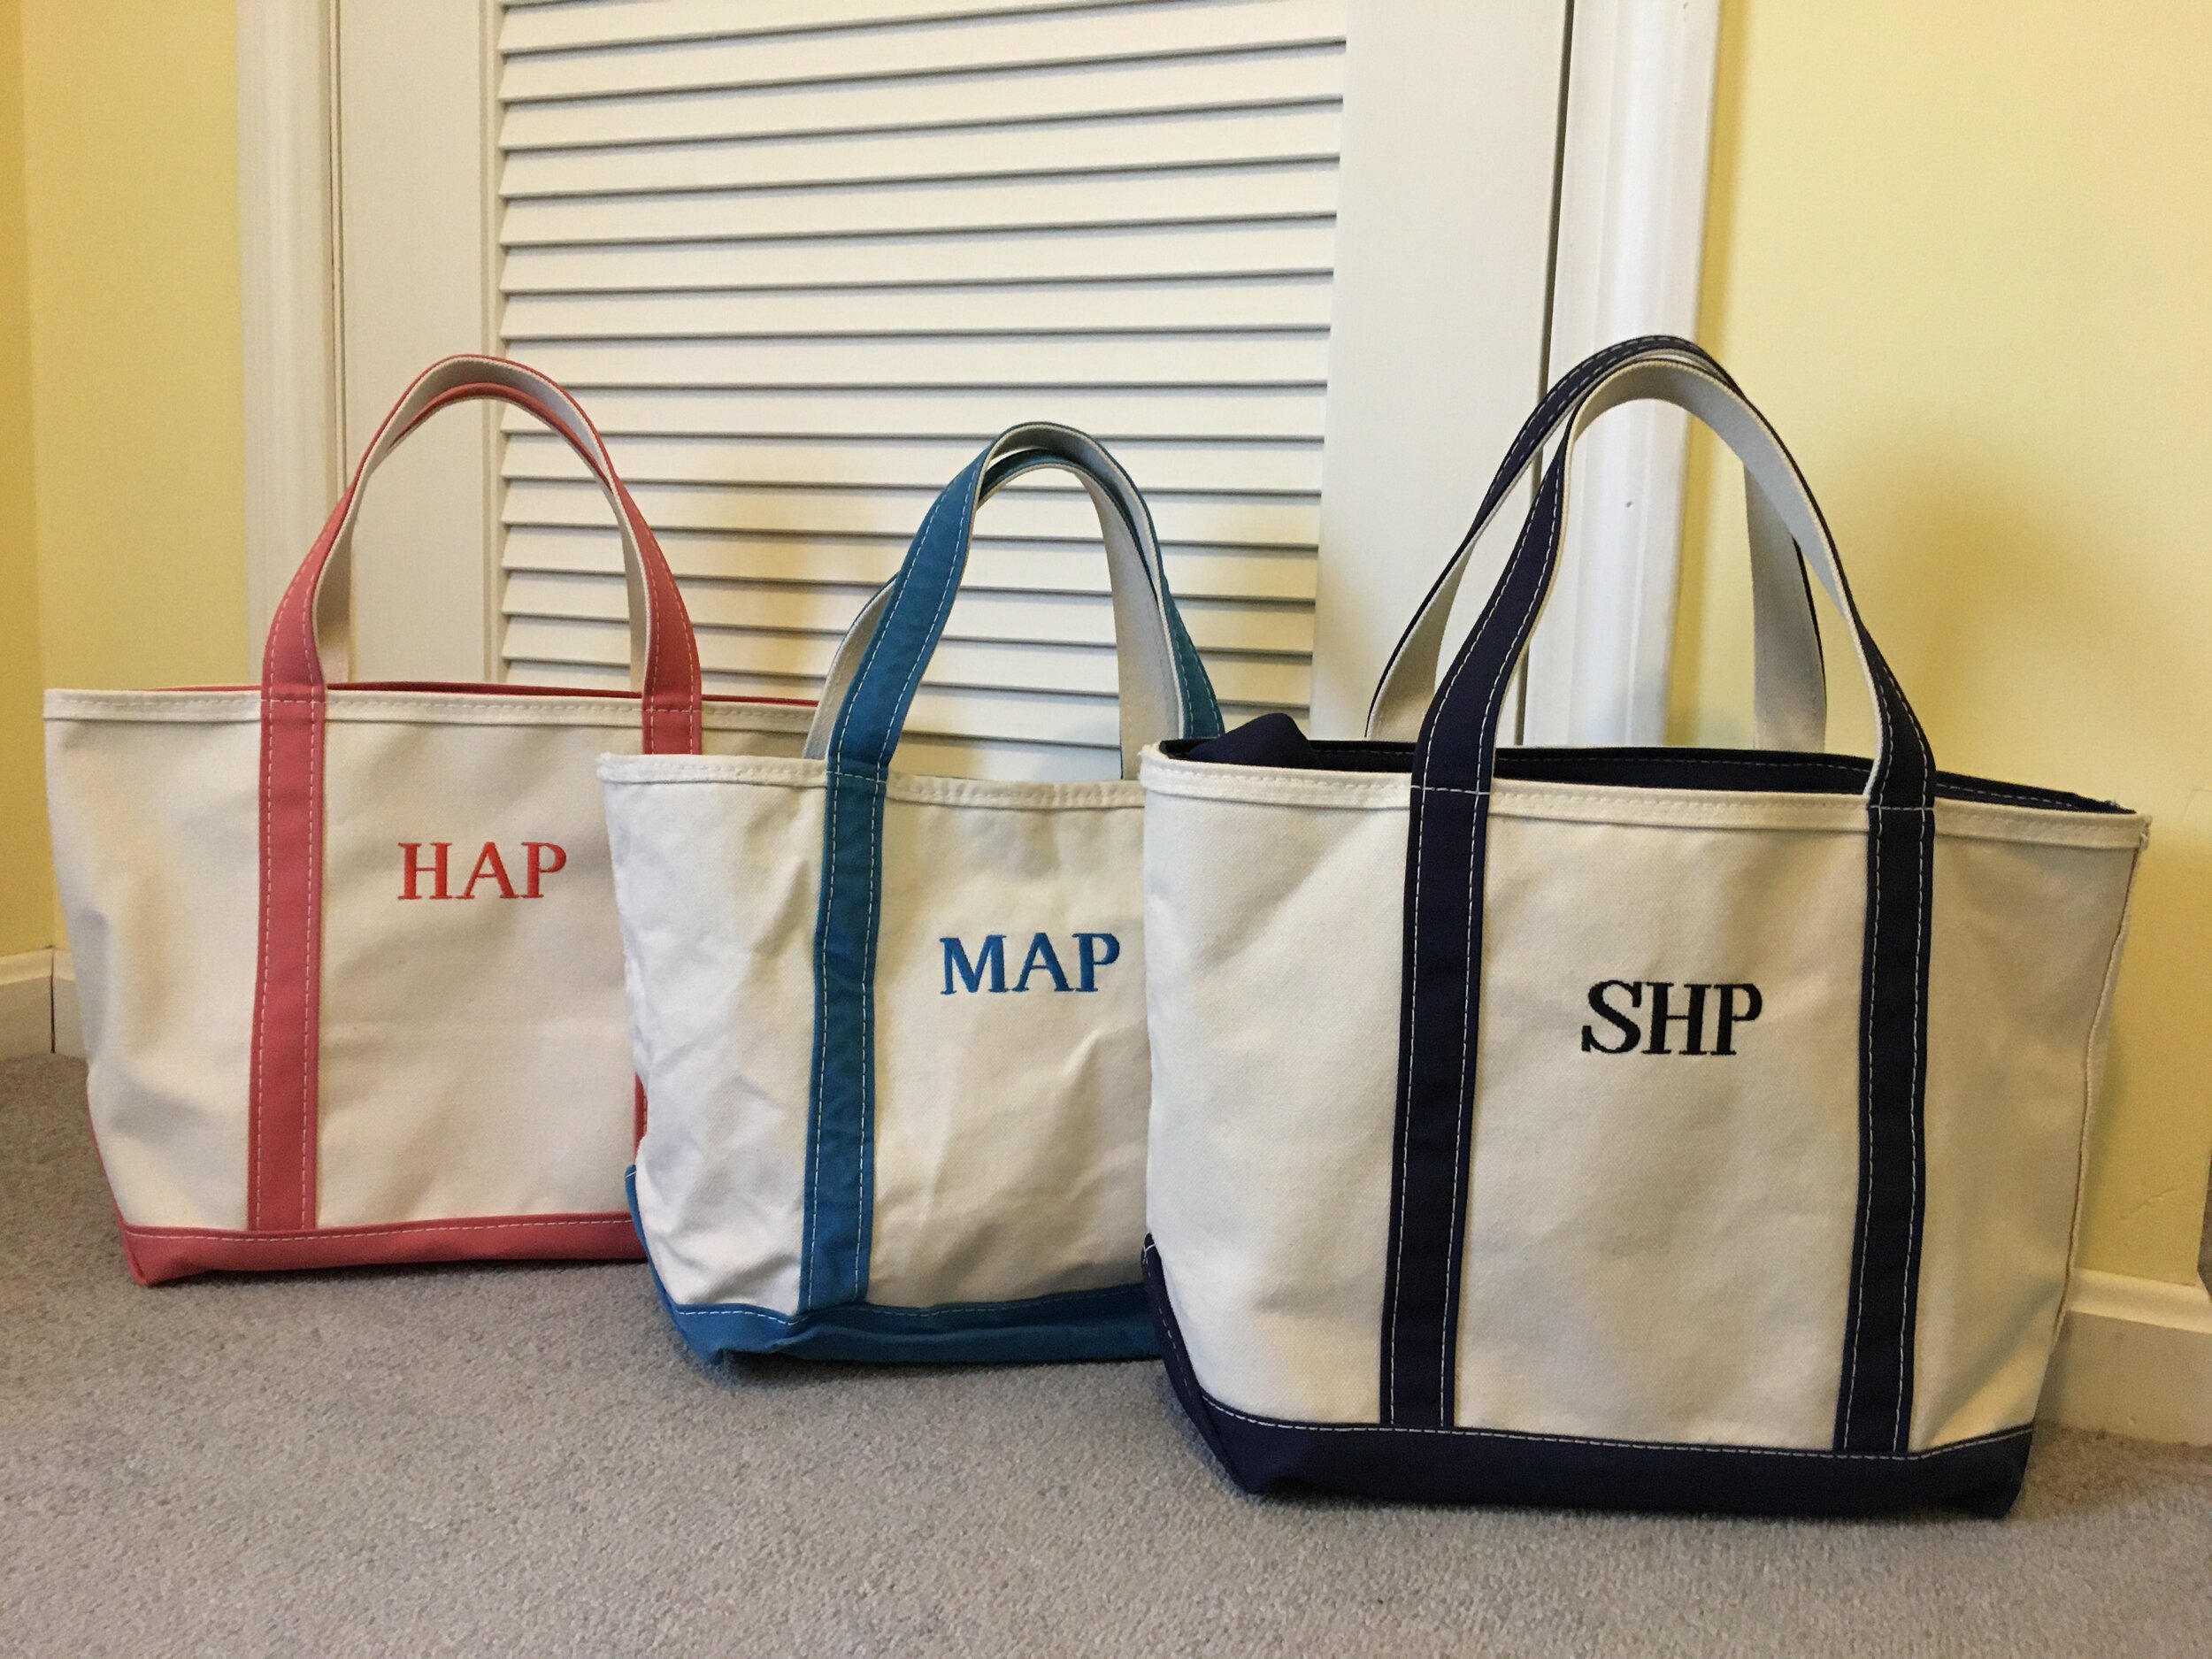
Because someday the kids will go back to school… (Right..? Right! fingers crossed) I ordered our youngest her own pink monogrammed L.L. Bean Boat and Tote to match Mama and big sis for when she hopefully starts school in the Fall. I love that each will have her own tote for school to stay organized and carry snow gear and sports things, and that these bags are something that will grow with them and be used for many years to come.
A bag for each of us and each of us has our own color to keep us organized. Our oldest’s bag has been through the wash many times and is a bit softer and more broken in :) These bags get better with use!
L.L. Bean Fashion
| This particular post is not sponsored by L.L. Bean but contains affiliate links and my personal opinions |
It seems kind of weird and petty to write about fun DIY projects during a Pandemic, but maybe fun projects to work on at home is just what we need right now :) I did this project about two months ago when I was looking for a nice way to display our oldest’s growing collection of award ribbons and medals but couldn’t find a display setup that I liked or was remotely affordable. The whole project was super easy and done start-to-finish within two days. Here’s hoping for things to go back to normal someday soon so she can continue to add to her award collection. | This post contains affiliate links |
Materials:
lumber (I used a 1x8" board for the shelf top and 1x6" board for the back)
two decorative shelf brackets (or two pieces of wood cut at 45 degree angle)
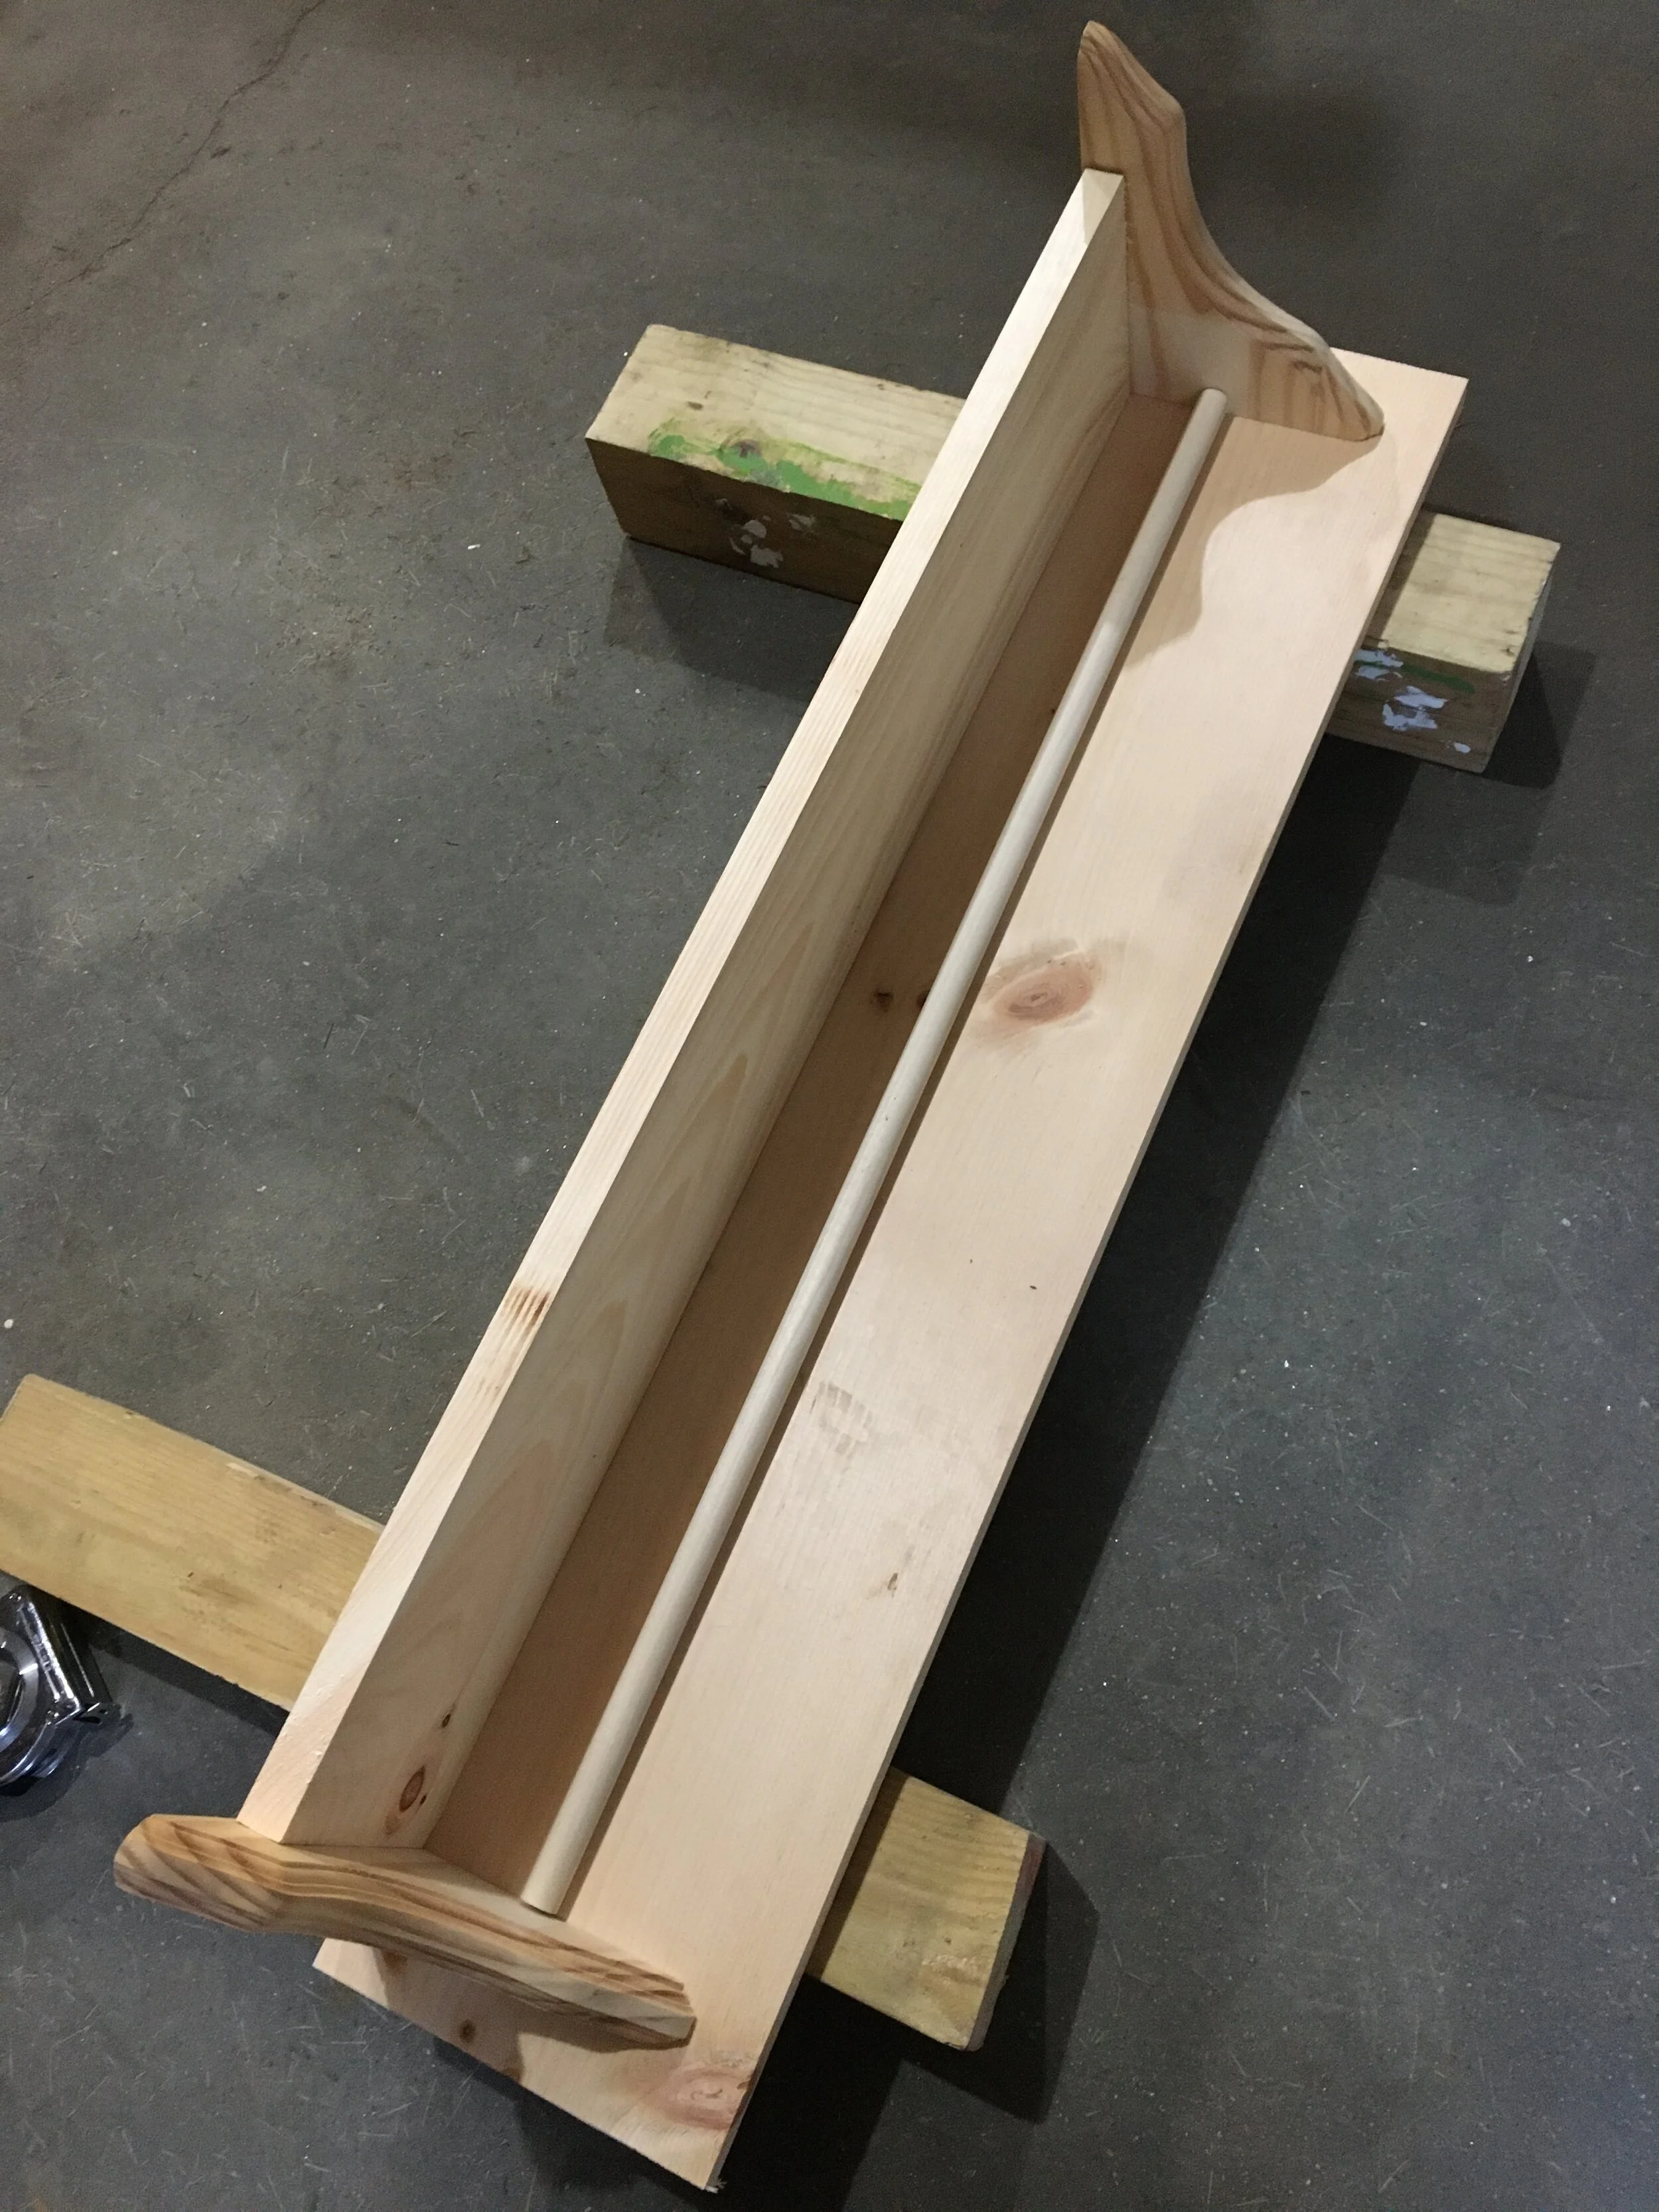
First decide how long you want the overall shelf to be (in our case I decided on making it 3ft wide). Then cut your shelf top to that length.
(Nothing is screwed in yet here… just laying everything out to make sure it will fit like I want it to.)
Next decide how wide you want the shelf back to be - remember that the self back plus the brackets should fall within your overall shelf top length. Ultimately how long you cut the shelf back is your preference though. But visually I think that the shelf back and the brackets look best if they fall within about 2 inches of the shelf top on each side.
(Side note: If you have a router you can cut a dovetail channel along the back of the shelf back now to make for easier hanging… I do not have one of those handy so I skipped this step and will hang our shelf another way.)
Once you have everything laid out, cut your dowel to about 1/8” less than your shelf back length so it will fit comfortably within that space.
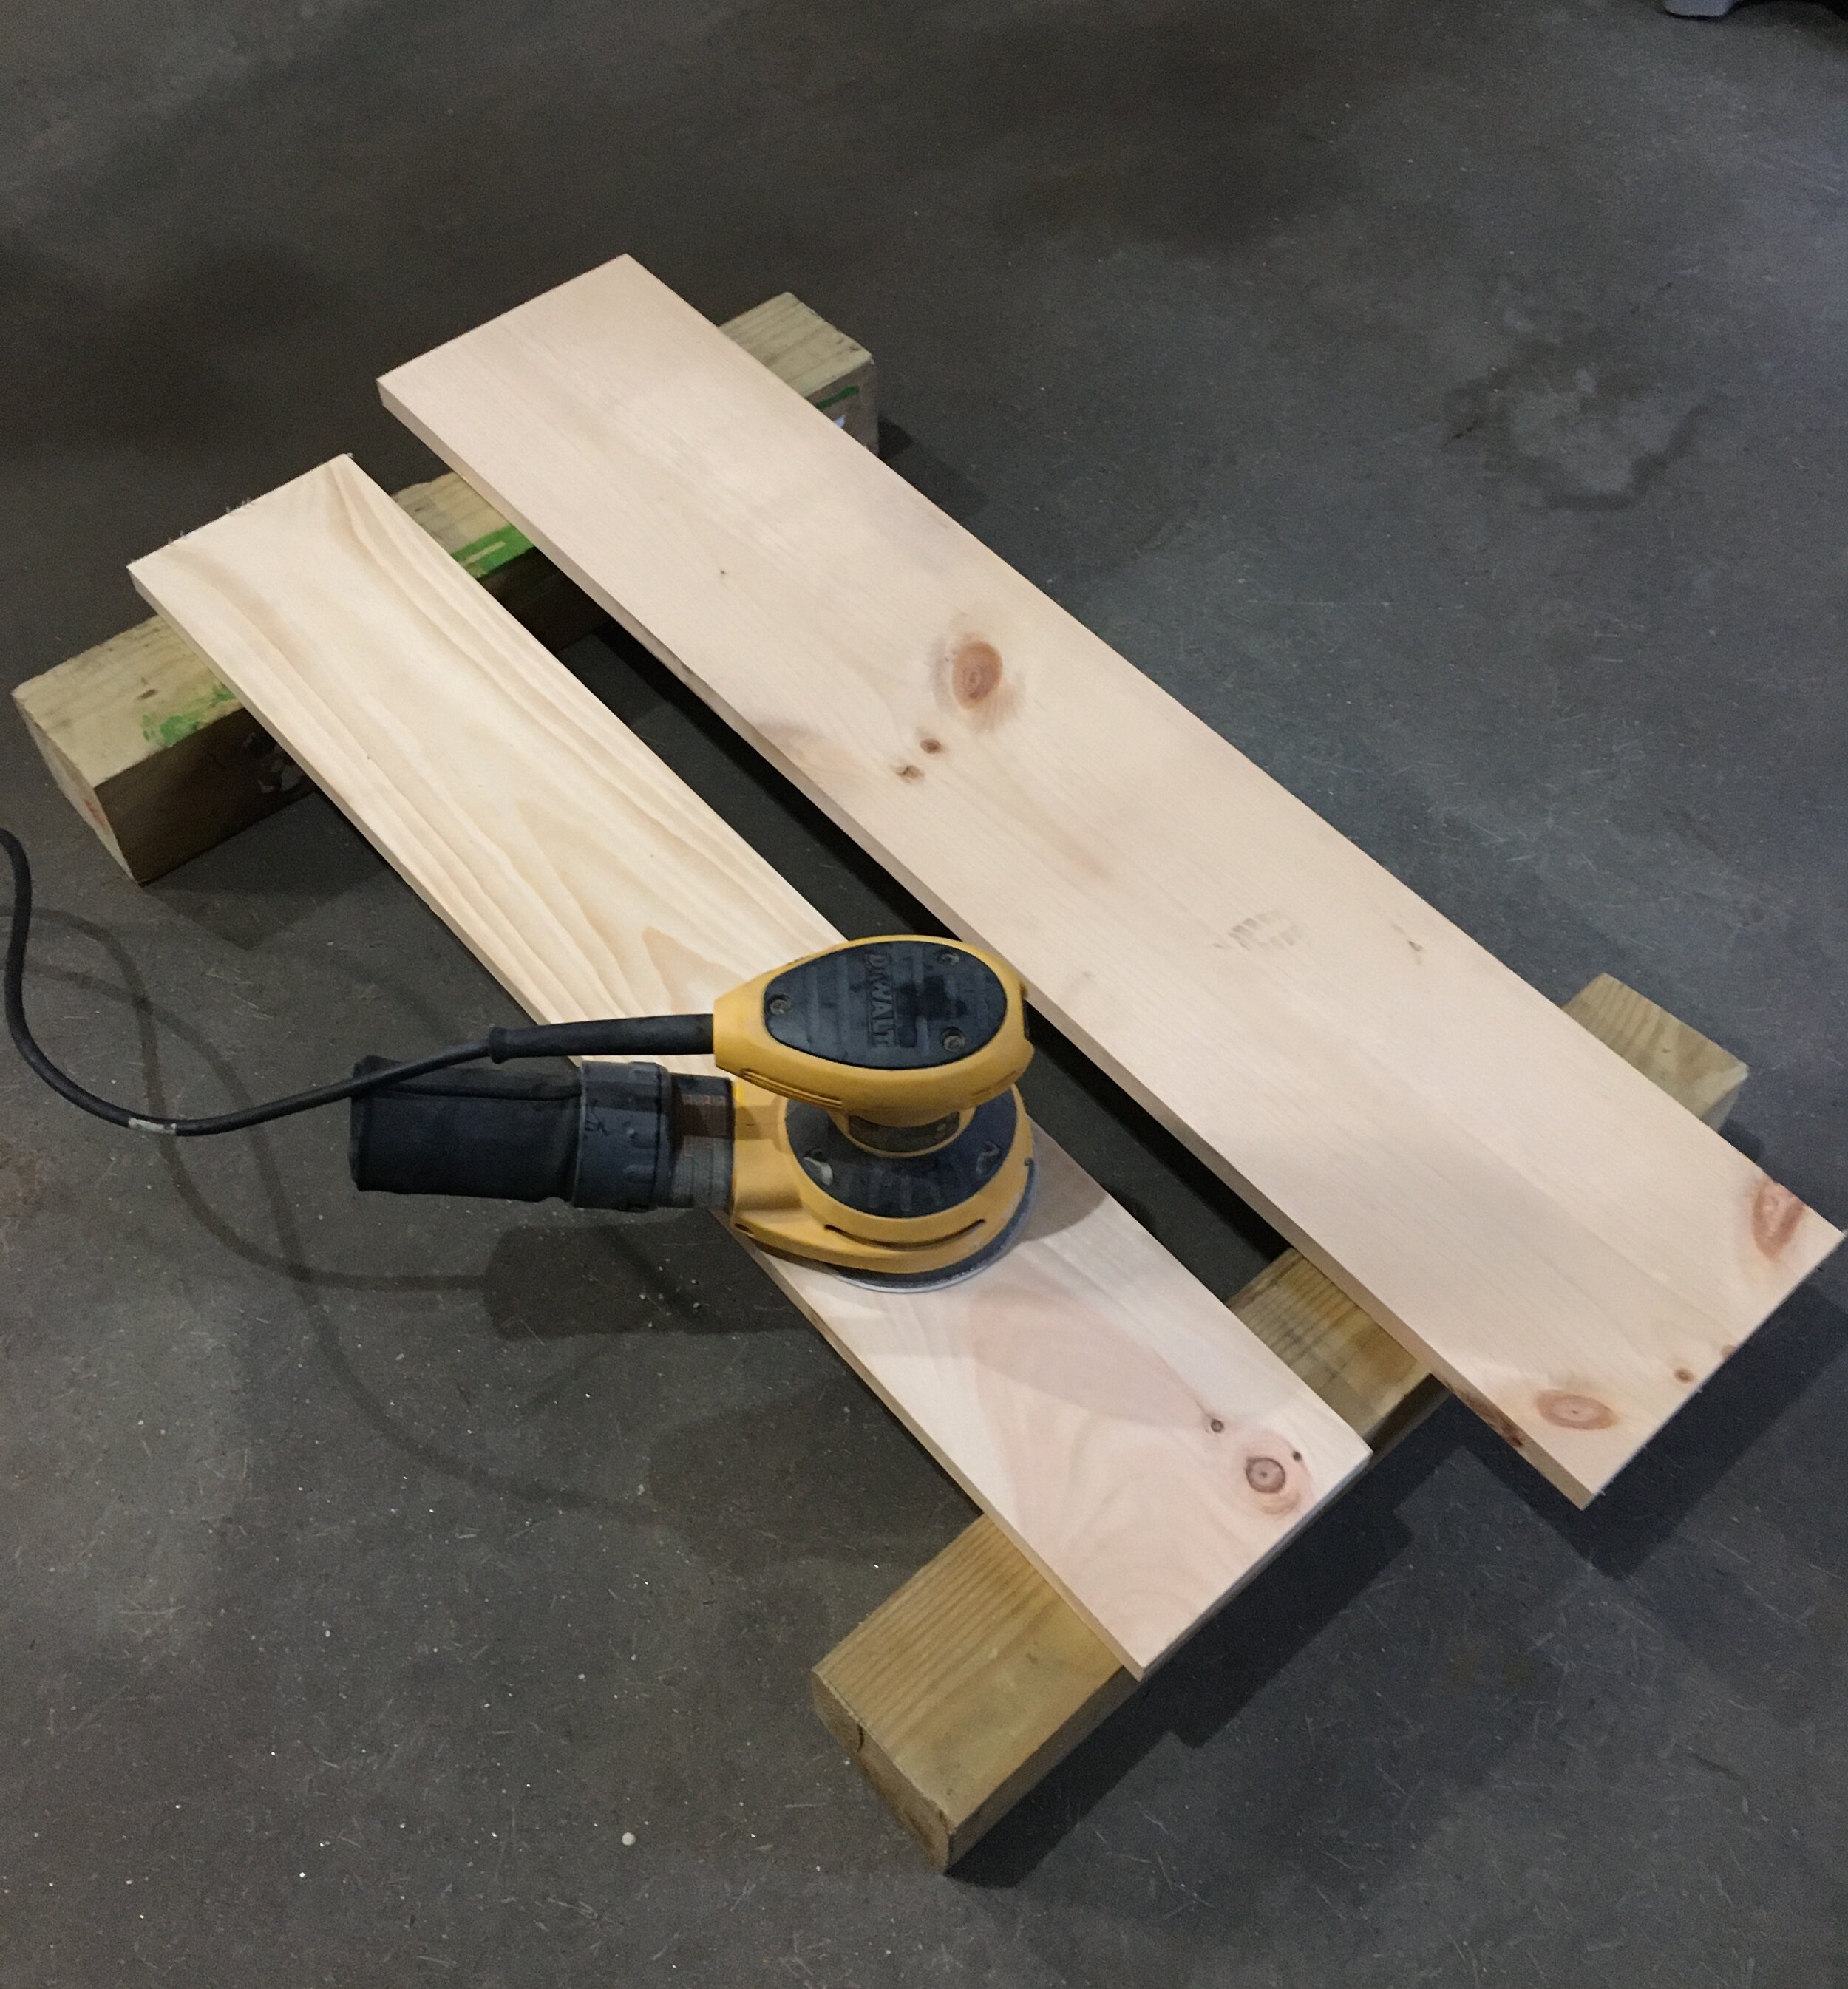
After everything is cut, I recommend sanding everything first before you assemble. I love using our orbital sander - it makes for quick work and does a nice job.
Next start assembling. Screw the shelf supports to the backing first, making sure everything is lined up and flush.
Next carefully center the shelf top, making sure it’s flush with the back and screw in.
Now for the fun part - paint! I did one coat of primer and then three coats of semi-gloss white paint, though you could choose any color you wish. I like semi-gloss paint since it has a slight sheen to it and is easier to dust and keep clean.
For hanging - first I measured this wall side-to-side to figure out where the shelf should fall within that space to be centered. Then I marked the studs with a stud finder.
To be honest I usually use two different kinds of stud finders when I have to hang something - I use a magnetic stud finder first to identify exactly where the stud is and then a digital one to find the edges of the stud. I’ve found that sometimes the digital ones can be finicky so it’s nice to know where the studs are first rather than get a false stud reading when it could be something else (a pipe, a thick area of plaster on the wall, etc).
Then using a level to make sure the shelf was level, I screwed directly into the wall studs through the shelf back making sure to place the screws where they would be hidden by the dowel once I installed it.
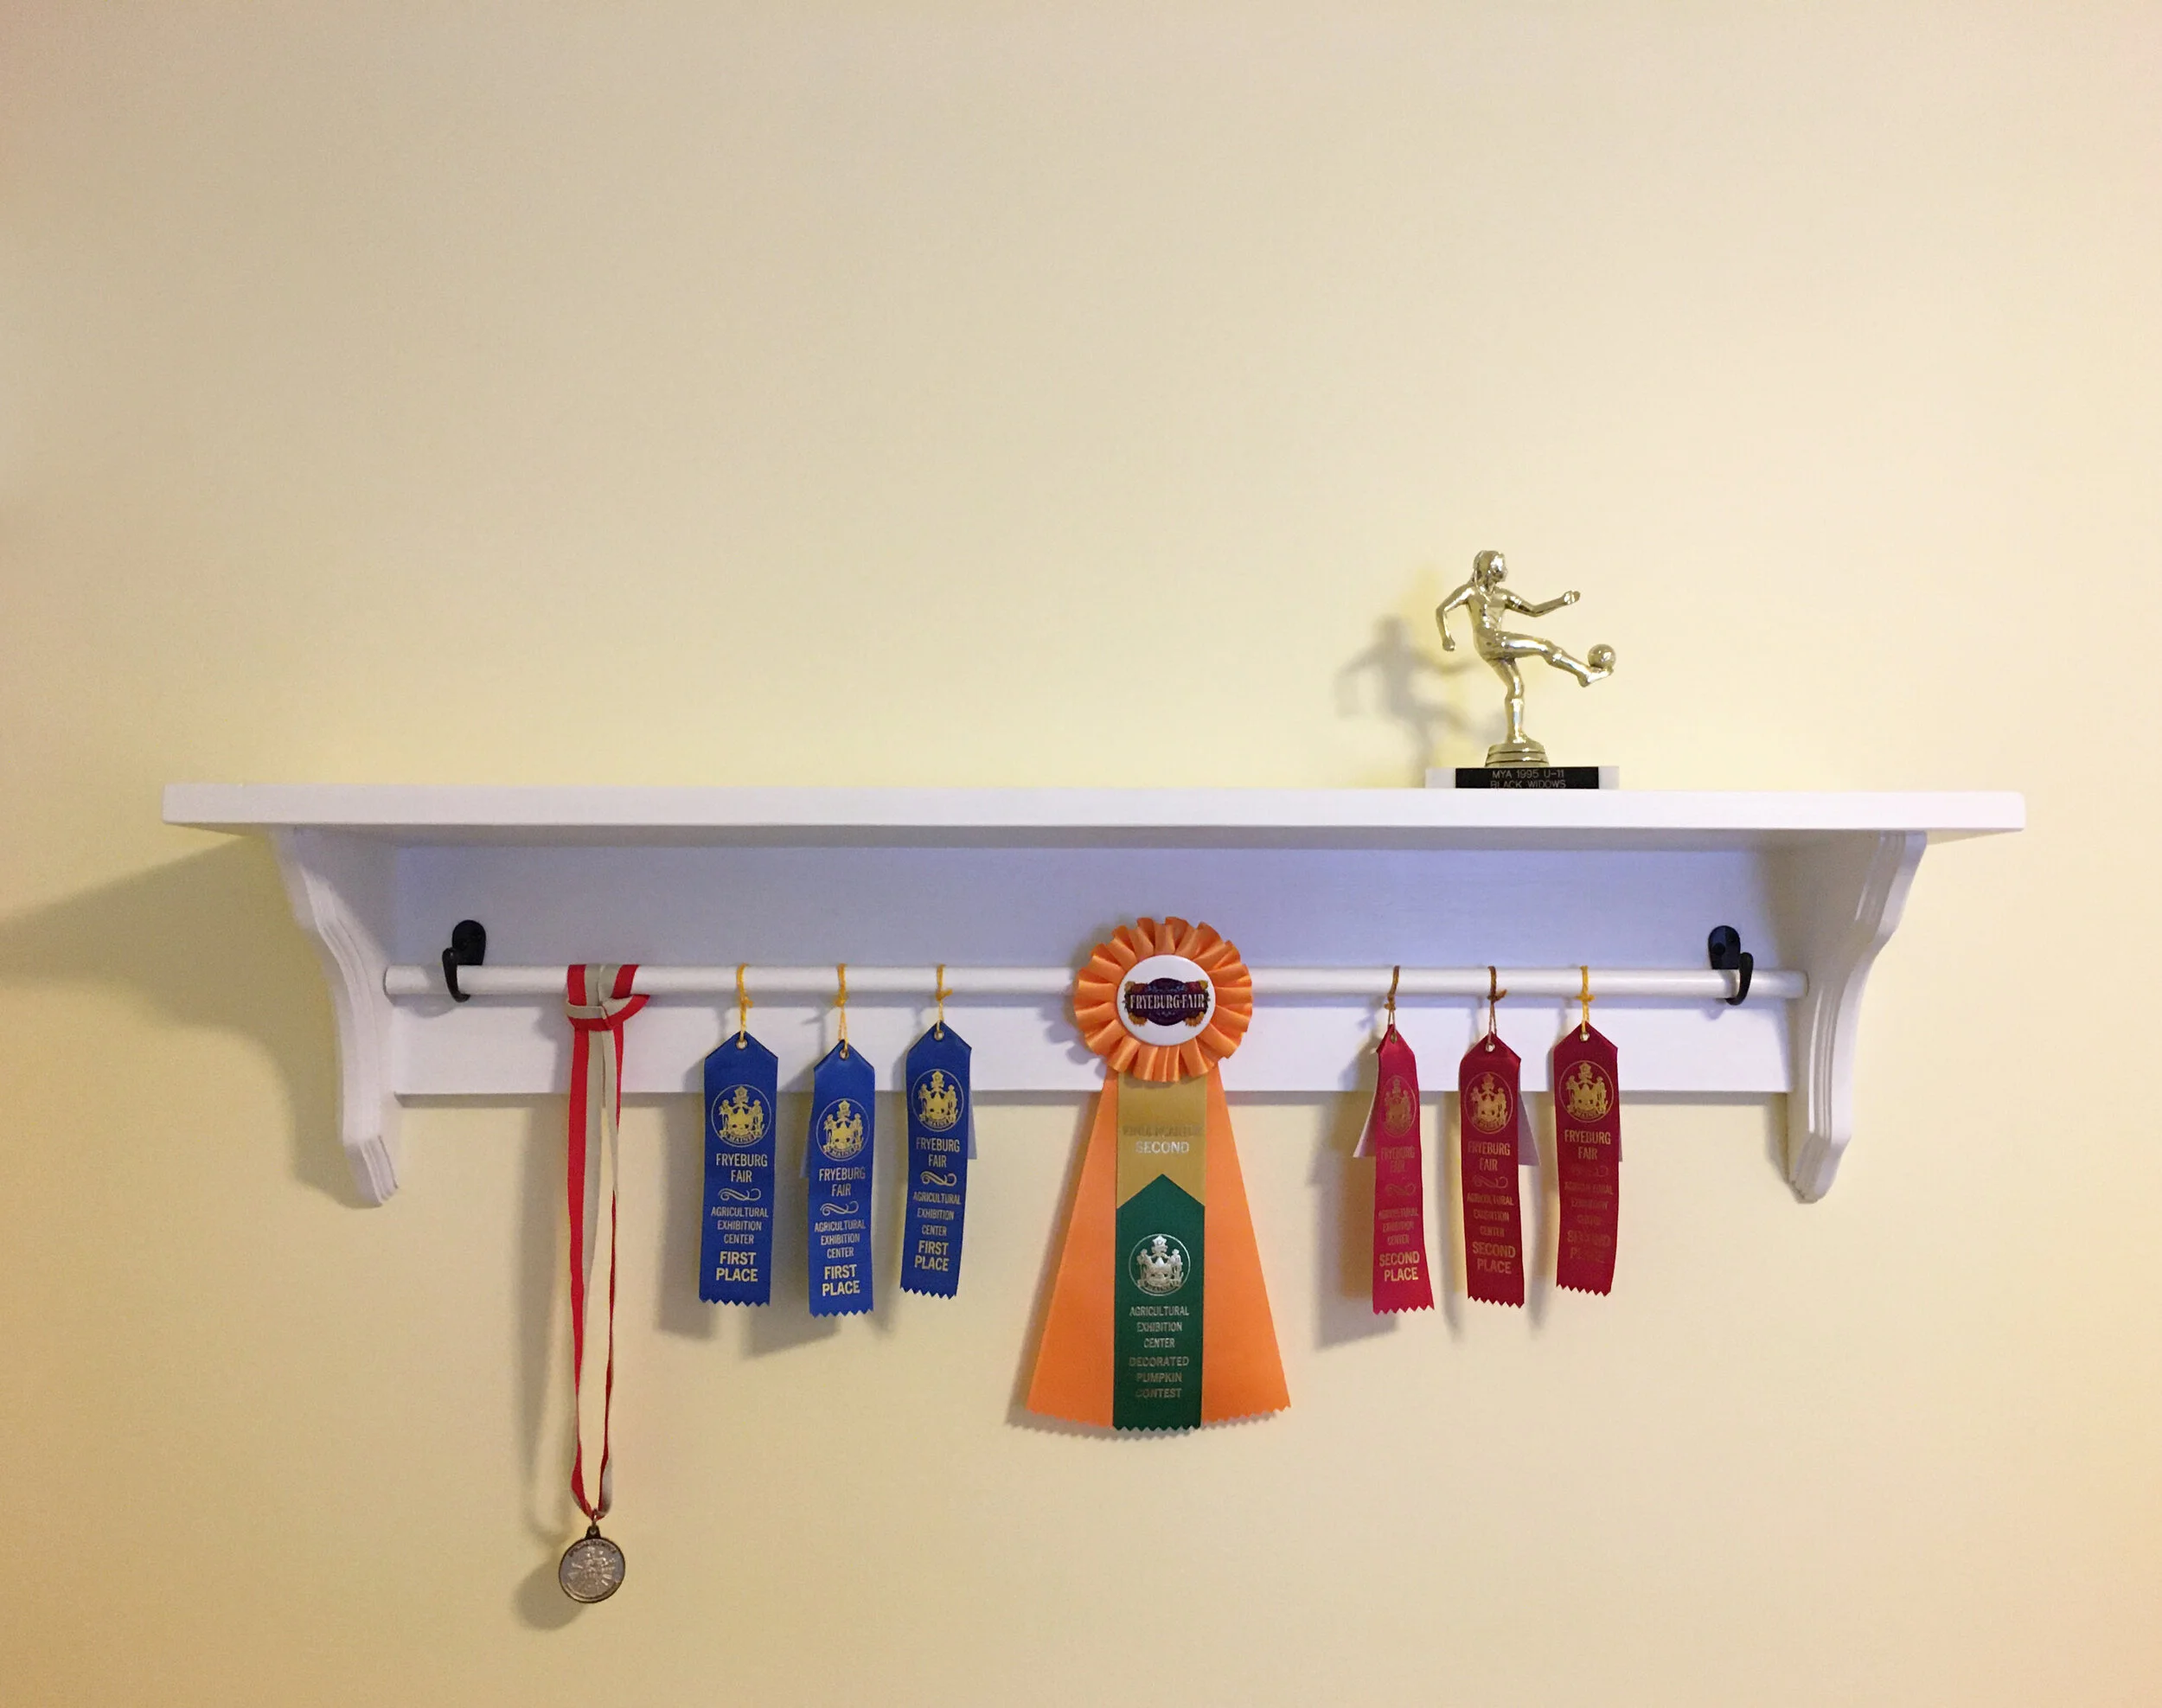
Next I hung the dowel by centering it and adding a simple hook to support it on each side, as shown above (this also hides the screws I used to hang it). And now the project is finished and ready to display ribbons, medals, and trophies!
To hang the ribbons and medals you can easily lift the dowel up and string them on, or loop them around the dowel like I did here.
I hope you liked the project and we look forward to when this Pandemic is over and there will be sport and fair ribbon awards again - stay well!
UPDATE:
Years later our kids are still using the DIY Ribbon and Trophy Displays but they’re getting a little full. In order to spread things out a bit I bought these simple medal holders (similar one linked), so they could hang their medals on these and keep the DIY Display just for their ribbons/trophies. It’s working great!