We make this super easy Flag Cake every year on the Fourth of July - it’s a little cheesy but it’s fun, delicious, and a tradition our kids look forward to. It’s never picture-perfect but it doesn’t have to be, just enjoy and have a Happy Fourth :) | This post contains affiliate links |
Really this “recipe” couldn’t be any easier! You just need a few very basic ingredients/pre-made items and you’re good to go!
Ingredients:
box of lemon cake mix and whatever you need to make it according to package directions (eggs, oil, etc). If you don’t like lemon you can use white or yellow cake mix too.
Cool Whip or other whipped topping
blueberries
sliced strawberries
How To:
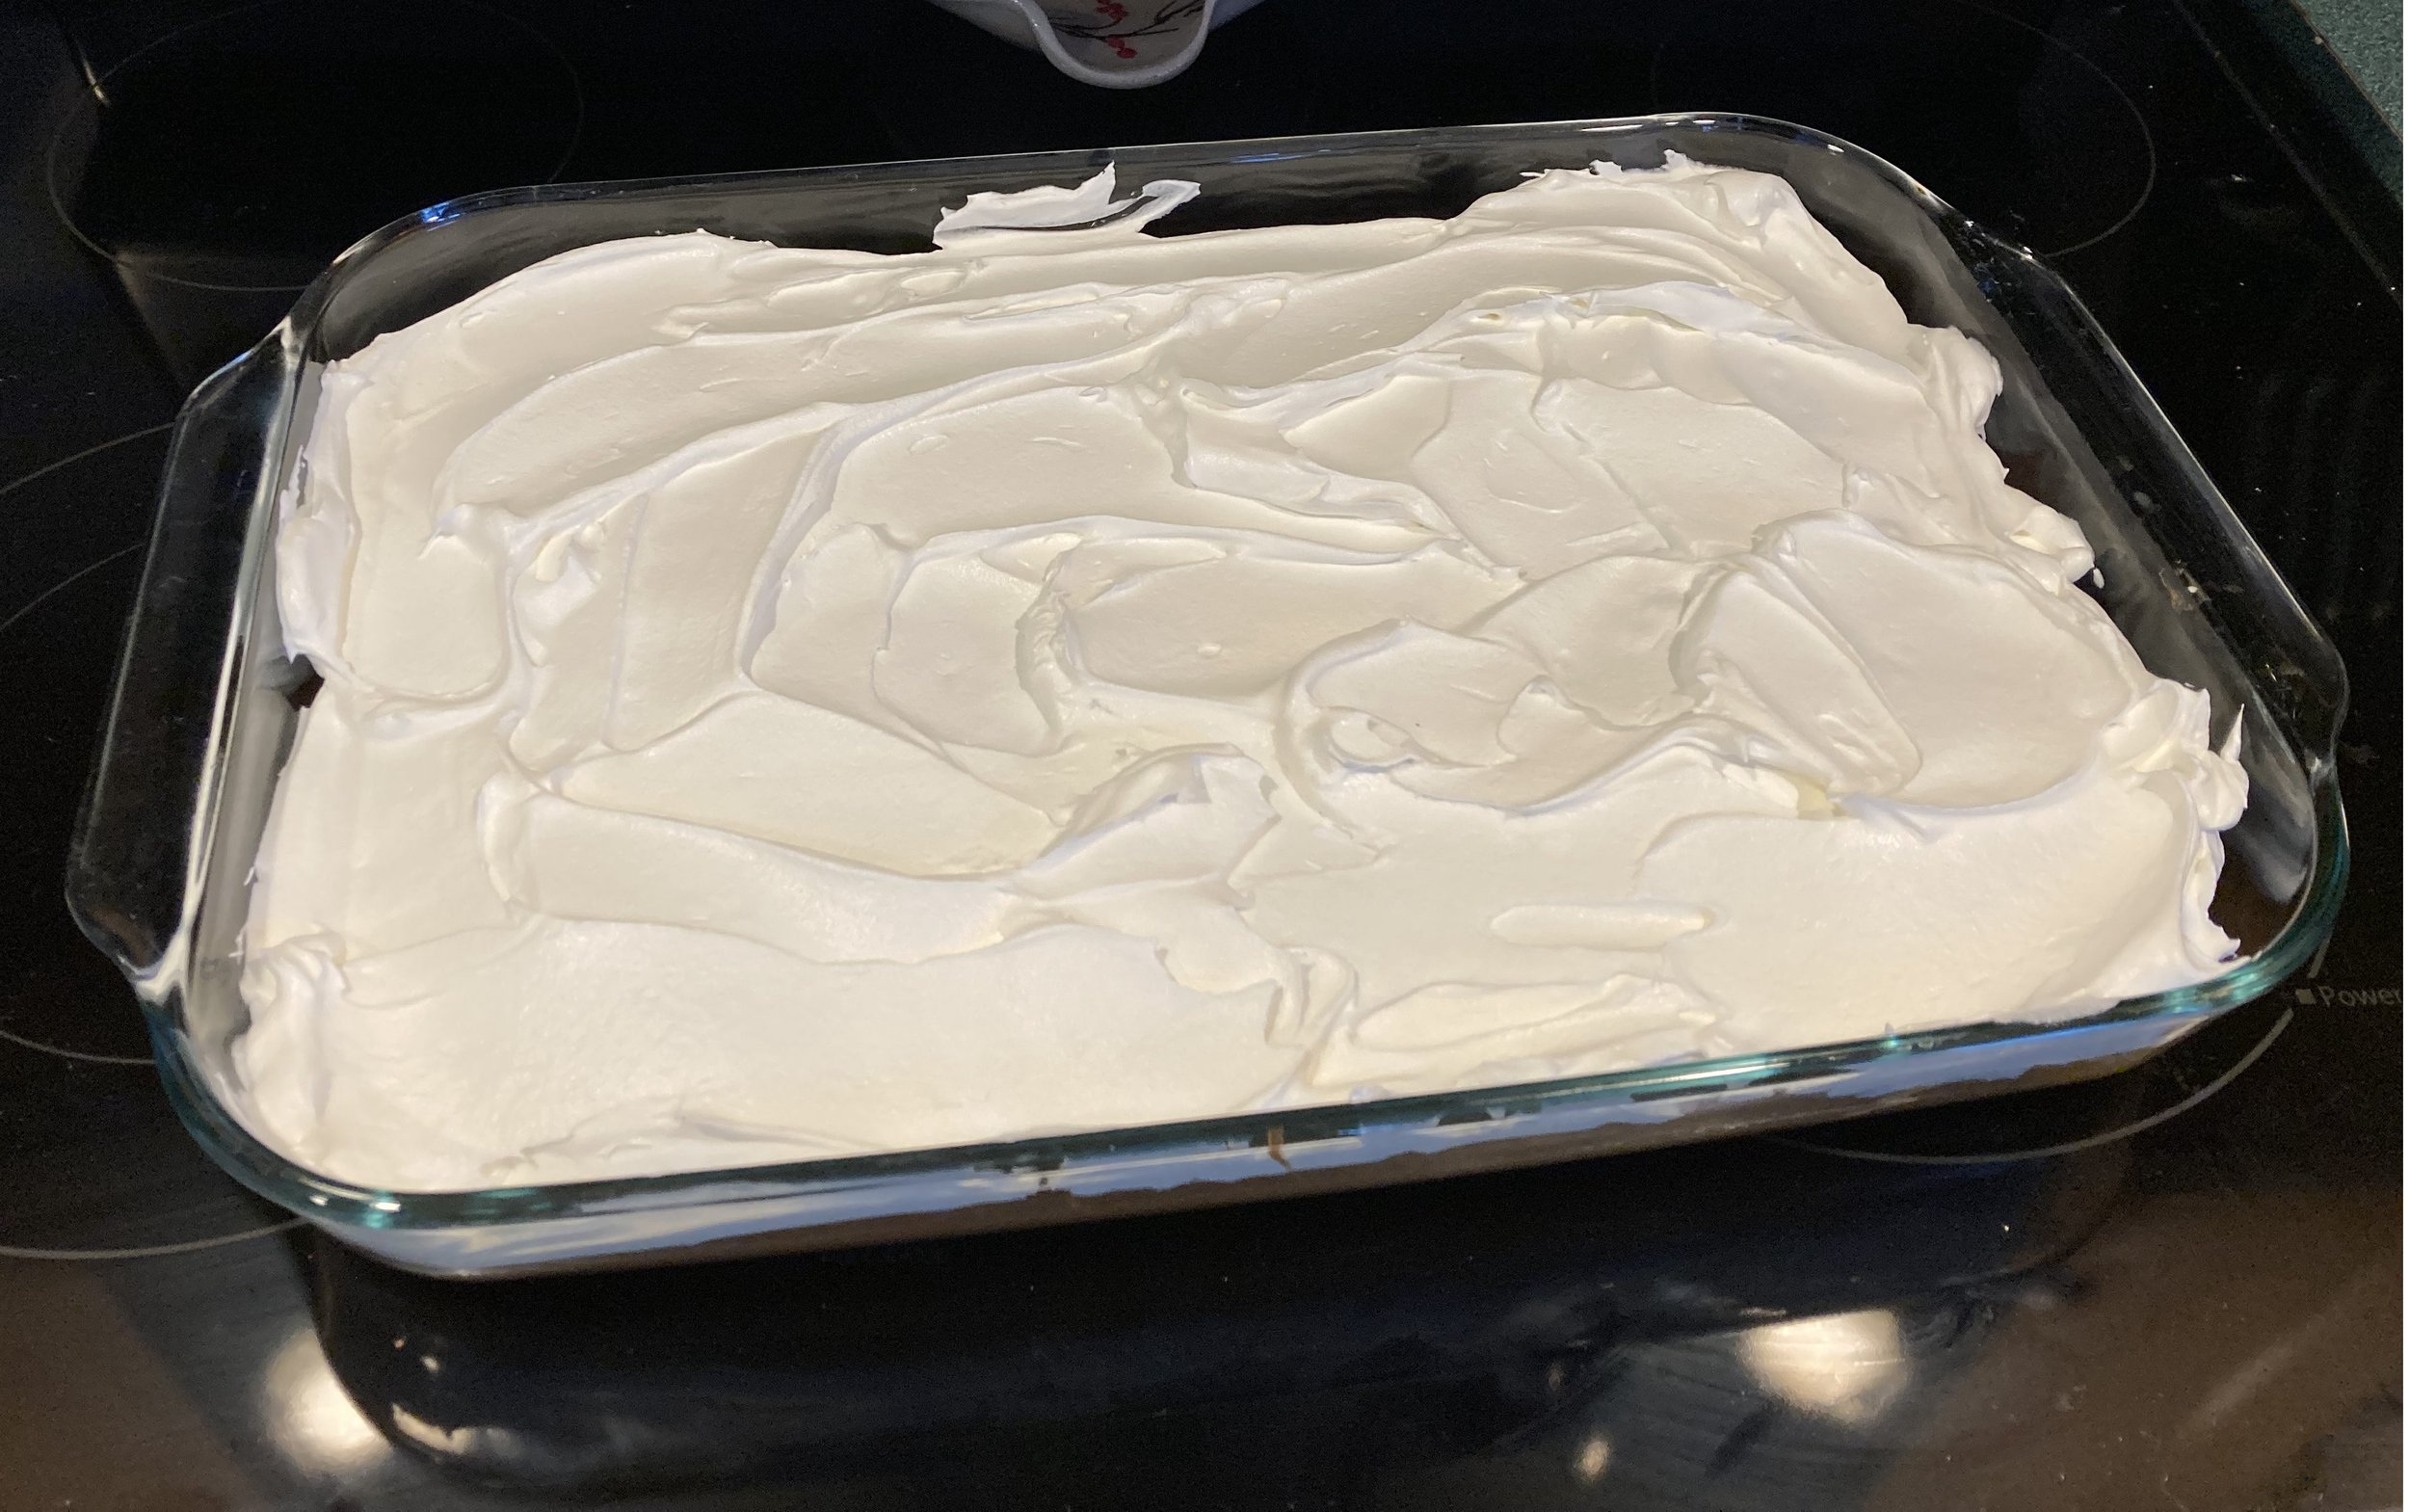
First bake your cake mix according to package directions in a rectangular baking dish/sheet pan.
Once it has cooled completely, add your whipped topping. We always use Cool Whip but you could use homemade or store bought whipped cream too.
Once the cake is covered in your whipped topping, it’s time to make the flag! In the upper left corner, lay out the blueberries in a square shape. Then arrange sliced strawberries in lines to make the stripes. We use a strawberry slicer to make the process go quickly (I confess when I first got this strawberry slicer as a gift I thought I would never use it, but it's actually super handy and I've used it more times than I can count! It especially came in handy with young toddlers for cutting their fruit up). Don’t worry about trying to fit in 13 stripes, we’re going for simplistic here - just fit in as many as you can that look nice.
And that’s it! Super simple, super easy, and a great dessert to make with the kids. We absolutely love that combination of lemon cake, whipped cream, and berries - yum! I hope you all have a wonderful, healthy and happy Fourth!
KEEP UP WITH BIRCH LANDING HOME
| Etsy | Facebook | Instagram | Pinterest | Bloglovin' | Hometalk |
It may not be Fall right now but that doesn't mean we can't still enjoy yummy apple baked goods! This recipe is for a soft-baked cookie - lightly spiced and not too sweet, just perfect.
Besides, it's my Grandma's recipe so you know it has to be good.
Now I never actually met my Grandma Dot - she passed away before I was born. But from the stories I’ve heard she was a hard worker, very outspoken, and feisty. Whenever I make these cookies I think of her and am honored to carry on a piece of her. We make these cookies pretty regularly throughout the year, especially when we get together with family (they are my Dad’s favorite cookies).
Before you start don't forget to read our 5 Tips for Making Perfect Cookies - Everytime!
Grandma Dot's Apple Cookies
Makes about 3 dozen, 2-inch cookies.
CREAM
- 1 cup sugar
- 1/2 cup shortening
- 1 tsp vanilla
- Add 2 beaten eggs
COMBINE
- 2 cups flour
- 1 tsp baking soda
- 1/2 tsp salt
- 1/4 tsp allspice
- 1/4 tsp nutmeg
- 1/2 tsp cinnamon
Sift dry ingredients together and add to creamed mixture.
Fold in 1 1/2 cups diced raw, unpeeled apples, coated with 1 tbsp brown sugar. (I usually chop my apples a little on the bigger side.) Dough will be crumbly.
Drop by small teaspoons full and BAKE at 375 degrees for 8-10 minutes.
These cookies are best enjoyed the same day you make them; they tend to get soggy the longer they sit because of the moisture in the apples. Usually they're gobbled up fast though, so this generally isn't an issue.
KEEP UP WITH BIRCH LANDING HOME
| Etsy | Facebook | Instagram | Pinterest | Bloglovin' | Hometalk |
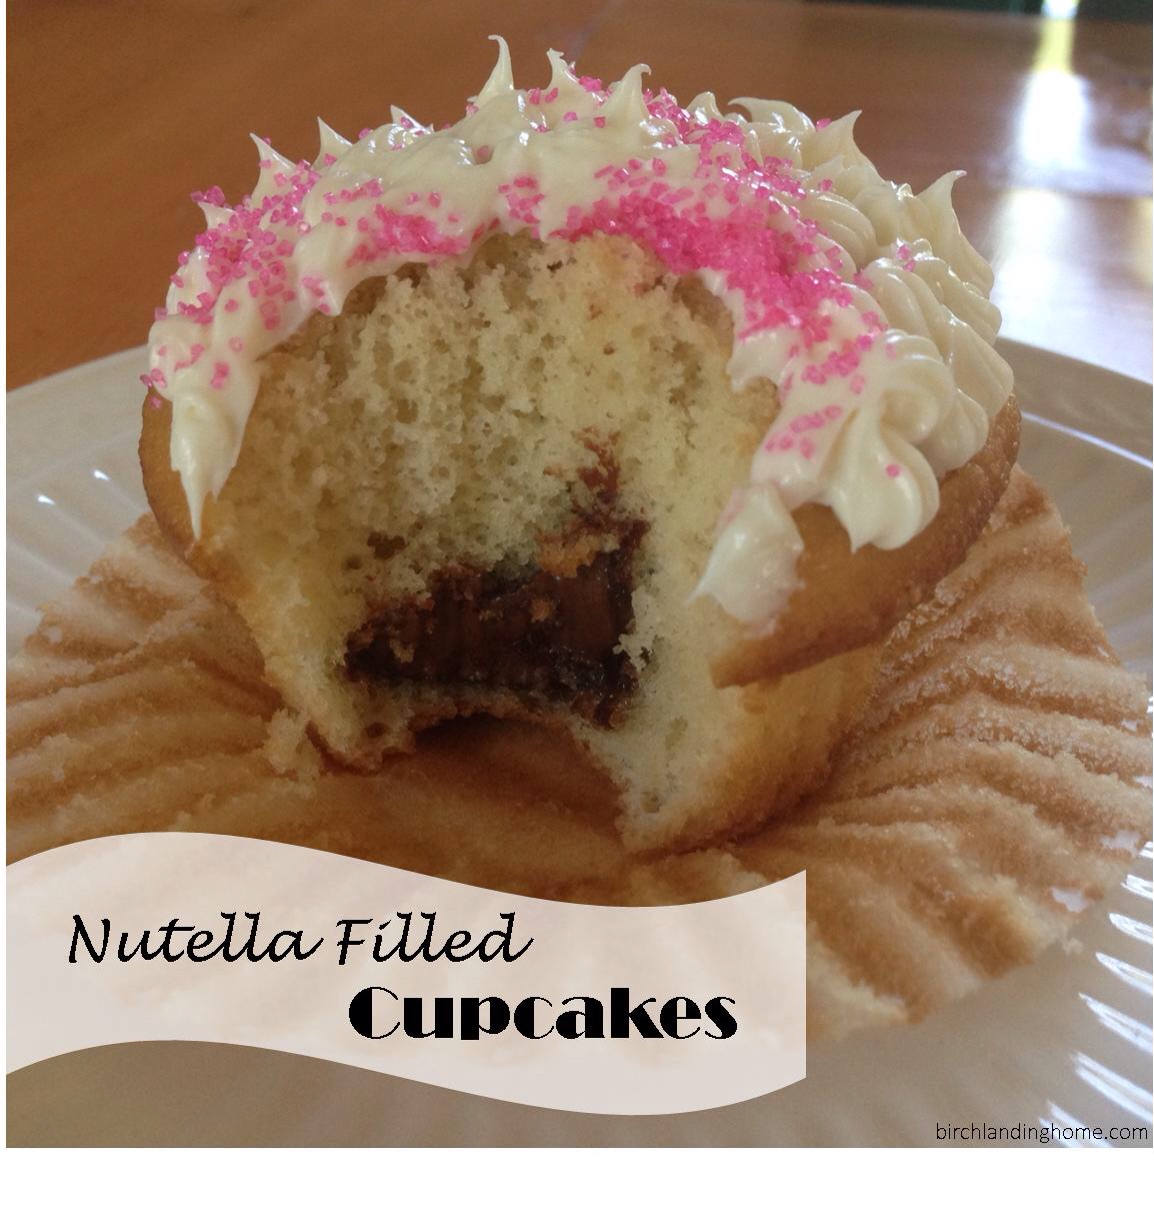
This past weekend we had some friends over and I needed to make a dessert for after dinner. After looking through the cupboards I realized we had a left over box of vanilla cake mix and vanilla frosting from my husband's birthday. I wanted to use that up, but needed something to jazz up the boring all-vanilla dessert. I saw a jar of Nutella and thought filling the cupcakes with that would be an awesome idea! This "recipe" can be super easy by using a box mix and ready-made frosting like I did, but if you have a great from-scratch recipe for cupcakes and frosting you can definitely use that instead!
At first I debated whether I should pipe Nutella into already cooked and cooled cupcakes, or put it straight into the batter before baking. I decided to go with adding the Nutella in before baking and other than it sinking towards the bottom half of the cupcake (some more than others), it worked great! Putting the Nutella in pre-baking also means a little less clean-up in the end, which is just fine by me.
Nutella Filled Cupcakes
Prep time 15 mins* | Cook time 20 mins* | Makes up to 24 cupcakes
*additional time needed to cool and decorate.
Ingredients
vanilla cake mix
wet ingredients needed for the cake mix (varies depending on brand, but you usually need eggs, water, vegetable oil)
vanilla ready-made frosting
Nutella
cupcake liners
sprinkles (optional)
Directions
Make cake batter according to package directions and fill muffin tin, lined with cupcake liners, with the batter.
Put a heaping teaspooon (or a little more) of Nutella on top of the batter.
Bake according to package directions (make sure cupcakes are thoroughly cooked).
Cool and decorate.
Enjoy!
Now wasn't that easy? :)
Tip: In the past I have used straight Nutella as frosting when I was short. It worked great, but keep in mind it stays very "goopy" and doesn't firm up or get that thin crust like most frostings do.
KEEP UP WITH BIRCH LANDING HOME
| Etsy | Facebook | Instagram | Pinterest | Bloglovin' | Hometalk |
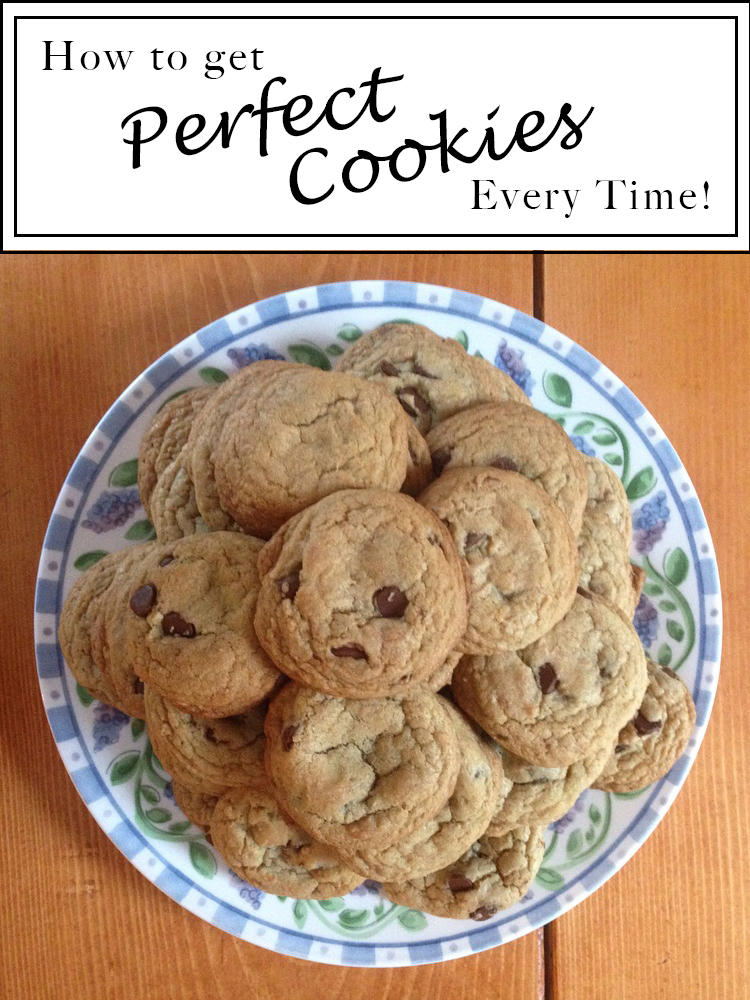
I always get told I make the best cookies, but making amazing cookies isn't all about the recipe - technique is what makes a good recipe great! Read on for my 5 tips to make perfect cookies, every time. | This post contains affiliate links |
5 Tips for Perfect Cookies
Sift
Make sure to sift all your dry ingredients. Doing this breaks up any clumps of flour or baking soda, combines everything evenly, and helps make your cookies light and fluffy.
Always line your cookie sheet with parchment paper, this is key to getting the cookie bottoms that perfect light golden brown. If you're planning on doing several batches of cookies make sure to round the corners of the parchment with some scissors first, as the sharp corners of the paper can start to burn after a few times in the oven.
A cookie scoop is probably one of the best little investments you'll make in the kitchen and I don't know how I ever lived without mine. Using a cookie scoop ensures you get uniform-sized cookies every time and makes the whole process of getting your cookies ready for the oven go so much faster.
Time
Always bake your cookies for the lower suggested time. Cookies that are just cooked all the way through make for the softest, chewiest cookies. If they aren't cooked in the middle yet you can always put them back in for another minute or two, but it's best to start with the lowest time.
Your Secret Weapon - the "Bread Trick"
Accidentally over-cook the cookies? Forget to cover them on the counter? Believe it or not, the magical solution for over-cooked or stale cookies is just a slice of sandwich bread and a big ziplock. Put all the cookies in a gallon ziplock bag, throw in a slice of bread, seal, and leave for a few hours - the cookies will get softer as the bread gets staler. Magic!
Looking for a yummy new cookie recipe? Be sure to check out my recipe for Grandma Dot's Apple Cookies!
Alright, now go make some amazing cookies (and share some with me, please?)
KEEP UP WITH BIRCH LANDING HOME
| Etsy | Facebook | Instagram | Pinterest | Bloglovin' | Hometalk |