I'm a wife, stay-at-home mom, crafter, and blogger living in rural New England. As seen in Martha Stewart Living, Food Network Magazine, and more! | Tutorials, DIY, crafts, parenting tips, recipes, money saving tips, product reviews, local product features, New England living, intentional living, and more! |
HAPPY NEW YEAR! To celebrate everything is 15-20% off in our Etsy Shop (our biggest sale of the year), December 31st, 2021 through January 7th, 2022 - no coupon code needed. Wishing you all a healthy, happy, and prosperous New Year!
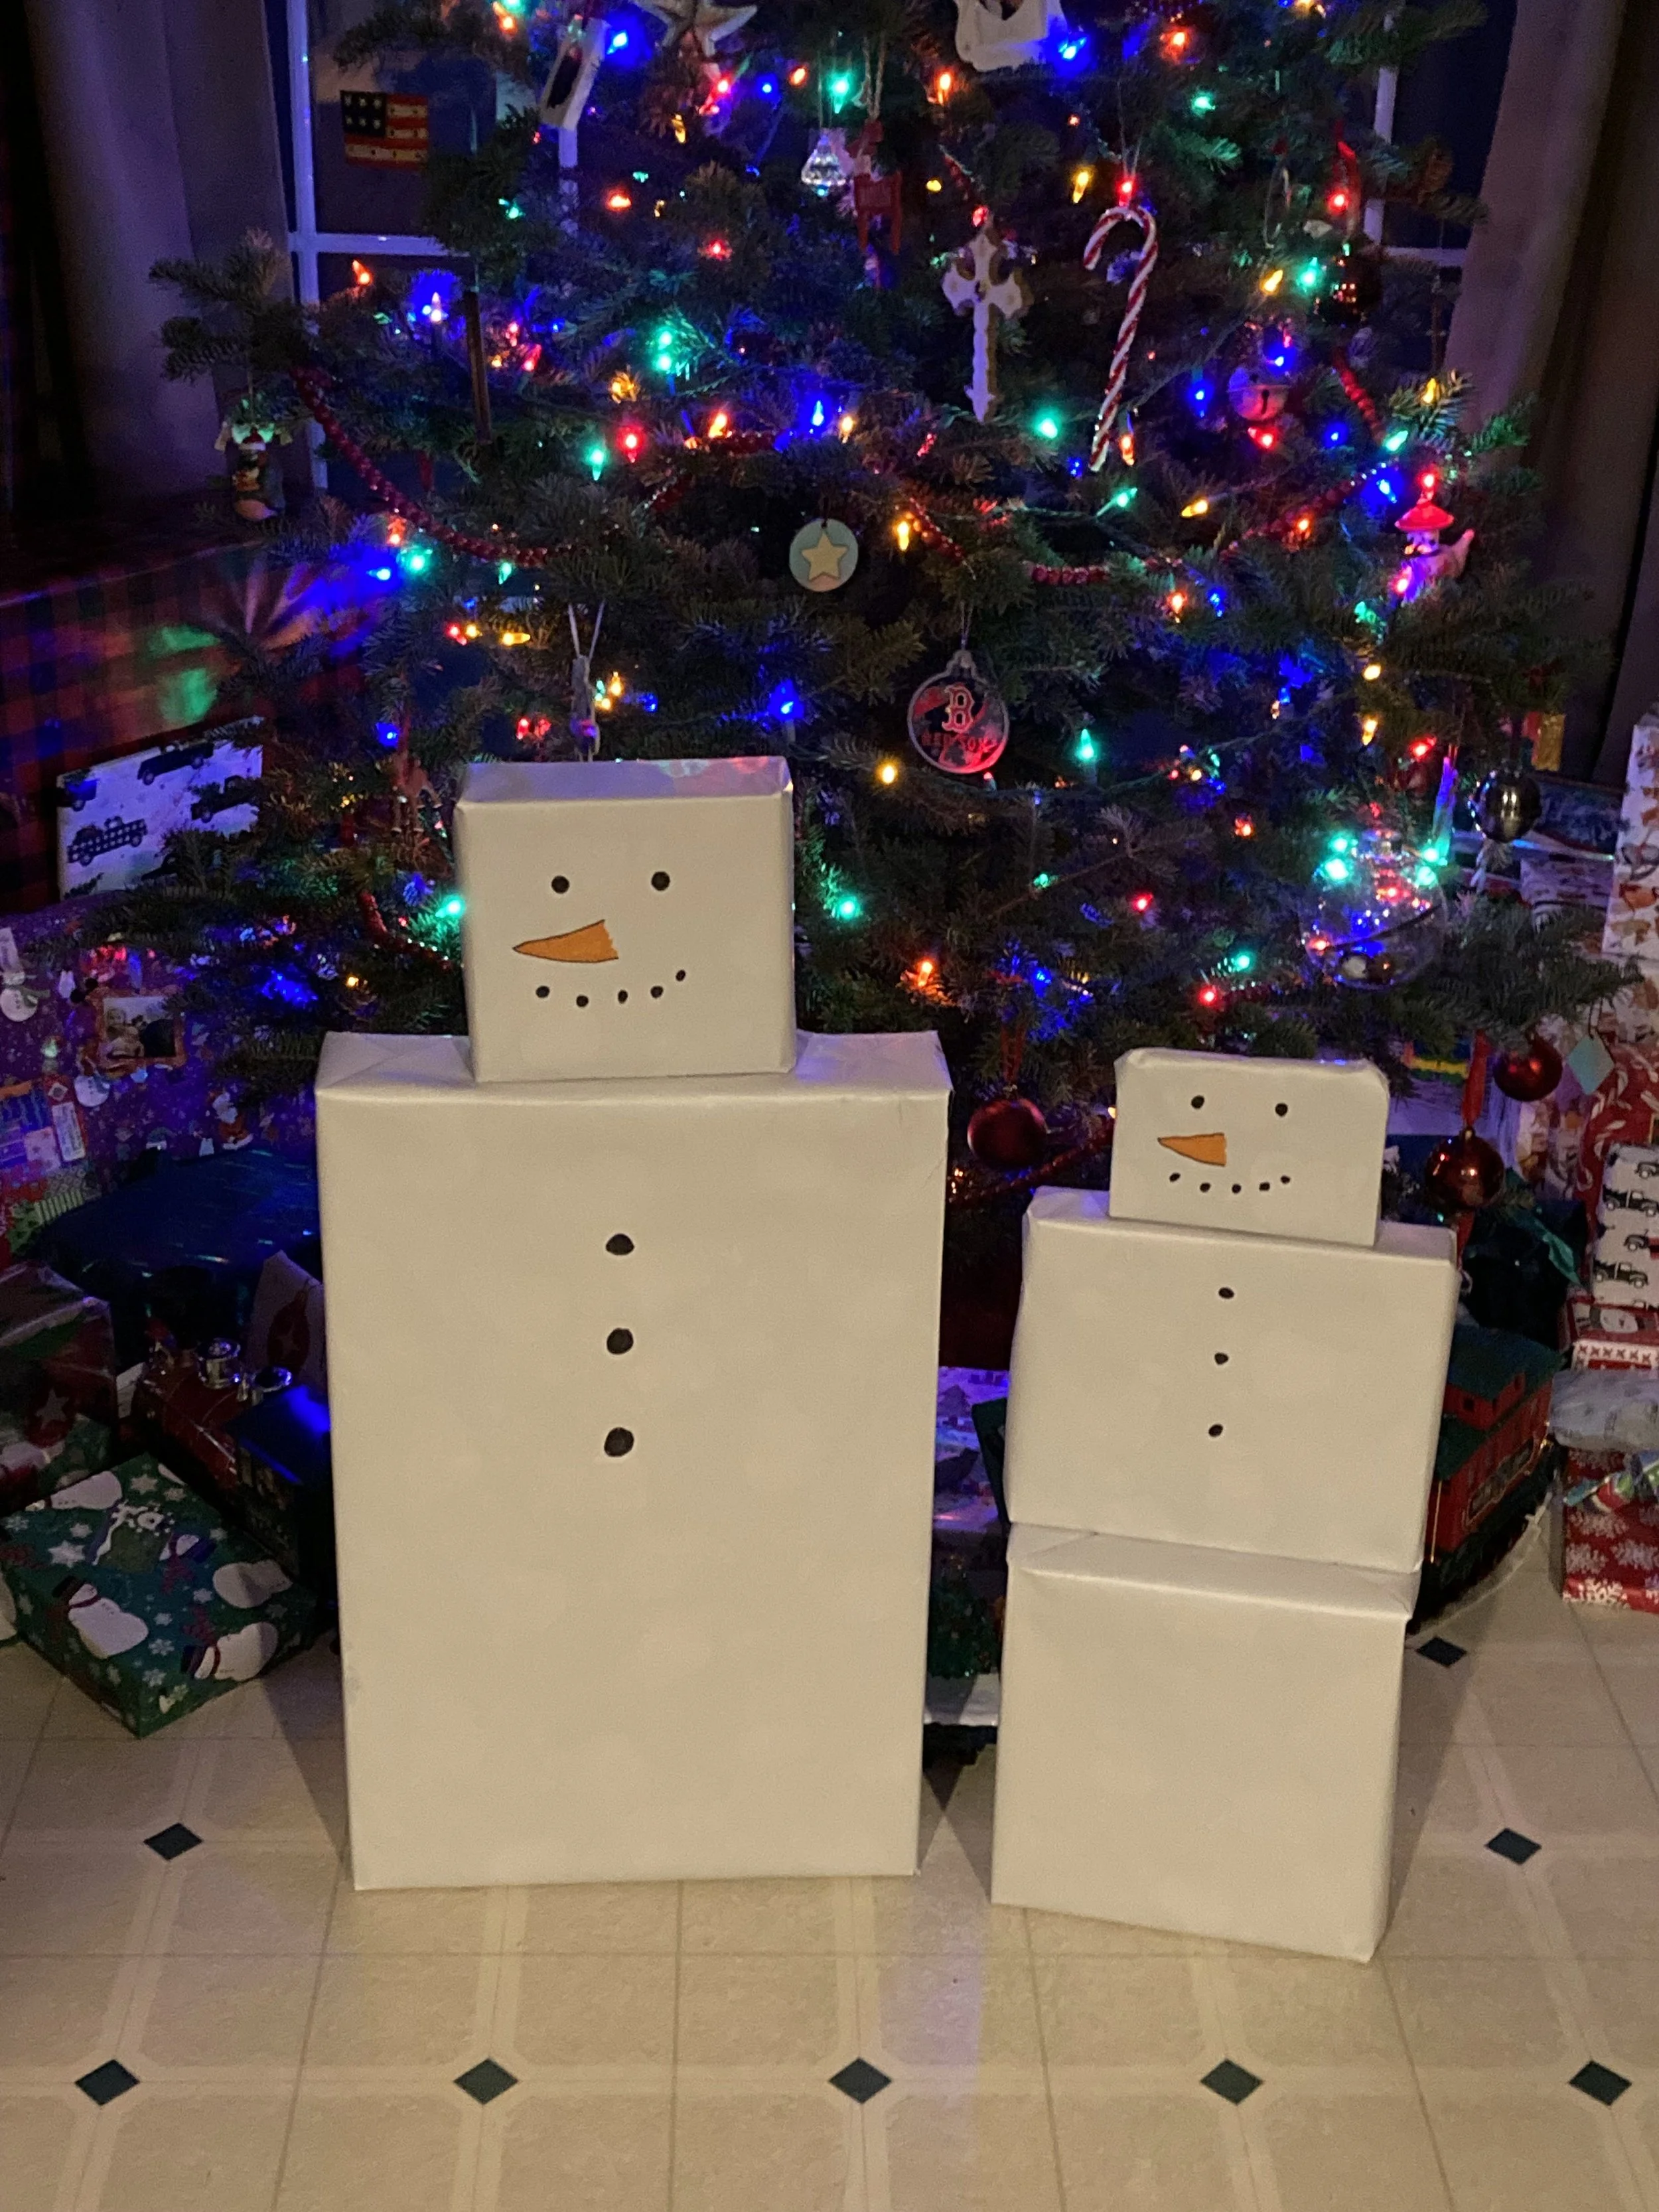
This year I was inspired by an old friend from high school - every year she makes themed “stacked characters” out of her family’s gifts. One year it was all Santas, another year all penguins, etc - complete with accessories! I thought it was such a cute idea and wanted to give it a try myself this year, but on a much simpler and smaller scale. So I opted to make each kid their own “present snowman” and they loved it! I think this has just become a yearly tradition in our family as well. | This post contains affiliate links |
To make the snowmen you don’t need to buy anything special - in fact I just used regular Christmas wrapping paper but wrapped the gifts inside-out so the plain white back of the wrapping paper was facing out! I chose 2-3 gifts for each child that stacked well on top of each other and wrapped them, white side facing out. Then I used a sharpie marker and orange colored marker to draw the face and buttons.
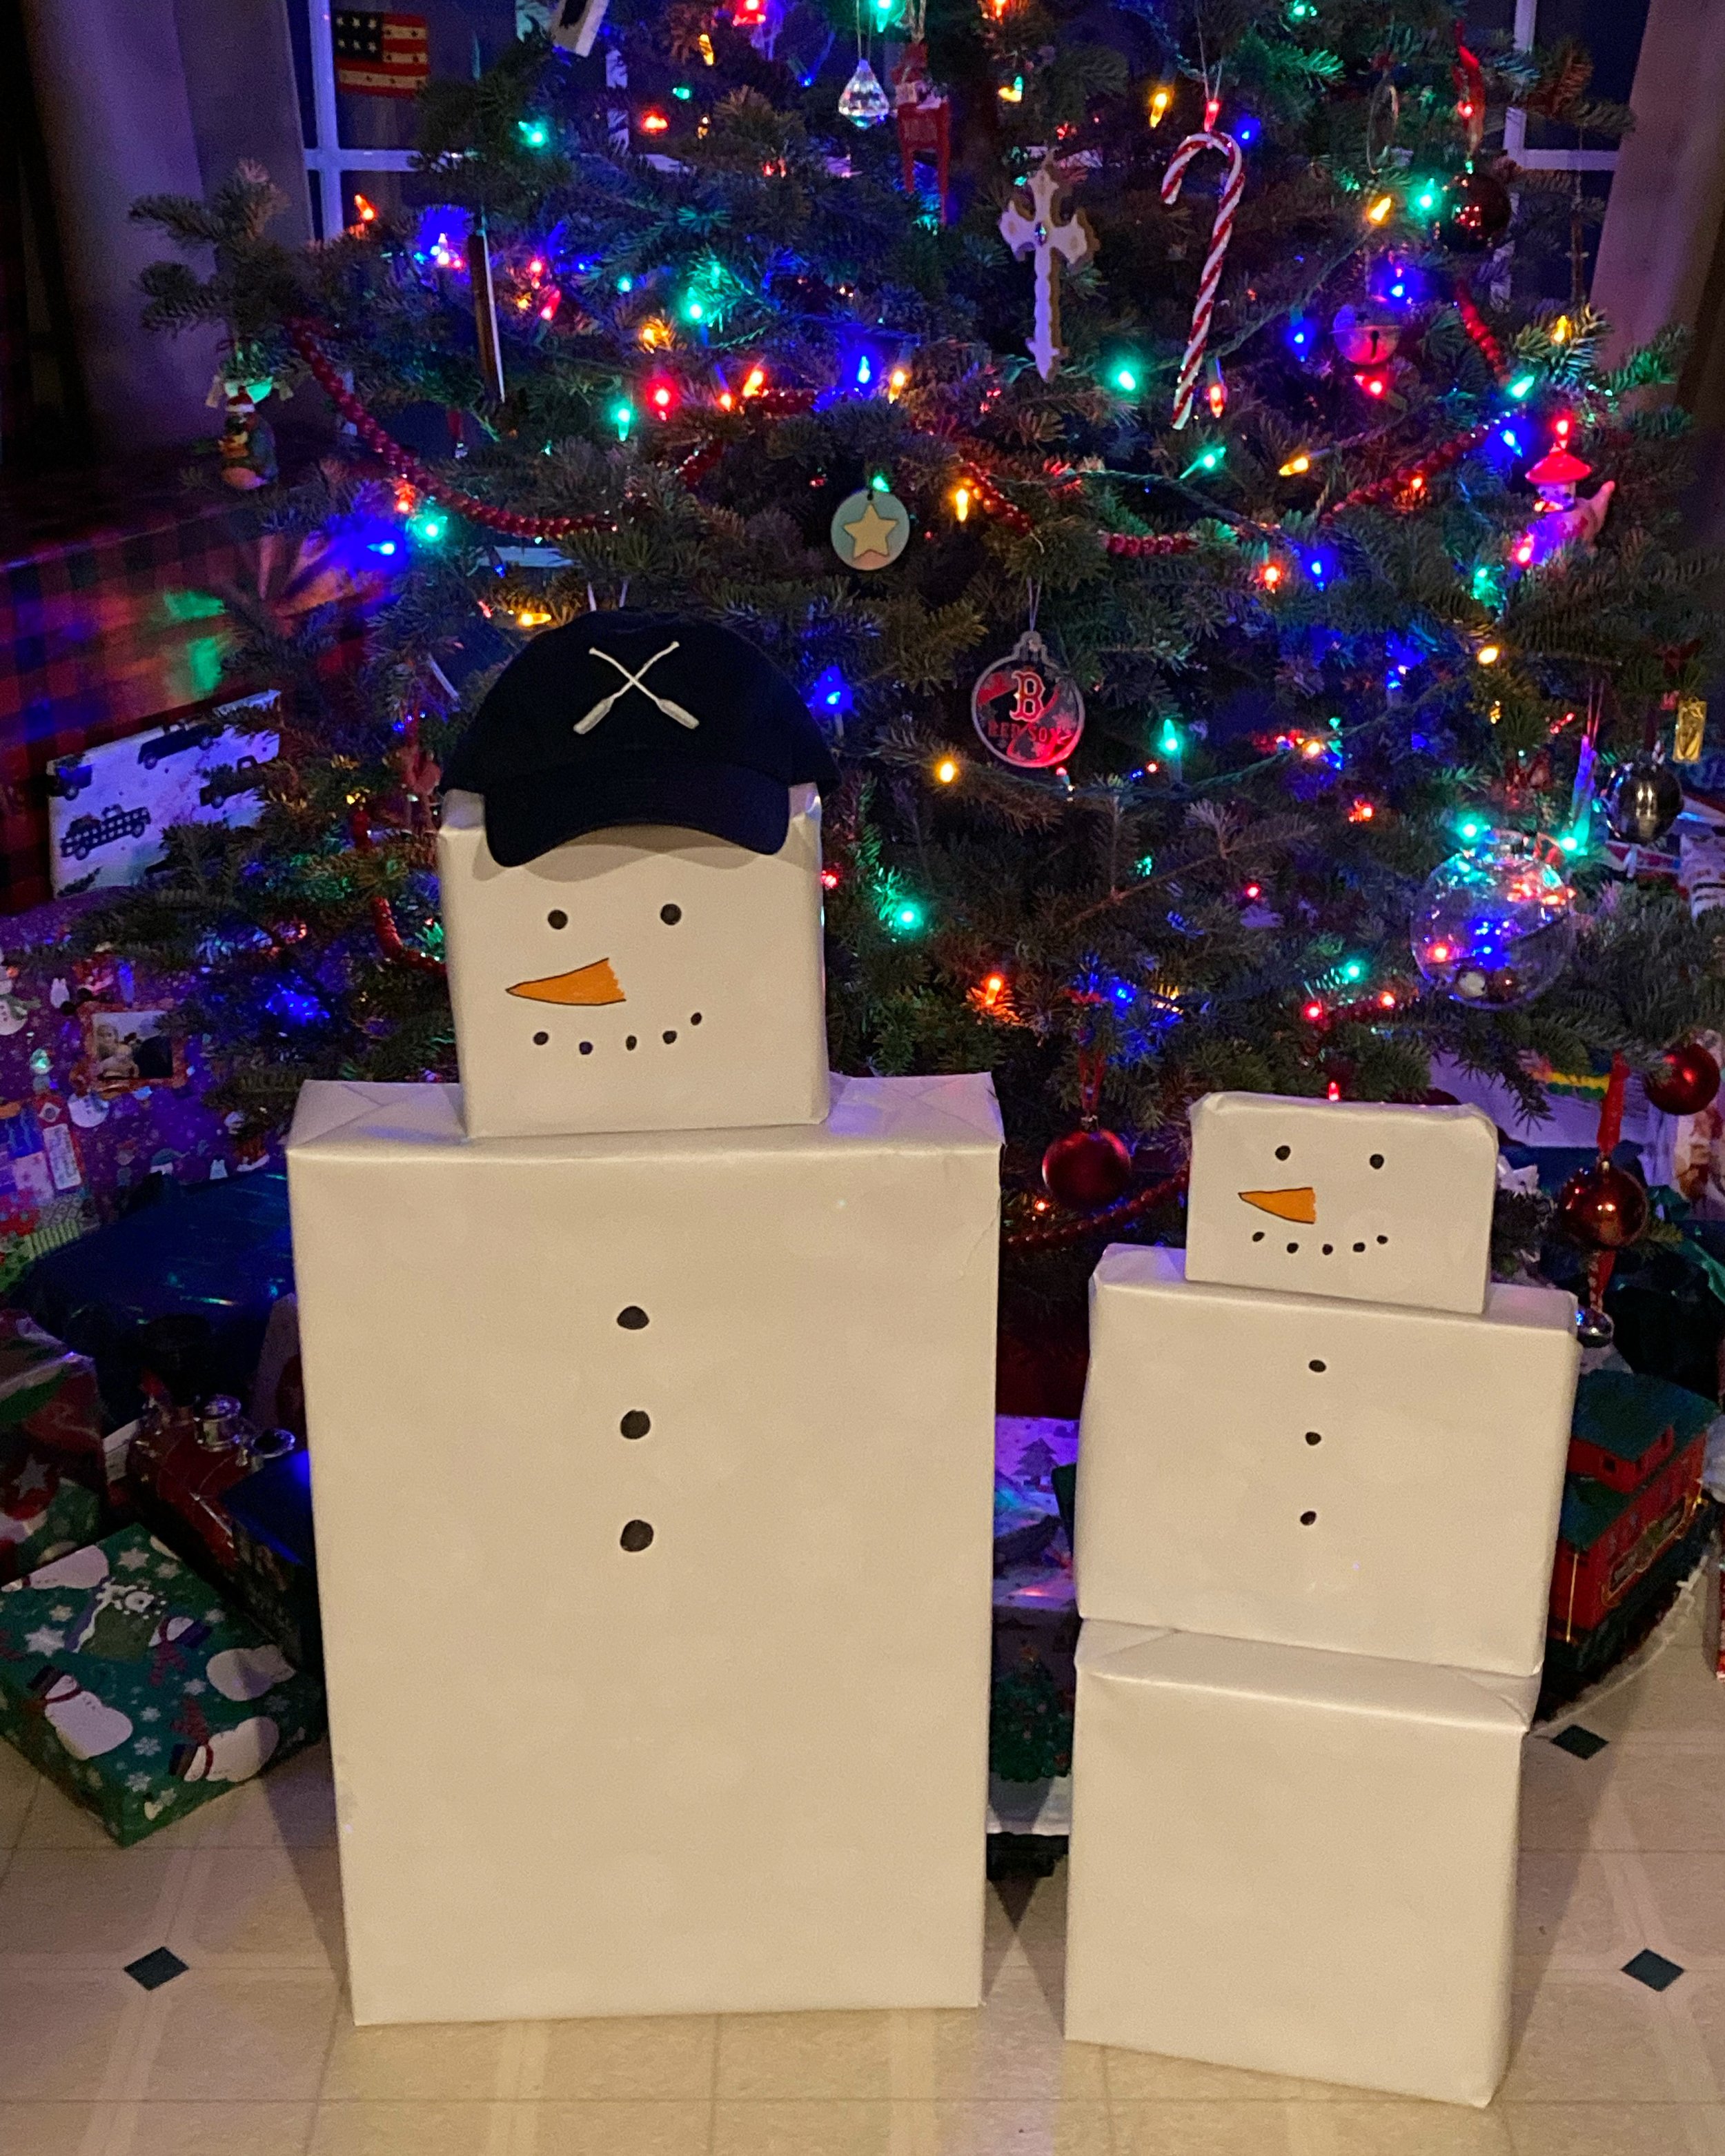
Our oldest daughter recently asked for one of our New England Lakeside Baseball Caps of her own so obviously we had to give her one for Christmas! The hat made the perfect finish for her Snowman and she got a huge kick out of it on Christmas morning.
This was such an easy and fun surprise and I hope you’ll give it a try too and make Christmas morning just a little more magical.
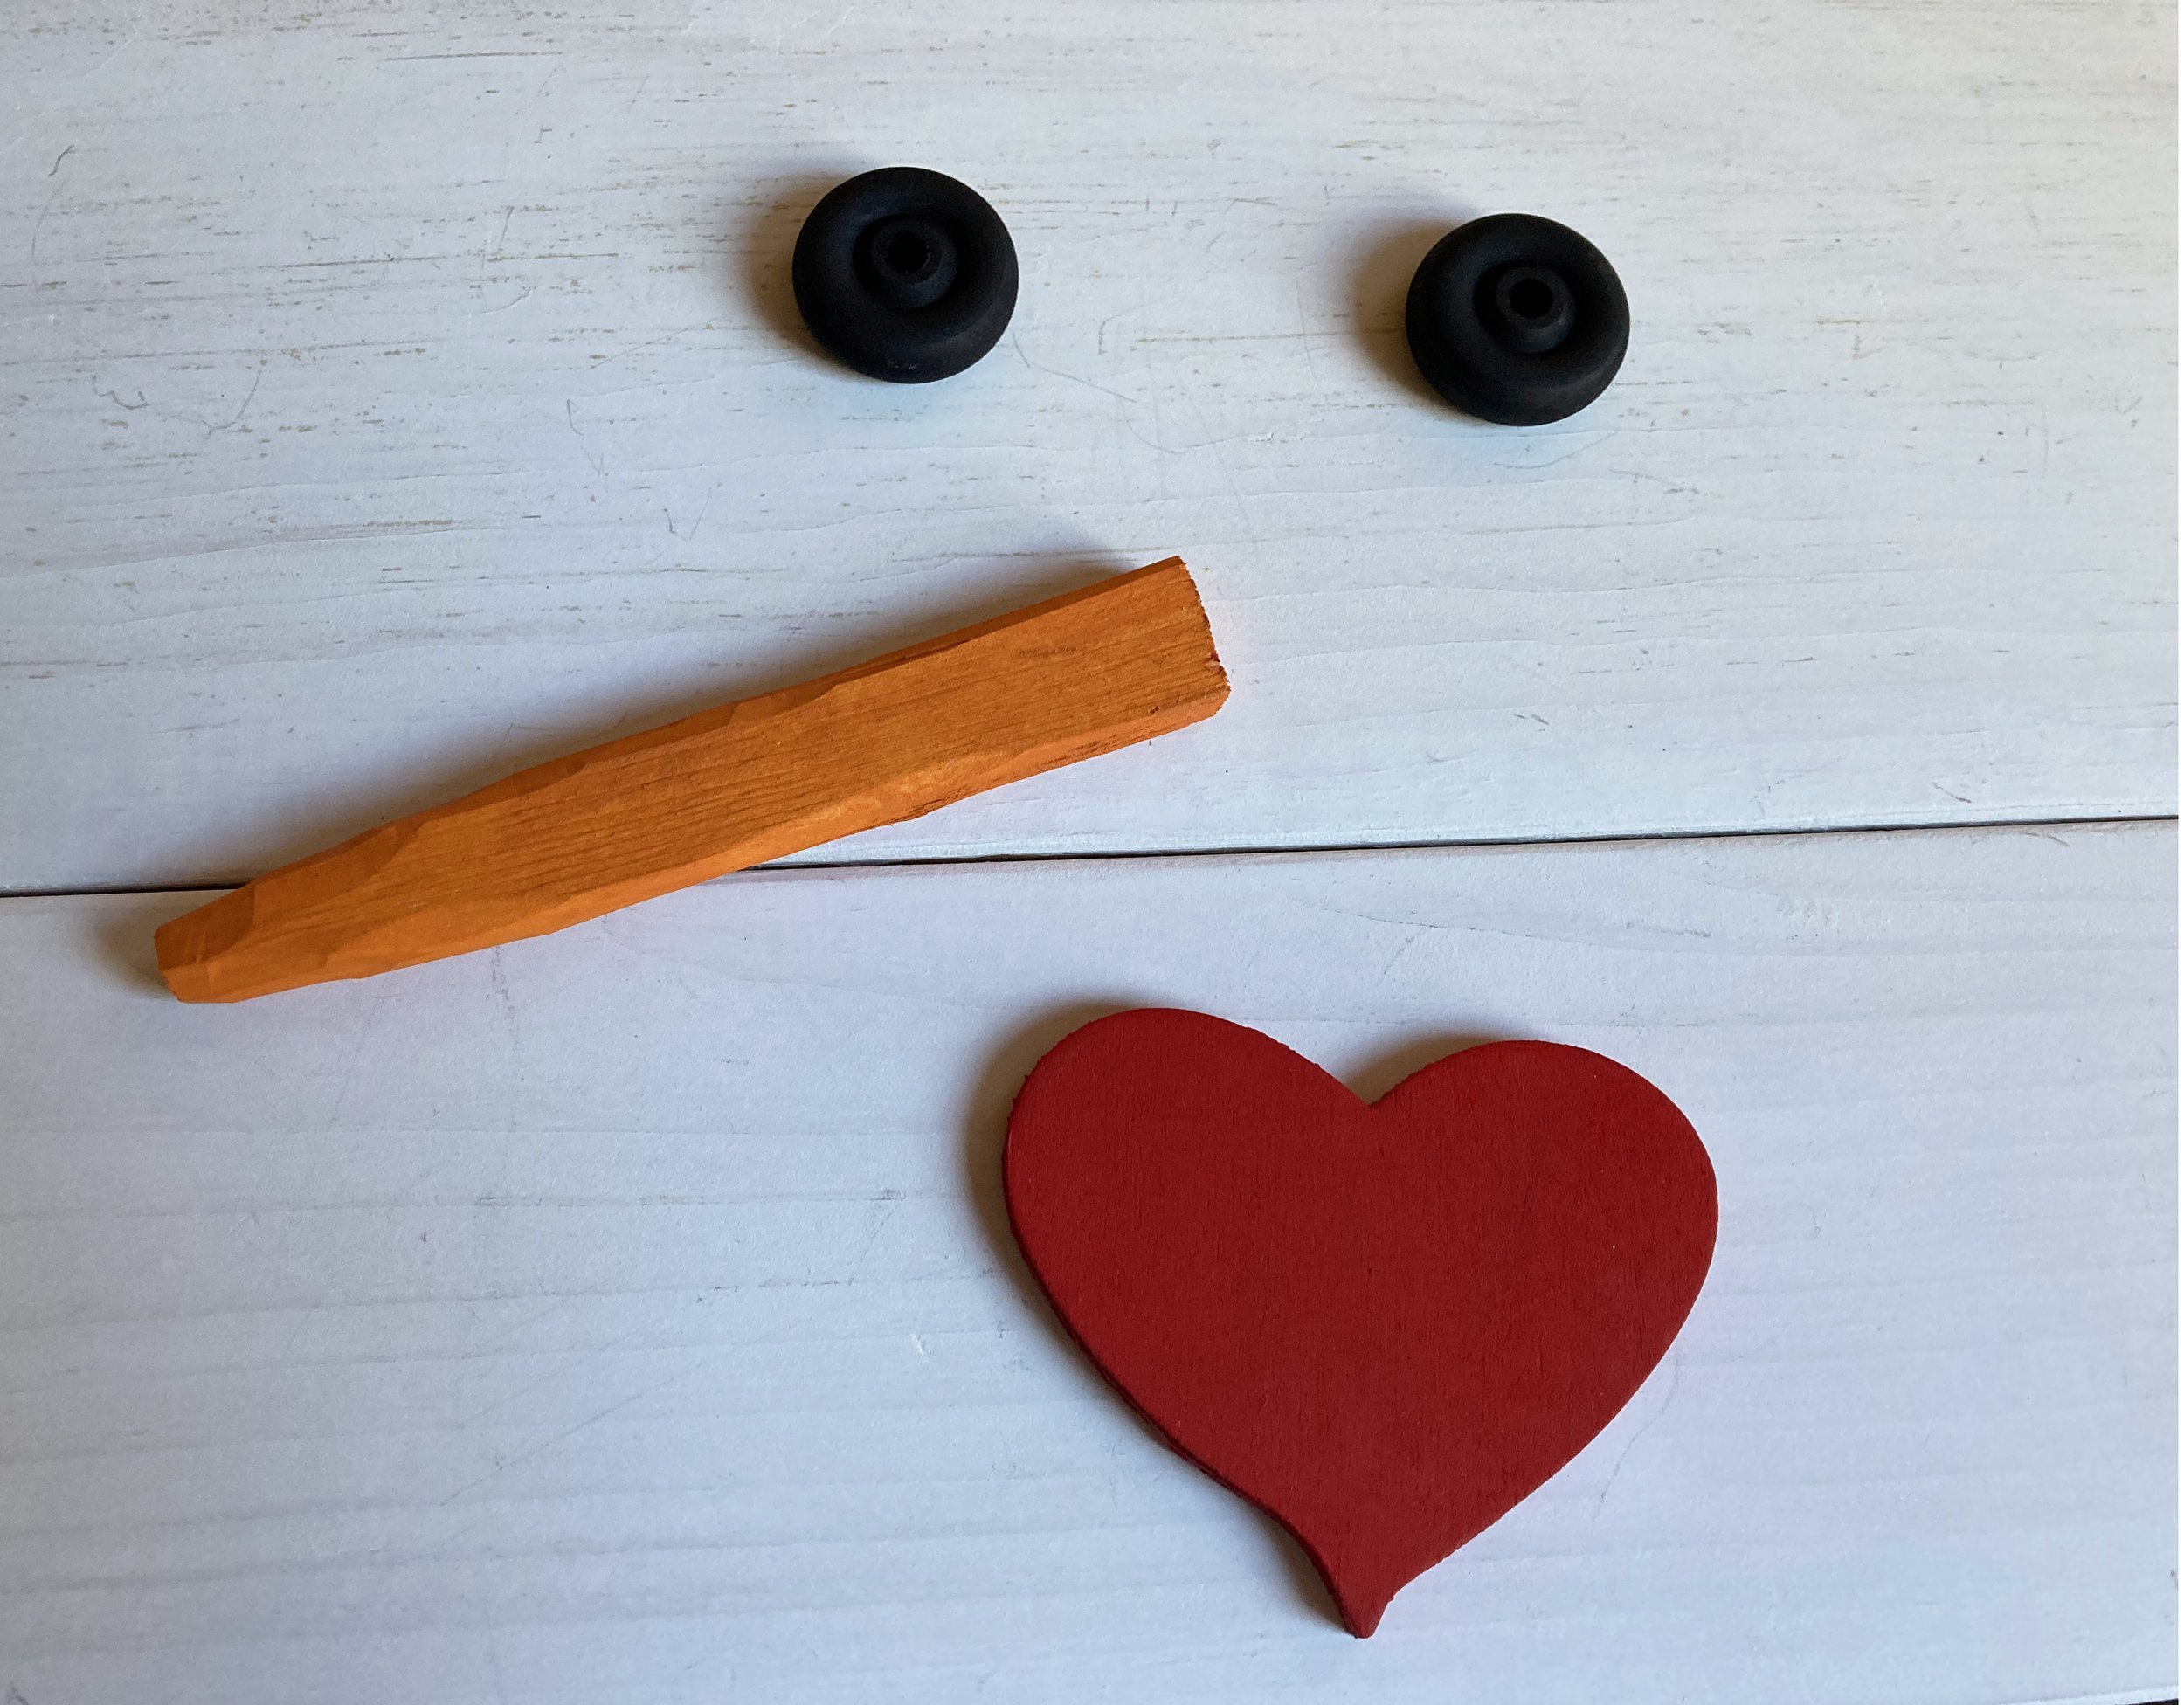
Just wanted to share this easy, cute homemade gift idea for anyone with small kids in a snowy climate - DIY Simple Snowman Kits! Since we aren’t able to get together with a lot of family and friends again this year (thanks Covid), we decided to make and send these little kits so our kids could “help” their friends make their own snowmen from afar. | This post contains affiliate links |
Really there isn’t too much to explain for this project — we gathered some basic materials, painted them, and then packaged them together before including a little note from the kids.
EYES: For the eyes we used wooden toy wheels from a craft store (similar ones linked) that we painted black - but you could use just about anything, including painted rocks or scrap wood. NOSE: For the nose I whittled down some pieces of scrap wood into a rough carrot shape, then painted them orange. HEART: For the hearts we glued together two layers of pre-cut balsa wood hearts we had picked up at a craft store (similiar ones linked), then painted them red. BUTTONS (OPTIONAL): We did not include buttons in our kits but you can include painted rocks, small pieces of scrap wood, or actual large buttons in your kits to be used as buttons. GIFT BAG: We packaged our kits up in some organza gift bags I had on hand (similar ones linked), but you could wrap them up in a number of ways including using a piece of fabric that could double as a scarf!
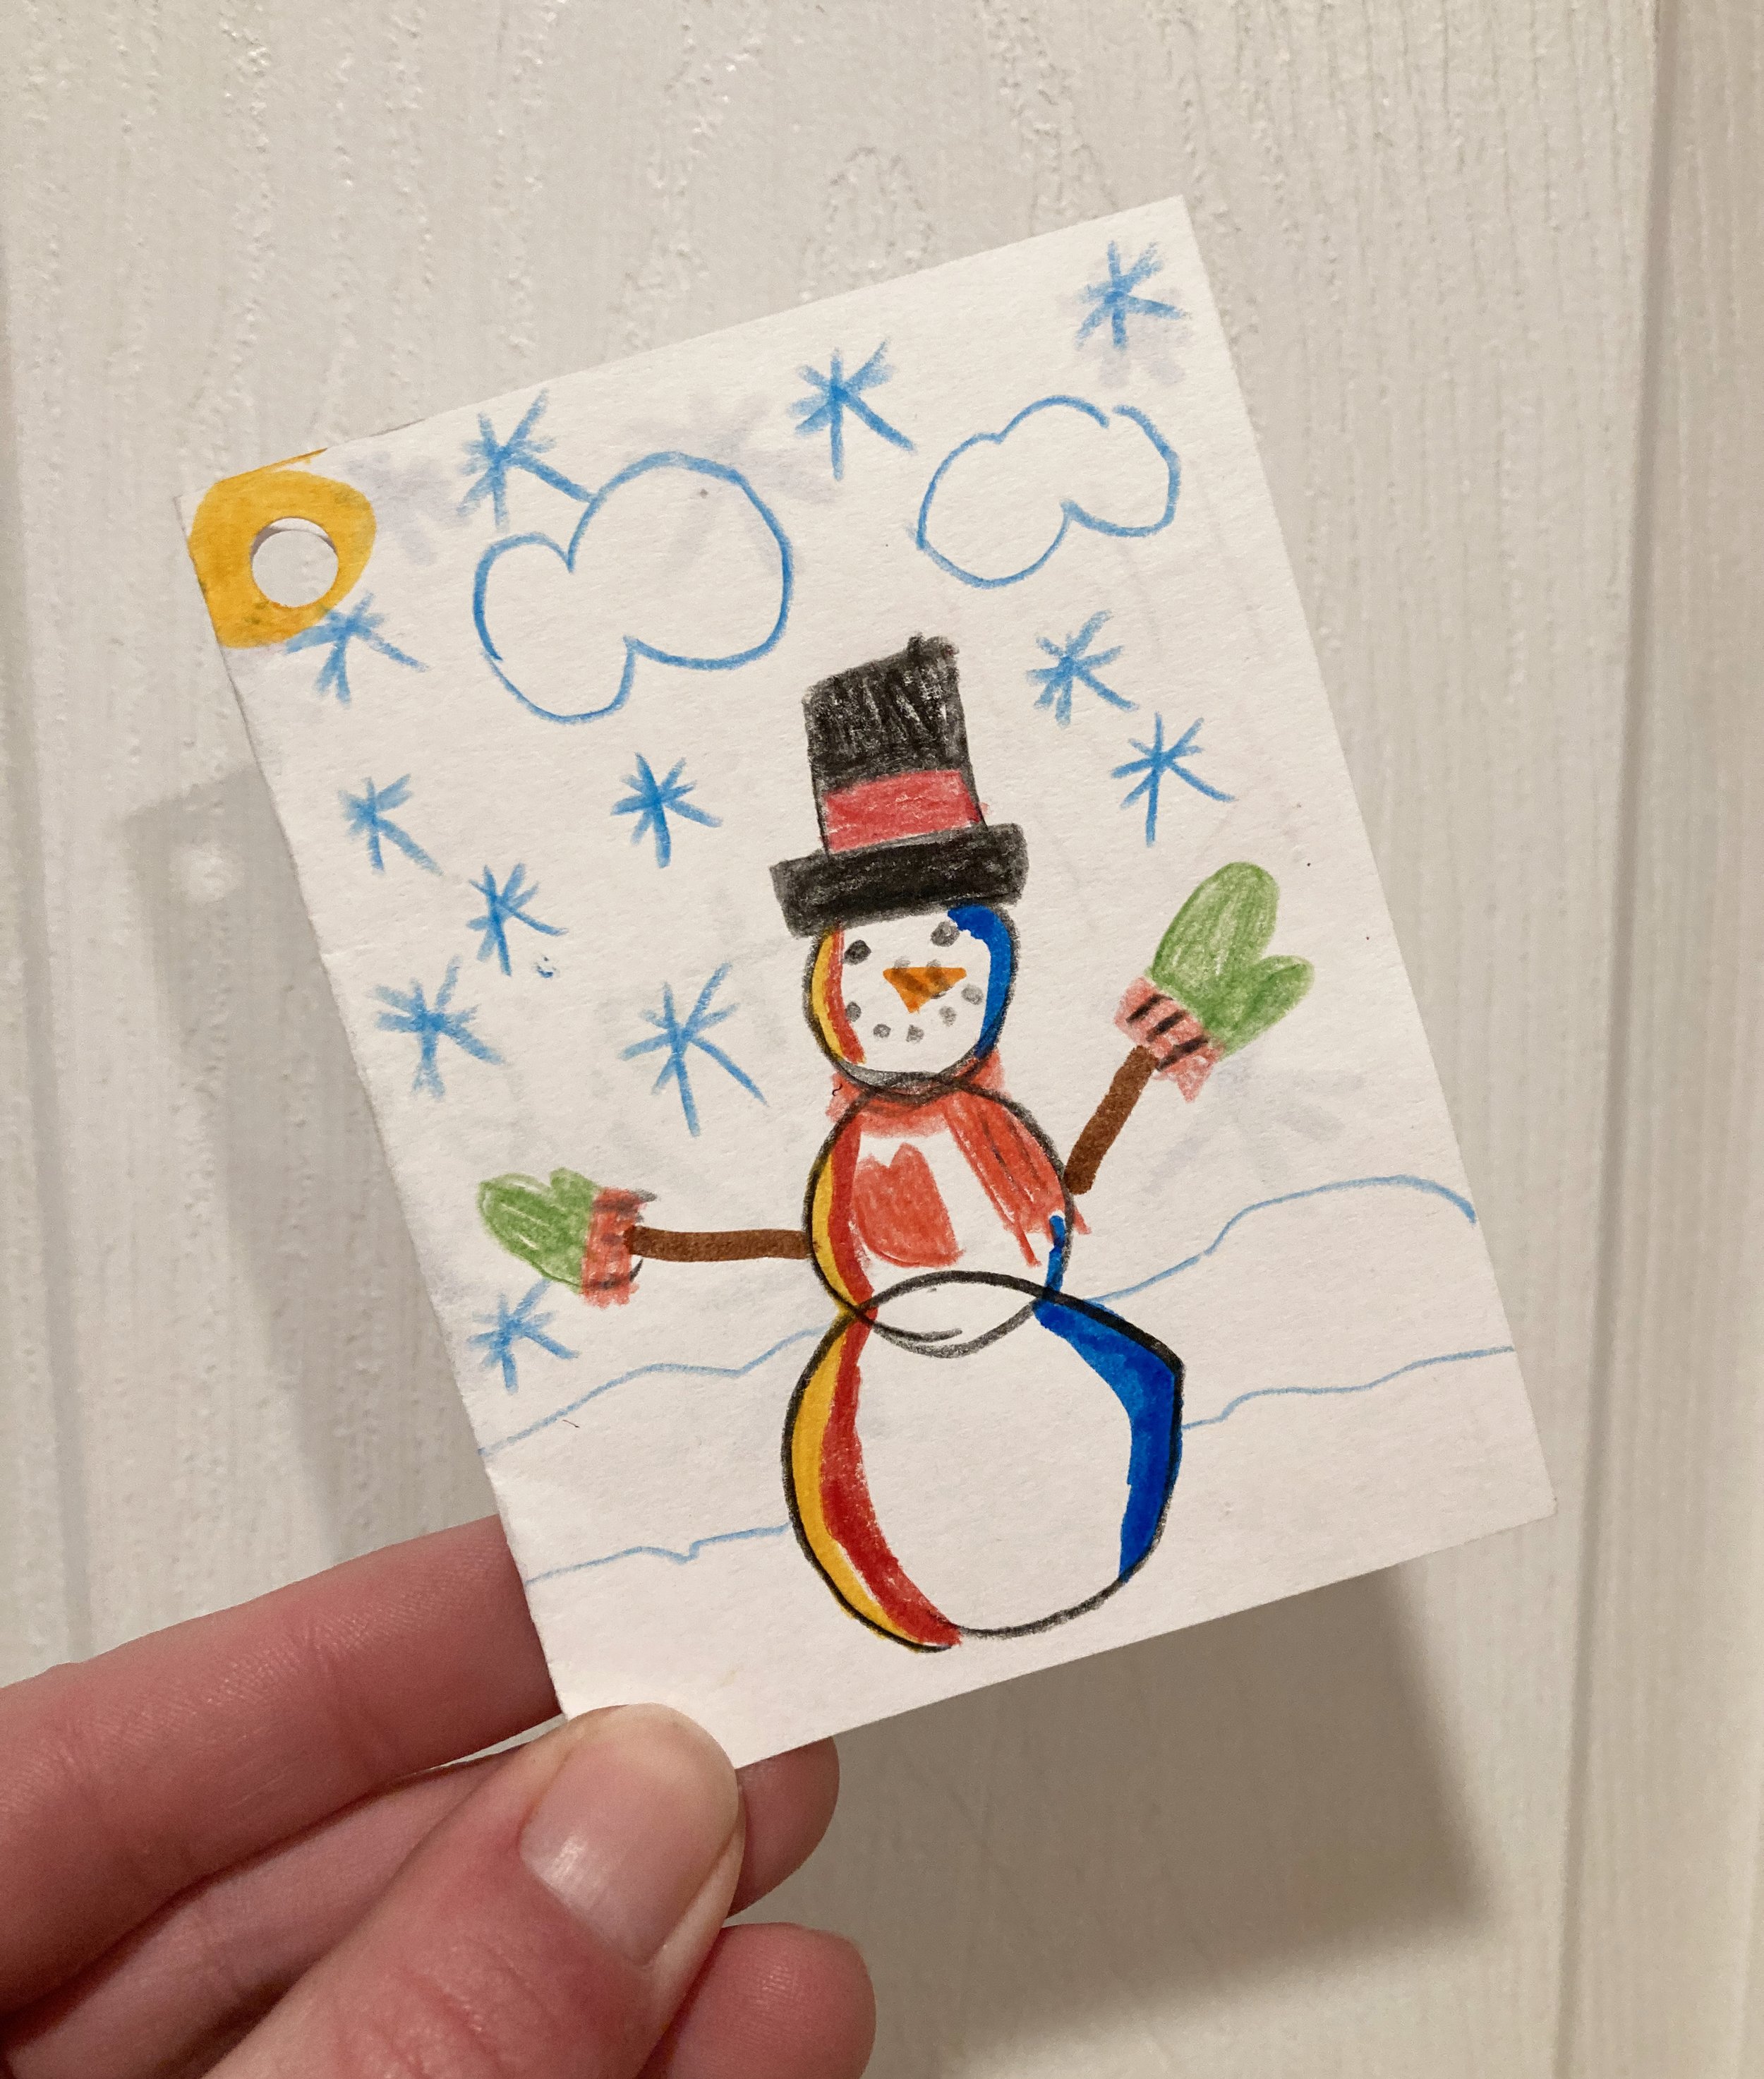
Then I had the kids make the gift tags and write notes to their friends - they loved coming up with special drawings and messages! Our friends really enjoyed getting these kits and I’m excited to see how their snowmen turn out. Hopefully these Snowmen supplies will be something they can reuse for future winters too! Just add snow… ;)
PS - I have a few kits left over listed for sale in my Etsy Shop if you would like to check them out. Just click the button below to shop:
I’ve teamed up with my friends Sewcialite and Sailormade to help you add a little bit of the coast on your tree and under it!
One lucky winner will receive a choice of hand-etched birch ornament from me, a holiday decoupage ornament kit from Sailormade, and 5 sheets of Shelly cane gift wrap from Sewcialite! This great giveaway is not to be missed, head on over to one of our Instagram accounts for details and to enter - this giveaway ends 12/5/21, so enter now!
Happy #givingtuesday! Did you know I donate a percentage of profits from Birch Landing Home to charity at year-end? So every time you visit my blog or purchase one of my crafts that donation gets the chance to grow. Last year I was able to donate to Gather and The Nature Conservancy.
I haven’t decided where this year’s donation is going yet so if you have a favorite charity please share it below!
Now through Tuesday November 30th, take 10-20% off everything in our Etsy Shop, no coupon code needed! At the moment we have a variety of great vintage finds, handmade ornaments, our new New England Lakeside Baseball Cap, and more! Quantities are limited and many of the vintage items are one-of-a-kind, so I recommend shopping early if you’ve had your eye on something.
If you’ve been following my Etsy Shop for awhile, you may have noticed I increased the pricing for most of my Handmade Ornaments this season compared to 2019 (I kept my Etsy Shop closed for most of 2020 due to the pandemic, and just focused on wholesale orders that year). In order to be transparent, I have increased my prices approximately 30% across the board for my handmade ornaments for 3 main reasons:
Getting paid for my time. These ornaments are simple and rustic but they do take a lot of time and effort… sourcing the wood from family and friends, cutting and slow drying the rounds so they don’t crack, creating the design and wood burning it by hand, drilling and stringing them, stamping and packaging them, etc - once I get the long logs in our garage I do the rest of the work solo. Last year I realized I was getting too stressed out about the amount of work and didn’t feel as though I was getting paid for the time I put in.
Postage costs. Postage costs have gone up considerably and no one likes to pay for it. In my Etsy shop I generally under-charge for shipping in order to not put off buyers, and orders over $35 always ship for free. Because of this I loose quite a bit of money on shipping costs on most orders and therefore need to charge a bit more for the items to make up for it.
Etsy fees. Etsy is wonderful for exposure and traffic which is why I’m still with them, but all their fees and listing charges add up fast and I need to account for those when pricing my items.
I just wanted to thank you all for the support and purchases you’ve made. I know these price increases aren’t easy and I likely won’t sell as many ornaments this year but I know it was needed in the long run in order to keep my Etsy shop profitable. I hope you can catch one of the sales we’re planning over the holiday season - the next one being a Black Friday/Cyber Monday sale that will run for several days straight. Keep an eye on Instagram and Facebook for more updates when that sale happens!
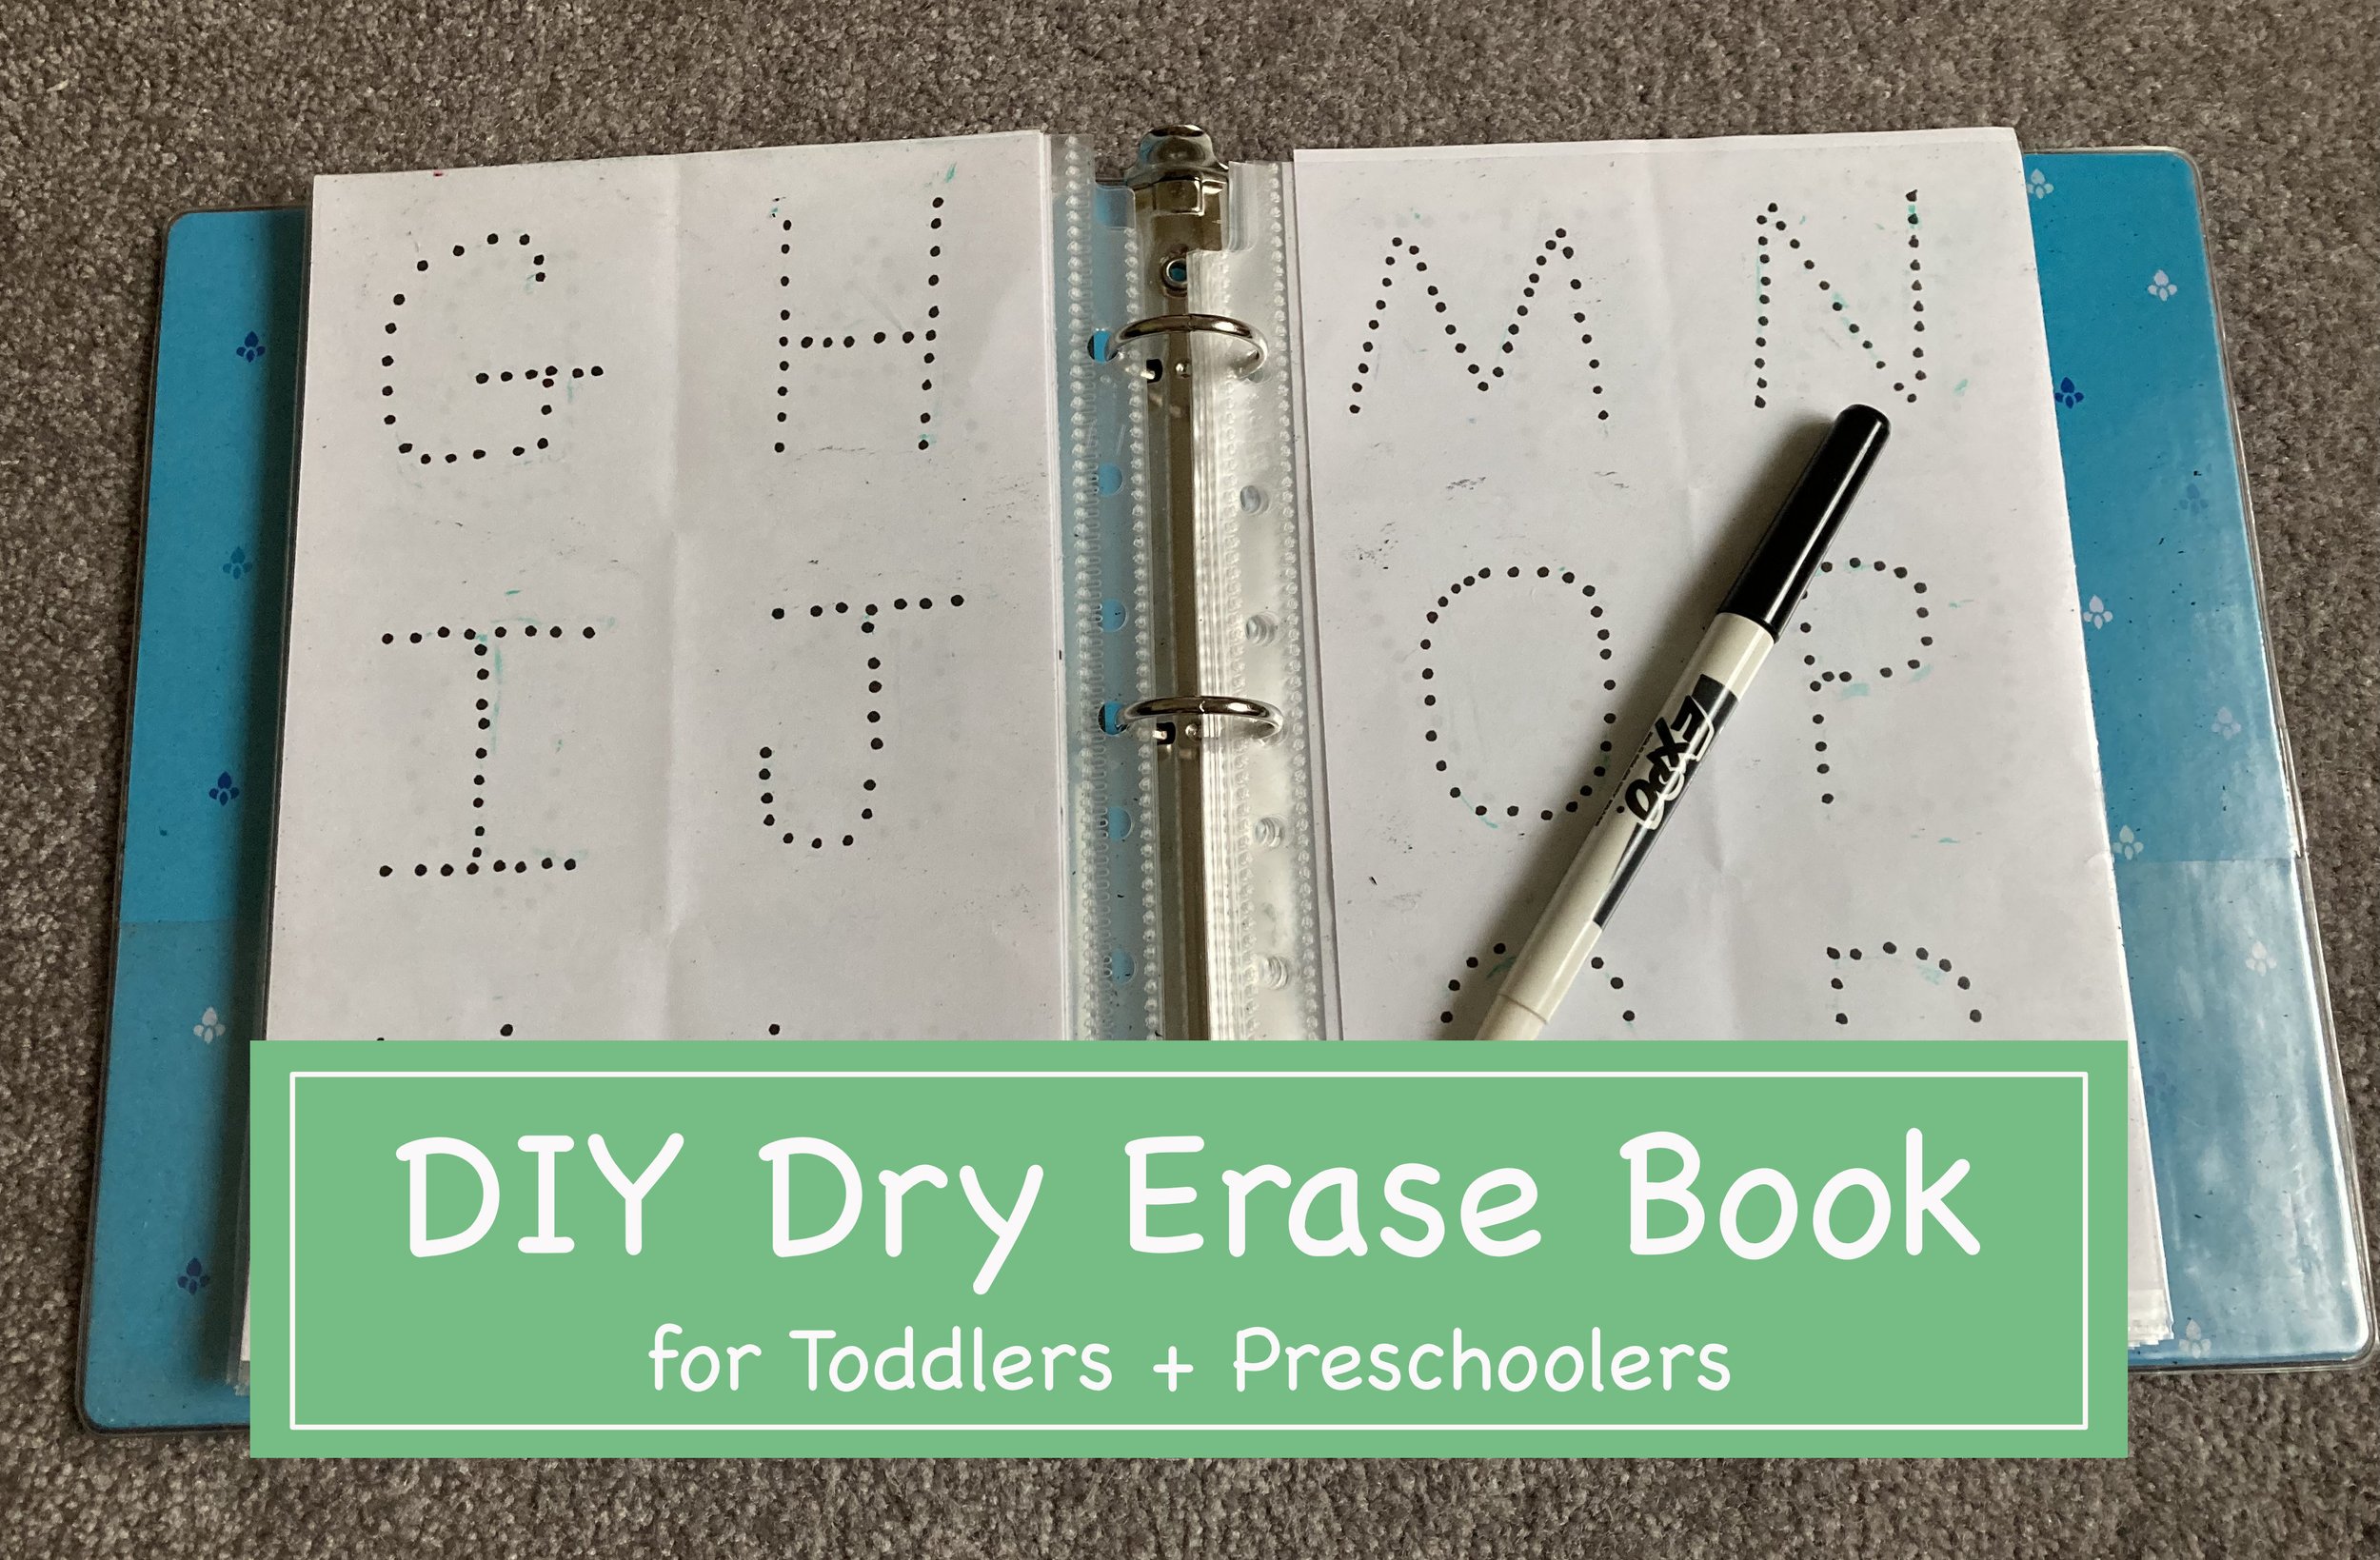
I was just refreshing the little books and toys we keep in our car, when I realized I had never shared about this Dry Erase Activity Book I made for our first kid years ago (and now our youngest uses it). It was incredibly easy to make and tailor to each child with what stage they were at/needed to work on. Here’s the super easy how-to, hopefully it will inspire you to make one yourself! | This post contains affiliate links |
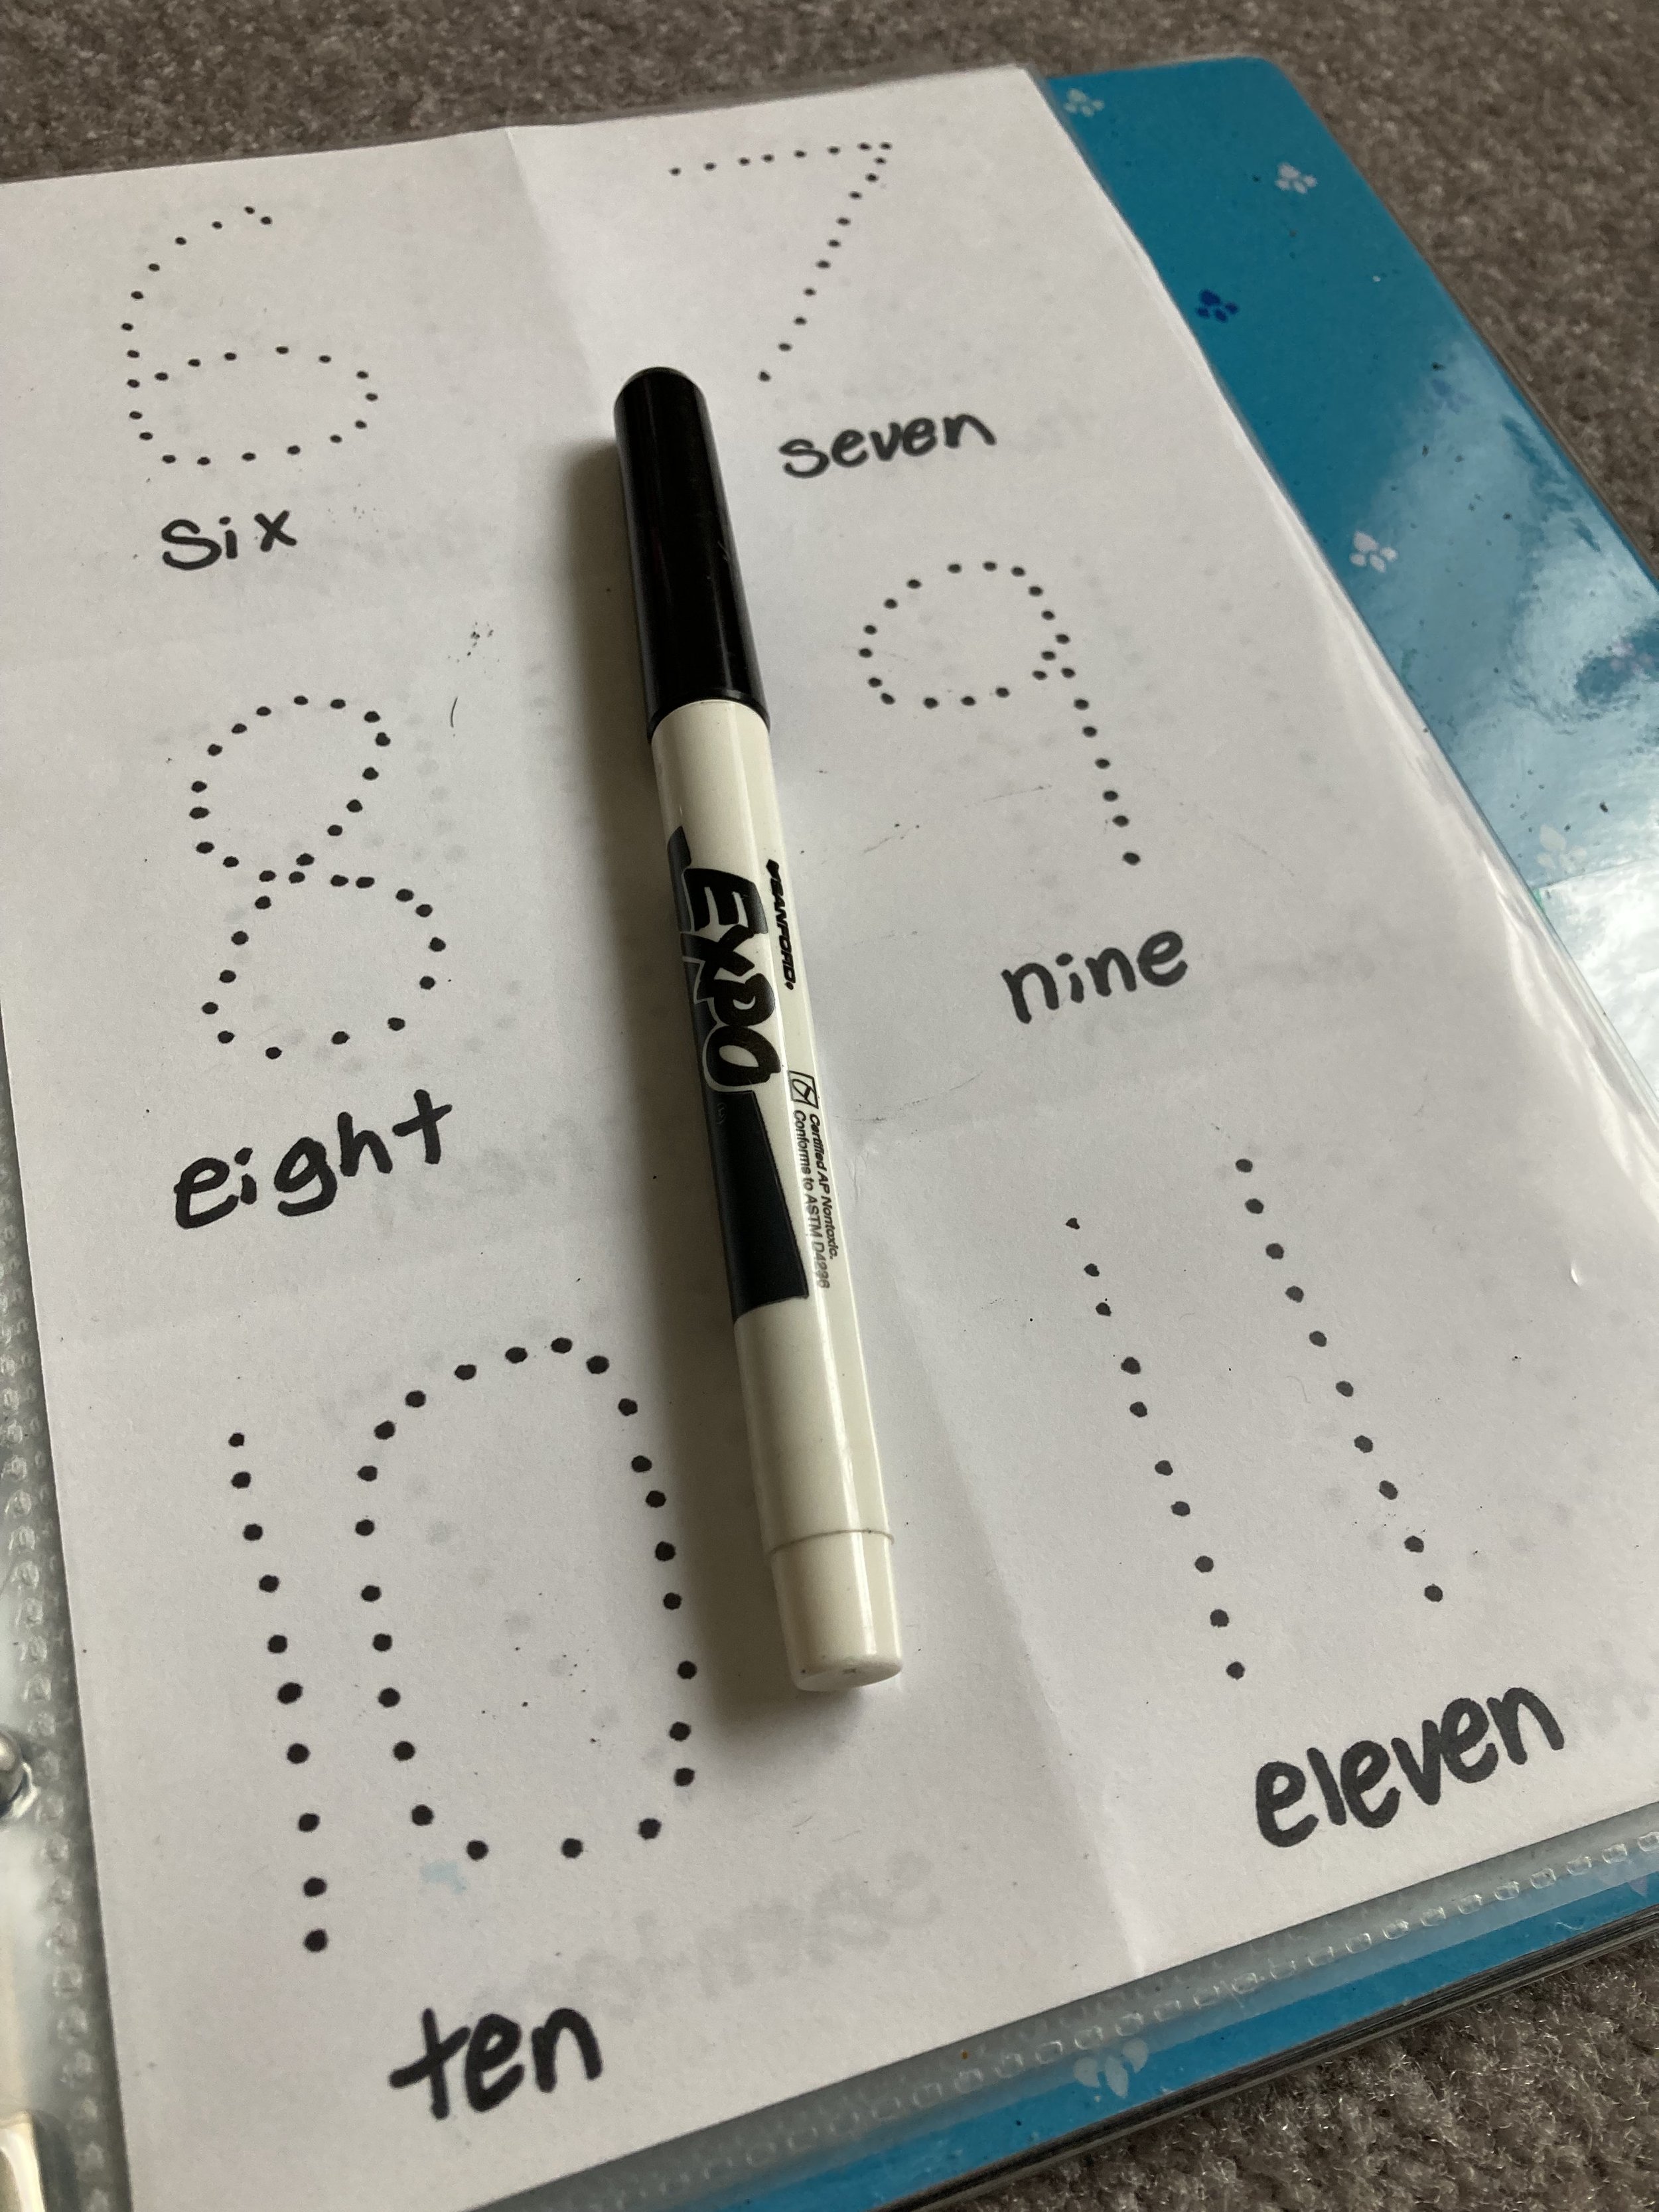
Really the how-to could not be easier! All you have to do is cut the computer paper in half to make it the correct size to fit in the sheet protectors, and then create your worksheets however you would like. I used dots for the kids to trace as well as made some free-draw pages and pages for them to practice writing out their whole names. In the pocket we keep a dry erase marker and some folded up paper towels to wipe the pages when they’re done.
We love this as a car toy and activity to do while the oldest is doing soccer practice, etc. And as your child grows you can update the pages with anything - math problems, maps to label, spelling practice, etc. Have fun tailoring it your kids and their age groups - we love that this can grow with our kids.
Page Ideas (for both young kids and older kids):
tracing shapes
tracing letters (uppercase and lowercase)
tracing numbers
writing name (all uppercase as well as with lowercase)
free draw pages
matching
math problems
spelling practice
labeling maps
labeling planets
draw features (eyes, hair, etc) on a blank face
draw details on a landscape photo
come up with your own - the possibilities are endless!
This Car Seat Organizer where our DIY Dry Erase Activity Book lives (along with other various car toys/books).