I'm a wife, stay-at-home mom, crafter, and blogger living in rural New England. As seen in Martha Stewart Living, Food Network Magazine, and more! | Tutorials, DIY, crafts, parenting tips, recipes, money saving tips, product reviews, local product features, New England living, intentional living, and more! |
We’re definitely living in different times right now… and it’s becoming clearer that it looks as though we will have to co-exist with the COVID-19 virus for the foreseeable future. Because of that anything we can do that might mitigate the risk of virus transmission, like always wearing face masks or face coverings when outside our homes, have become a part of our “new normal.” Since mask-wearing should be part of your new routine whenever you leave your house, it’s a good idea to have a system in place to make sure you always have clean masks at the ready and you never leave home without one. | This post contains affiliate links |
Disclaimer: I am not giving medical advice. Make sure to always consult the CDC and local health officials for up-to-date recommendations on mask wearing, storage, and care. Cloth masks are not considered medical grade and should be washed in between each use… check with individual mask makers/companies on the best way to store/wash/care for your masks.
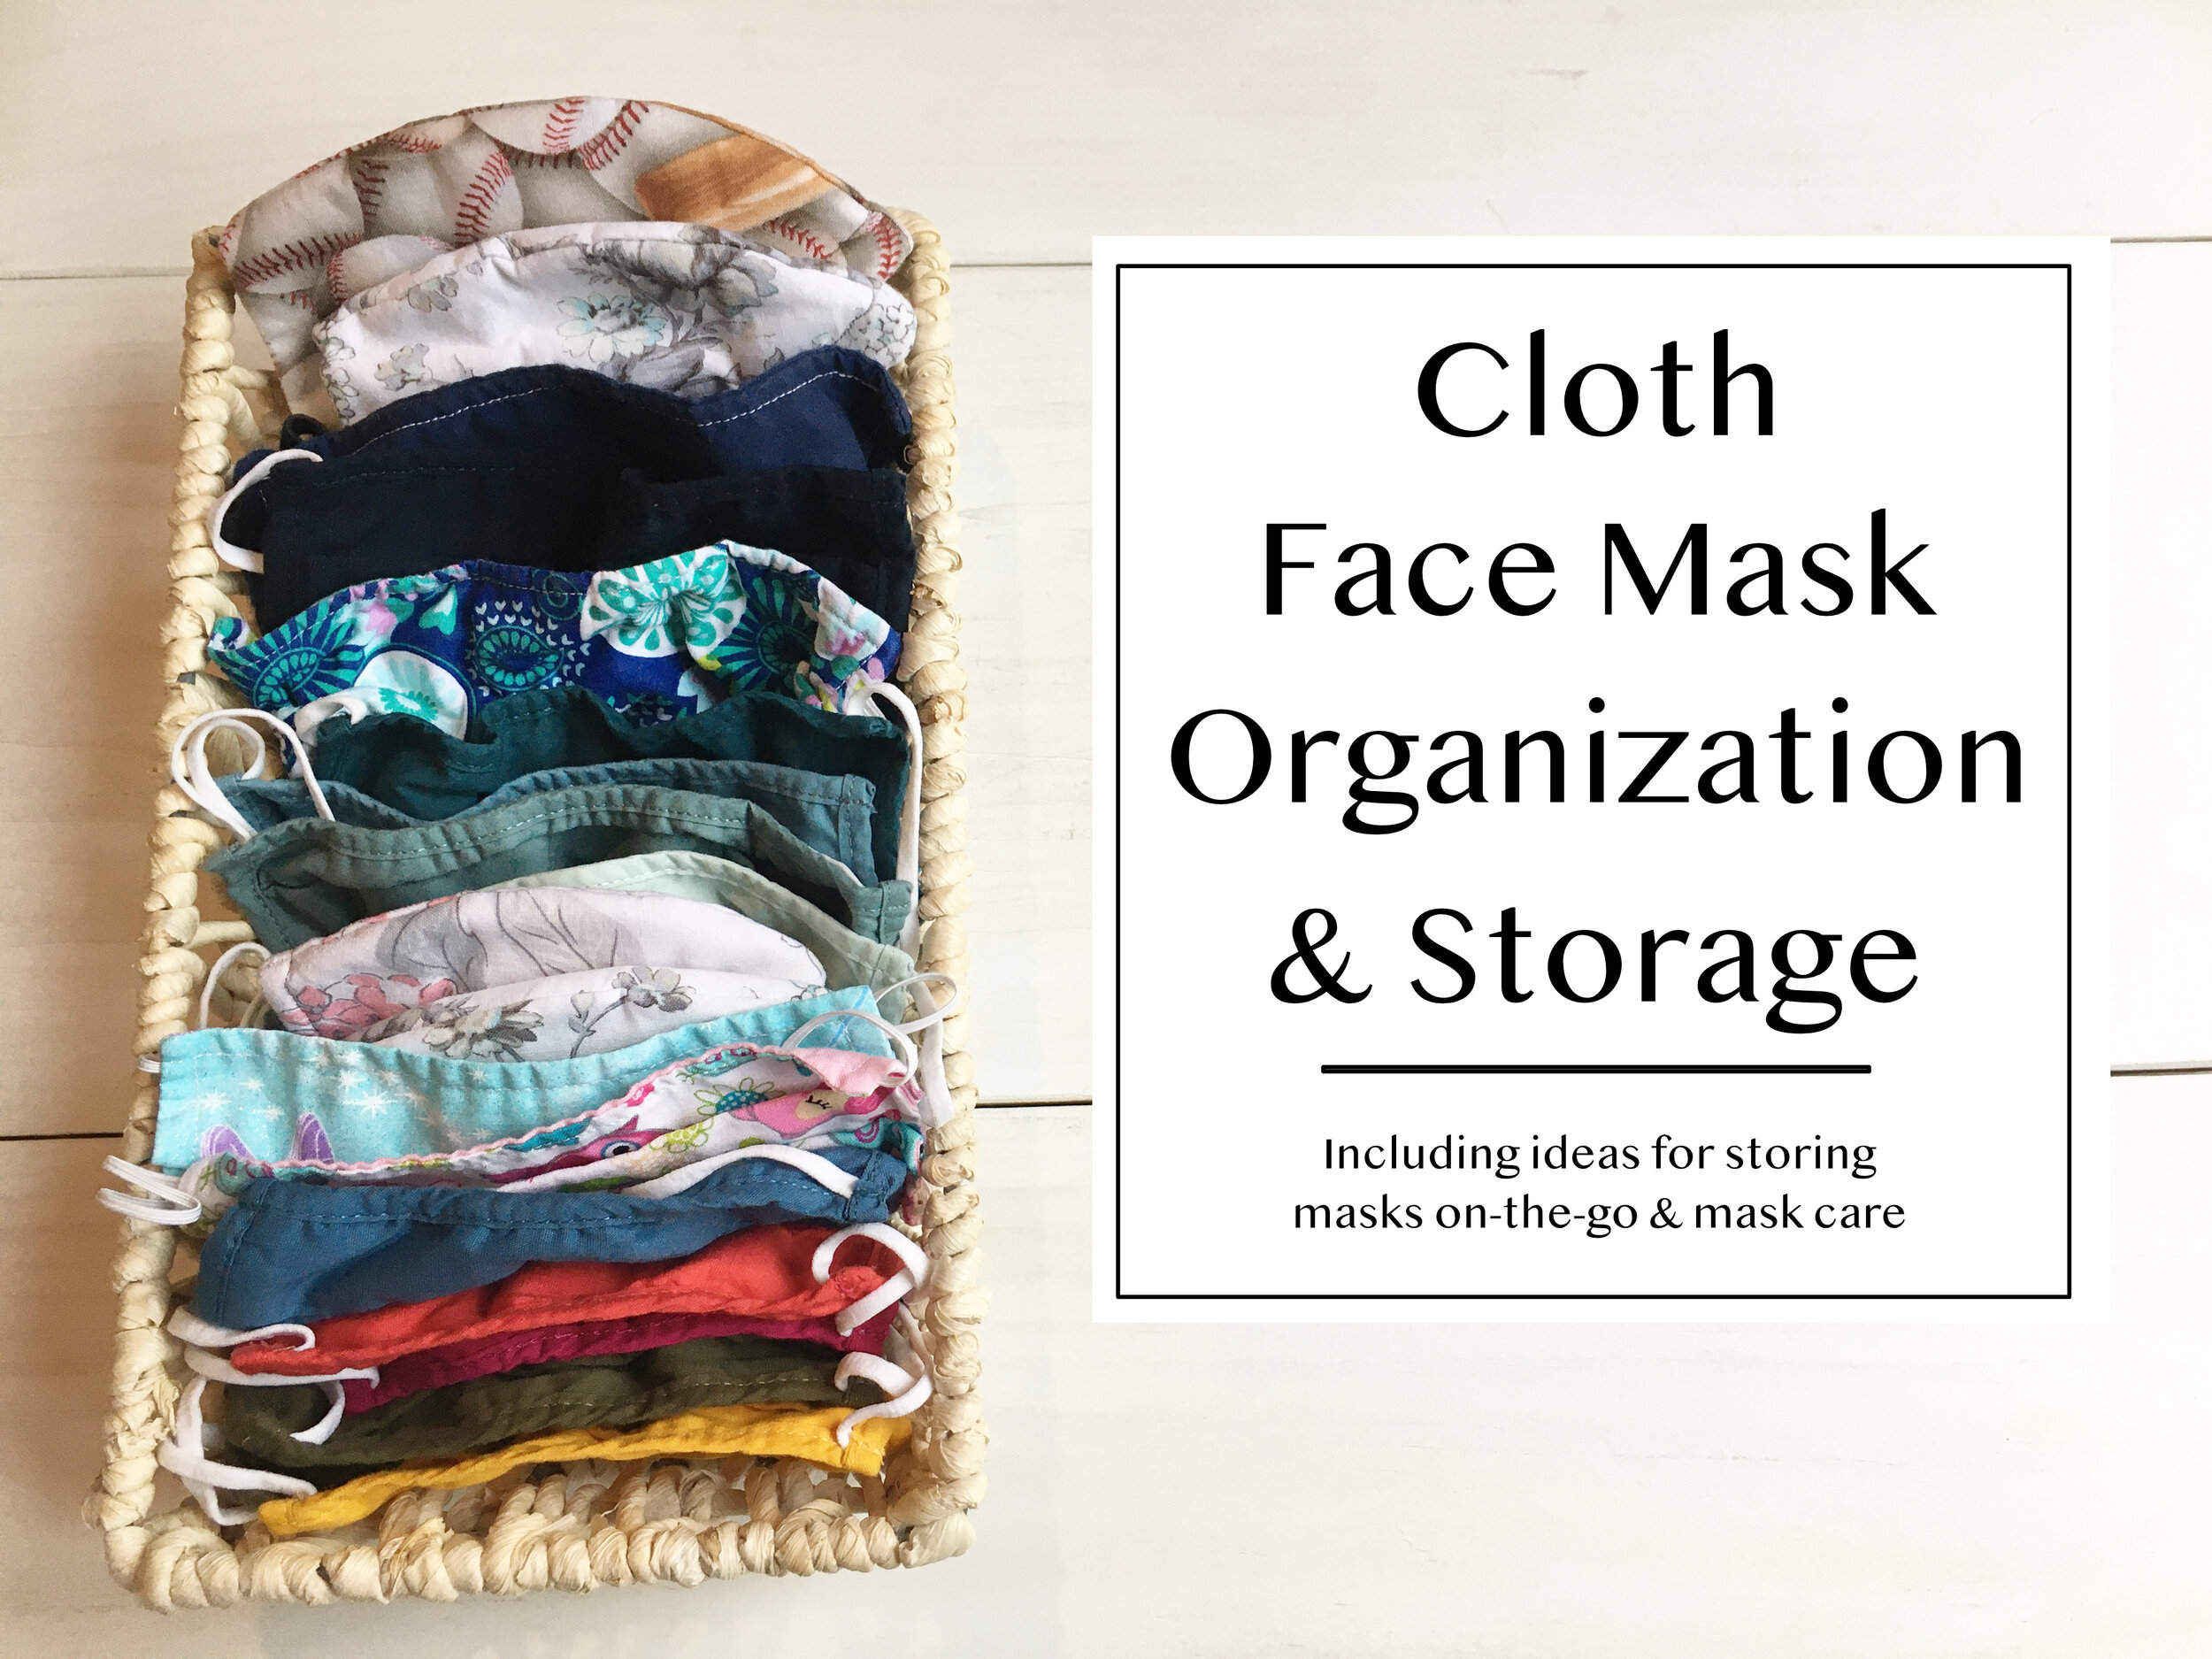
Mask Storage at Home
It’s a good idea to keep your clean masks in a designated area of your home, preferably in a place where you’ll be sure to grab one on your way out the door to do errands, go to work, etc. At first glance it might look like we have a lot of masks, but we really don't considering we're a household of four and it's essential to have enough masks to get through between laundry loads. We're still staying home and social-distancing very seriously, but whenever we have to do an essential errand/appointment or just go for a drive to get out of the house, we always make sure to have a clean mask for everyone that’s leaving the house.
In our home, we've designated a special basket that sits up high on our mudroom shelf, full of clean masks. We put the adult masks towards the back, and then kids masks in the front. I was unable to find a basket the same size on Amazon to link to, but I did find this
sleek bamboo box that looks to be the perfect size. If you don't have shelf space for a basket, you could alternatively use wall-mounted baskets for storage. Our masks are a mix of ones made with love for us by family members, as well as ones purchased from
Old Navy
and
Miss Harlow VT
(one of the local makers I featured in my "Masks by New England Makers" blog post).
If you don't like the idea of using a basket like we do and would rather hang your masks by the door, another option would be using
a small set of hooks
such as a set of compact coat hooks or key rack - or even just simple
Command Hooks.
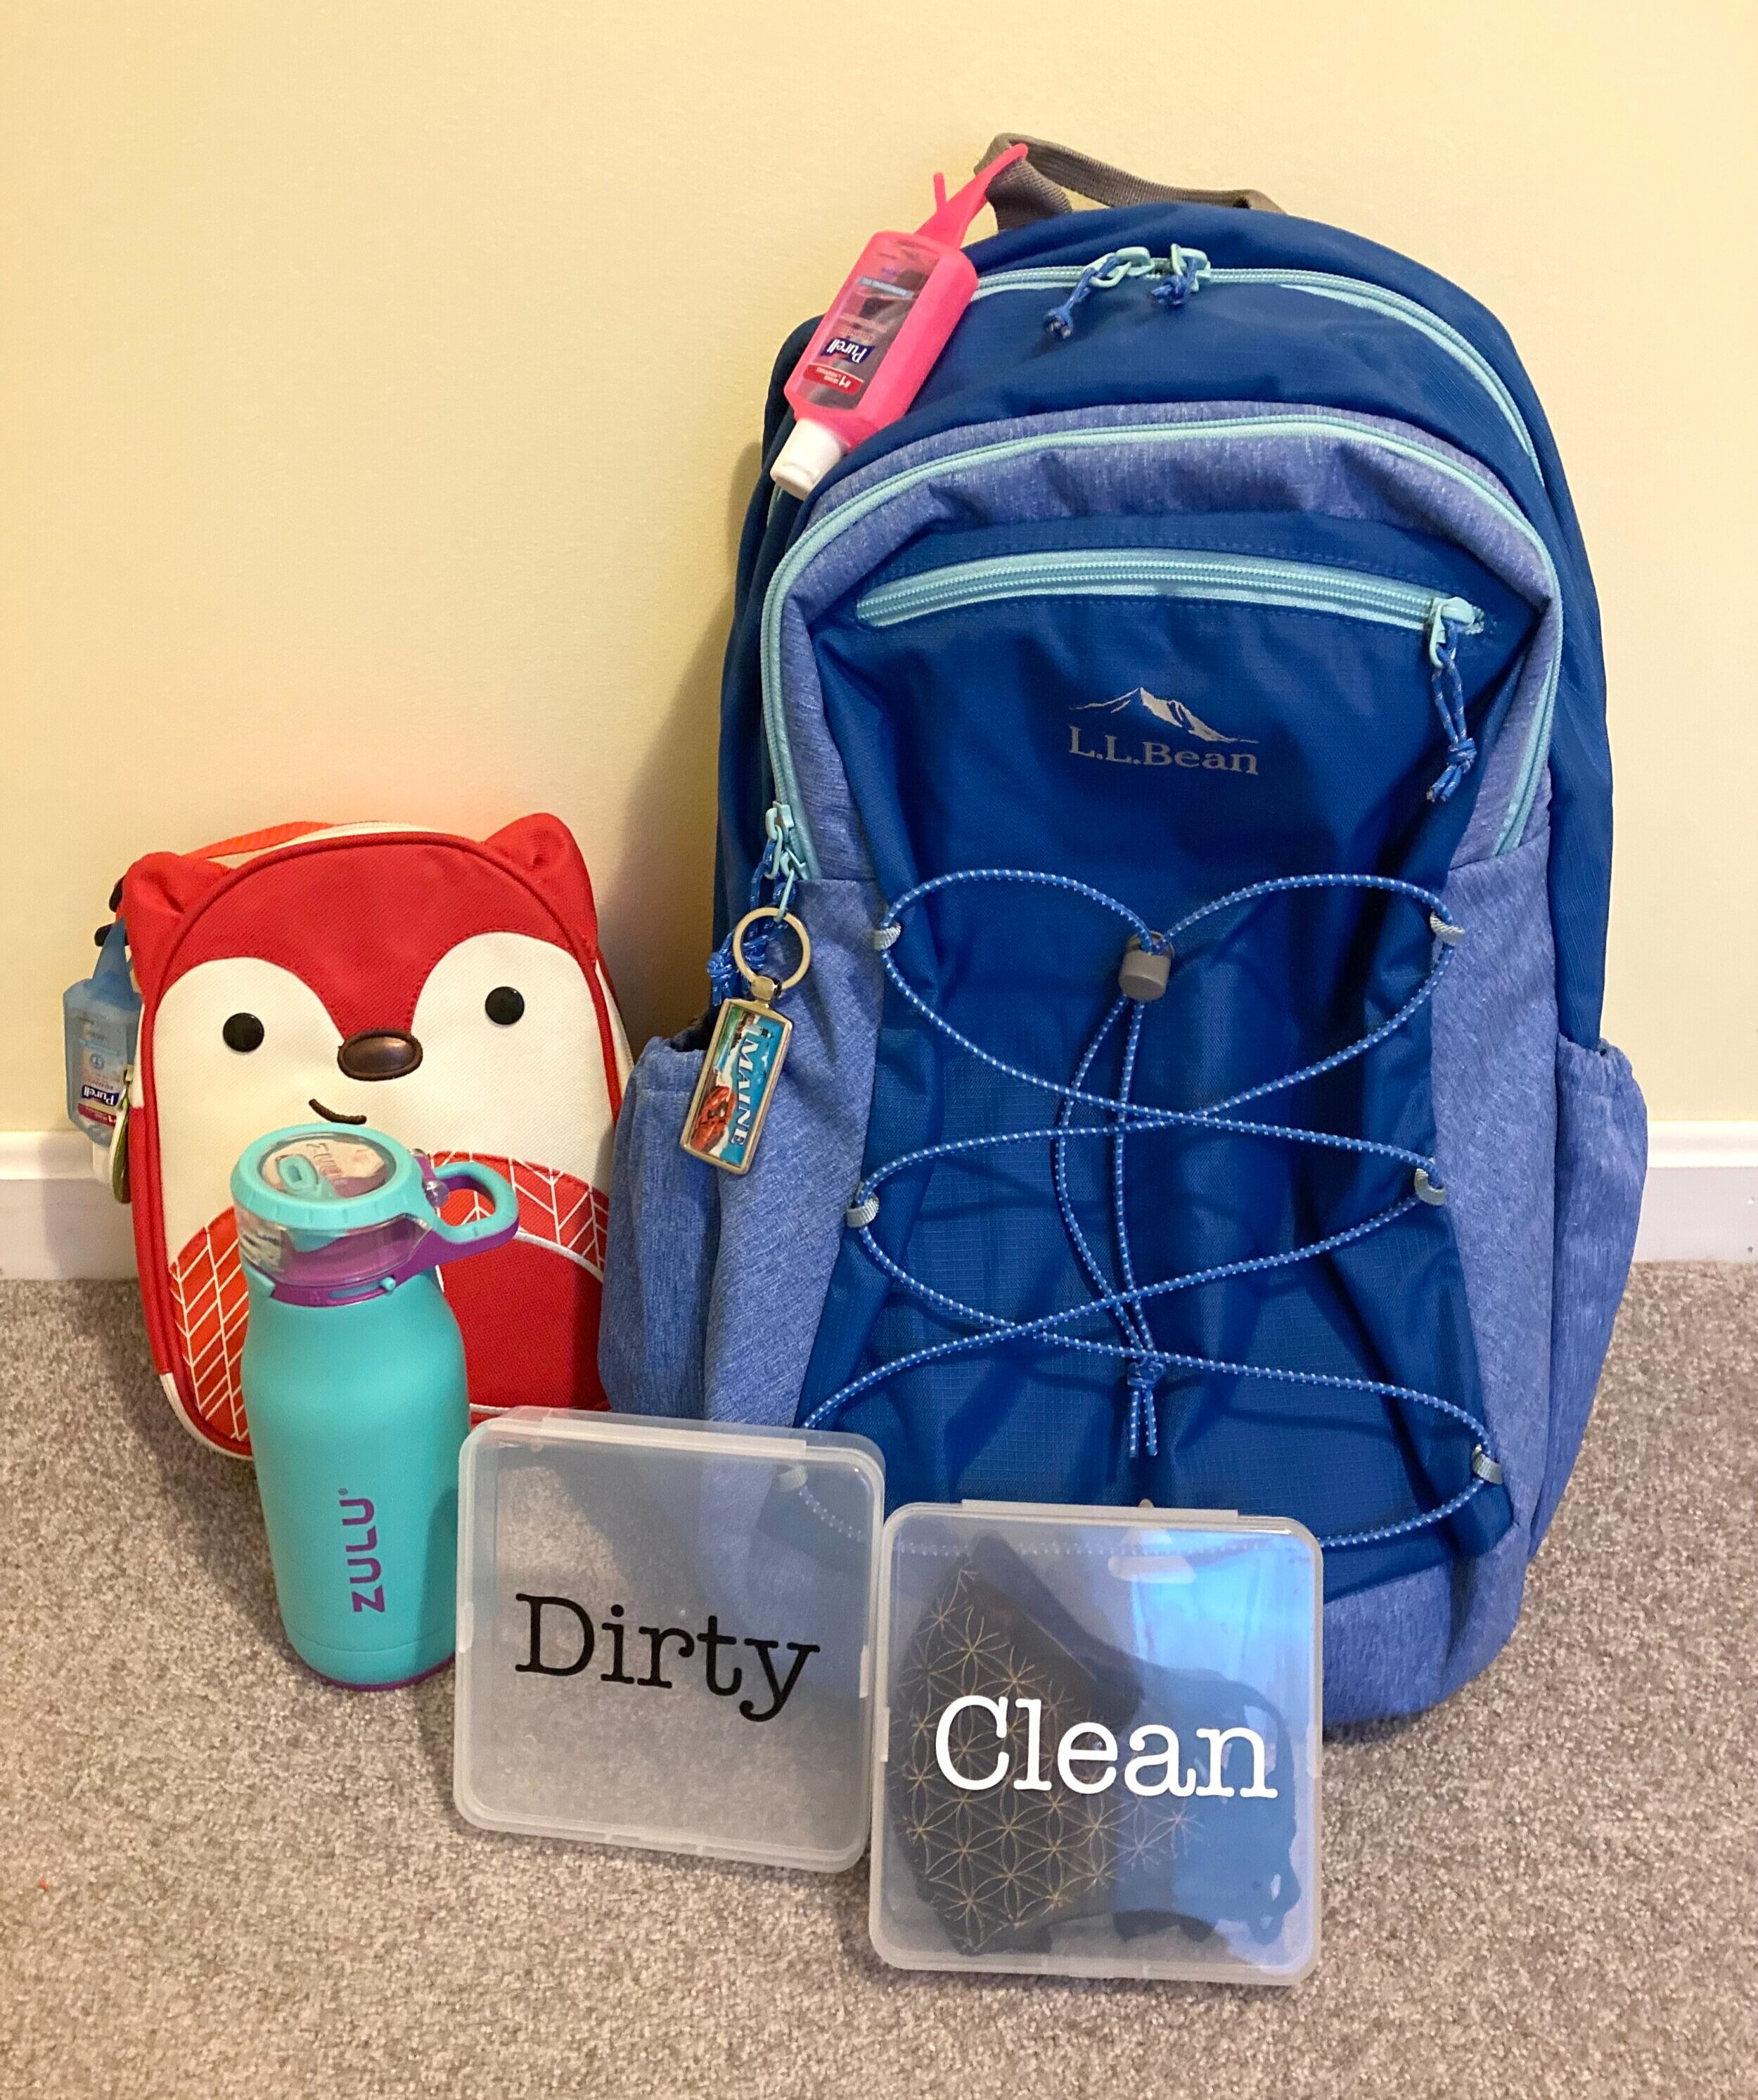
Mask Storage On-The-Go
We have found a
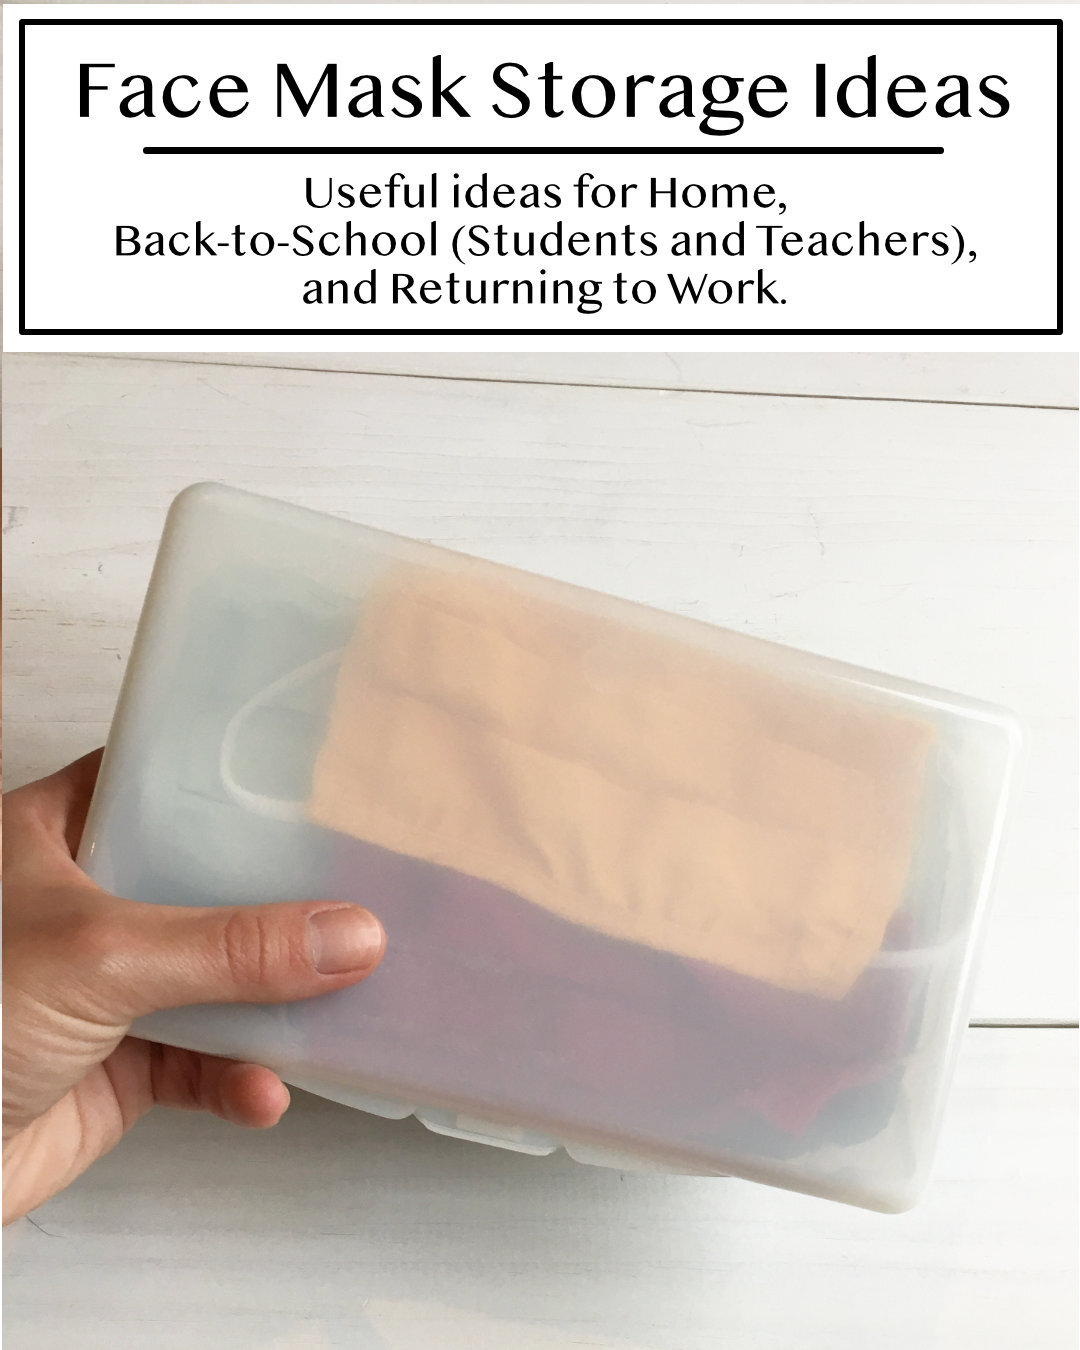
slim wipes container
is the perfect size for holding several face masks on-the-go! In fact, we always make sure to leave our case packed with an extra mask for each family member in the car. That way we're always covered if we forget one or need to change masks while we're out of the house. I think this would be a great way to carry extra face masks in your bag for work, or your child's backpack whenever they return to school. It would probably be a good idea to also keep a ziplock bag or separate sealed container in your bag in case you have a dirty/used mask that needs to be brought home to wash.
And if you wanted to take it a step further and have an organzied mask system on-the-go to put in your work bag or child's backpack, you might want to consider having two cases - one for clean masks and one for dirty masks. I ordered these clear mask cases from Amazon and cut labels for them on my Cricut. We'll be packing one with extra clean masks, and the other will be empty for dirty masks to come home in. Since we recently invested in some better quality masks I wanted to make sure they stay in cases when not in use to keep them in good shape.
Alternatively, if you don't have any slim wipes containers hanging around you could also use
Small Craft Storage Cases
, which come in clear and a variety of colors. This might be more cost effective too if you needed multiple cases - especially if you needed one or more cases for each family member, or if you were a teacher and wanted to make a case for each student in your class.
You can also easily label any of these cases with a
label maker.
We always make sure to keep the car stocked with our plastic case of extra face masks, hand sanitizer, and disinfectant wipes to help protect ourselves when we’re out doing errands.
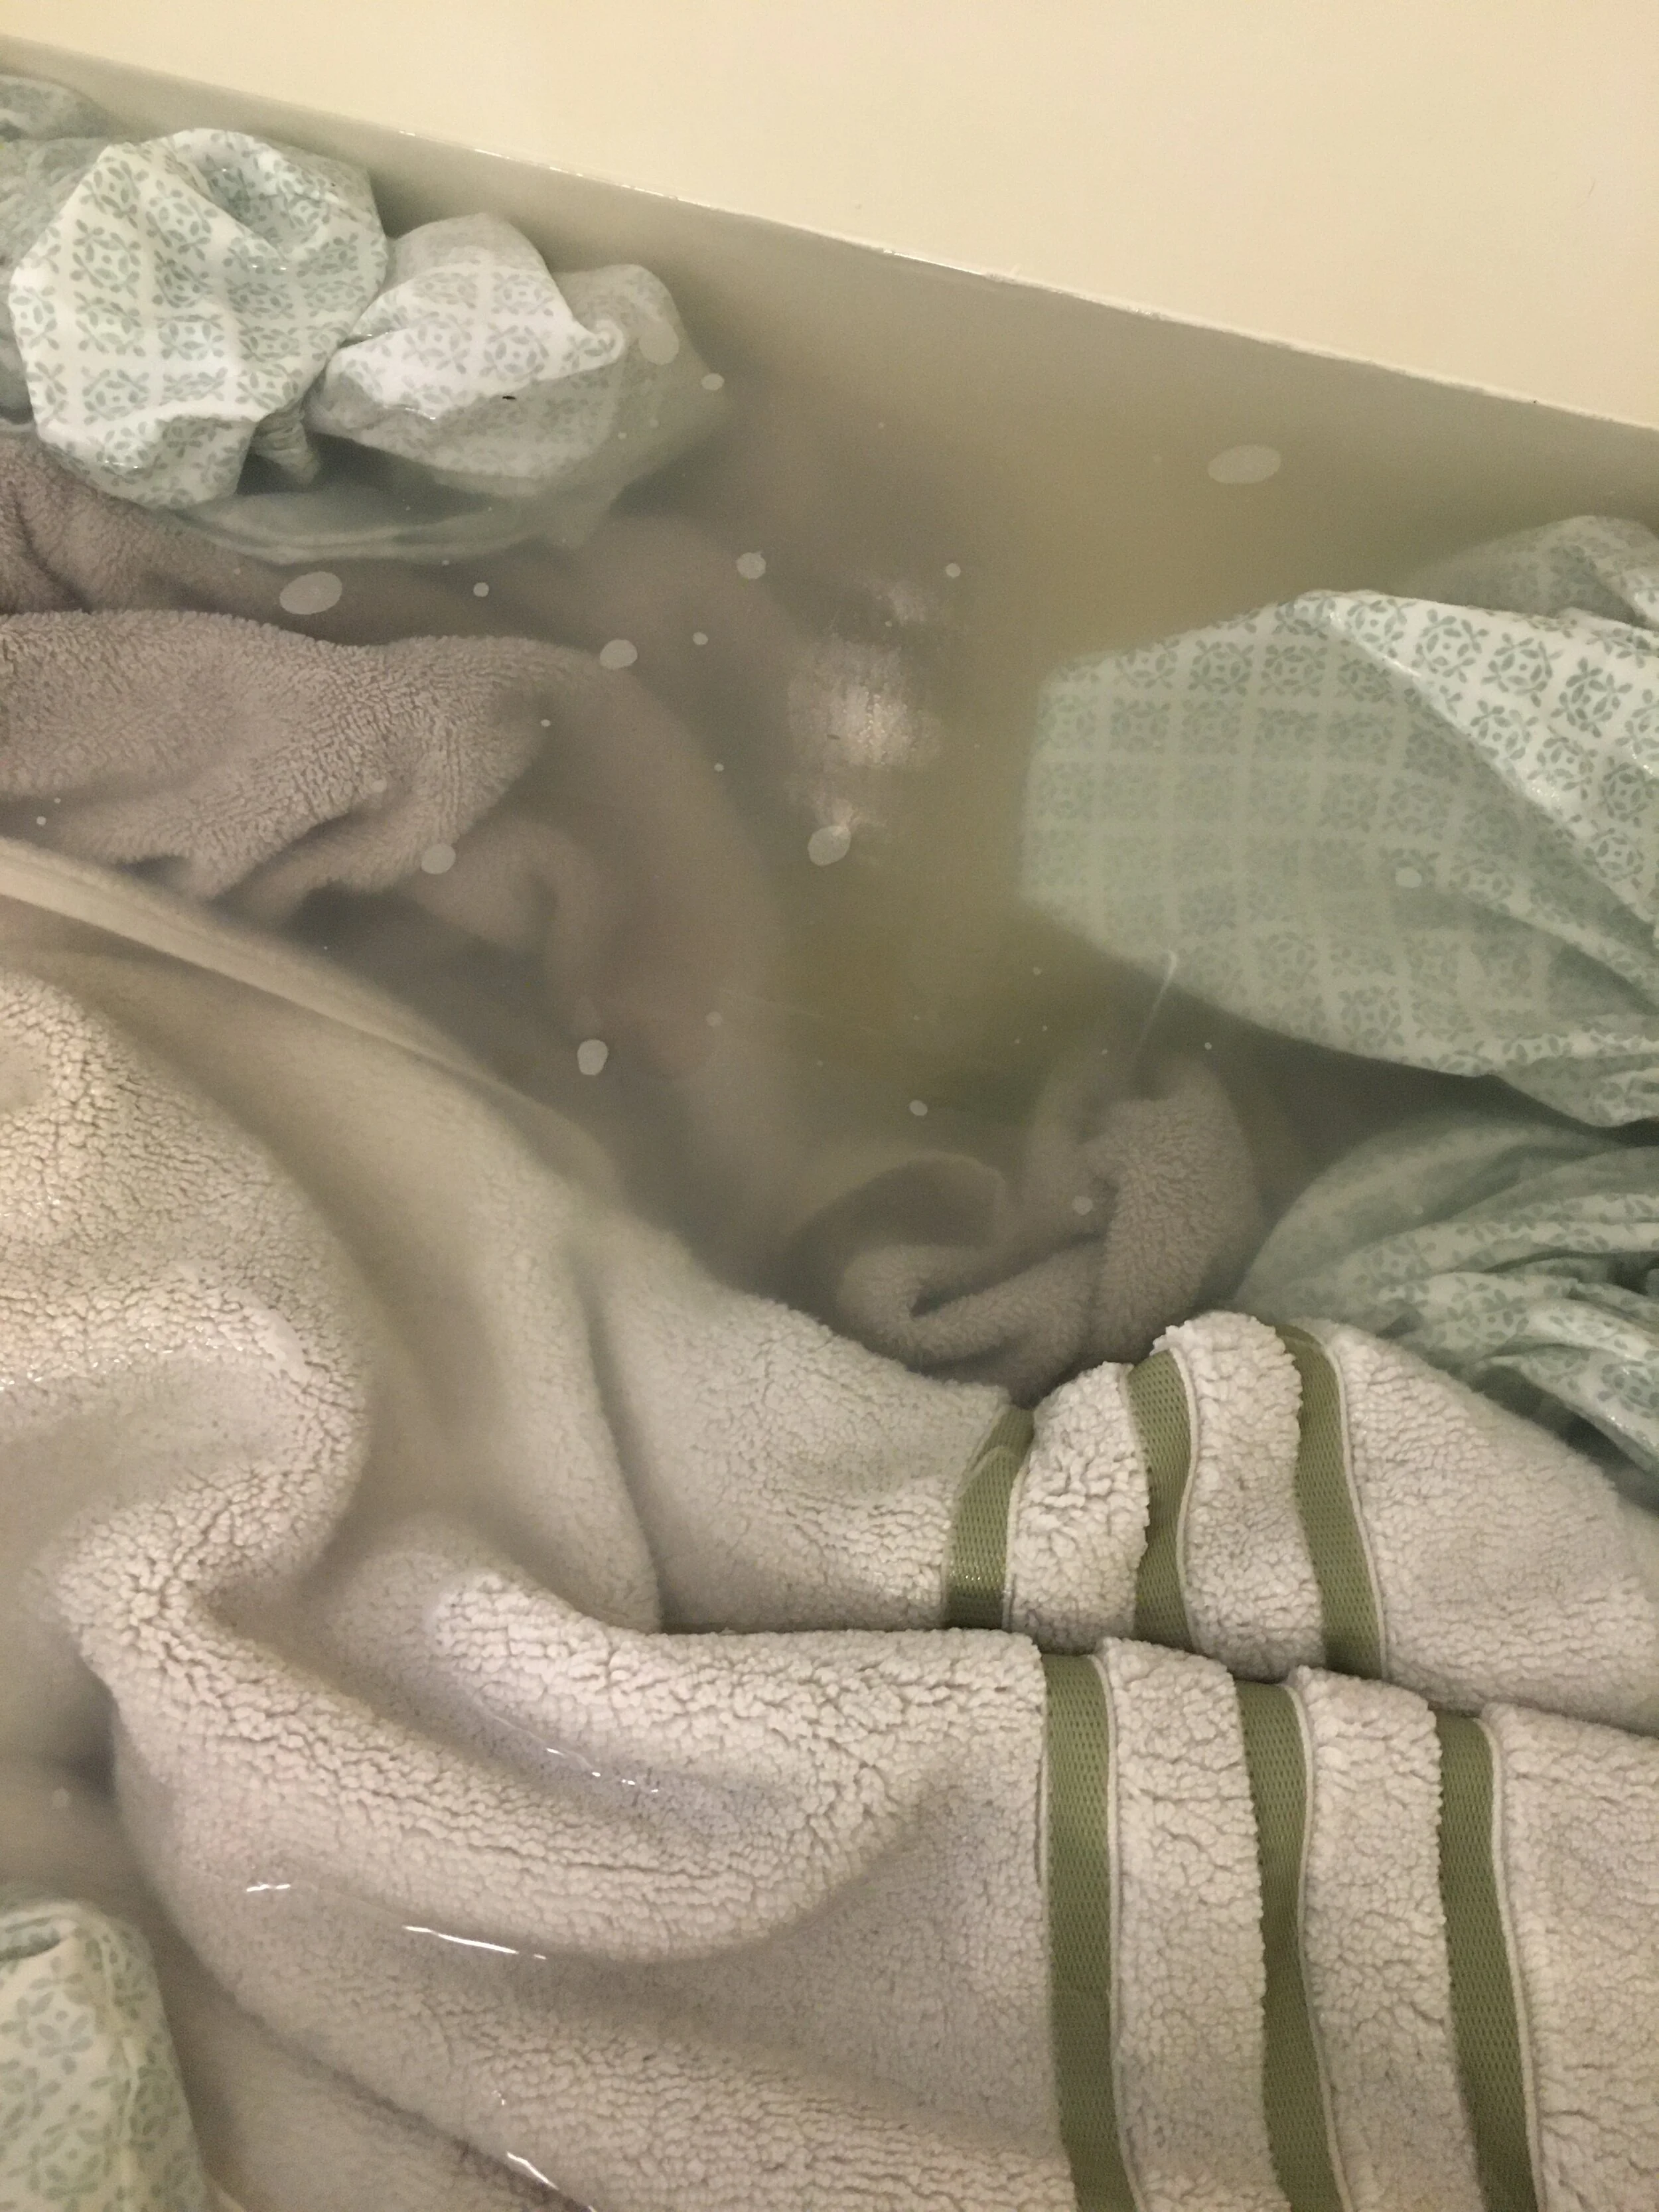
Mask Care
Always refer to individual mask makers/companies on the best way to care for each of your masks (hand wash only vs machine wash, line-dry vs dryer, etc.) But in general, all masks should be washed and allowed to thoroughly dry in between each use.
Since all of our masks are machine washable, we've found using a mesh lingerie laundry bag is perfect for keeping the masks from getting lost in the wash or caught on other items.
Quick Adjustment Tips
If you feel like your face mask is a little large or isn’t fitting as closely to your face as you would like, you can typically adjust it very easily by making a small knot in the ear loop elastics (as shown above) to make it smaller.
One mask accessory that we've found super helpful lately are
Mask Lanyards. We personally use them most often when we're out hiking or going for a long walk, that way the time we're out alone we can keep our masks down, however in the event we see someone coming up we can easily put them on if we need to pass others on the trail. We made a point to choose lanyards that have a breakaway safety feature, but use at your own discretion/risk.
Disclaimer: I am not giving medical advice. Make sure to always consult the CDC and local health officials for up-to-date recommendations on mask wearing, storage, and care. Cloth masks are not considered medical grade and should be washed in between each use… check with individual mask makers/companies on the best way to store/wash/care for your masks.
Vaccination Card Protector
Vaccinated? You may want to consider getting a Vaccination Card Protector for your vaccine card to help keep them protected and clean at home or while you're traveling. These are nice because you can remove your vaccine card to record updates/boosters if needed.
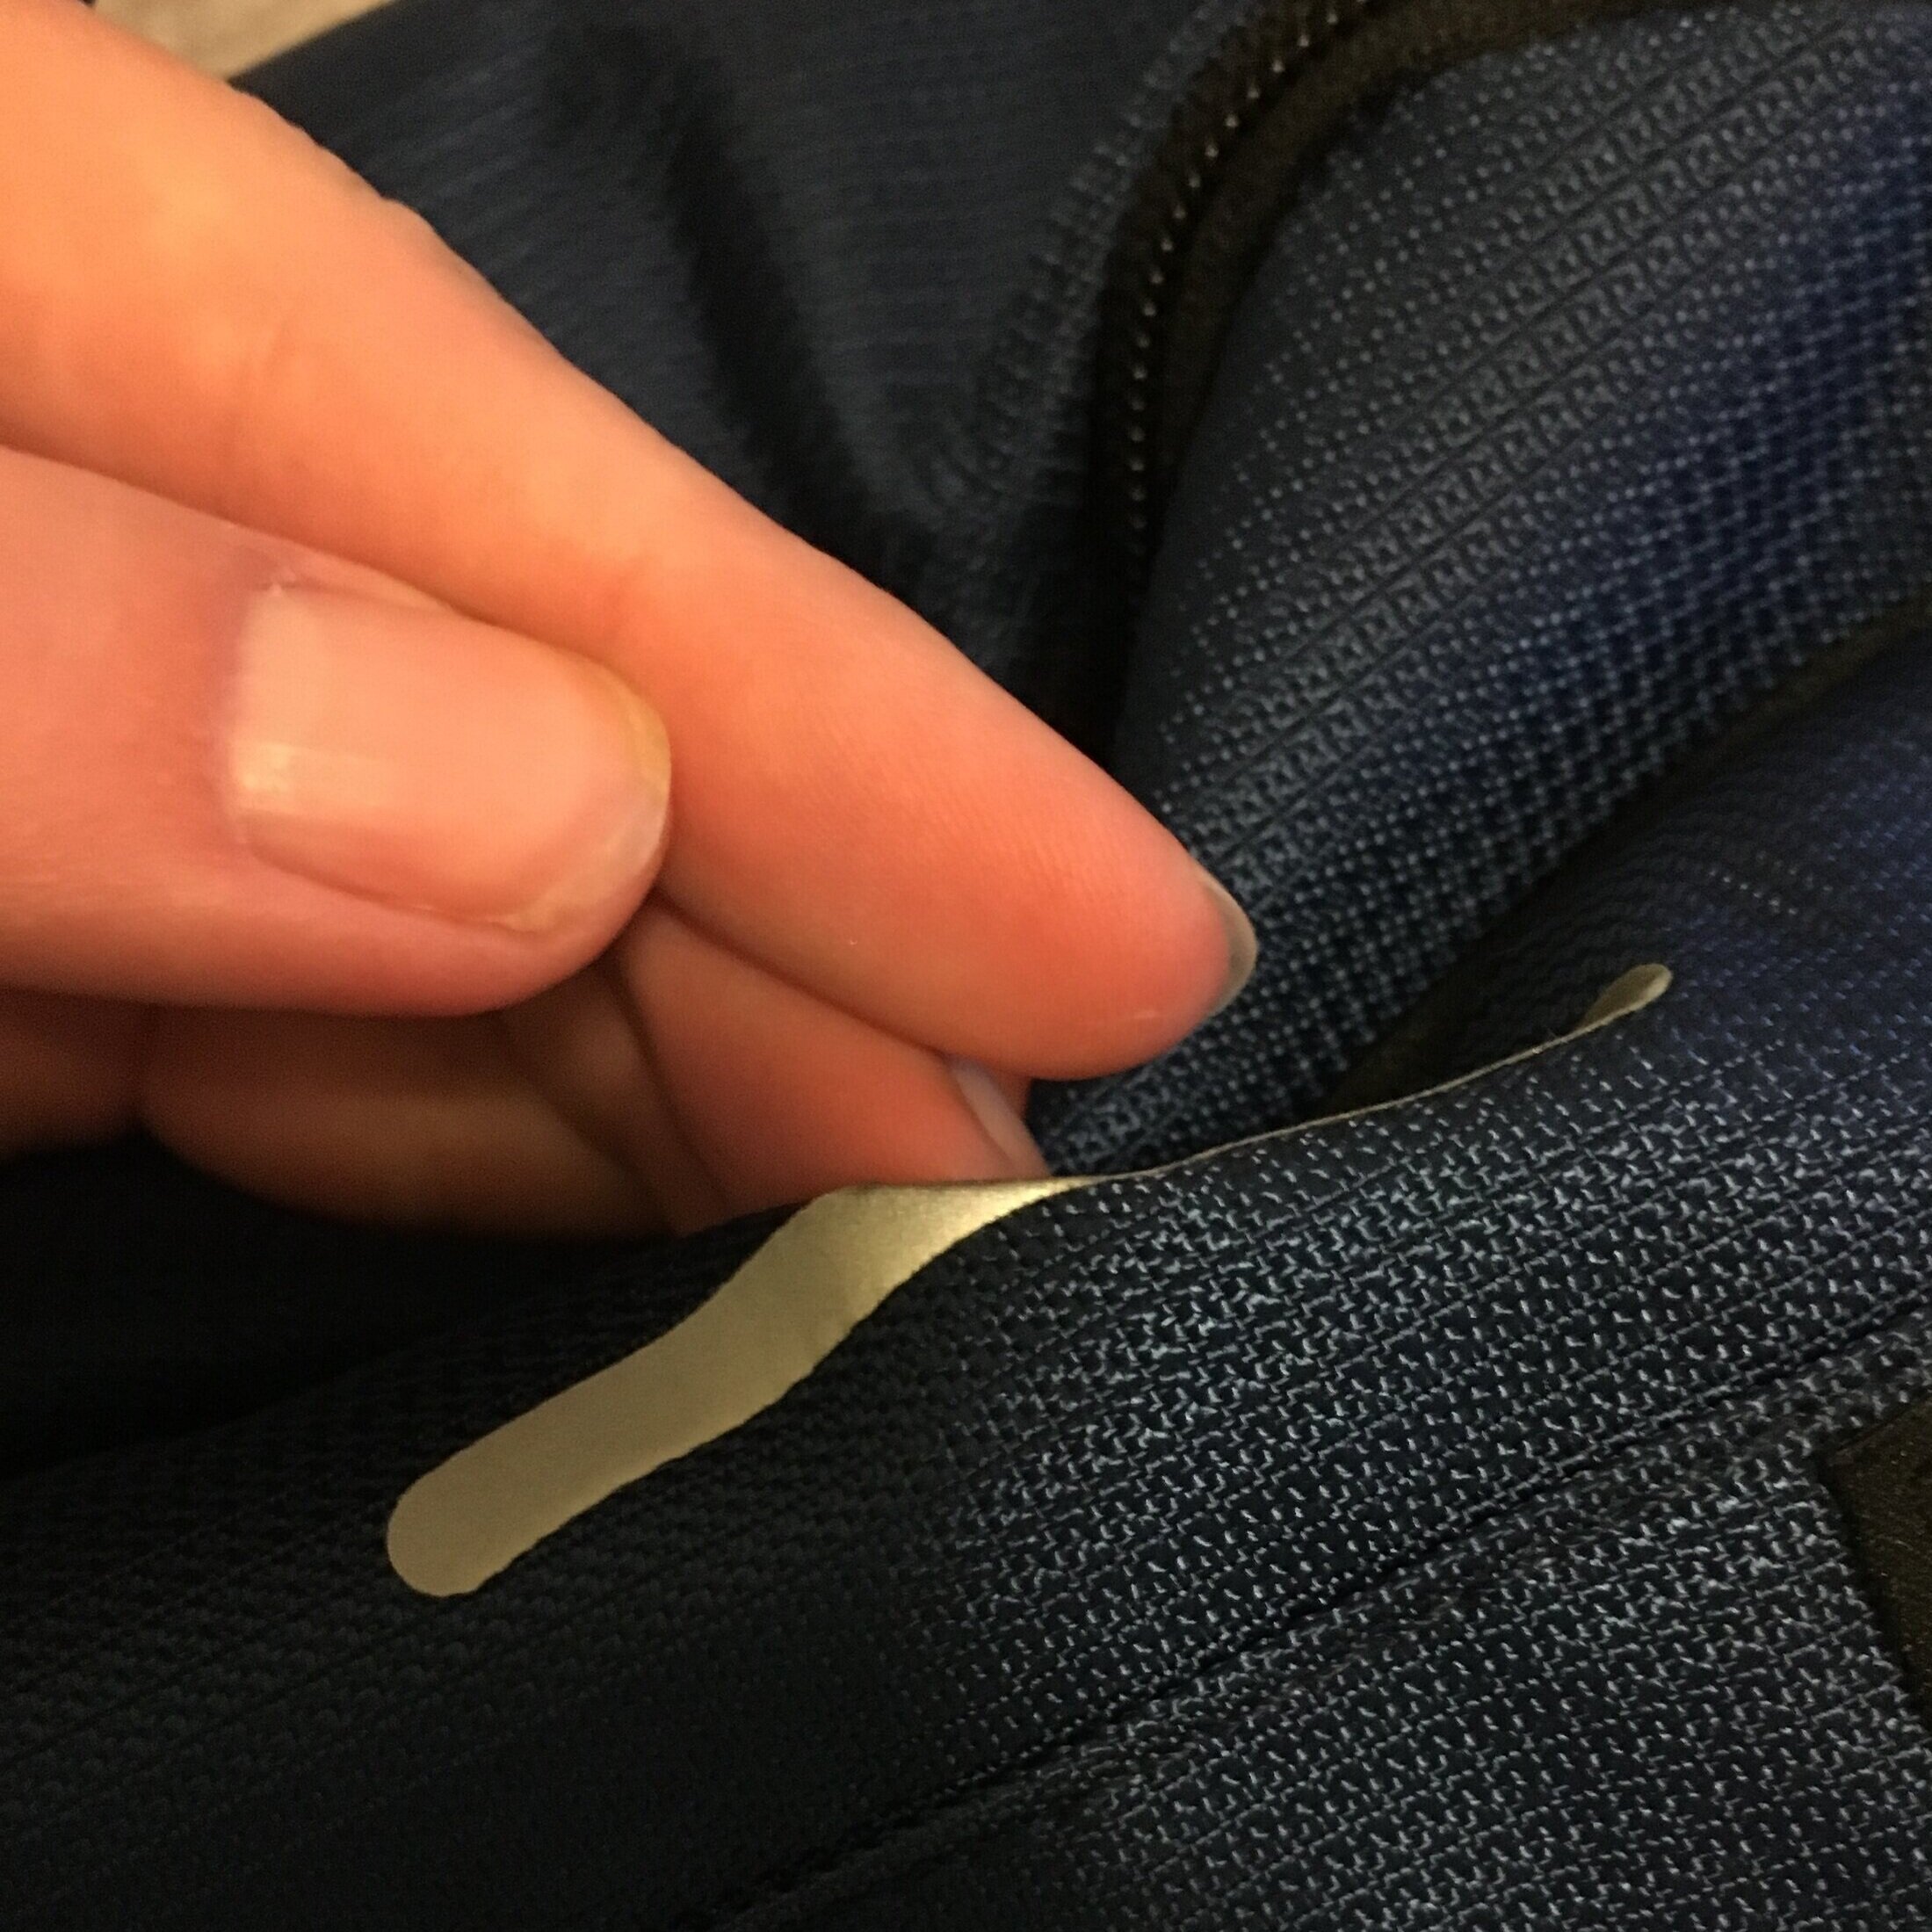
Just wanted to hop on here and share my latest favorite Amazon Find - just in time for back to school too. | This post is NOT sponsored, but does contain affiliate links | We’ve been using these reflective safety stickers for awhile on our helmets, bikes, etc but we recently realized they can stick amazingly well to fabric too! This makes them perfect for adding visibility to your children’s backpacks and coats, especially important for those early morning bus stops.
These particular stickers are Gear Aid "Tenacious Tape Reflective Patches", and we're SOO impressed with their sticking power - especially to fabric! They really stick well and look like they were manufactured as part of the fabric. They're completely flexible and durable.
We have yet to run them through the washing machine, but according to reviews online these ARE machine washable on most fabrics. And after seeing how well they adhere to fabric I am expecting them to perform well (I will definitely update this post in the future with more feedback though). Definitely check them out and add some safety and visibility to backpacks, coats, strollers, hiking gear, and more!
Living in the Northeast, ticks have just been awful the last few years and it seems as though you can't enjoy the outdoors anymore without finding one. It's so important to protect yourself and family from getting a tick in the first place (if you want to read more on my tips to keep ticks at bay, check out my previous post "Safeguarding Against TICKS"). But in the event you unfortunately get one on you, you need to be prepared so you can remove that awful thing ASAP. By having a Tick Kit handy, you'll be able to remove the tick quickly and safely and hopefully lessen your chances of catching a tick-borne illness. | This post contains affiliate links and personal tips - Disclaimer: I am not a medical expert, always check with your doctor for advice |
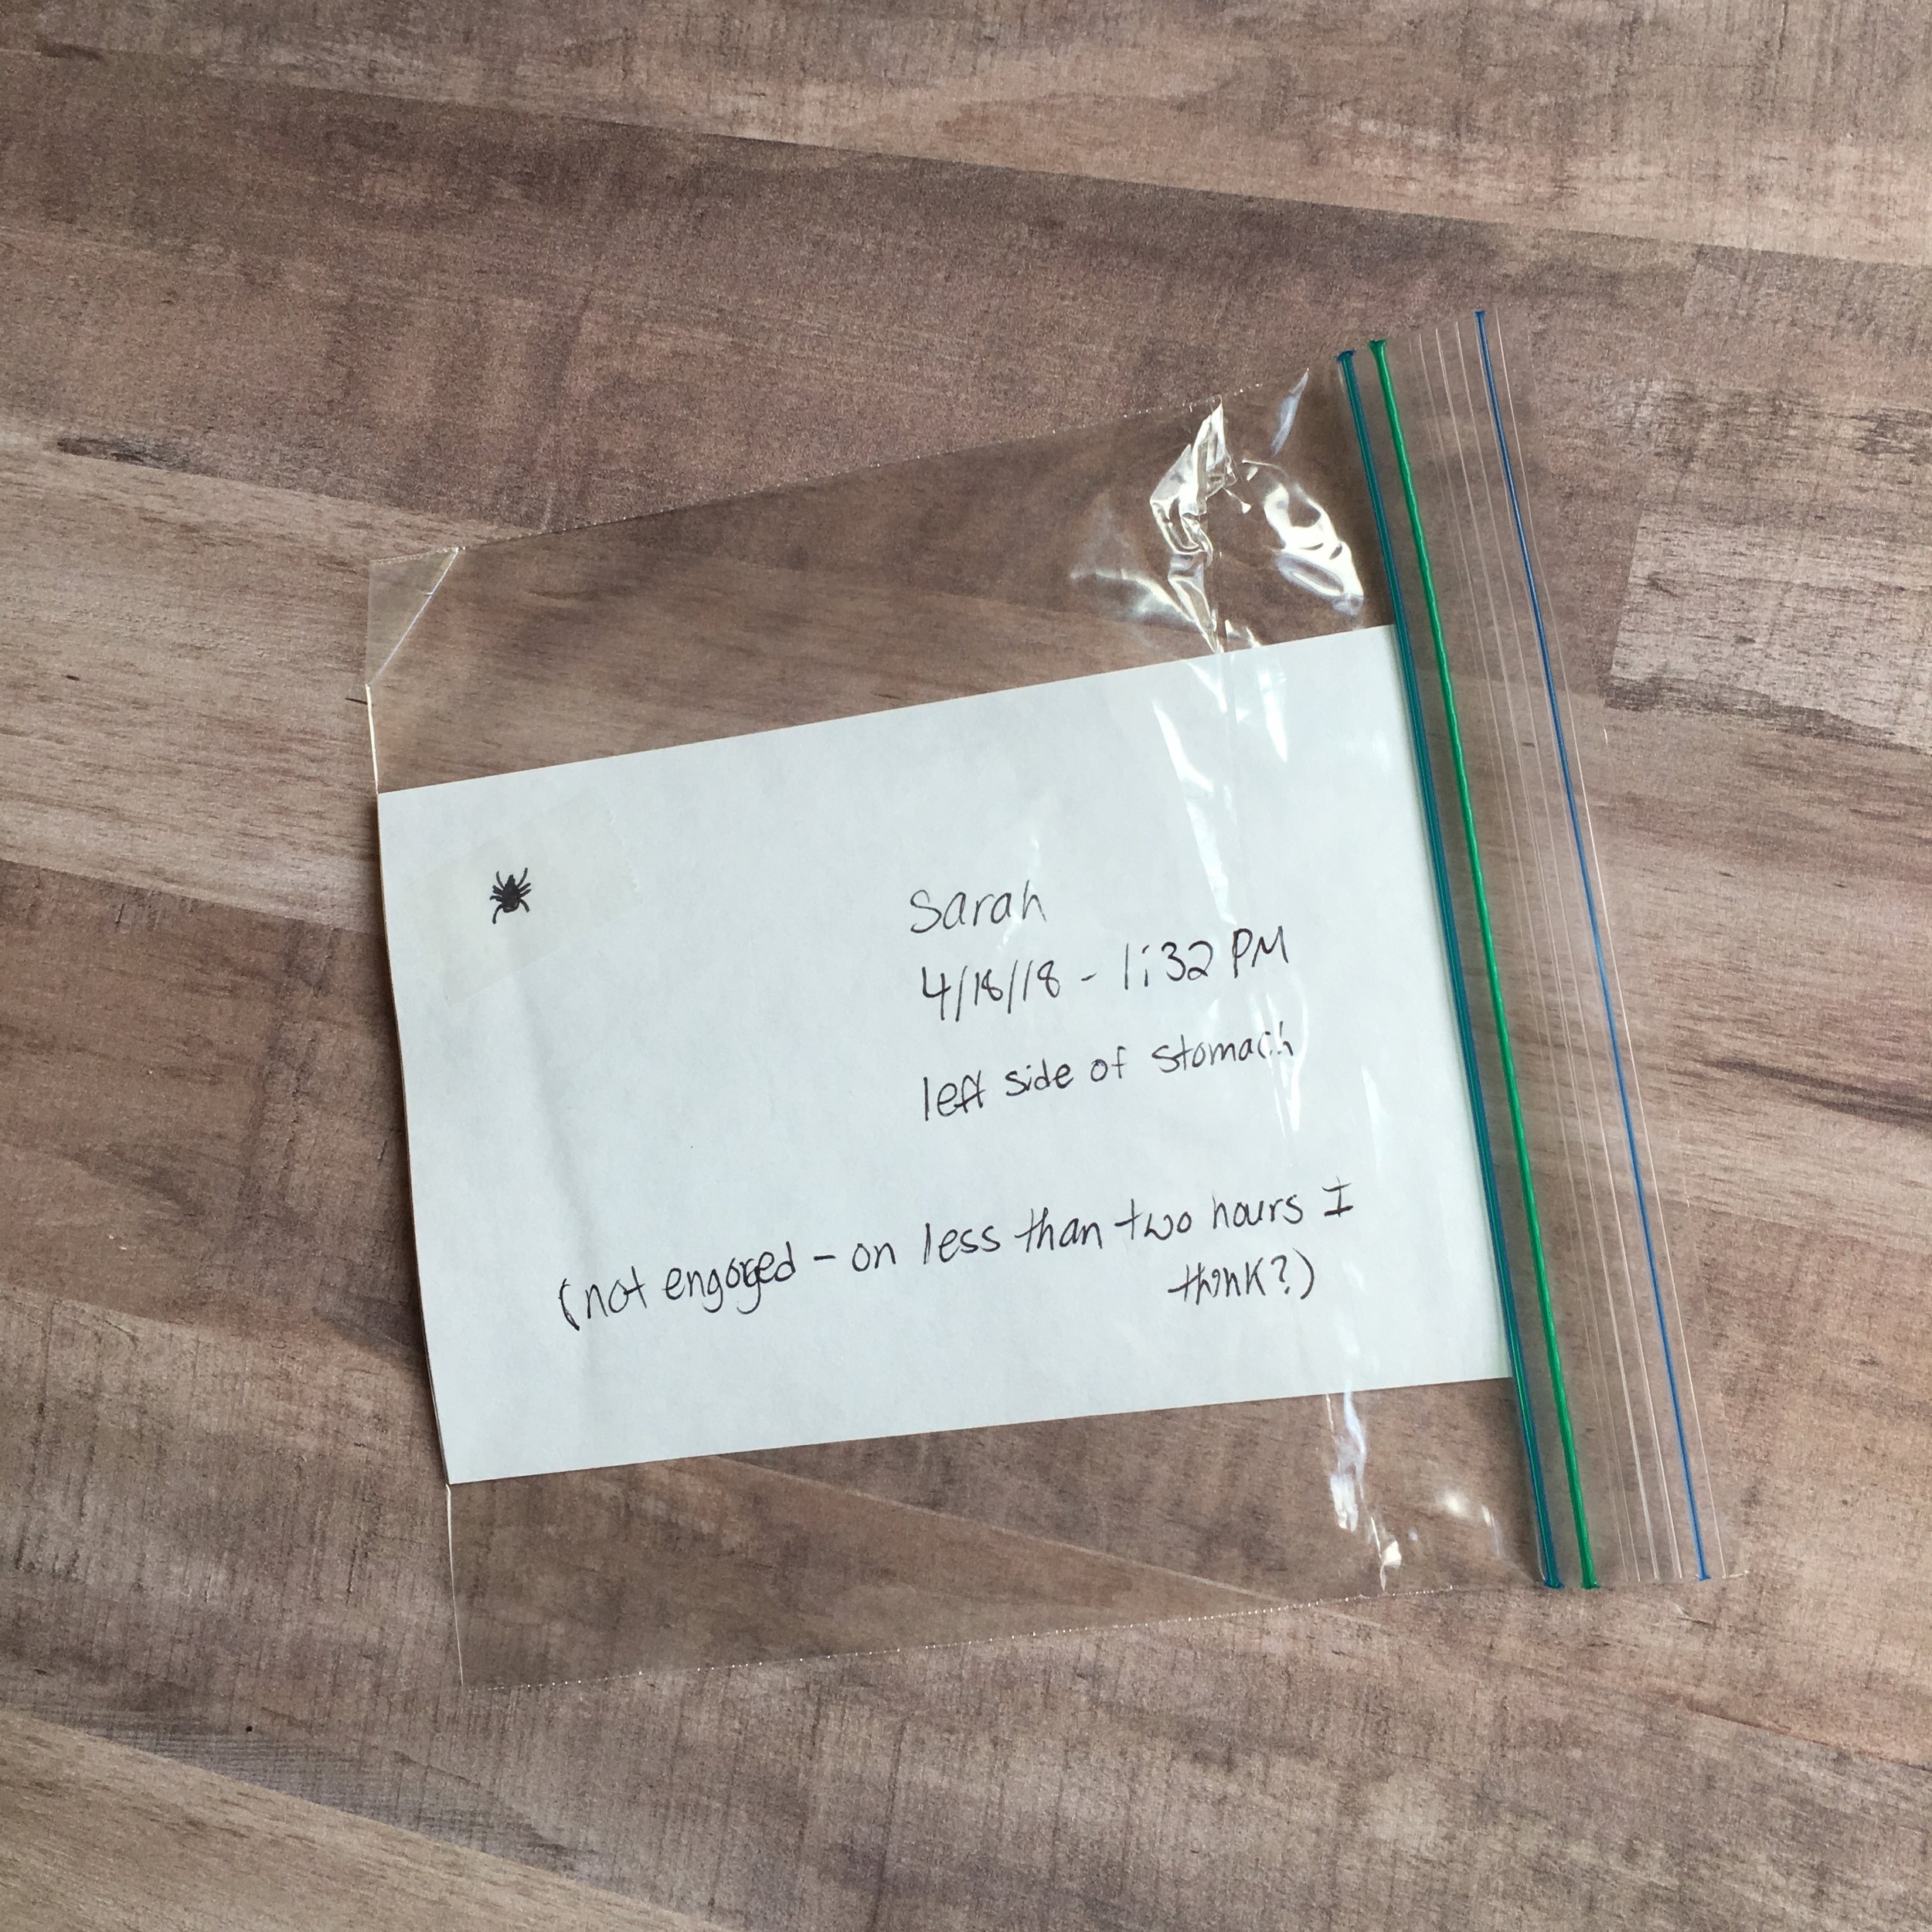
I recommend putting together several tick removal kits and keeping them handy at all times - keep one at home, one in the car, and one in your hiking bag for outdoor trips or diaper bag for playground excursions. That way if you're out and about and find one on you or your family you can safely remove it and document it, ready for testing purposes.
If you unfortunately get a tick attached to you, safely remove it immediately to help reduce your exposure to tick borne illnesses. Use the alcohol wipes to cleanse the area where the tick was removed as well as wipe down the tick spoon after removal.
It's important to keep the tick itself - as well as note when and where it was located and any other information about the situation (if the tick was engorged, your best guess at how long it could have been attached, etc). Tape the tick to an index card and use your pen to record all of this information, then place in an empty ziplock bag - feel free to double bag it if you want. Then call your doctor right away for advice on any precautions you may need to take, or if he wants to order to get the tick tested.
Whether or not you get the tick tested (either by your doctor or privately), you can also report your tick bite to TickEncounters. TickEncounters is a program run by the University of Rhode Island, recording and monitoring trends and information regarding tick bites and your information helps aid in their research. They can also help advise you about how to get the tick tested for your peace of mind in the event your doctor's office doesn't do it.
DISCLAIMER: I am NOT an expert or medical professional. These are tips and information I've learned over the years living in a tick-prone area. Always check with your own doctor and local experts for the best prevention and treatment plans for yourself and your family. Discuss with your doctor ahead of time what to do in the event of a tick bite (and I hope you never need to use that information).
Hiking with a toddler is a lot of fun with a little prep. Read on for our tips to make it an enjoyable time for everyone. | This post contains affiliate links and an honest product review of Nûby items |
Pick the Right Hike
One of the most important things to do is pick the right hike for your family. Technical hikes that are miles long aren't the wisest choice, especially in the beginning. For our hike we chose an easy hike with a wide path allowing plenty of room for our little one to run around as we walked.
Consider the Time of Year
The time of year will determine how to prepare for your hike too. It's a given that colder weather means packing layers, hotter weather calls for sunhats, sunscreen, and extra water. But here in New England it's hunting season right now, which is why we're wearing orange. Even though we're in a park, it's still very important to be visible (tip: our daughter's orange hat is just an adult sized beanie rolled up, no need to buy a child-sized one).
Gear
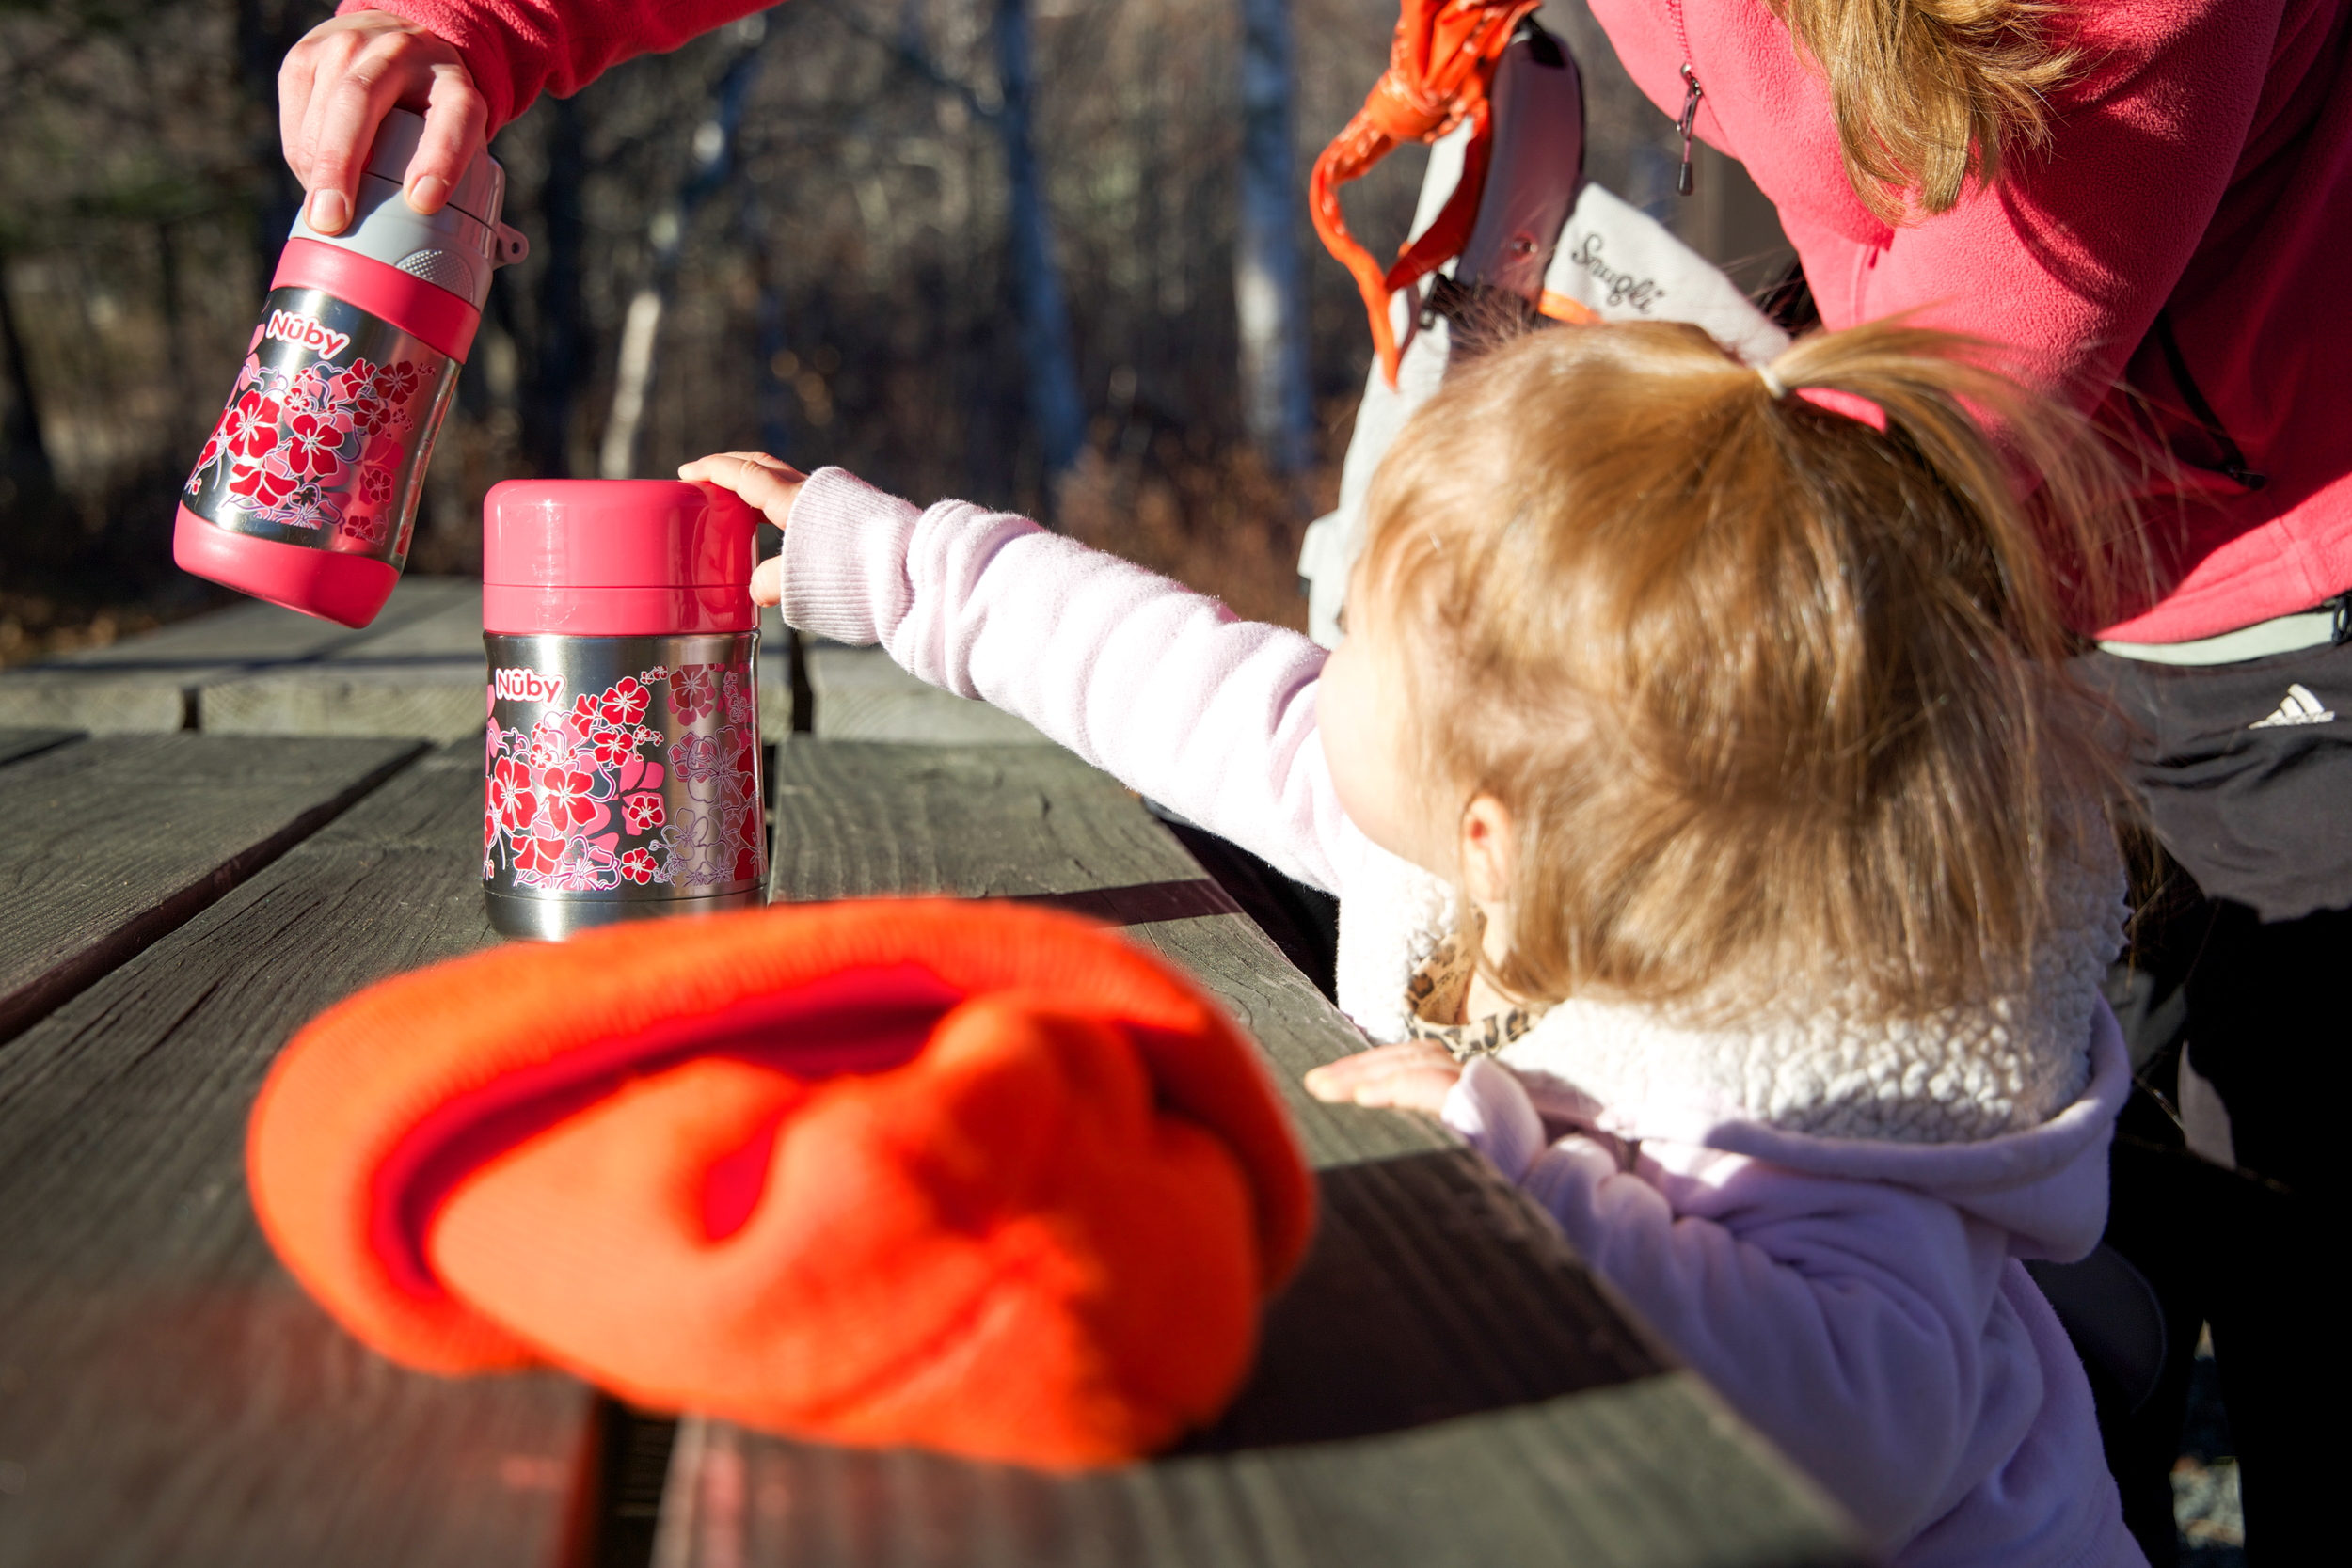
Really the best bit of advice I have is to be prepared. Pack your bag with everything you think you will need and it will help keep everyone happy. I've included a list of the gear we used on our little hike, including Nûby's Insulated Stainless Steel Food Jar and Insulated Stainless Steel Flip-It Cup which were provided to us to use and review.
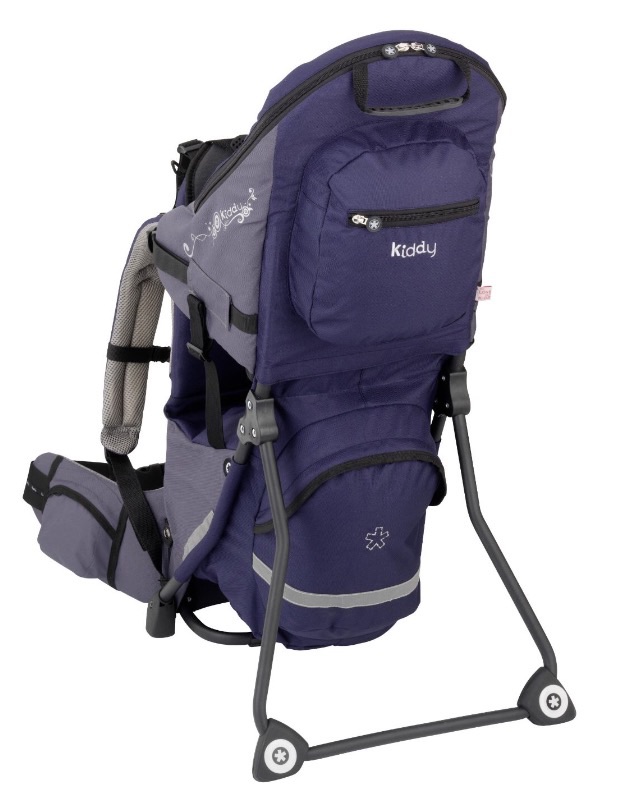
1. Hiking Backpack Carrier - These carriers are a life-saver when hiking with a little one. Independent toddlers will often insist on walking themselves, but at some point they're going to get tired or you may encounter rocky or steep terrain you don't want them to climb - and that's when this will be essential. These packs are comfortable for your little one and for you since they have a rigid frame, and padded waist, shoulder, and chest straps. There's often a lot of storage under the seat area too, which is perfect for carrying your snacks and supplies for the hike. Carriers with a fold-out stand are super helpful when loading and unloading your little one. The "Snugli" Backpack Carrier we have is a discontinued model, but the one I've linked to looks very similar to ours.
2. Insulated Thermos - Packing hot food to eat on a cool hike is always nice and refreshing. We packed some hot chicken noodle soup to enjoy at the end of our little hike and it really hit the spot. 3. Water for Everyone - Water on a hike is key. Even if you won't be hiking long, always pack plenty of water for you and everyone in your party. I packed a well-loved Kleen Kanteen for myself (can you believe I've had this bottle for over 7 years now? ..hence, the dents), and a Nûby Flip-It Cup for our little one. 4. Orange Hat - Visibility during hunting season is very, very important. Even if you're hiking inside a park, hunting may still be happening on adjacent properties and a hunter may inadvertently get close to hiking trails. 5. Snacks - Snacks are very important, you don't want a hangry toddler on your hands! I packed an Earth's Best cereal bar for our little one and a Lärabar for me. 6. First Aid Kit - You never know when a trip and fall may happen and it's important to have a first aid kit on hand for any potential cuts or scrapes. 7. Bug Spray - Even though it's getting colder out, mosquitoes are still present and ticks are a huge threat in our area. My husband and myself have pre-treated our hiking shoes with permethrin (not pictured) and spray our clothing with bug spray containing DEET to deter ticks. Our pediatrician had told us we could use DEET bug spray on our toddler (*always consult with your own pediatrician first!*), but we're leery about using chemicals on her so we use a locally-made all-natural bug spray (similar type of bug spray linked here). As soon as we get home we all make sure to change our clothes and check for ticks too, just in case.
Nûby was kind enough to send us their Insulated Stainless Steel Food Jar with Folding Spoon and Insulated Stainless Steel No-Spill Flip-It Cup to try on our hike. Their Insulated Food Jar is BPA-free, holds 15 ounces, and will keep food warm for 6 hours and cool for 7 hours. Inside the jar is a second compartment (I loved this feature!) that is perfect for keeping crackers for your soup or chili. There's also a fold-out spoon inside. We packed chicken noodle soup for our hike and it was still piping hot when we sat down to eat. Their Insulated Flip-It Cup is BPA-free, holds 9 ounces, and keeps liquids cool for up to 10 hours. I loved that it holds more than most of our other sippy cups and kept her drink nice and cold. Overall, I really loved these two products - they have a cute design, insulate well, and I love that they're stainless steel. The one thing that I didn't like about them is that they're not dishwasher safe (though that is typical of most double-walled cups and jars).
We've teamed up with Nûby to giveaway a stainless steel food jar and flip-it cup to a lucky follower to use on their own hikes - or any other adventure. Please see our giveaway post on Instagram (@birchlandinghome) for details and to enter. Good luck!!
Giveaway ends 11/25/15 at 1PM EST.
- I received these items for review from Nûby but all opinions expressed are my own. Please read our full Disclosure Policy for more information -
Nûby's Insulated Stainless Steel Food Jar with Folding Spoon and Insulated Stainless Steel No-Spill Flip-It Cup can be purchased at various retailers including Amazon and Babies 'R Us.