Creating our family's Christmas card each year is a tradition I greatly look forward to. I especially love looking back at past years to see how much everyone has grown. I used to tuck these old cards away in a drawer but I've found it much more accessible and enjoyable to put them within reach, displayed in a special photo album. | This post contains affiliate links |
Luckily, we've always done 5x7 inch photo cards which fit perfectly inside a
festive perfectly-sized photo album I found on Amazon. If you've done different sized or odd-sized cards through the years, it might make the most sense to use a
big scrapbook to chronicle them. Just make sure to order an extra card to add to the album each year and cherish the memories!
KEEP UP WITH BIRCH LANDING HOME
| Etsy | Facebook | Instagram | Pinterest | Bloglovin' | Hometalk |
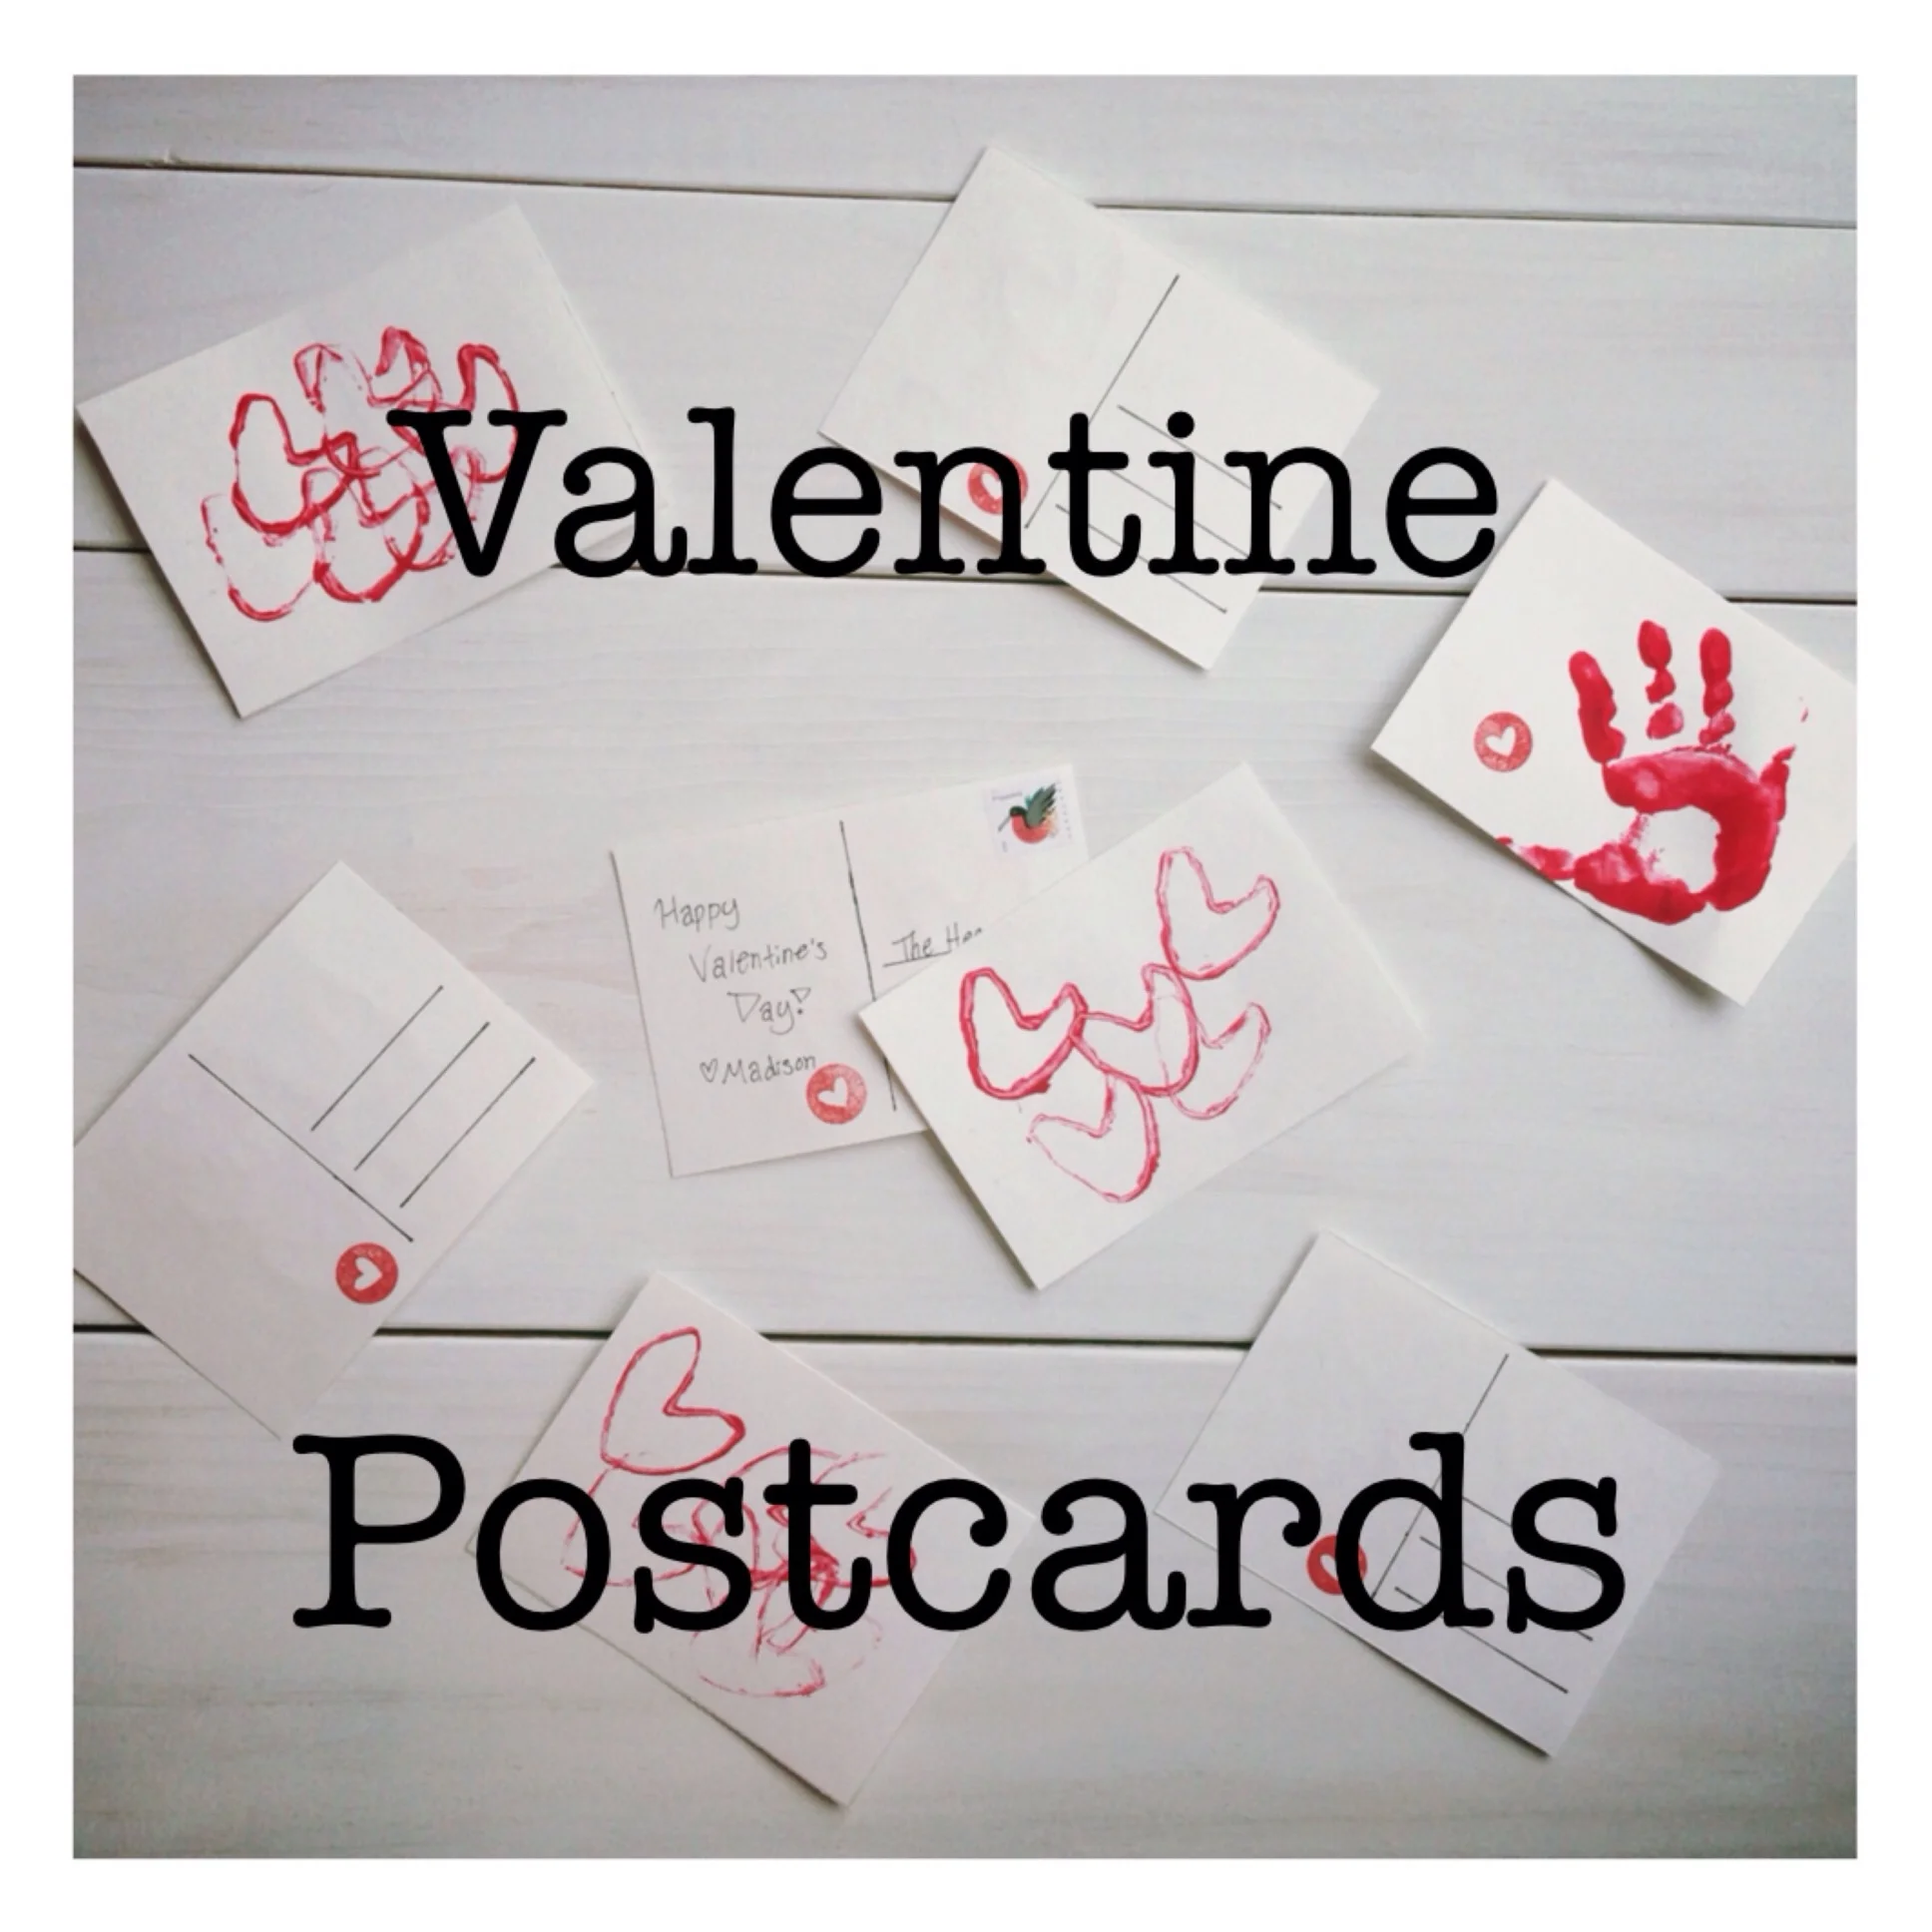
Last year I started the tradition of having our little one make Valentines for close family and friends. This year I wanted to continue the tradition but find a way to make them as inexpensive as possible, and so I settled on the idea of DIY Valentine Postcards.
| This post contains affiliate links |
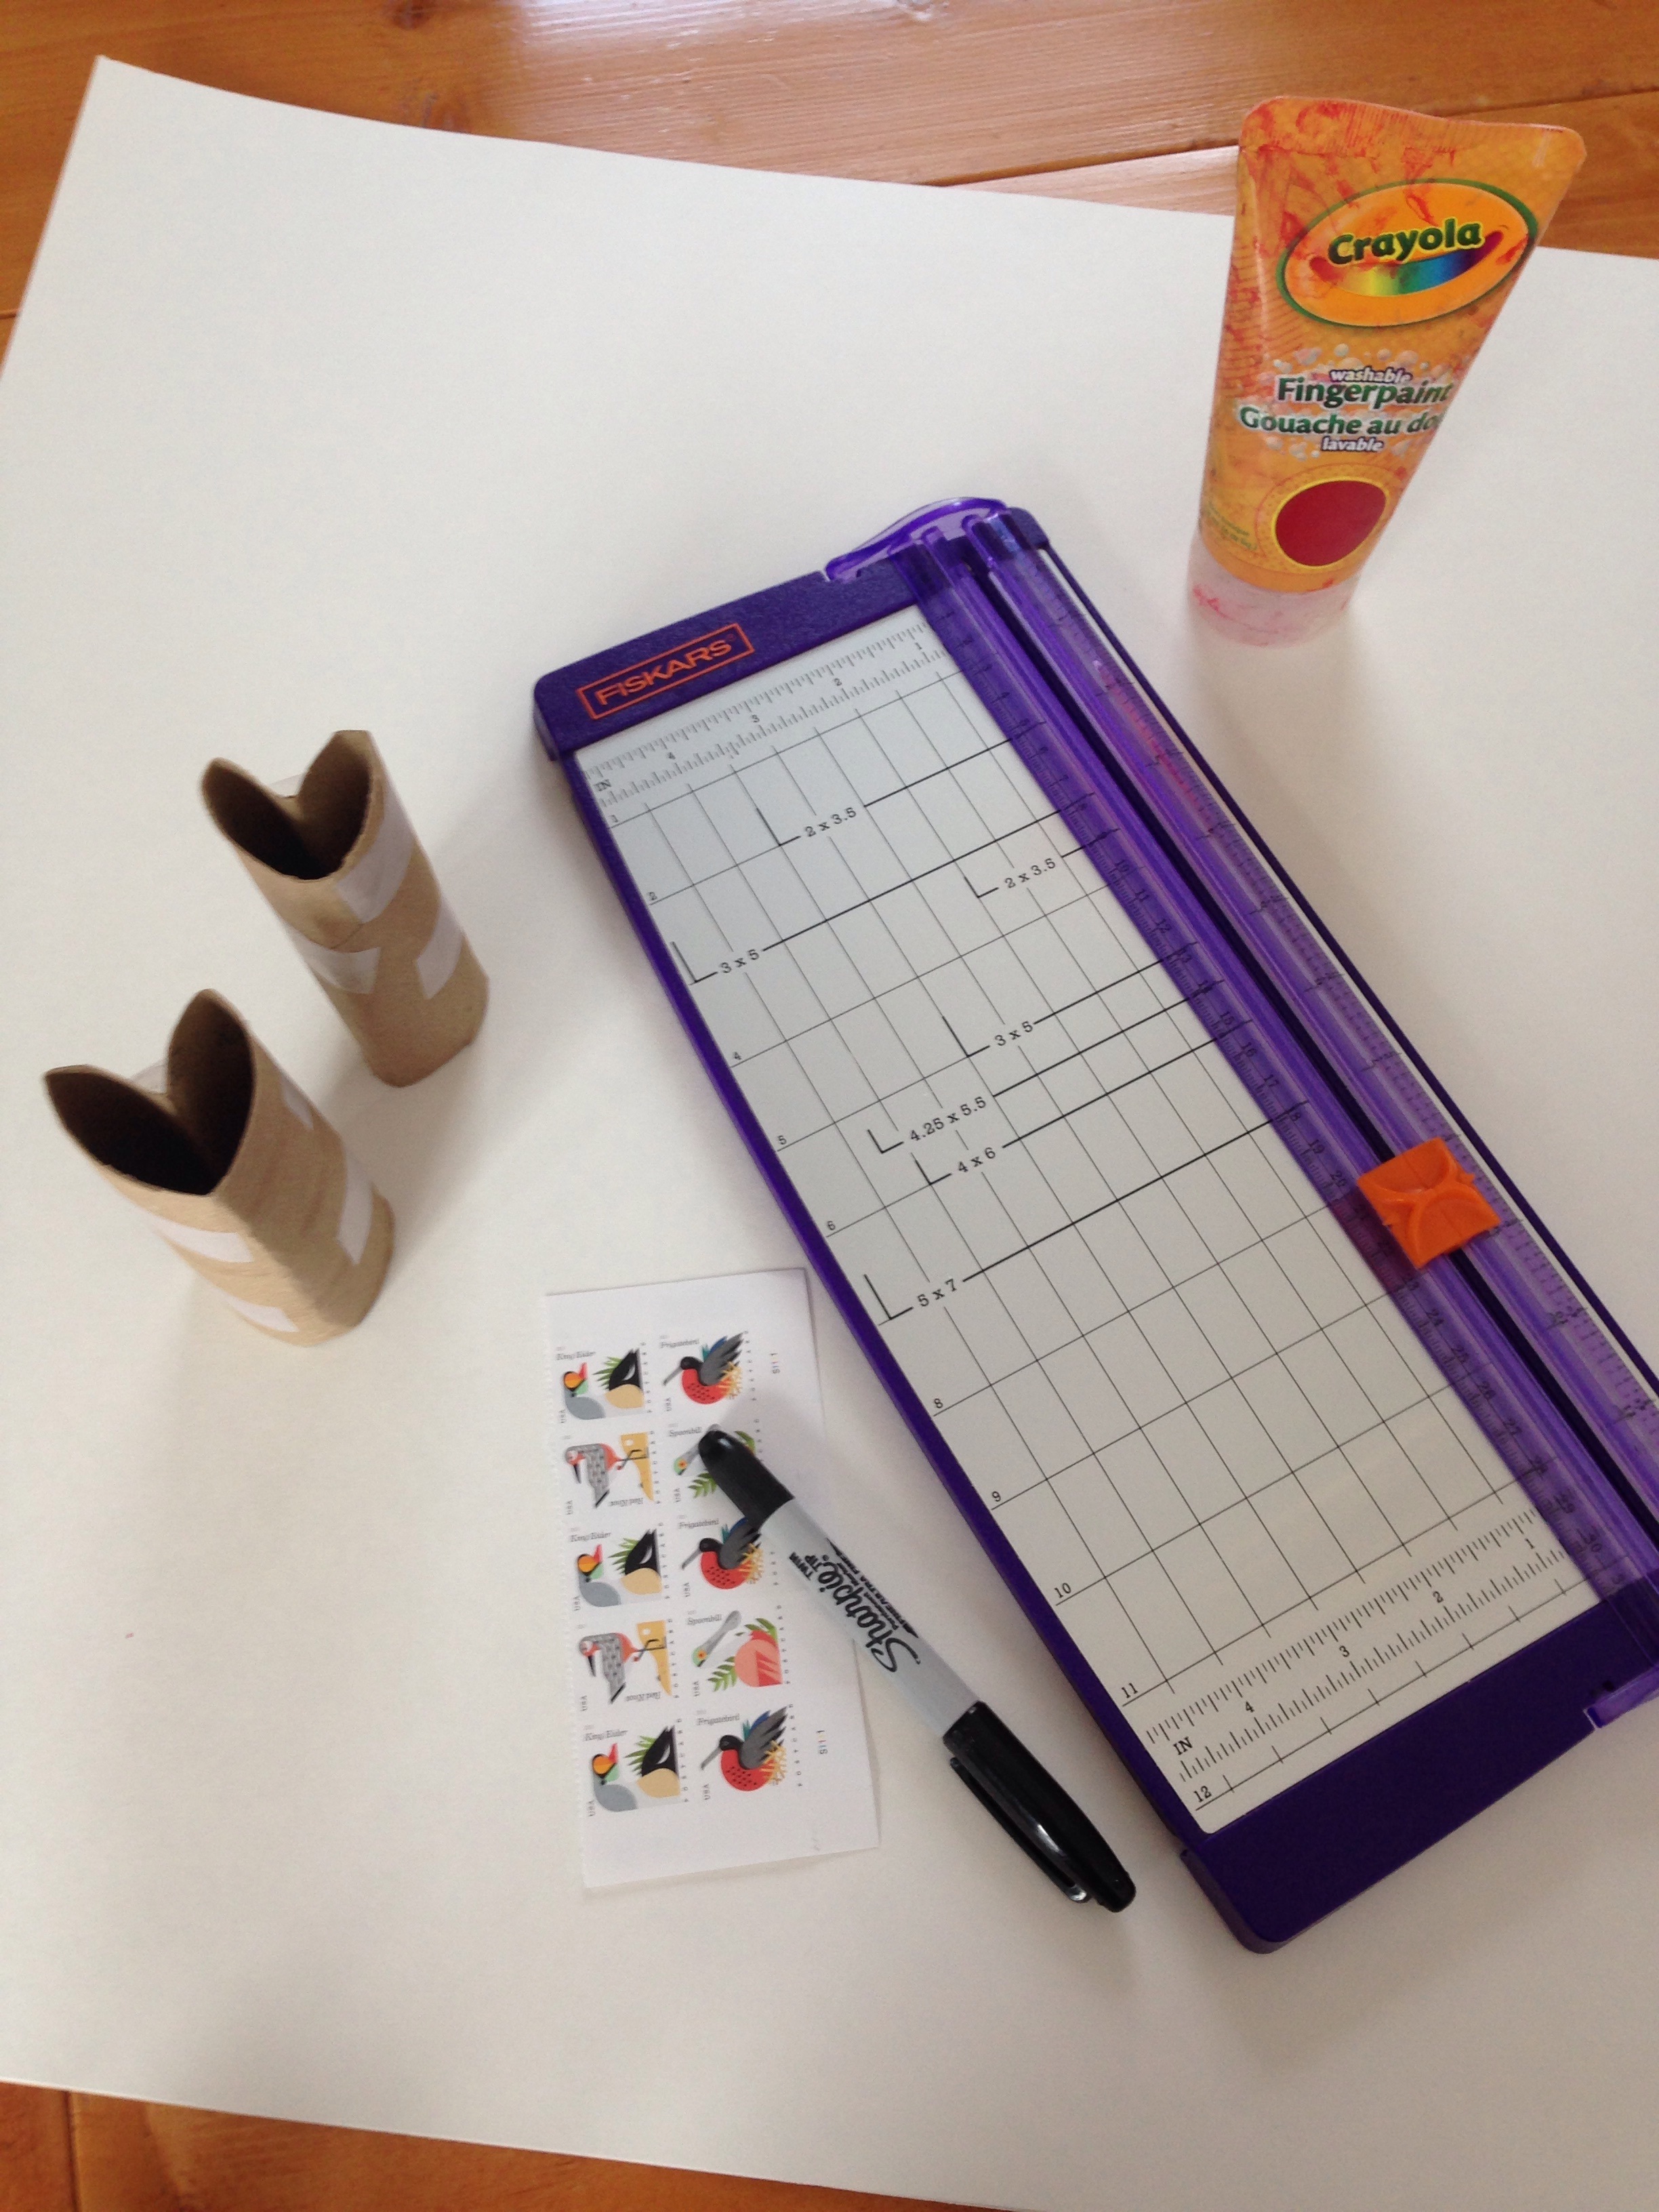
Materials:
How-to:
One of the reasons I decided to make postcards this year instead of traditional cards was, not only are postcards cuter, they cost almost 30% less to mail than a traditional card - these postage savings add up! As a result, this project cost next to nothing to do. I already had the paint, toilet paper rolls, rulers, etc. - I just had to run down to the local store and pick up a piece of poster board which cost a whopping 99 cents.
The how-to is pretty straight forward: use a ruler to measure and cut out your postcards (I made mine 4x5.5", but you can check here for more details on postcard requirements). If you have a paper cutter that can come in quite handy to make quick work of cutting them out.
Next use a ruler and a sharpie to create the back of the postcard, one line down the middle and then three lines on the right hand side for the address.
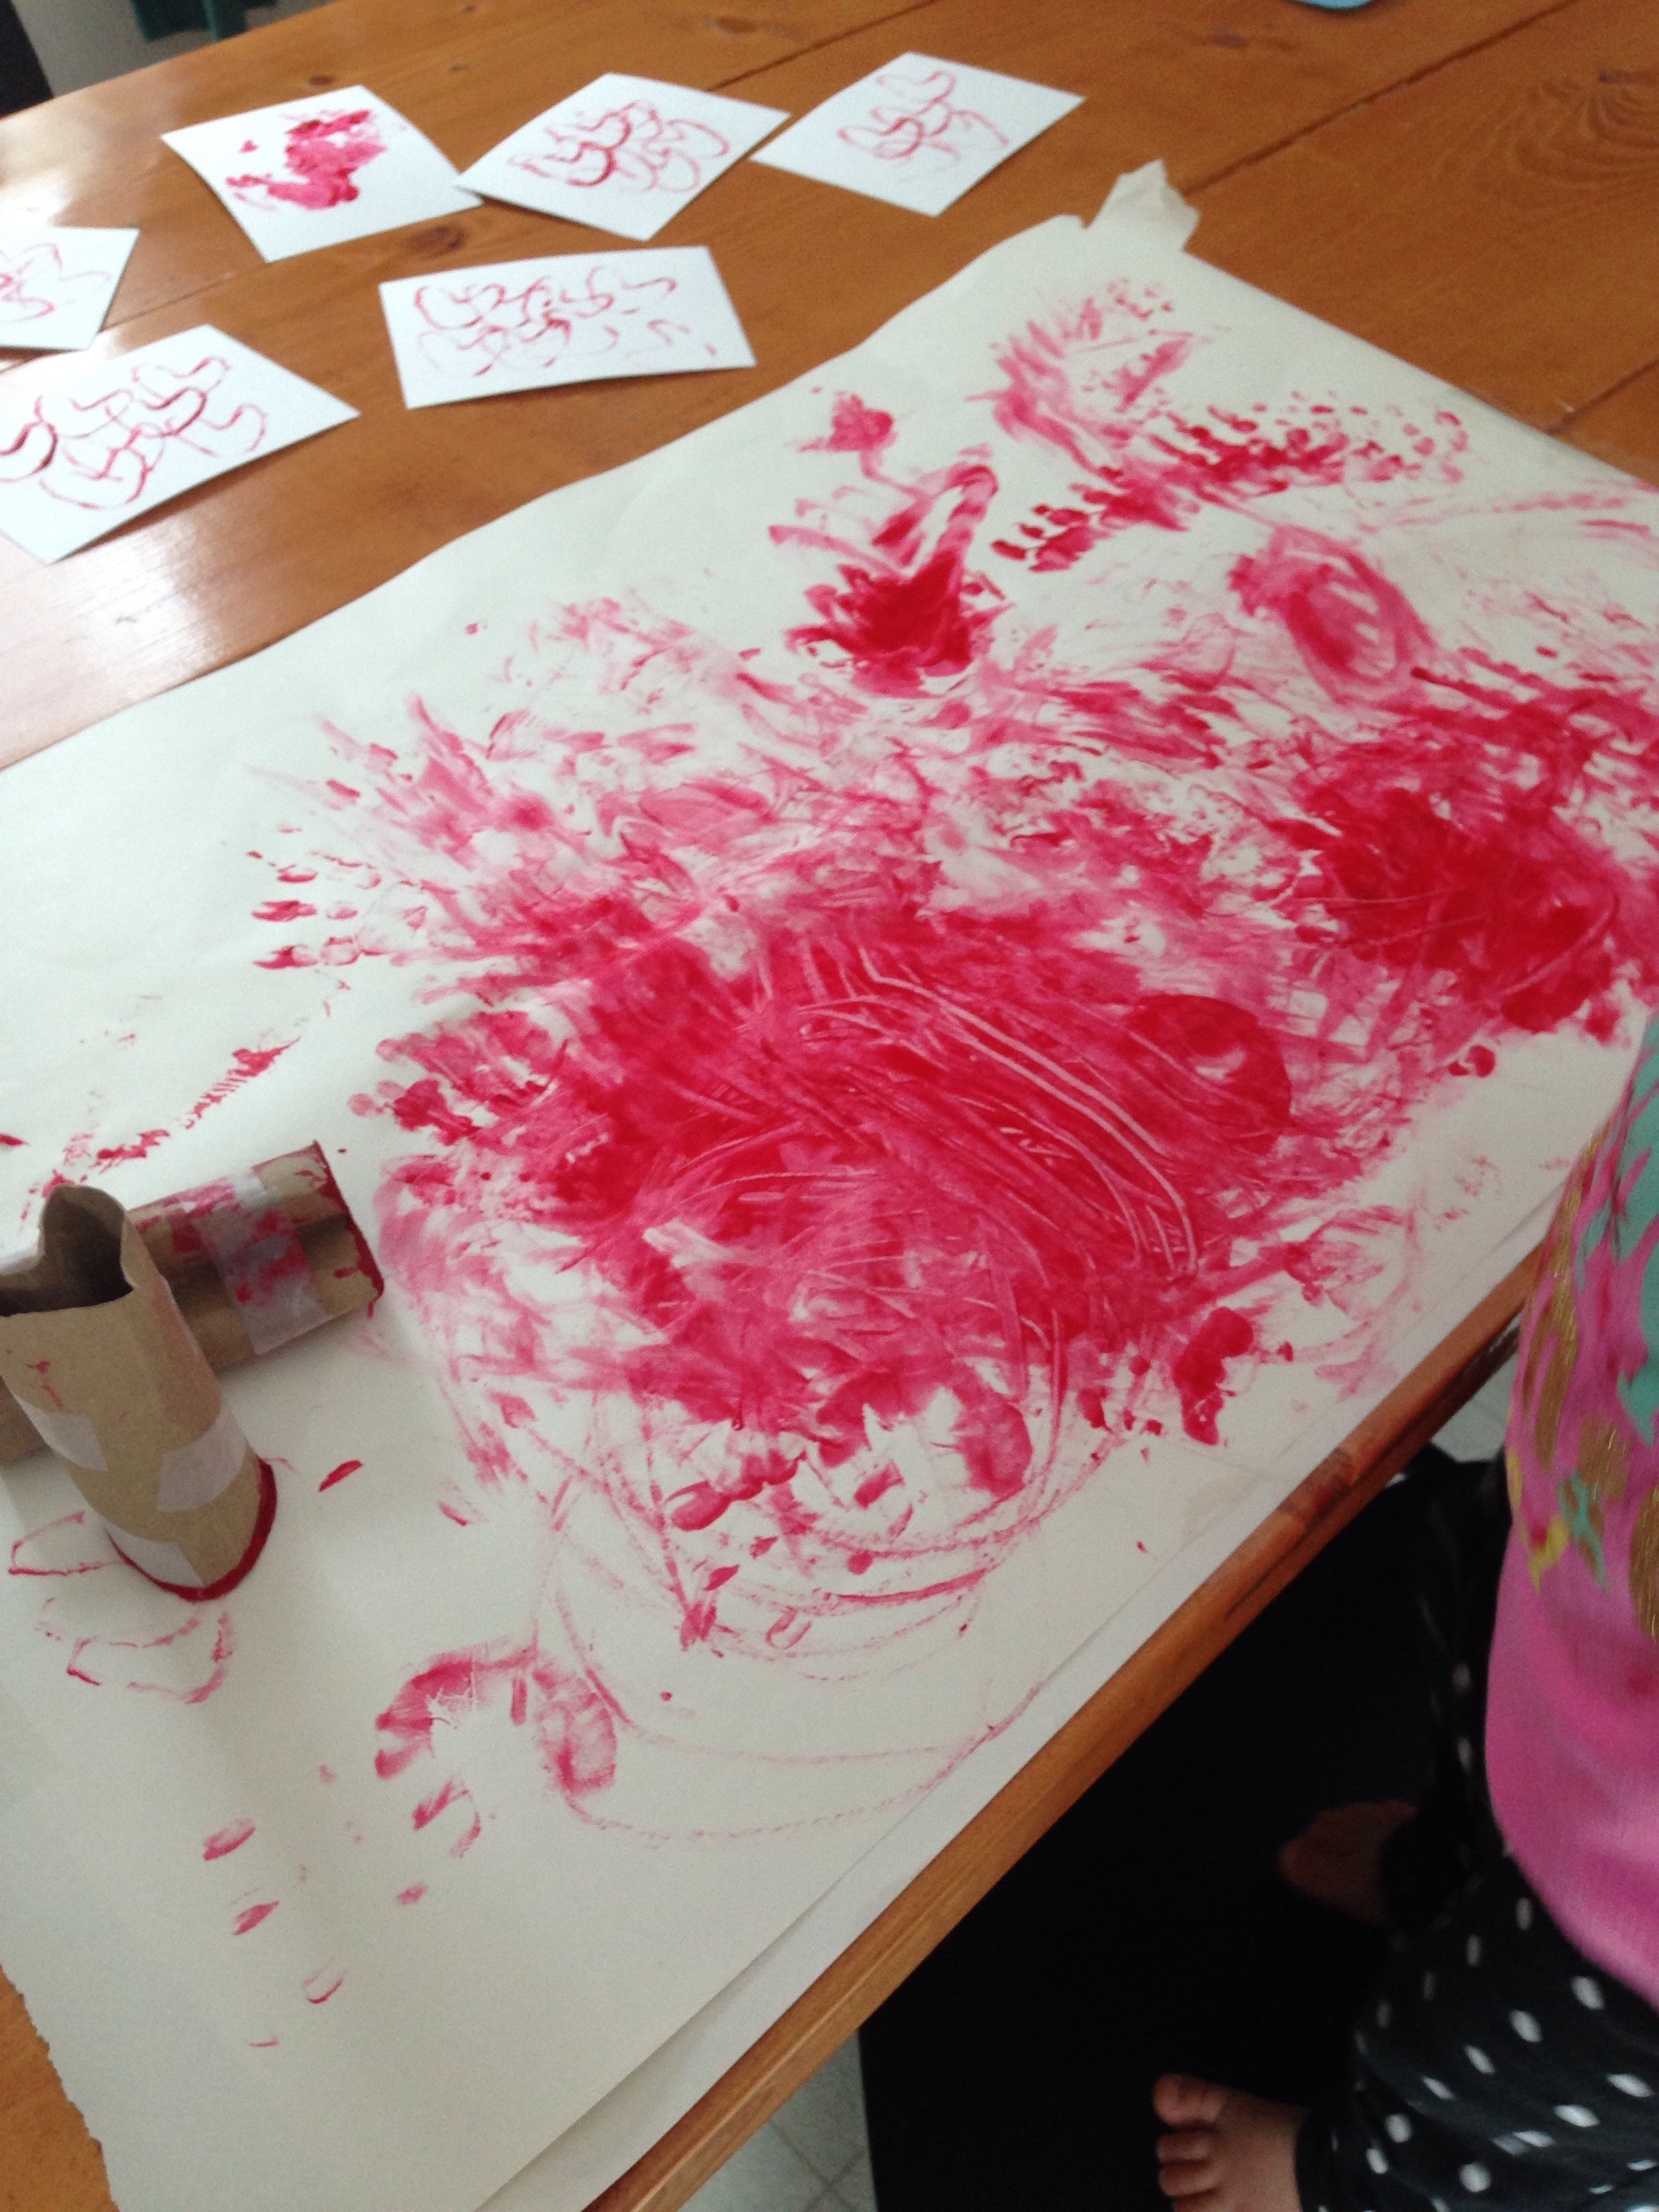
Next let your toddler go to town! I put down one card at a time to keep the backs clean from paint as well as to keep them from getting over-saturated. To make the heart "stamp" I used toilet paper tubes bent into a heart shape and held together with tape.
Once the cards were done I let our little one go crazy on the table covering.
The cards drying - they came out pretty great!!
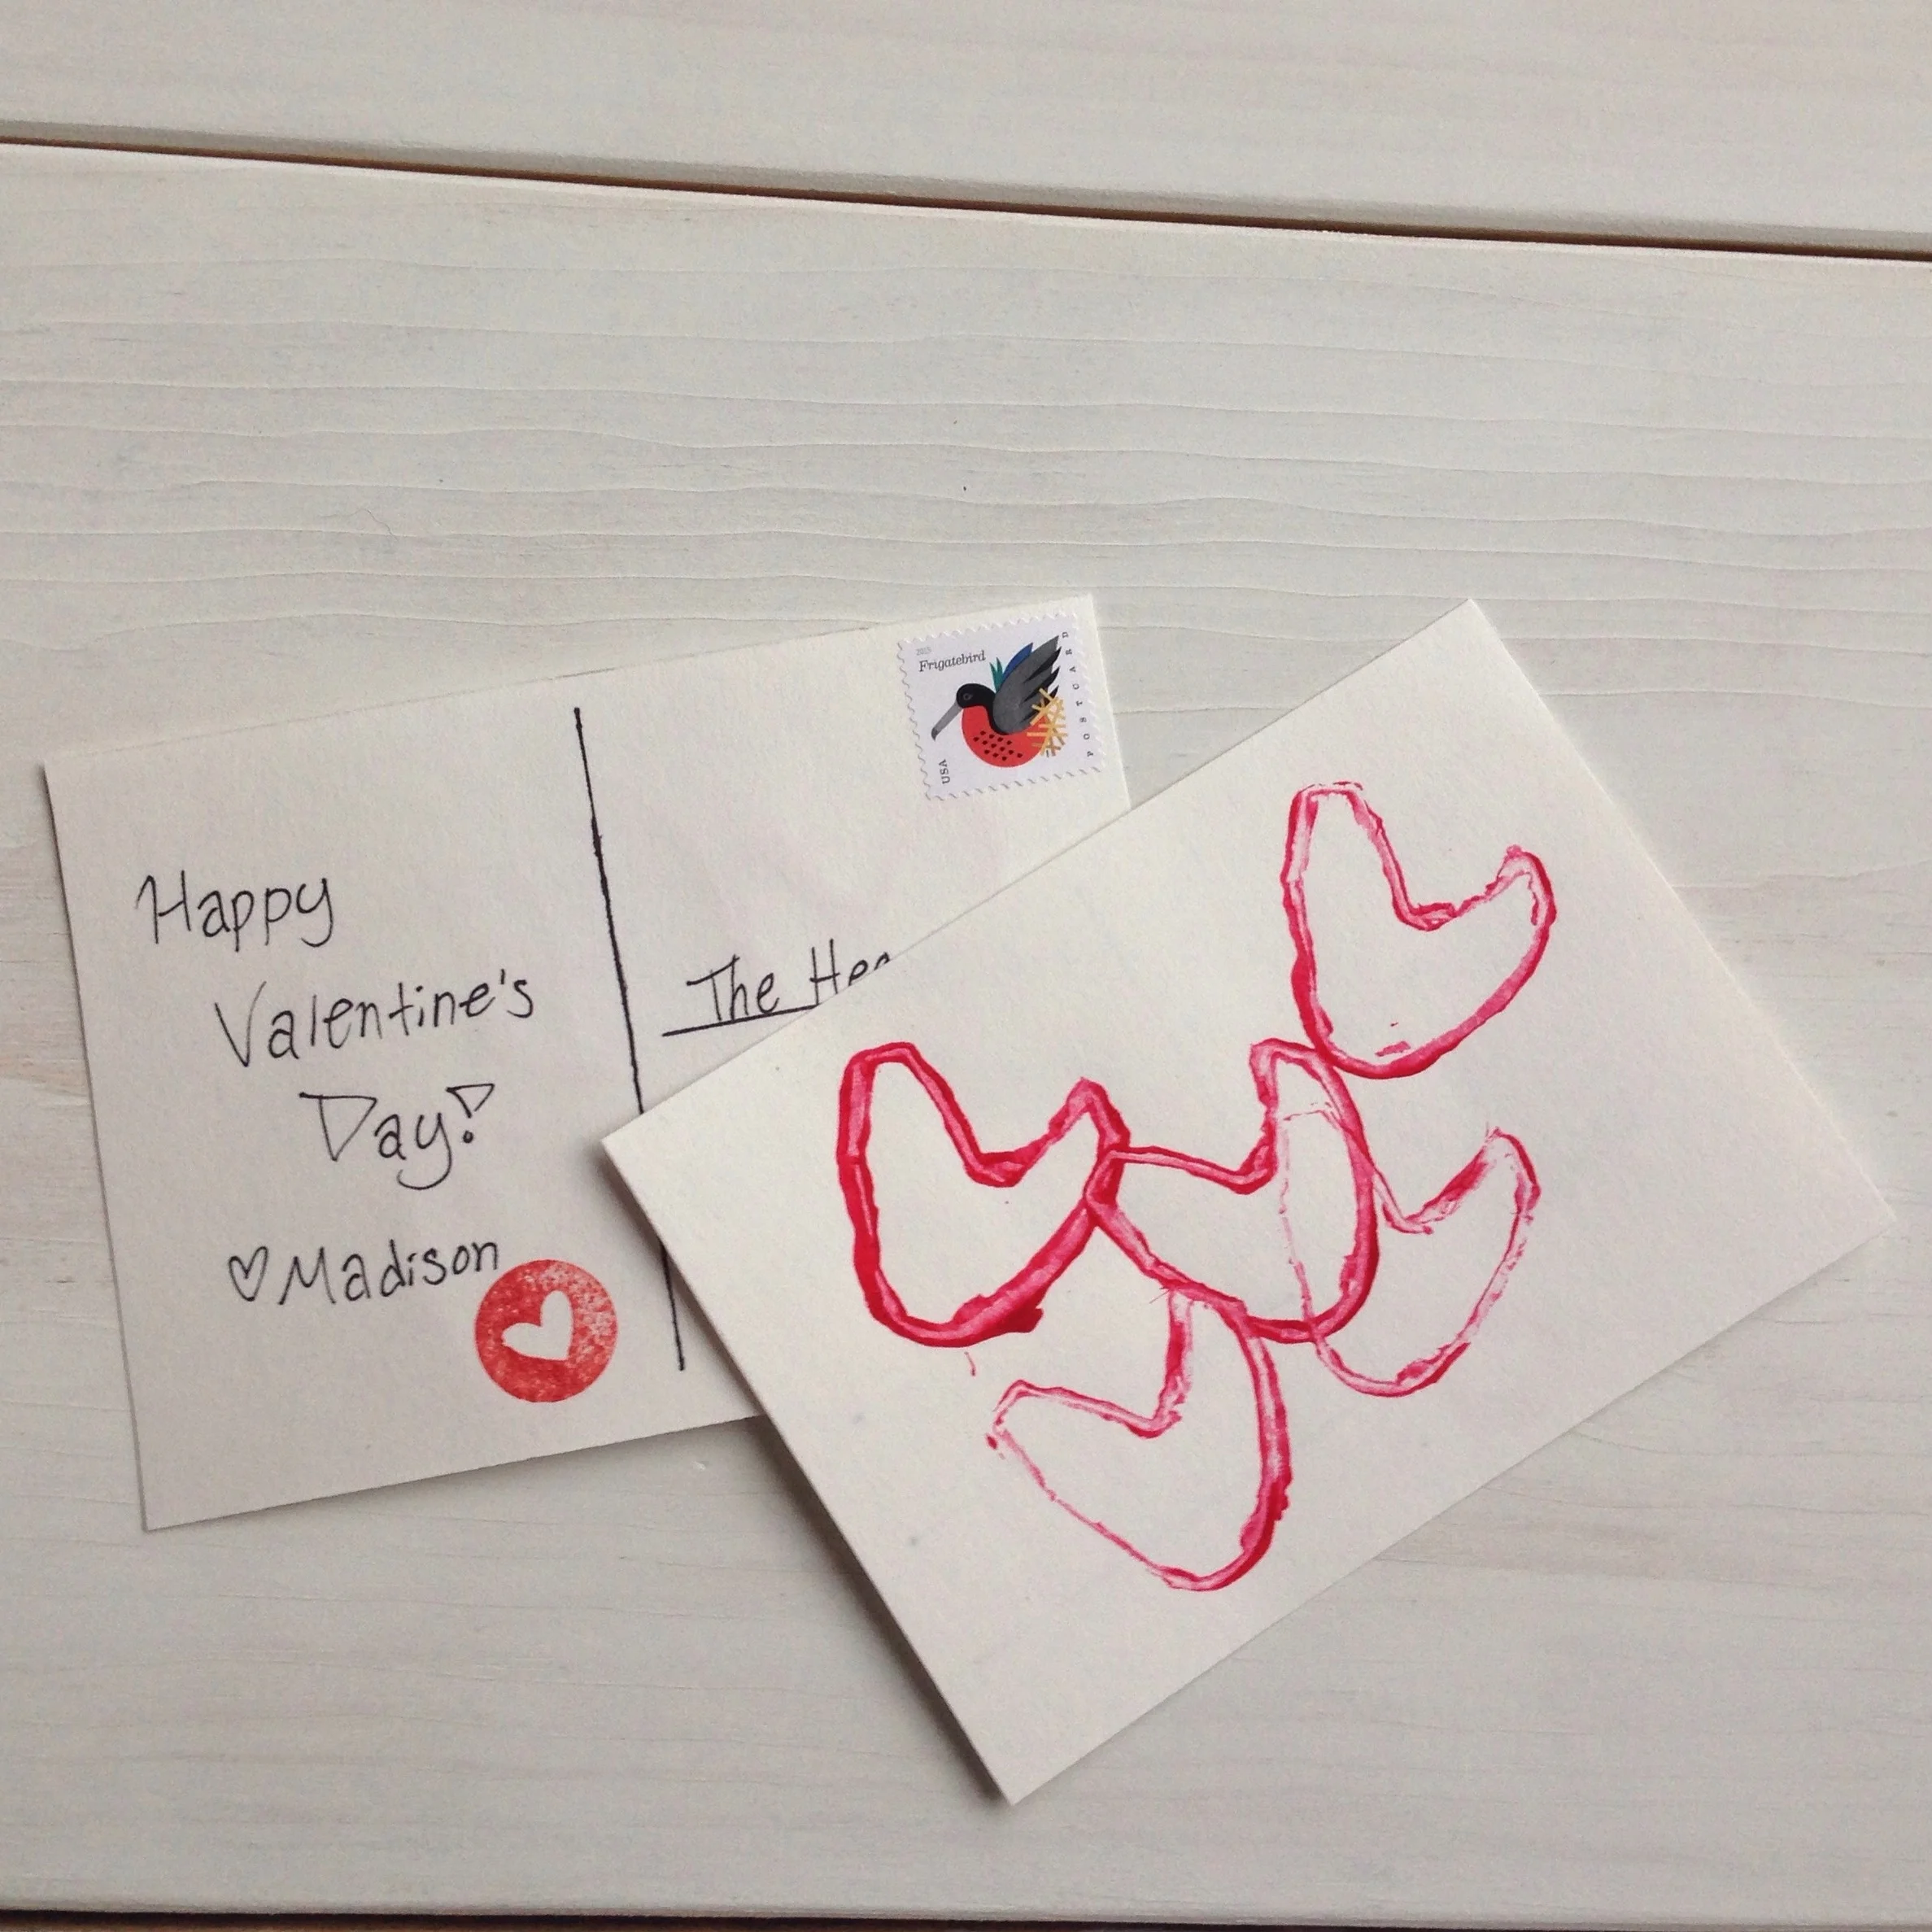
I kept the backs very basic with a simple handwritten message and a little heart stamp.
I hope you enjoyed this little Valentine DIY! It was very quick and easy and the possibilities are endless when it comes to how you want to paint, color, or draw the front of the postcard.
Happy Valentine's Day!
Check out our other Valentine's Posts:
KEEP UP WITH BIRCH LANDING HOME
| Etsy | Facebook | Instagram | Pinterest | Bloglovin' | Hometalk |
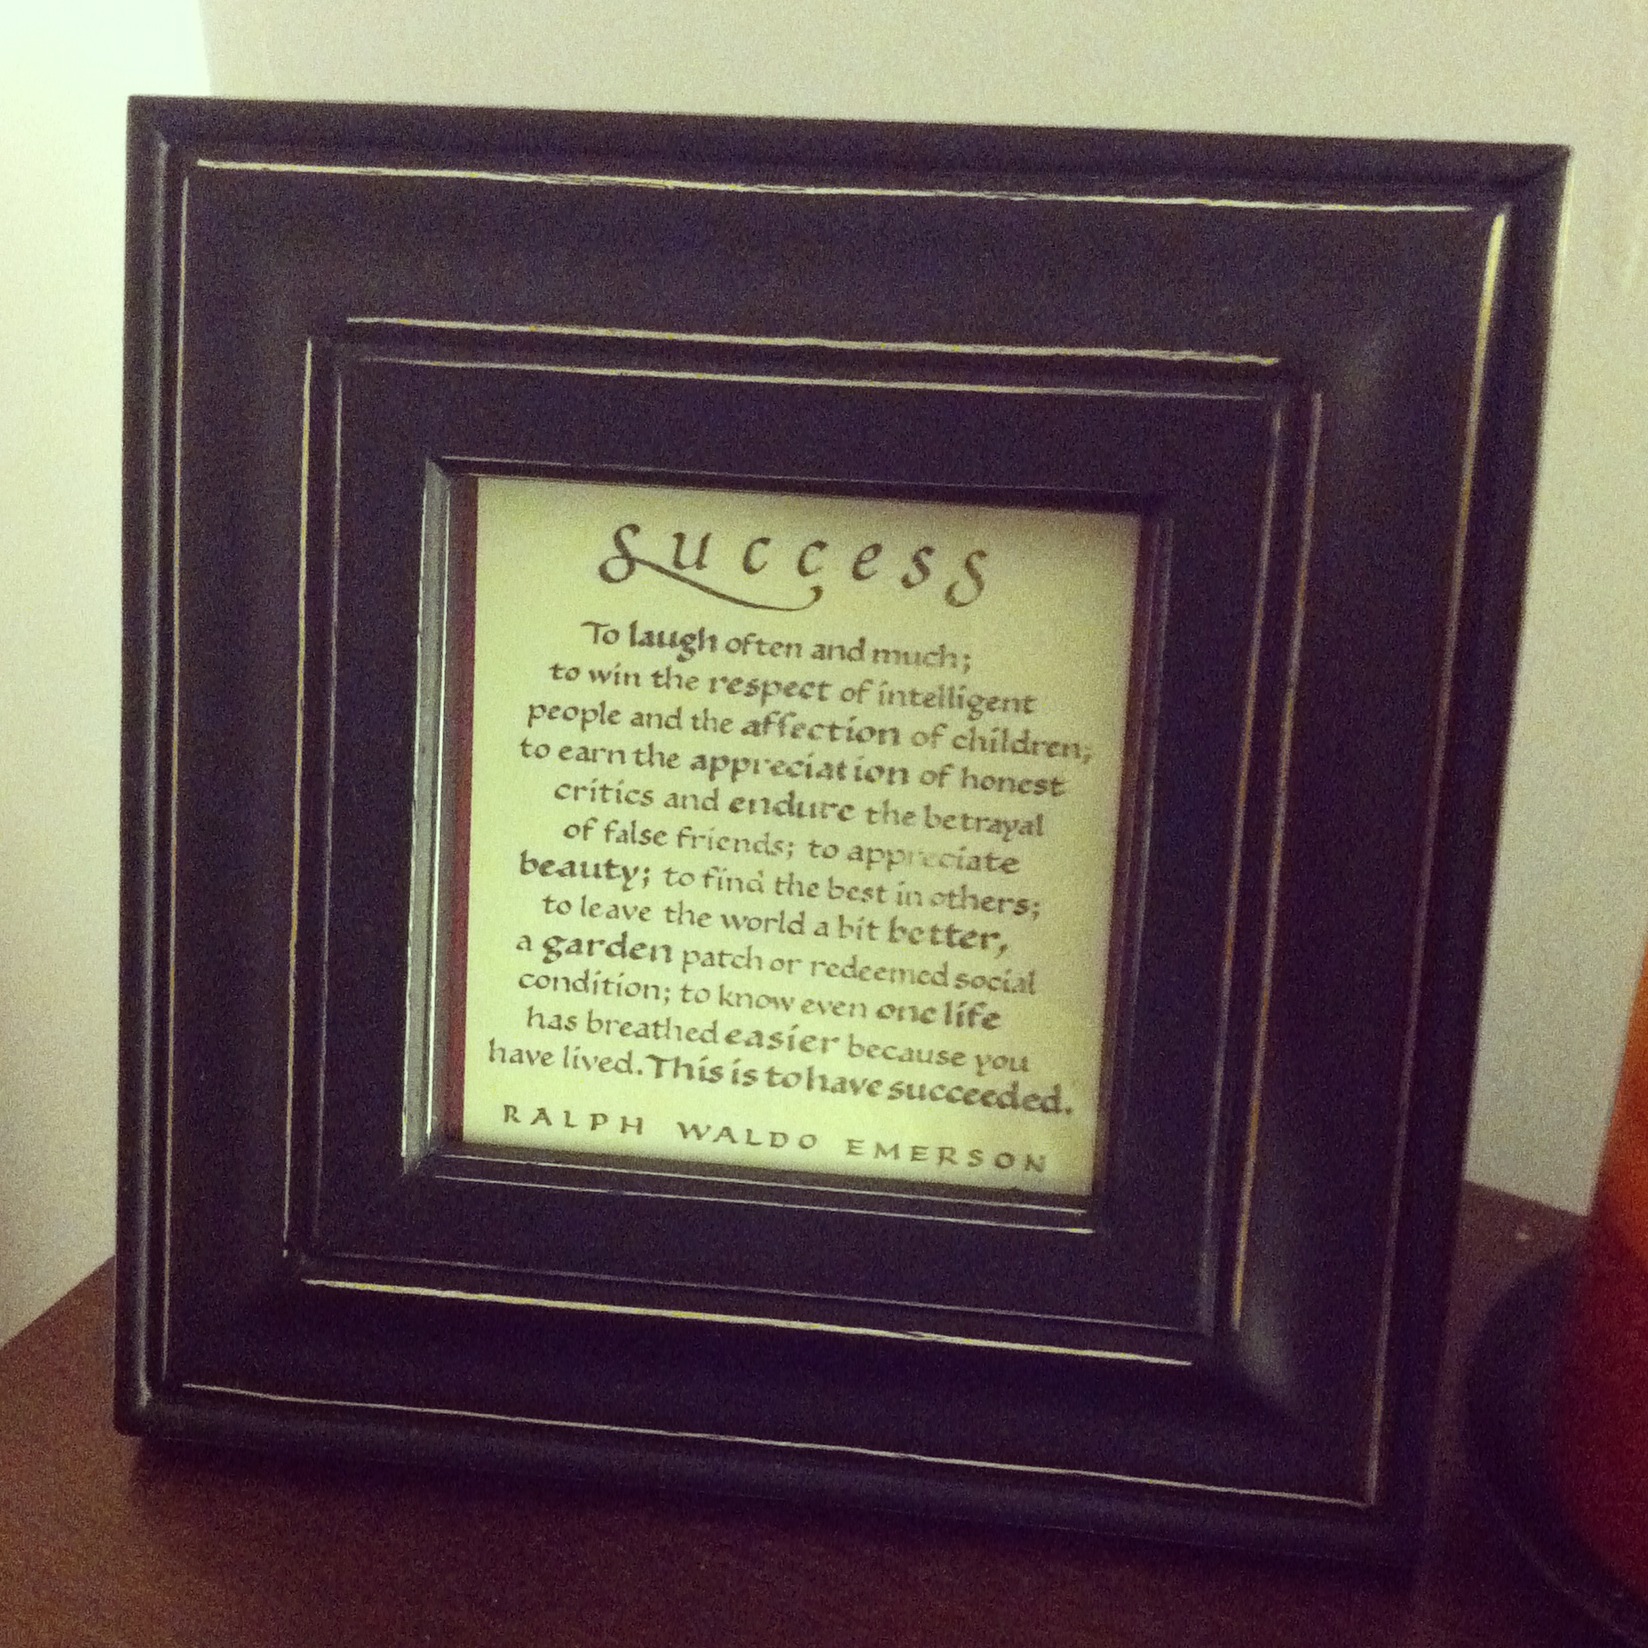
My Great-Aunt (who is now 97!), gave me this handmade card when I graduated high school. Though she hadn't made it herself, even then I thought the stamped Emerson quote was just beautiful.
Just about 10 years later I still had the card, and this summer I finally framed it with her signature safe on the back. It sits on my desk now, reminding me that success comes in many forms.
Success
To laugh often and much;
to win the respect of intelligent
people and the affection of children;
to earn the appreciation of honest
critics and endure the betrayal
of false friends; to appreciate
beauty; to find the best in others;
to leave the world a bit better,
a garden patch or redeemed social
condition; to know even one life
has breathed easier because you
have lived. This is to have succeeded.
Ralph Waldo Emerson
KEEP UP WITH BIRCH LANDING HOME
| Etsy | Facebook | Instagram | Pinterest | Bloglovin' | Hometalk |