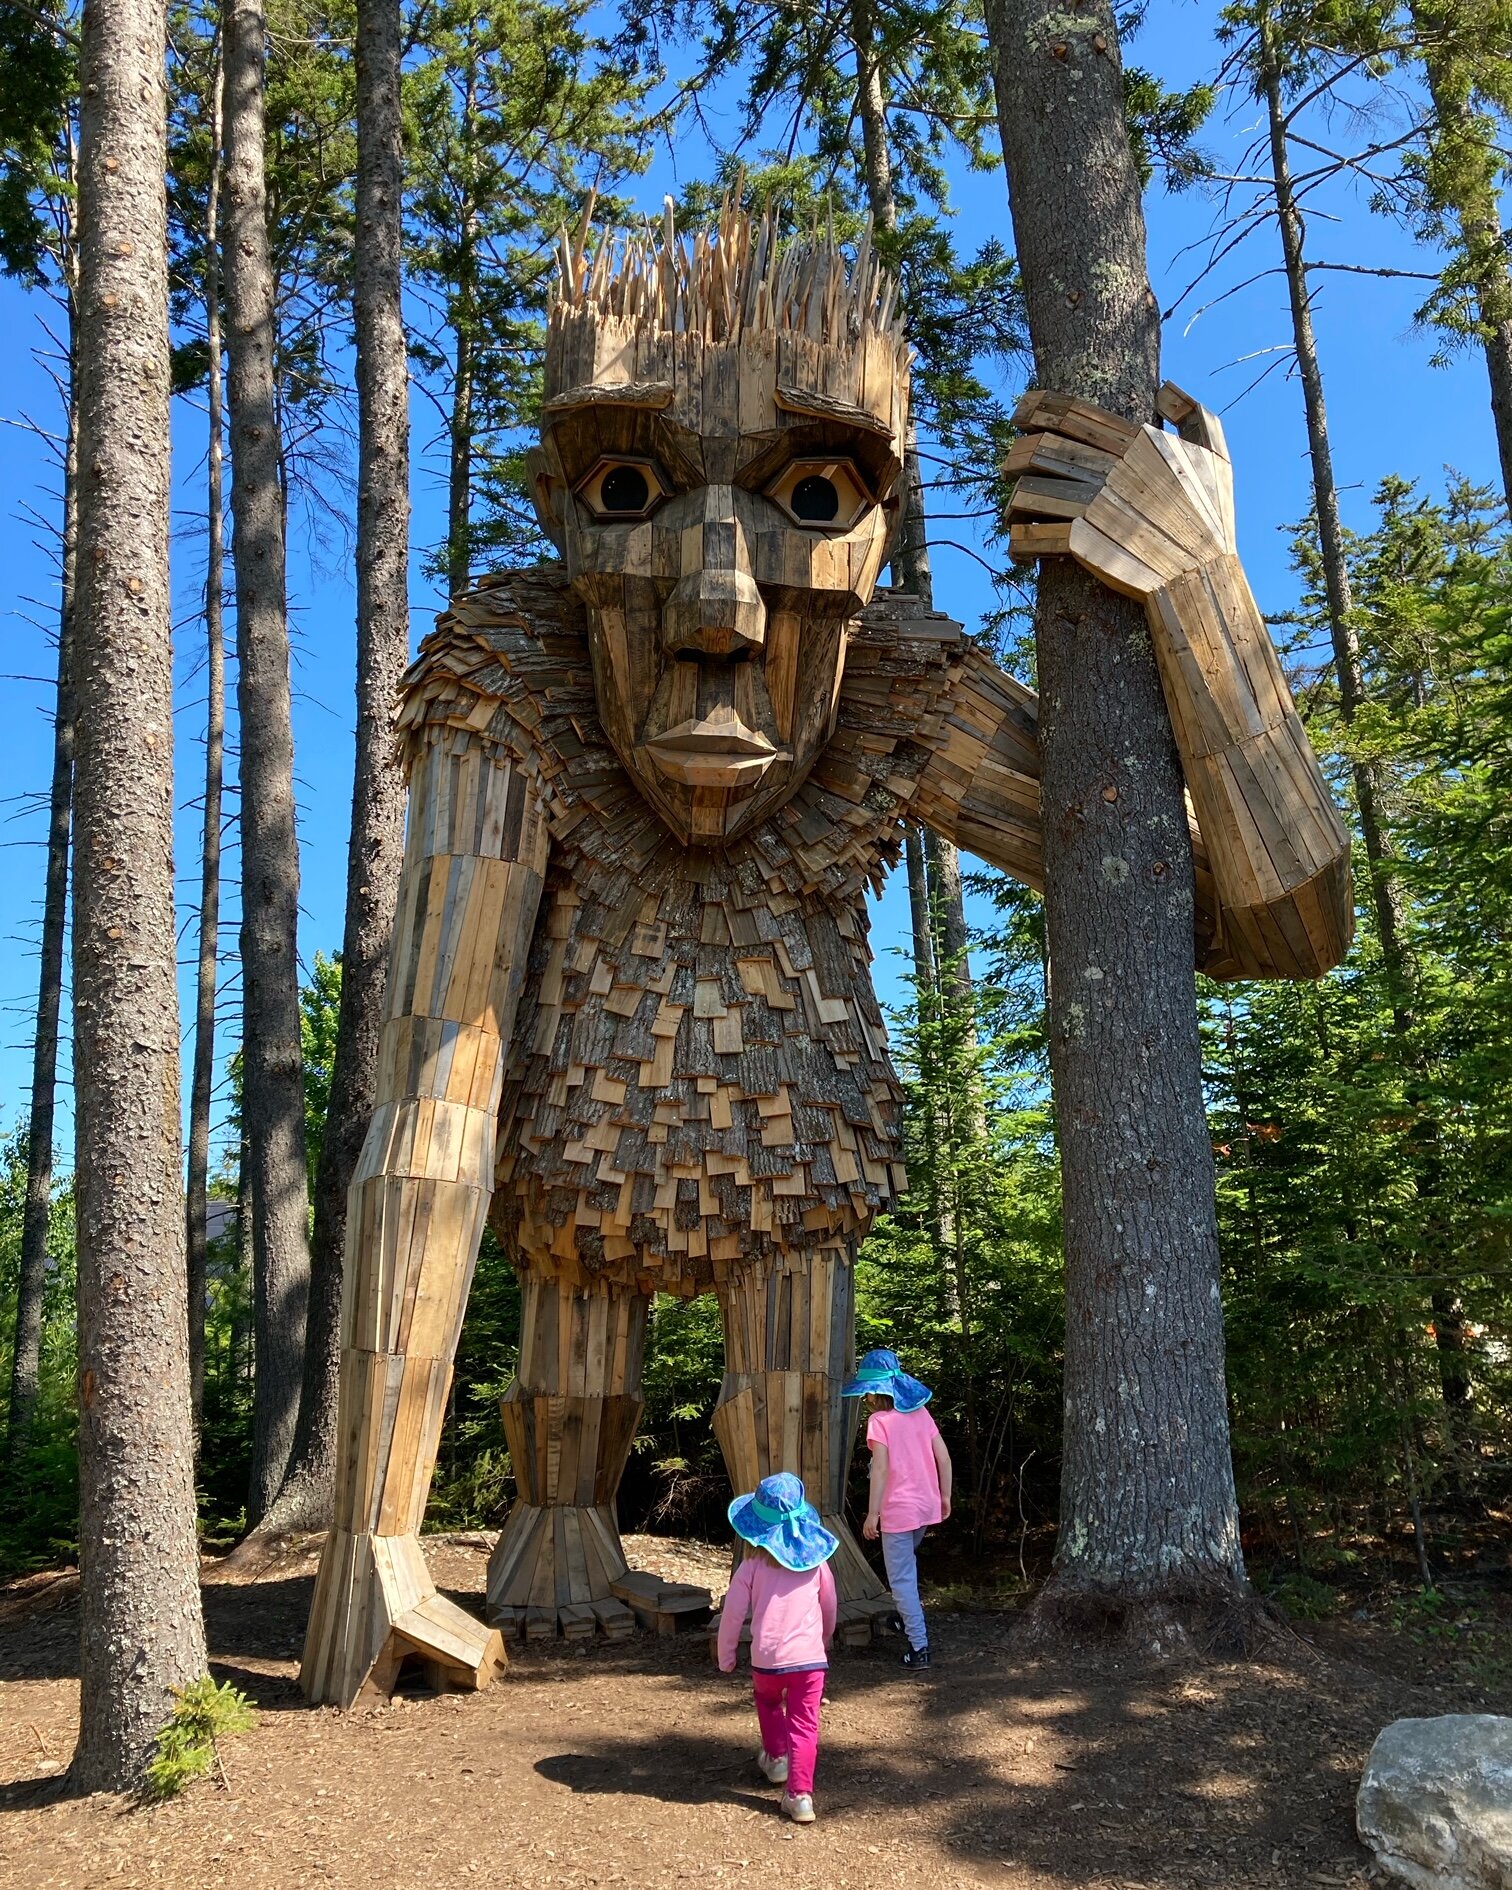
This past weekend we took a much needed day trip up to Boothbay, Maine to finally see the amazing Coastal Maine Botanical Gardens and its new art installation of giant trolls by Danish artist Thomas Dambo. The whole visit was beautiful and so fun. I’ve included a few photos here but they don’t do this magical place justice - the Gardens and the trolls must be seen in person if you ever have the chance! Here are a few tips and items of note from our trip. | This post contains affiliate links |
Tickets
Currently at this time Coastal Maine Botanical Gardens are requiring advanced purchased tickets only and your entry is timed (I believe this is for COVID precautions to help spread out visitors and limit the amount of visitors coming in at any one time to help reduce crowding). We purchased ours for one of the first time slots of the day and it was perfect. We found that the park was getting rather crowded by lunch so earlier was definitely better.
Masks
There were signs asking non-vaccinated guests to wear masks inside buildings, however we did not see that enforced. Nevertheless, we have been very COVID-cautious ourselves and made sure our kids put on their masks when we passed through the entrance building and when we left, also we had them put them on whenever we went into any other enclosed spaces.
The Trolls
There are five giant Trolls tucked away in the woods throughout the park. The map in the brochure was a bit confusing and it was difficult to tell exactly which paths some of them were on, but after a quick conversation with a very helpful gardener we had a good plan to see them all. At most of the trolls there were groups gathered to take photos but everyone was very respectful, waited their turn, and gave space so each group could take good photos with the trolls which was very nice.
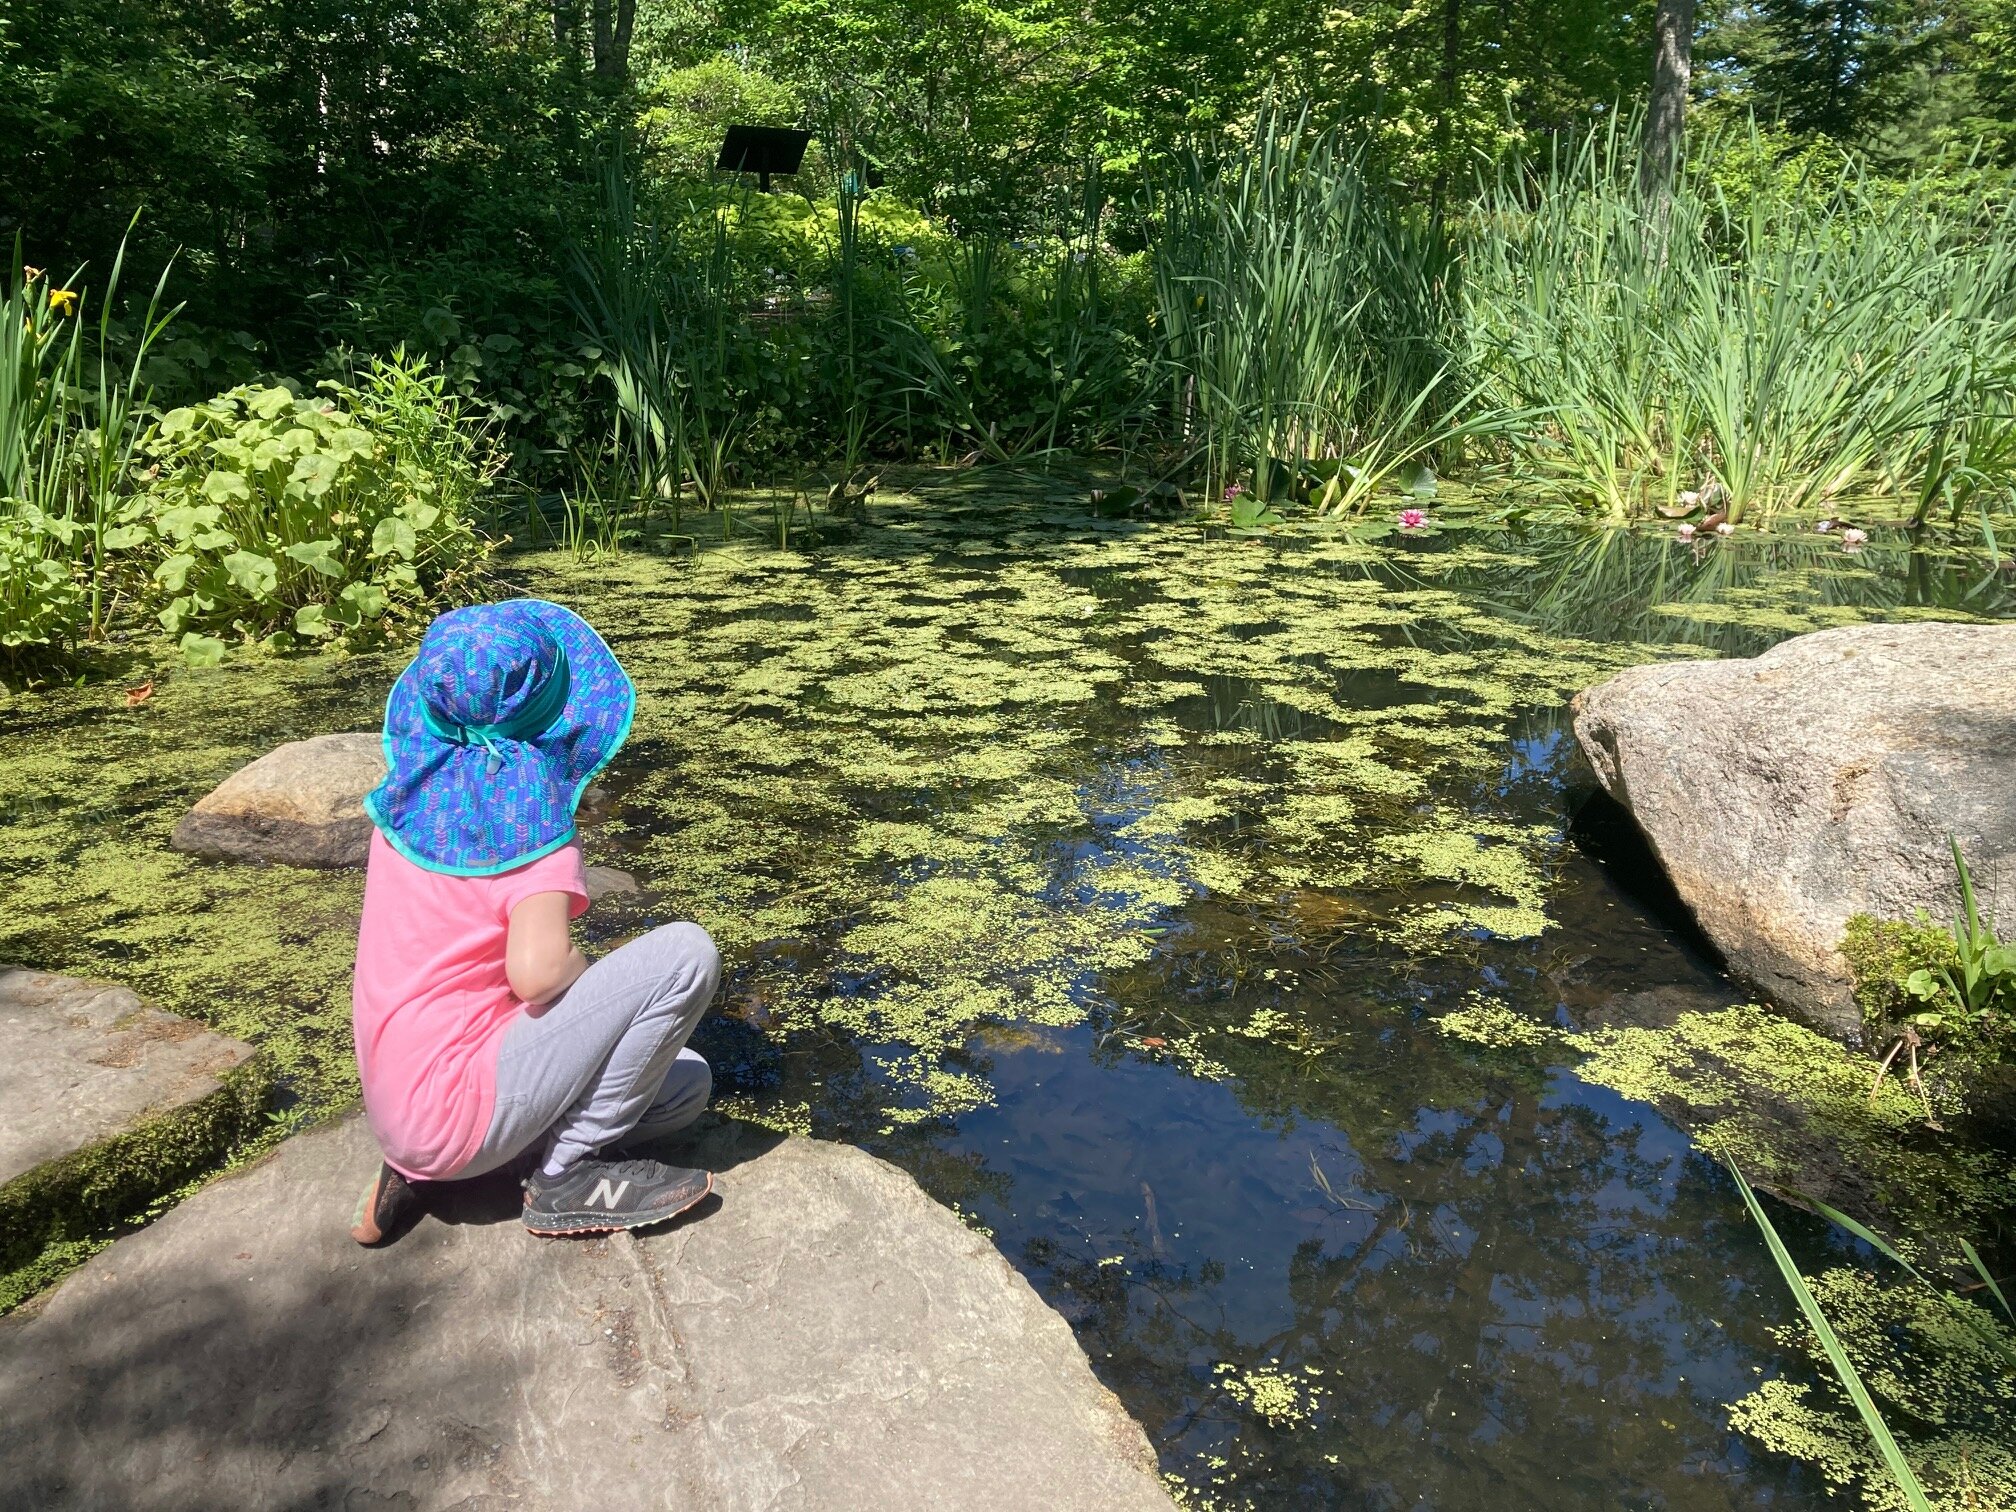
So Much to Explore
Besides the incredible trolls, there are miles of hiking trails and so many gardens to explore. We spent several hours there and didn’t even see most of them. Our favorite areas were the Children’s Gardens with its whimsical flowers, buildings, and animals, and the various ponds and fountains. Our kids especially loved watching the tadpoles (SO many tadpoles!) and turtles in the ponds.
We got lots of compliments on our kids' matching sunhats too! They are our absolute favorite ones by Sunday Afternoons.
Lunch
We headed out early afternoon when it started to get very hot and crowded but we easily could have stayed and explored longer! There was an on-site cafe that had grab-n-go food that looked great but we decided to forgo that and opt for seafood on the way home (when in Maine). We would have loved to stop at Red’s Eats in Wiscasset but the line was down the block when we went by, so we got takeout from Sea Basket instead and ate our weight in fried seafood and lobster rolls - it hit the spot.
Overall it was a beautiful day to get out and explore this beautiful place with our family - we’re already planning on coming back later in the summer to see everything with different plants in bloom.
KEEP UP WITH BIRCH LANDING HOME
| Etsy | Facebook | Instagram | Pinterest | Bloglovin' | Hometalk |
Our little one may be happily playing independently but the second I go to make dinner she demands to be held and refuses to be put down, making cooking impossible. To help keep her occupied but still involved I've been eyeing a learning tower / kitchen helper on Amazon for months now, but at $200 it just wasn't in our budget. My sister-in-law had made a learning tower from a plan by Ana White and suggested I try to make one too. I was unsure at first, I've never made anything more complicated than a birdhouse, but I decided to give it a go! Read on for my lessons learned and know that you can totally make one too. | This post contains affiliate links |
{ Note: the plans that I worked from were from Ana White and can be found HERE }
The first step to making the learning tower was buying the lumber.. which is easier said than done when you just have a little car! Nevertheless, Miss M and I made the nearly hour-long trek out to Lowe's to pick up lumber, paint, and screws. One thing I really liked about the Ana White plan was that it had both a shopping list and a "cut list" so you knew exactly how much of each kind of wood to buy and then how to cut it up. I made a mistake at Lowe's though and ended up buying 6-foot boards instead of 8-foot.. I don't know if I read the sign too quickly or what, but it made me come up short for the project. Thankfully we had some extra wood in the garage and I was able to fudge it.
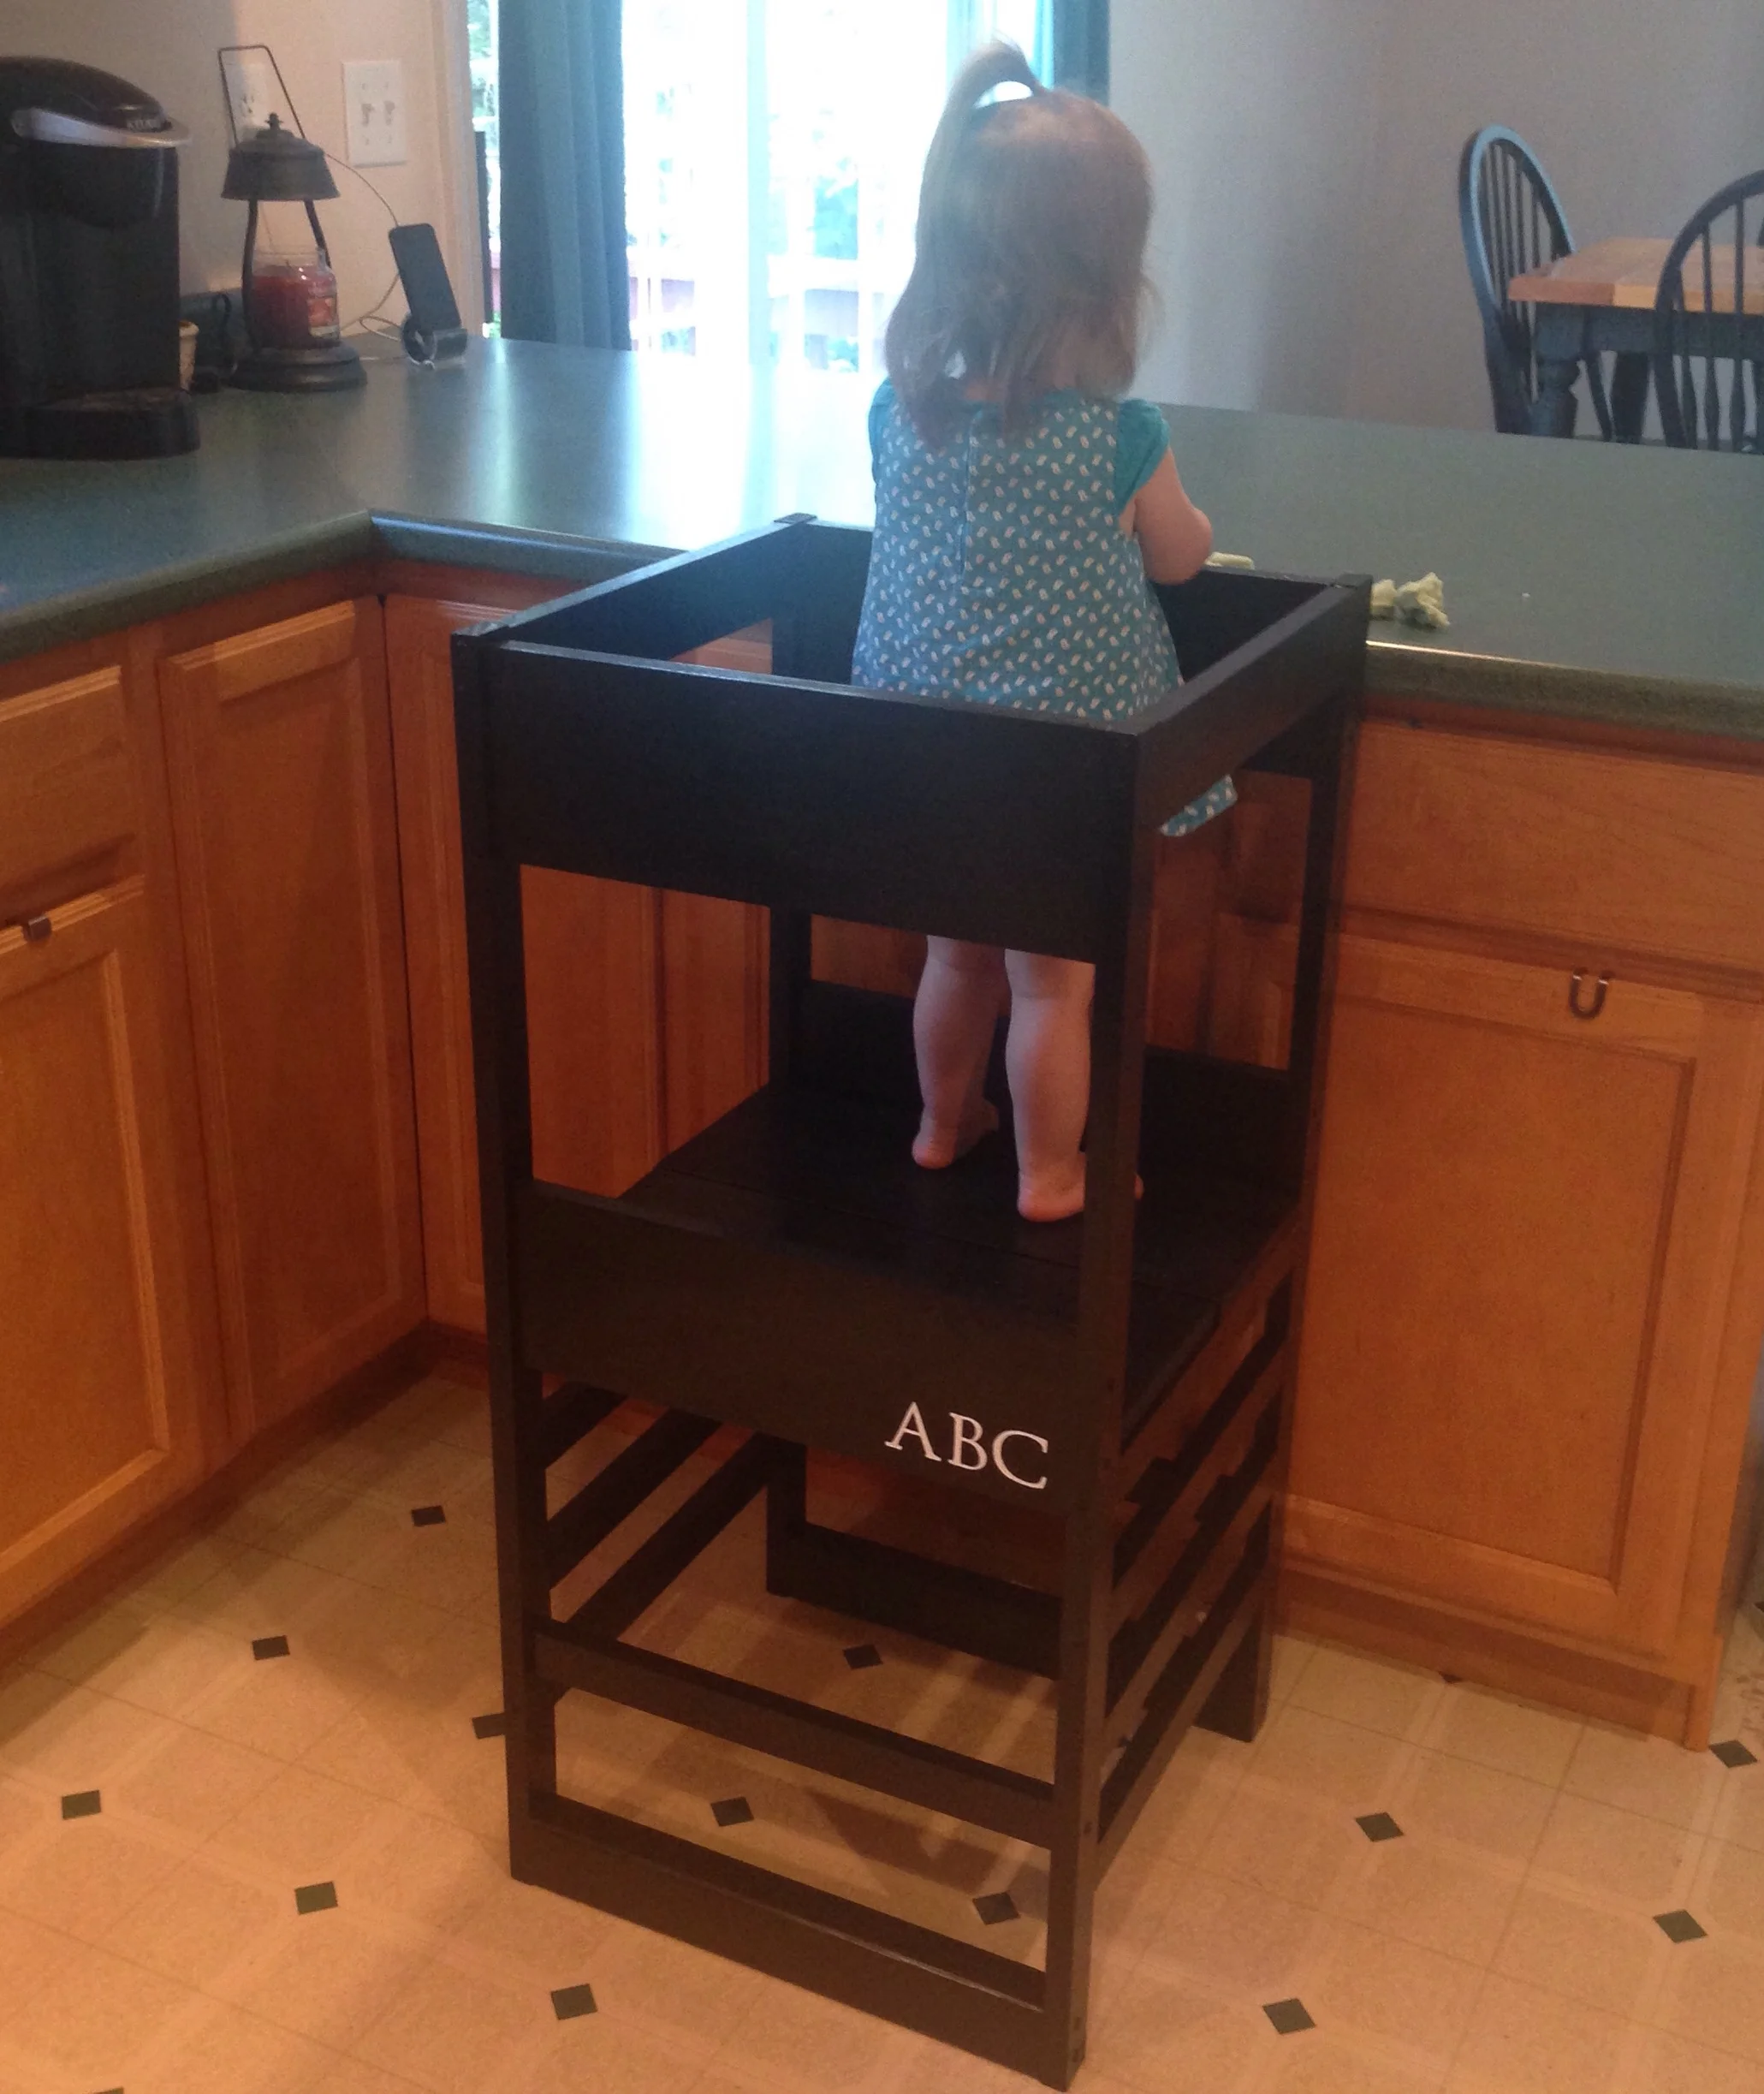
For our learning tower, I made some modifications - some were planned and some kind of happened as the project went on (partly due to the wood shortage). For example, I decided against doing the arches on the top - as lovely as they were, we don't have a jigsaw so I had to nix it. I also did the base of the tower a little differently and I didn't do the tip resistors (at least not yet), my sister-in-law omitted the tip resistors and has had no problems. Our little one is pretty good with the tower (knock on wood), but for peace of mind I think we will do something to help prevent it ever tipping - most likely adding some scrap wood to make a lip that will fit under the edge of our counter. Another thing I did differently was make the front and back top railing wider, the reasoning for this was two-fold - for one thing, it gave me more room to screw in the the top railings without the screws running into each other. Another was that the wider wood makes it impossible for our little one to open the kitchen drawers in front of her (so key).
One criticism of Ana White's plan is that while it gives you a great outline of what to make and how to go about it, it definitely doesn't spell everything out - and for this detail-oriented person that drove me nuts! For example, it doesn't detail how many screws you should use when attaching each piece or how to position the screws when you join sides together (this was a huge issue so they didn't run into each other). Another big problem was that the plan had quite a few typos and some of the steps would stop mid-sentence missing the full explanation of what to do.
I highly suggest cutting all the wood, labeling it, laying it out and really thinking through how it's going together. My biggest challenge by far was figuring out a good way to hold the pieces together while I pre-drilled and screwed them together. The wood the plan calls for is pretty thin (another downside of the plan), so that limited the ways I felt I could hold it without damaging it. I tried using vices and clamps to help hold everything together but they always seemed to be in the way so I ended up holding it in place anyway I could, even with my foot if necessary (awkward).
I also had to improvise on how to center the front and back side pieces against the wider side of the legs. It turned out that a picture book we had was the perfect thickness and became a great spacer.
To space the boards for the platform I placed some extra screws between them as spacers. Once it was all attached together, I just pulled the screw spacers out.
For paint, I used a high-gloss black enamel paint by Val-Spar and gave it two coats (though I probably should have done 1-2 more). I really recommend using high-gloss paint or stain so it can be wiped down easily after every use.
I wanted to add some personalization or decoration to the learning tower, but also wanted to keep it simple so that it would blend into the kitchen better. I decided against personalizing the tower since we're hoping to have more kids and I wanted to keep it "neutral" - so I settled for stenciling "ABC" on one of sides for a little decoration, using the Martha Stewart Monogram Serif Stencil Set.
Our little one loves her new learning tower and now feels like she can "help" when I'm making dinner. This tower also makes arts and crafts a lot easier (here she's playing with some homemade playdough).
Safety Notice: It goes without saying, but always supervise your little one while they're using the learning tower and make sure there is nothing dangerous within reach (hot plates, knives/other sharp objects, stove, off-limit foods, etc). Use at your own risk.
Other posts you might enjoy:
KEEP UP WITH BIRCH LANDING HOME
| Etsy | Facebook | Instagram | Pinterest | Bloglovin' | Hometalk |