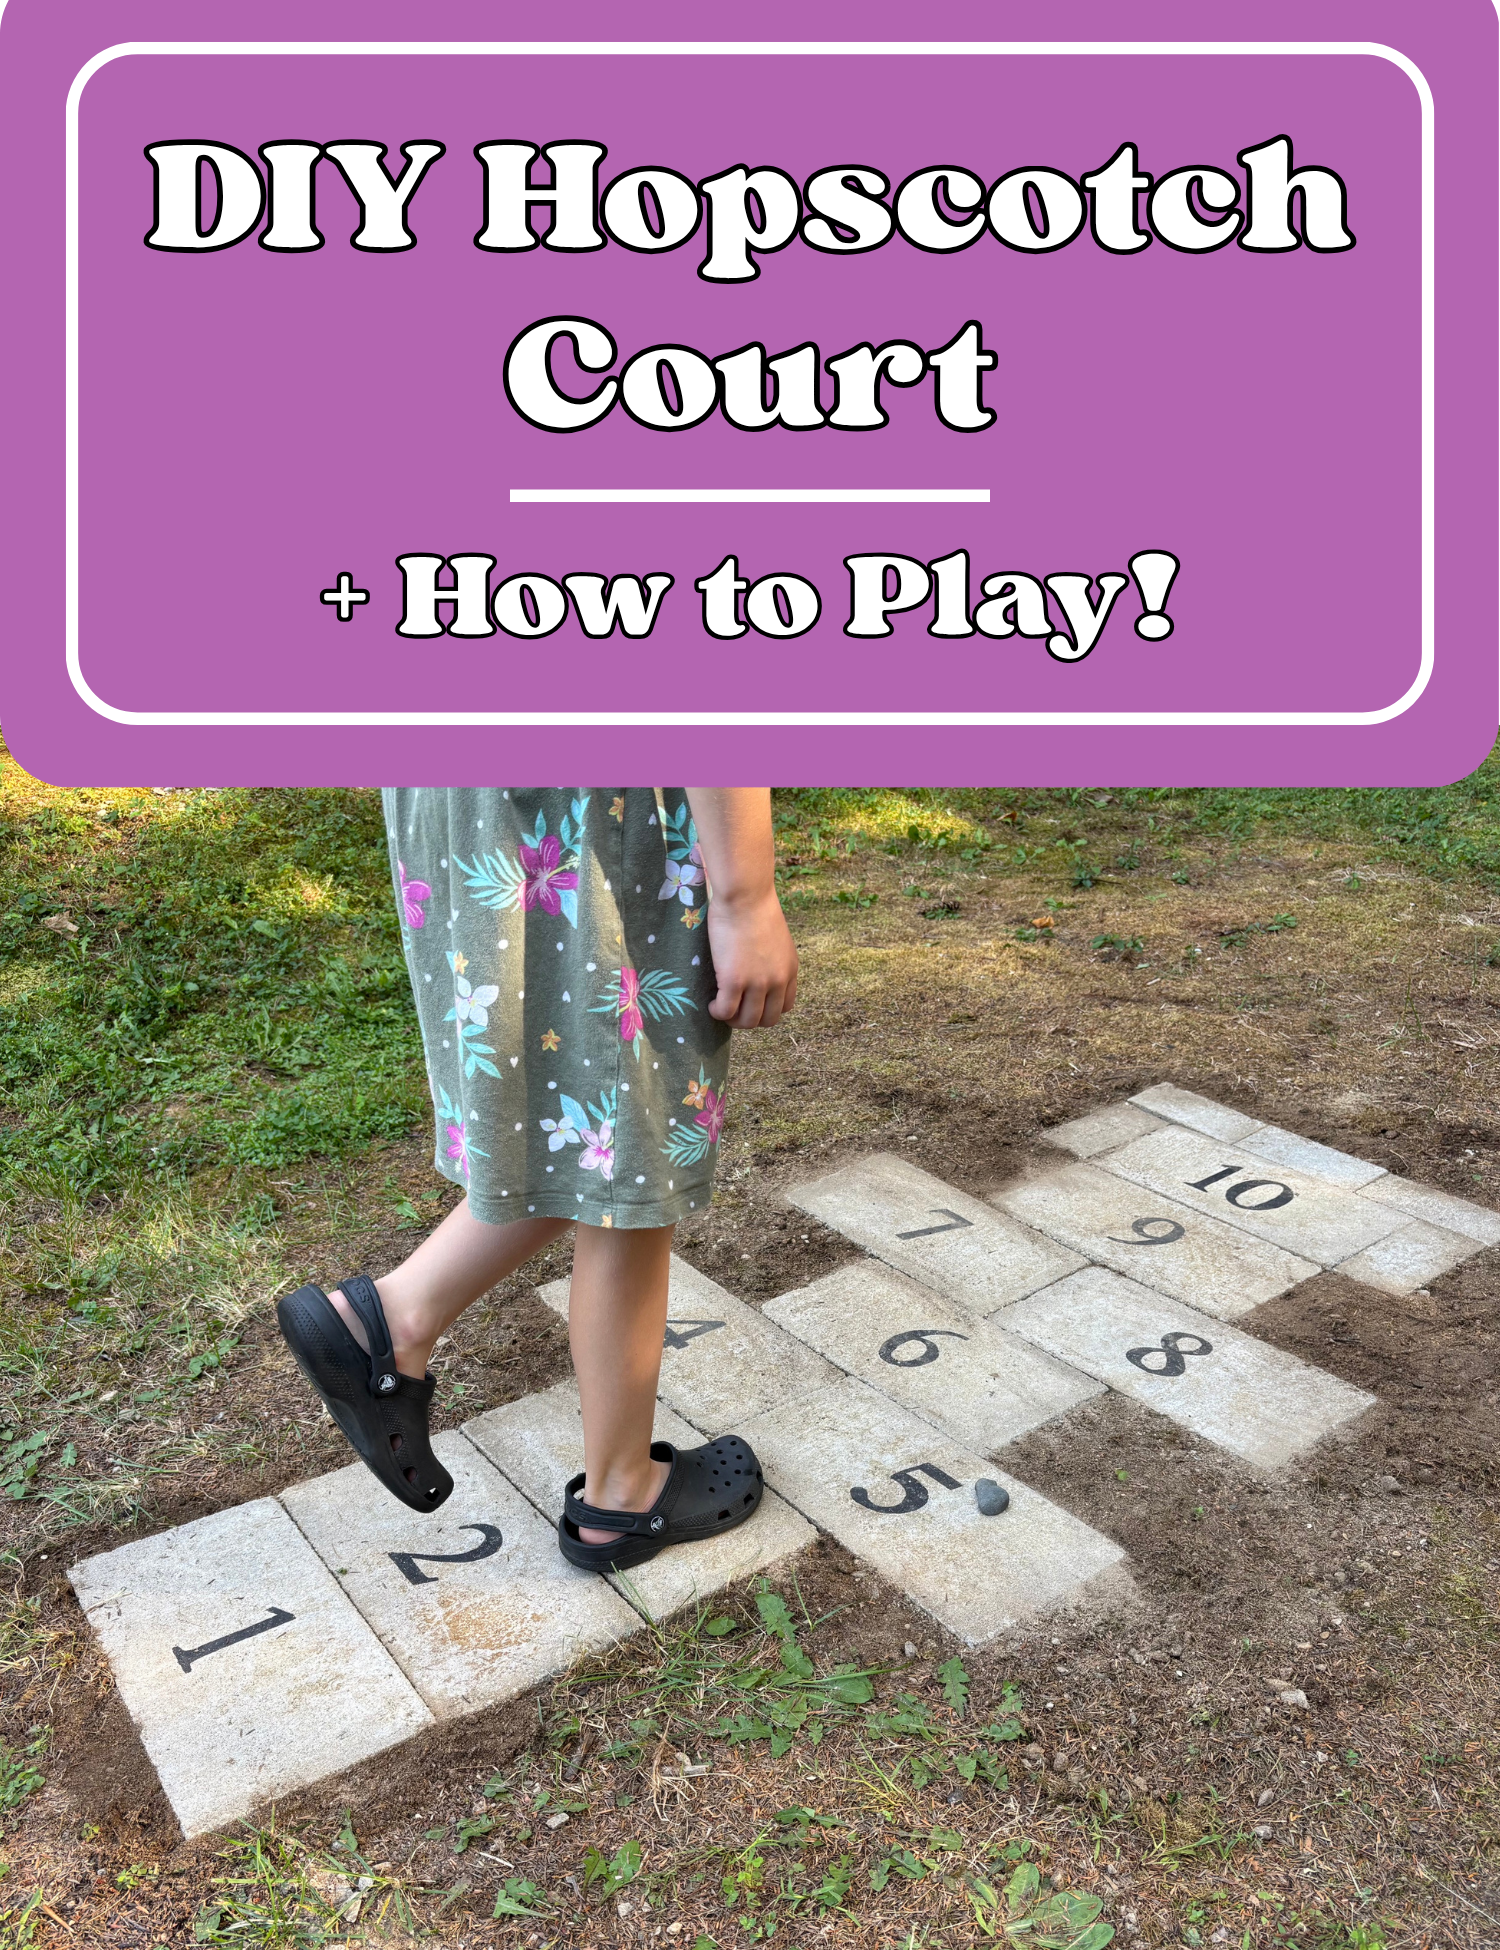
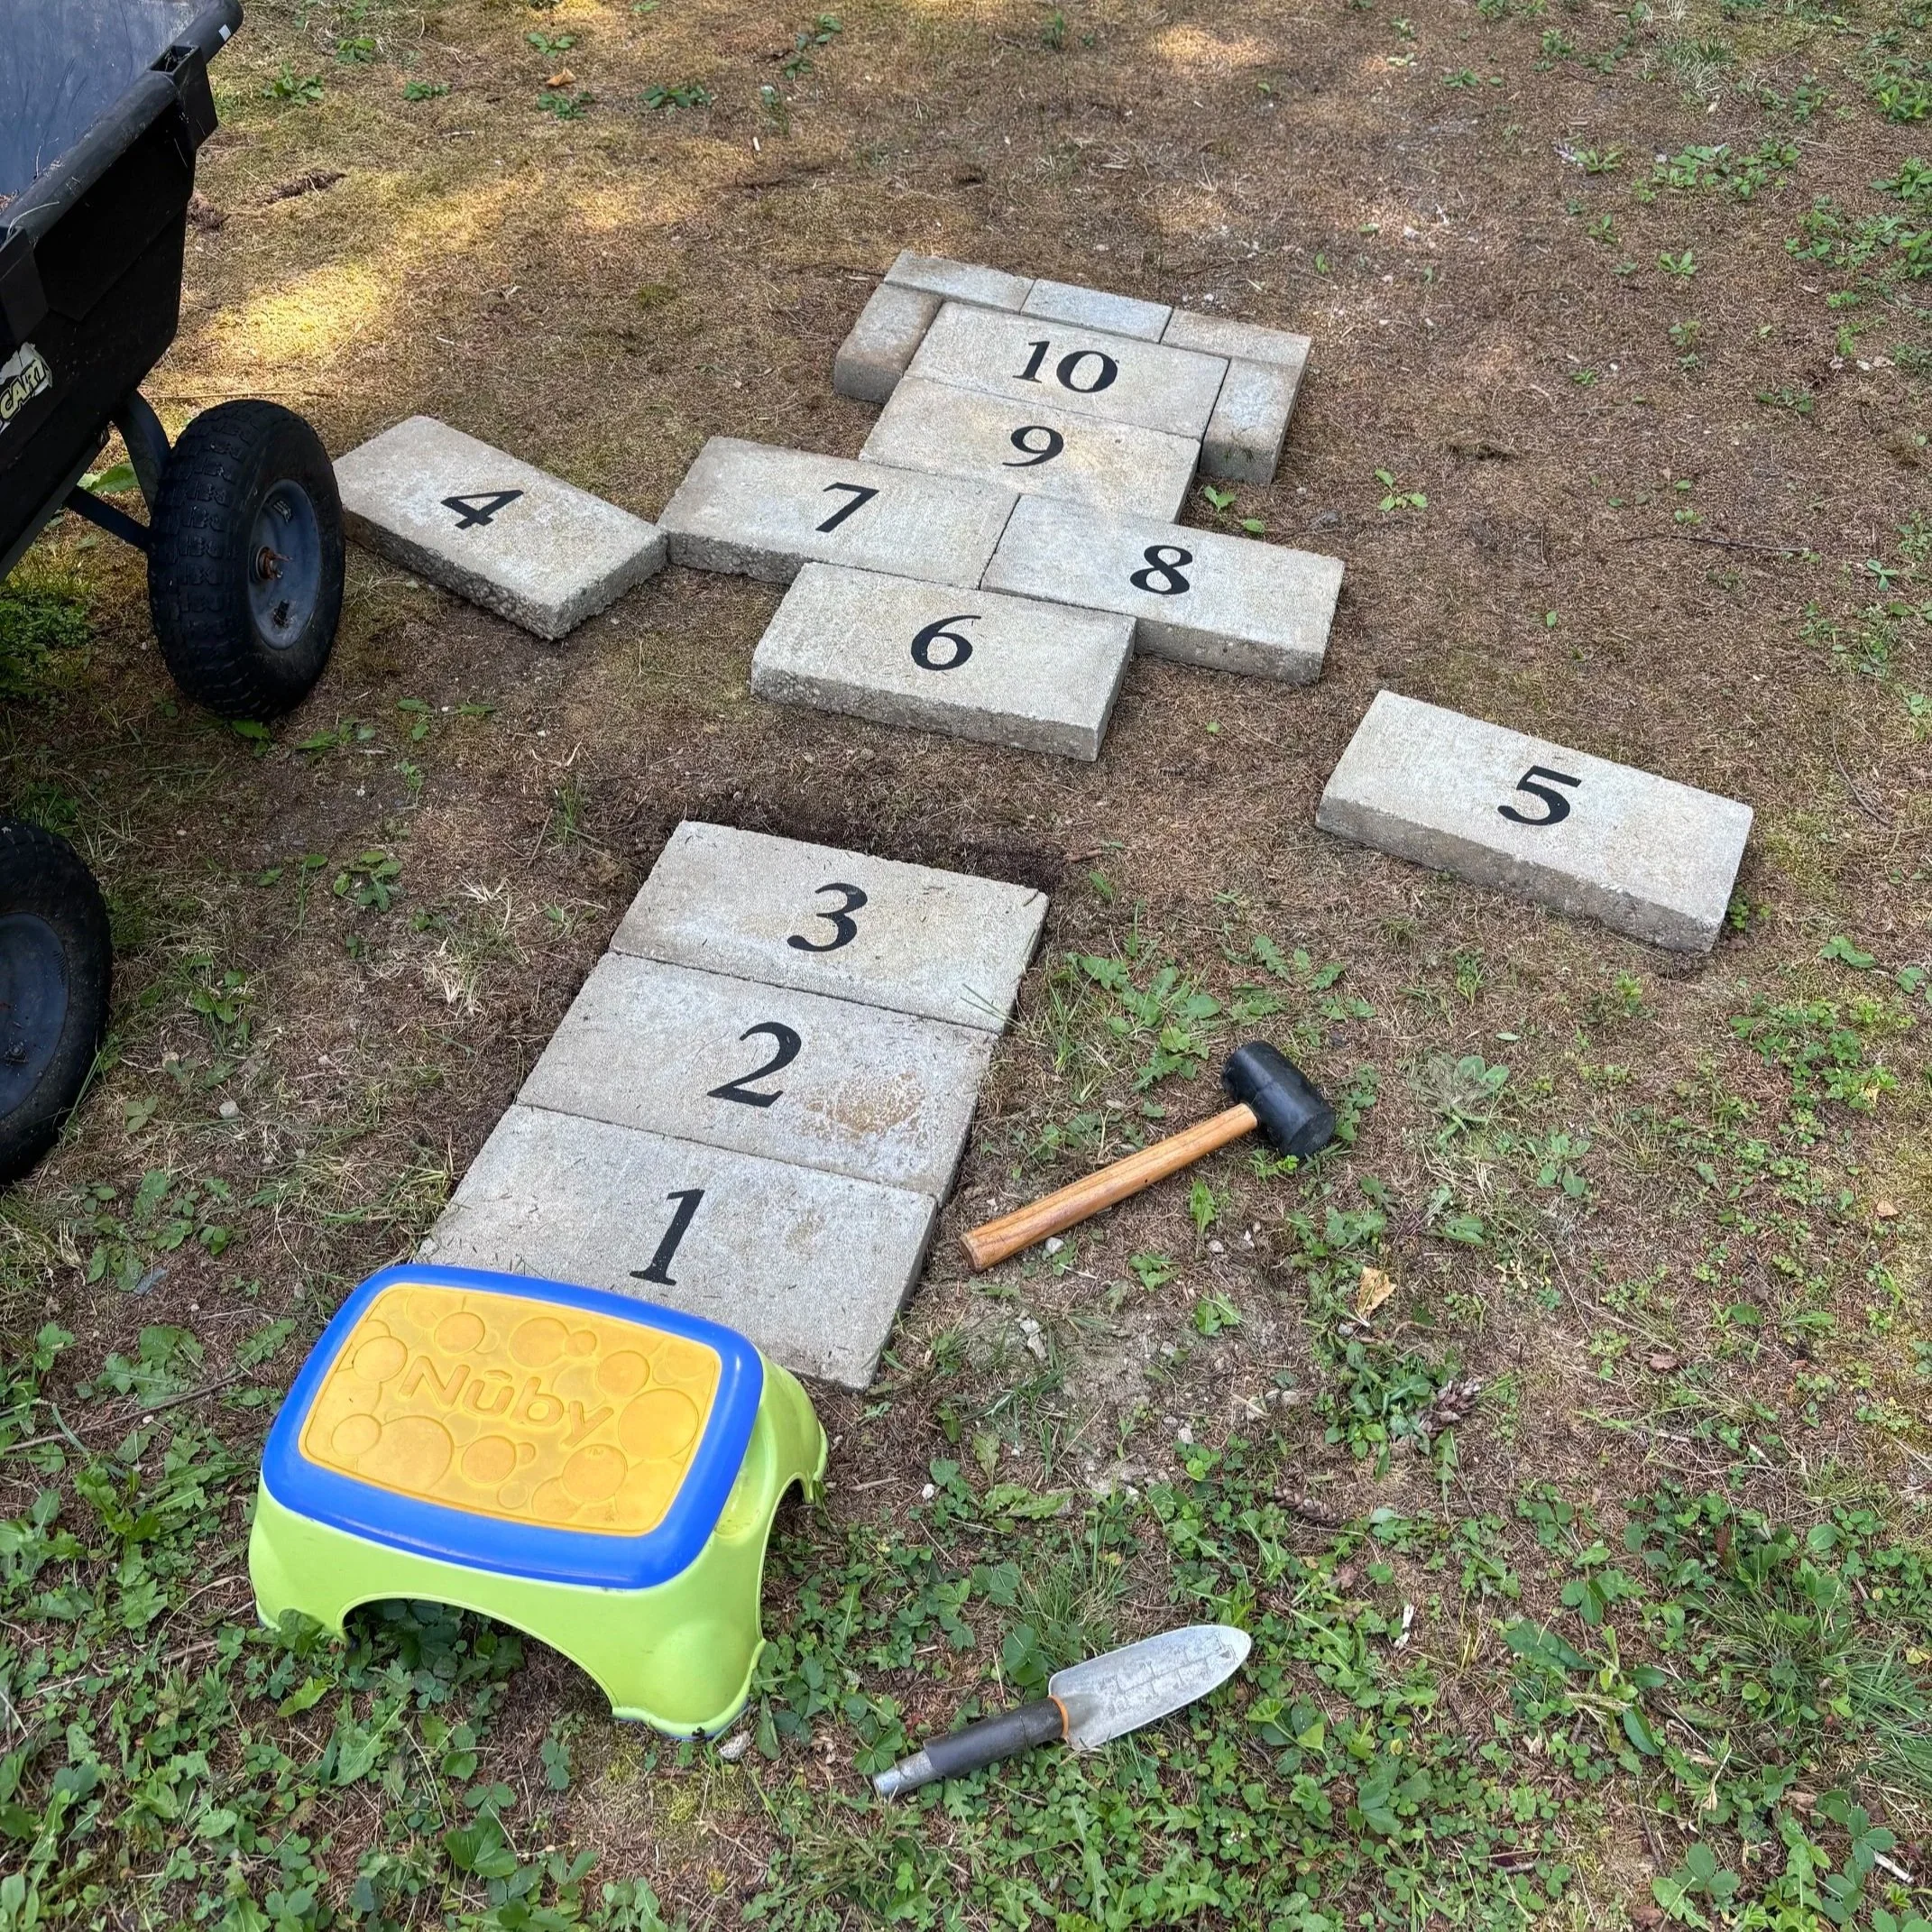
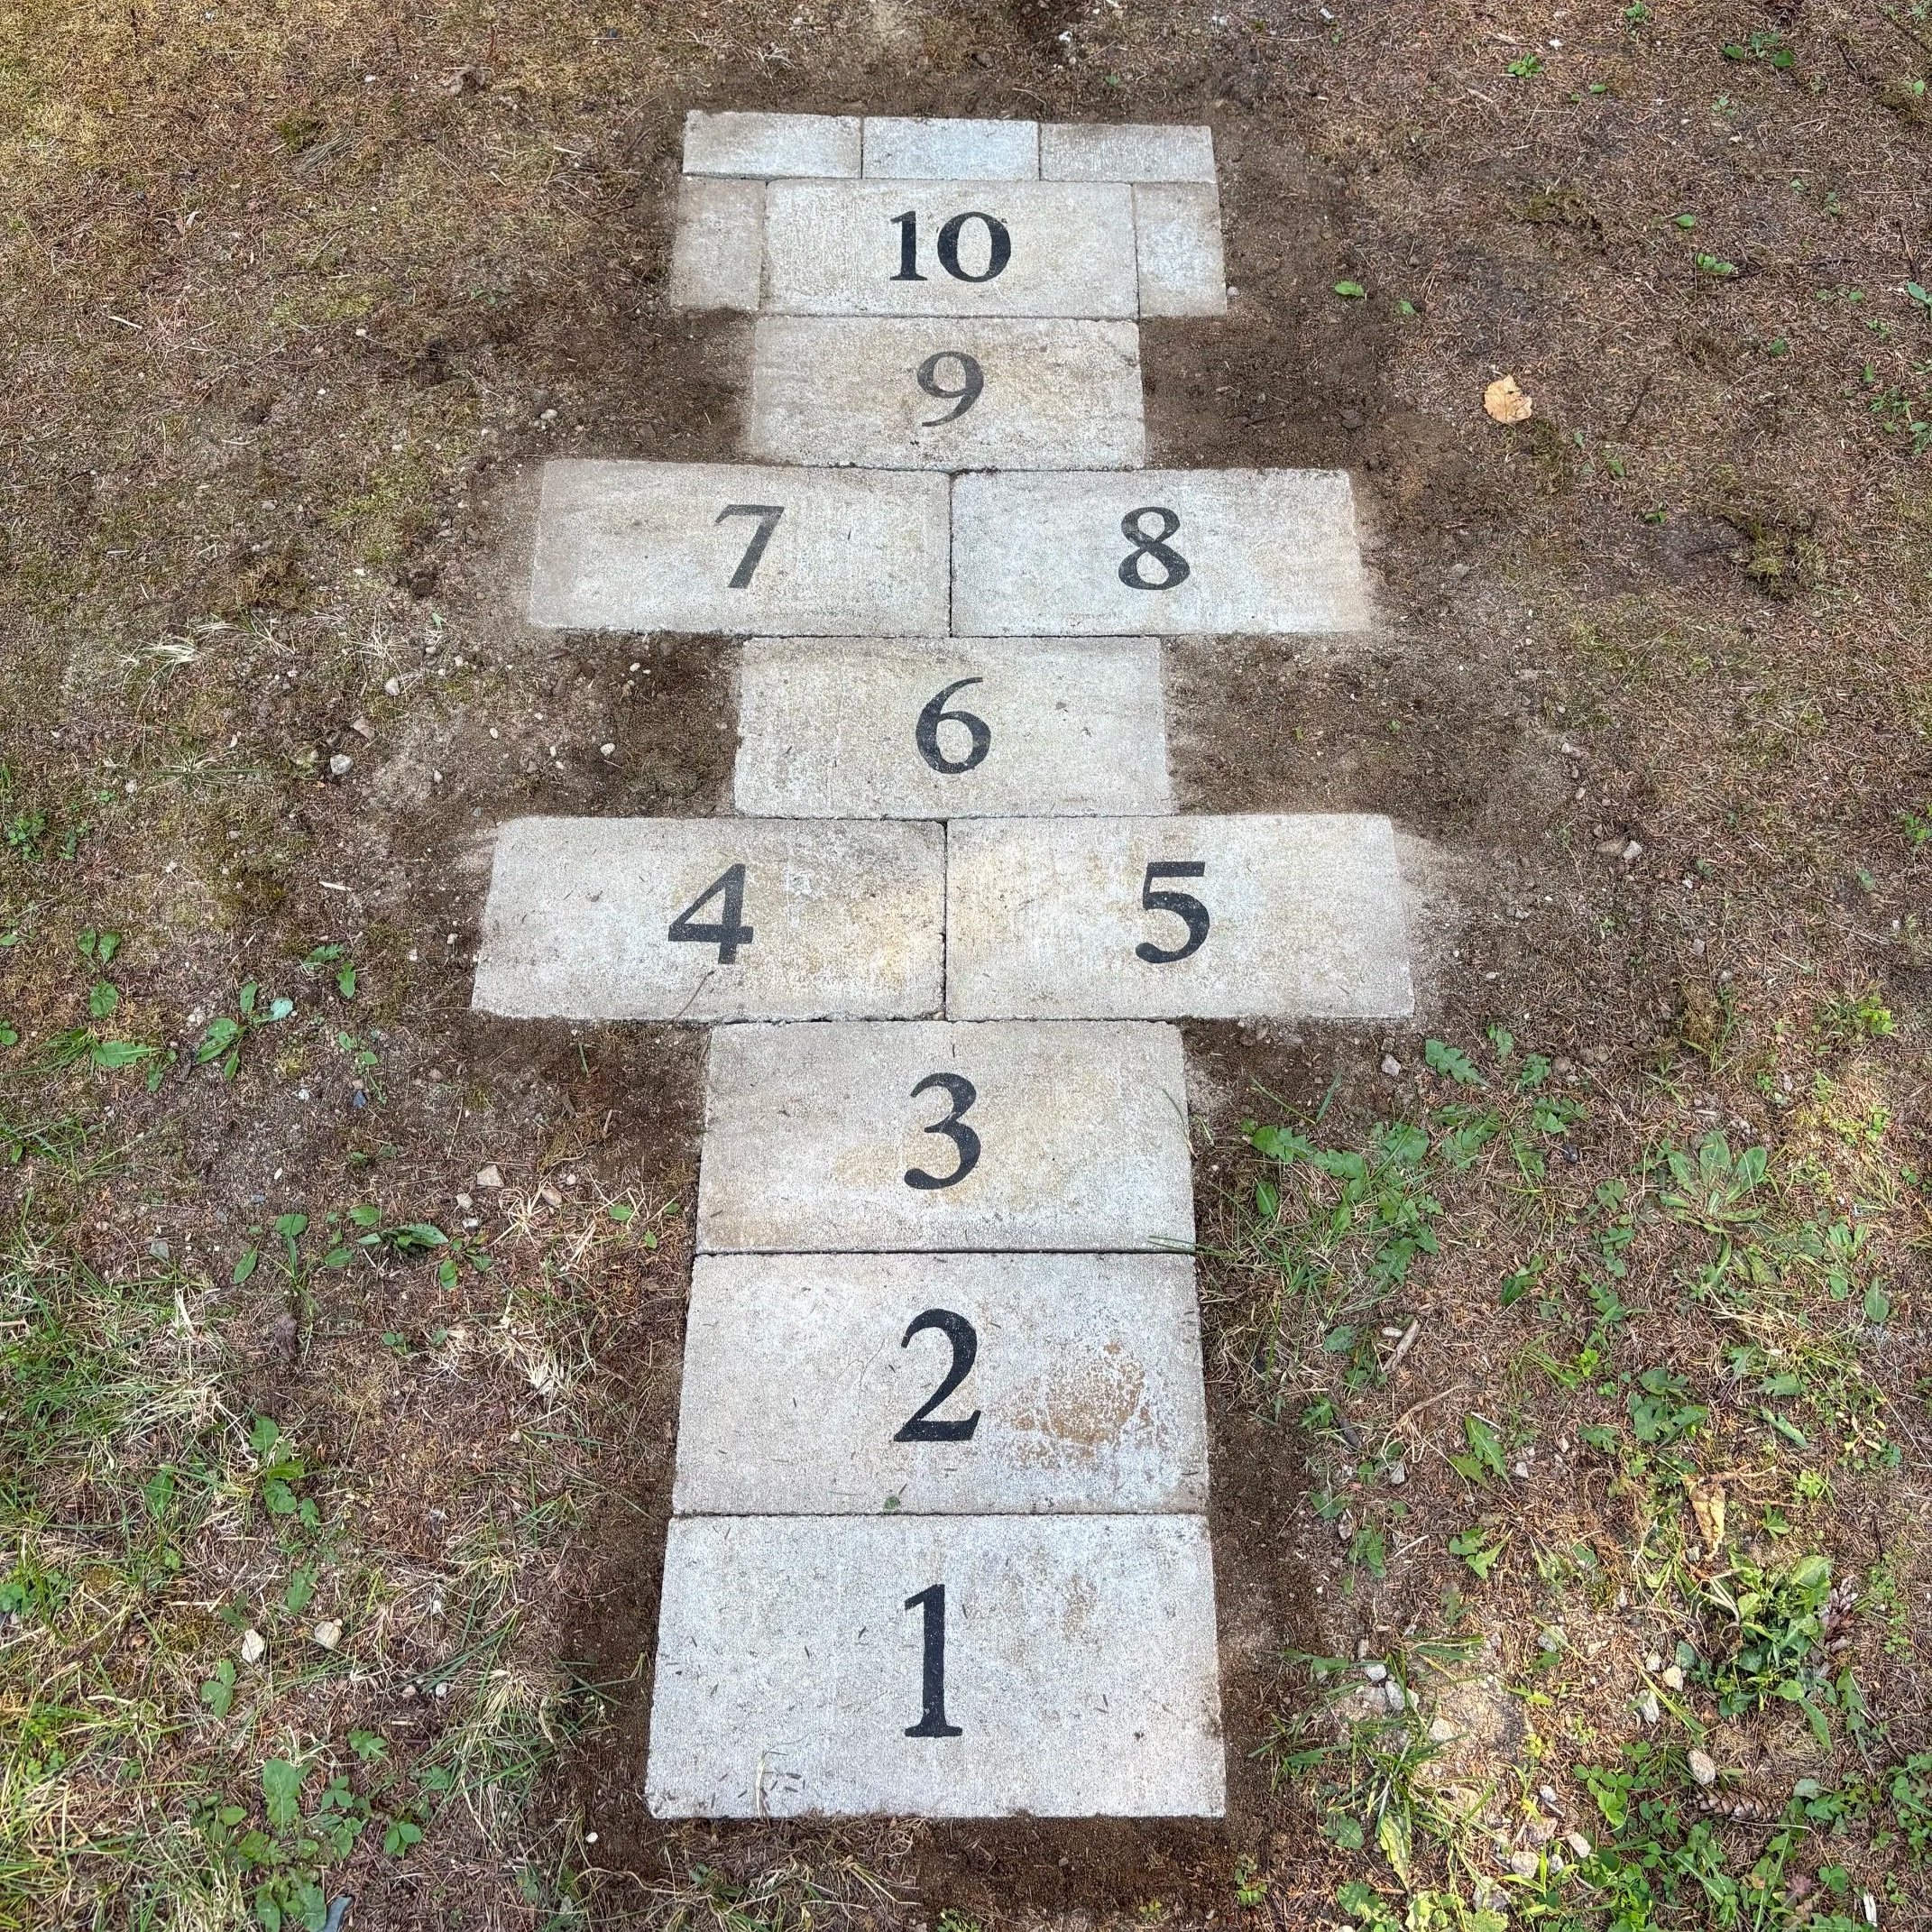
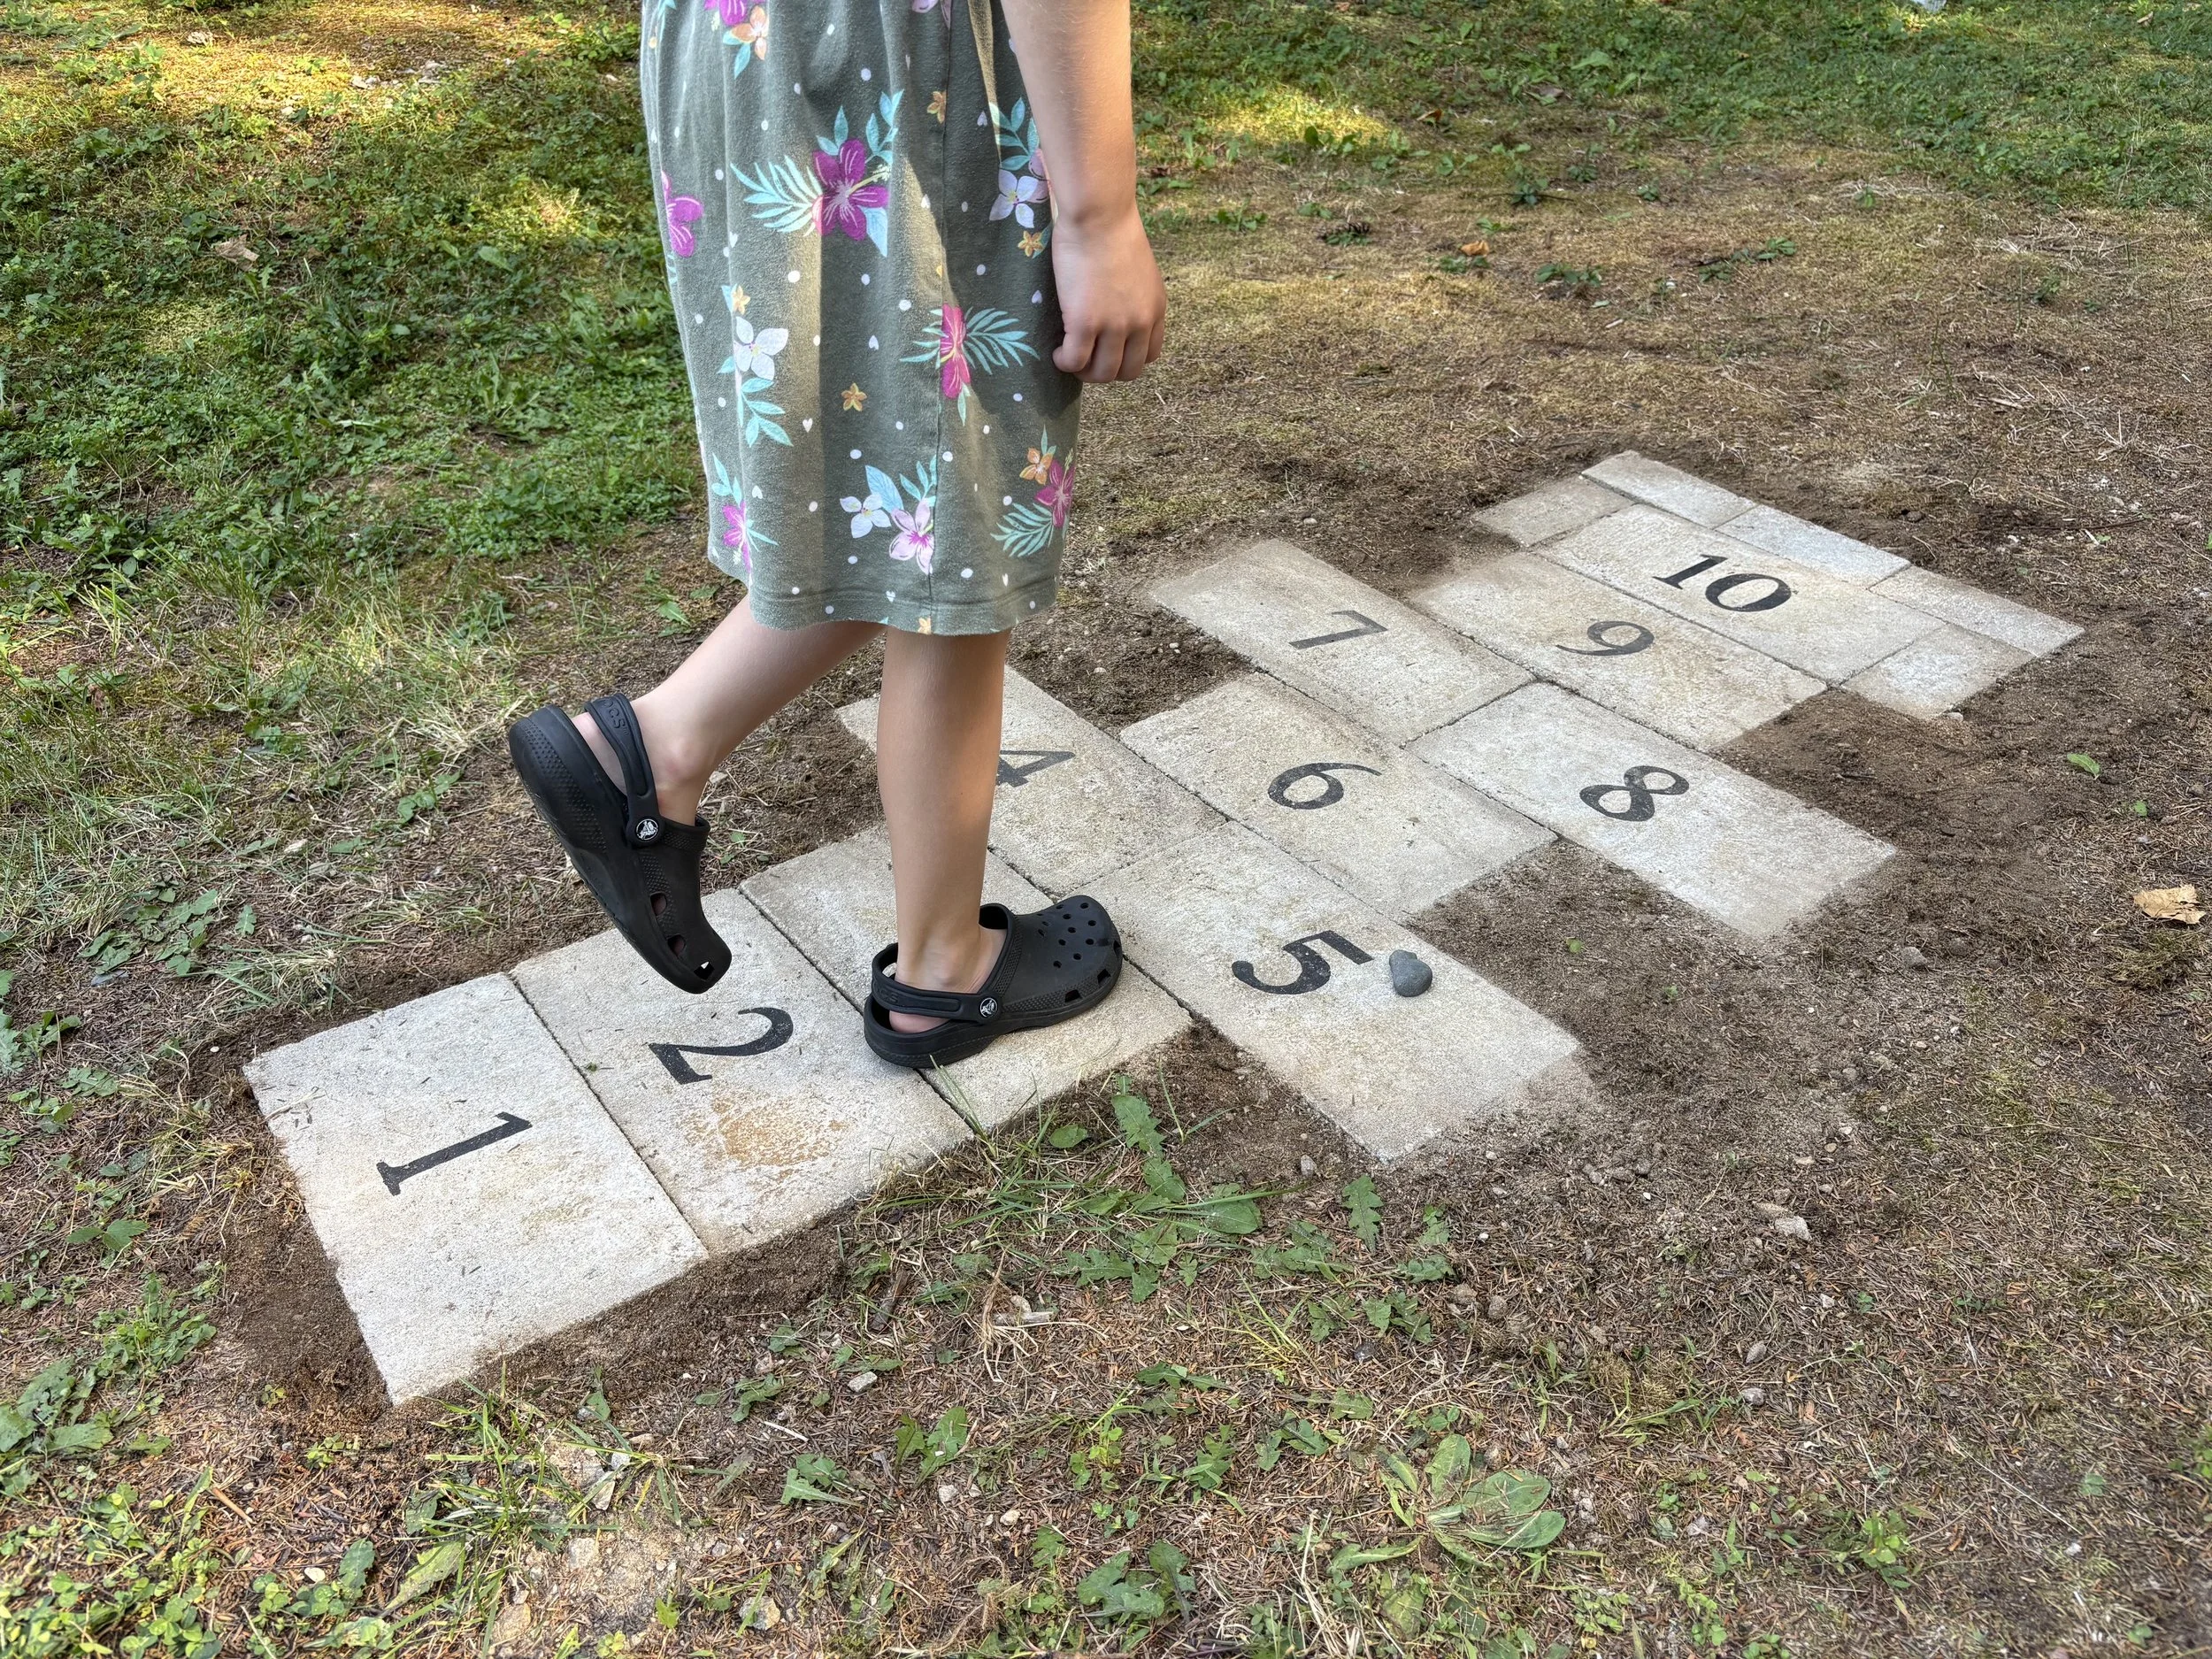
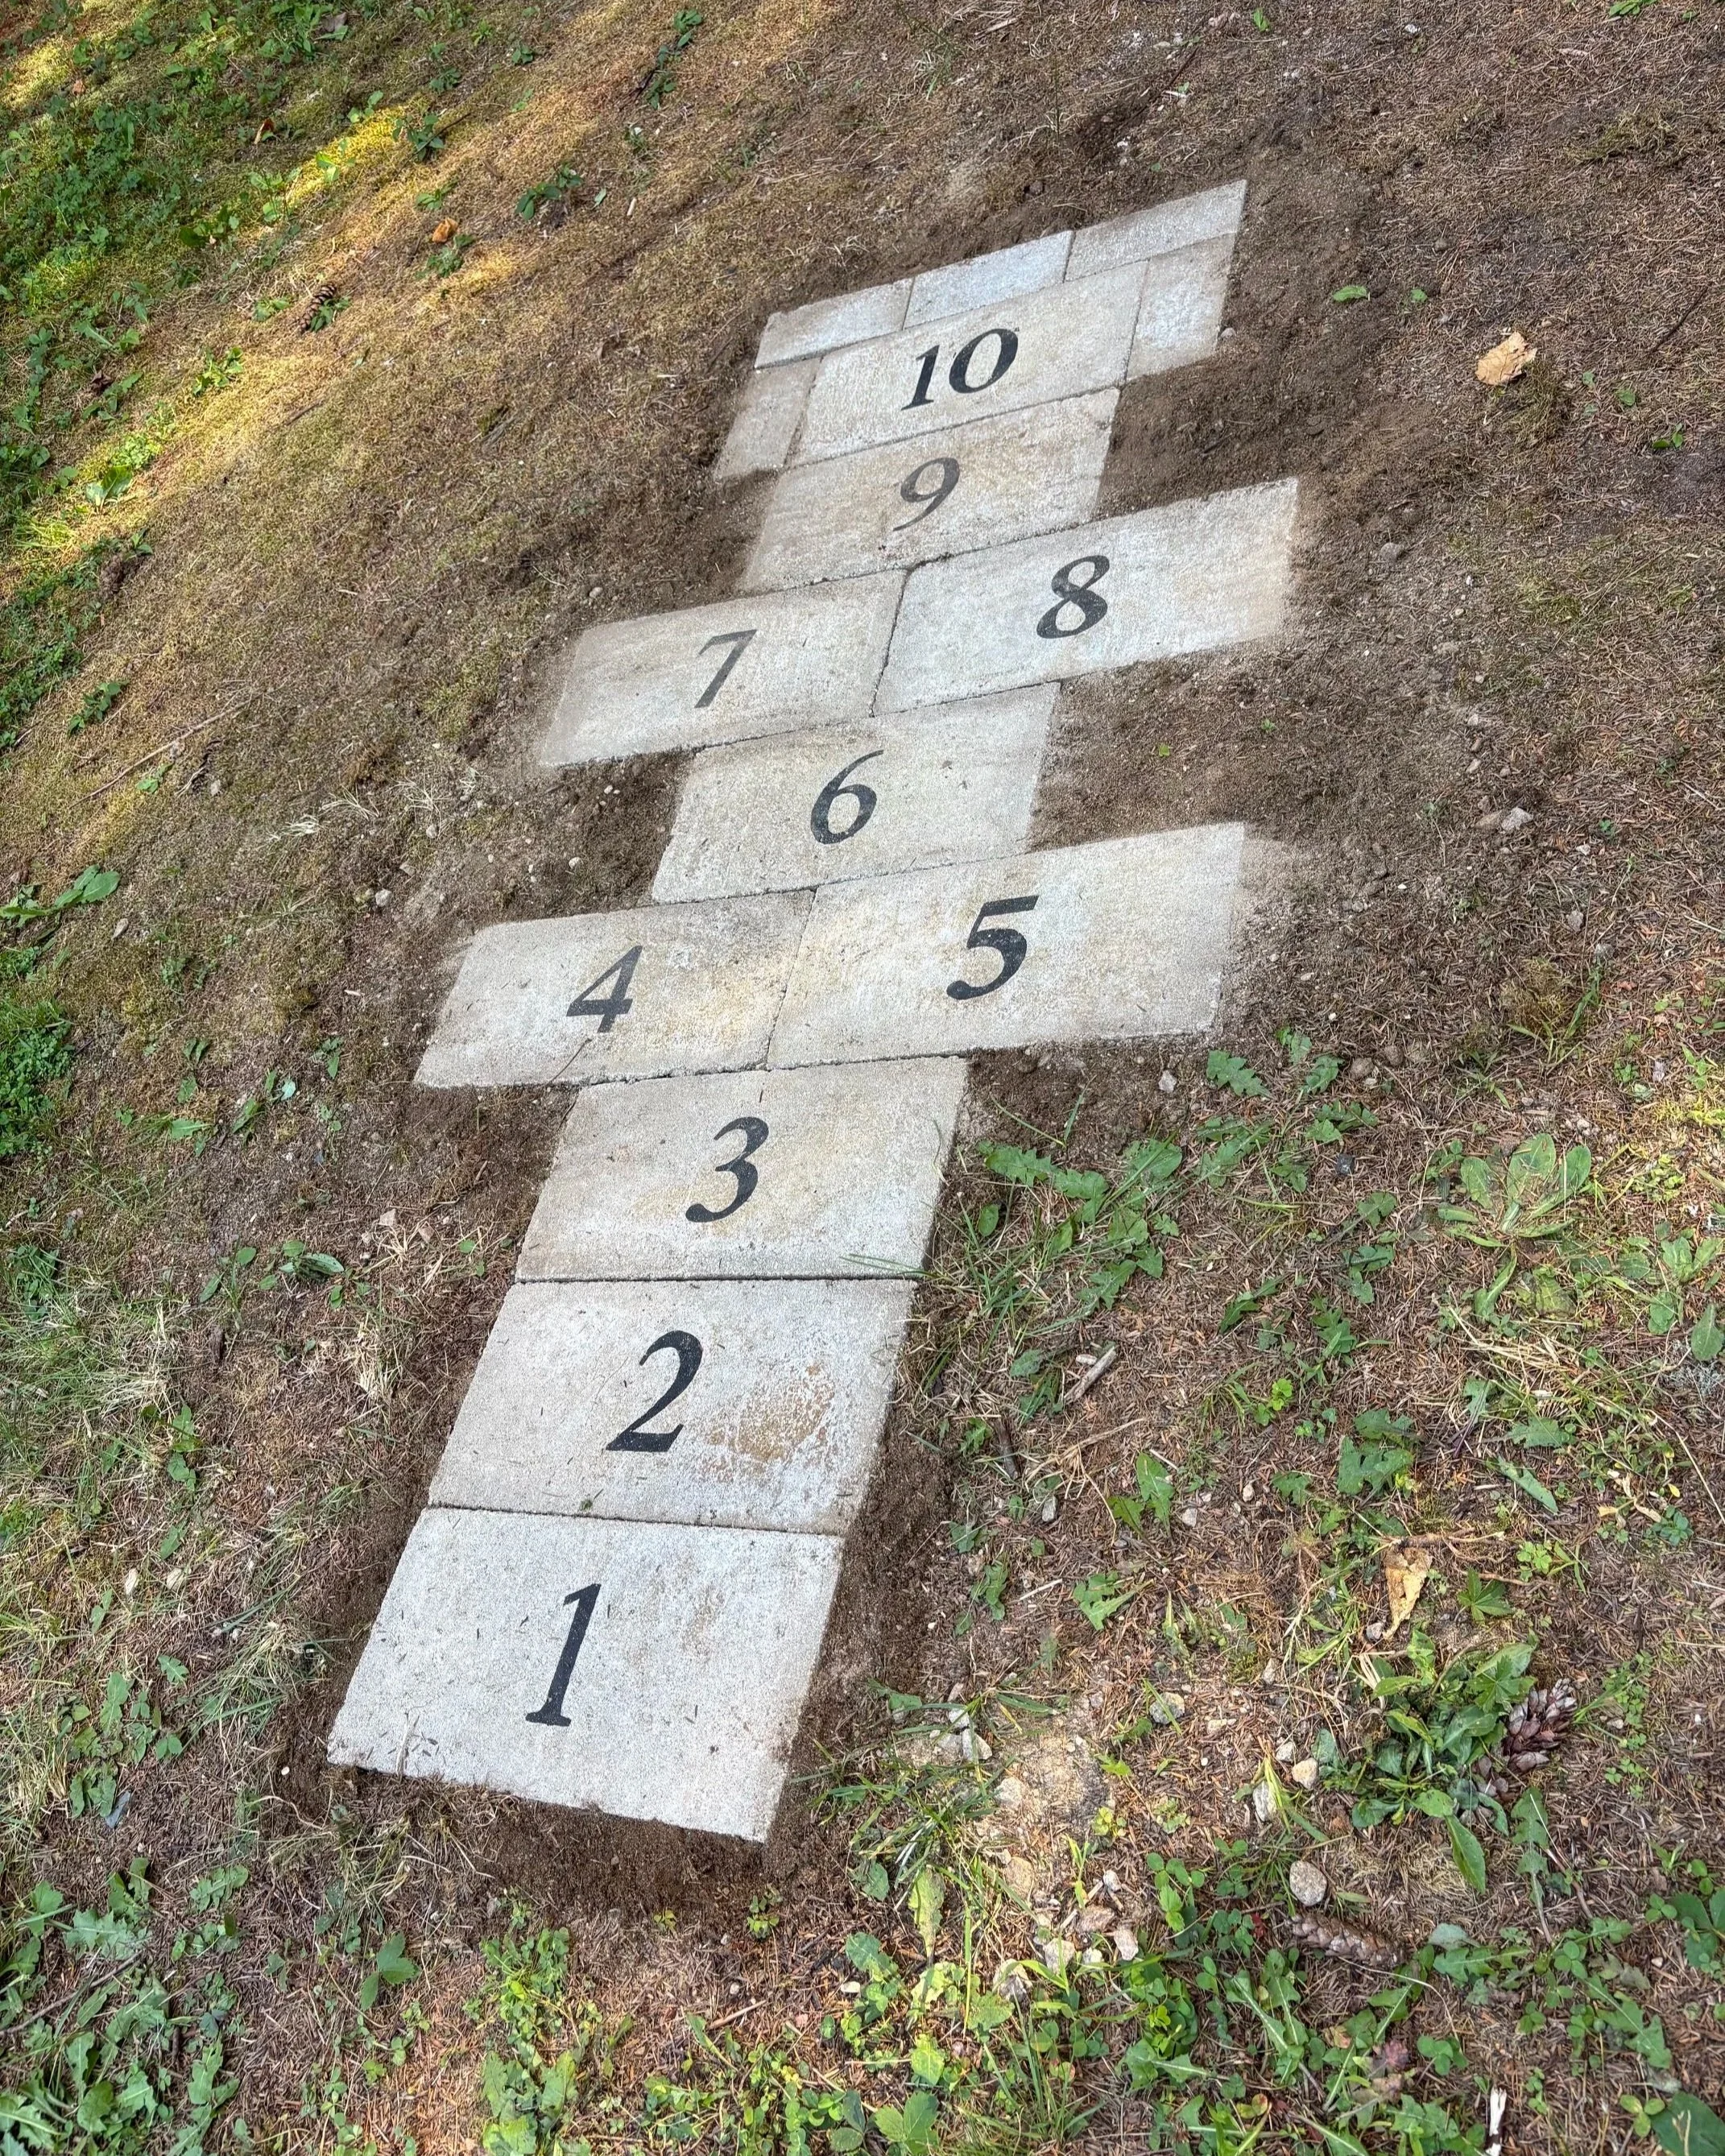
For years I’ve had the idea of making a permanent hopscotch court in our lawn using pavers but never got around to making it. Our kids are getting older, and I figured it’s now or never! We had some extra pavers and bricks from an old project laying around so I decided to go for it and finally make our hopscotch court and teach our kids this classic recess game. | This post contains affiliate links |
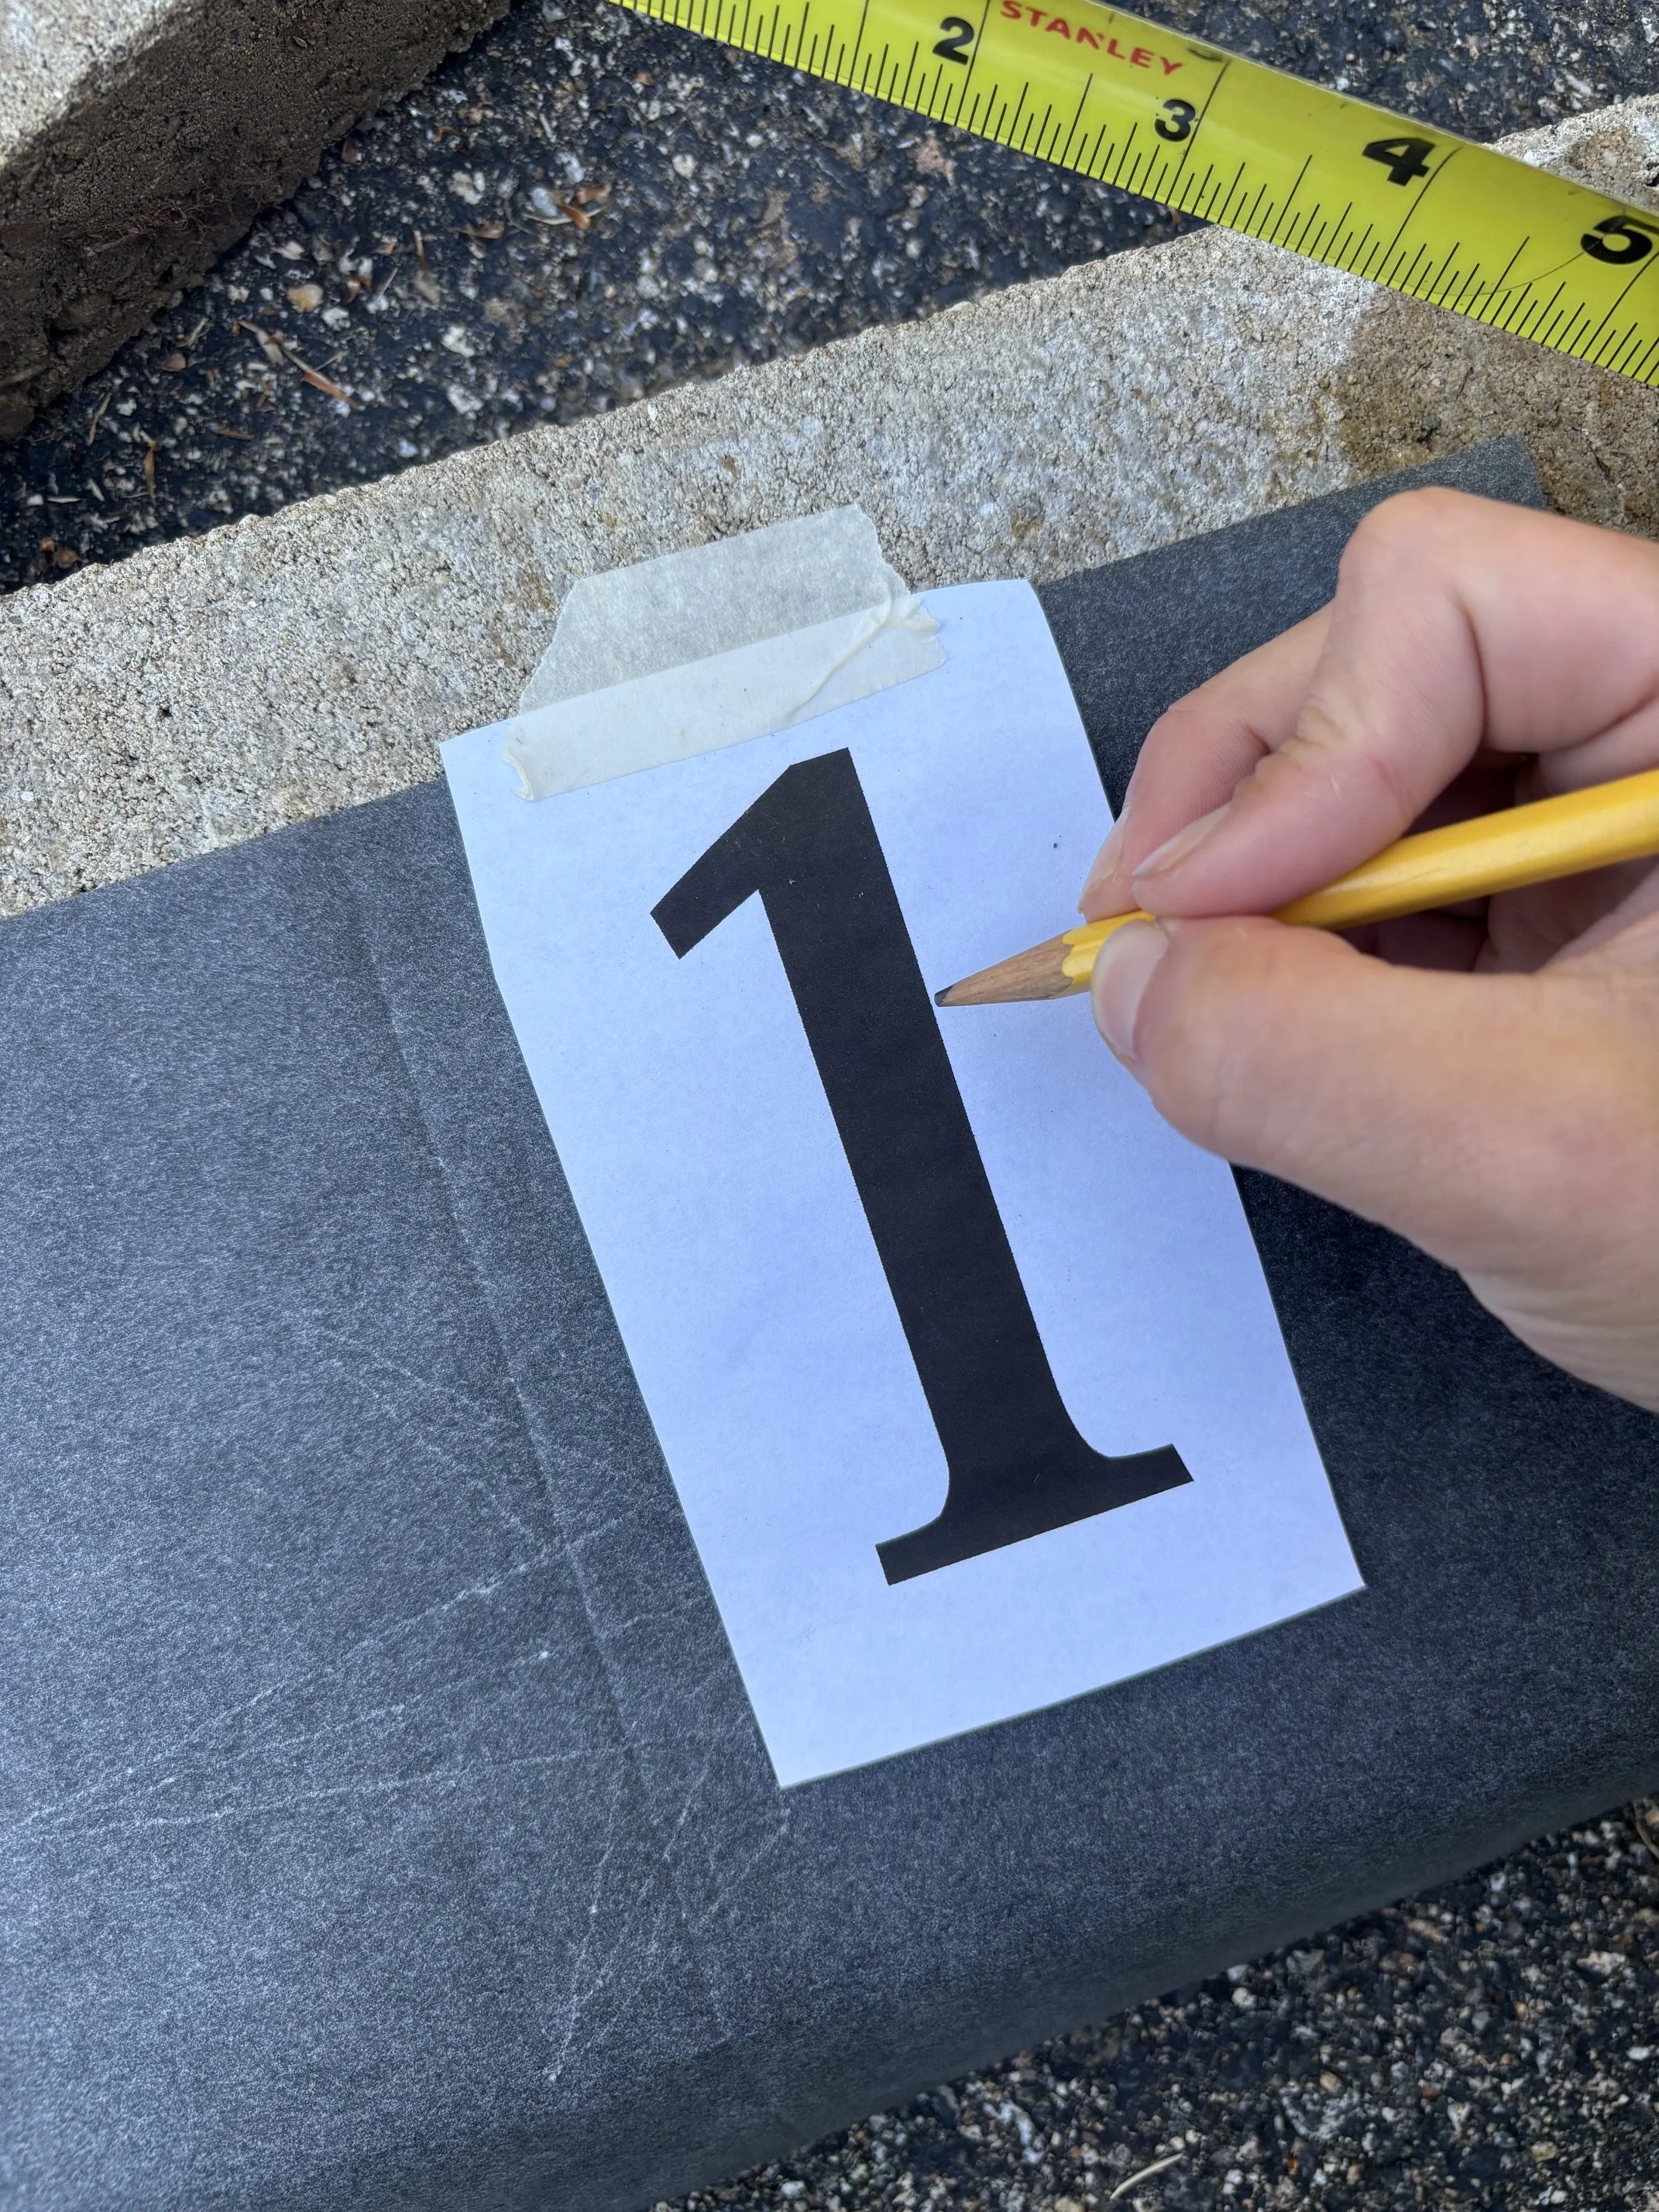
Print out numbers 1-10 on computer paper at the size you want your numbers to be - I used Canva, but you could use Word or Pages too. (Alternatively, you could buy stencils or freehand it.)
Center the numbers on the bricks and tape in place.
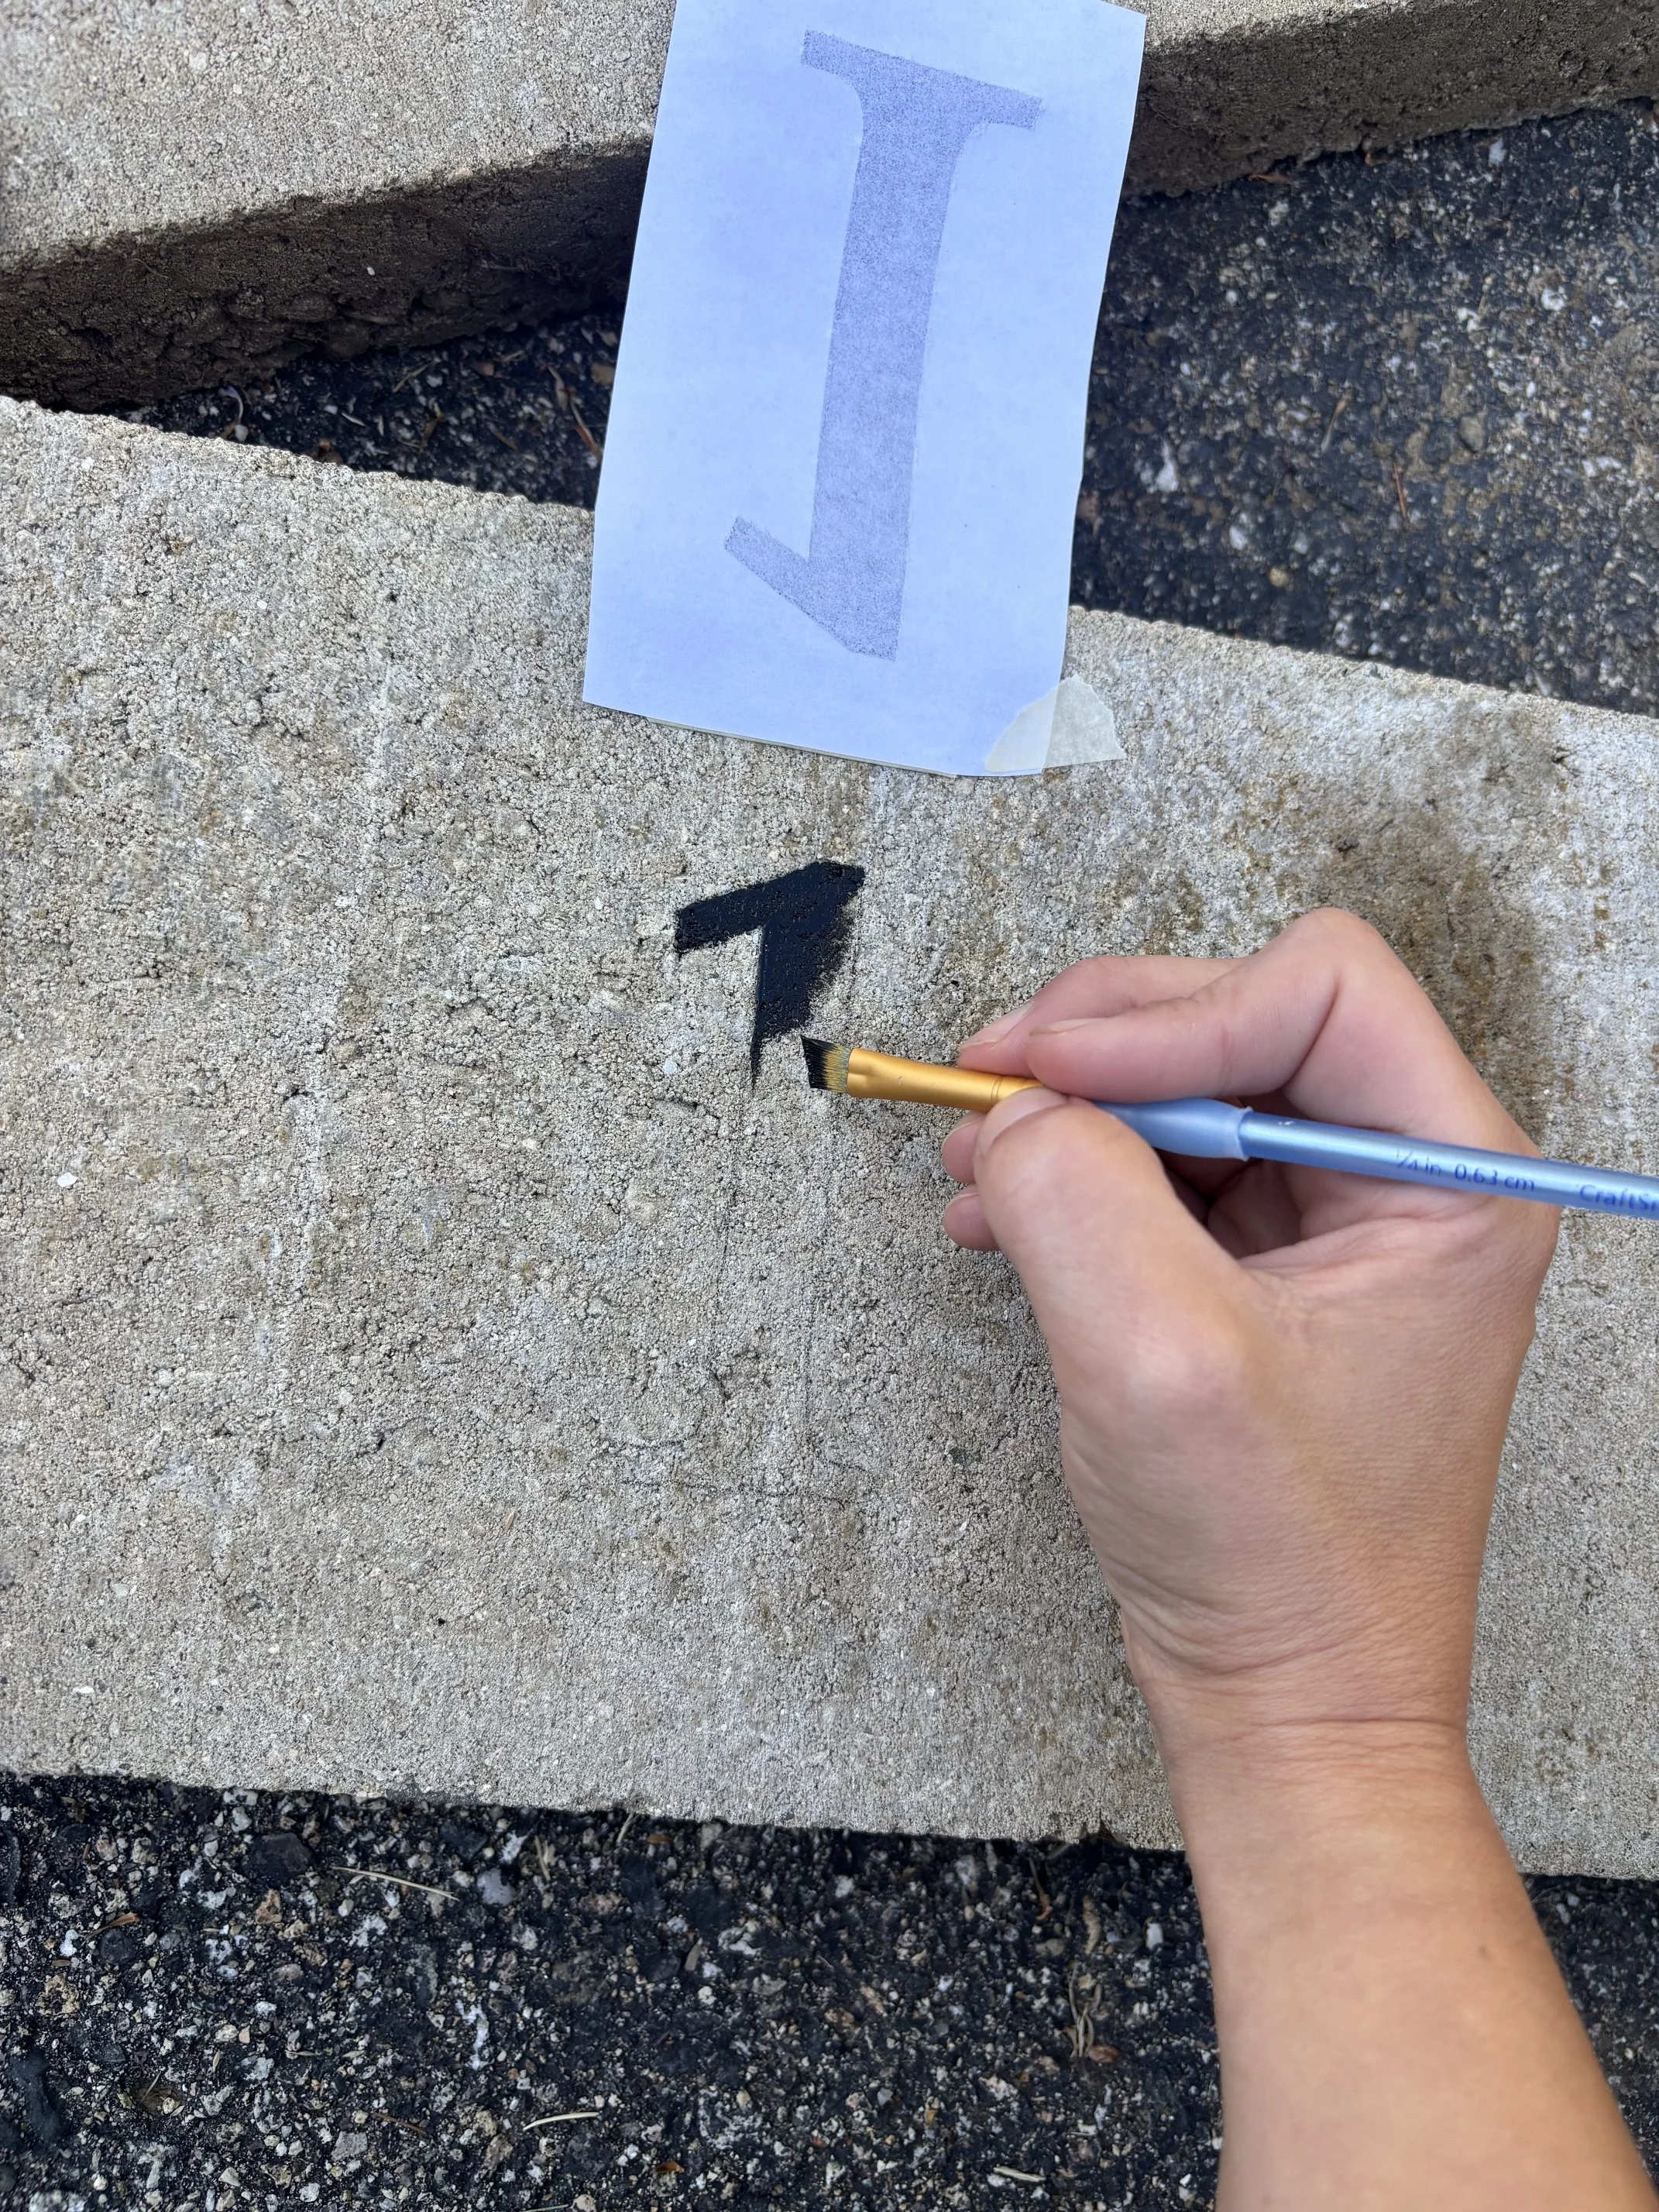
If using printed out numbers, put the carbon paper face down between the printed number and the paver and trace with a pencil.
Hand paint the numbers within the outline and allow to dry.
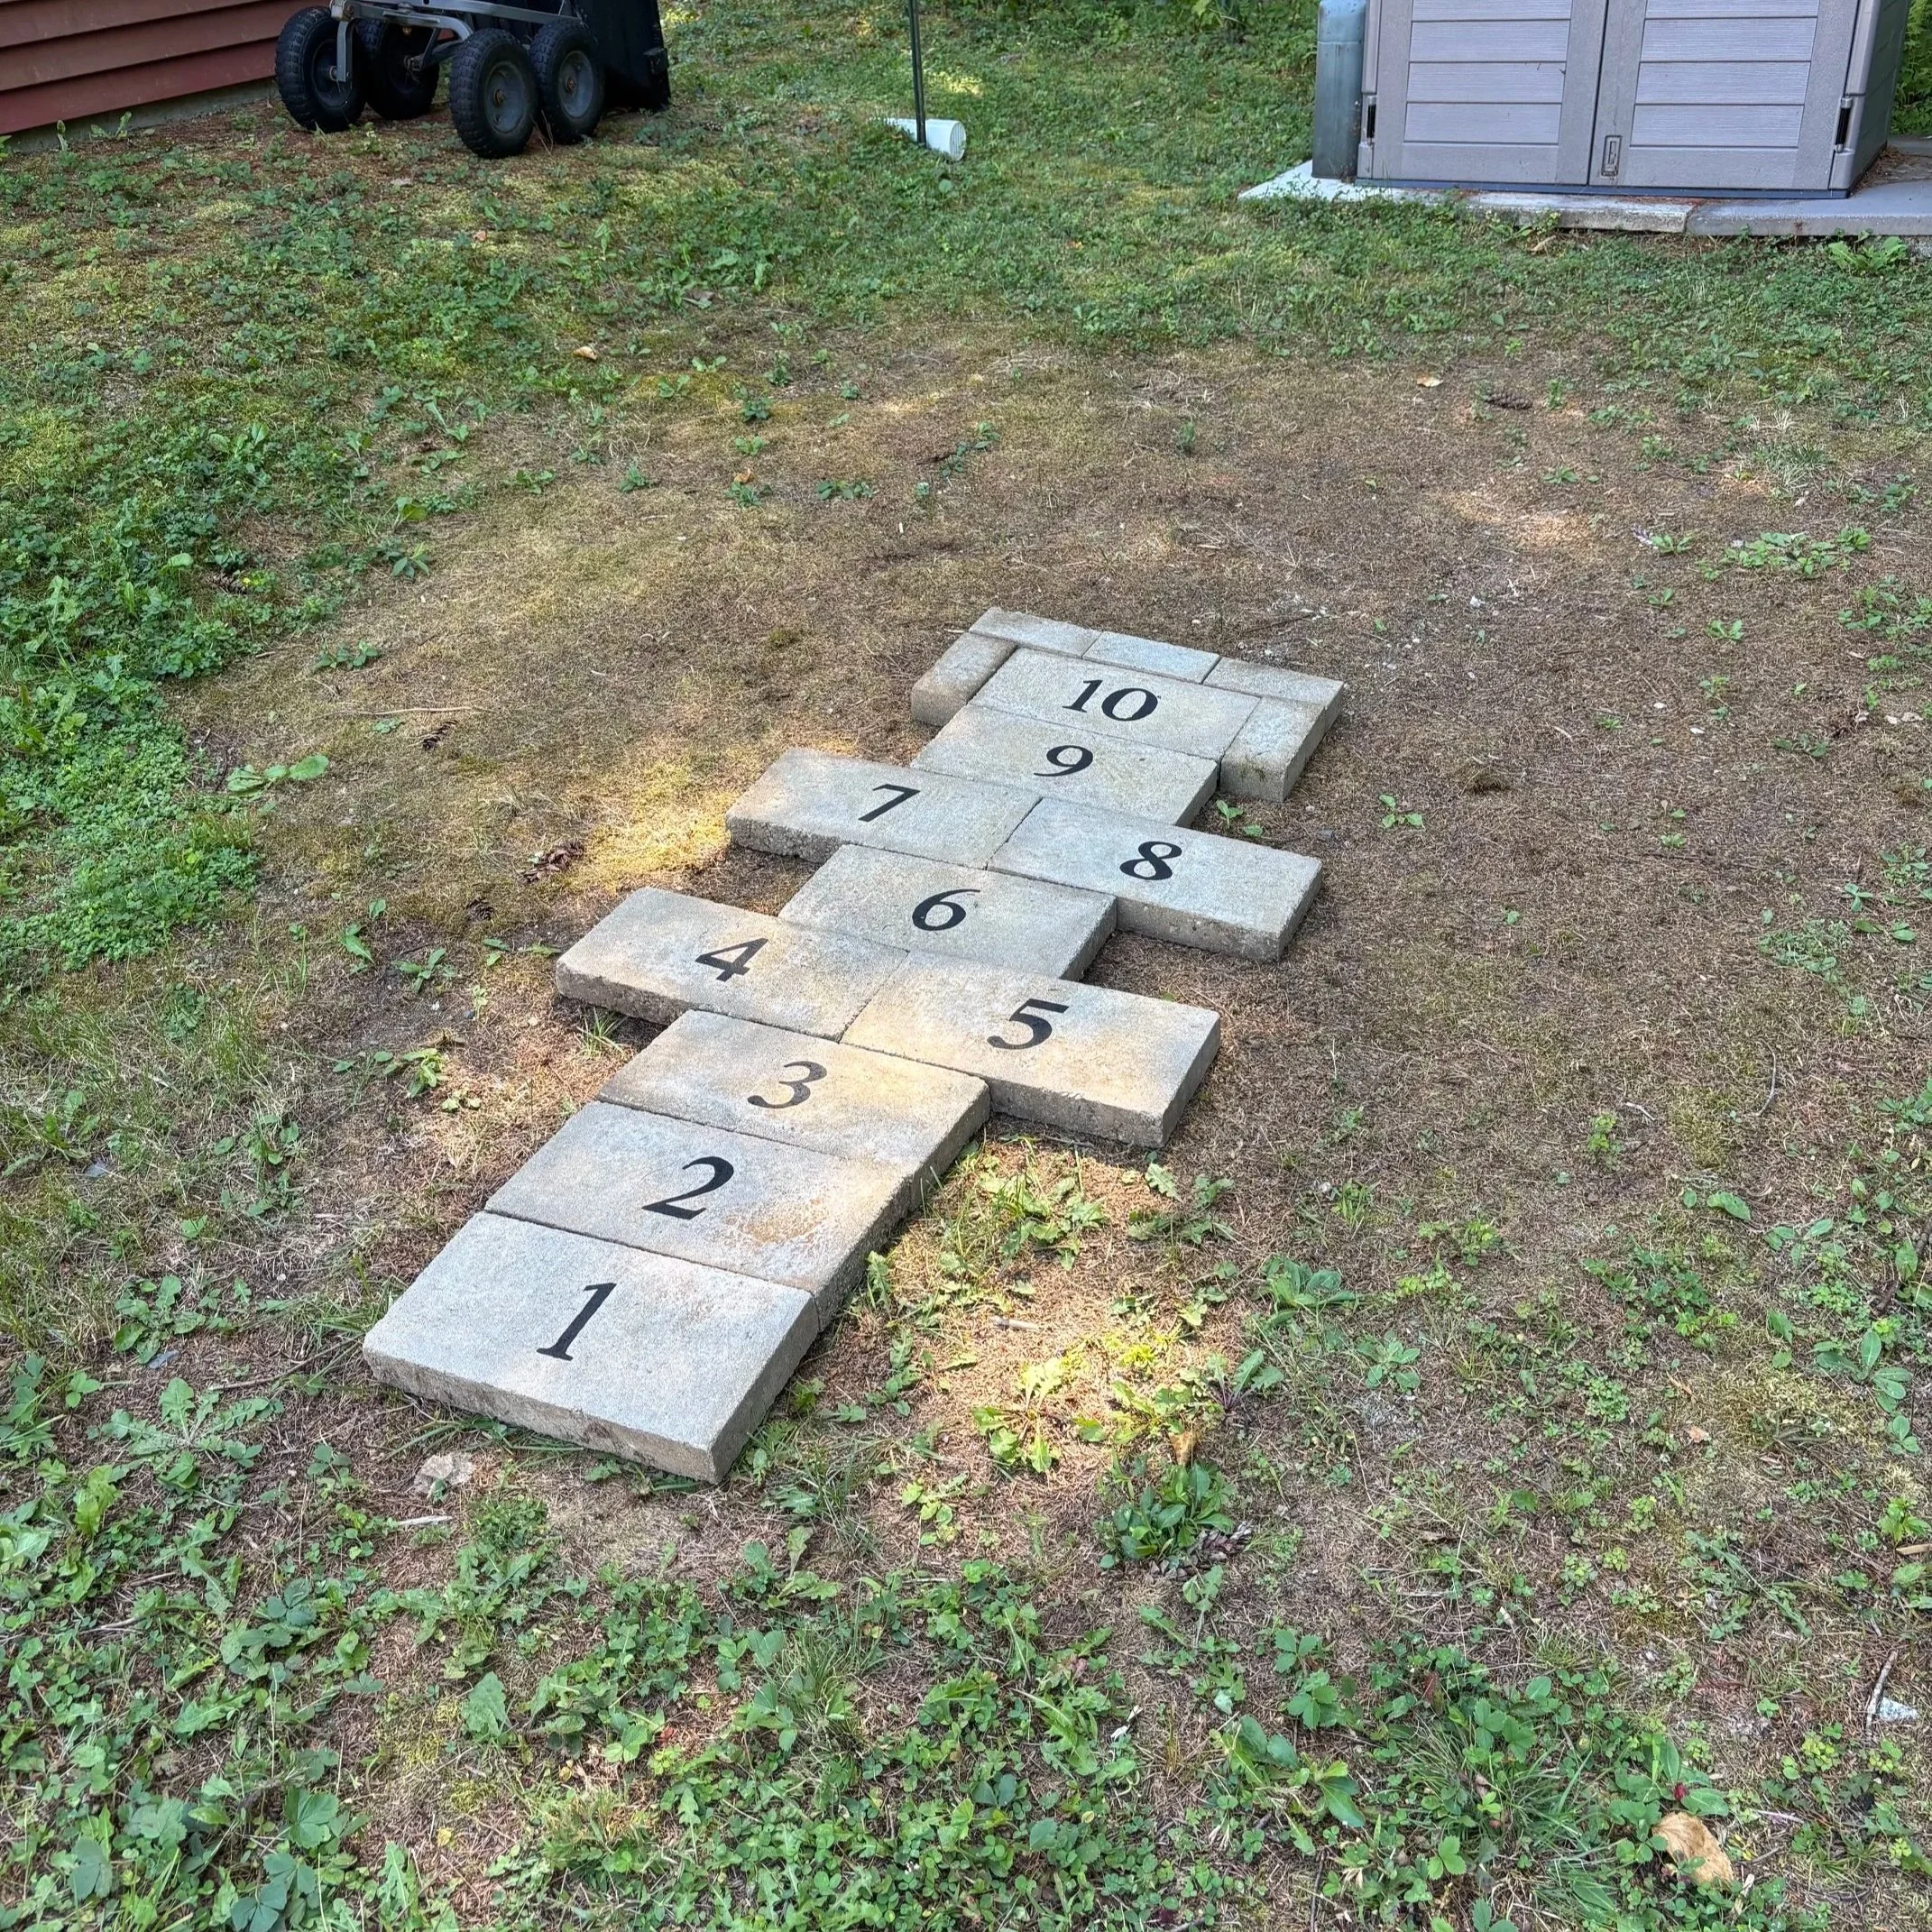
5. Lay out how you want the Hopscotch Court to be. There are several different ways you can layout the spaces, but I went with what is probably the most traditional layout. (Optional: Use extra pavers to outline the 10 space to make it larger, or use a larger paver for the 10 space.)
- Now that you have it laid out, dig out the soil to the depth of the pavers. I find it easier to to lay one paver at a time and level it with the surrounding ground. (Optional: You can use the rubber mallet to help set the pavers into place.)
Pro Tip: Use a little stool to sit on to save your back!
How to Play Hopscotch
There are some variations on how to play Hopscotch, but I’ll share how I learned growing up - and all you need is a Hopscotch Court and a small rock! Yes, a rock!
Start facing spot #1 and toss the small rock onto the court. Hop on one foot towards the rock. If there are two number squares next to each other you can land with both feet, one in each square.
When you get to the spot with the rock, skip that spot and continue to the end of the court.
When you get to the #10 spot, turn around and repeat the process heading back towards #1, but pick up the rock on your way back.
Once you get back to the beginning it’s the next person’s turn. If you fall, or land where you’re not supposed to, you’re out.
Don't want to commit to building a permanent Hopscotch Court in your yard? Just draw a temporary one on your driveway or sidewalk with chalk!
KEEP UP WITH BIRCH LANDING HOME
| Etsy | Facebook | Instagram | Pinterest | Bloglovin' | Hometalk |
Recently I looked at our family calendar and realized every single day in July was booked with 95% of it being kids' activities or lessons. It felt crazy, and unhealthy. I went through our calendar and cancelled several things and now we have some downtime again - I feel like I can breathe.
| This post contains affiliate links |
Some of my fondest memories growing up were those lazy summer days where we spent every moment outside with no plans and completely lost track of time, no idea what day of the week it even was. That's what kids' summers should be, not pressure to get ahead or keep up. Every day shouldn’t be booked with tennis lessons, or tutoring, or private training. There's plenty of time to over-schedule yourself once you're an adult - for now it’s so important to be a kid.
I recently read a few articles and books that talked about the importance of letting kids have downtime for their mental health and the opportunity to grow and make more decisions on their own. I highly reccomend reading "How to Raise an Adult" - while I definitley don't agree with all of the points or suggestions in the book, it's a great reminder that your kids are capable of much more than you think and you need to give them some space to figure it out on their own (and not overschedule their life). Also the article "Summer Sanity" is a short read from the University of Florida that also touches on the issues of over-scheduling.
I wish you all a safe, relaxing - and not over-scheduled - summer :)
KEEP UP WITH BIRCH LANDING HOME
| Etsy | Facebook | Instagram | Pinterest | Bloglovin' | Hometalk |
A lot of families have their own traditions for when the Tooth Fairy comes - some do elaborate gifts or glitter-covered dollar bills, others do a quarter under the pillow and keep it very simple. We decided to keep our tradition simple, but still make it special. Here’s how we’re handling it… | This post contains affiliate links |
Those loose teeth seem to sneak right up on you. Out of nowhere our daughter’s tooth became suddenly very loose and she lost it within a few days. Luckily I was on top of it and had already planned how we were going to do the Tooth Fairy, but I suggest being prepared and having any special Tooth Fairy supplies or money set aside well ahead of that first loose tooth.
Since our daughter can be a light sleeper, we decided having a separate "Tooth Pillow" would be the easiest and safest bet to keep the Tooth Fairy's visit undetected. The Tooth Pillow we purchased also came with a cute little notepad for the Tooth Fairy to leave her receipts and a bottle of glitter (which we decided not to use... we didn't want glitter all over the place, haha). When she looses a tooth, it goes into the pillow which we hang on her closet doorknob and the Tooth Fairy trades the tooth for money and a receipt.
How much money should the Tooth Fairy leave? Well, that’s up to you and your family. Some people leave a lot of money per tooth (like $5-10), others just leave change. We decided $1-2 per tooth was a good amount but to make it more special we leave “unusual” money that you don’t see every day. Prior to her loosing her first tooth I went to our local bank and traded a $10 bill for any unusual US Currency they had in their drawer. In exchange I got a few $1 gold coins, some $2 bills, and a few half dollar coins. This way she gets special unique “Tooth Fairy Money” that can be saved or spent at her discretion.
To Keep or Not to Keep the Teeth? Again, another personal choice for you and your family. For us, we decided to just keep that first lost baby tooth in a small jar which we put away with other baby keepsakes. (They also sell some cute specialty Keepsake Boxes for these things.) Some people do decide to keep all lost teeth, but for us that's just not our thing.
Once those teeth start getting loose be prepared for them to keep coming. After our daughter lost the first tooth, we had about a two month break and then she lost three more teeth in less than one week - it’s definitely a good idea to be prepared with a stash of Tooth Fairy Money because you never know when the next one will happen.
KEEP UP WITH BIRCH LANDING HOME
| Etsy | Facebook | Instagram | Pinterest | Bloglovin' | Hometalk |