I'm a wife, stay-at-home mom, crafter, and blogger living in rural New England. As seen in Martha Stewart Living, Food Network Magazine, and more! | Tutorials, DIY, crafts, parenting tips, recipes, money saving tips, product reviews, local product features, New England living, intentional living, and more! |
Recently I realized “Crap. I’m almost in my mid-30’s… and it’s all downhill from here. Time to start proactively taking care of my skin!” Up until this point I was just washing my face and maybe using some moisturizer some days and that was it. Thankfully I don’t really have any wrinkles or fine lines to speak of - yet - but I know they’ll be coming on soon. After some trial and error and consulting some friends that are really into skincare products, I settled on a simple routine that I’m enjoying so far and feel as though I’m getting the best bang for my buck. The best part? Most of these are inexpensive drug store finds, with just a few high-end heavy hitters. | This post contains affiliate links |
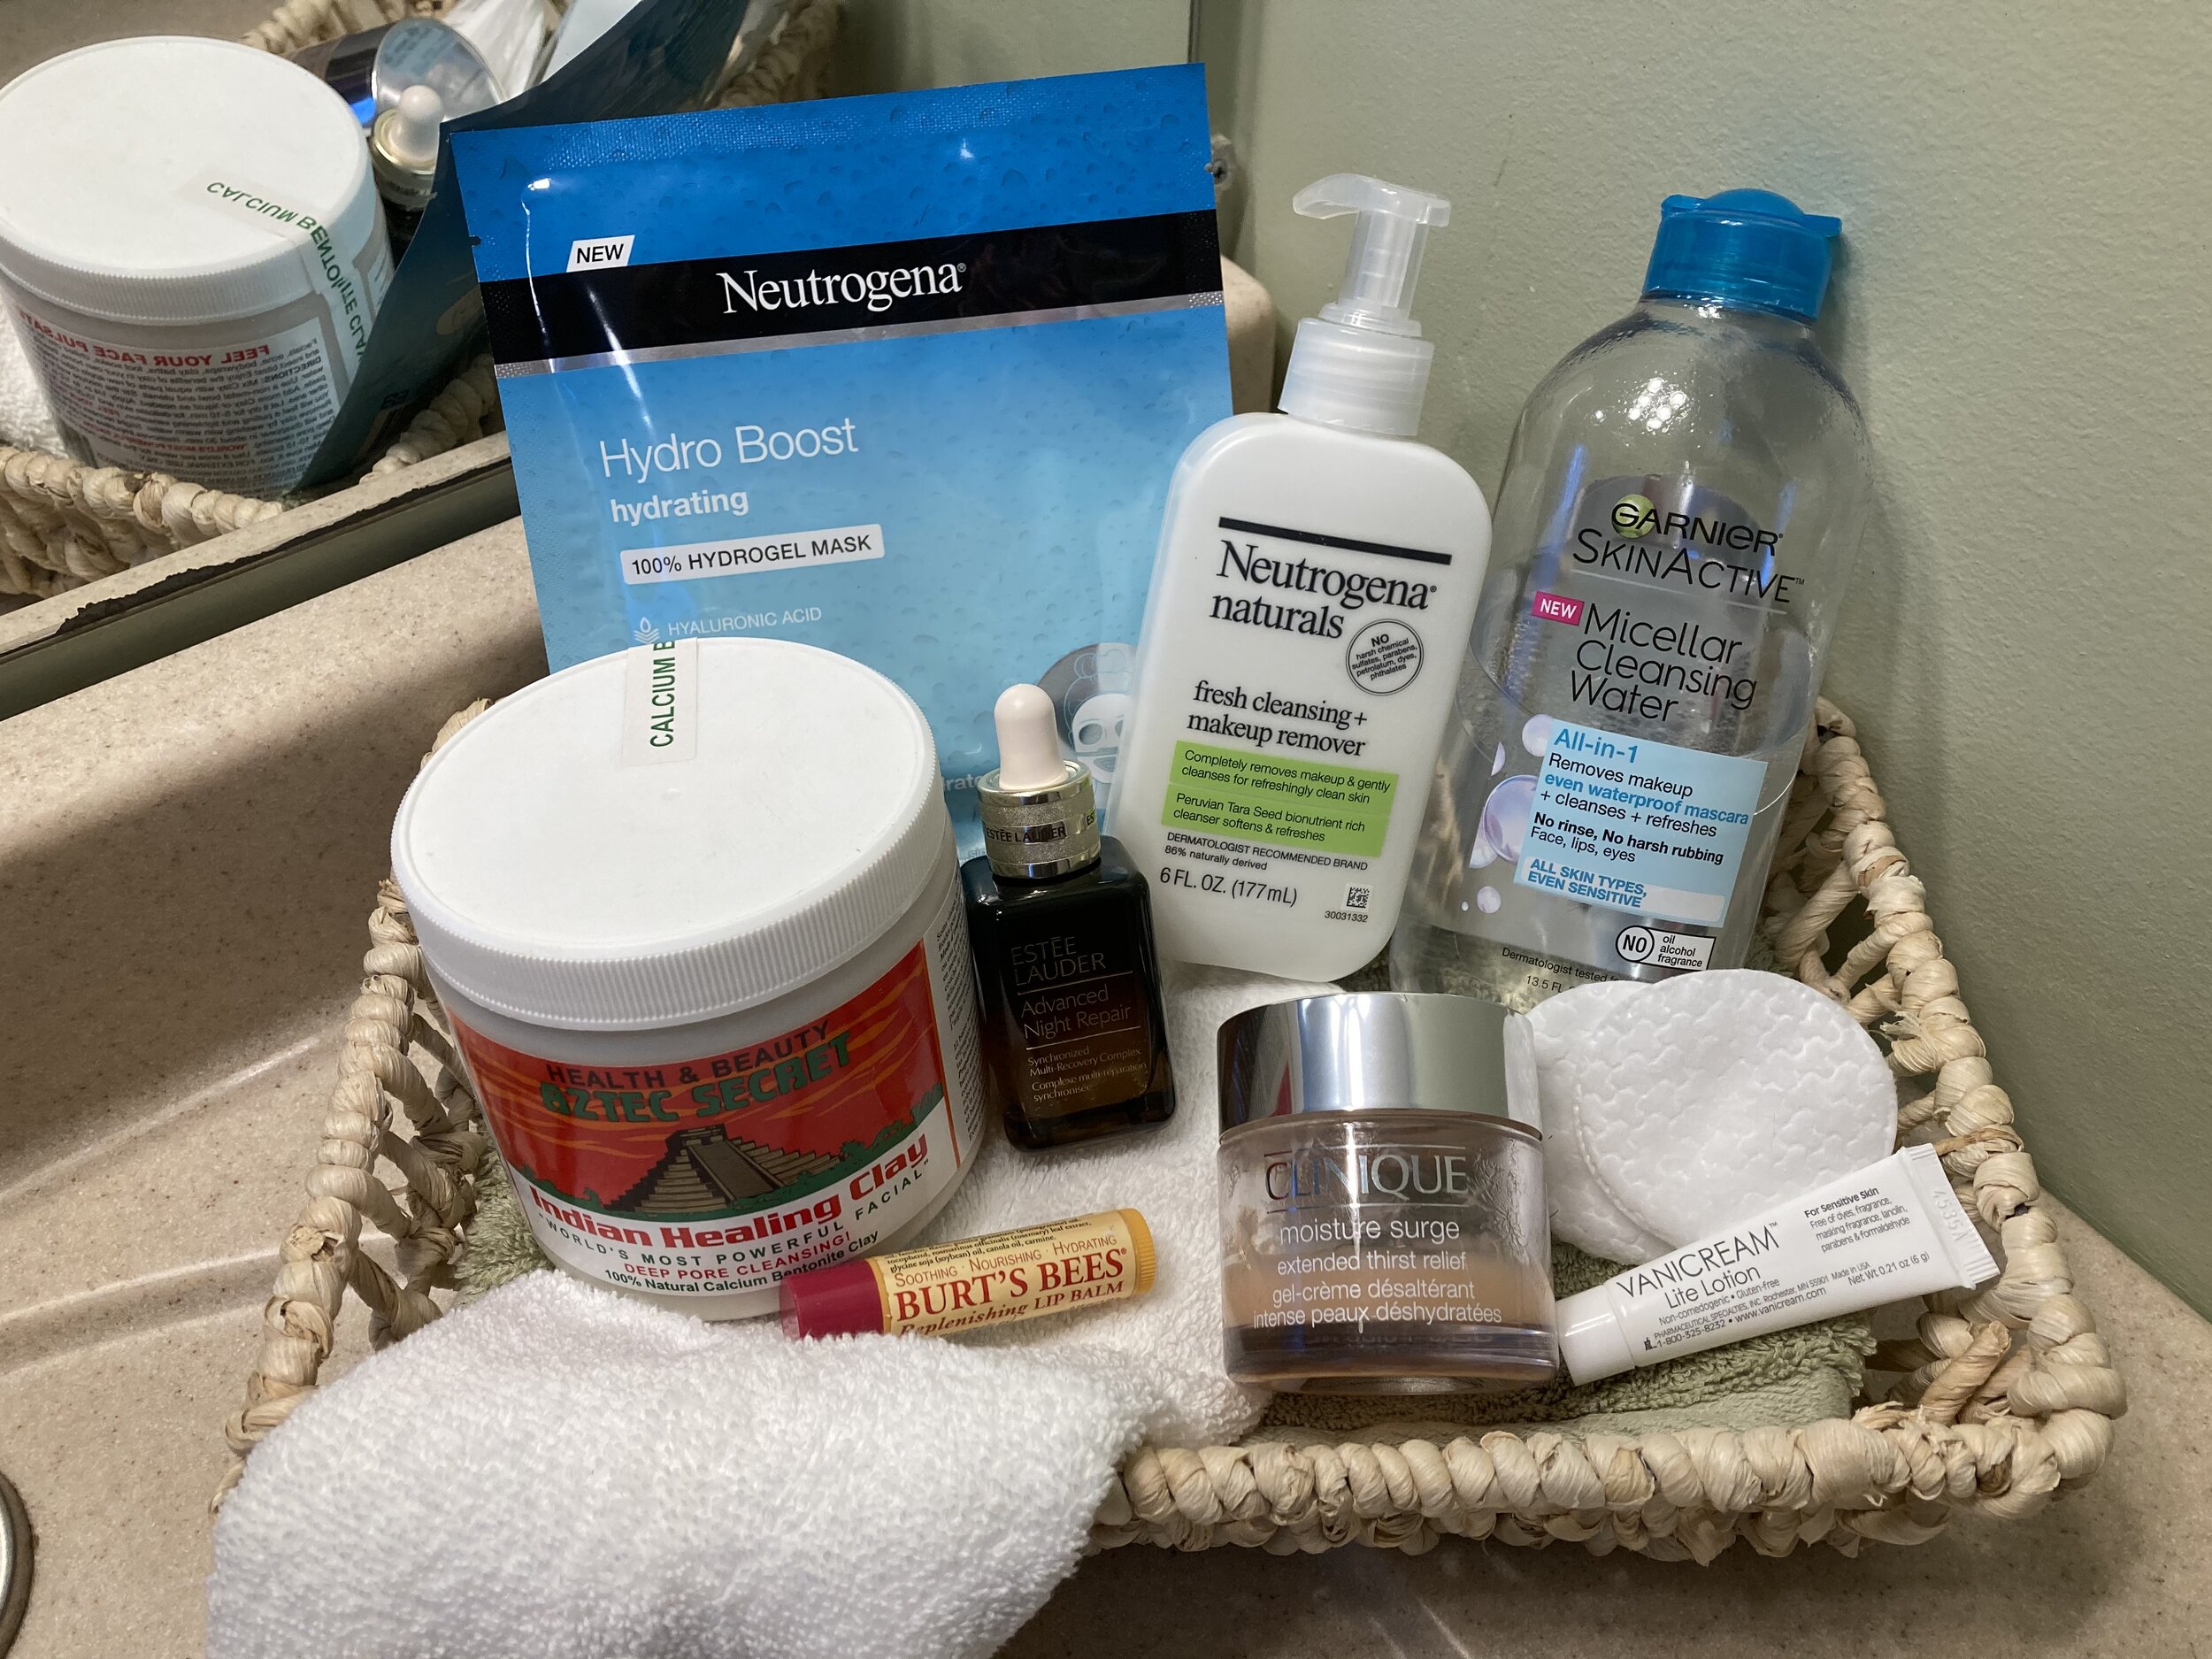
Simple Mid-30's Skincare Routine - Everything I’m using as the moment, including occasional treatments.
Disclaimer: I am not a “beauty blogger” or skincare expert, just sharing what I’m using and loving so far. It’s a good idea to consult your dermatologist or a skincare expert for more specific recommendations for your skin type and lifestyle. Also make sure to consult your doctor if you’re pregnant or breastfeeding, as certain skincare ingredients should not be used during those times.
AM Routine
Simple Mid-30's Skincare Routine - AM
Step One:Neutrogena Naturals Fresh Cleanser Every morning I start with using this Neturogena Naturals Cleanser, I really love this one because it's very gentle on my sensitive skin and smells amazing.
Step Two: CeraVe Vitamin C Serum (not pictured.. I started using this after I first published this post) After I cleanse and before I moisturize I put a little bit of this Vitamin C Serum on my skin. I feel as though it's made a big difference in evening out my skin tone and brightening. I also really love the way it feels!
Step Three: Clinique Moisture Surge Moisturizer I have been using this moisturizer for years and LOVE it. It's so light and a little goes a really long way. While it is a little on the expensive side, one jar lasts me forever so I definitely get a lot bang for my buck with this one.
What I'm Missing:SUNSCREEN This is a huge hole in my daily regimen and I know that... I have been trying to find a light, mineral based sunscreen for daily wear and haven't found the right one just yet. Once I find one I like I will update this post - and if you have any you love, please let me know!
PM Routine
Simple Mid-30's Skincare Routine - PM Routine
Step One: Garnier Micellar Cleansing Water This cleanser is perfect for end-of-day cleansing and removing makeup. I use the Blue verison since I sometimes wear waterproof mascara and it works like a charm to take it all off (the Pink version is reccomended for regular cleansing and non-water proof makeup removal). I just put a little bit on a cotton round and wipe it all away, no rinsing needed.
Step Two: Estée Lauder Advanced Night Repair Serum This serum has come highly reccomended to me by so many people as an important part of their daily skincare routine. It has hyaluronic acid which is supposed to help moisturize your skin and reduce fine lines. While I can't attest to wrinkle reduction (I don't have any yet), it does make my skin feel amazingly smooth afterwards and I'm hoping it will keep fine lines at bay in the future. This serum can be expensive but I find a little goes a long way and I haven't made much of a dent in the bottle at all yet.
These are things I do occasionally, maybe once every 2-4 weeks or whenever I feel like it. I never use both masks in the same weekend though - I spread them out.
Neutrogena Hydro Boost Hydrogel Mask This is a great, refreshing, hydrating mask. Love using this when my skin might be feeling a little dull or dry.
Aztec Secret Indian Healing Clay Mask This mask is amazing for deep cleaning pores! It comes as a powder and you mix a little in a bowl with some warm water to make the mask - you can also mix it with a little bit of Apple Cider Vinegar to give the mask a little more power. Since you mix it yourself you can stretch one jar for a long time.
Vanicream Lite Lotion I got this as a sample and love it for spot treating any extra dry spots that occasionally pop up, especially after doing a mask. It's fragrence-free too which is a nice break when my skin might be feeling sensitive.
Important Buying Tip: When purchasing “higher end” brands (such as Clinique or Estée Lauder), always make sure you’re purchasing directly from the company or from an established department store chain (such as Nordstrom, Macy’s, etc) to make sure you’re getting real, legitimate products. While you may be able to find high-end brands listed for sale on other online retailers (yes, even the big ones), these products are often knock-offs sold by third party sellers and who knows what could be in them.
Our little one may be happily playing independently but the second I go to make dinner she demands to be held and refuses to be put down, making cooking impossible. To help keep her occupied but still involved I've been eyeing a learning tower / kitchen helper on Amazon for months now, but at $200 it just wasn't in our budget. My sister-in-law had made a learning tower from a plan by Ana White and suggested I try to make one too. I was unsure at first, I've never made anything more complicated than a birdhouse, but I decided to give it a go! Read on for my lessons learned and know that you can totally make one too. | This post contains affiliate links |
{ Note: the plans that I worked from were from Ana White and can be found HERE }
The first step to making the learning tower was buying the lumber.. which is easier said than done when you just have a little car! Nevertheless, Miss M and I made the nearly hour-long trek out to Lowe's to pick up lumber, paint, and screws. One thing I really liked about the Ana White plan was that it had both a shopping list and a "cut list" so you knew exactly how much of each kind of wood to buy and then how to cut it up. I made a mistake at Lowe's though and ended up buying 6-foot boards instead of 8-foot.. I don't know if I read the sign too quickly or what, but it made me come up short for the project. Thankfully we had some extra wood in the garage and I was able to fudge it.
For our learning tower, I made some modifications - some were planned and some kind of happened as the project went on (partly due to the wood shortage). For example, I decided against doing the arches on the top - as lovely as they were, we don't have a jigsaw so I had to nix it. I also did the base of the tower a little differently and I didn't do the tip resistors (at least not yet), my sister-in-law omitted the tip resistors and has had no problems. Our little one is pretty good with the tower (knock on wood), but for peace of mind I think we will do something to help prevent it ever tipping - most likely adding some scrap wood to make a lip that will fit under the edge of our counter. Another thing I did differently was make the front and back top railing wider, the reasoning for this was two-fold - for one thing, it gave me more room to screw in the the top railings without the screws running into each other. Another was that the wider wood makes it impossible for our little one to open the kitchen drawers in front of her (so key).
One criticism of Ana White's plan is that while it gives you a great outline of what to make and how to go about it, it definitely doesn't spell everything out - and for this detail-oriented person that drove me nuts! For example, it doesn't detail how many screws you should use when attaching each piece or how to position the screws when you join sides together (this was a huge issue so they didn't run into each other). Another big problem was that the plan had quite a few typos and some of the steps would stop mid-sentence missing the full explanation of what to do.
I highly suggest cutting all the wood, labeling it, laying it out and really thinking through how it's going together. My biggest challenge by far was figuring out a good way to hold the pieces together while I pre-drilled and screwed them together. The wood the plan calls for is pretty thin (another downside of the plan), so that limited the ways I felt I could hold it without damaging it. I tried using vices and clamps to help hold everything together but they always seemed to be in the way so I ended up holding it in place anyway I could, even with my foot if necessary (awkward).
I also had to improvise on how to center the front and back side pieces against the wider side of the legs. It turned out that a picture book we had was the perfect thickness and became a great spacer.
To space the boards for the platform I placed some extra screws between them as spacers. Once it was all attached together, I just pulled the screw spacers out.
For paint, I used a high-gloss black enamel paint by Val-Spar and gave it two coats (though I probably should have done 1-2 more). I really recommend using high-gloss paint or stain so it can be wiped down easily after every use.
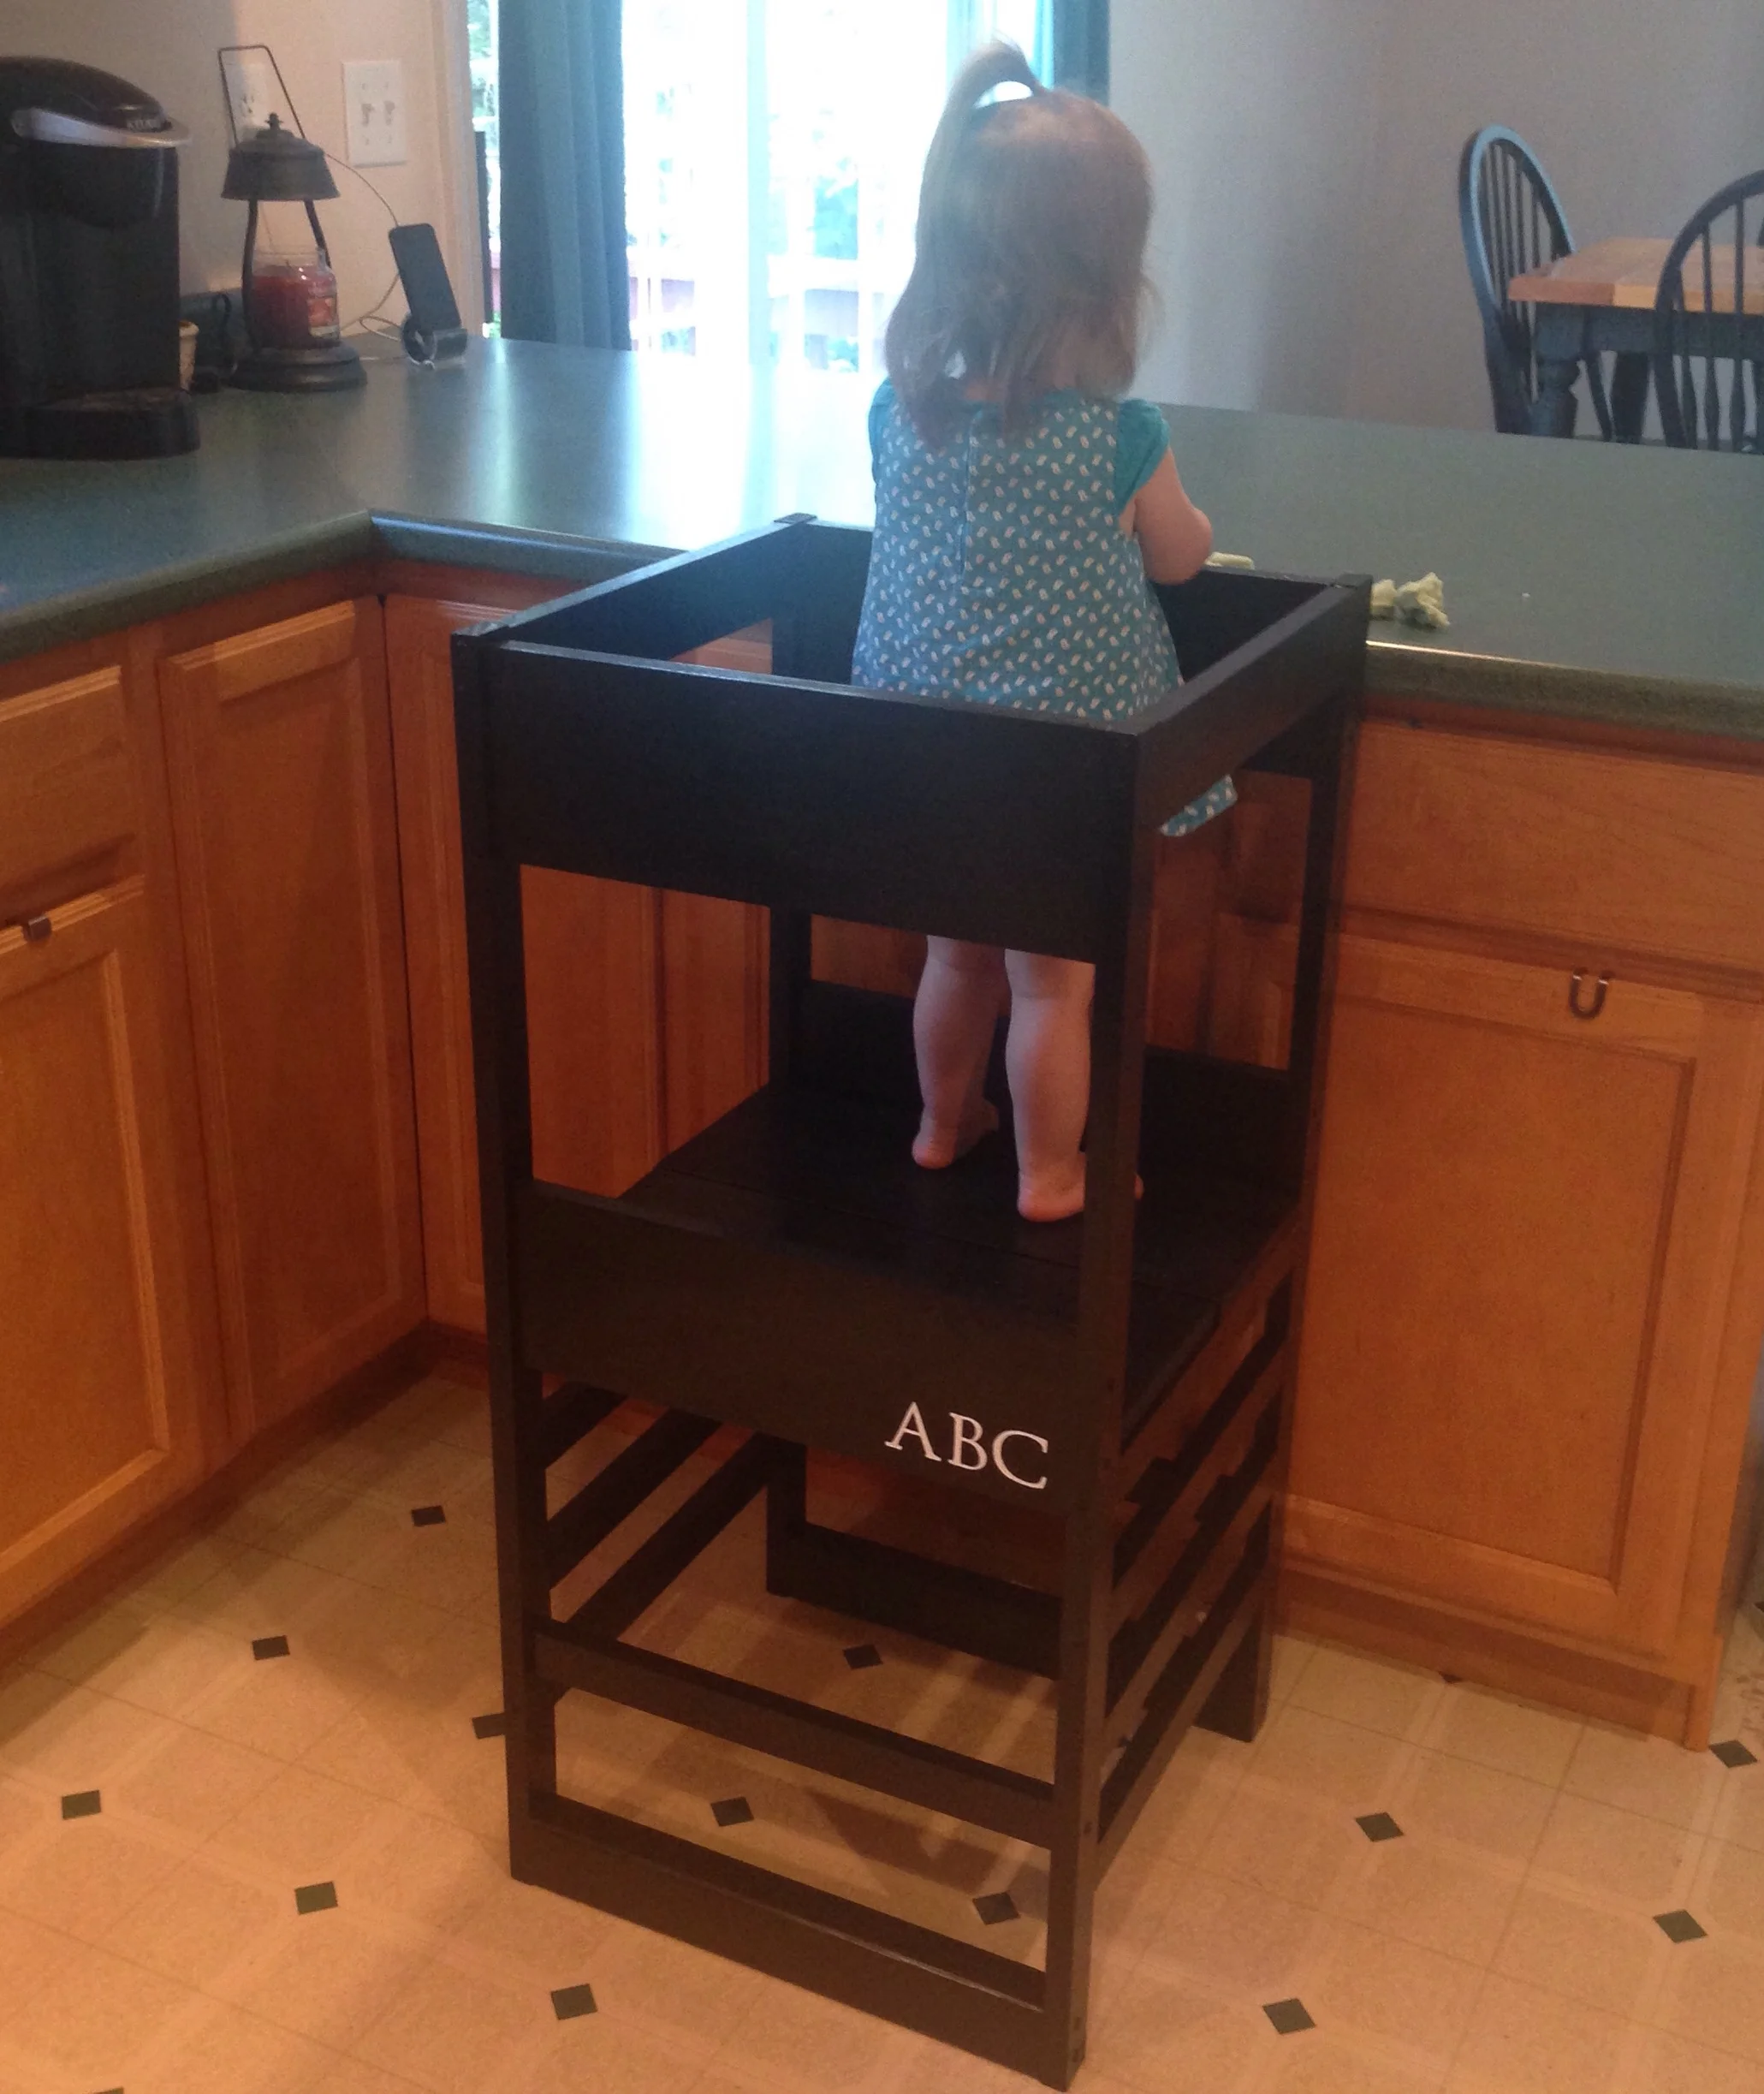
I wanted to add some personalization or decoration to the learning tower, but also wanted to keep it simple so that it would blend into the kitchen better. I decided against personalizing the tower since we're hoping to have more kids and I wanted to keep it "neutral" - so I settled for stenciling "ABC" on one of sides for a little decoration, using the Martha Stewart Monogram Serif Stencil Set.
Our little one loves her new learning tower and now feels like she can "help" when I'm making dinner. This tower also makes arts and crafts a lot easier (here she's playing with some homemade playdough).
Safety Notice: It goes without saying, but always supervise your little one while they're using the learning tower and make sure there is nothing dangerous within reach (hot plates, knives/other sharp objects, stove, off-limit foods, etc). Use at your own risk.