I'm a wife, stay-at-home mom, crafter, and blogger living in rural New England. As seen in Martha Stewart Living, Food Network Magazine, and more! | Tutorials, DIY, crafts, parenting tips, recipes, money saving tips, product reviews, local product features, New England living, intentional living, and more! |
We decided to try our hand at making our own toddler art Valentine cards to send to family and friends - it was so easy and a lot of fun! | This post contains affiliate links |
heart-shaped stencil (I just used a cookie cutter from the kitchen)
glue
How-to:
For our little one to make her art, I taped some big sheets of finger painting paper to our kitchen floor and let her go to town! This was also her first painting experience, and it's safe to say that she really enjoyed it... though I think she may have been just as interested in trying to pull the tape off the floor.
Even though I was an art education major, I'd never used special paper for finger painting and I was a bit skeptical at first. The paper touts being "glossy and non-absorbent" and I wasn't sure how the paint would stay on the paper or if it would dry well. Nevertheless, it worked great! The non-absorbency and glossiness is perfect for finger painting - a little paint goes a long way since it isn't absorbed into the paper and the smooth glossy surface makes it easy for little fingers to move the paint around. Drying time was pretty fast too and the paint stayed well on the paper, no flaking or peeling.
Once the paintings were dry, I used a heart-shaped cookie cutter to trace out the hearts and cut them out.
I glued the hearts onto a folded piece of white stationery from C.R. Gibson, then added a little handwritten note inside and they were done. Now to mail them off to family and friends!
Hope everyone had a wonderful and safe New Years! With a little one now I spent my evening like I do most.. putting her to bed, working on Birch Landing things, then curling up on the couch to watch some TV with the hubby. Pretty wild and crazy, huh? I wouldn't have it any other way.
Reflections
This has been a pretty big year for me, for us: Becoming a new mom with ten million new things to learn (and am still learning), getting into the groove of staying home full-time with our little one, starting this little Etsy business, and getting a photo of our ornaments into Martha Stewart Living, to name just a few of the amazing things that happened this year. We're very blessed and I am so very thankful.
Resolutions
What's New Years without some personal resolutions? 1. I'd love to get back into running. I ran pretty regularly until I was 8 months pregnant, stopped, and then never really got back into it but it's about time I do. 2. Ruthlessly cleaning out and reorganizing the basement and closets is also a priority. We have too much stuff (and I have wayyy too many clothes), it's time to lighten that load. 3. And of course I'd love to grow this little business as much as I can - I have lots of ideas for wedding decorations, decor, and accessories all in a rustic theme. I'm planning on phasing out some items in my shop over the next few months to transition Birch Landing Home into its new identity. You can expect our Etsy shop to officially find its niche in 2015.
I want to thank you all for giving me a great start in 2014 and I'm looking forward to making 2015 even more successful!
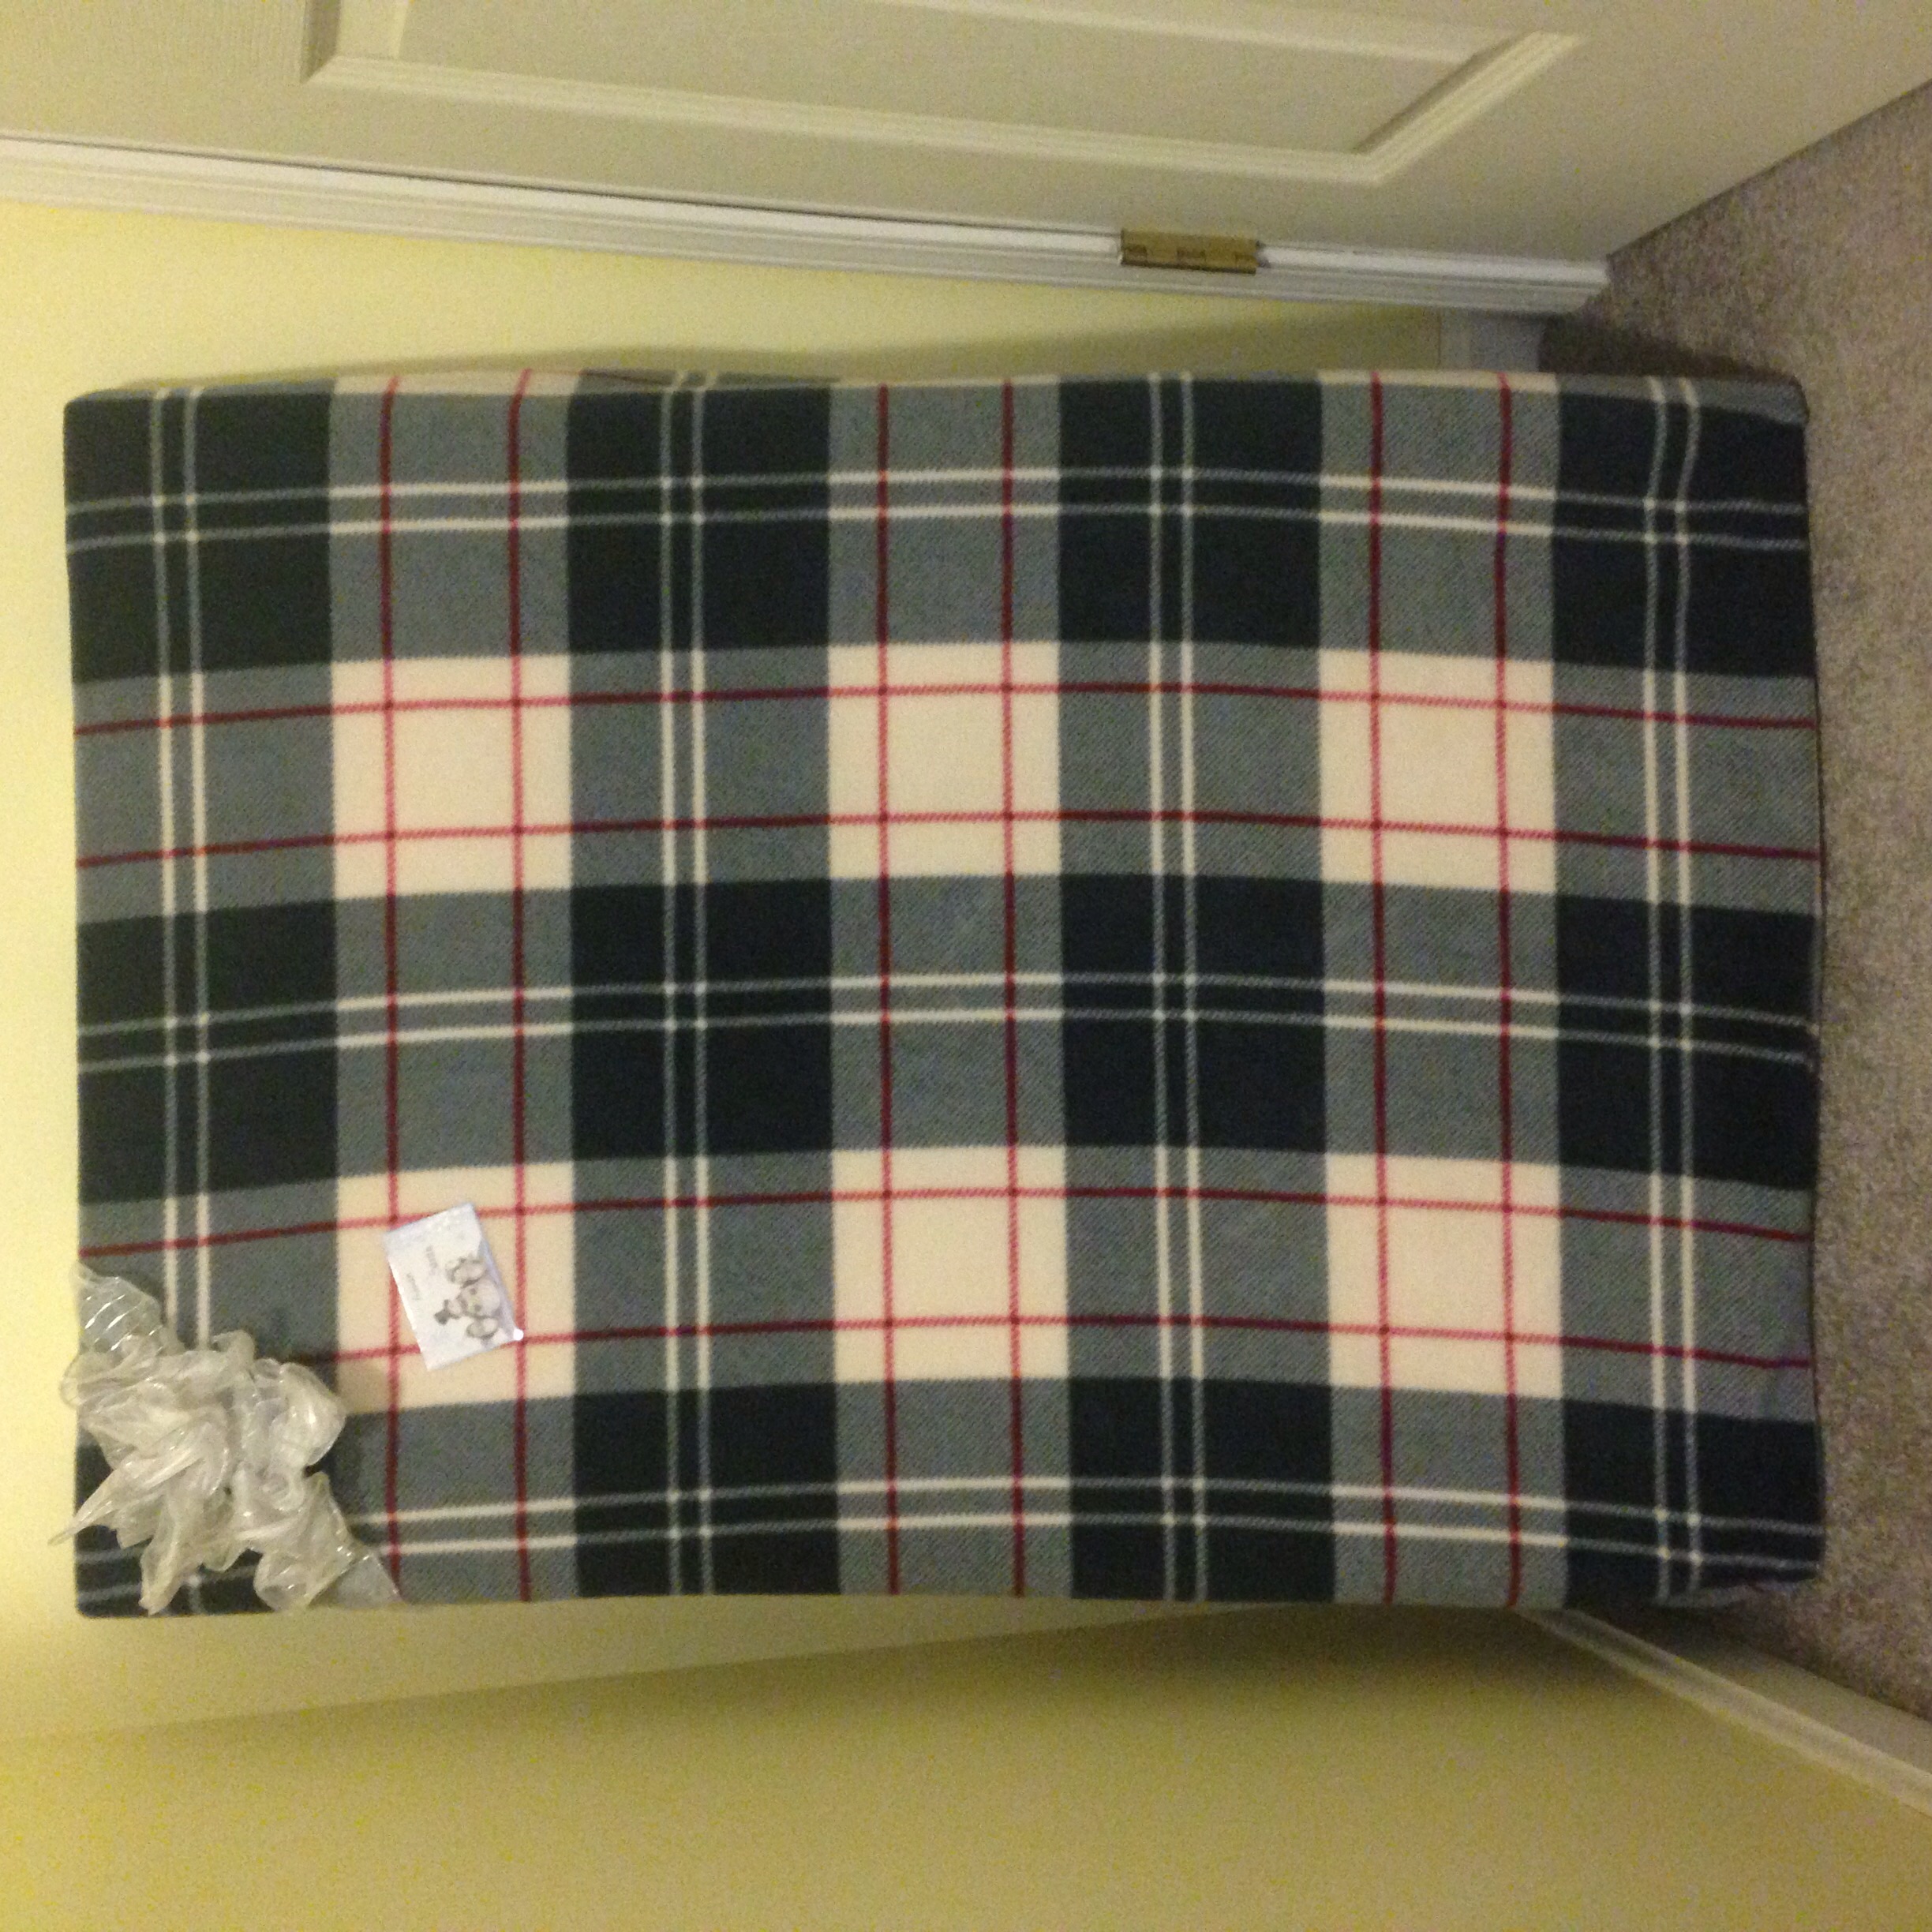
Have a gift that's too big to wrap easily? Use a throw blanket (or large piece of fabric) to wrap it! Just "tape" it shut with clothespins or safety pins. This saves paper, is more eco friendly, looks festive, won't rip, and the recipient gets a cozy throw too!
Stephanie over at Newlyweds:North (now called Olive & Tate) just featured our hand-etched maple snowflake garland on her beautiful Christmas mantle! Be sure to check out the full post for more pictures and details.
PS - She's also shared a special coupon code that's good until January 1st! ;)
Stephanie over at Newlyweds:North (now called Olive & Tate) put together a list of some of her favorite Etsy shops and we're honored to say that Birch Landing Home made the cut! Be sure to check out her post and all the other wonderful shops featured :)
This year was the first year my husband and I have been able to get a real live Christmas tree. Before, we were in an apartment, then we got a puppy, then we had a baby... so this year we were finally able to get a real tree!
To commemorate this special event I had my husband cut a slice off the end of our Christmas tree and I turned it into a special hand-etched snowflake ornament for us. It's a little big and a little lopsided, but it'll be a special keepsake of our first real tree. On the back I wrote "Our First Christmas Tree - 2014."
Maybe I'm cheap, but it always hurts buying Christmas wreaths every year. It's so easy to drop $40-50 just to buy two wreaths for the front and back doors, only to throw them out not long after New Year's. Starting last year I got tired of throwing that money away and decided to make my own super-simple swag for our doors.
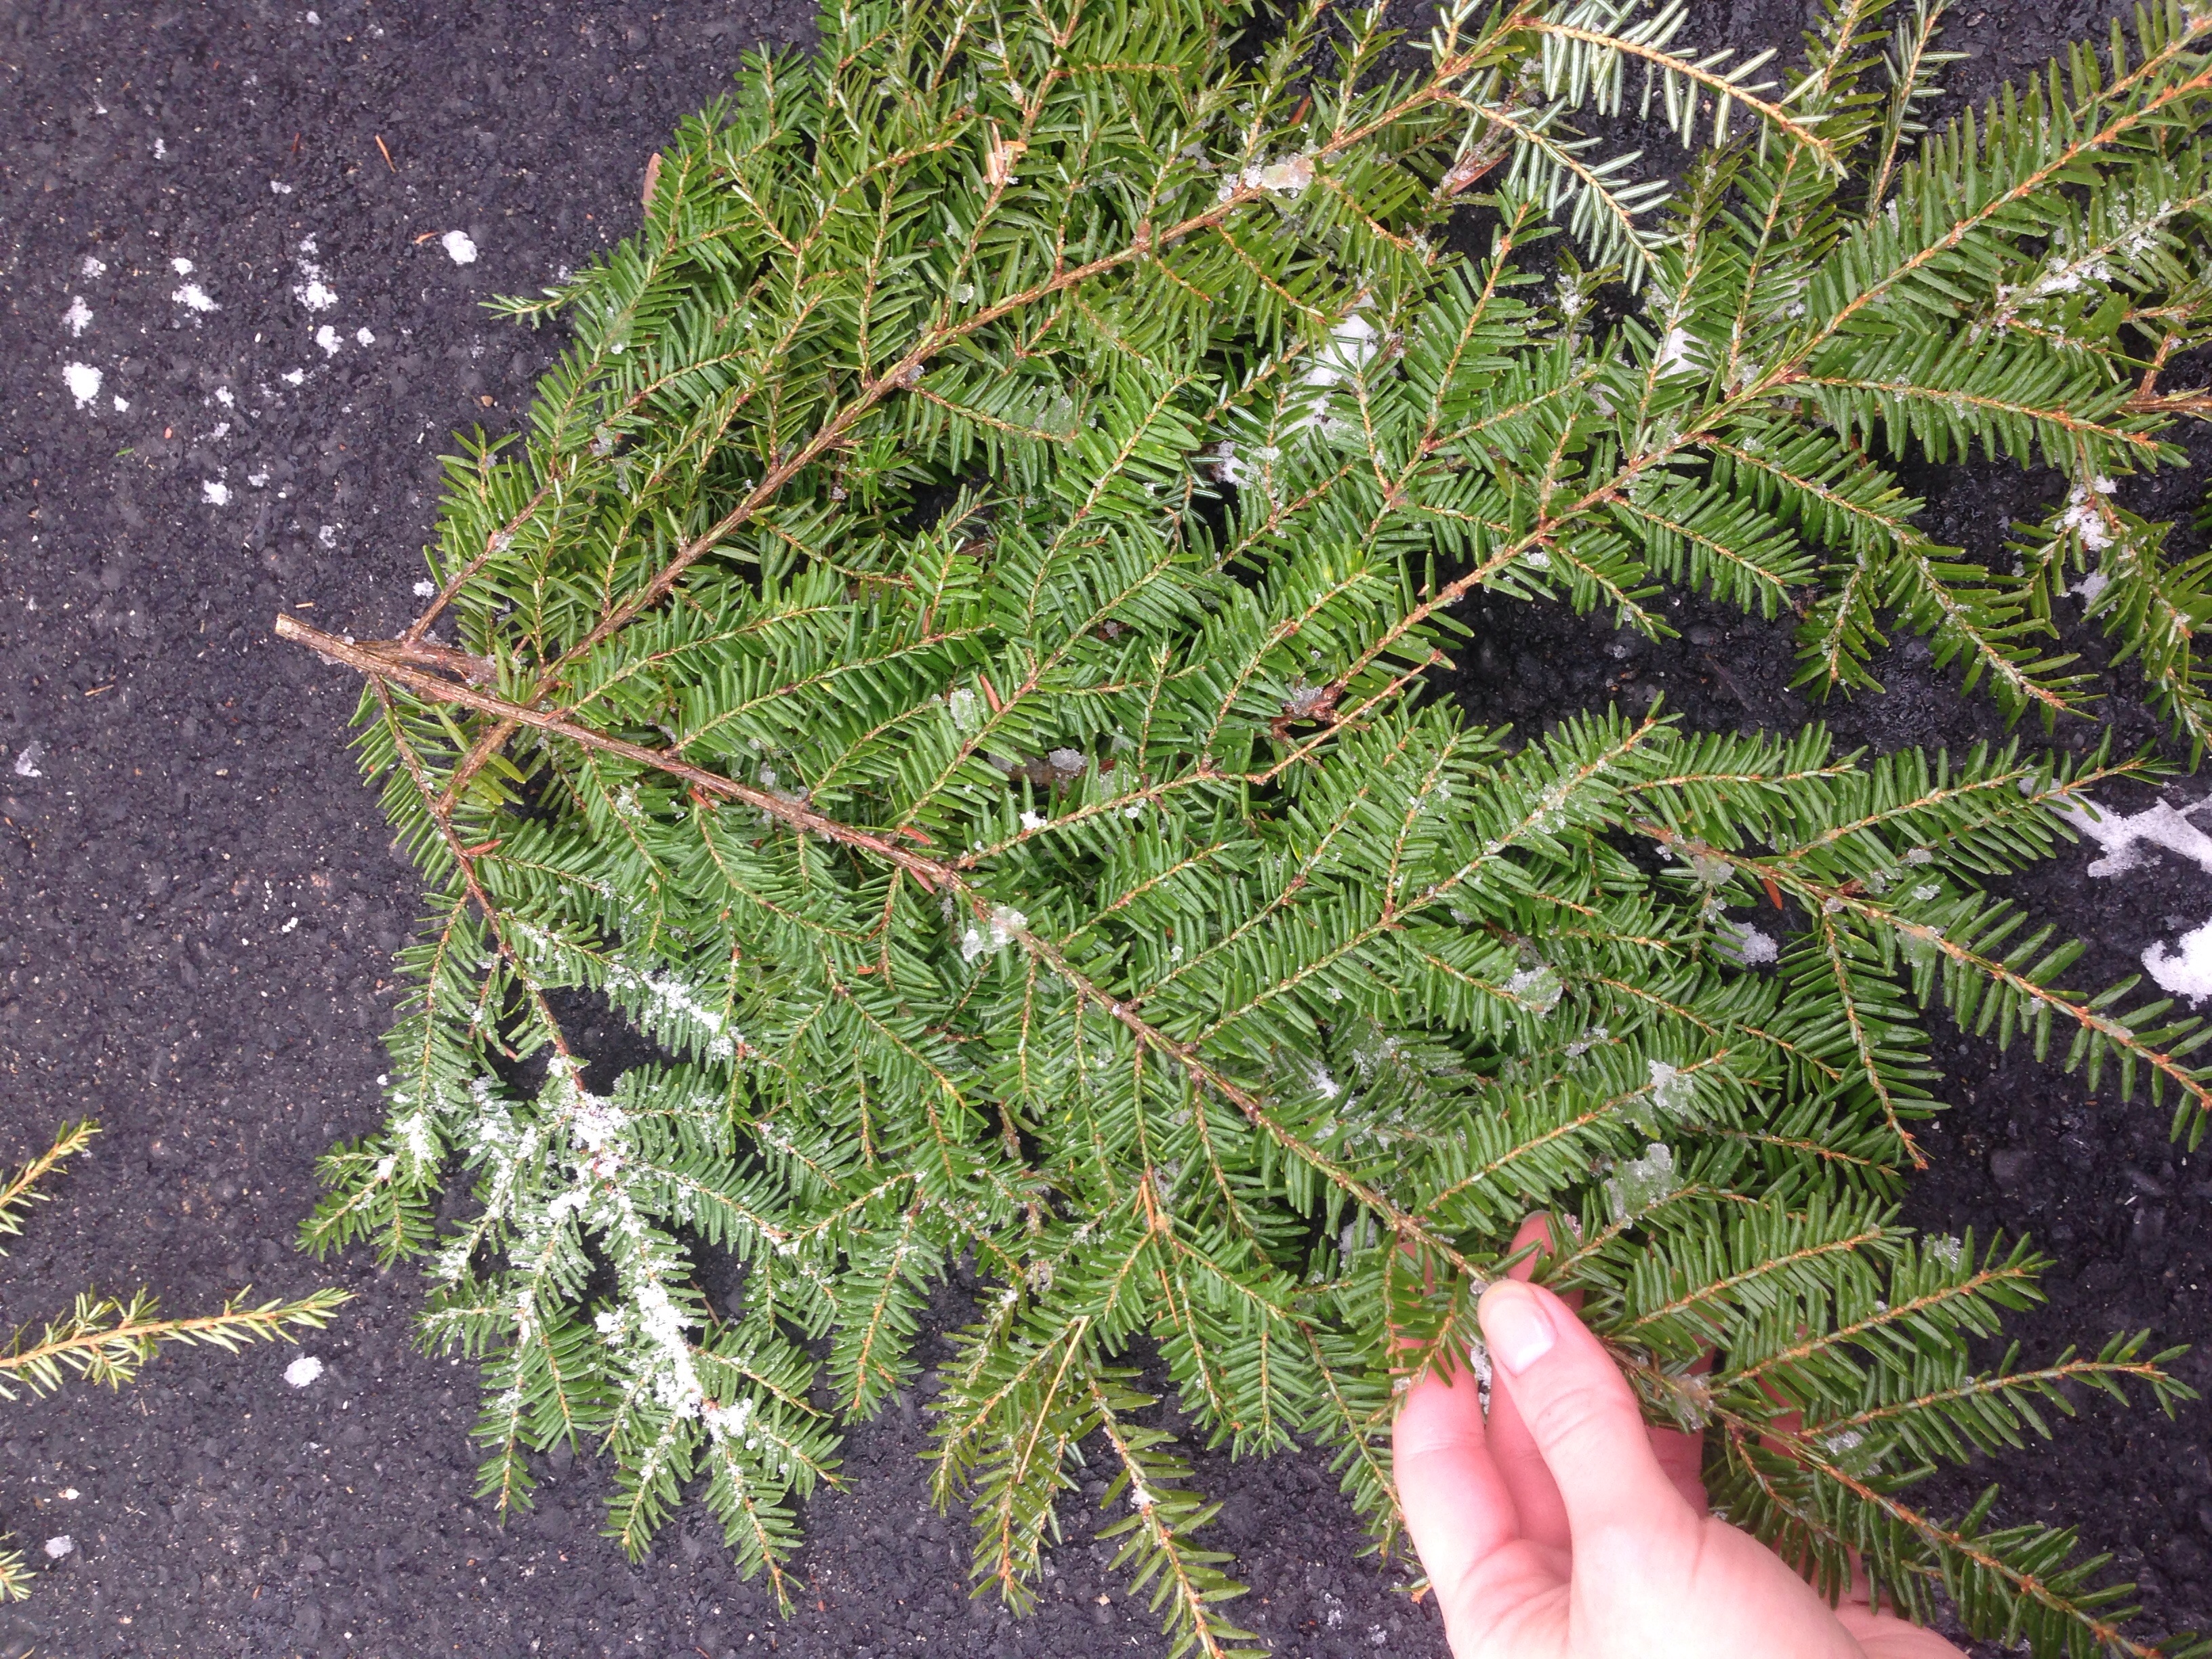
We're lucky enough to have a lot of hemlock trees behind our house, so I took some clippers and headed out to trim back some branches that needed to be cut anyways. Our dog followed me out to "help" - and by help I mean run around with a branch I cut. If you don't have suitable trees in your yard you may be able to get away with using the trimmings off your Christmas tree or you can buy bundles of hemlock or fir tree at the grocery or craft store for pretty cheap.
I made some smaller cuttings and started fanning them out, making a rough diamond shape.
Once it was getting close to what I wanted, I used some hand clippers to trim long pieces back into shape. If you have holly or other greenery you want to add, now would be when to do it.
Once I was pretty happy with it, I used some craft wire to bundle it together. You want to make it pretty tight so none of your branches slide out over time as you open and close the door. Use some extra wire to make a loop at the back for hanging.
Now add your bow. I had our bows made at the local garden center a few years ago. They had spools and spools of different fabric ribbon available, I picked the pattern I wanted and they made me up a couple of matching bows. I think they cost me $7 each, but I reuse them every year so it was definitely worth it! These bows have some wire in the back to attach it to the swag. After you add the bow, do any final trimming of the greenery.
This finished swag cost me nothing this year since I already had all the materials, and that's just fine by me ;)