Happy Small Business Saturday! Just wanted to hop on here real quick and share just a few of my favorite small businesses and makers, most of which are based right here in New England. Quite a few are having sales today, so please go check them out and support them if you can!
Small Business Saturday Picks
- Wiglesworth's Mercantile - Wiglesworth's Mercantile is one of the newest shops in Portsmouth, NH. The owner Anne is committed to only carrying items made right here in New England, and this week she is giving back to local charities with every purchase at her store (I love that so much!).
- Mermaids & Madeleines - Heather from Mermaids & Madeleines makes the most beautiful, bright coastal-inspired jewelry around. She's also such a positive, happy soul and a joy to follow on Instagram.
- Wolfeboro Candle Company - Carrie from Wolfeboro Candle Company makes wonderful candles, and this season is offering Gift Boxes too (our Hand-Etched Snowflake Ornament is included in the Large Gift Box).
- Maine Rope Mats - Maine Rope Mats makes amazing recycled lobster rope mats and products. We personally have two of their mats and love the fun it brings to our doorways.
- S.Lynch Knitwear - Samantha isn't actually from New England, but is a New Englander at heart and it shows in her beautifully made knitted items. I just love her chunky knit hats and her craftsmenship is beautiful!
- Daytrip Society - Daytrip and Datyrip Jr., both in Kennebunkport Maine, are some of my favorite stores around. They are beautifully currated and have such thoughtful and unqiue gift ideas.
- Watts in Maine - Watts in Maine is best known for their Perfect Catch Cuff, but also offers other jewelry and accessory items as well. They also have made donations to help with Shark Research.
- Sewcialite - Roula of Sewcialite hustles so hard every day, working fulltime and creating the most amazing coastal-inspired rope creations and jewelry in her spare time.
KEEP UP WITH BIRCH LANDING HOME
| Etsy | Facebook | Instagram | Pinterest | Bloglovin' | Hometalk |
Hey, hey it's PRIME DAY! Making a list of some of the deals I come across - check them out at the link below (I'll be updating the list throughout the day). Now’s a great time to get a jump start on Christmas and Holiday gifts.
KEEP UP WITH BIRCH LANDING HOME
| Etsy | Facebook | Instagram | Pinterest | Bloglovin' | Hometalk |
Being home 24/7 and trying to limit grocery trips and ordering really makes you evaluate how quickly you’re going through supplies in your home. With two little kids, paper products were something we were blowing through and made me wonder how we could change this for the better. | This post is not sponsored but does contain affiliate links |
Now when I say "paper products" in this post I'm talking about paper towels and paper napkins. To greatly reduce our usage of these things we made the switch to reusable "unpaper" towels and aren't looking back.
(And before you ask... yes, reusable toilet paper/wipes do exist too - but that's not for us, though if the toilet paper shortage continues who knows...).
“Unpaper” towels are cloths that you can use like paper towels but wash and reuse for a long time. You could really use just about any kind of cloth - wash cloths, tea towels, cloth napkins, pieces of flannel, etc. Hopefully you have something around the house already that you can use, but if you don’t and decide to purchase some we’ve found them to be worth the investment. For the price of a large package of throw-away paper towels, you can purchase of set of reusable ones that will last you a very, very long time and will eventually pay for themselves.
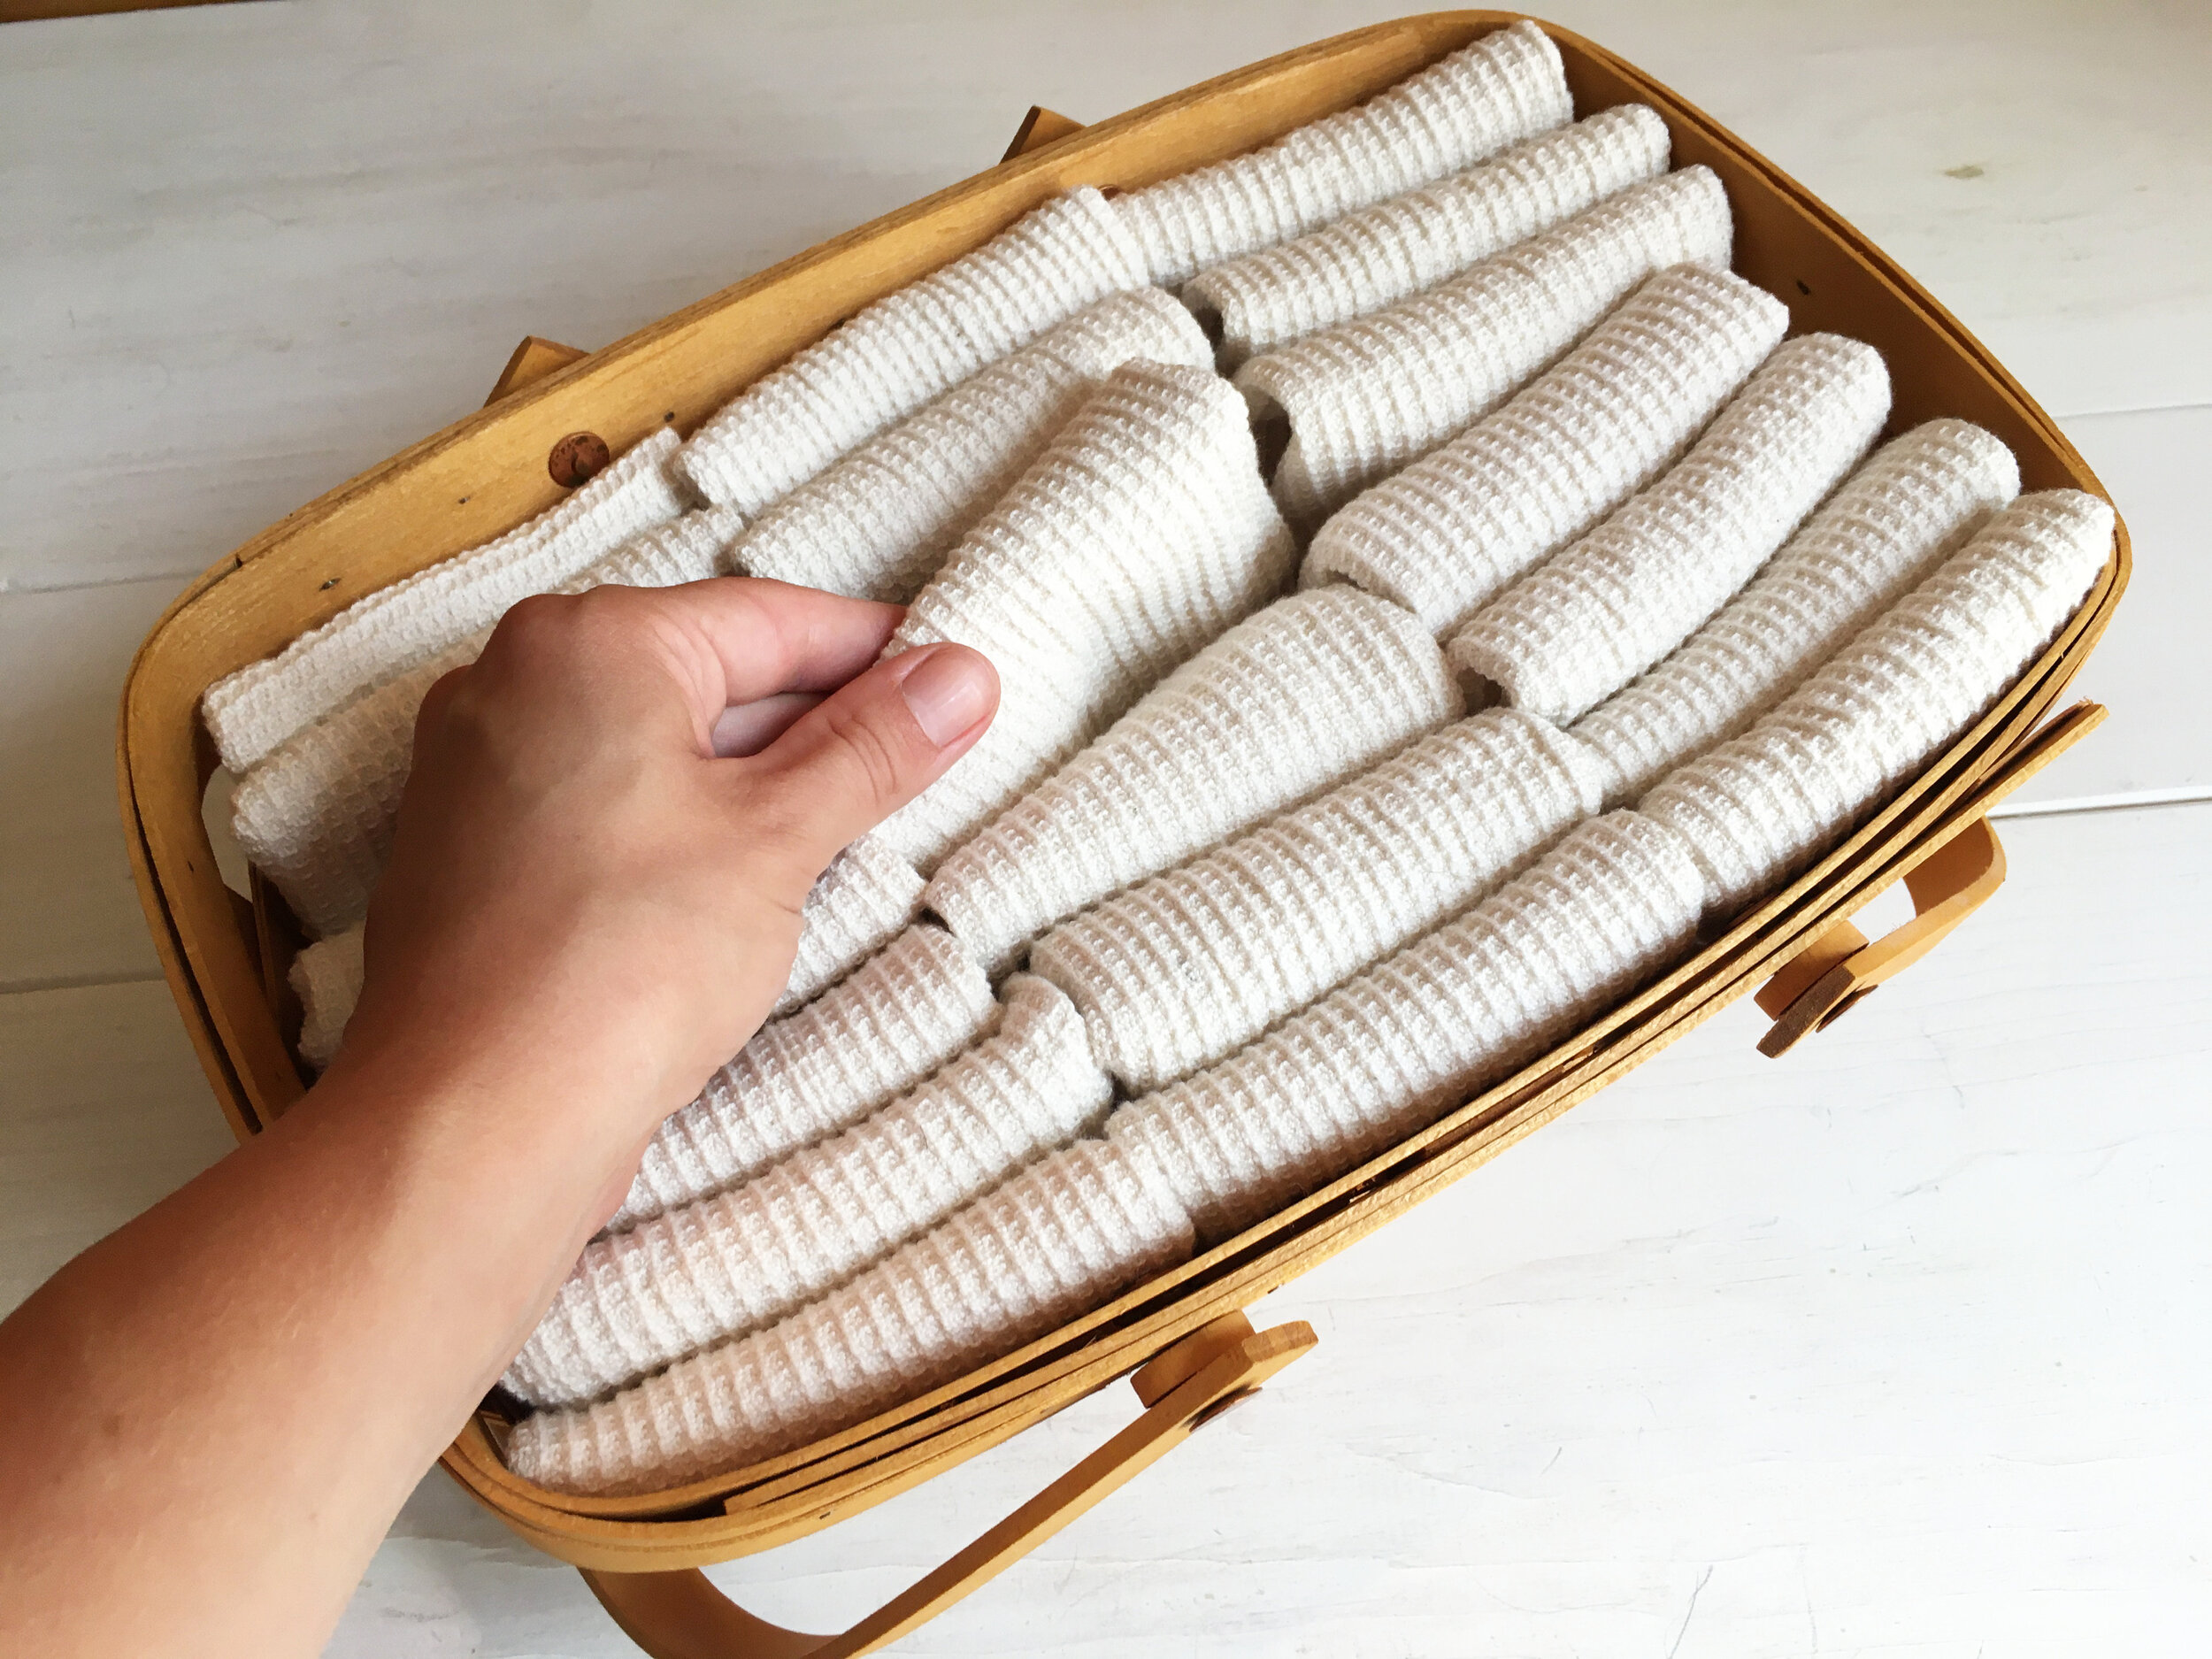
We thought about just using our current dishtowels but we use them regularly already for dishes and big spills (which happen a lot with two small kids). We were primarily looking for something smaller that would function like a paper towel and also wouldn’t fill our washing machine quickly (something else to consider), which is why we settled on these modestly-sized, organic bamboo cloths.
Some people will roll them on a paper towel holder and use them in place of ALL paper towels, completely eliminating paper towels in their home. For our household we decided to fold them and place them in a basket on our counter, next to our roll of paper towels. That way we’d be constantly reminded to grab a cloth instead of a paper towel whenever we had to wipe a dirty face or sticky fingers, but we’d still have paper towels at the ready if we really needed them. I even hung a little note over the paper towel holder to remind us to use less of them.
Since starting this system we’ve cut down on our paper towel usage big time. This has saved us money on our grocery bill and we feel like we’ve made a positive long-term change that’s more eco-friendly.
Cleaning Unpaper Towels: I hung a small mesh laundry bag on the doorknob of our laundry closet, which is conveniently right off the kitchen, to toss the used unpaper towels in to be washed. Whenever I start a load of laundry, I just throw the mesh bag in with the rest of the washing. You could also easily hang a mesh bag or small basket on the inside of a cupboard door with a Command Hook too if that is a more convenient spot.
Hopefully I’ve inspired you to find a reusable, money-saving solution to something in your home like we have found unpaper towels to be for us.
This post is not sponsored but contains my personal opinion as well as affiliate links.
KEEP UP WITH BIRCH LANDING HOME
| Etsy | Facebook | Instagram | Pinterest | Bloglovin' | Hometalk |
We’re still social-distancing very seriously but all our favorite outdoor spaces (hiking trails, lakes, beaches, camping areas, etc) have been totally overrun lately with people looking for a change of scenery. This unfortunately makes it impossible to social-distance safely, so we tend to just stay home. | This post contains affiliate links |
In order to make our weekends more special we started a weekend tradition early on during Quarantine to “camp at home” every weekend. During the colder months and bad weather, this meant camping in our living room every Saturday night with sleeping bags and staying up late watching a family-friendly movie. Sunday mornings we make a special breakfast, usually of pancakes or egg sandwiches.
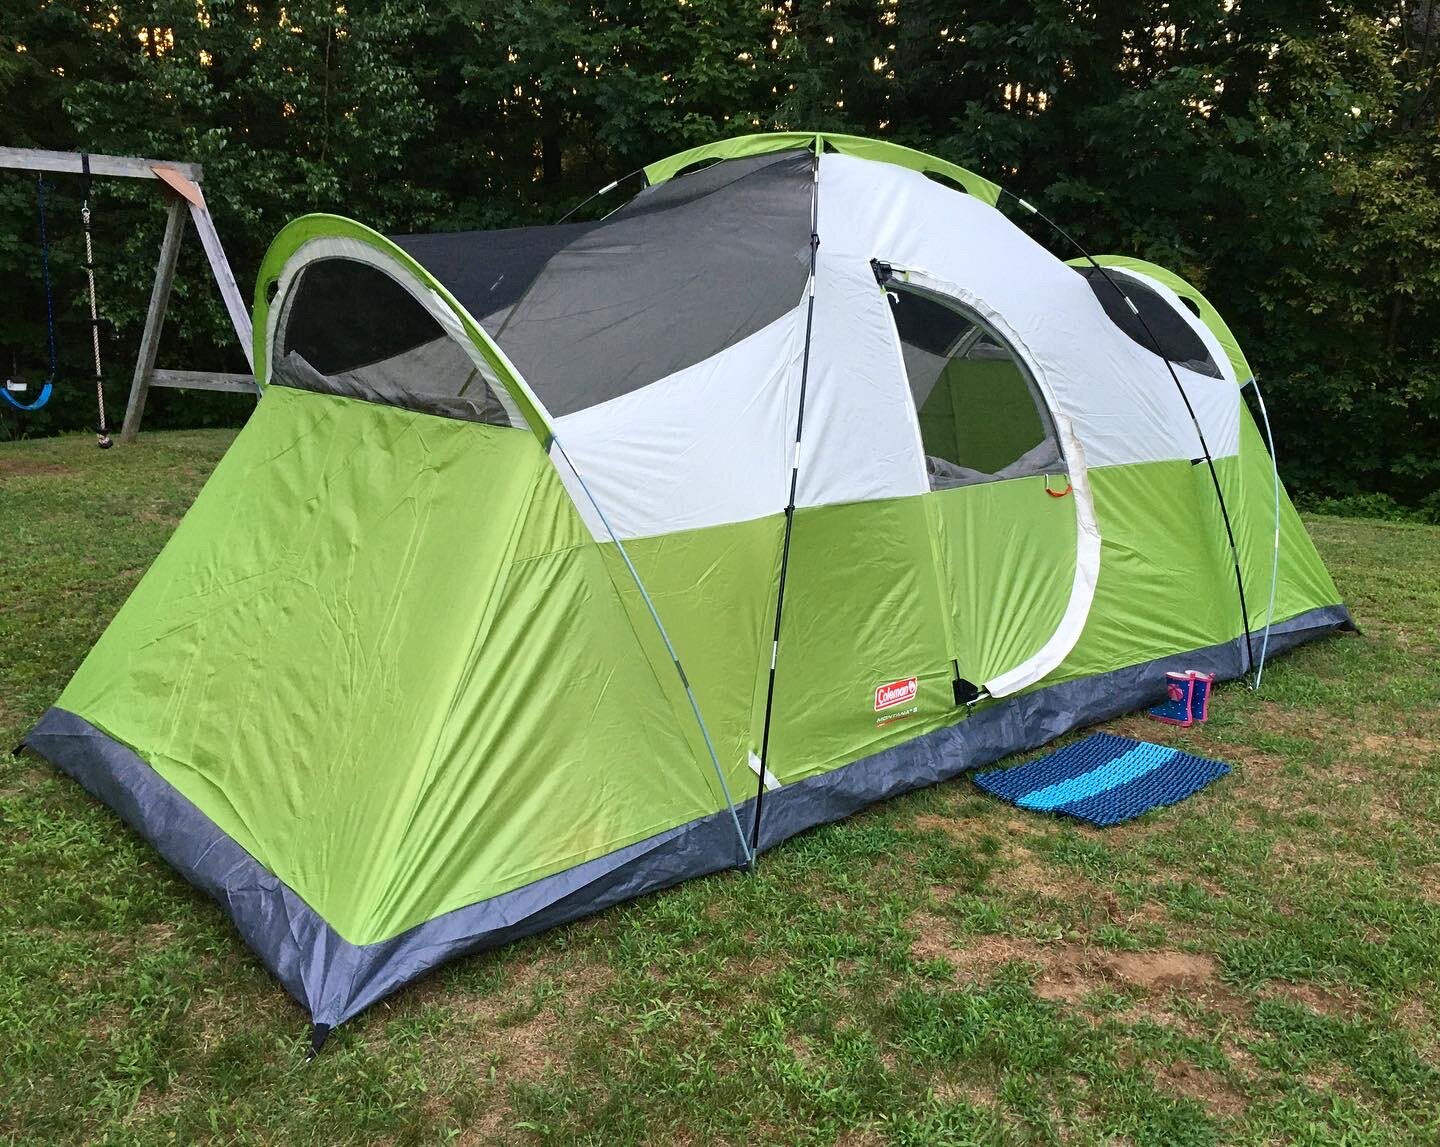
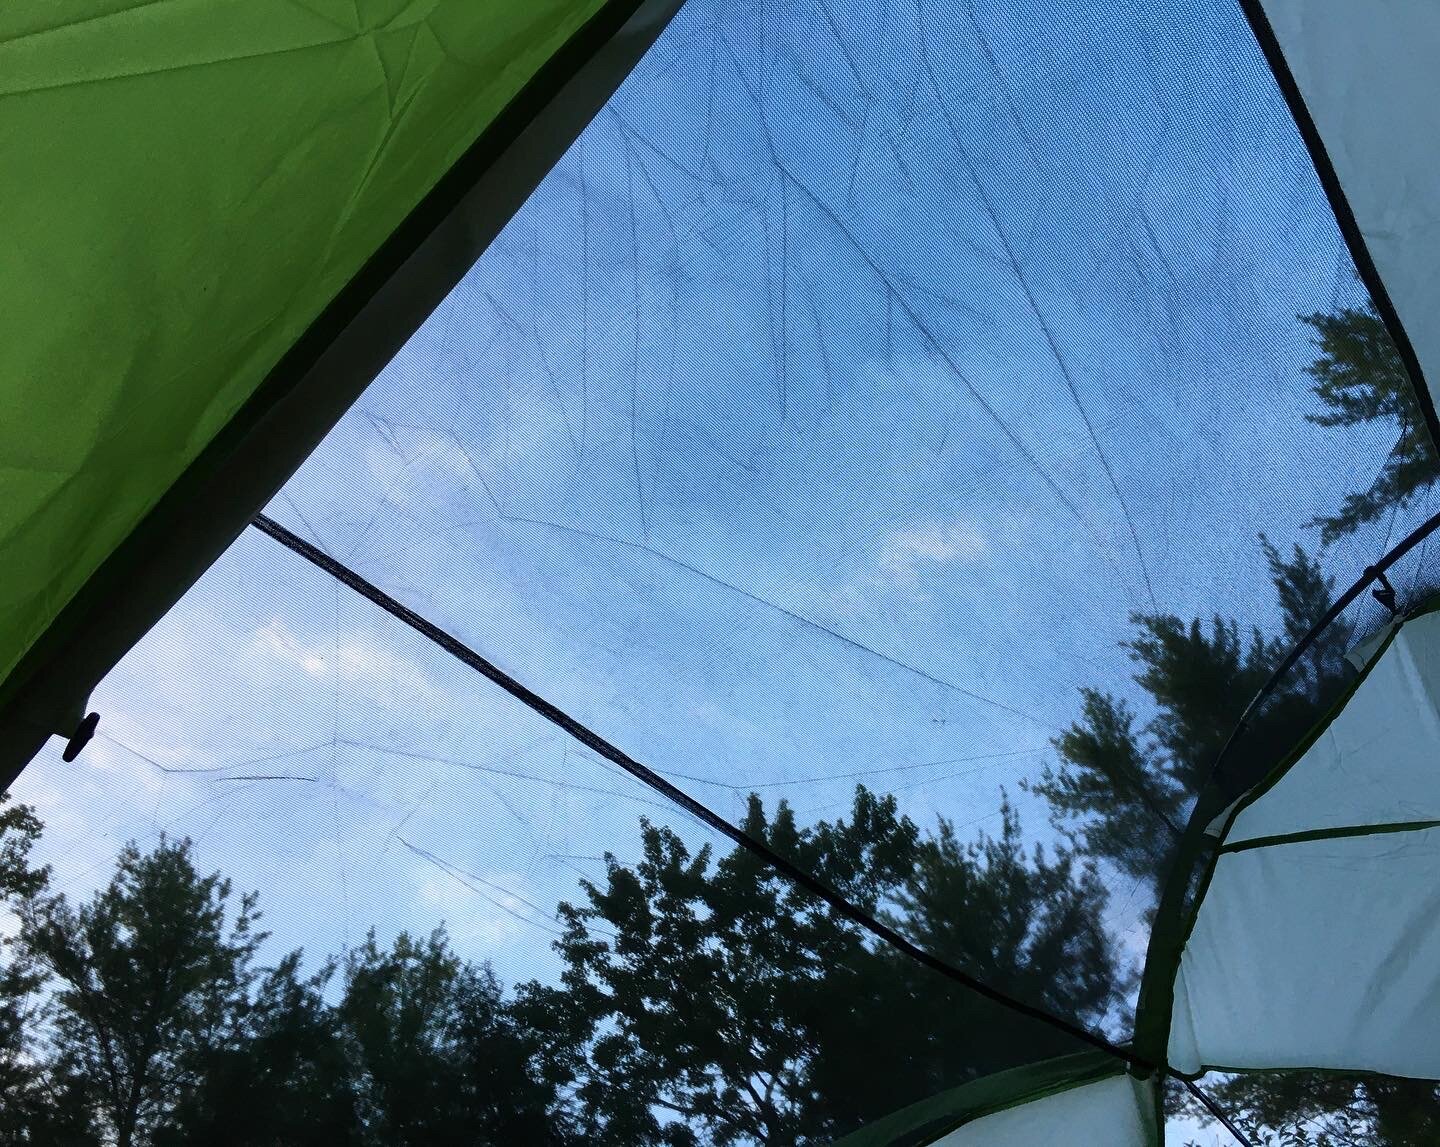
Now that the weather is warmer, we’re doing more backyard camping. Our large tent is nice and roomy for all of us to spread out - and the extra large screen areas on the top mean we can leave the rainflap off in nice weather so we can see the stars and watch the fireflies (which is what we typically do). It feels really magical and the kids love it!
When we set up the tent we typically try to camp for at least two nights in a row to get more out of it.
(Pro-tip: Put a doormat outside your tent to help keep grass and sand from getting tracked in - We purchased our mat from one of our favorite companies, Maine Rope Mats.)
We may be stuck at home, but that doesn’t mean we still can’t make special memories. I hope you can find a fun tradition to start at home during this time too - stay well!
KEEP UP WITH BIRCH LANDING HOME
| Etsy | Facebook | Instagram | Pinterest | Bloglovin' | Hometalk |
Now that we’re always eating at home and not going out for breakfast it’s great to have a fast and easy no-mess egg sandwich that you can make quicker than than it would take you to sit in the drive-thru line. This trick will make the perfect fluffy egg sandwich start-to-finish in just about ONE MINUTE. For reals. | This post contains affiliate links. |
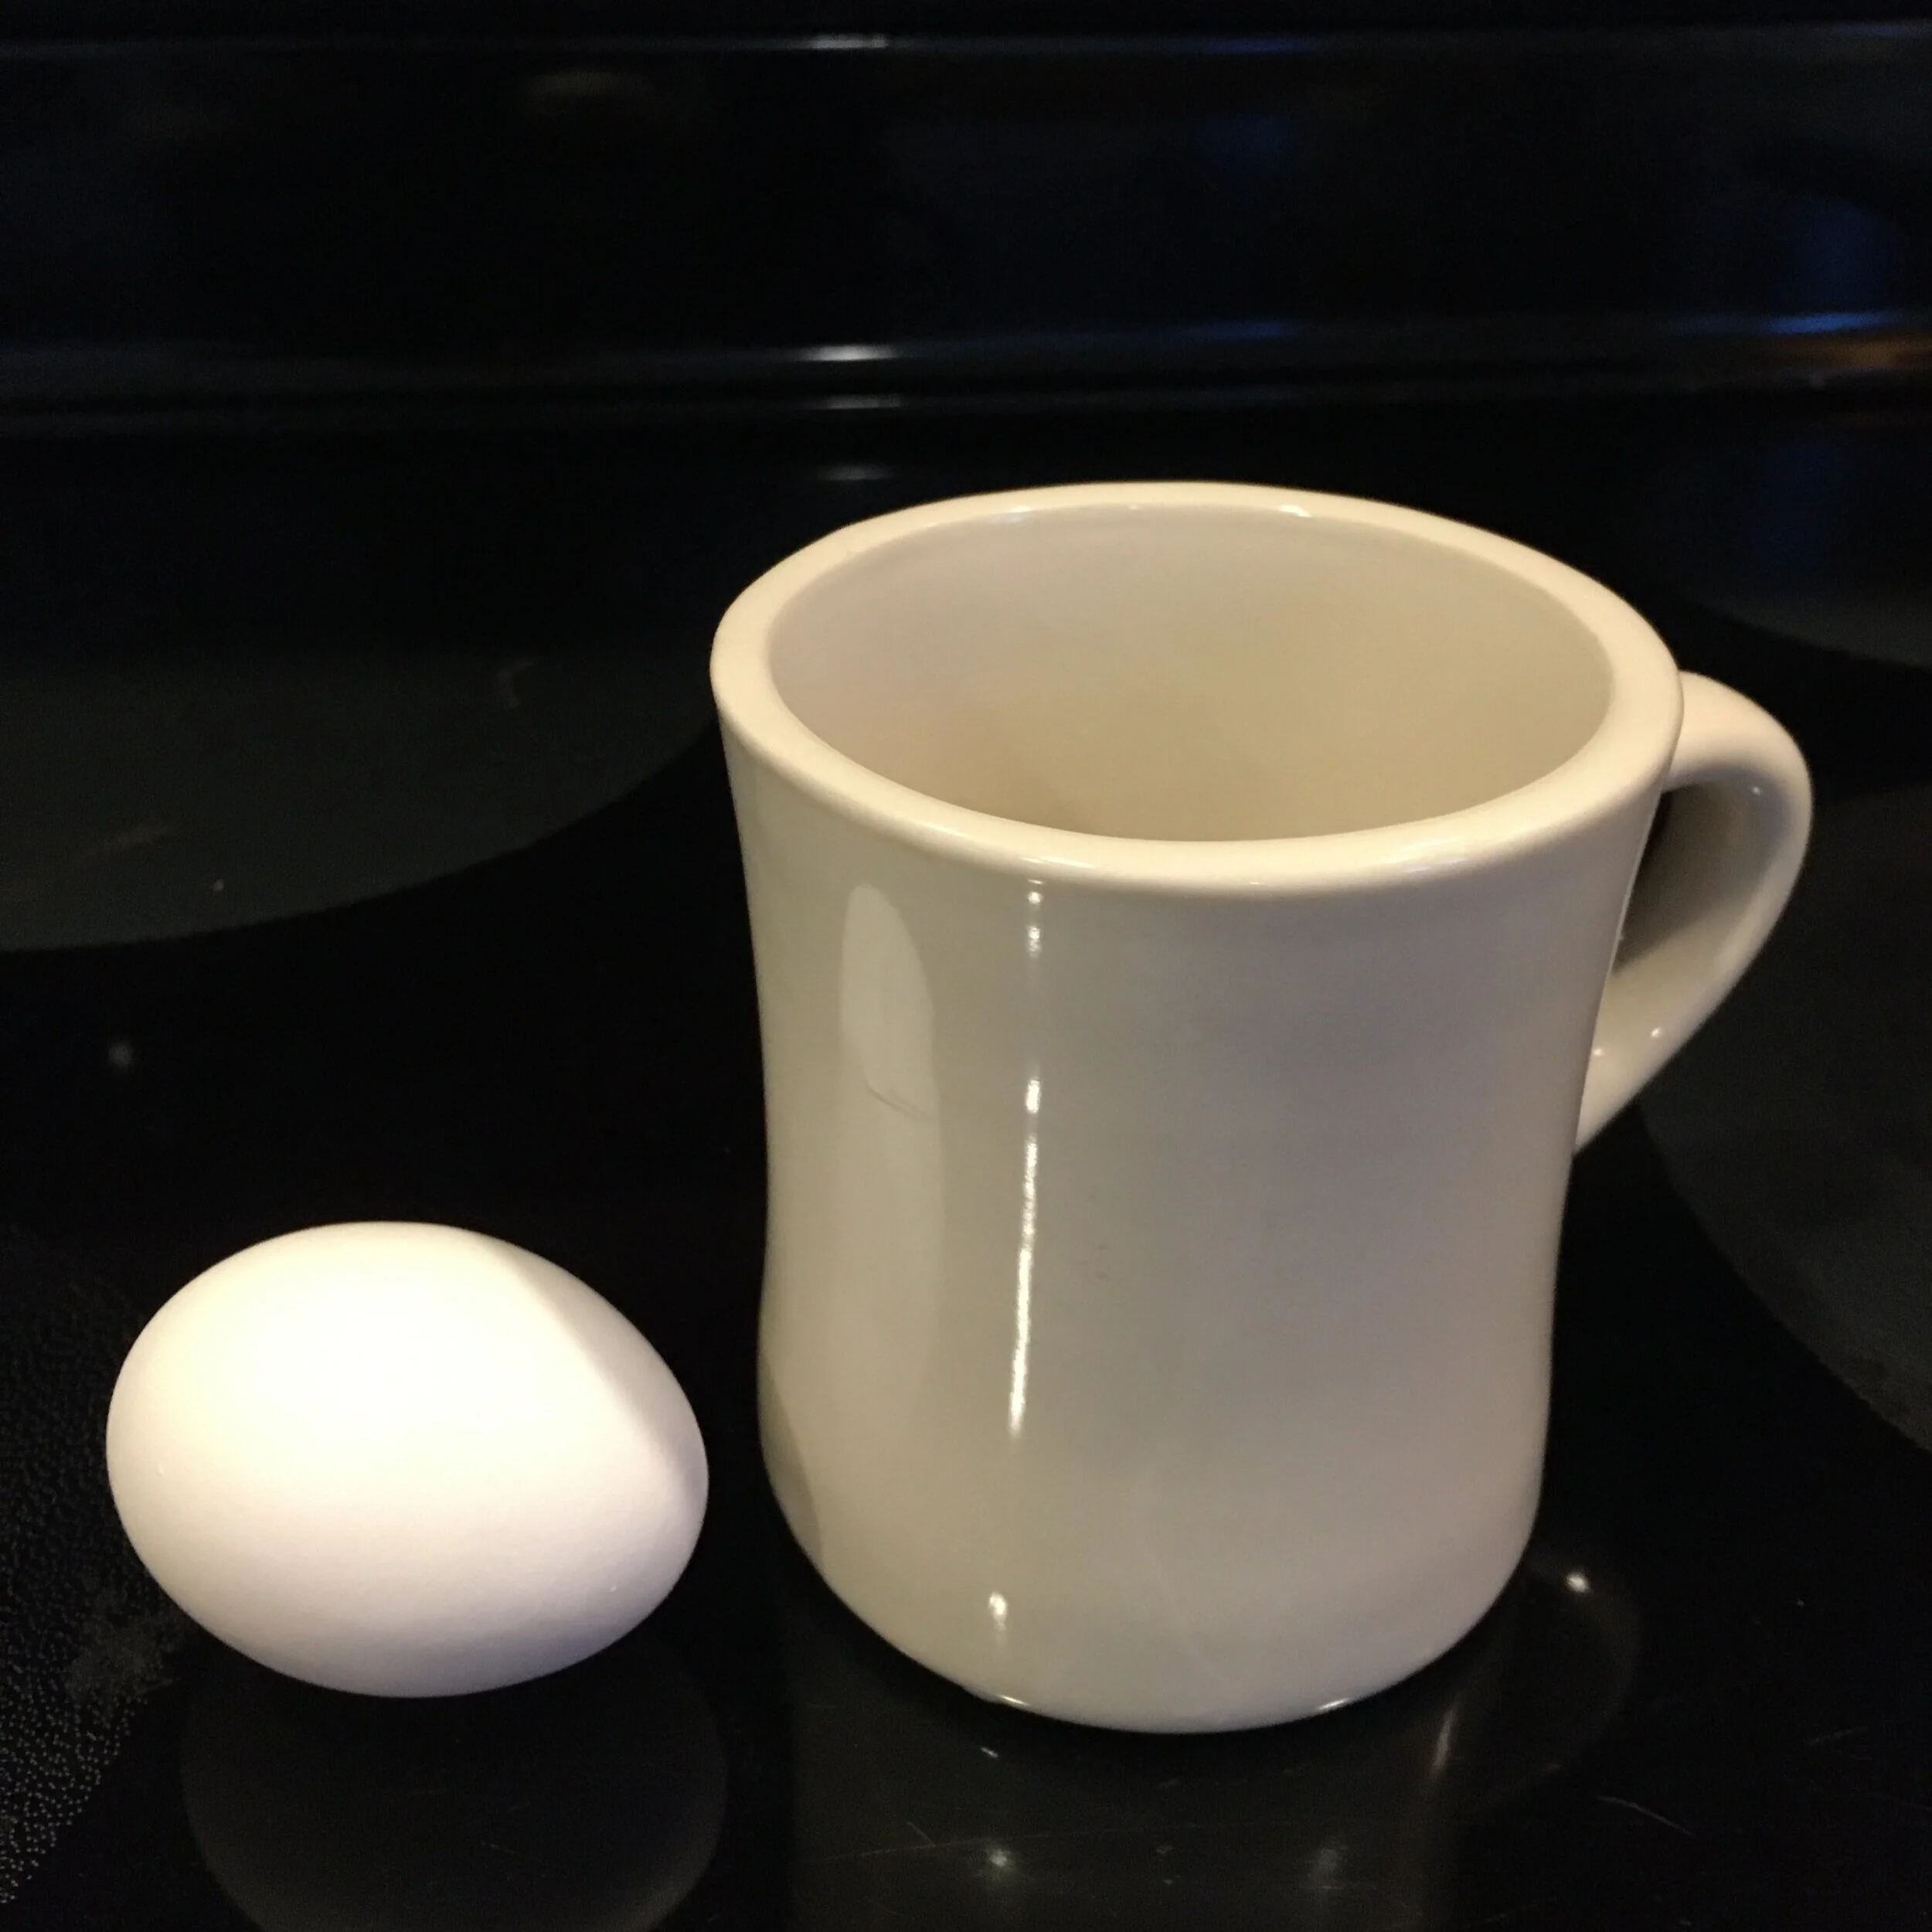
Really, this “recipe” couldn’t be any easier… the bottom line is you will need an egg, an English muffin (or some type of bread), a microwave-safe coffee mug, and a microwave. That’s it!
You might also want some shredded cheese handy, small diced precooked veggies (leftovers from the night before work great), hot sauce - or any other topping of your choice.
First, crack the egg into your microwave-safe coffee mug and “whisk” with a fork to break up the yolk. Now is also the time to add a generous pinch of shredded cheese (shown here) or a small amount of chopped pre-cooked veggies (leftovers work great). Put the mug in the microwave and cook on high/normal for one minute* (*please note that depending on your microwave model and what you add, you may need to adjust your cook time. Also DO NOT microwave fork.) While the egg is cooking you can toast your bread, if desired.
Once the egg is done make sure it is cooked throughly (it’s opaque with no runny spots and steaming all the way through) by checking with a clean fork and loosen it from the mug. Then simply turn the egg out onto your bread and add any condiments you desire - I personally can’t eat eggs without hot sauce.
And that is it! Once the coffee mug cools, just soak it in the sink to loosen any stuck-on egg and run through the dishwasher like normal. No pans to heat up or clean after which is a huge plus in my book. Enjoy your easy breakfast :)
Disclaimer: Please note that depending on your microwave model and what you add, you may need to adjust your cook time. Make sure your egg is fully cooked before eating.
KEEP UP WITH BIRCH LANDING HOME
| Etsy | Facebook | Instagram | Pinterest | Bloglovin' | Hometalk |
| This is post is part of a Partnership and contains affiliate links |
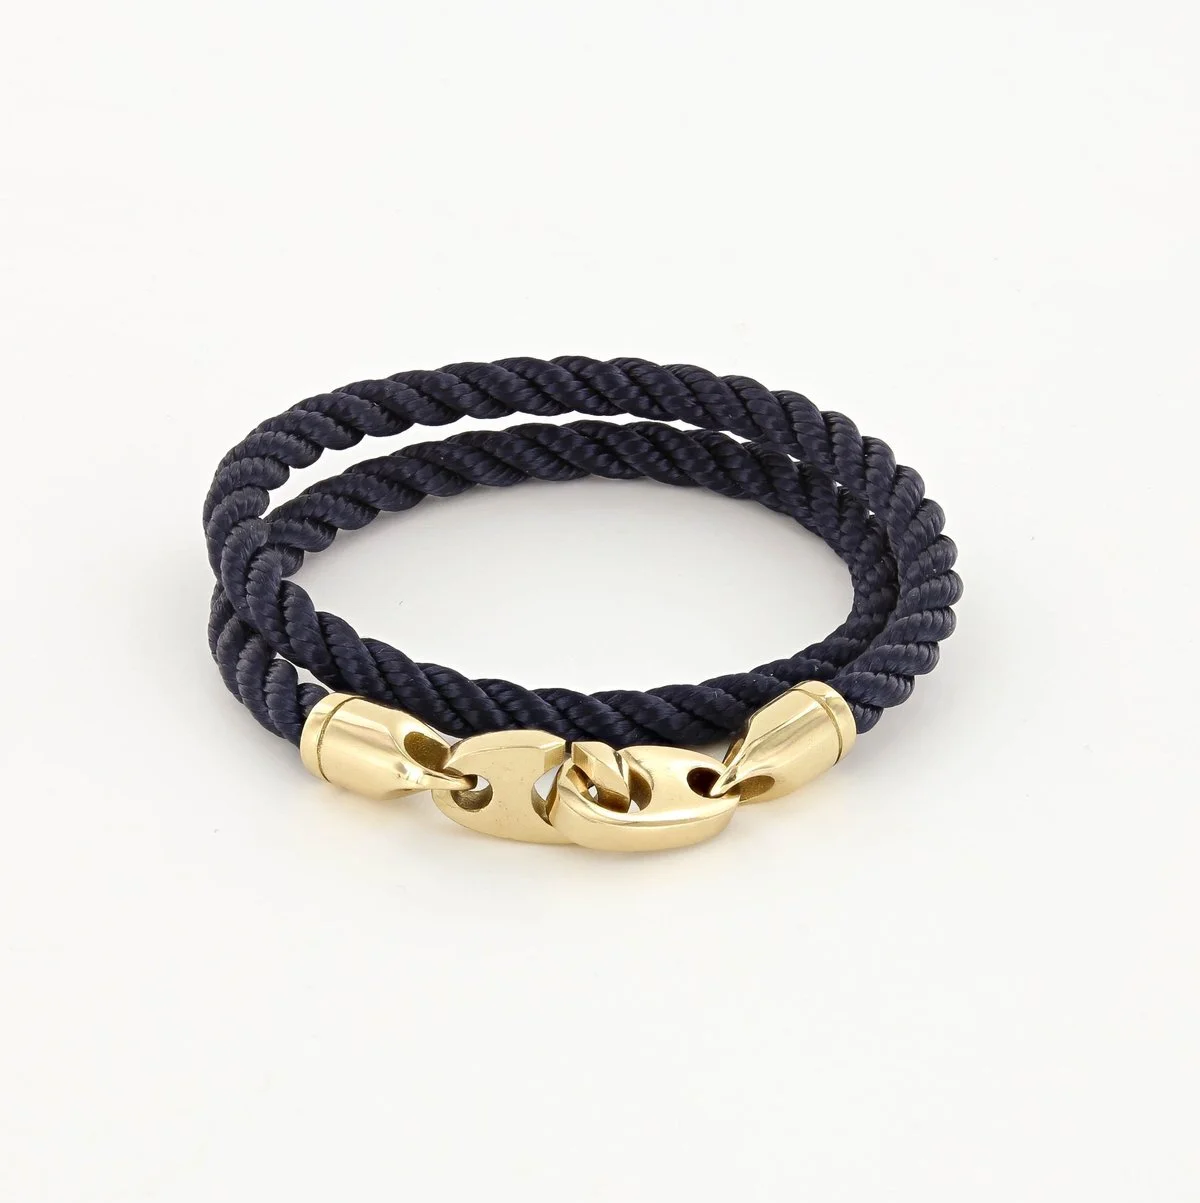
Summer is just around the corner and you can’t go wrong with nautically-inspired jewelry to compliment any outfit. If you’re on the hunt for some, definitely check out Massachusetts-based company Sailormade. Sailormade is best known for their Brummel Bracelets but have a wide variety of jewelry, accessories, and gifts to make you feel like you’re right on the Cape. Before you shop, click my link below to get a $10 Credit applied to your order:
- All photos used with permission from Sailormade -
KEEP UP WITH BIRCH LANDING HOME
| Etsy | Facebook | Instagram | Pinterest | Bloglovin' | Hometalk |
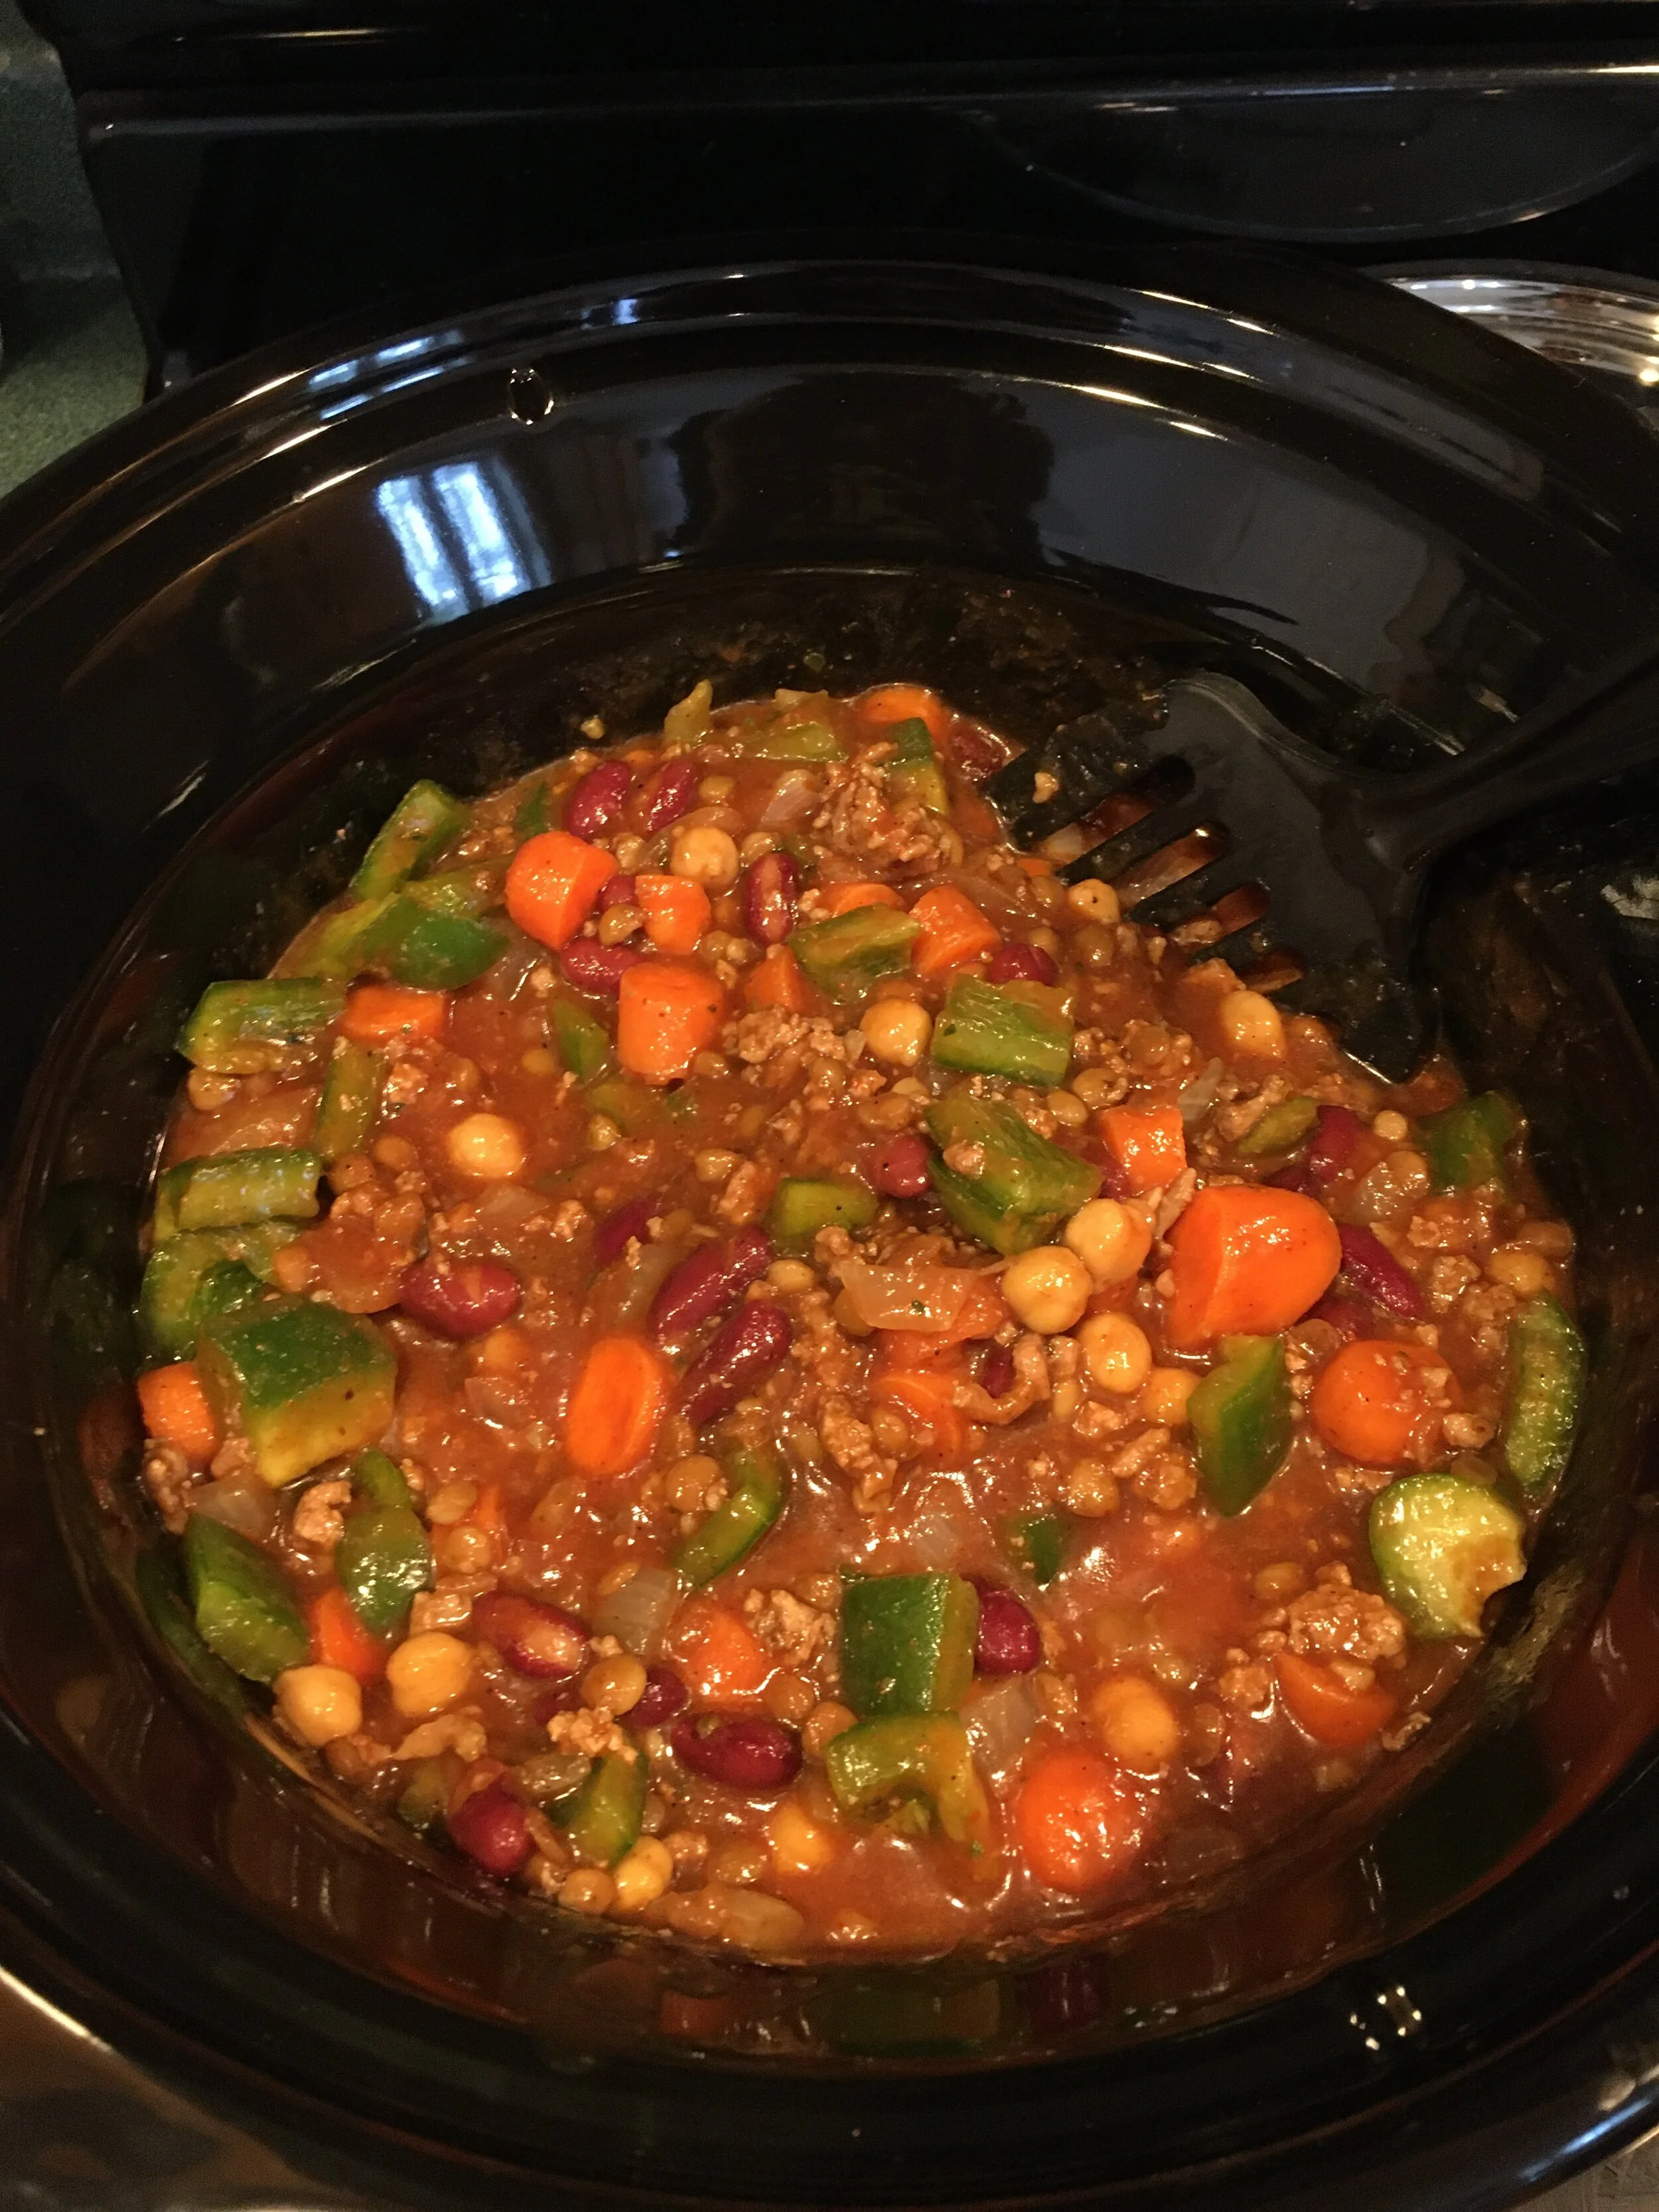
Yesterday I decided to make what I’m going to call “Quarantine Chili.” Now what is the recipe for Quarantine Chili you might ask? Well pretty much you take whatever fresh veggies or meat you have in your fridge that you worry may go to waste soon and throw them into a big crock pot of chili before they go bad. Waste not, want not!
Now for my chili I started with my typical chili “base”:
2 cans of tomato sauce
1 can of red beans (rinsed and drained)
1 can of garbanzo beans (rinsed and drained)
1 can of lentils (rinsed and drained)
2 tablespoons chili powder
1-2 teaspoons of jarred garlic
1 teaspoon of turmeric
1 teaspoon of Italian seasoning
To that I then added all the things I wanted to use up - this will vary depending on what you have in your fridge:
1 lb of cooked ground lamb (lamb is definitely an unusual choice for chili. I had originally planned to make lamb stuffed peppers with it, but by using it in chili I am able to stretch it farther and get more meals out of it… And surprisingly lamb in chili is just fine! I was worried it would taste weird but it’s still great)
a lot of carrots (we had a bag of carrots that have been in the fridge for awhile and were close to being done. I wanted to use them up and not go to waste so I added them to the chili… it was definitely heavy on the carrots but I’m glad we used them up)
handfuls of spinach (we have a big container of spinach that will be getting wet and smelly soon… better use some of it up!)
green pepper (the ones I was originally going to make the stuffed lamb peppers with)
a large onion (that one has been hanging out on the counter for awhile…)
Then combine all ingredients in a large Crock Pot and put on high for several hours until it’s cooked through and ready. We’ll be eating this for dinner for two nights and then I will portion out and freeze the rest to eat later.
Definitely be aware of what you’re using - you don’t want to use any ingredients are actually spoiling (very bad idea!) - but by using up what good ingredients you have by making a healthy, hearty chili you will not let your precious groceries go to waste and will make something nutritious to feed your family during this time.
Stay healthy friends!
KEEP UP WITH BIRCH LANDING HOME
| Etsy | Facebook | Instagram | Pinterest | Bloglovin' | Hometalk |
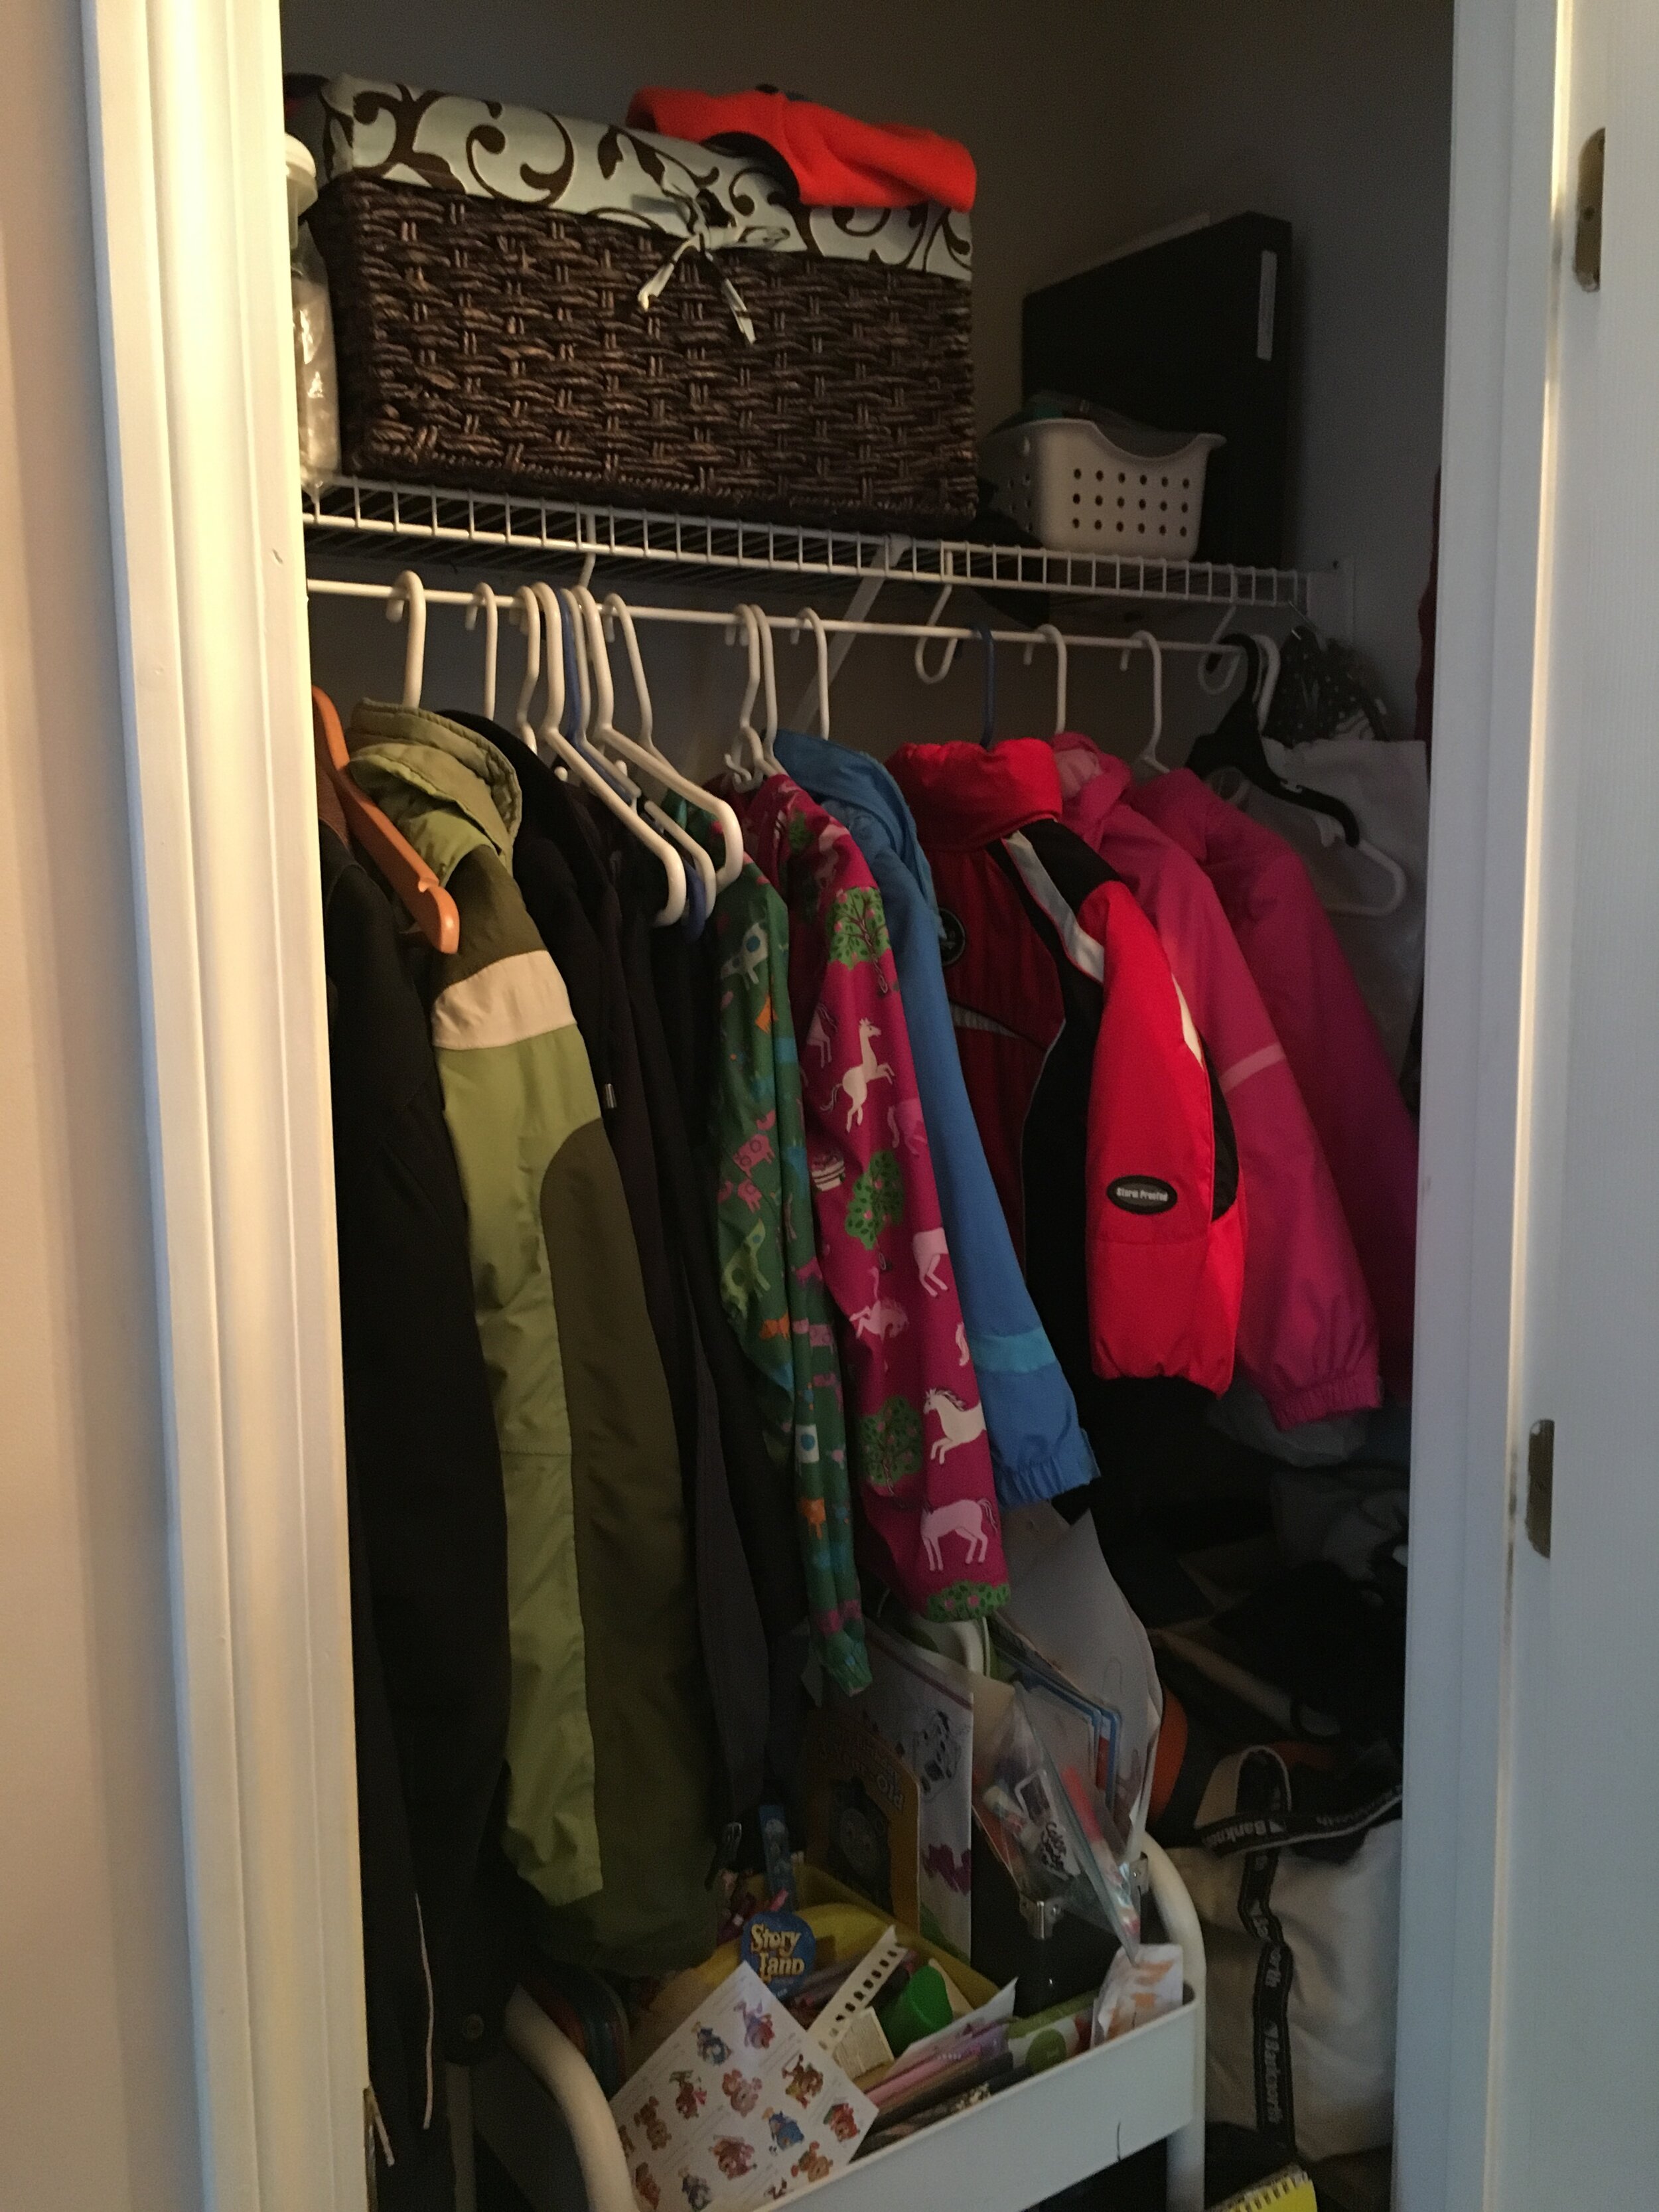
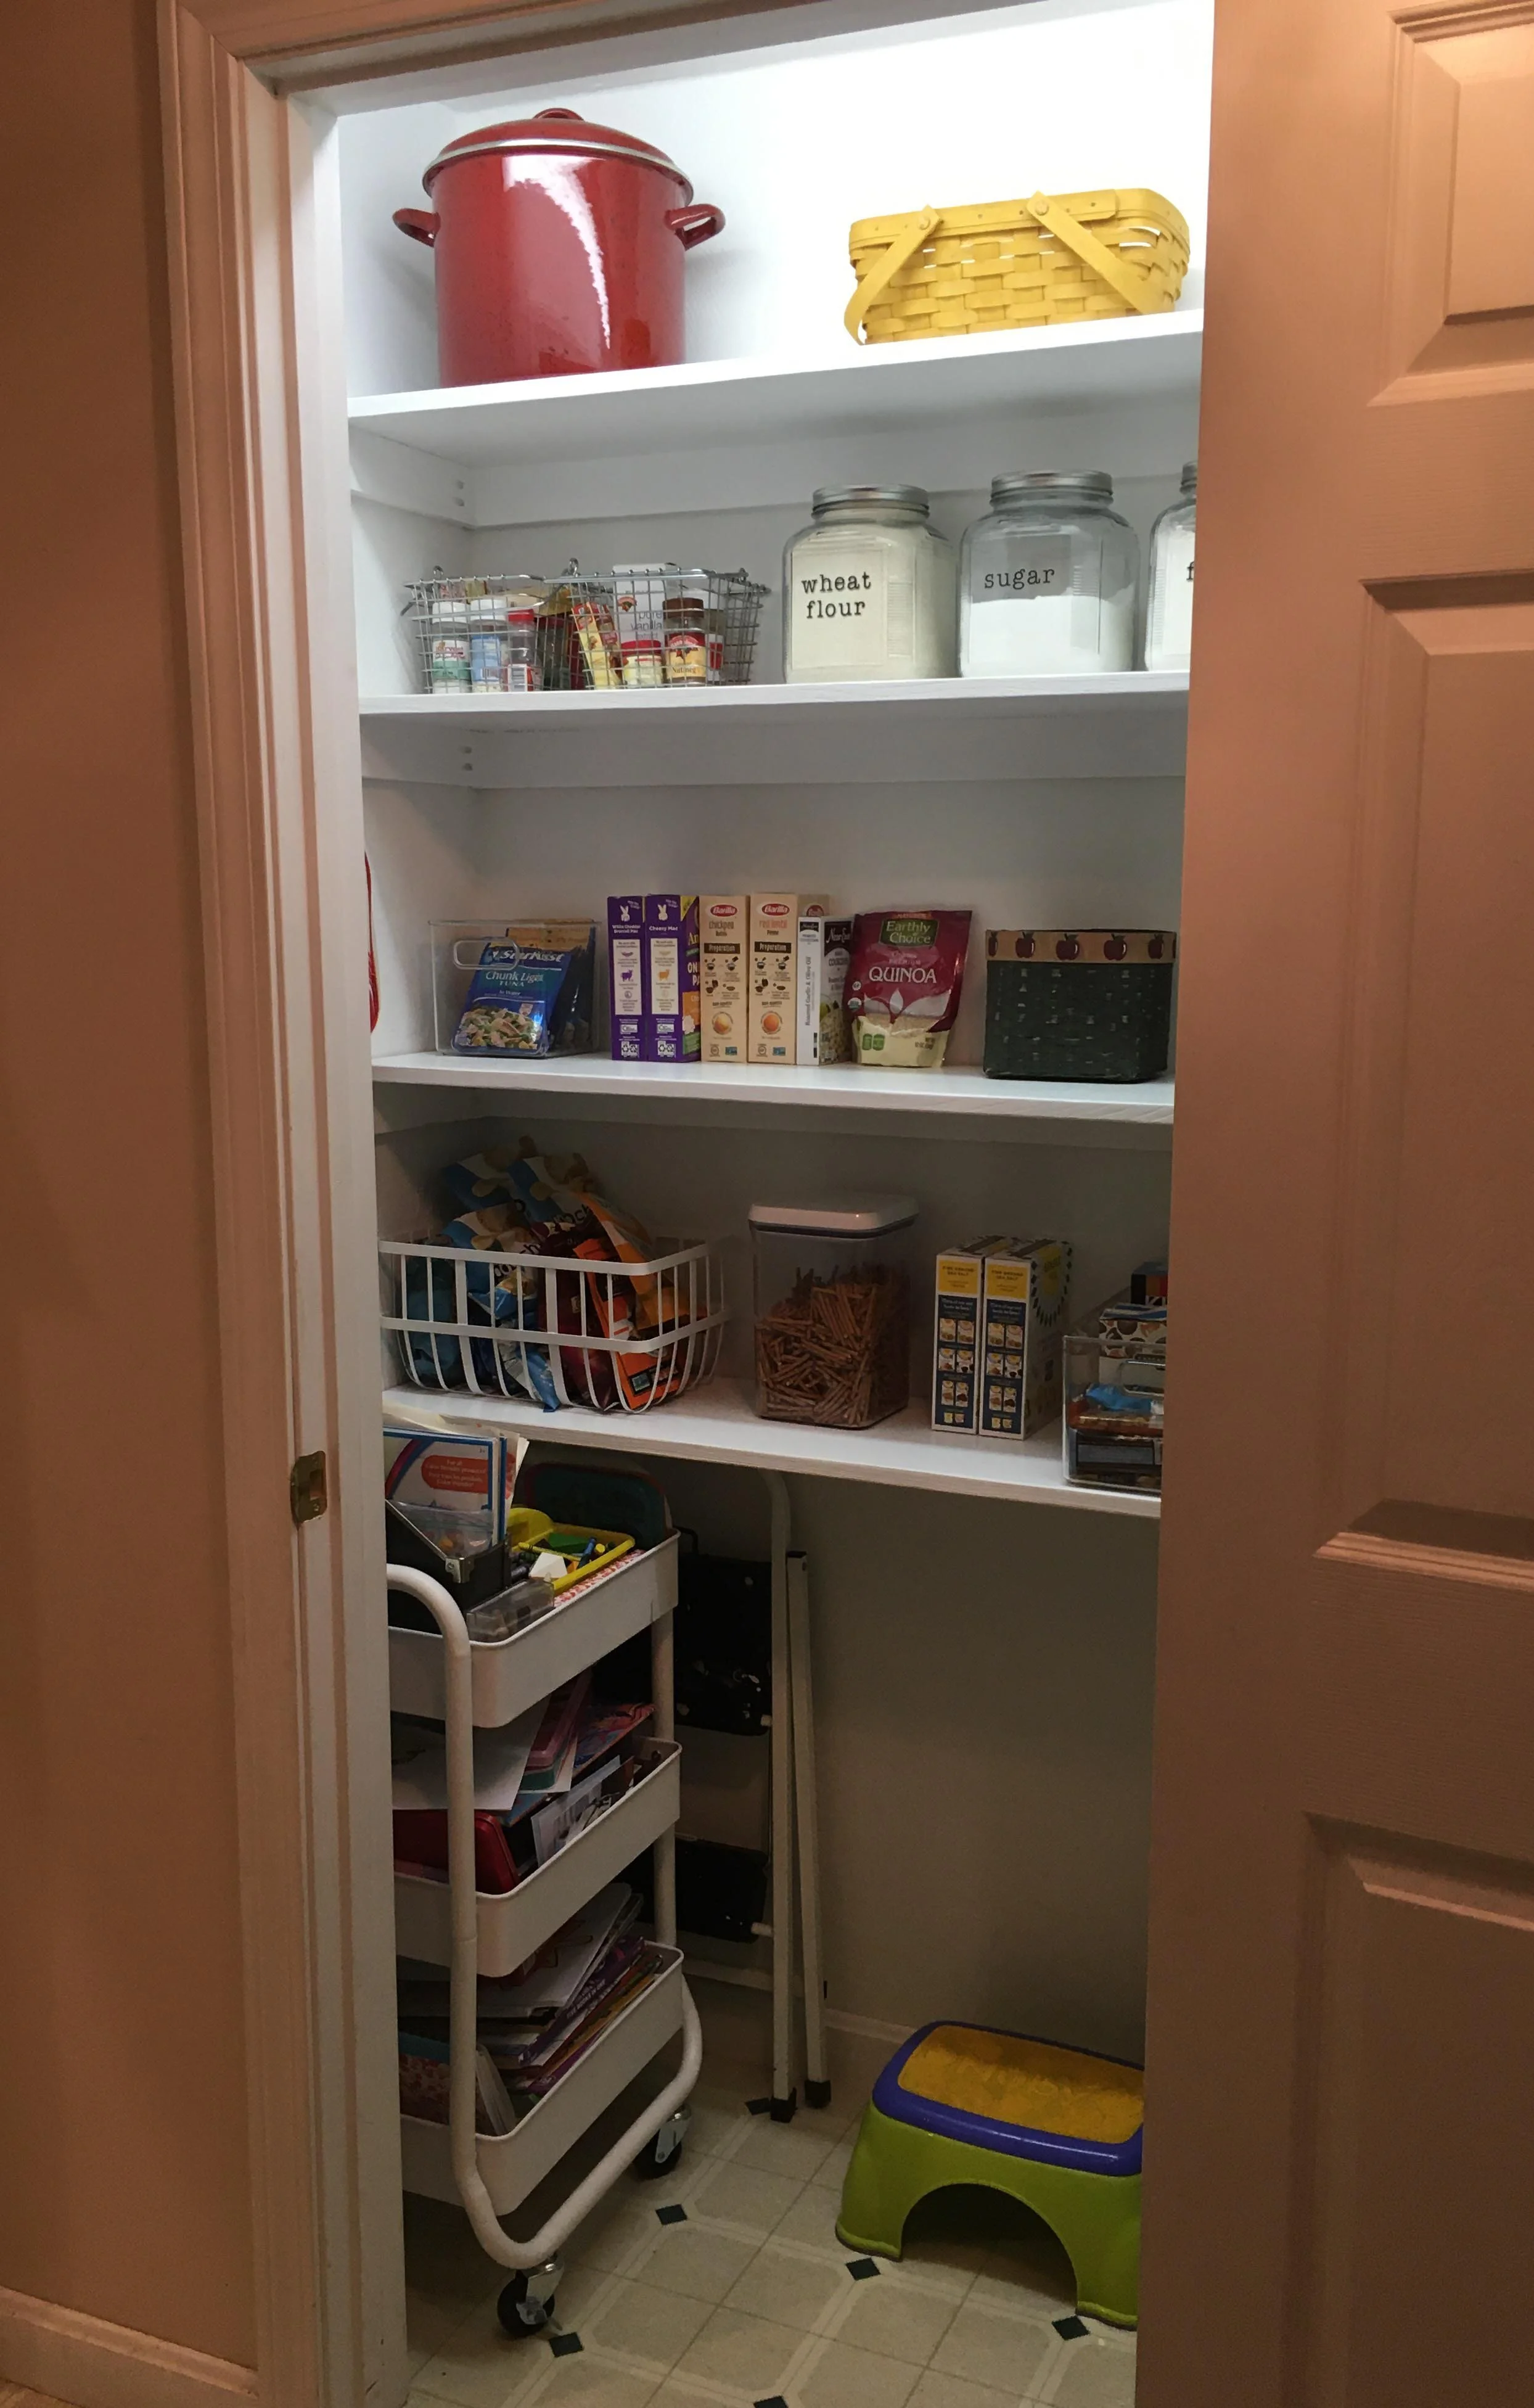
Our kitchen was lacking a pantry, so we often kept canned goods and backstock on a shelving unit at the foot of our stairs in the basement. But because half of our food and snacks were downstairs and half were upstairs it made for frequent mistakes when buying groceries… it was hard to visualize exactly what we had and where so we often ended up overbuying certain things and forgetting to buy others. Tired of wasting money, food, and time running up and down the stairs I decided to make over a coat closet into a functional pantry. | This post contains affiliate links |
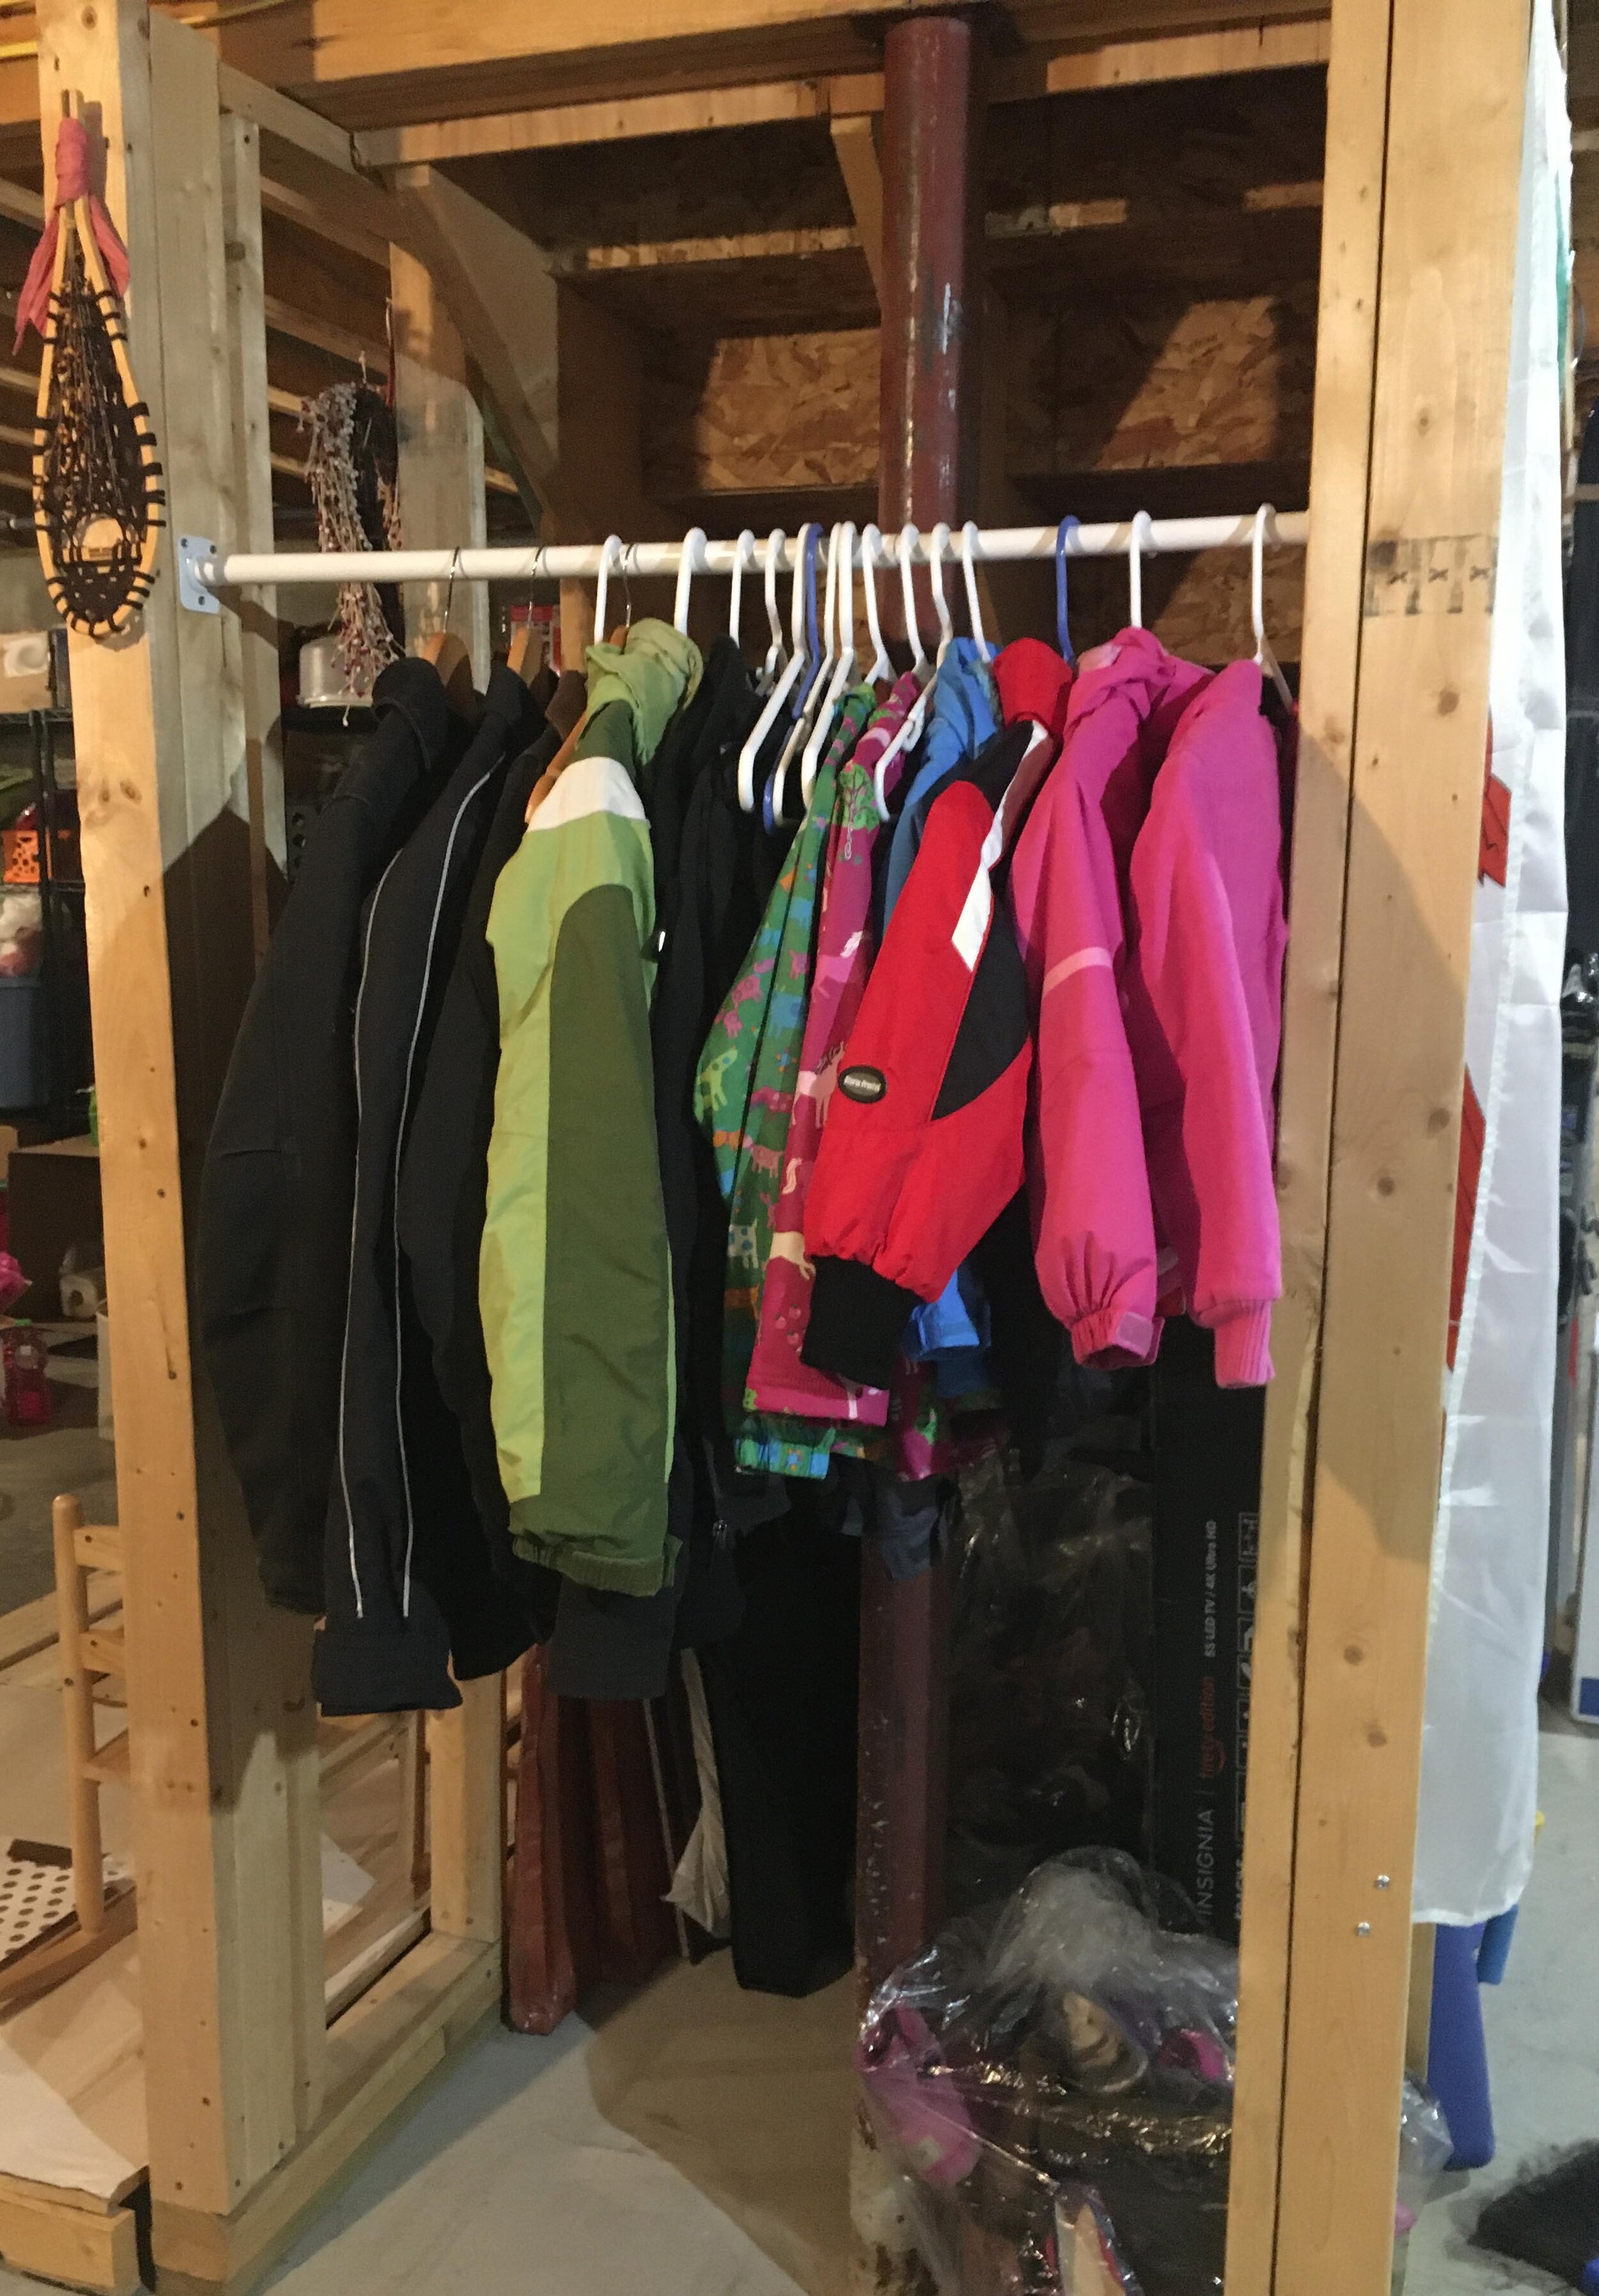
Now while this coat closet (pictured below) was pretty jammed full, it was very underutilized. It’s where we kept our off-season coats, hats, and boots as well as some hiking gear and my daughters’ Art Cart - most things we did not need to use daily, or often at all. My solution to this was to relocate all these items to our basement - I hung a closet rod under the basement stairs and moved all our off-season clothing and gear to this new space where it was still easily accessible but out of the way.
The next step was to pull out the old wire shelf and closet rod system, patch the holes, and repaint the inside of the closet. Thankfully I already had spackle and some leftover white paint so I was able to get the closet to a clean slate easily and it didn’t cost a dime.
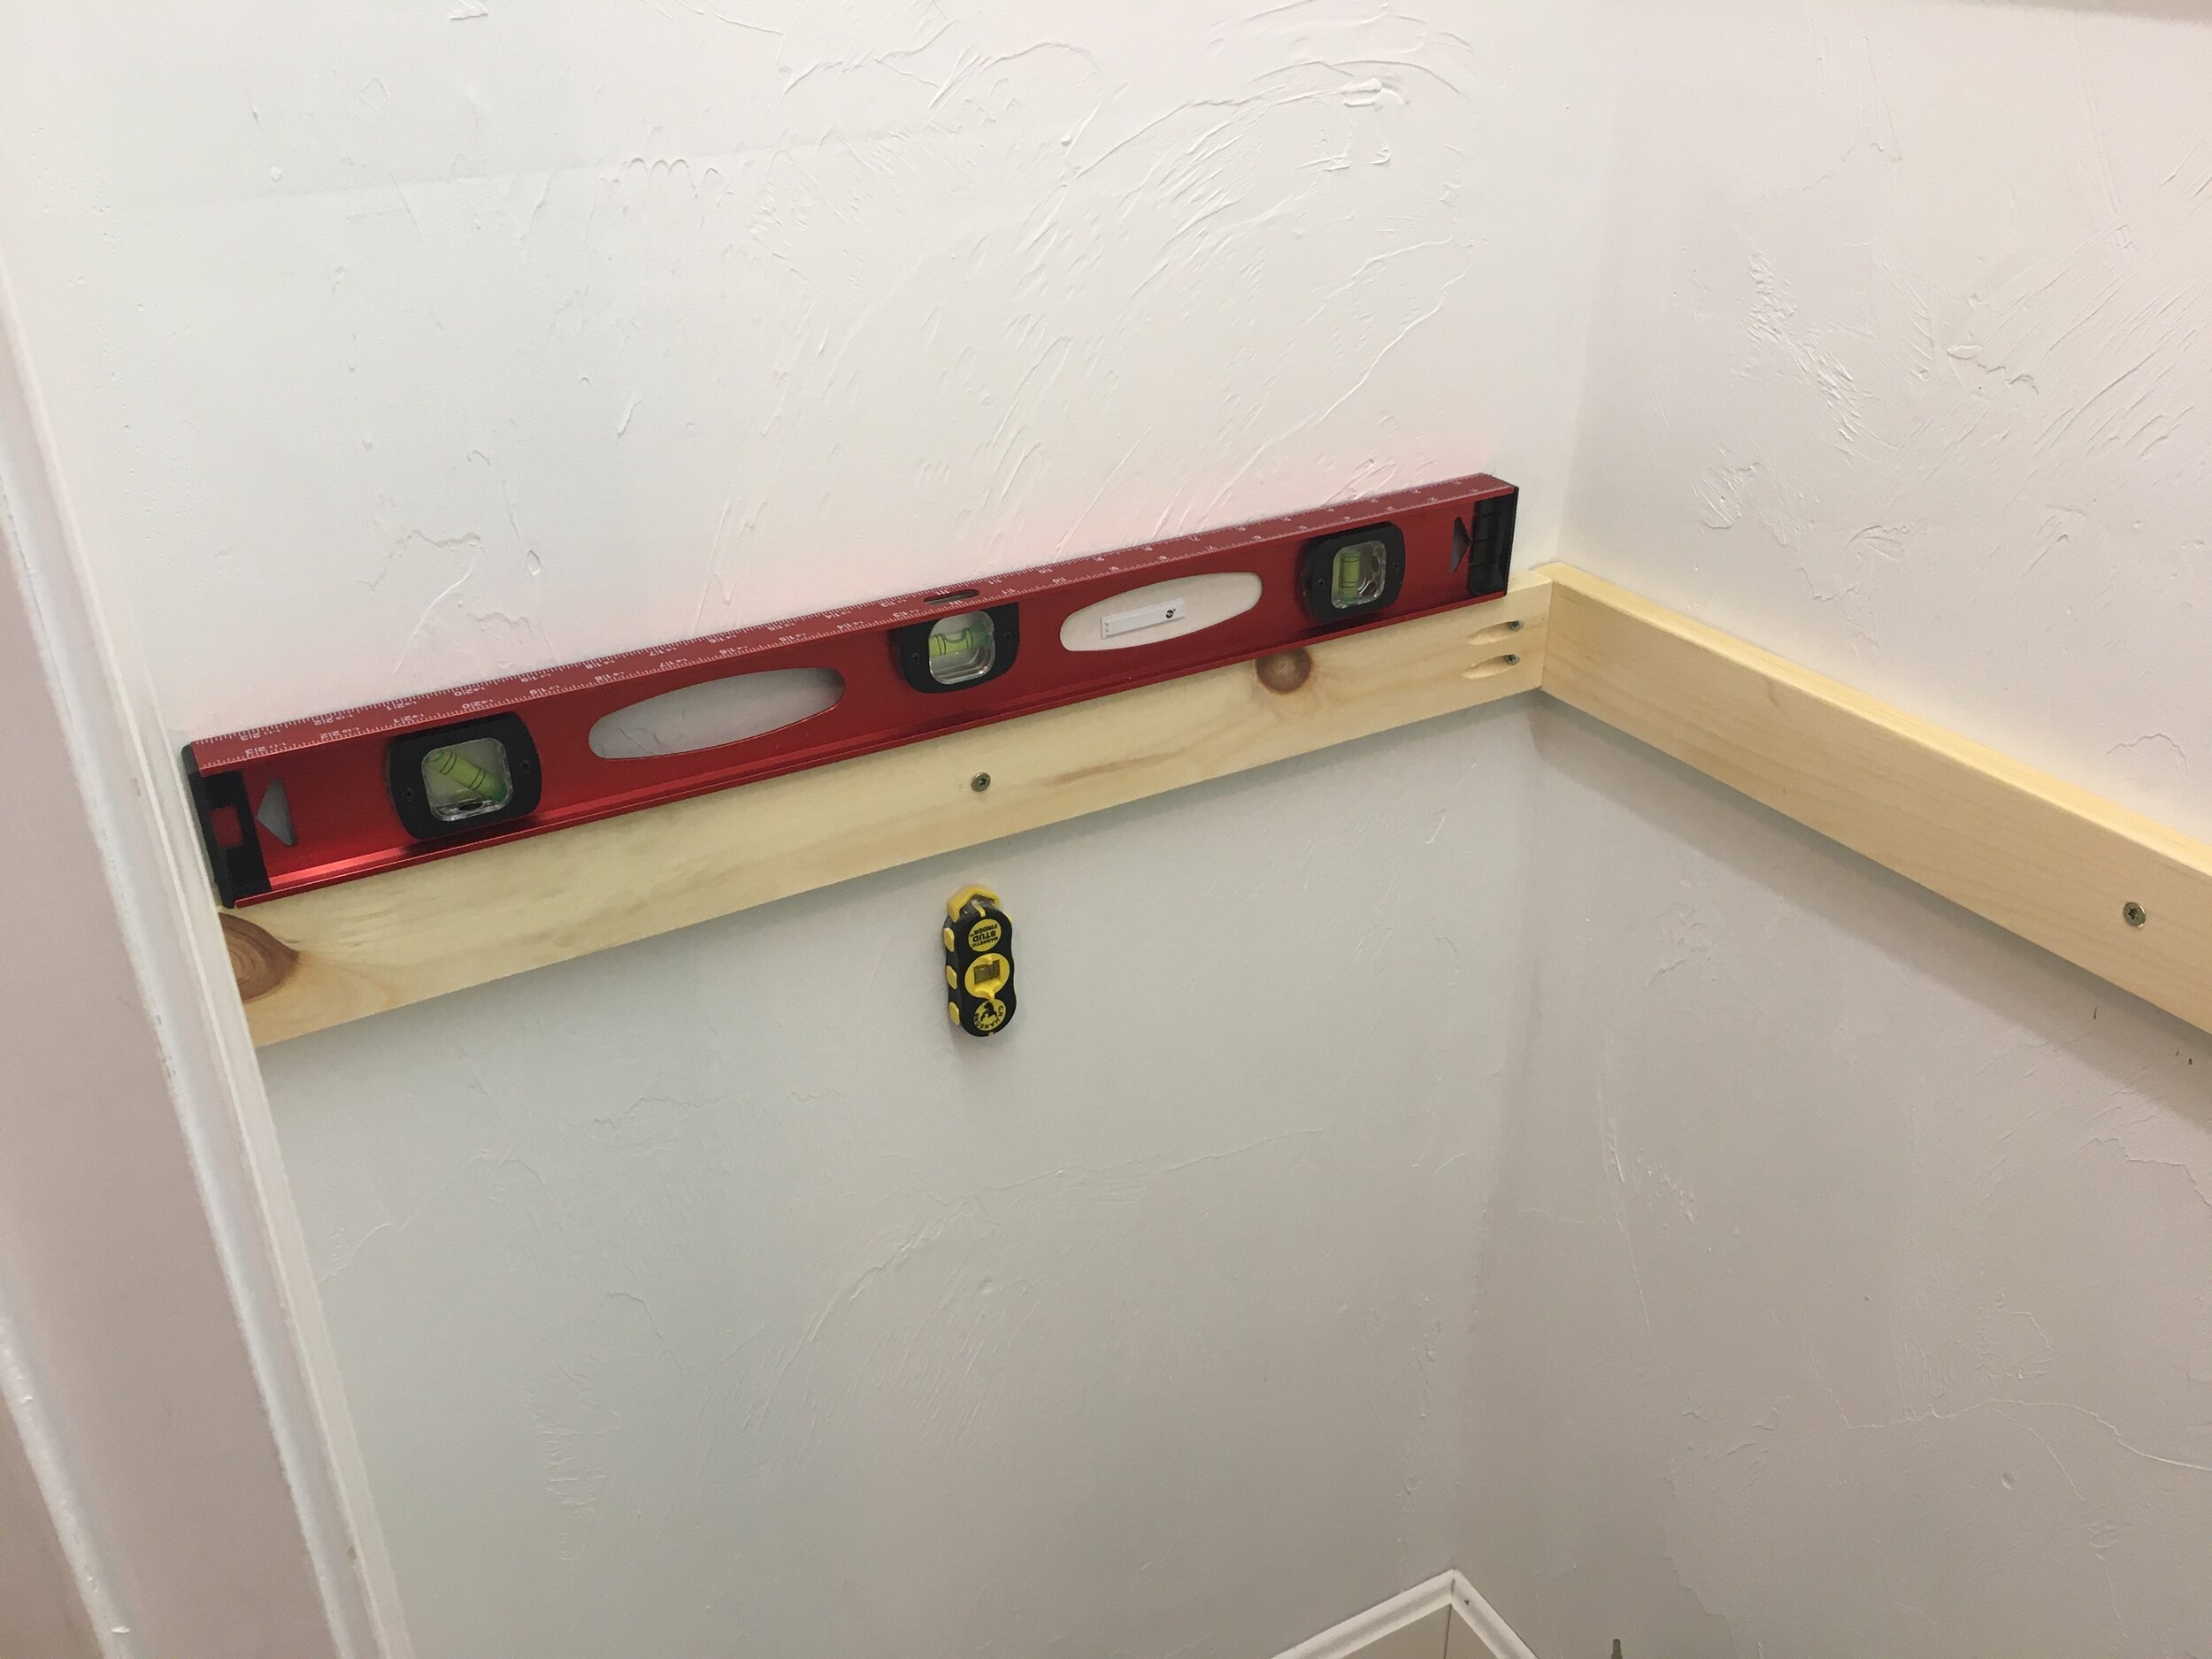
Now for the fun part! I got to decide how many shelves I wanted and the spacing, so I laid it out with painters tape to play with how I wanted it before I made a final decision. For our setup I decided on four shelves starting at about waist-height. I wanted to leave the bottom open to accommodate the dog food bin, the Art Cart, step stool, etc. Then I screwed in 1x3 inch “runners” that would support the shelves along the back wall. I used a stud finder to make sure I was screwing the runners into studs and a level to make sure everything was square.
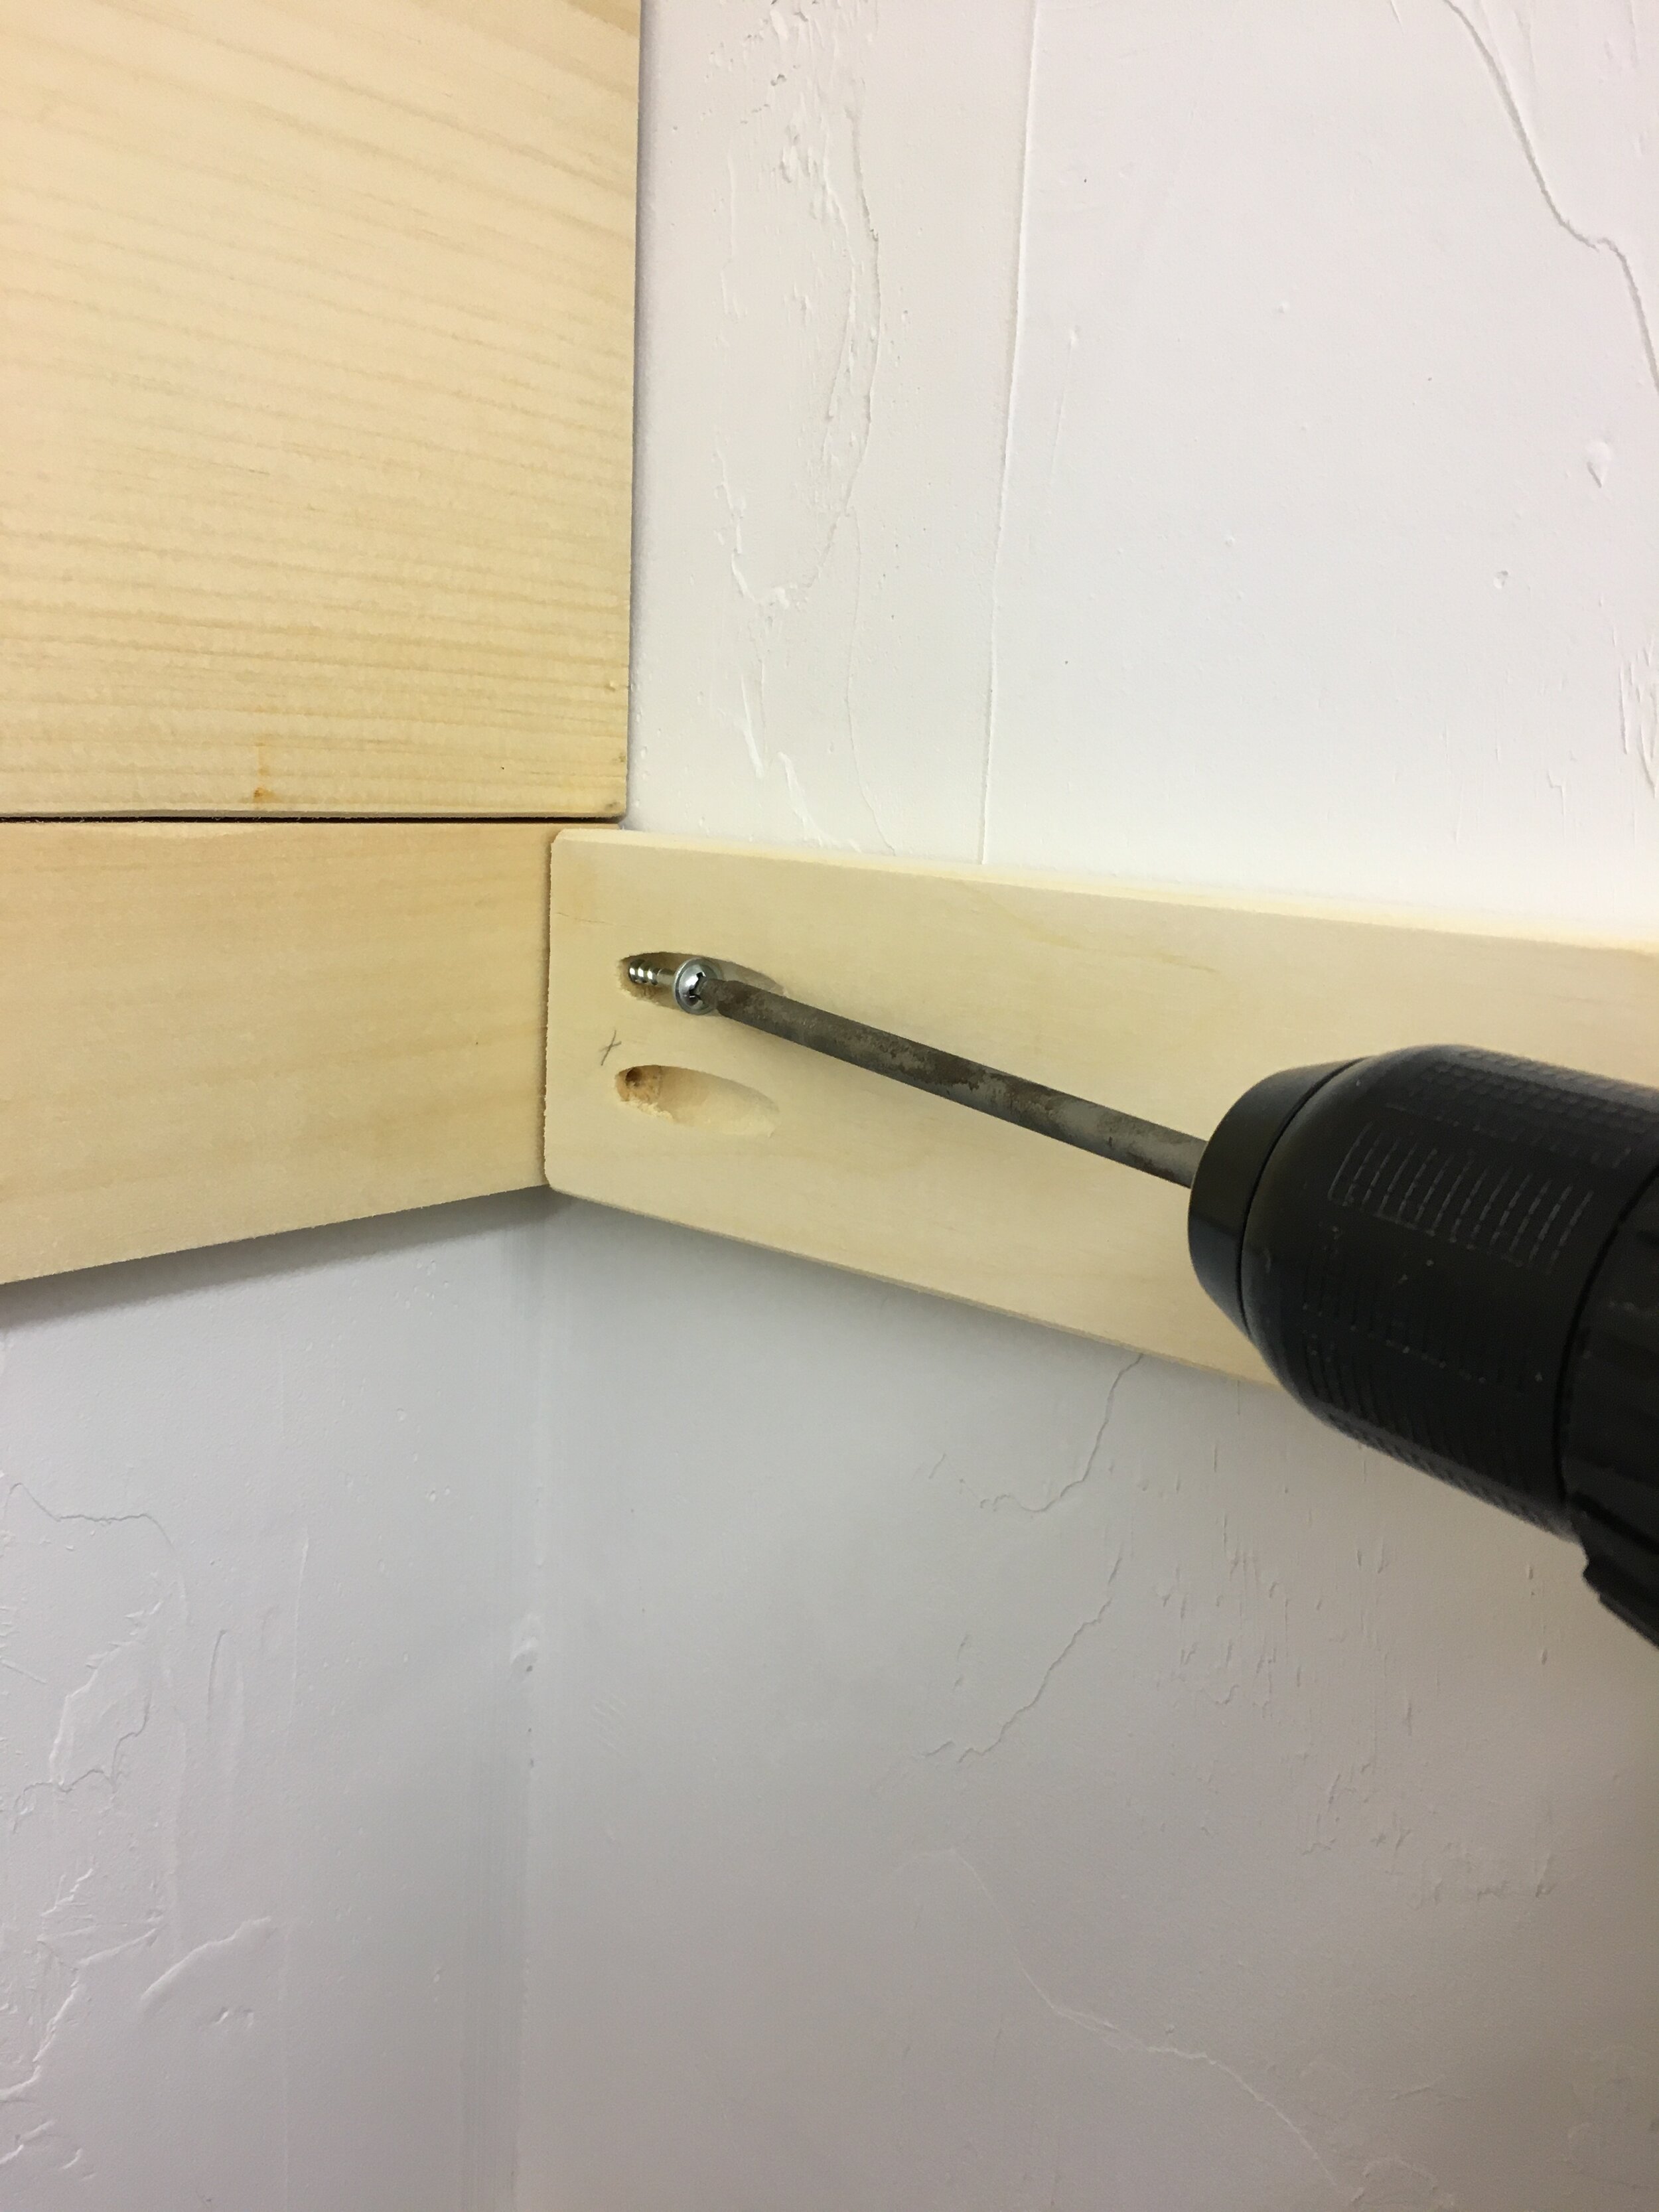
Then I added runners to one side of the closet next, following the same routine - but with these pieces I had pre-drilled pocket holes with our Kreg Jig first so it would make for a clean and secure joint in the corners.
Before installing the runners on the opposite side of the closet, it’s wise to keep in mind how you will be able to maneuver the shelf boards in once all the runners are in place (it would be very difficult to get the top shelf in with all the runners installed, for example). So before installing the opposite side’s runners I slipped some of the trickier shelf boards into place first (I used 1x12”s cut to length for the shelves) before I finished screwing in all the side runners.
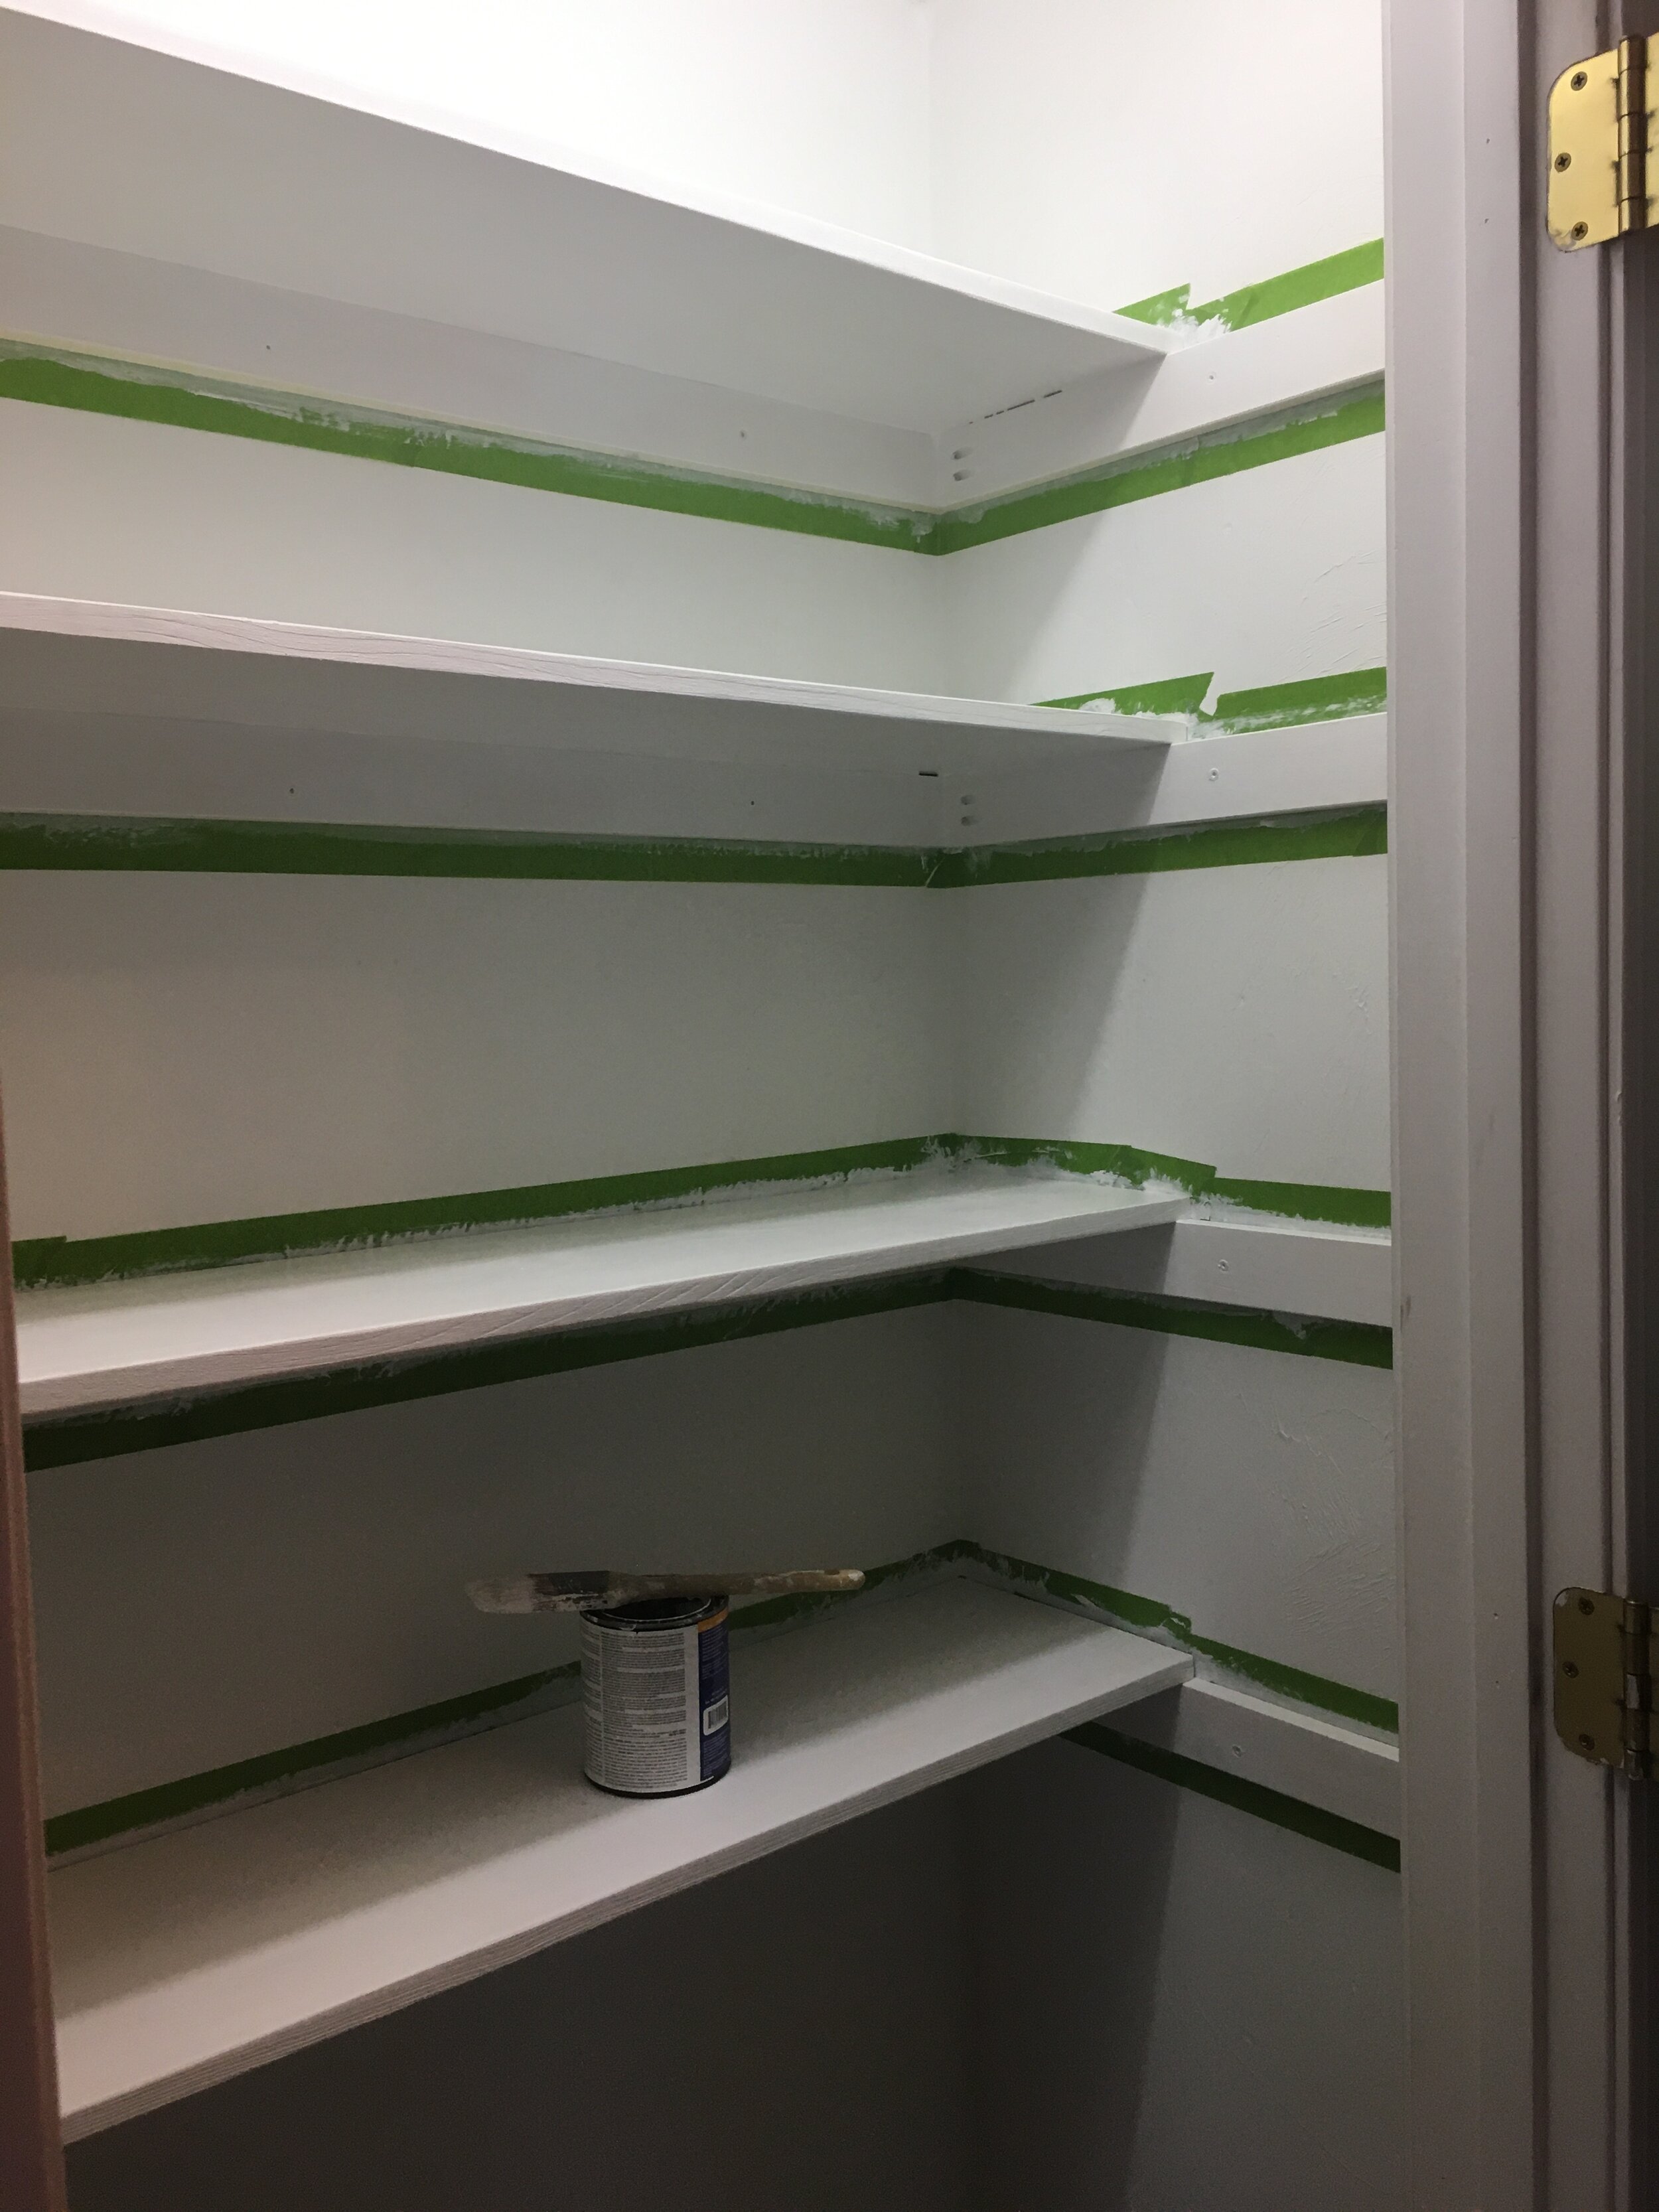
I secured the shelves into place with some finishing nails, then taped off the shelves and runners to get ready for paint. I used primer and then several coats of white semi-gloss paint since it’s a little easier to wipe down and keep clean.
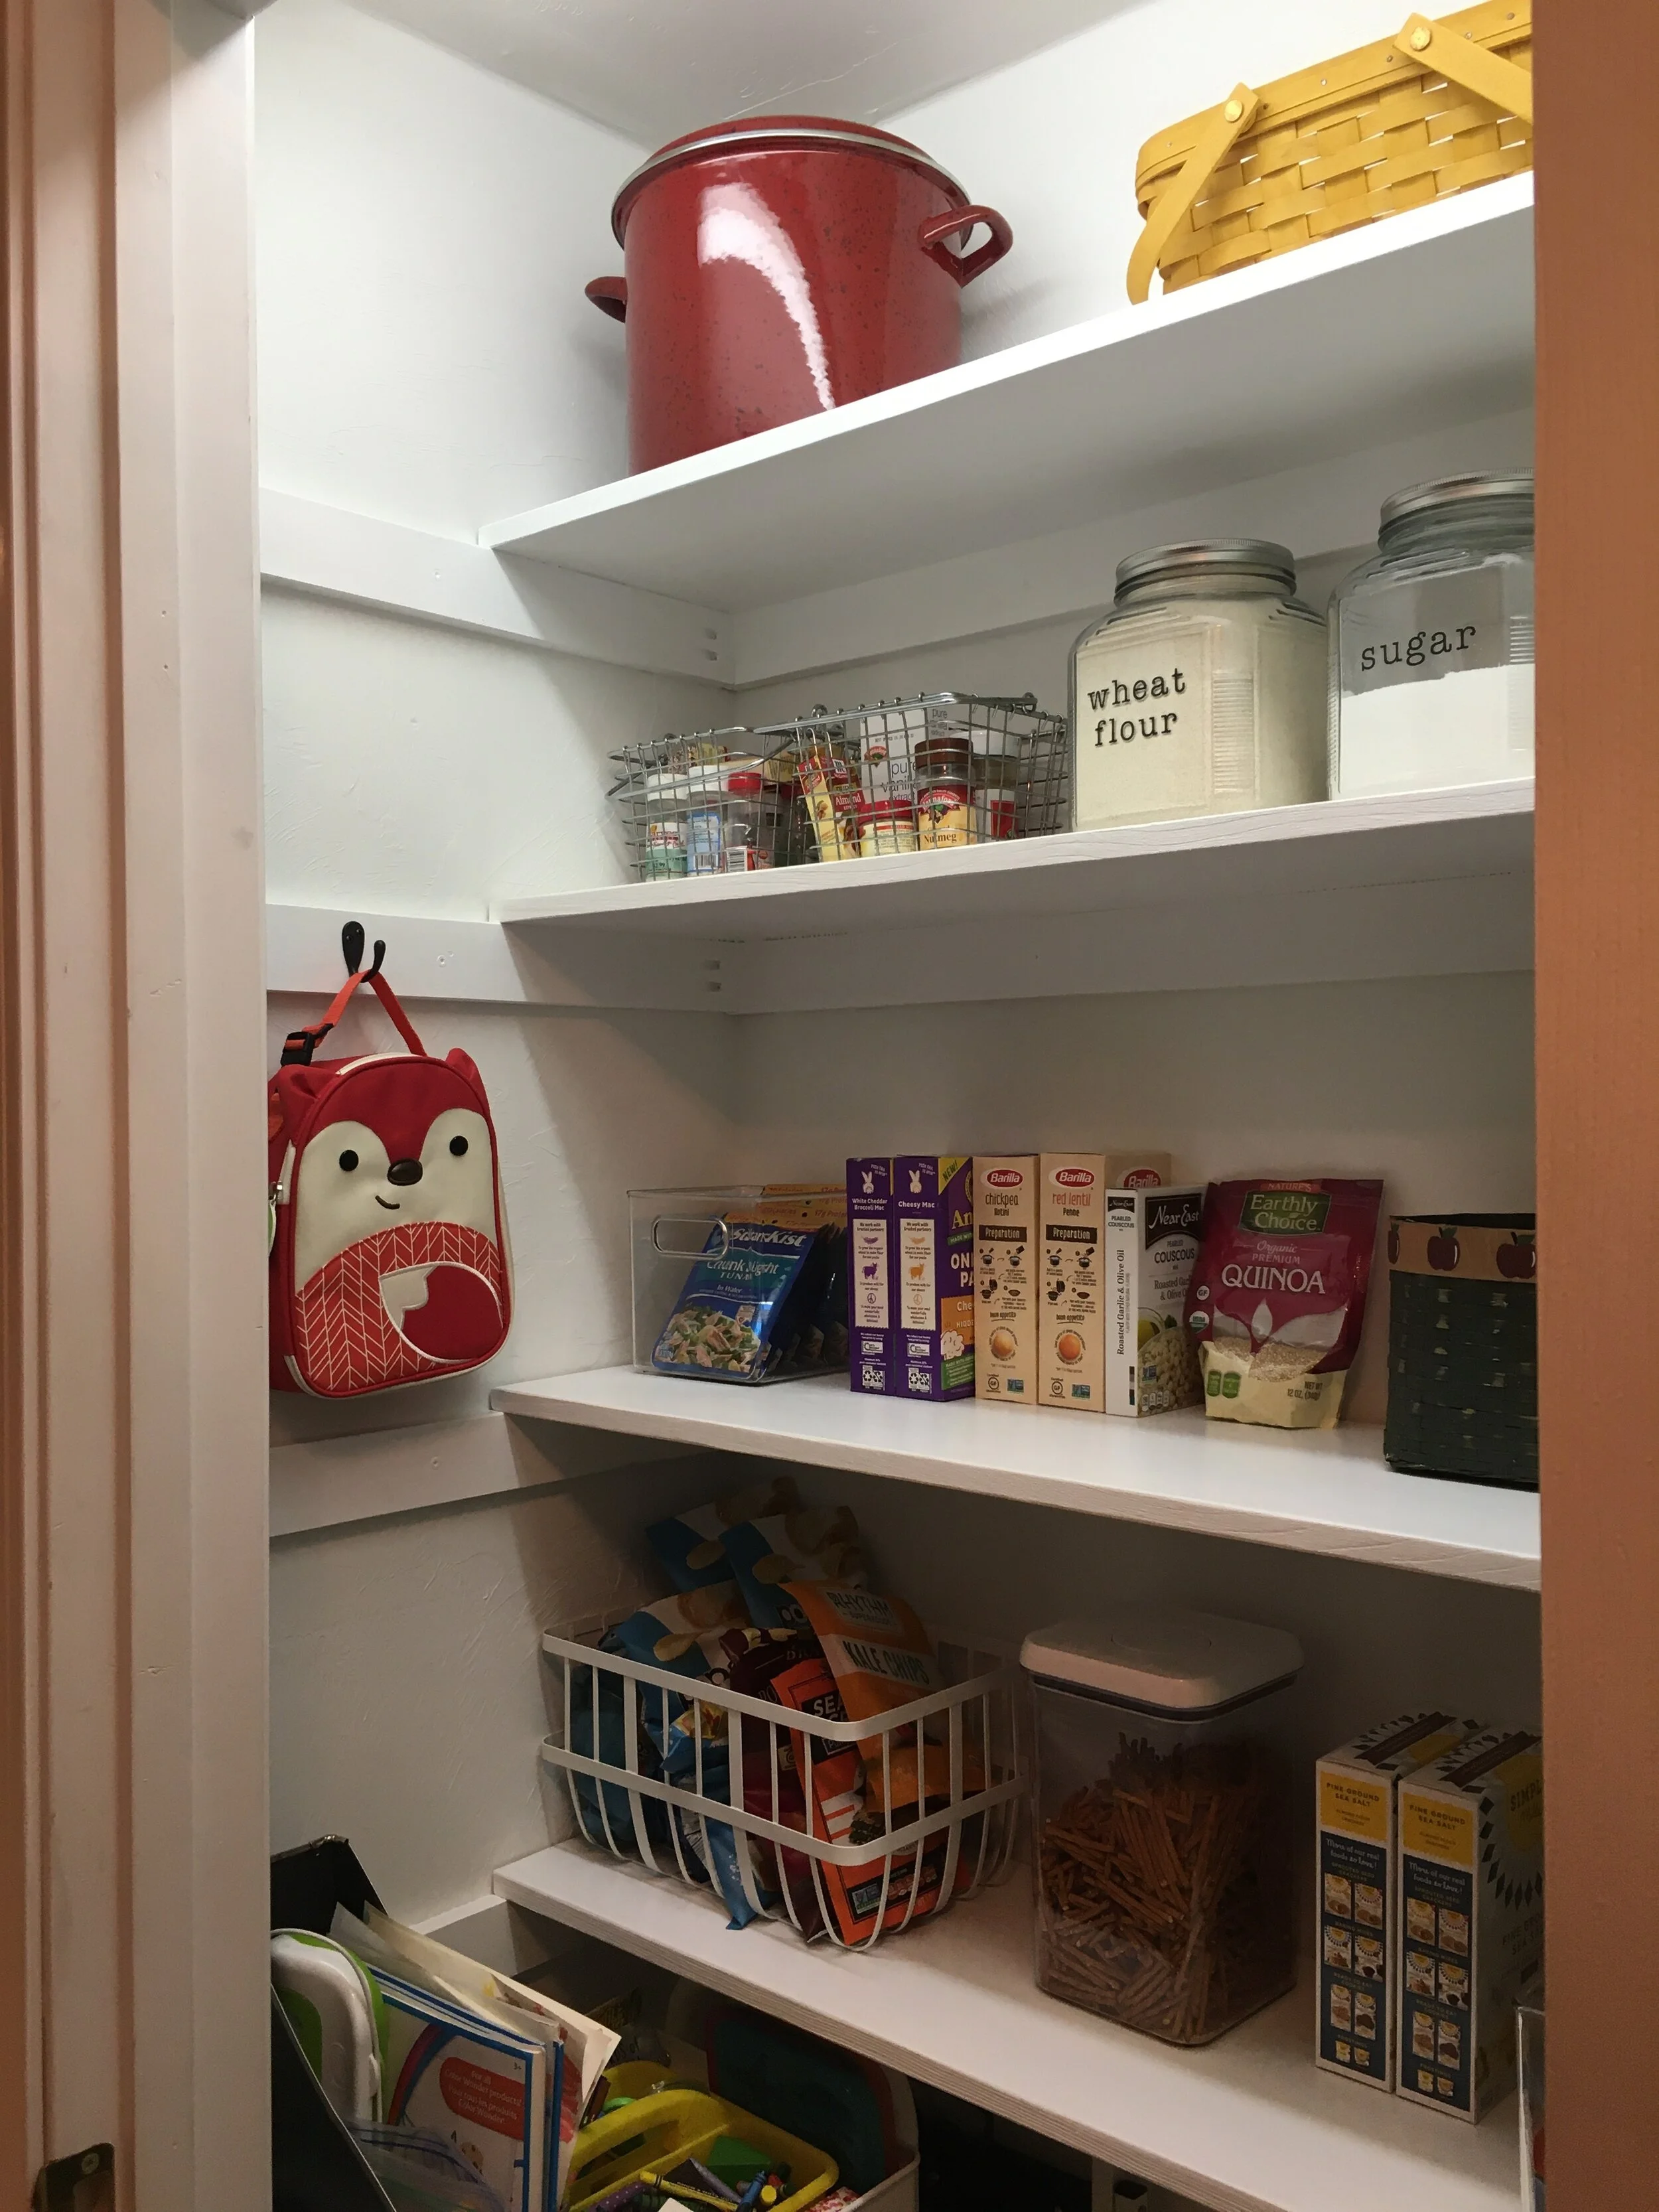
I just love how farmhouse and “Shaker” the exposed rails on the sides look and I wanted to play it up. Once the paint was dry I added some functional hooks to hang aprons, lunchboxes, etc on the side rails.
And now the project is complete! I am so happy with how it turned out and it’s wonderful to have everything in one place. I can see this project saving us money on groceries in the long run now as everything will be in one place now and we’ll be less apt to waste food.
Eventually, I would love to replace the closet door with a fun screen door and get some more glass jars and baskets for a cleaner looking pantry - but all in good time.
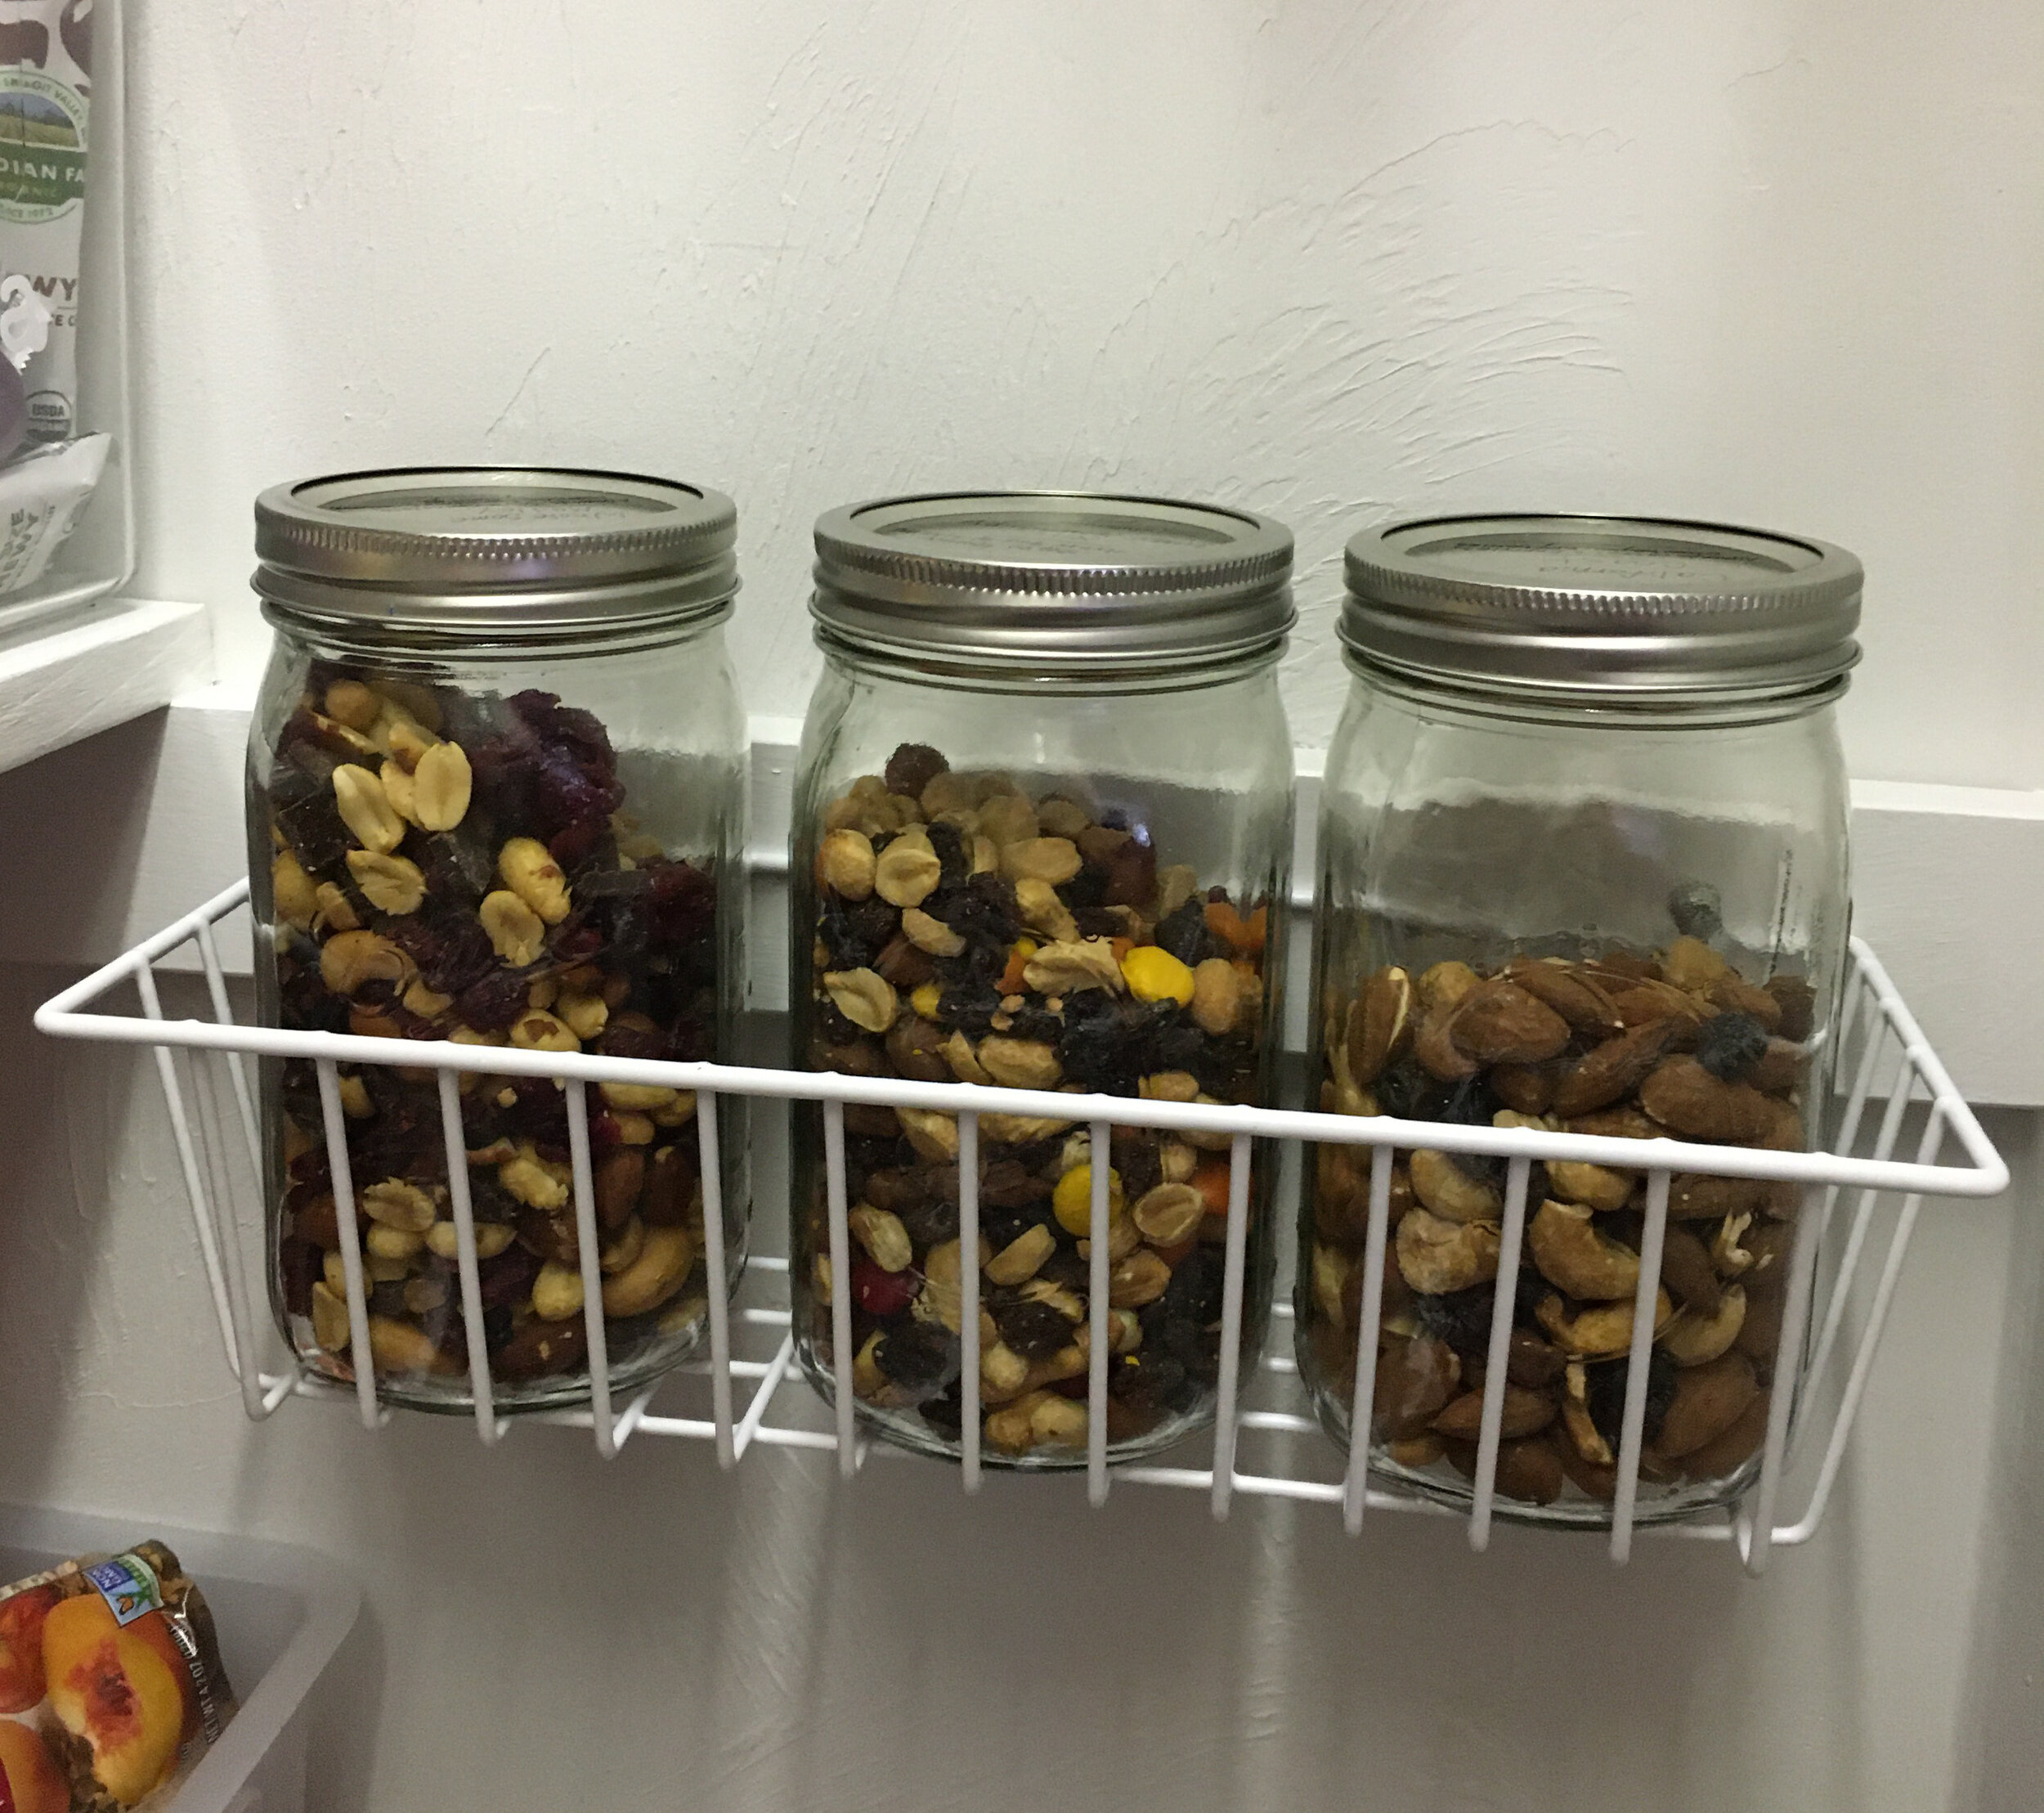
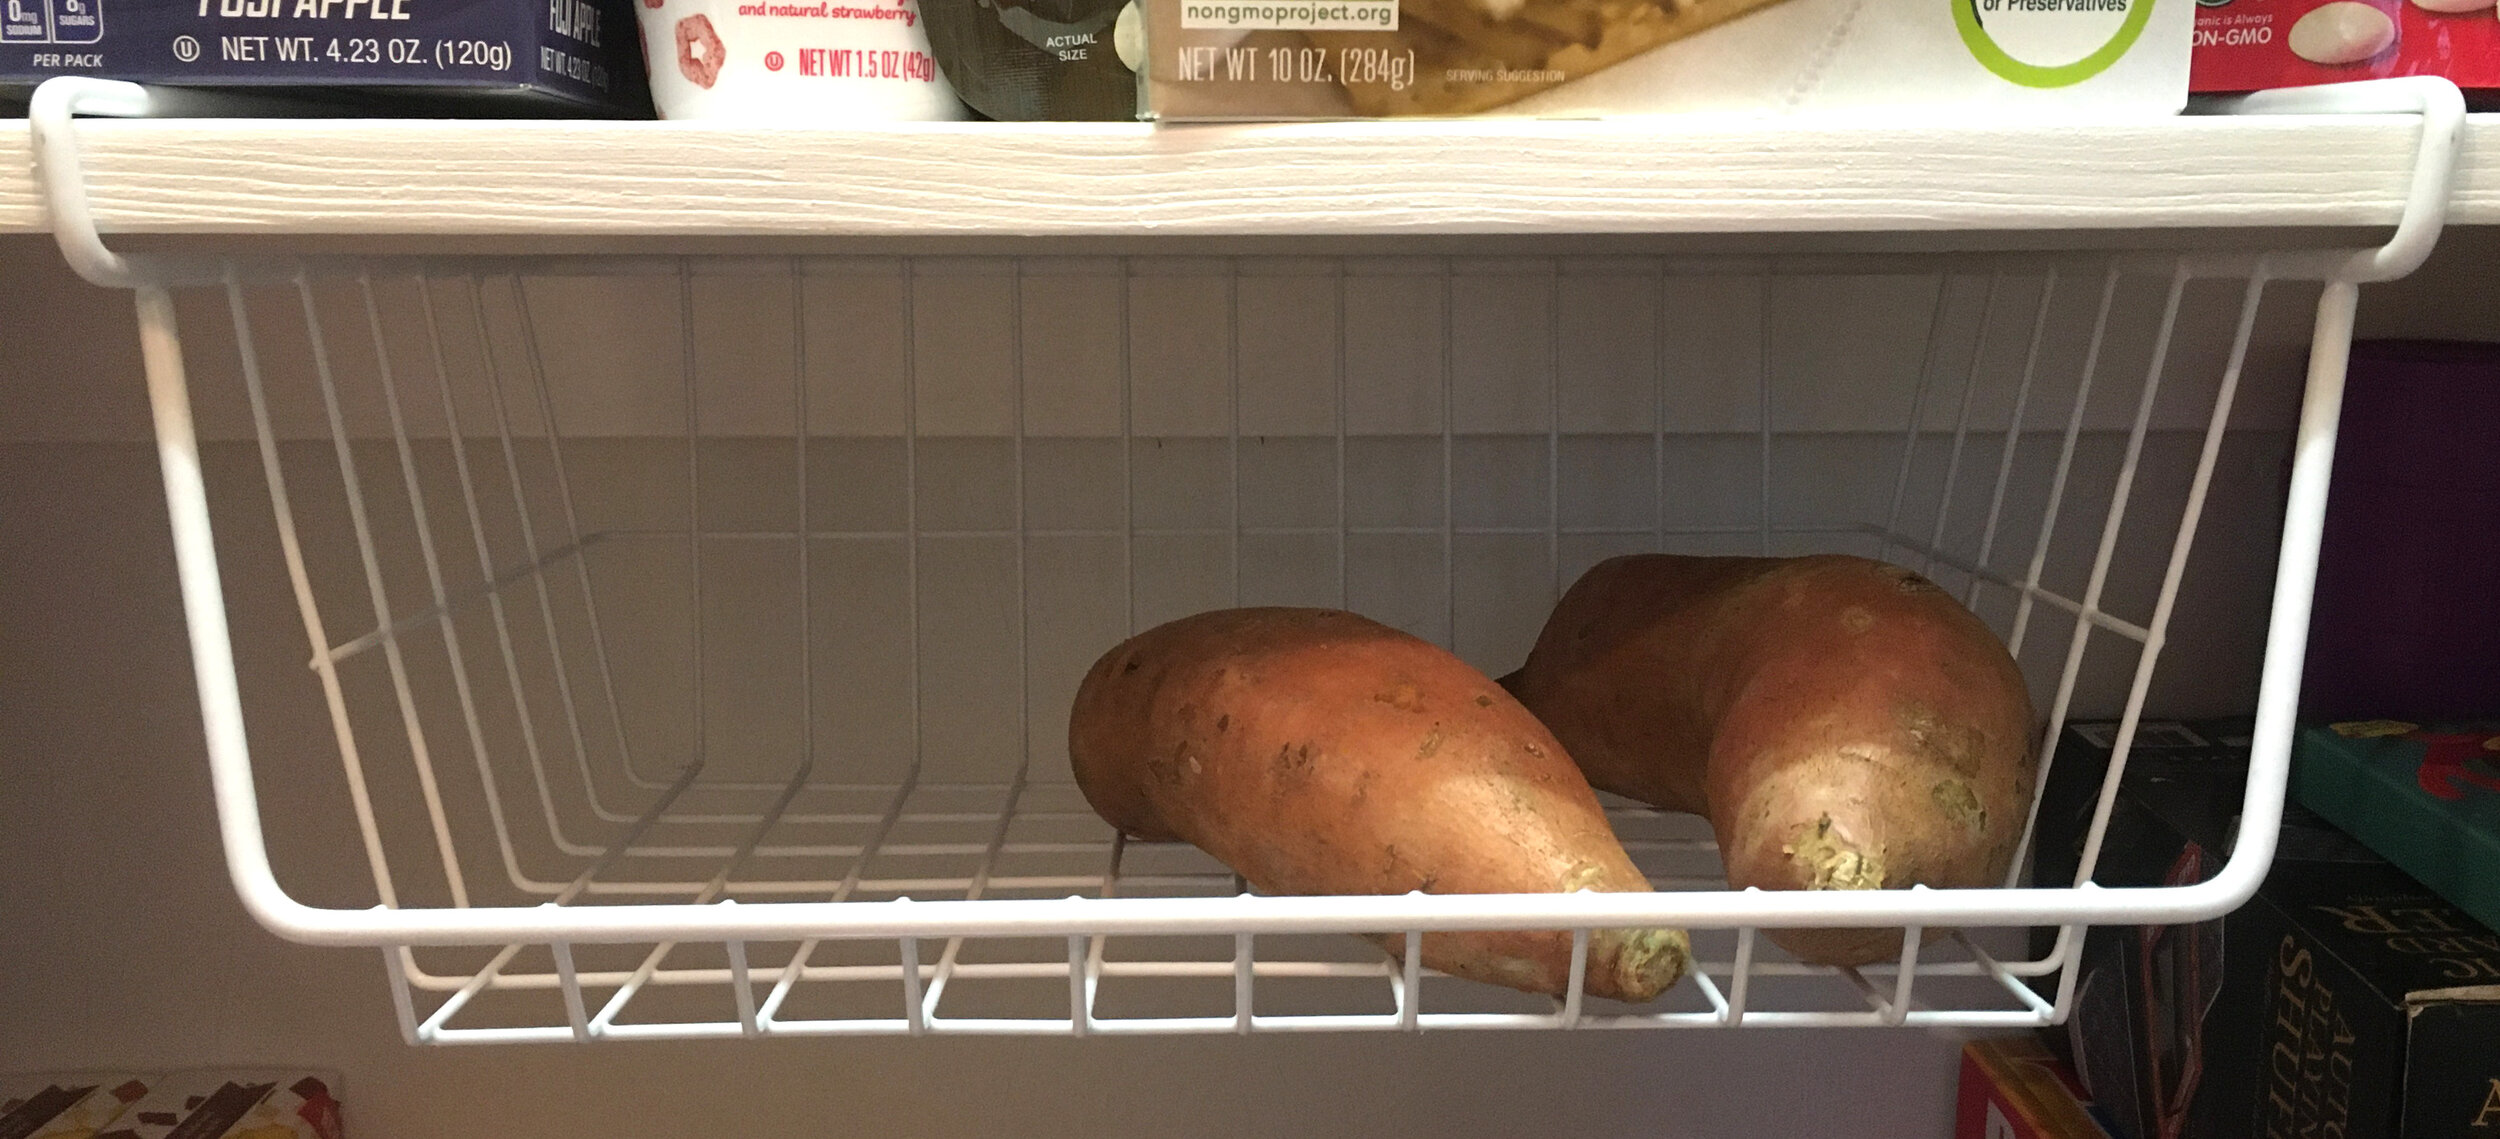
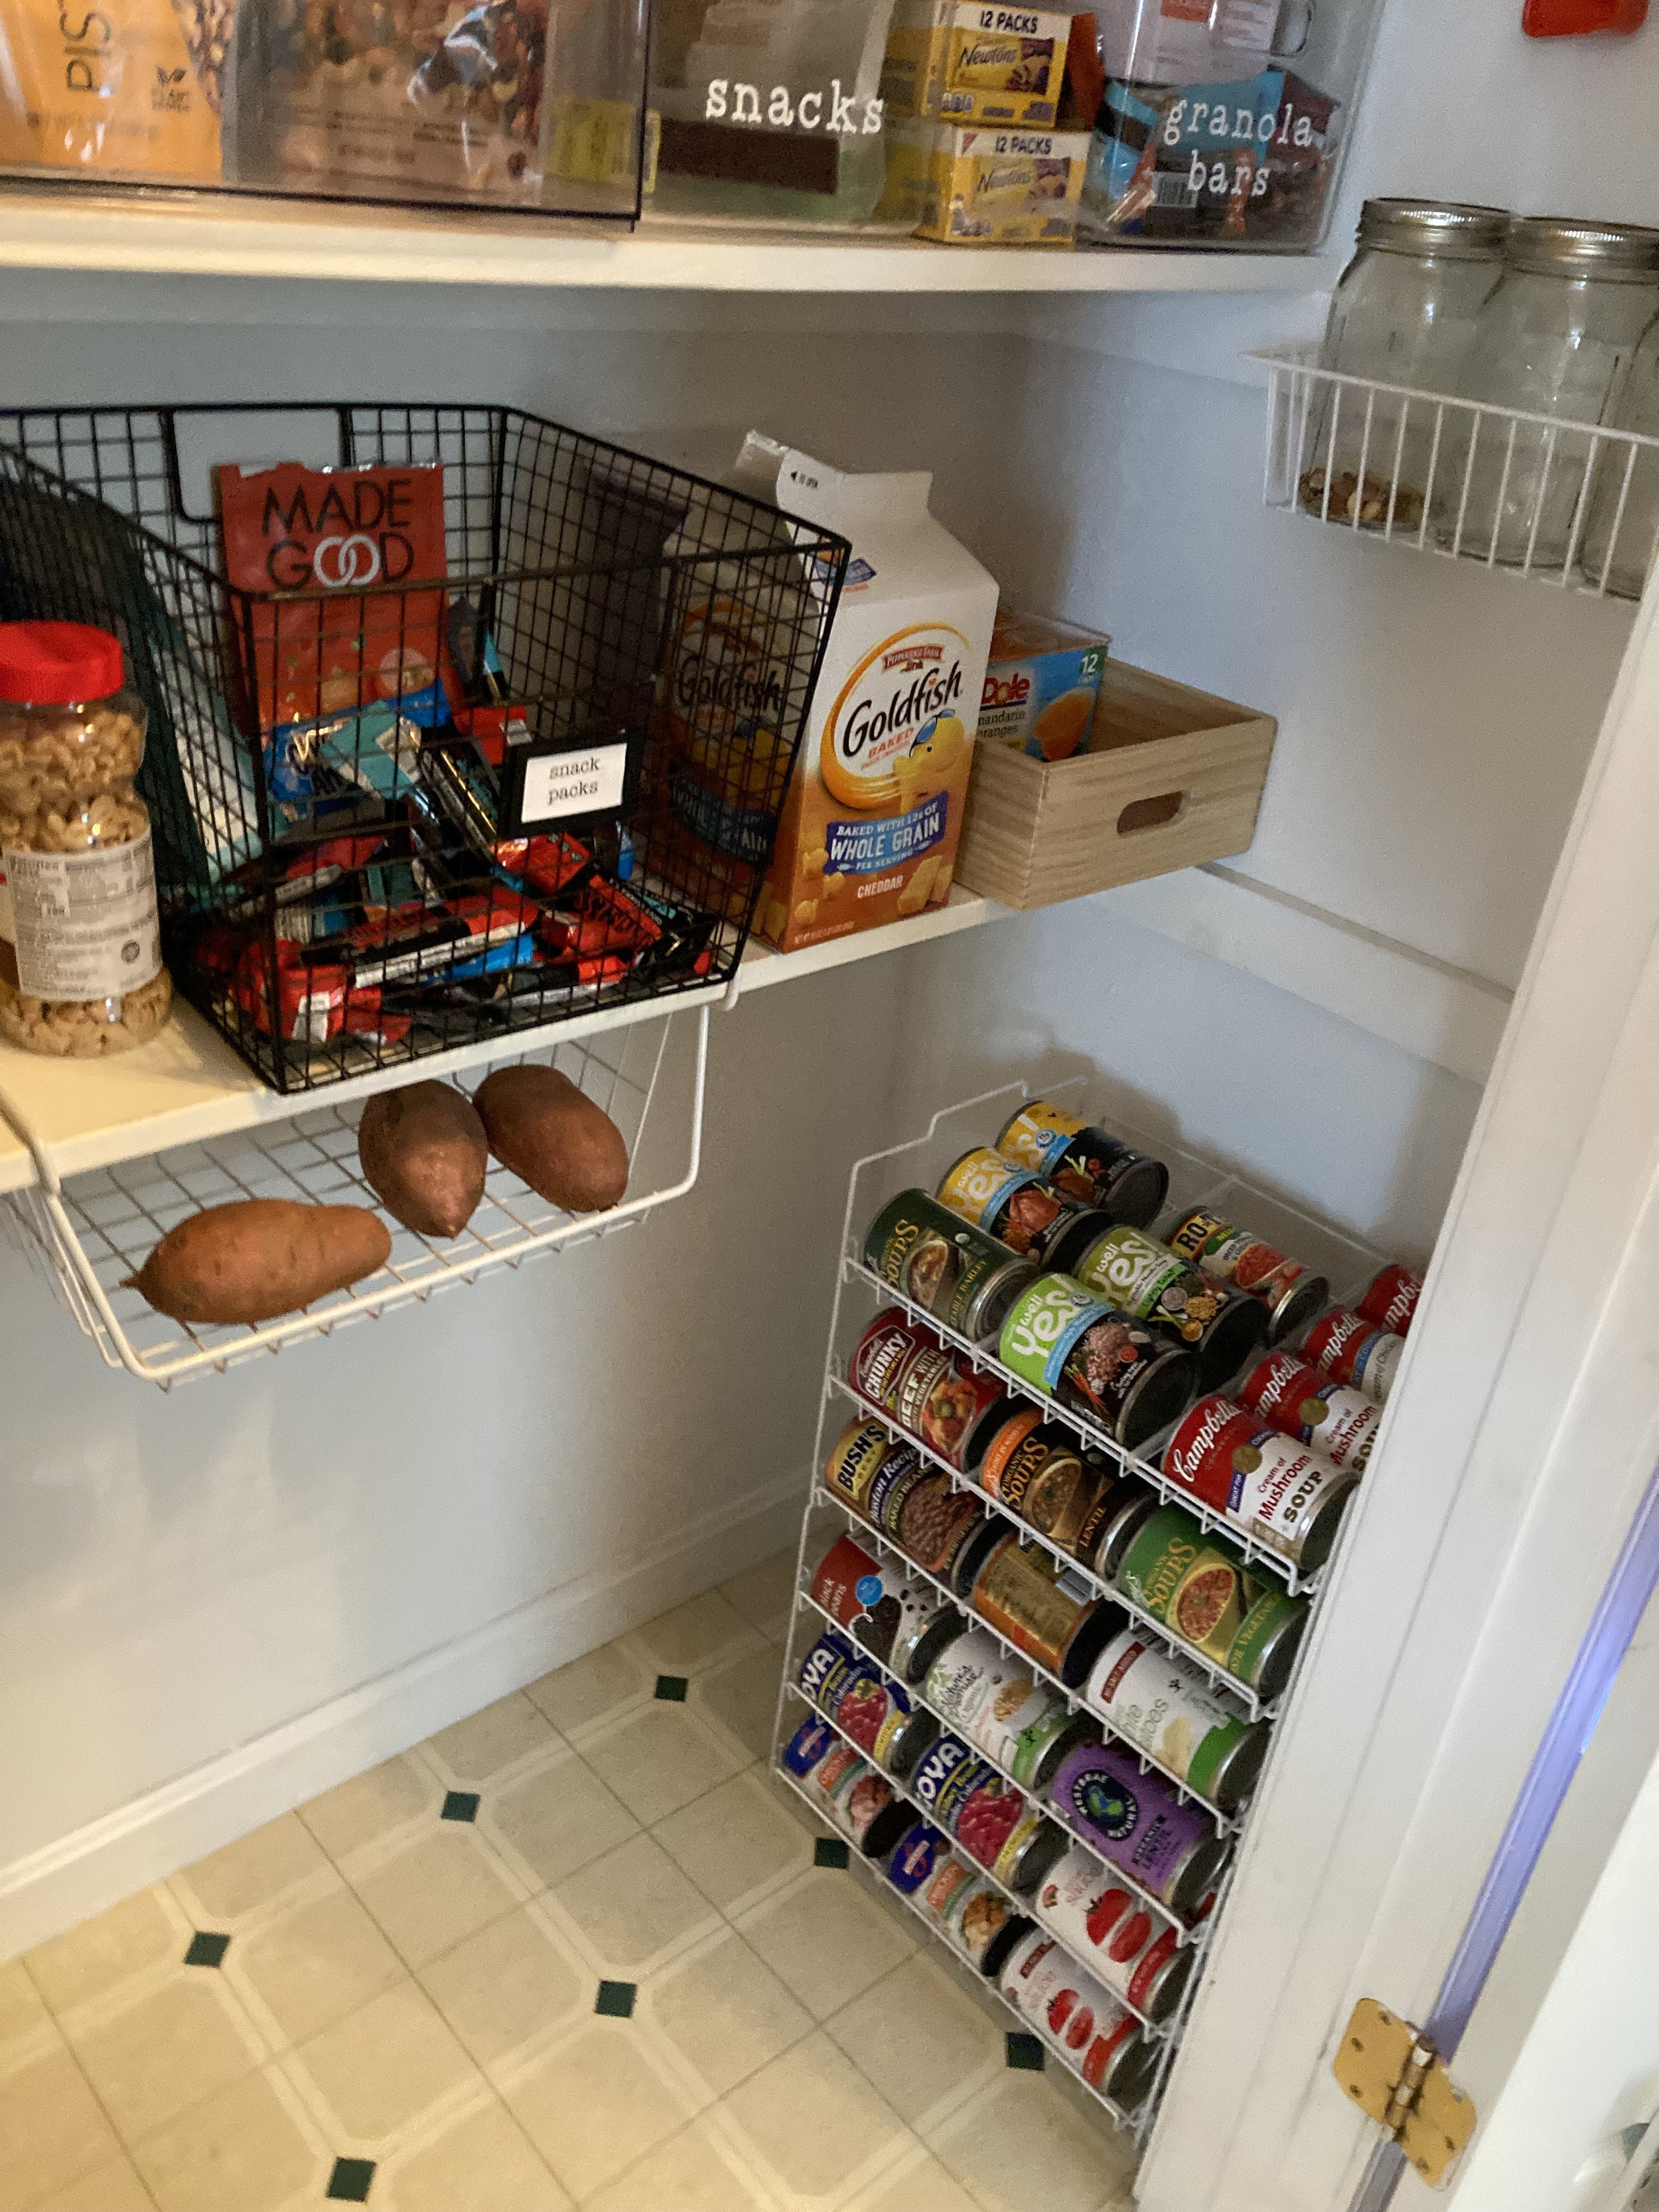
Over this past winter I added a few simple add-on organizers to our pantry to maximize the space and love how functional they are. Here they are below (and please excuse the glimpses of clutter in the pantry… as it now holds extra groceries and our family board games too - because, real life):
Additional Storage for the Walls
It turns out our door is an odd size and in order to get a screen door for it we would have to custom order one (at a cost of about $300+! Yikes). So instead I decided to cut a custom vinyl label to stick to the door to make it more finished. I could have designed my own but I found a design I really liked on
Etsy
and bought the digital design file. After purchasing the design file, I used my
Cricut
and
651 Permanent Vinyl
to make the label and then transferred it to the door. In hindsight I probably should have made it slightly smaller, but overall I love how it came out and how budget-friendly it was since I already owned a Cricut Machine and the vinyl.
|
Pantry Digitial Design File
|
Cricut Machine
|
651 Permanent Vinyl in Matte Black
|
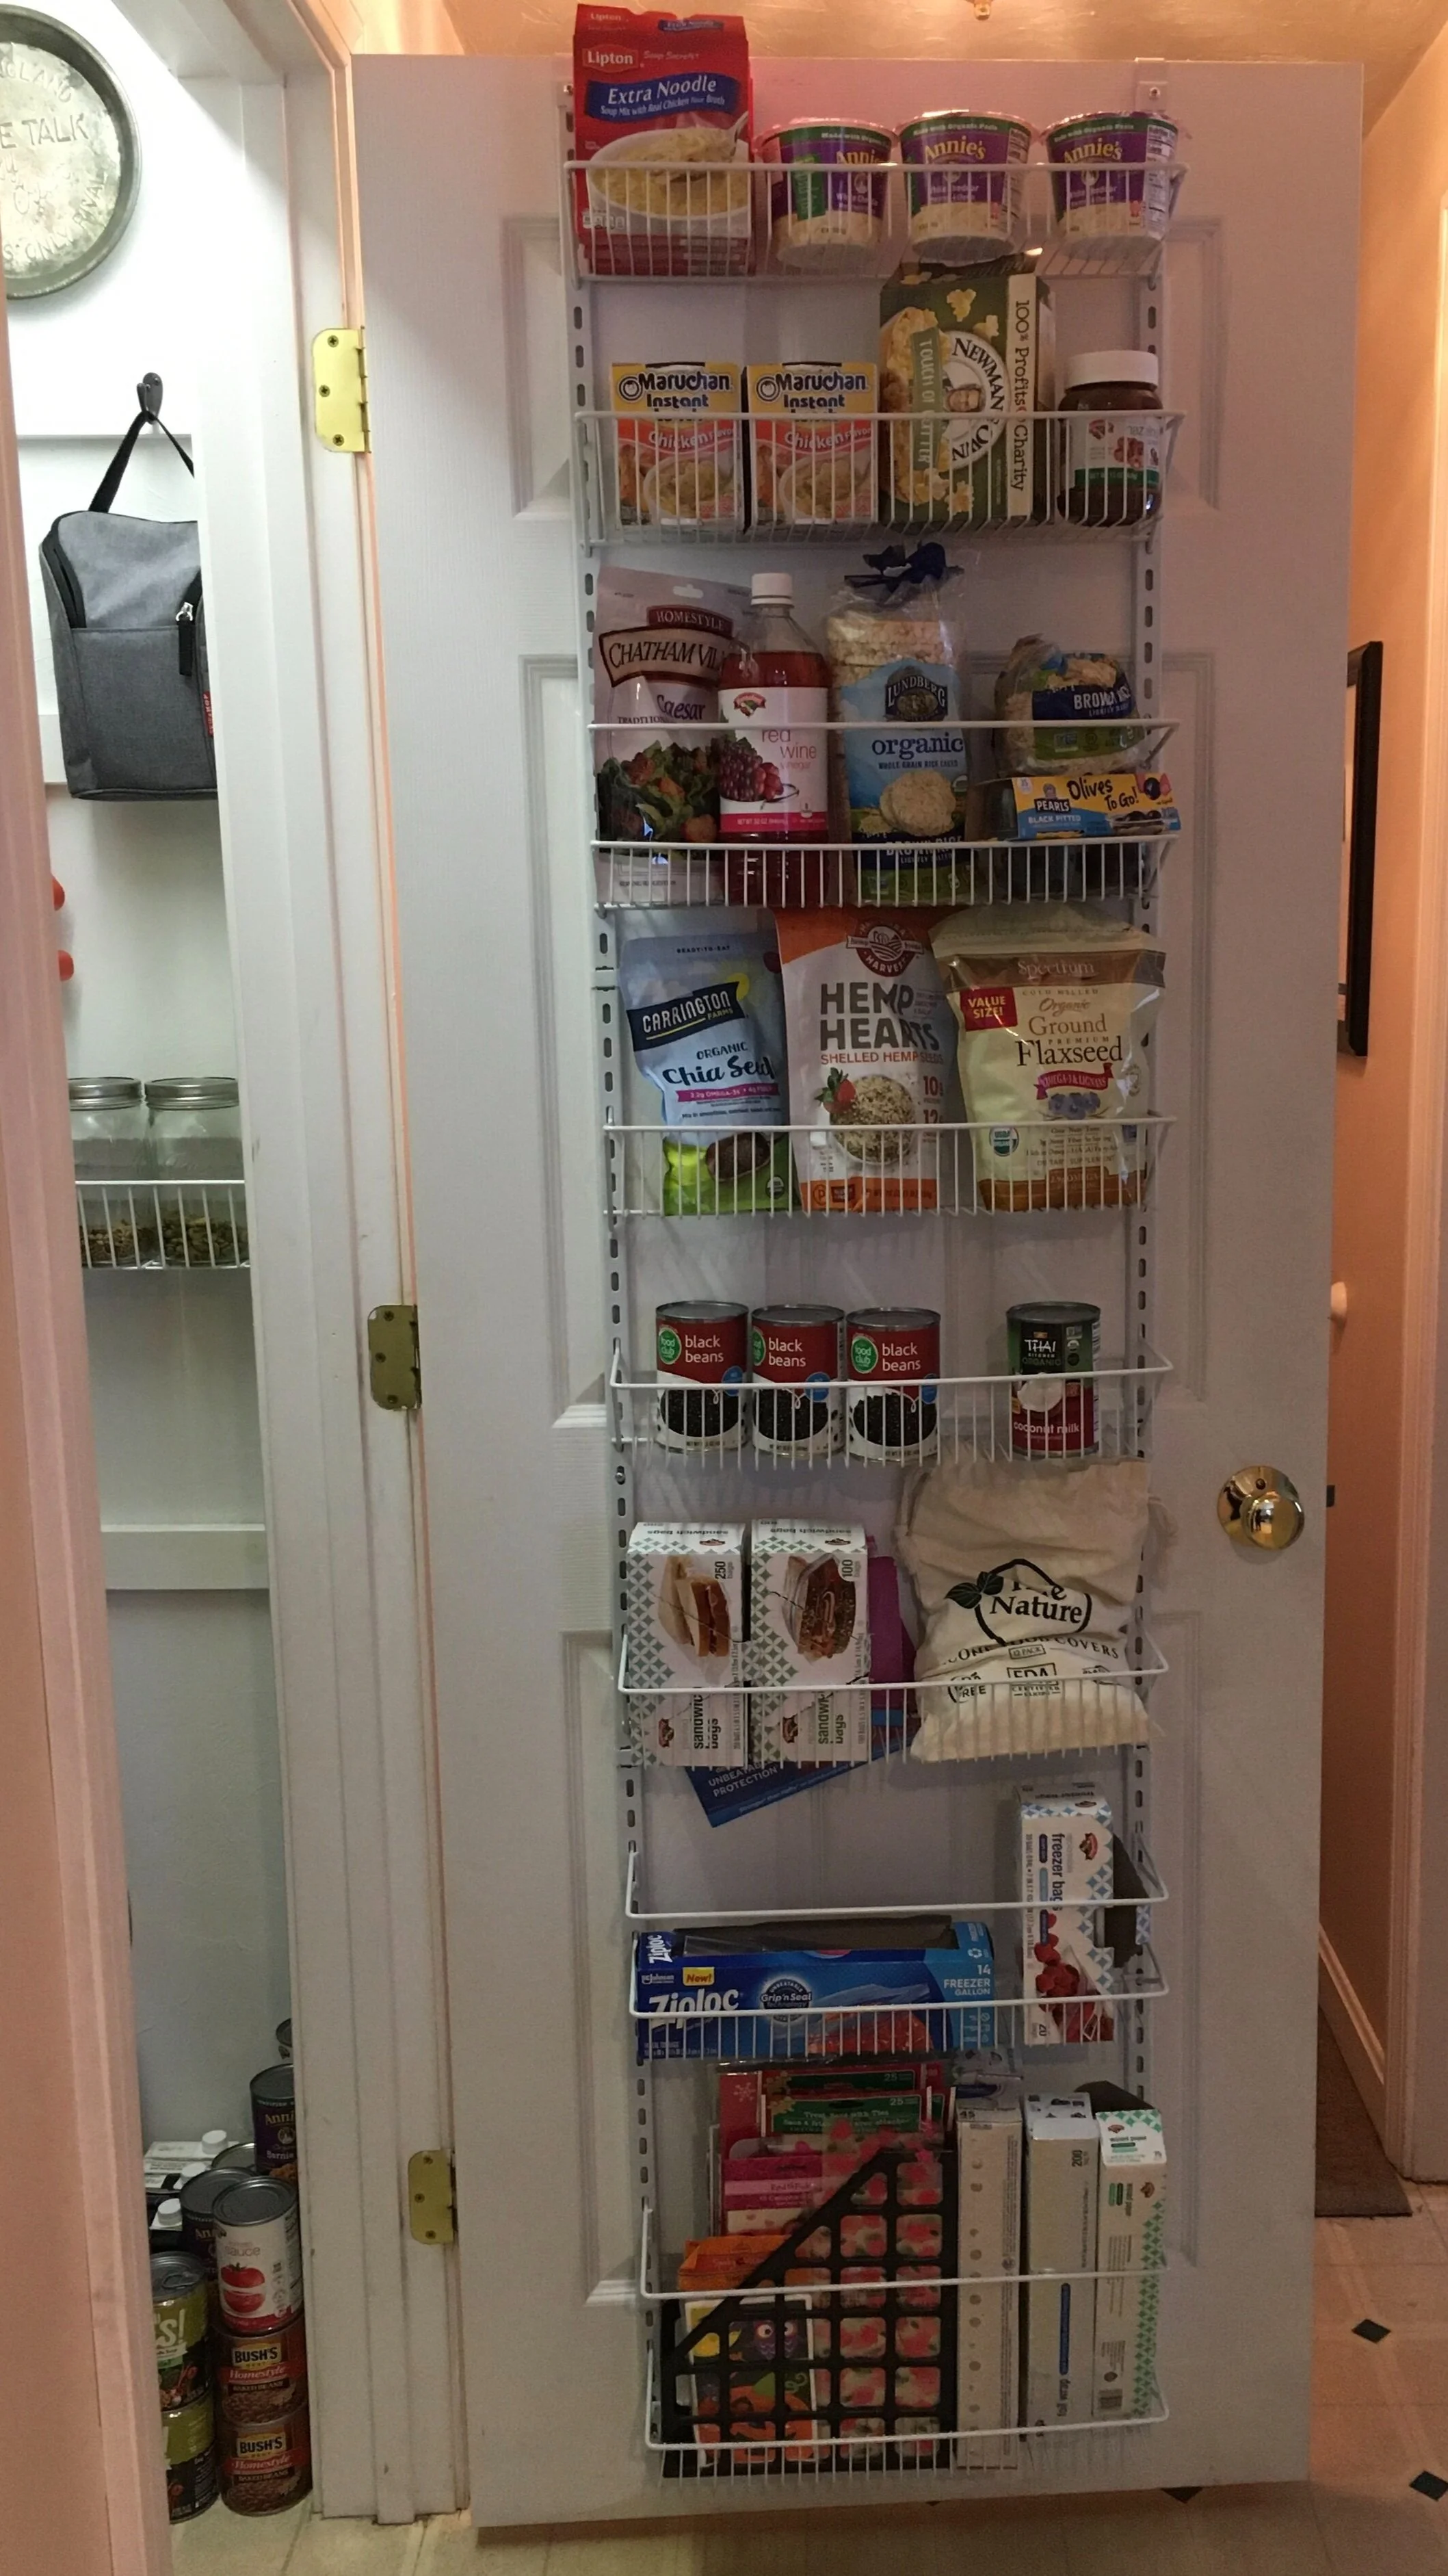
Finally, we decided to add a
ClosetMaid Adjustable Organizer
to the back of the pantry door to fully utilize the space. It was very simple to install and I am impressed with how sturdy it is once it's assembled and screwed in. We used the lower baskets for foil, parchement paper, ziplocks, silicone bowl covers, etc. The middle baskets we designated for frequently used canned goods, smoothie mix-ins, as well as salad fixings and rice cakes. Finally on the top two baskets we put convenience foods that we rarely use since I'm so short. Note: If you have a hollow-core door, you might want to use a specialty set of anchors/screws to attach it to the door for stability, rather than just screw into the door with regular screws.
|
ClosetMaid Adjustable Organizer (18 inch)
|
True Nature Silicone Food Covers
|
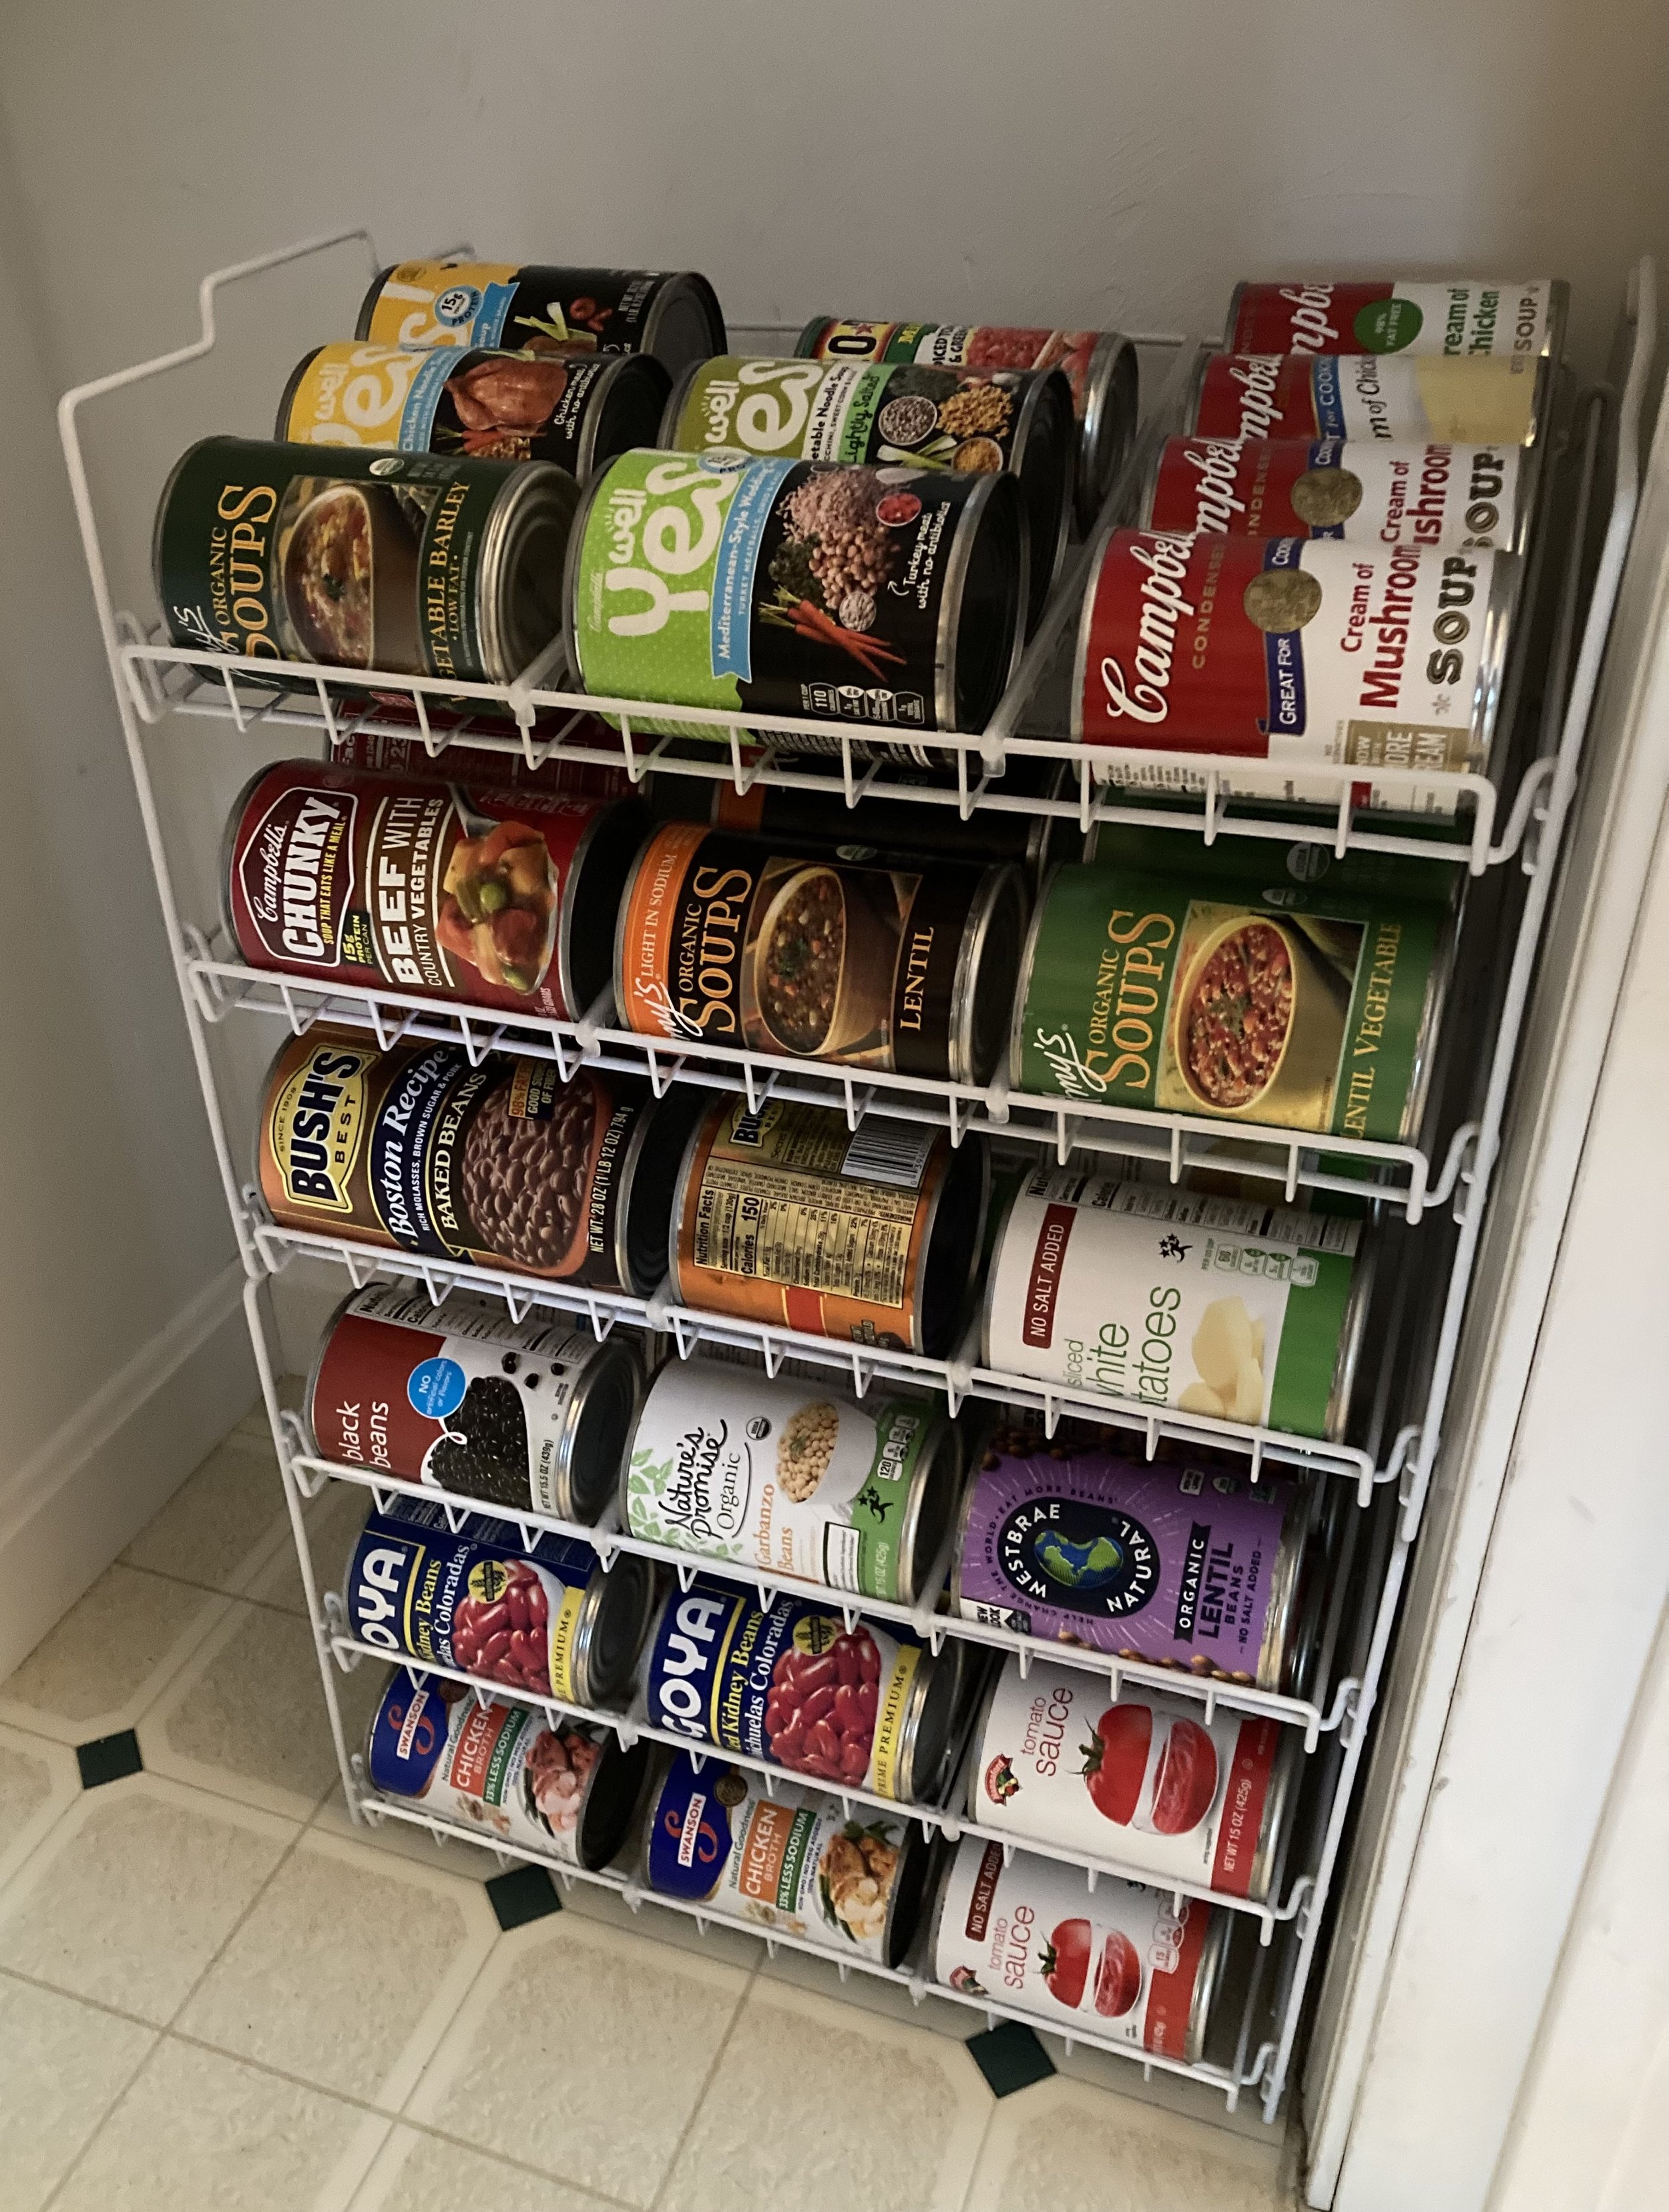
Stackable Canned Goods Organizer
Another later addition to our pantry organization are these amazing stackable can racks for organizing canned goods. Before I had quite a few canned goods just sitting on the floor of the pantry and in a separate kitchen cupboard, but I never could see everything at once and often cans in the back got forgotten -- Now everything is in one spot where I can see them and I can meal plan more efficiently.
| Stackable Can Rack Organizer (I have two racks stacked here) |
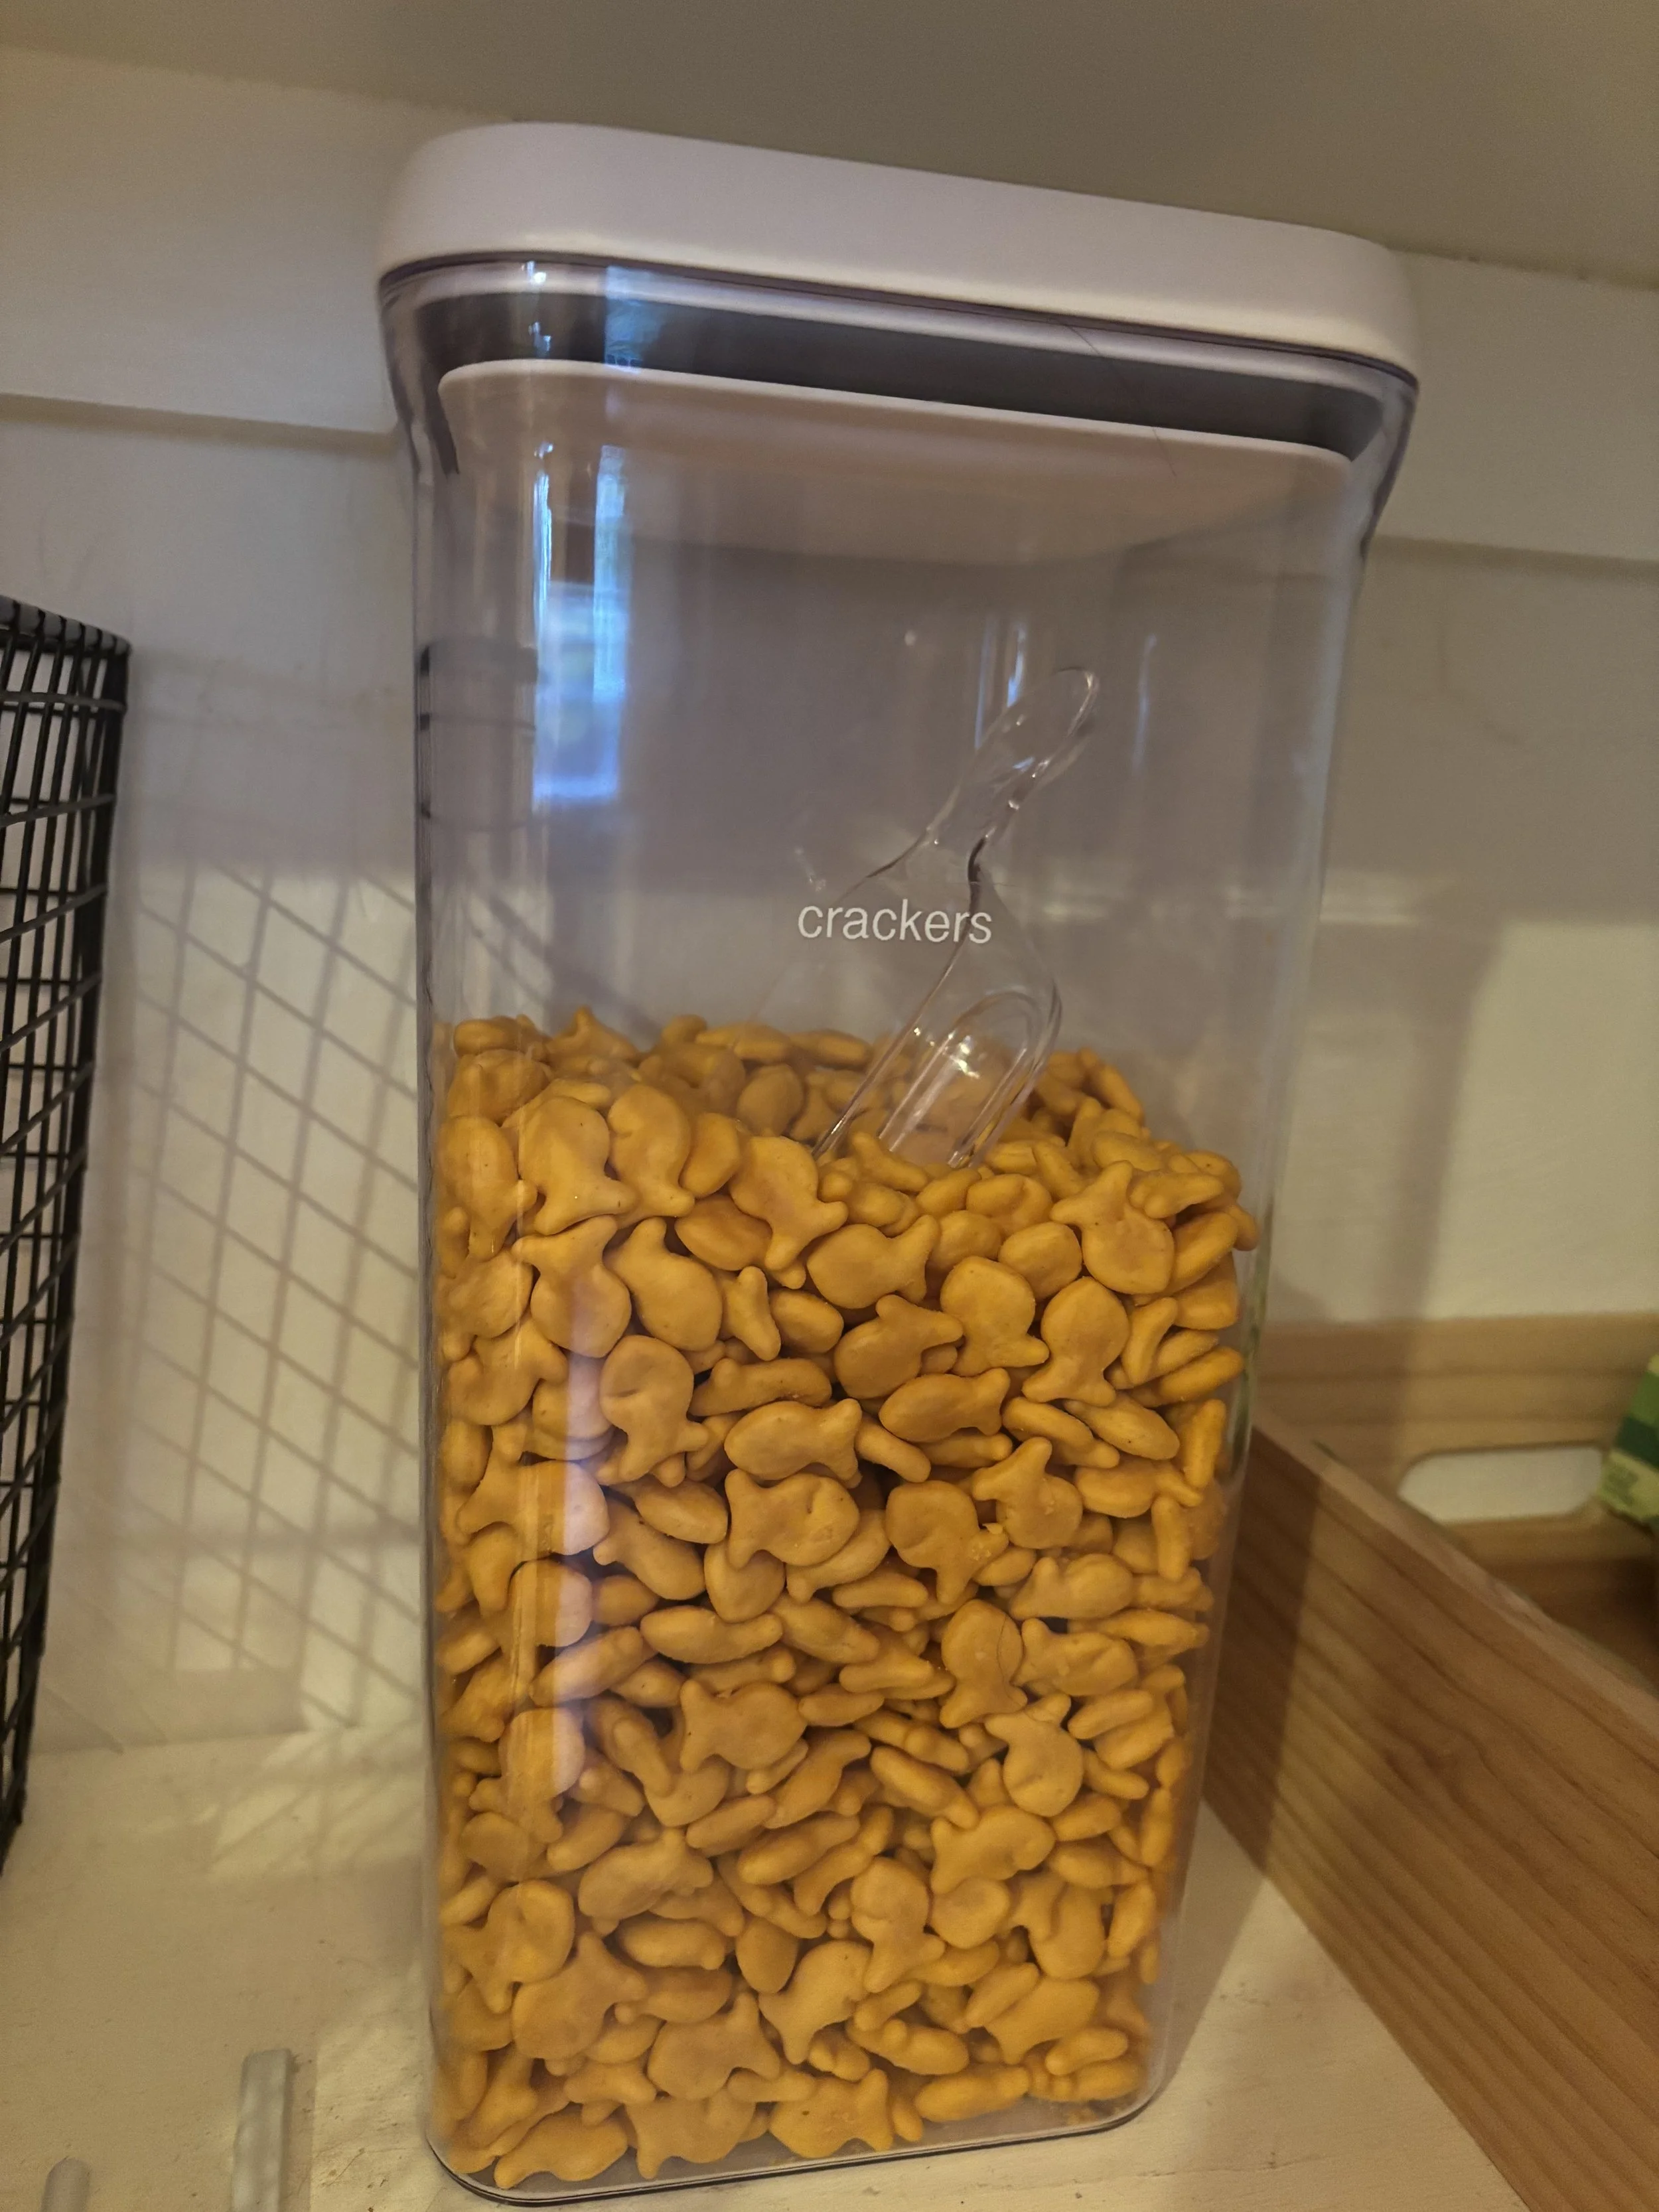
OXO POP Containers with Scoops for Snacks
Disclaimer
This website shares personal opinions and experiences regarding a variety of topics. Please do your own research regarding all things and use information/opinions stated here at your own discretion and risk.
Check out our Related Posts:
KEEP UP WITH BIRCH LANDING HOME
| Etsy | Facebook | Instagram | Pinterest | Bloglovin' | Hometalk |