I'm a wife, stay-at-home mom, crafter, and blogger living in rural New England. As seen in Martha Stewart Living, Food Network Magazine, and more! | Tutorials, DIY, crafts, parenting tips, recipes, money saving tips, product reviews, local product features, New England living, intentional living, and more! |
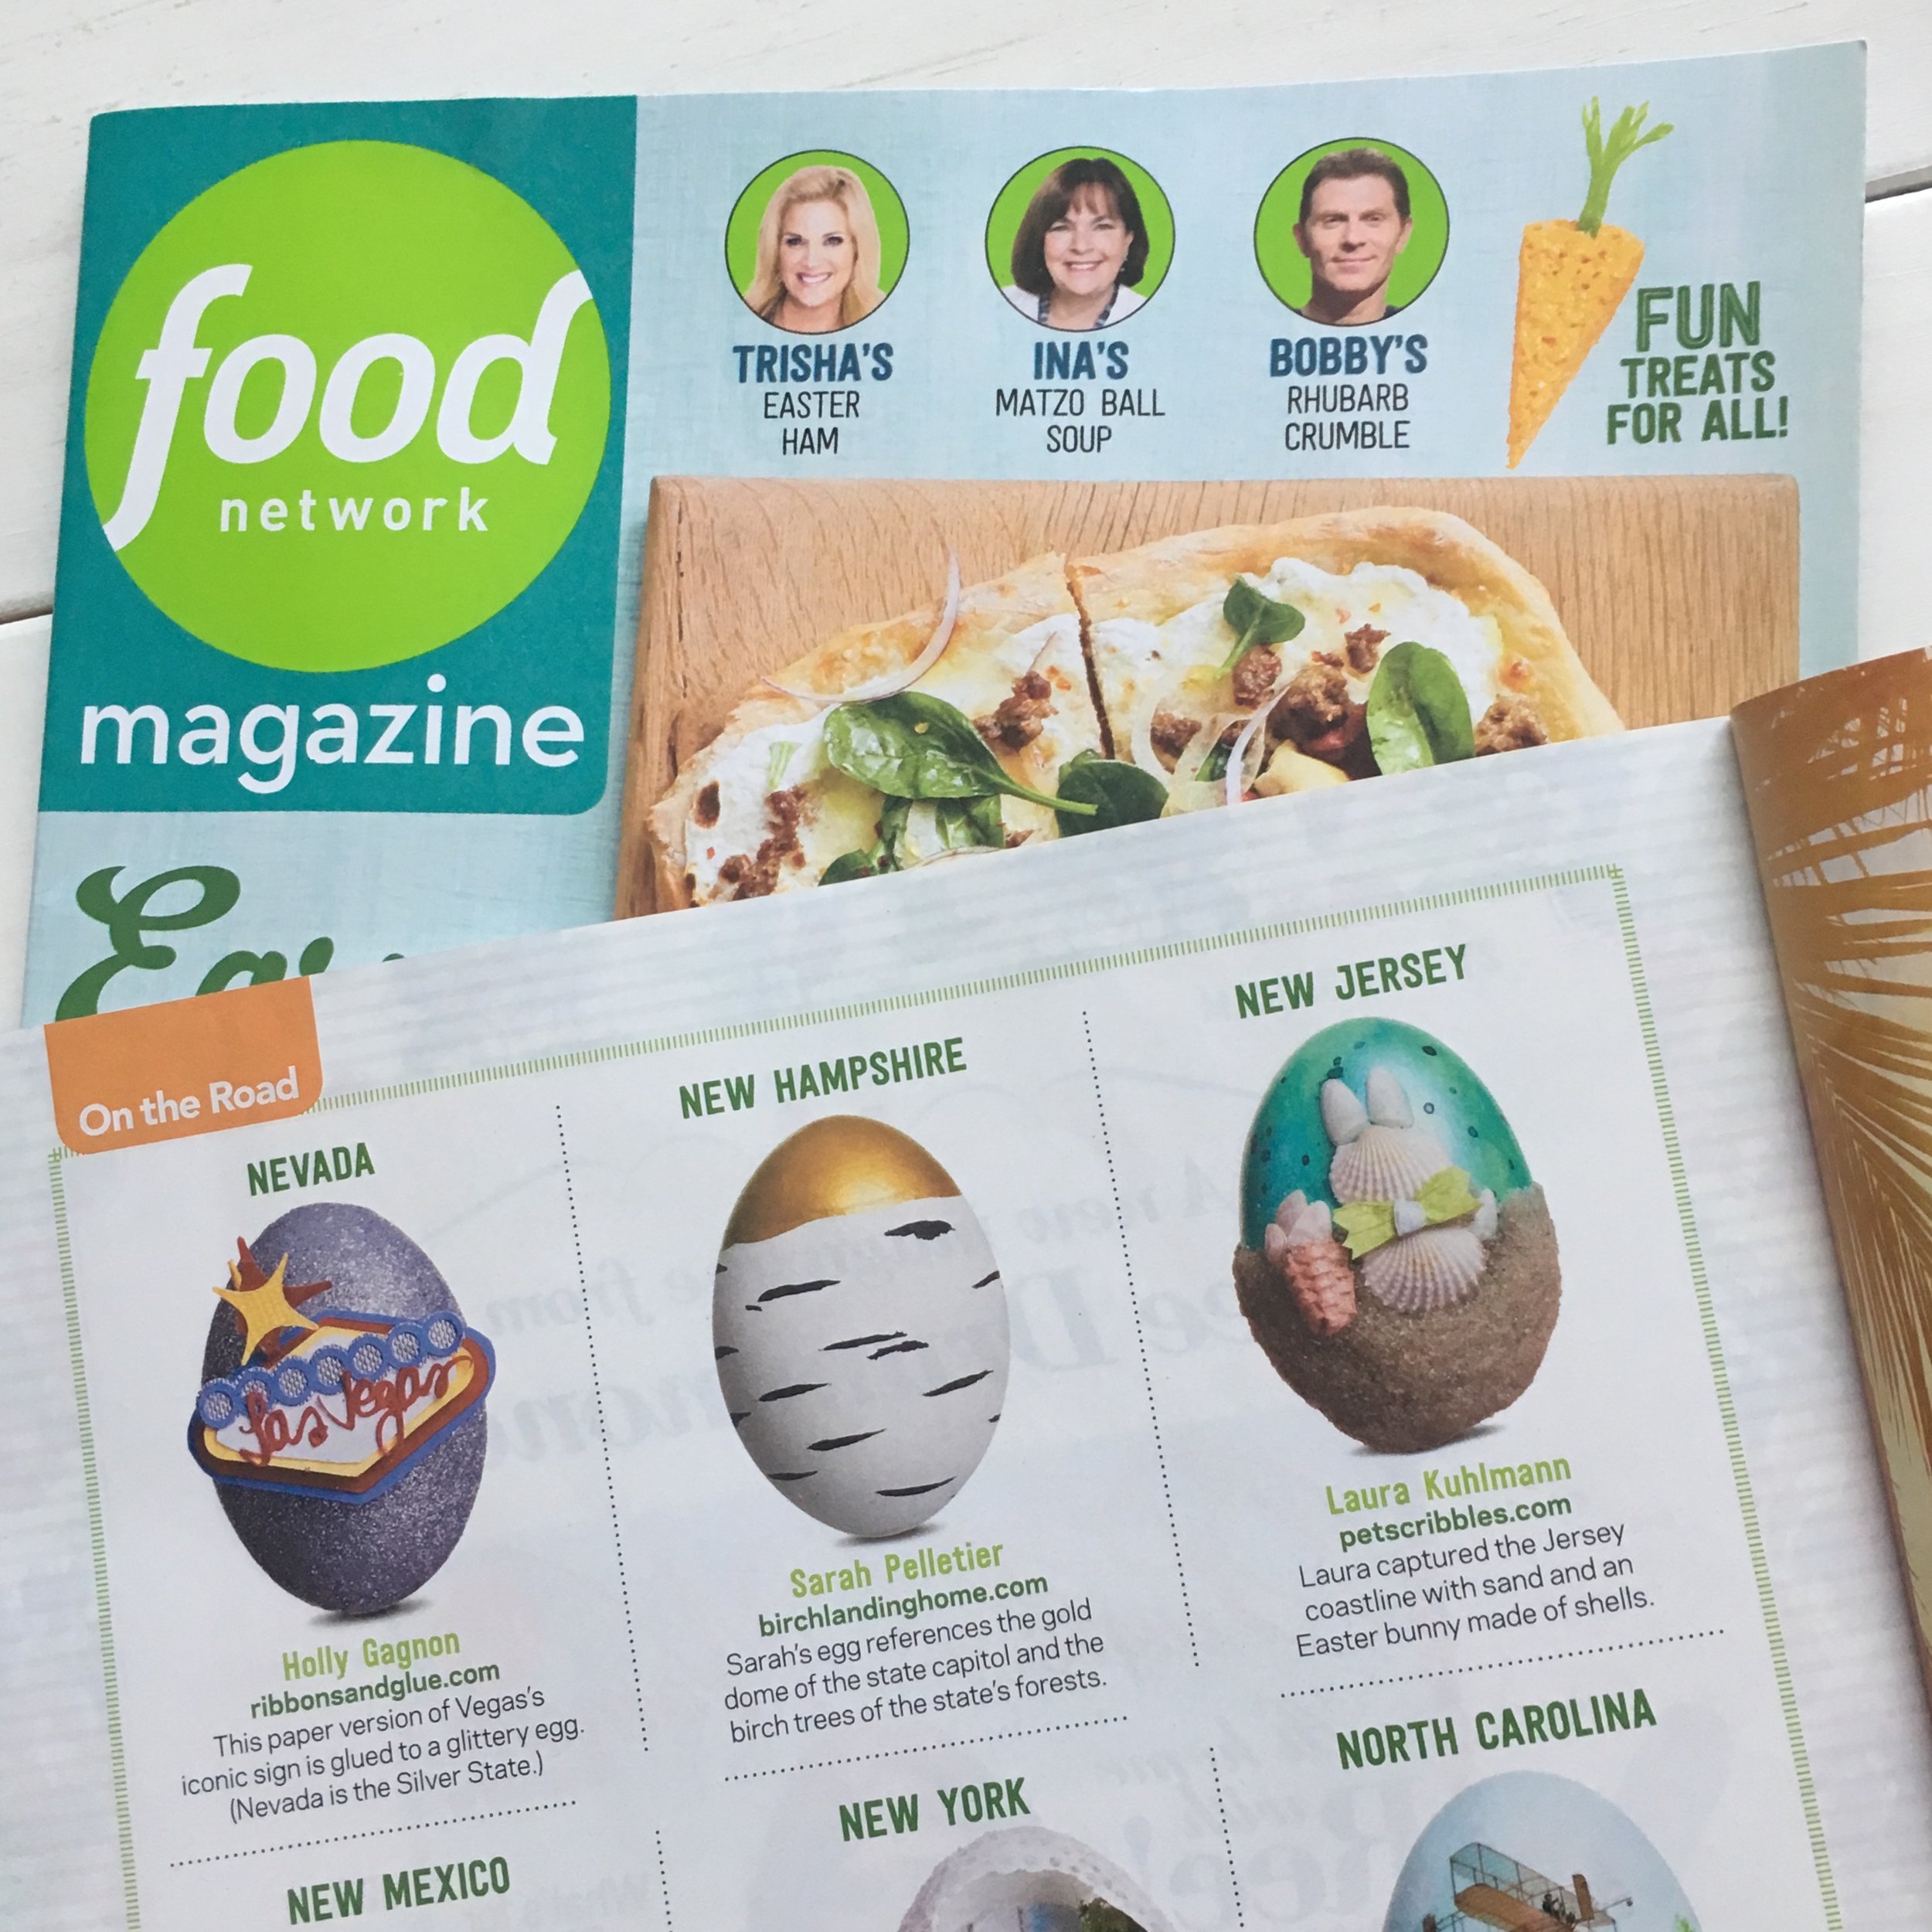
A few months ago, Food Network Magazine emailed me and asked if I'd be interested in designing a New Hampshire-themed egg for their Easter issue! I was completely blown away and honored for the opportunity. My New Hampshire egg design was a gold-dipped, faux birch bark egg - gold-dipped to represent our State House with it's golden dome, and the birch bark paint finish to represent our our state tree, the white birch. Fun Fact: My great-grandfather was a steeplejack and did the gold leaf on the New Hampshire capitol dome back in the 1920's! | This post contains affiliate links |
Creating one of these gold-dipped birch eggs for yourself is pretty simple! Here's the full how-to:
Materials:
faux egg (for the Food Network Magazine example and most of the photos in this how-to, I used an Eggnot, a fake ceramic egg - but you could also use a wooden egg. If you use real hardboiled eggs I would not recommend eating them after painting)
white acrylic paint (if your fake egg isn't already white to begin with)
paper cup
thin paintbrush
tinfoil to make a stand for the egg to dry on
How-to:
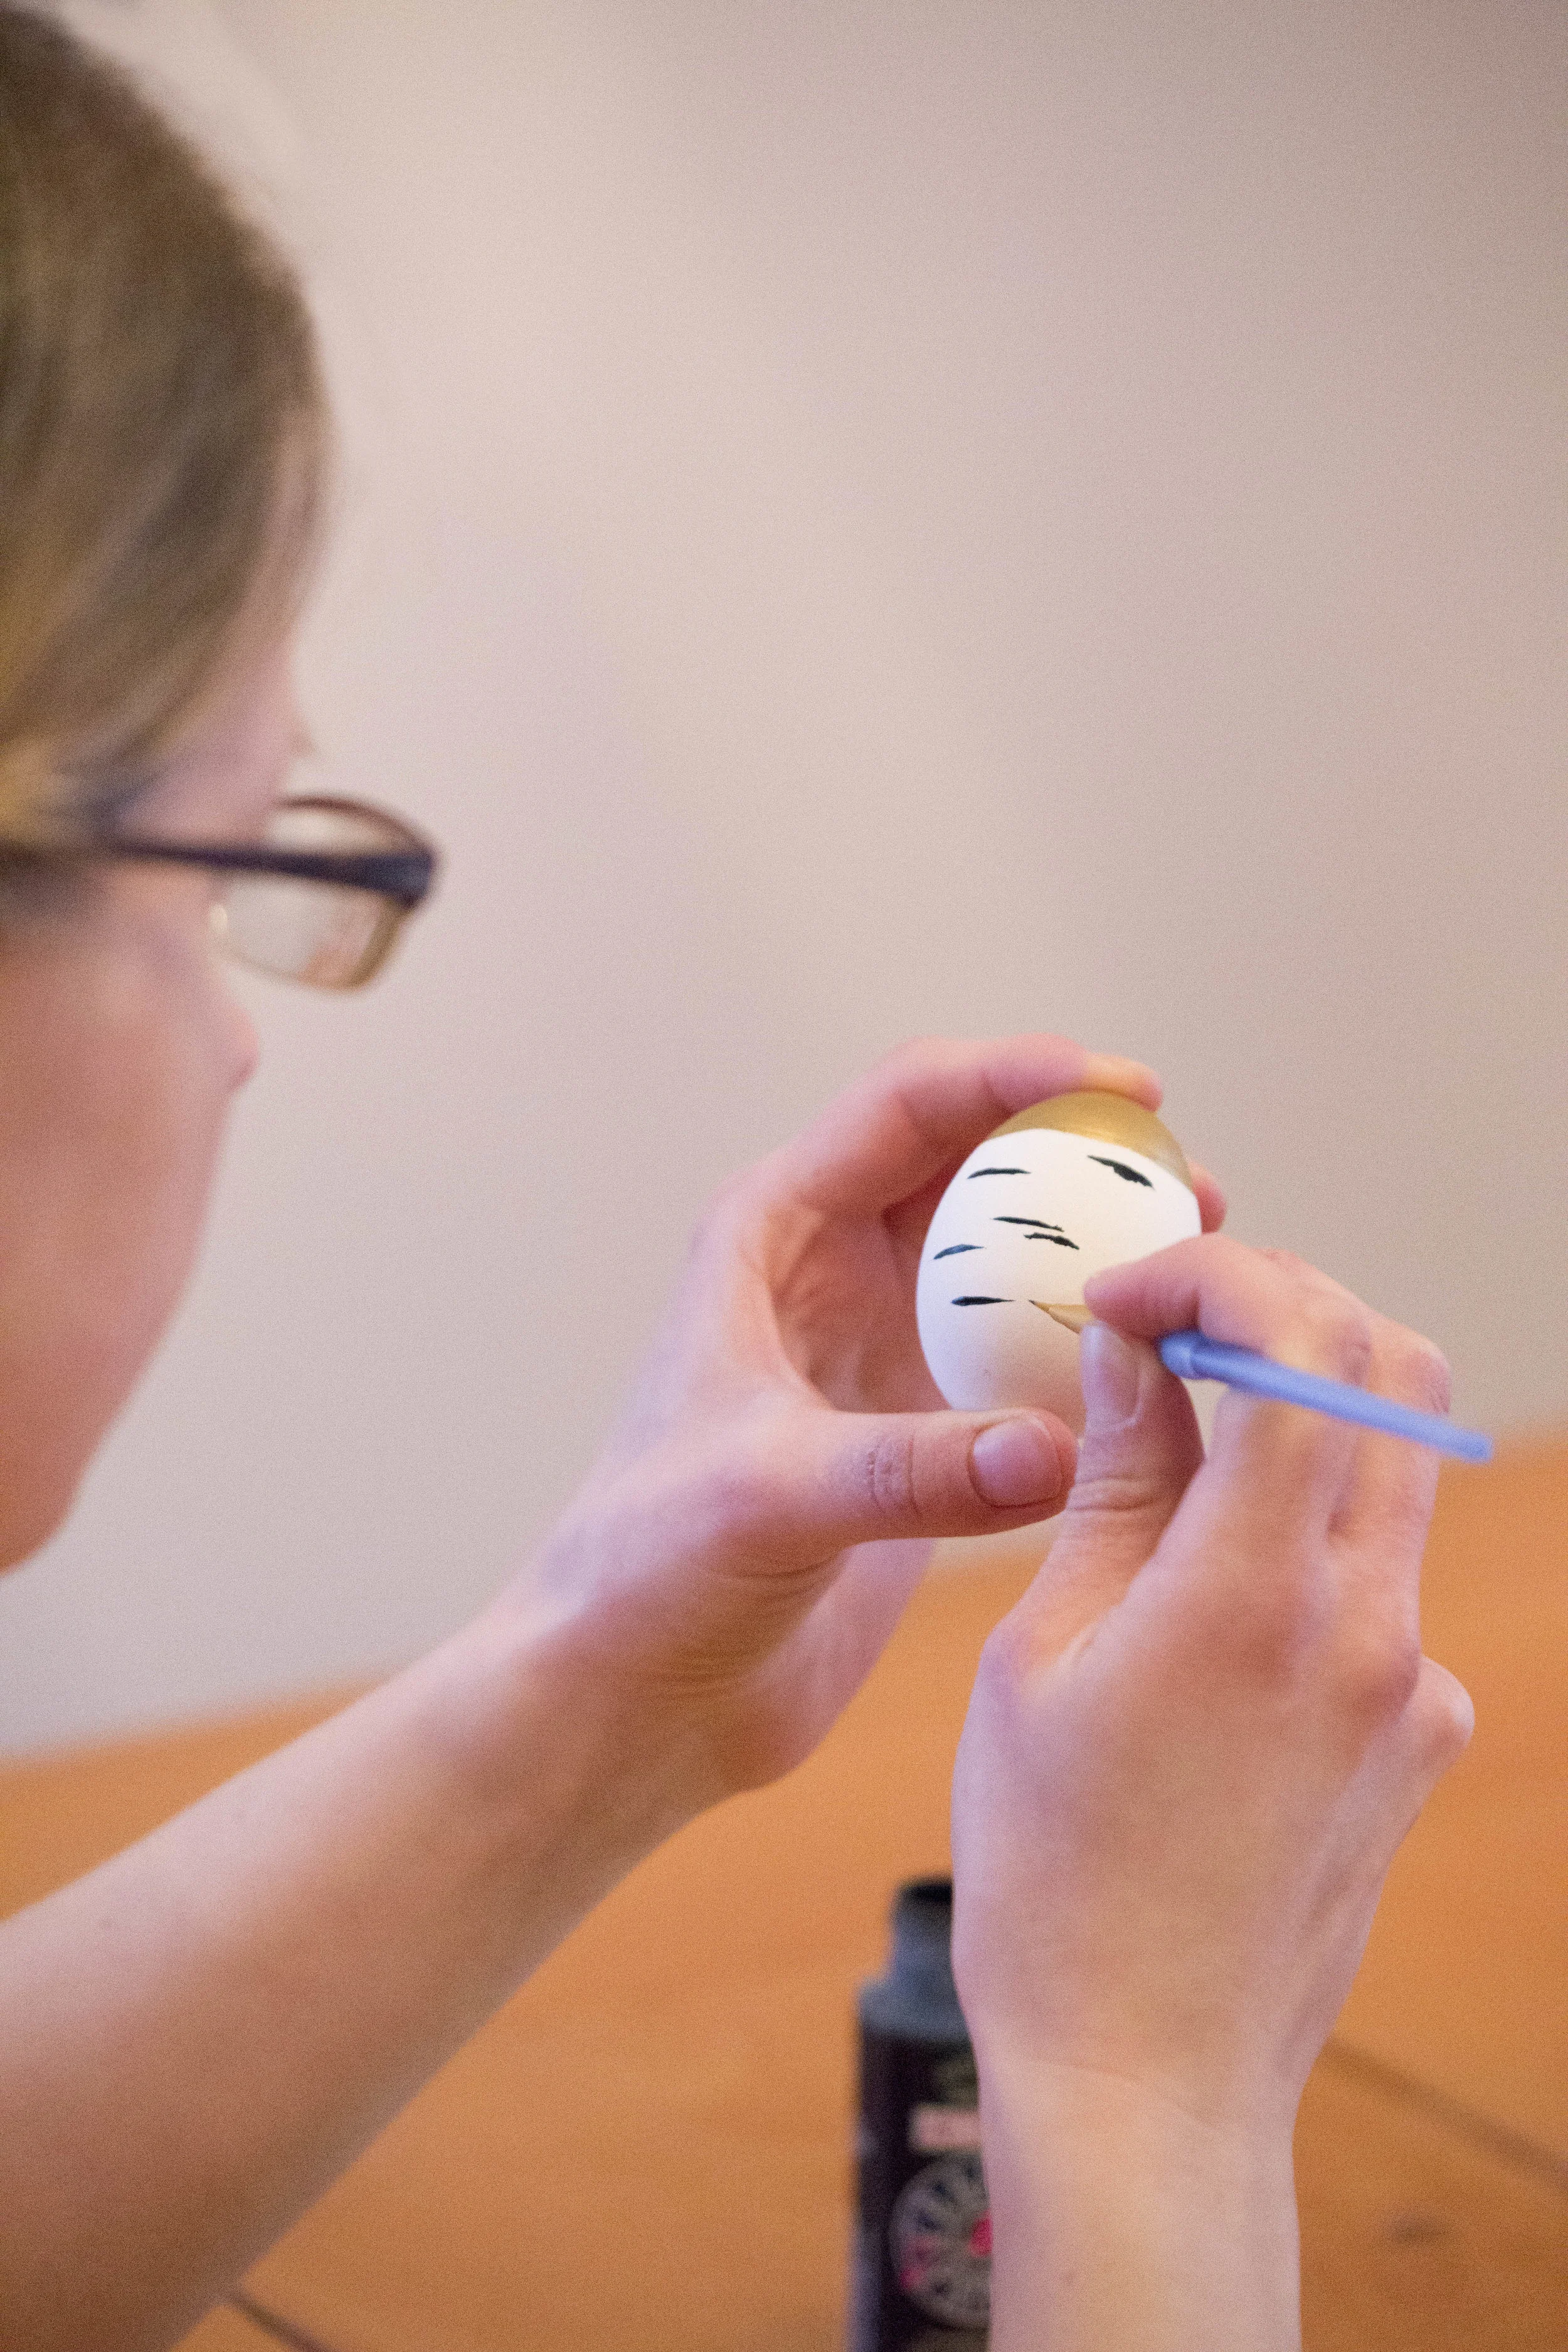
1. First, make a tinfoil ring to hold your egg while it dries between steps. Then if your egg isn't already white, paint white and allow to dry between coats. It may need several coats of paint.
2. Next shake the gold acrylic paint well and pour about half an inch of it into a small paper cup. Dip the top of the egg carefully into the cup. (I found it best to to do the gold-dip first, then paint the bark pattern after since sometimes the black lines were visible under the gold-dip.) Gold paint tends to be thick and you may have some swirling or thick drips after dipping. You can try to smooth these out a bit with a paintbrush but it usually looks cleaner if you just leave it as-is, even if you end up with a thick spot within the dip. After the gold dip, carefully place the egg in the tinfoil ring to dry.
3. Once the gold-dip is dry, use a thin paint brush to paint horizontal black lines on the egg, all the way around. Vary the placement and thickness of the lines a bit to mimic the look of birch bark. You may have to carefully hold the egg for a few minutes to let it air dry a bit before carefully setting it, gold top down, into the tinfoil ring to finish drying.
And that's it! While making them can be tedious with the drying time between steps, it's really quite easy. And in the event you don't feel like tackling this project yourself, I have a limited supply of painted Wooden Gold-Dipped Birch Eggs in my Etsy Shop!
Incredibly honored and excited to say that I designed and painted the New Hampshire egg for the latest issue of Food Network Magazine! I was completely blown away when they sent me an email last November, asking if I wanted to be a contributor for this piece (um, YES!) and it’s so exciting to finally see it in print! Thank you, Food Network Magazine!
If you want to make your own NH-inspired egg, please check out my full tutorial HERE.
PS - Make sure to pick up a copy, so many creative eggs from every state - not to mention all the yummy recipes!
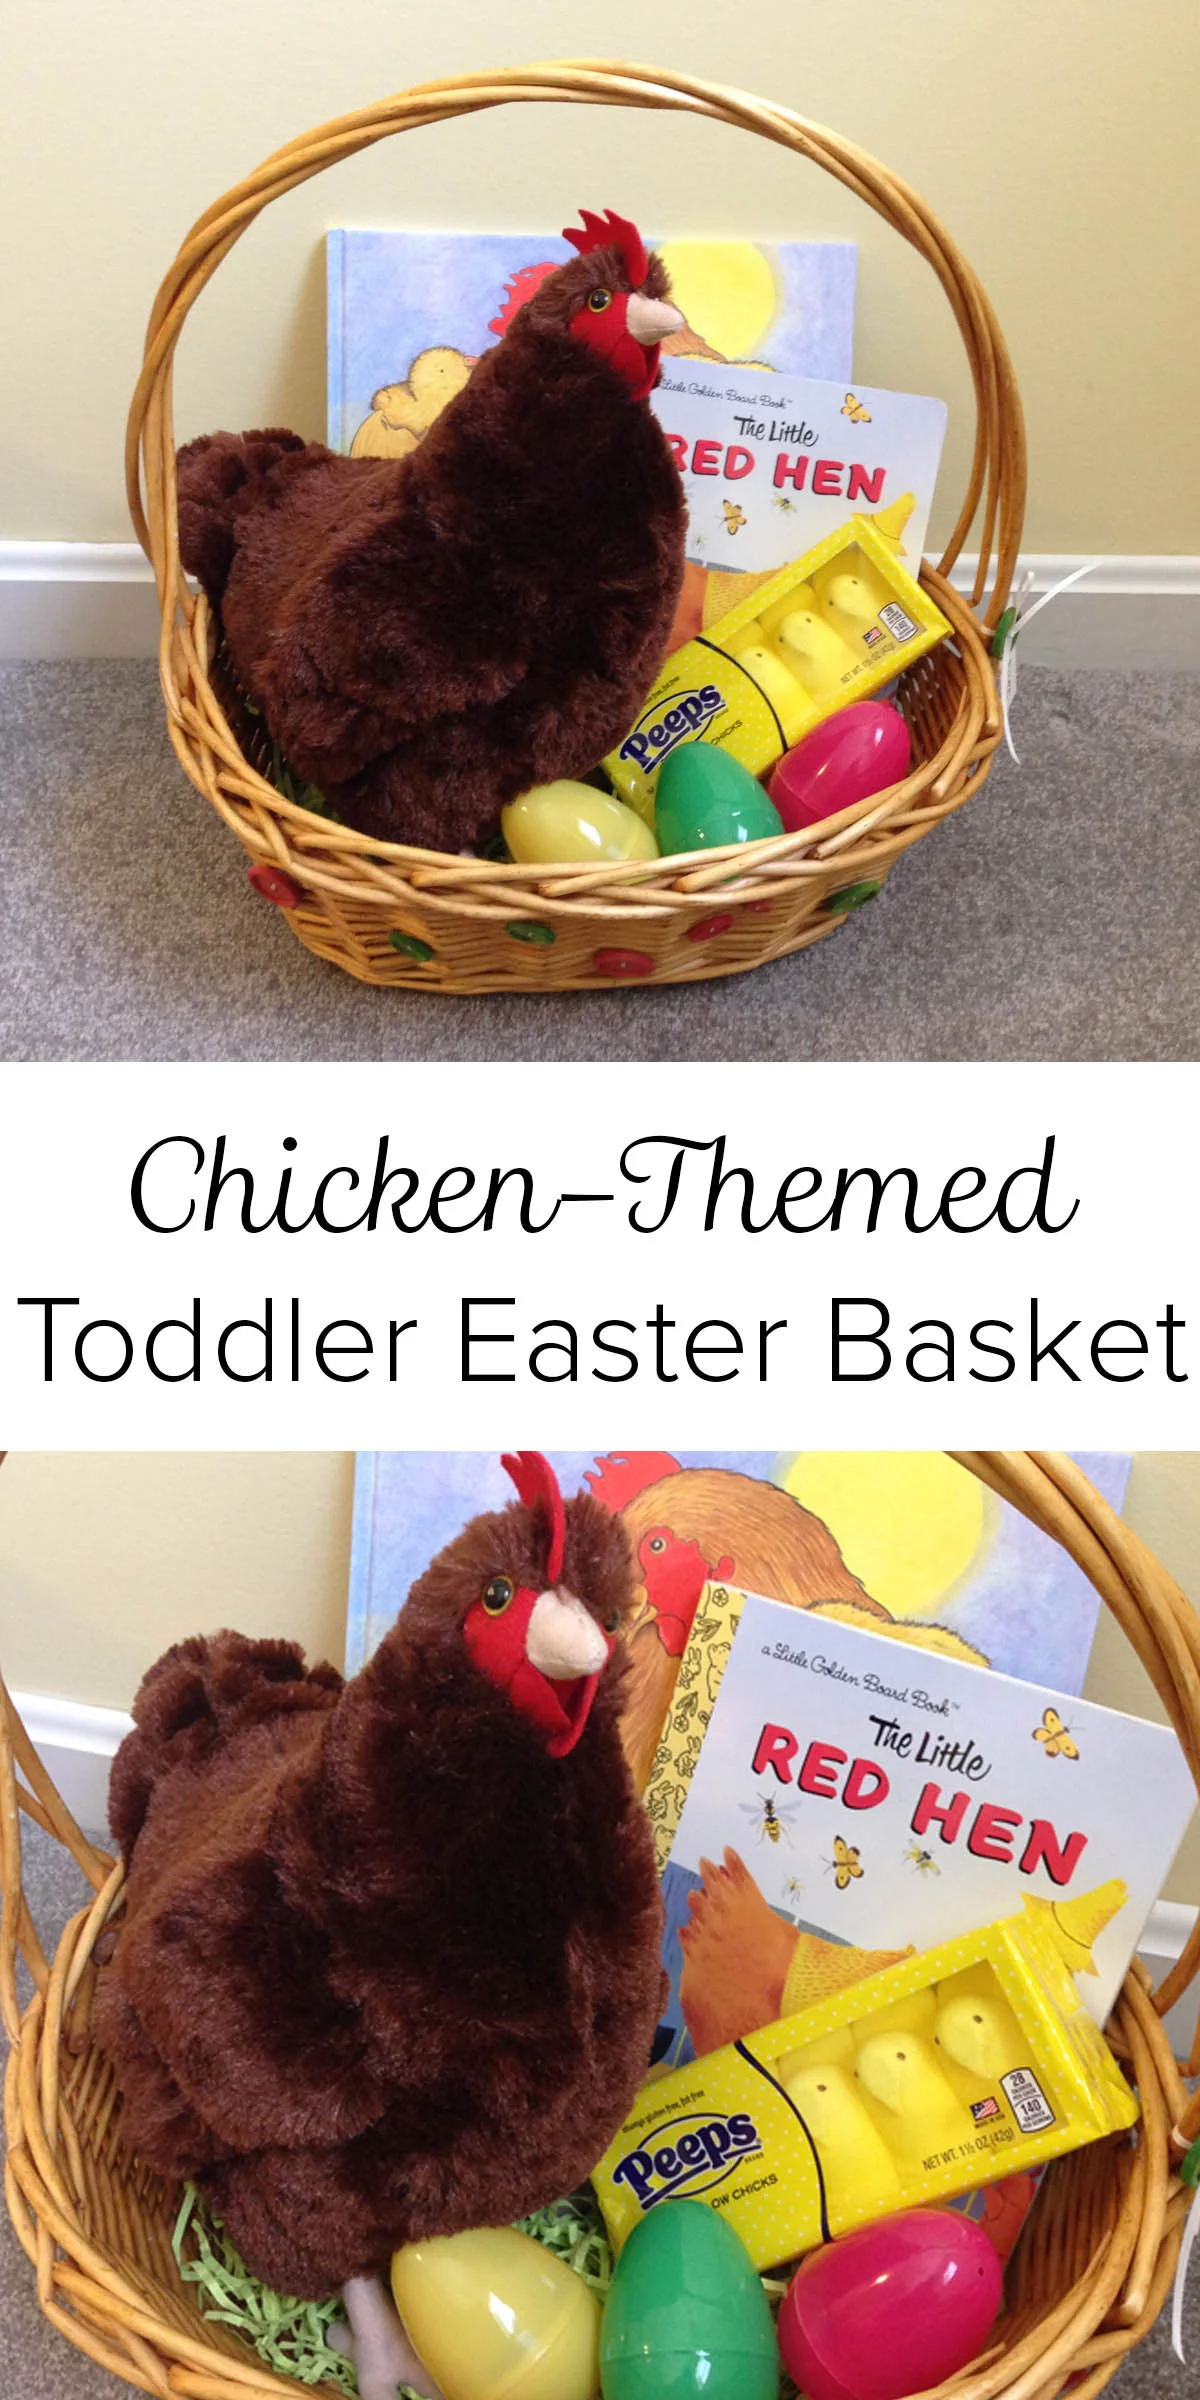
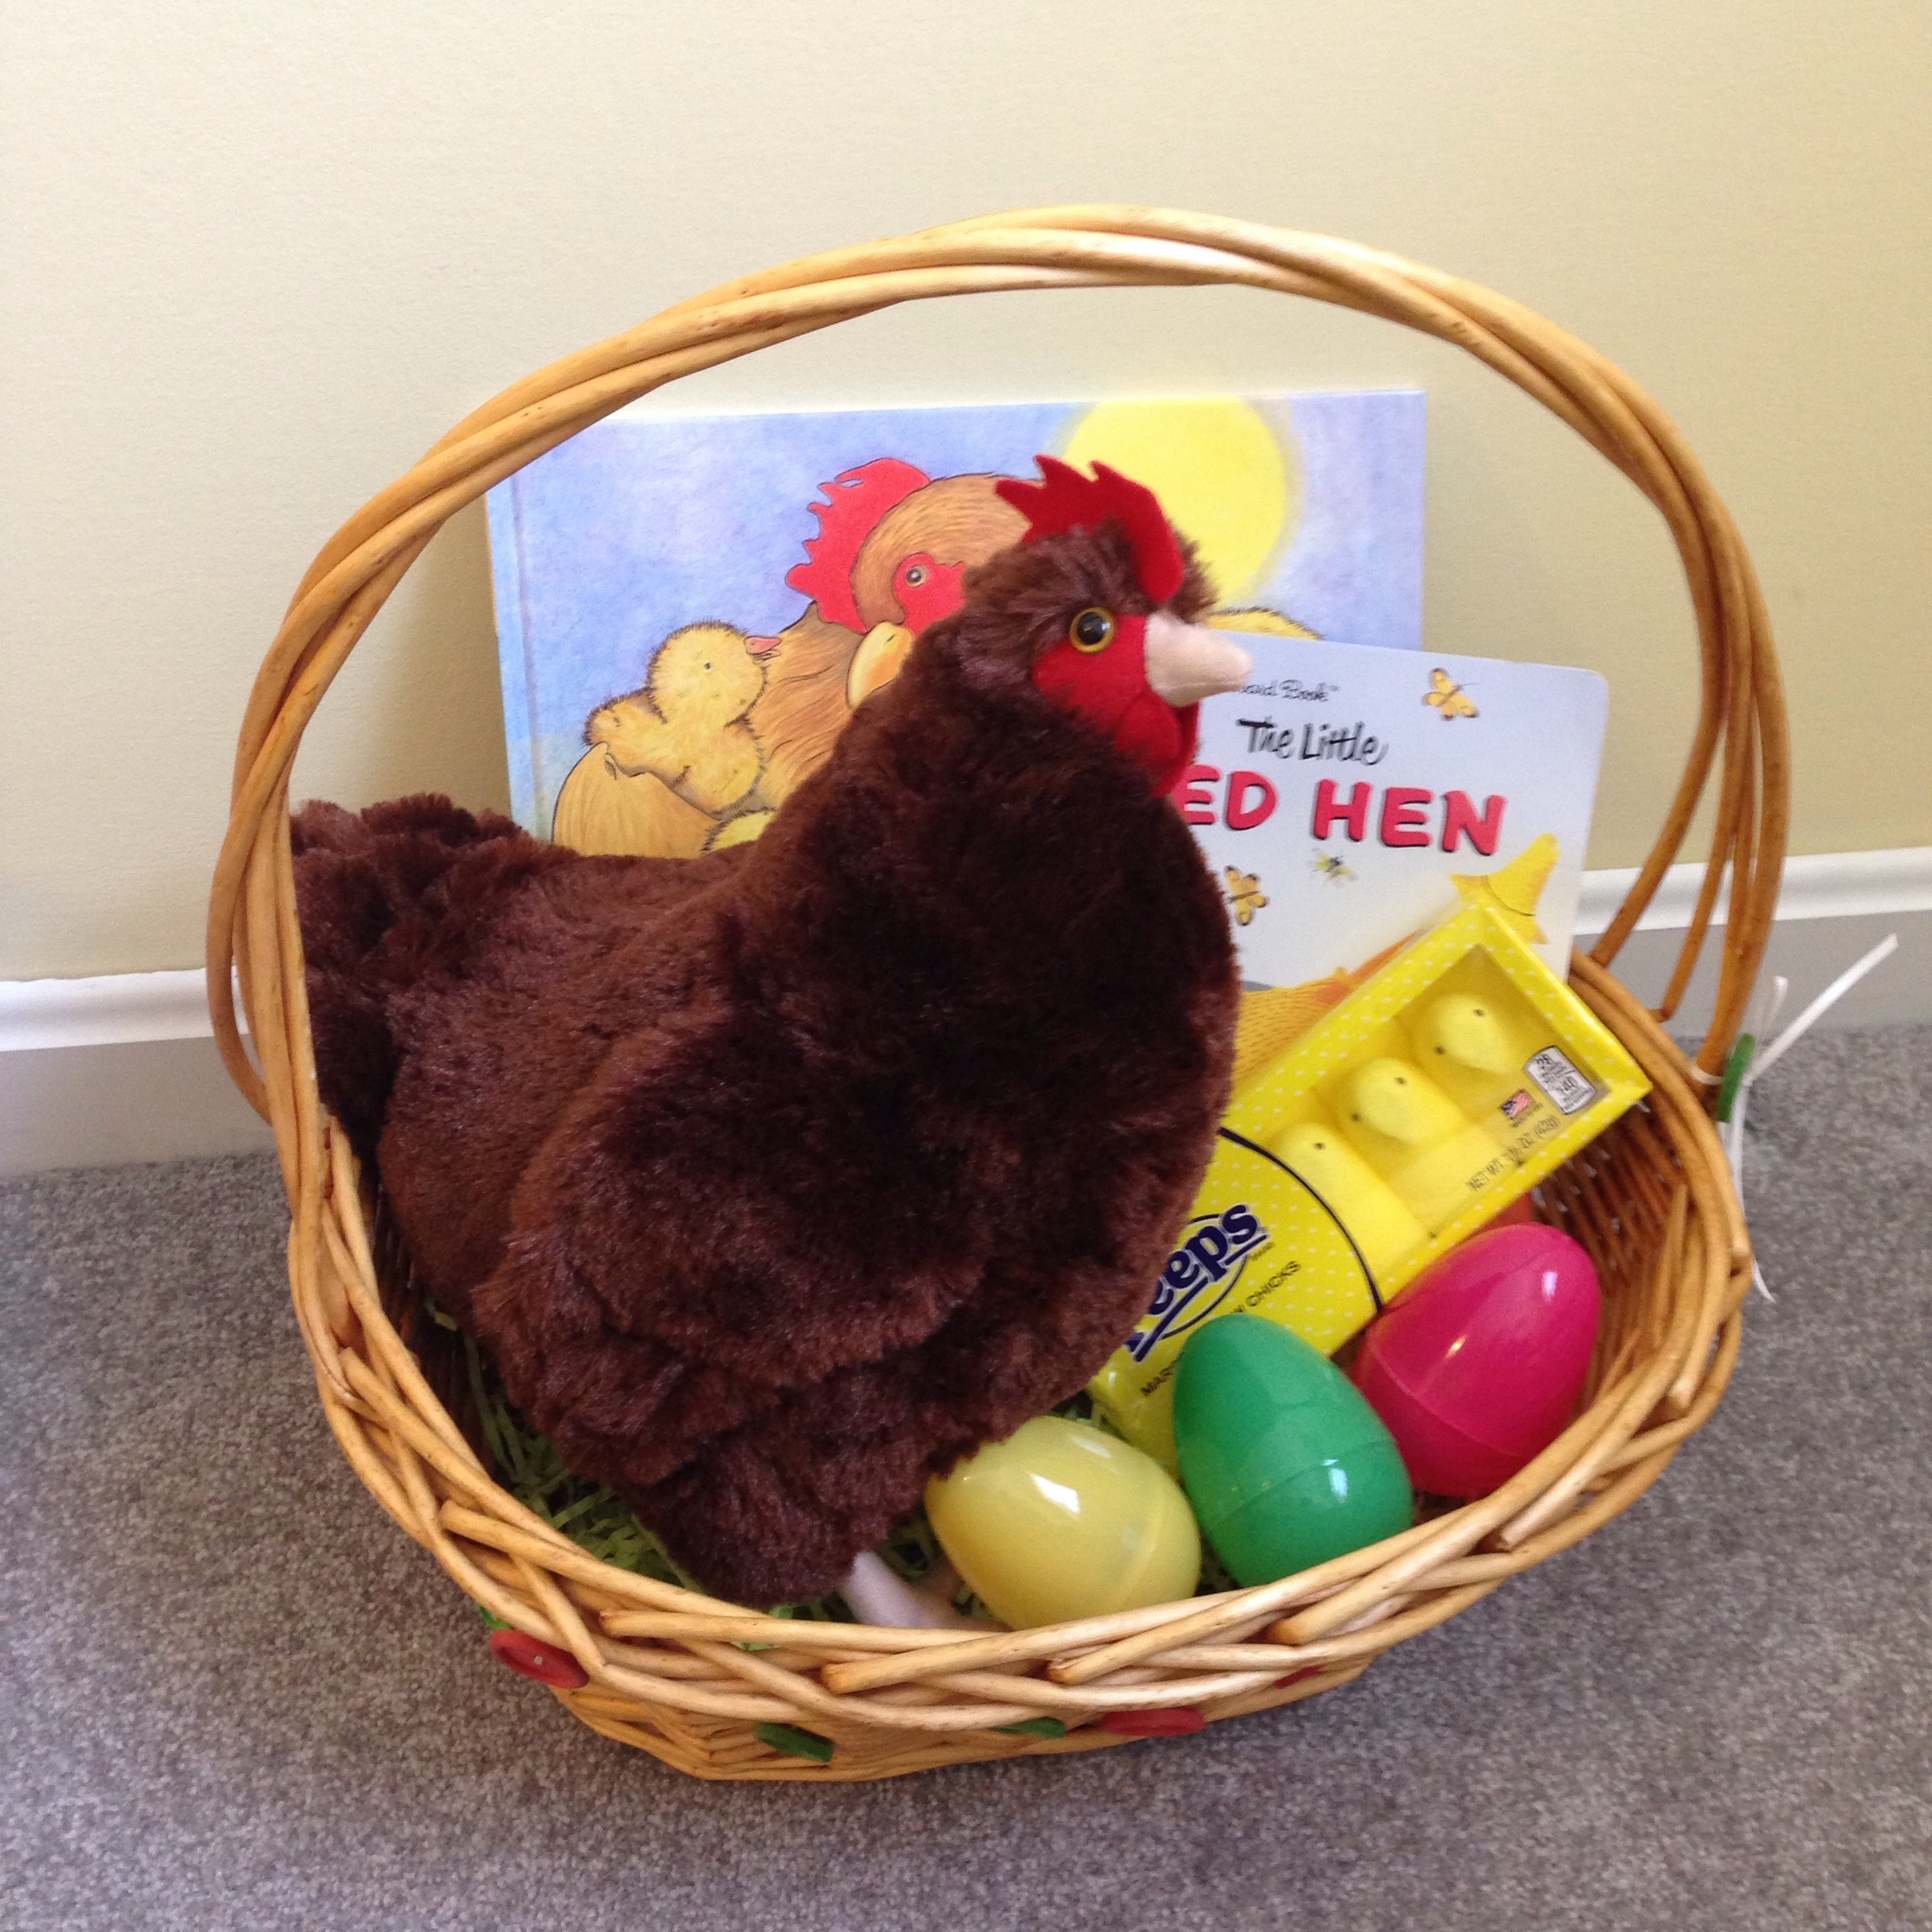
Last year we started keeping backyard chickens and they've become a really fun and important addition to our family. We love the fresh eggs we get everyday and our toddler thinks the chickens are super fun. Since she's become so fond of our six Rhode Island Red hens, I thought we'd make her Easter basket chicken-themed this year! Now to just wait until Easter.. | This post contains affiliate links |
Two of "the girls."
We have six Rhode Island Red hens (two of them pictured here), so I tried to find chicken-related items that looked like our girls. Most of the items I found can be purchased through Amazon, but you may also have luck finding similar things at your local store. (Amazon also had other chicken breeds too in case you were looking to find something that looked more like ones you have at home.)
I think creating an animal-themed Easter basket can be a really fun and engaging idea, and could easily be done to reflect whatever animal(s) you might have at home - dogs, cats, horses, fish, etc.
Here are the items I chose for our Chicken-Themed Easter Basket:
Chicken Stuffed Animal - Our little one is going to LOVE this stuffed chicken! It's about the same size and color as our Rhode Island Red hens. Amazon also has stuffed animals of several other breeds of chickens as well.
Easter Eggsfilled with mini M&Ms - Plastic Easter eggs is a given, just simply fill with your little one's favorite candy.
Marshmallow Peeps - Baby chicks for the mama hen! (I included these Marshmallow Peeps in this post as an example, but I actually won't be giving them to our daughter - I don't feel as though she's old enough to eat them just yet.)
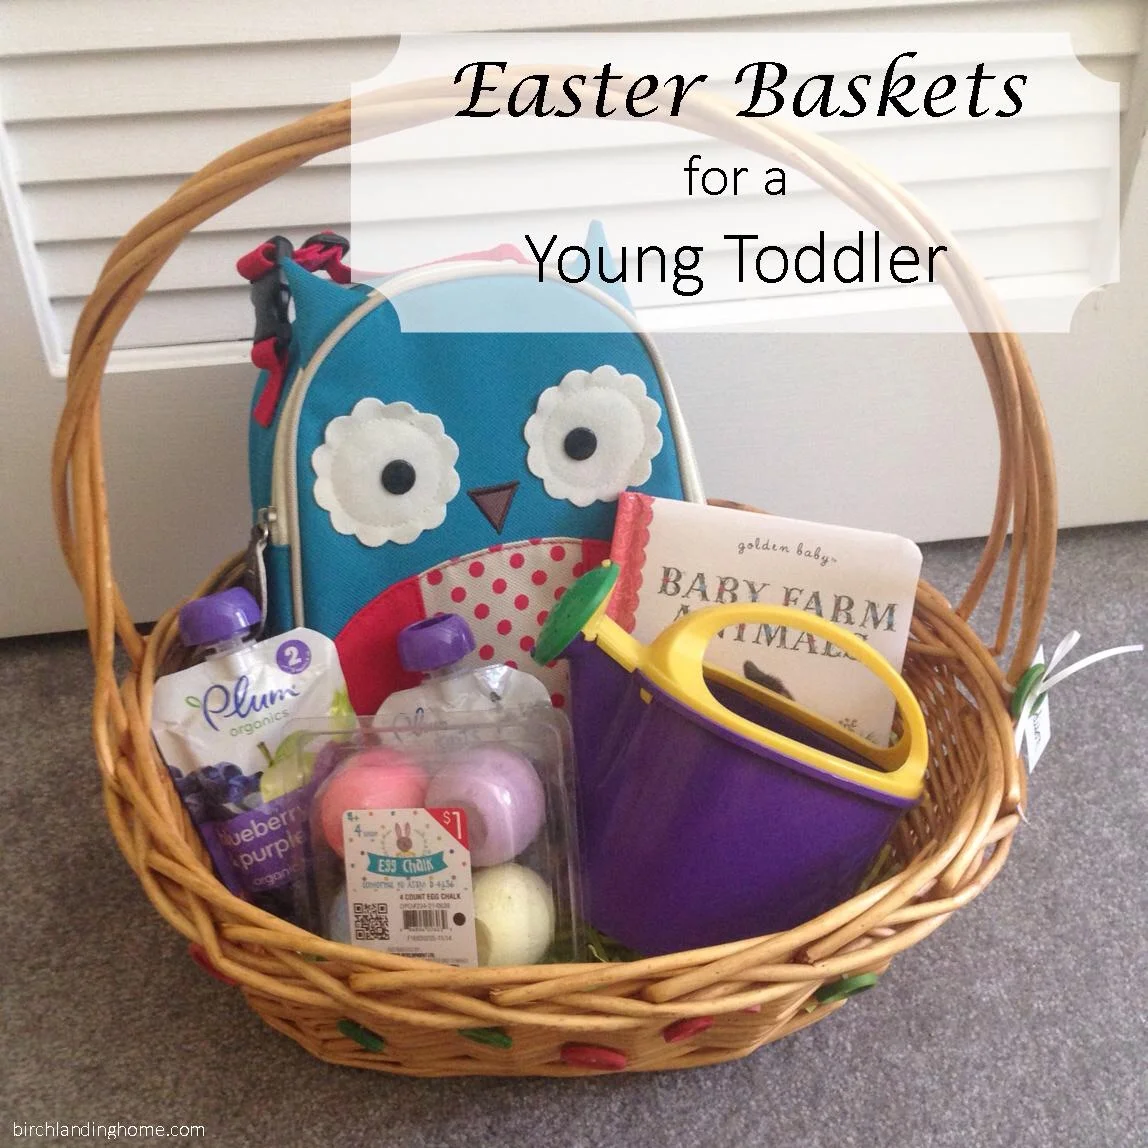
Today I thought I'd share what we'll be putting in our little one's Easter Basket. My goal was to spend less than $20 and fill it with practical and fun items. | This post contains affiliate links |
Our little girl is only 15 months old, has more than enough toys, and doesn't eat candy yet so I was a little stumped as to what to put in her Easter basket at first. After some thought I decided to fill it with some items she needed anyway and a few things to use outside once the warmer weather comes (someday soon, I hope).
I started with the Easter basket I made for her last year (you can read my post on making her Button Easter Basket here). First I filled the bottom with paper Easter grass - having a toddler and a dog, it's so important to use the paper Easter grass over plastic just in case any gets eaten. The paper grass is also a lot more eco-friendly.
I love what I found to put in her basket!
In her basket:
Owl Lunchbox by SkipHop. She desperately needed a new lunchbox (hers broke) and this owl one from Amazon was just the cutest. There are many other animal styles to choose from too if owls aren't your thing.
Purée pouches by Plum Organics. What toddler doesn't love snacks? We picked these up last time we were at Target but they can be found at just about any grocery store or purchased by the case from Amazon.
Baby Farm Animals board book by Golden Books. We actually got this book for free from the local library (they were clearing out duplicates) but you can usually find inexpensive board books on Amazon or on sale at your local book store.
Child's Watering Can. We got this from the Dollar Store, but these can also be found at your local pharmacy. (Similar one here.)
Egg-Shaped Chalk. These came from the dollar bins at Target, and I love them because they're easy for little hands to hold. (Similar ones here.)
Since I got the board book for free I spent right around $15 for everything - wahoo!
Other basket ideas for a one-year old or young toddler:
All of these items can be done for a girl or a boy, and are easy to tweak if you wanted to tailor it more to your own child. I hope I've given you some ideas of what to put in your little one's Easter basket - Happy Easter!
Looking for more Easter ideas? Check out our other Easter posts:
I've never really liked the cheesy Easter baskets they push at the big box stores. You know, the cheaply-made dyed ones.. the ones you always seem to need to re-buy every year because they're so easily damaged? Not to mention, they're pretty boring. This year I decided to make a special one for our daughter. I LOVE buttons and thought that would make a very adorable theme for decorating an Easter basket. | This post contains affiliate links |
I started with a sturdy willow basket (we purchased ours off Amazon, but you could get one just about anywhere), and used a needle strung with heavy button thread to "sew" the buttons to the basket. Really I'm just tying them on, but the needle makes it a lot easier to thread the string around a few times.
"Sewing" the buttons to the basket.
Once I felt as though the button was good and secure (we don't want them coming off, remember they can be a choking hazard), I tied off the thread with a couple knots and cut off the excess string.
Sewing one of the last buttons on.
This project took less than half an hour and now we have a cute, special Easter basket to use for years to come!
Looking for more Easter ideas? Check out our other Easter posts: